By Design Bundles
How to Use Digital Papers in Canva
Today we will learn how to use digital paper in Canva. Though originally created for scrapbookers, digital paper can be used like any other decorative paper. Examples include adding backgrounds to any design, creating labels, elements and so much more.
In this tutorial, we will be creating two designs using digital scrapbooking papers from Design Bundles.
Use Digital Paper with Letter Frames
Canva has frames that you can use for text masking. You can include video or any image inside these frames. In our case, we will use a cerulean deco digital paper to mask with letter frames.
Step 1 - Add Letter Frames
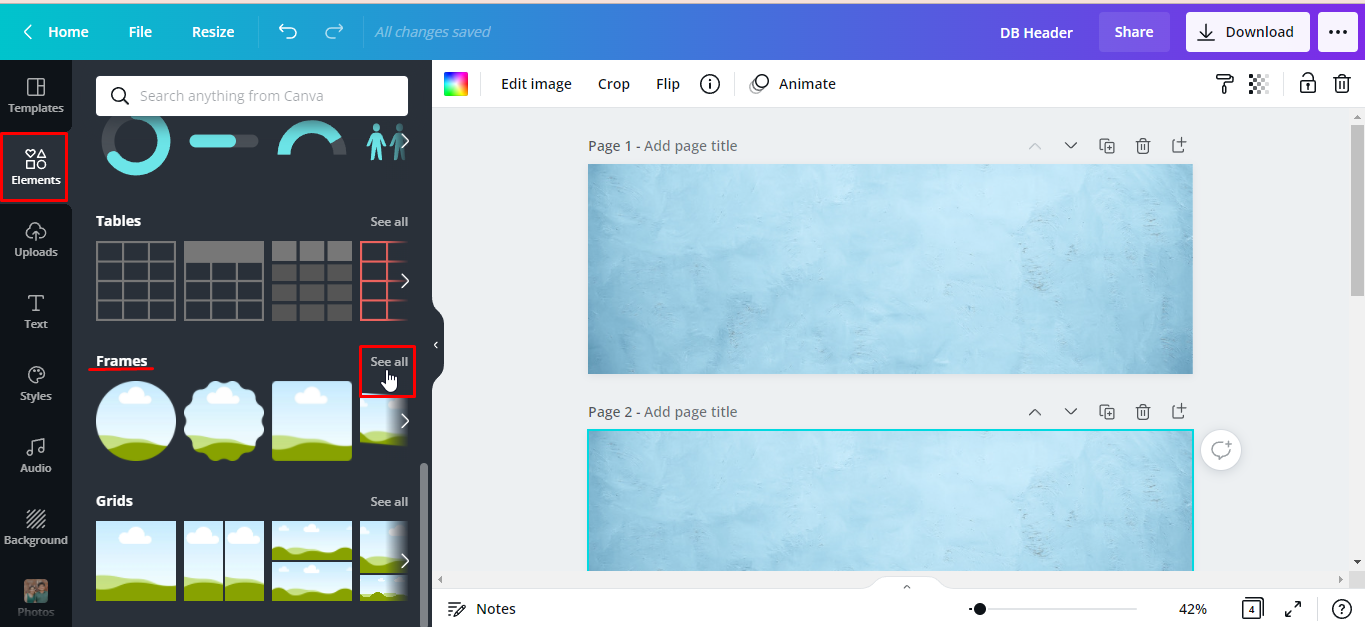
From the editor panel on the left, click Elements > Frames > See all.
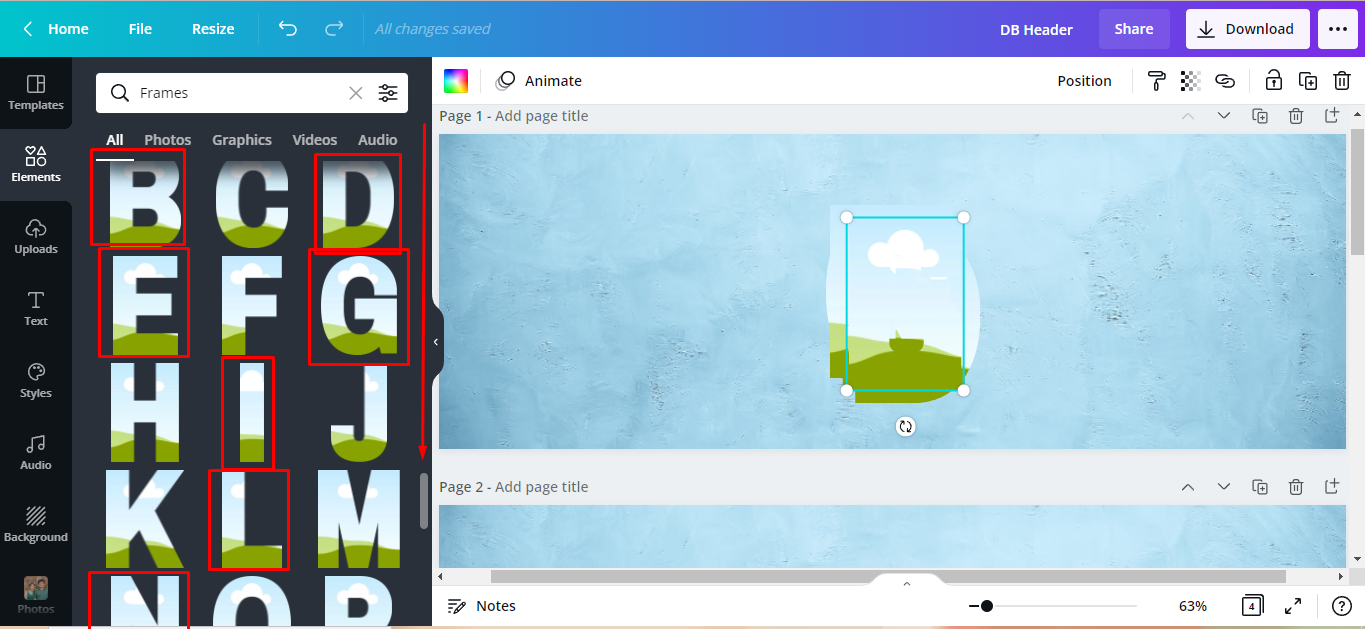
Scroll down until you see all the letters that you need.
We want to spell out Design Bundles so we will click the required letters. For them to have a uniform size, we clicked and added all the letters to our canvas first before resizing them.
Step 2 - Resize and Arrange Letter Frames
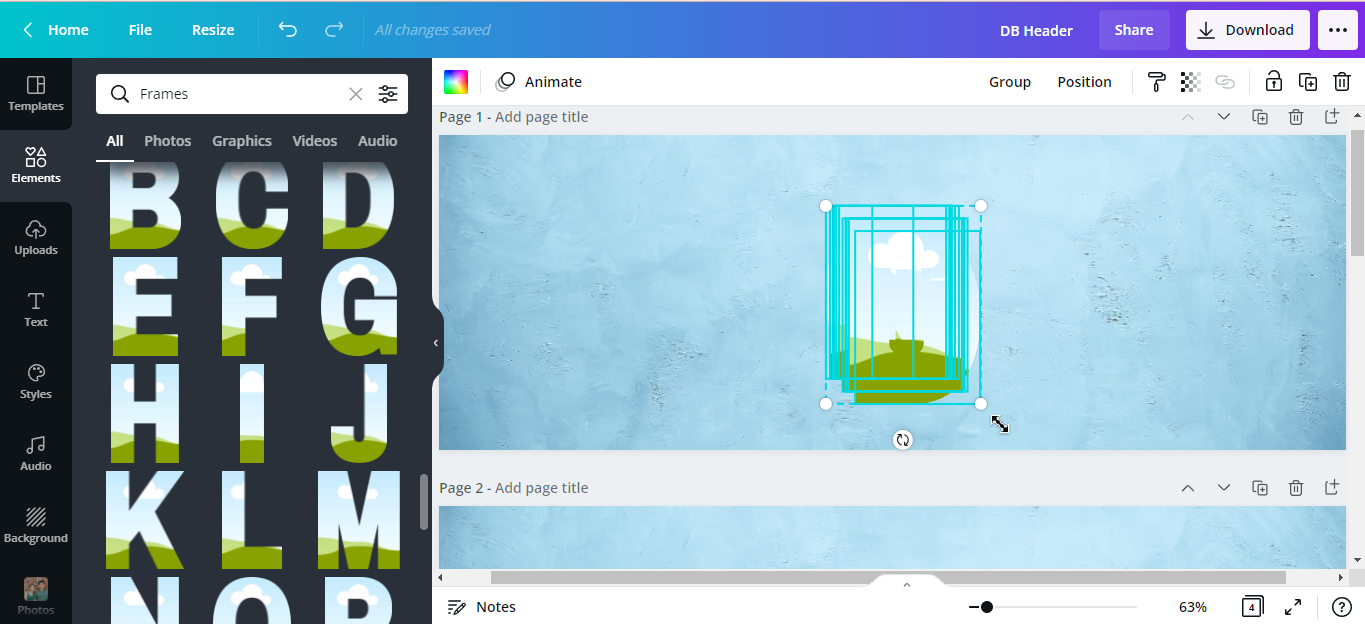
To resize the letter frames all at once, click and drag your mouse over all the frames. Scale them to the desired size by dragging the corners in or out.
Arrange all the letter frames across the canvas to spell out DESIGN BUNDLES.

Step 3 - Evenly Space the Letter Frames
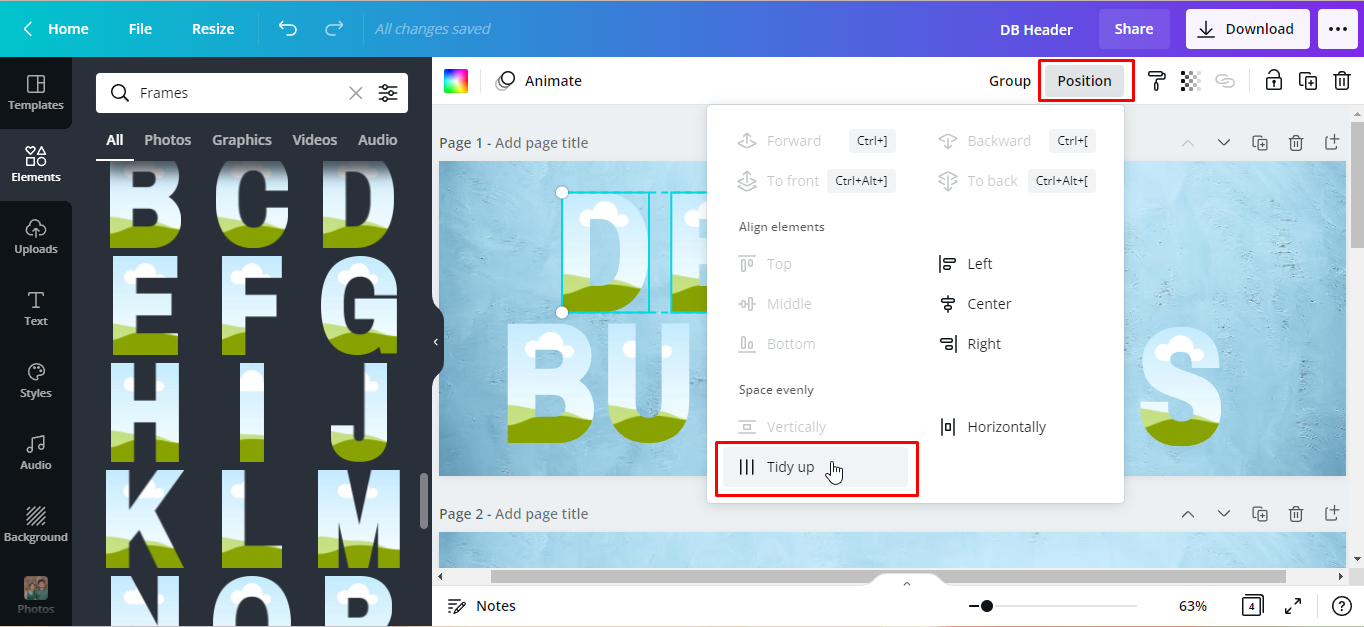
To make sure everything is perfectly aligned, select/highlight all the DESIGN letters. Then click Position from the toolbar > Tidy up. Do the same to BUNDLES.
Step 4 - Upload Digital Paper in Canva
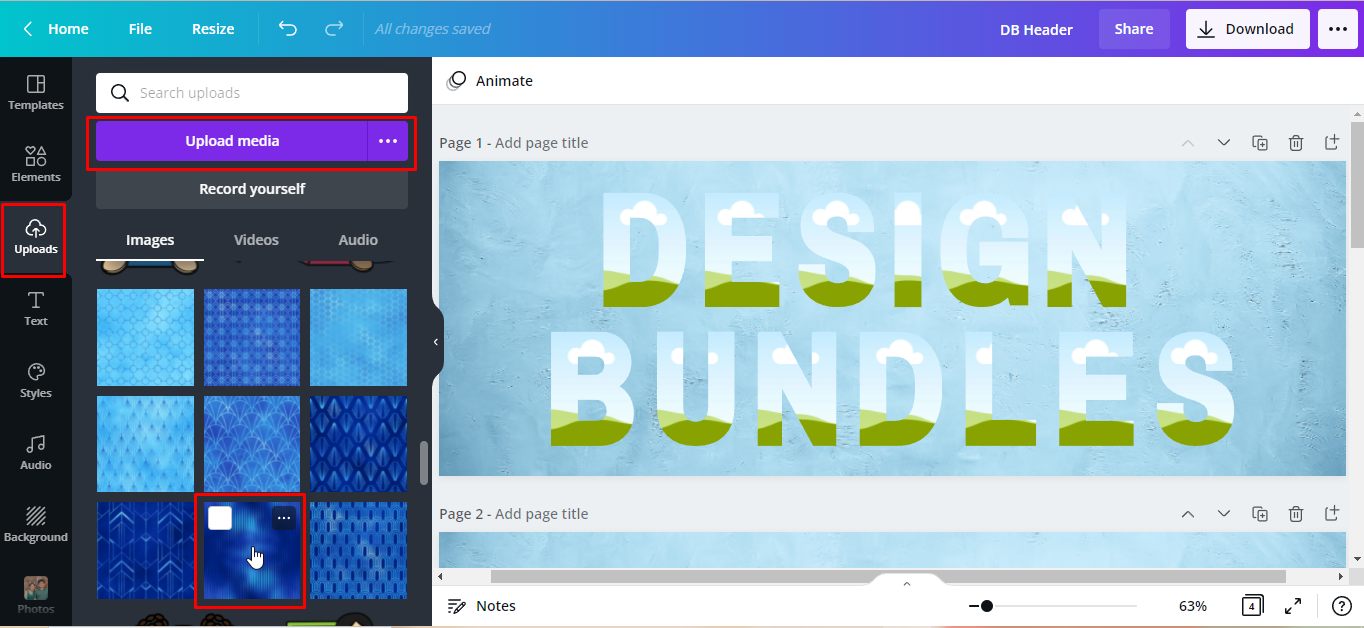
Next, we need to upload the images in Canva in order to use them. From the side panel, click on the Uploads tab > Upload Media. Now choose the file you’d like to use in your design. For our design, we will use the number 6 paper from this seamless digital paper set from Design Bundles.
Step 5 - Insert Digital Paper Into Frame
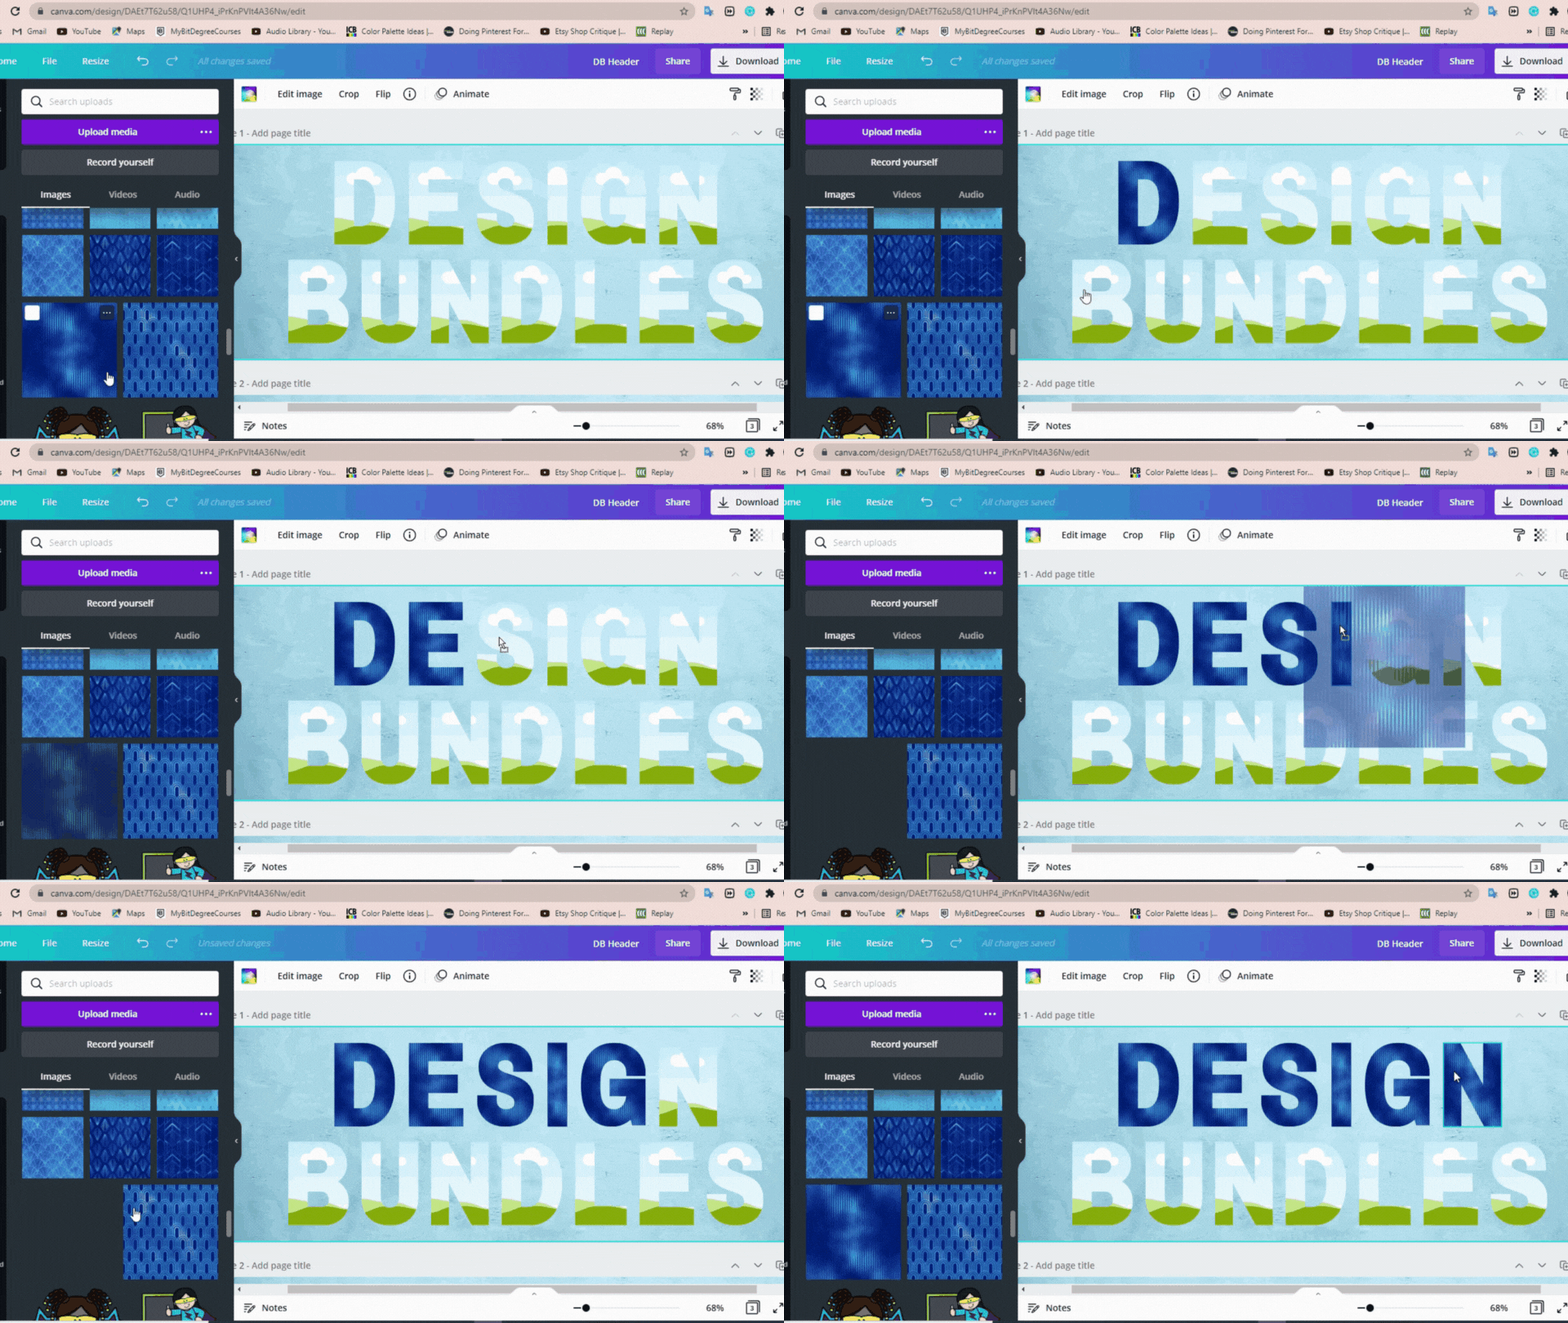
With each letter, take the image then drag and drop it into a letter frame.
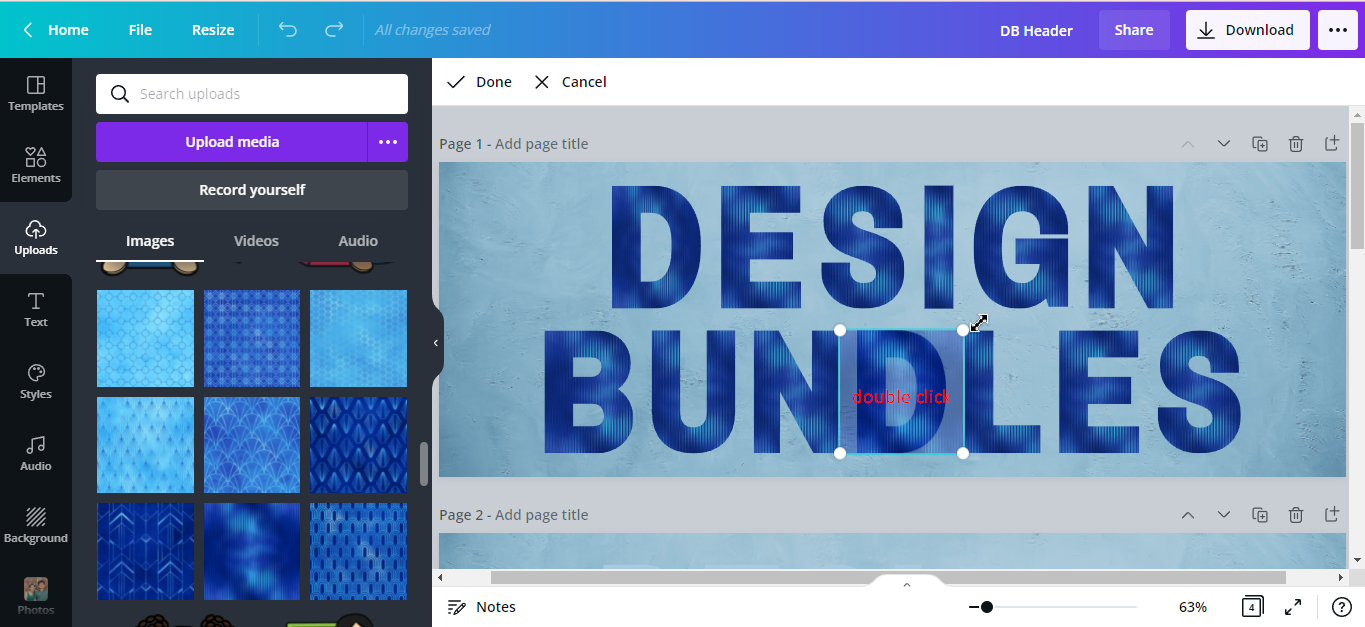
You can resize, crop, or adjust the placement of the paper inside the frame if needed. Just double-click and drag the corners of the paper in or out.
Take a look at our finished design in the following image.

Add Digital Paper to a Scrapbook Page
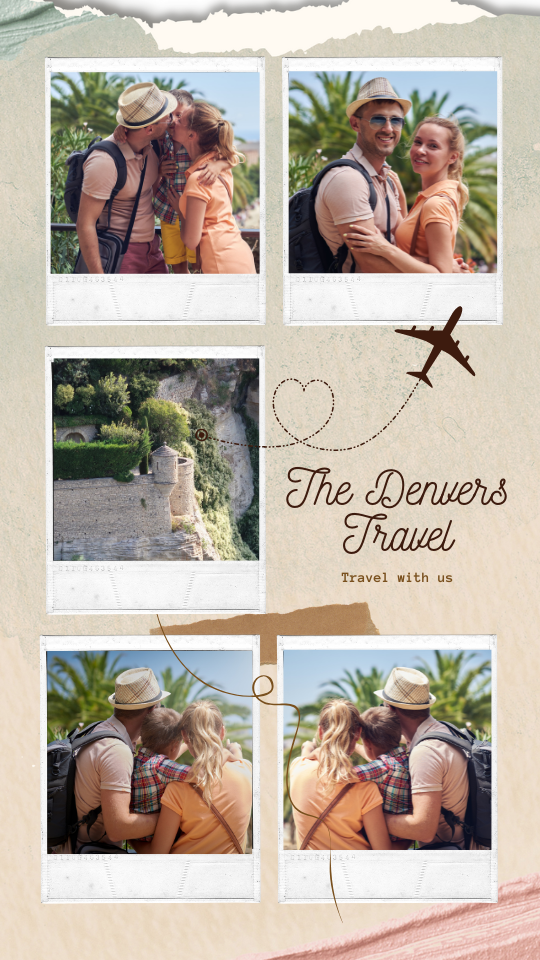
This time, we’re going to make a travel scrapbook page using this ripped notepaper. We already created the layout and added some travel photos from the Canva library. We have an excellent tutorial on using templates to create a layout if needed.
Step 1 - Edit Placement and Size of Digital Paper
As we did in Step 4 for the Letter Frames, we uploaded the file that we wanted to use. For our design, we will use the ripped paper number 2 from the set.
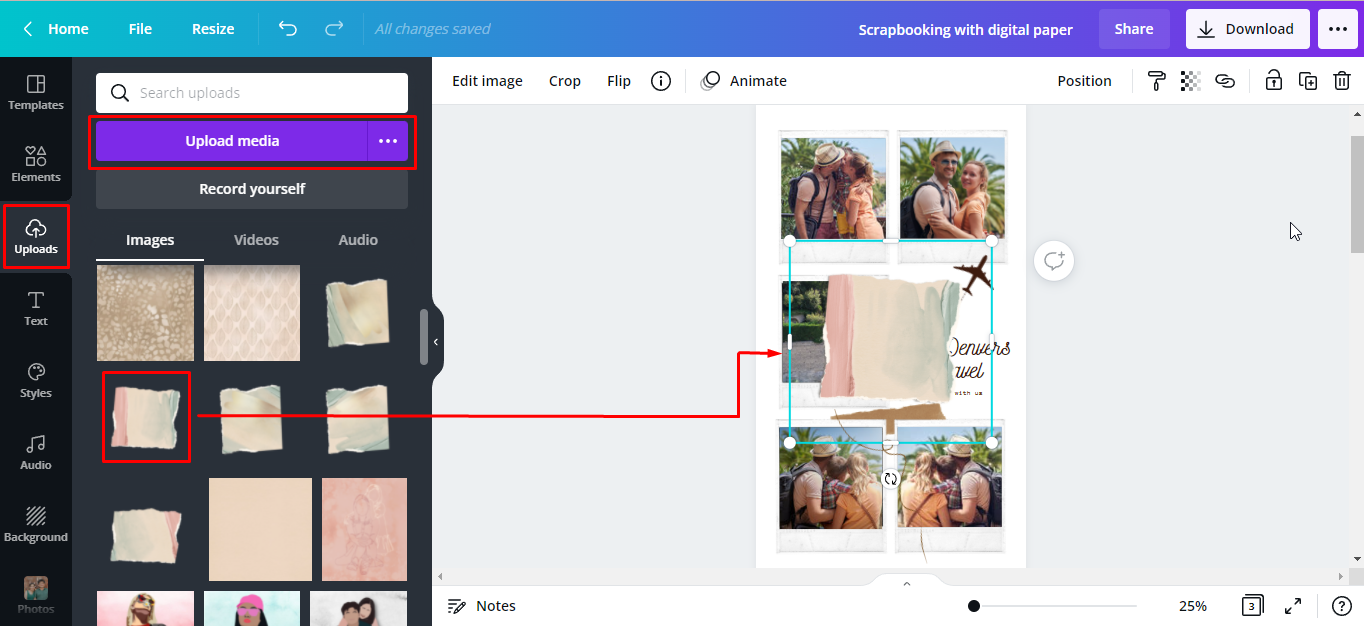
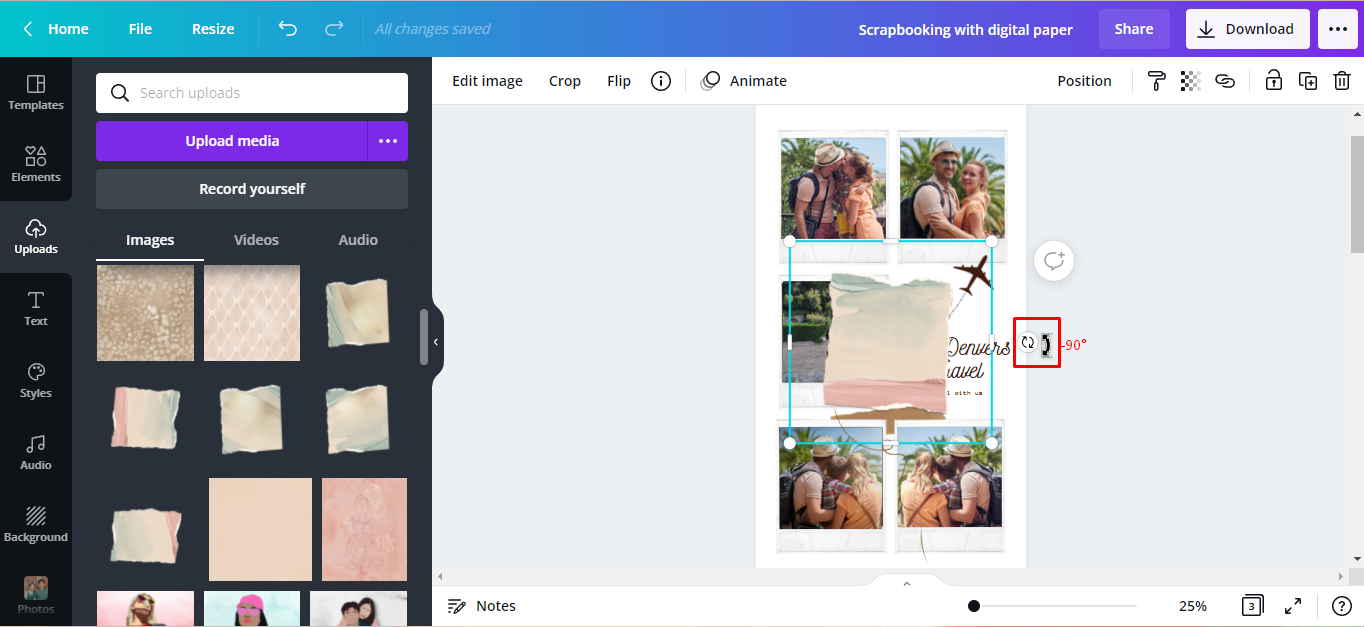
We want the blue part of our paper to be at the top and the pink at the bottom of our canvas. So we will rotate it by clicking + holding the rotating arrow handle ↻ counter-clockwise to -90°.
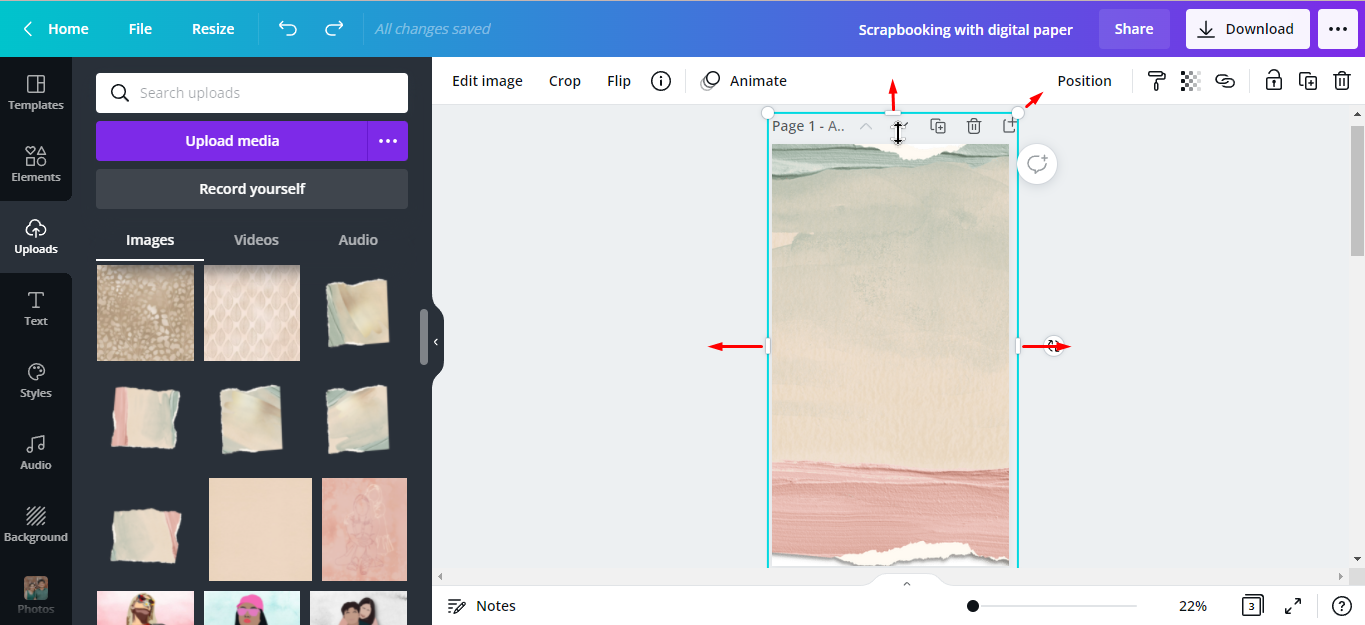
To scale it up, drag the white handles out until it’s the same size as our canvas.
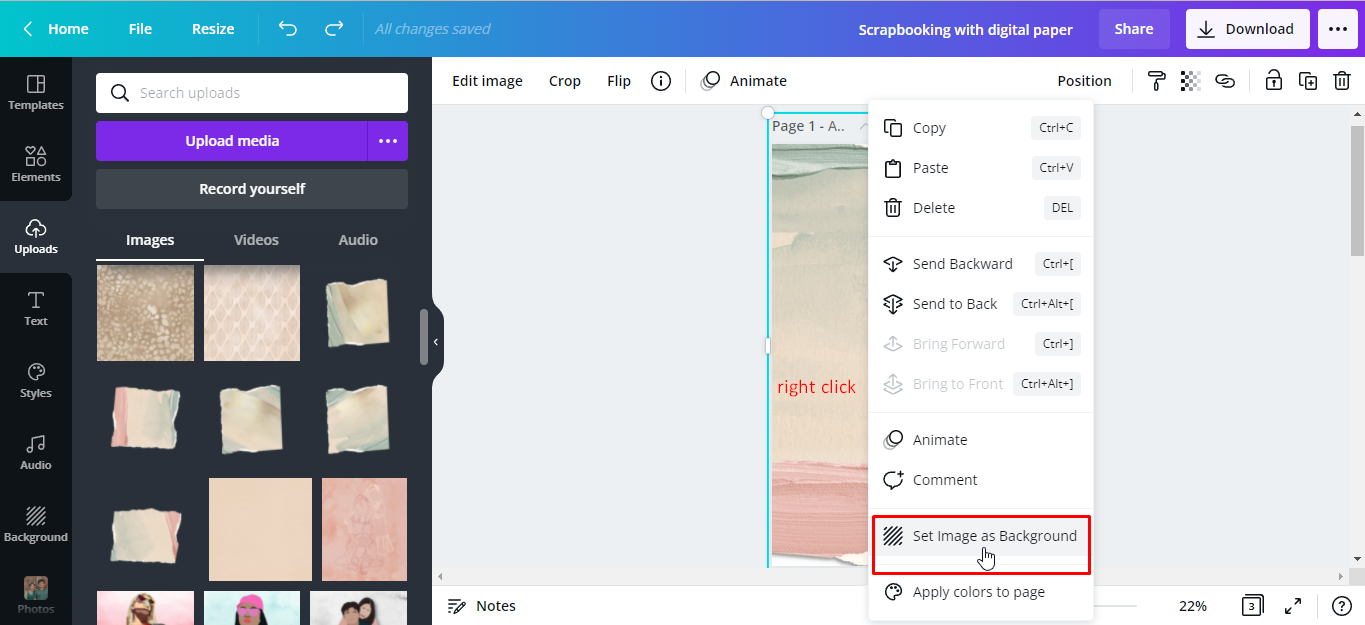
Step 2 - Set as Image Background
To set our image as a background, right-click > Set as Image Background.
There you have it, here’s our finished travel scrapbook page using digital paper.
These are just a few ways on how to use digital paper in Canva. Design Bundles is filled with a large selection of digital backgrounds to suit any project. With so many options available, what you use them for is restricted only by your imagination.