By Design Bundles
How to Create a Layered Image in Cricut Design Space
If you’ve ever received a flat JPG or PNG image but wish you could use it like a typical cut file with multiple layers, then this tutorial is for you.
In this tutorial, we show you how to take a flat PNG image, and turn it into a multi layered cut file in Cricut Design Space. Once the image is separated, you will be able to use the multiple layers to cut the project out of vinyl or cardstock with your Cricut cutting machine.
Step 1. Open Cricut Design Space
Click New Project.

After you have clicked New Project, you will be taken to a blank canvas where you can choose to upload an already made PNG file, or to start your own cut file creation. You can upload this Free Sunflower SVG from Design Bundles if you’d like to follow along with the tutorial or you can check out some of our other Sunflower SVGs if they suit you better!

Step 2. Upload your image
Locate the image from your device that you want to make into multiple layers. Then select the Complex option and click continue.

Step 3. Use the Magic Wand tool
Use the Magic Wand tool to click on the pieces of the image you want to remove. You want to keep one color remaining at a time. For this example, I’m clicking on all of the petals and butterflies to keep only the inside portion behind.

You can click the Preview button to see a silhouette of what your cut layer would look like. If you are happy with those changes, click continue.
Step 4. Click the Cut Image option
Save this layer of the image as a Cut Image and then hit upload.

Step 5. Upload the file again
Click upload image and locate your original image to upload it again. You will select complex, then hit continue.
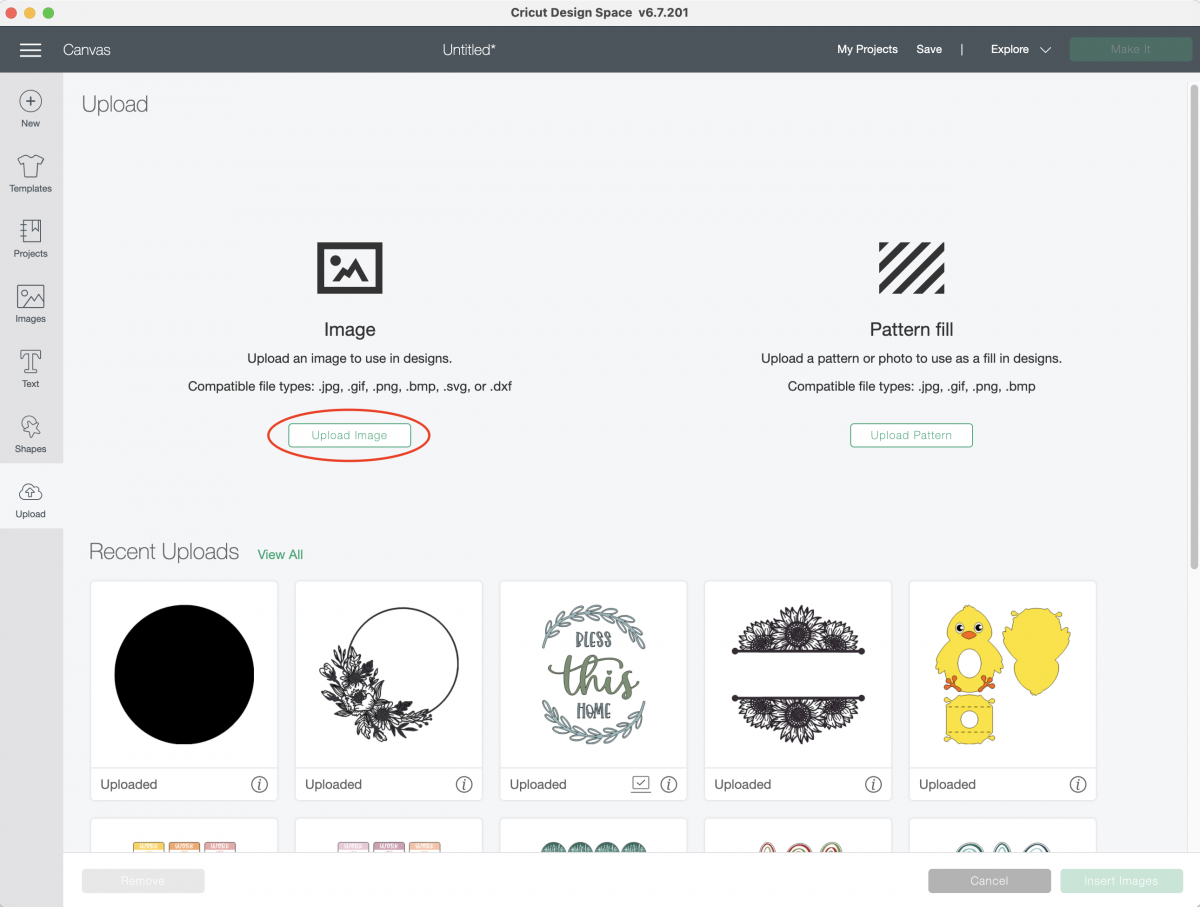
You will repeat steps 3-5 again until you have all colors saved as a separate layered cut file image.
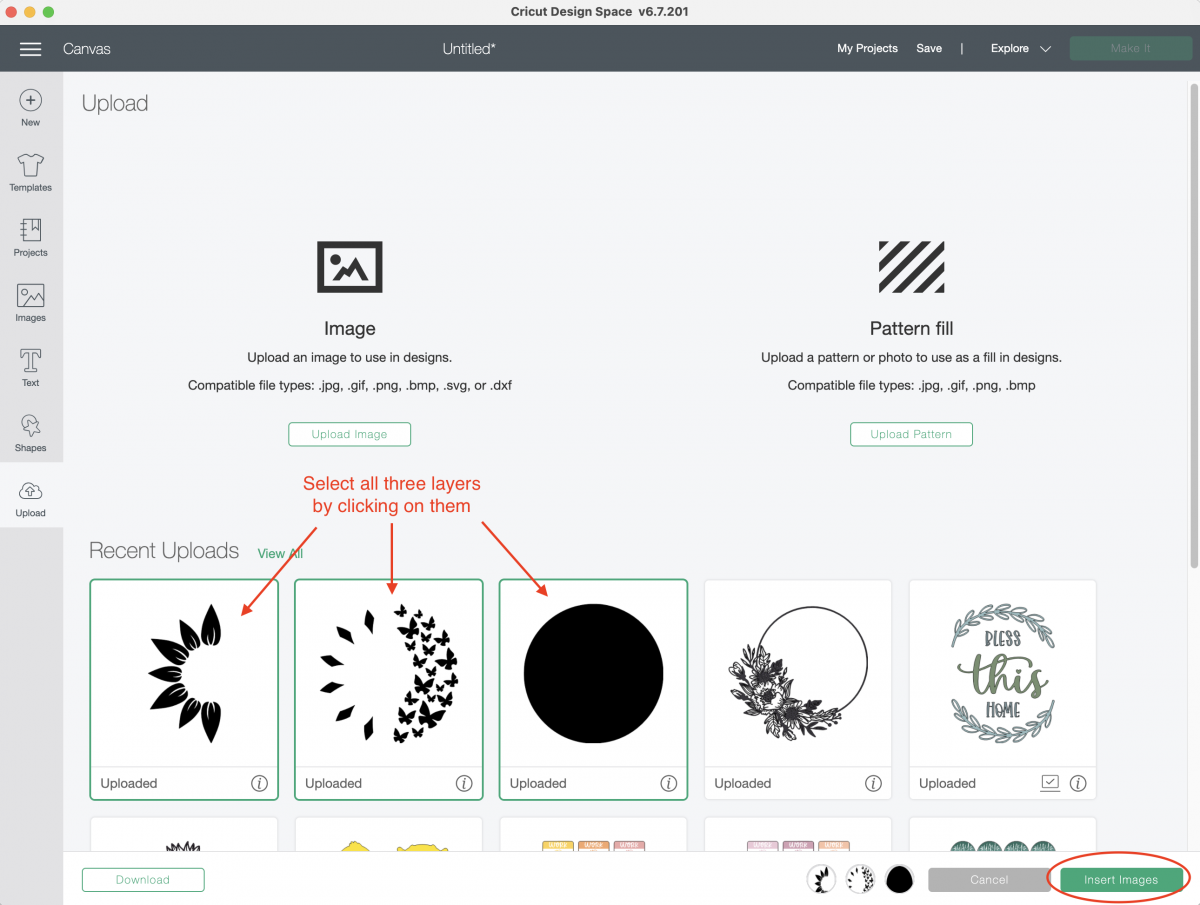
Step 6. Insert all images into your project.
You can click on each file, and then hit insert images. This will bring the multiple layers into your project screen.
All of your layered images are now in Design Space.
If the files come into Design Space too large you may need to scale them down. You can do this by changing the Width and Height in the top menu panel.

Step 7. Change the colors of the layers
This step is optional, but I like to change the colors of the layers to get an idea of what the final project will look like when I cut it with vinyl or cardstock.
In the Layers panel, select one of the layers. Then in the Operation menu click on the black square. Then select a color for the layer. Repeat this process for each layer.

You now have a multi layer SVG cut file image to use with your Cricut cutting machine.

Step 8. Click Make it
You will now see all that each layer is on a separate mat for you to cut individually. This allows you to put a different colored piece of vinyl or cardstock on your mat and cut them separately.

And you're done! If you liked this tutorial make sure to check out some of our other Cricut tutorials such as editing default material settings and making sticker sheets in Design Space.