By Design Bundles
Cricut Tutorials7 min
How to Use the Group Hiding Feature in Cricut Design Space
In today's tutorial we will learn how to use the Group hiding feature in Cricut Design Space. This feature is a great tool to use when you are working with multiple projects at one time. It will allow you to quickly remove items off the canvas screen without actually deleting them.
To demonstrate this feature we will be using a few SVGs from a welcome Fall SVG bundle. There's a ton of beautiful fall SVGs to choose from on Design Bundles.
To begin, open Cricut Design Space and upload the SVGs you will be using. We have an easy to follow guide on uploading SVGs to Design Space to Cricut Design Space if needed.
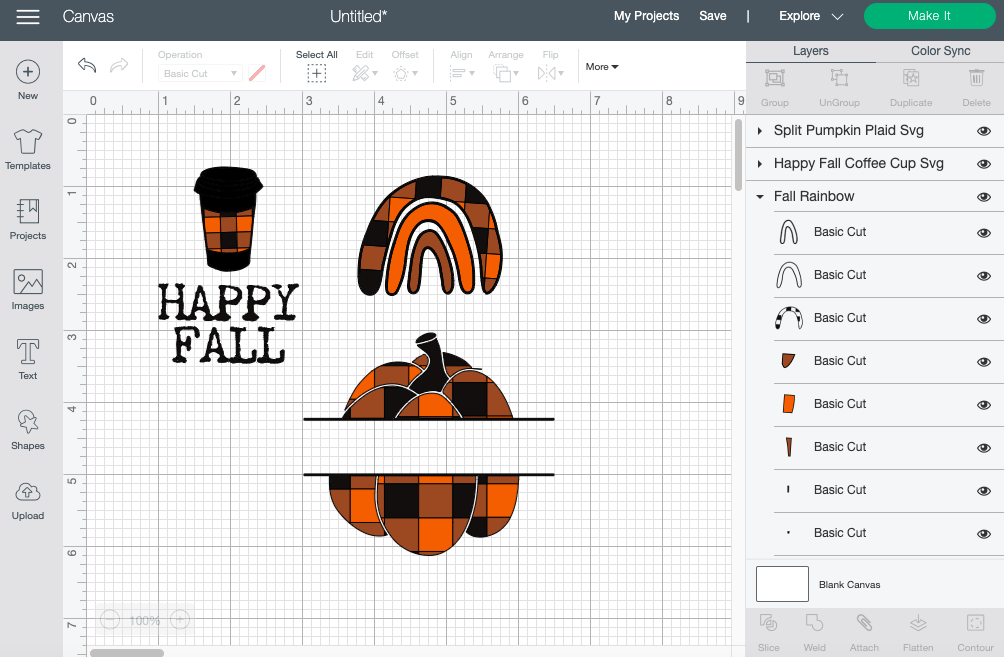
Next, locate your layers panel, which is on the right side of your canvas screen. In this panel, you can view and choose individual layers and group layers to hide or make changes. At this point, all the layers can be seen on the Layers panel.
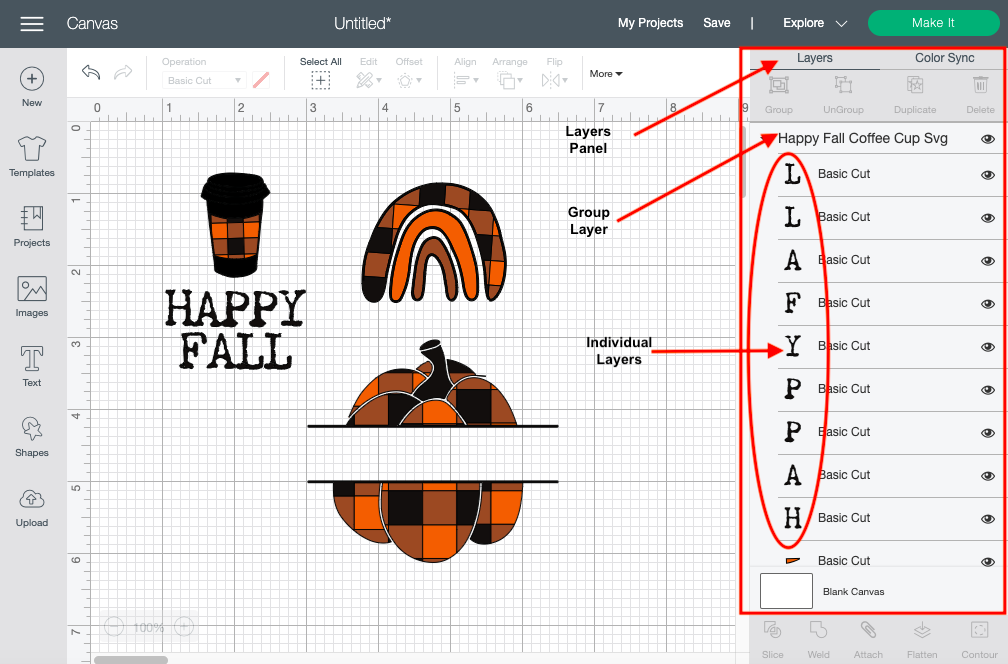
The amount of layers can be very distracting, especially when you are working with multiple designs with several pieces. We can hide many of these pieces on the layers panel as well. Simply click on the tiny triangle next to the main layer, which will often be the file's name. If the triangle is facing down, you will have access to each layer within that design. If the arrow is facing towards the right, the layers are hidden within the layers panel.
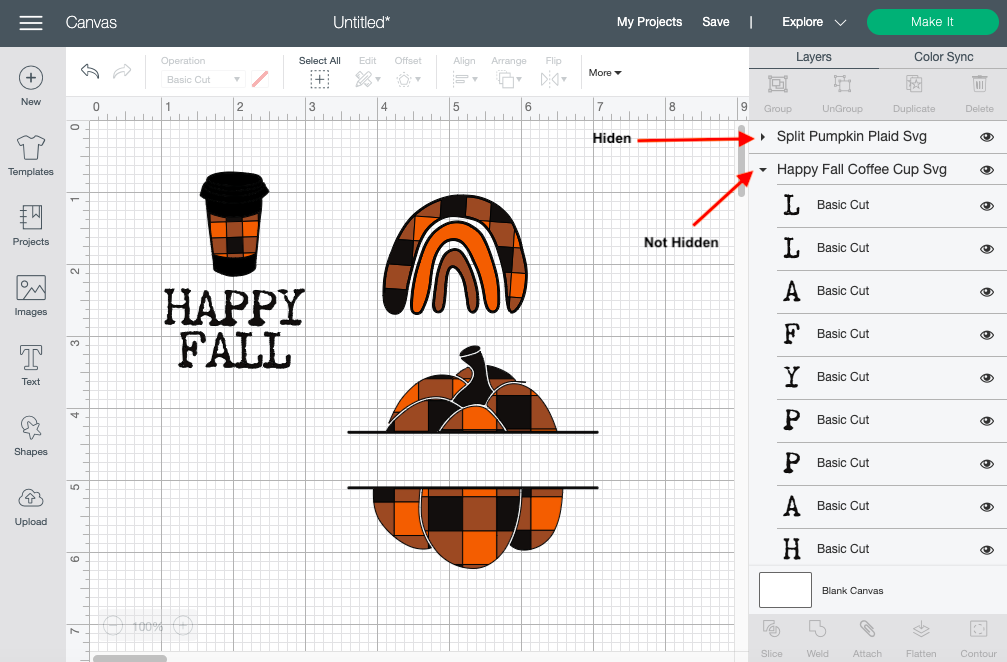
To hide the objects on the canvas page, you first have to select the grouped layer. You can do this by selecting the grouped layer under the layers panel. Alternatively click on the image on the canvas screen.
Next, click the Eye button across from it. A slash will appear within the eye, and this will mean that the layer is hidden. Thus, the selected item will no longer be on the canvas page.
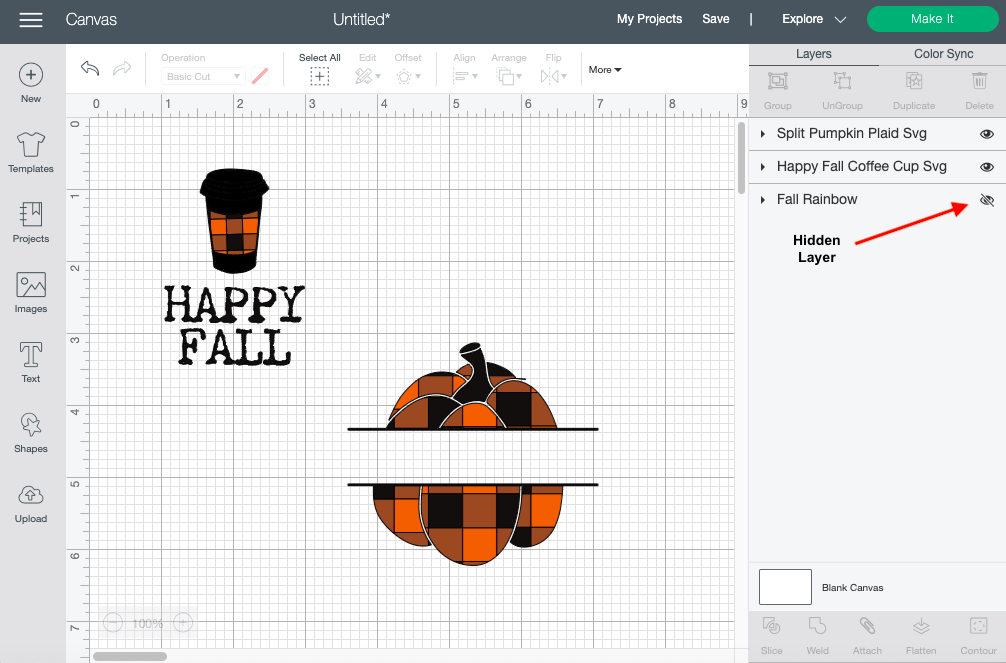
Reclick on the eye icon and the slash will disappear. You will now be able to view the item on the canvas page.
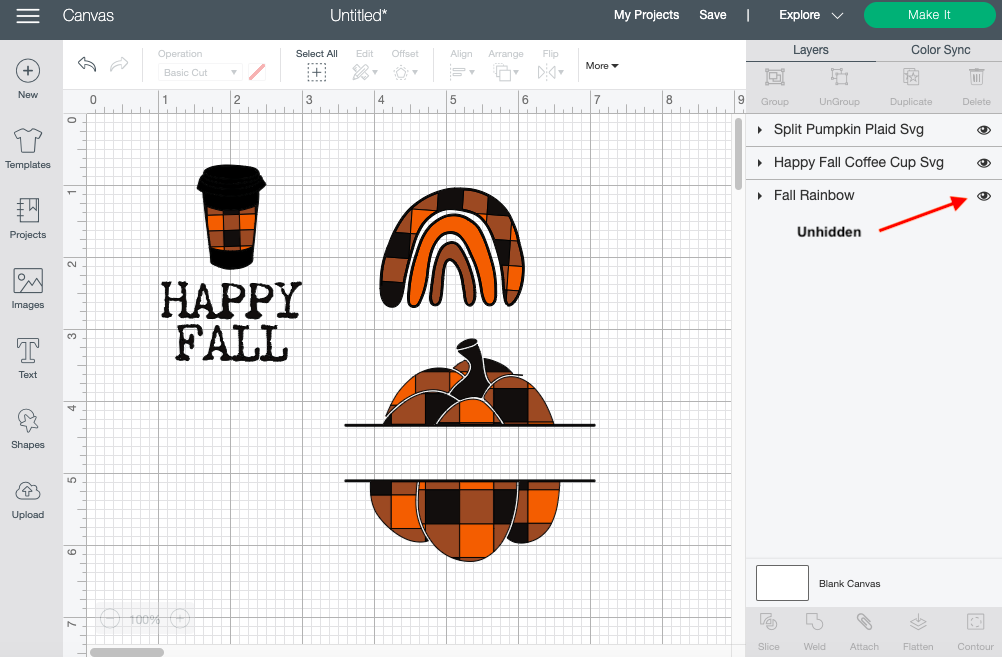
Using the Group Hide feature is a quick way to remove items from your canvas without having to delete them.
If you liked this tutorial, make sure you don't miss out on our other guides on Cricut keyboard shortcuts and how to zoom in Design Space.
To demonstrate this feature we will be using a few SVGs from a welcome Fall SVG bundle. There's a ton of beautiful fall SVGs to choose from on Design Bundles.
Step 1 - Upload SVGs
To begin, open Cricut Design Space and upload the SVGs you will be using. We have an easy to follow guide on uploading SVGs to Design Space to Cricut Design Space if needed.
Step 2 - Select and Hide
Next, locate your layers panel, which is on the right side of your canvas screen. In this panel, you can view and choose individual layers and group layers to hide or make changes. At this point, all the layers can be seen on the Layers panel.
The amount of layers can be very distracting, especially when you are working with multiple designs with several pieces. We can hide many of these pieces on the layers panel as well. Simply click on the tiny triangle next to the main layer, which will often be the file's name. If the triangle is facing down, you will have access to each layer within that design. If the arrow is facing towards the right, the layers are hidden within the layers panel.
To hide the objects on the canvas page, you first have to select the grouped layer. You can do this by selecting the grouped layer under the layers panel. Alternatively click on the image on the canvas screen.
Next, click the Eye button across from it. A slash will appear within the eye, and this will mean that the layer is hidden. Thus, the selected item will no longer be on the canvas page.
Reclick on the eye icon and the slash will disappear. You will now be able to view the item on the canvas page.
Using the Group Hide feature is a quick way to remove items from your canvas without having to delete them.
If you liked this tutorial, make sure you don't miss out on our other guides on Cricut keyboard shortcuts and how to zoom in Design Space.
Related Tutorials
Cricut Tutorials
How To Use The Slice Tool In Cricut Design Space To Split Images
Learn how easily to Split Images in Cricut Design Space using the Slice Tool.
Cricut Tutorials
How to Use a PDF File in Cricut Design Space
In this tutorial we guide you through the steps on using a PDF file in Cricut Design Space.
Cricut Tutorials
How to use Glyphs in Cricut Design Space
Discover how to use font glyphs/alternate characters in Cricut Design Space.
Silhouette Tutorials
How to Use Silhouette Files in Cricut Design Space
Discover how you can use your Silhouette Studio file in Cricut Design Space.
Cricut Tutorials
How to use Fonts In Cricut Design Space
Learn how to successfully use Fonts in Cricut Design Space with this step-by-step tutorial.
Cricut Tutorials
How to Use Pattern Fill in Cricut Design Space
Learn how to use the pattern fill feature in Cricut Design Space with this beginner tutorial.