By Design Bundles
How to Use Digital Papers in Cricut Design Space
Digital papers can be used in Cricut Design Space to create beautiful projects. Decorative elements can be cut out for Scrapbooking and so much more. As digital papers can be found in many colors and patterns, they are great for just about any idea. In this tutorial we will be using digital papers in Cricut Design Space to create a stunning Thank You card.
We will be uploading and using a watercolor digital paper to really make this card pop. To start, open Cricut Design Space and create a new project.
Step 1 - Create a Card Base for Digital Paper
We want to create a card base to use with our digital paper. To do this we will make use of the Shapes tool, which can be found on the left side toolbar. Click on the tool and a pop-up menu will appear with several shapes to choose from. For this project, we will be using the Square shape to create the Thank You card.

Next, select the square then click on the More tab on the top toolbar. In the pop-up box click the Lock icon to unlock sizing. Type in the Width and Height of your Thank You card. Today we will be sizing the square to 8.5 by 5.5 for our card.
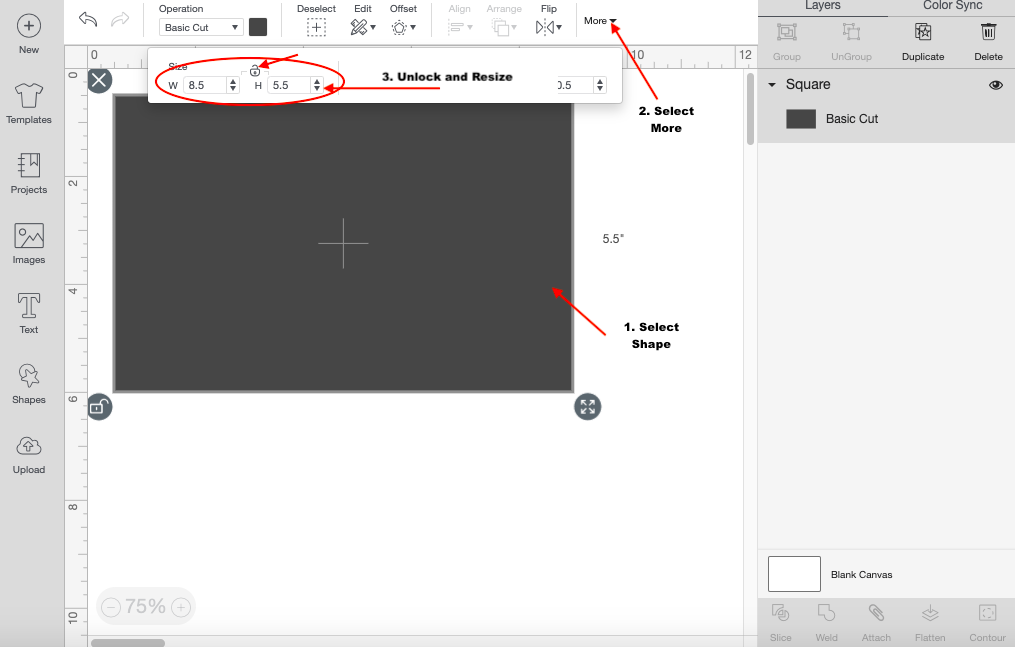
Now, add a score line using your Shapes tool once more. We have a great guide onusing the score line in Design Space if needed.
Step 2 - Add Text to the Card Base
Next, click on the Text icon on the left-side of your screen. The text box will appear and you can type out your text for the card. We have a great guide on using the text tool in Cricut if you are new to Design Space.

Step 3 - Upload your Digital Papers
With everything set up we can now upload our digital papers. To start, click the Upload button on the left-side of your canvas screen.

On the next page click the green Upload Pattern button. This is the option we will be using today to upload our digital papers.

Select the Browse button in the center of the page to locate your digital papers for the project. Alternatively you can drag and drop the file onto the center of the page.
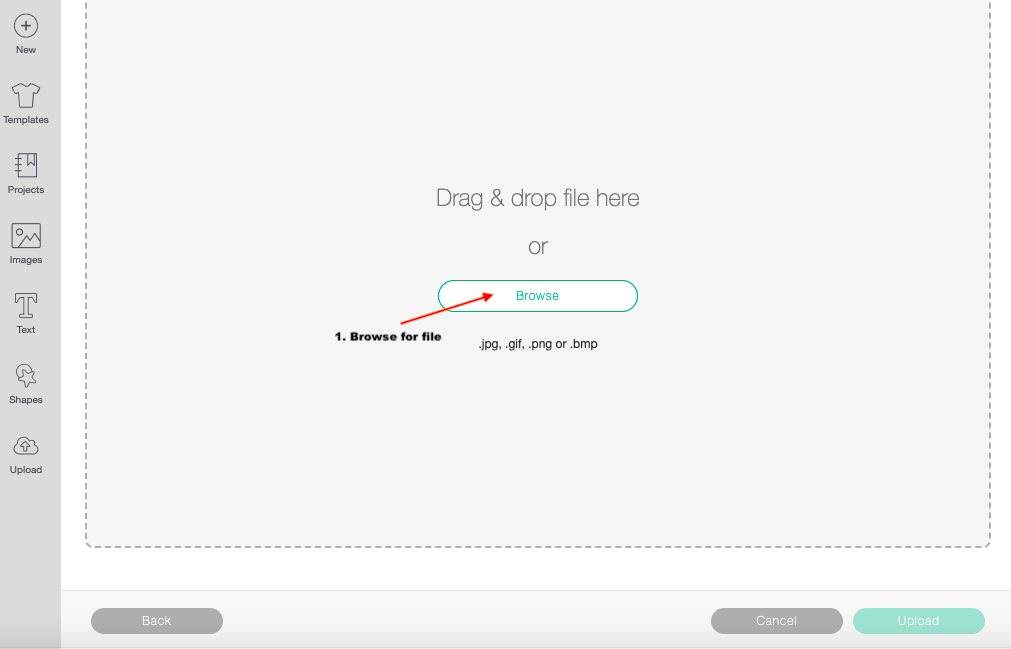
The Cricut program will automatically direct you to the Upload Pattern page once the file is selected. You can now name the uploaded pattern and then click Upload.

Once uploaded you can head back to the canvas screen and carry on with your project.
Step 4 - Access and Use the Digital Paper
We need to change the selected design to a Print then Cut Project before using the digital paper. To do this, select the item then click on the Operation tag. Once a drop down box appears, scroll down to the bottom then select Standard.
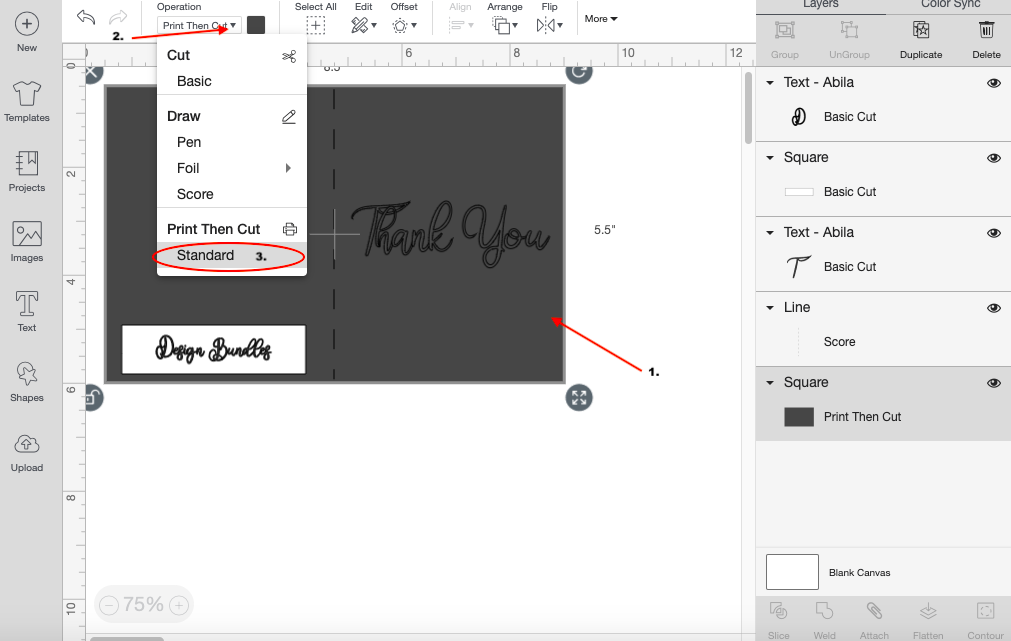
With the Print then Cut item still selected, click on the color swatch next to the Operation tab. Then click on the Print Type tab and change it to Pattern.

You will now have access to all the patterns currently in Design Space. This includes the digital paper you previously uploaded. Click on your digital paper and it will appear on the selected item.

You can also make modifications to the current pattern by clicking the Edit Pattern Button. A pop-up screen will allow you to scale, rotate, and flip the pattern to create a whole different look. You can preview all the changes made to the pattern on the left side of the Edit Pattern Screen.

Great job! You have successfully uploaded, used, and even made modifications to the digital paper. You can continue to use digital papers to make cards as we did today. You can even create items such as stickers, kitchen labels, and so much more.
If you liked this tutorial make sure to check out our guides on how to use mockups in Cricut and how to flatten your image in Design Space.