By Design Bundles
Illustrator Tutorials10 min
Golden Text in Illustrator
For this tutorial, you will need some Gold Gradients for Illustrator or Gold Gradient images to use as reference. We also used the Font “Glimmer Script” from Font Bundles.
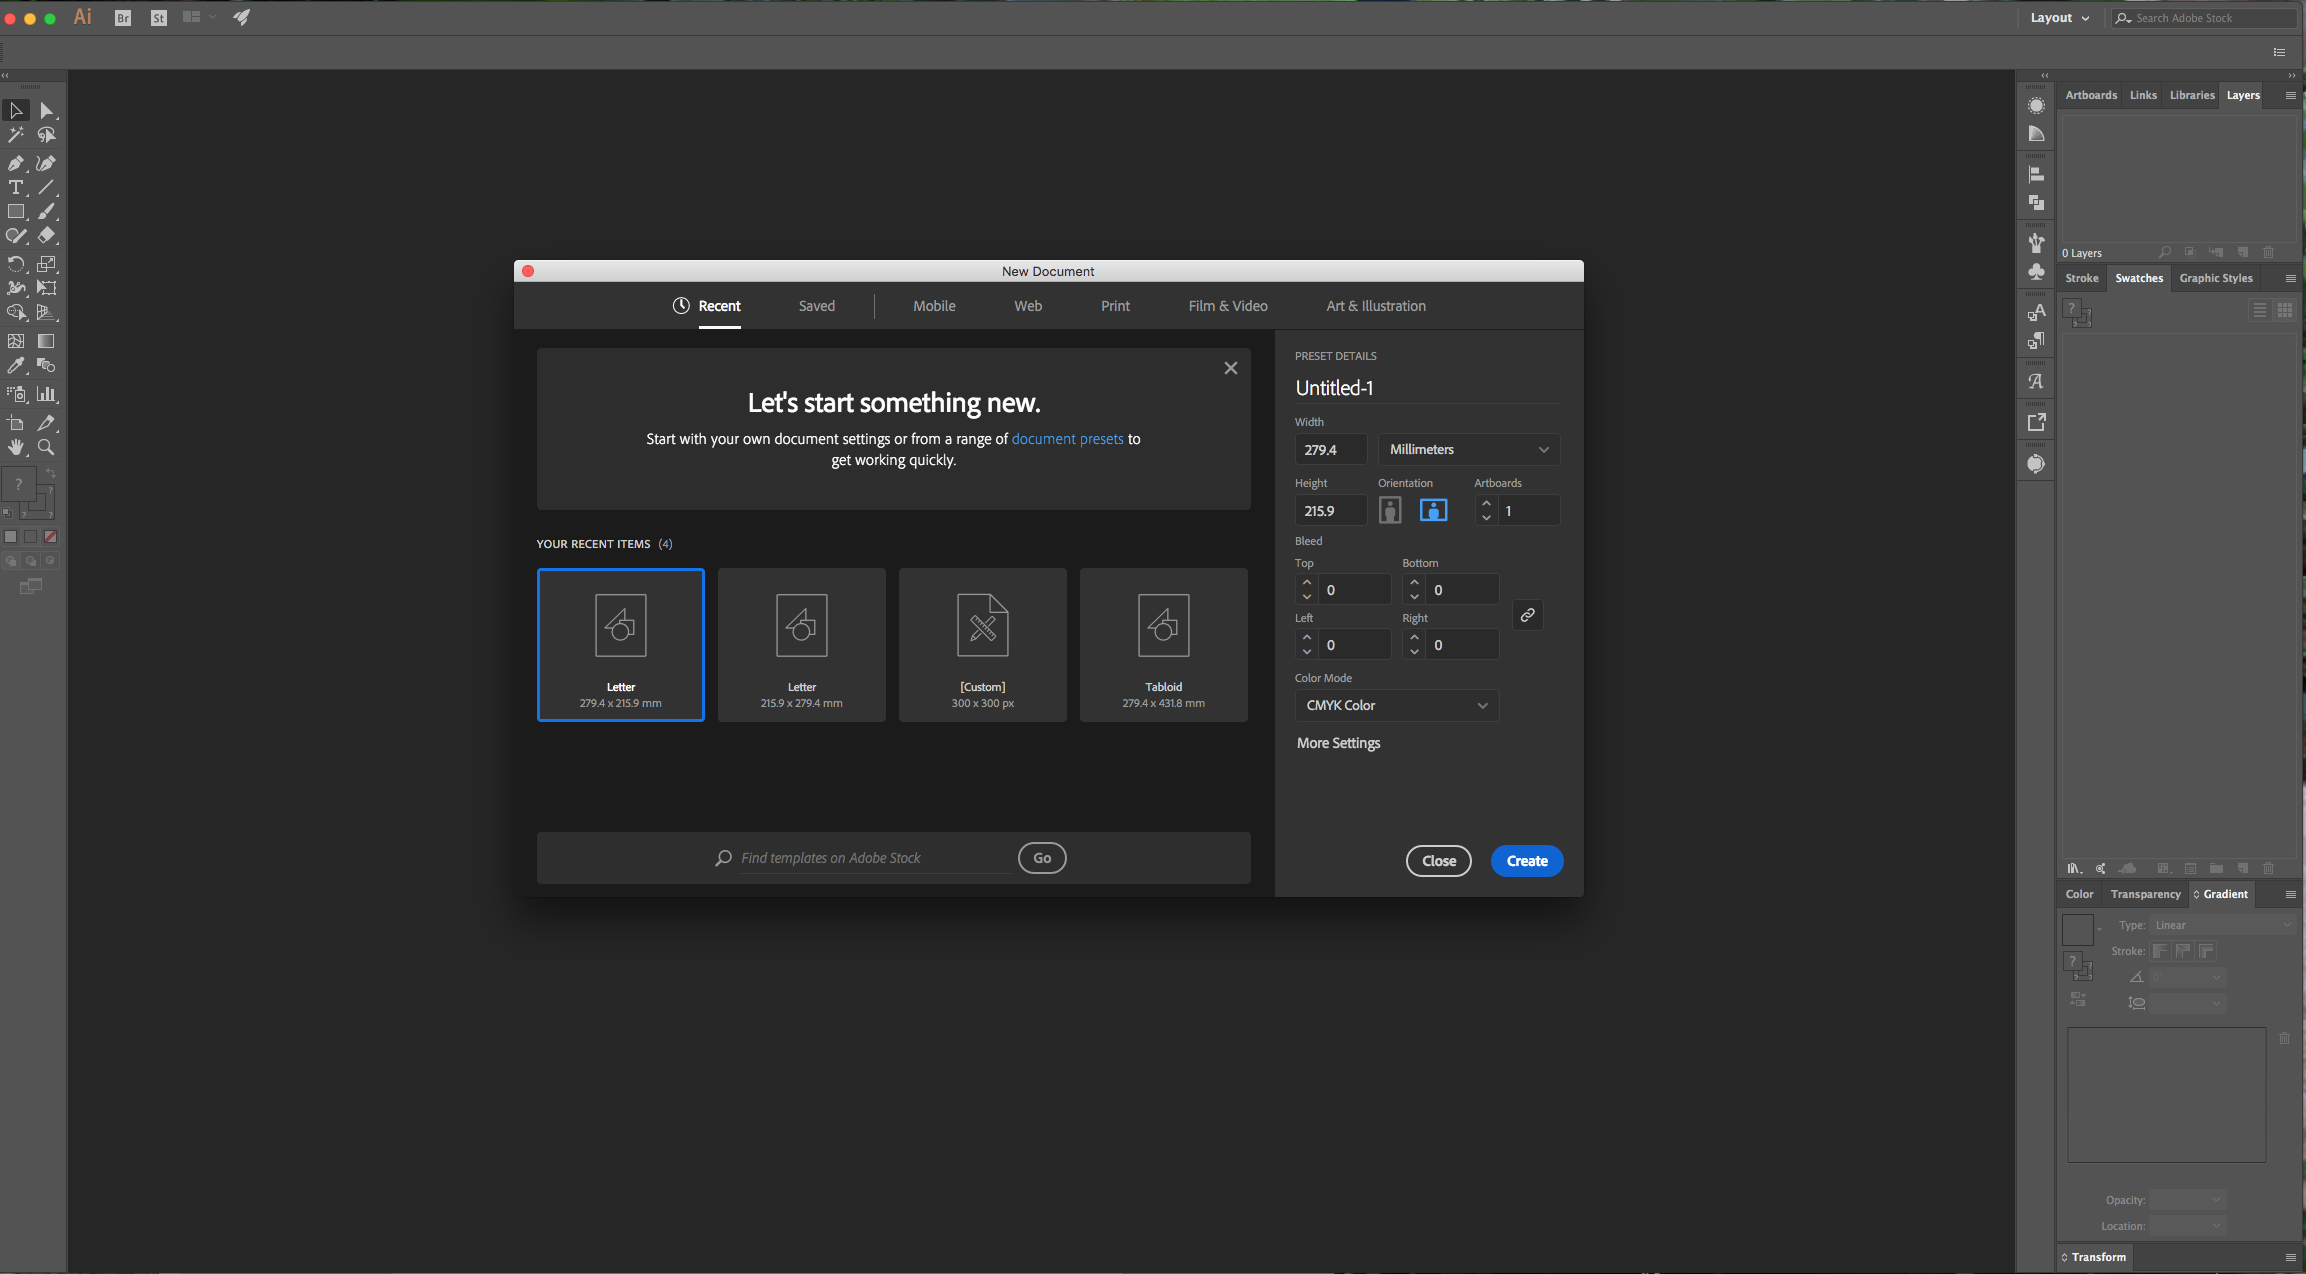
1 - In Illustrator, create a “New Document”.
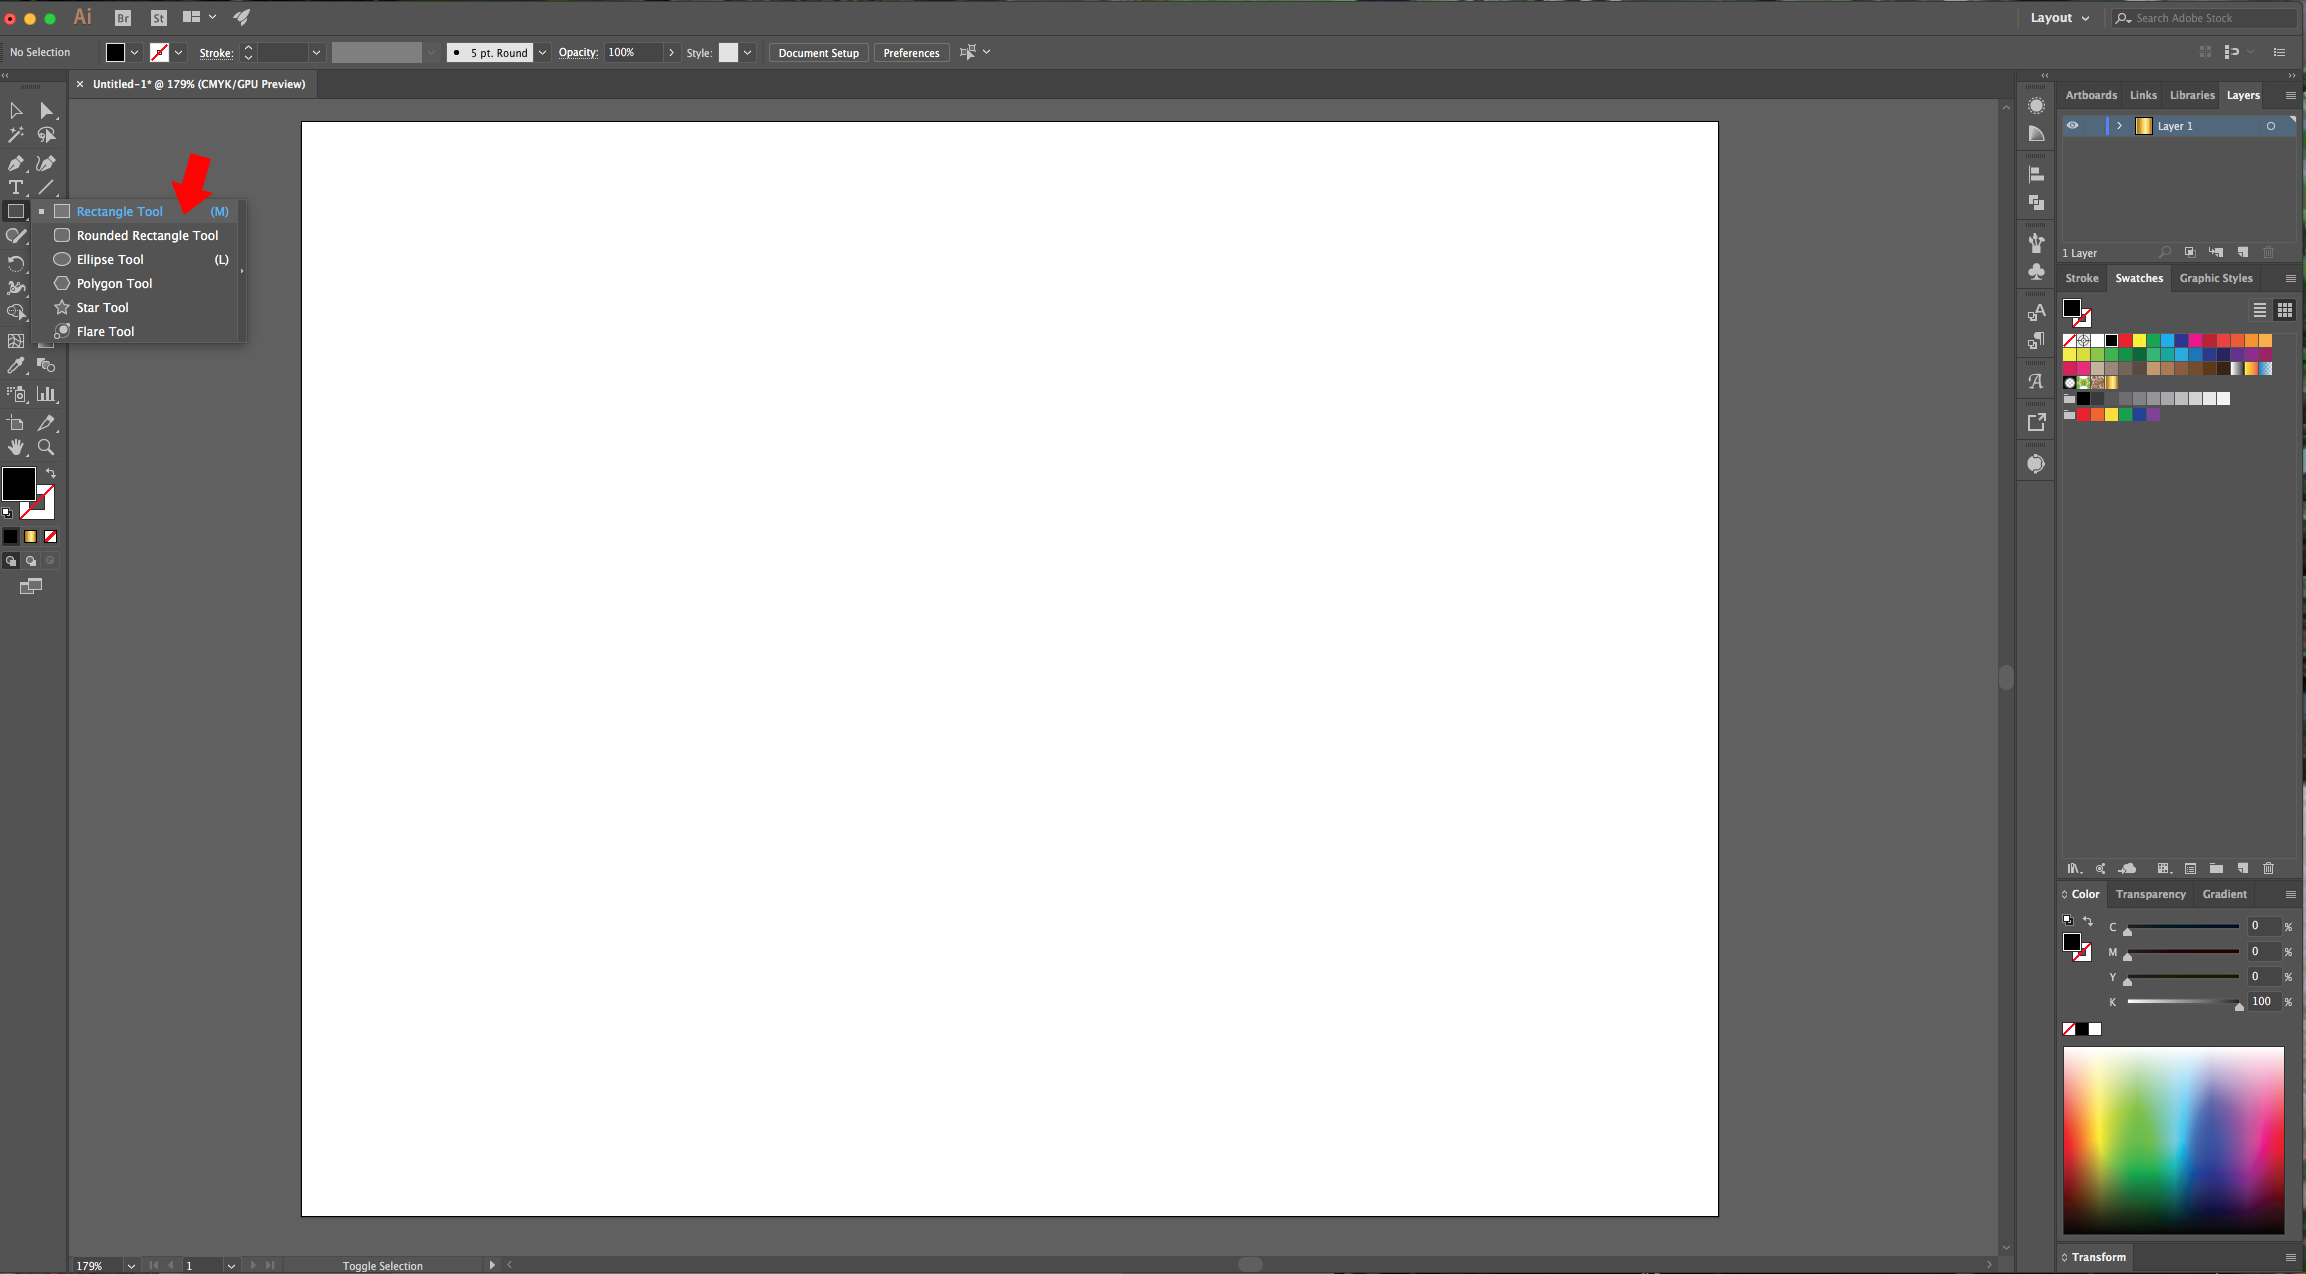
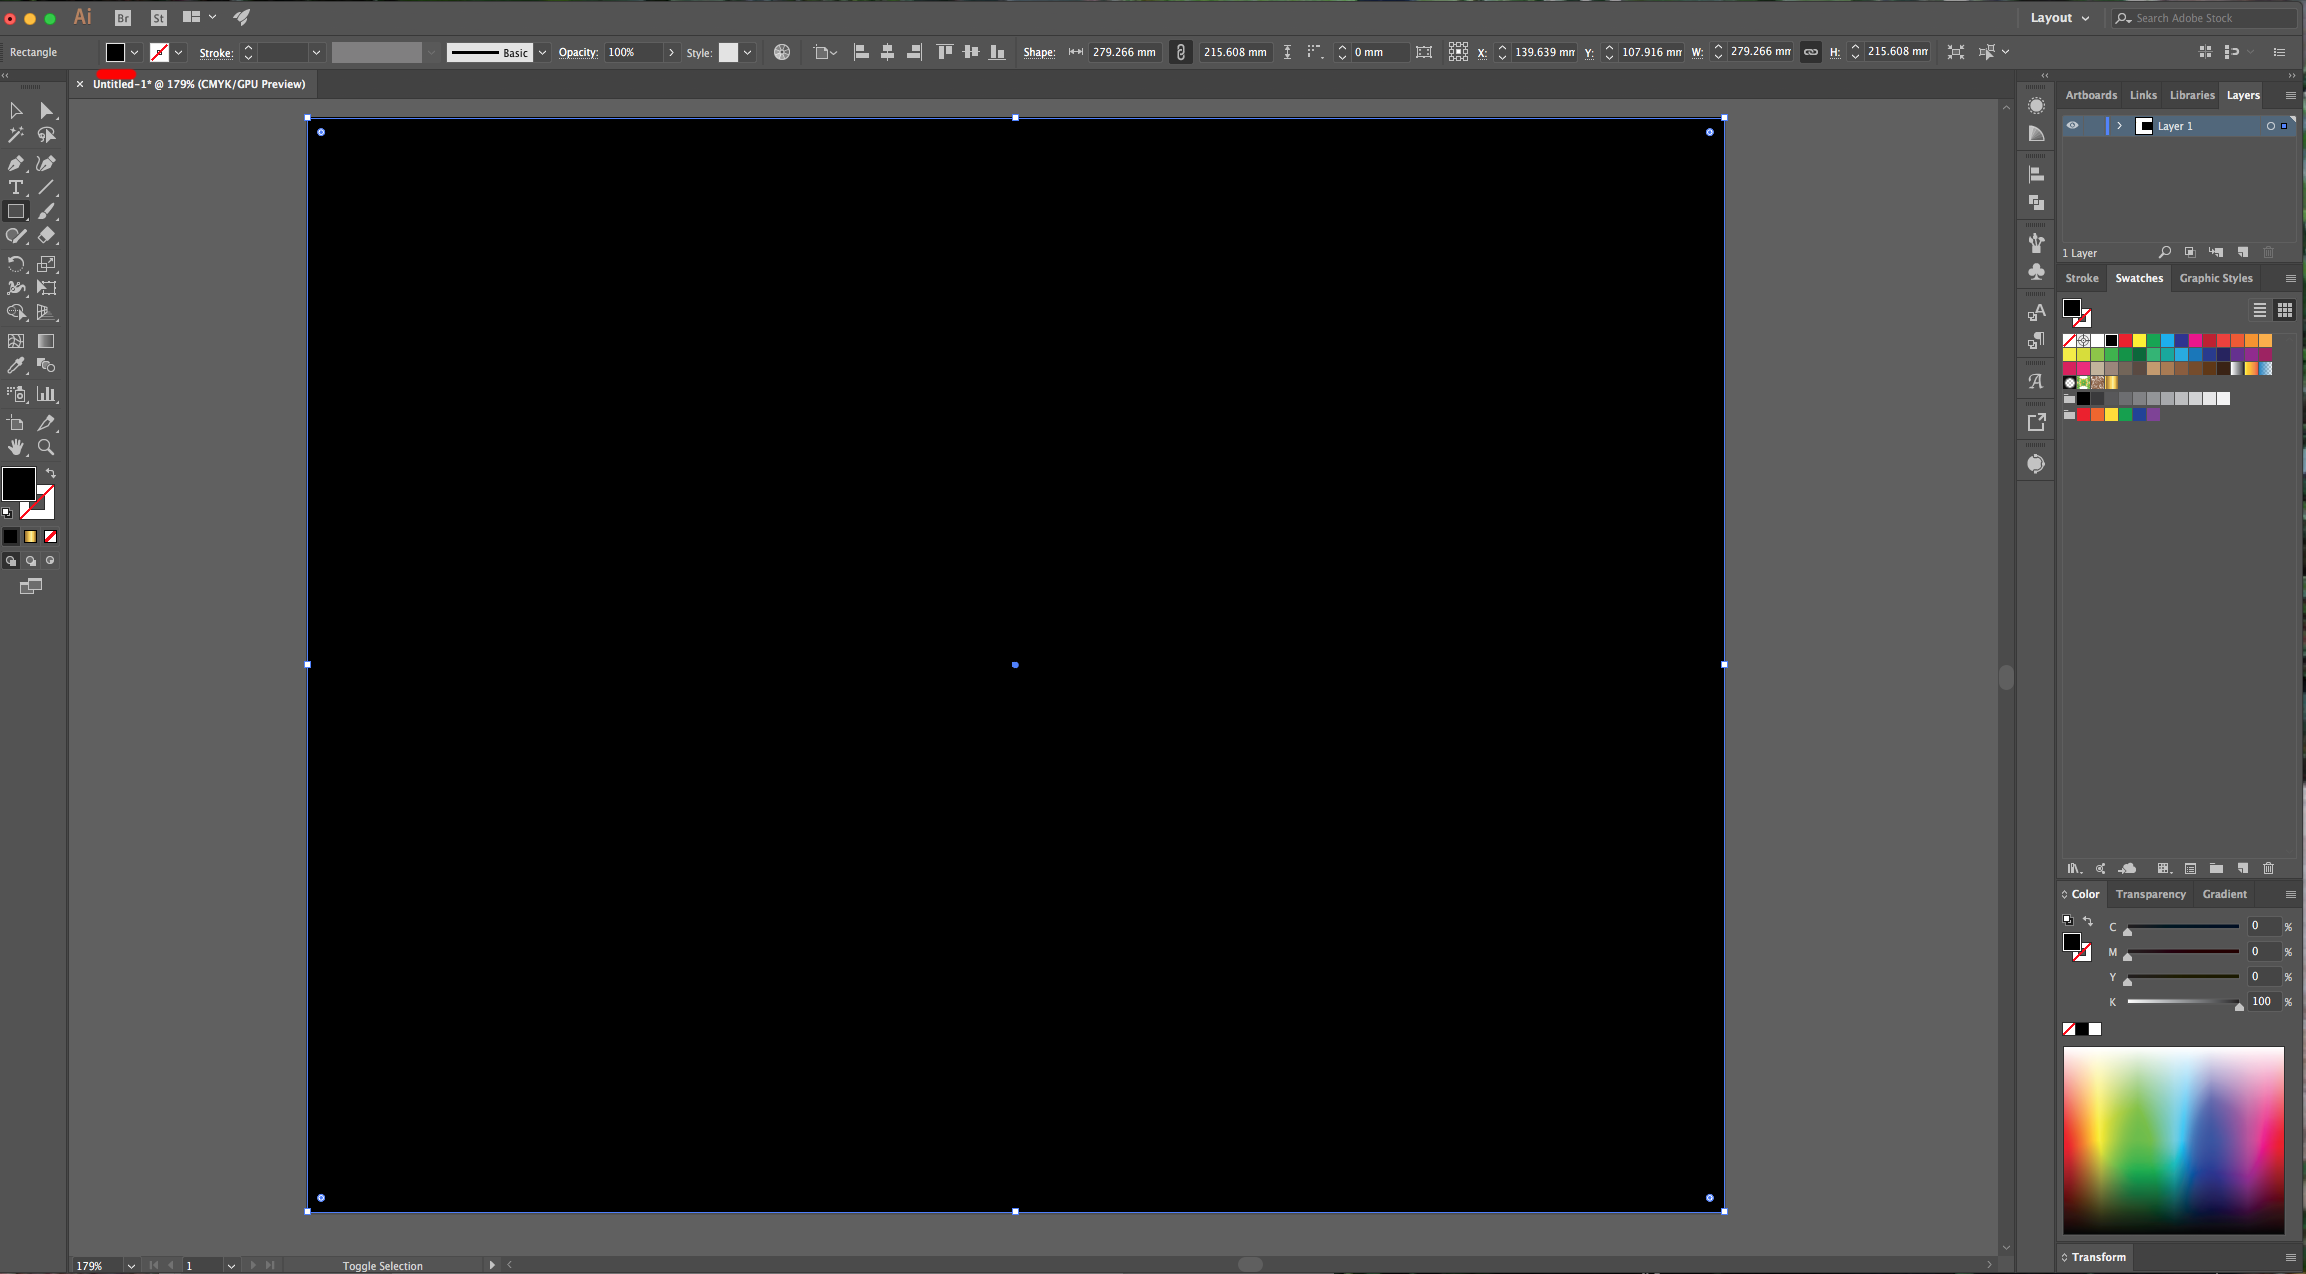
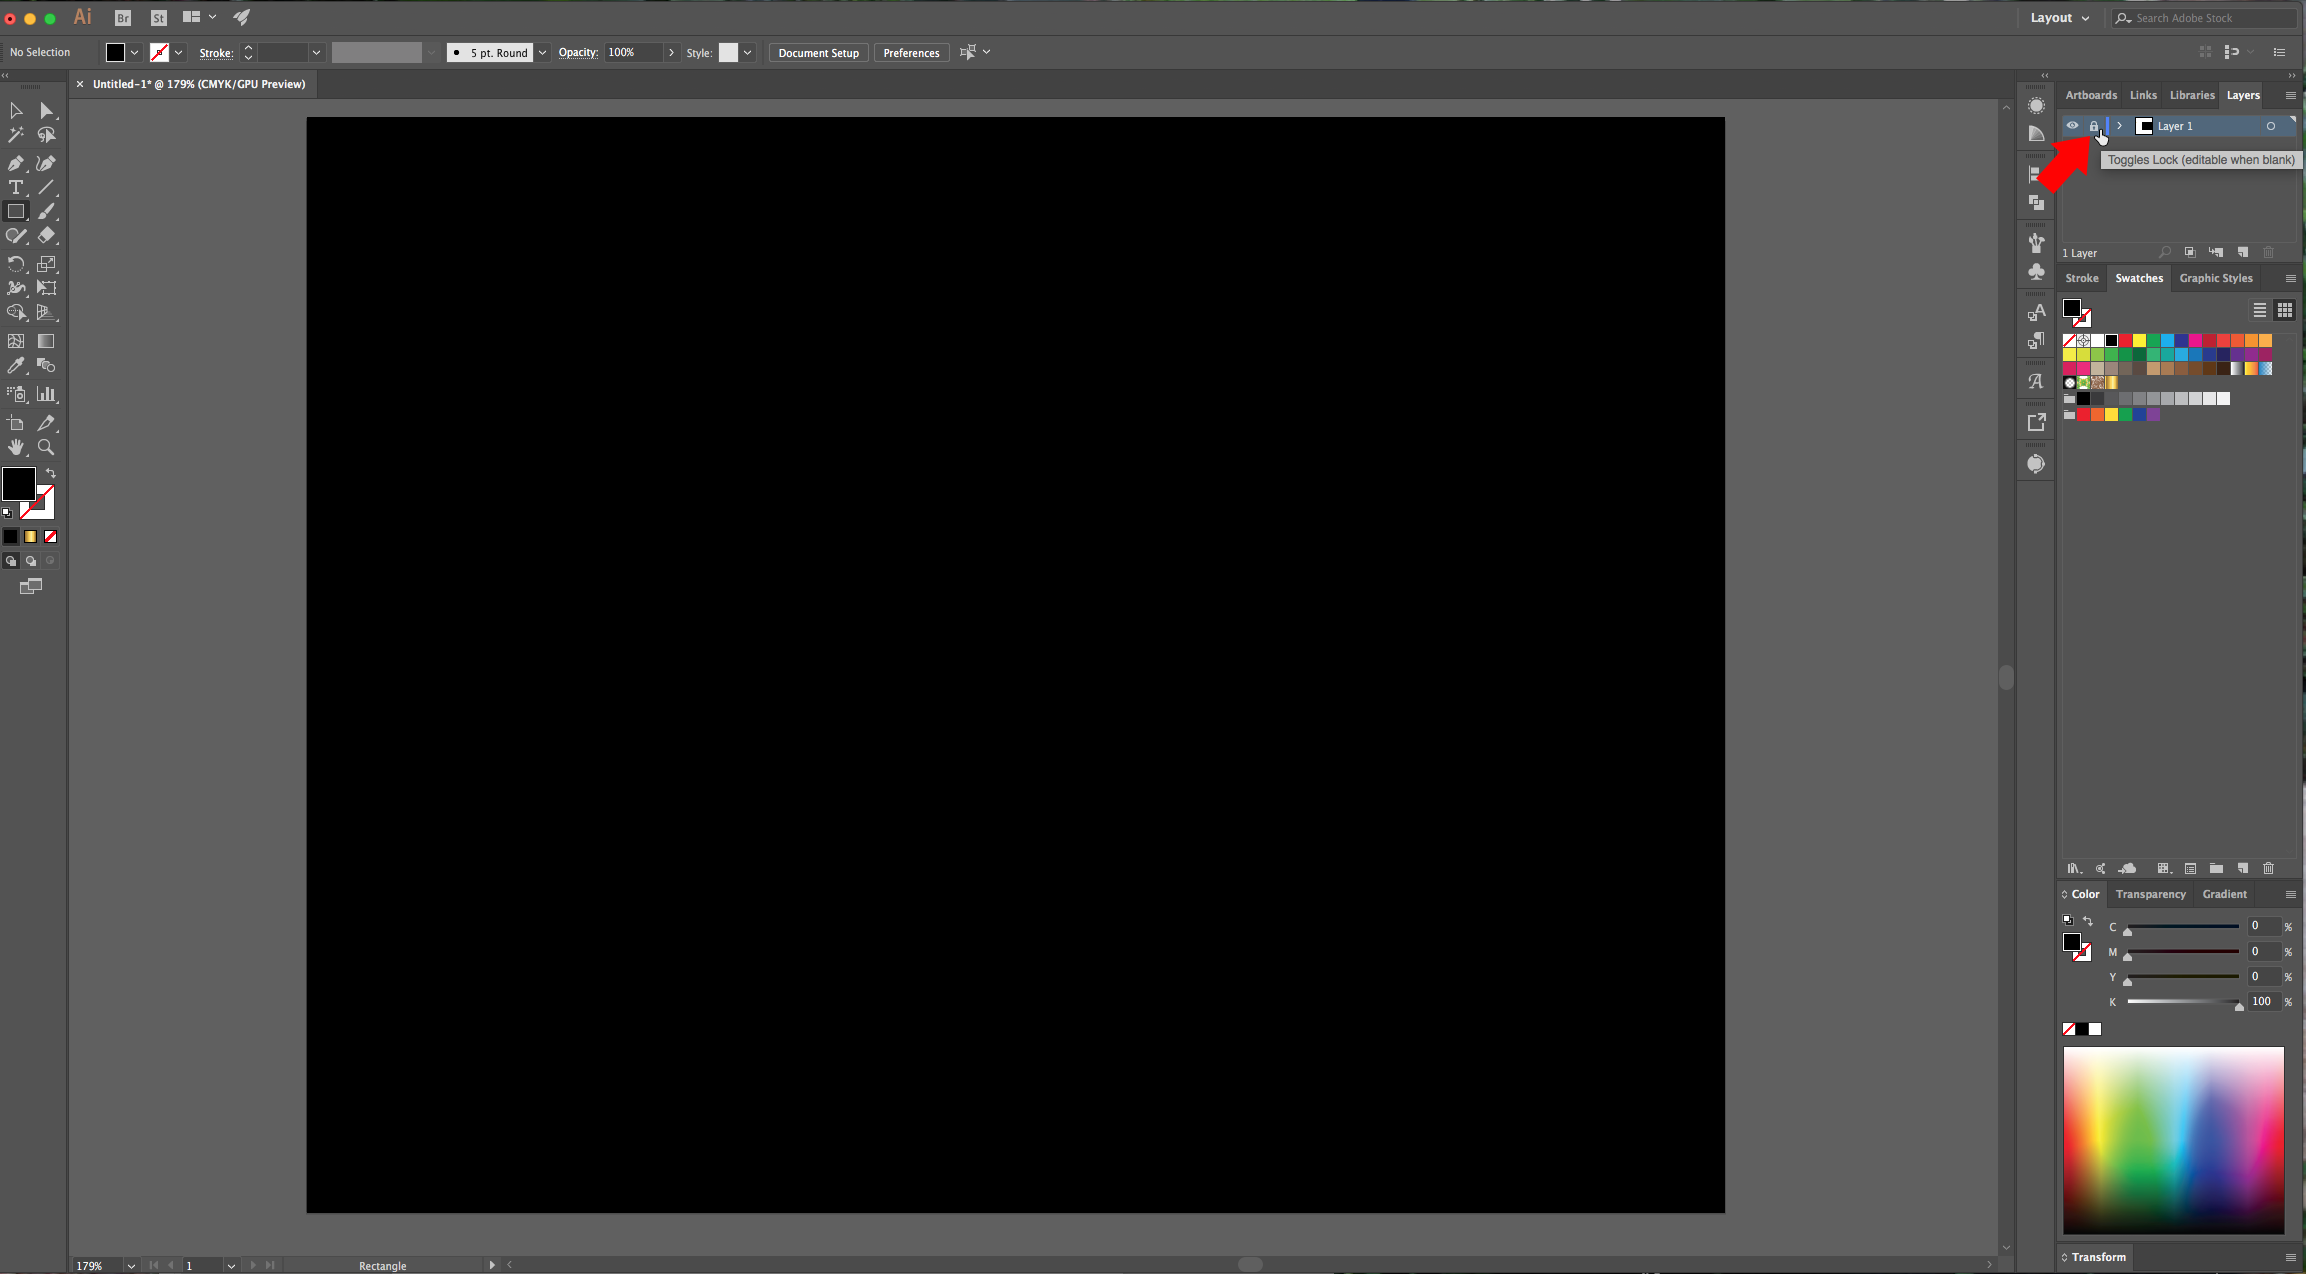
2 - Select the “Rectangle Tool” (M), draw a rectangle that covers all your document and fill it with Black. Lock this Layer by clicking to the left of its thumbnail and bringing out the small Padlock icon.
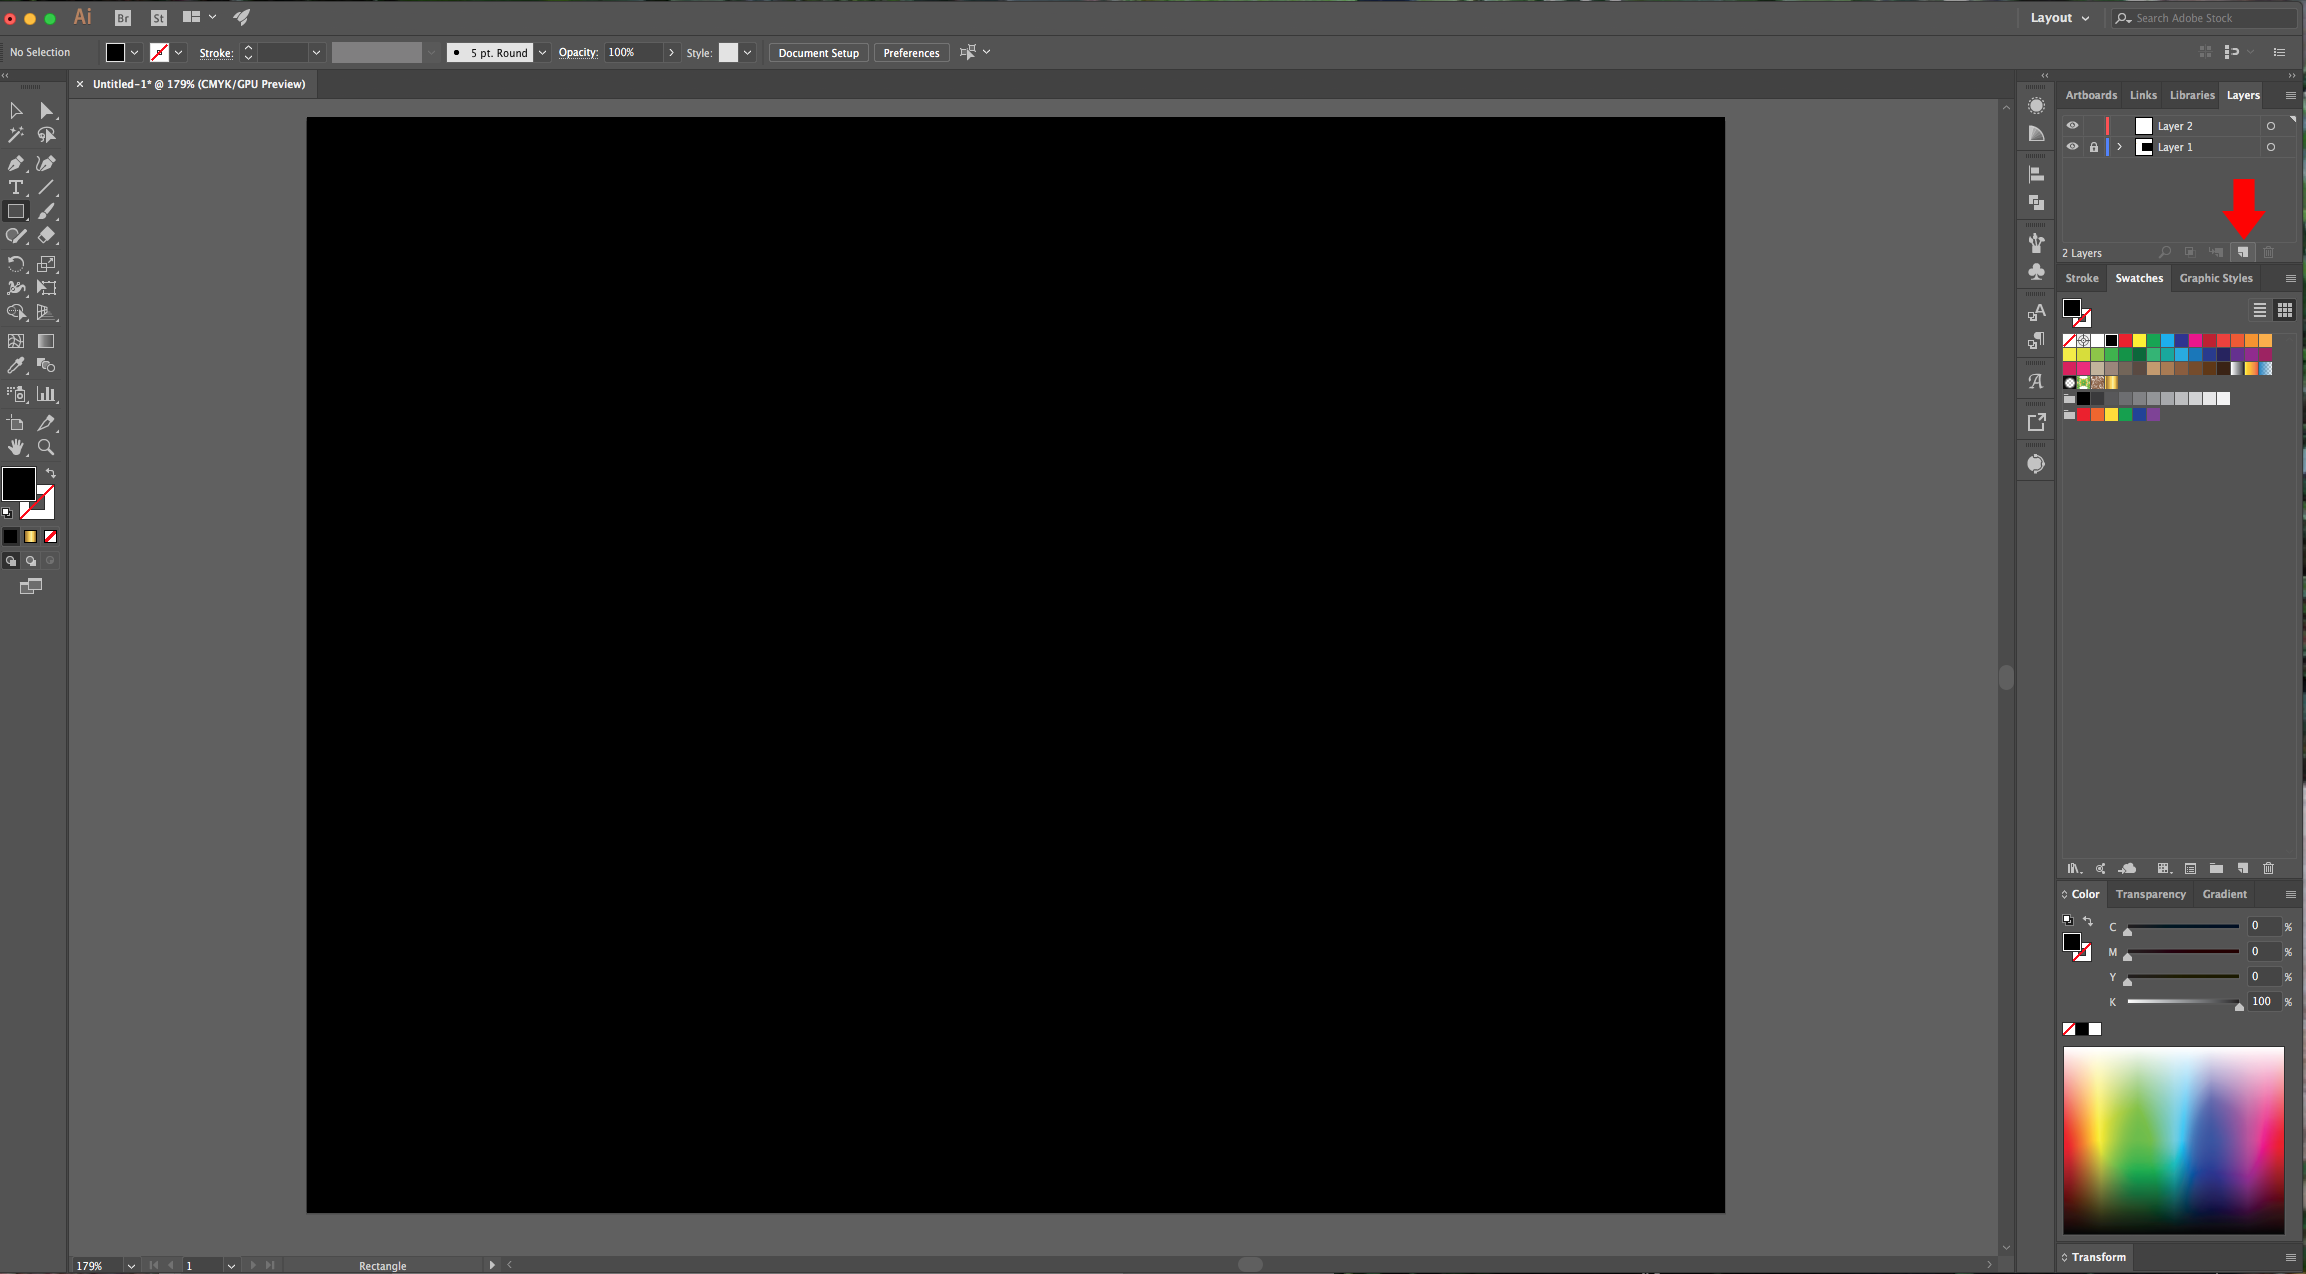
3 - “Create New Layer” by clicking on the button at the bottom of the “Layers Panel”.
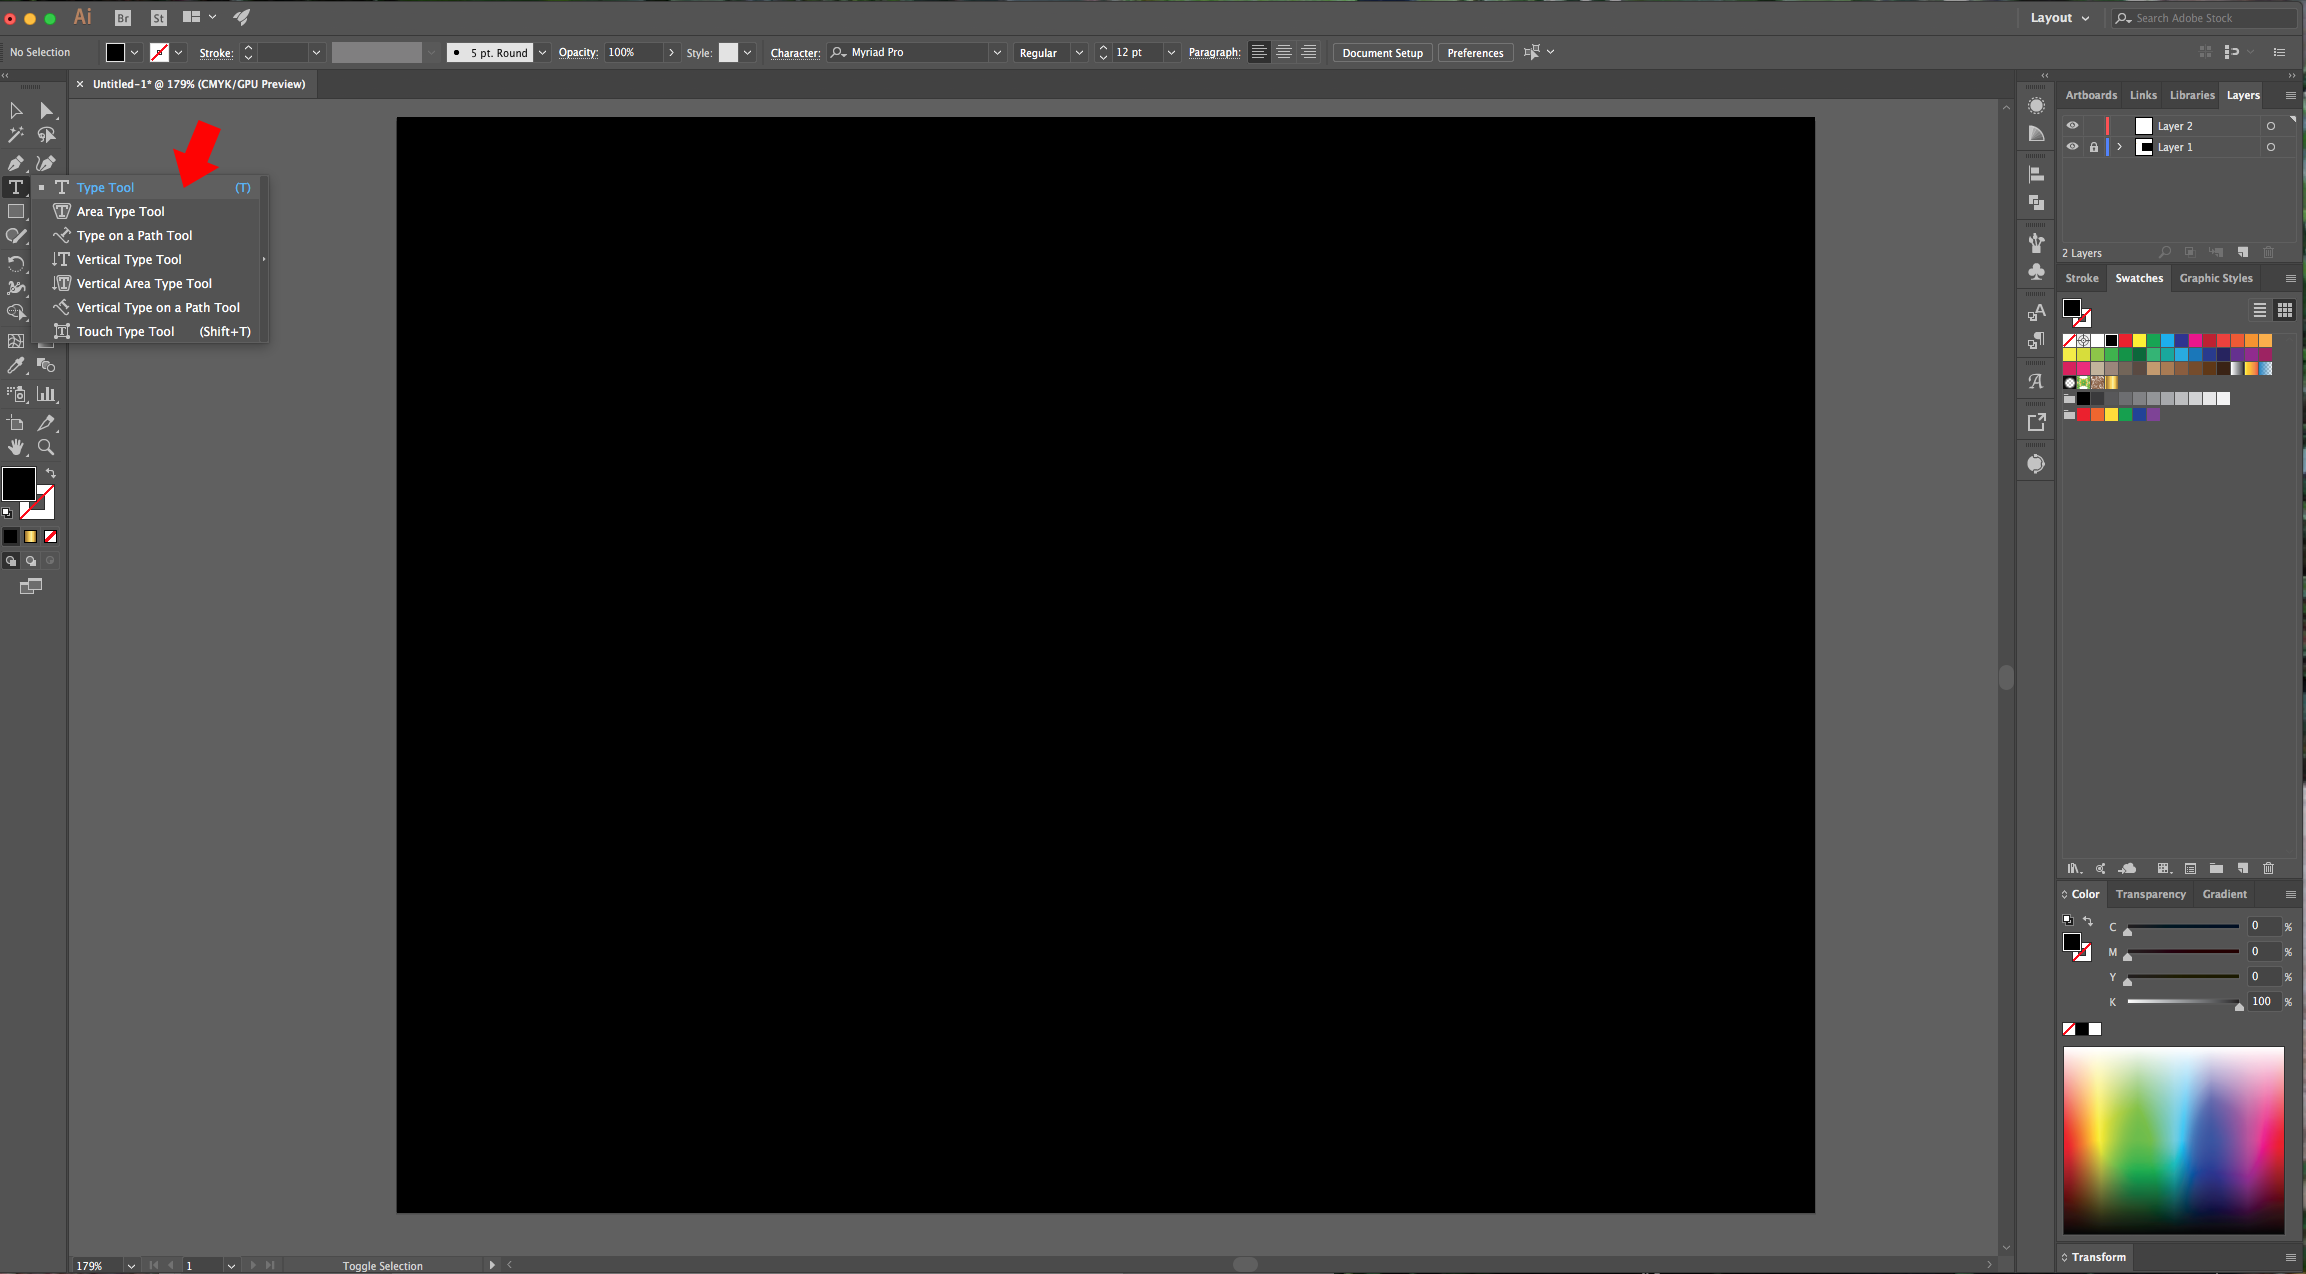
4 - Select the “Type Tool” (T), choose your font (we used Glimmer Script) and type your text. The Size will depend on your font and document. We noticed that there was some odd spacing between two letters so we selected them and changed the “Tracking” value in the “Character Panel”.
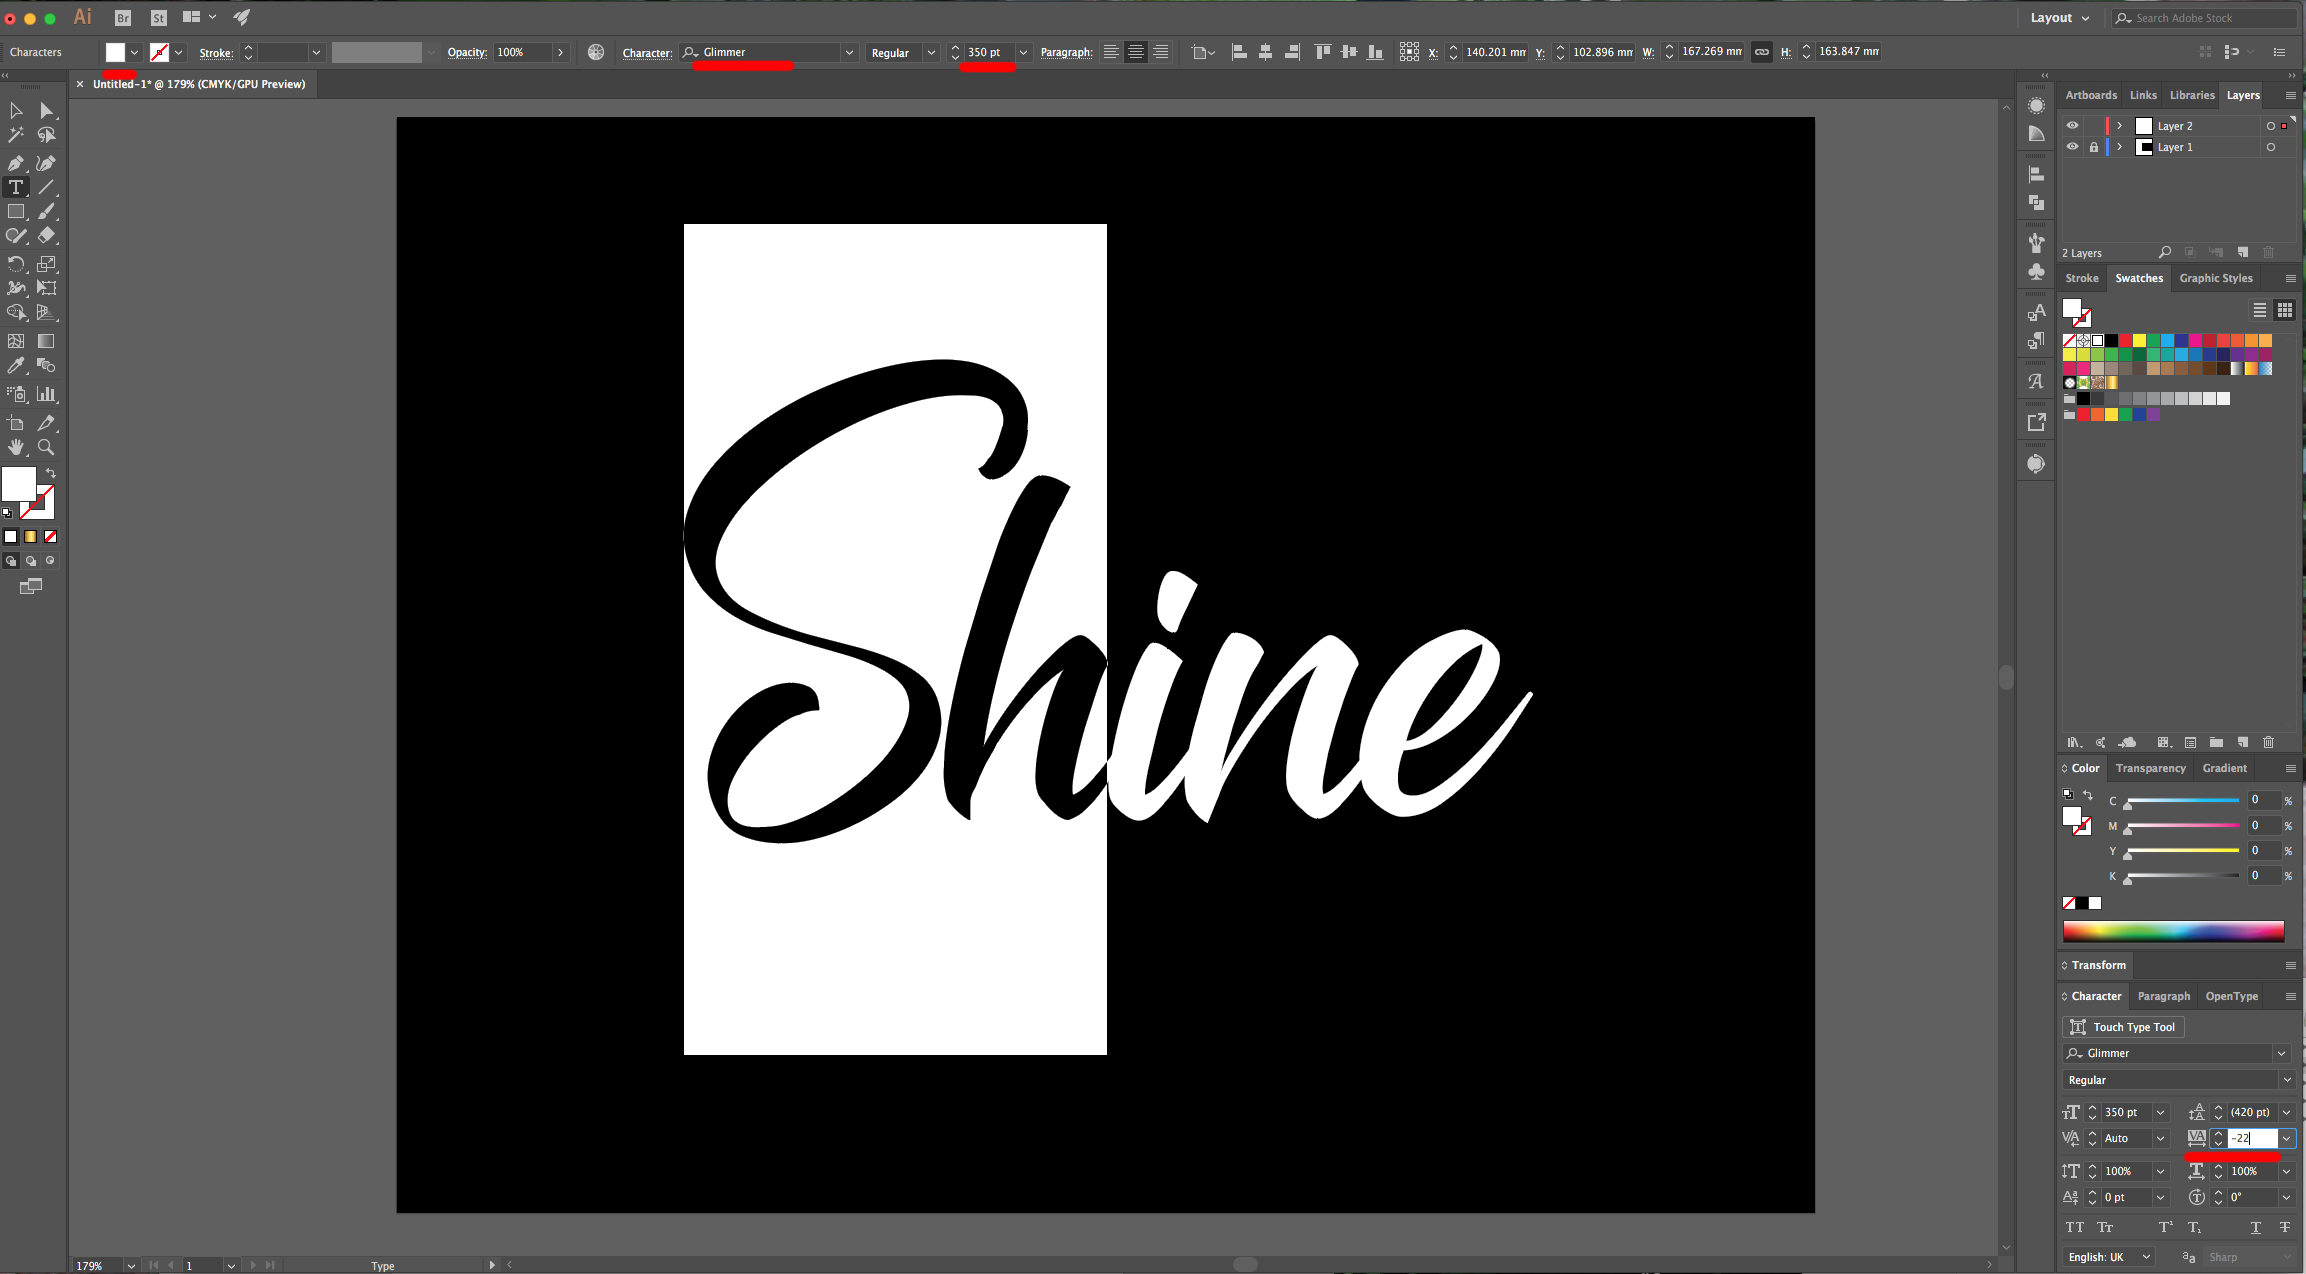
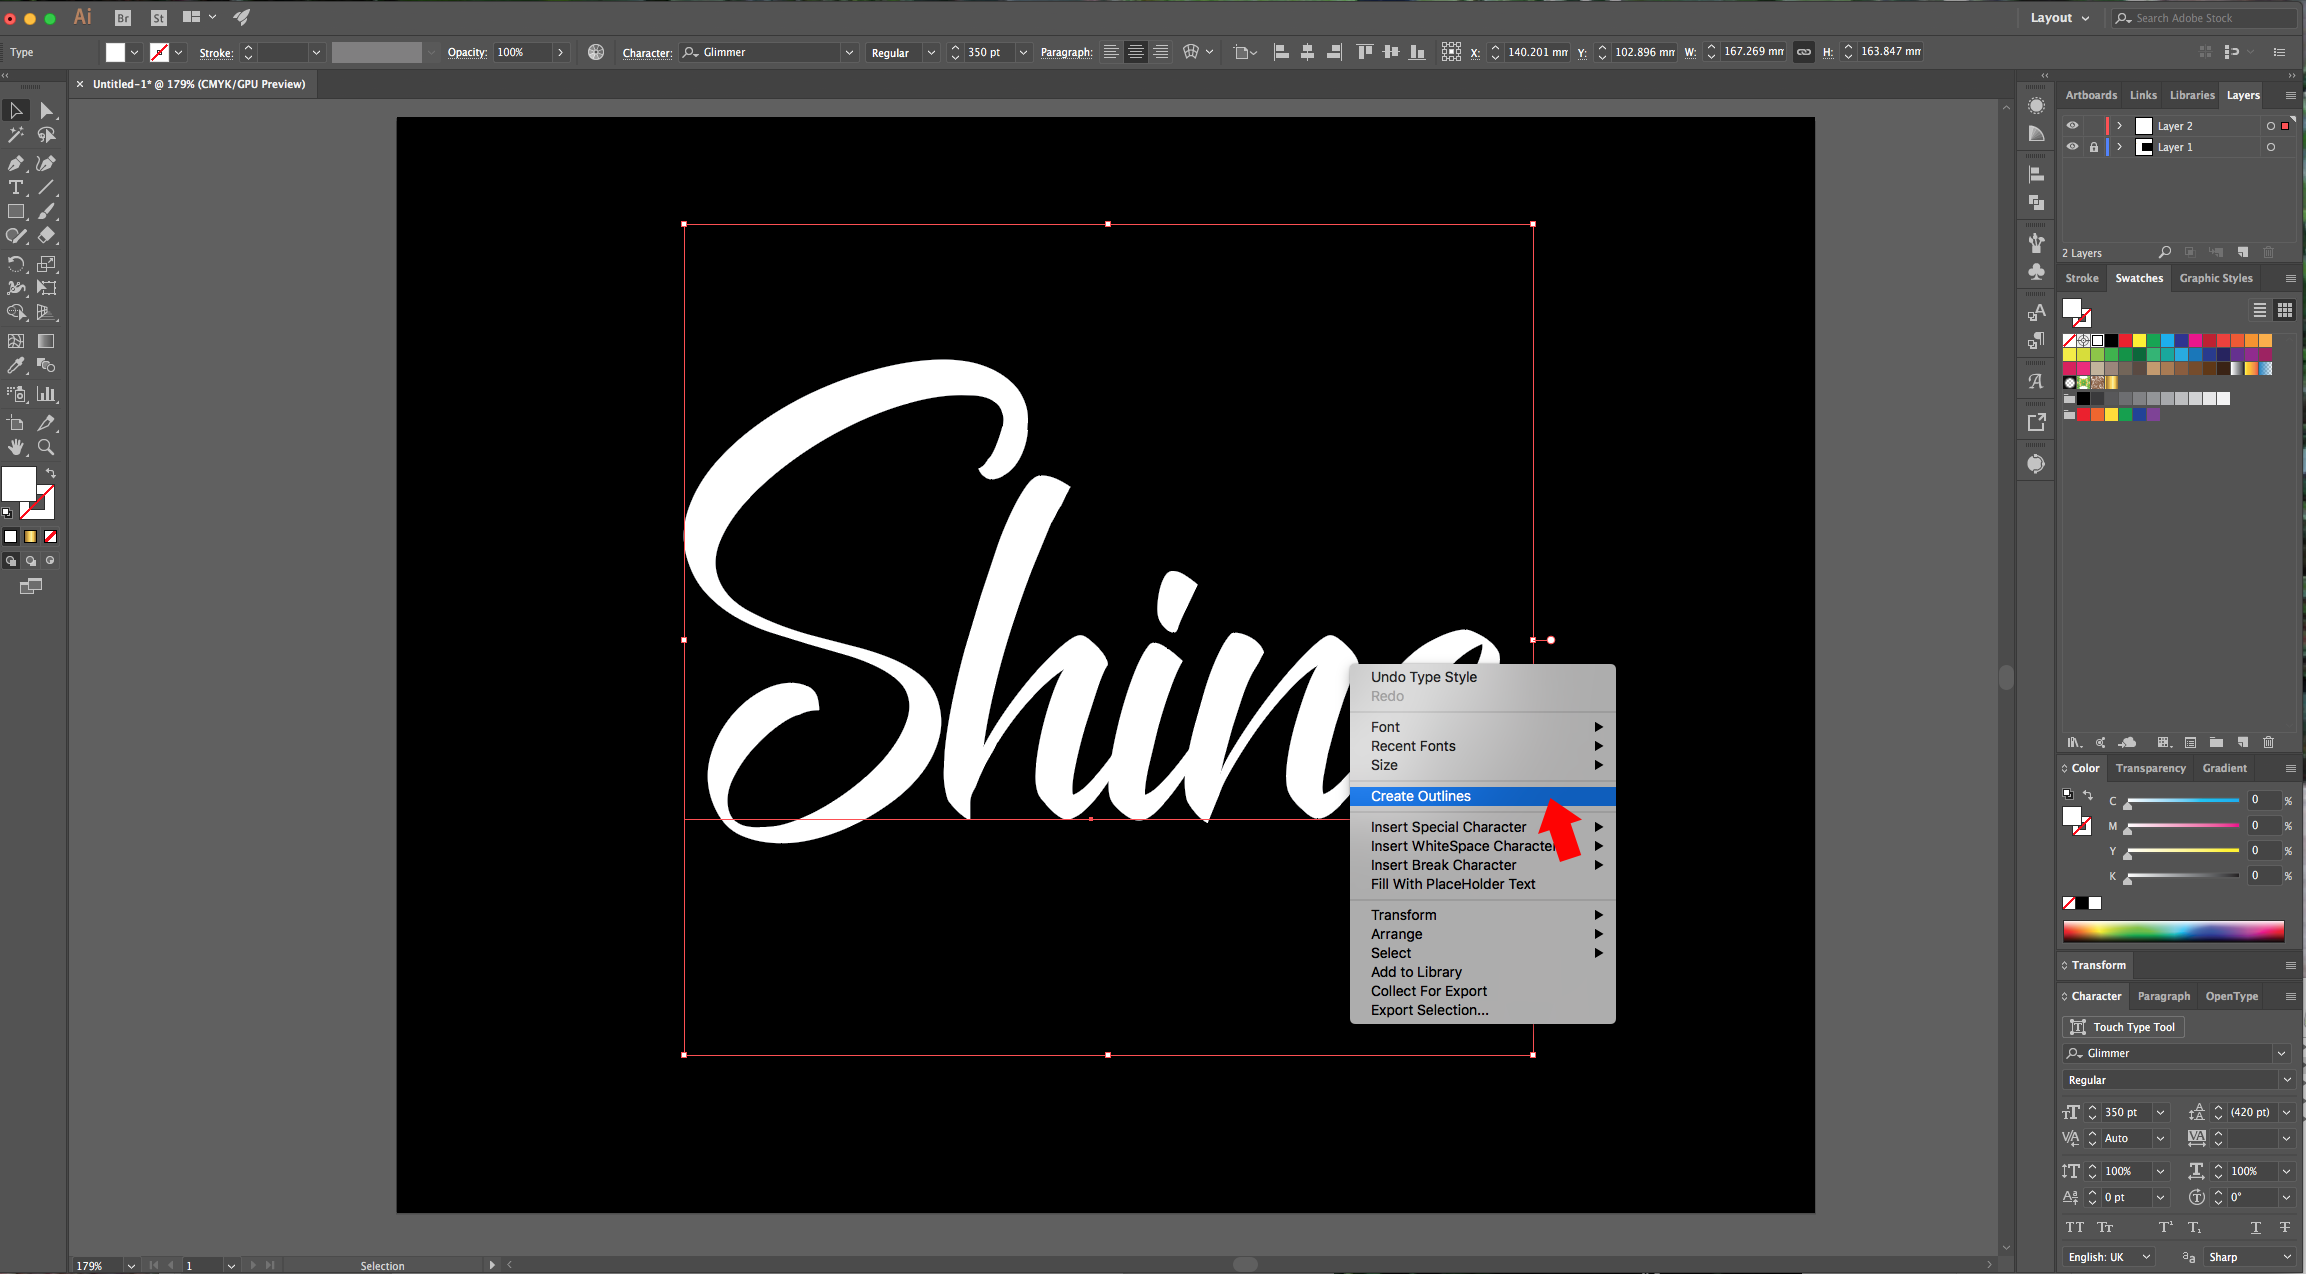
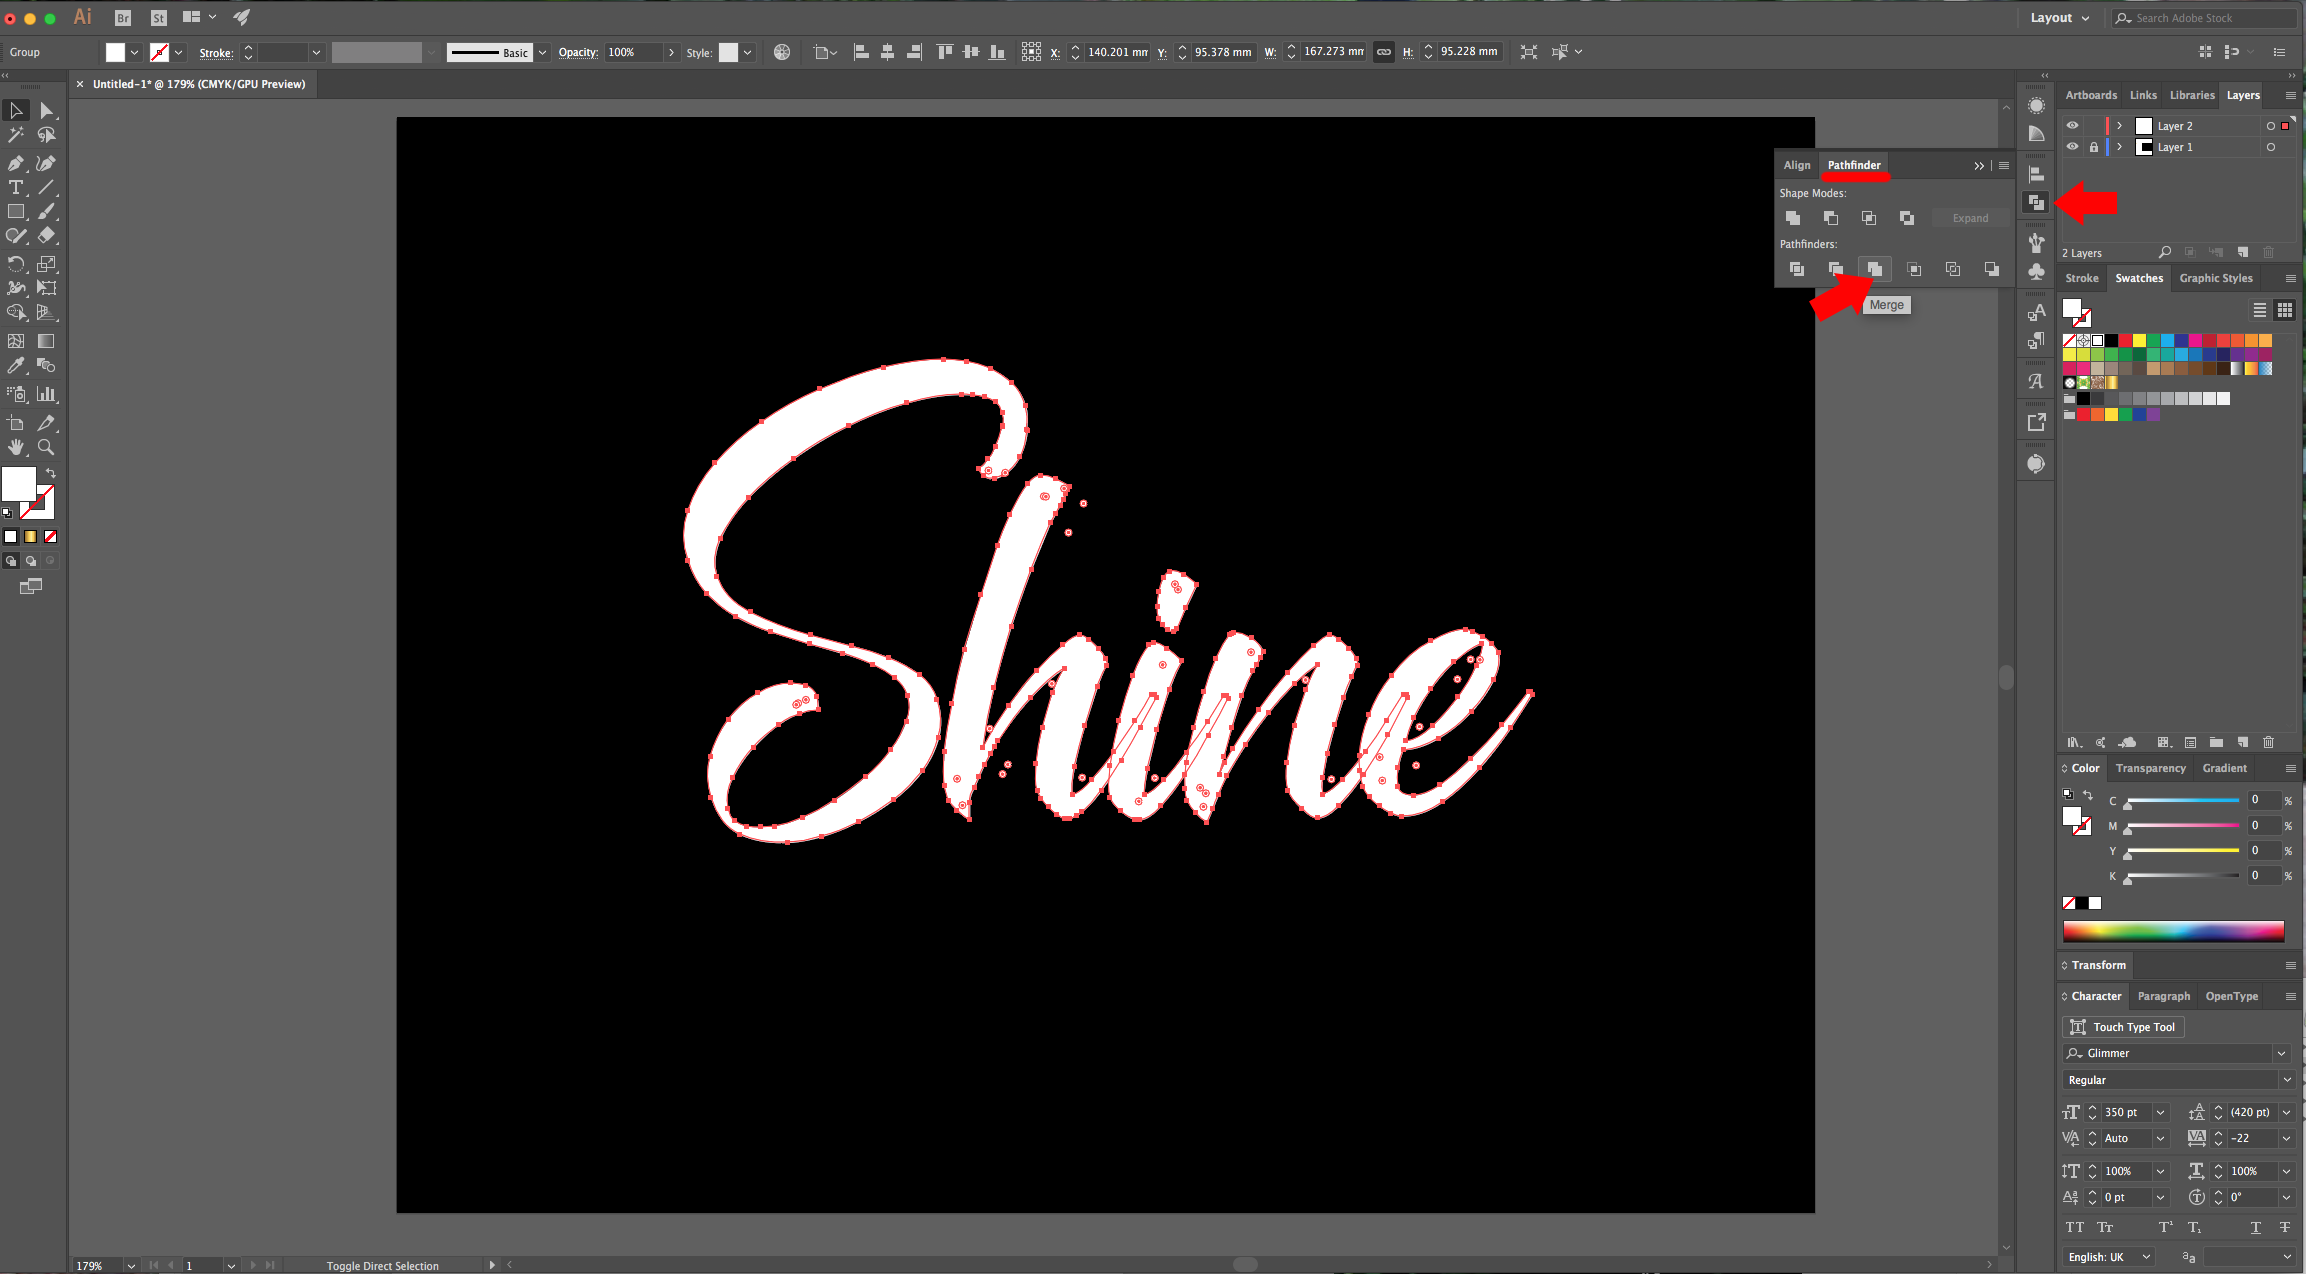
5 - Right-click on your text and choose “Create Outlines”, then go to the “Pathfinder Panel” and choose “Merge” to unite all the letters and get rid of the overlapping portions.
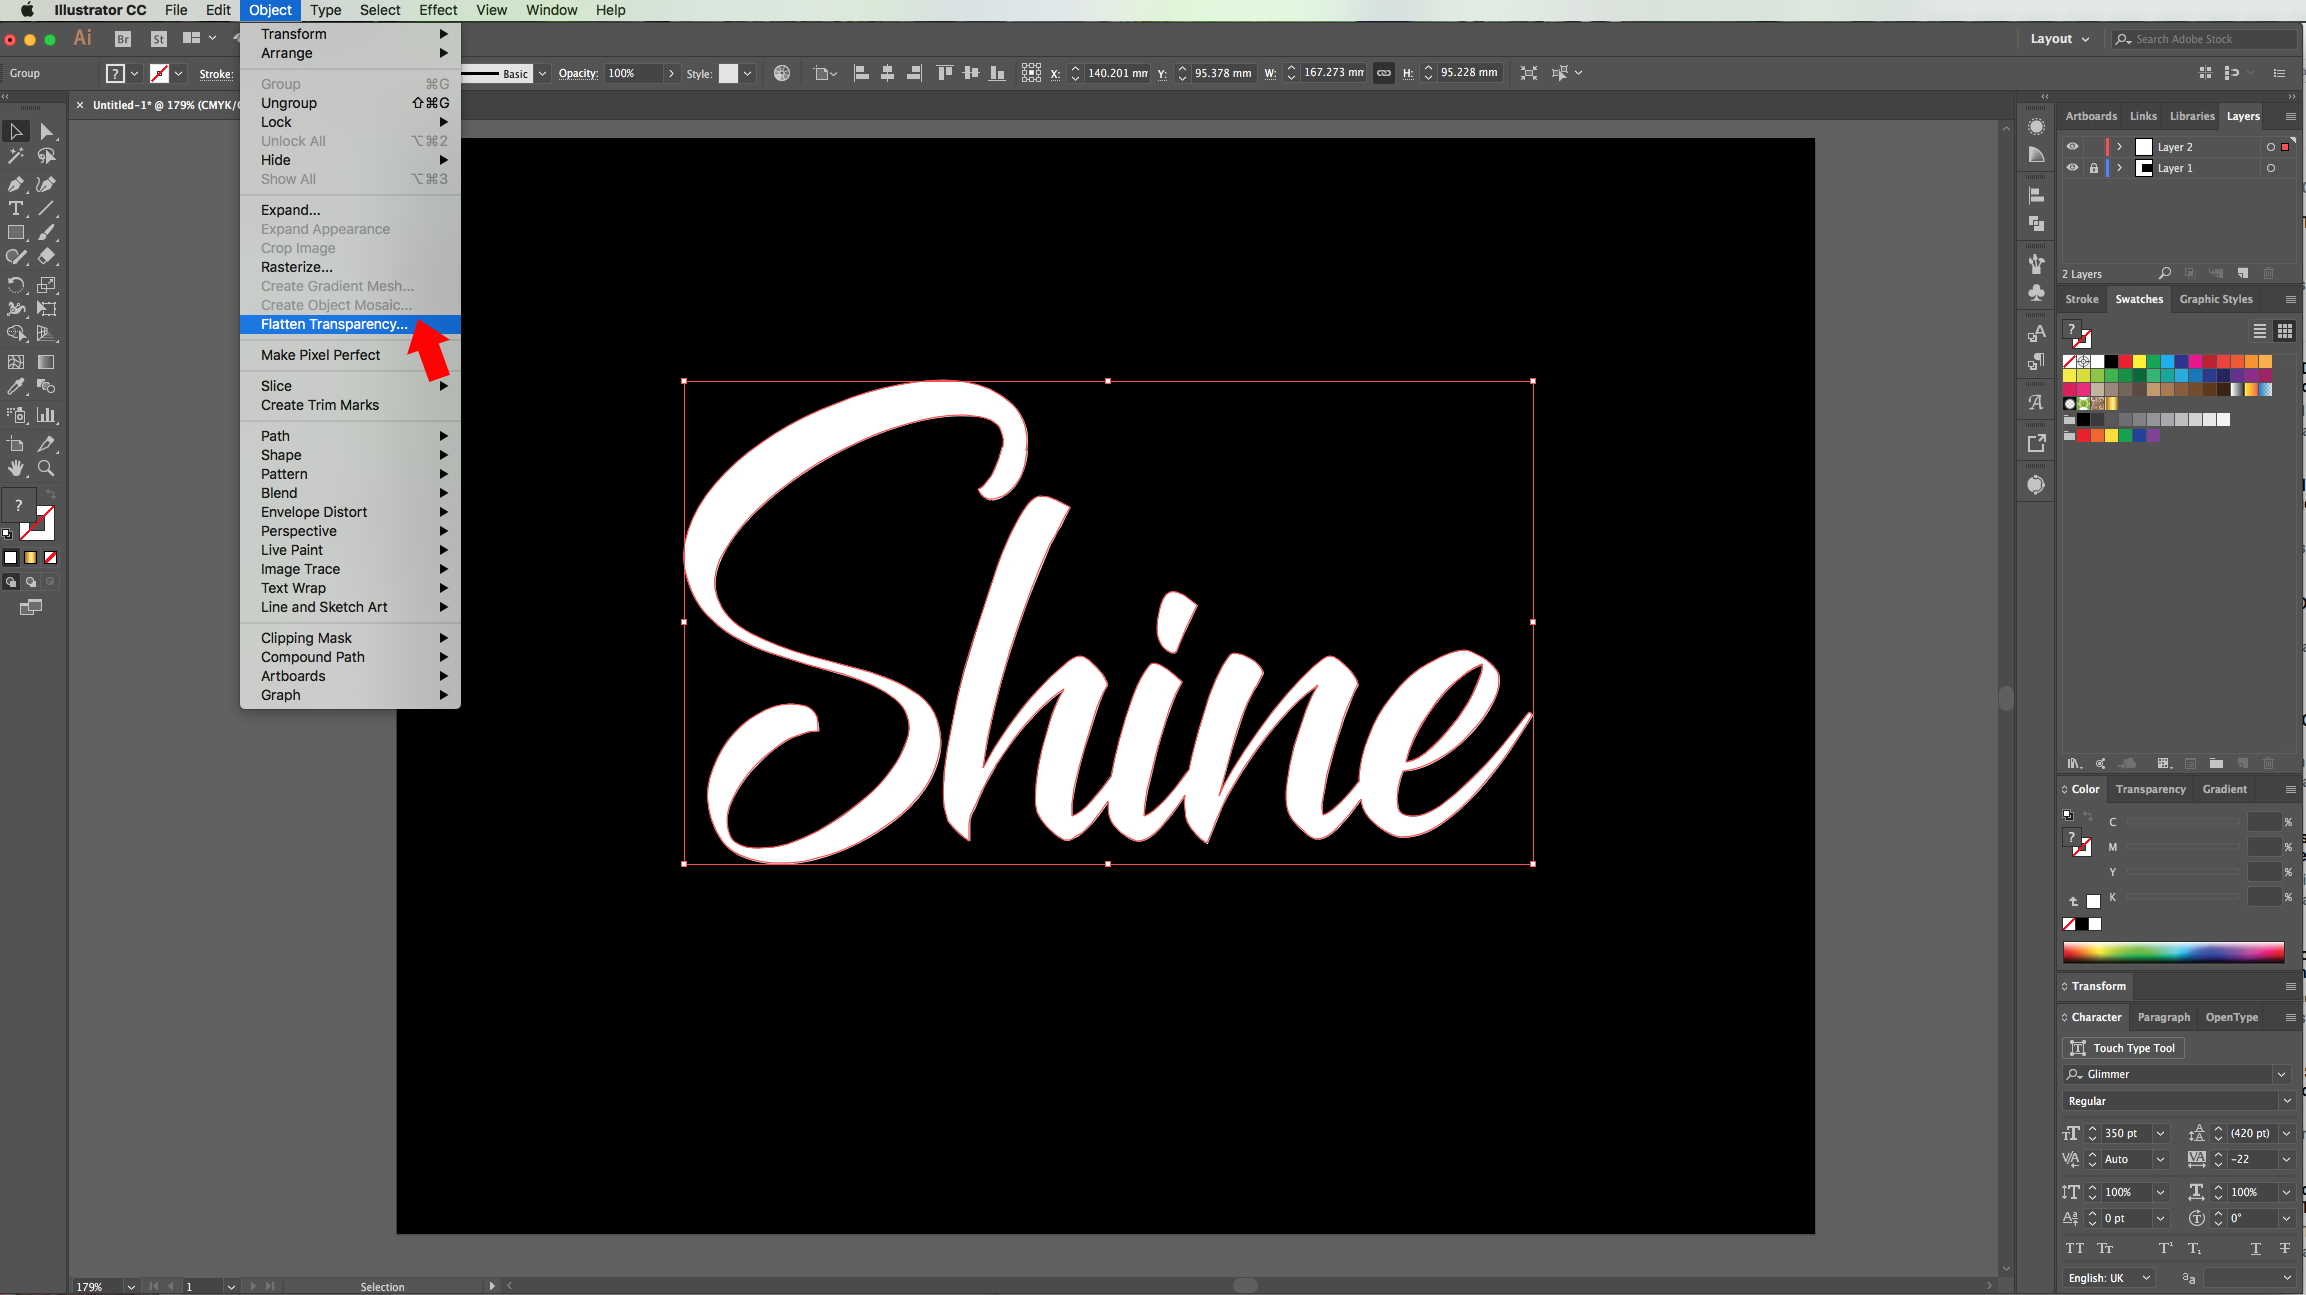
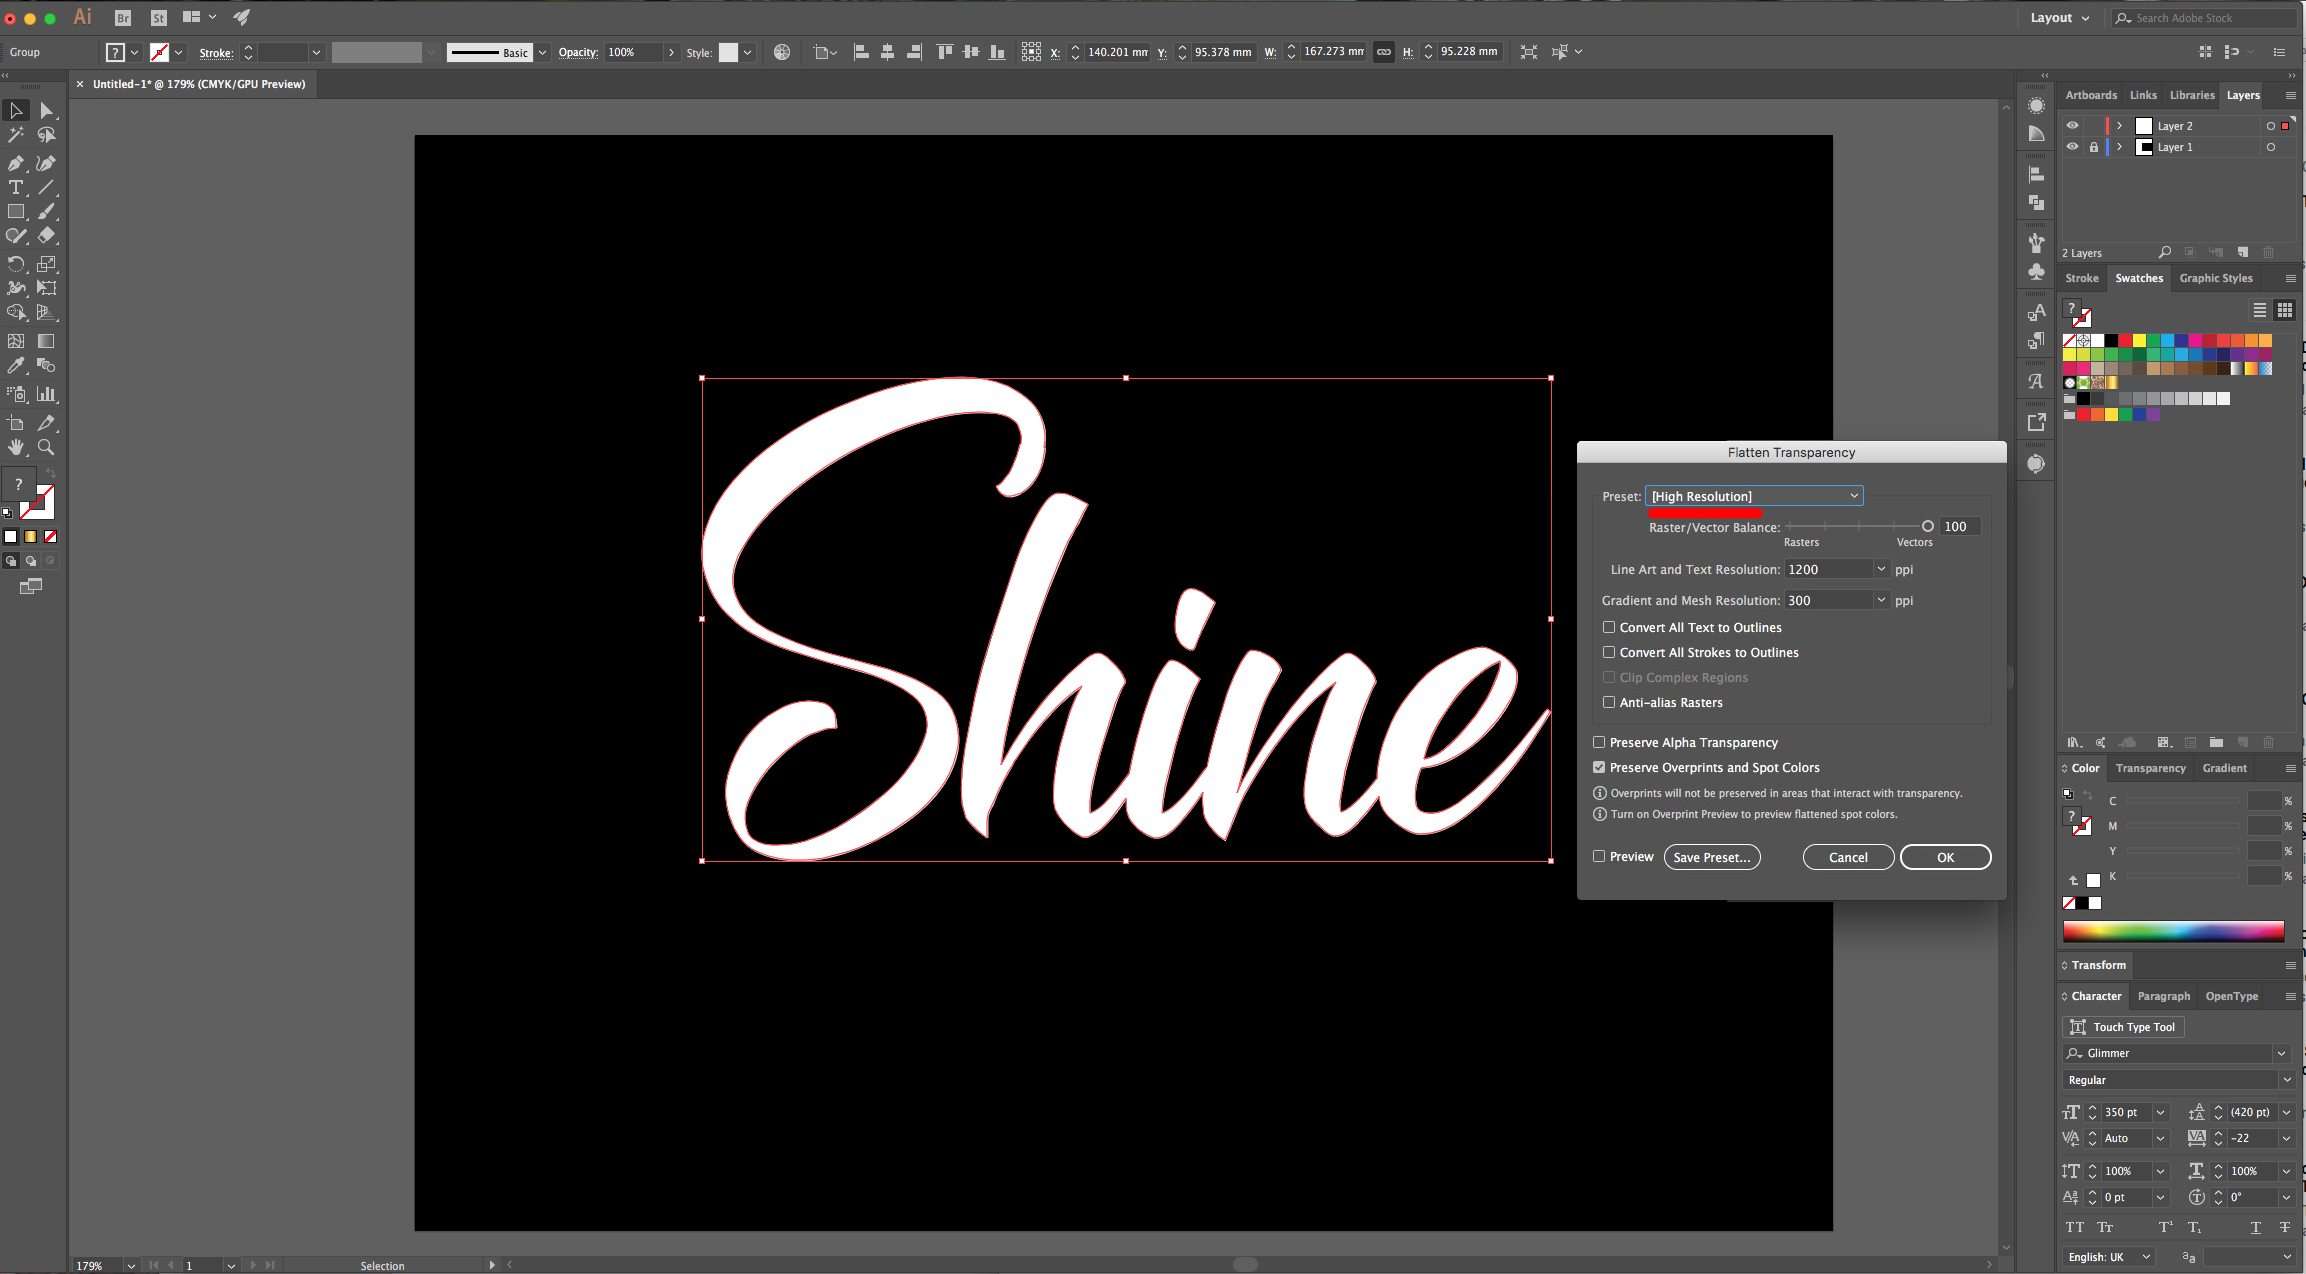
6 - Go to Object > Flatten Transparency and choose the “High Resolution” Preset.
7 - With your text selected go to the “Appearance Panel” and from the “Effects” Menu choose 3D > Extrude & Bevel. Apply the following values:
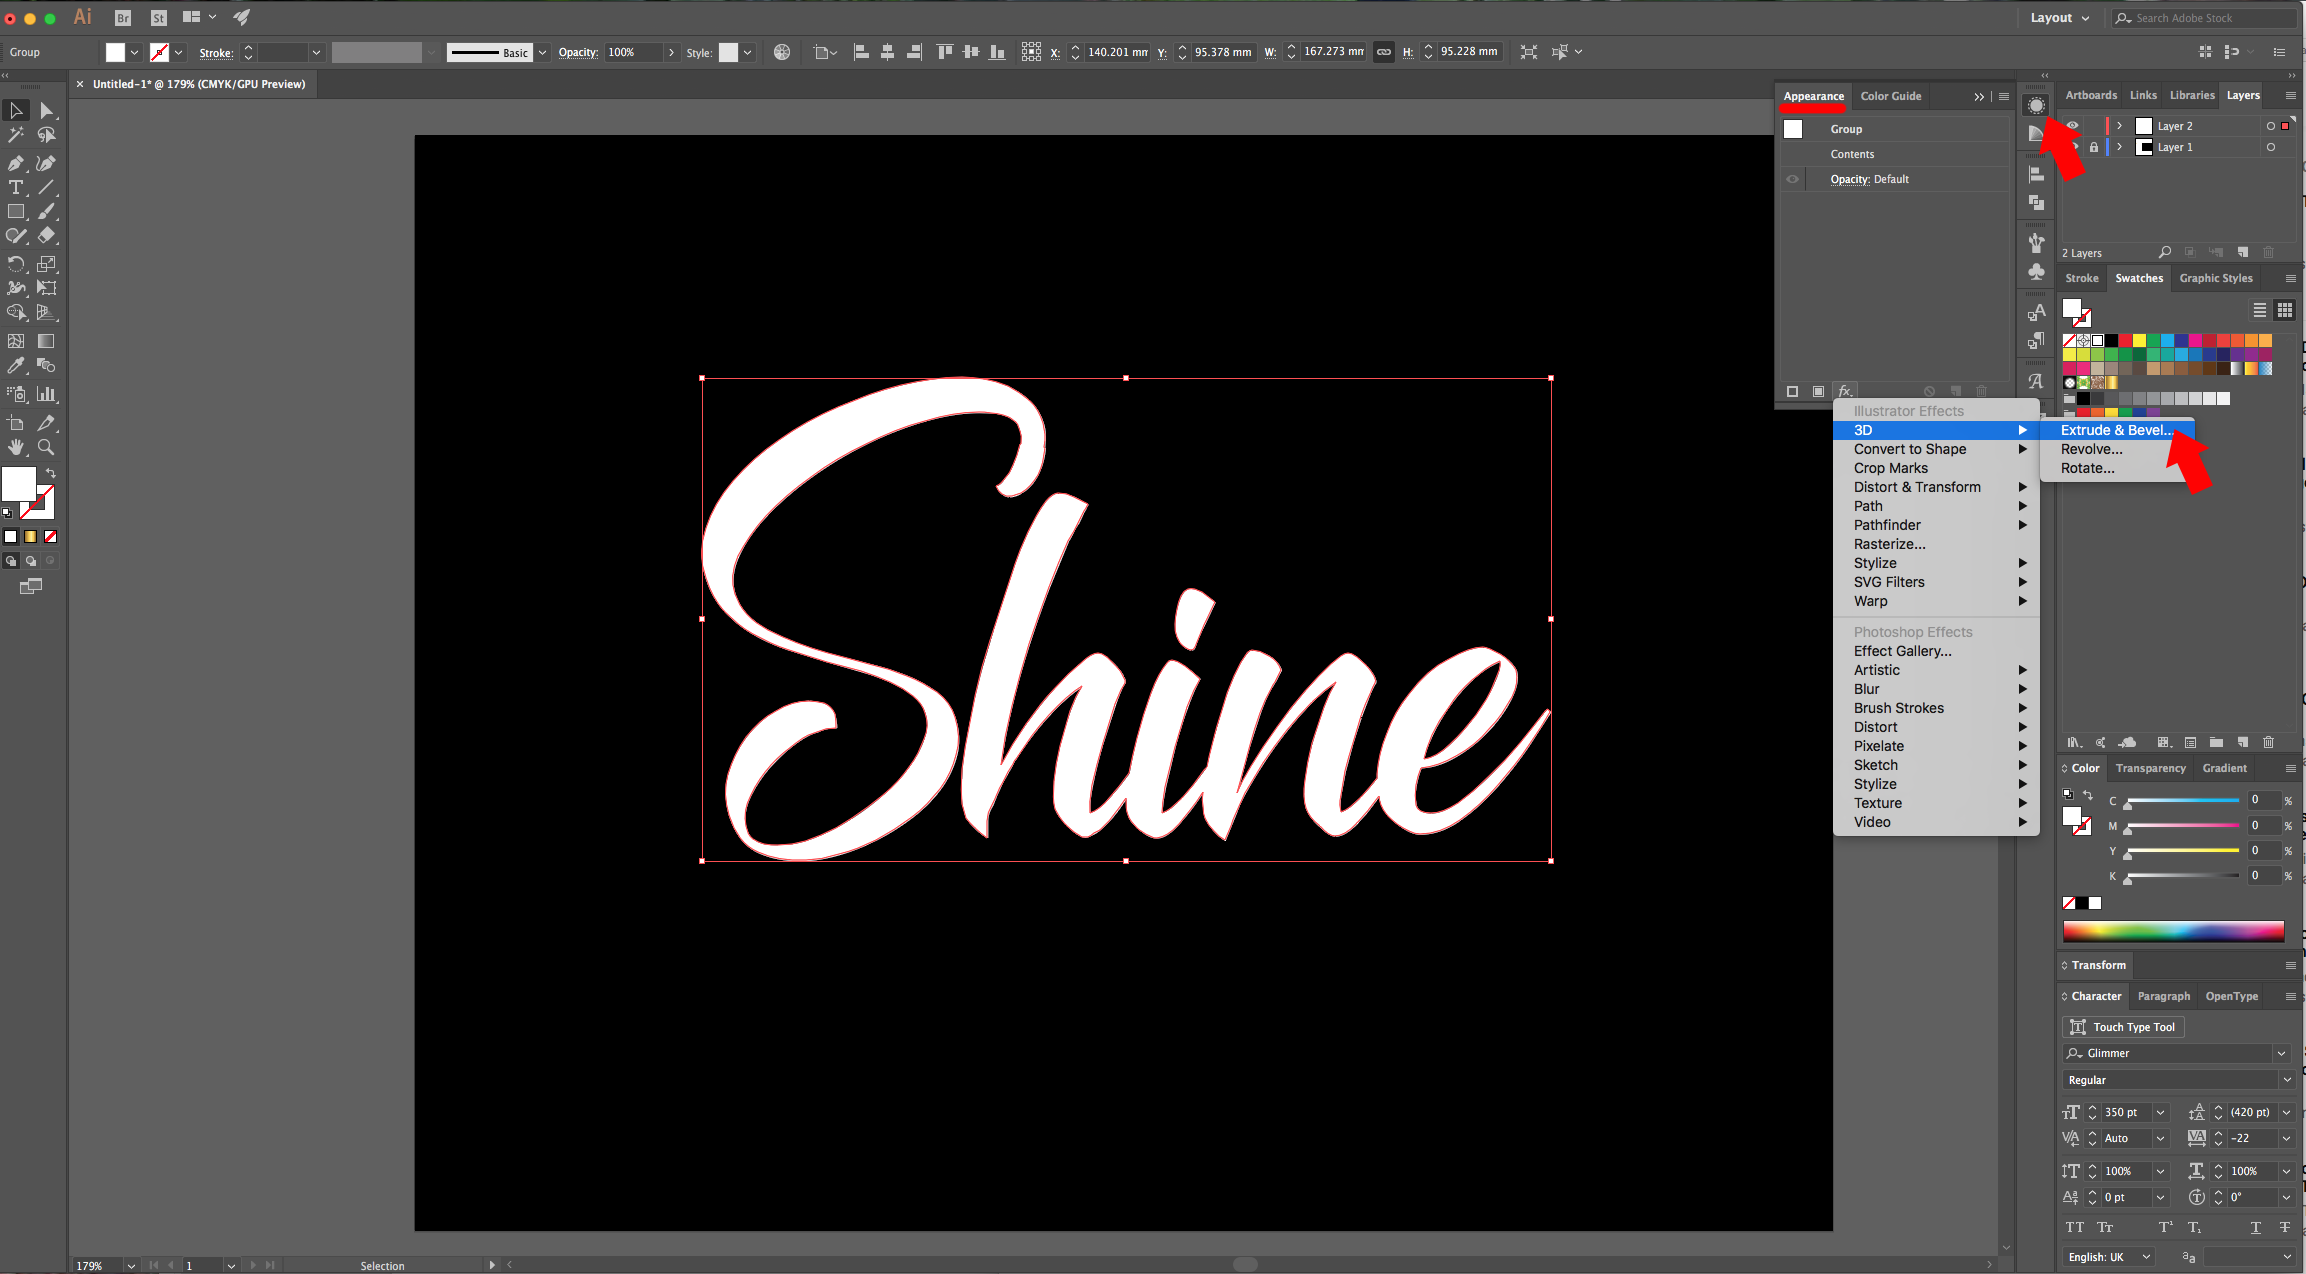
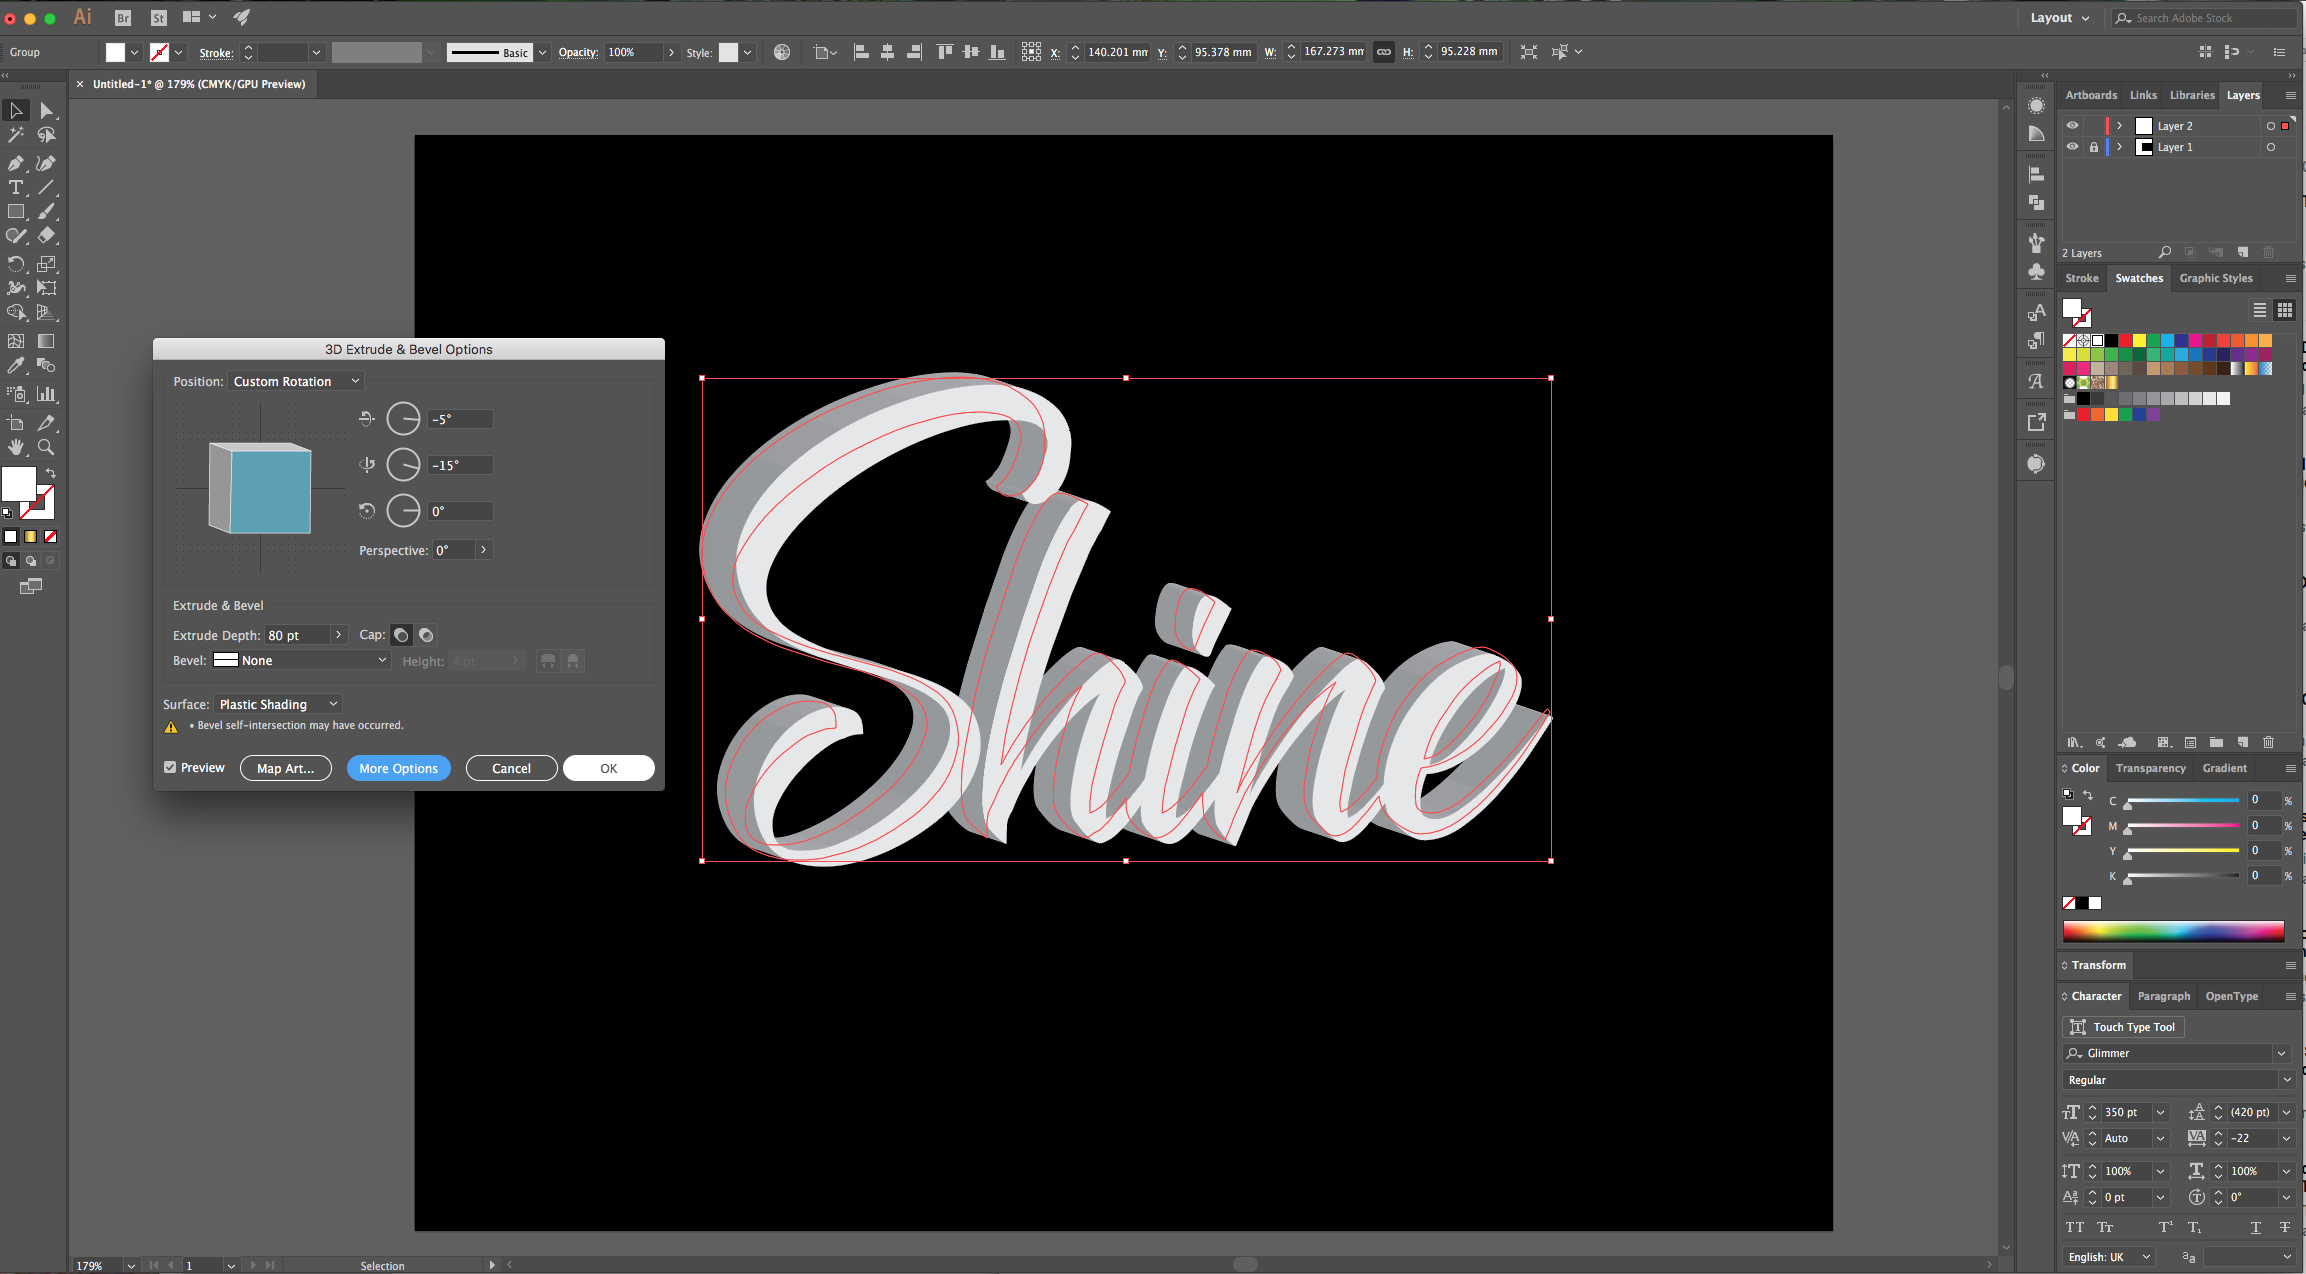
8 - Go to Object > Expand Appearance and then right-click on top of your text and choose “Ungroup”. Do this last part twice (Ungroup).
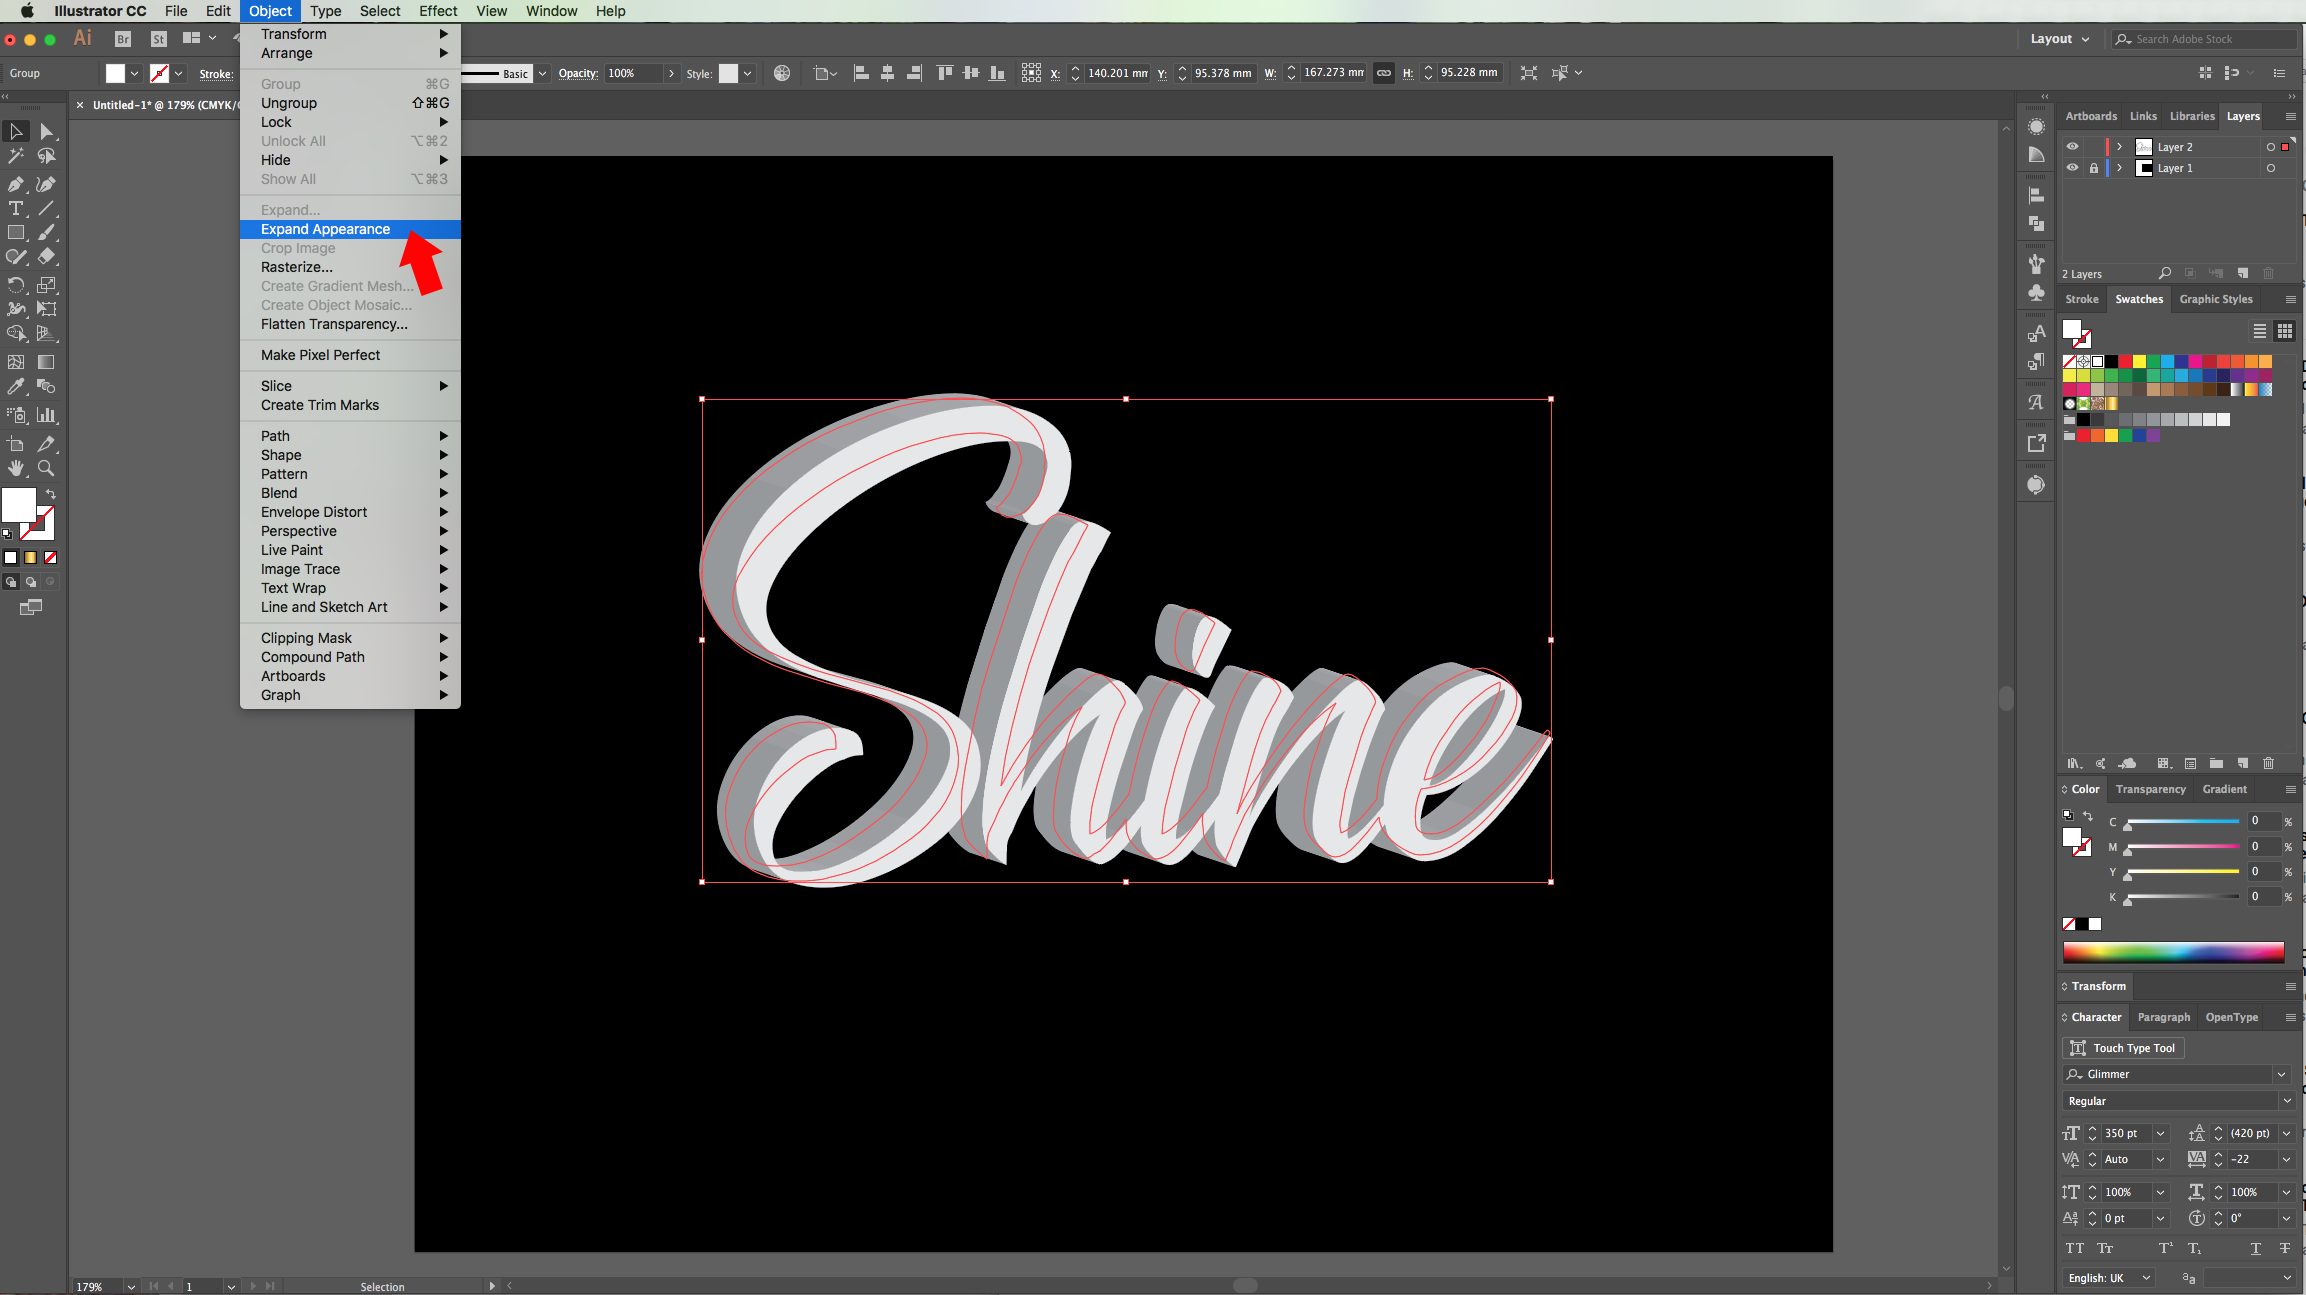
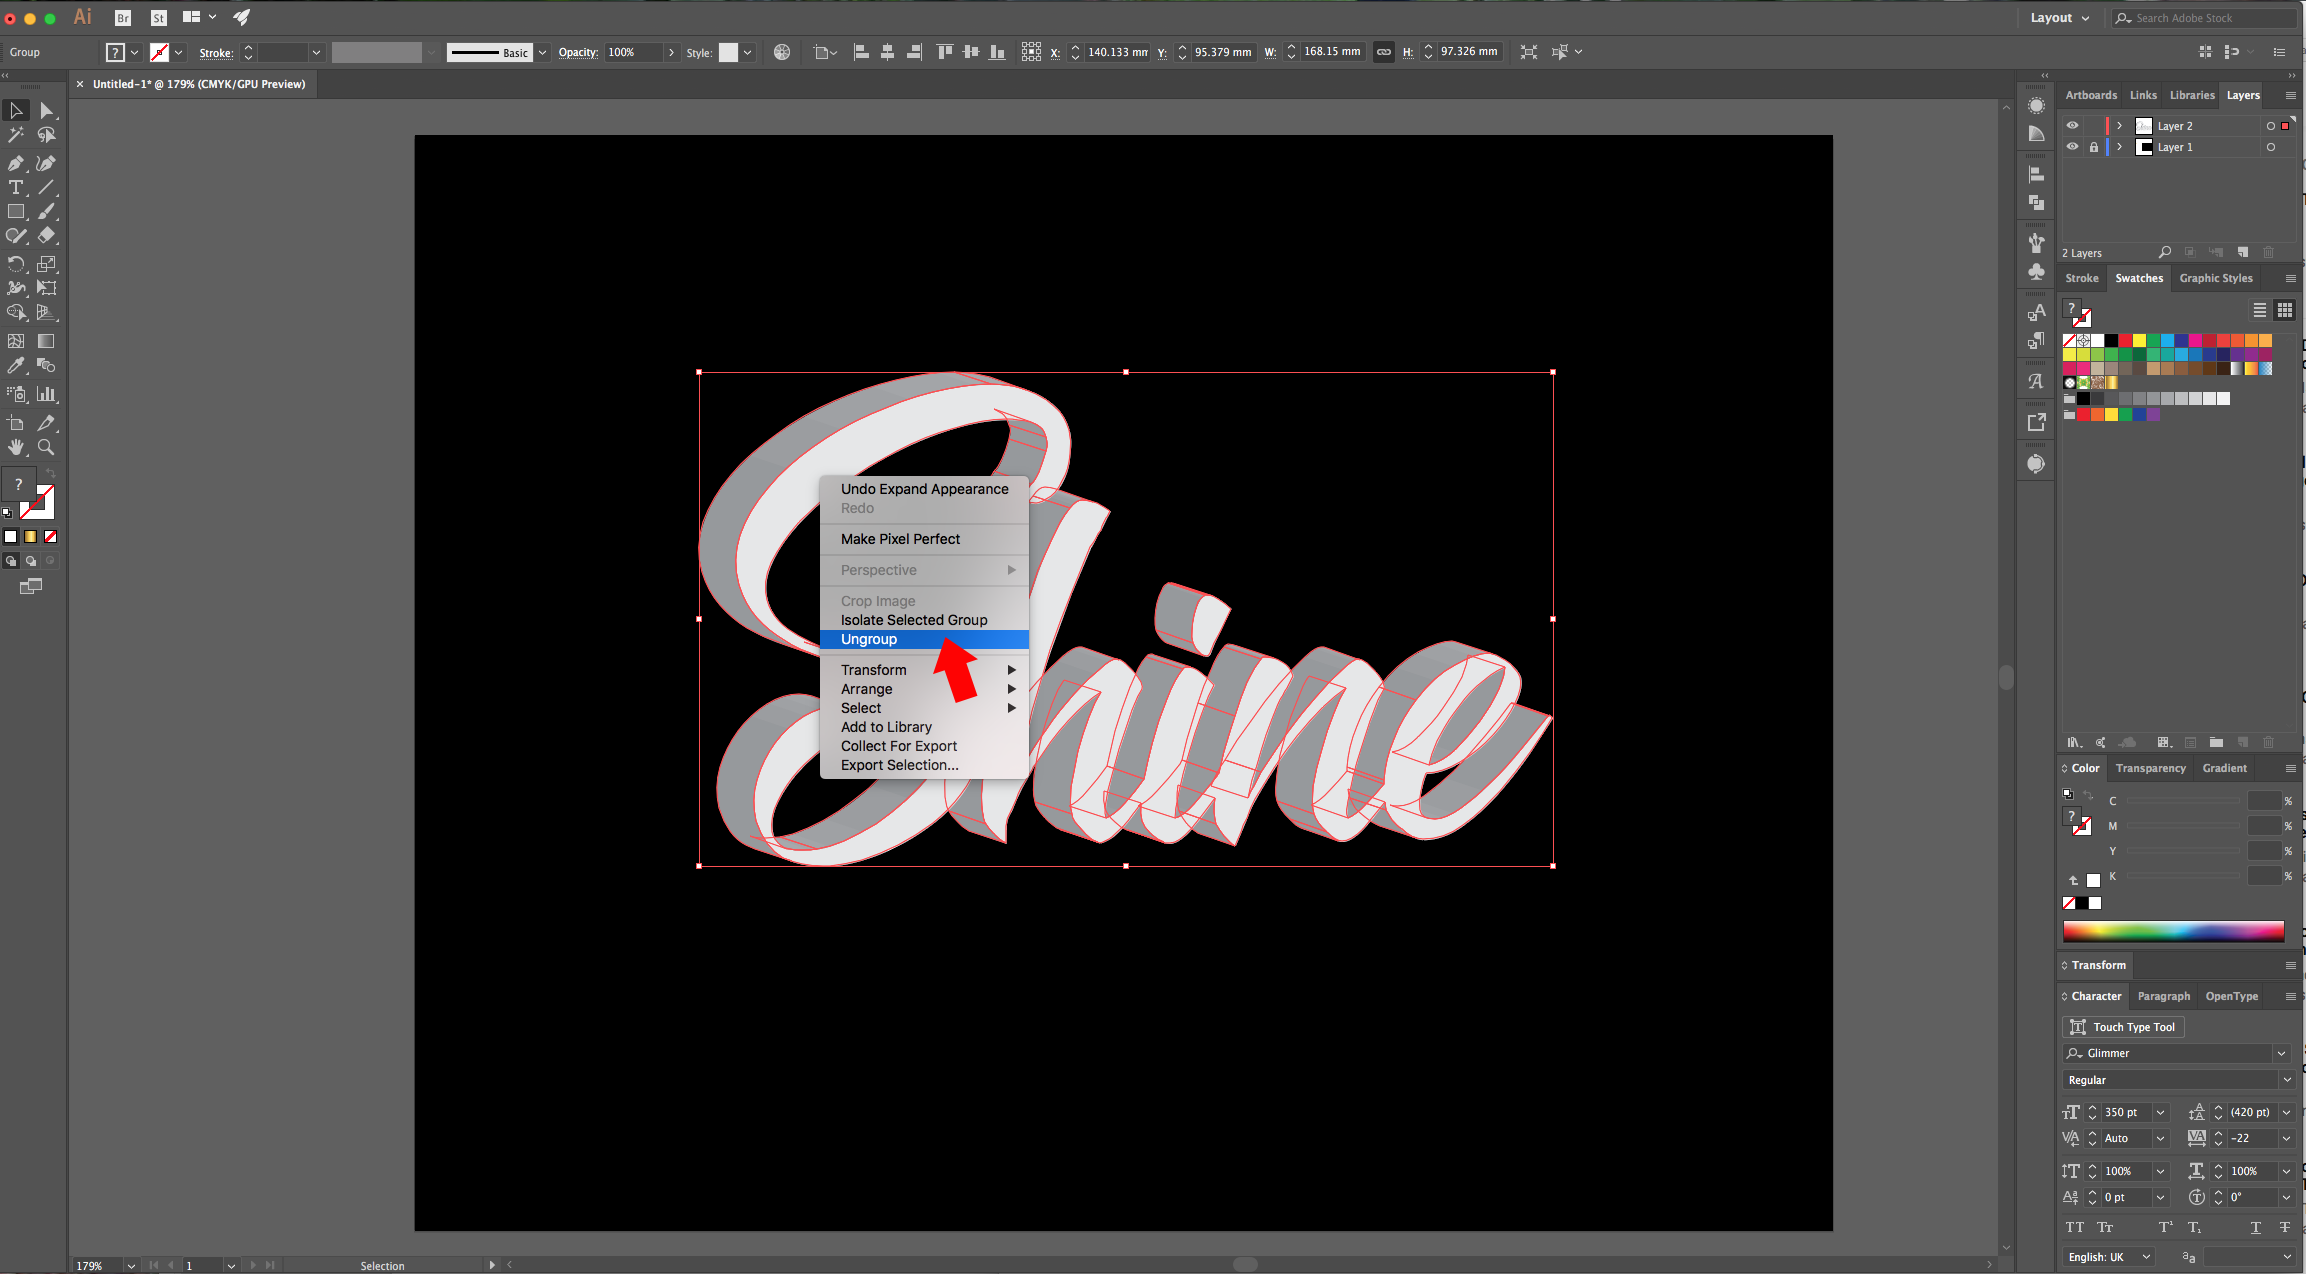
9 - Select the front part of your text (except for the dot of any “I”) and “Group” it together (Command/Control + G). “Cut” (Command/Control + X), create a “New Layer” and “Paste in Place” (Shift + Command/Control + V) your Text Front.
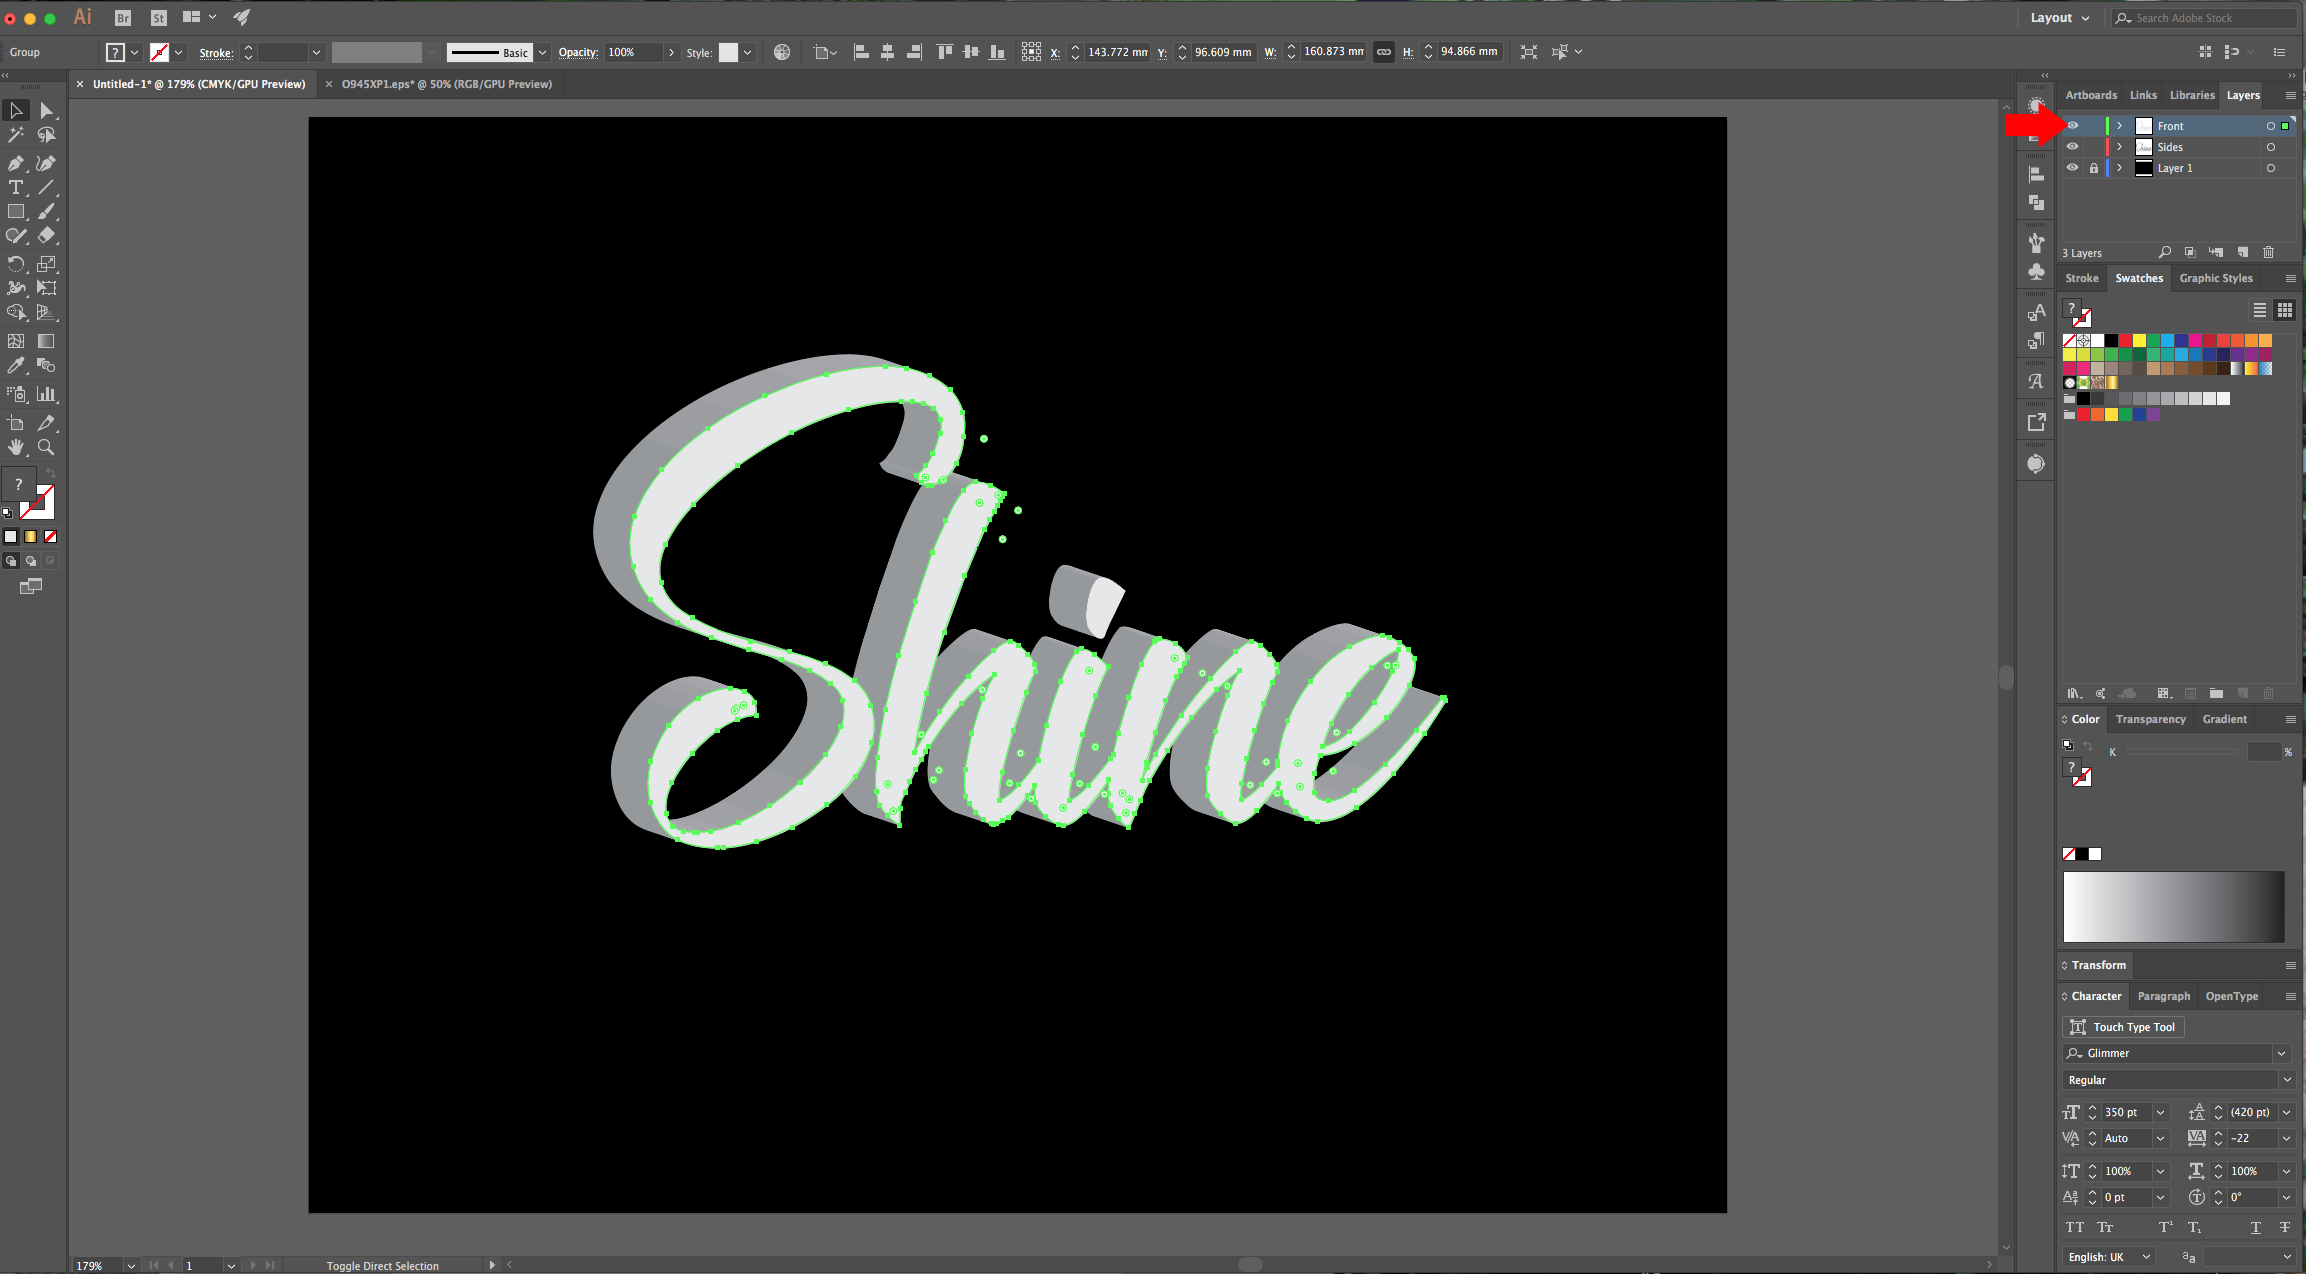
10 - Check each side portion of your letters and use the “Unite” option in the “Pathfinder Panel” with the sides that have many segments to create one “Piece”. Is easier to “Lock” the “Front” Layer while doing this to avoid selecting it by mistake.
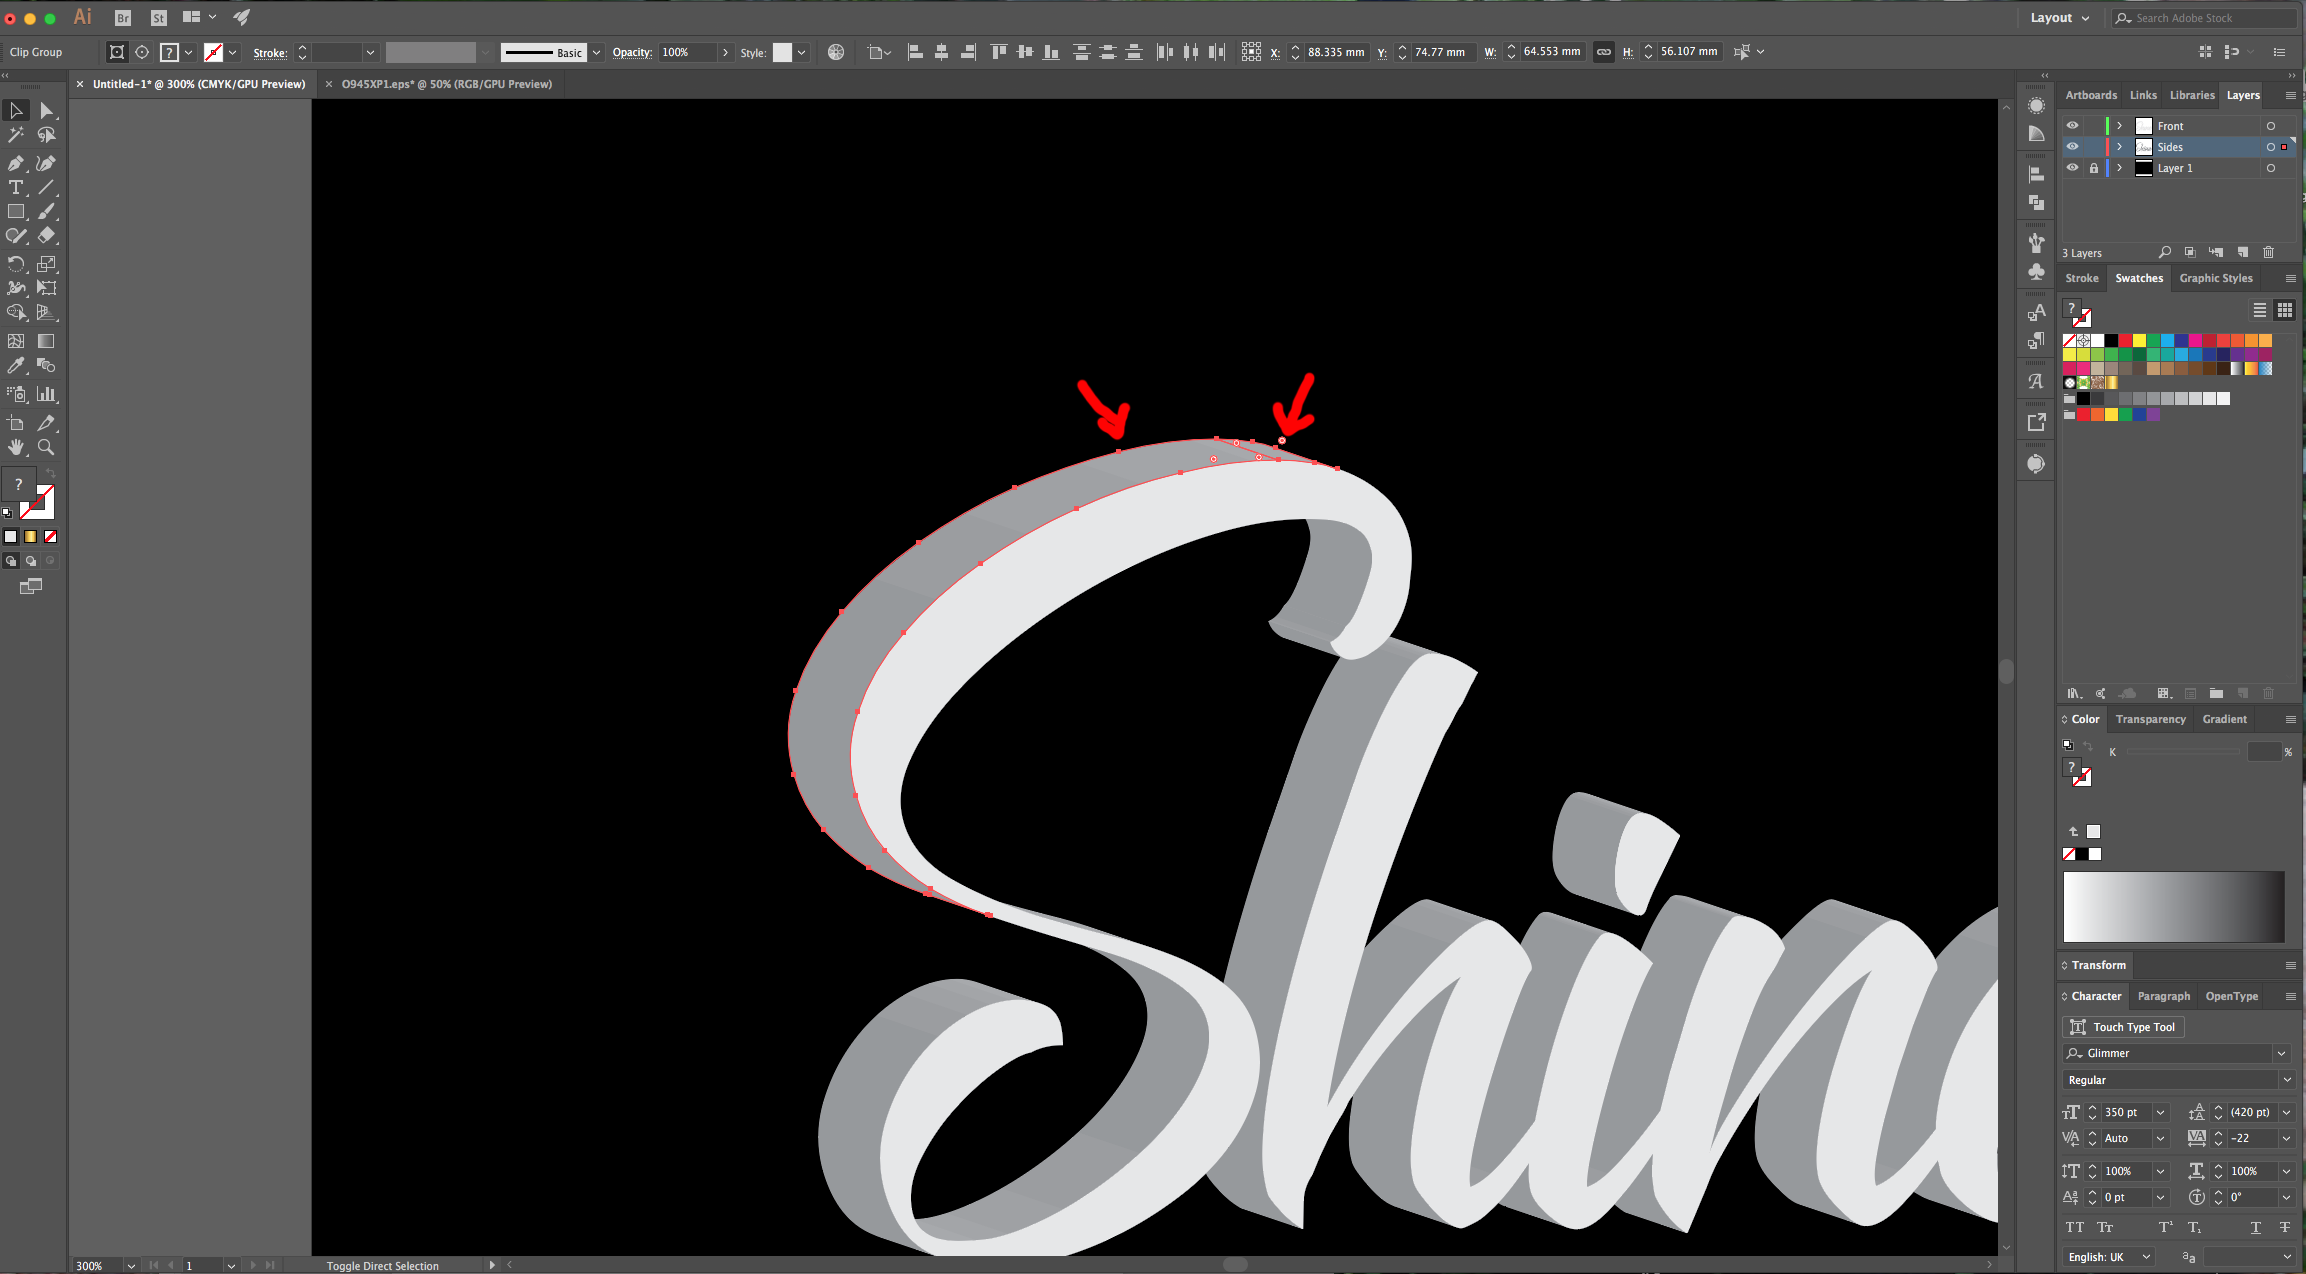
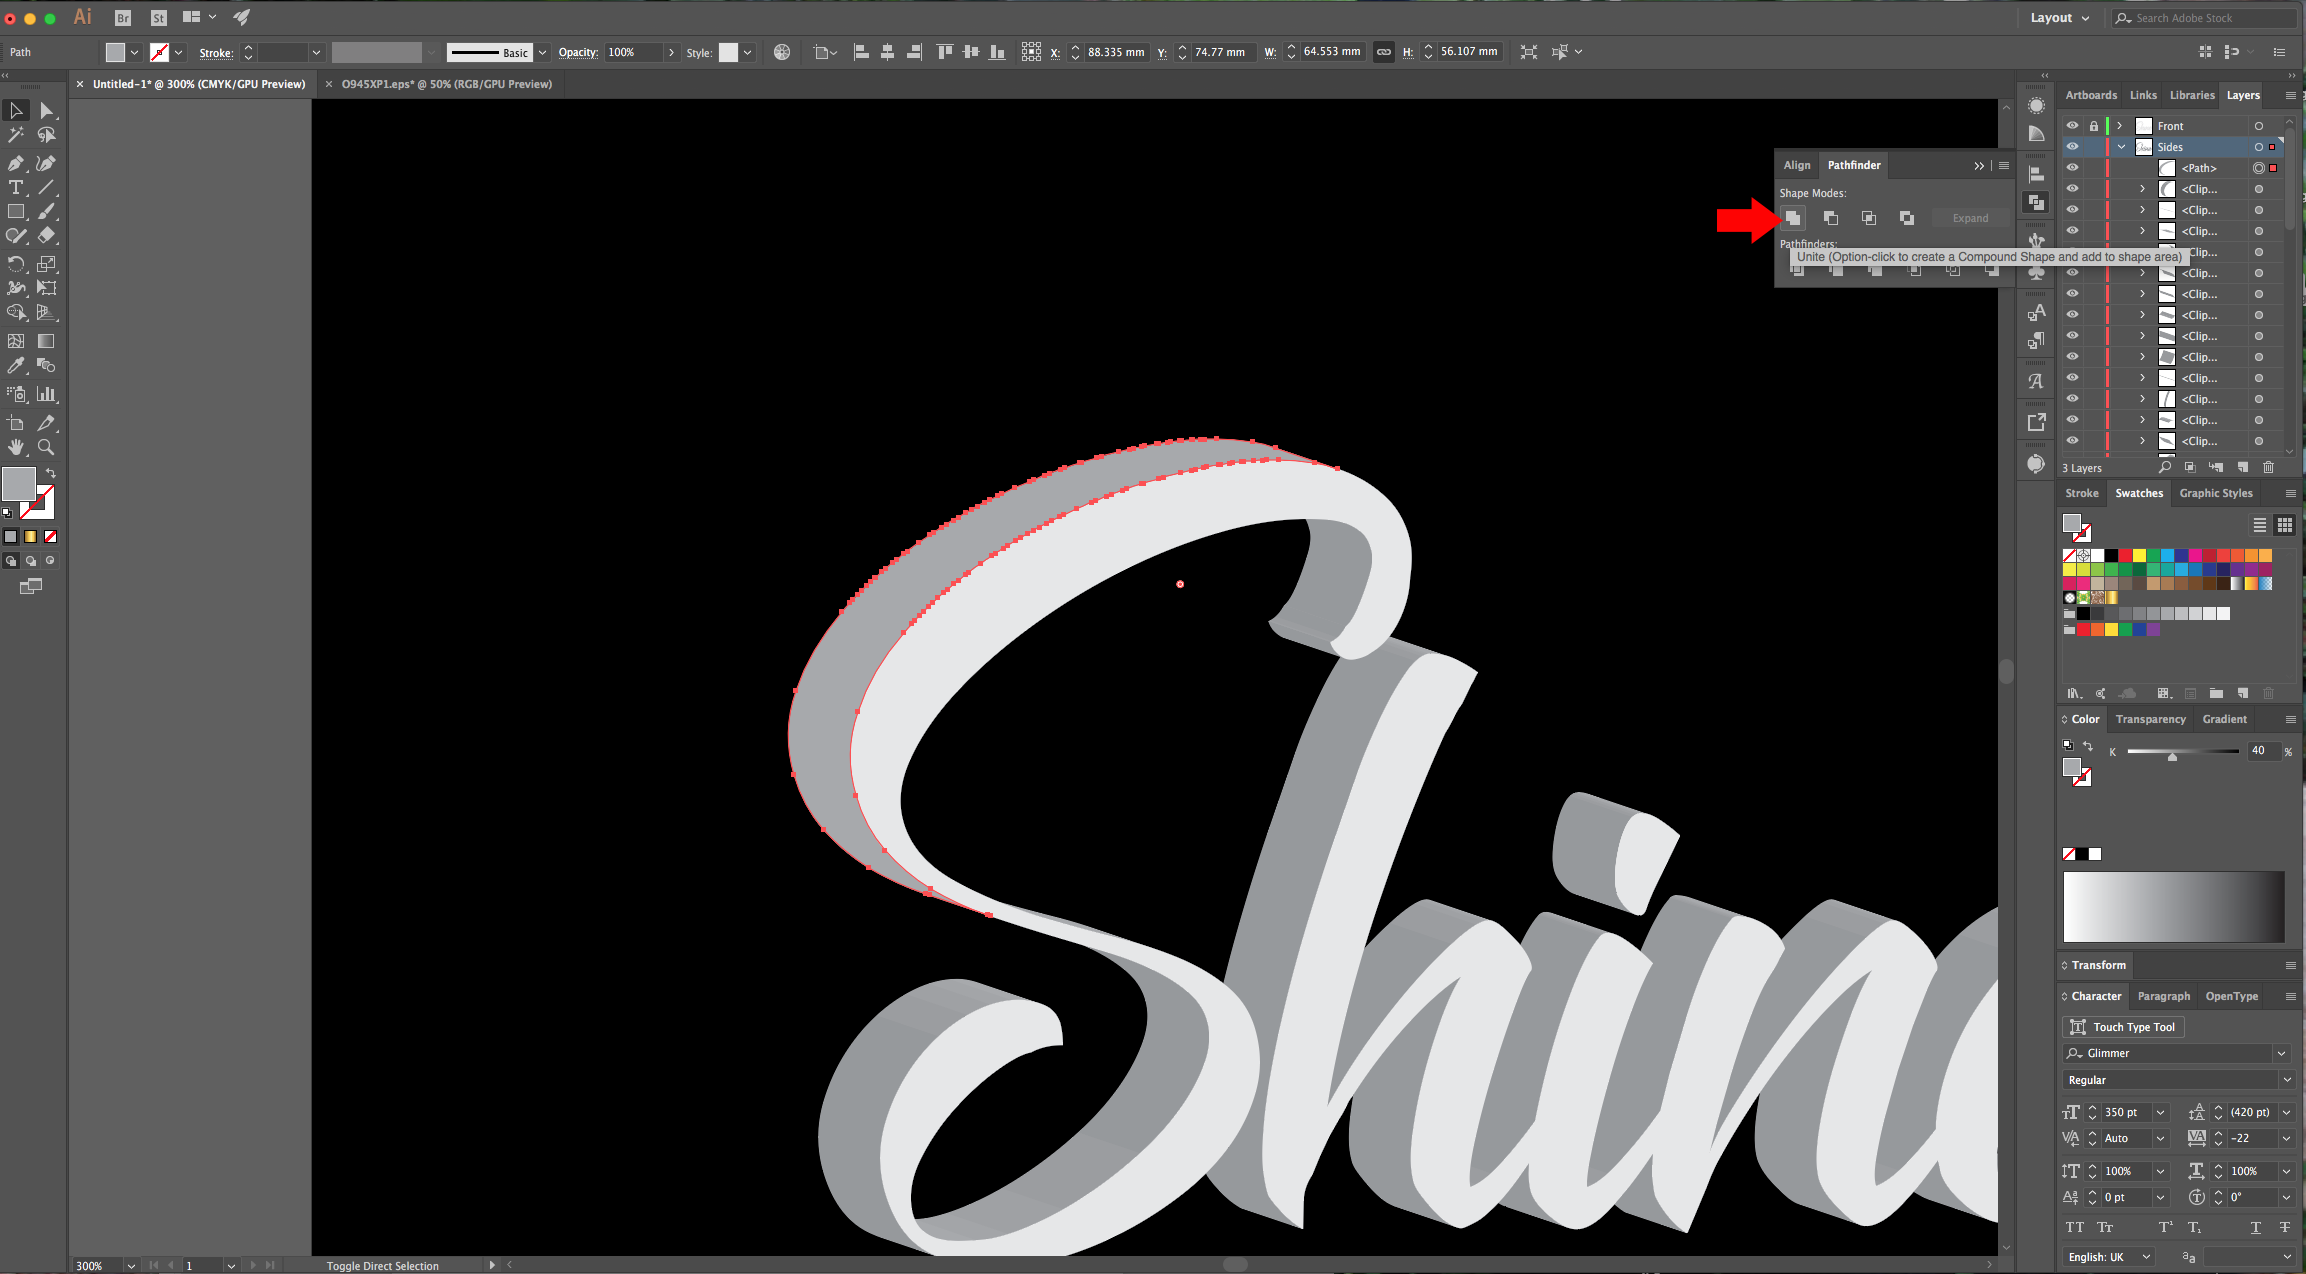
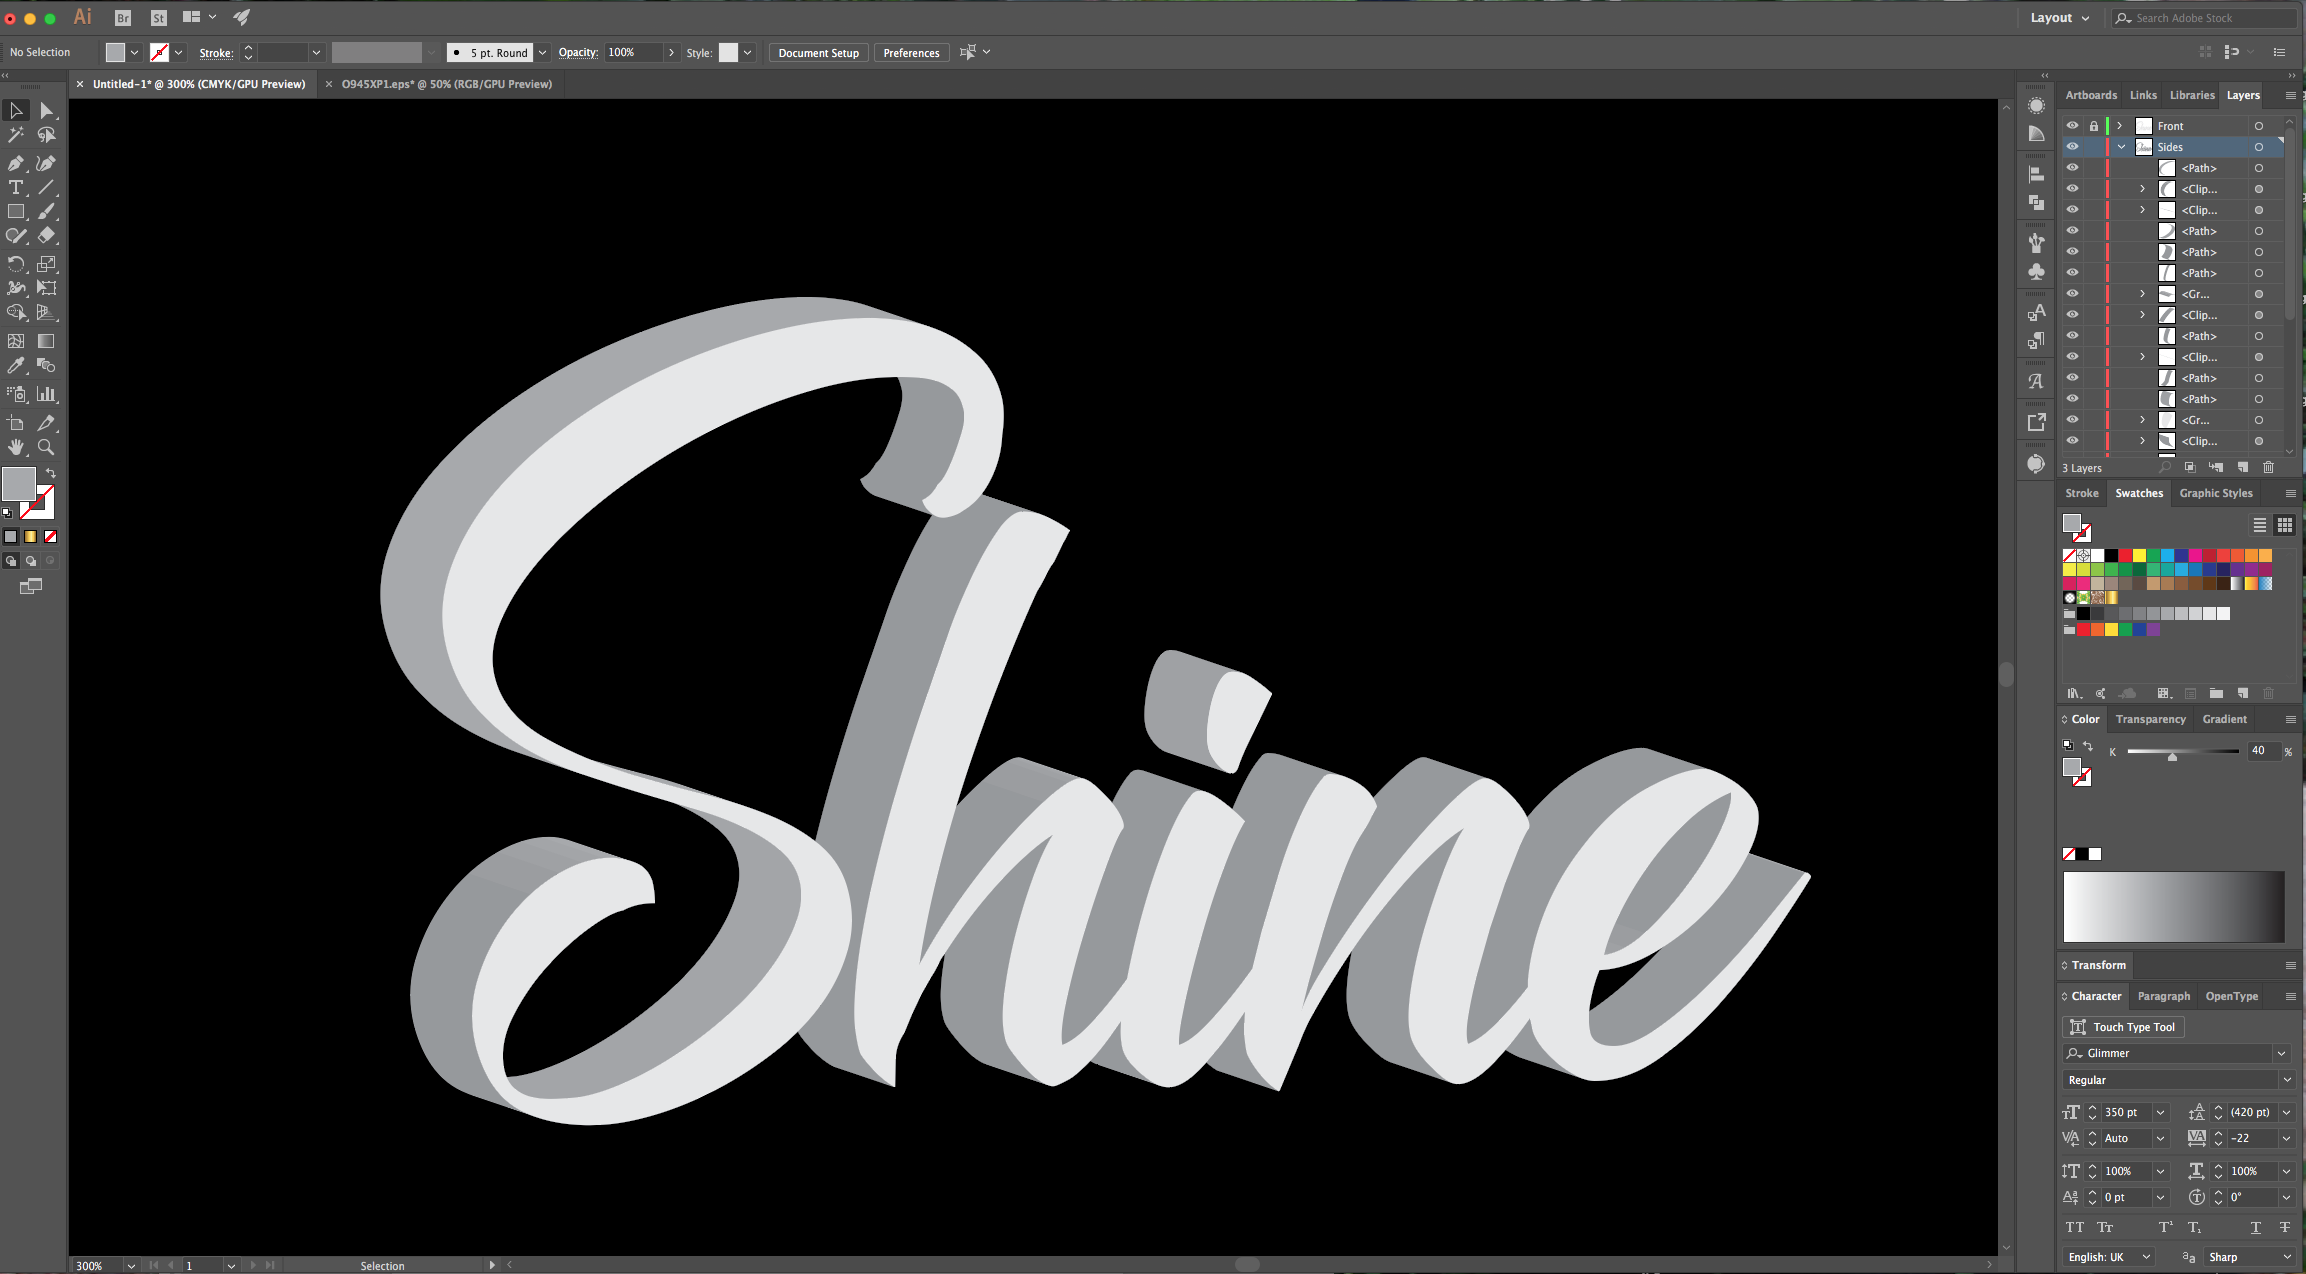
11 - Once all the sides are done, bring the “Gold Gradient” into your document. You can do it by “Copying” and “Pasting” it from another file or by adding it as a “New Swatch”. You can also make one by placing a “reference Image” in your document and using the “Eyedropper Tool” (I) to select the different shades and create the “Gradient”.
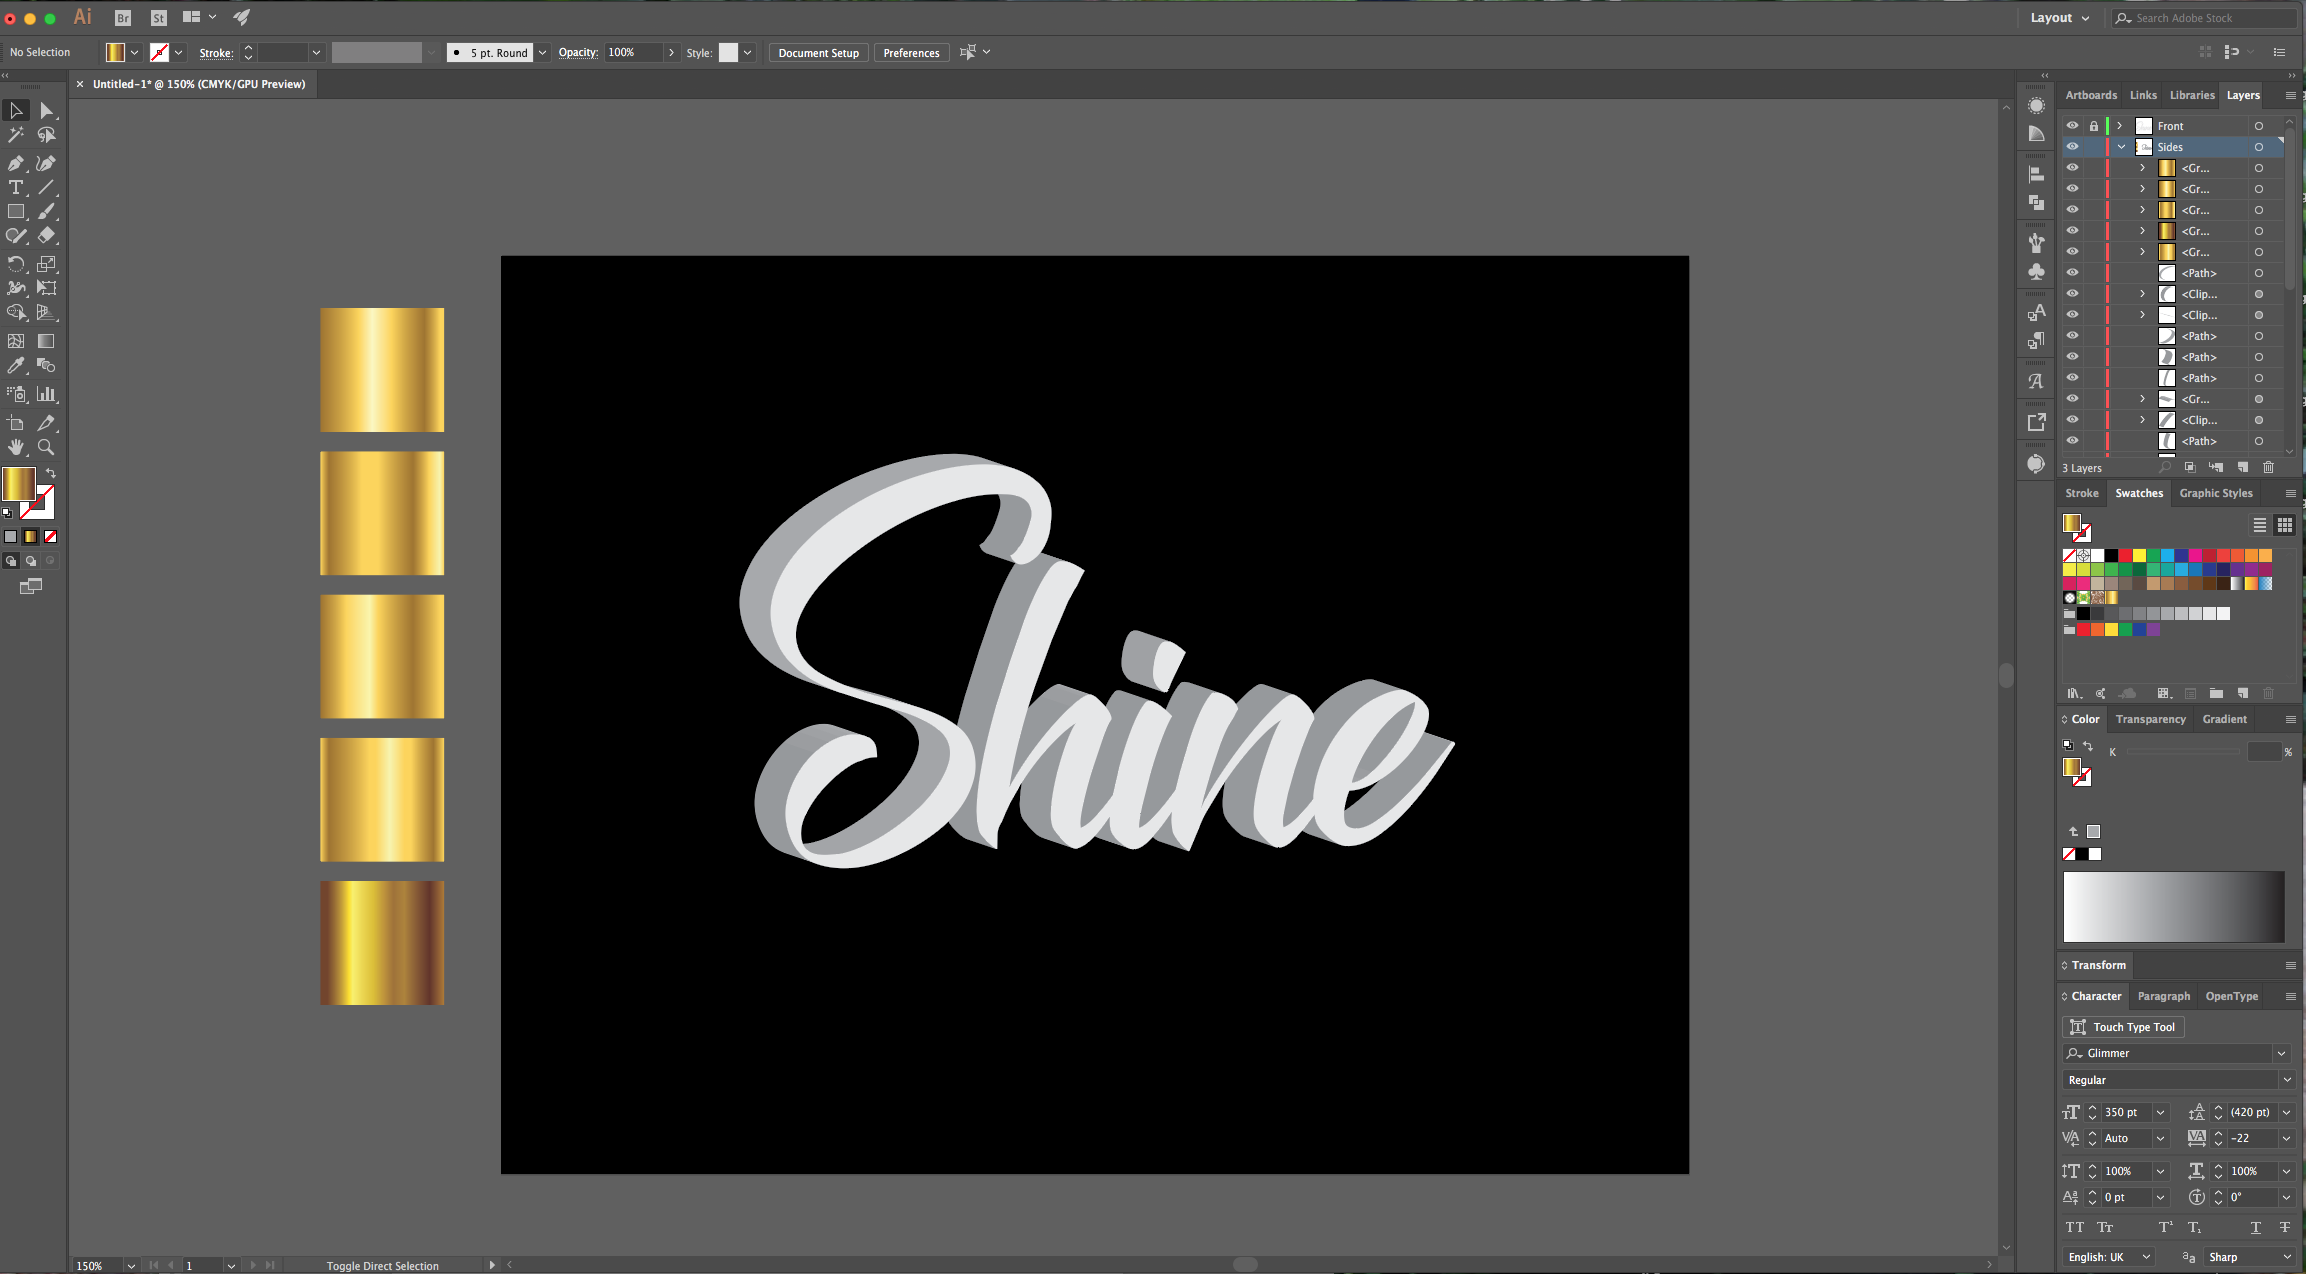
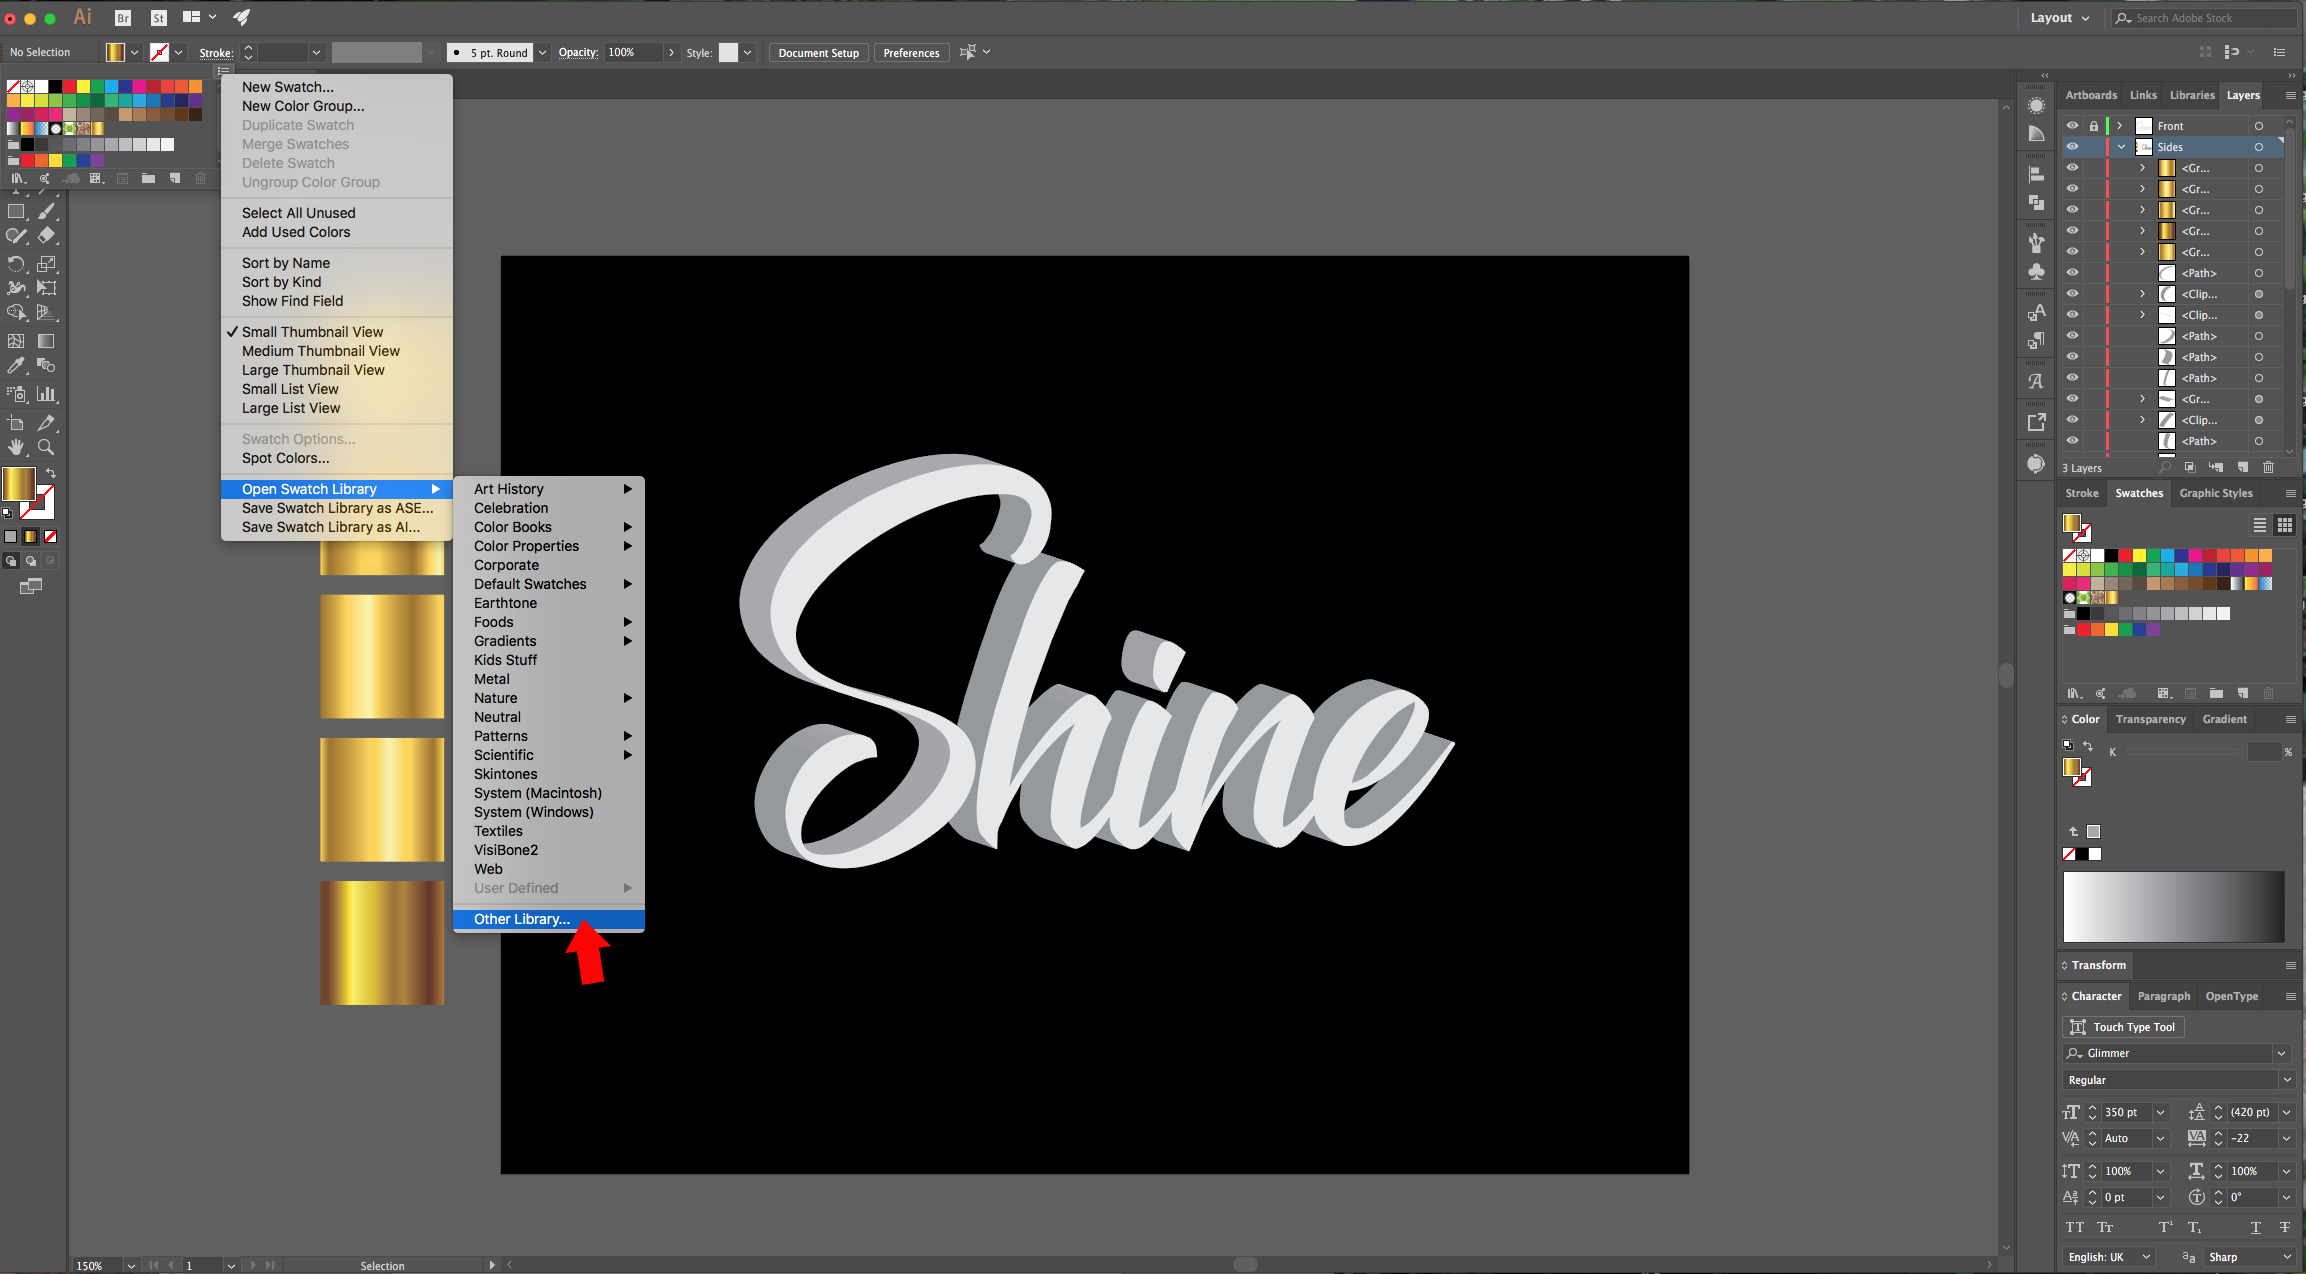
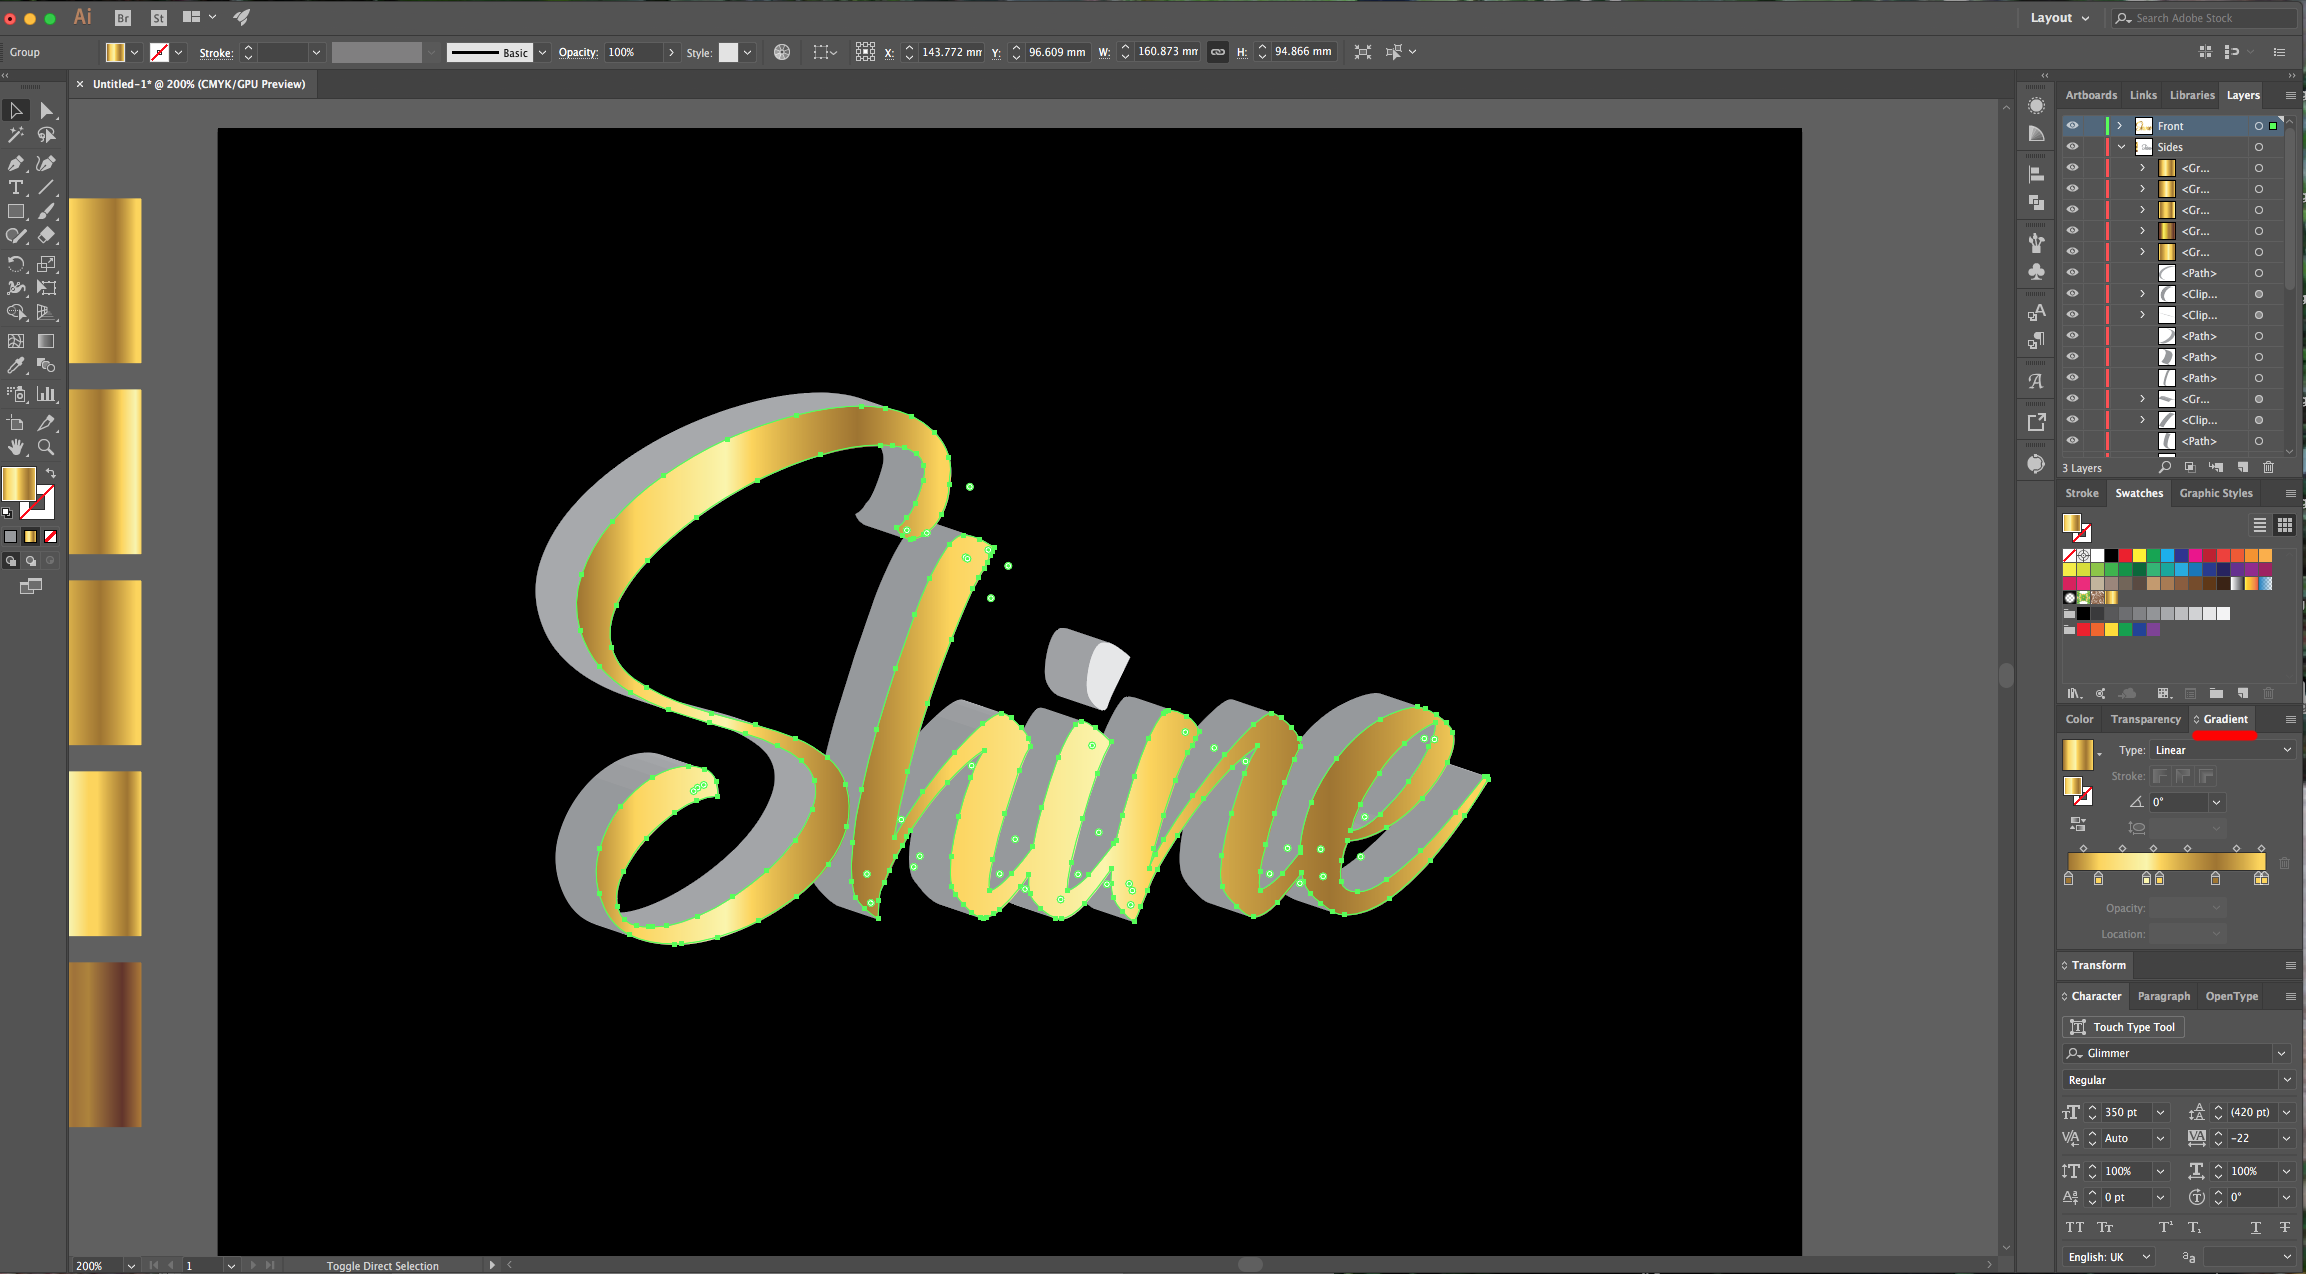
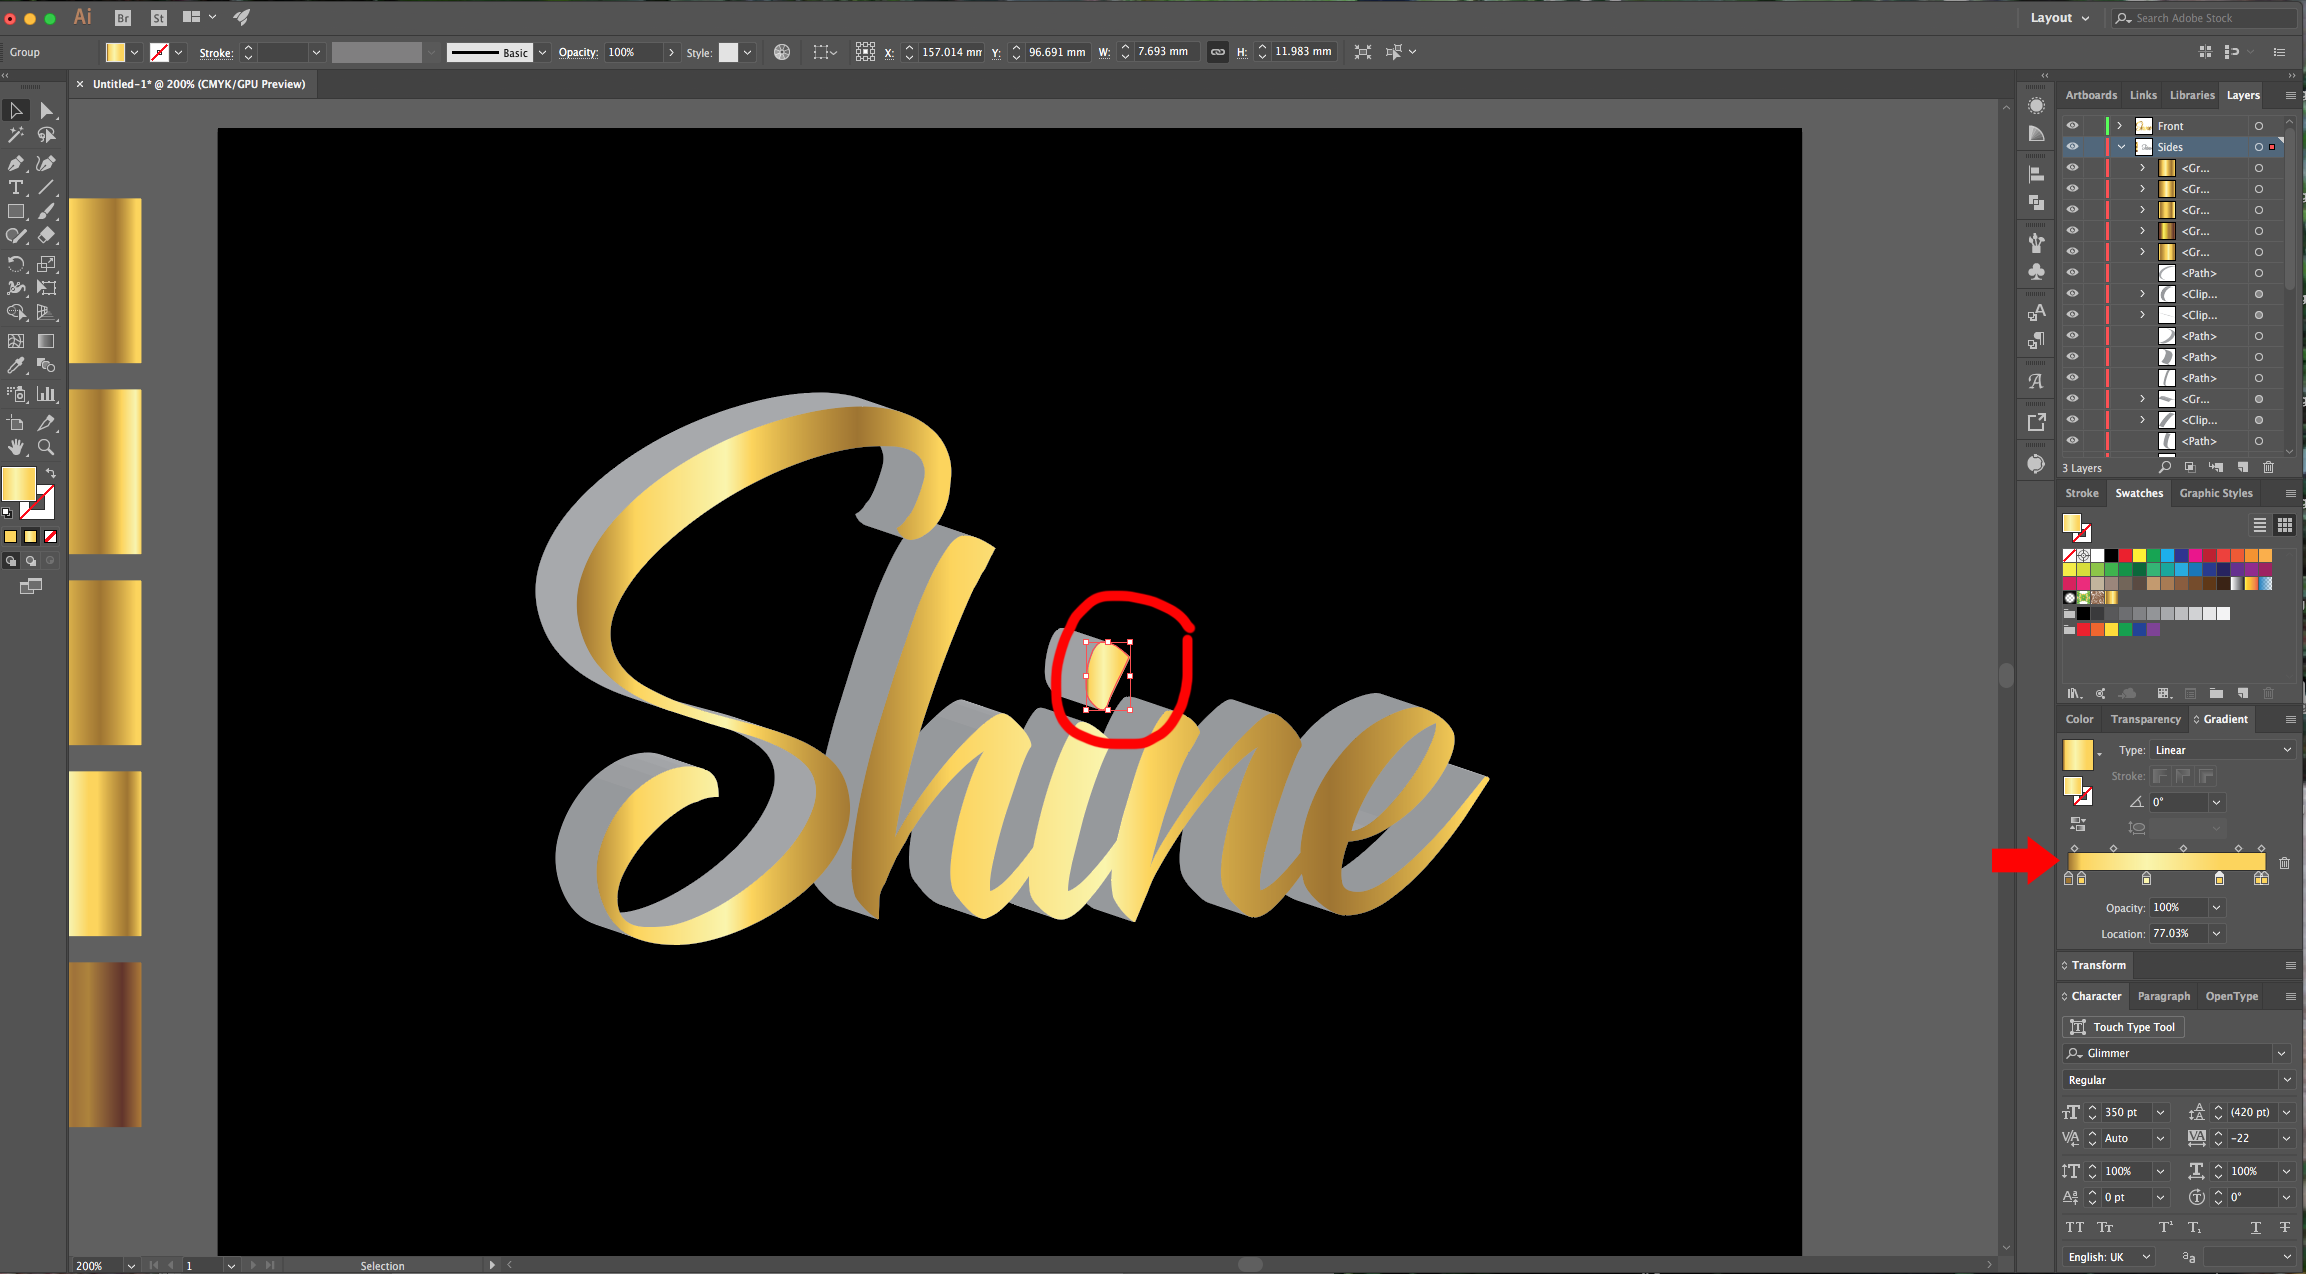
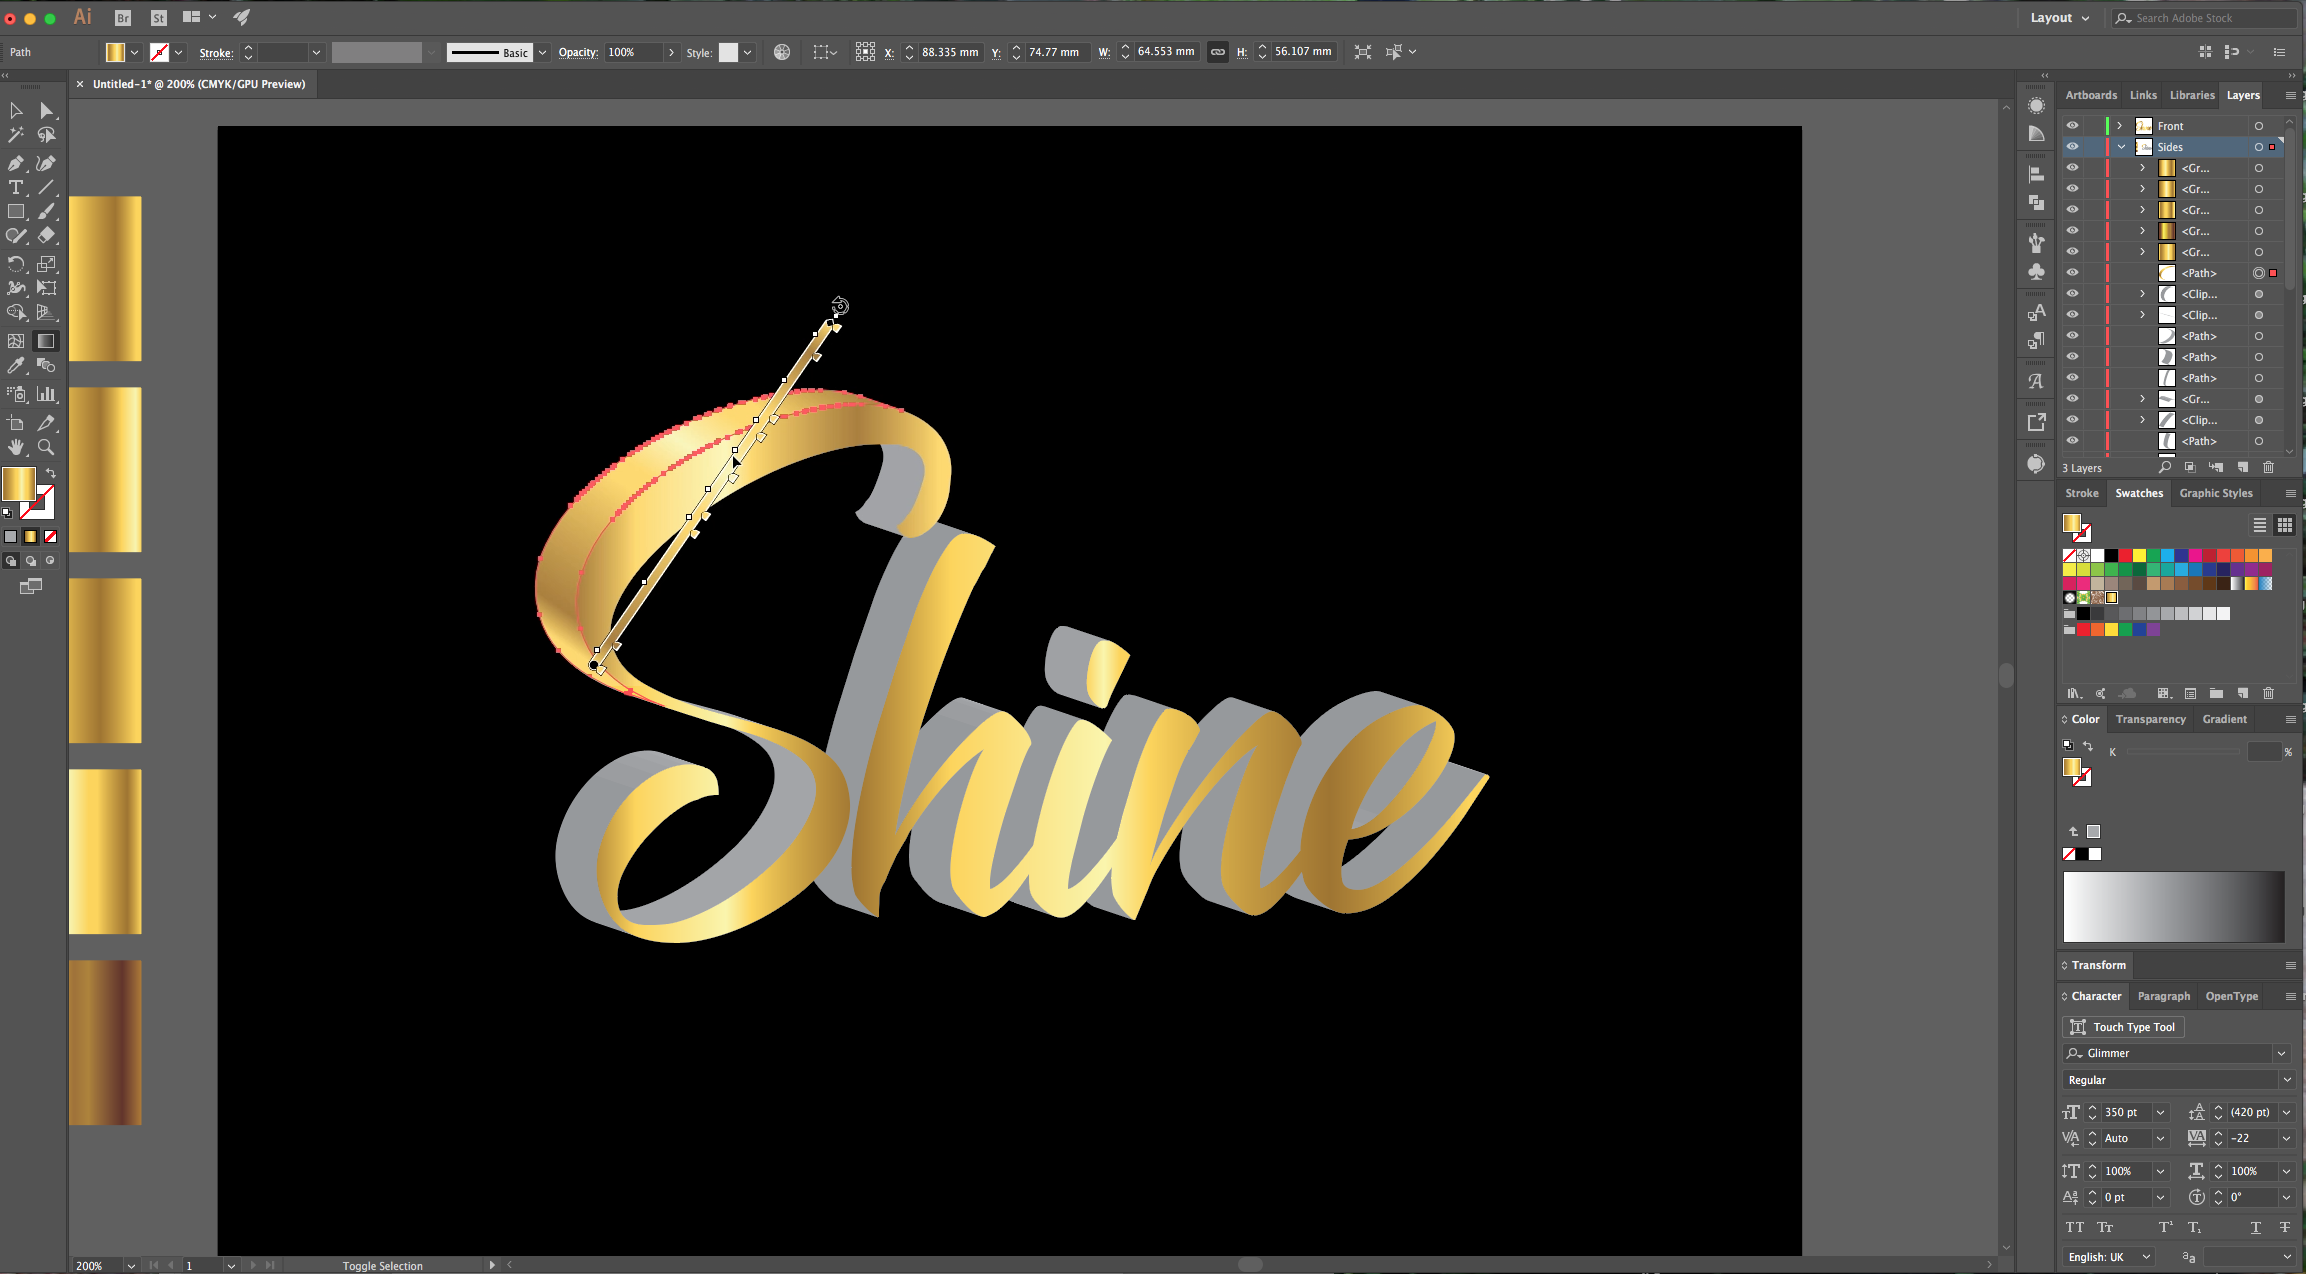
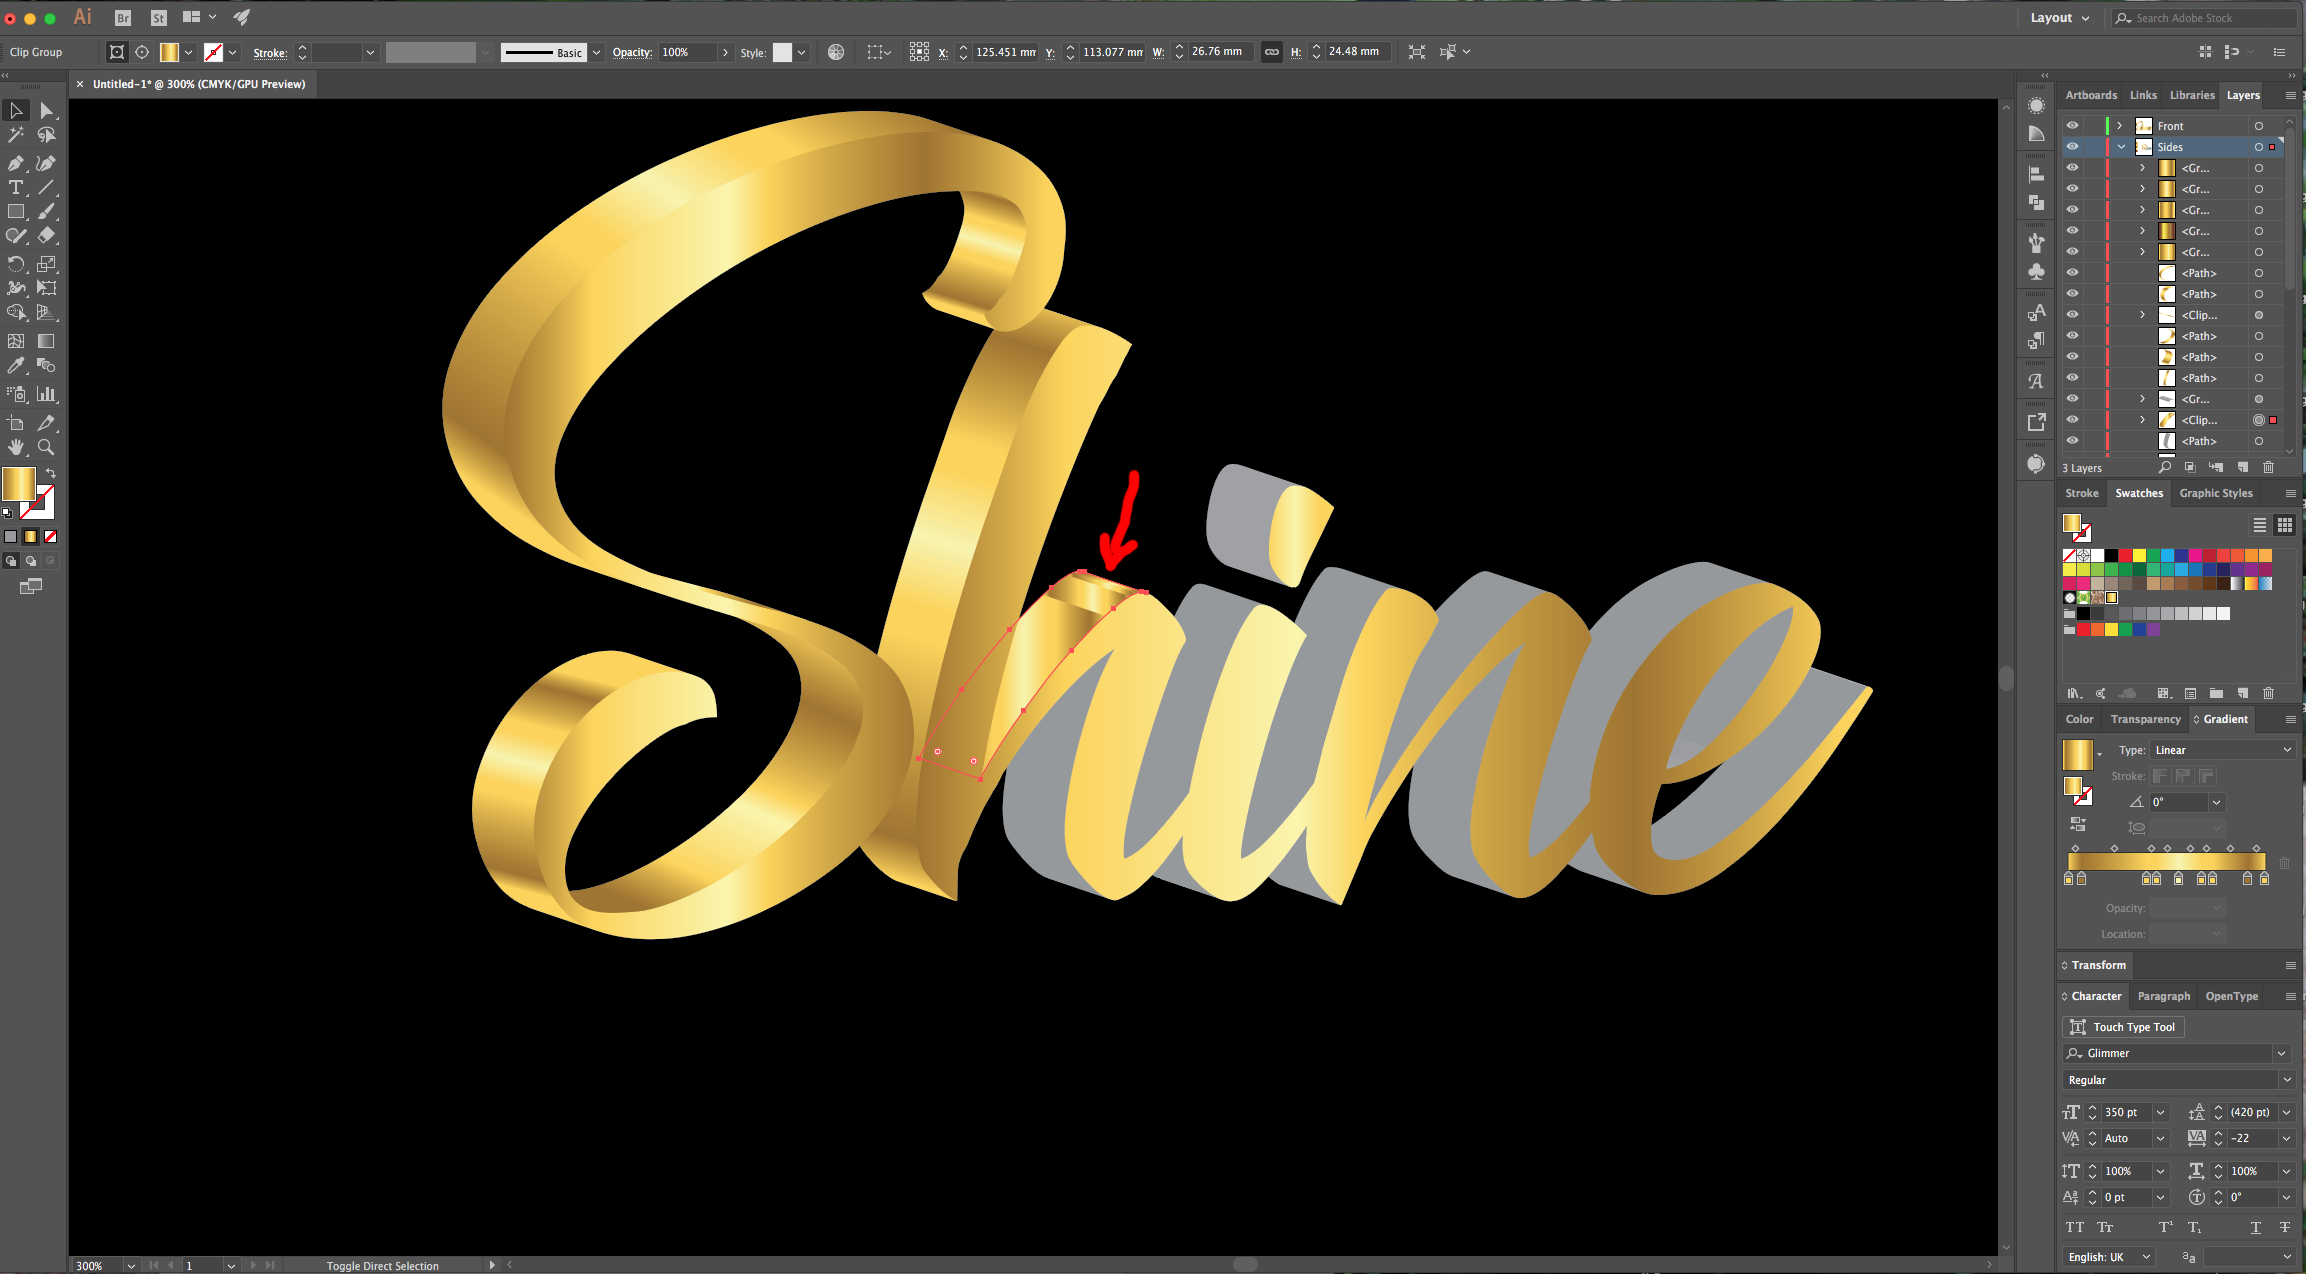
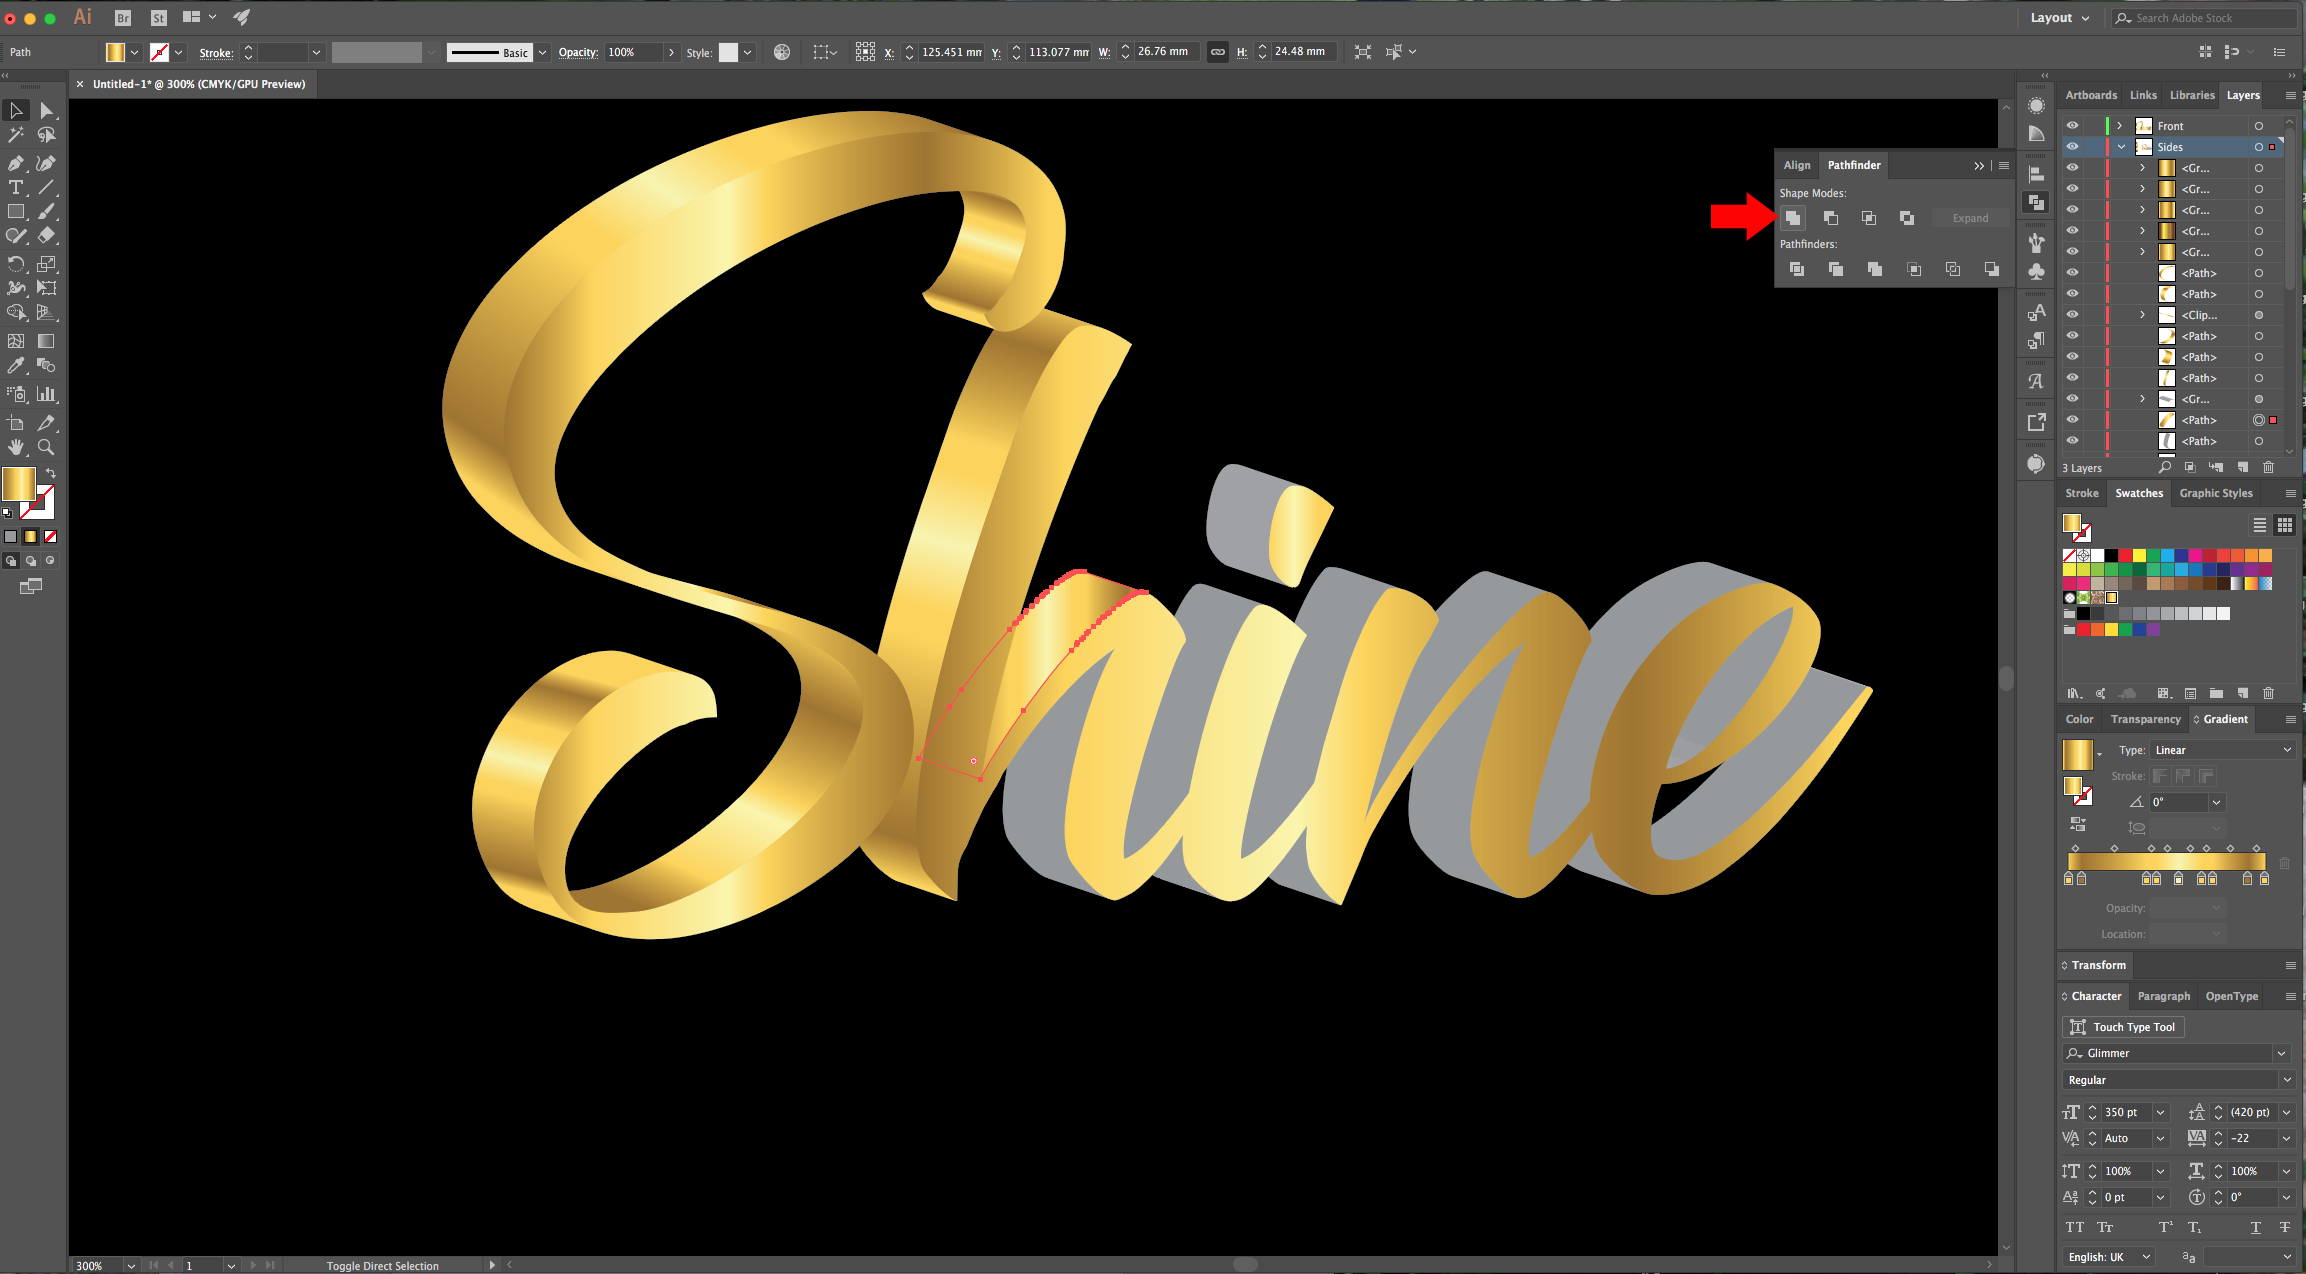
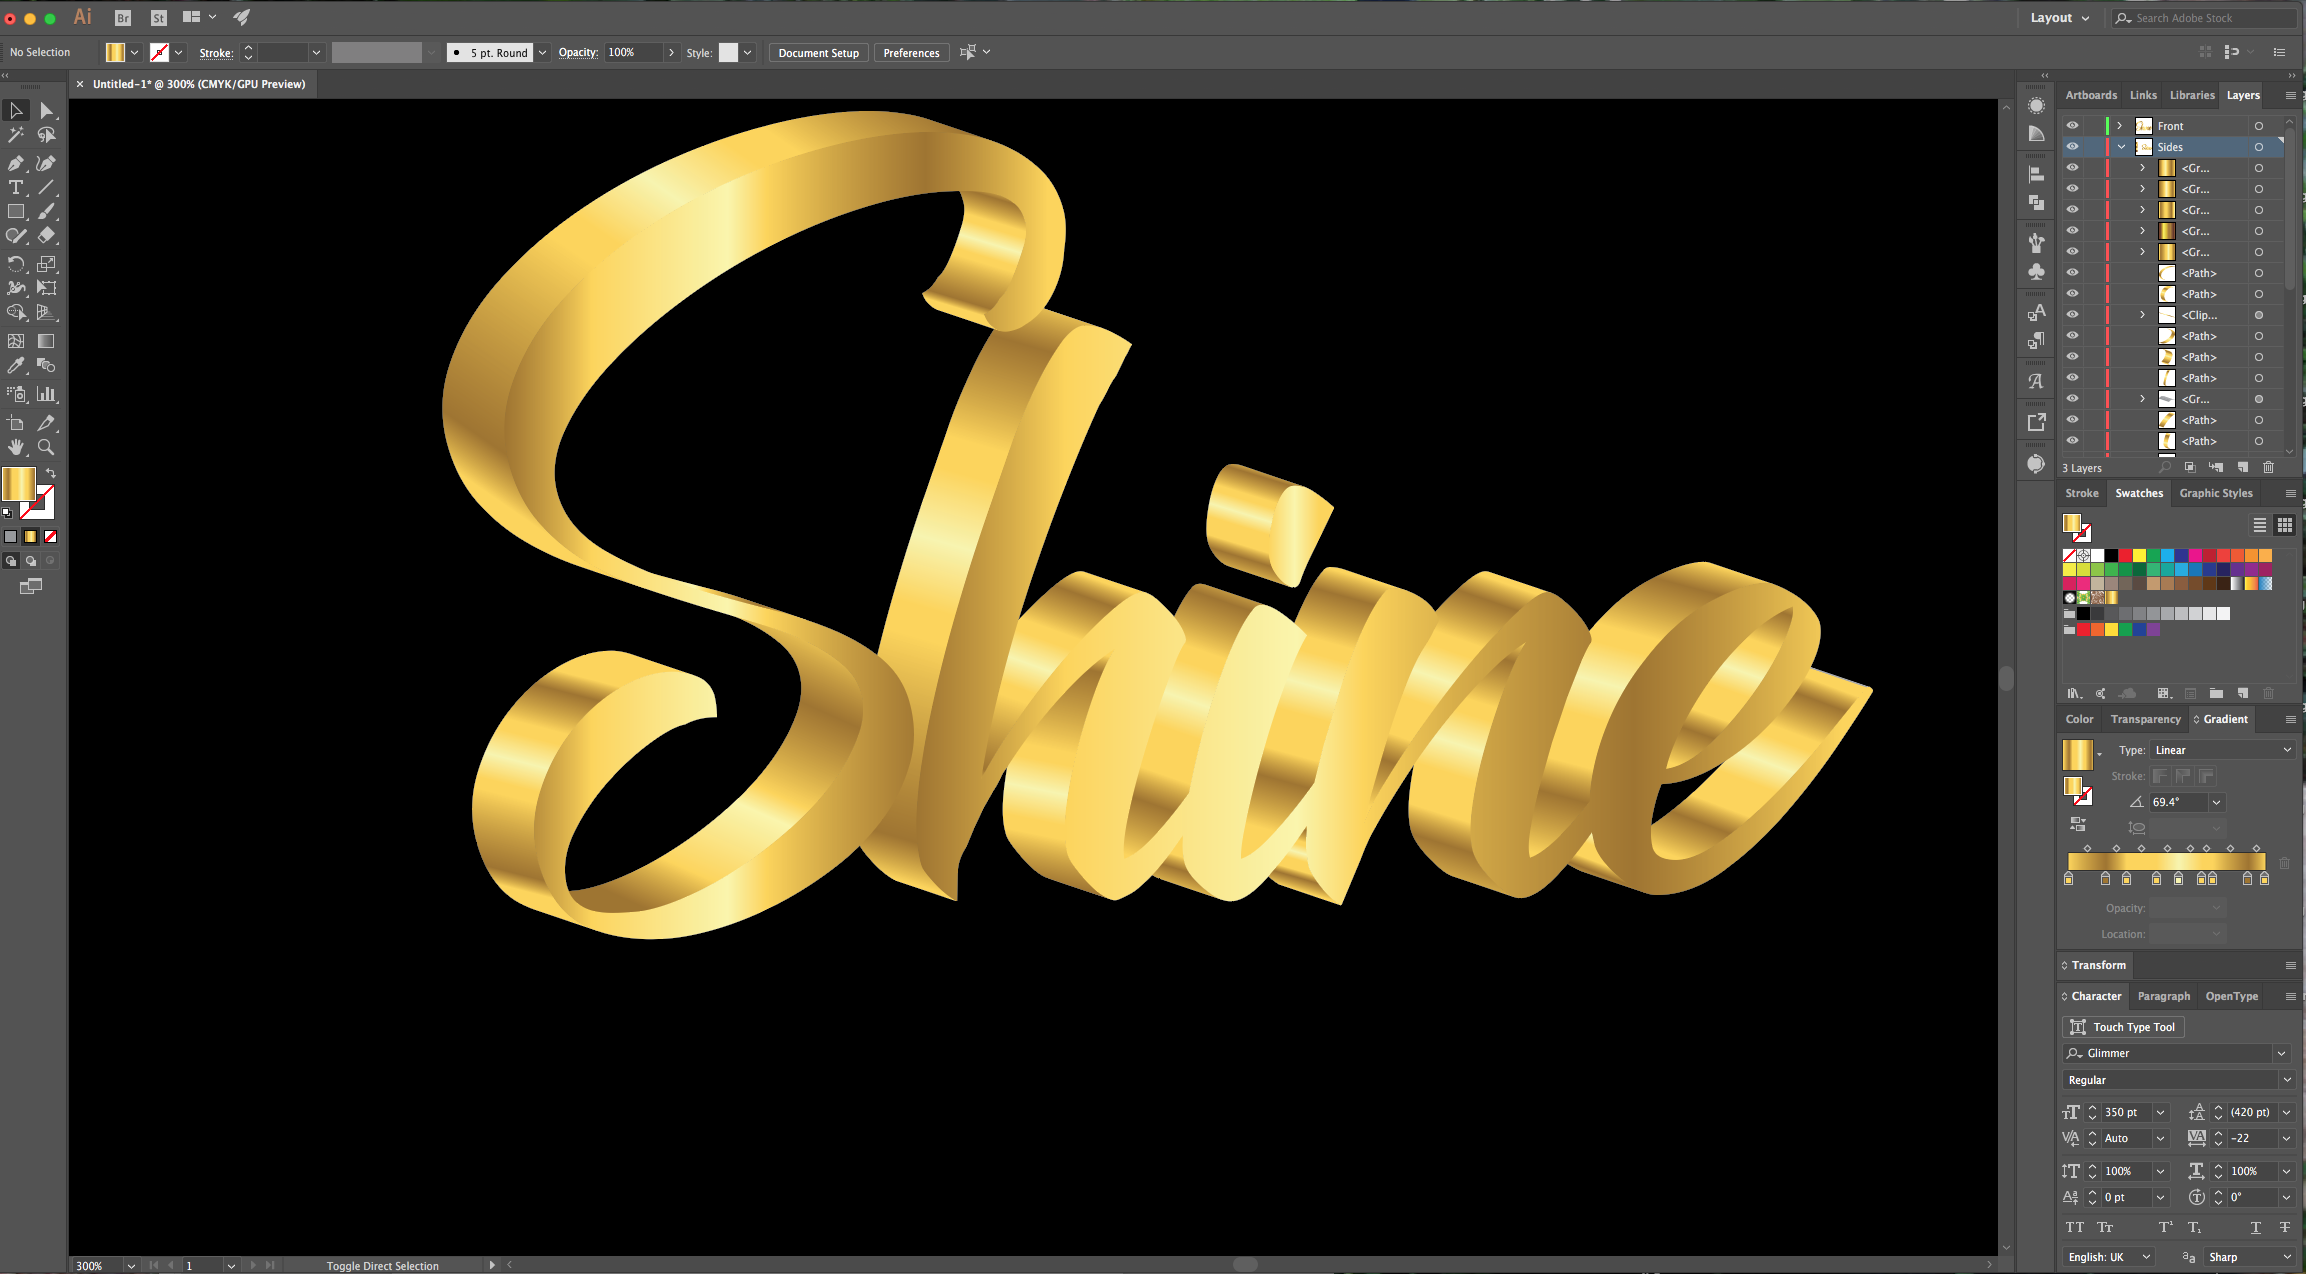
12 - Unlock the “Front” Text Layer, select it and use the “Gold Gradient” as “Fill”. Use the “Gradient Tool” (G) to change the Angle, size and other details of the gradient using the “Gradient Annotator” to make it look more realistic. Repeat this step with the “Side” portions of your text. Don’t forget the dot of the “i”. If after applying your “Gradient” you see that is not smooth and has “jumps”, just go to the “Pathfinder Panel” and apply the “Unite” Option again.
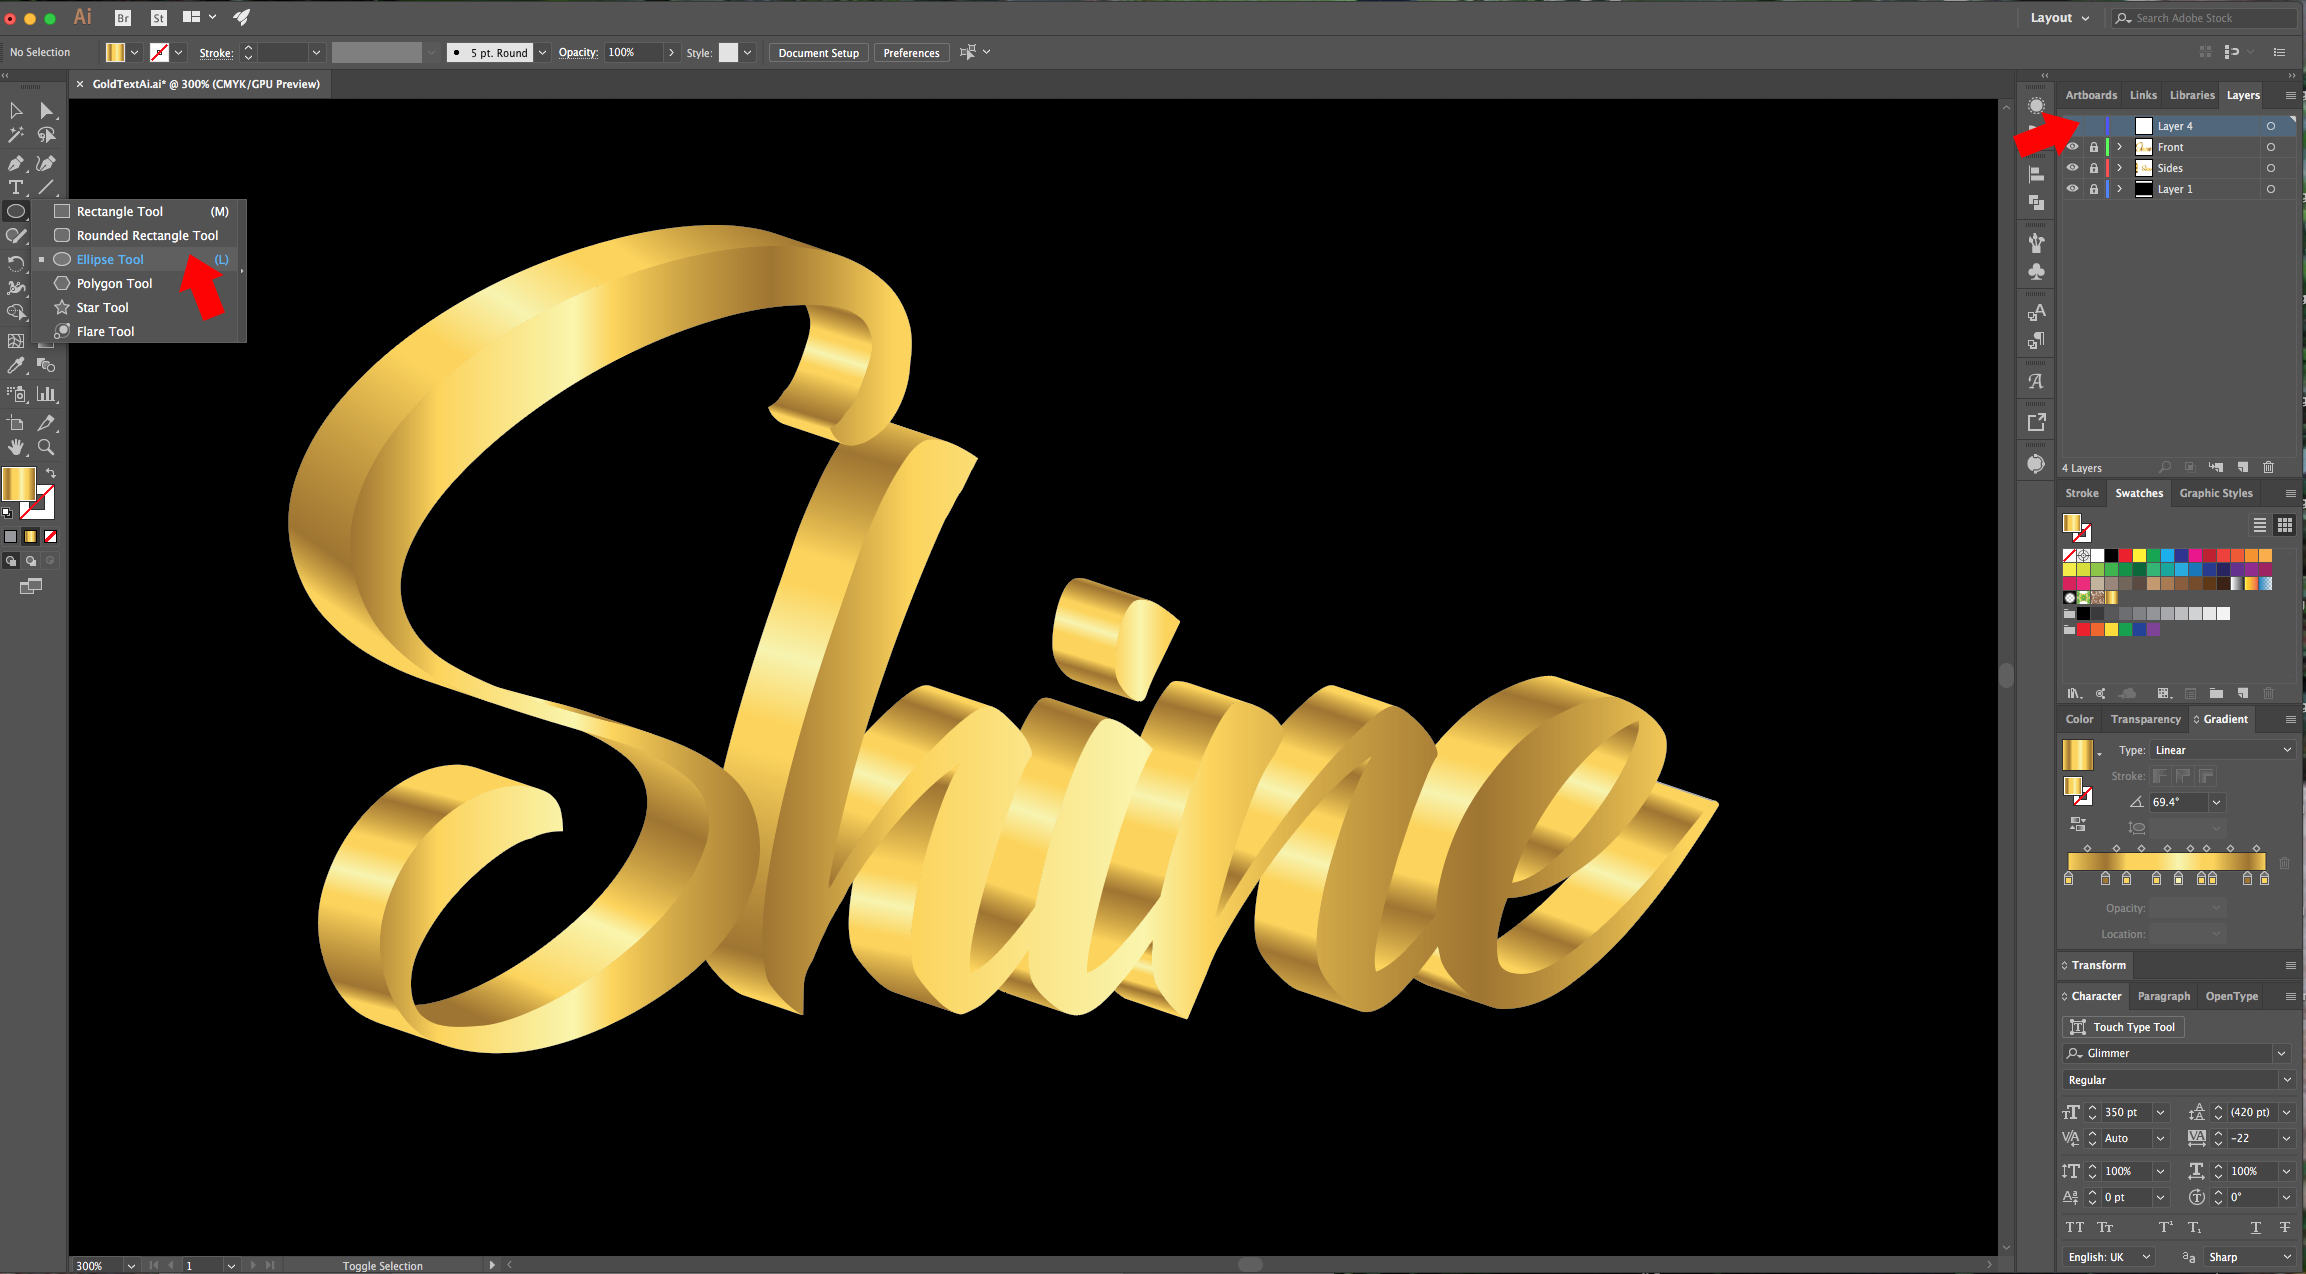
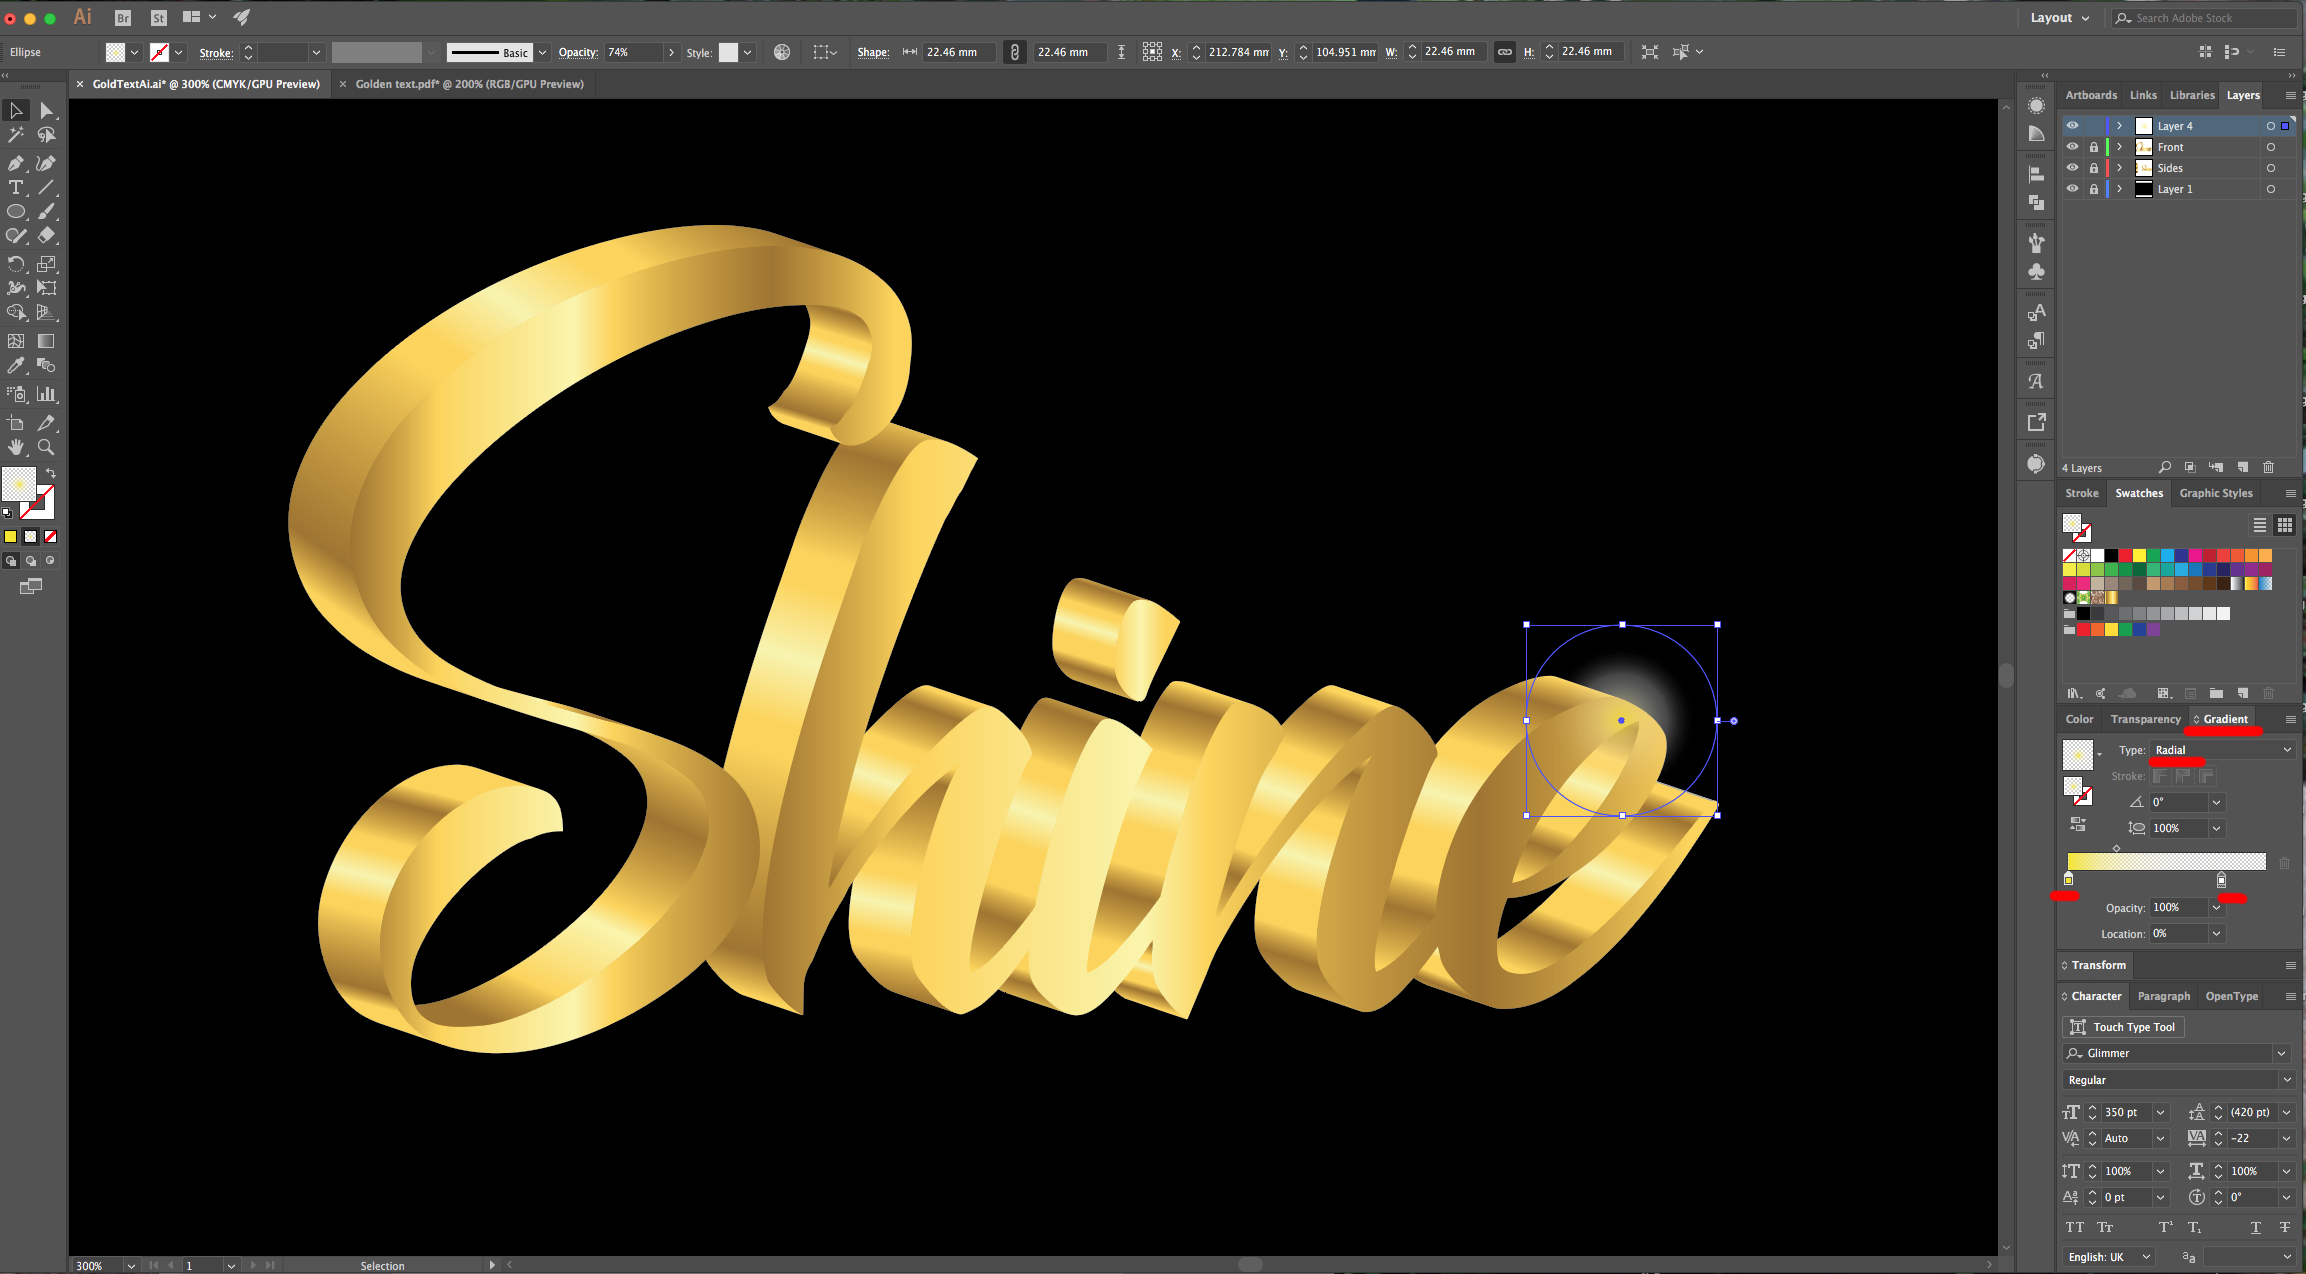
13 - To add some shine, lock your layers and create a “New” one. Choose the “Ellipse Tool” (L), draw a “Circle” and fill it with a “Radial Gradient” from a Bright Yellow (#f7e506) to Transparent (play around with the different “Sliders” until you get a result that pleases you. Then, lower the “Opacity” to 25% in the “Transparency Panel”. You can “Resize” it and place it where you want, then “Duplicate” it by holding “Alt” key while dragging it to a side to add other spots.
14 - Check out your work:
1 - In Illustrator, create a “New Document”.
2 - Select the “Rectangle Tool” (M), draw a rectangle that covers all your document and fill it with Black. Lock this Layer by clicking to the left of its thumbnail and bringing out the small Padlock icon.
3 - “Create New Layer” by clicking on the button at the bottom of the “Layers Panel”.
4 - Select the “Type Tool” (T), choose your font (we used Glimmer Script) and type your text. The Size will depend on your font and document. We noticed that there was some odd spacing between two letters so we selected them and changed the “Tracking” value in the “Character Panel”.
5 - Right-click on your text and choose “Create Outlines”, then go to the “Pathfinder Panel” and choose “Merge” to unite all the letters and get rid of the overlapping portions.
6 - Go to Object > Flatten Transparency and choose the “High Resolution” Preset.
7 - With your text selected go to the “Appearance Panel” and from the “Effects” Menu choose 3D > Extrude & Bevel. Apply the following values:
8 - Go to Object > Expand Appearance and then right-click on top of your text and choose “Ungroup”. Do this last part twice (Ungroup).
9 - Select the front part of your text (except for the dot of any “I”) and “Group” it together (Command/Control + G). “Cut” (Command/Control + X), create a “New Layer” and “Paste in Place” (Shift + Command/Control + V) your Text Front.
10 - Check each side portion of your letters and use the “Unite” option in the “Pathfinder Panel” with the sides that have many segments to create one “Piece”. Is easier to “Lock” the “Front” Layer while doing this to avoid selecting it by mistake.
11 - Once all the sides are done, bring the “Gold Gradient” into your document. You can do it by “Copying” and “Pasting” it from another file or by adding it as a “New Swatch”. You can also make one by placing a “reference Image” in your document and using the “Eyedropper Tool” (I) to select the different shades and create the “Gradient”.
12 - Unlock the “Front” Text Layer, select it and use the “Gold Gradient” as “Fill”. Use the “Gradient Tool” (G) to change the Angle, size and other details of the gradient using the “Gradient Annotator” to make it look more realistic. Repeat this step with the “Side” portions of your text. Don’t forget the dot of the “i”. If after applying your “Gradient” you see that is not smooth and has “jumps”, just go to the “Pathfinder Panel” and apply the “Unite” Option again.
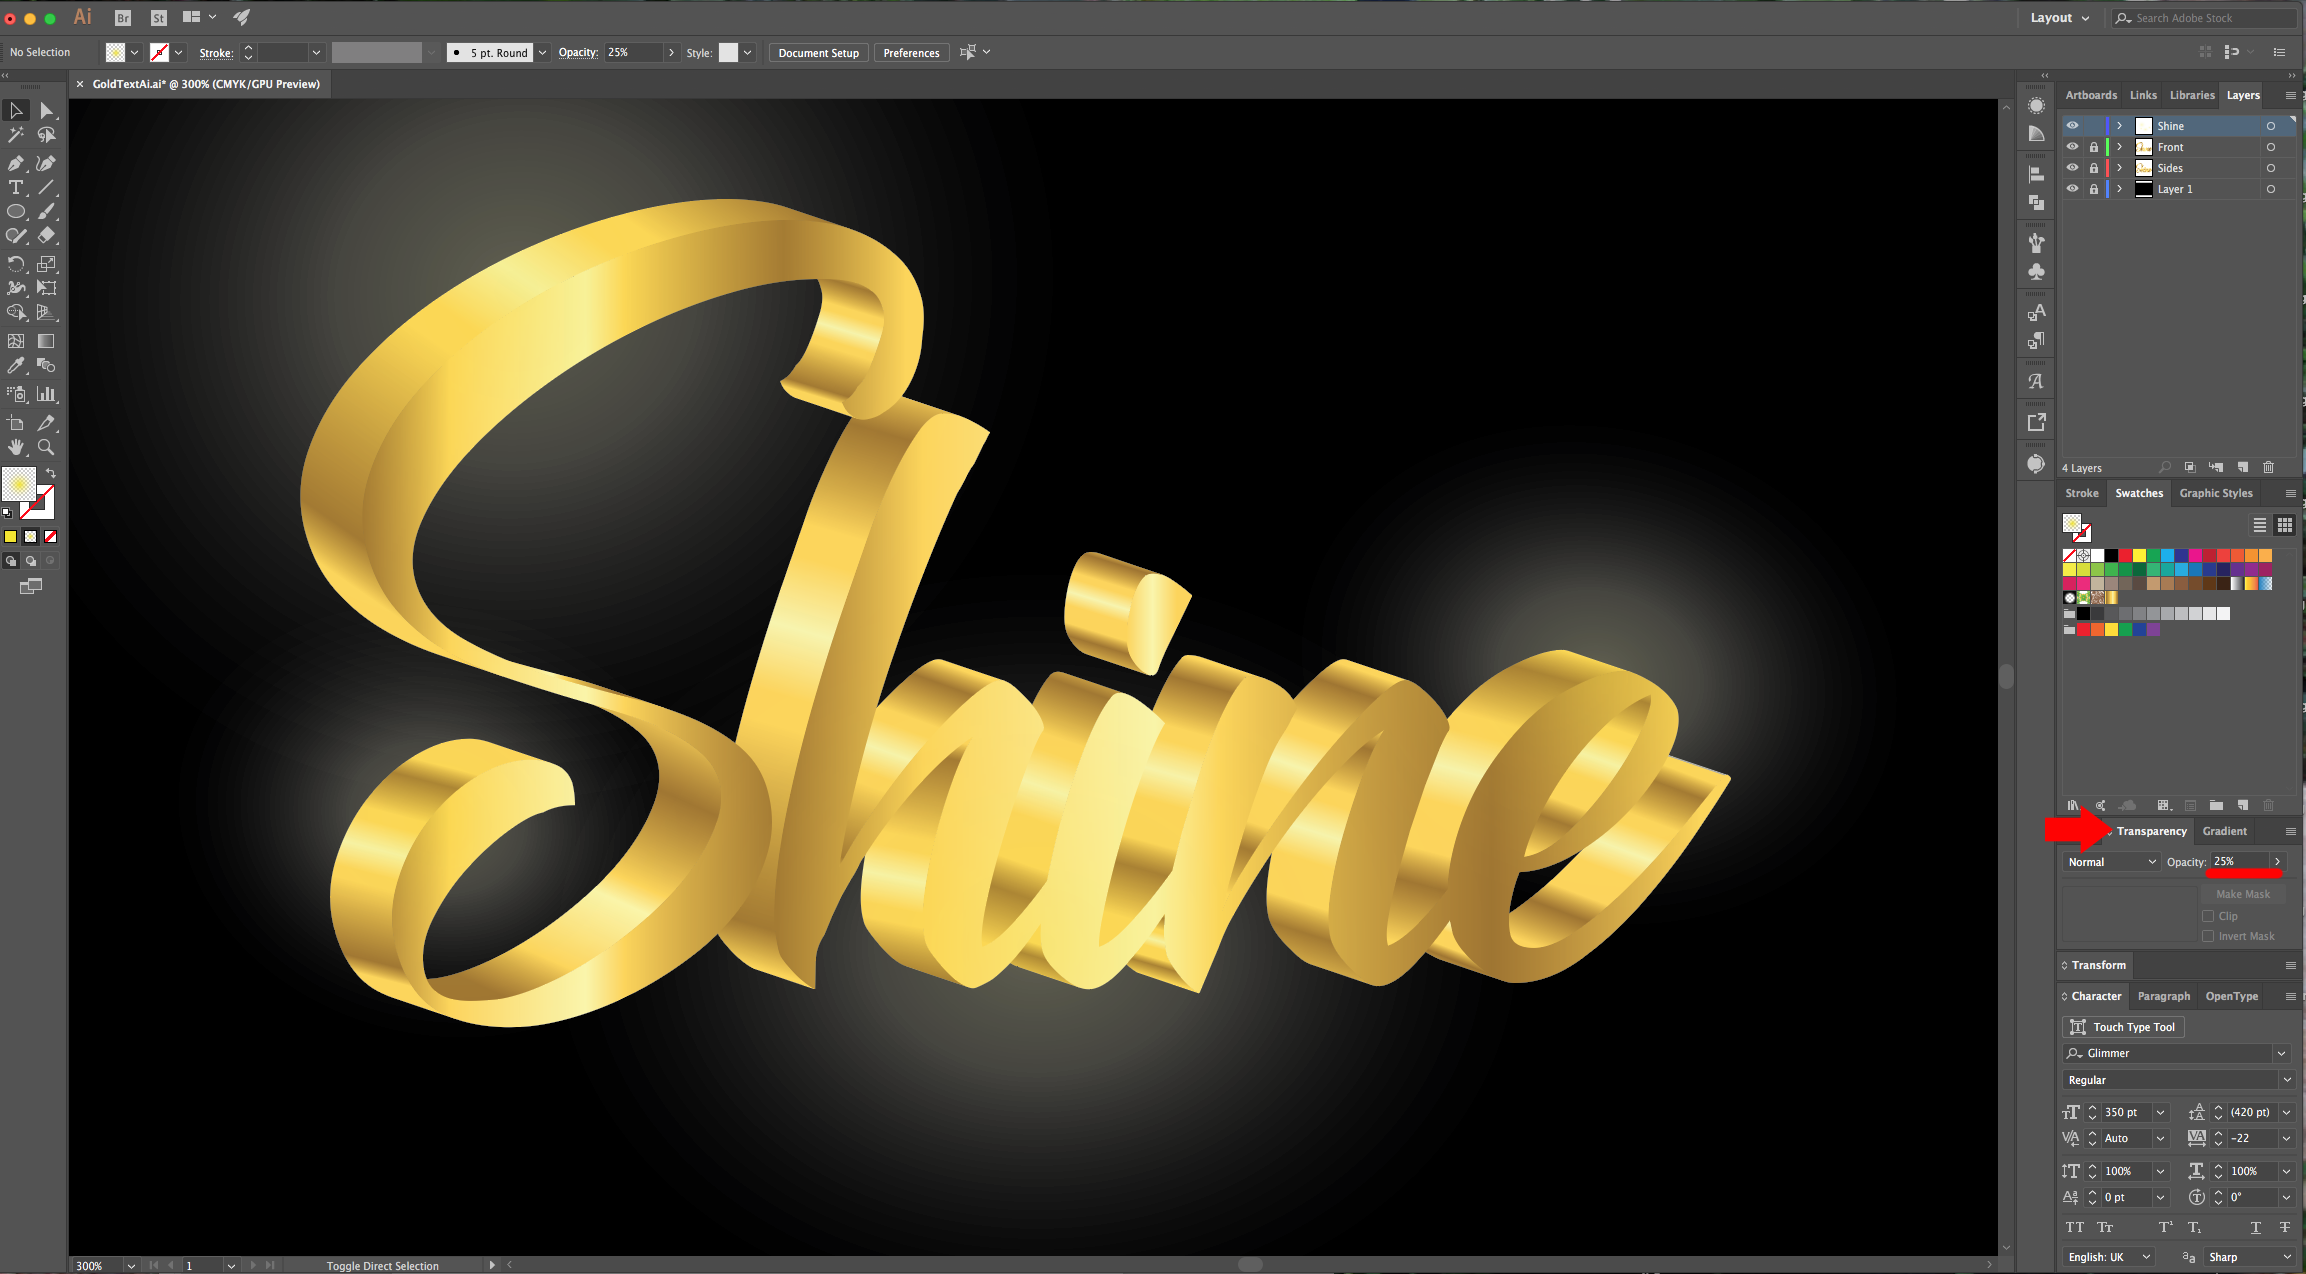
13 - To add some shine, lock your layers and create a “New” one. Choose the “Ellipse Tool” (L), draw a “Circle” and fill it with a “Radial Gradient” from a Bright Yellow (#f7e506) to Transparent (play around with the different “Sliders” until you get a result that pleases you. Then, lower the “Opacity” to 25% in the “Transparency Panel”. You can “Resize” it and place it where you want, then “Duplicate” it by holding “Alt” key while dragging it to a side to add other spots.
14 - Check out your work:
by @lornacane
Related Tutorials
Illustrator Tutorials
Wavy Text in Illustrator
Learn how to create Wavy Text in Illustrator using two Methods in this tutorial.
Illustrator Tutorials
Place Images Inside Text in Adobe Illustrator
In this Adobe Illustrator tutorial, learn how to quickly place images inside text.
Illustrator Tutorials
How to Use Text Effects in Illustrator
Learn how to use Illustrator Text Effects in 1 click!
Illustrator Tutorials
Editing Text in Adobe Illustrator
With this step by step tutorial we'll show you everything you need to know about editing text.
Illustrator Tutorials
Overlapping Text in Illustrator
Learn how to easily overlap text in this Adobe Illustrator tutorial.
Illustrator Tutorials
How to Gradient Fill Text in Adobe Illustrator
In this tutorial we will show you how to gradient fill text in Adobe Illustrator.