By Design Bundles
Isometric Text in Illustrator
For this Tutorial, we are going to use the Free Font “Bajern” from Font Bundles.
1 - In Illustrator, create a “New Document”.
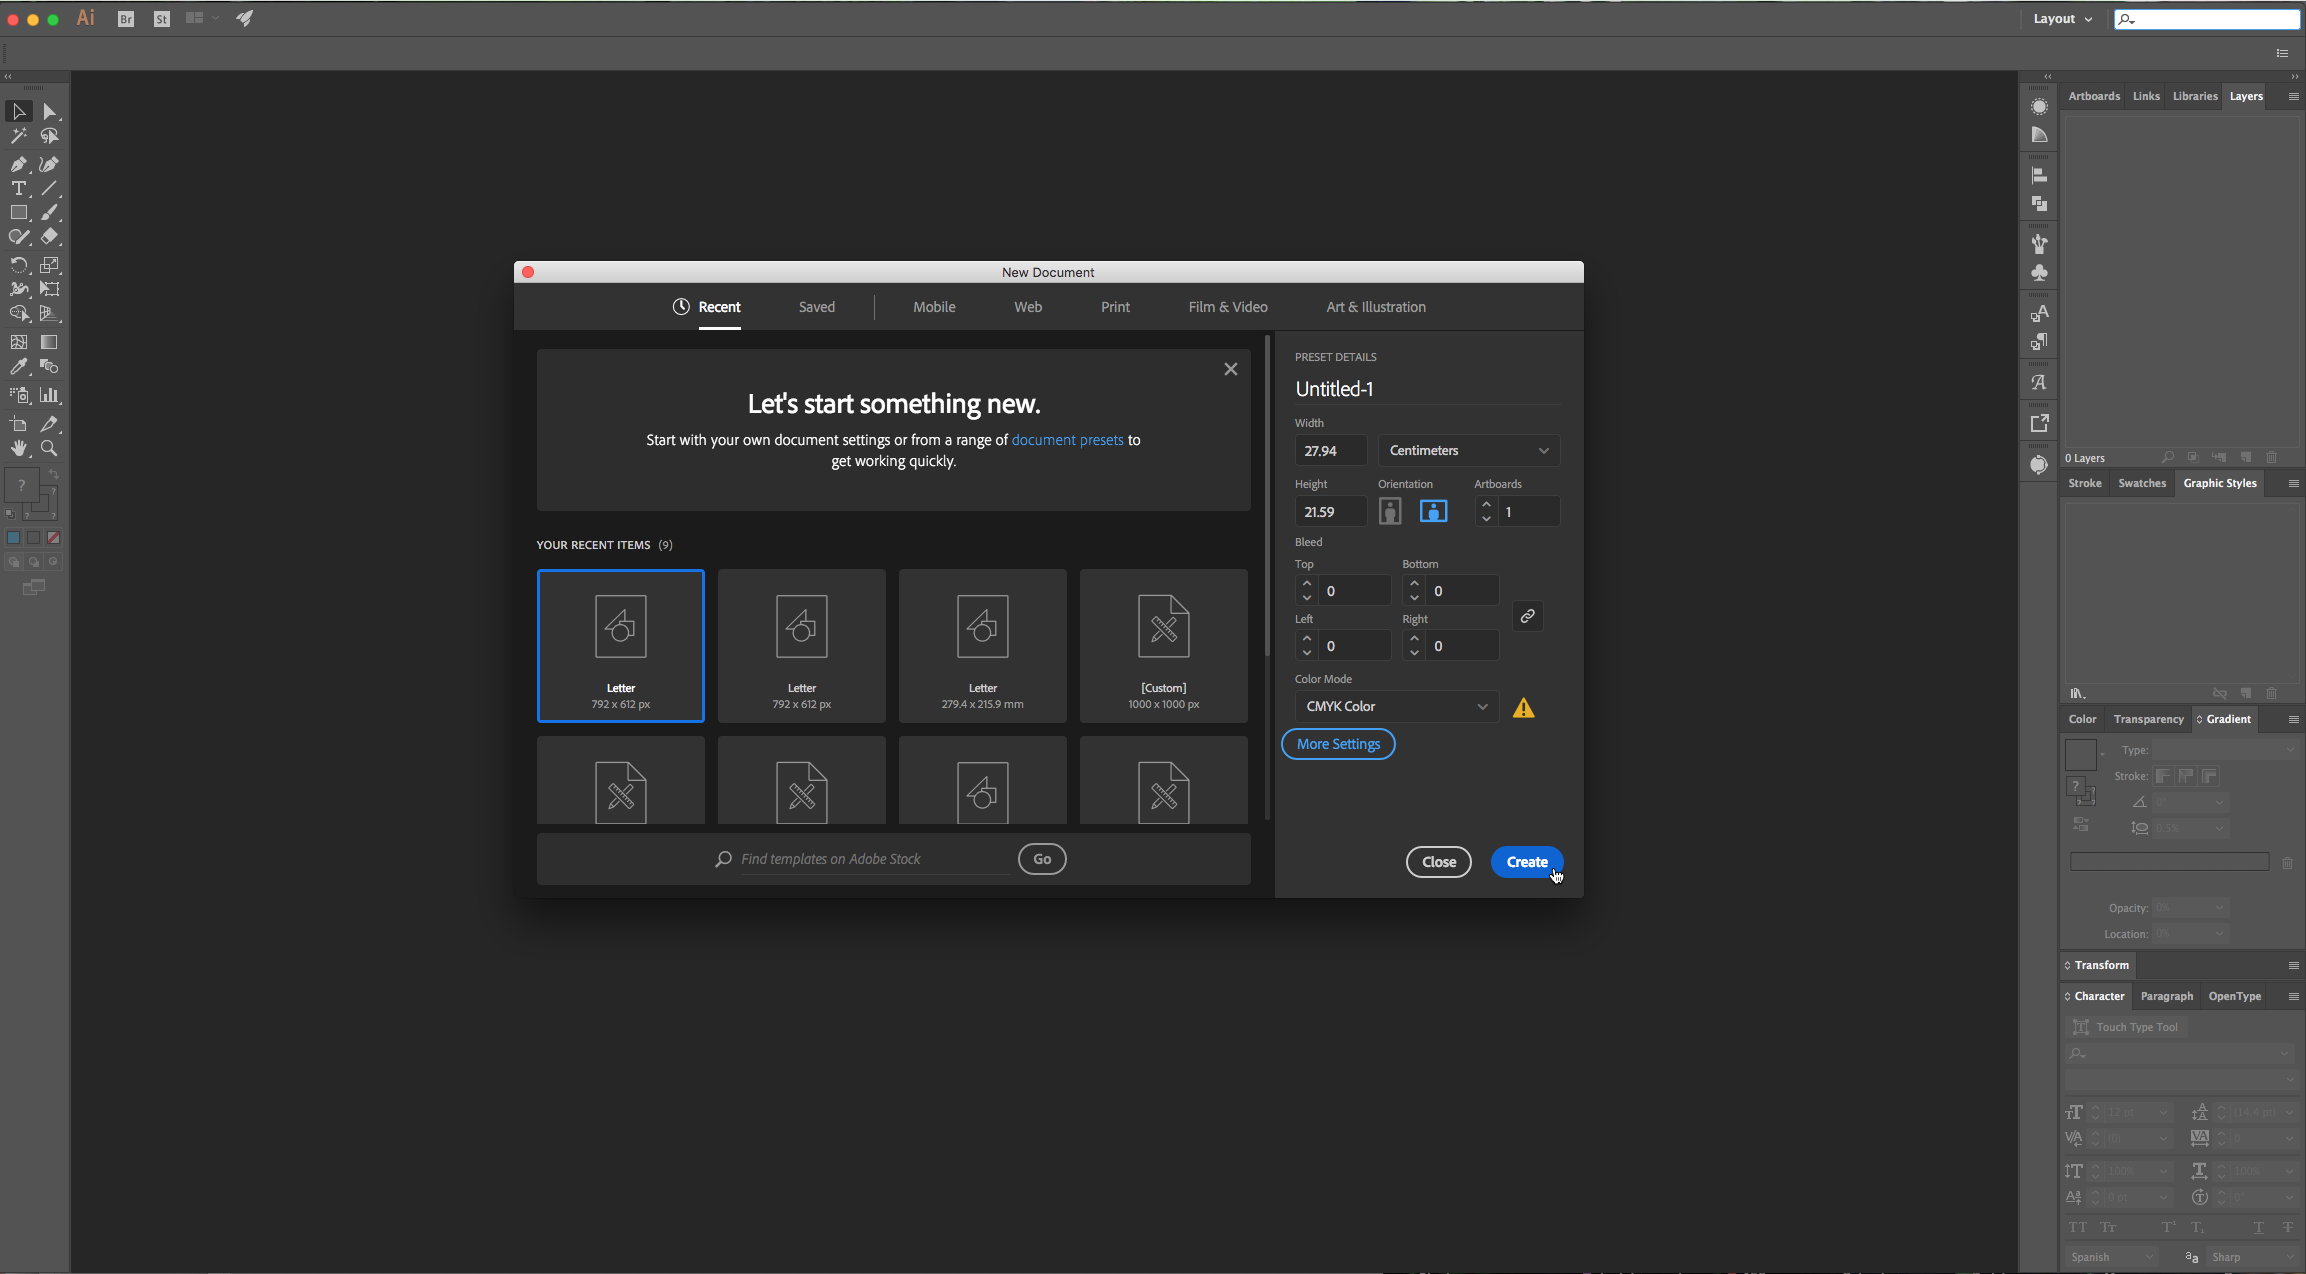
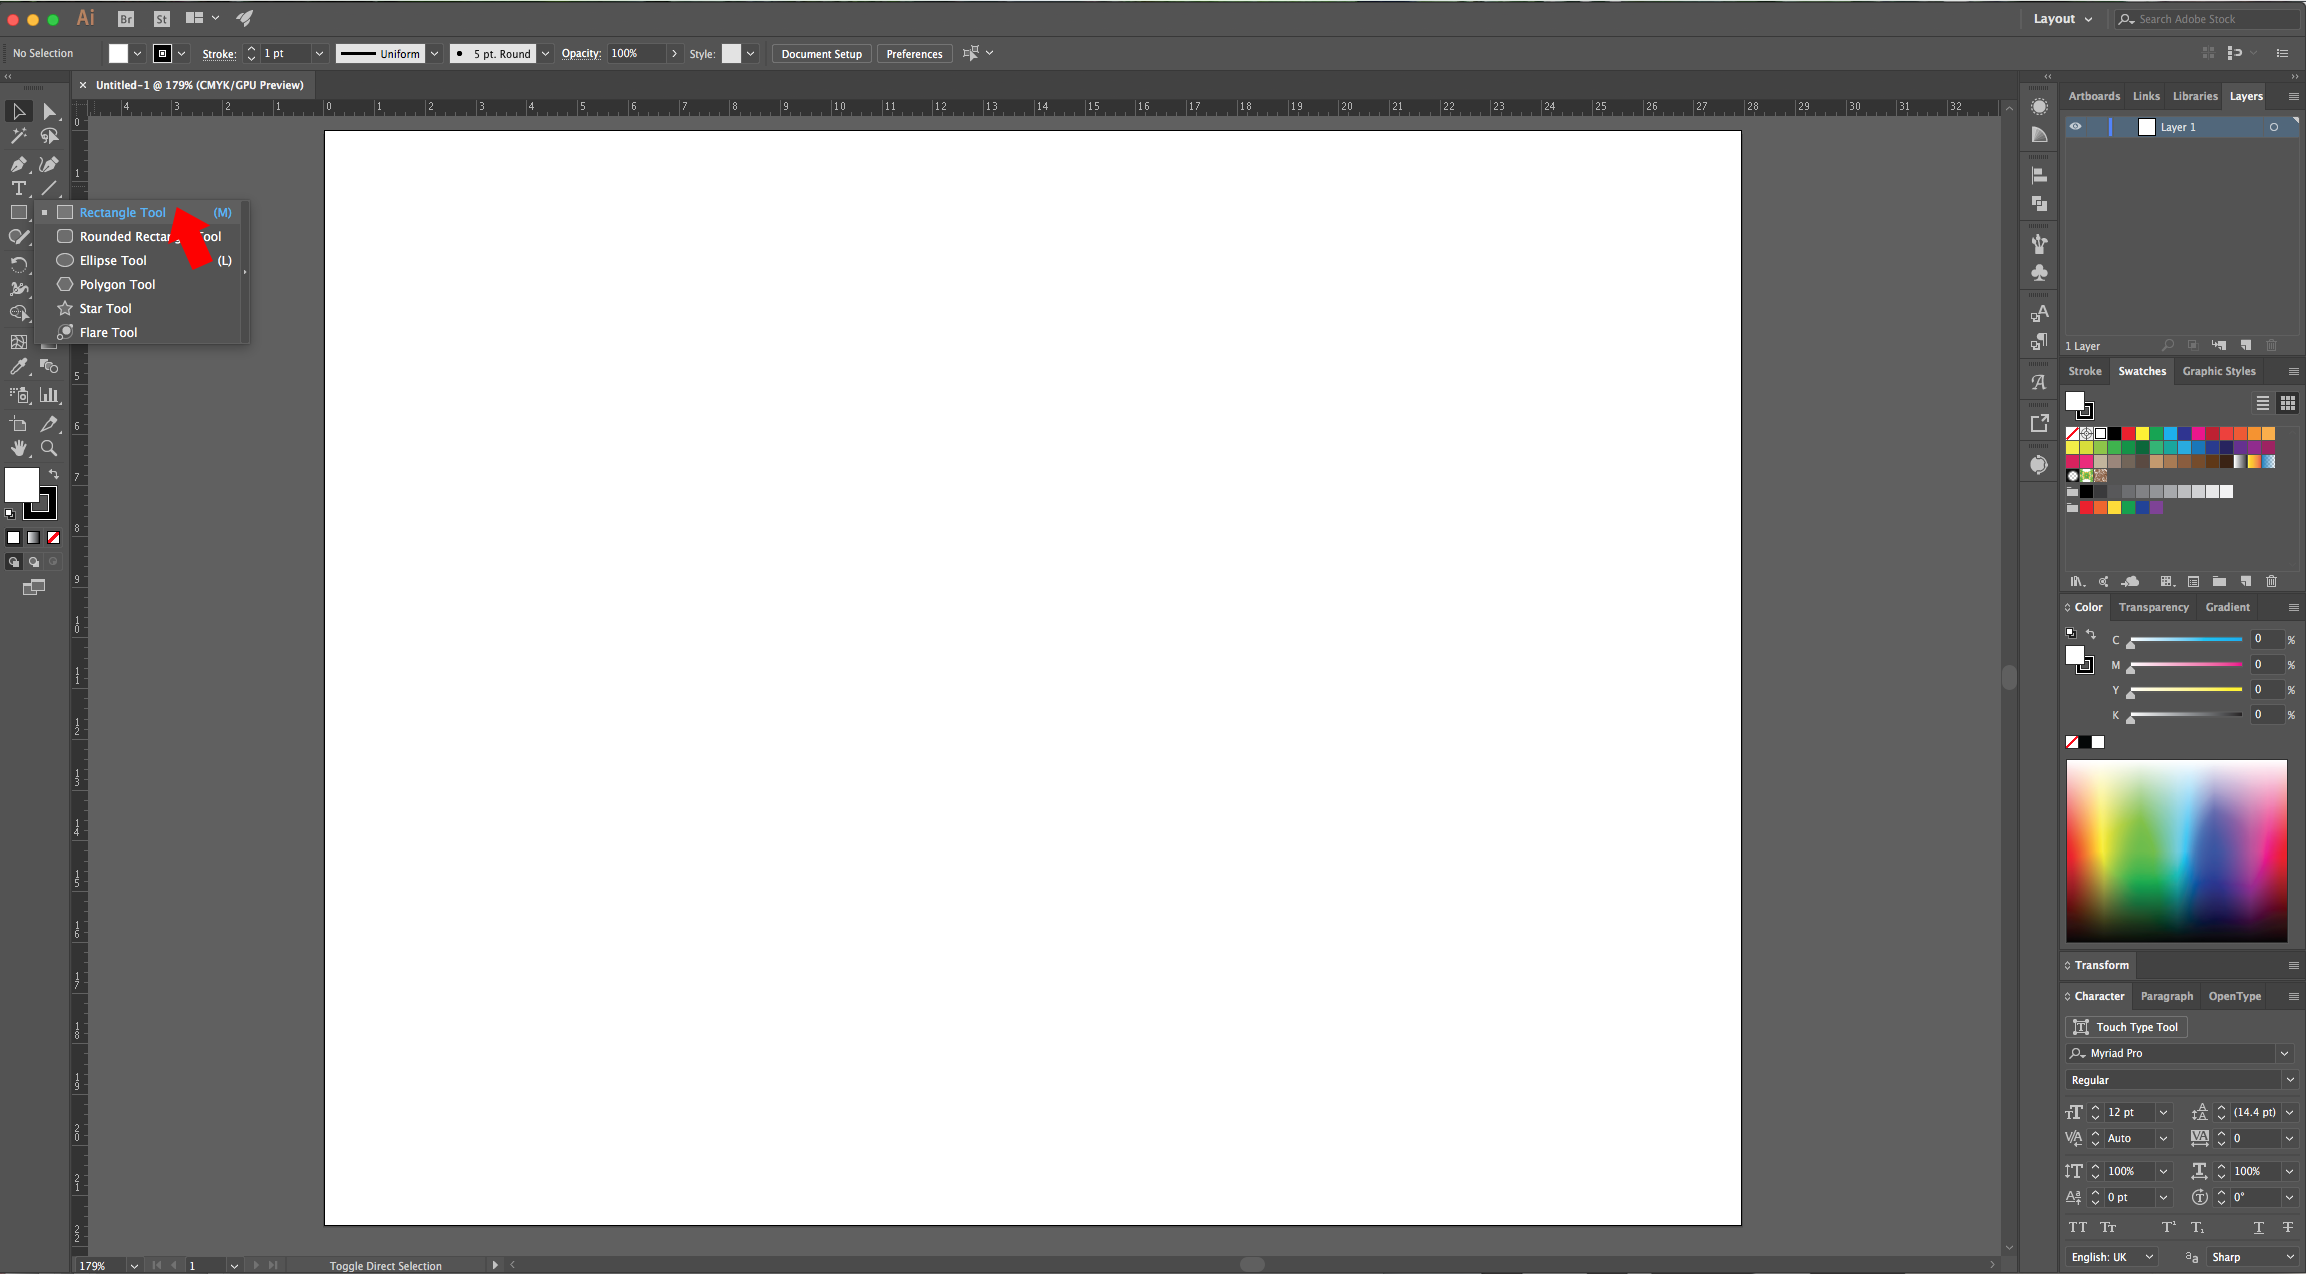
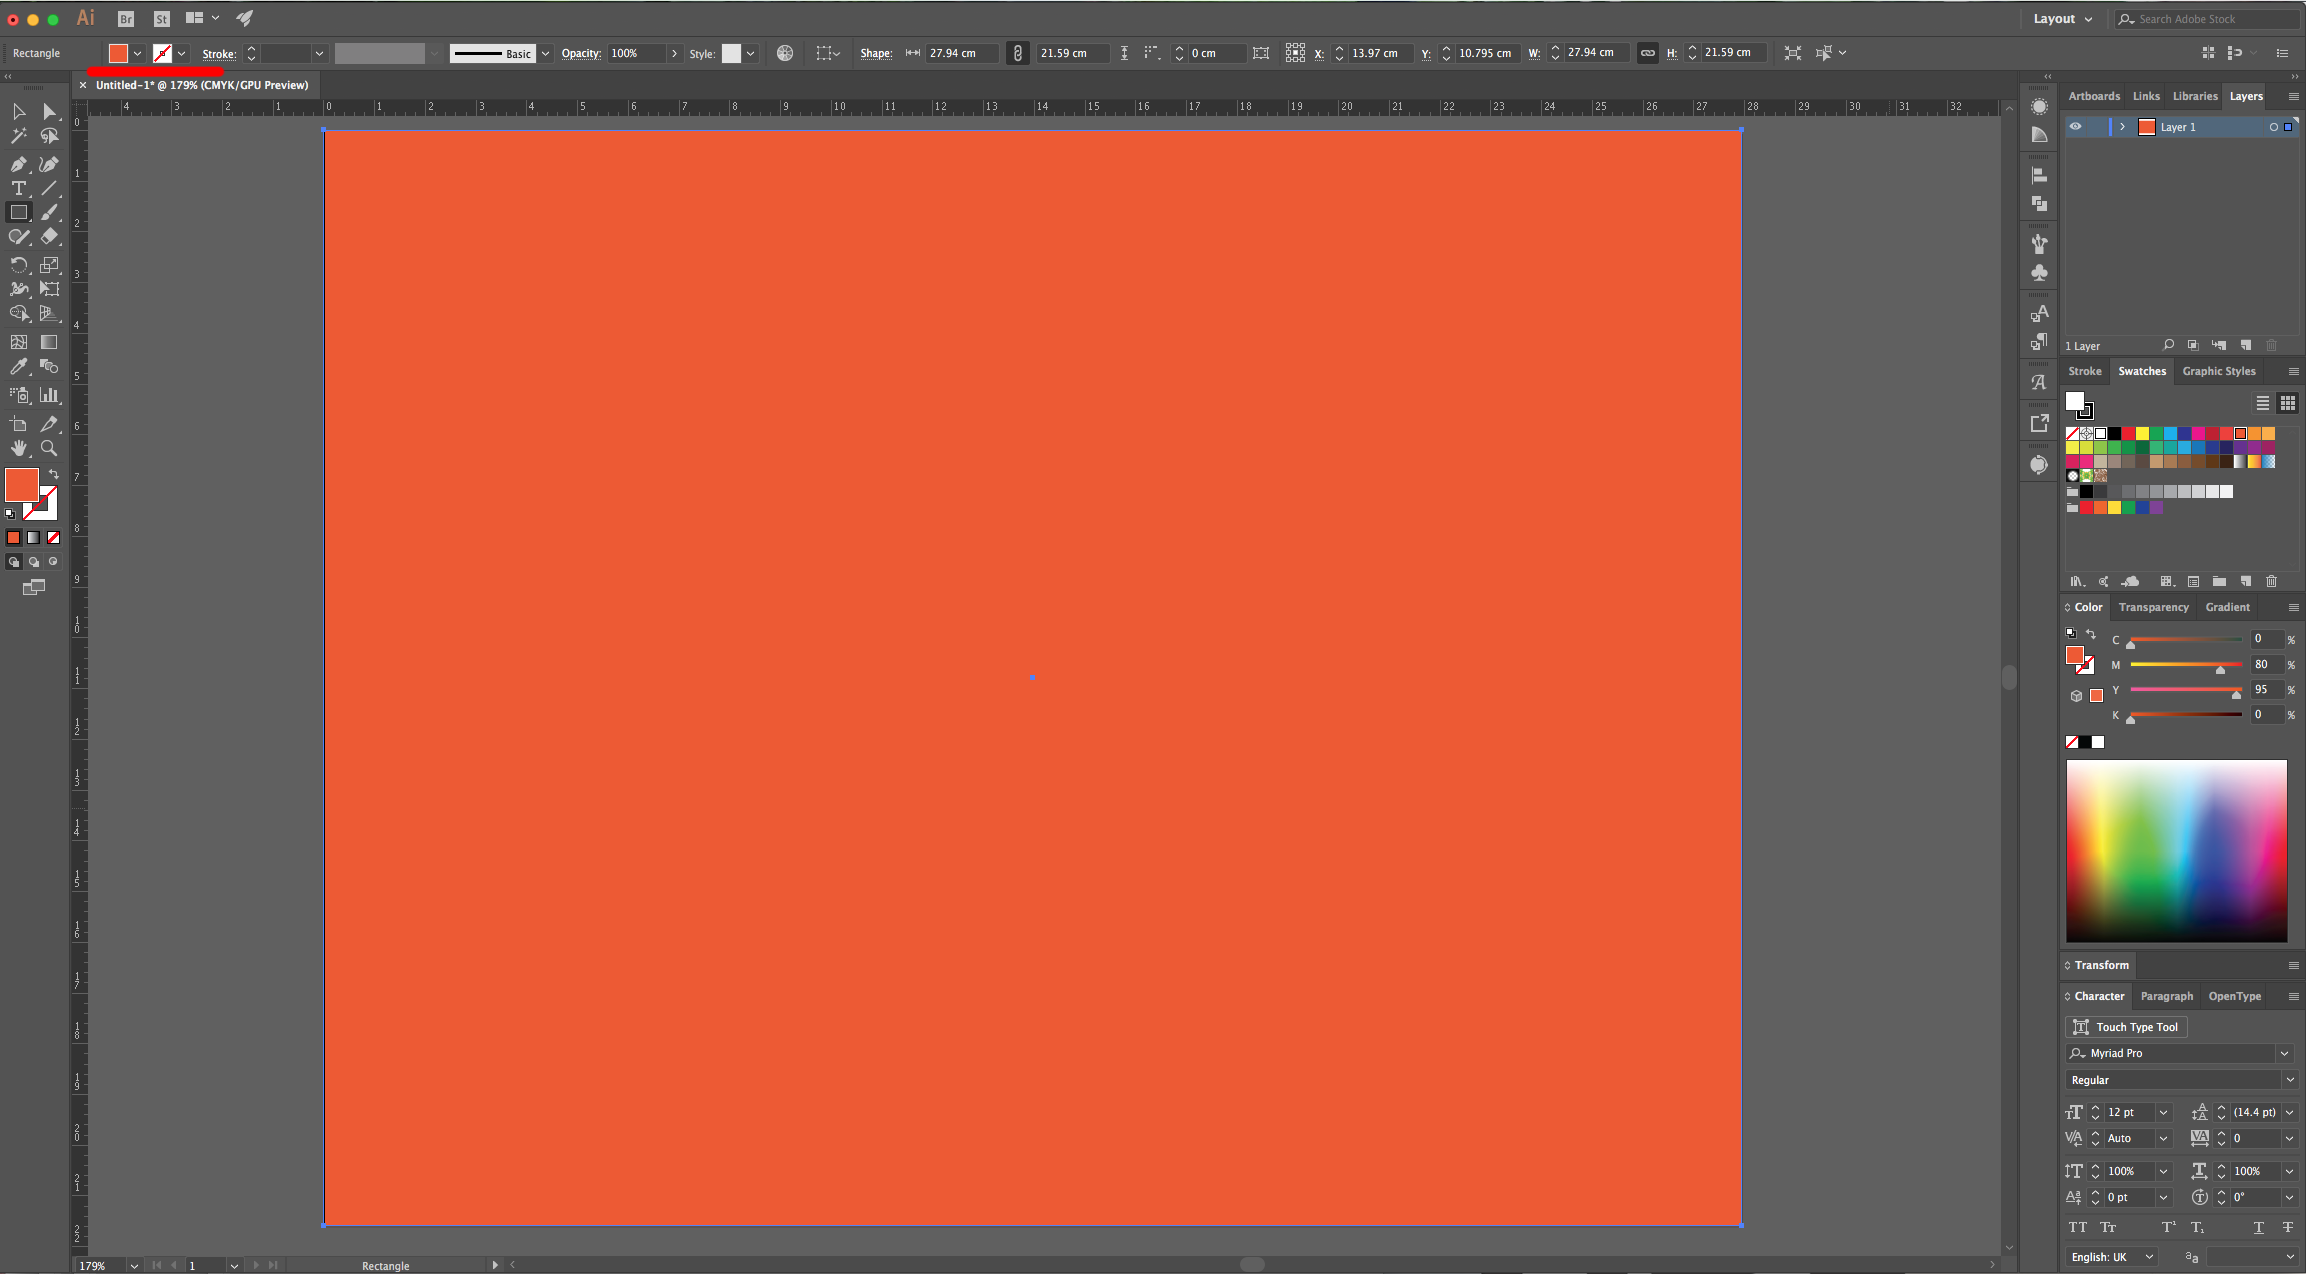
2 - Select the “Rectangle Tool” (M) and make a rectangle that covers all your document. Fill it with the color of your choice.
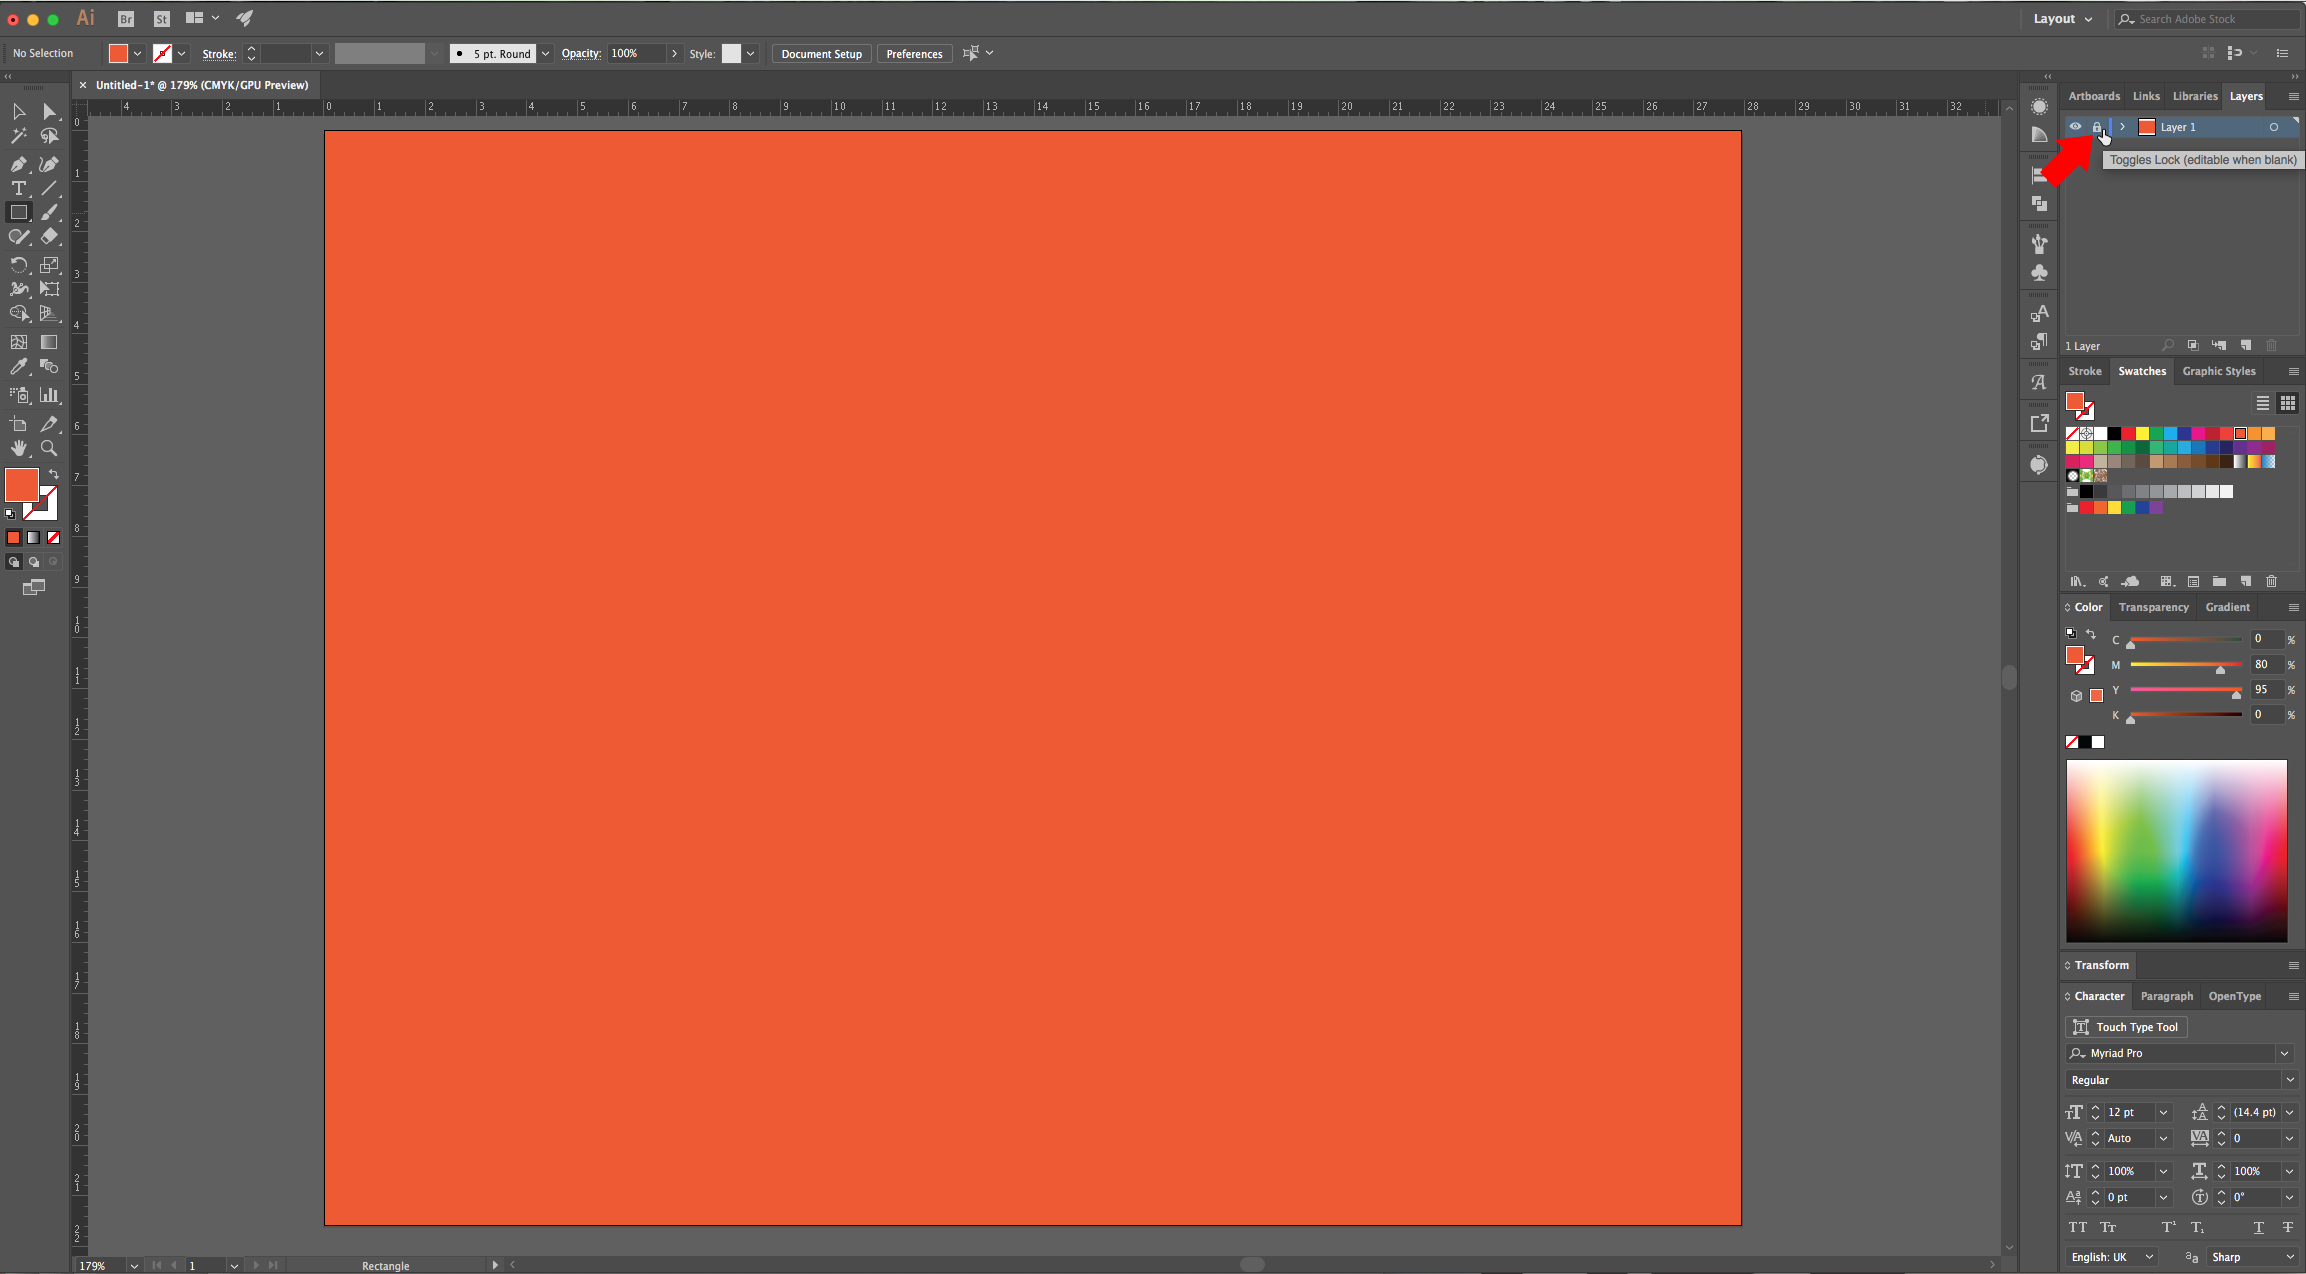
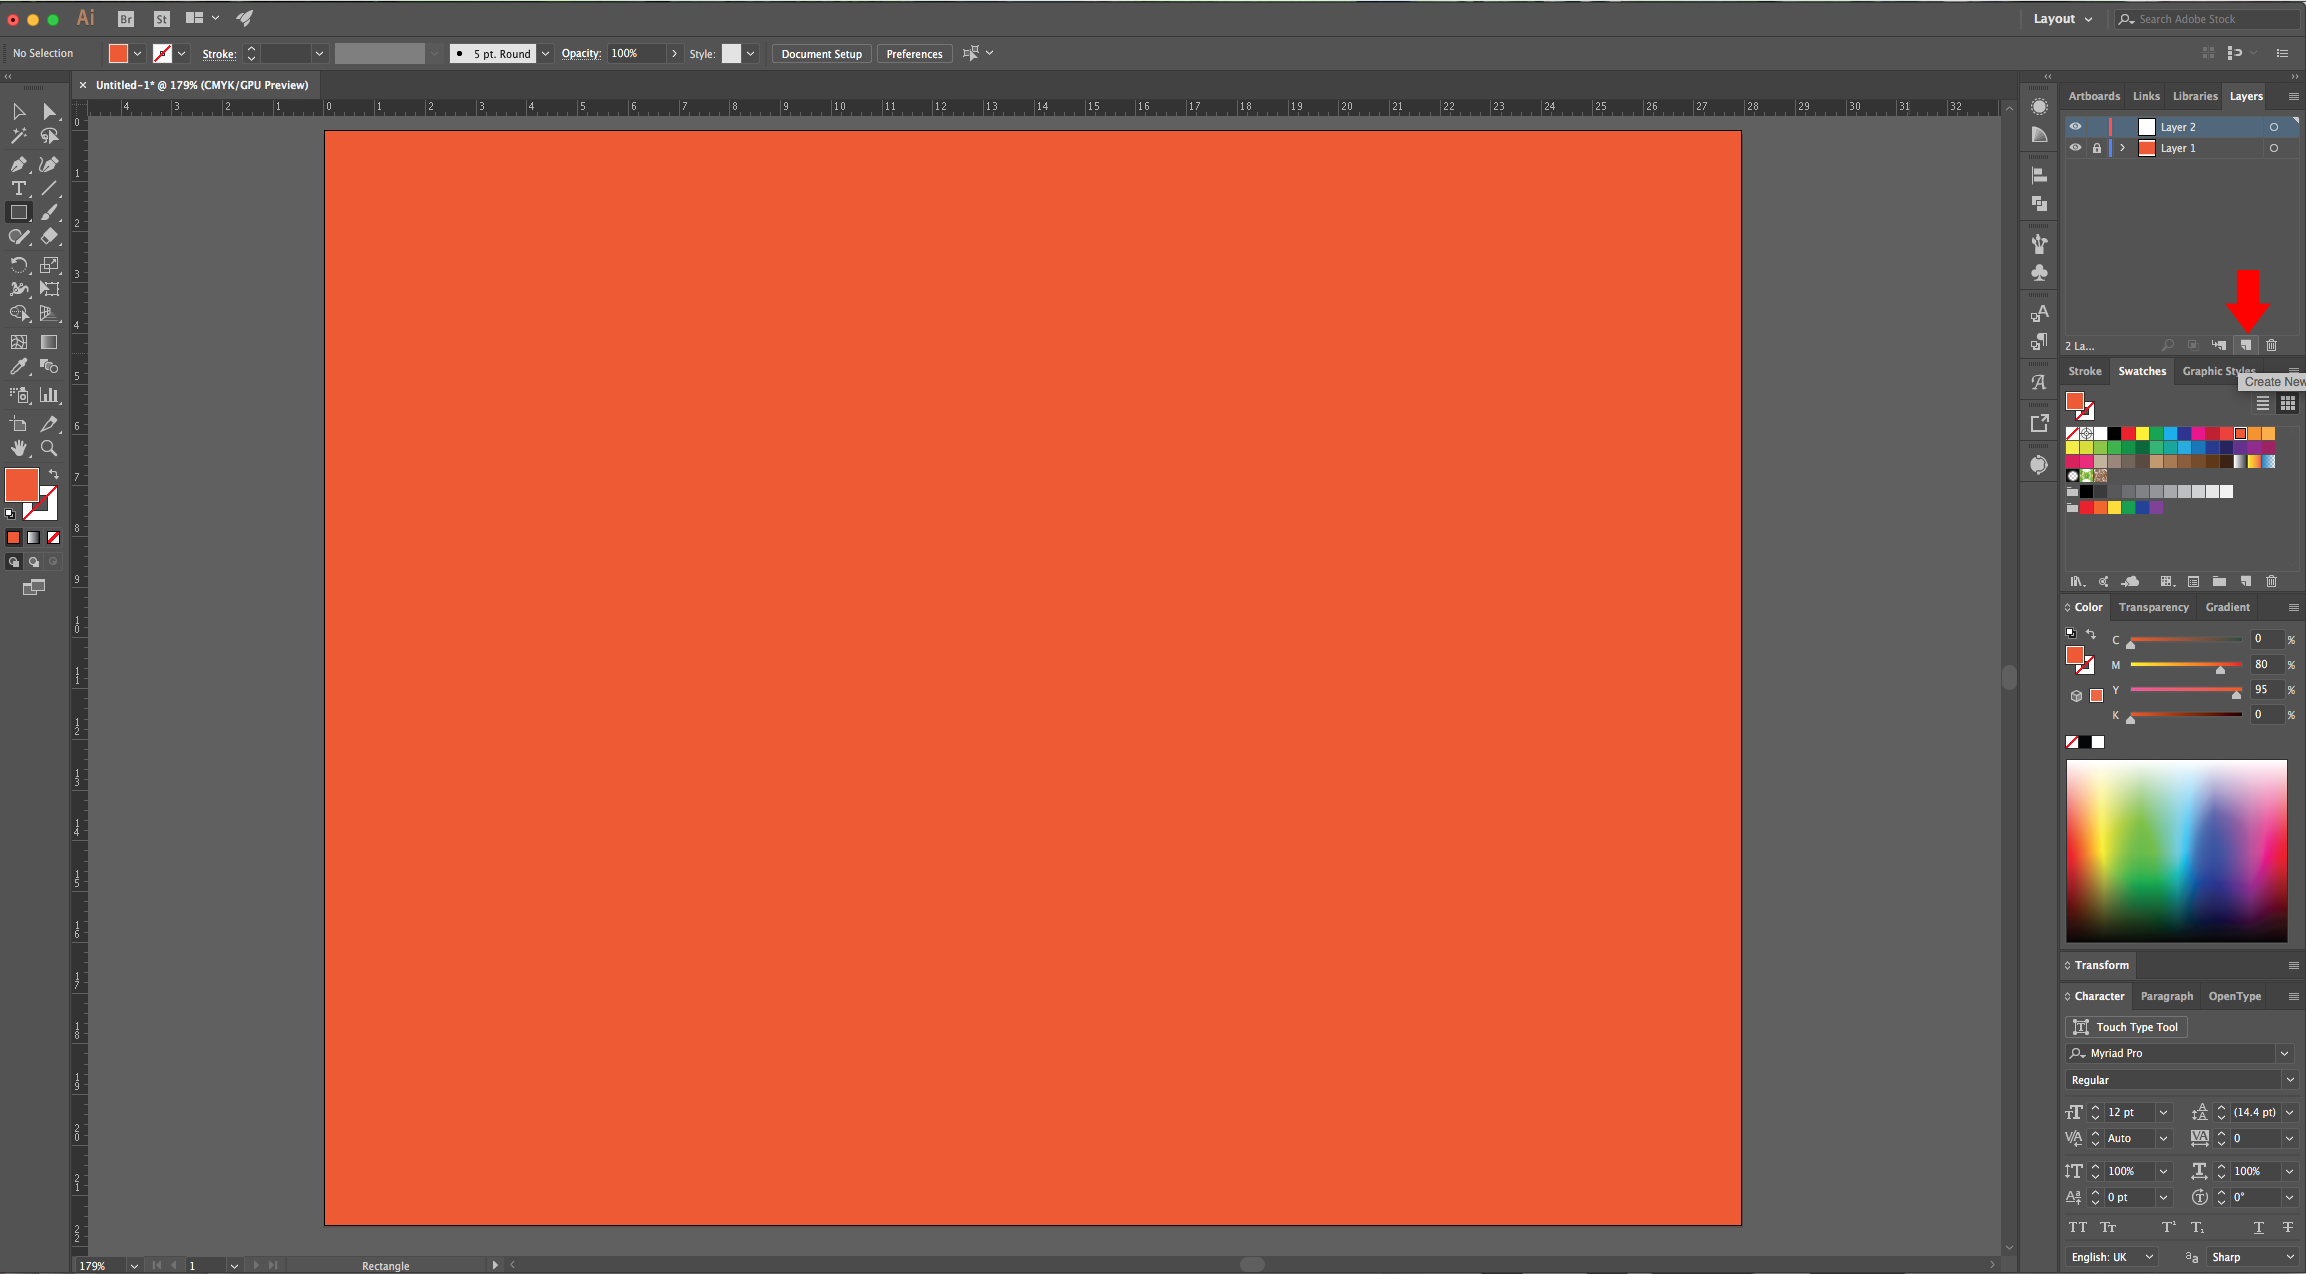
3 - Lock your Layer by clicking on the left side of its thumbnail in the and bringing out the small padlock icon. Then, click on the “Create New Layer” button at the bottom of the “Layers Panel”.
4 - Select the “Type Tool” (T), choose your font (we used “Bajern”) and type your text. Change the “Tracking” a bit to separate your text if needed.
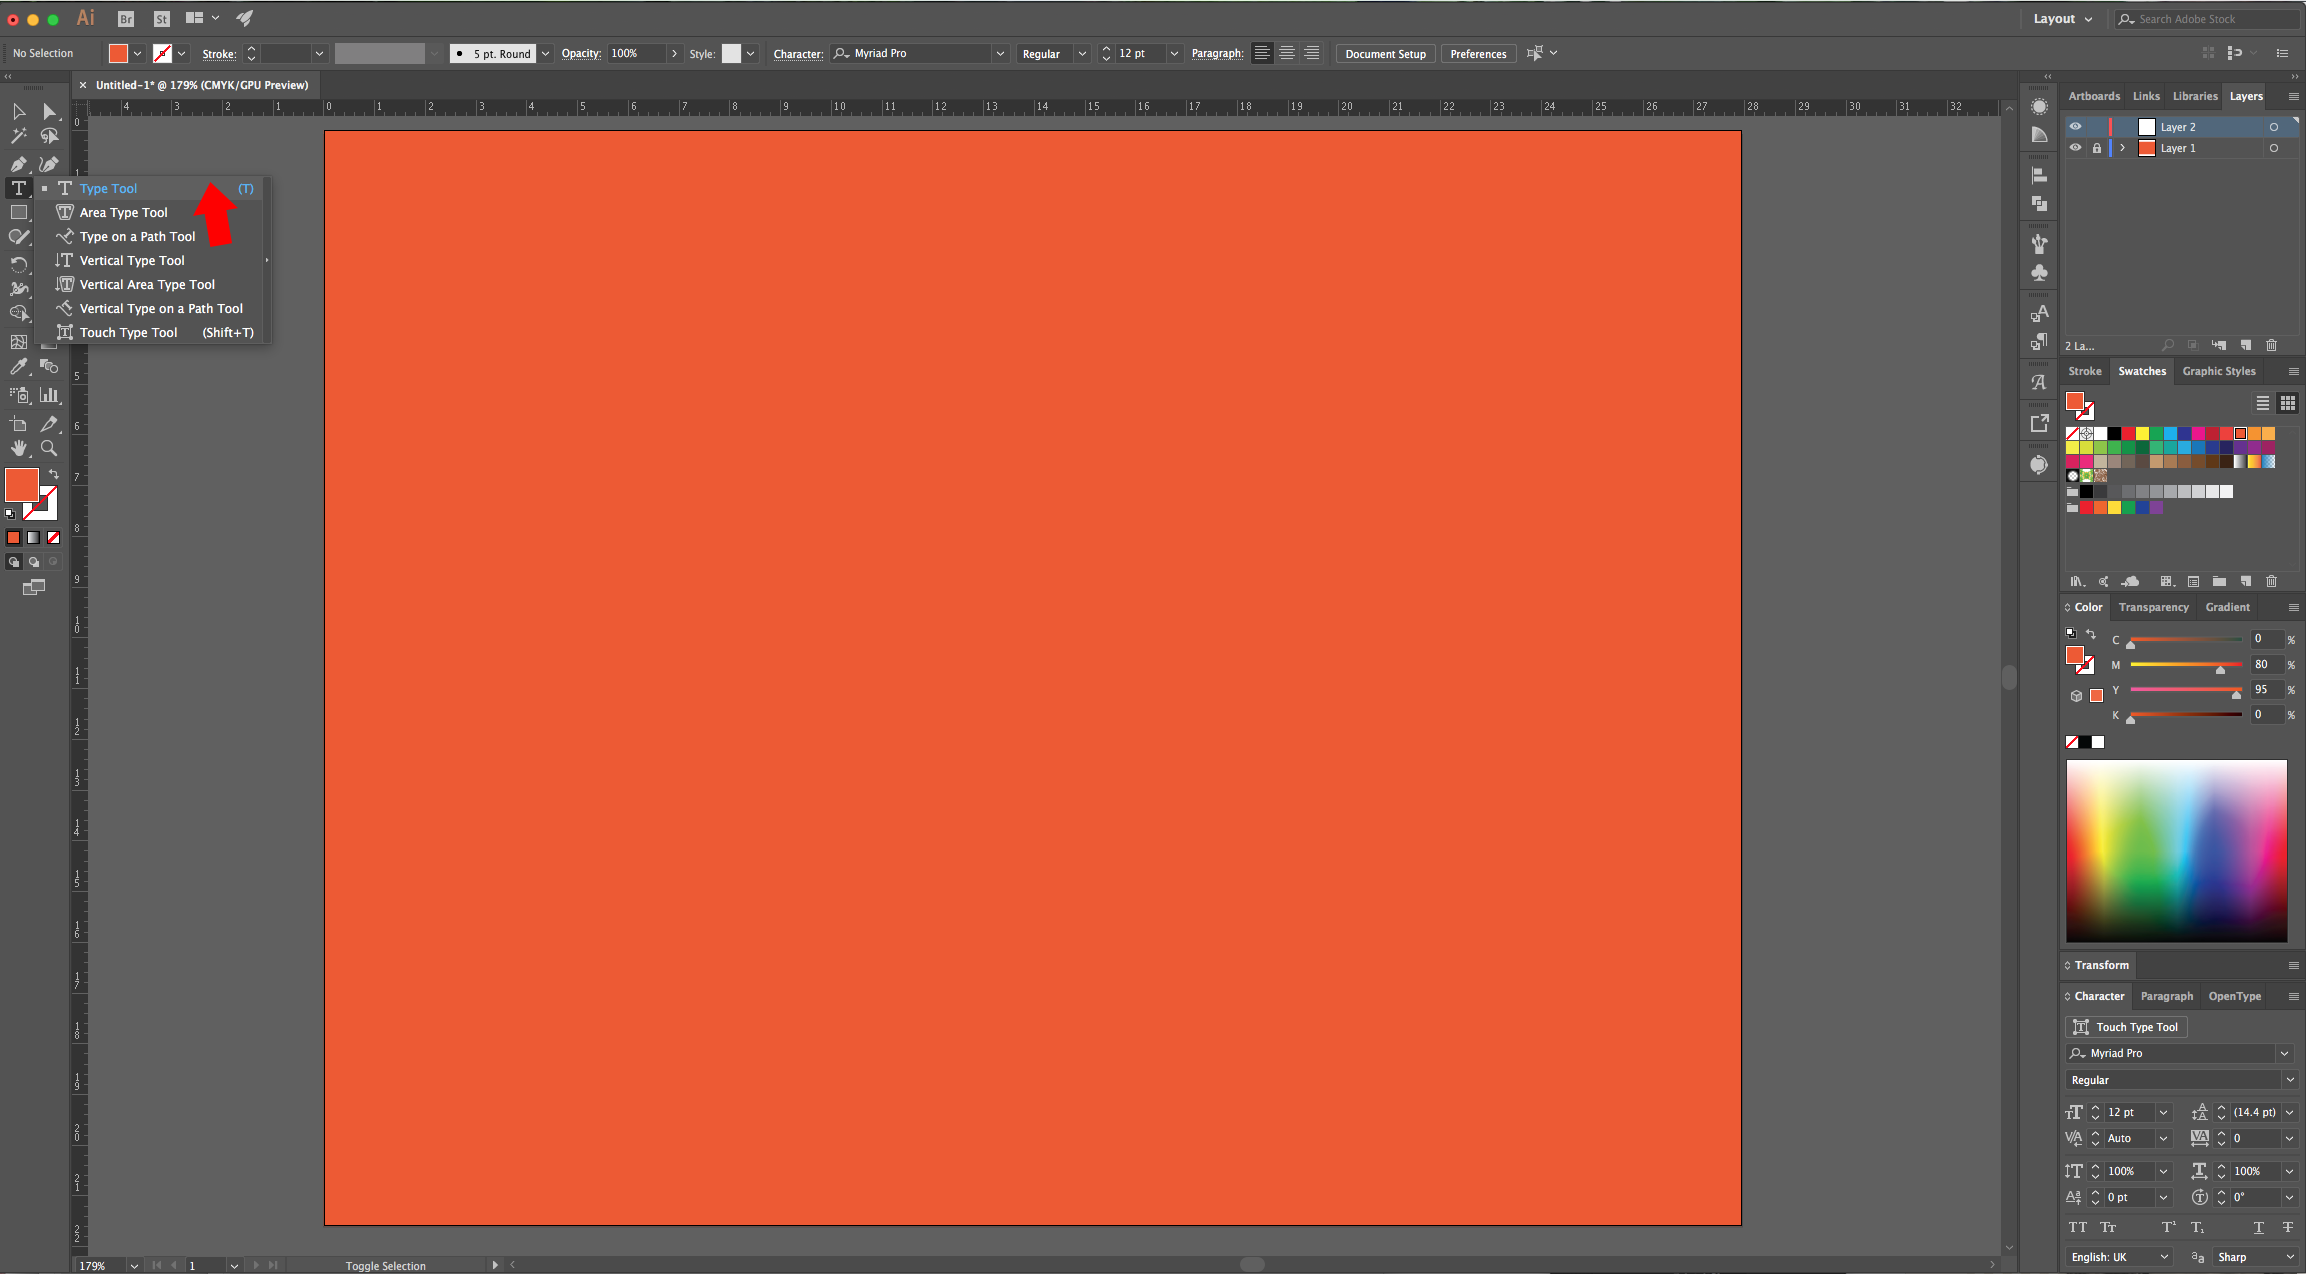
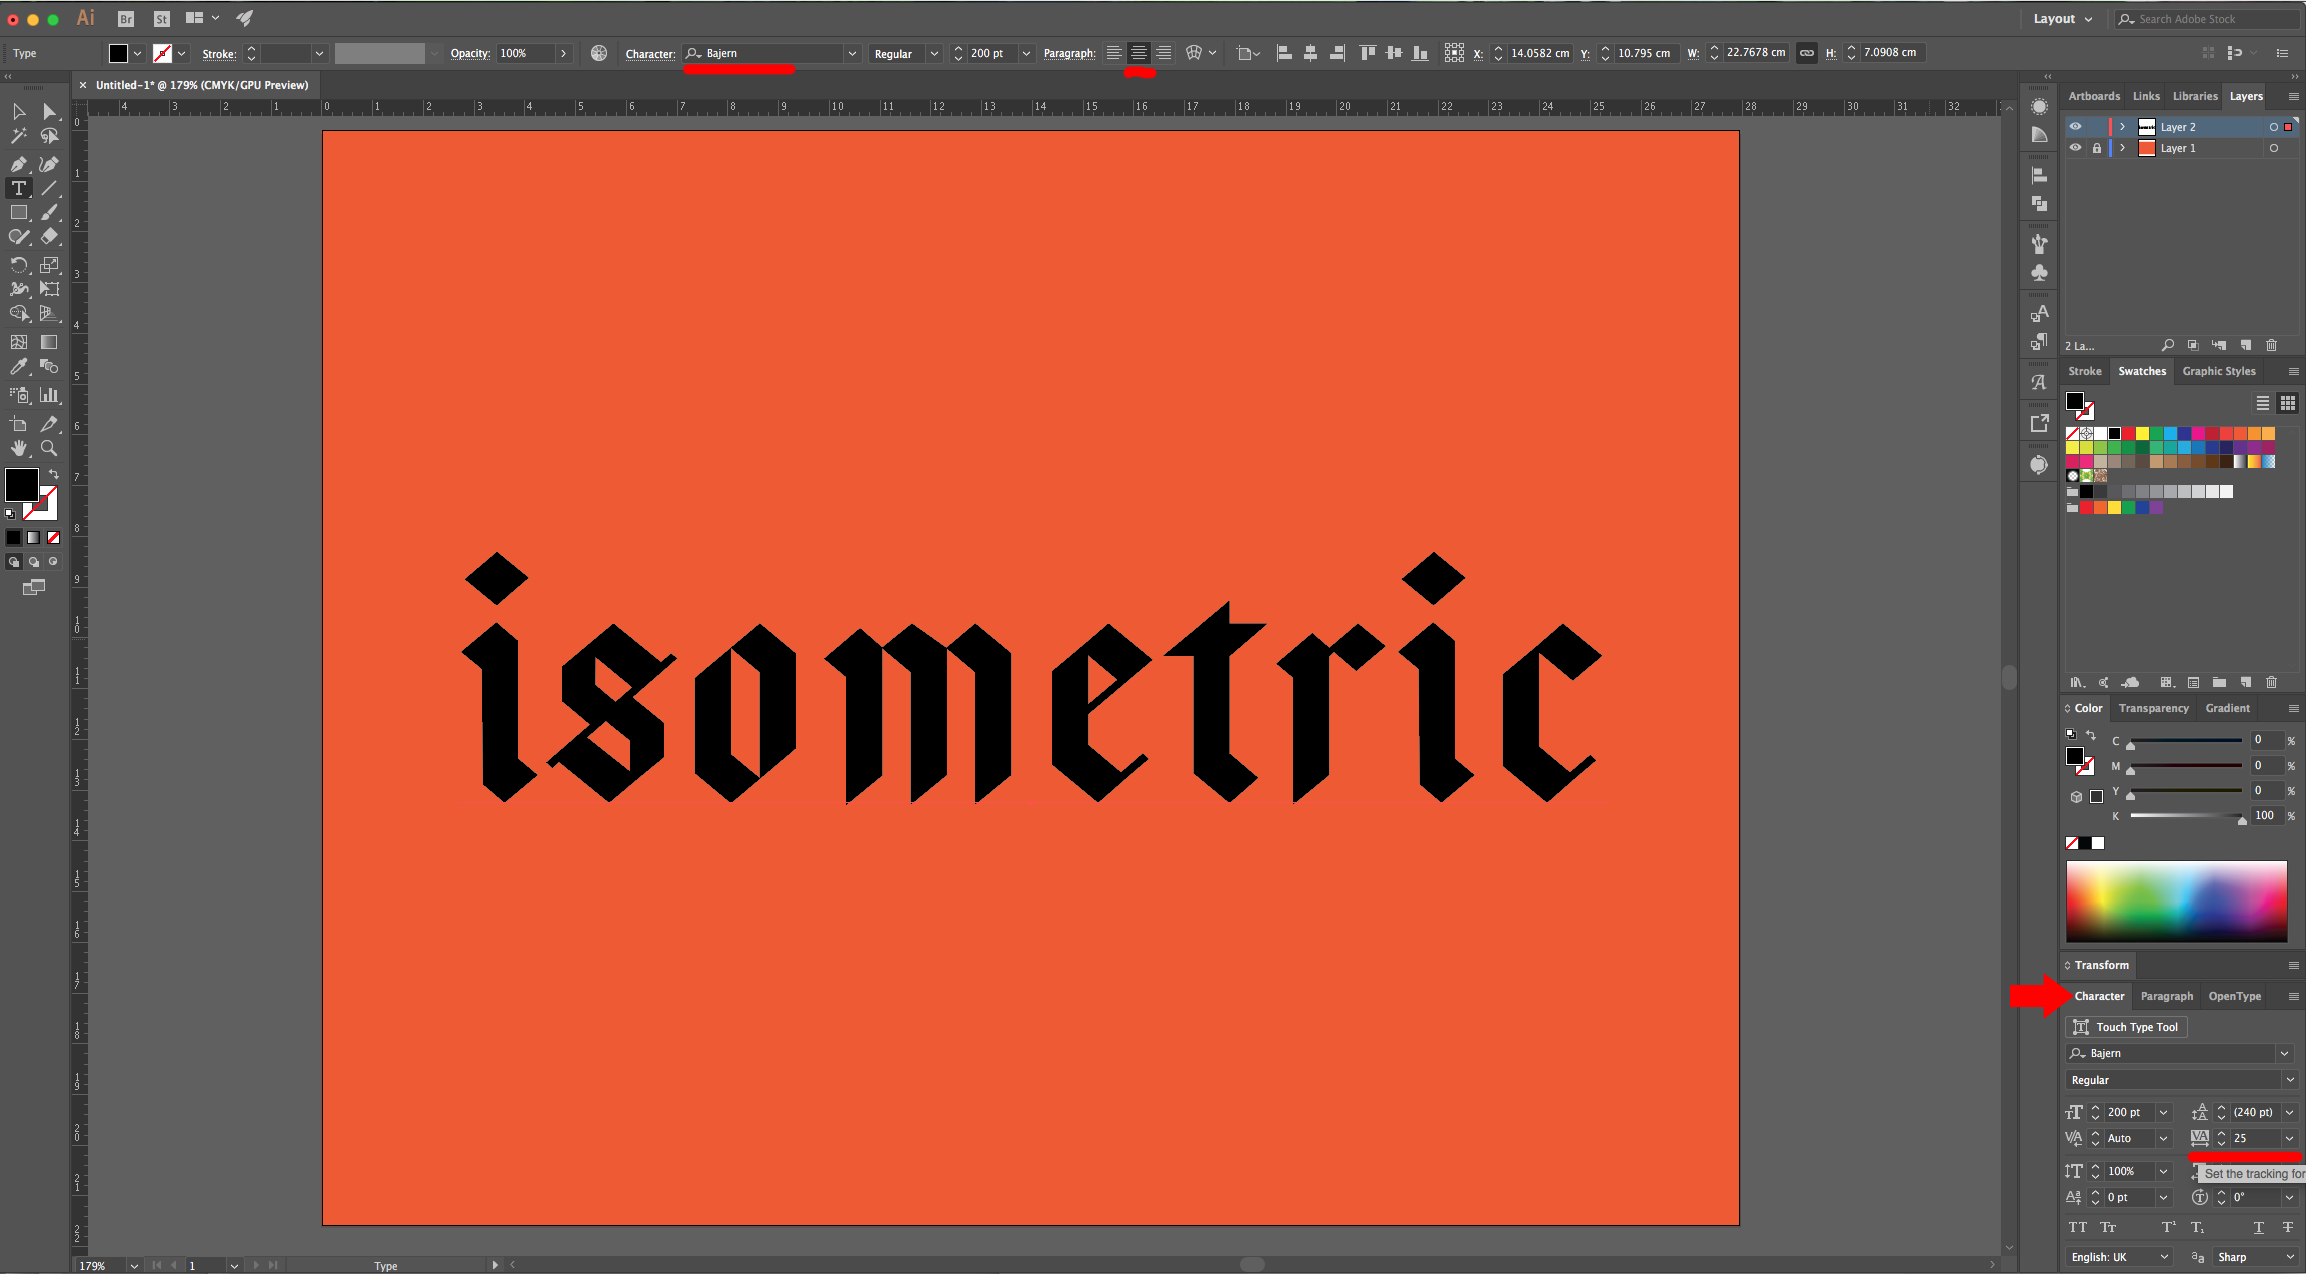
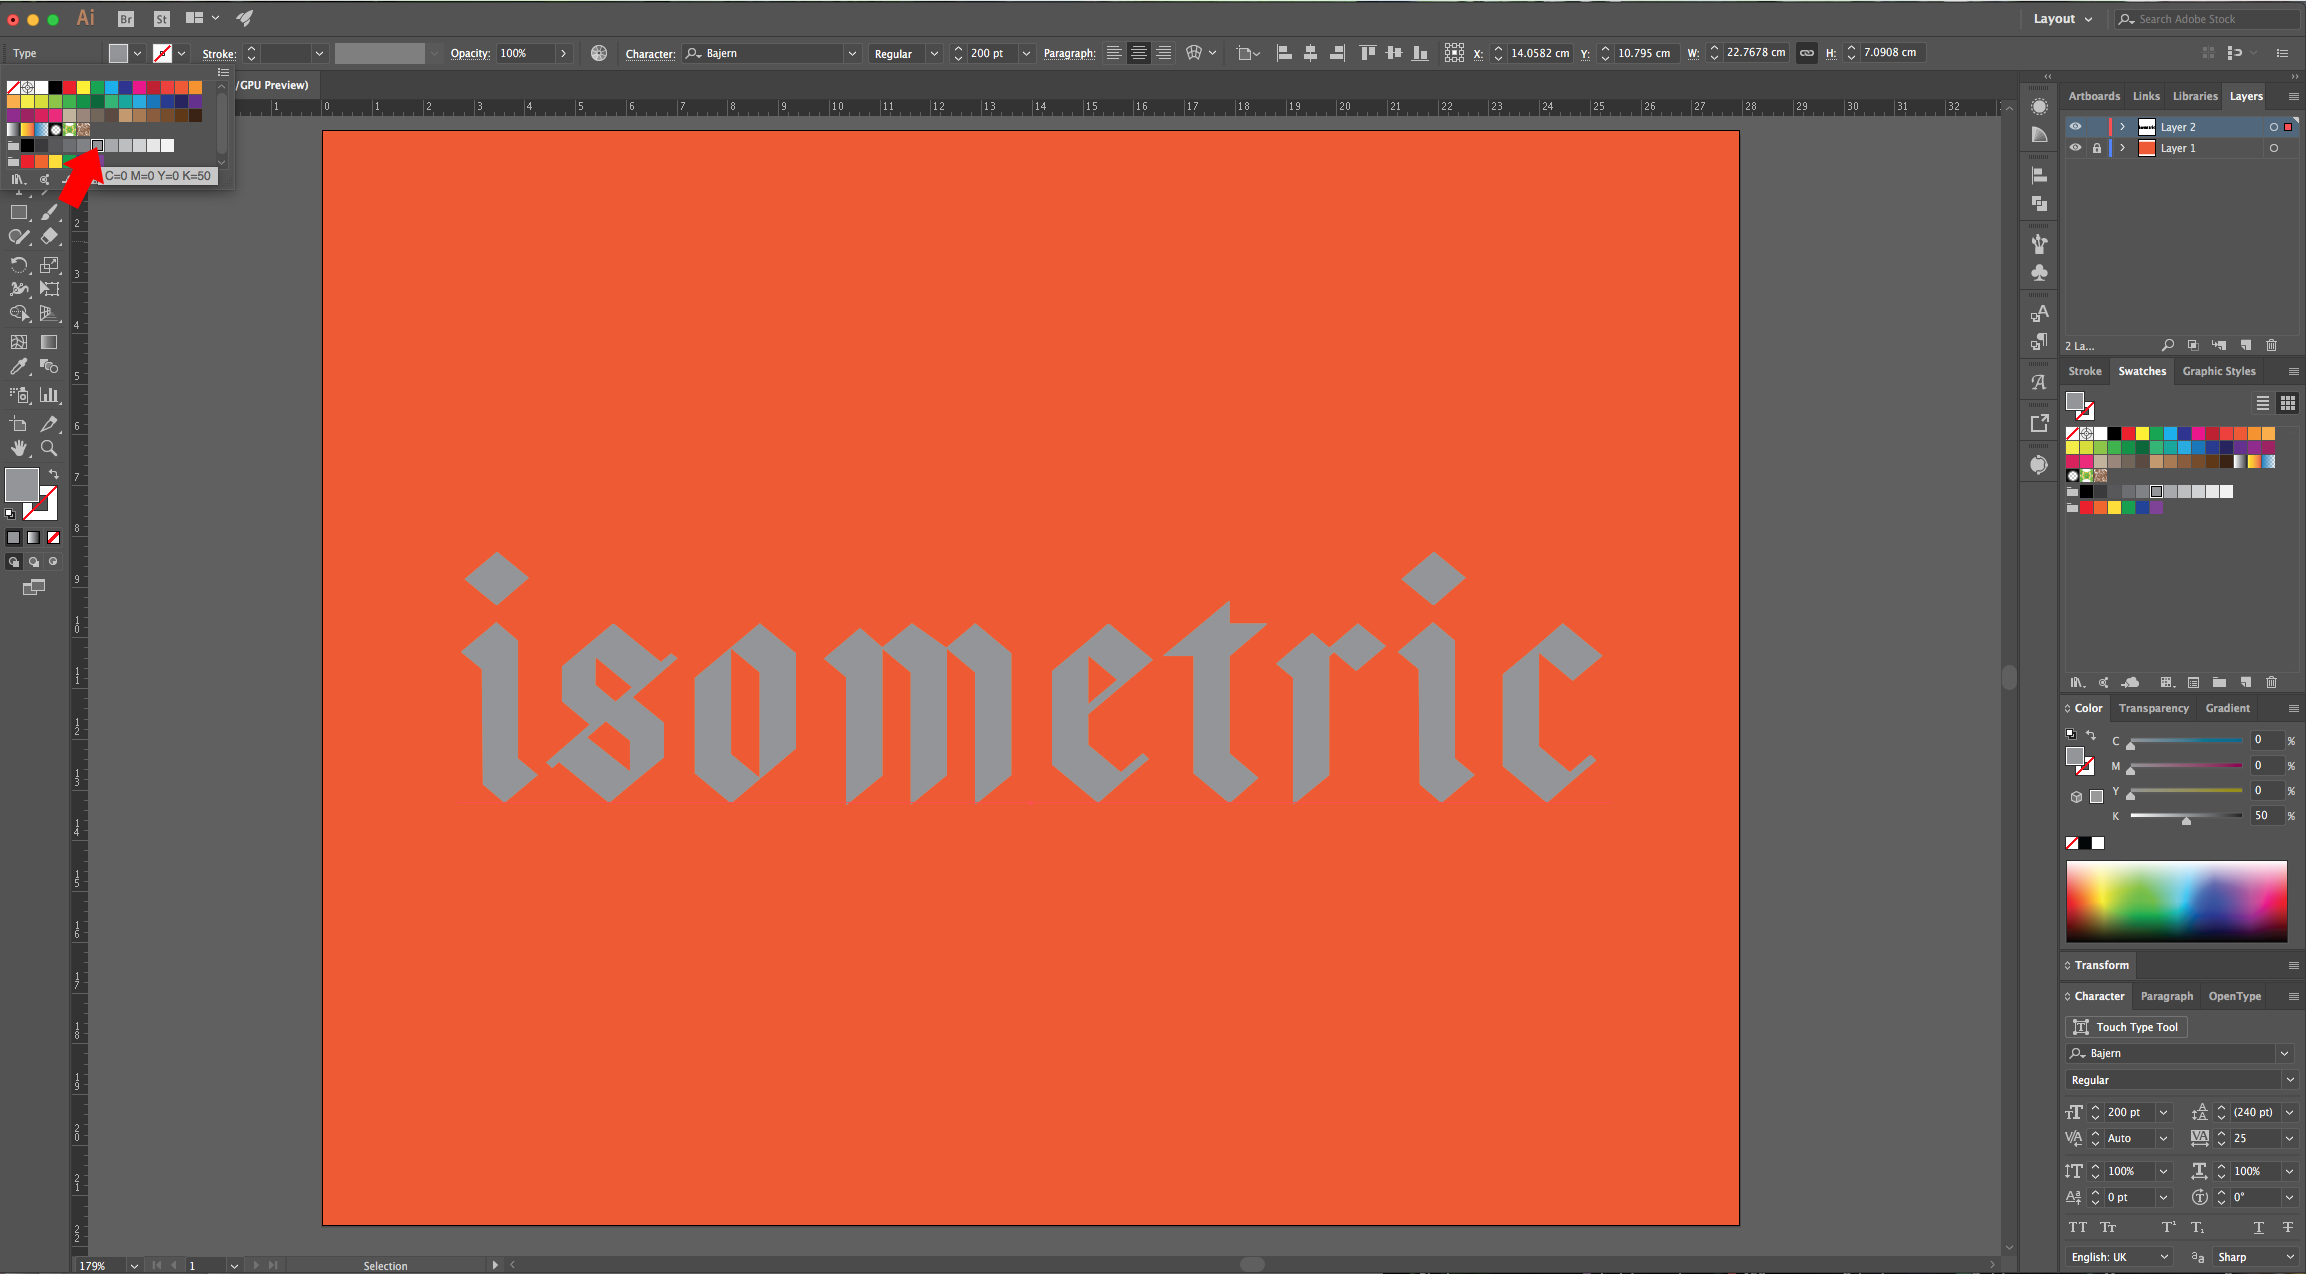
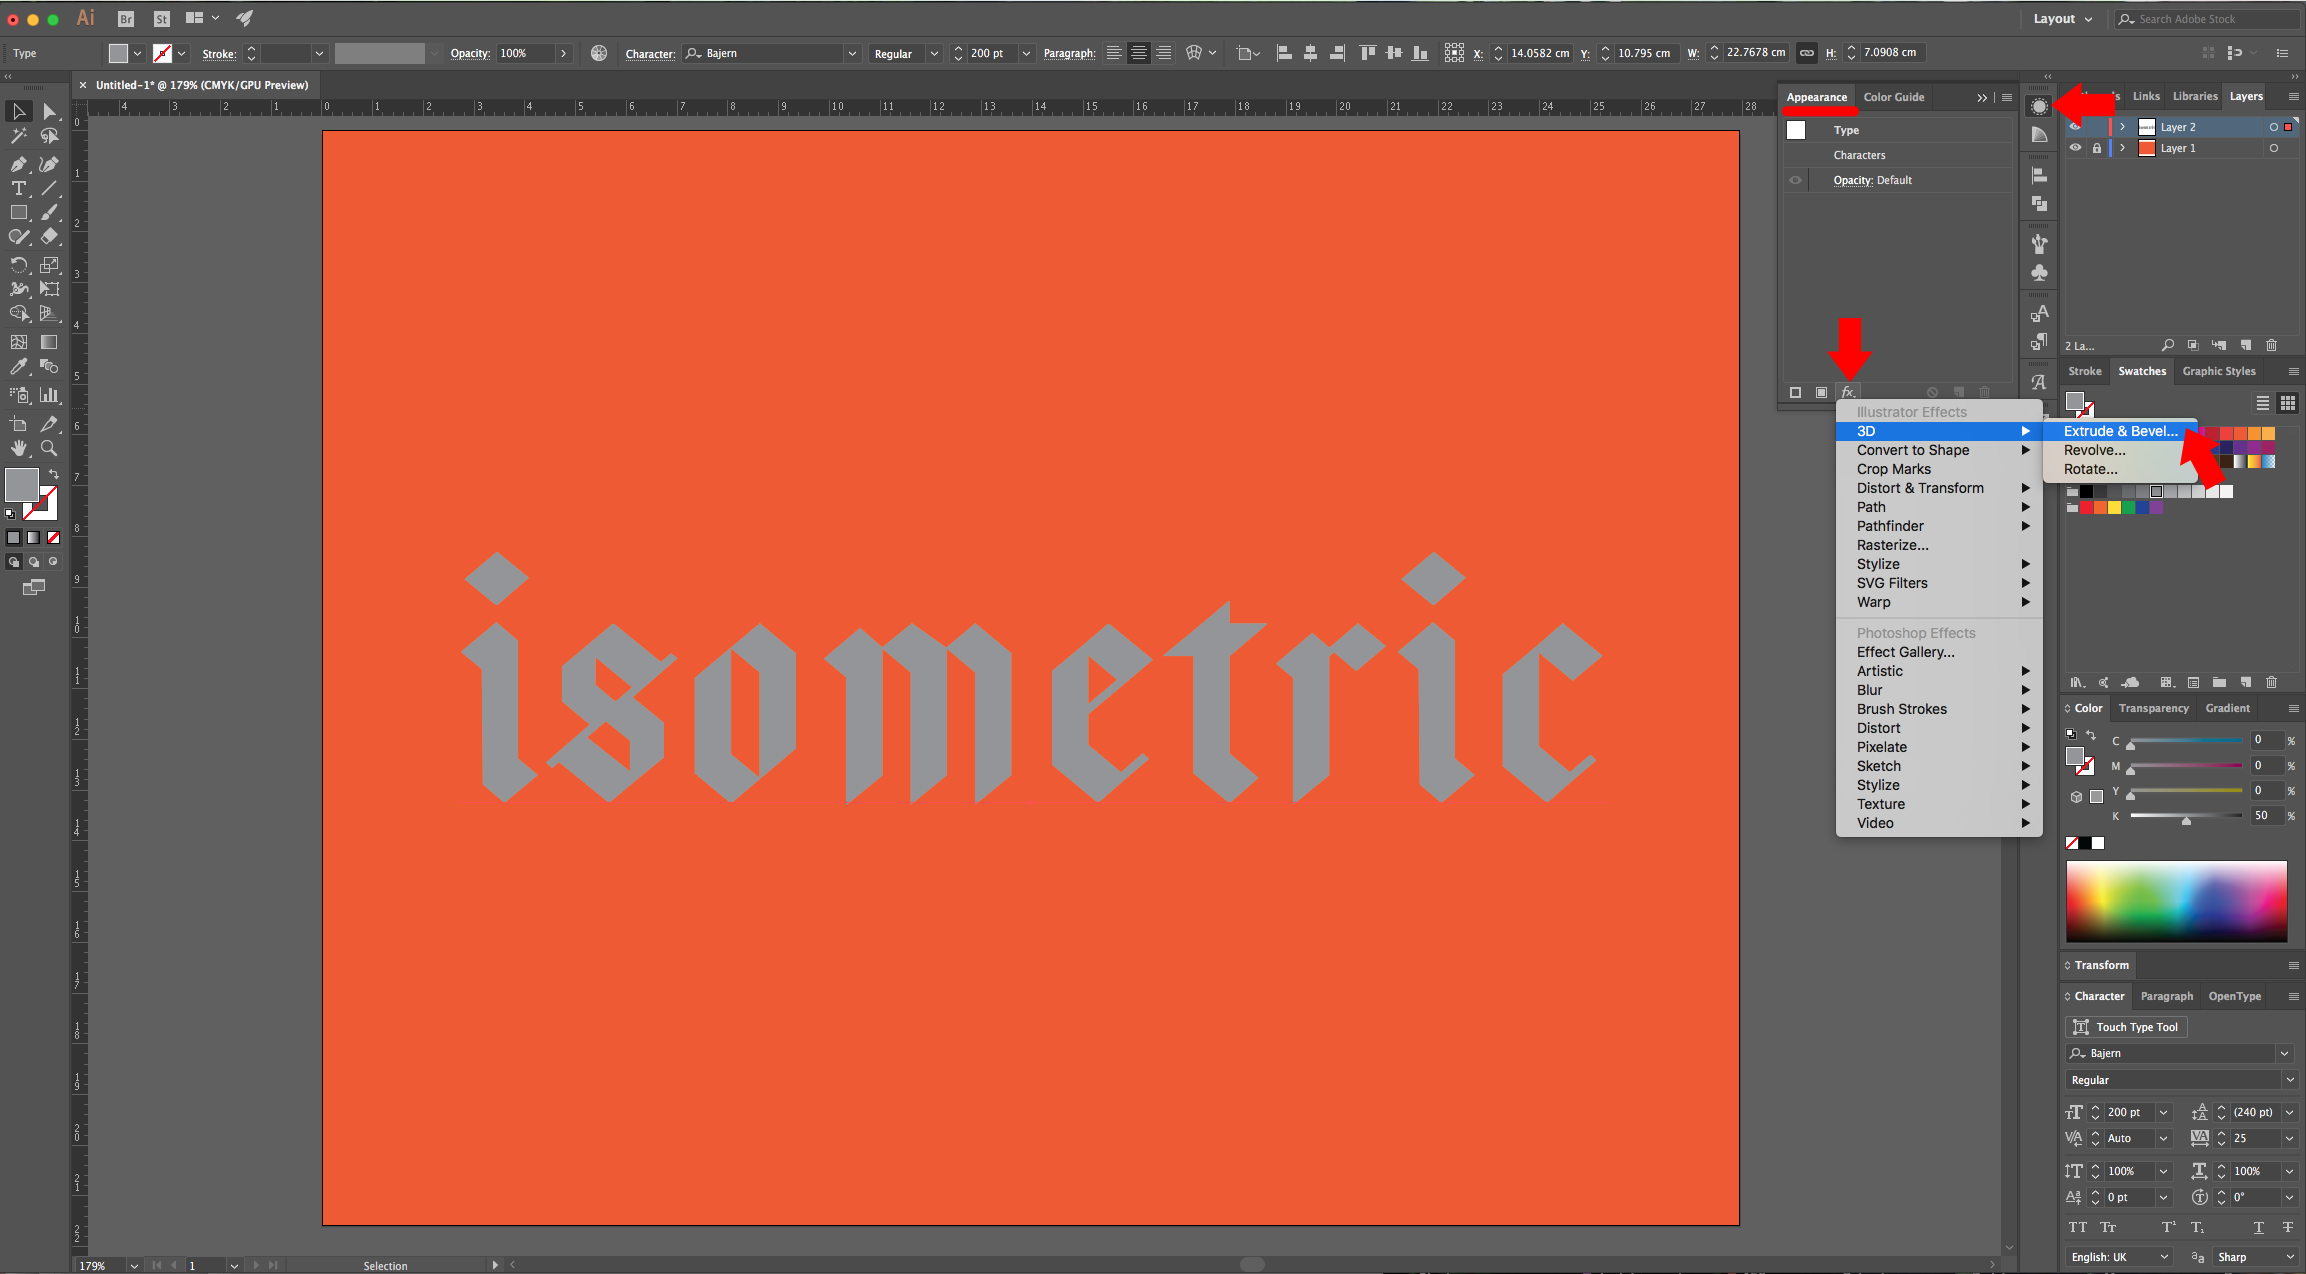
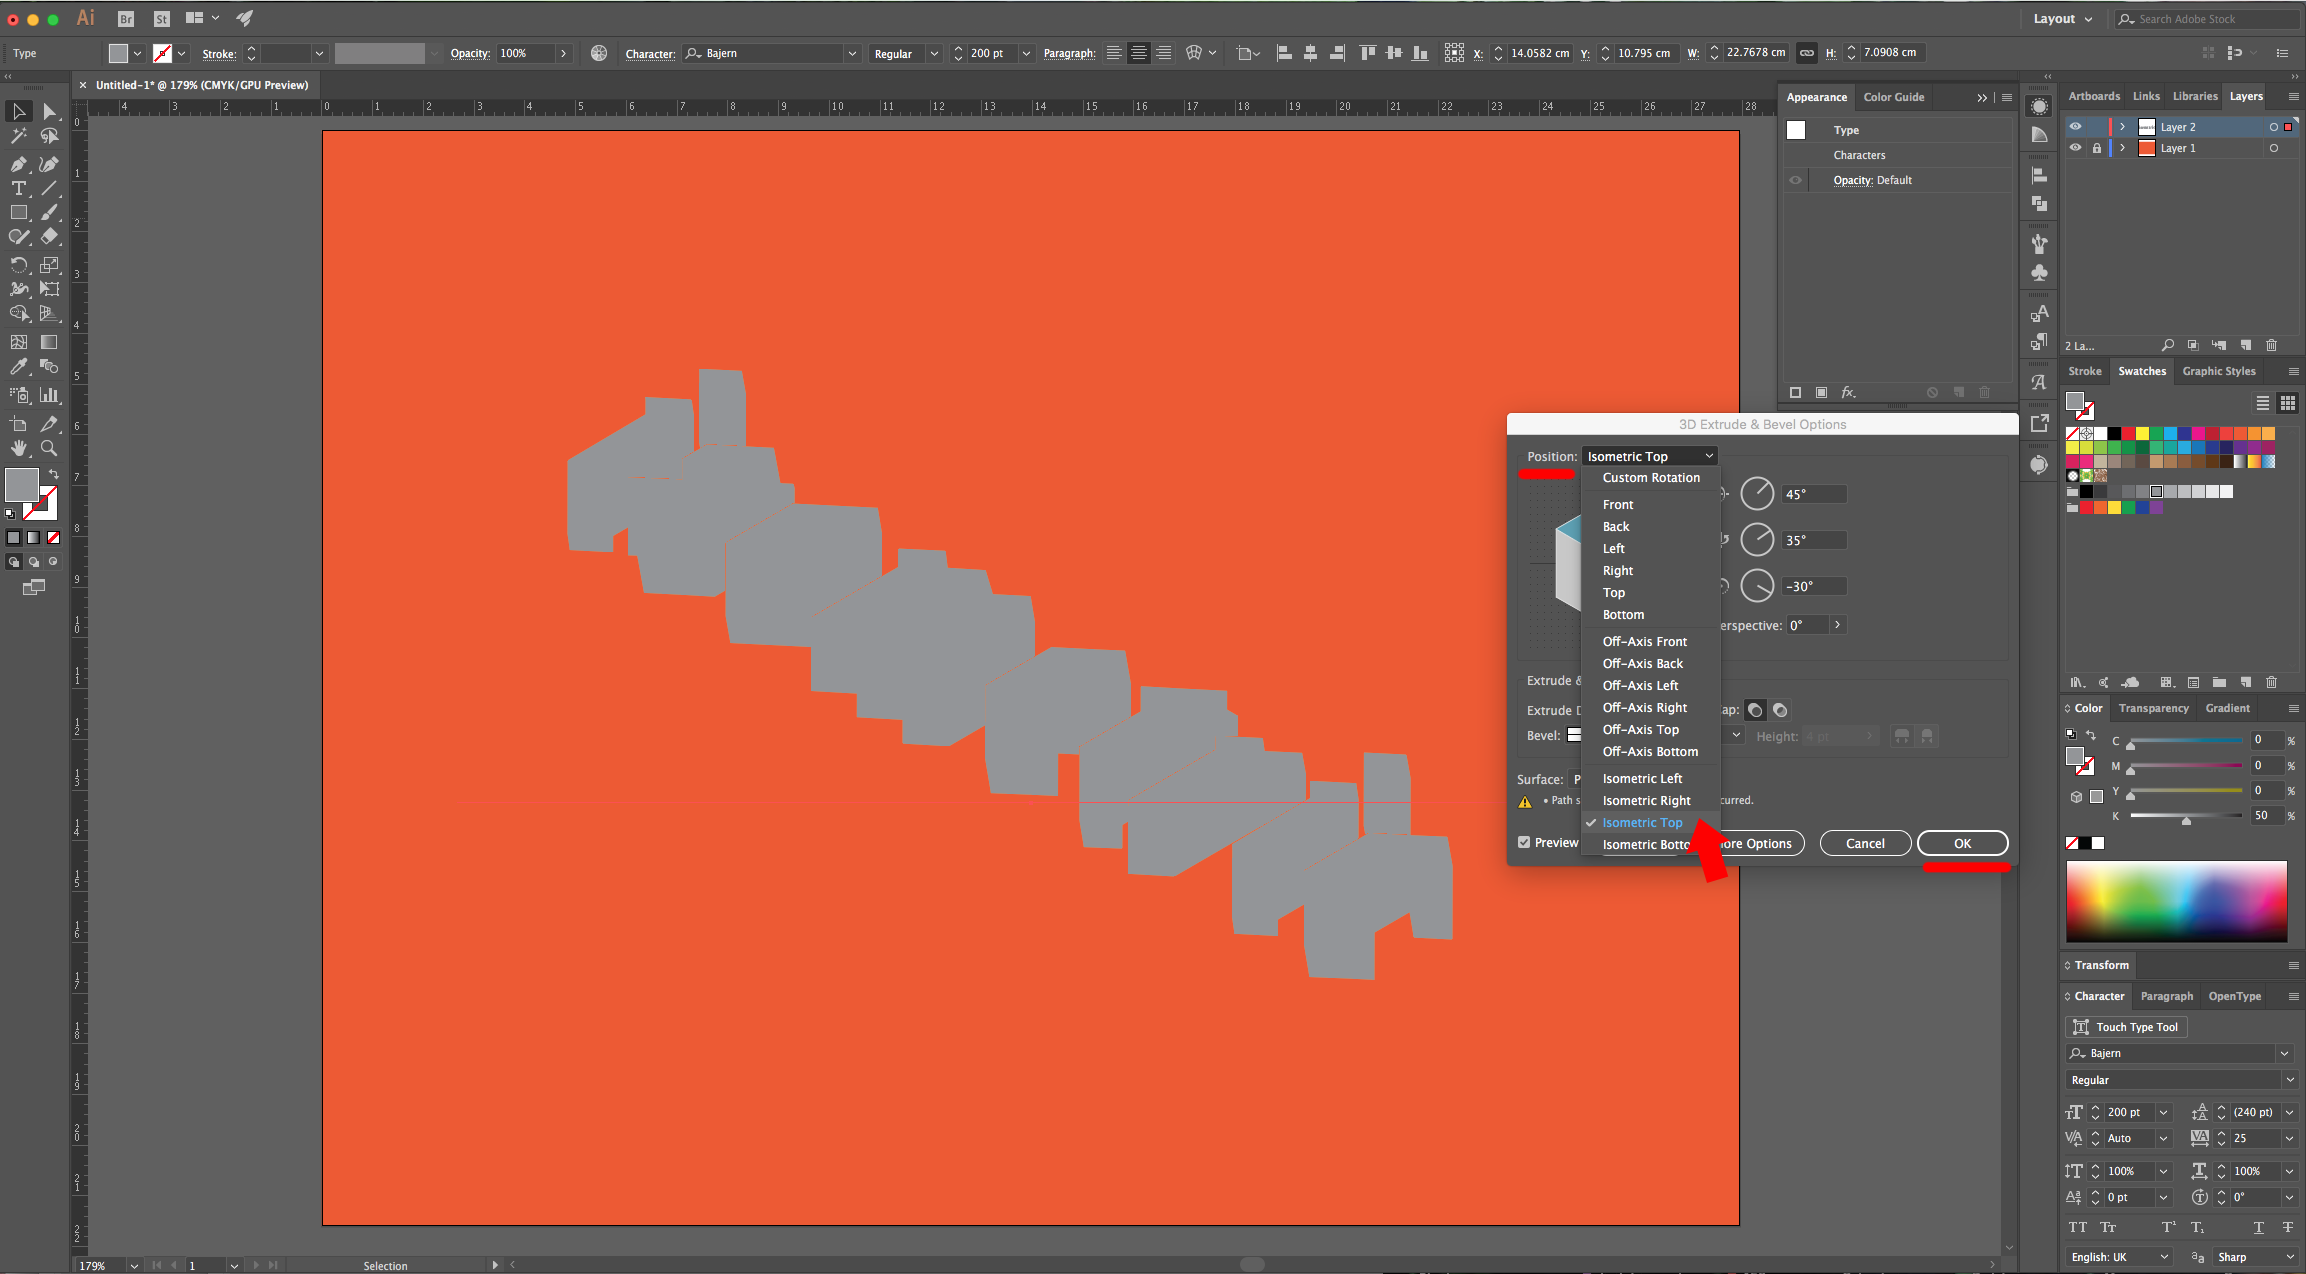
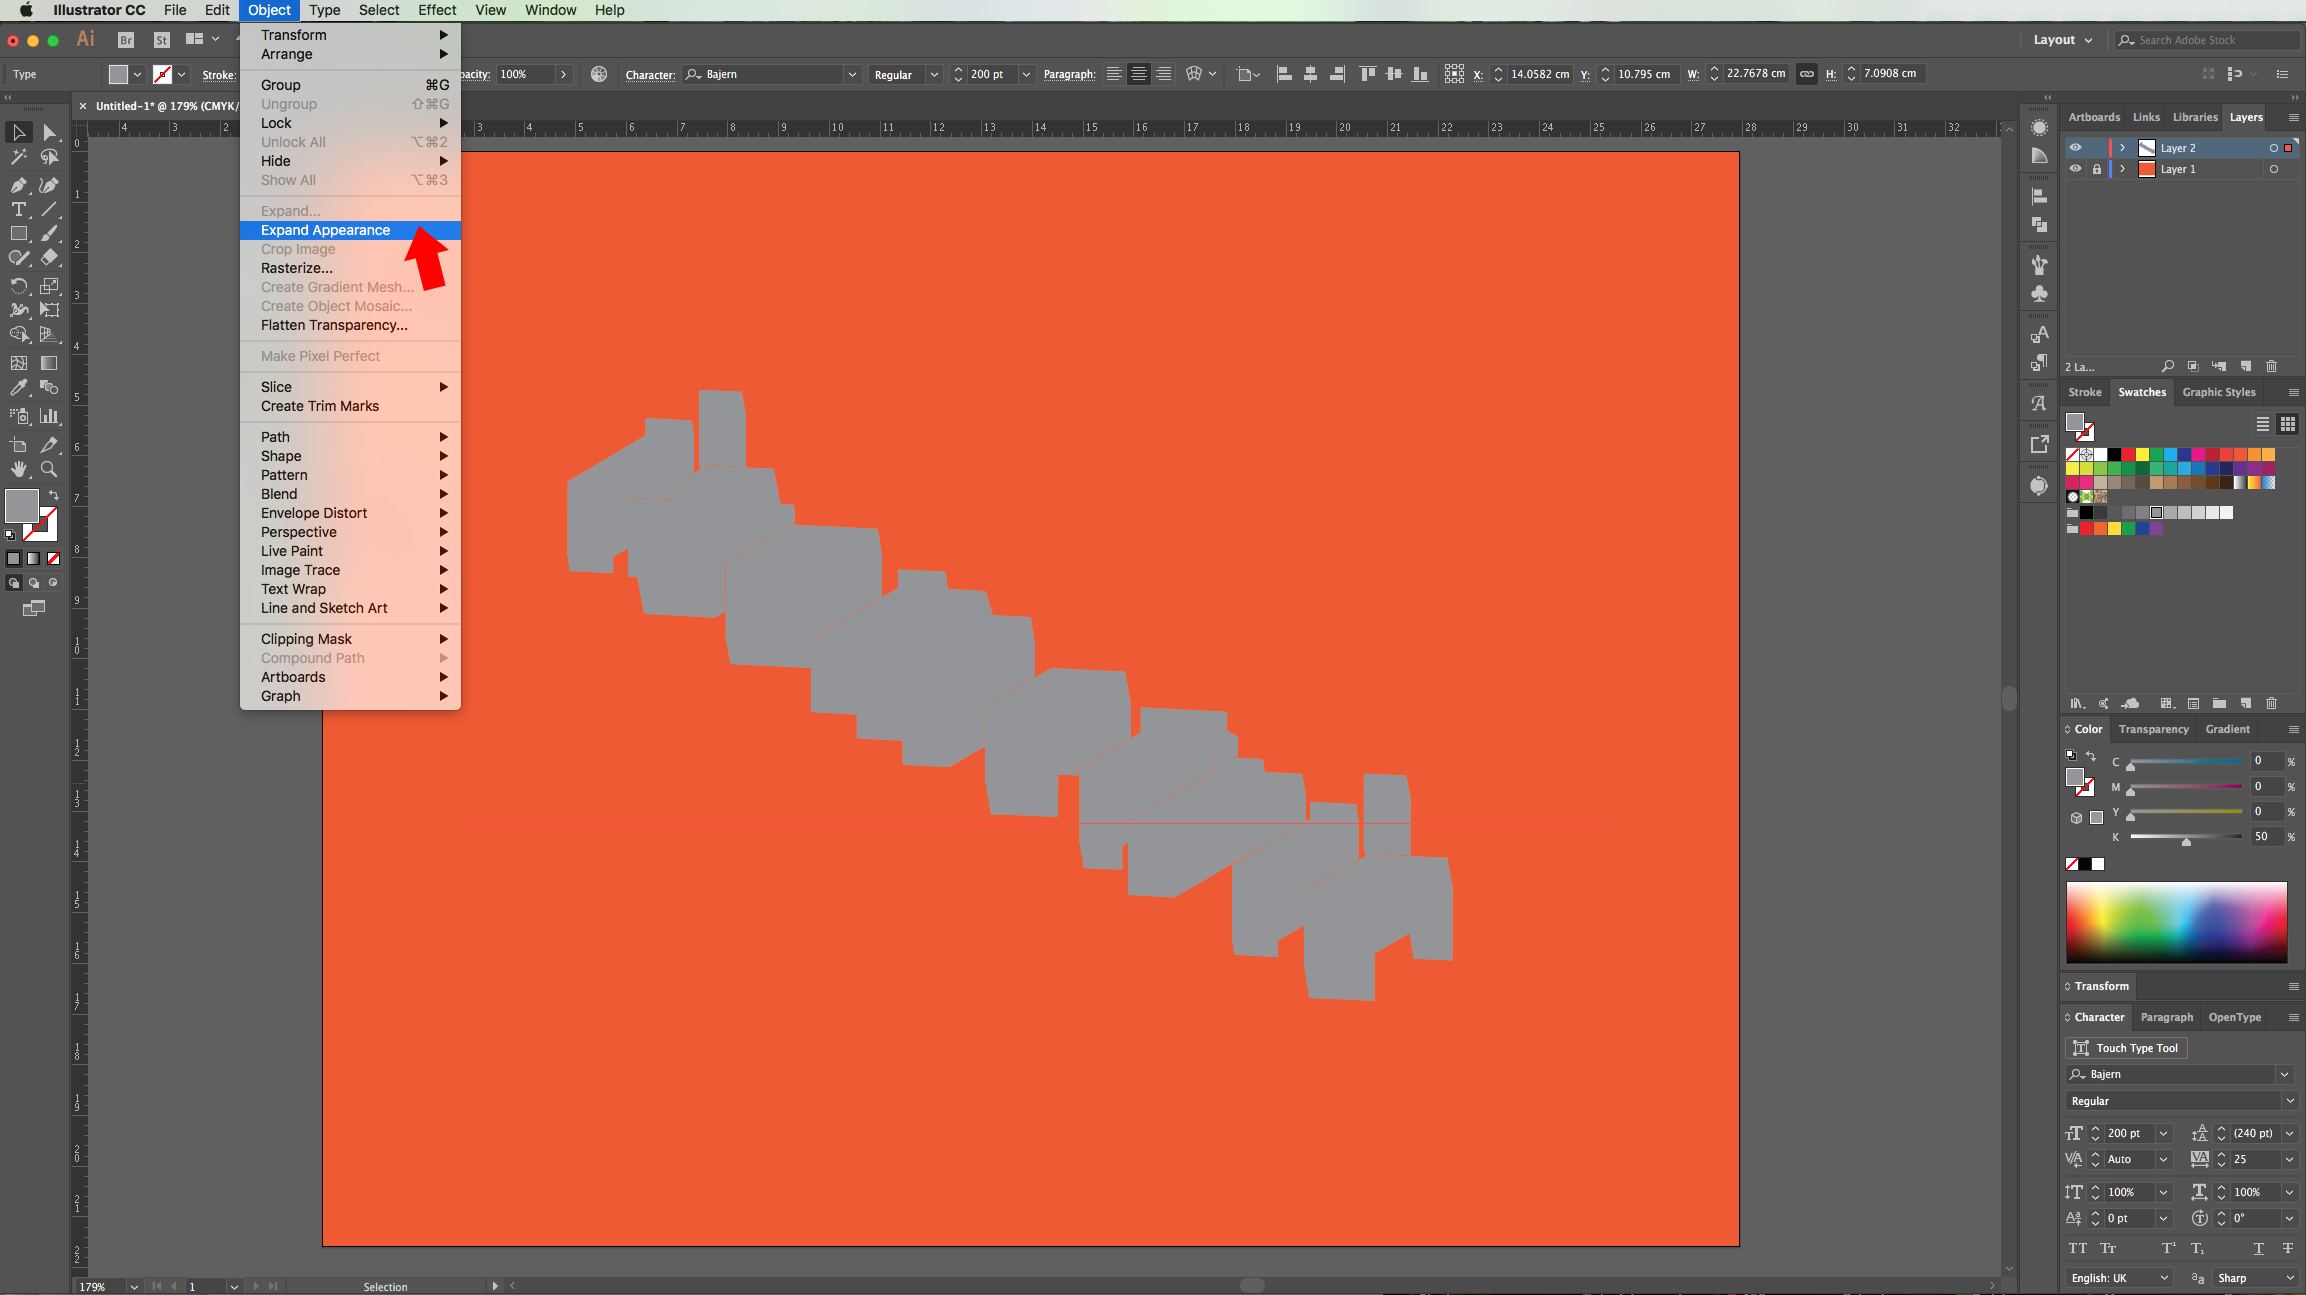
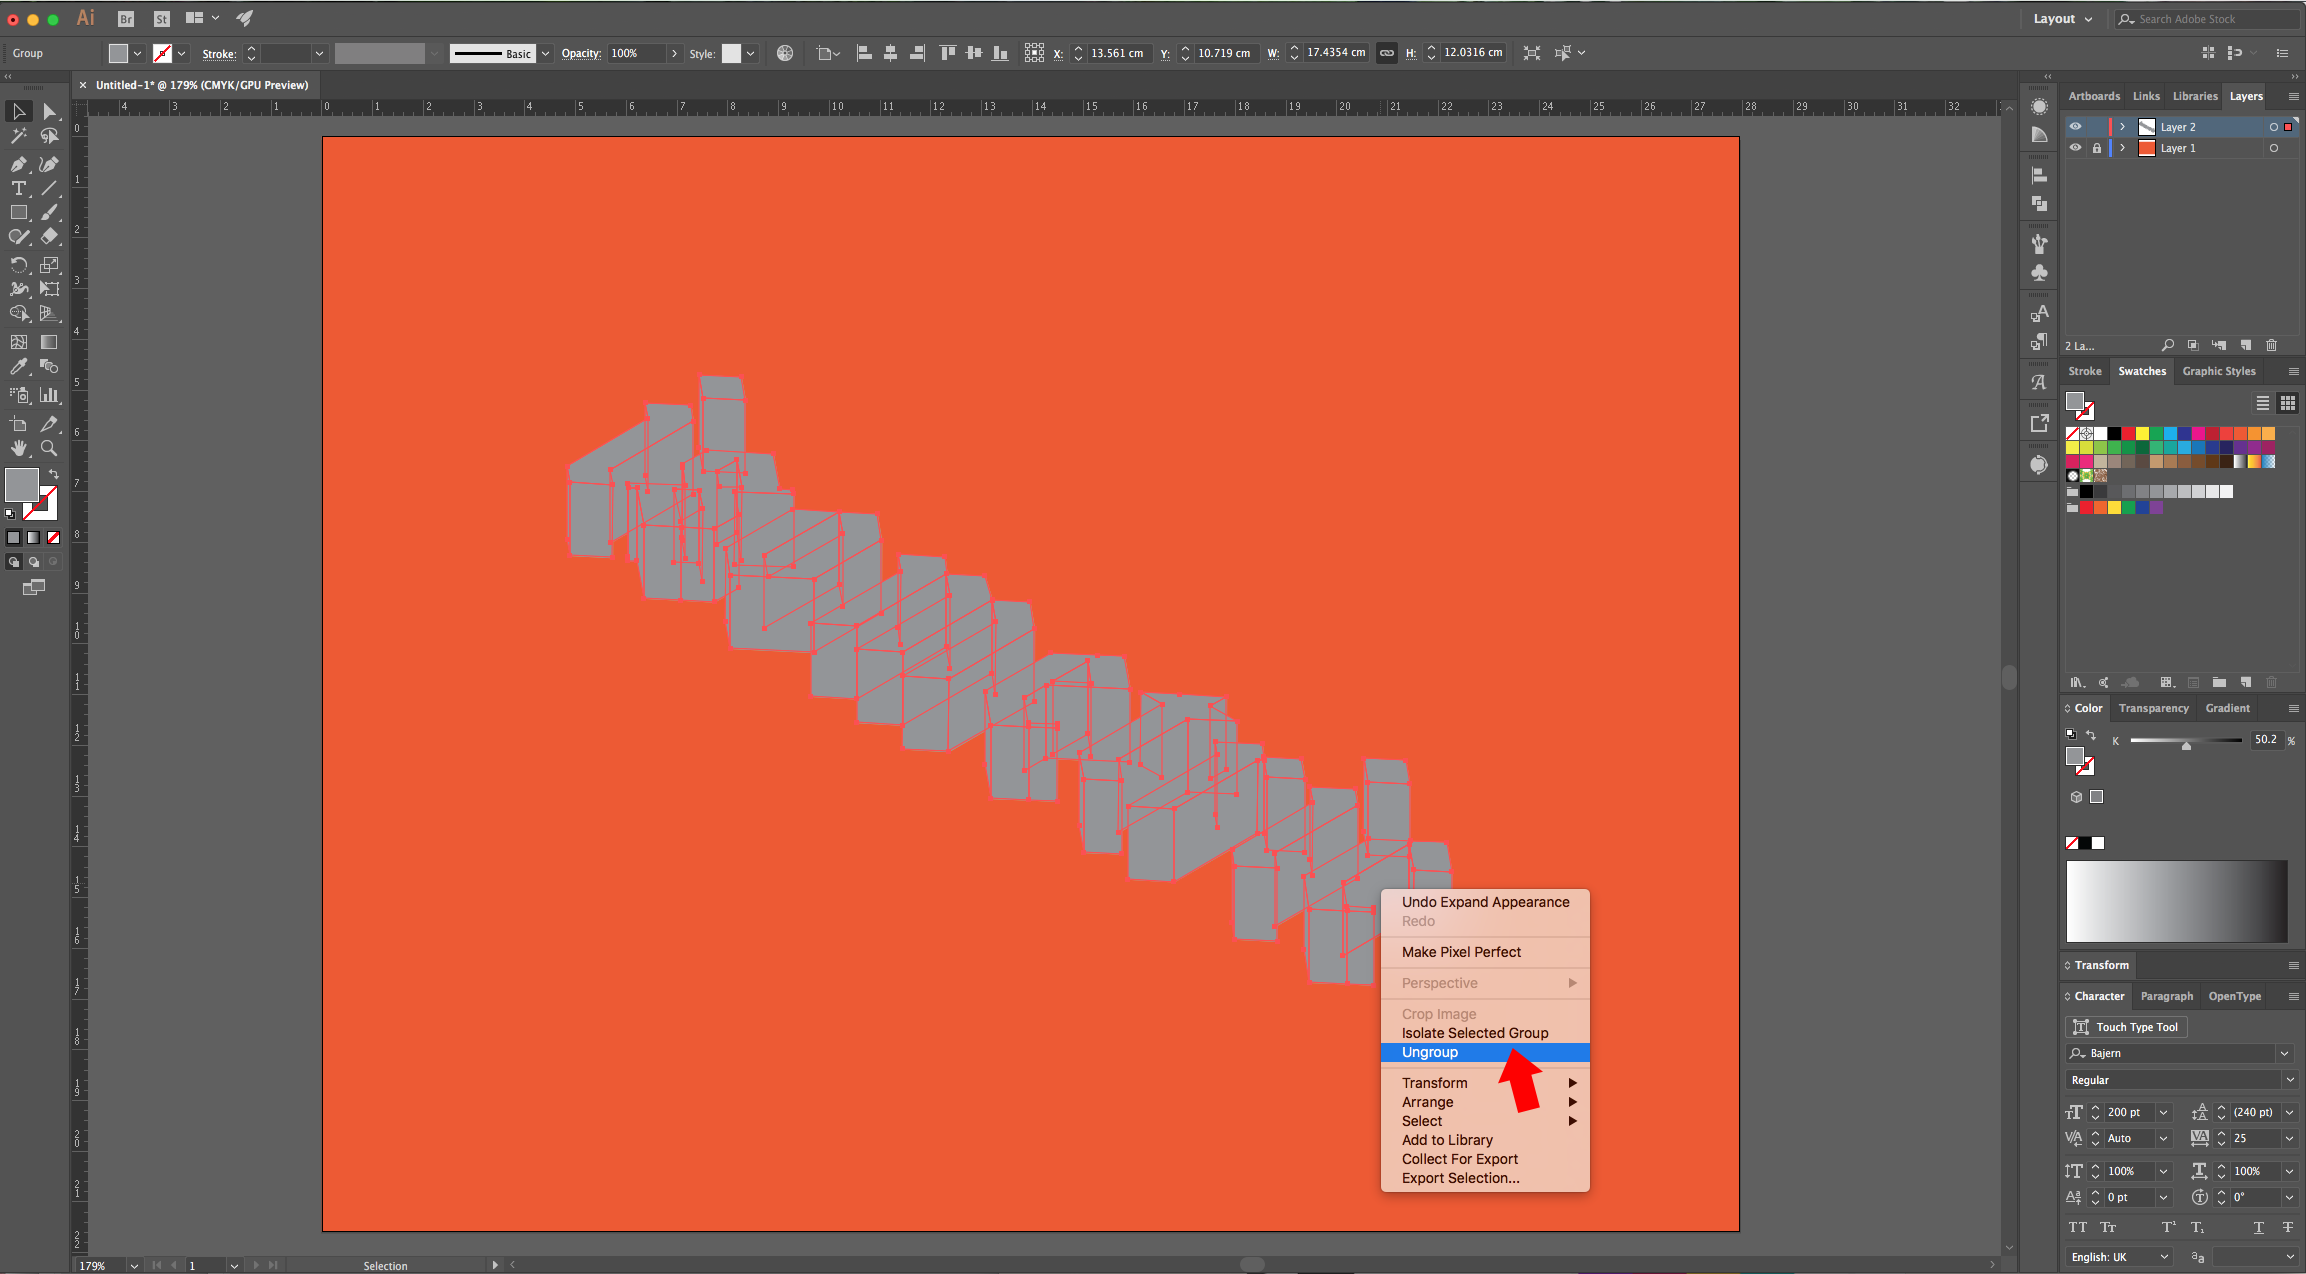
5 - Change the “Fill” color to a medium grey and in the “Appearance Panel” click on the “Add New Effect” button at the bottom and choose 3D > Extrude & Bevel. Choose “Isometric Top” in the “Position” drop-down menu and click “OK”. Go to Object > Expand Appearance, then, right-click on top of your text and choose “Ungroup” twice.
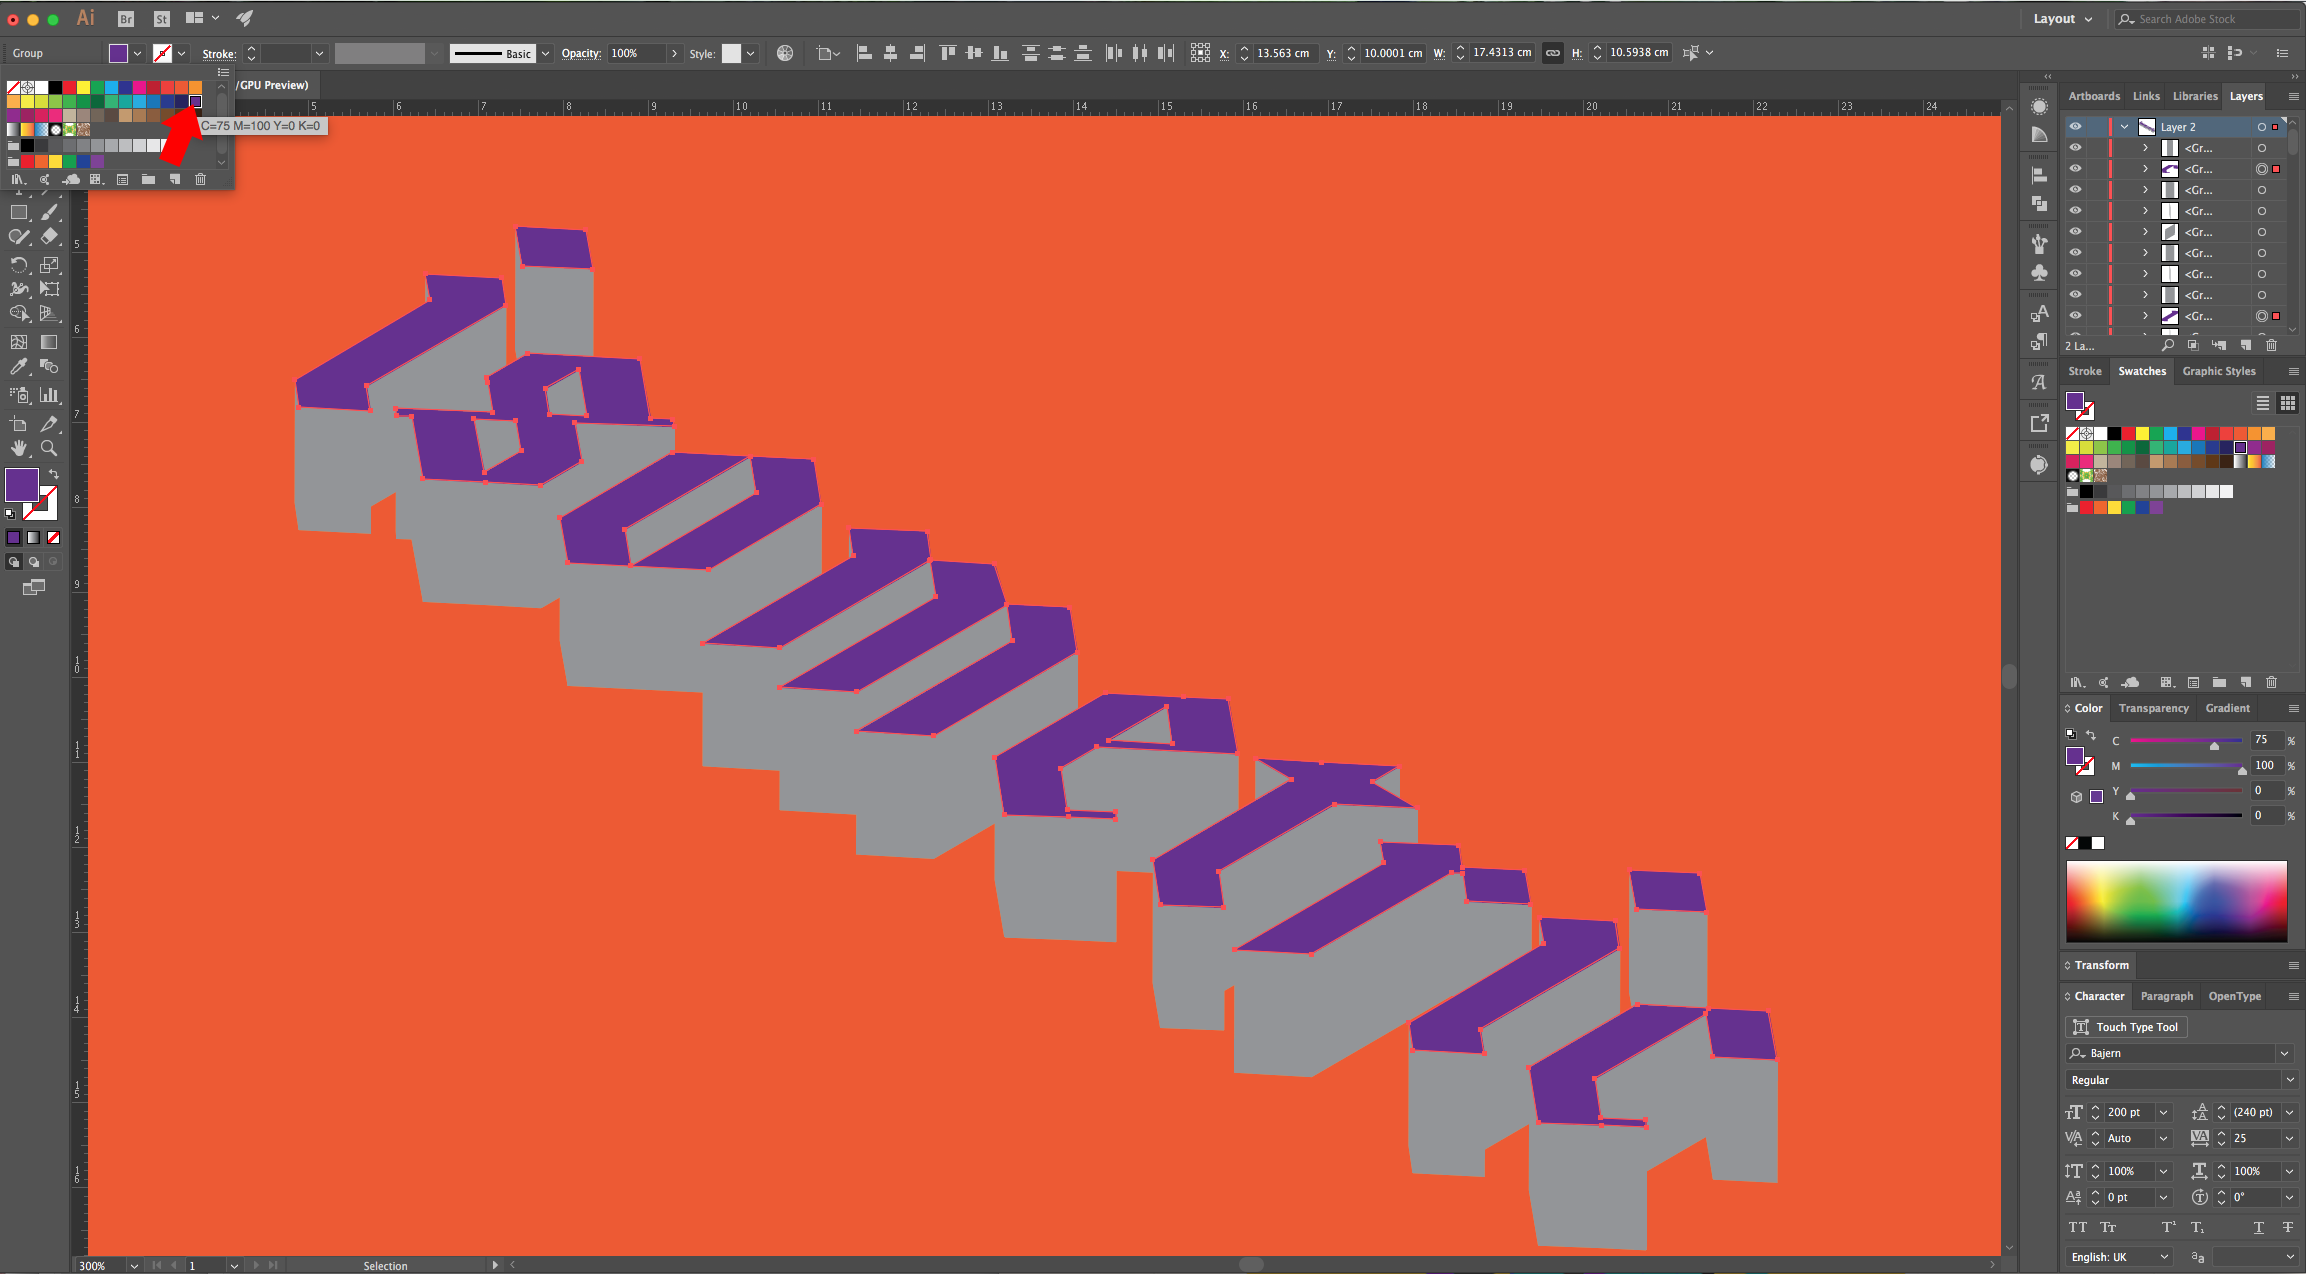
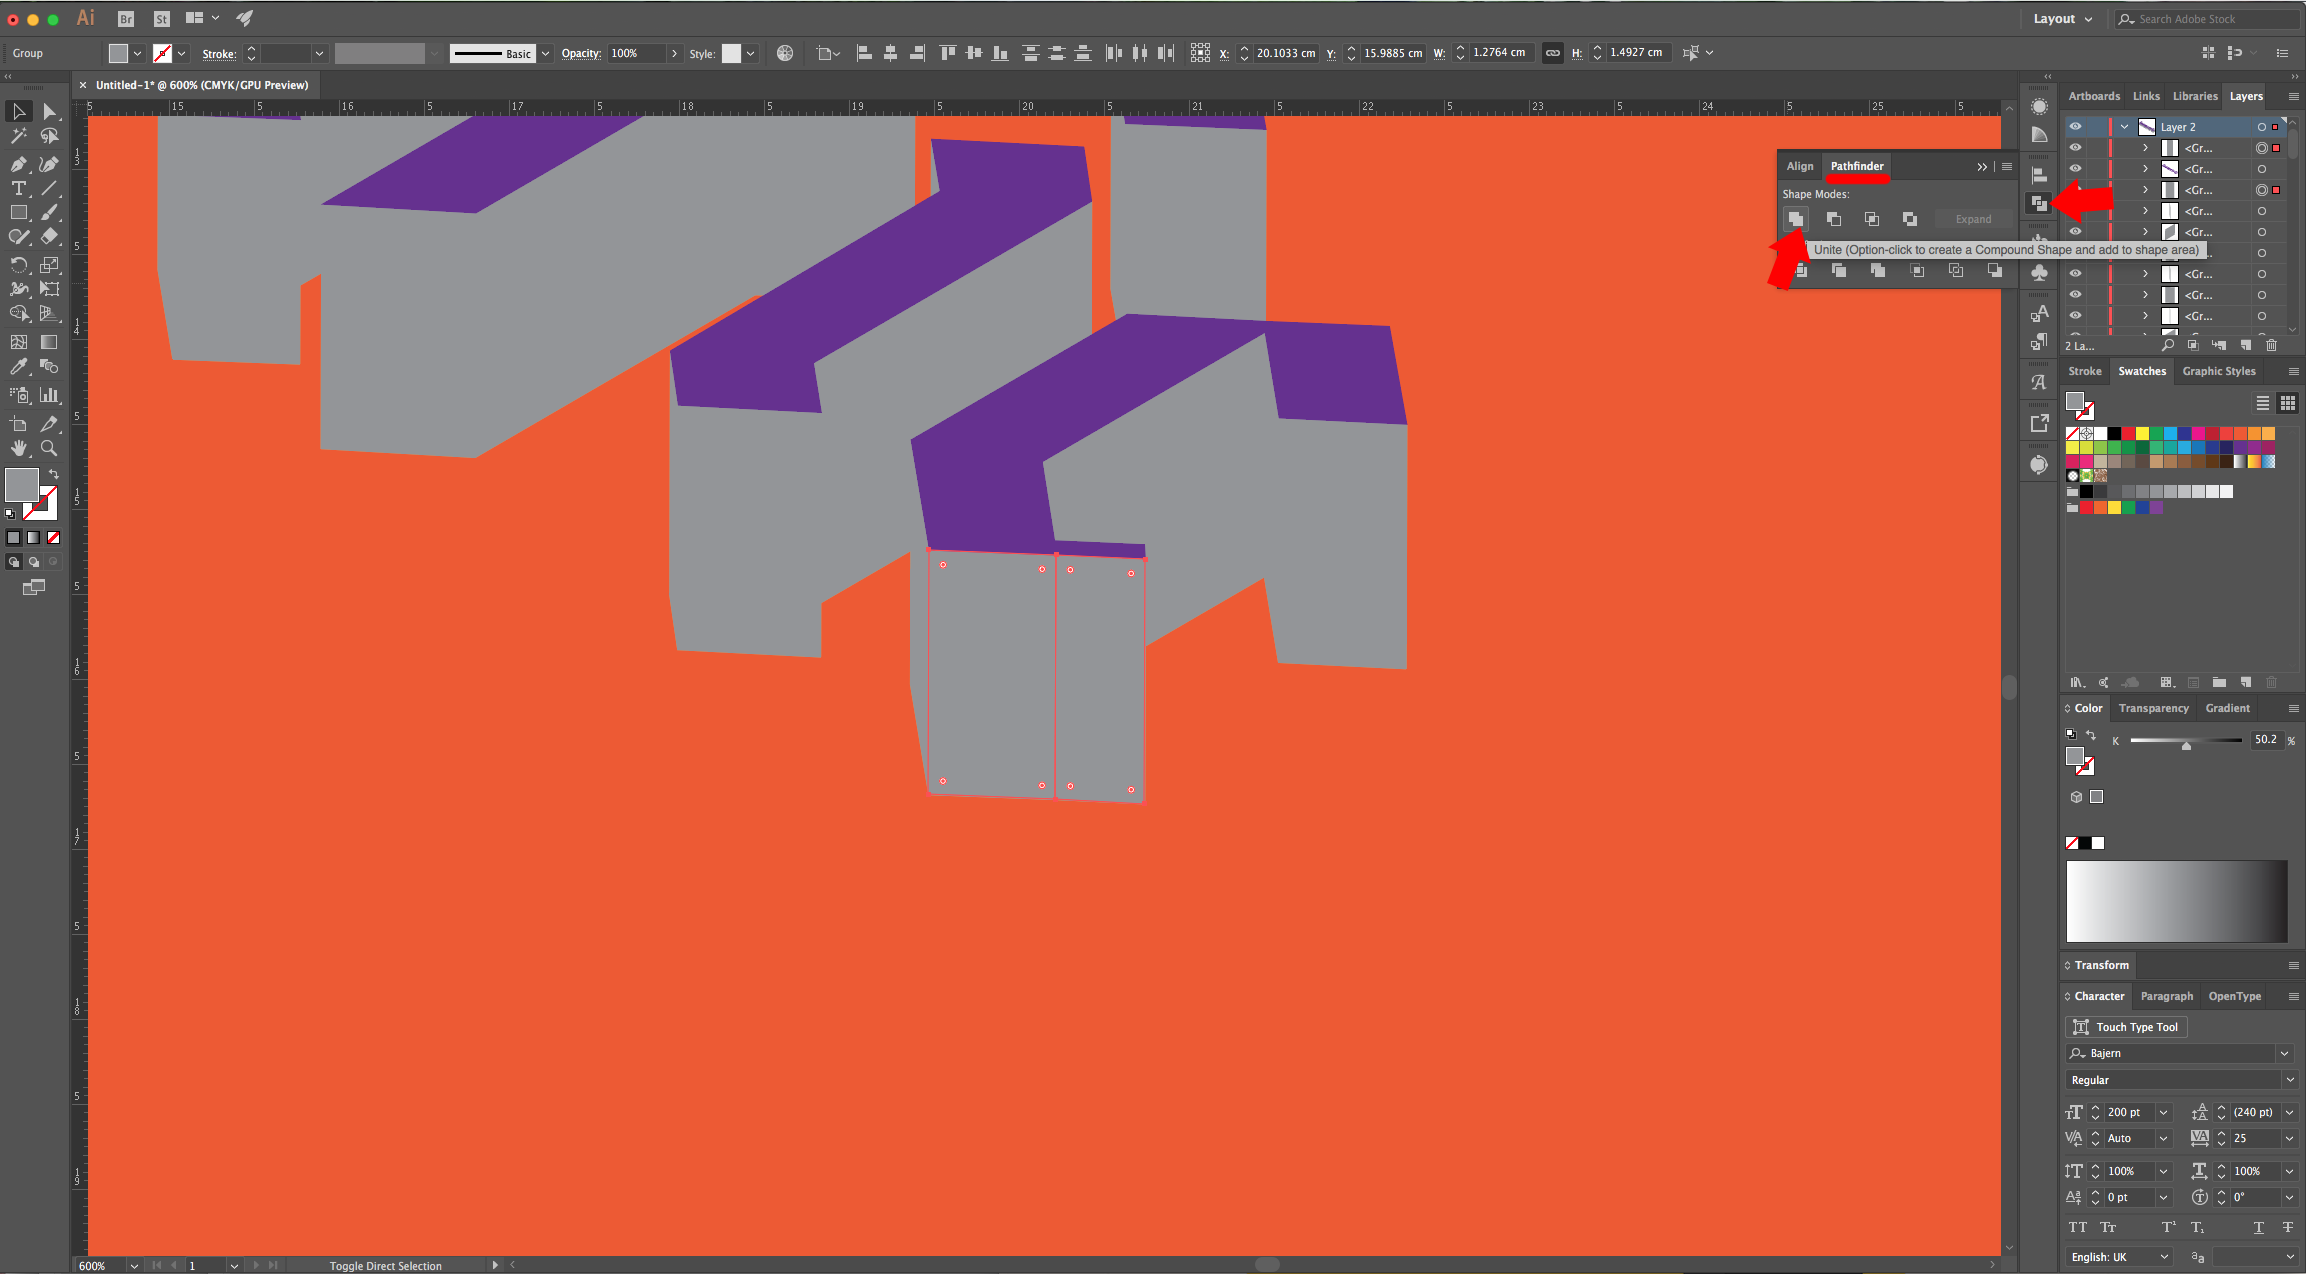
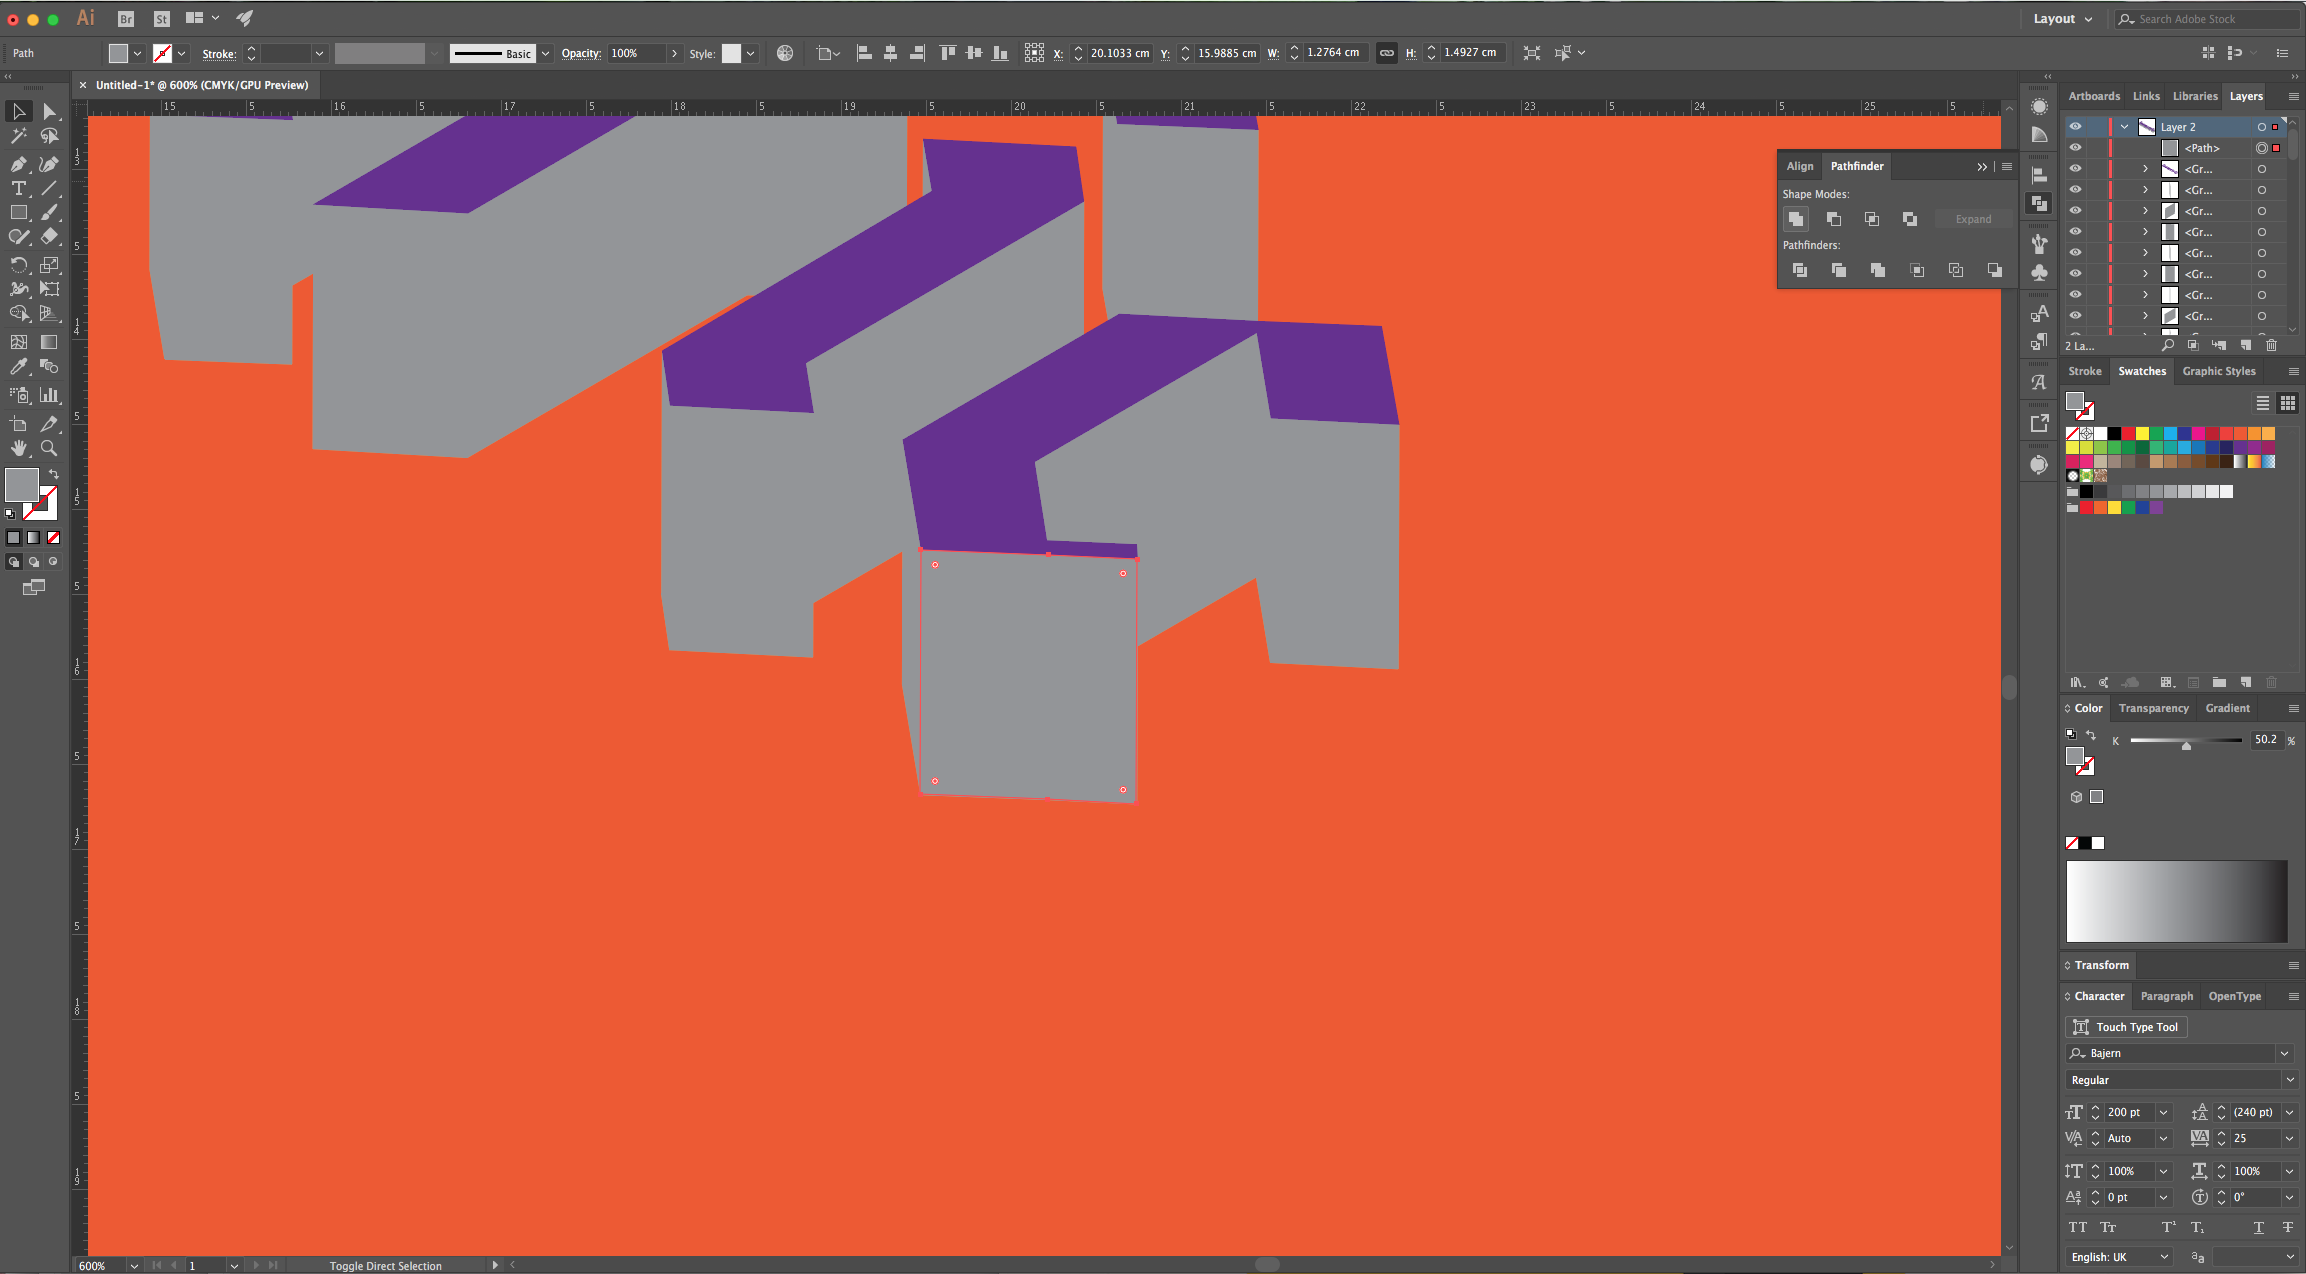
6 - Select all the “Top” portions of the letters and fill them with a bright color, then, right-click on top of them and choose “Group”. In some of your letters, especially if they have rounded parts you will notice that you have multiple segments. Select all the segments that form that portion and click “Unite” in the “Pathfinder Panel”.
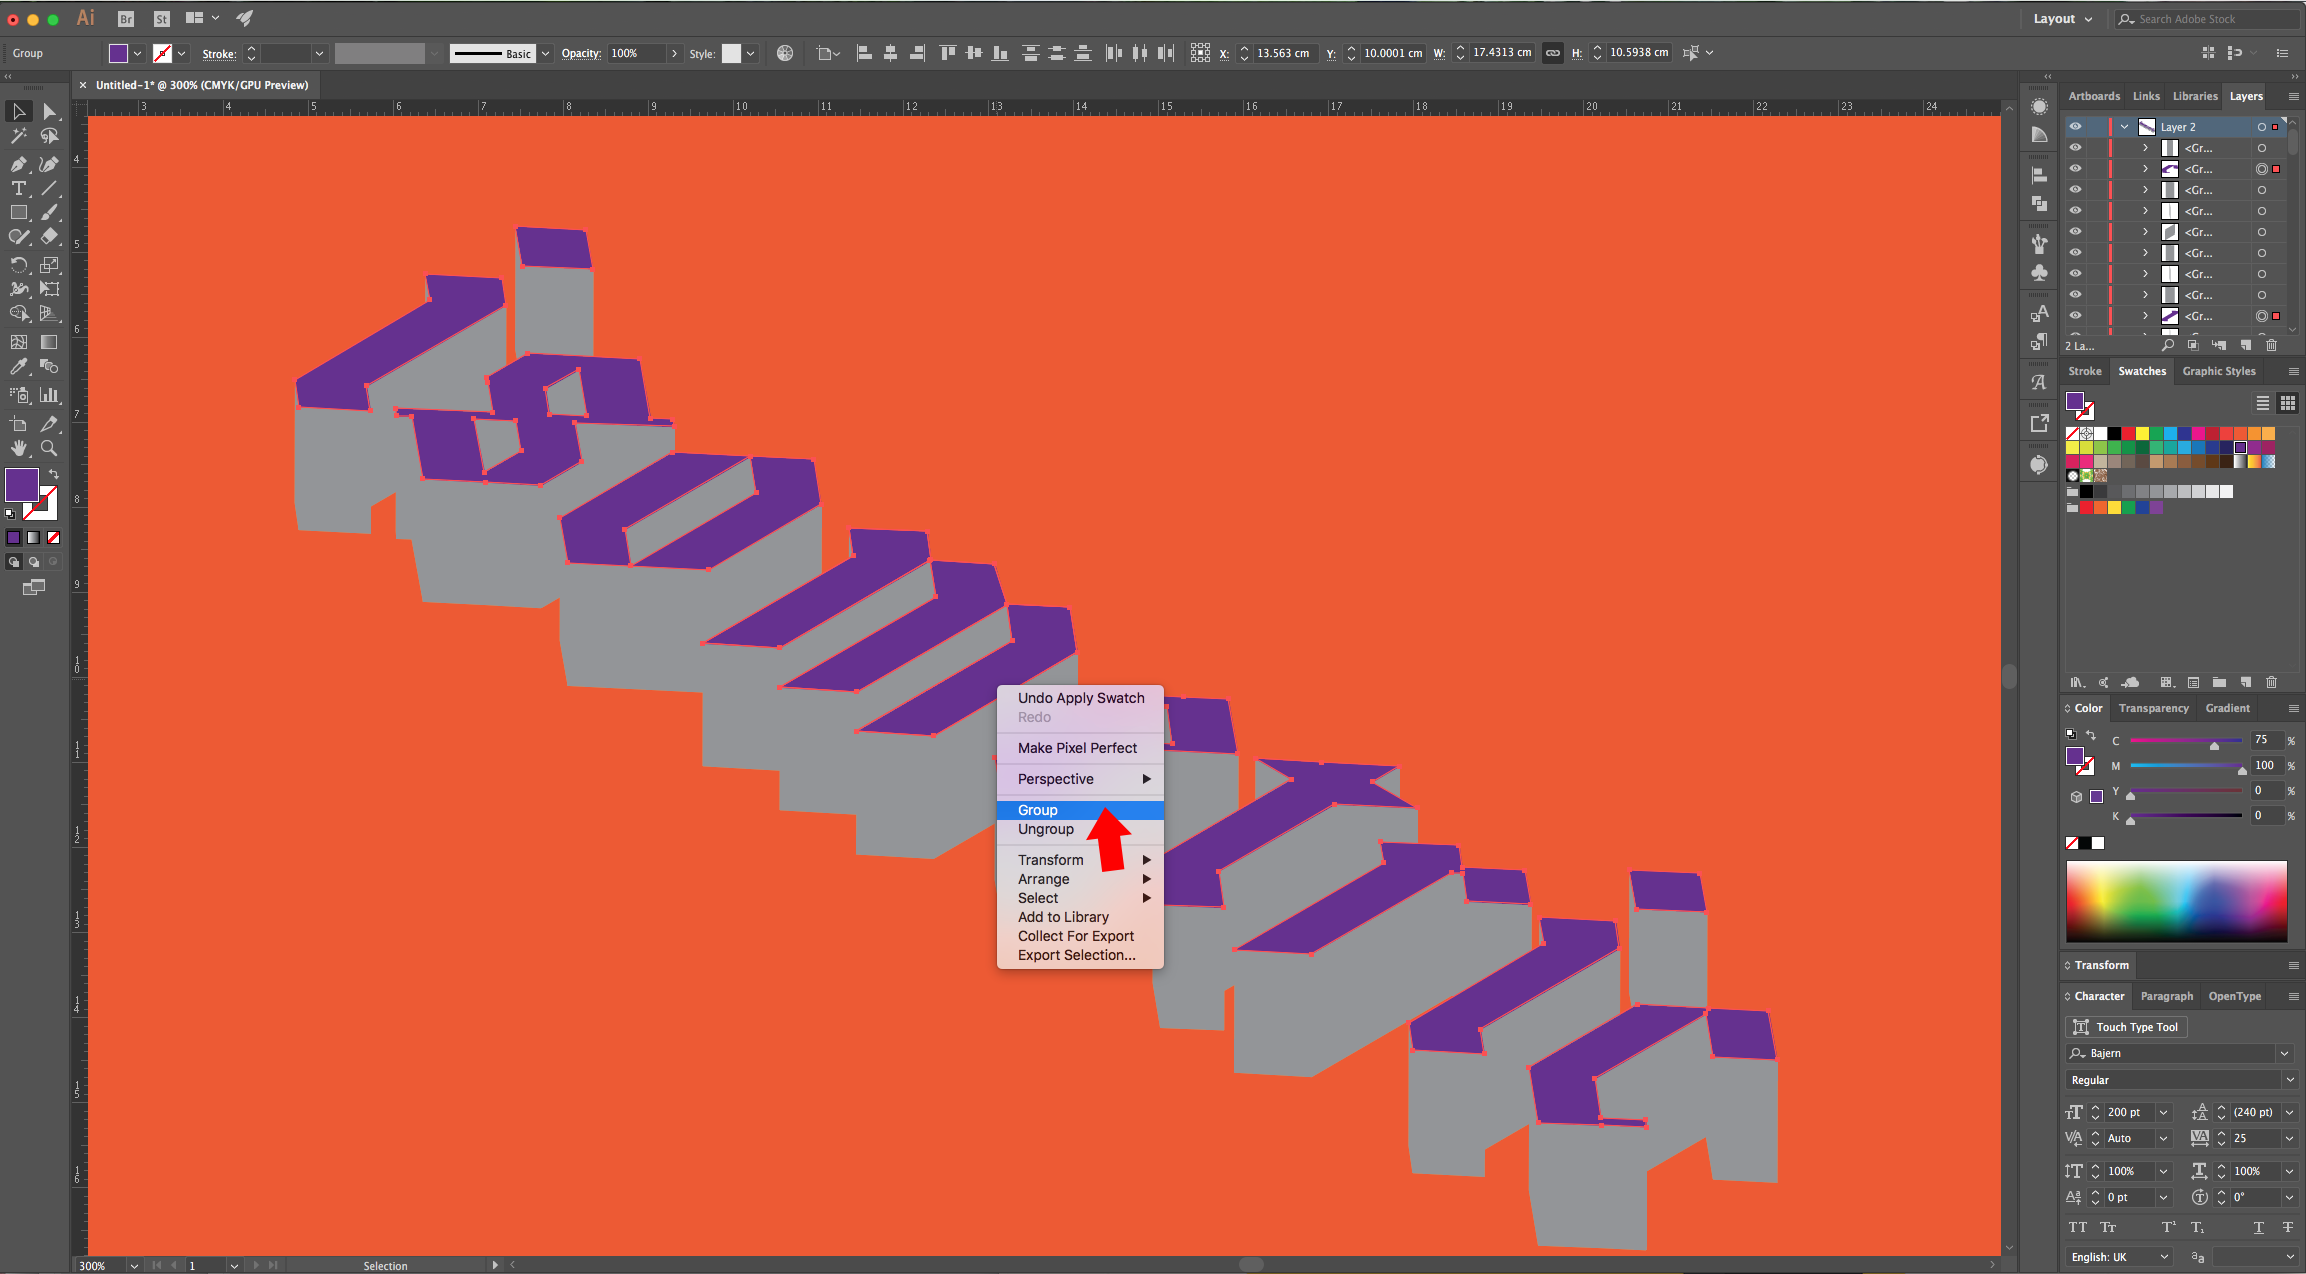
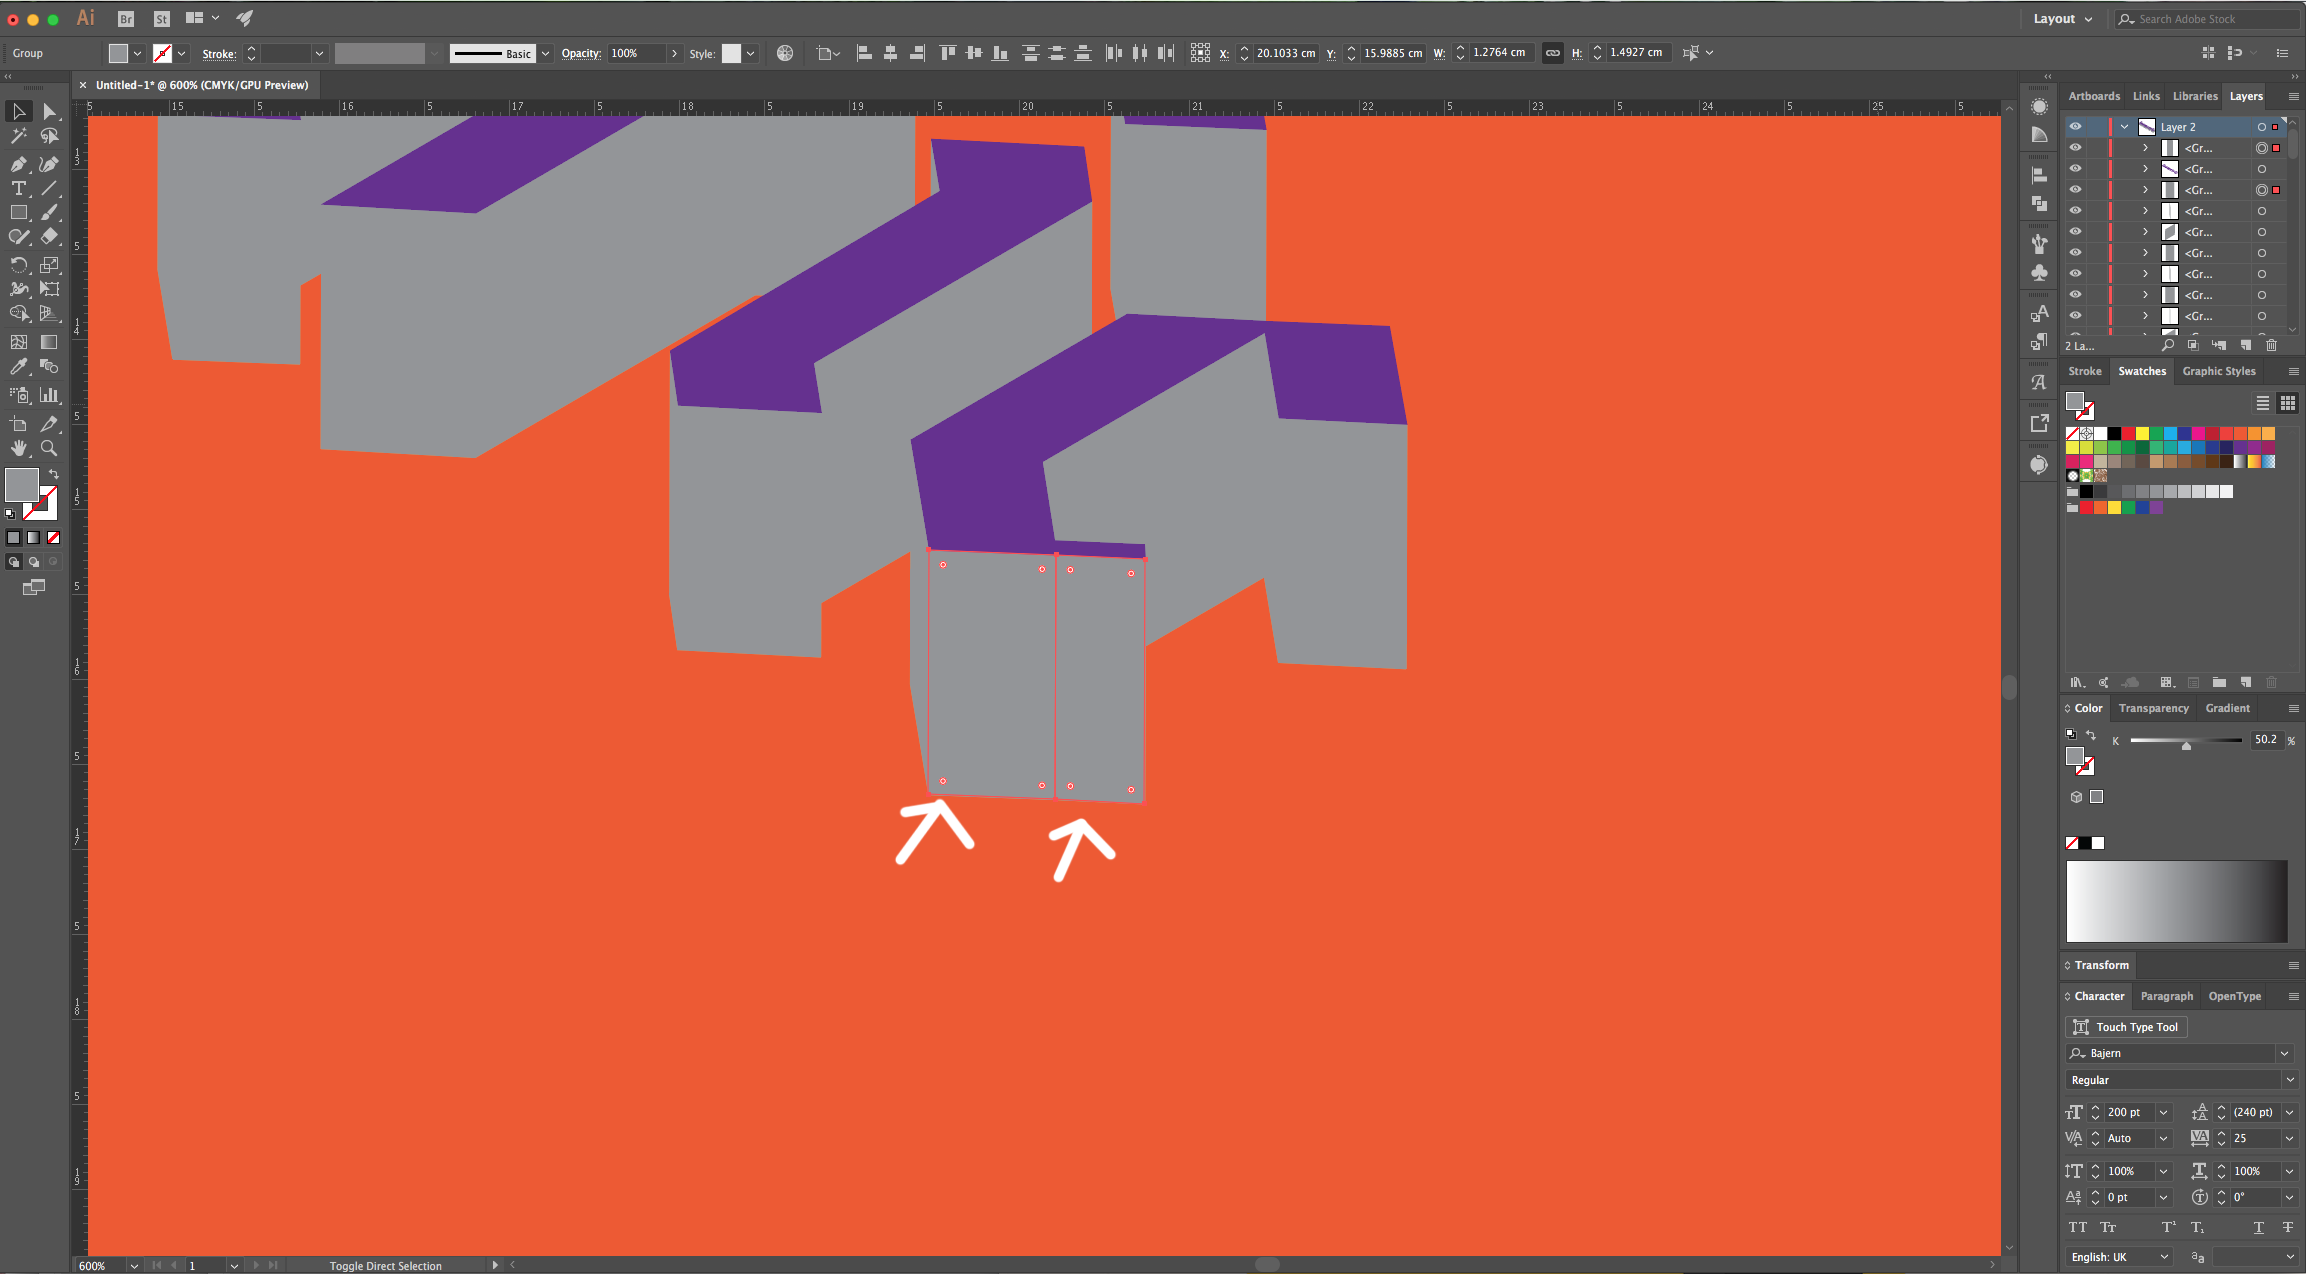
7 - Select all the sides of the letters that face the same direction and fill them with contrasting colors. This has to be done individually, otherwise the stacking order of the shapes is affected.
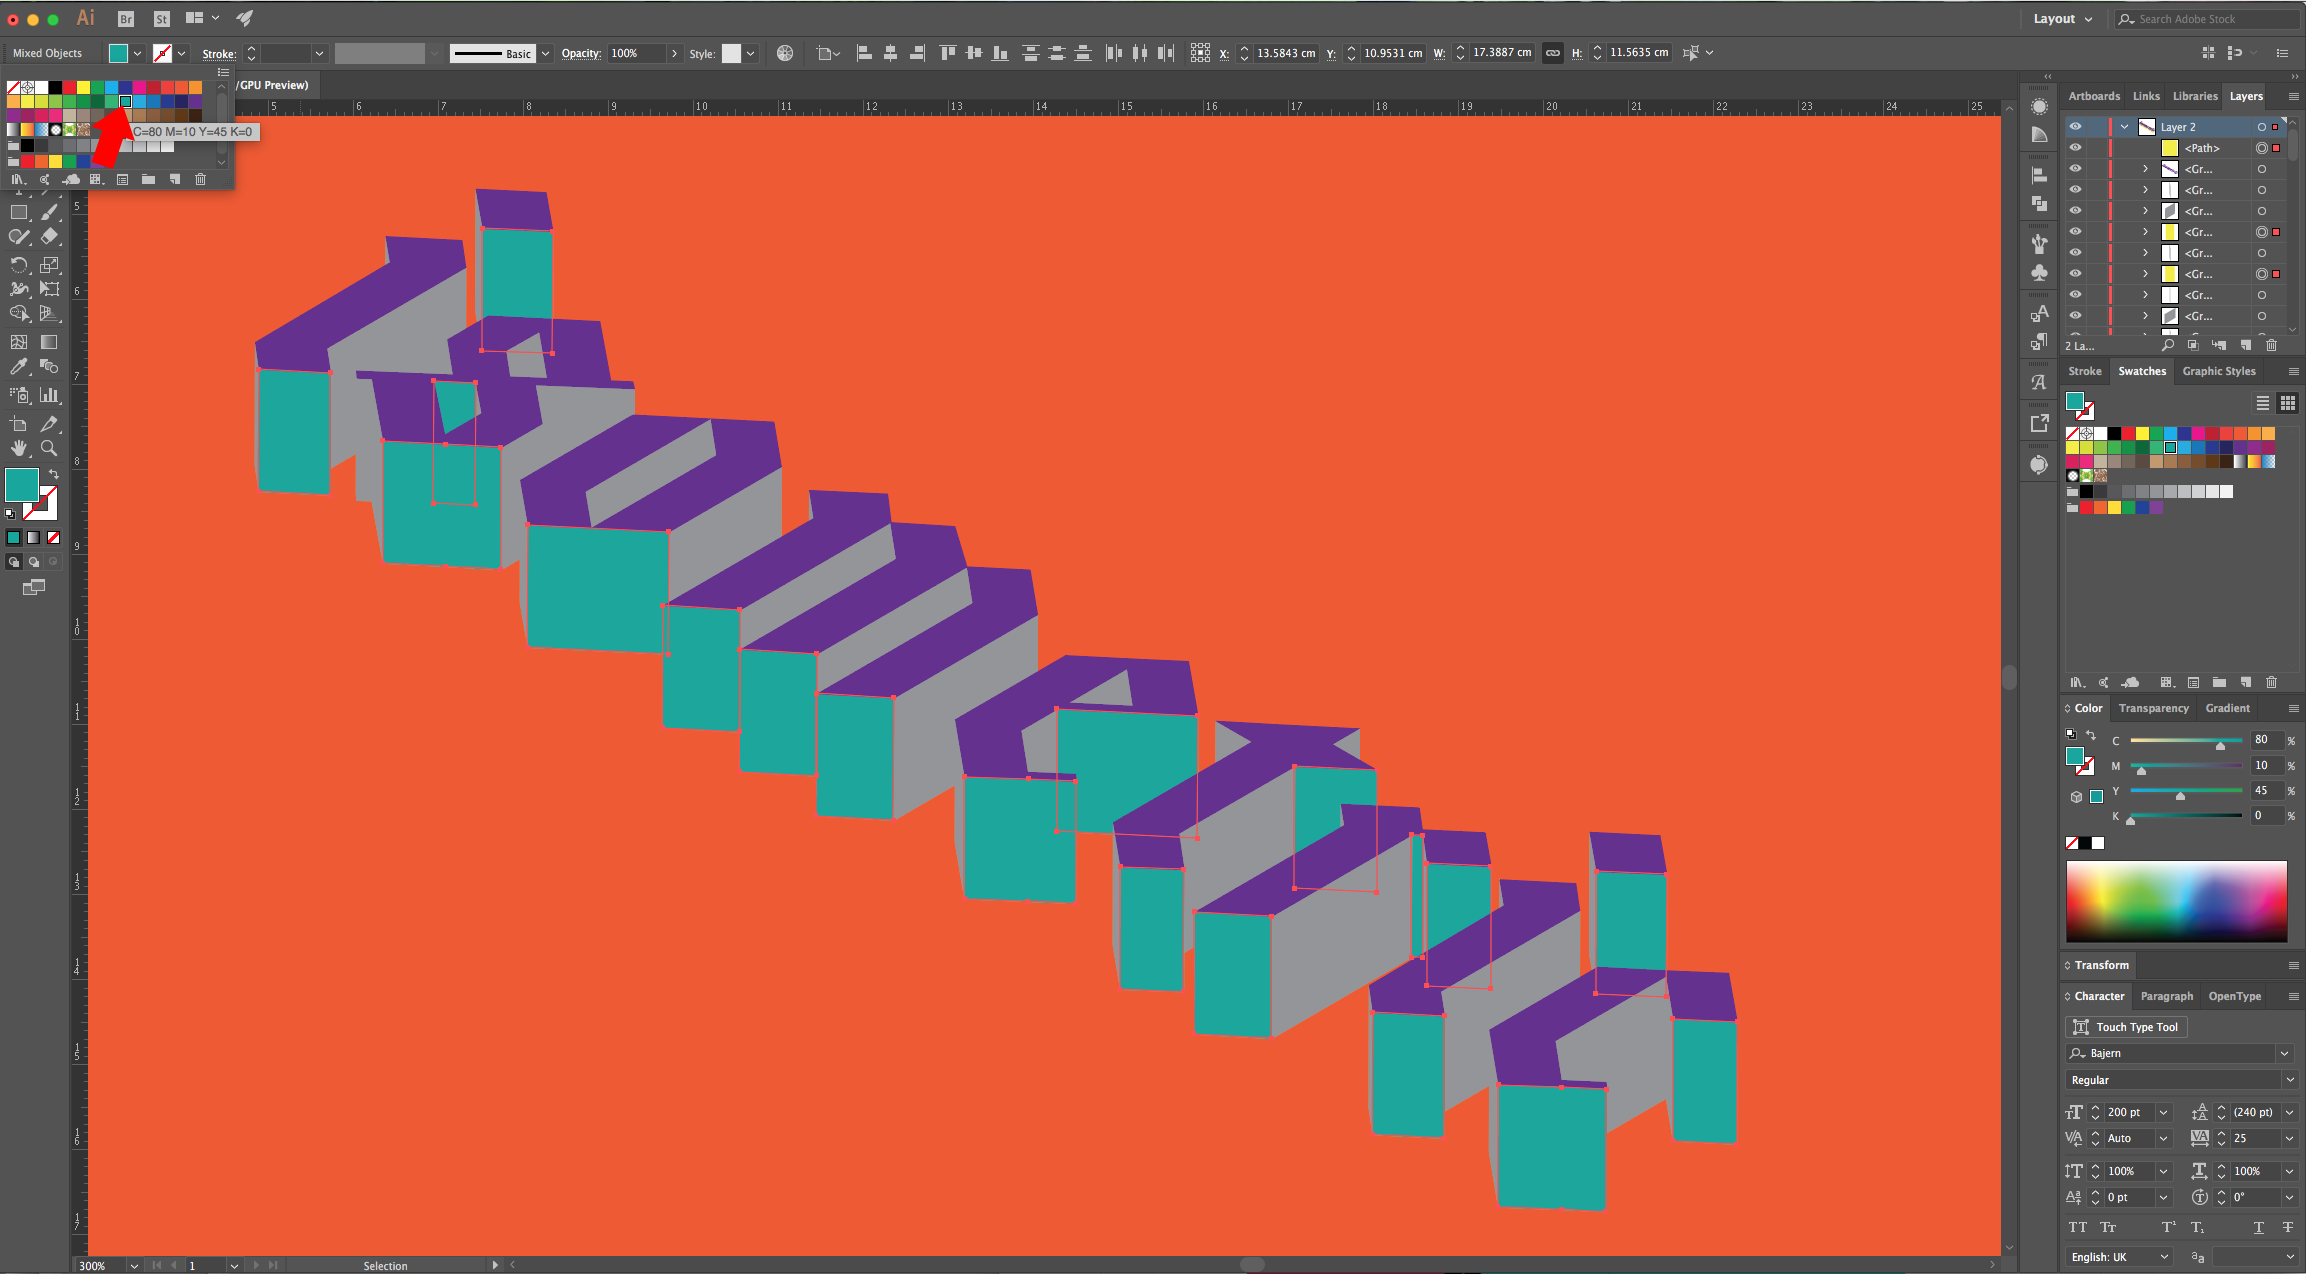
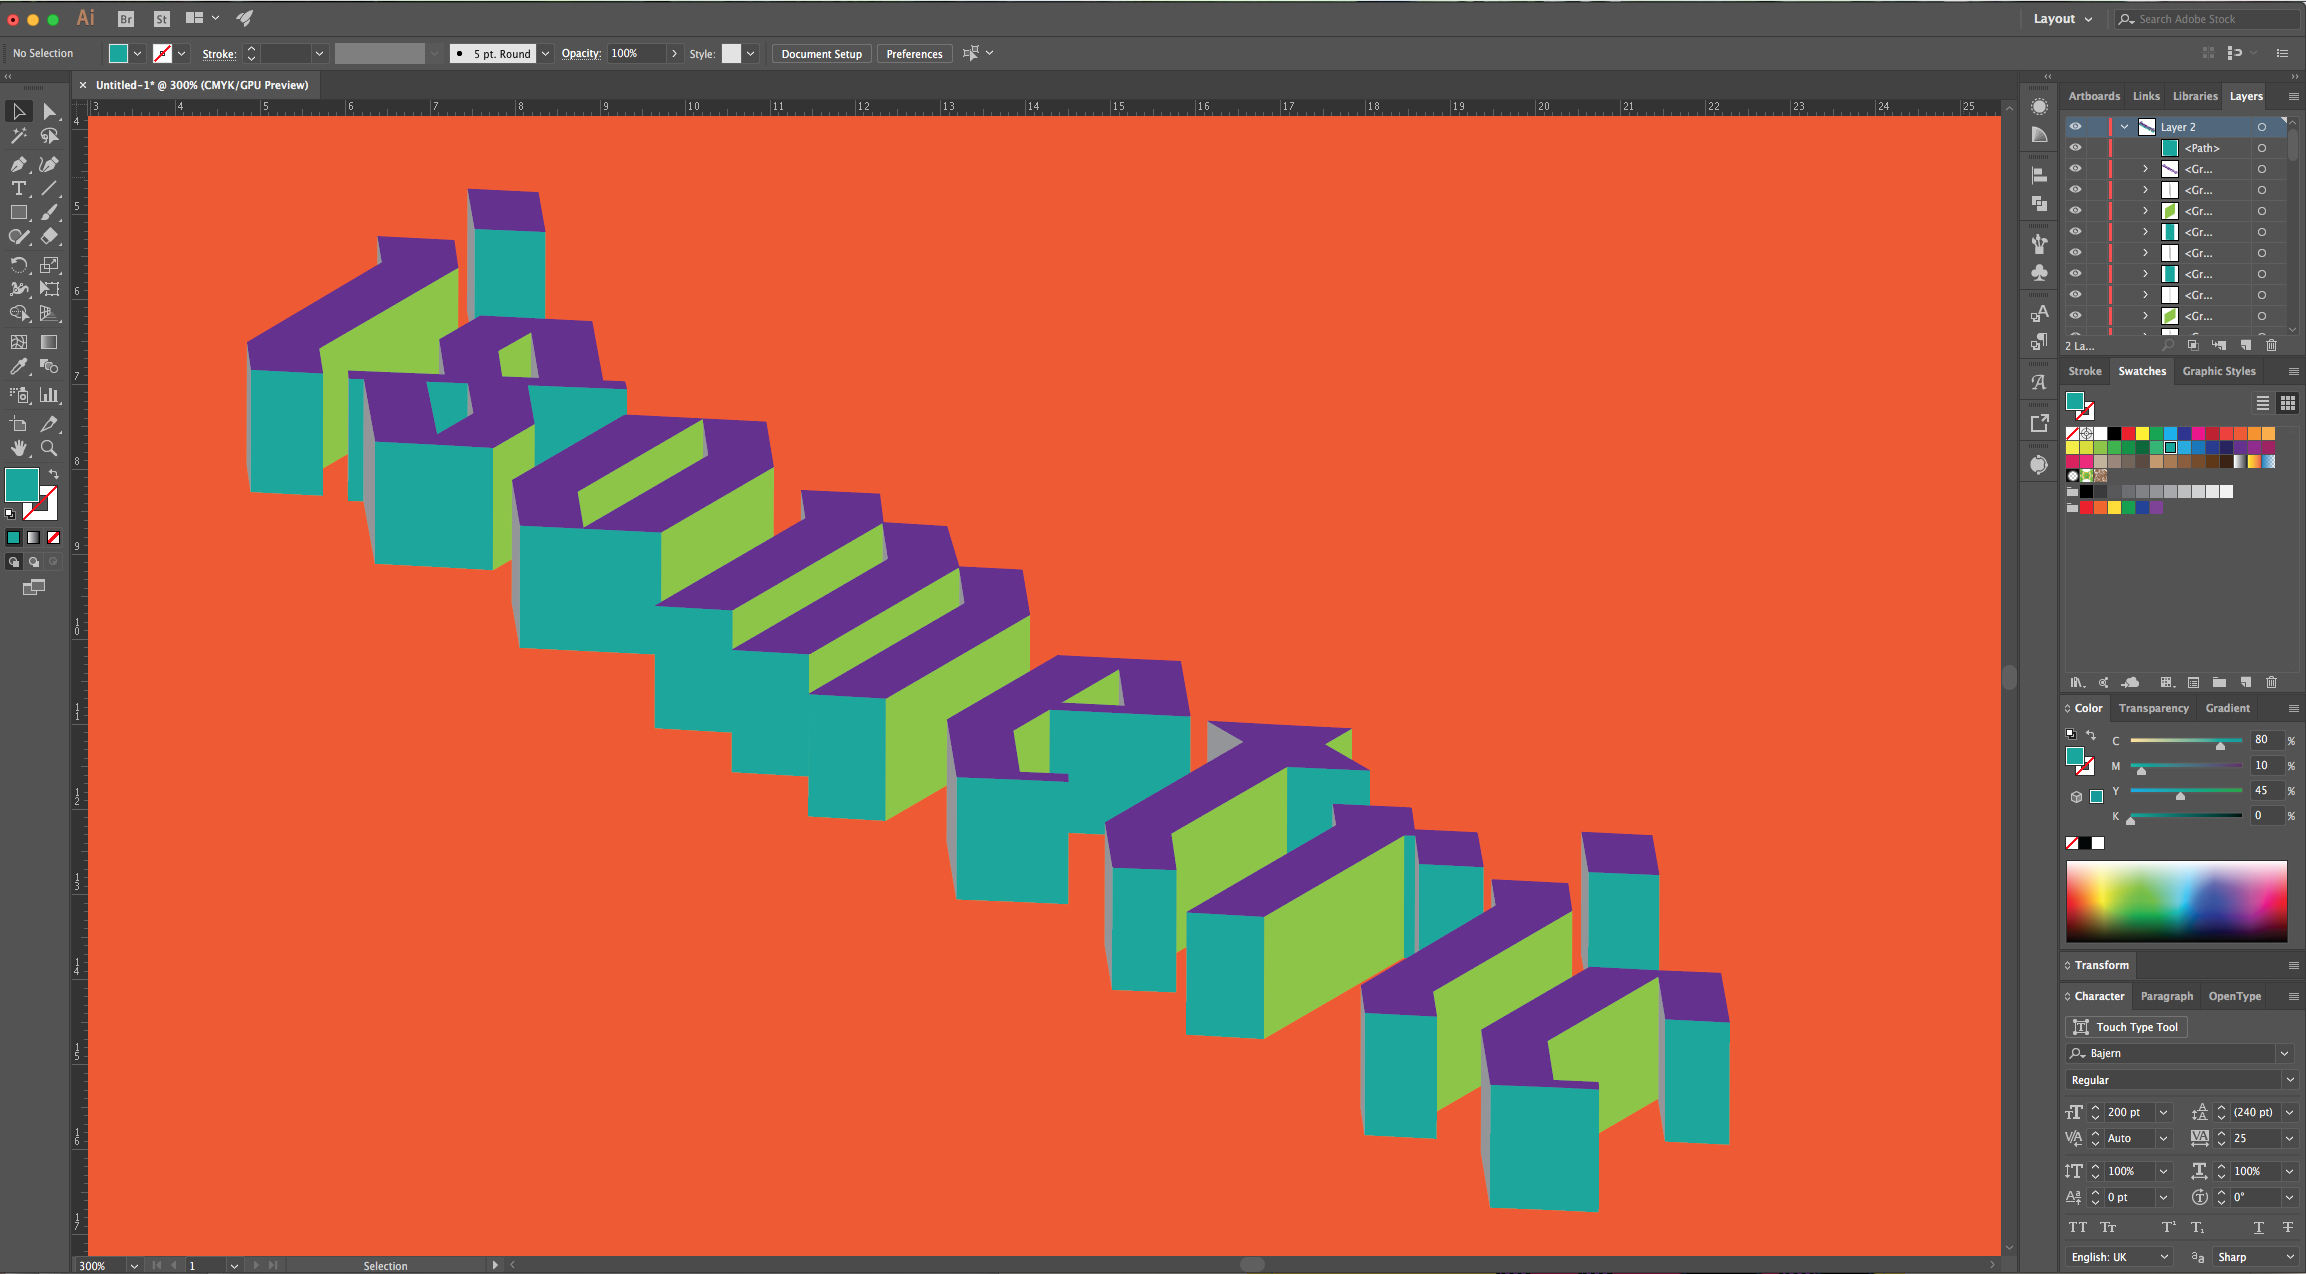
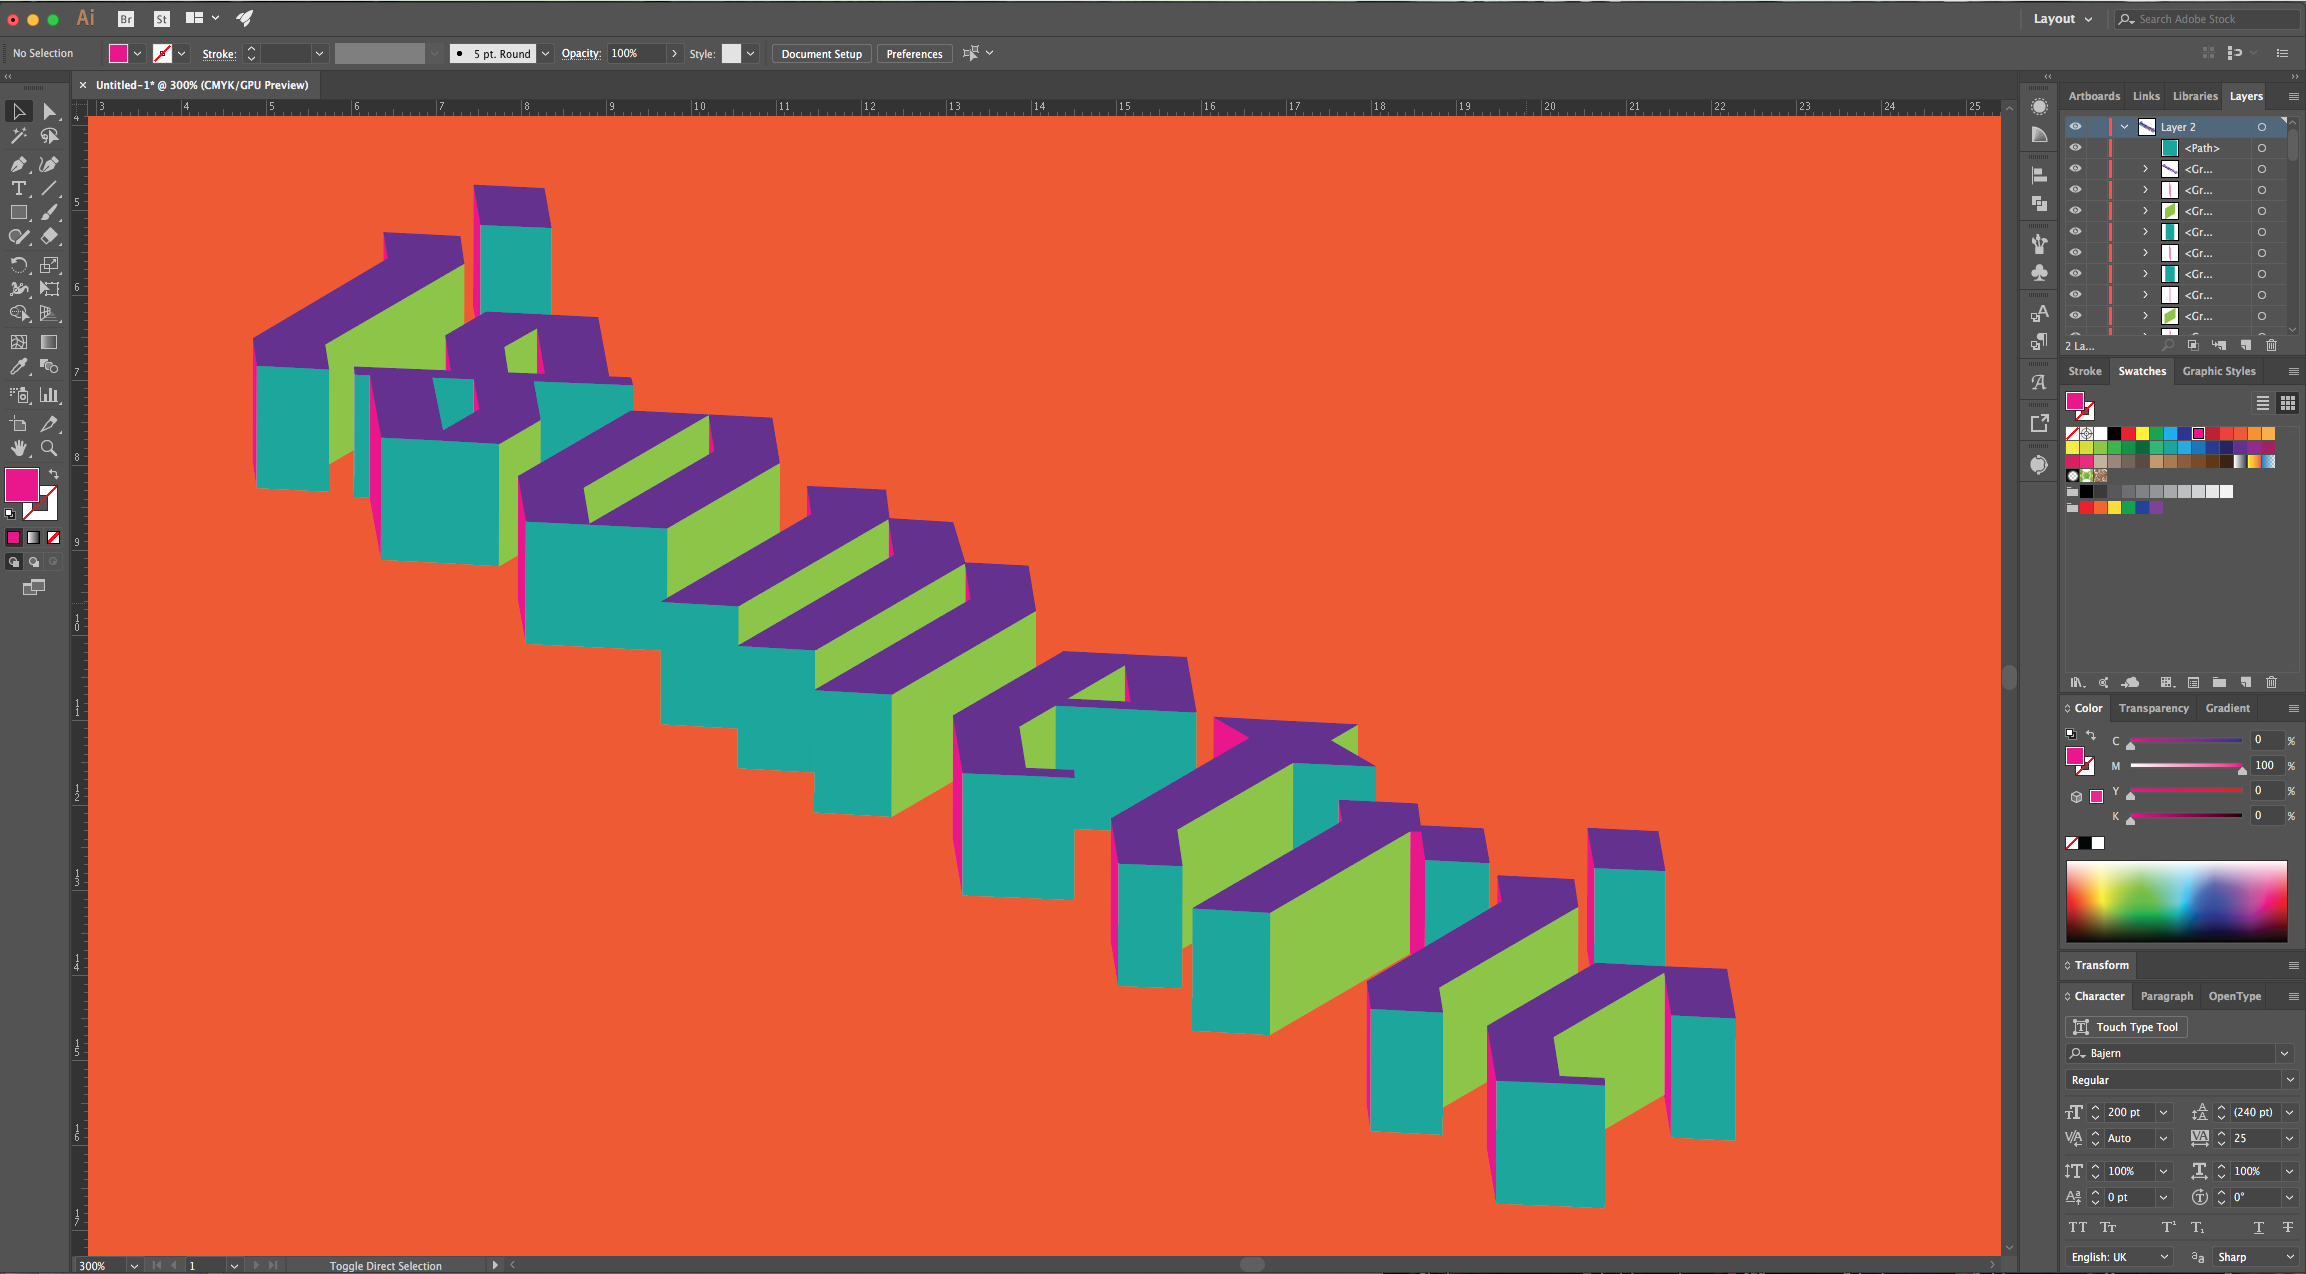
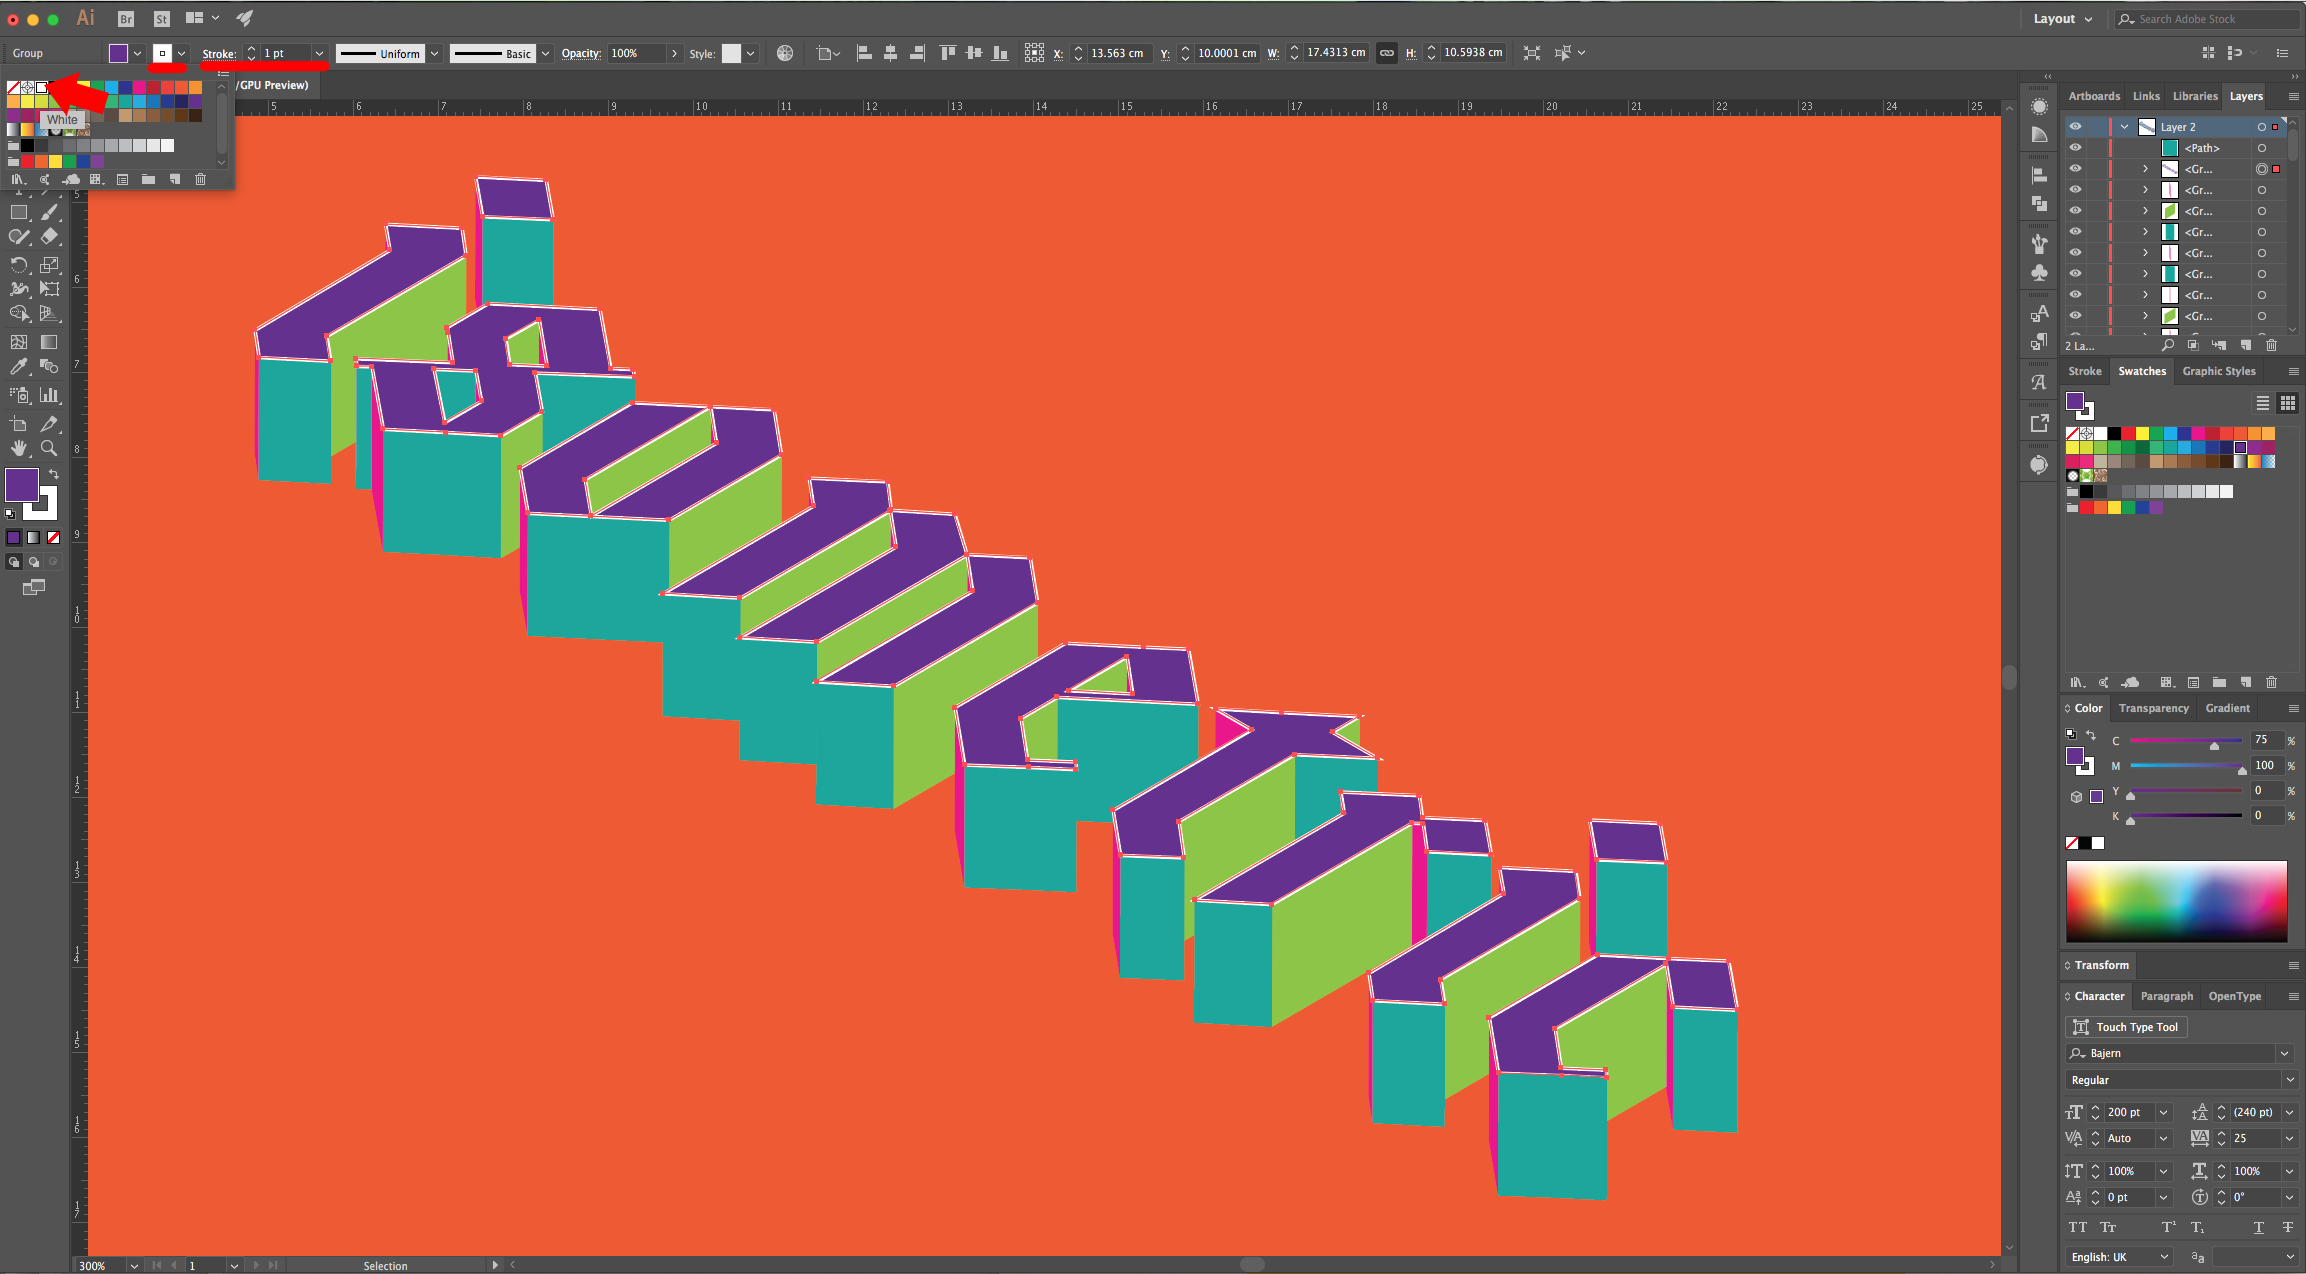
8 - Select the “Top” group and apply a White “Stroke” with a 1 px “Weight”, a “Rounded Cap” and a “Bevel Join Corner”. “Copy” it (Command/Control + C), “Paste in Front” (Command/Control + F) and change the “Fill” and “Stroke” color to Black.
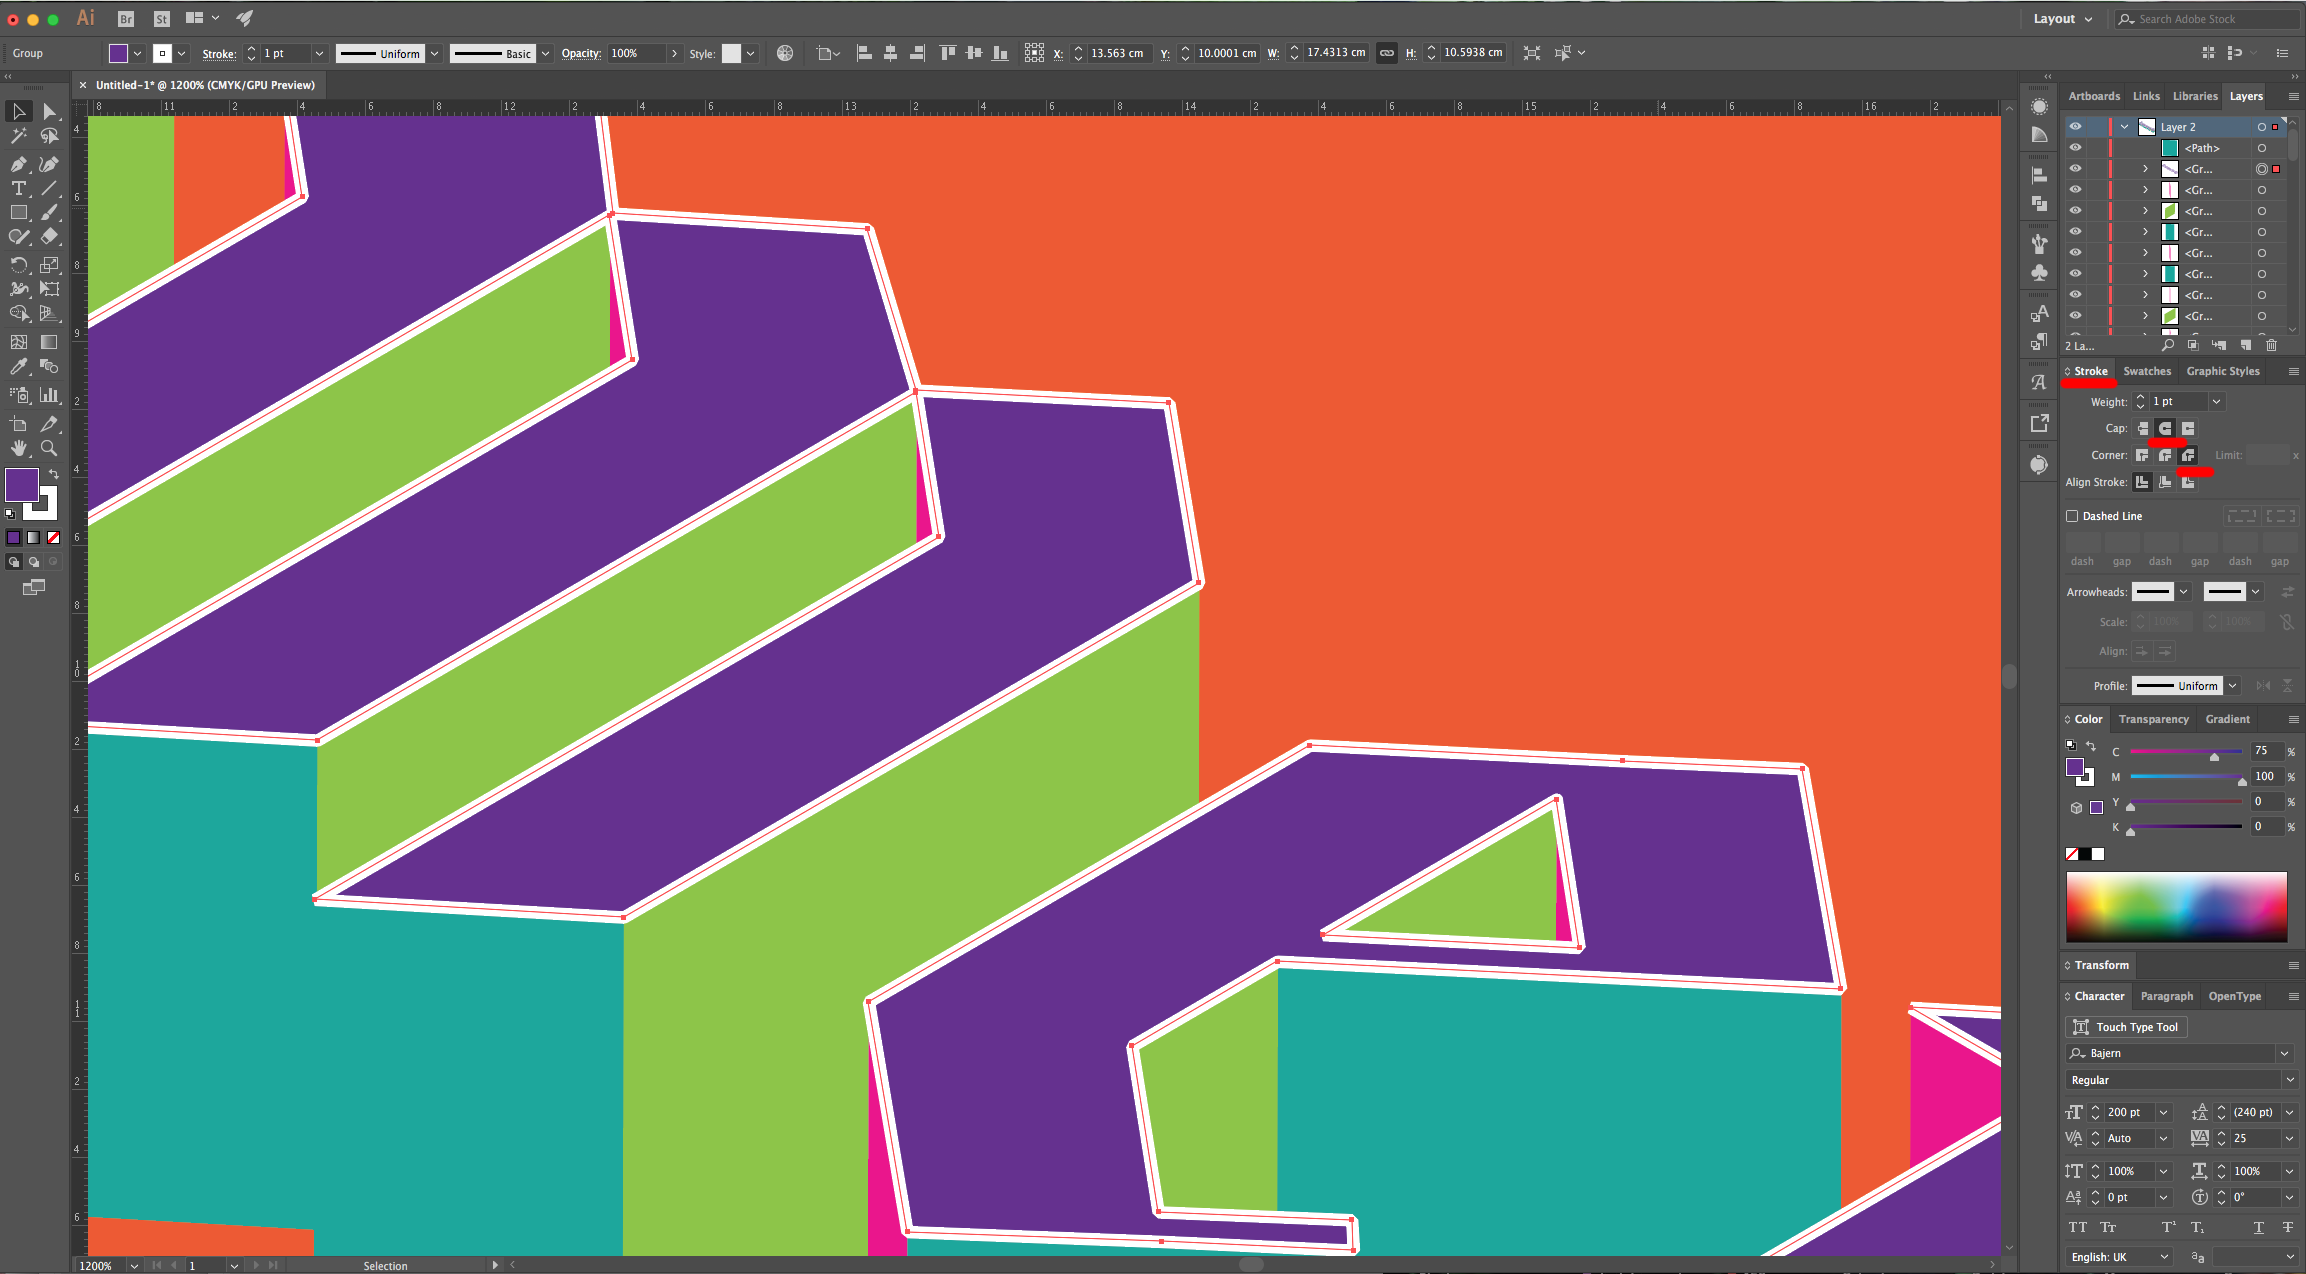
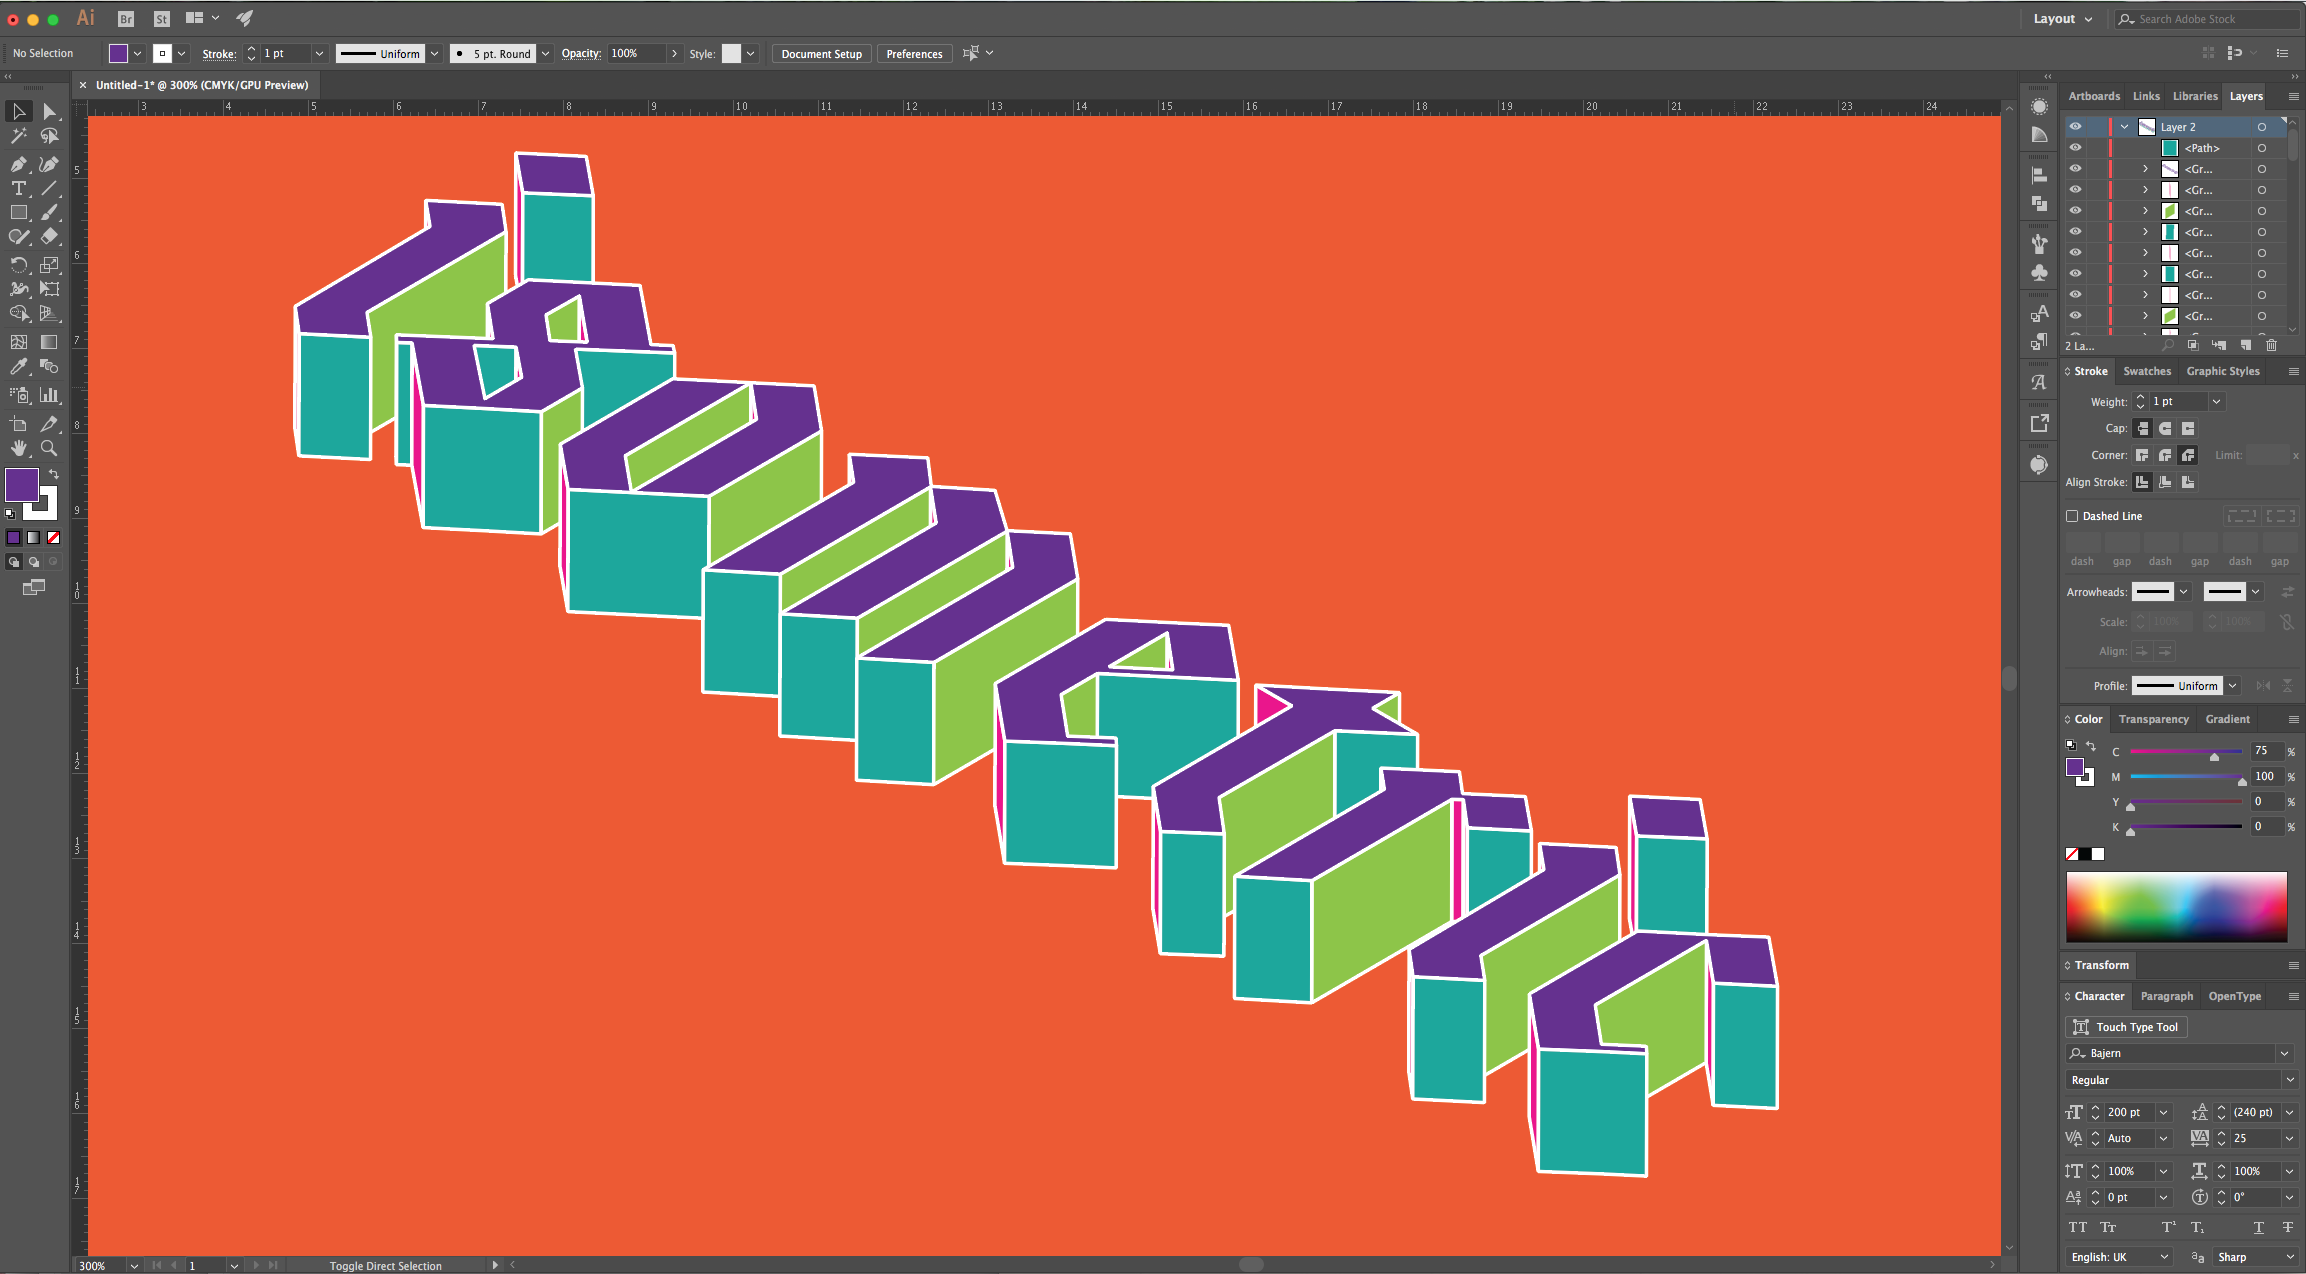
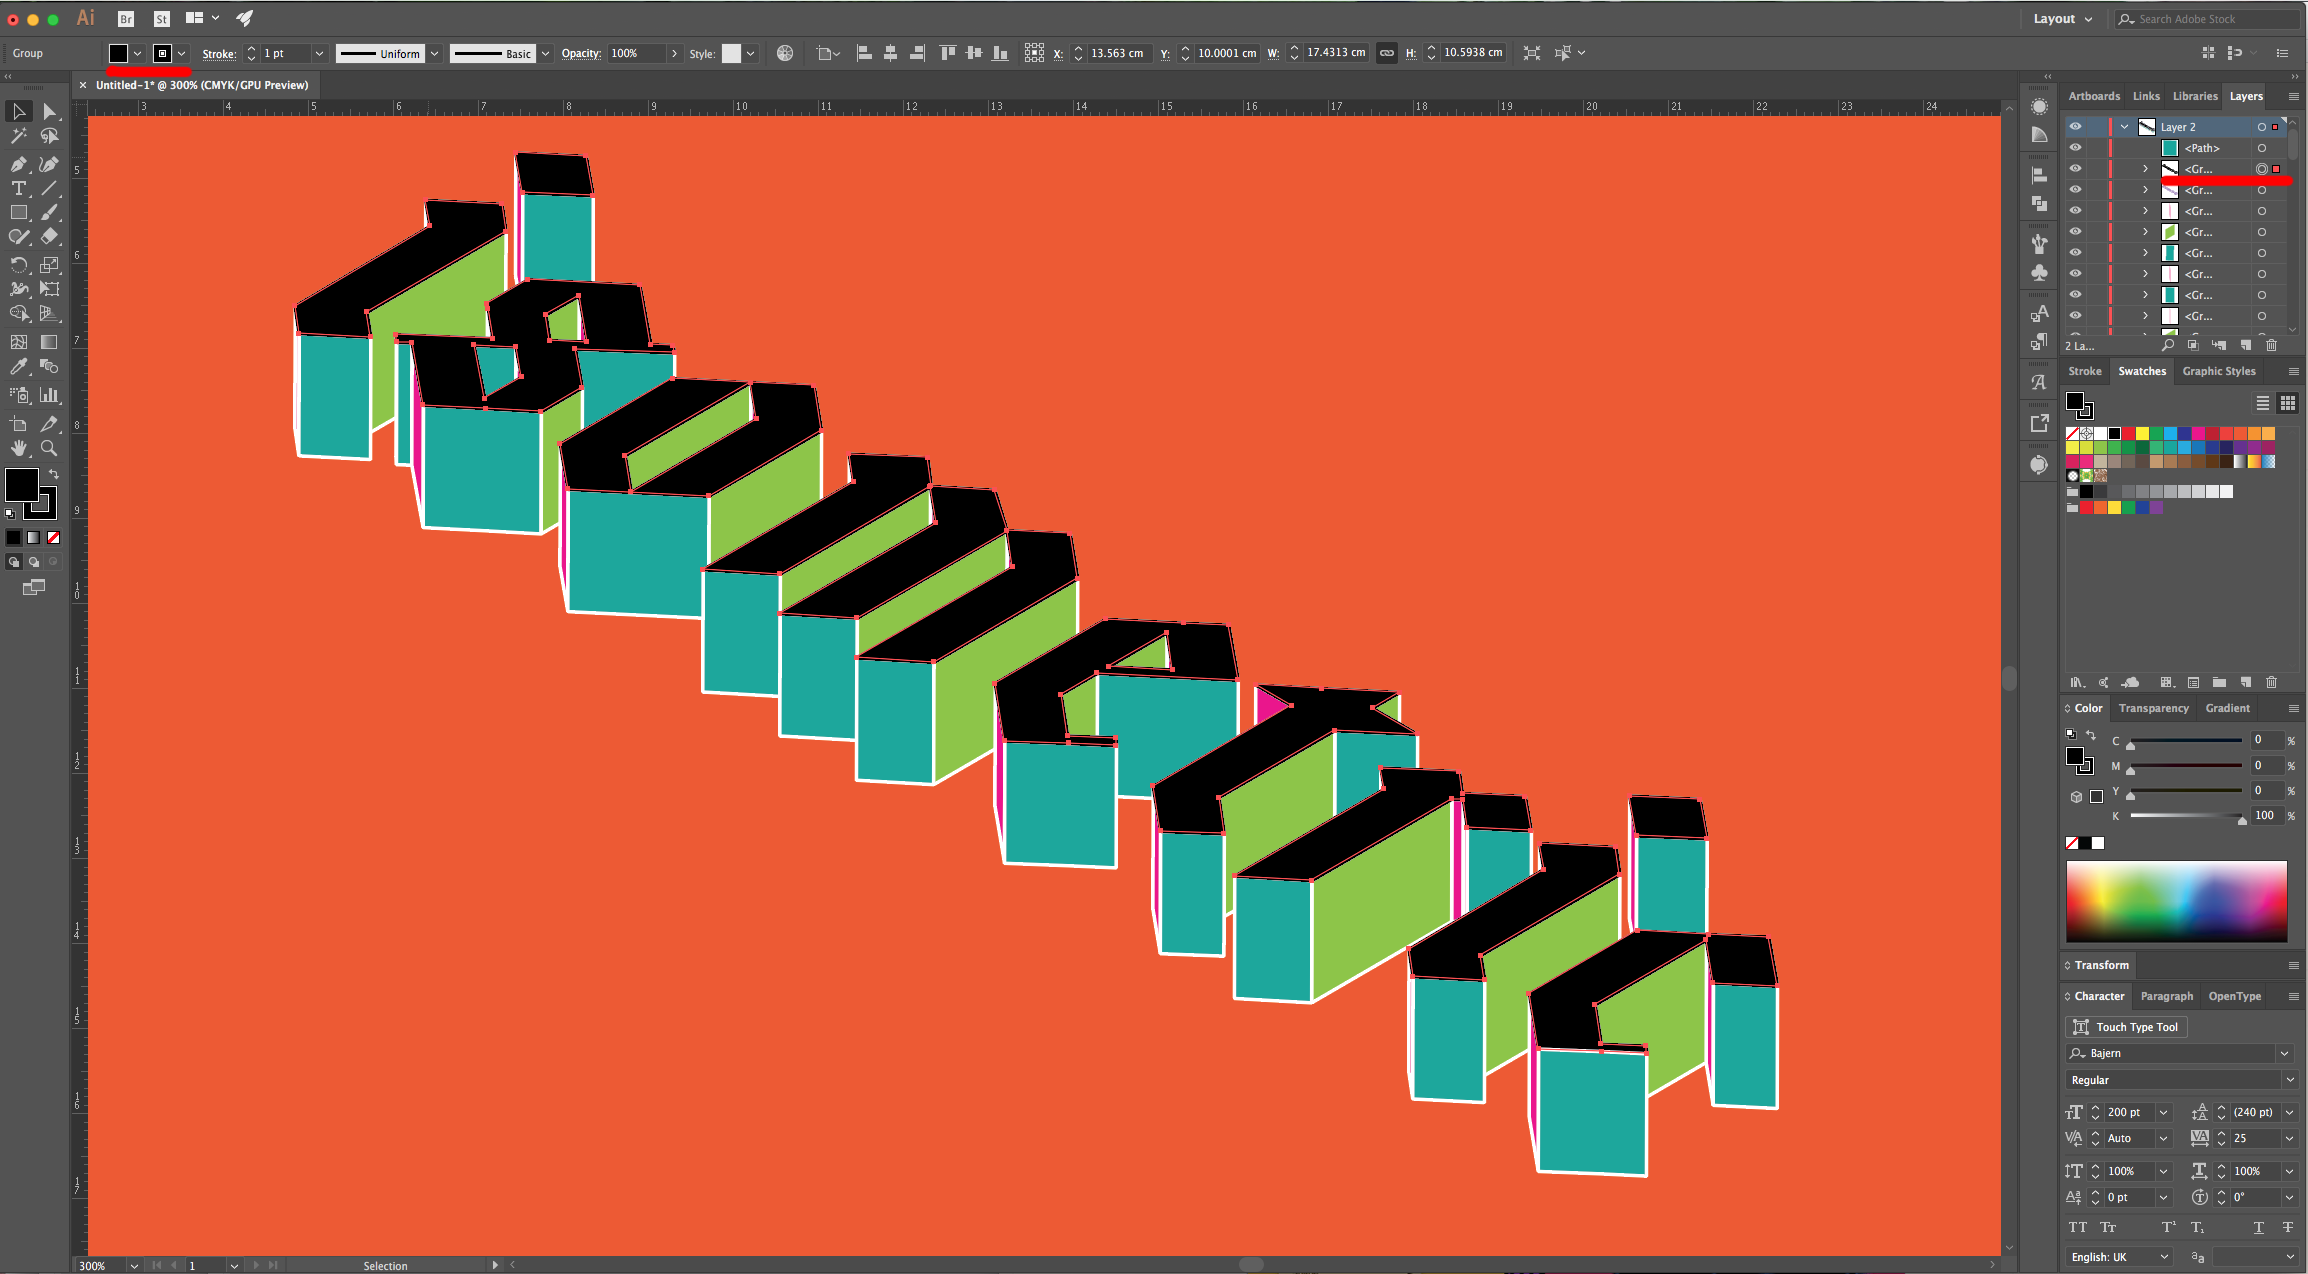
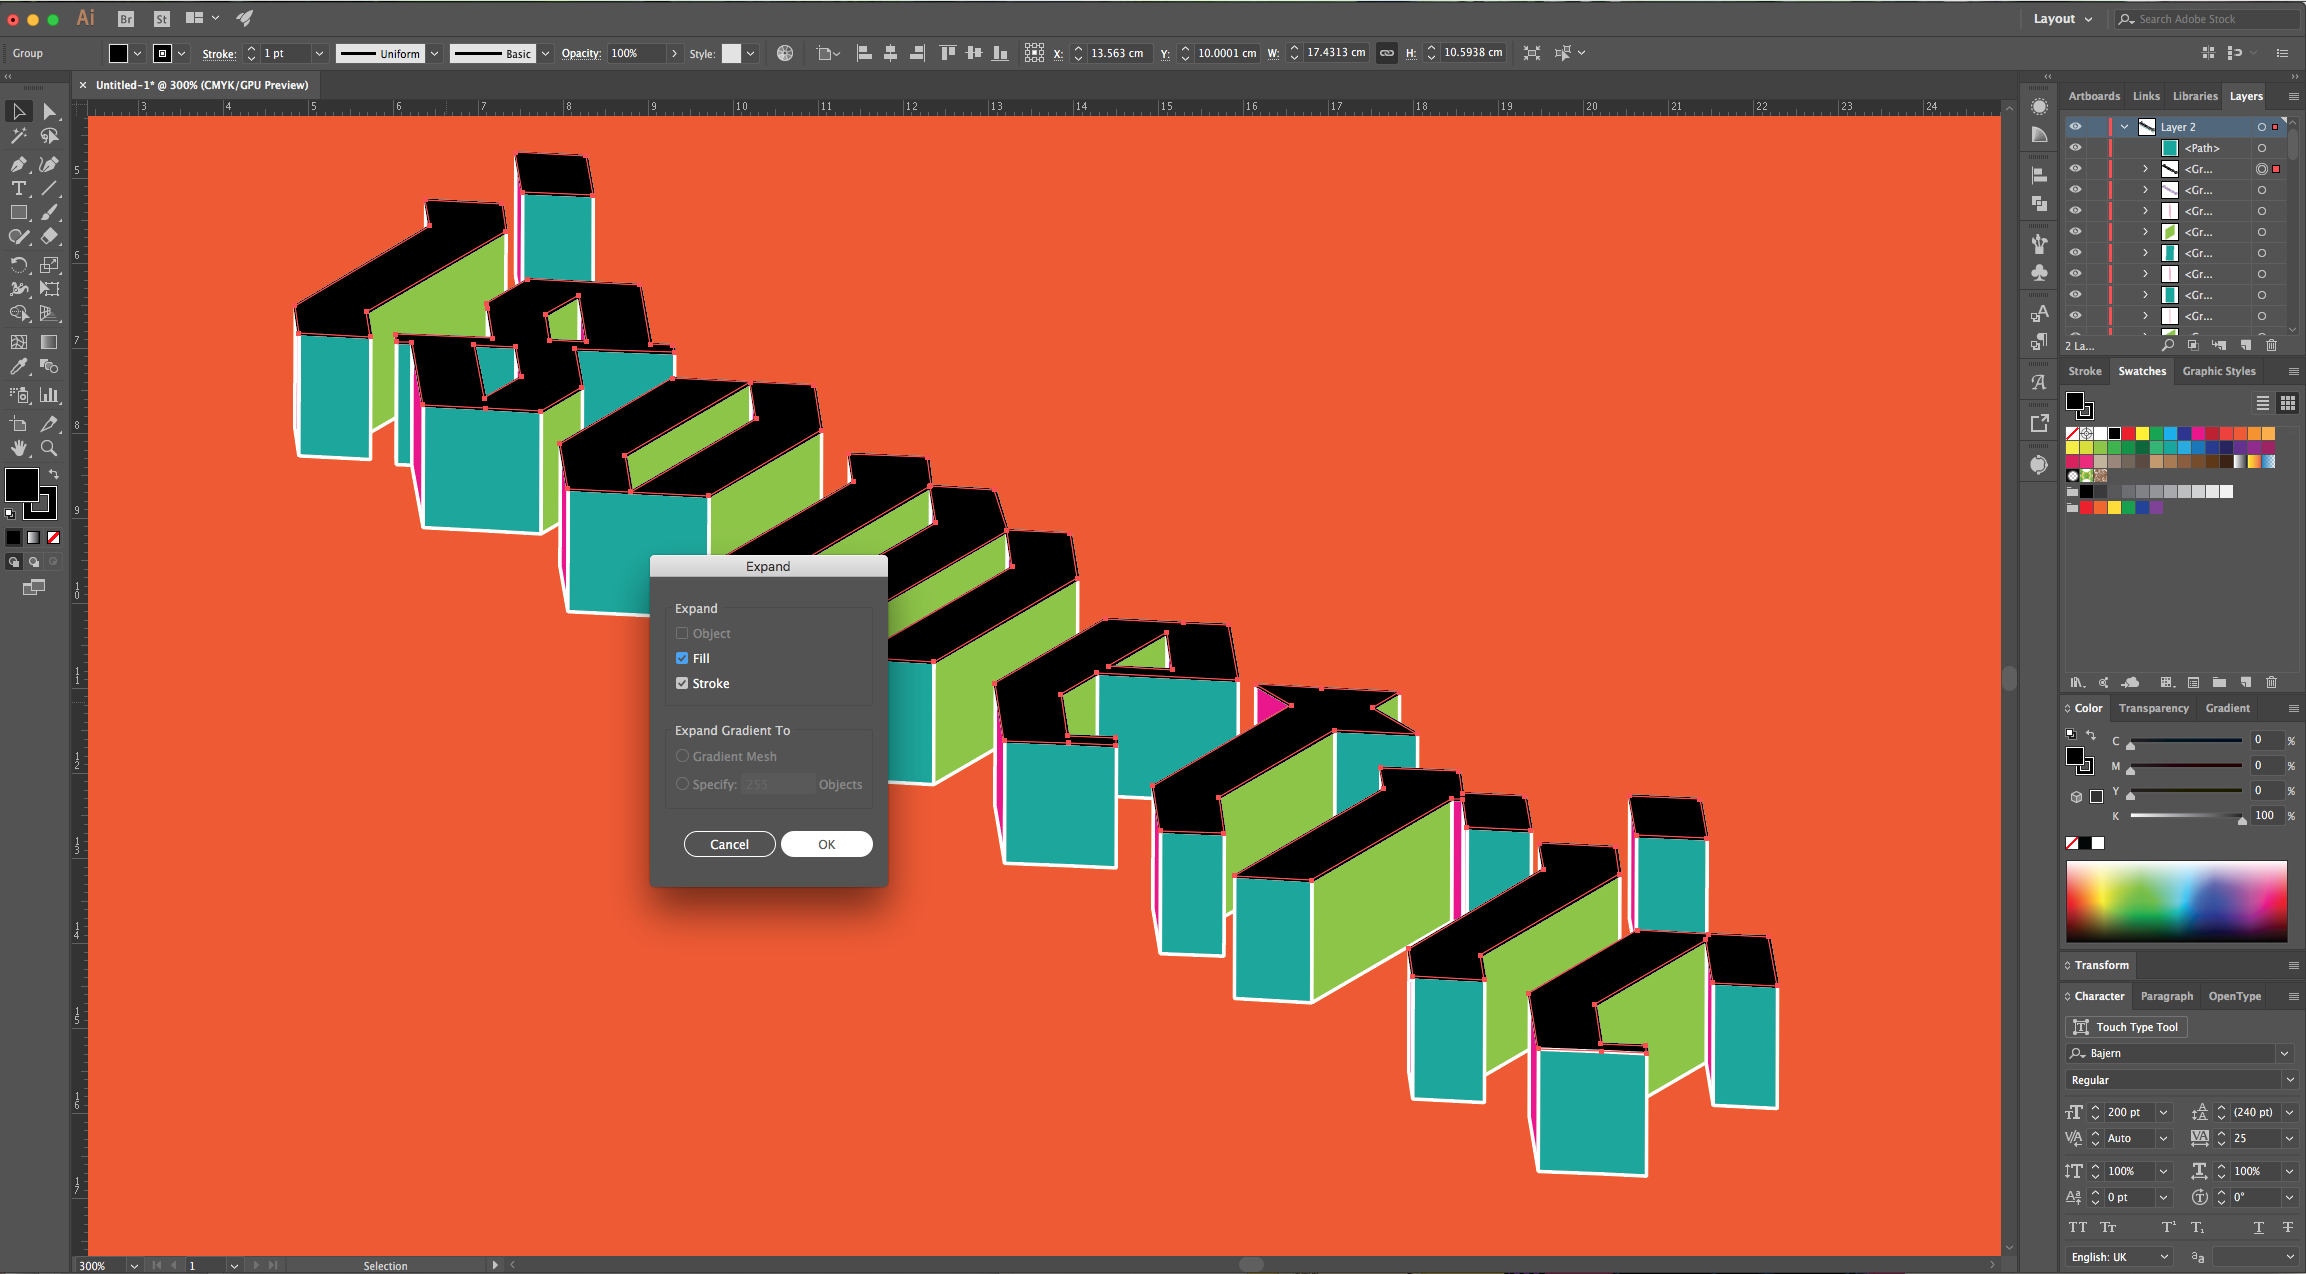
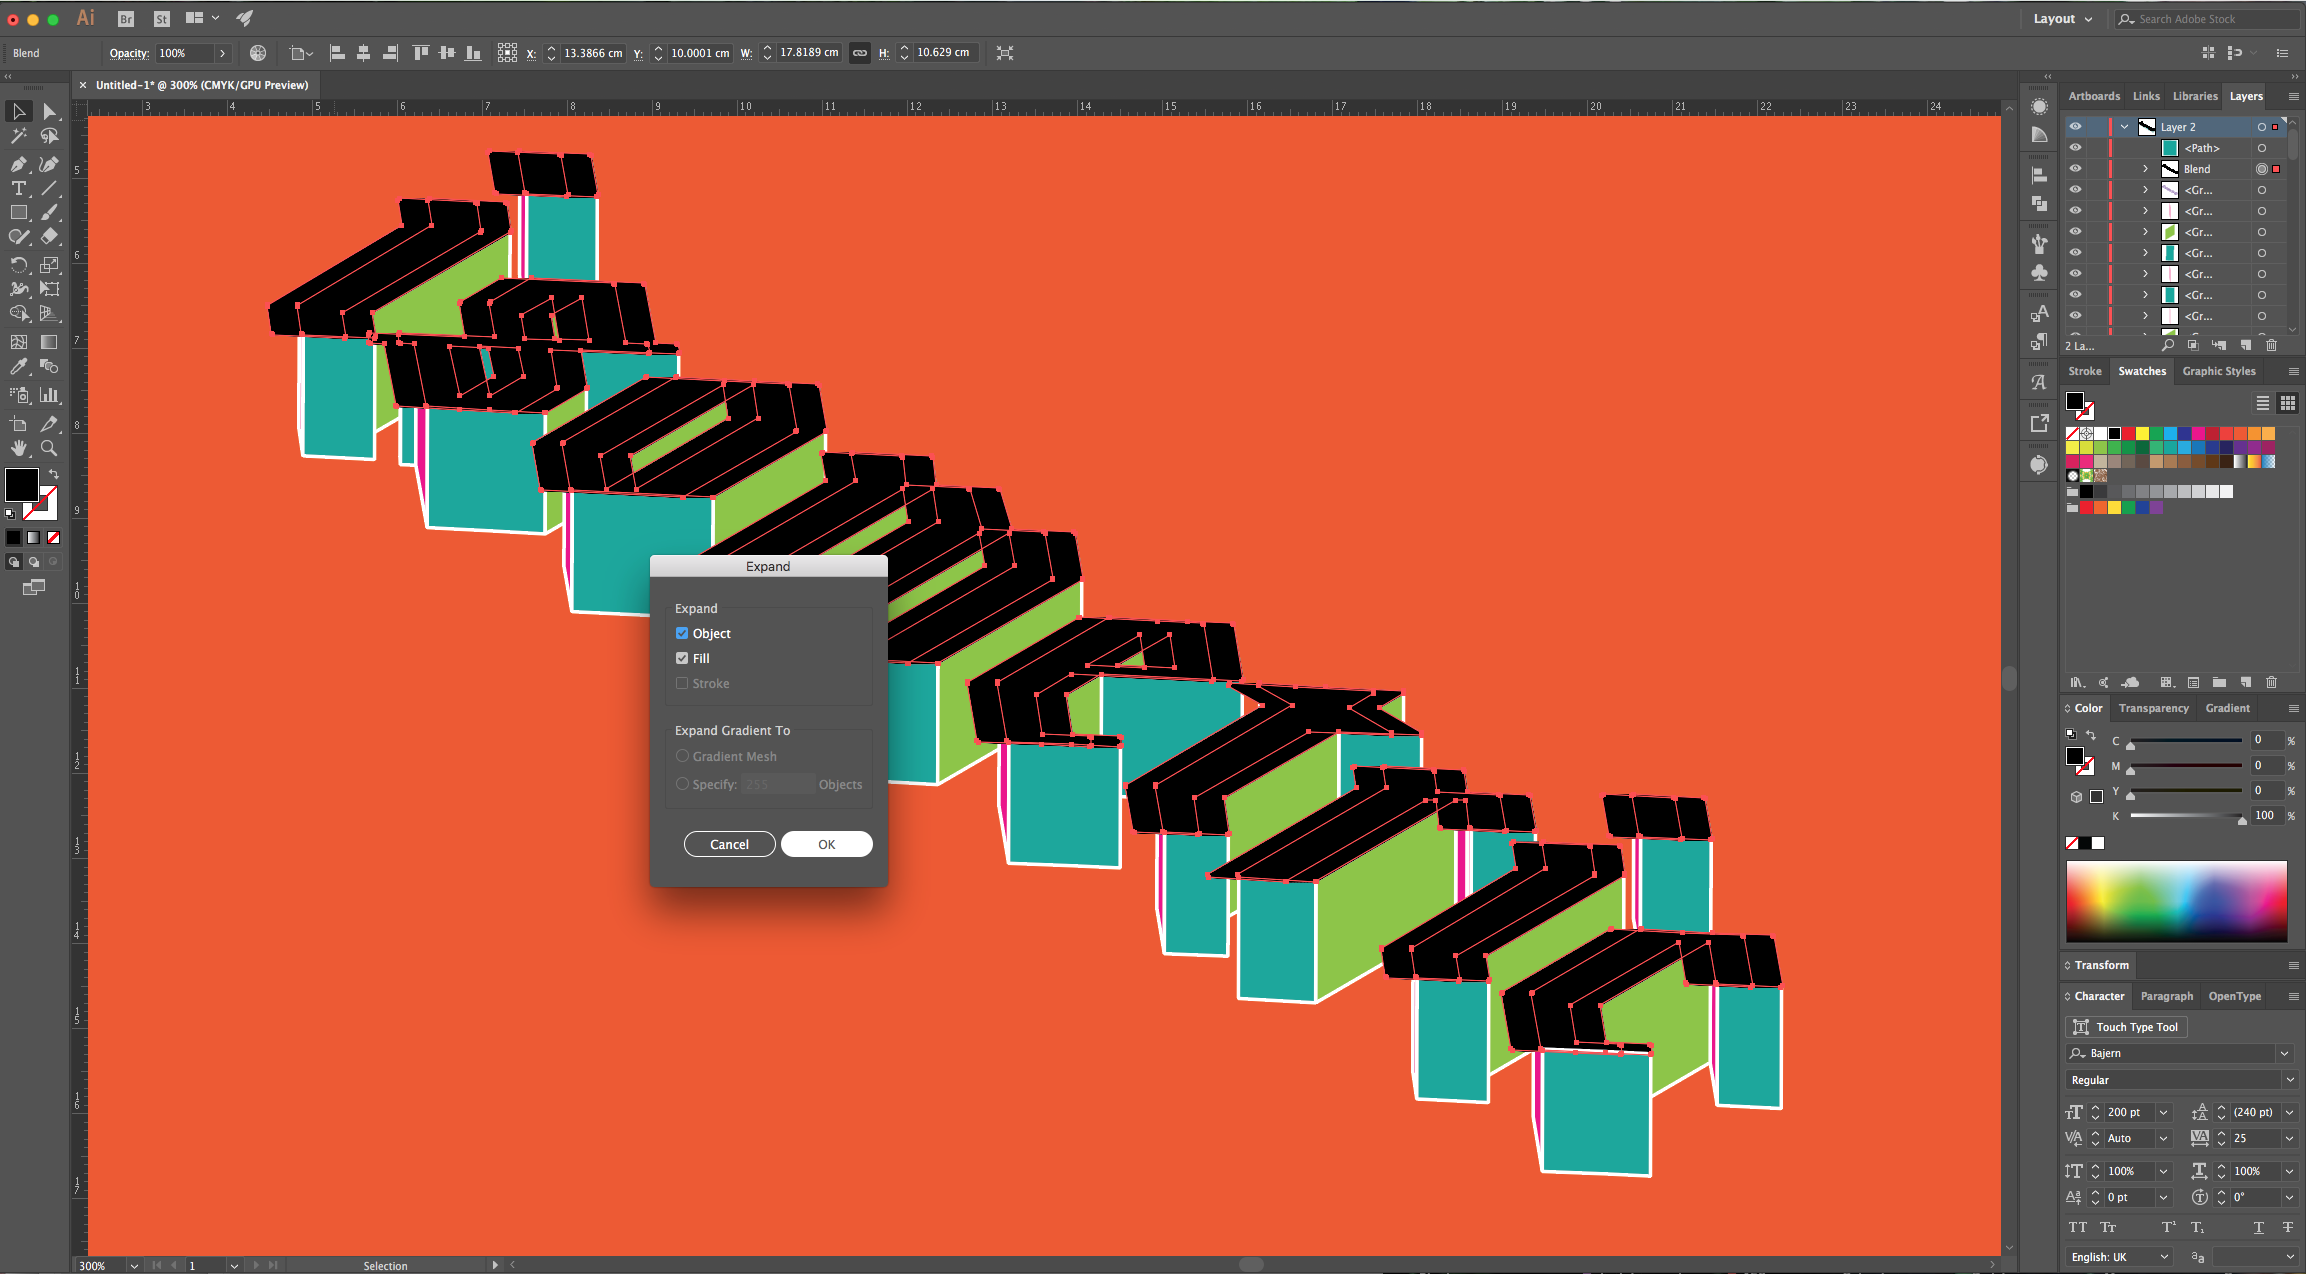
9 - Then, go to Object > Expand and make sure that the “Fill” and “Stroke” boxes are checked before clicking “OK”. With everything still selected, go to the “Pathfinder Panel” and click “Unite”.
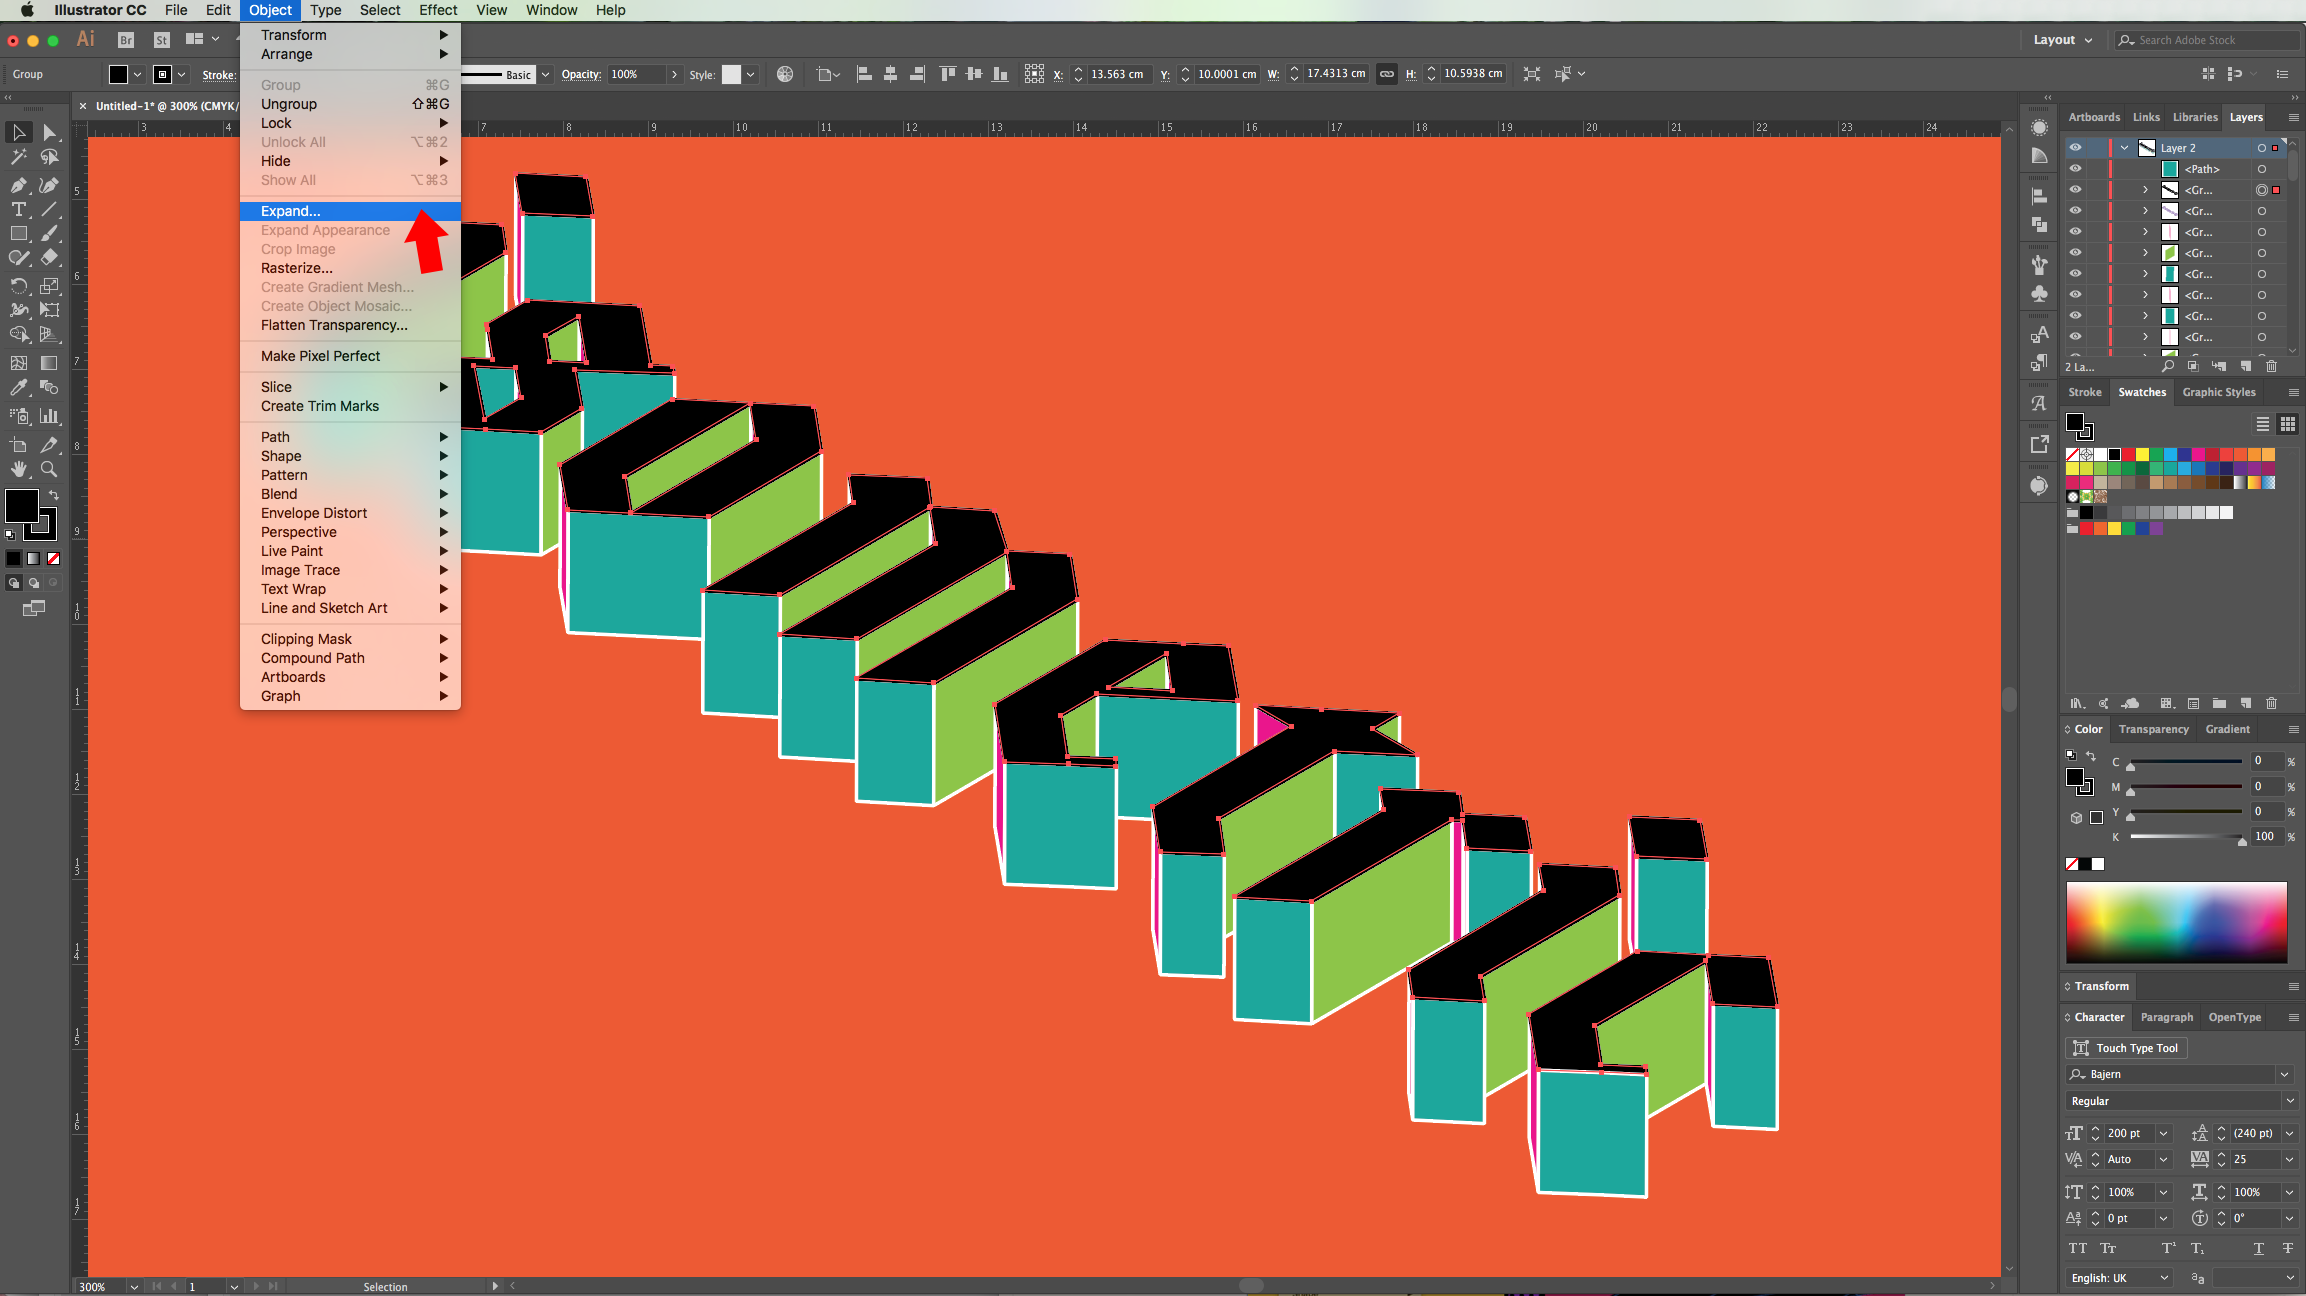
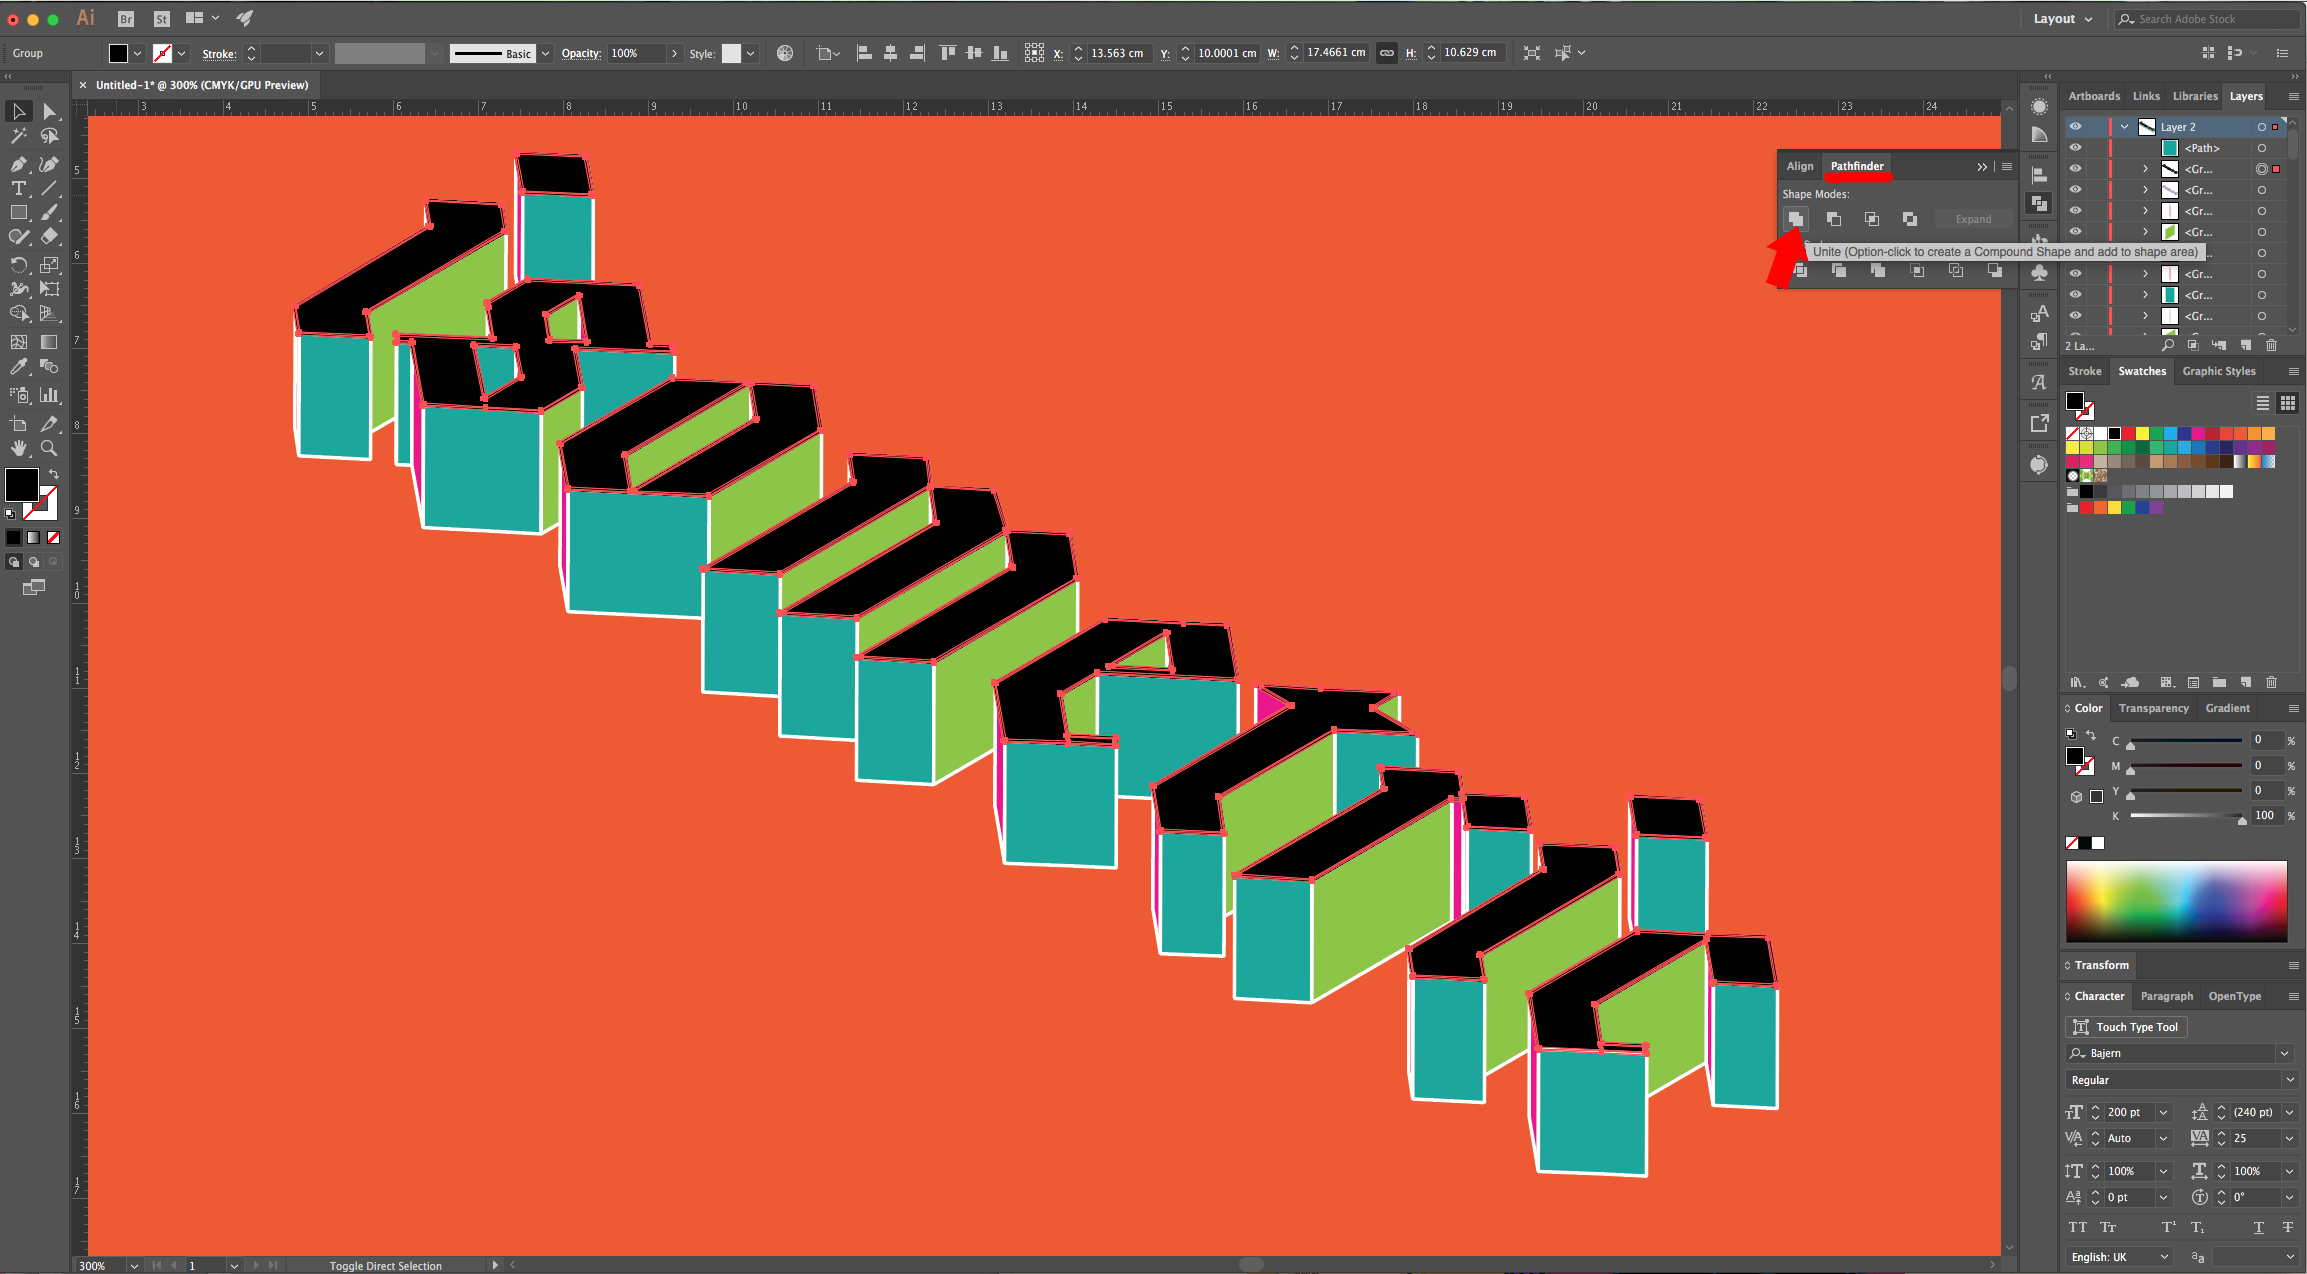
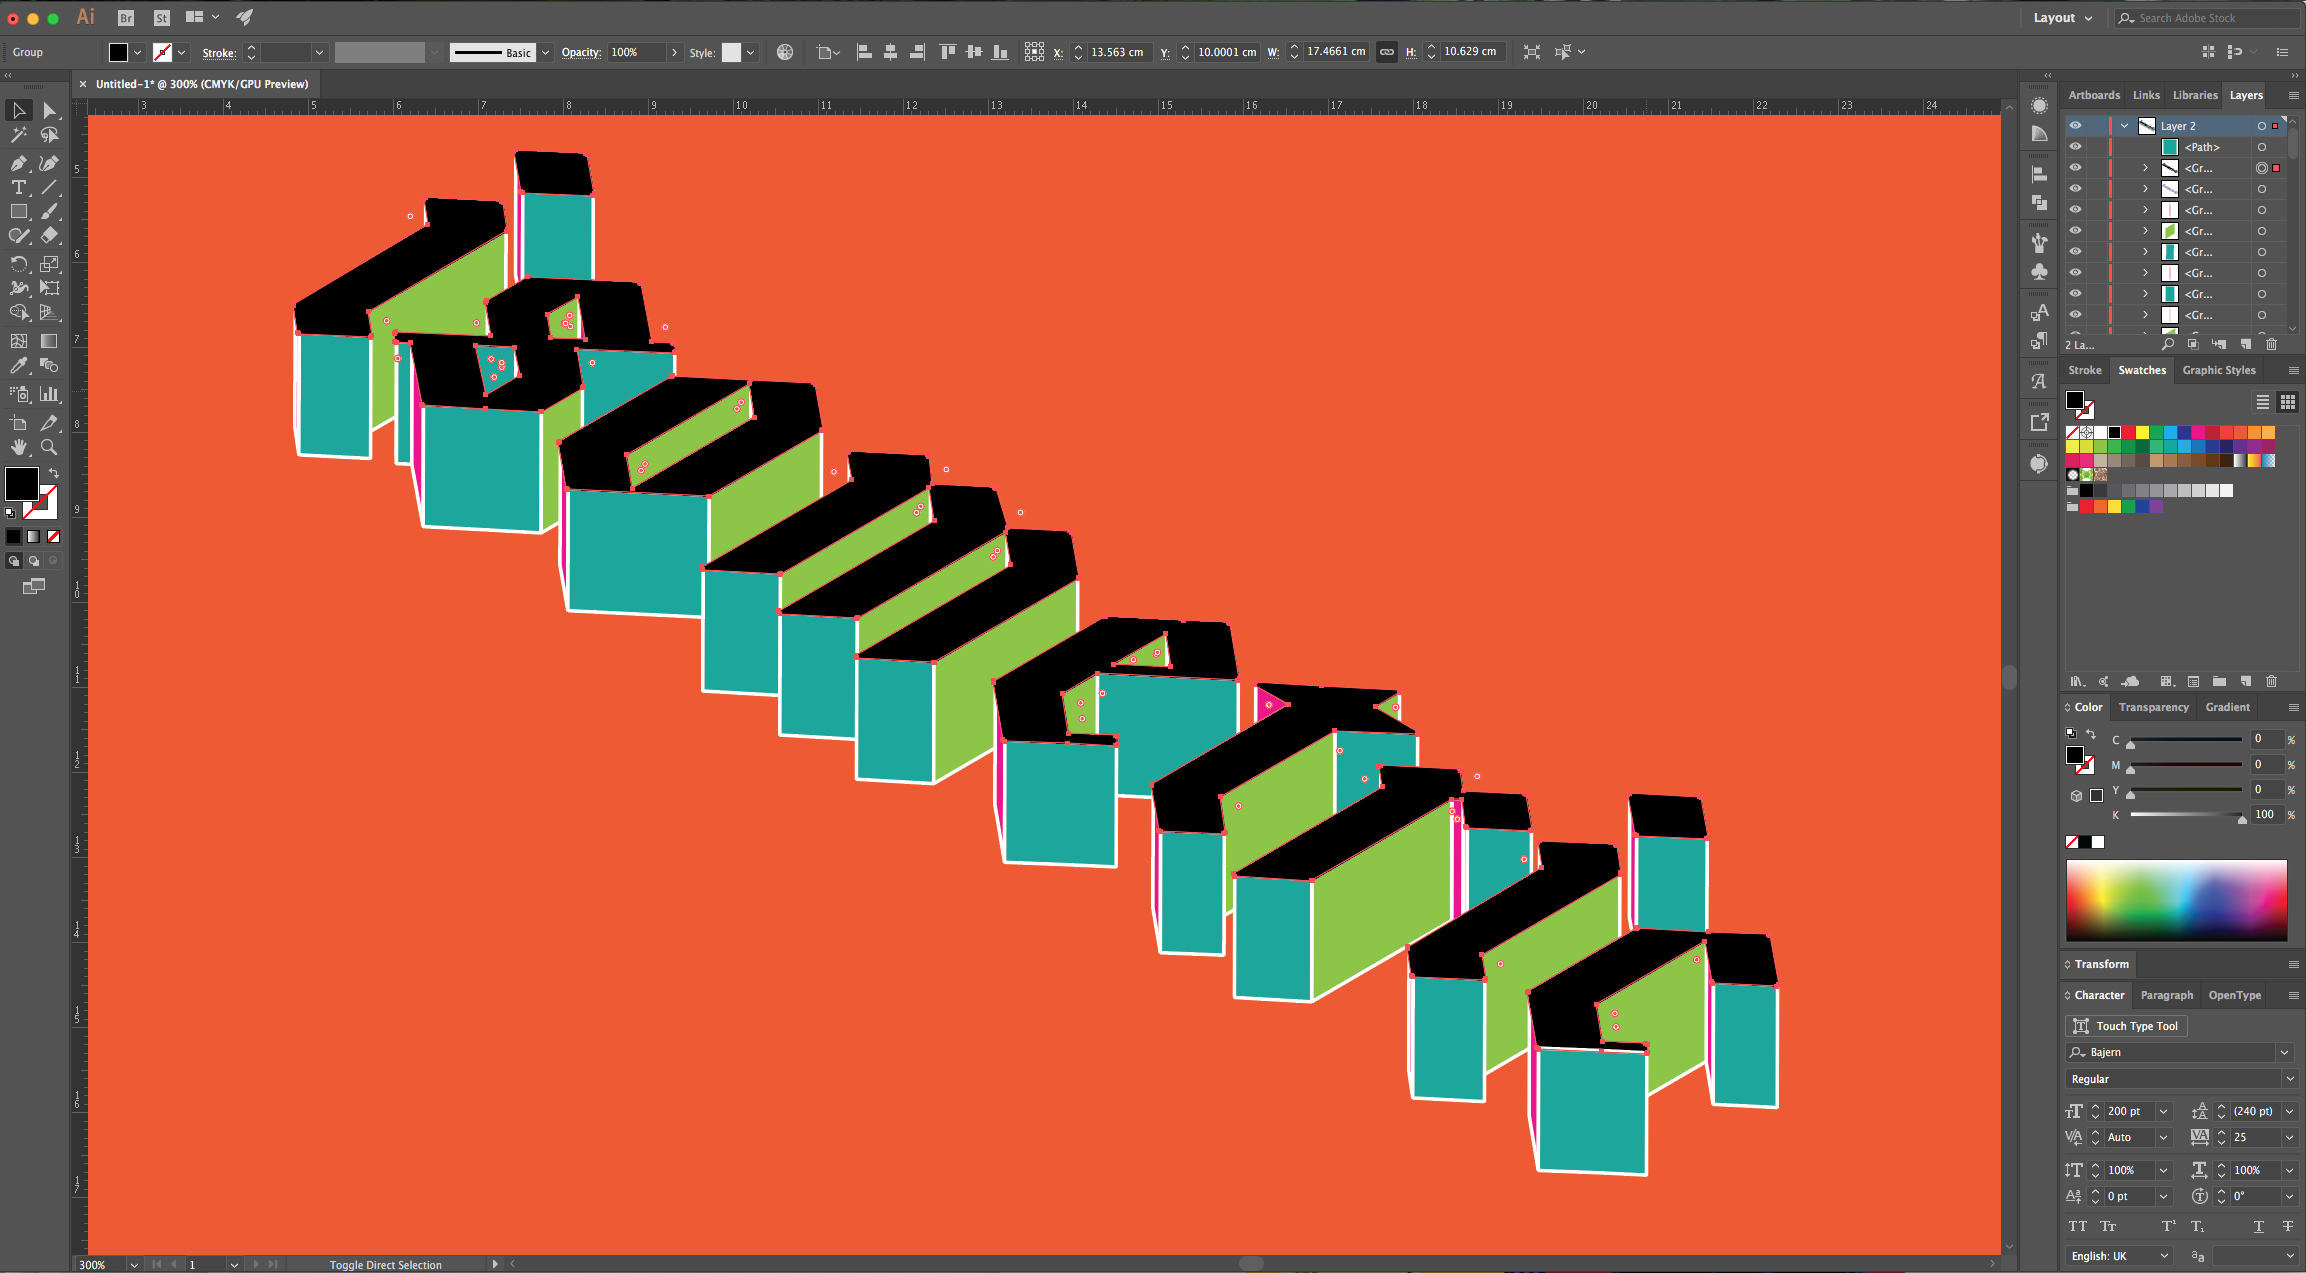
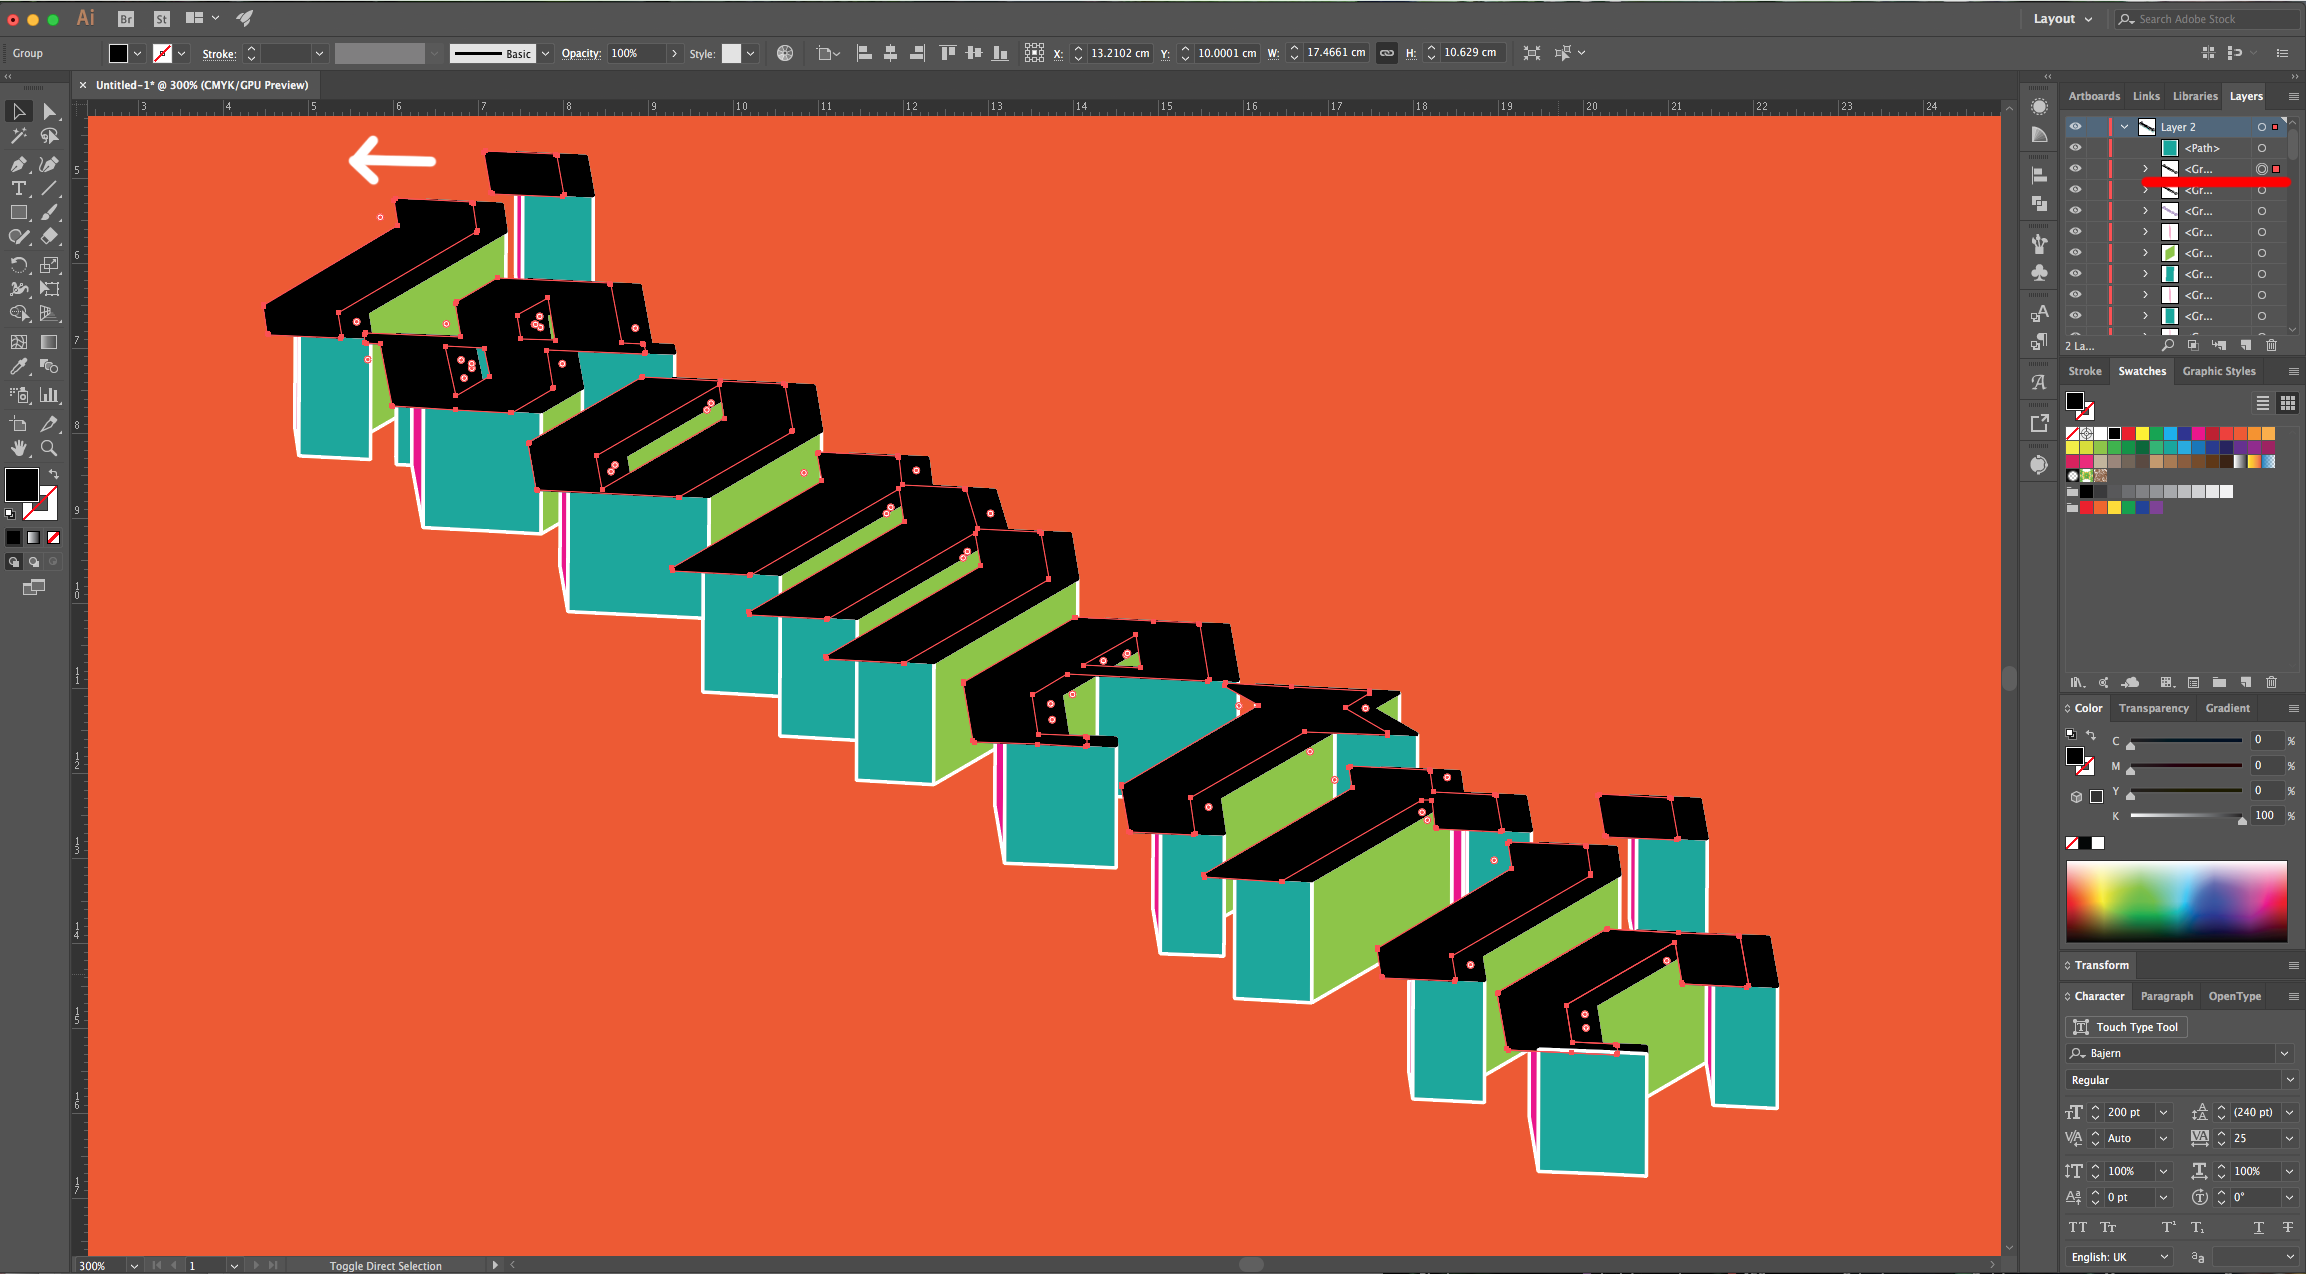
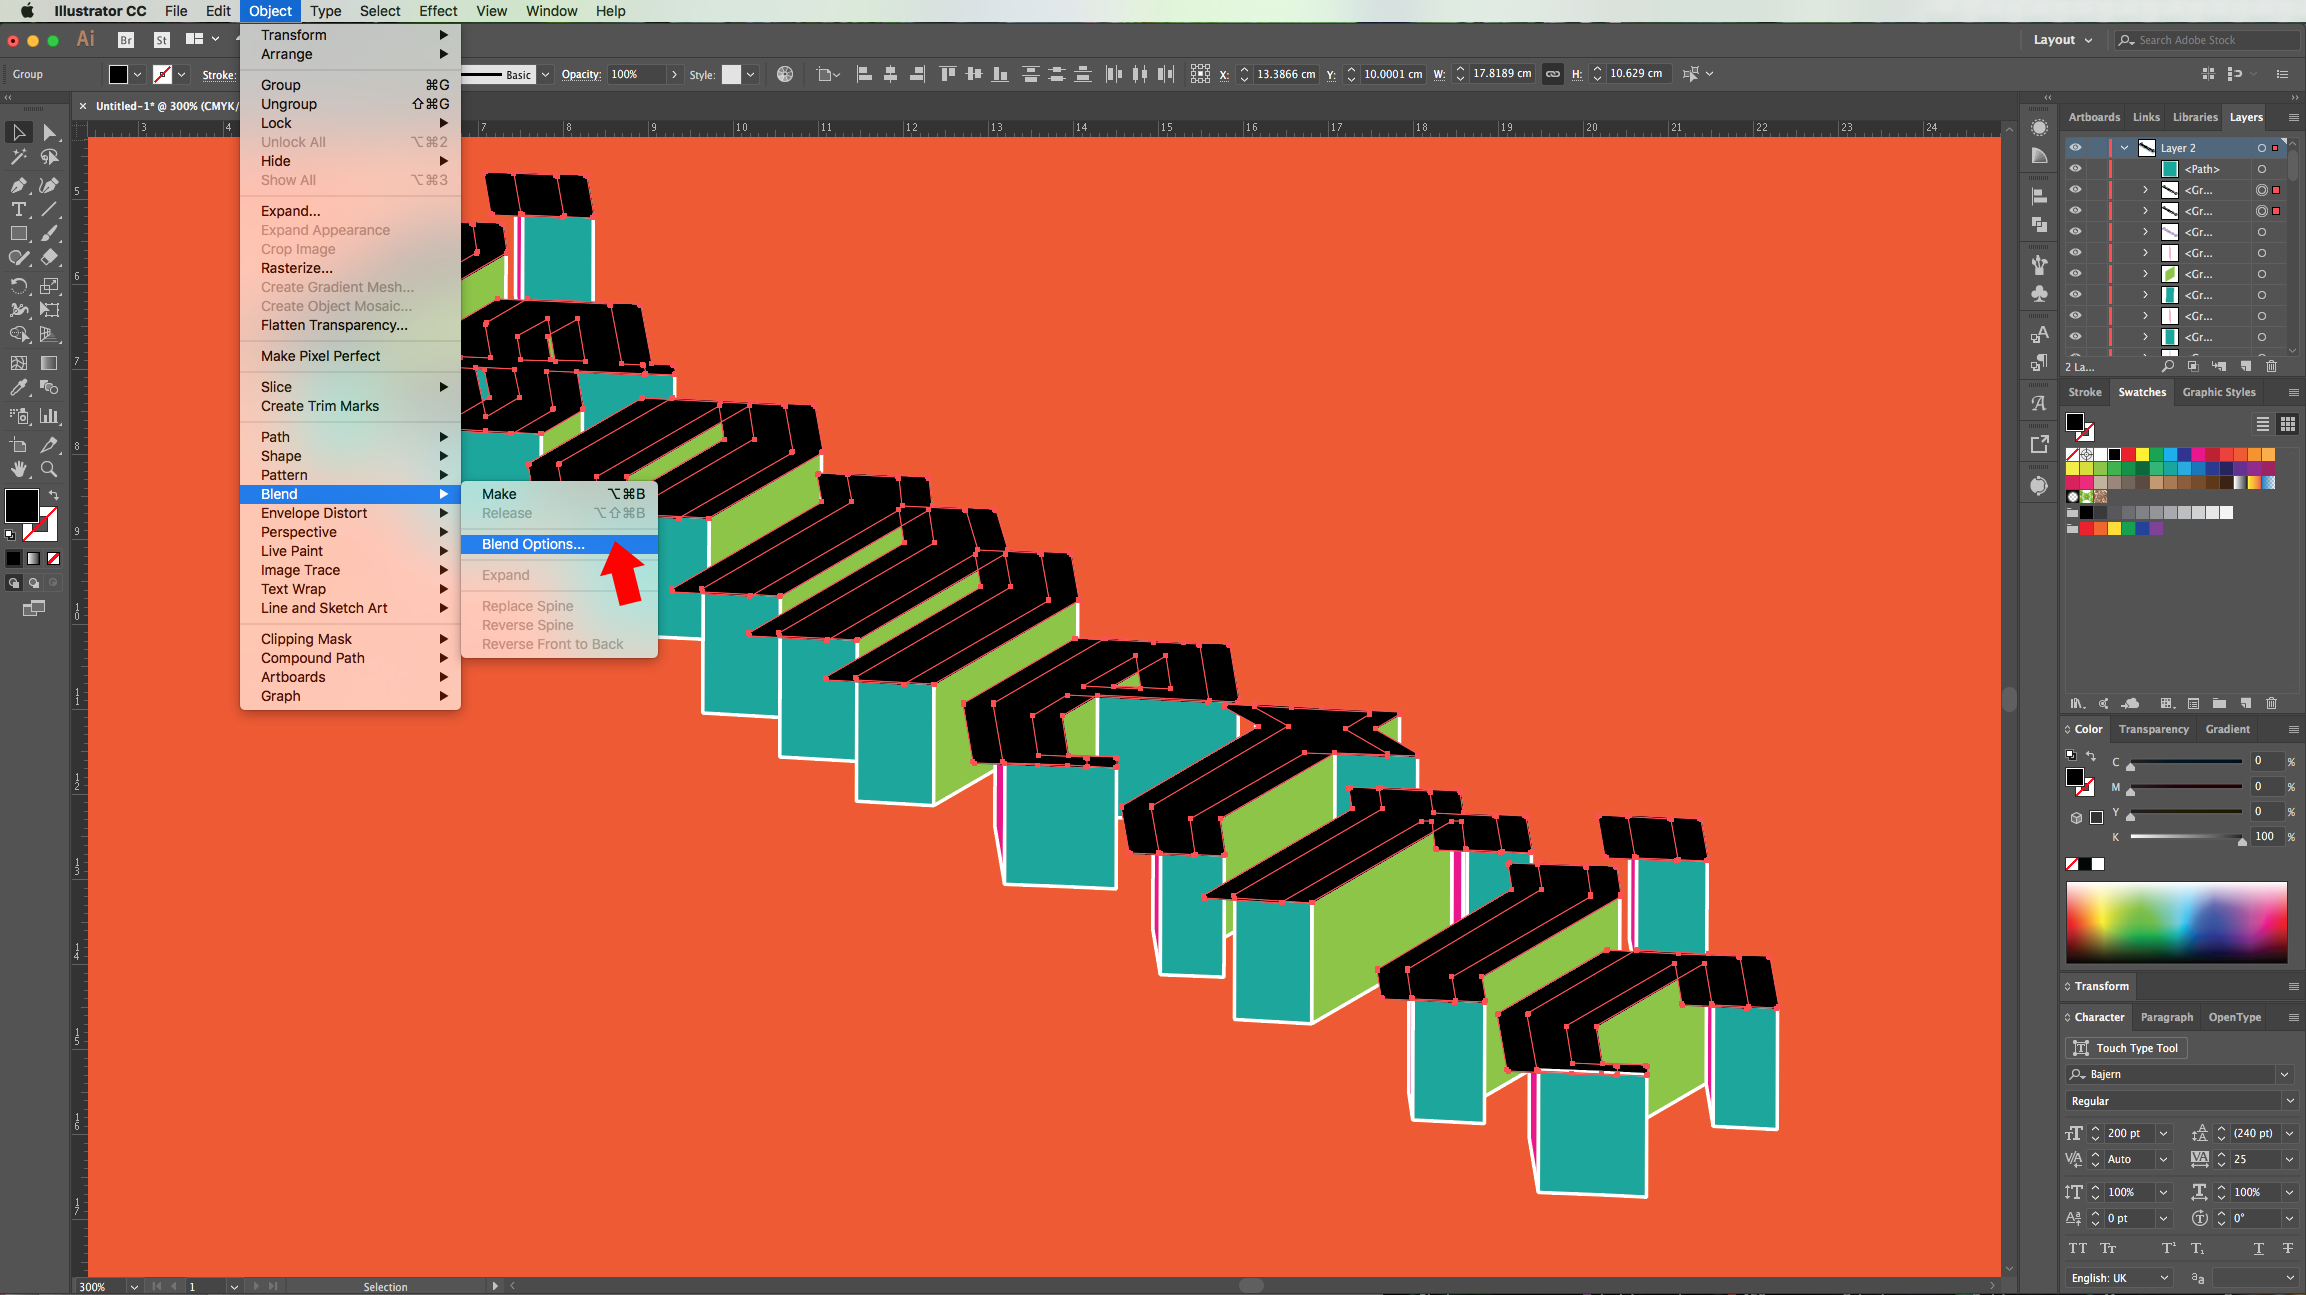
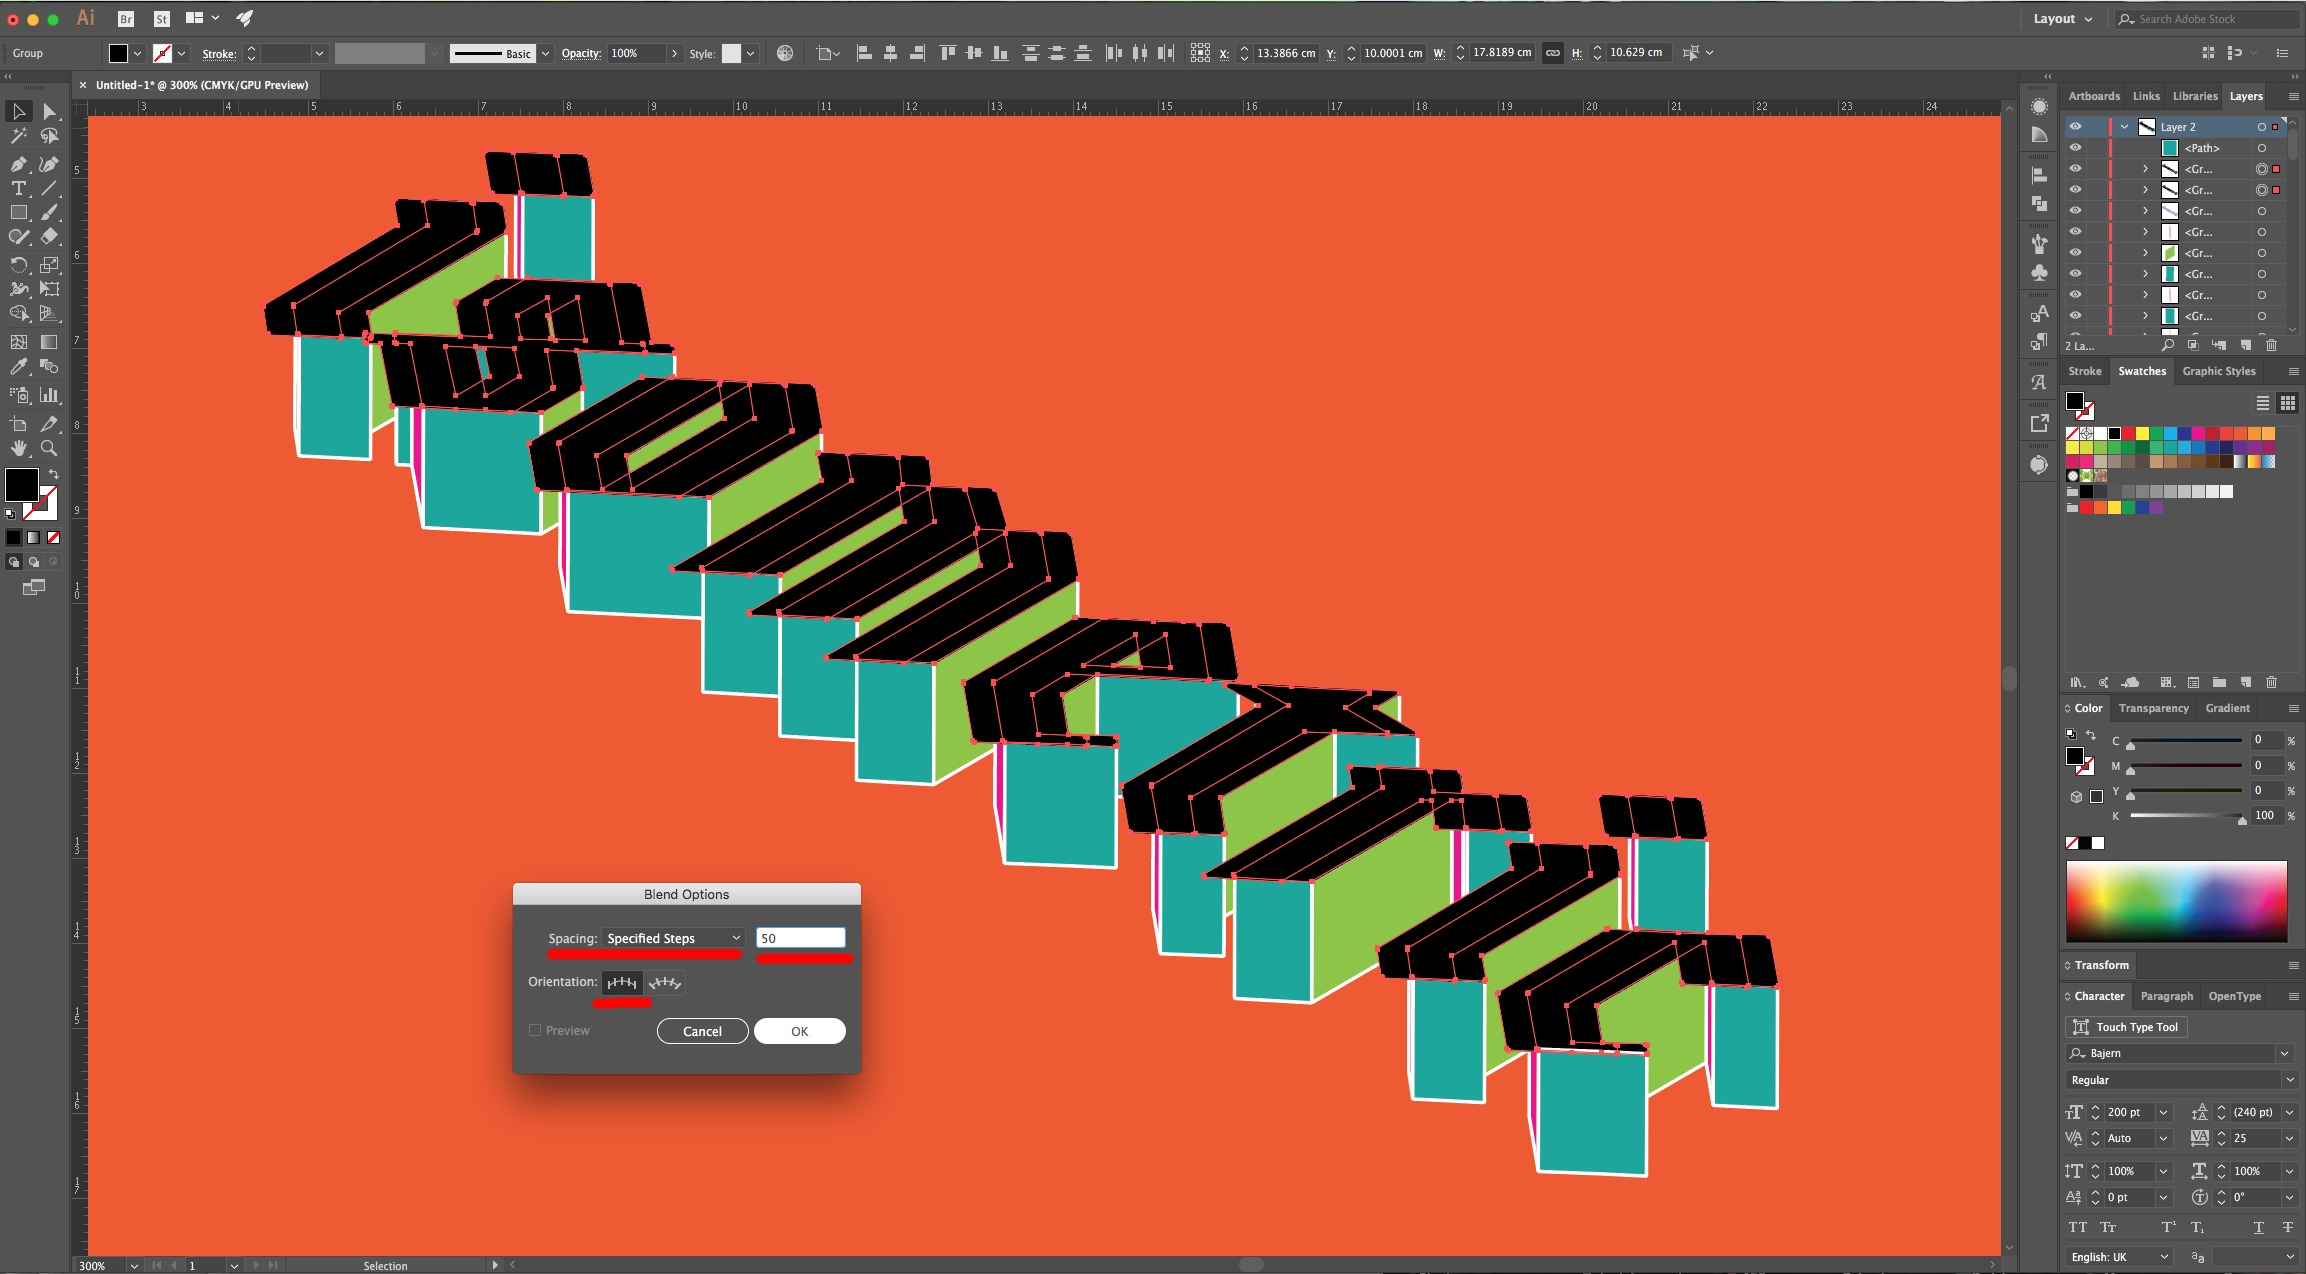
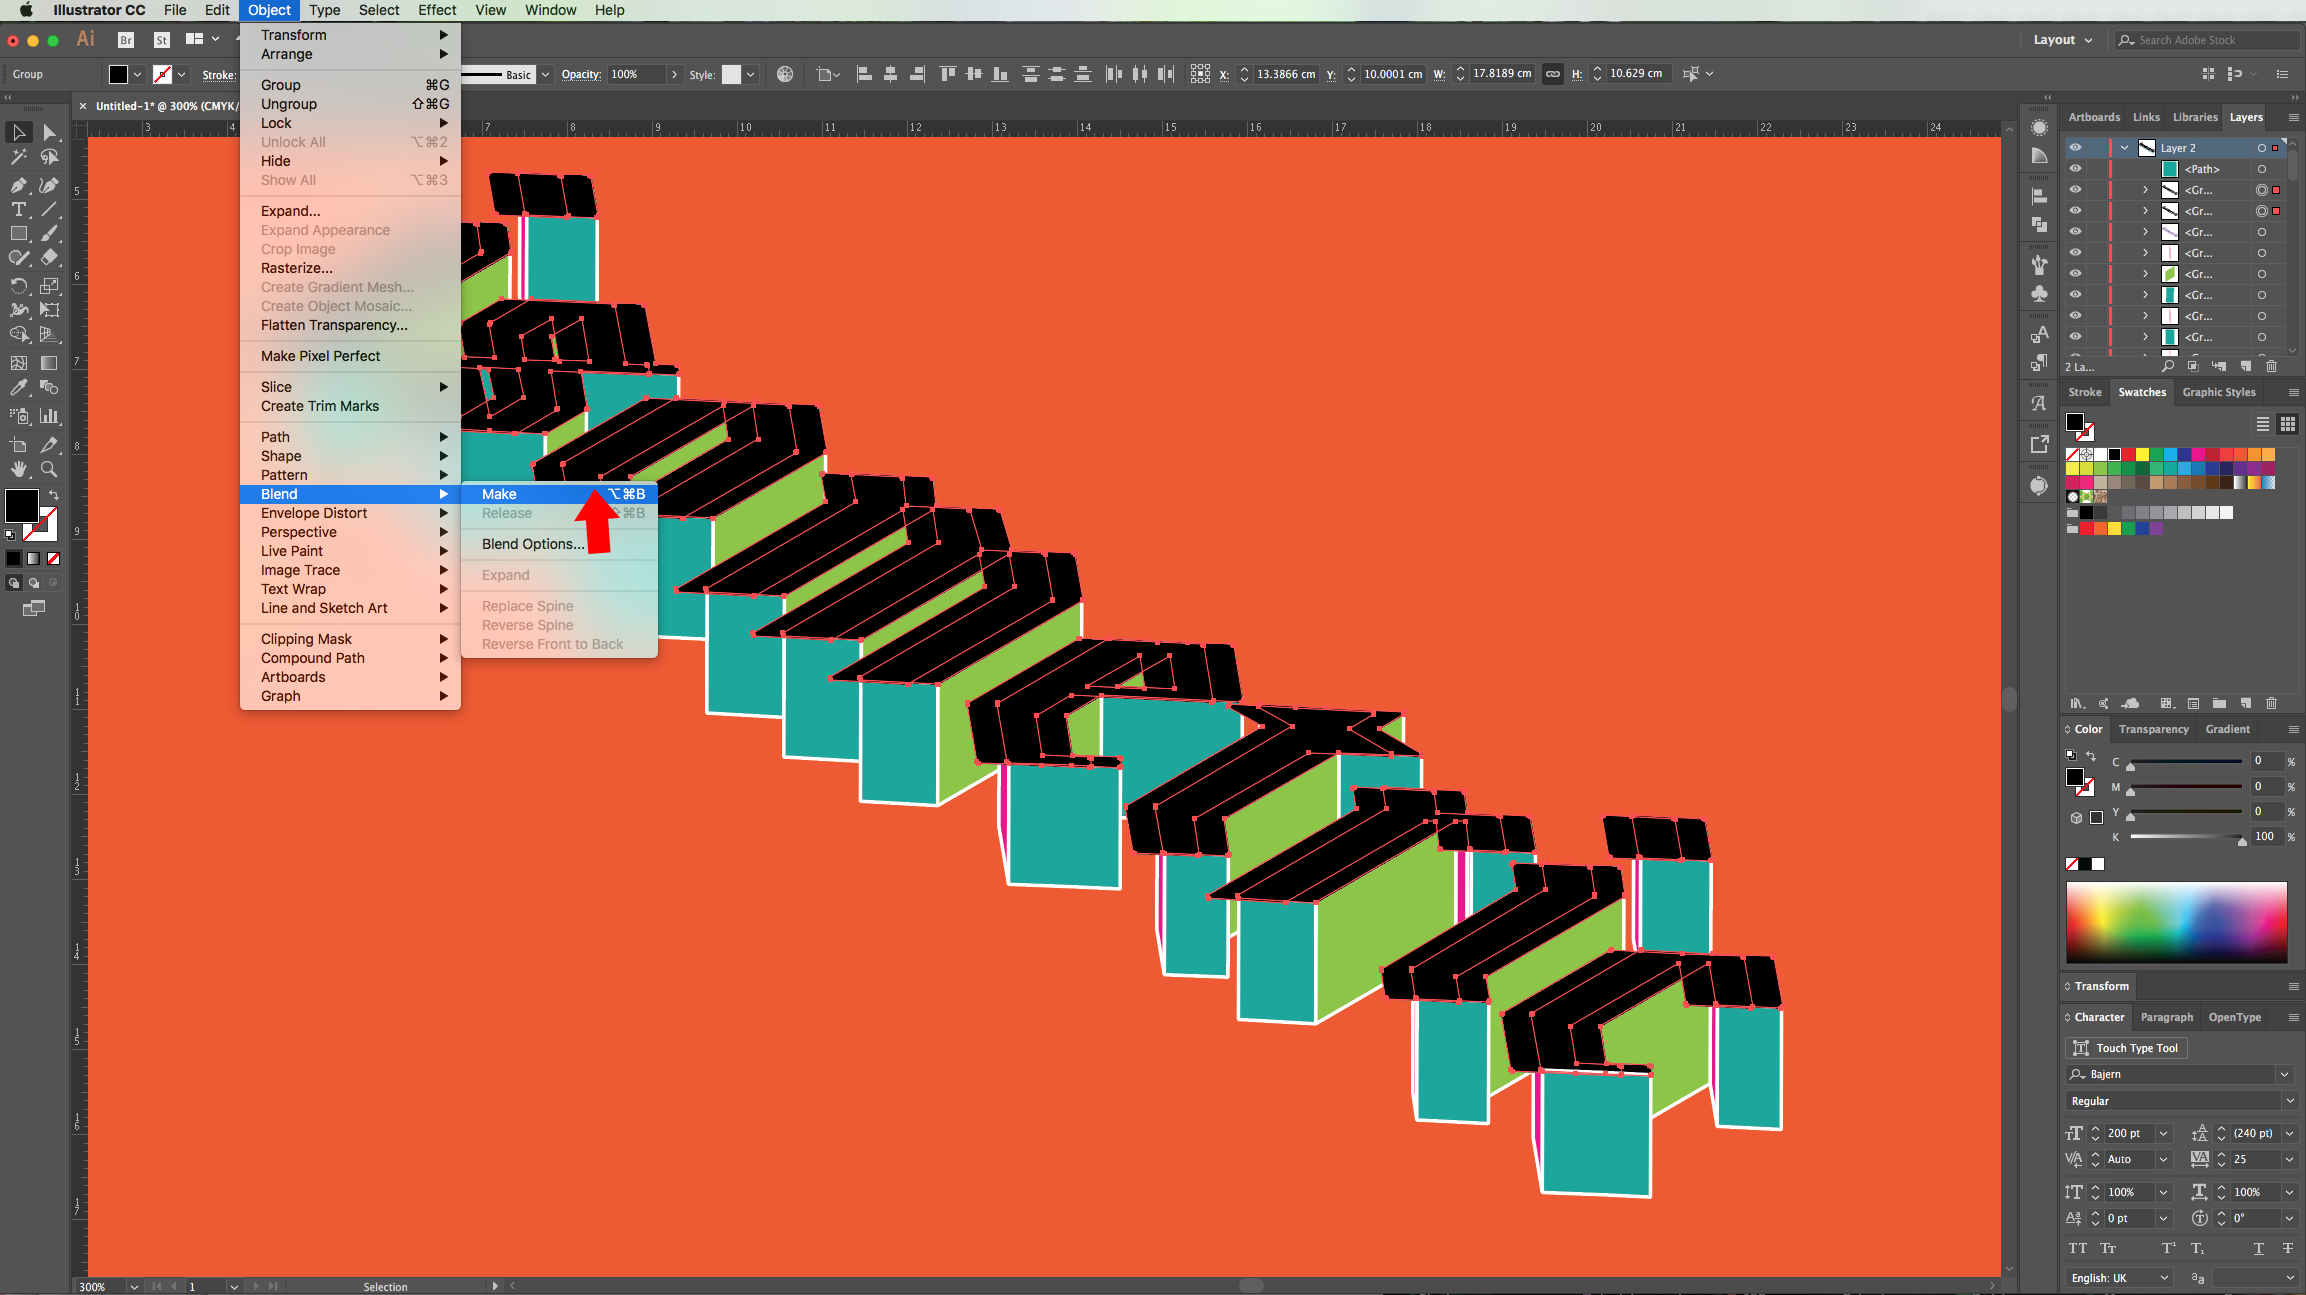
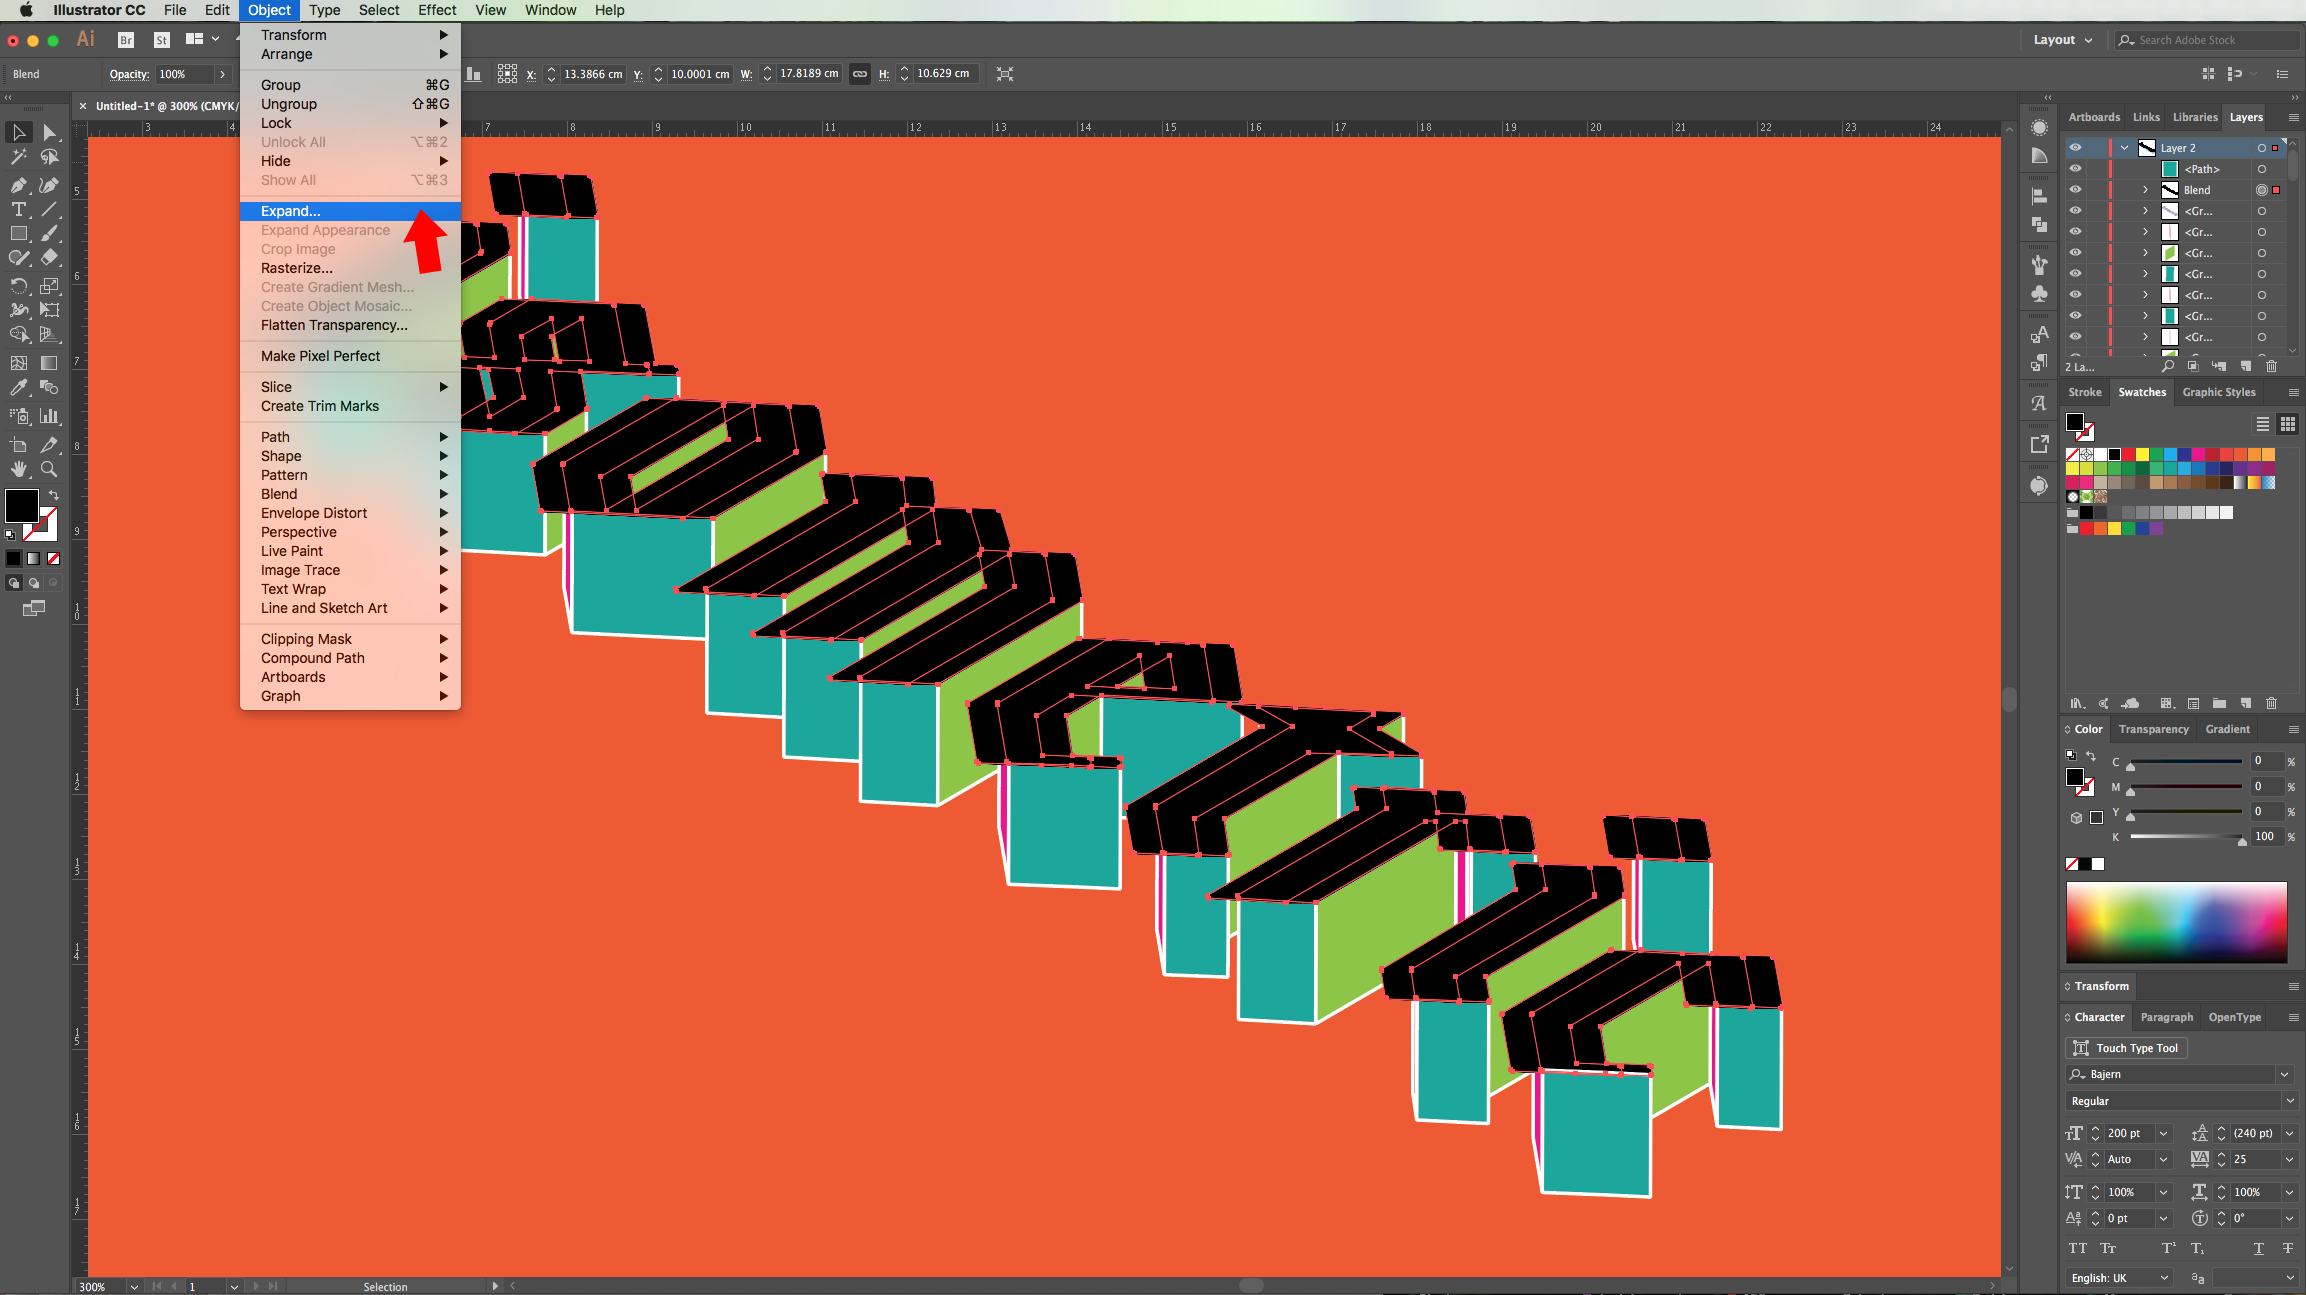
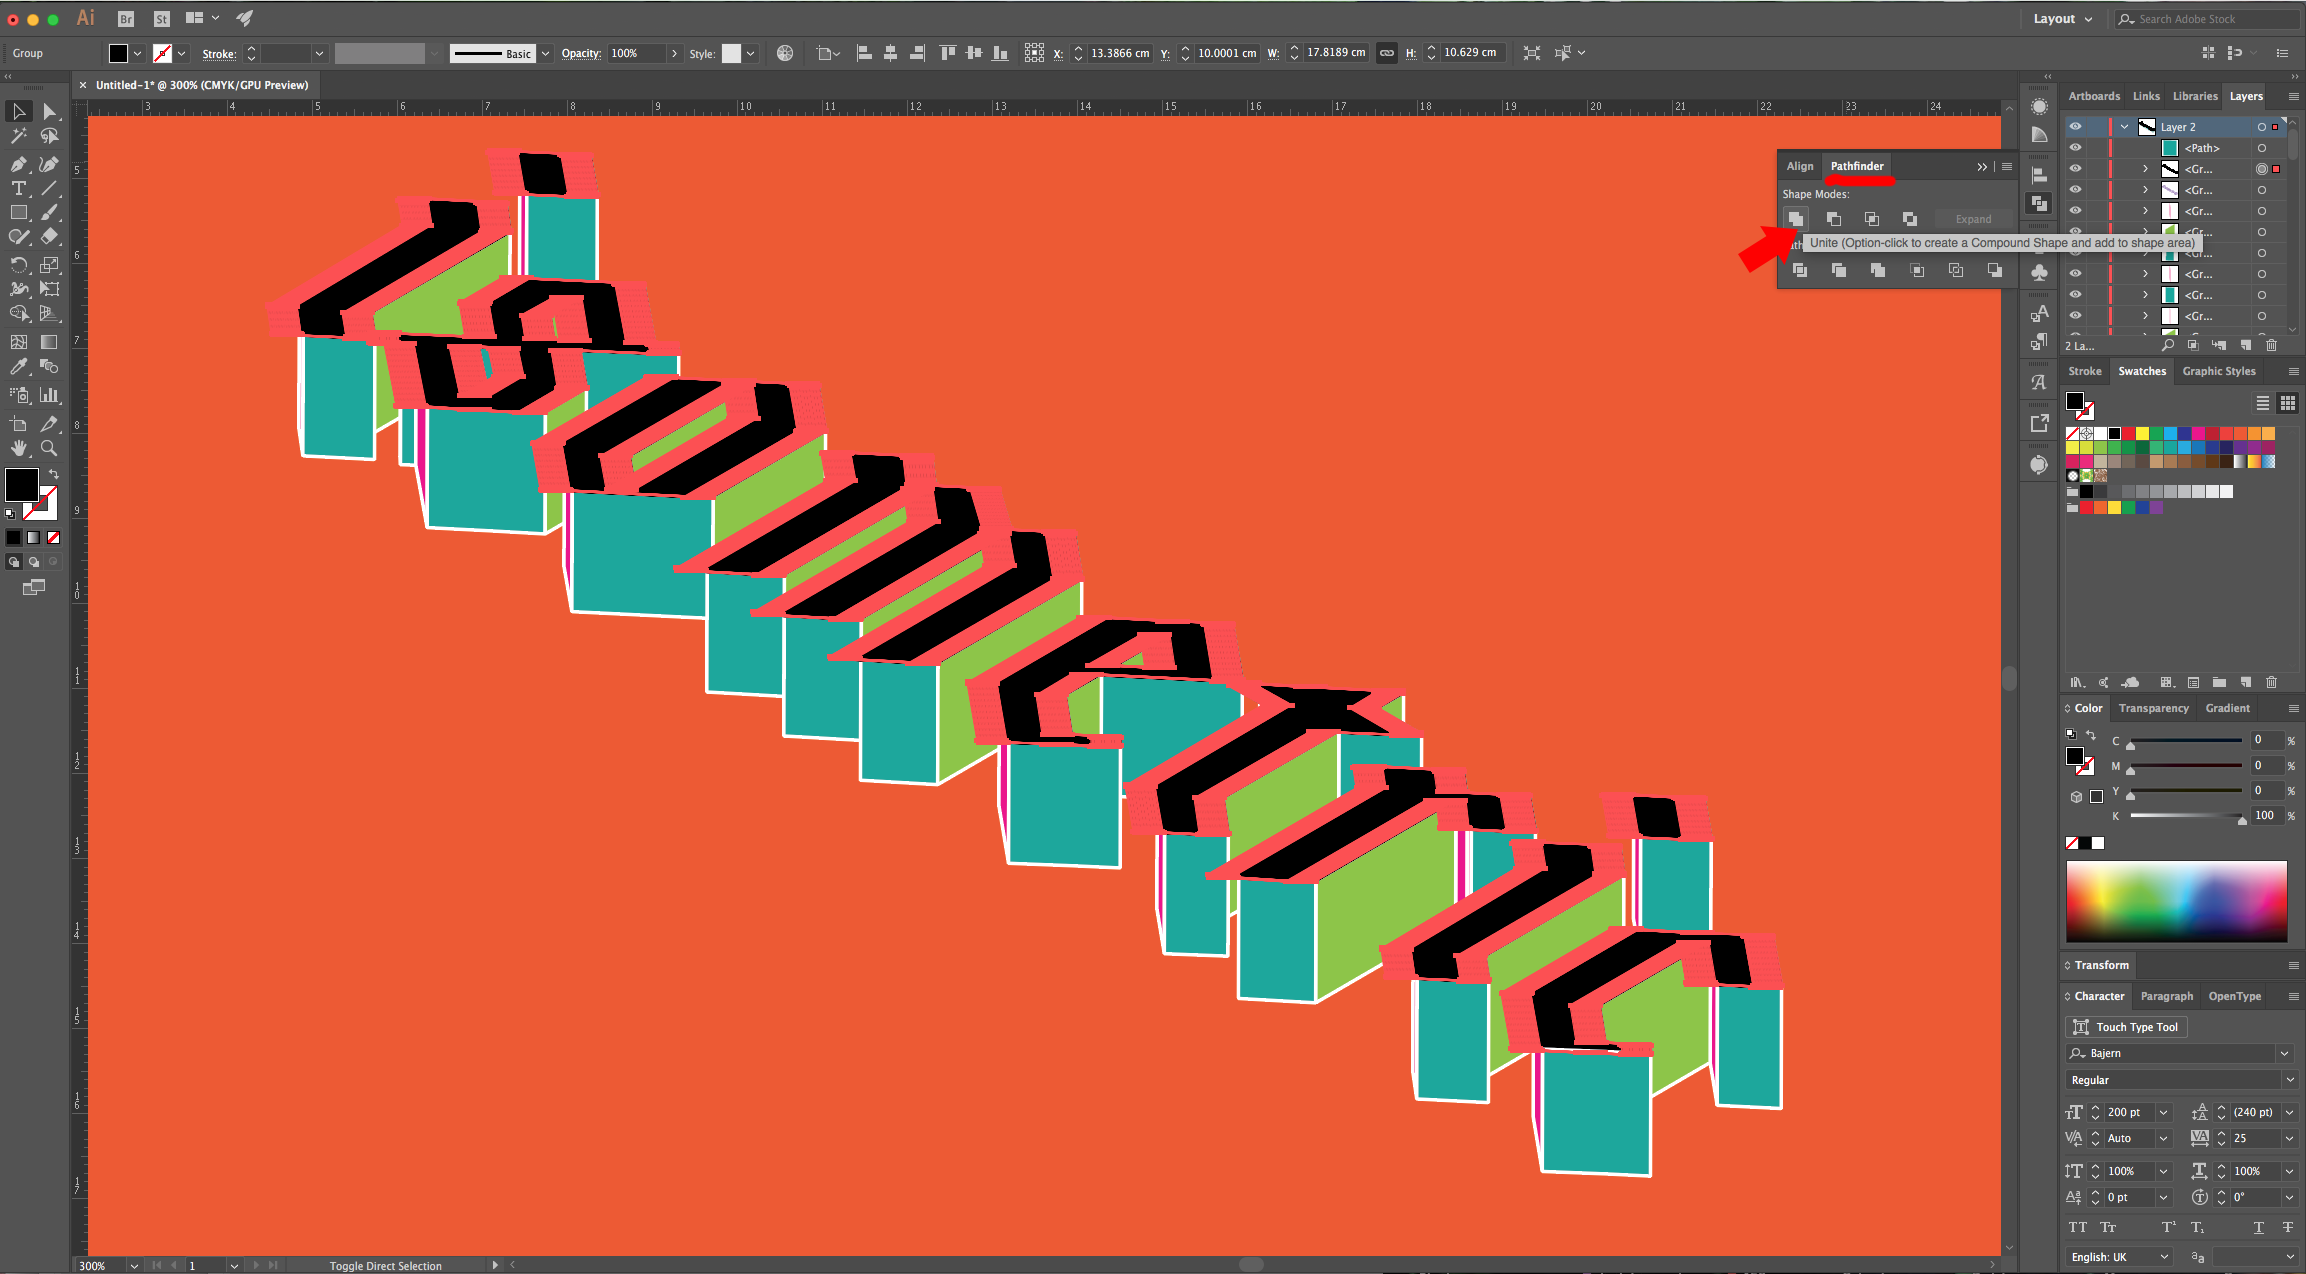
10 - Repeat the “Copy” and “Paste in Front” one more time and nudge de duplicate about 10 clicks to the left, select both and go to Object > Blend > Blend Options… use “Specified Steps” for “Spacing” and a value from 50 to 100+. Then, go to Options > Blend > Make (Alt/Option + Command/Control + B). Go to Object > Expand and make sure that the “Object” and “Fill” boxes are checked before clicking “OK”. Finally, go to the “Pathfinder Panel” and click “Unite”.
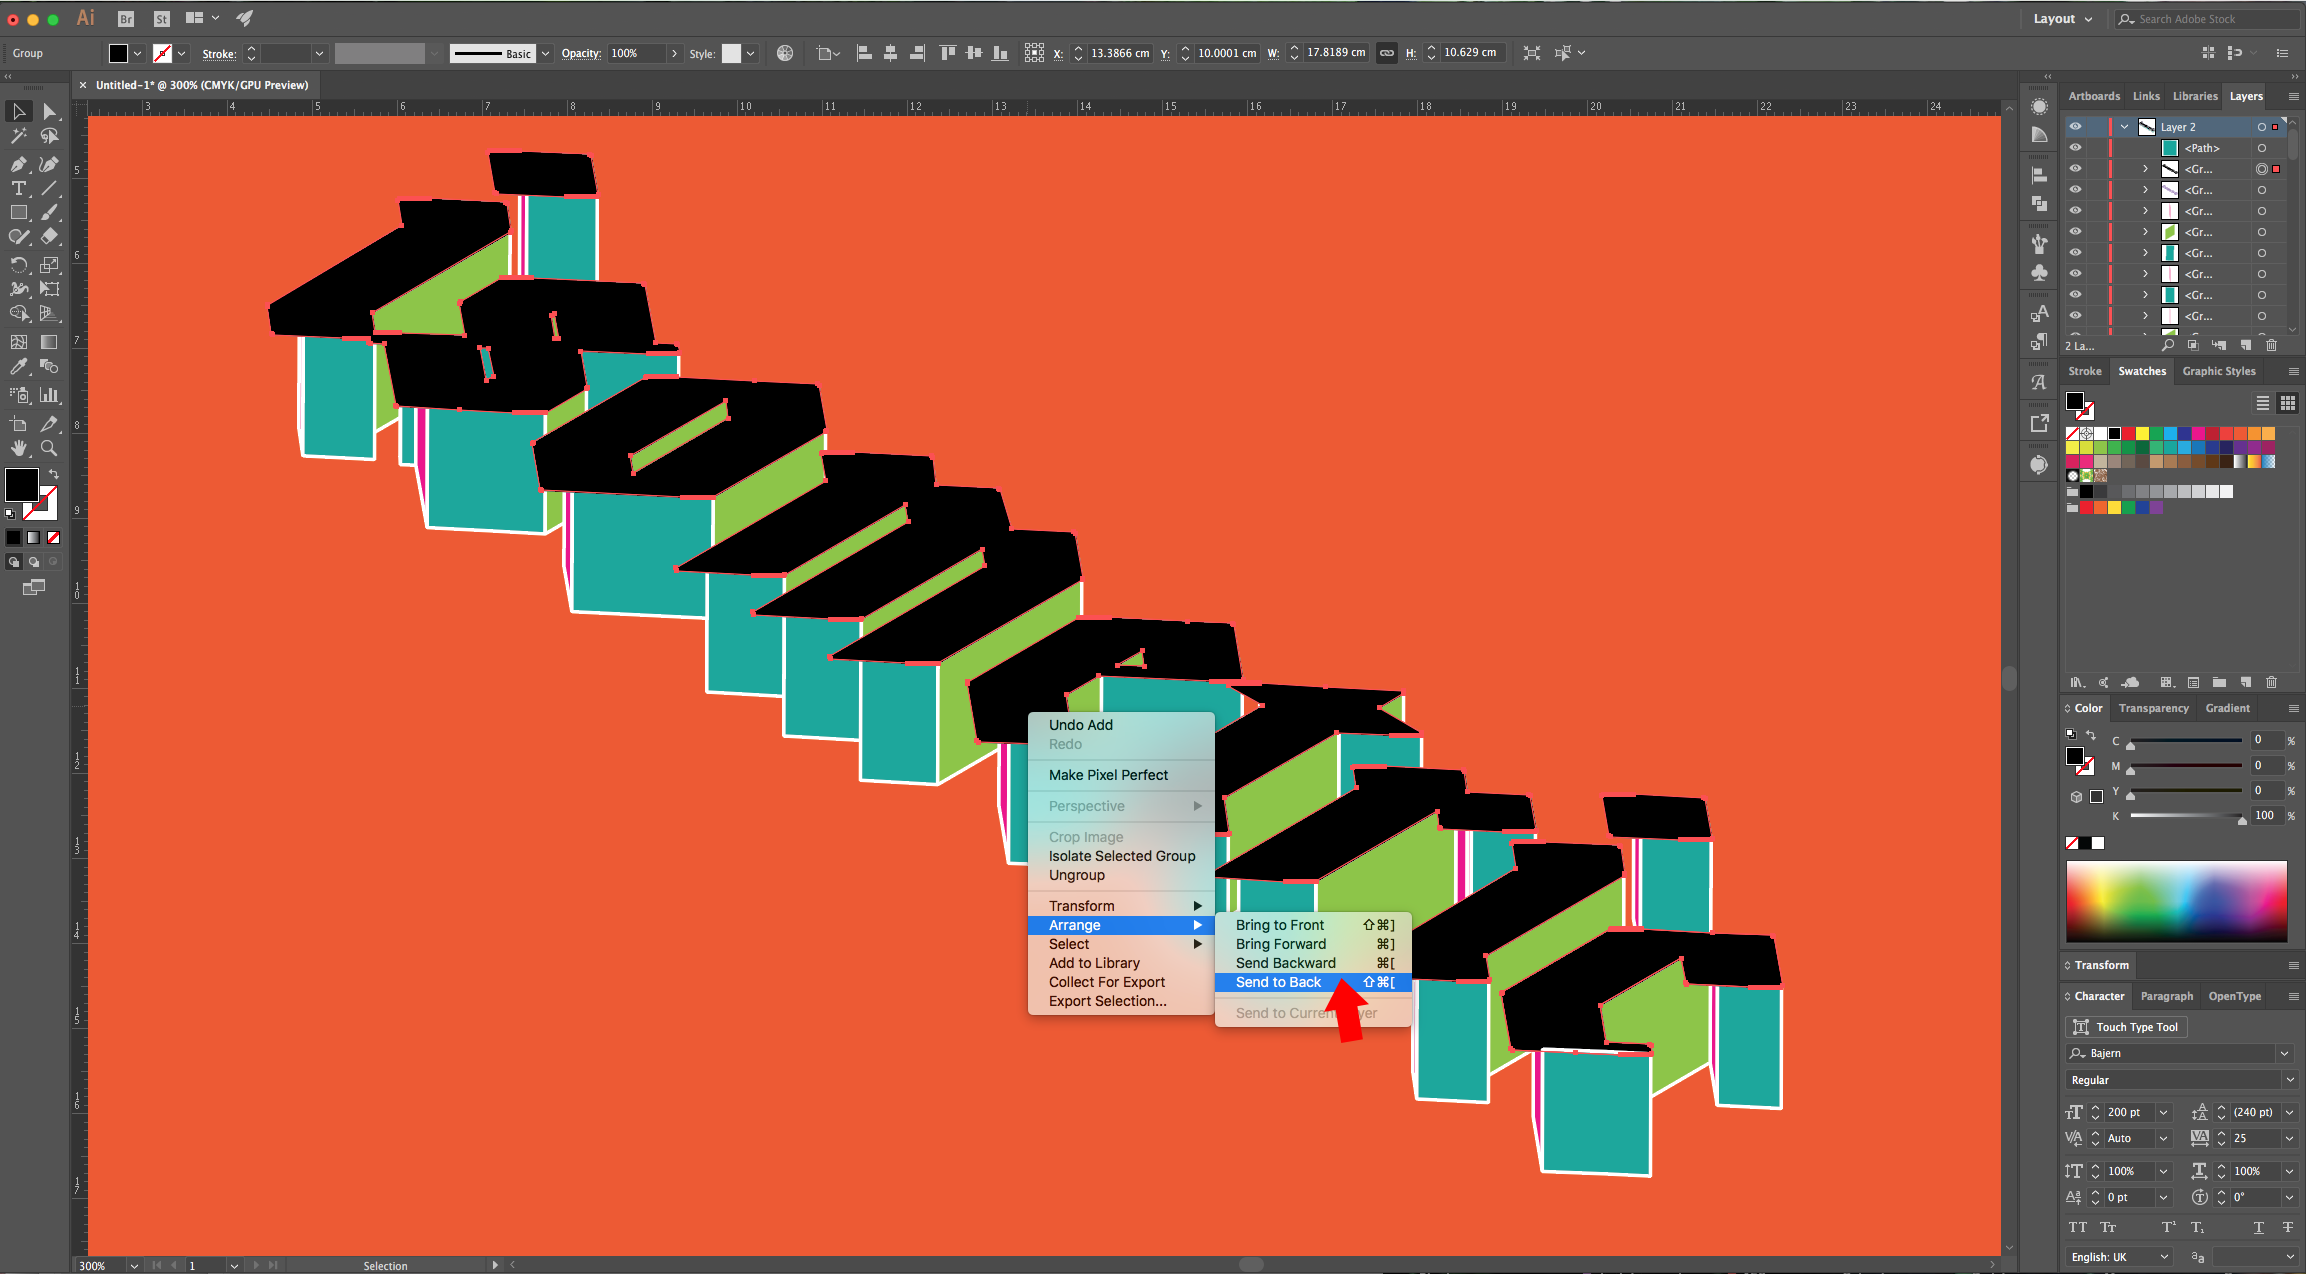
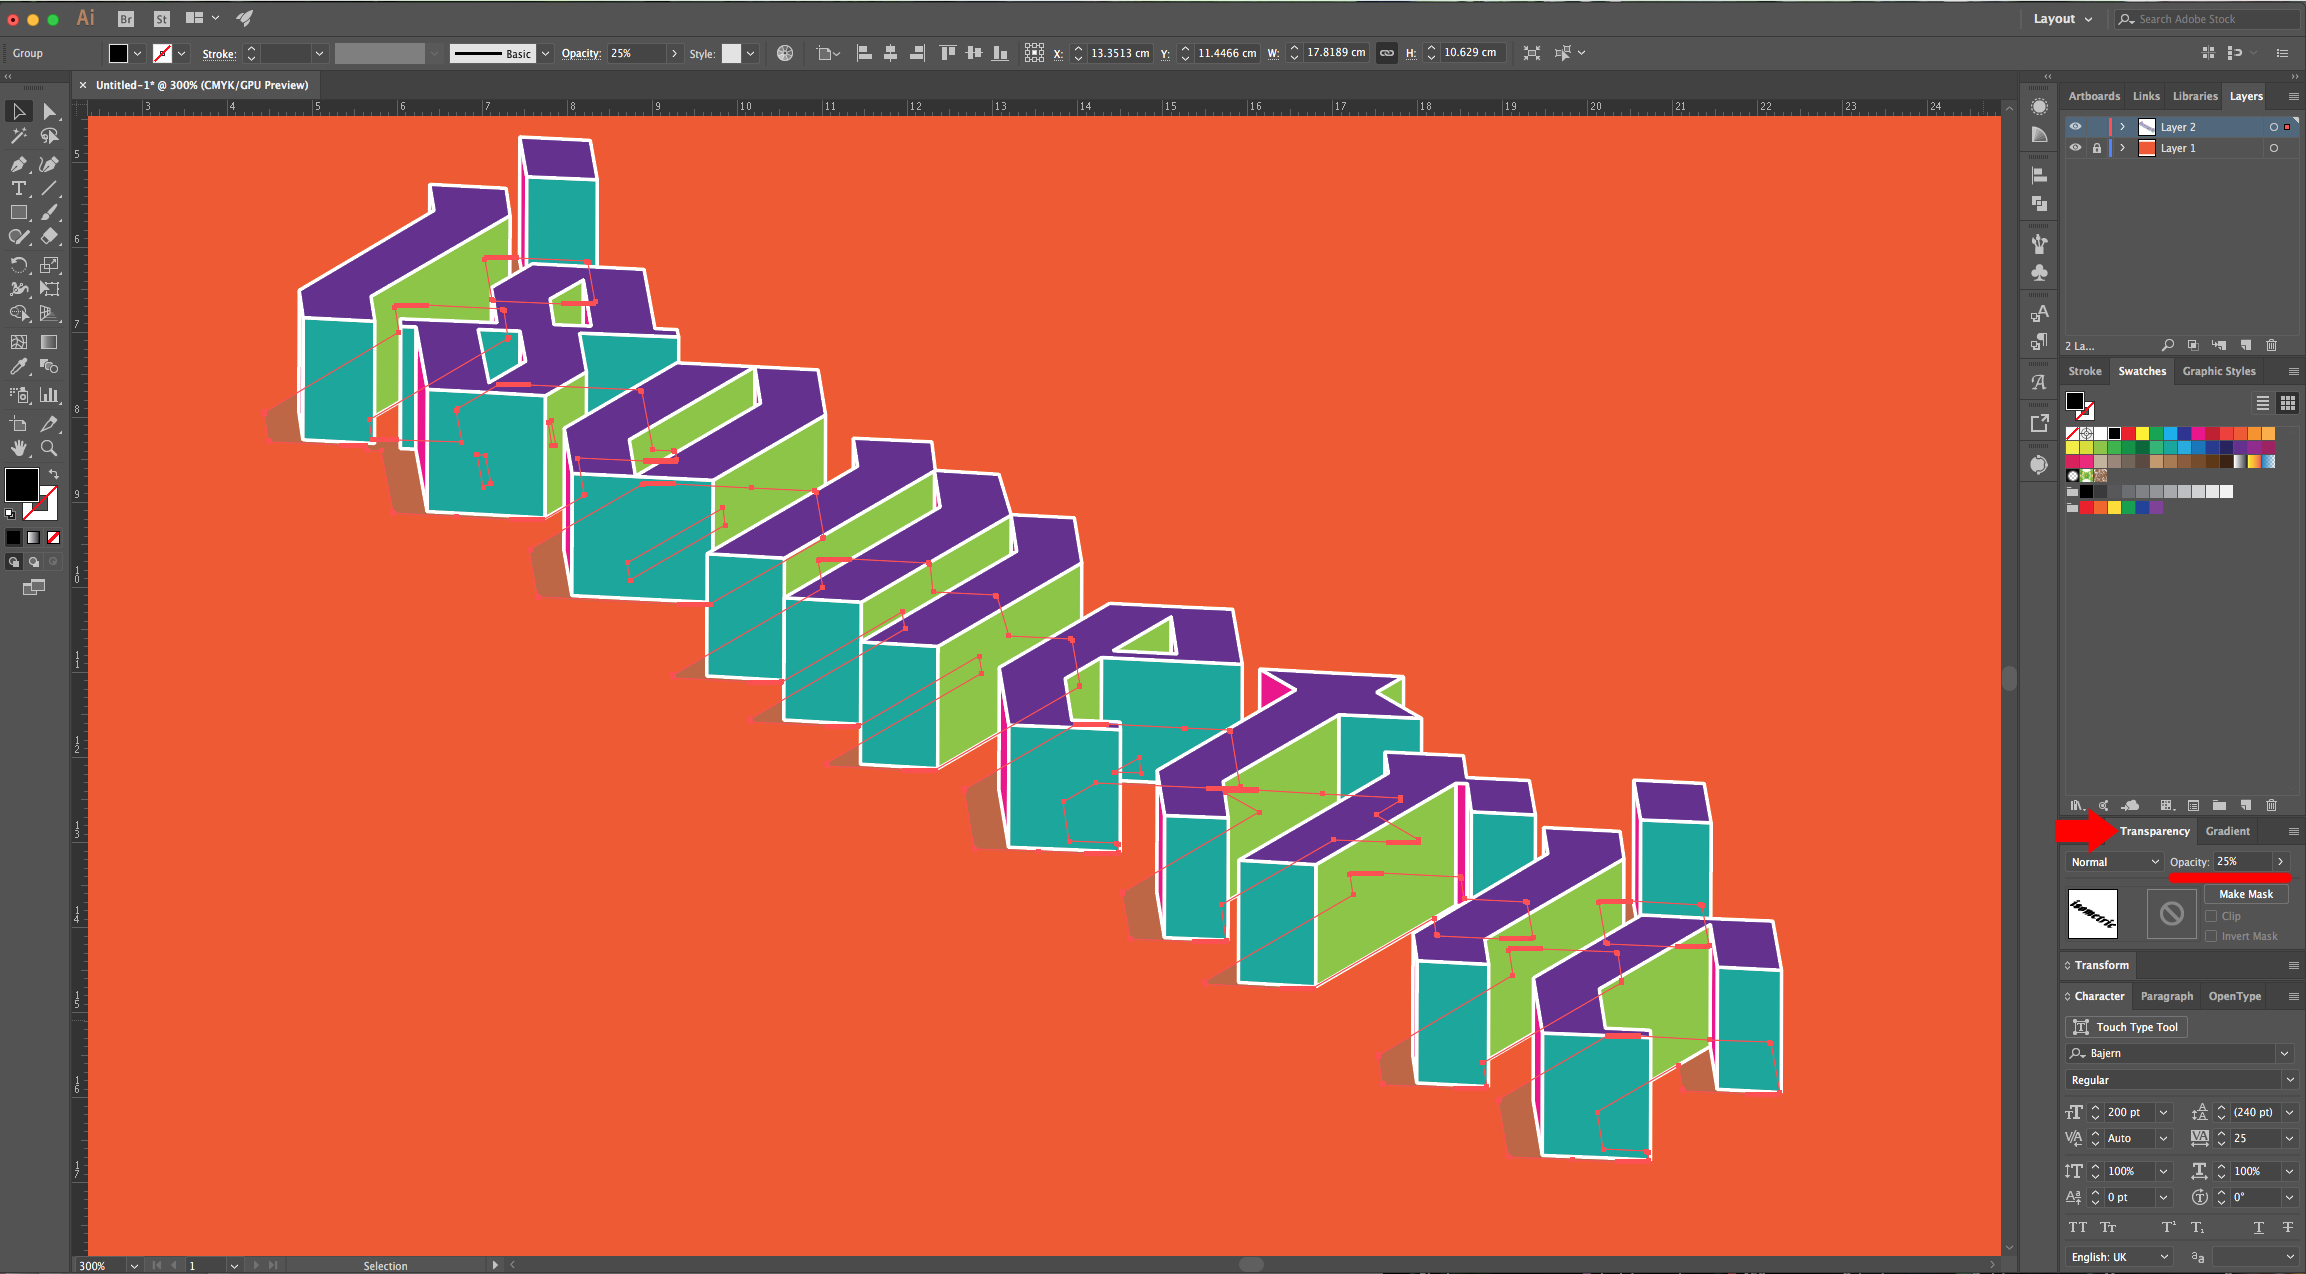
11 - Right-click on top of your resulting “Path” and choose Arrange > Send to Back. Move it if needed, to simulate a “Shadow” and lower the “Opacity” to about 25% in the “Transparency Panel”.
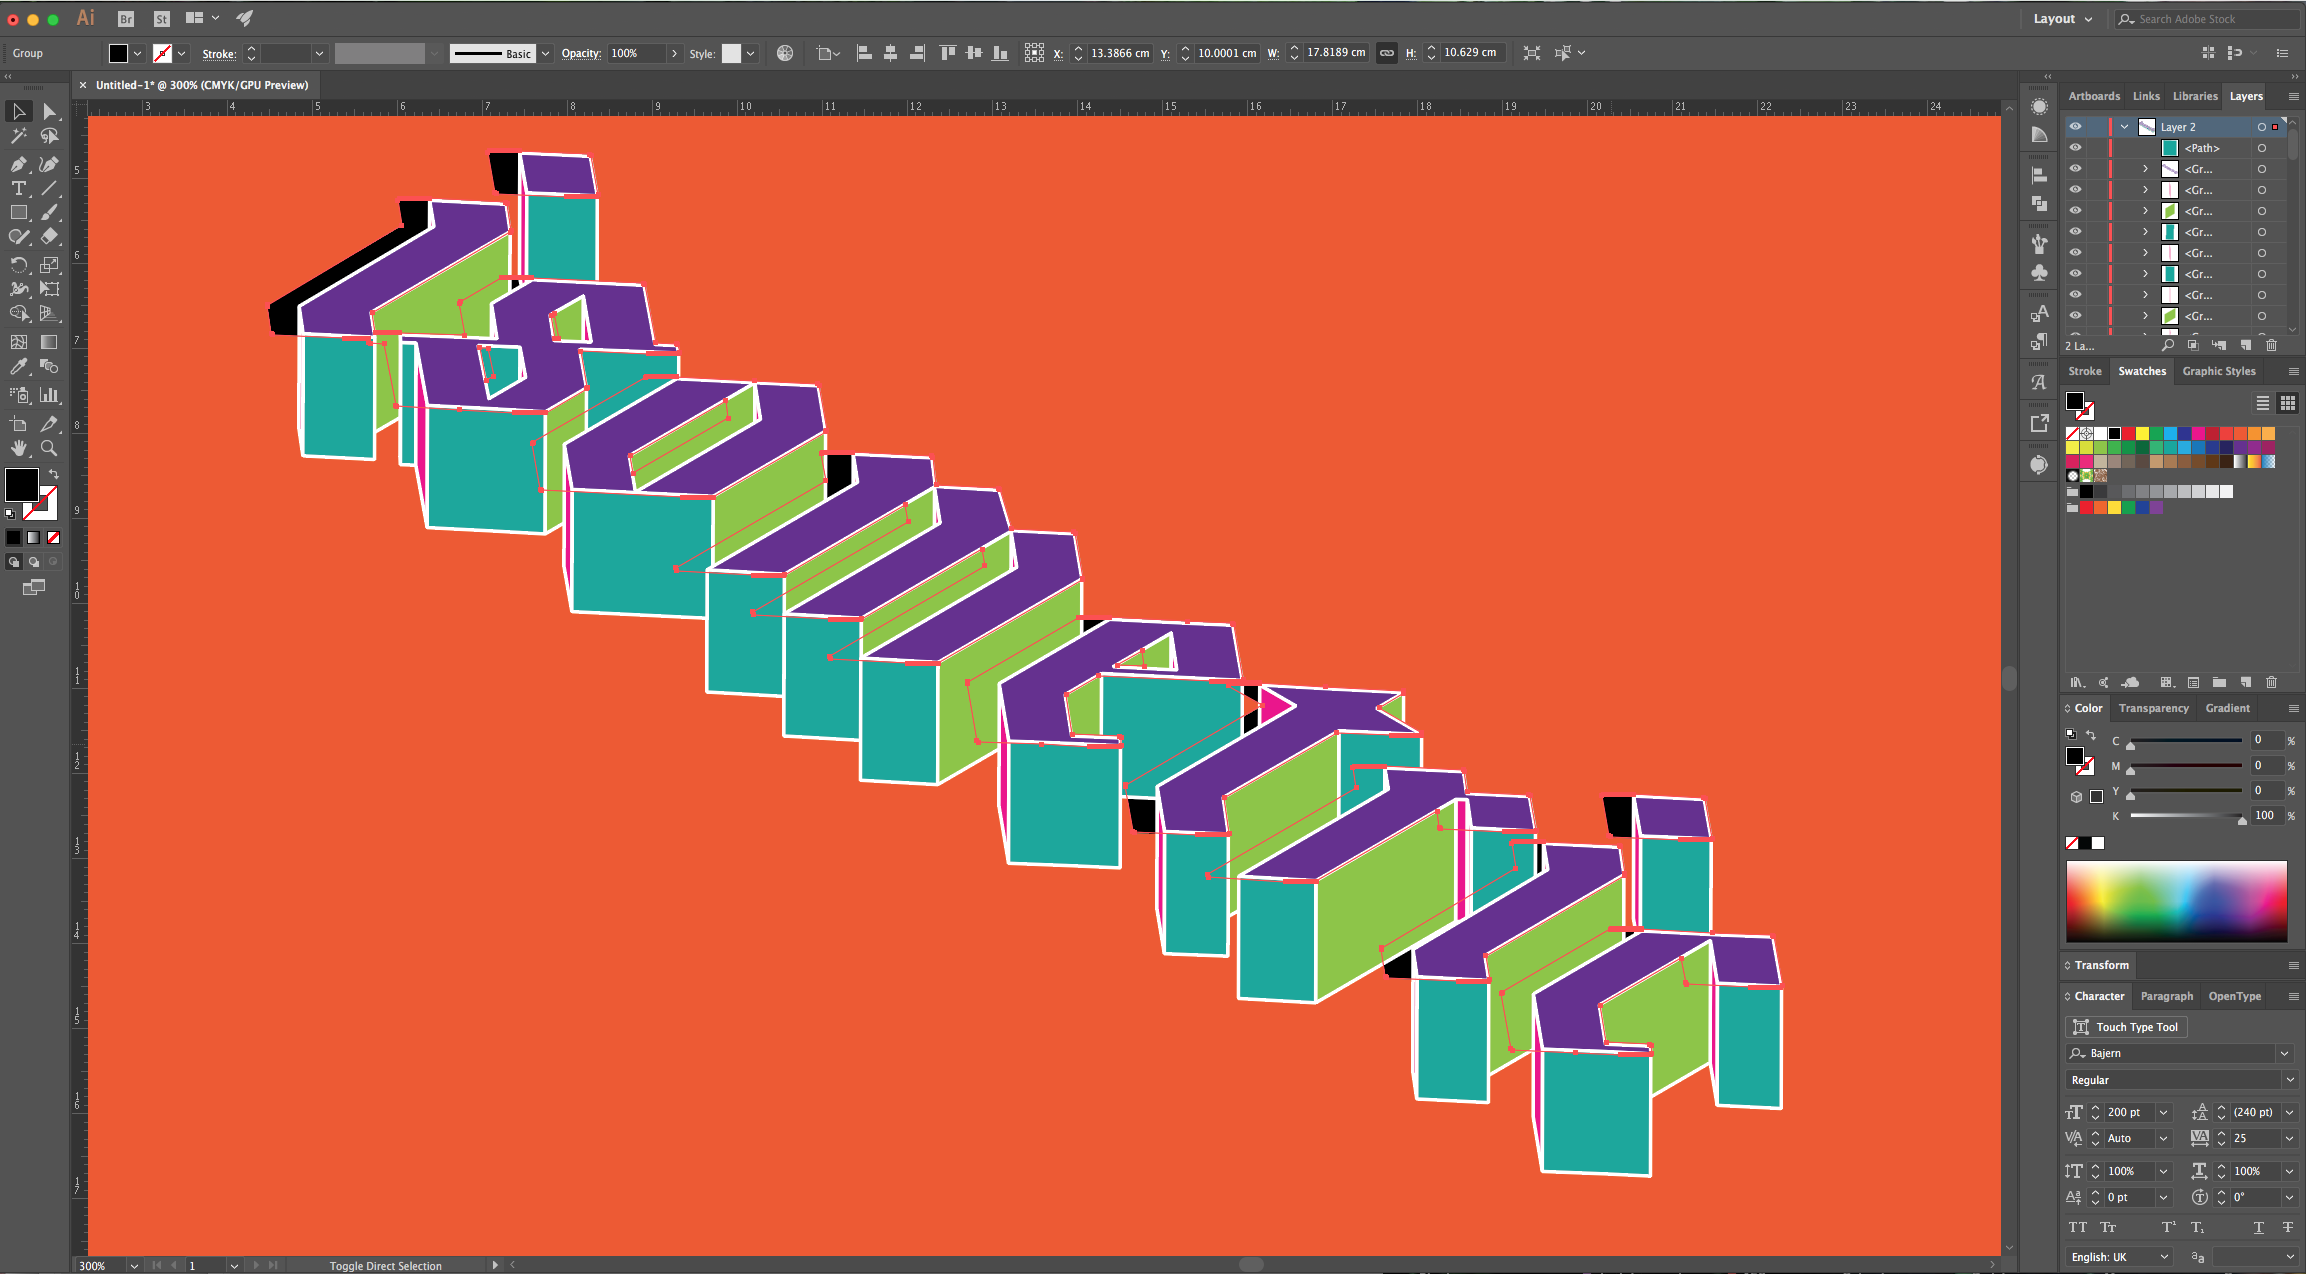
12 - You can also change the “Background” color if you want.
1 - In Illustrator, create a “New Document”.
2 - Select the “Rectangle Tool” (M) and make a rectangle that covers all your document. Fill it with the color of your choice.
3 - Lock your Layer by clicking on the left side of its thumbnail in the and bringing out the small padlock icon. Then, click on the “Create New Layer” button at the bottom of the “Layers Panel”.
4 - Select the “Type Tool” (T), choose your font (we used “Bajern”) and type your text. Change the “Tracking” a bit to separate your text if needed.
5 - Change the “Fill” color to a medium grey and in the “Appearance Panel” click on the “Add New Effect” button at the bottom and choose 3D > Extrude & Bevel. Choose “Isometric Top” in the “Position” drop-down menu and click “OK”. Go to Object > Expand Appearance, then, right-click on top of your text and choose “Ungroup” twice.
6 - Select all the “Top” portions of the letters and fill them with a bright color, then, right-click on top of them and choose “Group”. In some of your letters, especially if they have rounded parts you will notice that you have multiple segments. Select all the segments that form that portion and click “Unite” in the “Pathfinder Panel”.
7 - Select all the sides of the letters that face the same direction and fill them with contrasting colors. This has to be done individually, otherwise the stacking order of the shapes is affected.
8 - Select the “Top” group and apply a White “Stroke” with a 1 px “Weight”, a “Rounded Cap” and a “Bevel Join Corner”. “Copy” it (Command/Control + C), “Paste in Front” (Command/Control + F) and change the “Fill” and “Stroke” color to Black.
9 - Then, go to Object > Expand and make sure that the “Fill” and “Stroke” boxes are checked before clicking “OK”. With everything still selected, go to the “Pathfinder Panel” and click “Unite”.
10 - Repeat the “Copy” and “Paste in Front” one more time and nudge de duplicate about 10 clicks to the left, select both and go to Object > Blend > Blend Options… use “Specified Steps” for “Spacing” and a value from 50 to 100+. Then, go to Options > Blend > Make (Alt/Option + Command/Control + B). Go to Object > Expand and make sure that the “Object” and “Fill” boxes are checked before clicking “OK”. Finally, go to the “Pathfinder Panel” and click “Unite”.
11 - Right-click on top of your resulting “Path” and choose Arrange > Send to Back. Move it if needed, to simulate a “Shadow” and lower the “Opacity” to about 25% in the “Transparency Panel”.
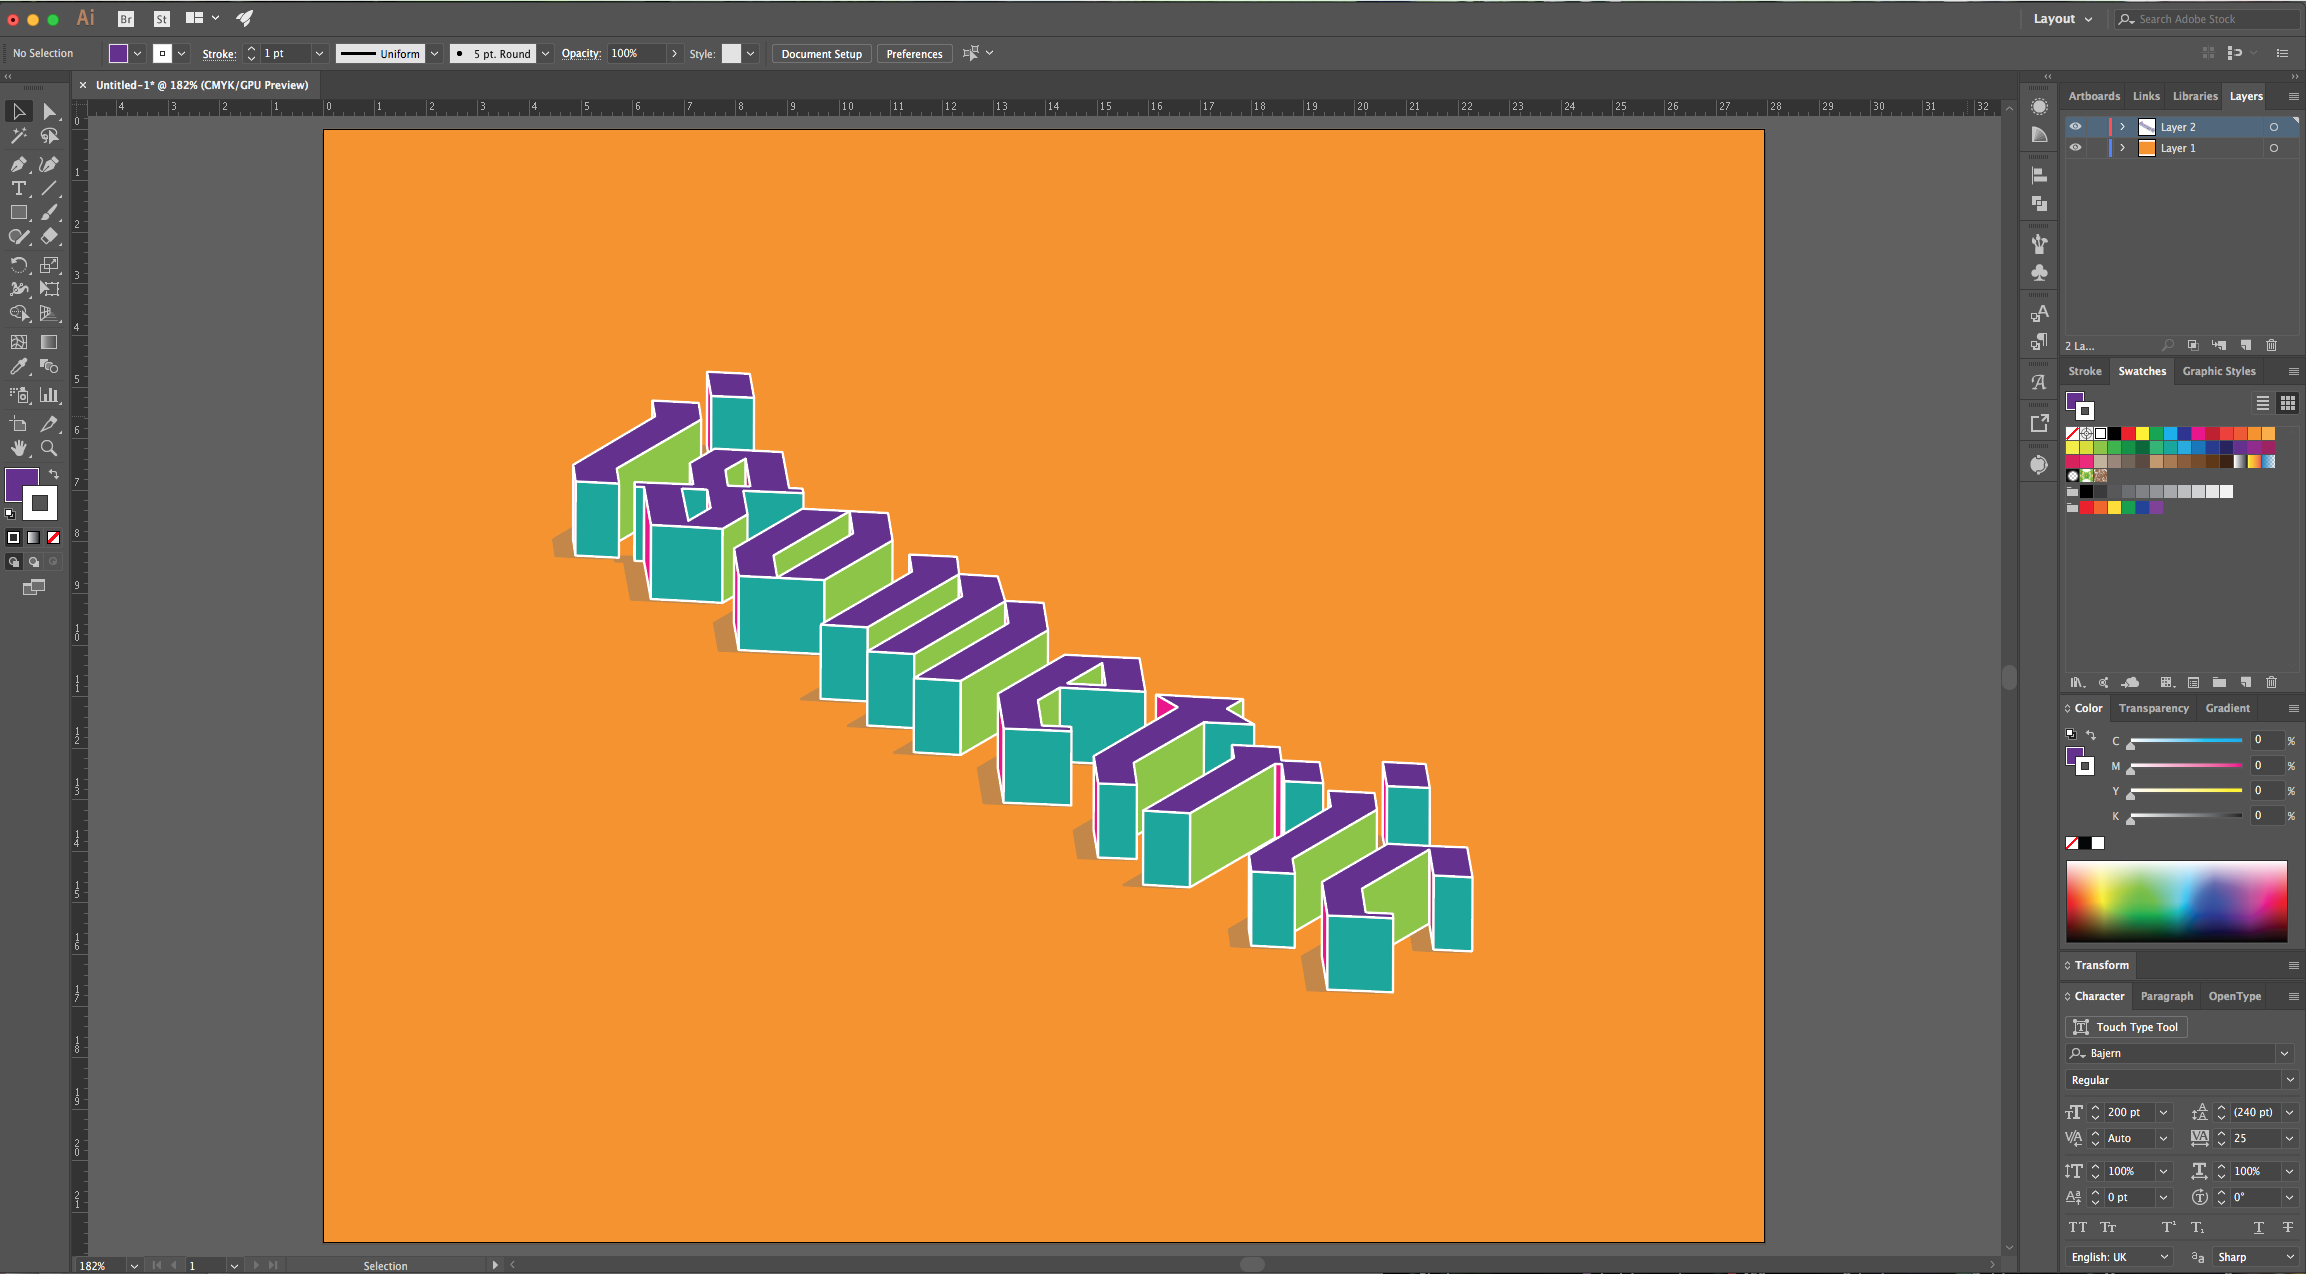
12 - You can also change the “Background” color if you want.
by @lornacane
Related Tutorials
Illustrator Tutorials
Wavy Text in Illustrator
Learn how to create Wavy Text in Illustrator using two Methods in this tutorial.
Illustrator Tutorials
How to Create an Isometric Design in Illustrator
In this tutorial, discover how to create an impressive Isometric Design in Illustrator.
Illustrator Tutorials
Place Images Inside Text in Adobe Illustrator
In this Adobe Illustrator tutorial, learn how to quickly place images inside text.
Illustrator Tutorials
How to Use Text Effects in Illustrator
Learn how to use Illustrator Text Effects in 1 click!
Illustrator Tutorials
Editing Text in Adobe Illustrator
With this step by step tutorial we'll show you everything you need to know about editing text.
Illustrator Tutorials
Overlapping Text in Illustrator
Learn how to easily overlap text in this Adobe Illustrator tutorial.