By Design Bundles
How to Create an Offset in Inkscape
In our tutorial today we will show you how to create an offset in Inkscape. An offset can make a thin font thicker so that it is easier to cut with your machine. You may also want to add an offset for stickers to give a clearance around the edges. Follow our tutorial as we guide you through a quick way of adding an offset.

To show the process we will be using this lovely script font but we have many more calligraphic fonts to choose from.
You will first need to install the fonts on your PC or Mac before opening Inkscape. Once done, go ahead and open a new document in Inkscape.
Step 1 - Add and Edit the Text
Let’s begin by adding the text first. On the left side toolbar, click on the “A” icon to access the Text Tool. Change the font in the Font Family in the top toolbar, then change the size. Click anywhere on your new document to enter text edit mode and start typing.

We also decided to add glyphs to our text for that little bit of extra flair. The color of the text was adjusted using the Color Palette at the bottom of the screen.

Step 2 - Convert Text into an Object
To apply an offset, we need to convert the text to an object. Before following this step, make sure you are happy with your text. Once converting to an object, you will not be able to enter text edit mode.
Click on the Move Tool top left then go to Path > Object to Path.

The letters have now been separated into individual objects but we need to ungroup and then combine them. First, Right click > Ungroup and while everything is still selected, go to Path > Union. The Union feature is effectively the same as using Weld in Silhouette. This combines all the elements into a single object.

Step 3 - Create an Offset
For this tutorial we are going to use the Linked Offset option as it is easier to work with.
Use the Linked Offset
Make sure that your text object is selected, then go Path > Linked Offset.

Now, look for the little triangle which should appear at the top of your text.

Click + drag this triangle up to increase the thickness of the offset. Don’t worry about the color, we will fix that shortly.

Change Offset Color
To be able to see the offset more clearly, choose a color from the Color Palette at the bottom of the screen. The color can be changed at any point.

You can carry on editing the offset and making it thicker or thinner. Once you are happy, move the text below the offset so we can clearly see the next part of the process.
Convert the Offset to a Path
You may want to keep the offset as is so you can skip this part if you want. We want to remove the smaller pieces like the center of the “O”. This is so we create clean cut lines when cutting with our machines.
First, go to Path > Convert to Path. Then, with the text object still selected, go to Path > Break Apart.

You will now see all the little pieces we want to remove. A quick way to do this is by going to Path > Union.

Align Text Objects
The offset and the smaller pieces have been combined into one object. To align both objects, go to Object > Align and Distribute. The Align and Distribute panel will open on the right hand side.
Next to Relative To, select First selected. Then, click on Center on Vertical Axis and Center on Horizontal Axis.

You can still change the color of either object. Here we opted for a lighter offset and a darker text.

Step 4 - Save Design as a SVG
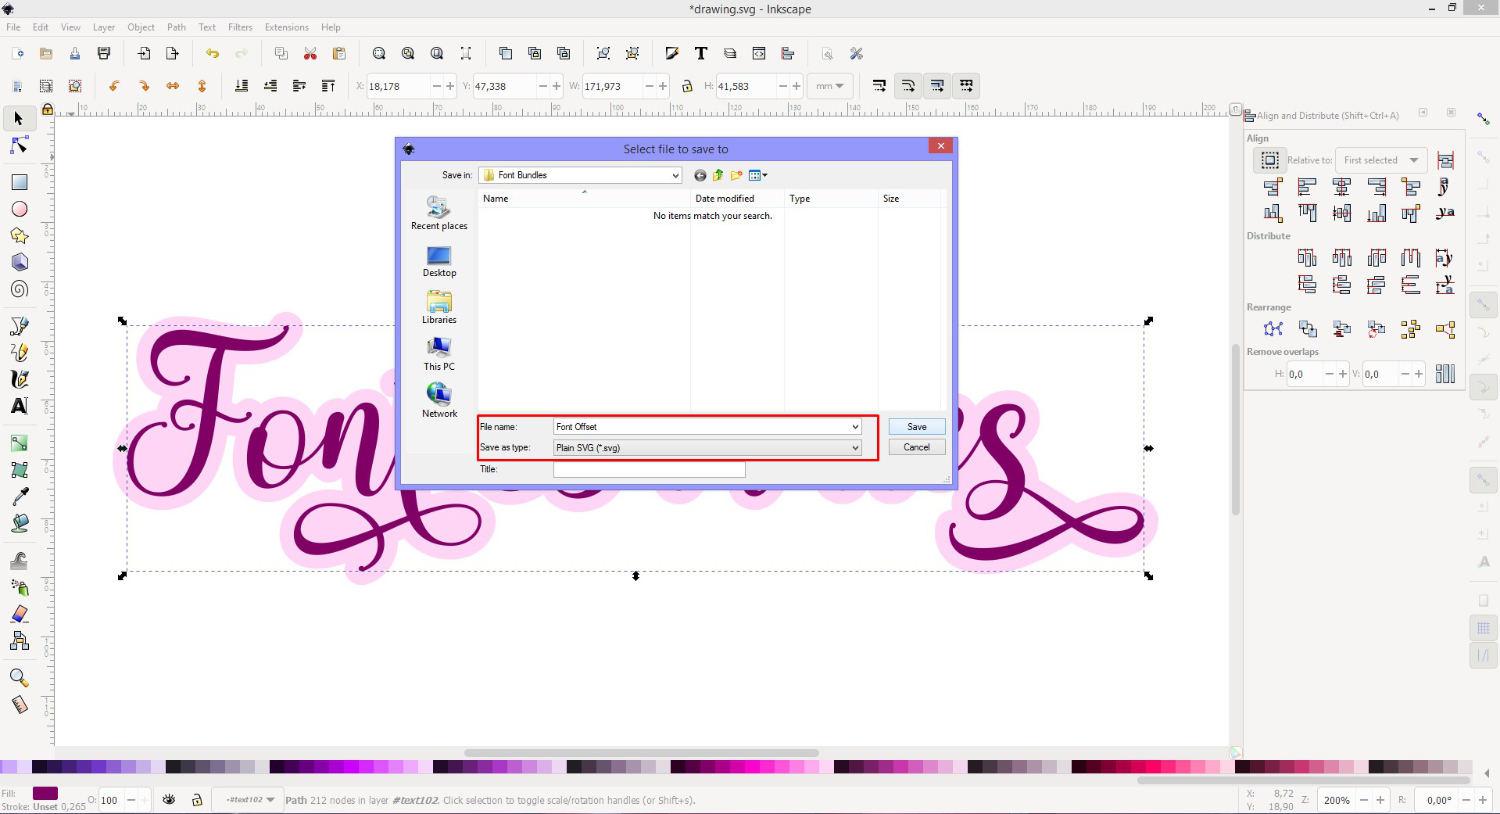
If you want to use your design as a cut file, you will need to save it as a SVG. To do this, go to File > Save As, then in the window give your file a name. Click on the drop down menu for Save as type and select Plain SVG.
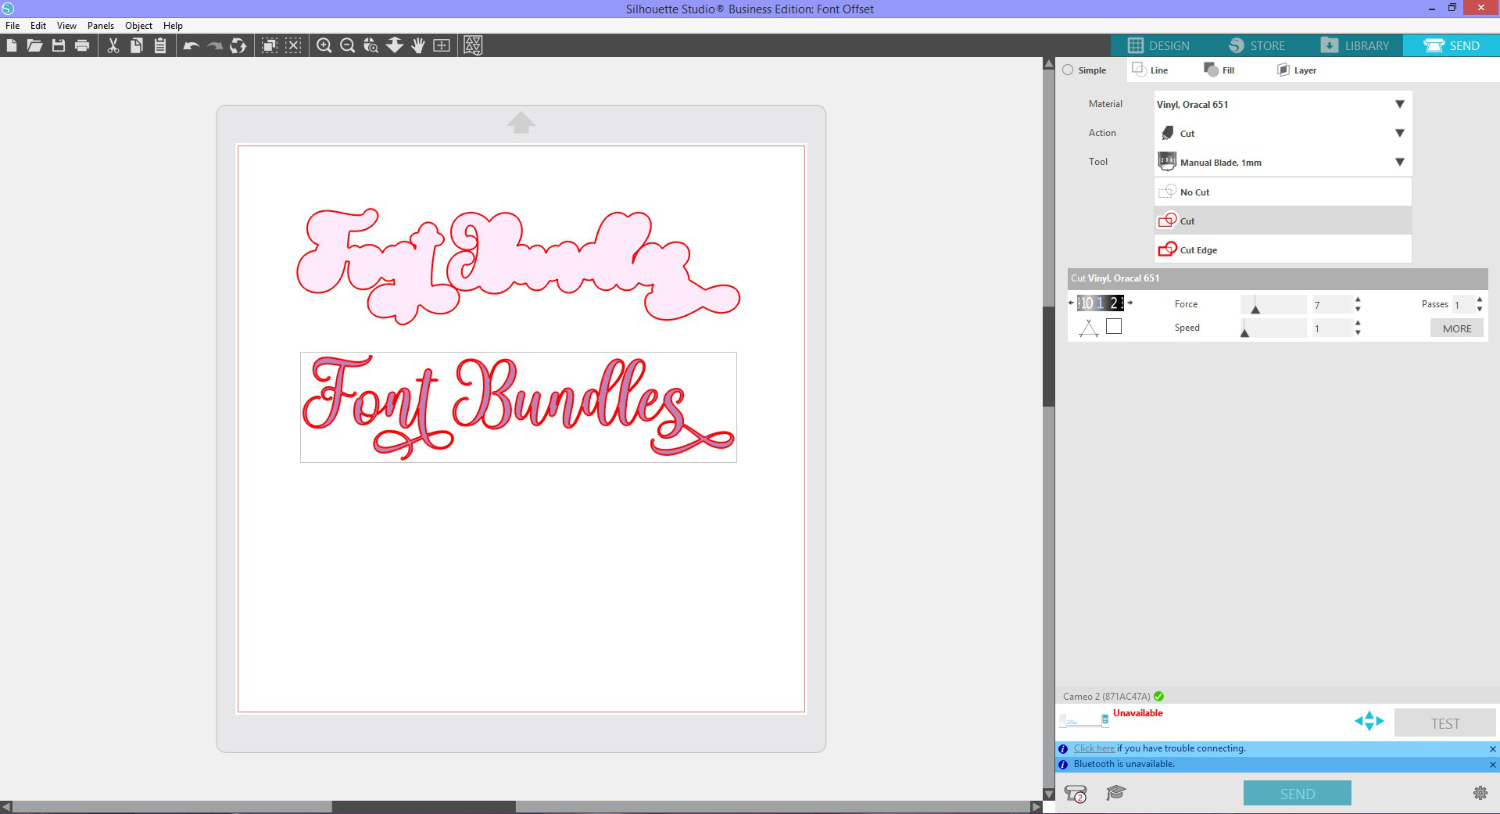
We tested the design out in Silhouette Studio. After ungrouping and separating, we clicked on the Send button. As you can see, the offset has nice clean cut lines without any stray areas.
We hope you enjoyed this tutorial on how to create an offset in Inkscape. An offset can be used in many different projects including adding impact to text. You can even add patterns to your text, making it stand out and look amazing.