By Saqib Ahmad
How to Prepare a Print Ready DTF or UVDTF File
Preparing your digital artwork correctly is not merely a suggestion - it is the single most critical technical step in achieving flawless DTF (Direct to Film) and UVDTF (UV Direct to Film) prints. The vibrancy of colors, edge sharpness, durability, and overall professional appearance of your final product depend entirely on how well your file is prepared.
Even the most beautifully designed artwork can fail during printing if the file setup is incorrect. Common issues such as color distortion, jagged edges, patchy ink coverage, or poor adhesion are almost always the result of improper file preparation. This comprehensive step-by-step guide explains exactly how to prepare a print-ready DTF or UVDTF file using Adobe Photoshop, along with the technical principles that ensure consistent, high-quality results.
The Four Pillars of Print-Ready DTF & UVDTF Files
Before opening Photoshop, it’s essential to understand the four core technical requirements every professional DTF or UVDTF file must meet.
1. Transparent Background (Non-Negotiable)
Your artwork must have a 100% transparent background.
Why this matters:
DTF and UVDTF printers apply ink only where artwork exists. The process involves laying down a white ink base beneath the colored inks. If your file contains any visible background - even solid white, the printer will treat it as printable ink. This results in unwanted blocks, outlines, or rectangles transferring onto the final product.
Best practice:
Always use PNG format, as it supports transparency through an alpha channel and is the industry standard for DTF and UVDTF printing.
2. Eliminate Semi-Transparency (Critical for Print Integrity)
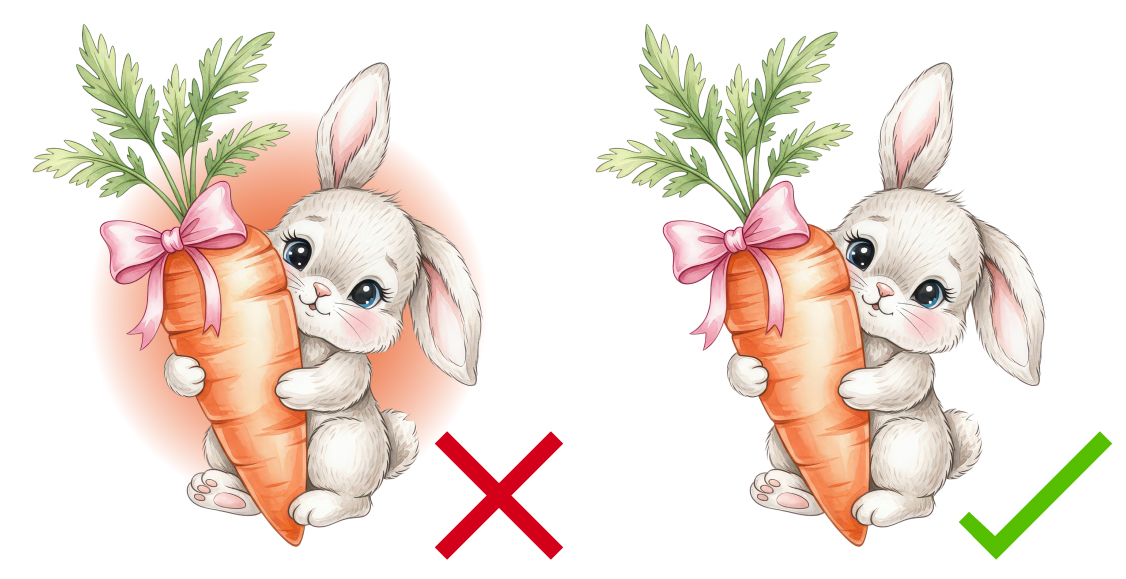
While a transparent background is required, semi-transparent elements within the design must be avoided. This includes:
- Soft shadows
- Glow effects
- Feathered or blurred edges
- Gradients fading to transparency
- Reduced opacity layers (e.g., 90%, 50%)
Technical explanation:
DTF and UVDTF printers interpret transparency as ink density. A pixel that is 50% transparent receives only 50% ink and 50% white backing. This leads to several issues:
- Uneven or patchy ink coverage
- Weak adhesive bonding
- Color fading or dullness
- Premature cracking or peeling
Best practice:
Ensure all artwork elements are 100% solid opacity with clean, hard edges. If soft visual effects are needed, simulate them using halftones or solid patterns rather than true transparency.
3. Set Resolution to 300 DPI
Resolution directly affects print clarity. Always work at 300 DPI (Dots Per Inch).
Why 300 DPI matters:
- Ensures crisp details and smooth edges
- Prevents pixelation and blurriness
- Meets professional print standards
Low-resolution files (such as 72 DPI) may look fine on screen but will degrade significantly when printed.
4. Use a Large Canvas Size (3000 × 3000 Pixels or More)
A large canvas provides flexibility without sacrificing quality.
Recommended size:
Start with 3000 × 3000 pixels or larger.
Benefits:
Working at a larger size allows you to scale the artwork down for different applications (small logos, large prints, decals) while maintaining 300 DPI and sharp detail.
Step-by-Step Photoshop Setup for DTF & UVDTF
Step 1: Create a Print-Ready Document
Open Adobe Photoshop
Go to File → New
Set the following:
- Resolution: 300 DPI
- Dimensions: 3000 × 3000 px (or larger)
- Color Mode: RGB Color (8-bit or 16-bit)
- Background Contents: Transparent
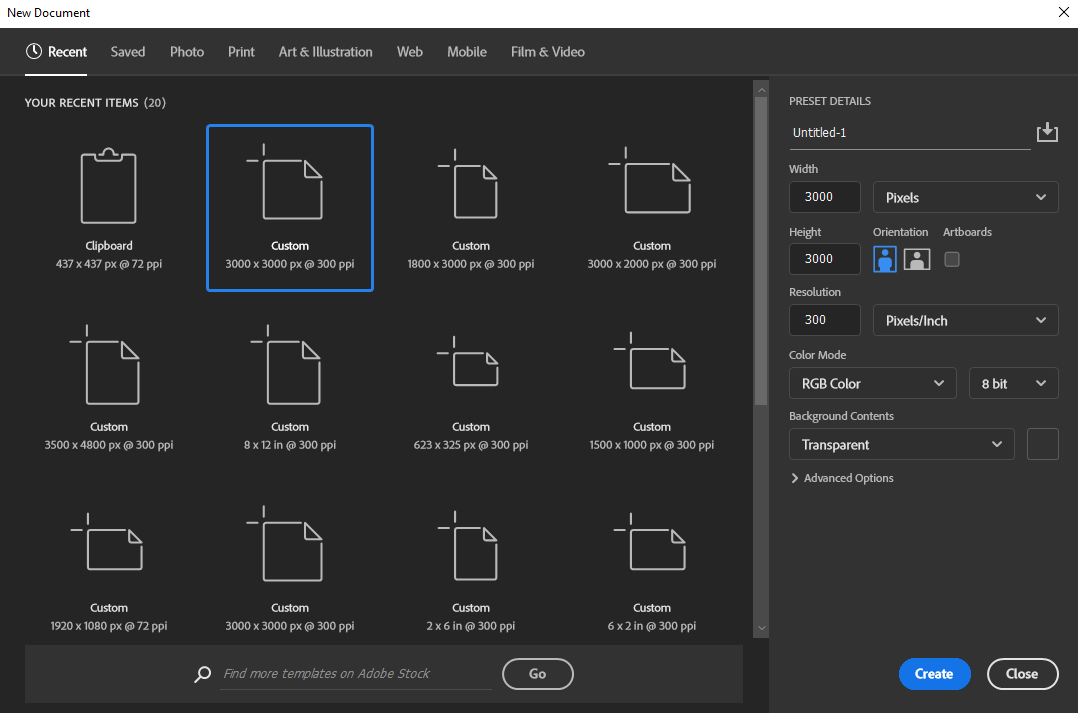
- Image Preview of Settings in Photoshop -
Step 2: Import and Inspect Your Artwork
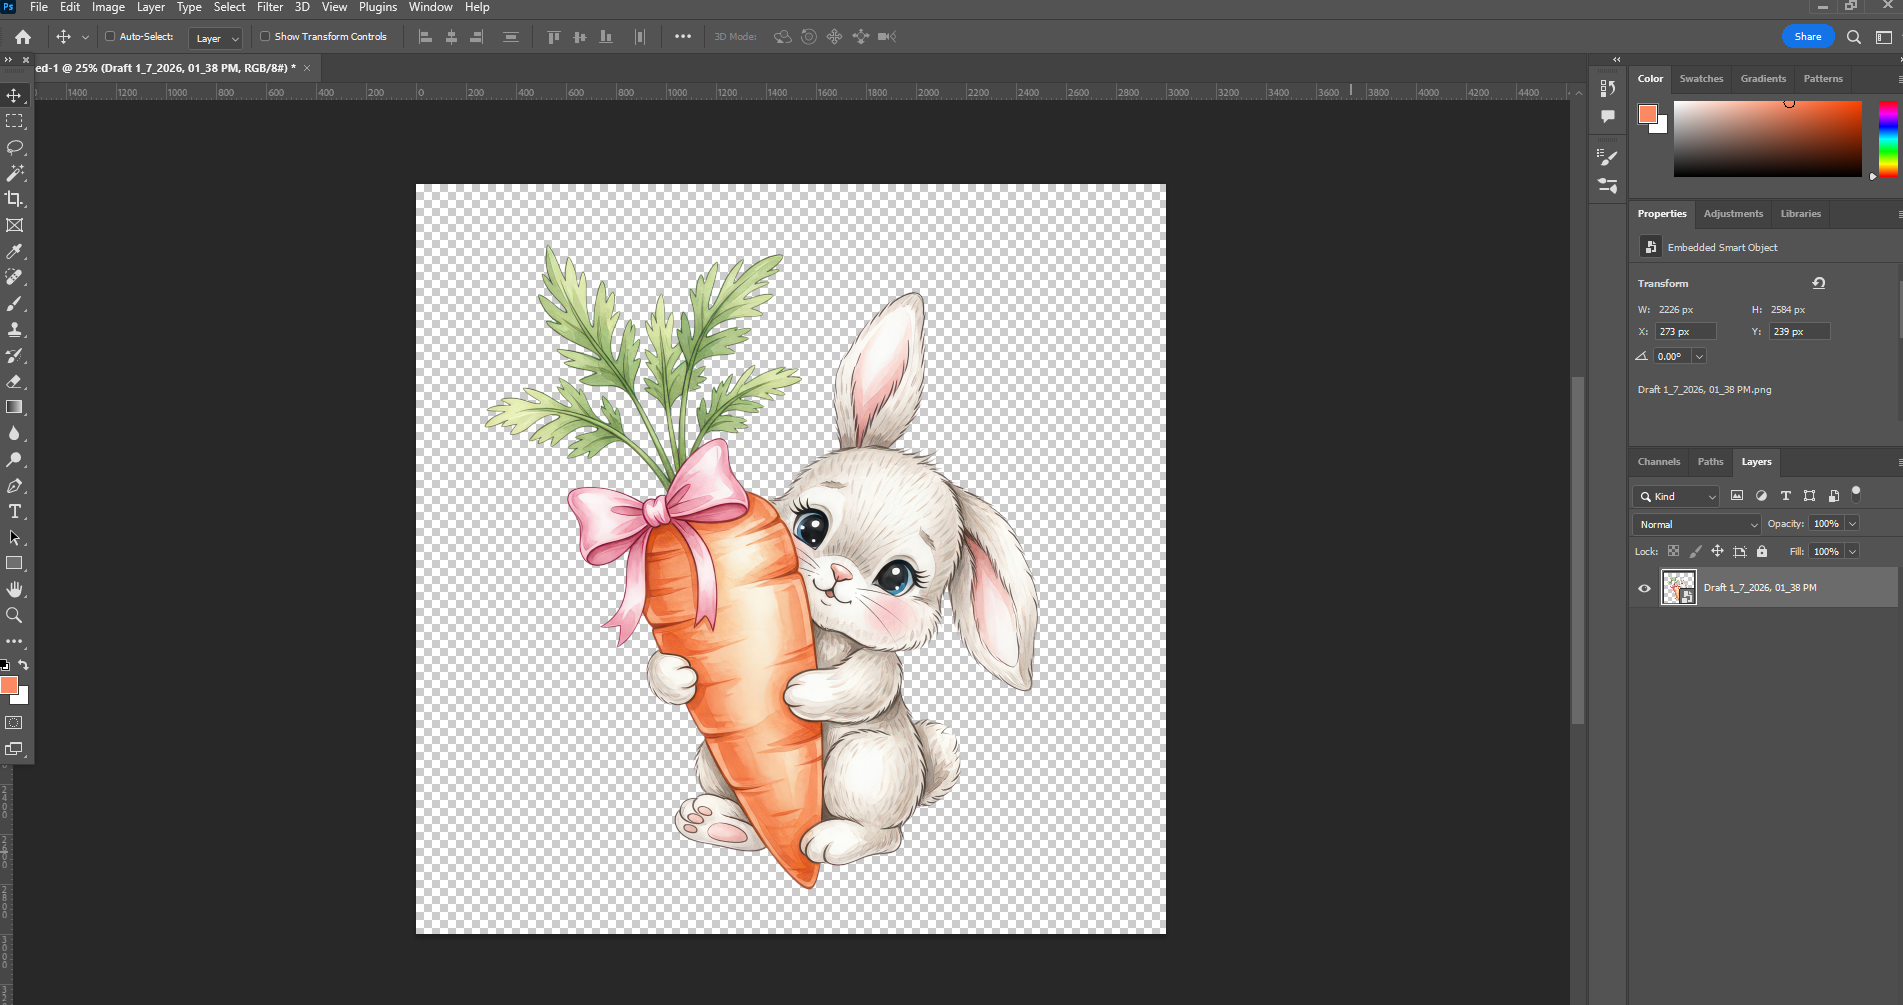
Go to File → Place Embedded or Simply Drag and Drop
- Import your PNG artwork
- Confirm full transparency—no visible background colors
- Zoom in (300–400%) to inspect edges
- Remove any feathering or semi-transparent pixels using hard selections, threshold adjustments, or manual cleanup
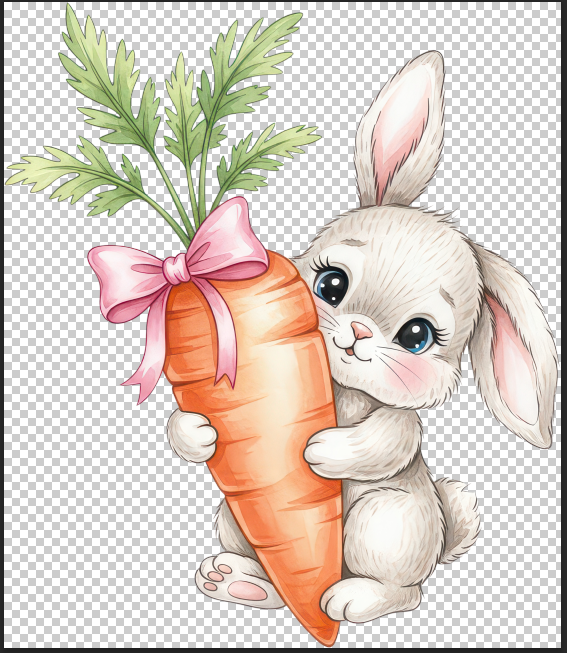
Step 3: Size and Crop Correctly
Position and resize the artwork as needed
Use the Crop Tool to tightly frame the design
Avoid excessive transparent space around the artwork
Tip: If you Like Image to Fit into Artboard from all sides just Go to Image > Click on Trim and Hit ok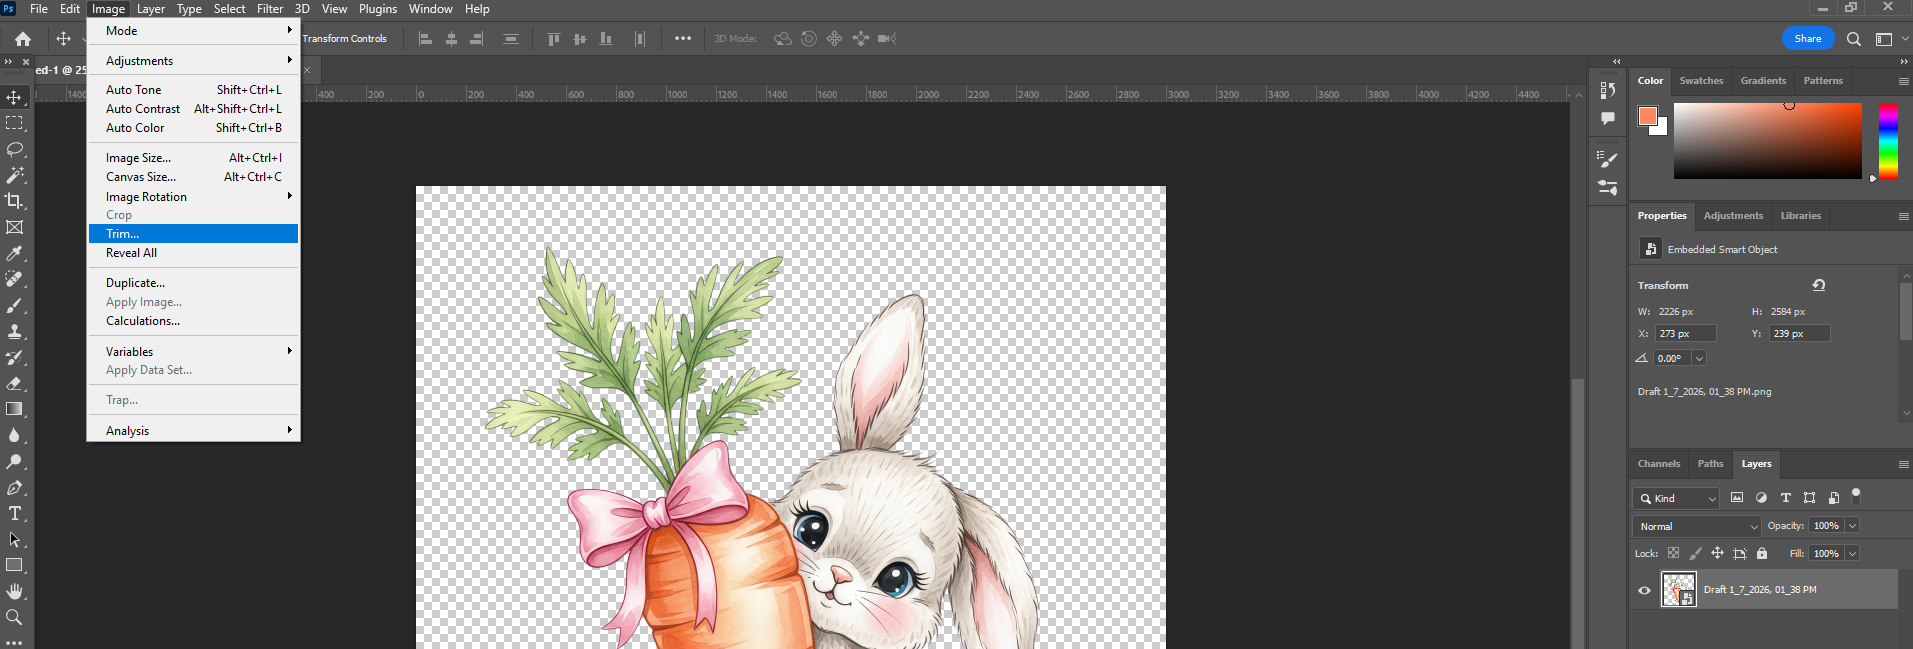
Step 4: Export the Final File
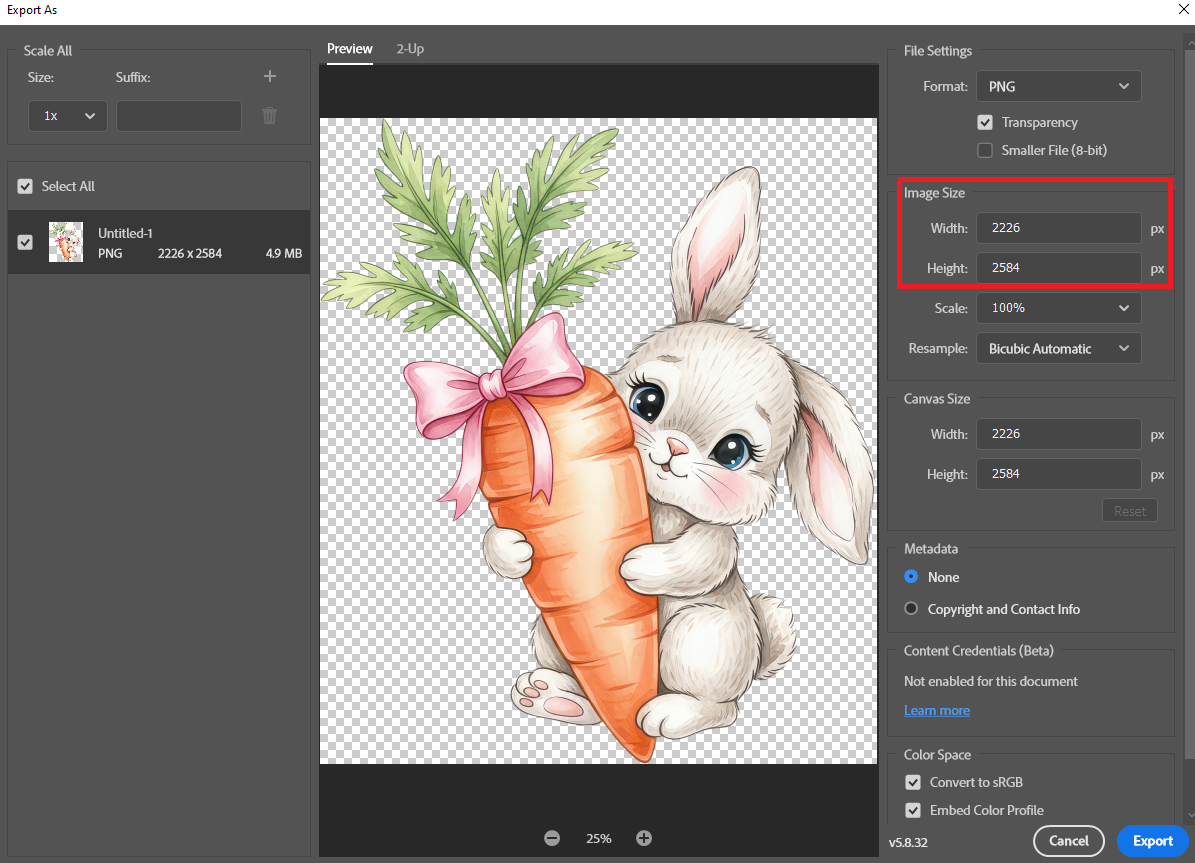
Go to File → Export → Export As
Select PNG
Ensure Transparency is enabled
Export at maximum quality - Just make sure you change the image size according to your need.
Your File is now ready to use. You can try DTFPrinter to Test and also you can order at same time. Here is the Link
Final Thoughts
By following these four core principles and the Photoshop preparation workflow, you ensure your DTF or UVDTF files are fully optimized for professional printing. Proper preparation eliminates printing errors, improves adhesion, enhances color vibrancy, and delivers clean, durable, high-quality transfers every time.