By Design Bundles
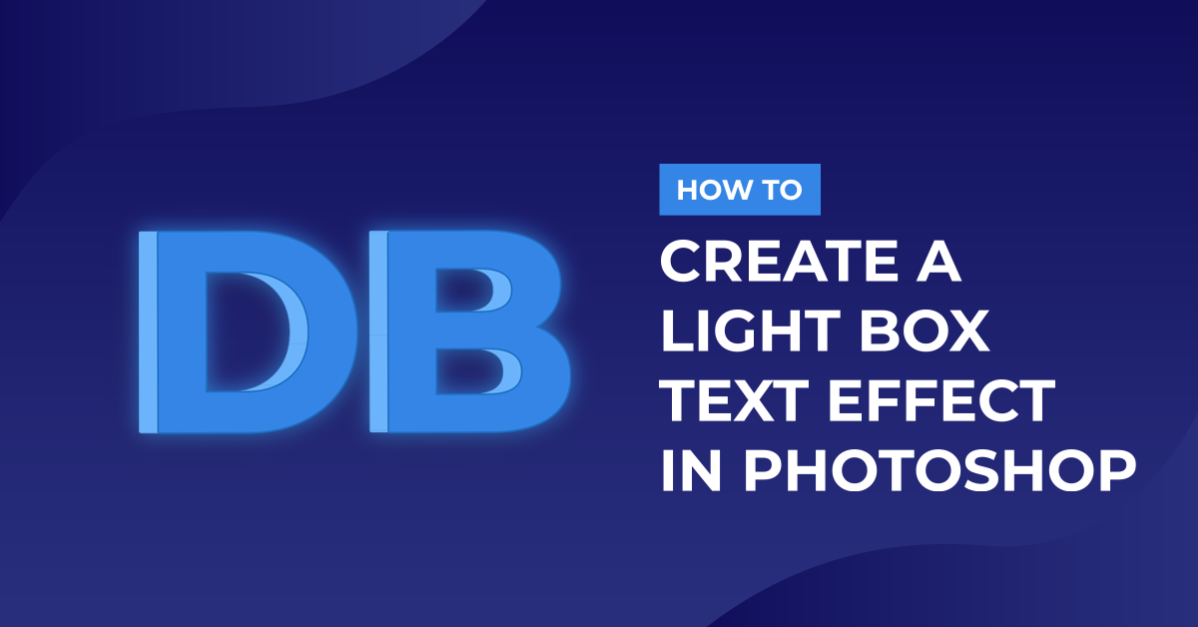
Light Box Text in Photoshop
For this tutorial, we will use a Dark Background Image and “Big John & Slim Joe” Free Font from “Ion Lucin”.
1 - In Photoshop, open the image you chose as “Background”.

2 - Select the “Type Tool” (T), choose your font and type your text. You can use any color as “Fill” color. The size will depend on the word you are typing.


3 - Center the text by selecting both Layers (“Shift” key) and clicking the “Align Vertical and Horizontal Centers” buttons on the Top Menu.


4 - Right-click on top of the “Text” Layer thumbnail and “Convert to Smart Object”. This way, you can change your text without losing the effect.

5 - Select the “Text” layer thumbnail and make a “Duplicate” (Command/Control + J) . Name the Duplicate “Main” and “Hide” it by clicking on the “Small Eye” icon on the left side of its thumbnail.

6 - Double-click on top of the “Text” layer Thumbnail and apply the following “Layer Styles”:
Bevel & Emboss: (Highlight Mode: #bab101, Shadow Mode: #3b3834)

Color Overlay: (#80b0bc)


7 - Go to Filter > Blur > Gaussian Blur and use a “Radius” of 0.6 Pixels.


8 - Select the “Text” layer thumbnail and make another “Duplicate” (Command/Control + J) or right-click on top of its Thumbnail and choose “Duplicate Layer”. Name this Duplicate “Light 1”.


9 - Select the Original “Text” layer and enter “Free Transform” (Command/Control + T). You will get a “Pop Up” warning about “Smart Filter”, click “OK”. In the Top Menu, change the “Width” value to 99.3% and the “Height” value to 99%. Hit “Enter” or click the “Check Mark” on the Top Menu.


10 - Select the Original “Text” layer (bottom one) and make another “Duplicate” named “Light 2”. Select the Original “Text” layer again, enter “Free Transform” ( Remember the “Pop Up” warning about “Smart Filter”). In the Top Menu, change the “Width” value to 98.6% and the “Height” value to 98%. Hit “Enter” or click the “Check Mark” on the Top Menu. Create 5 more “Duplicates” (total: 8 “Light” layers) and repeat the steps scaling down the original “Light” layer by W: -0.7 and H: -1 (Light 3: W 97.9 and H: 97, Light 4: W 97.2 and H: 96, Light 5: W 96.5 and H: 95, Light 6: W 95.8 and H: 94, etc.)


11 - Select all the “Light” layers and “Group” them together by dragging their thumbnail to the Small Folder icon on the bottom of the “Layers Panel”. Name the Folder “Extrude”.

12 - Select the “Main” layer thumbnail and make another “Duplicate” (Command/Control + J) or right-click on top of its Thumbnail and choose “Duplicate Layer”. Name this Duplicate “Effect 1”. Drag it and place it under the “Main” Layer.


13 - Double-click on top of the “Effect 1 ” layer Thumbnail and apply the following “Layer Styles”:
Blending Options: Fill 0%

Inner Shadow: (#ffffff, Contour: Cone)

Inner Glow: (#8db6d1)

Satin: (#567d97, Contour: Gaussian)

Gradient Overlay:

14 - Create another “Duplicate”, name it “Effects 2” and place it under “Effects 1”. Double-click on top of its Thumbnail and apply the following “Layer Styles”:

Blending Options: Fill 0%

Inner Shadow: (#935e2f)

Inner Glow: (#8db6c1)

Color Overlay: (#9bc5d0)

Drop Shadow: (#224e62)

15 - Go to Filter > Blur > Gaussian Blur and use the same value as before (0.6 Pixels). Apply to both the “Effects” Layers.


16 - Select the “Main” layer thumbnail again and make another “Duplicate” (Command/Control + J) or right-click on top of its Thumbnail and choose “Duplicate Layer”. Name it “Shadow” and place it on top of the “Background” Layer. )Hide the Top Layers to get a better view if needed).

17 - Double-click on top of the “Shadow ” layer Thumbnail and apply the following “Layer Styles”:
Blending Options: Fill 0%

Color Overlay: (#616573)

18 - Go to Filter > Blur > Gaussian Blur and use a “Radius” of 5 Pixels.


19 - Go to Filter > Blur > Motion Blur and use a 0° “Angle” and a “Distance” of 35 Pixels.


20 - Make a “Duplicate” (Command/Control + J) of the “Shadow” Layer. Open the settings of the original one (click on the “Small Arrow” on the right side of its Thumbnail), double-click on “Motion Blur” and change its “Angle” to -90° and “Distance” of 65 Pixels.


21 - Duplicate the “Shadow” Layer again, open the settings of the original one, drag “Motion Blur” to the “Trash” and change the “Gaussian Blur” Radius to 25 Pixels. Turn On the Top Layers and “Move” the “Shadow copy 2” Layer a bit to the Right and the “Shadow” Layer a bit to the Down to get a more realistic effect.


22 - “Group” together the different parts of the “Effect” (“Effects”, “Extrude” and “Shadow”) and lower the “Opacity” of the “Shadow” Groups to about 80%. Select the “Main” layer thumbnail and make another “Duplicate” (Command/Control + J) or right-click on top of its Thumbnail and choose “Duplicate Layer”. Name this Duplicate “Light”. Drag it and place it under the “Main” Layer.


23 - Double-click on top of the “Light ” layer Thumbnail and apply the following “Layer Styles”:
Blending Options: Fill 0%

Satin: (#74bdd8, Contour: Gaussian)

Color Overlay: (#7ccee6)

24 - Go to Filter > Blur > Gaussian Blur and use a “Radius” of 45 Pixels.


25 -Go to Filter > Blur > Radial Blur and use an “Amount” of 40 , Blur Method: Zoom and Quality: Good.


26 - Check out your work!

* To modify your text, just double-click on the “Main” Layer (it will open it in another “Document”) change the text and “Save”. You should see the changes on your original file.
by @lornacane