By Design Bundles
Photoshop Tutorials11 min
Transparent Rainbow Text in Photoshop
For this tutorial we will use the free font “Beaver” from Qoob Design Studio.
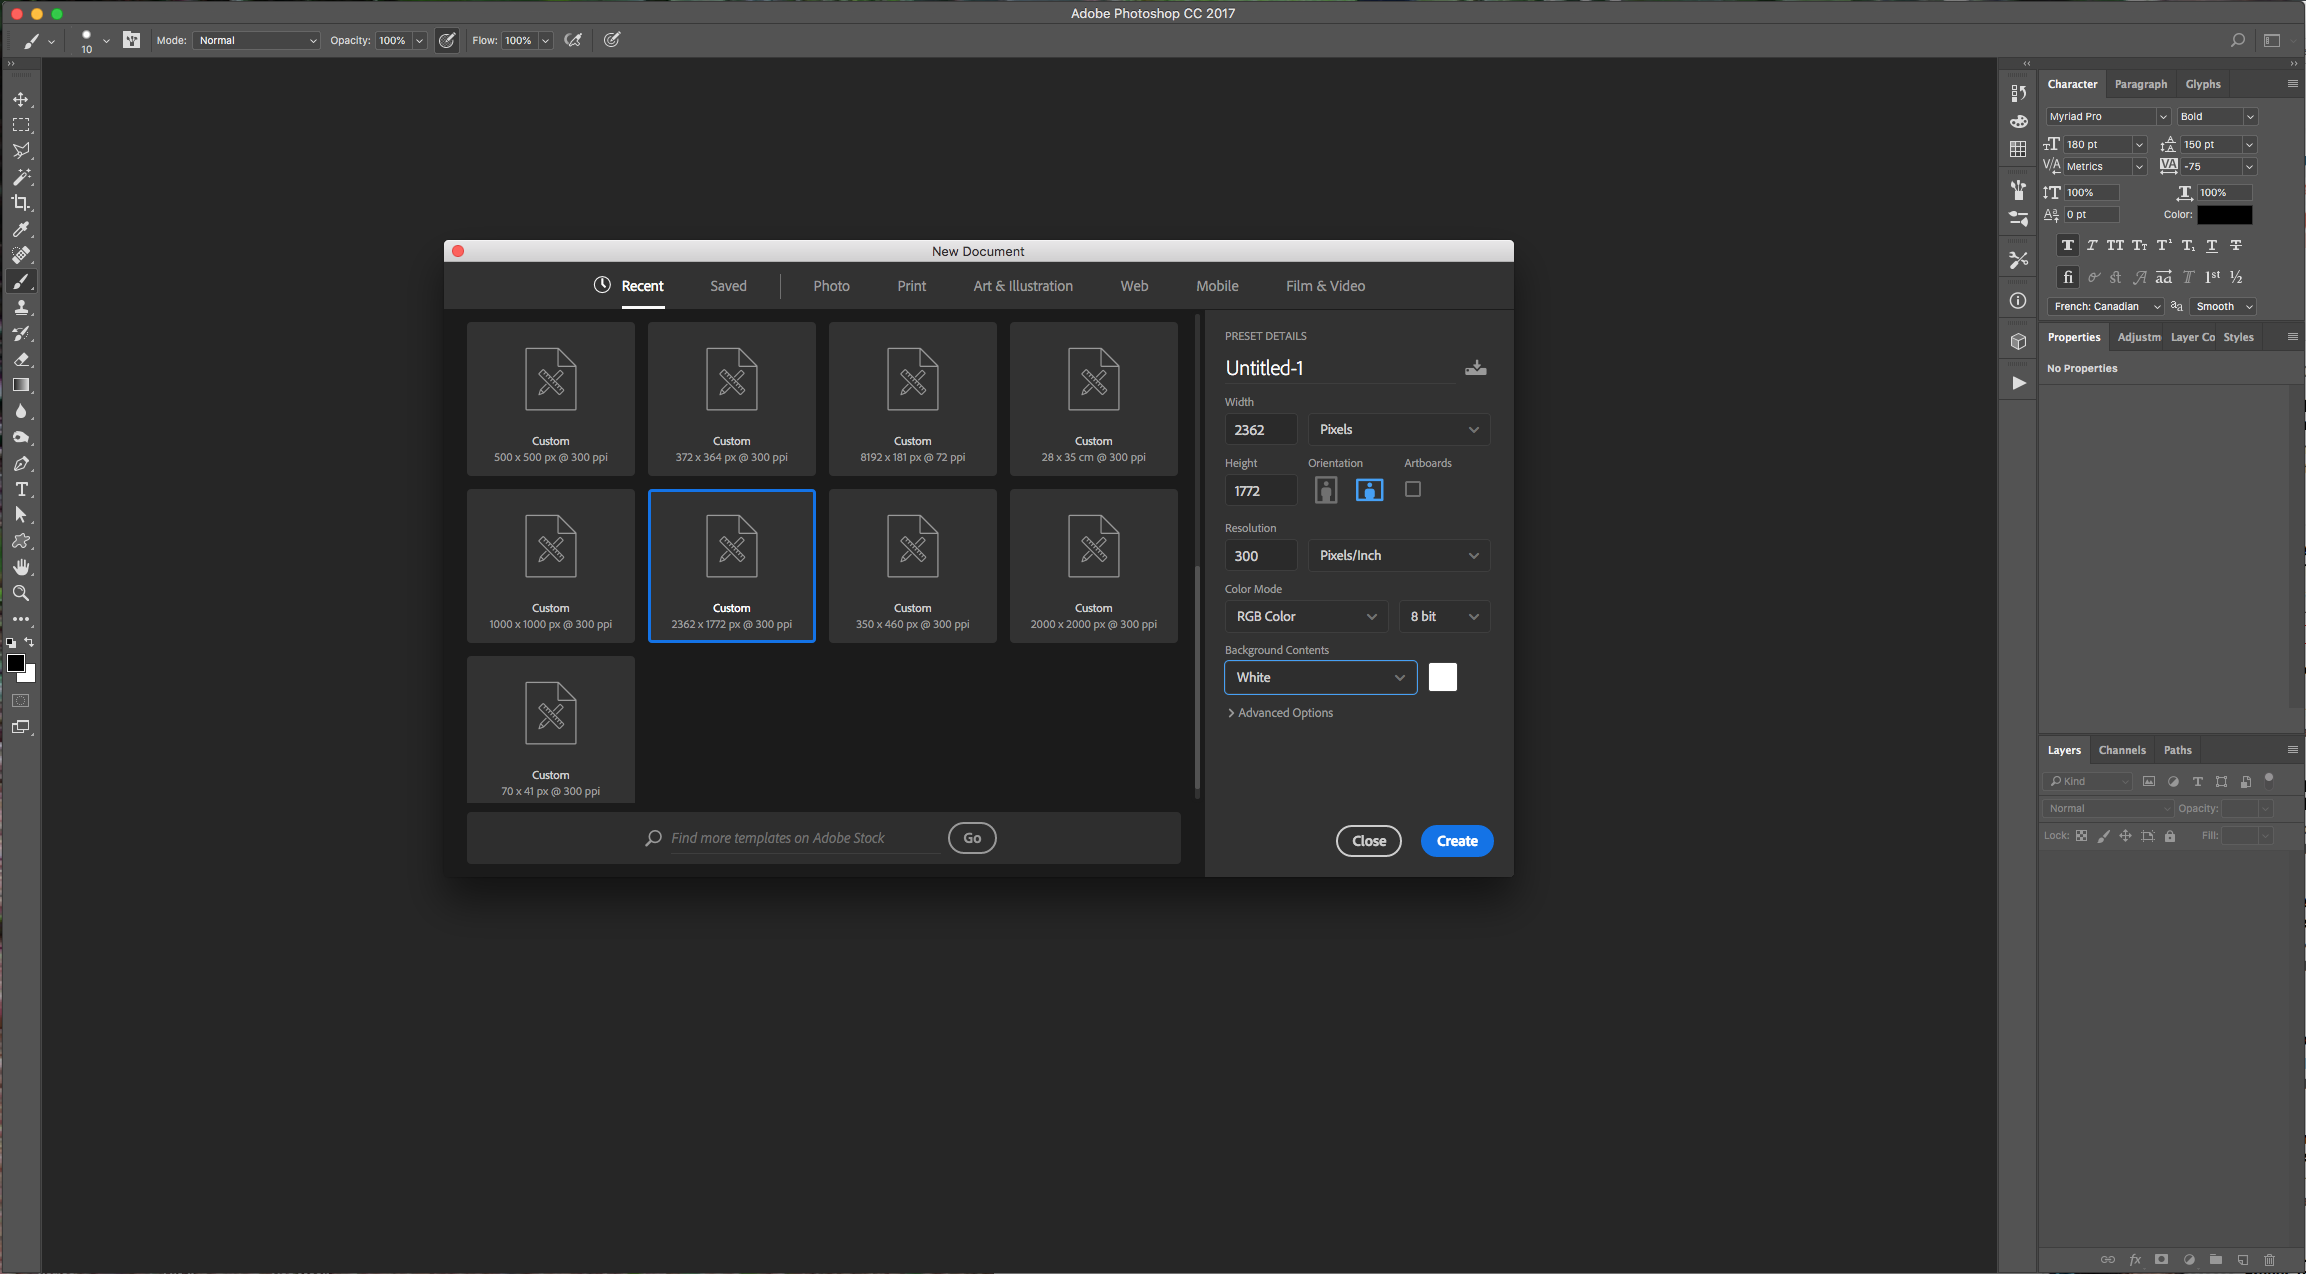
1 - In Photoshop, create a “New Document” and use White as your “Background” color.
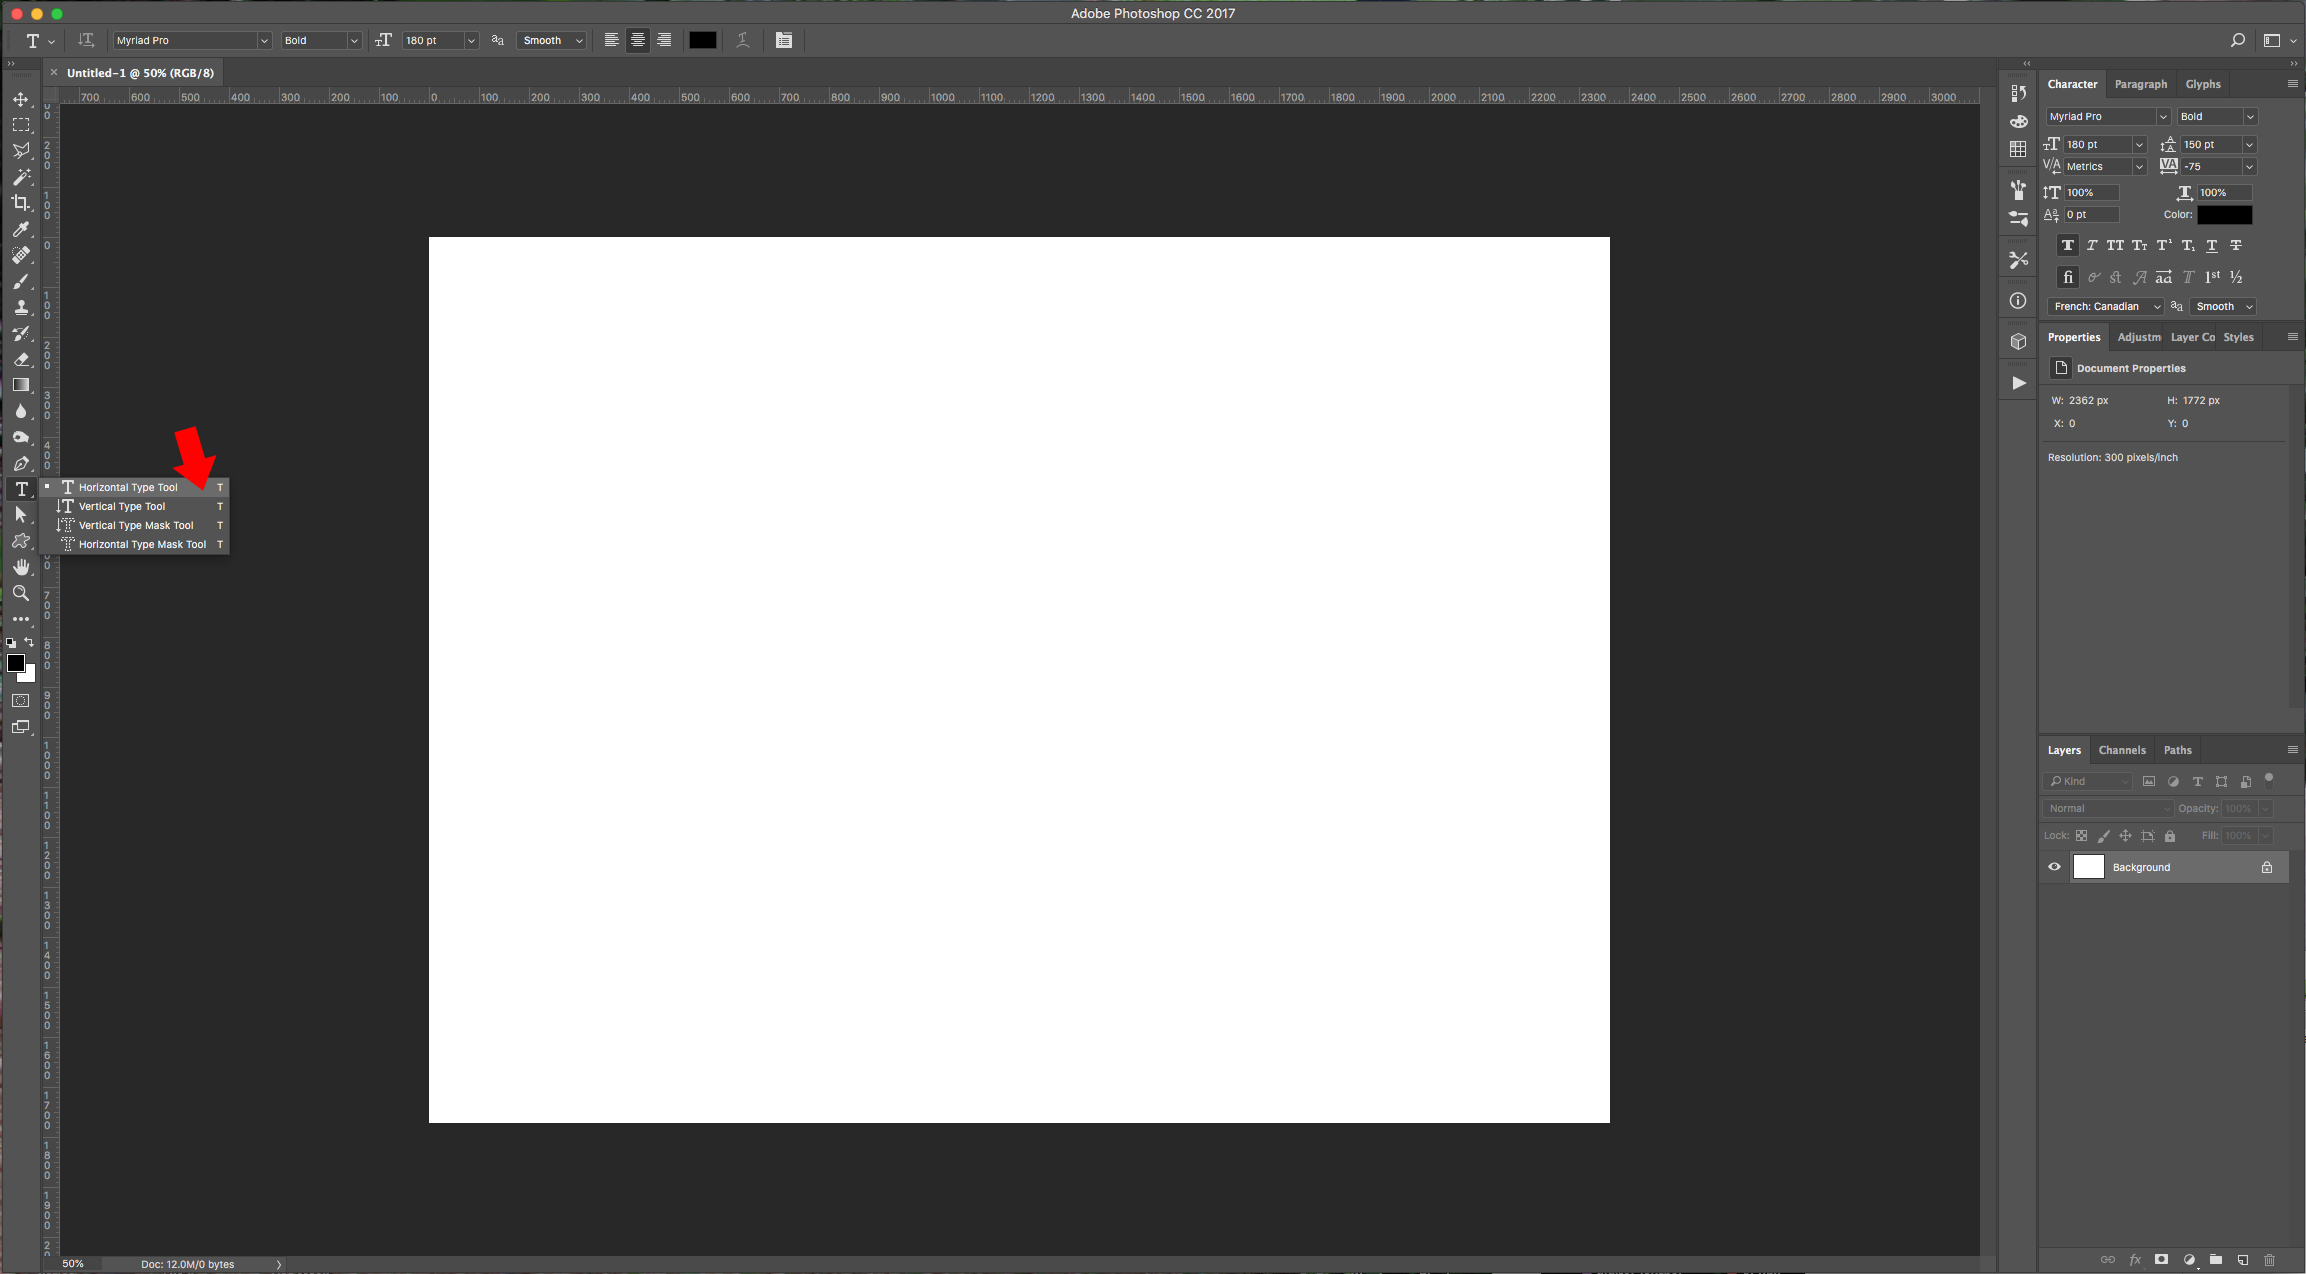
2 - Select the “Type Tool” (T), choose your font (we used “Beaver”) and type your text. Use Black as “Foreground” color.
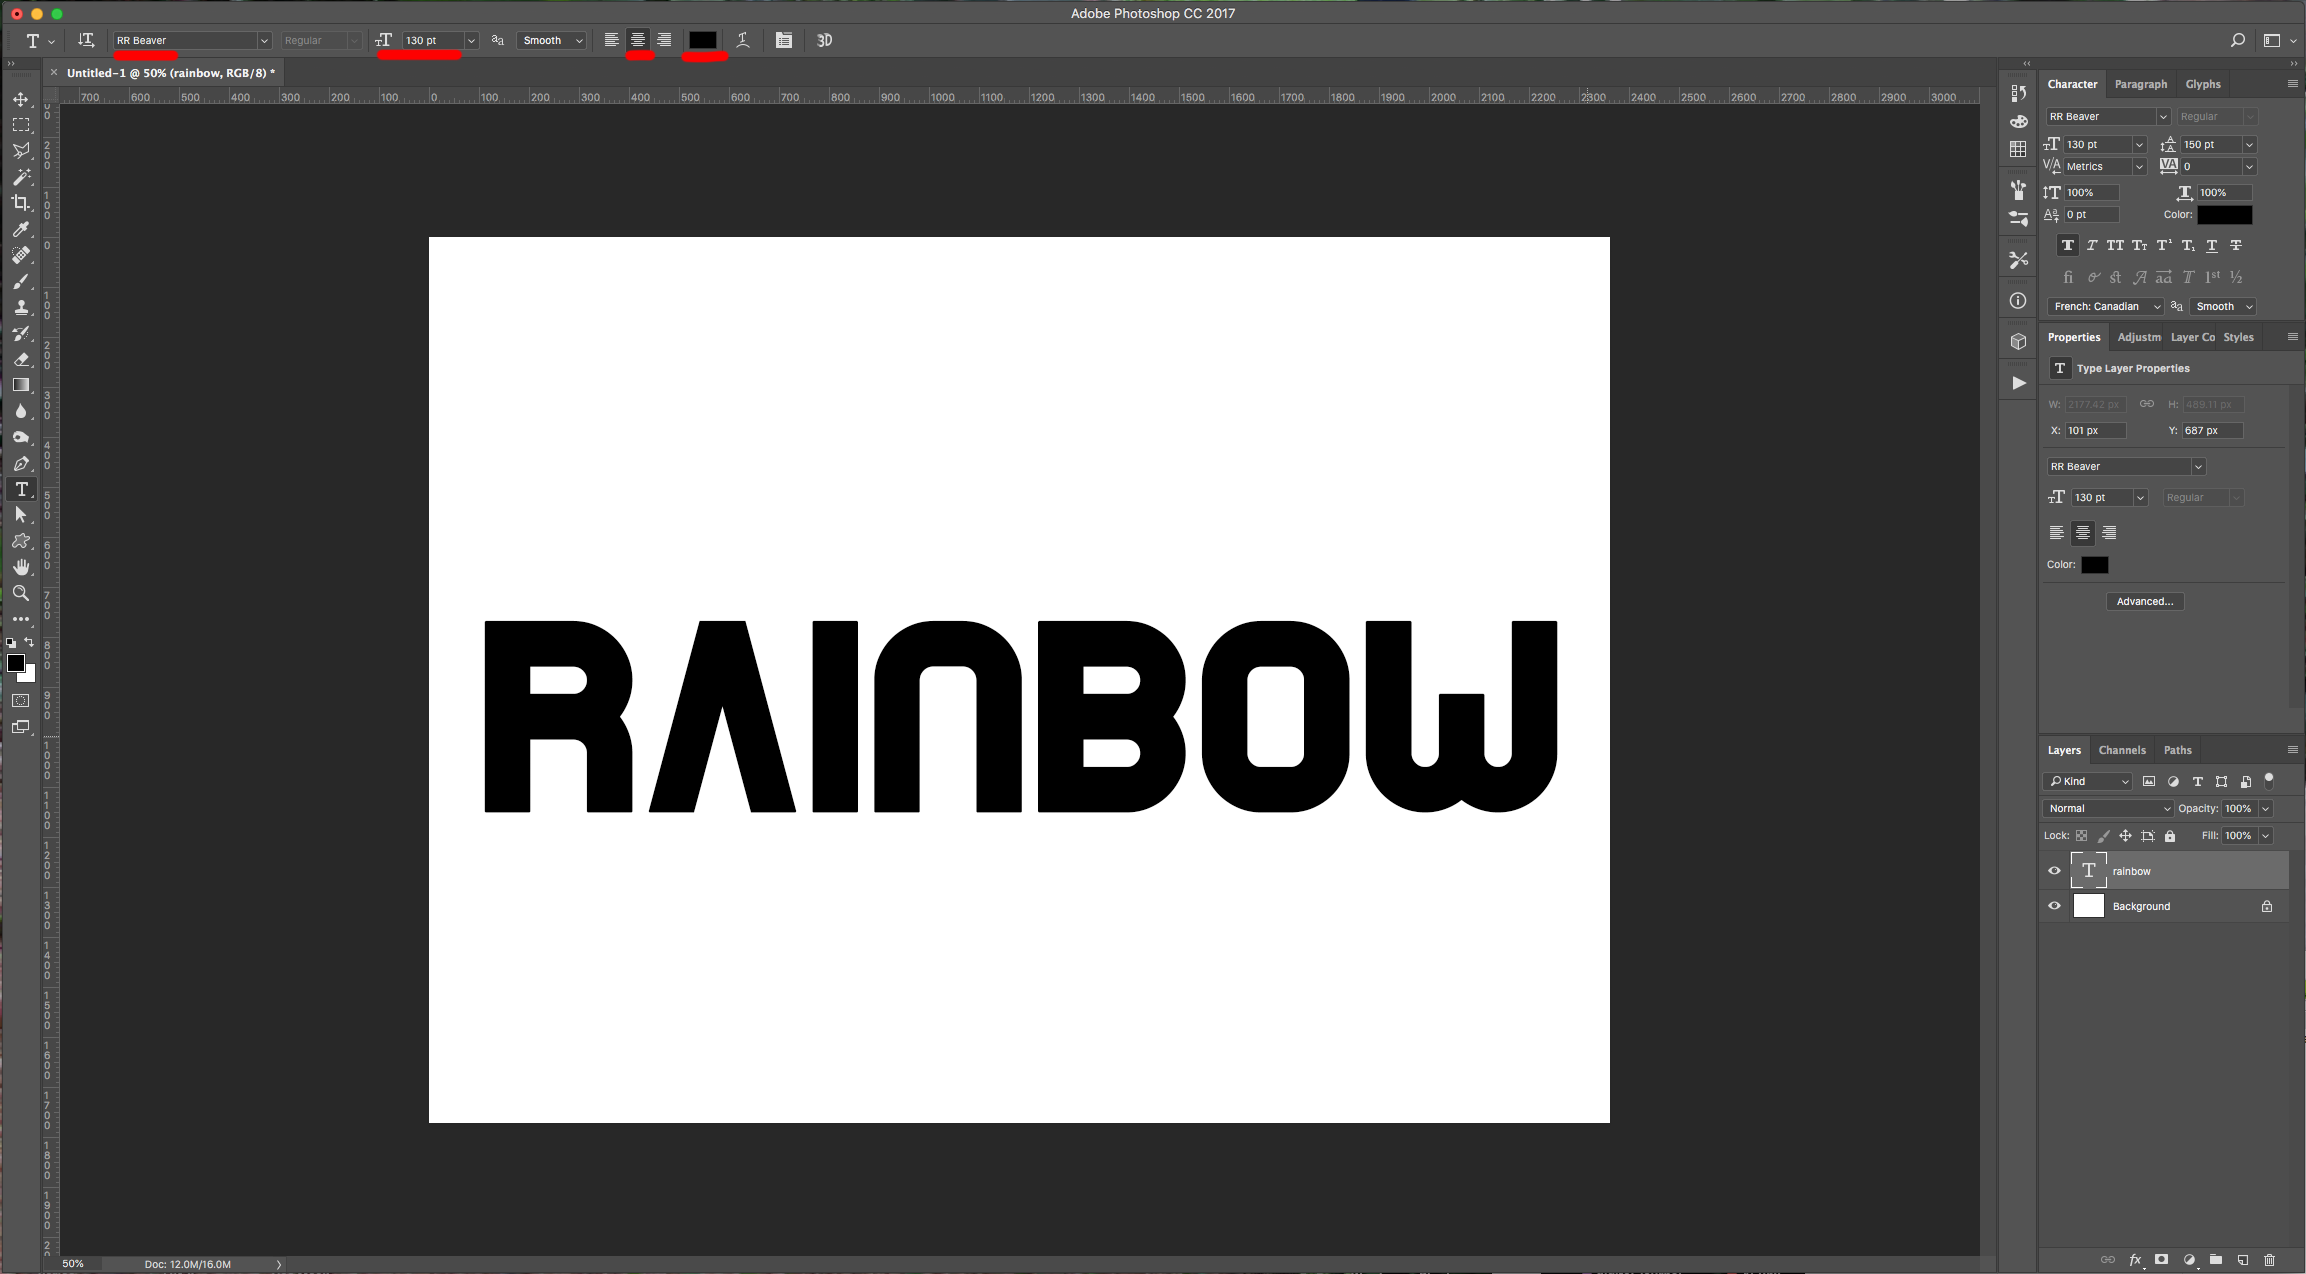
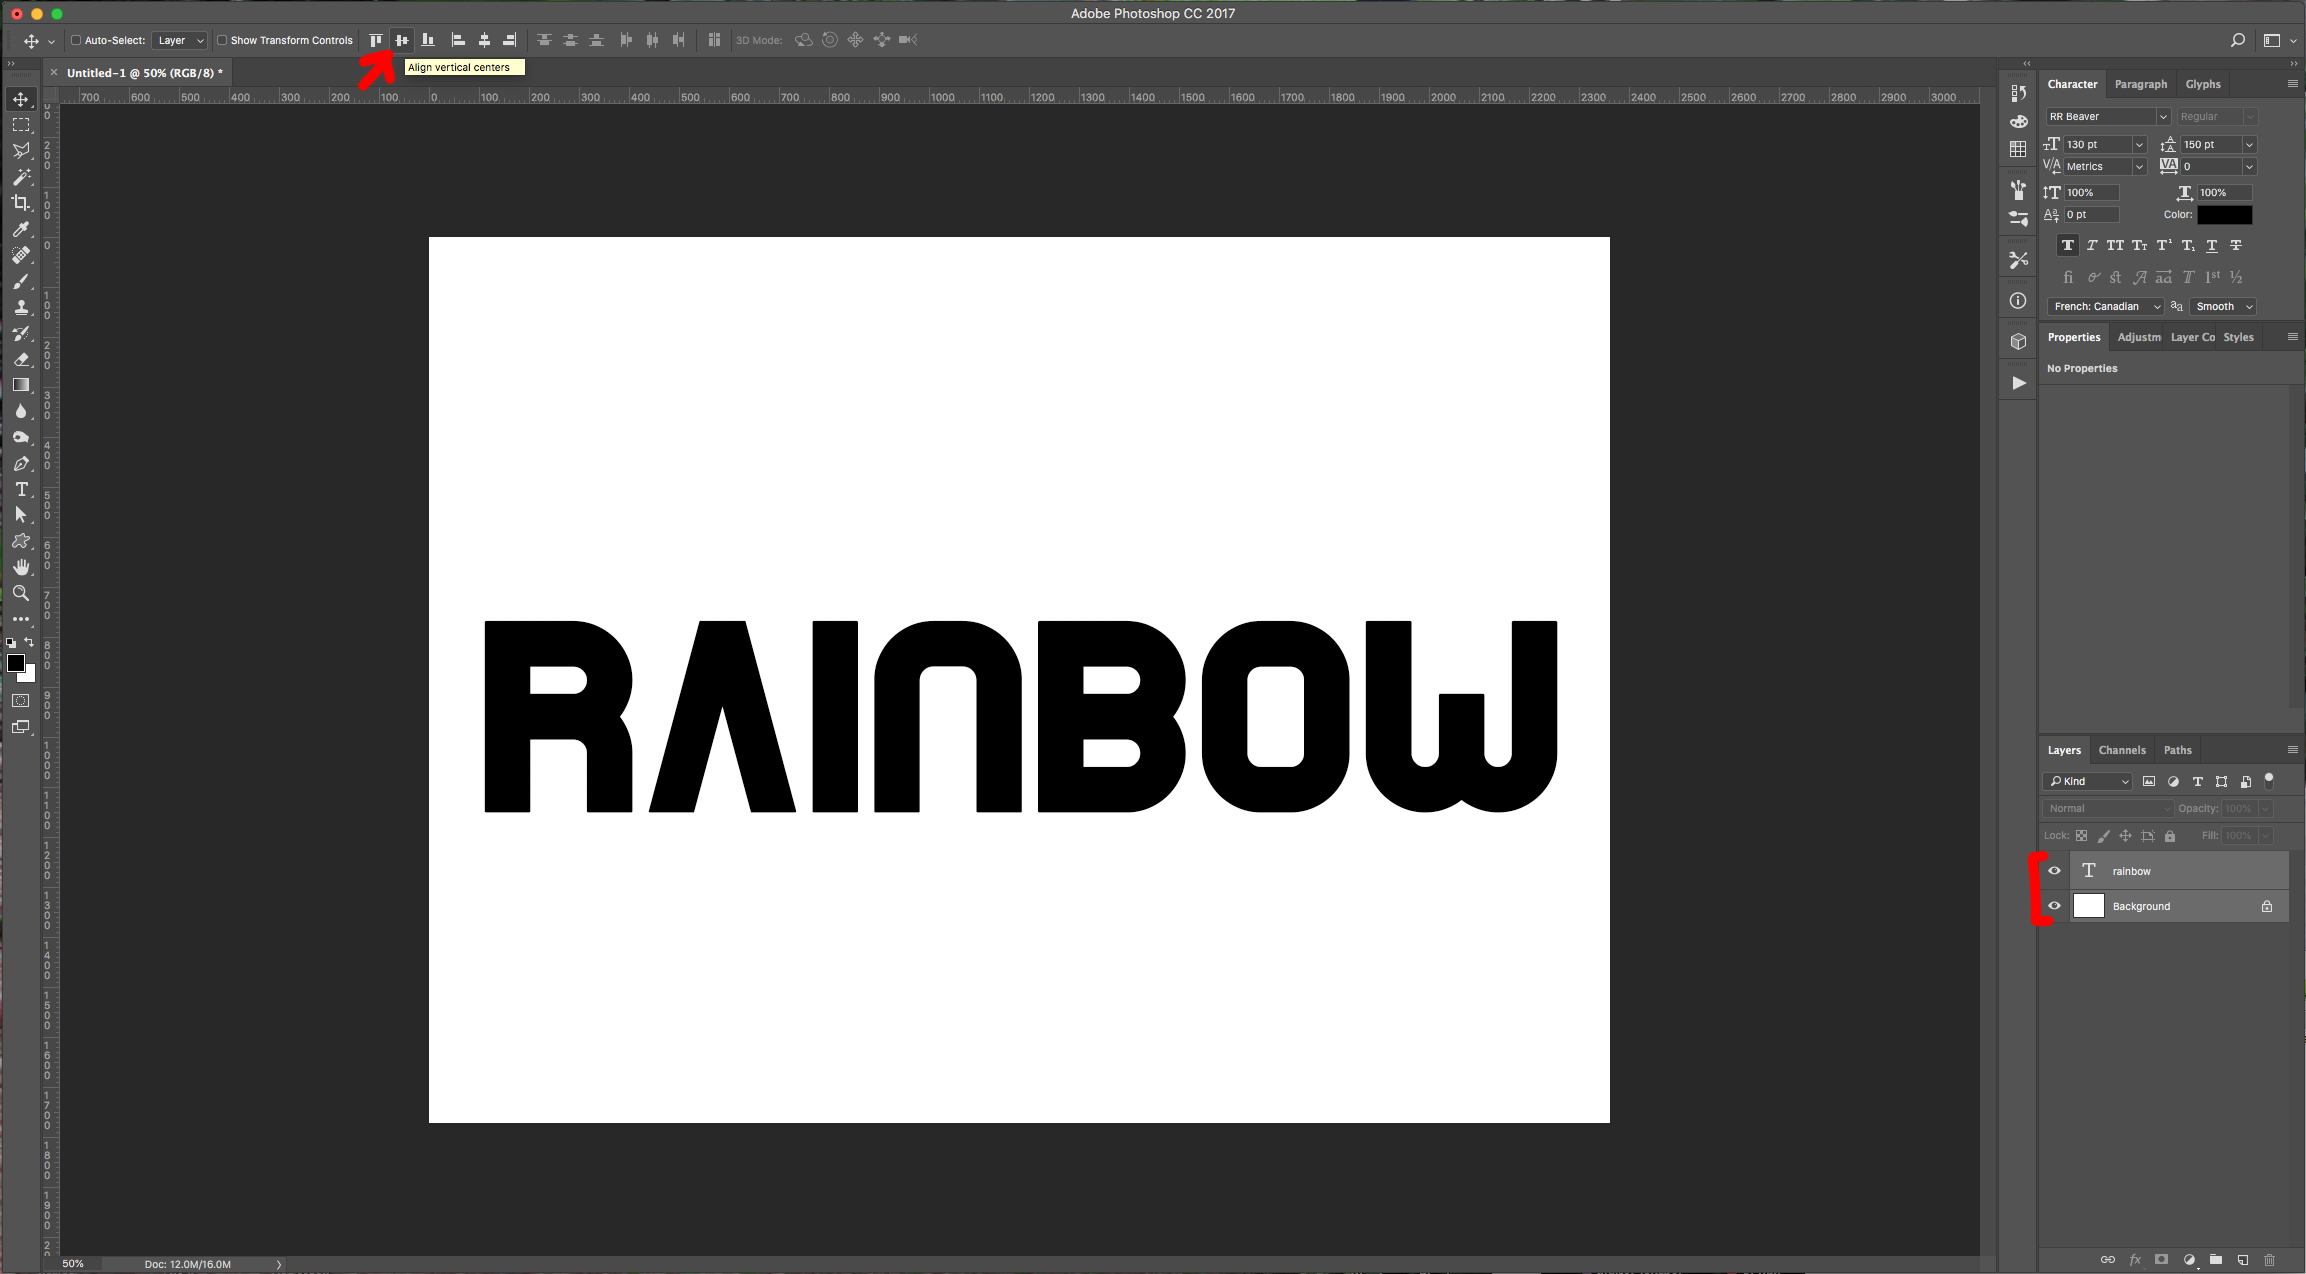
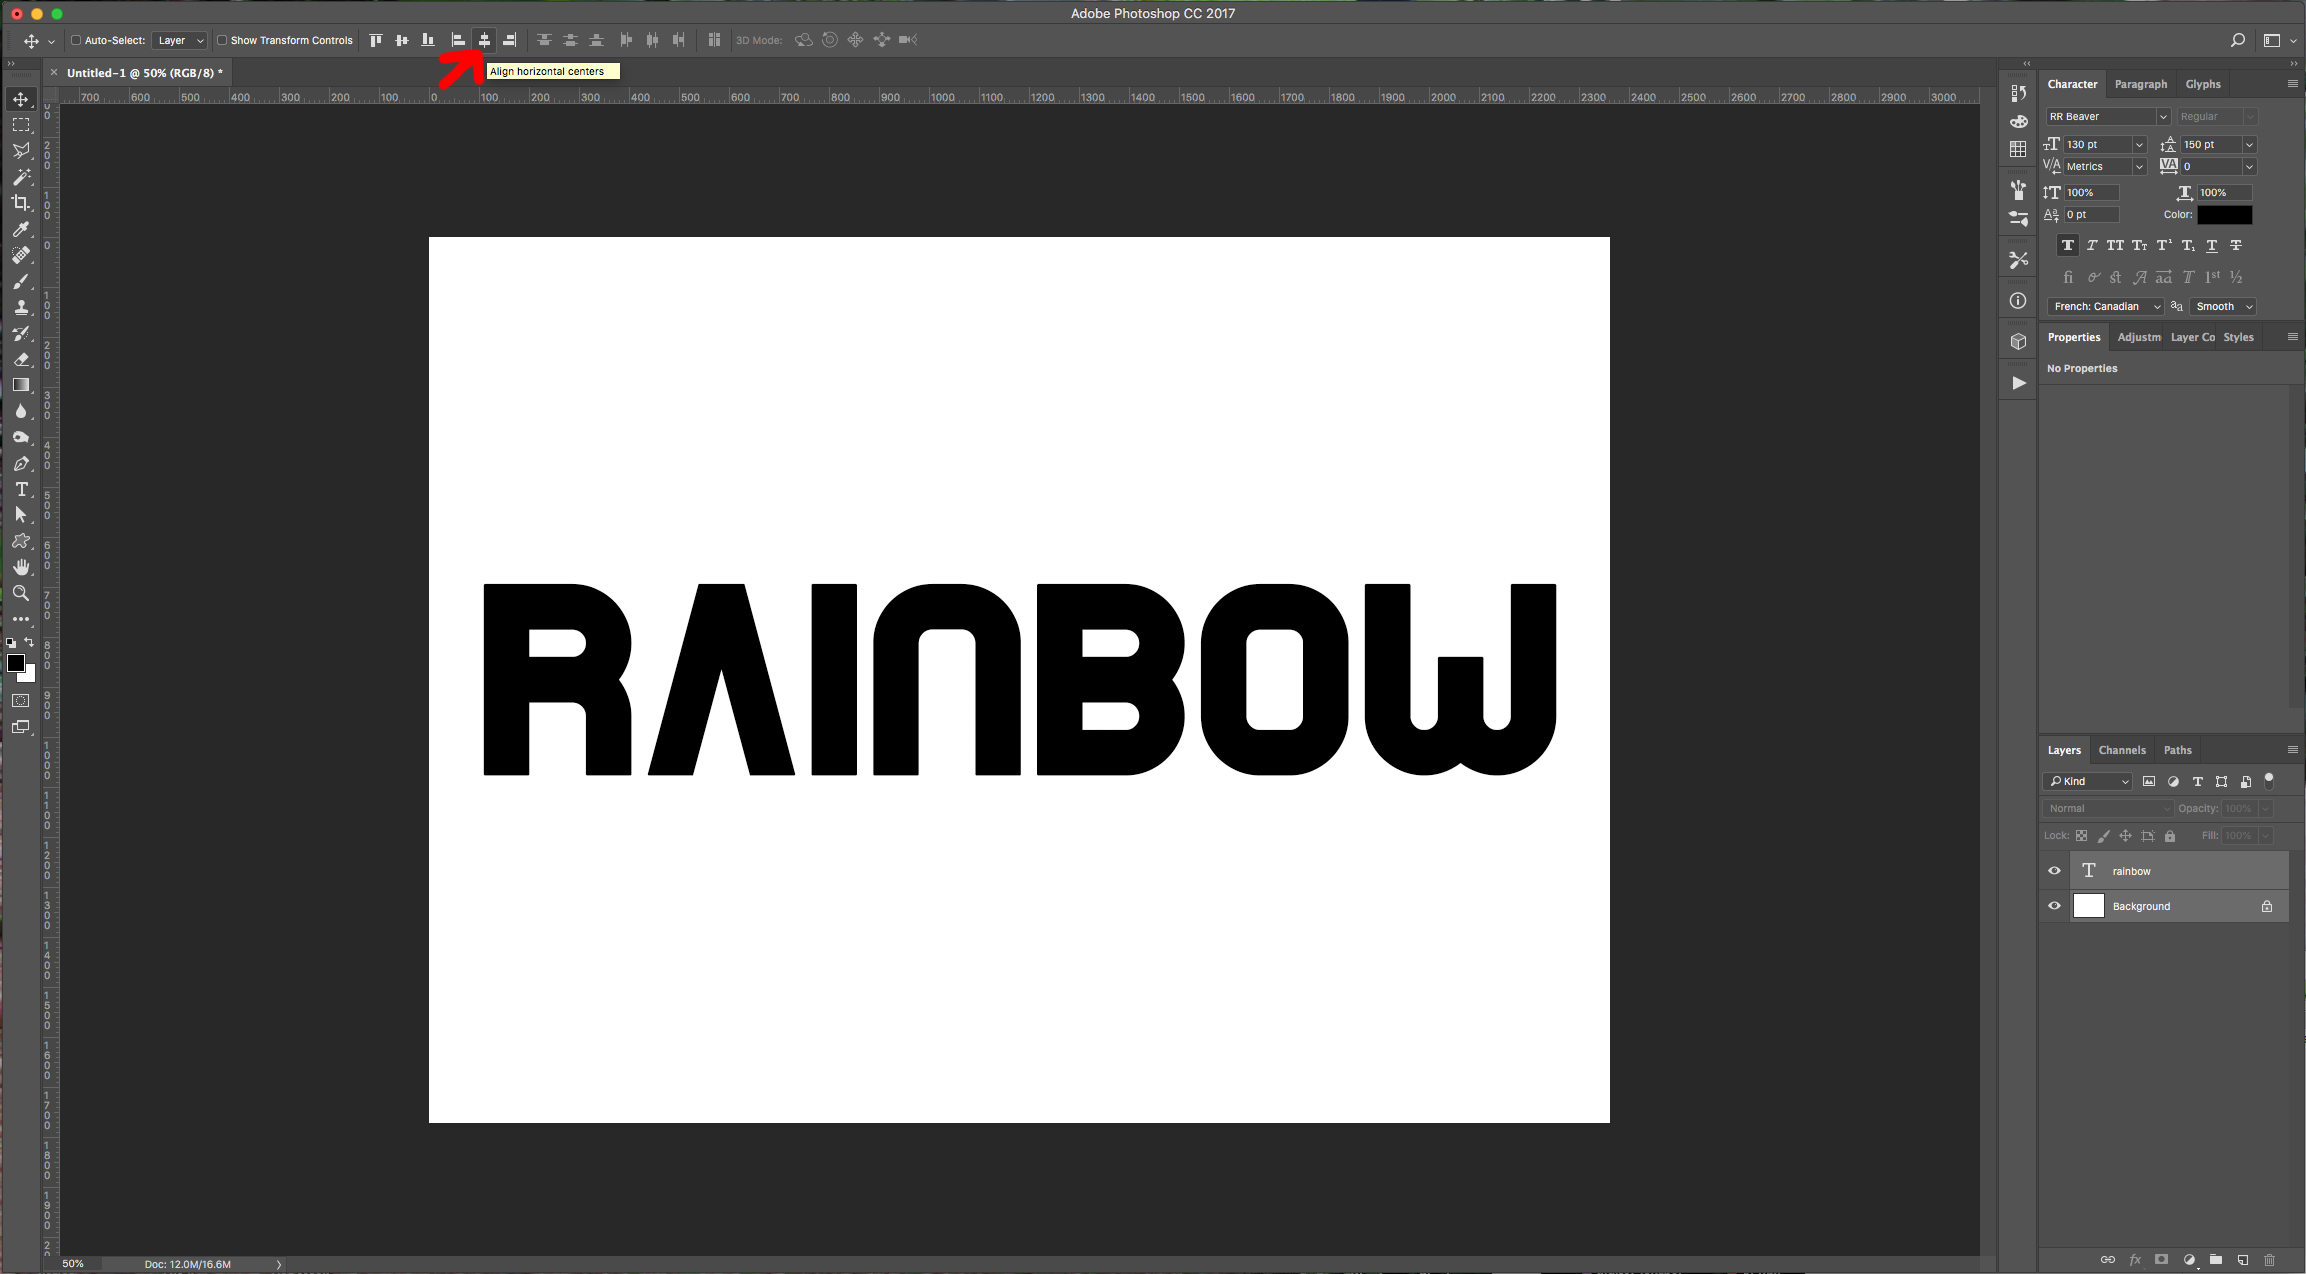
3 - Select both Layers (“Shift” key) and head to the upper Menu to “Center” your text clicking the “Horizontal and Vertical Align Centers” buttons.
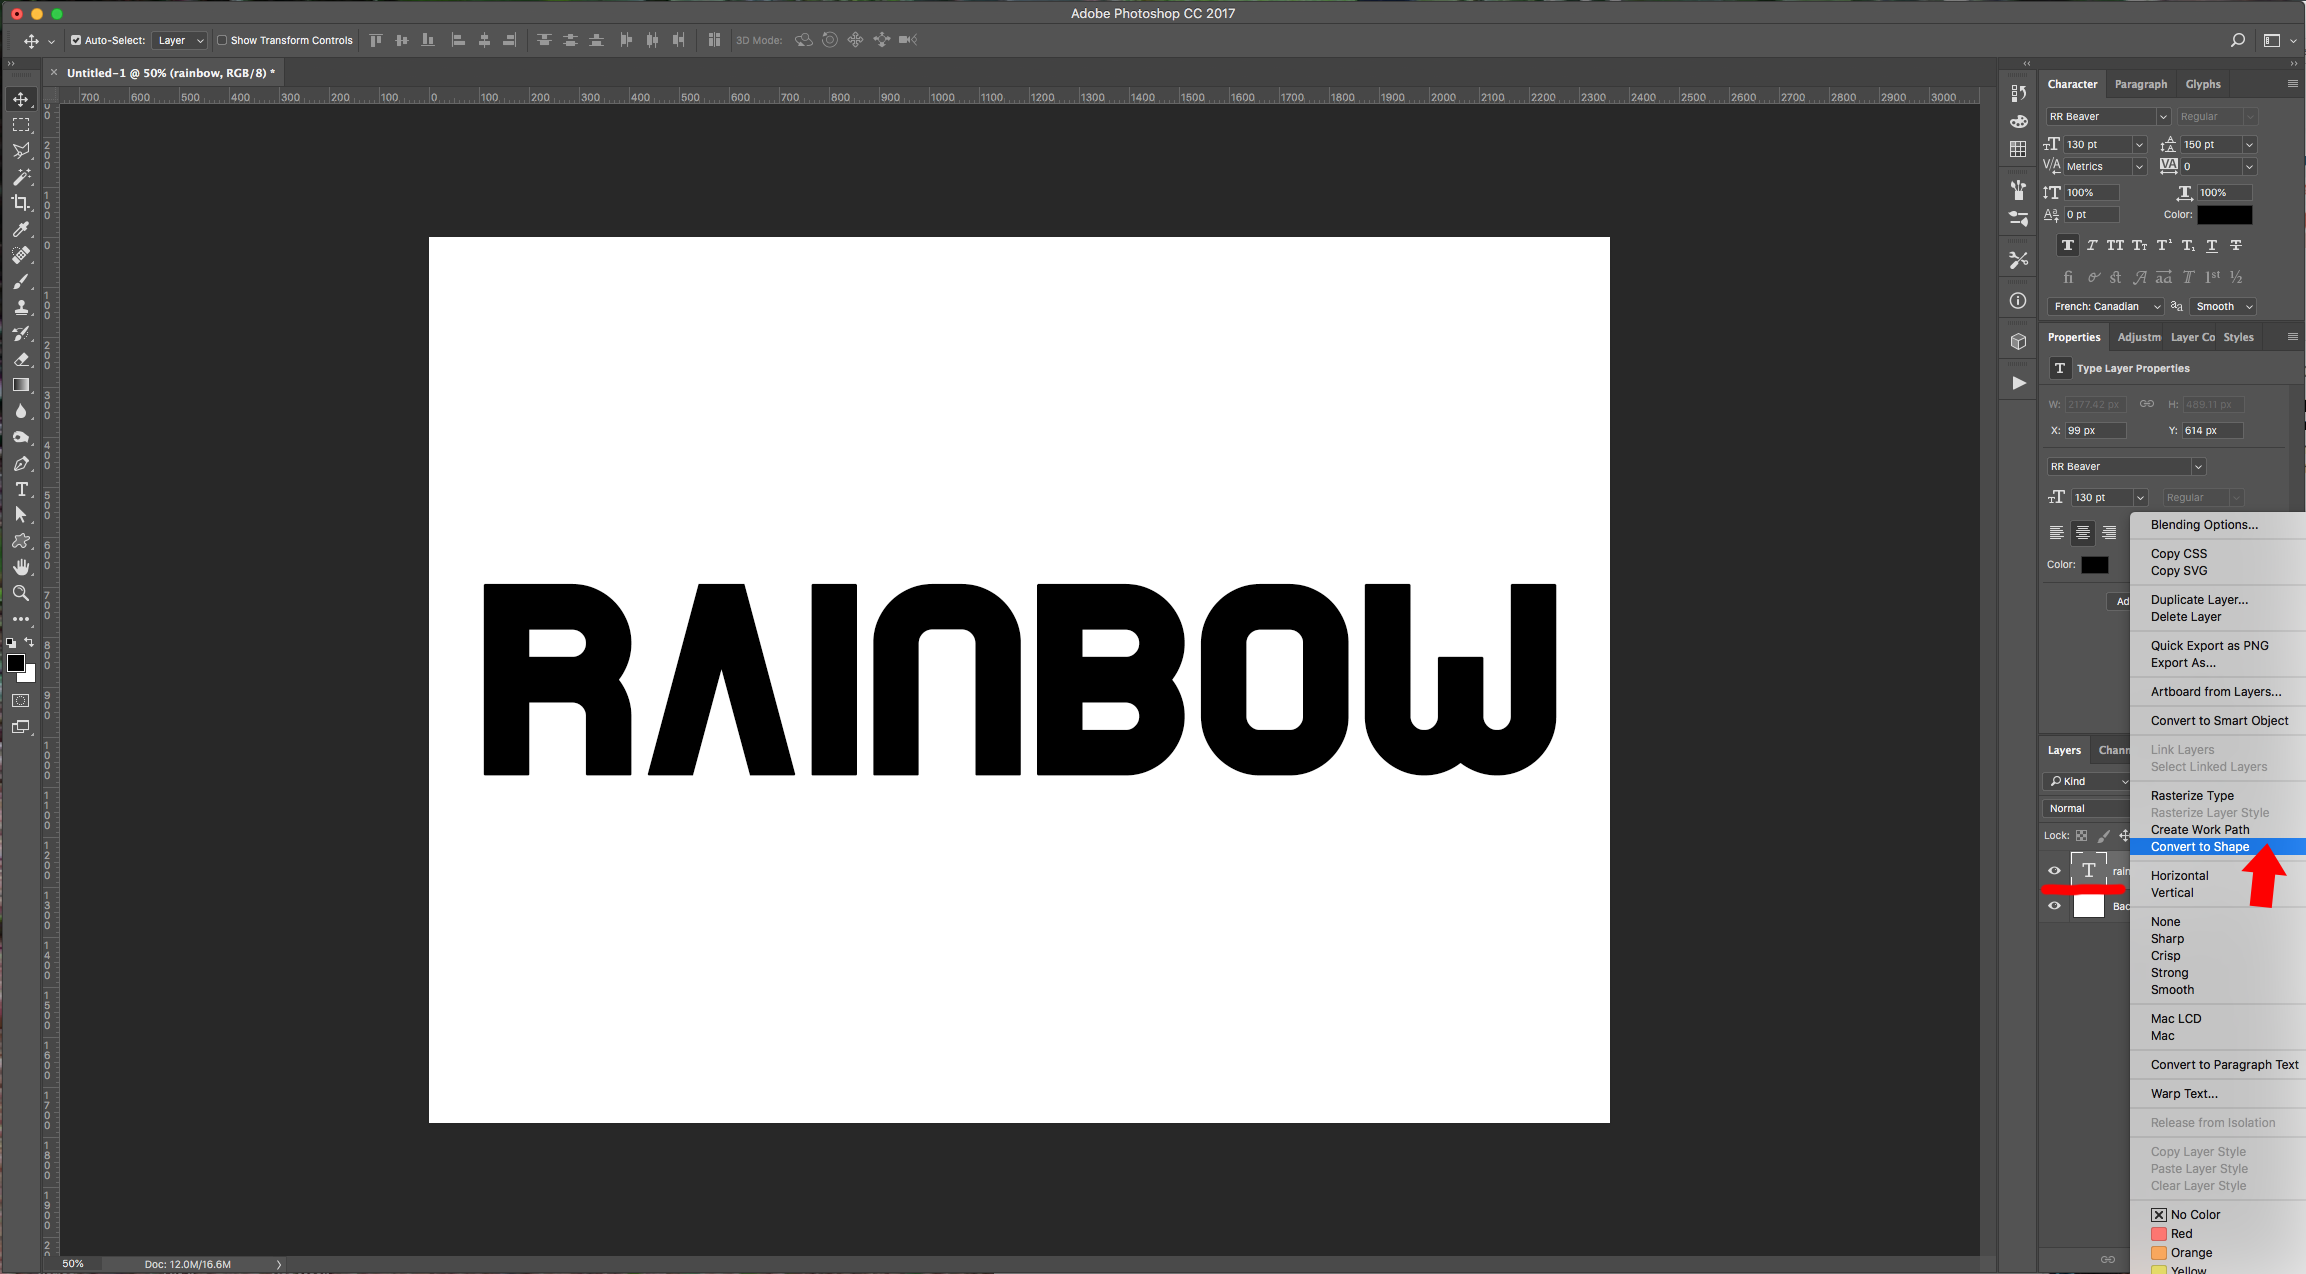
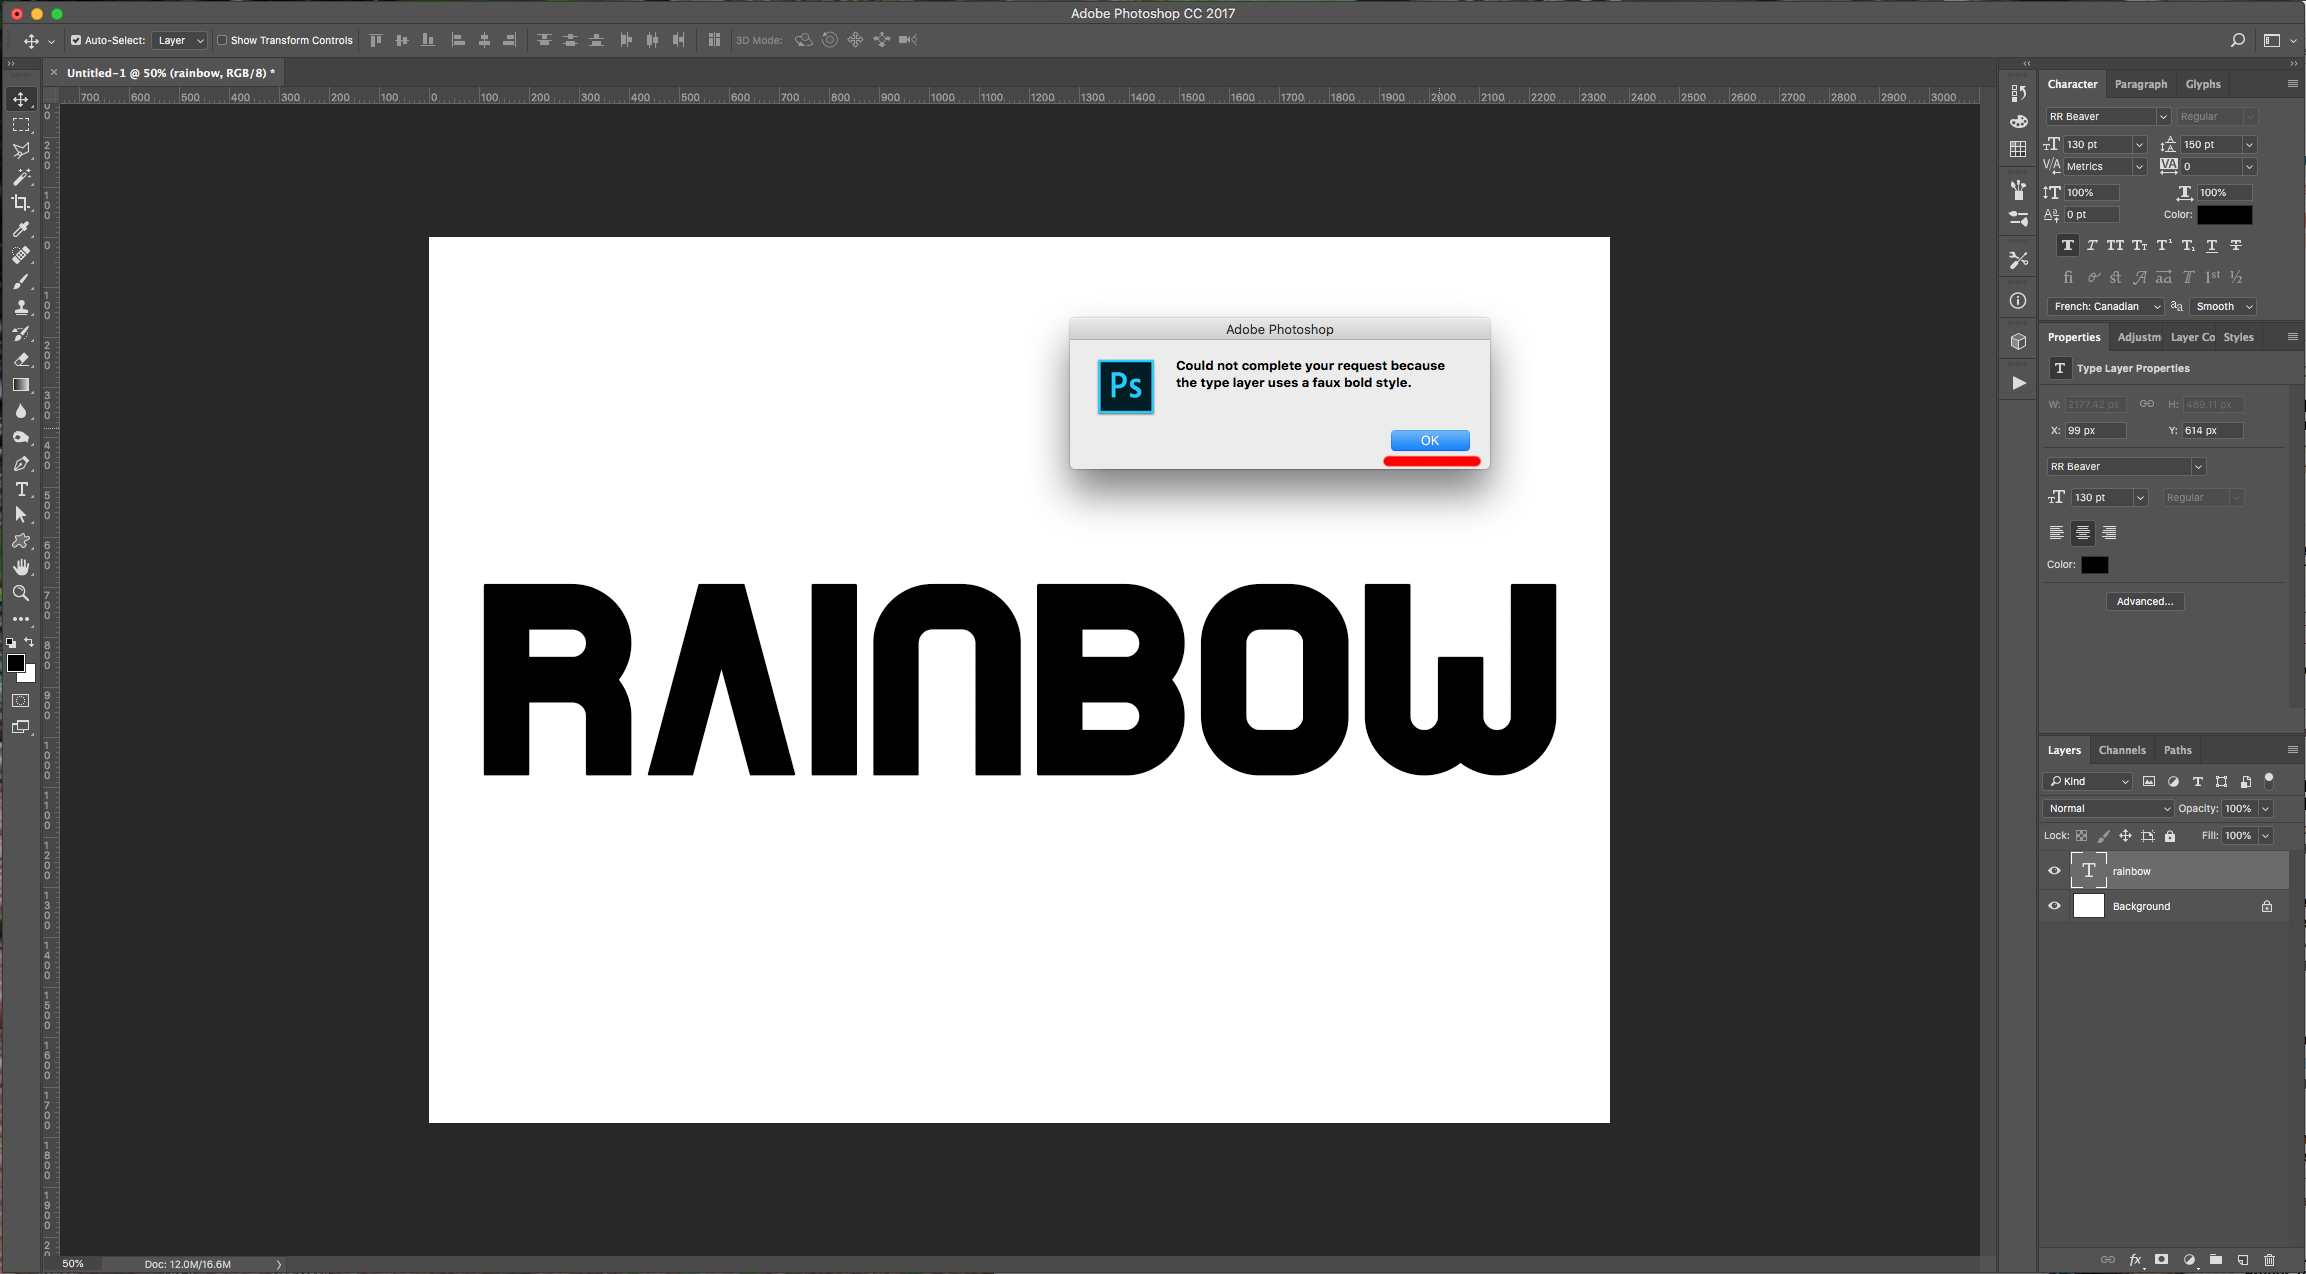
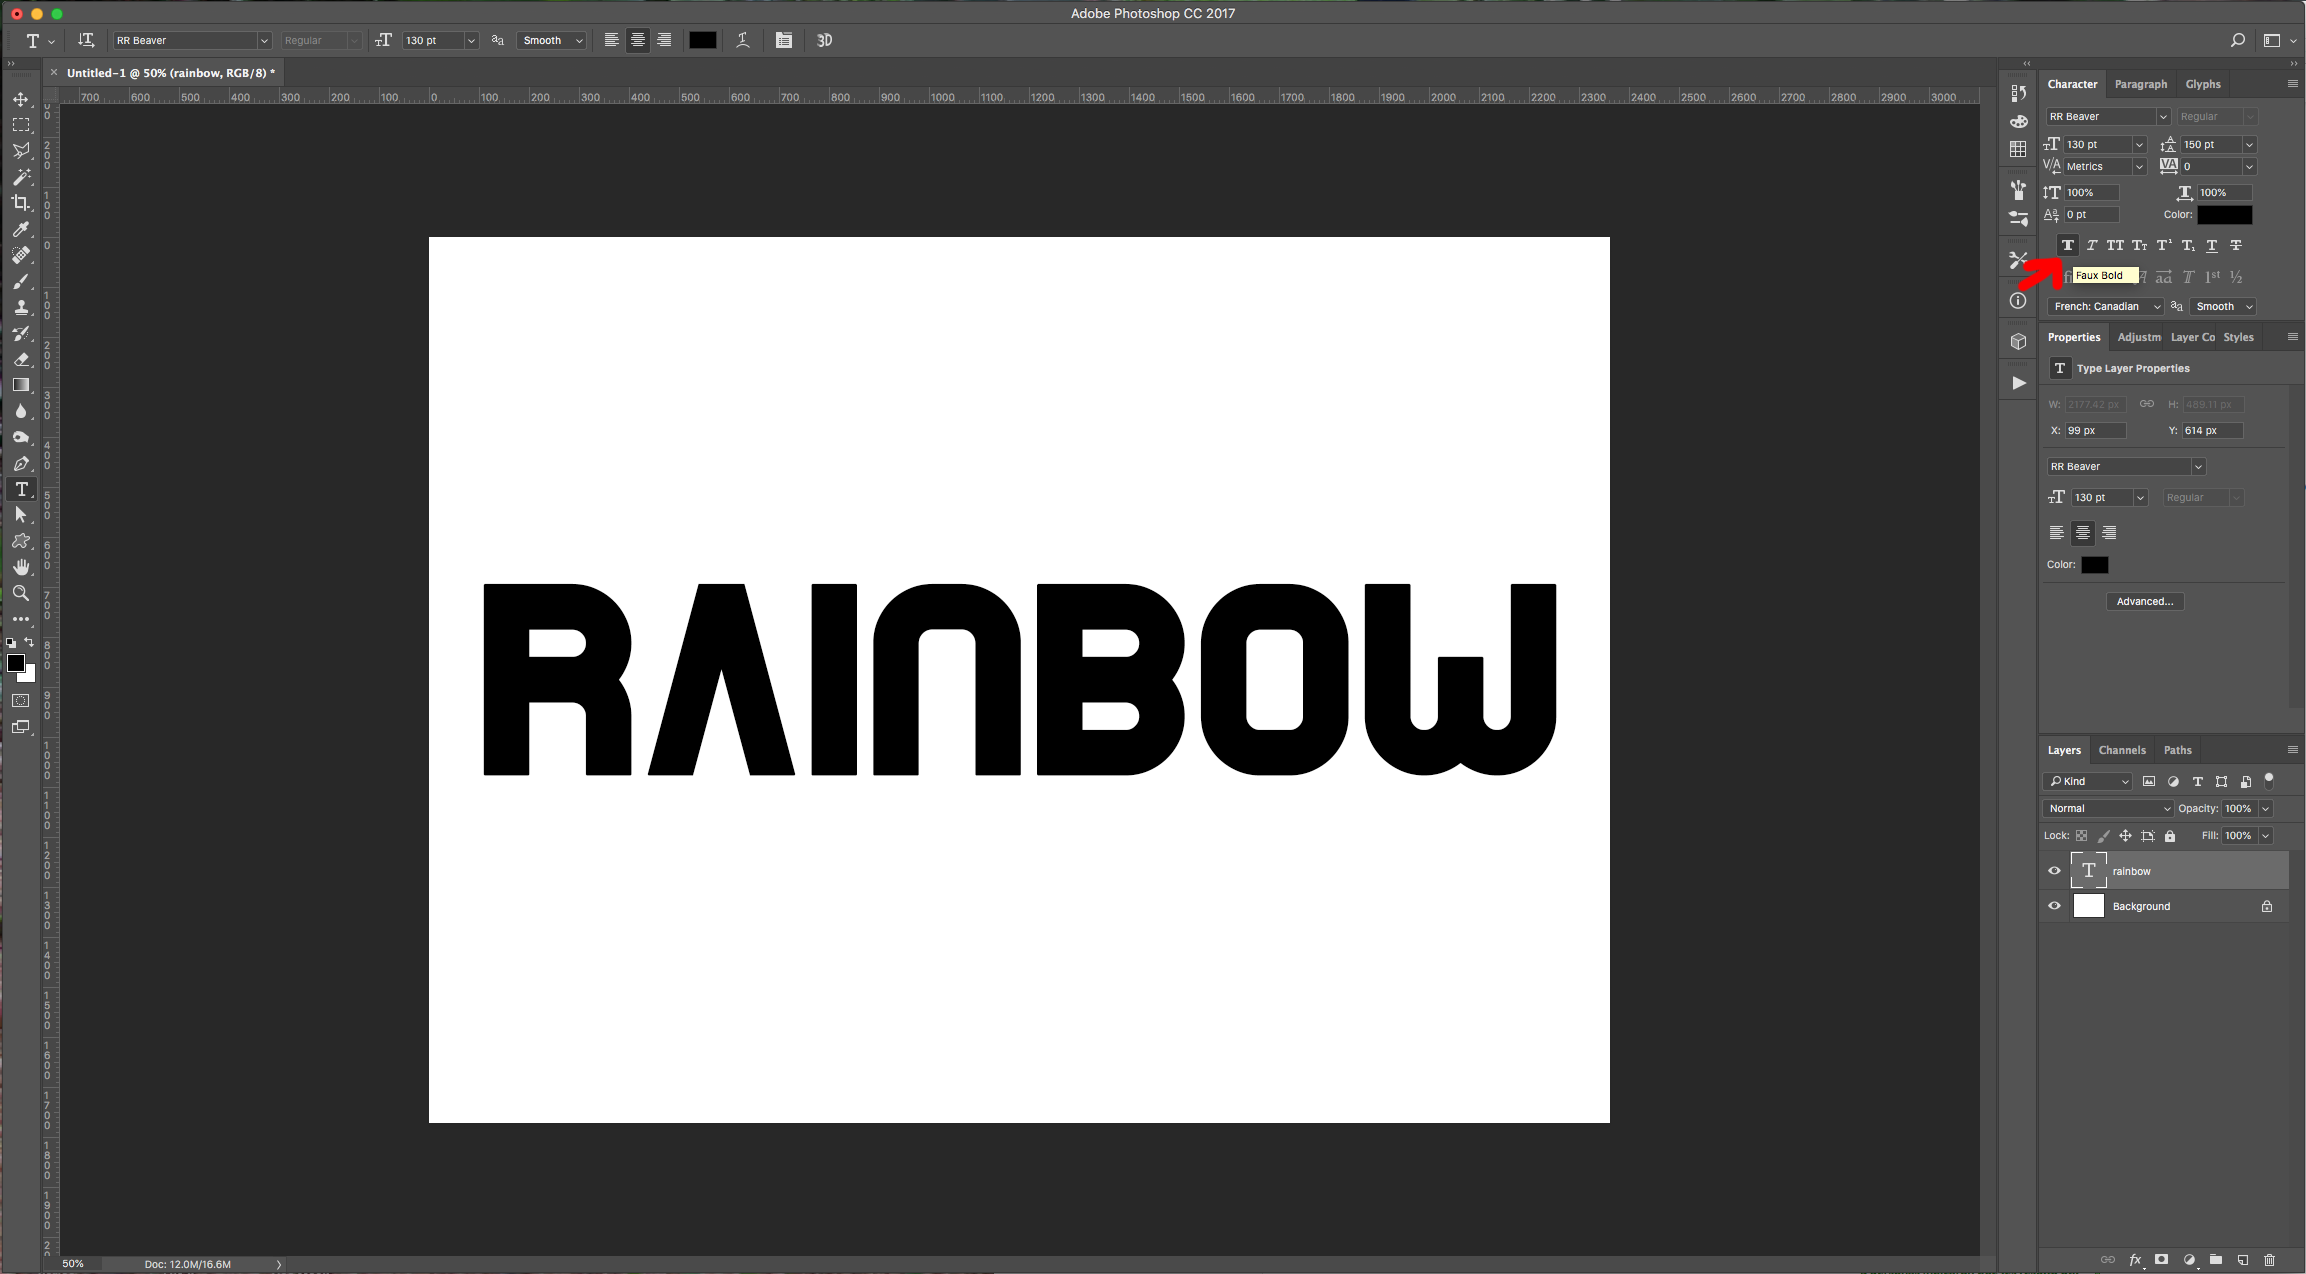
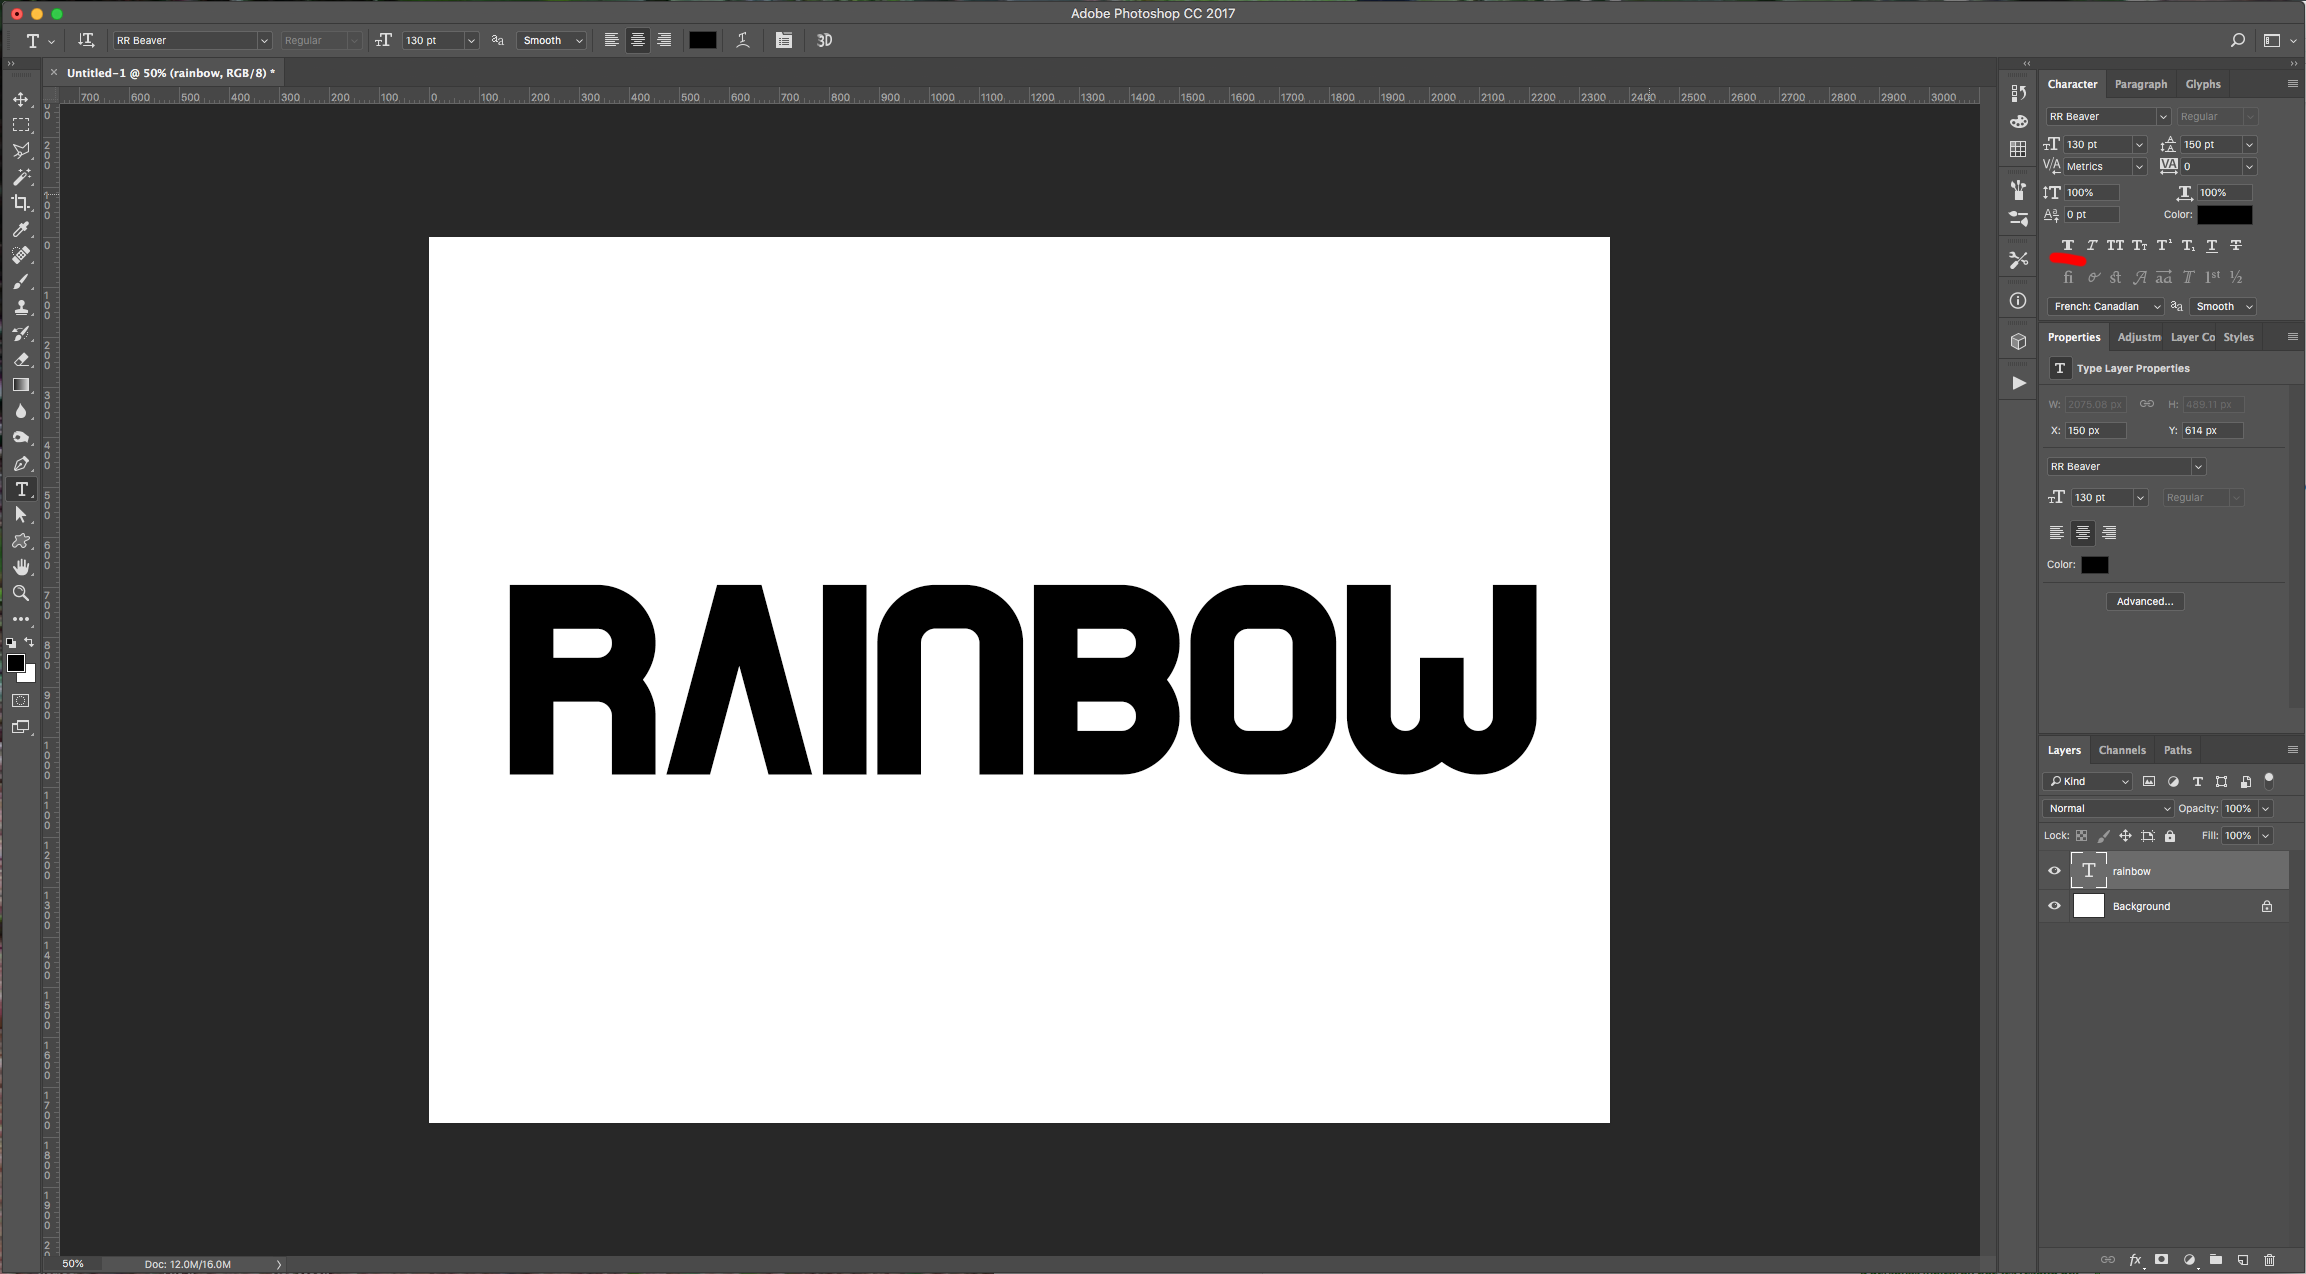
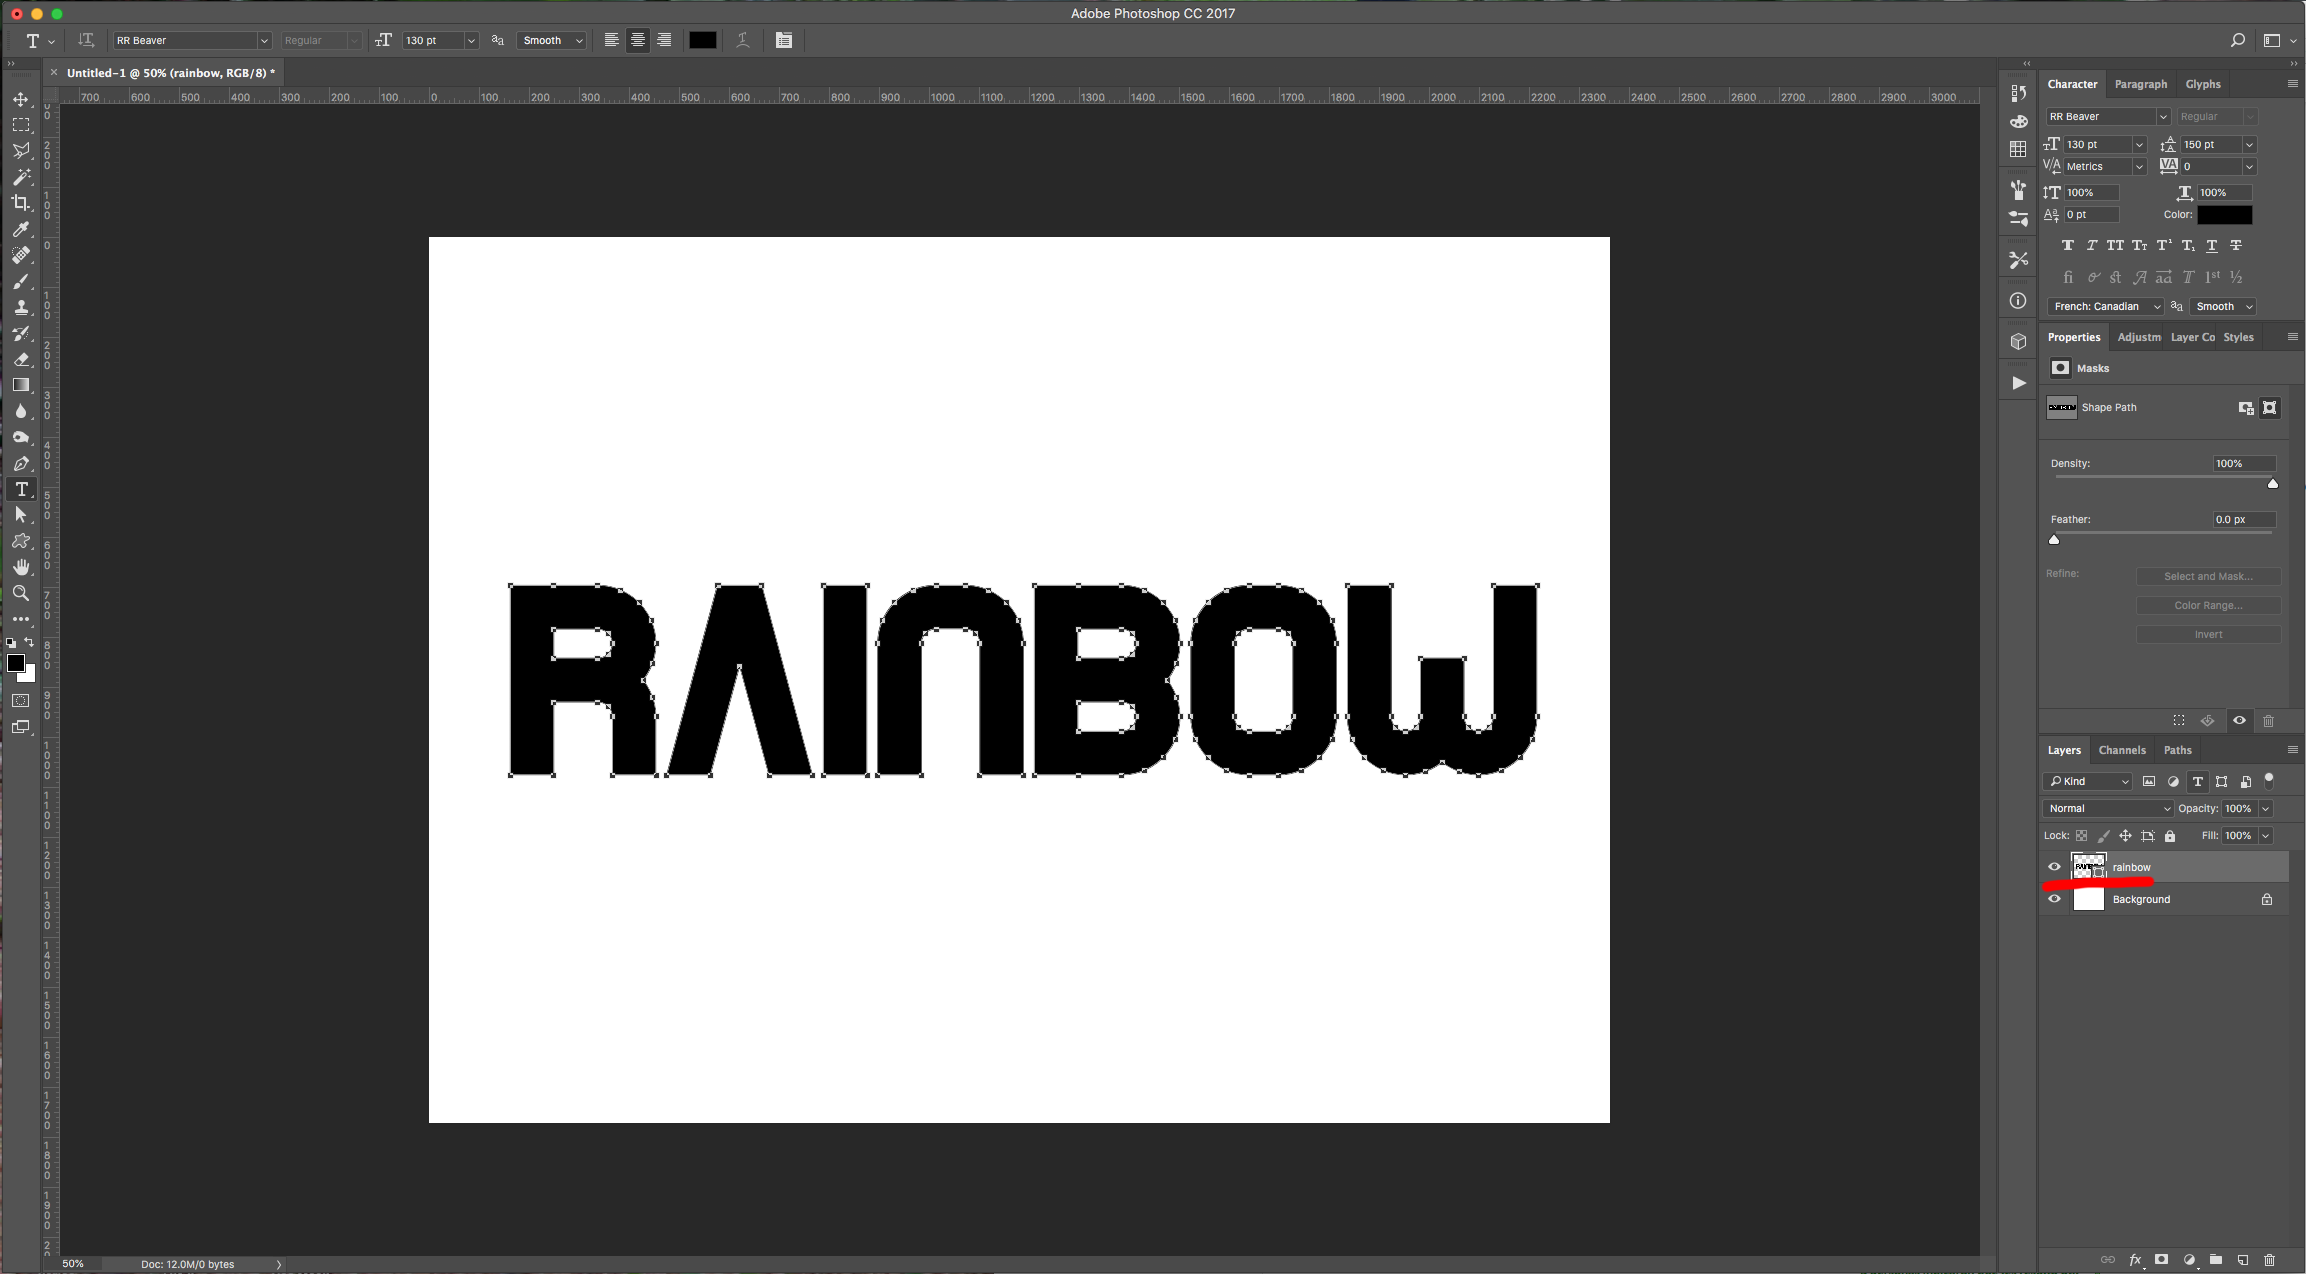
4 - Right-click on top of your text layer and choose “Convert to Shape”. If you get a warning telling you that your request could not be completed because the Type Layer uses a “Faux Bold Style” click “OK”, head to the “Characters Panel” and click on the small button on the bottom-left to disable the “Faux Bold” (or any other added “Style”). Now you can “Convert to Shape”.
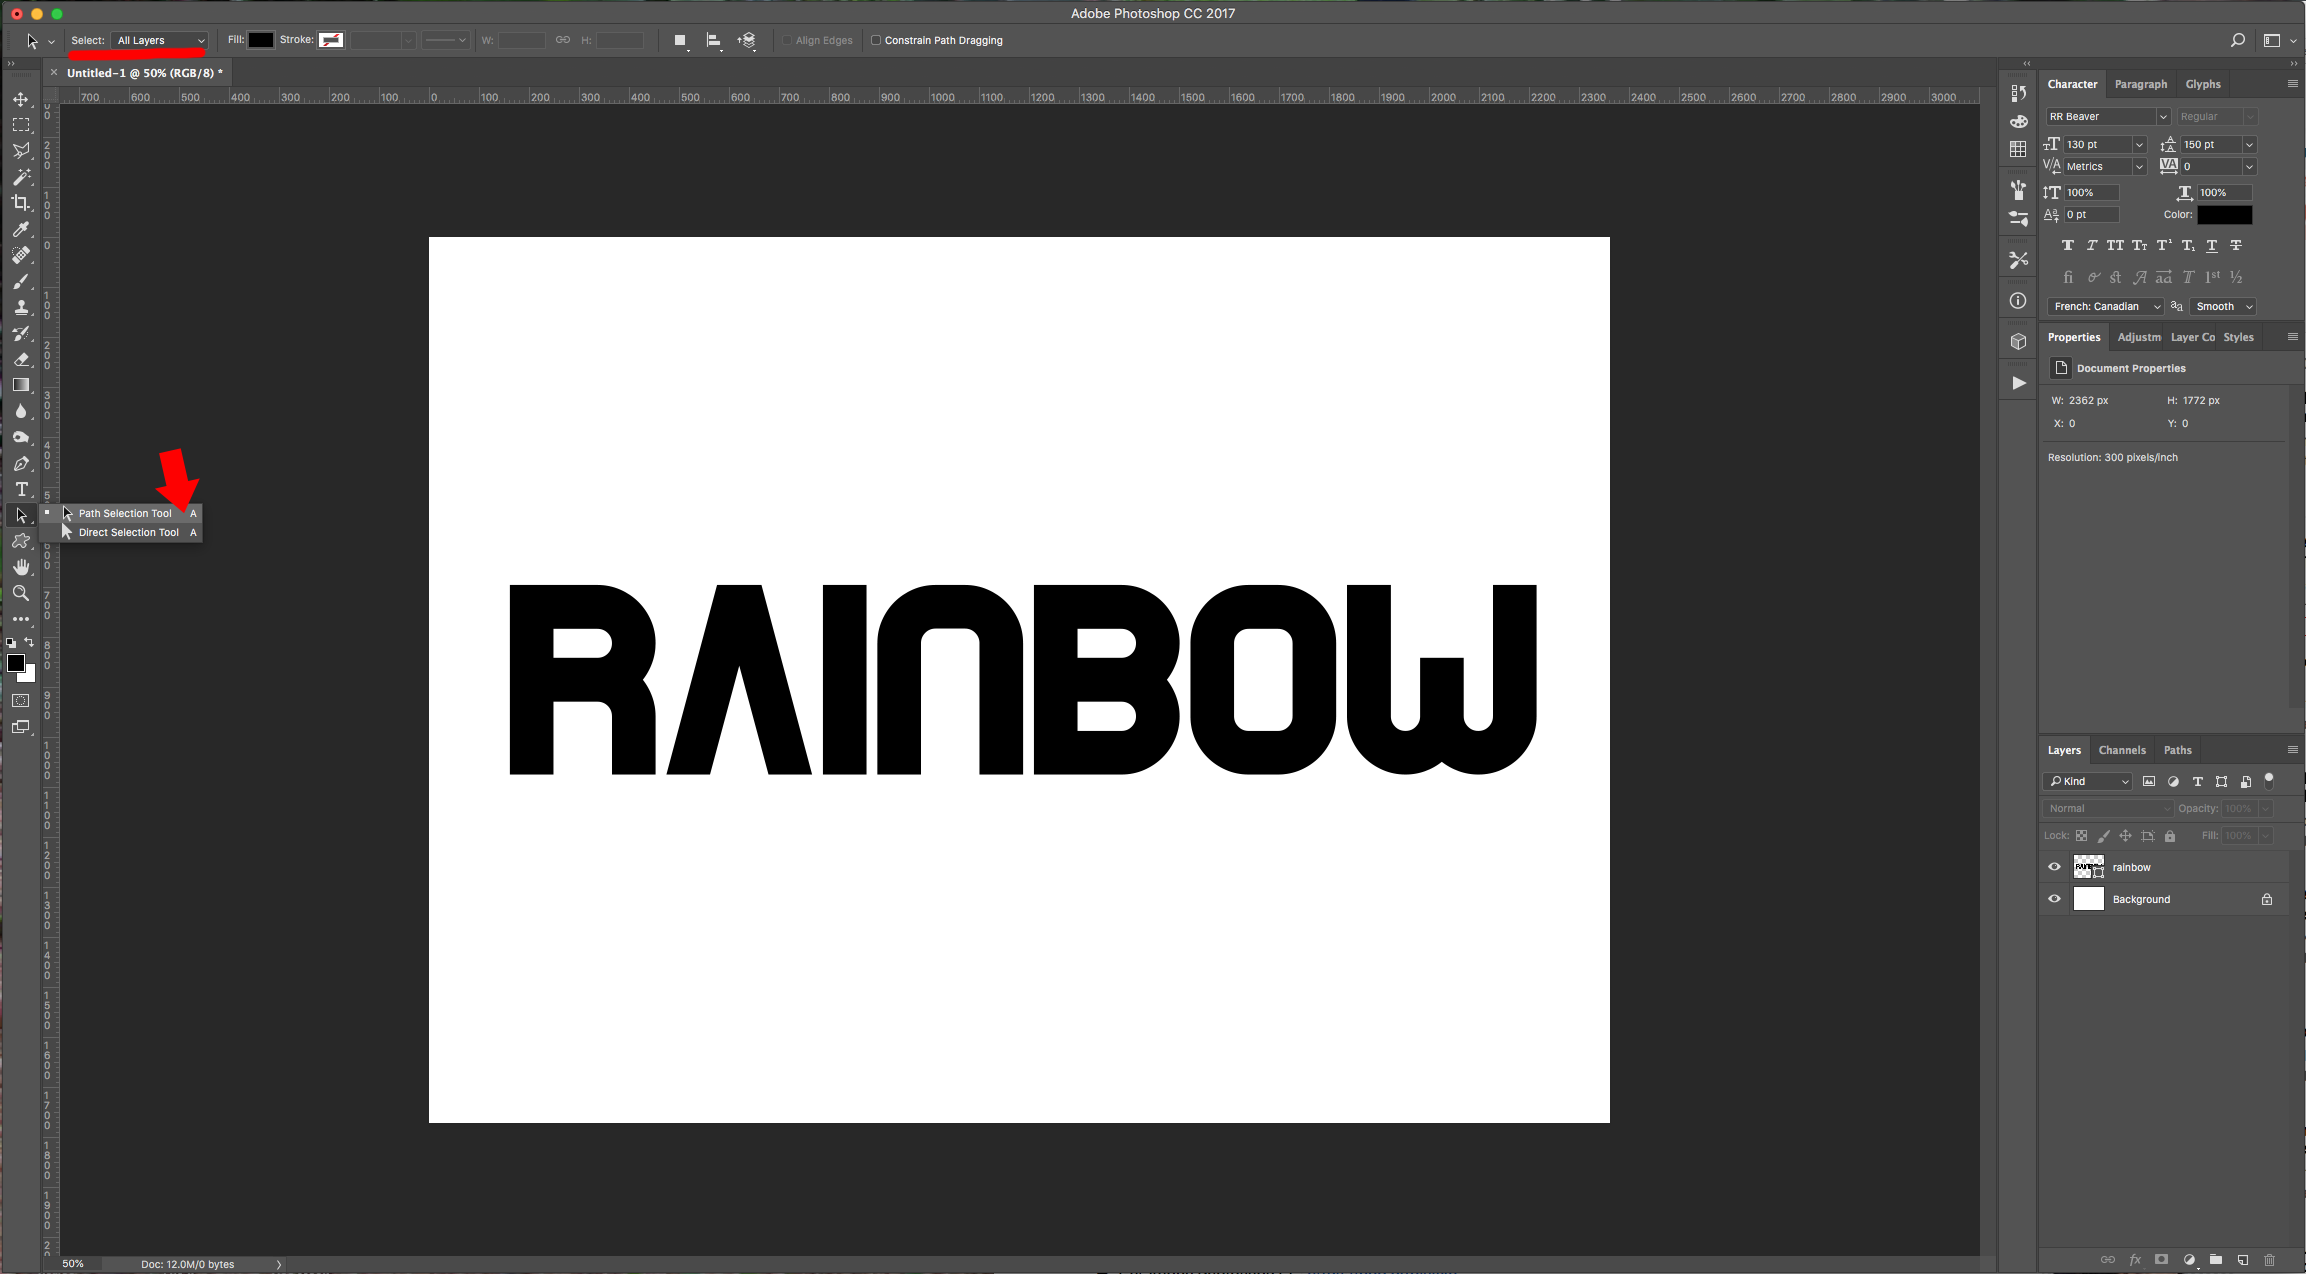
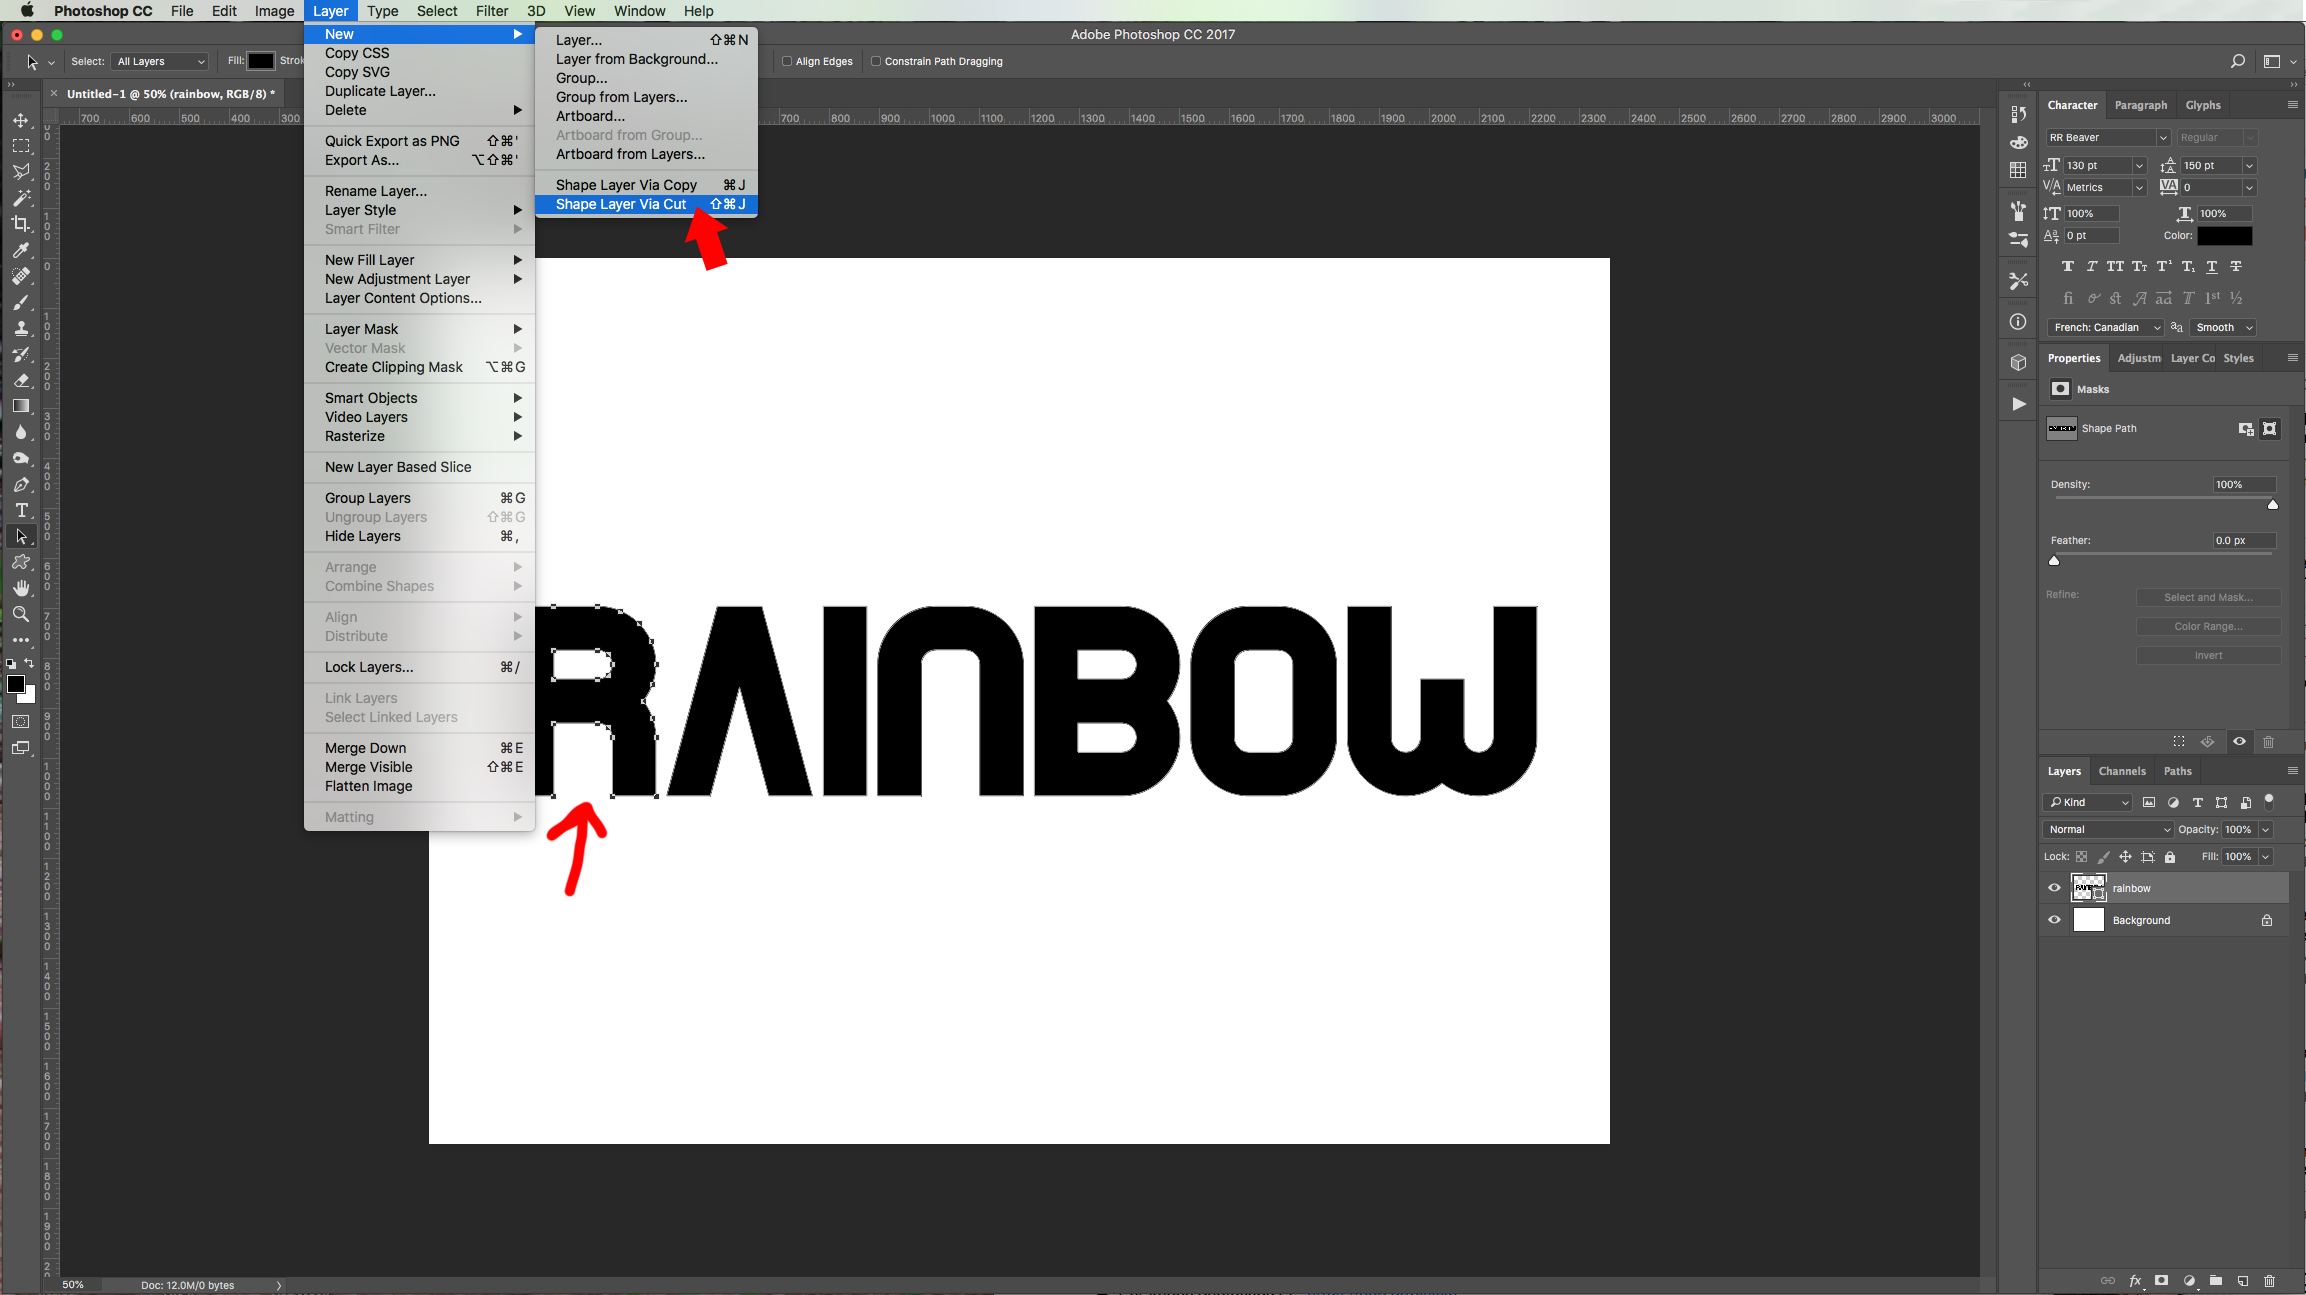
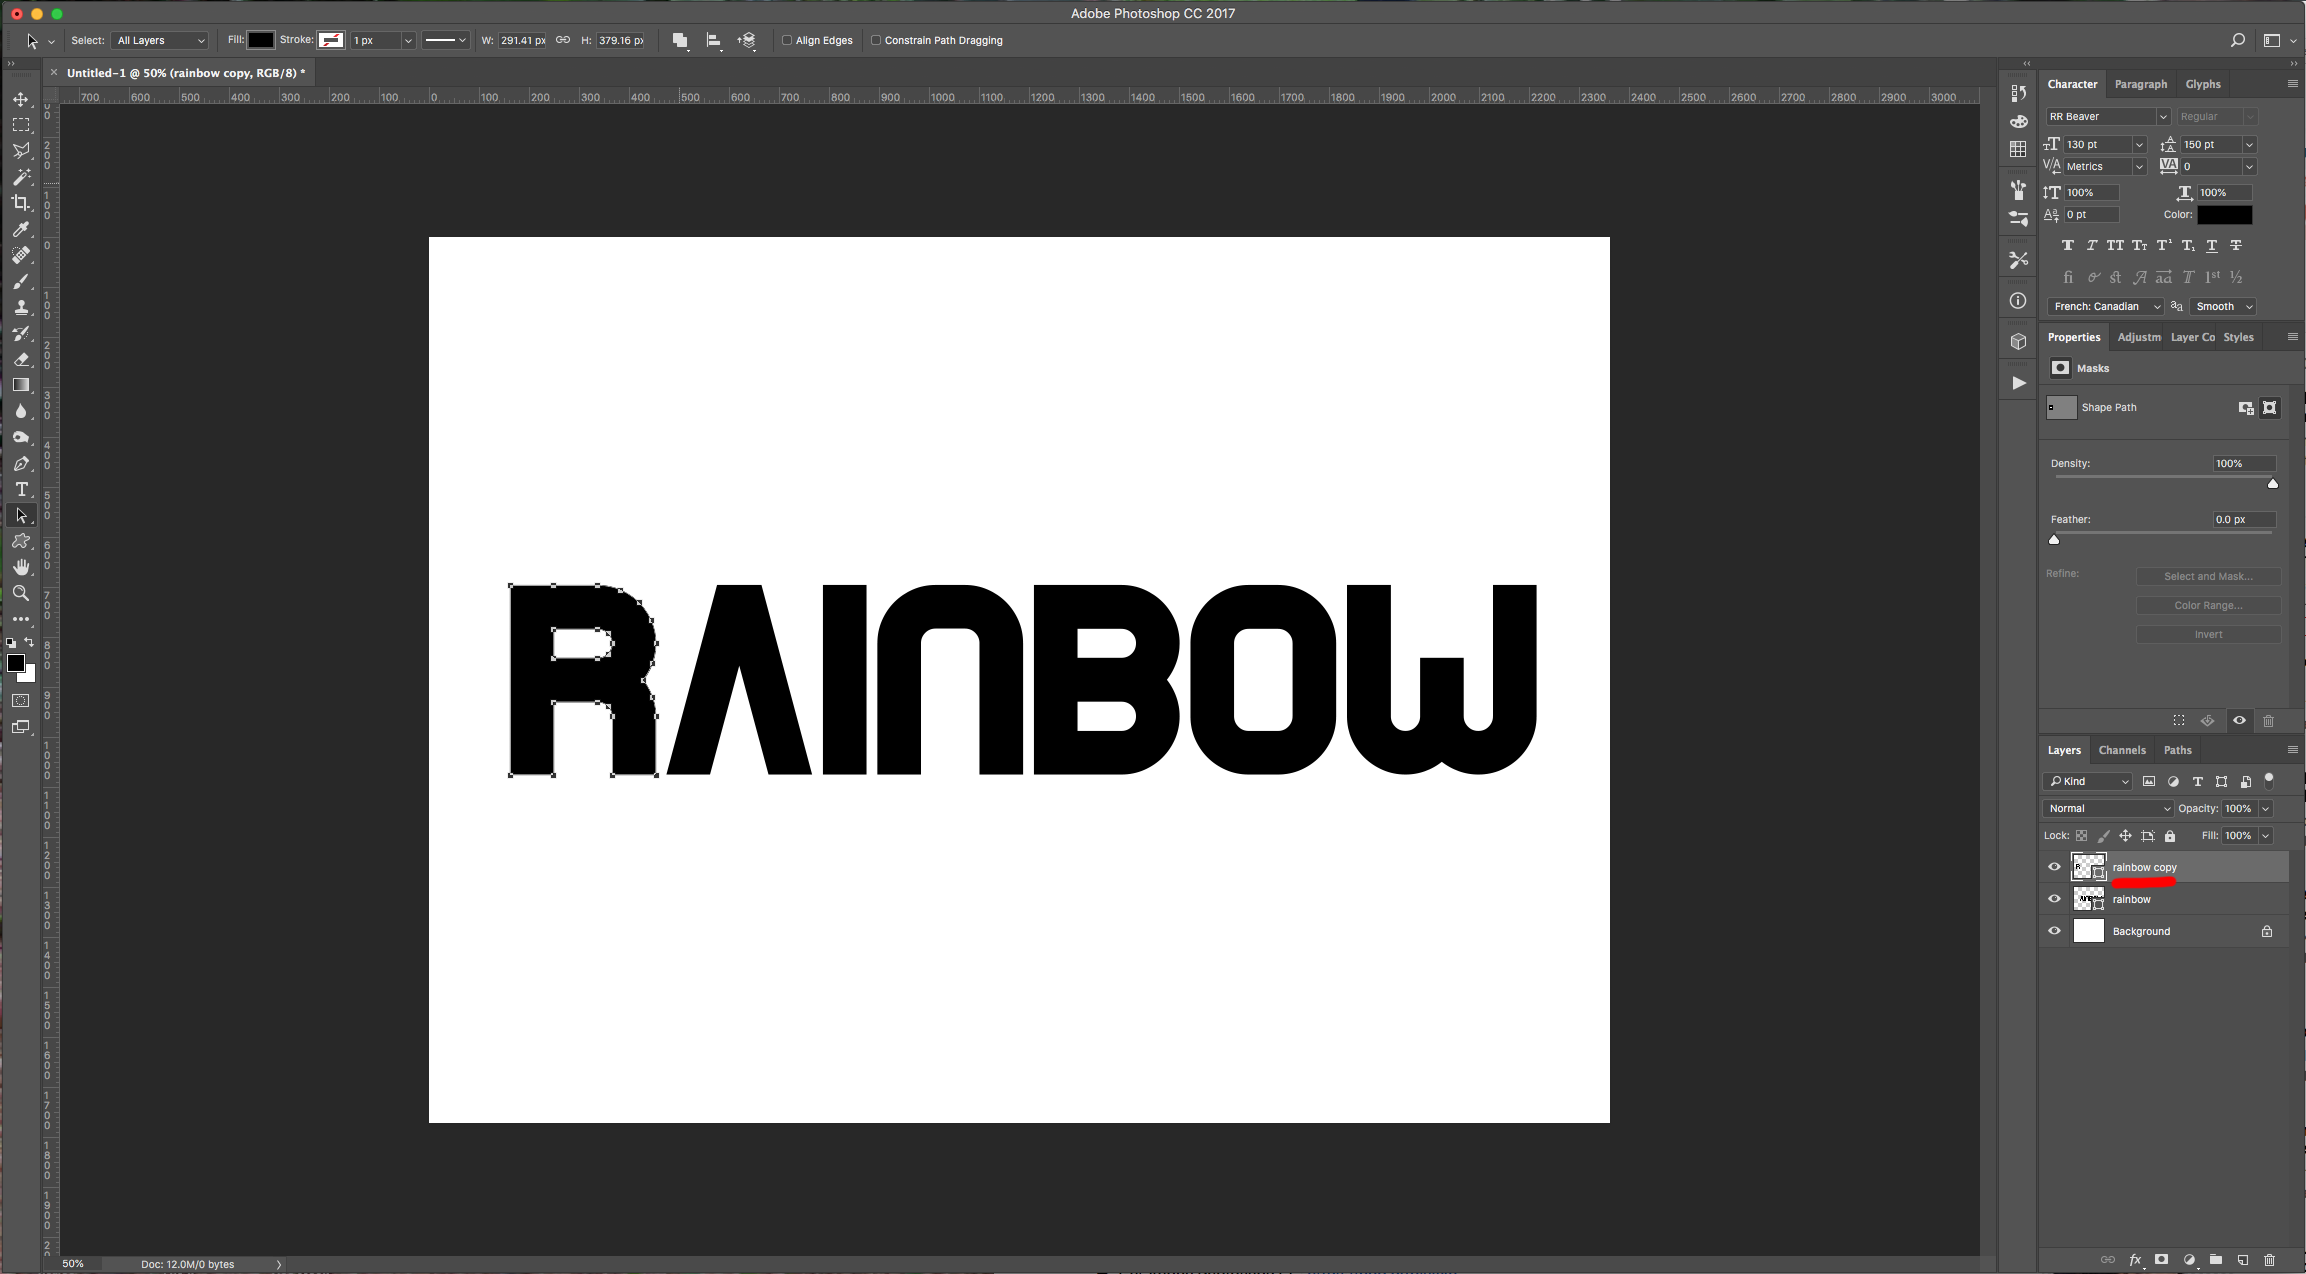
5 - Use the “Path Selection Tool” making sure the “Select All Layers” is selected on the Top Menu. Click on the first letter of your word to selected and go to Layer > New > Shape Layer Via Cut (Shift + Command/Control + J). This will create a “New Layer” with the letter in it. Repeat this for each letter.
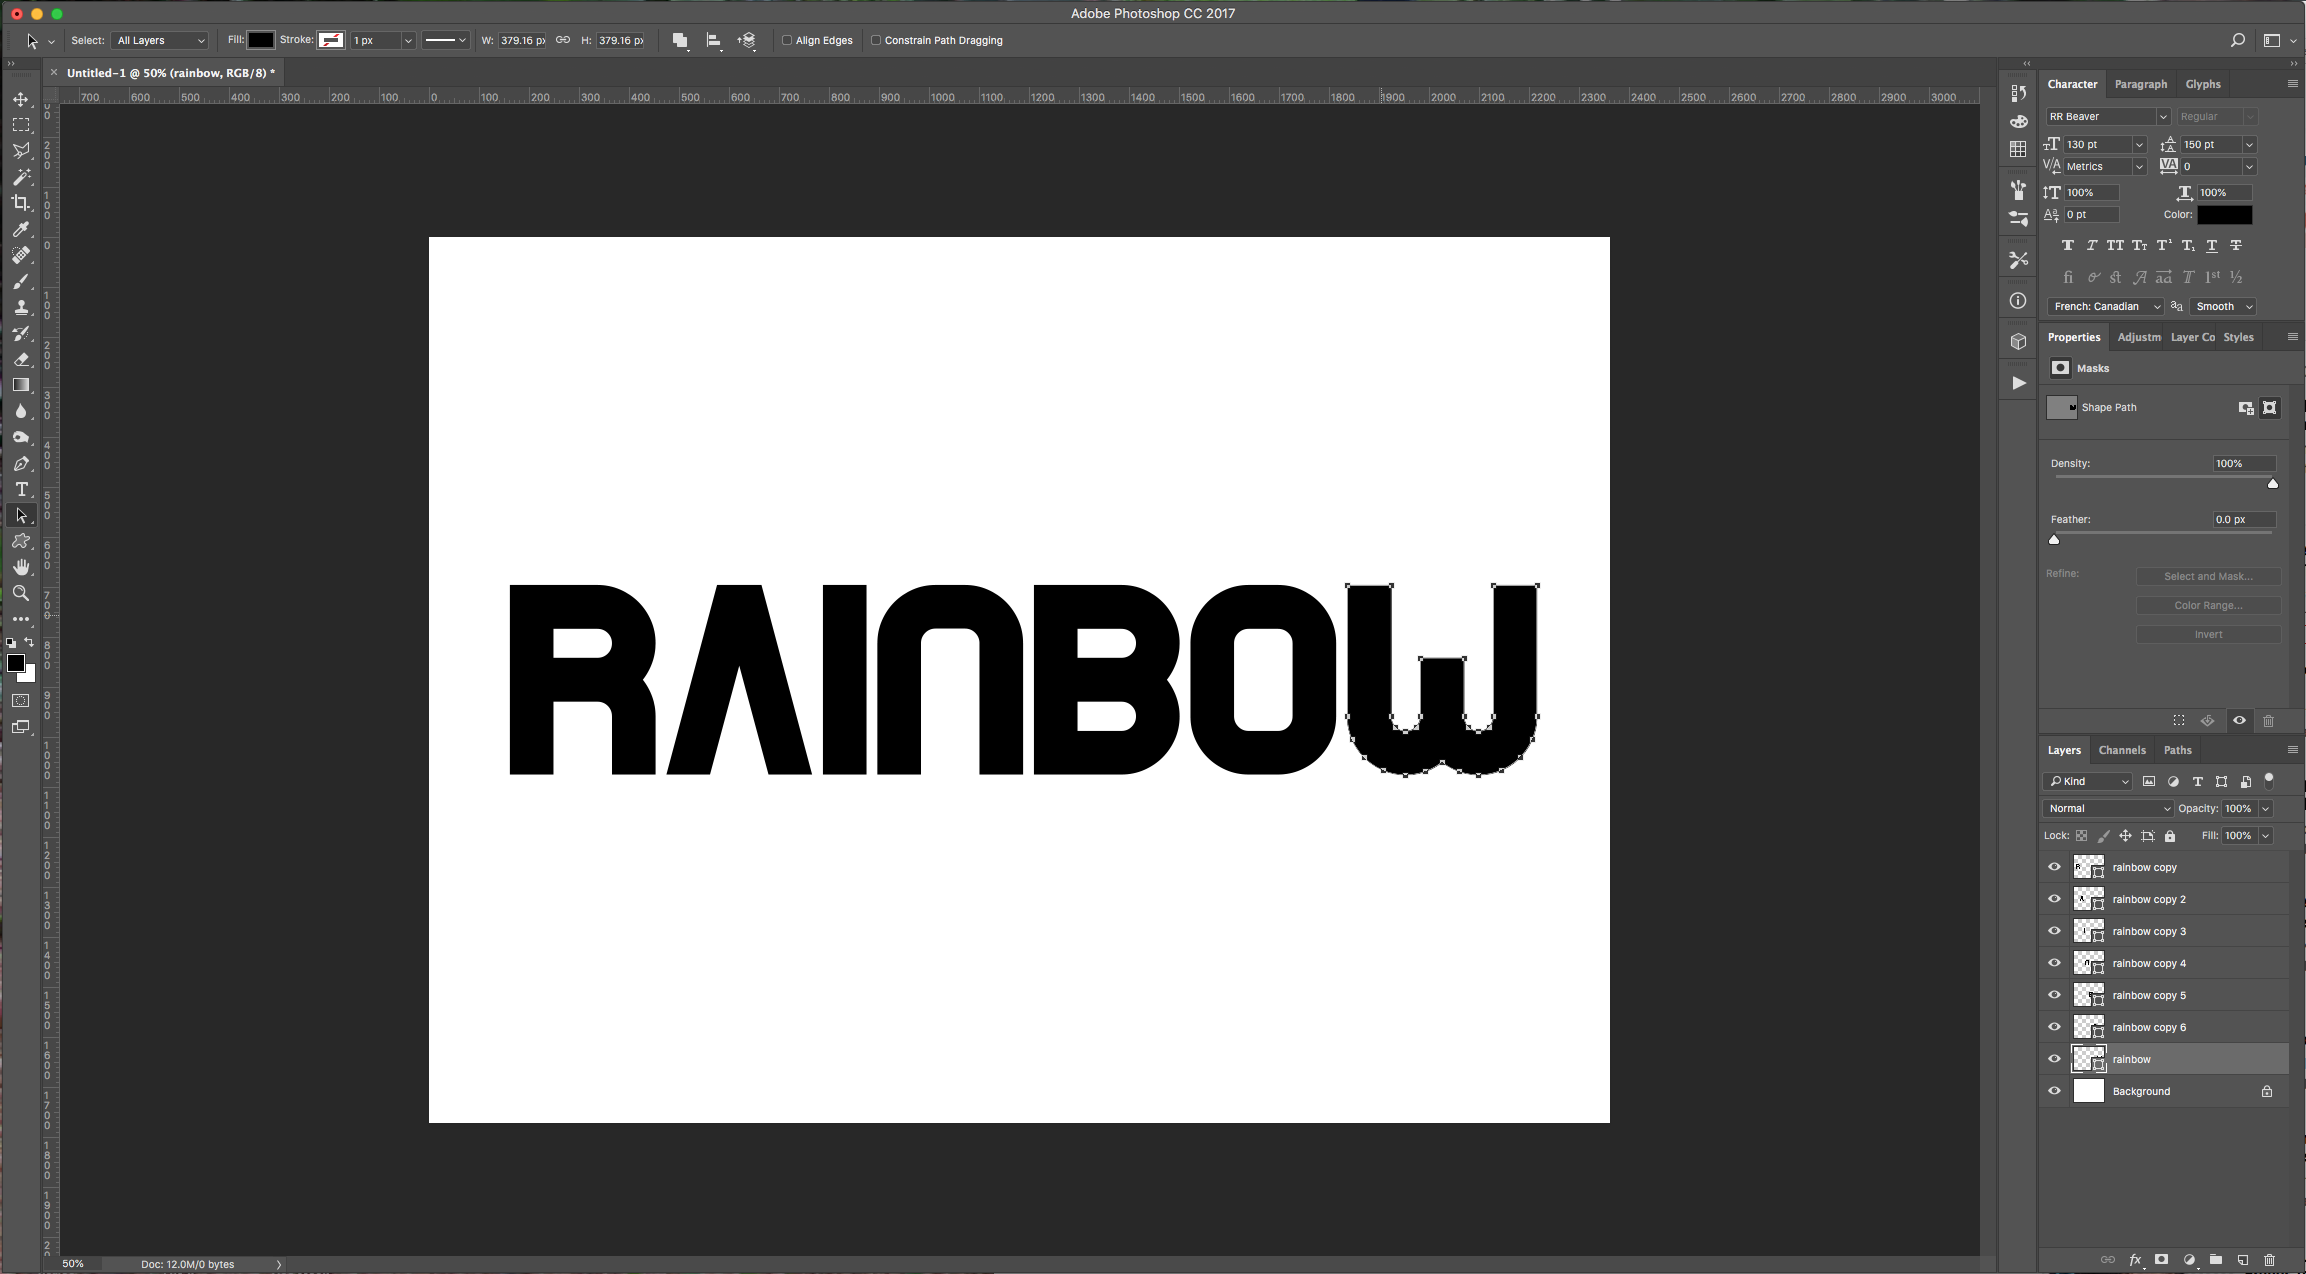
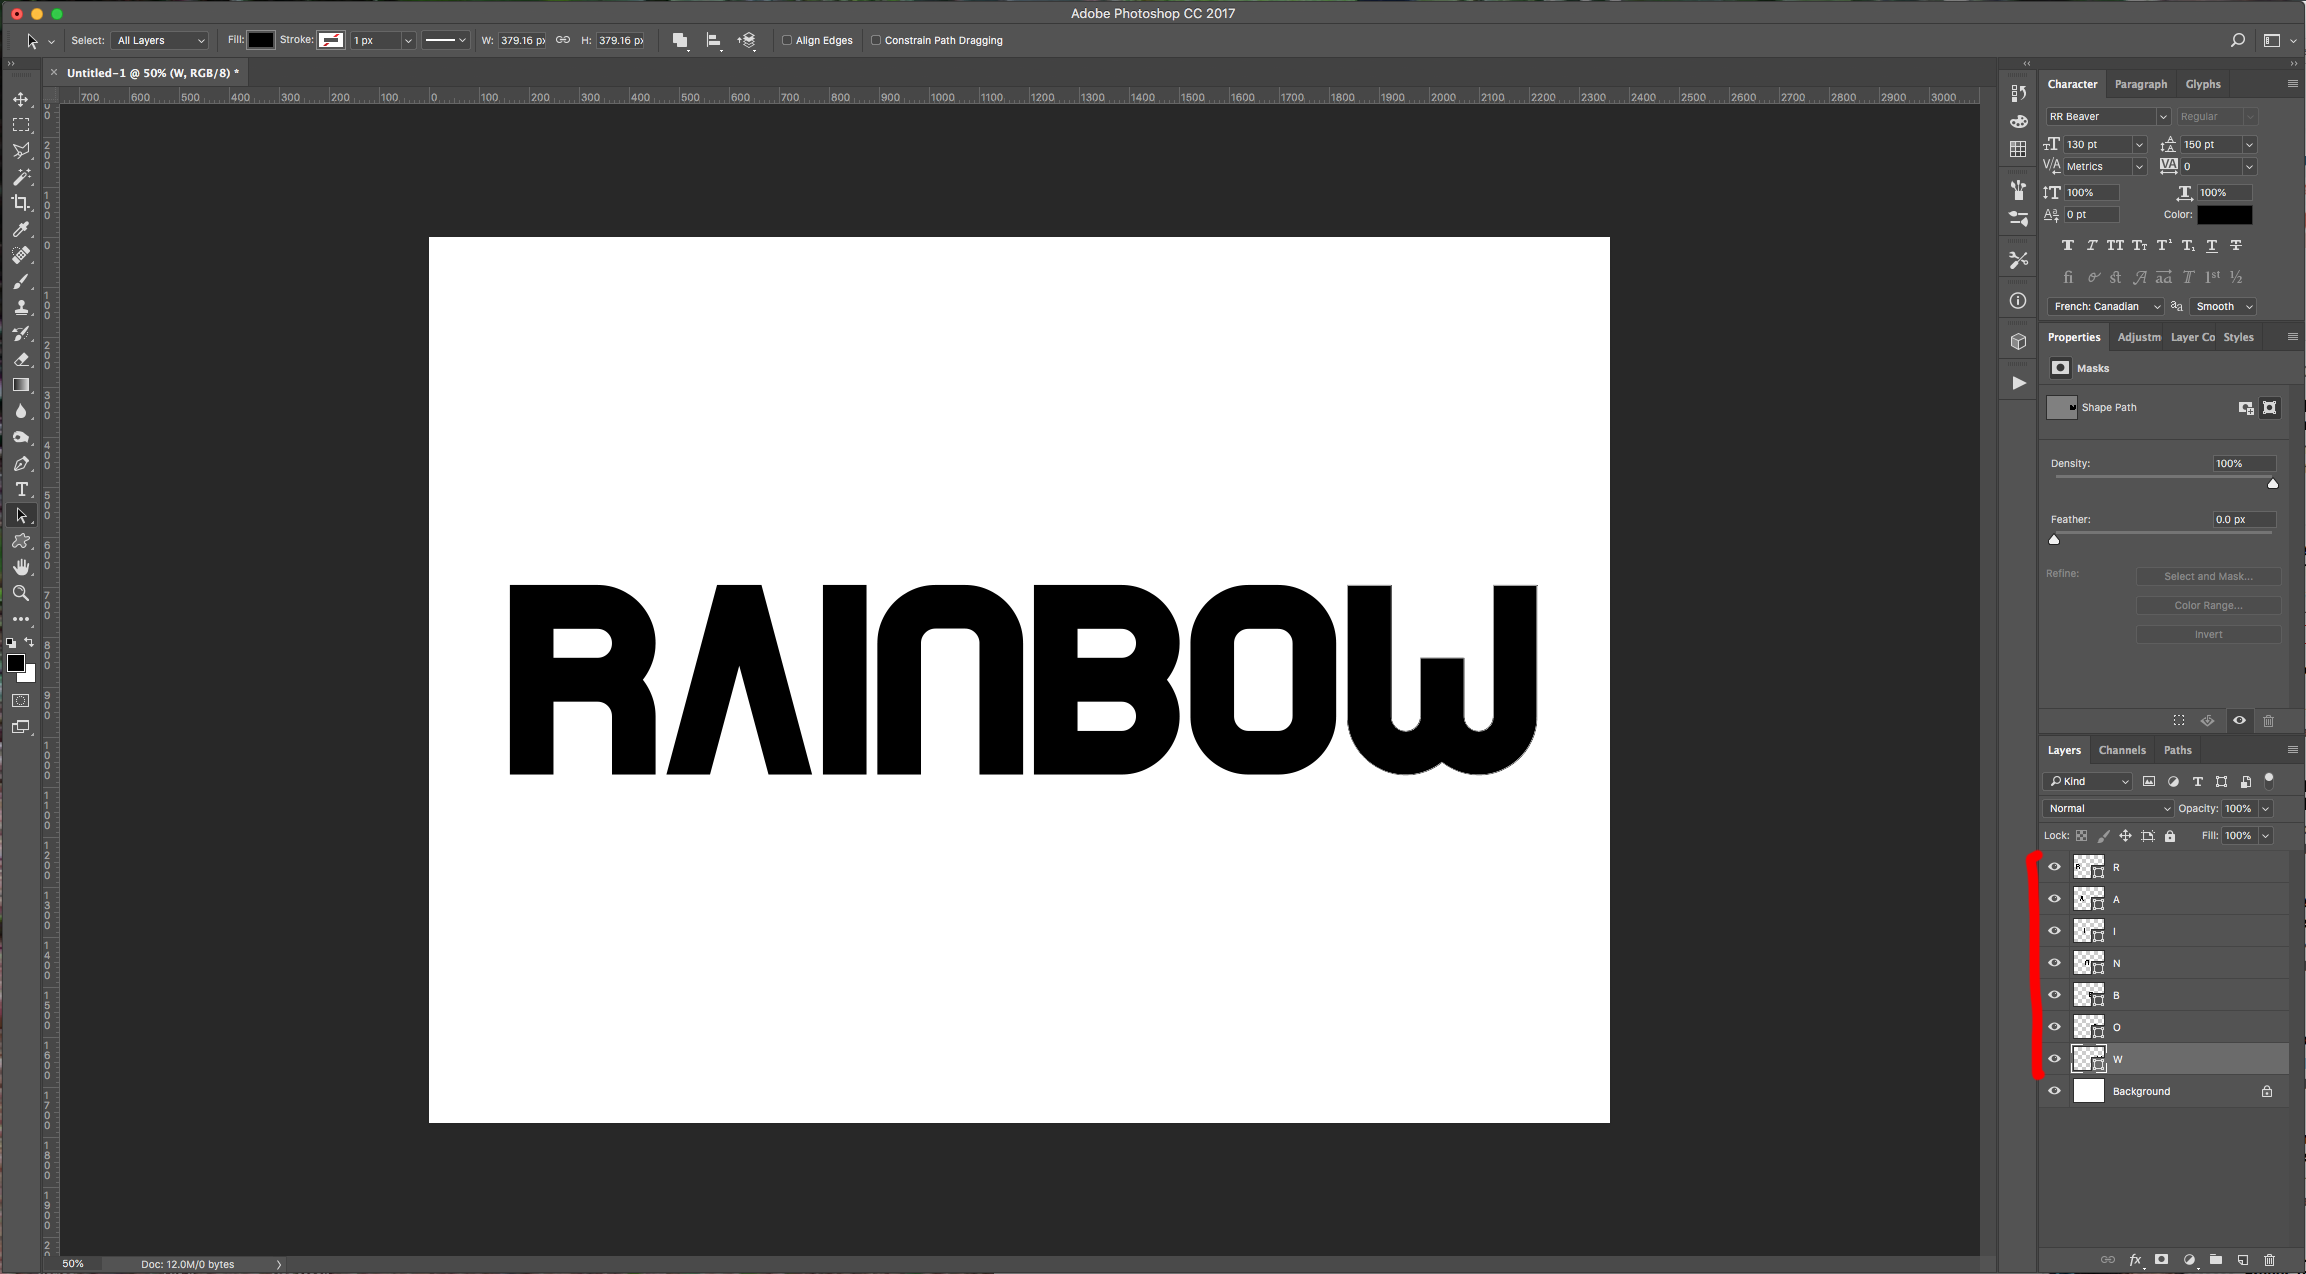
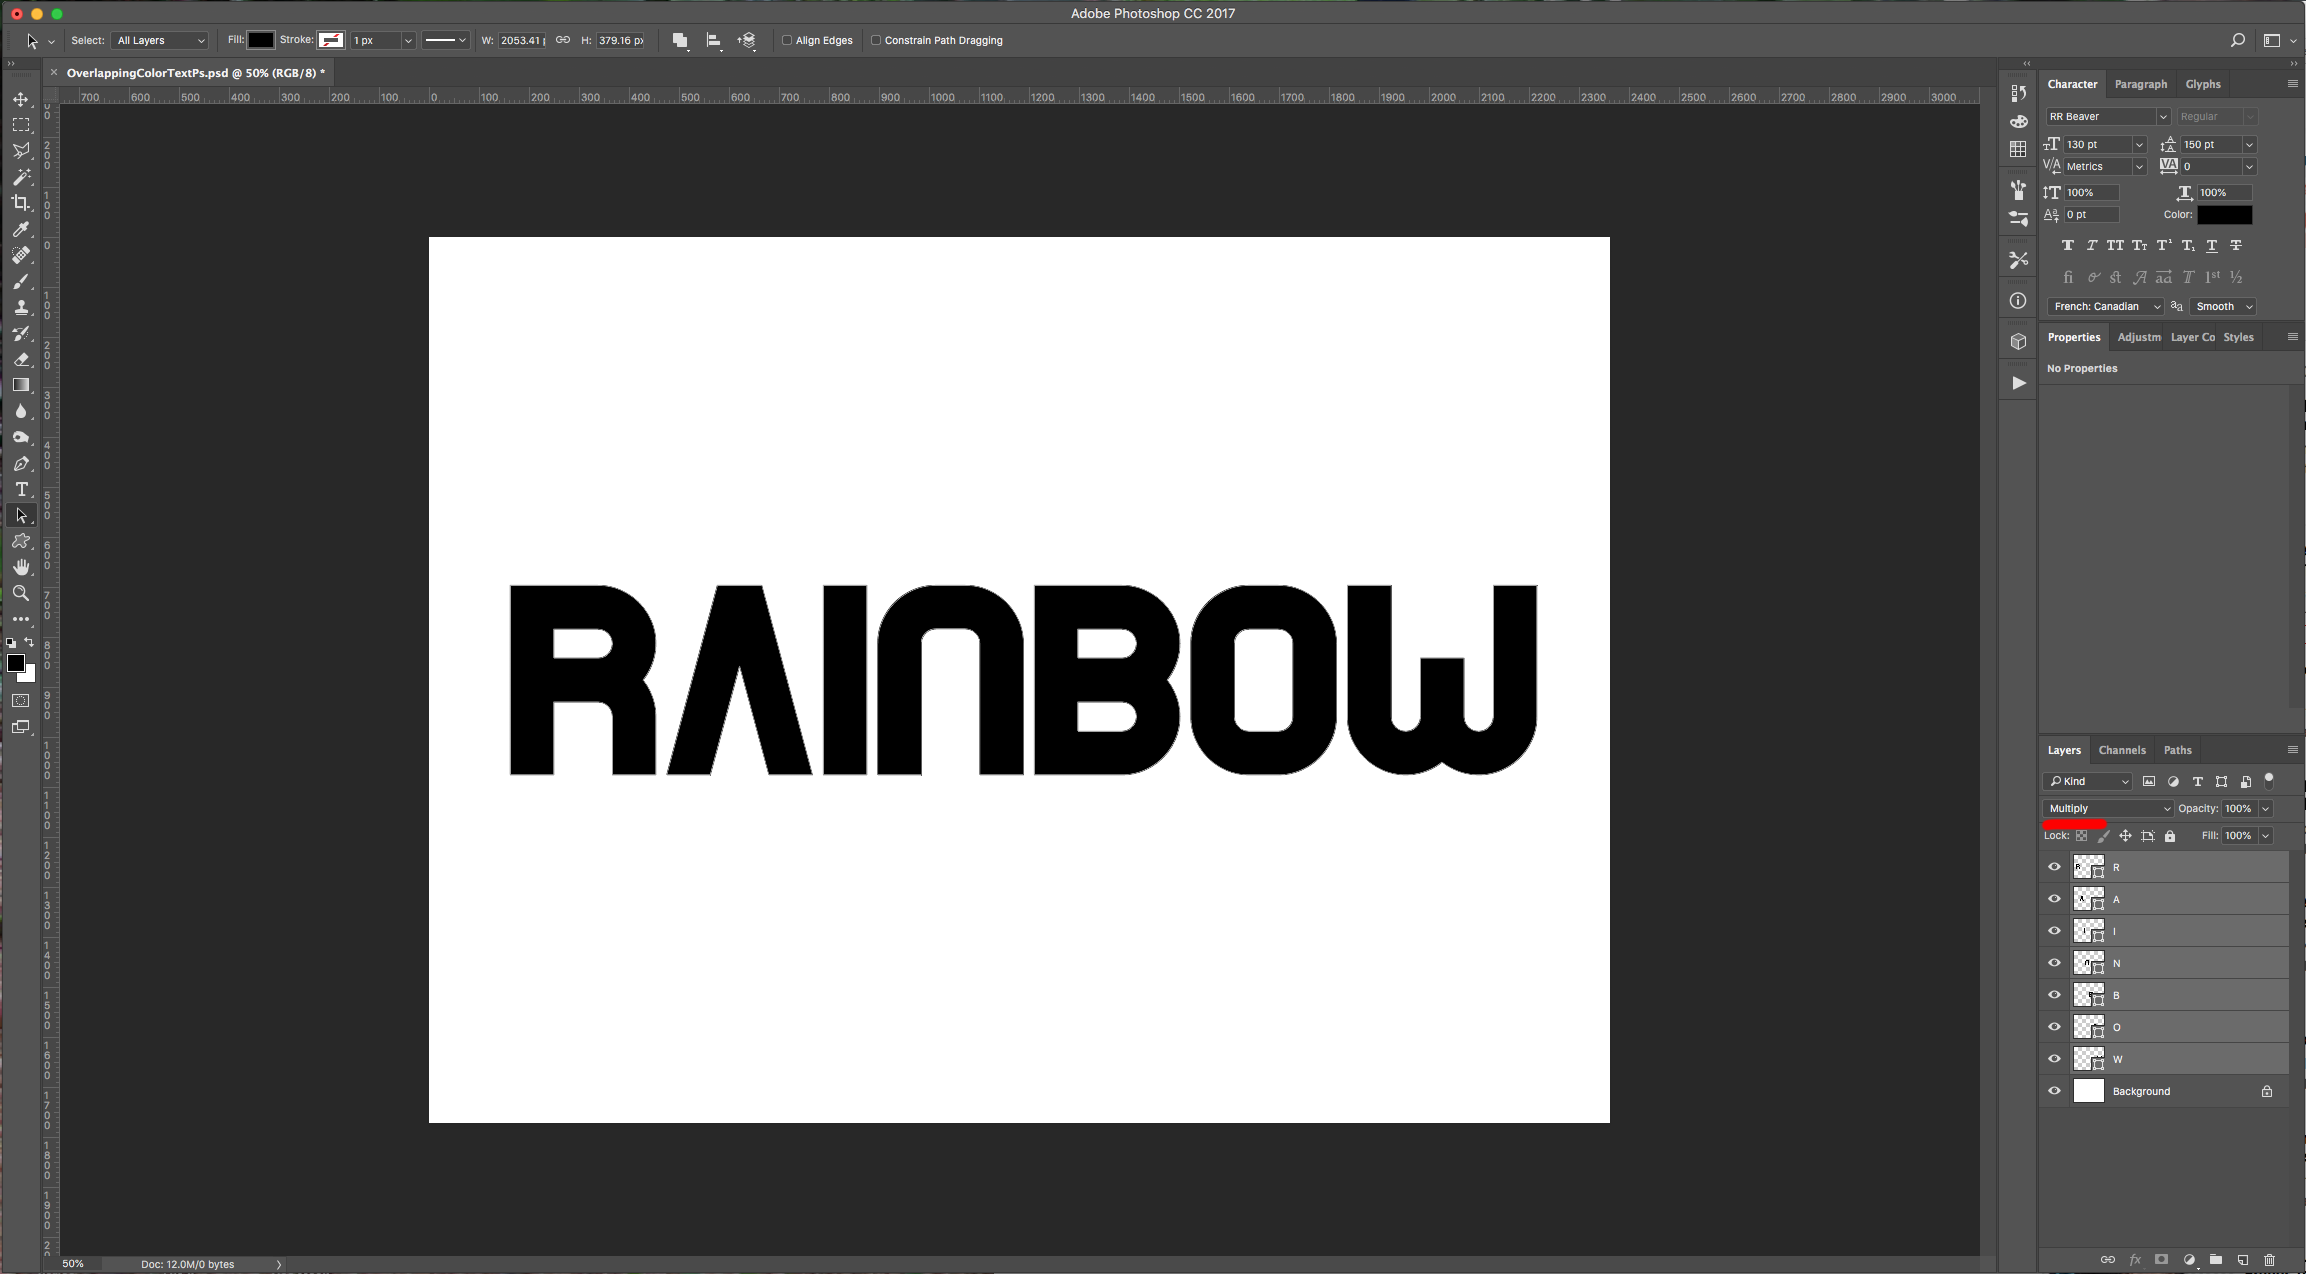
6 - Rename the Layers if you want, select them all (“Shift” key) and change their “Blending Mode” to “Multiply”
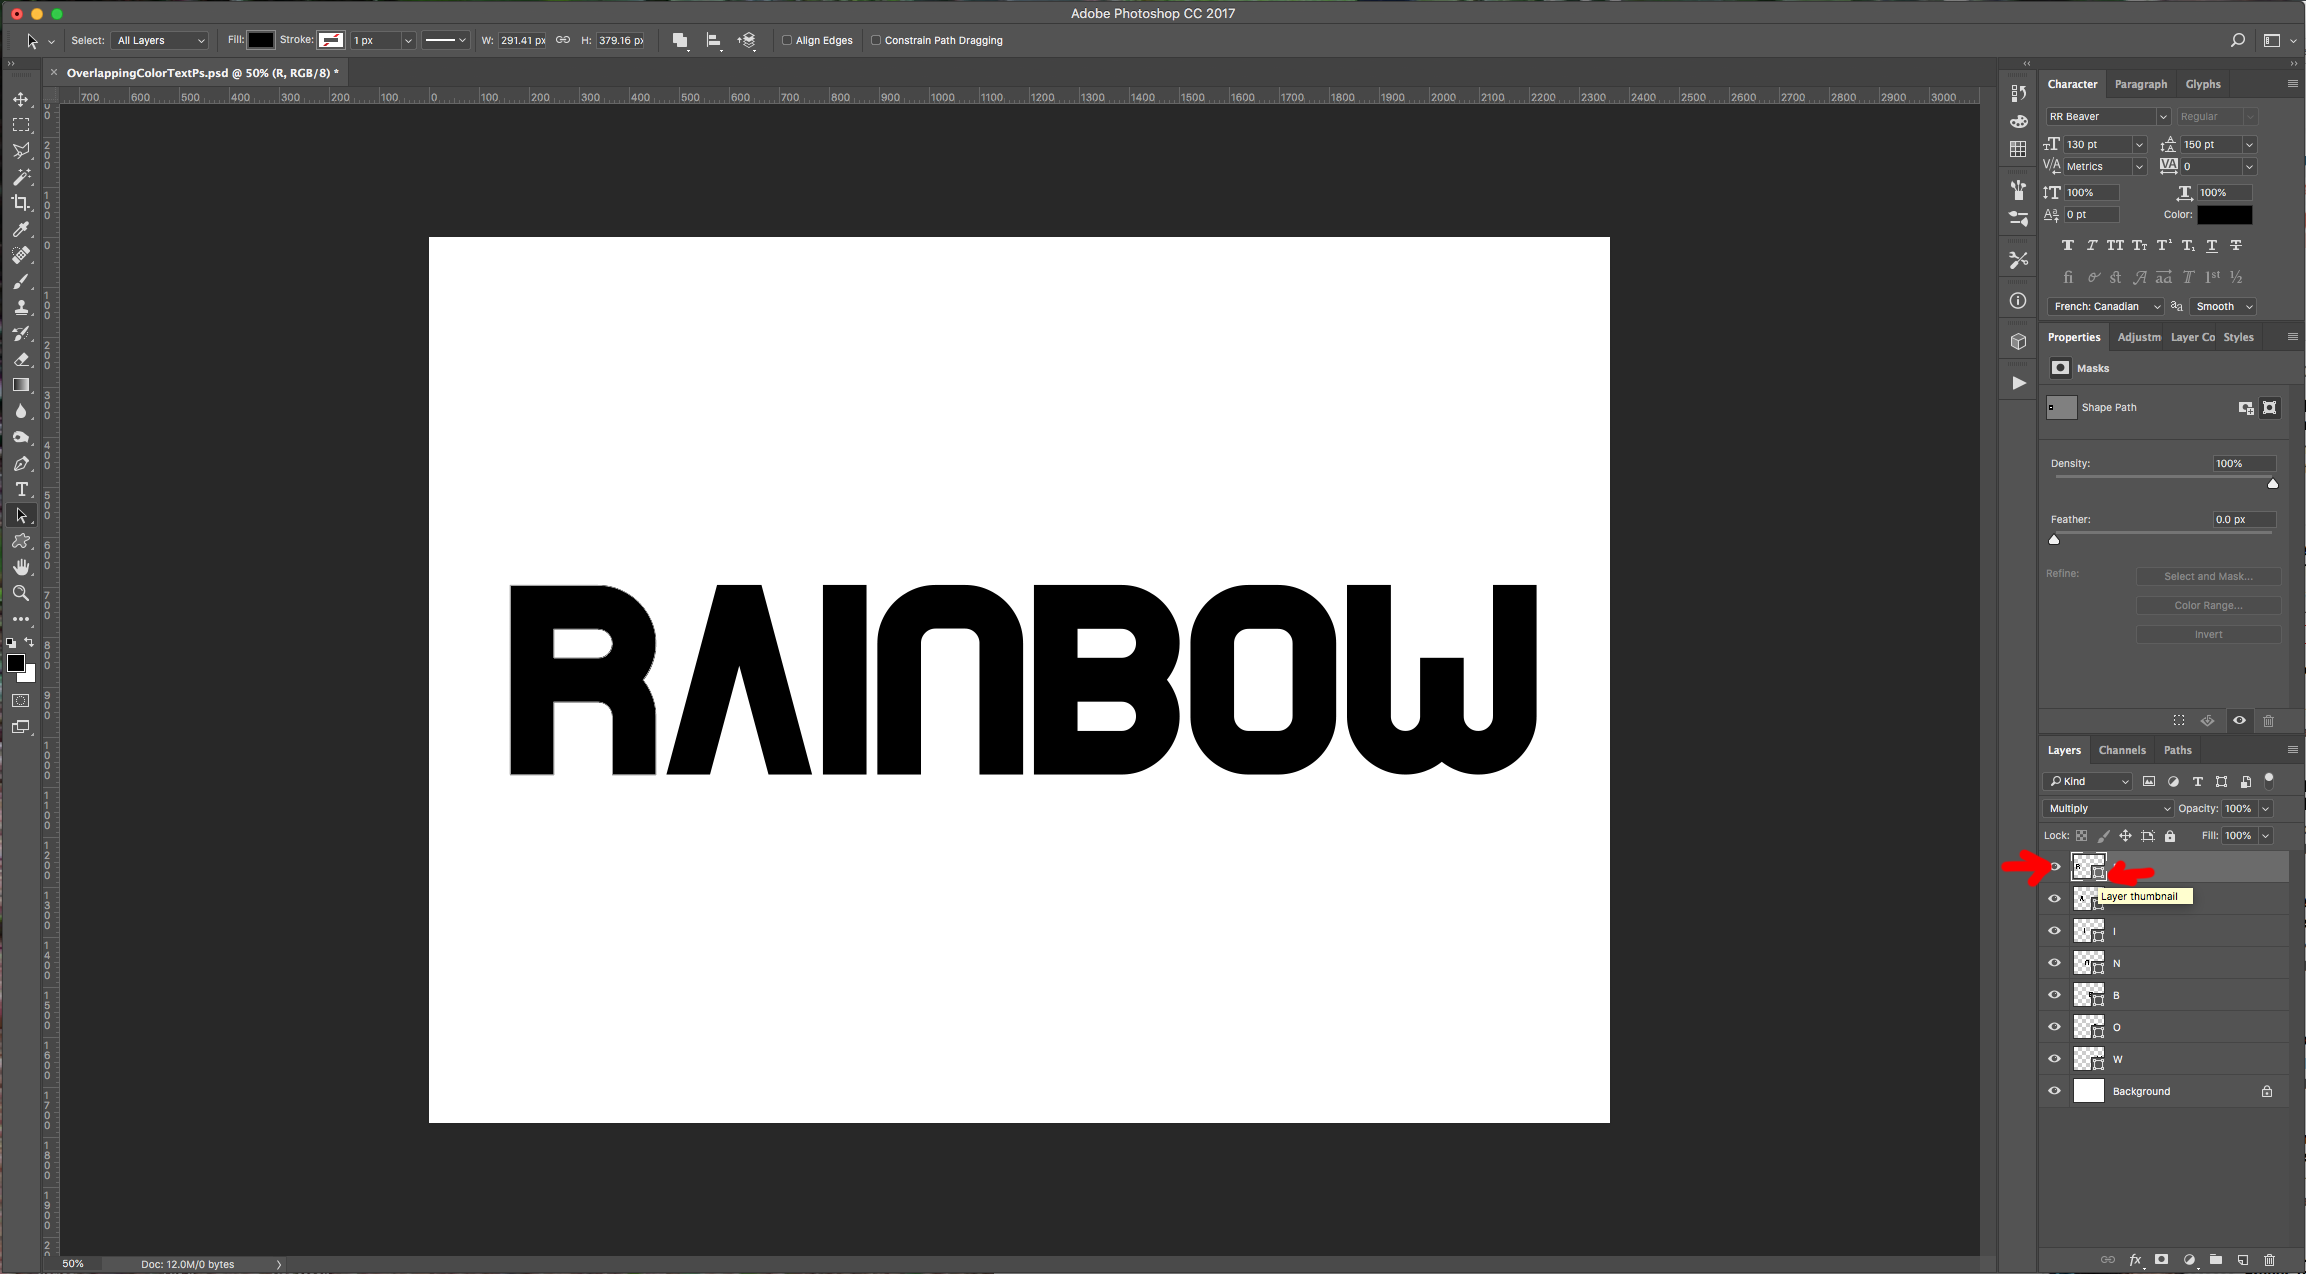
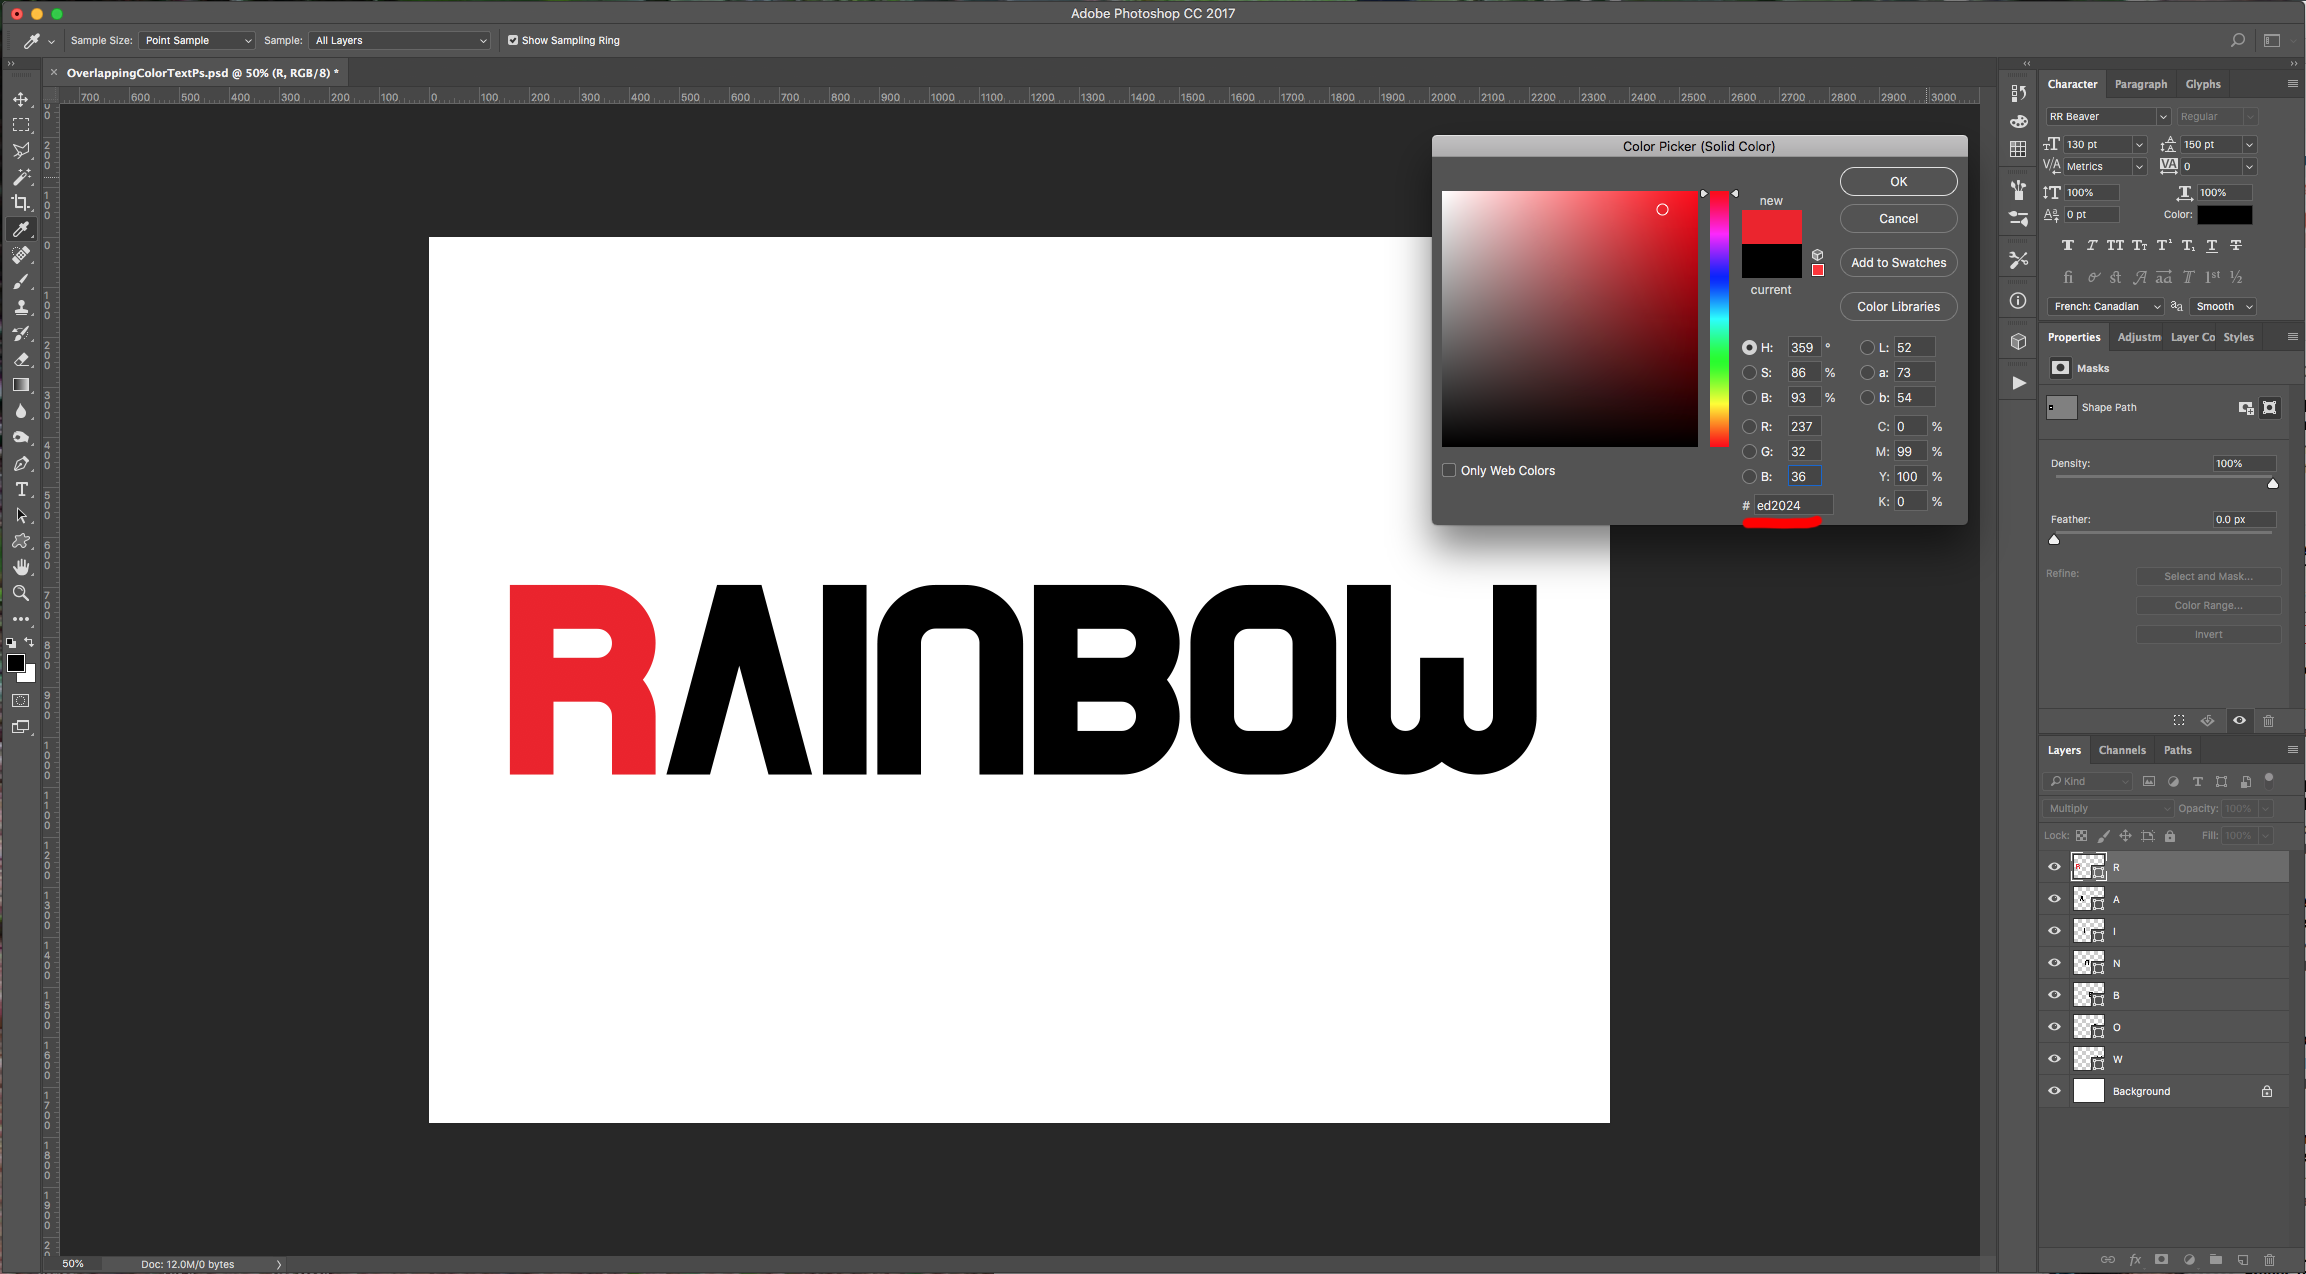
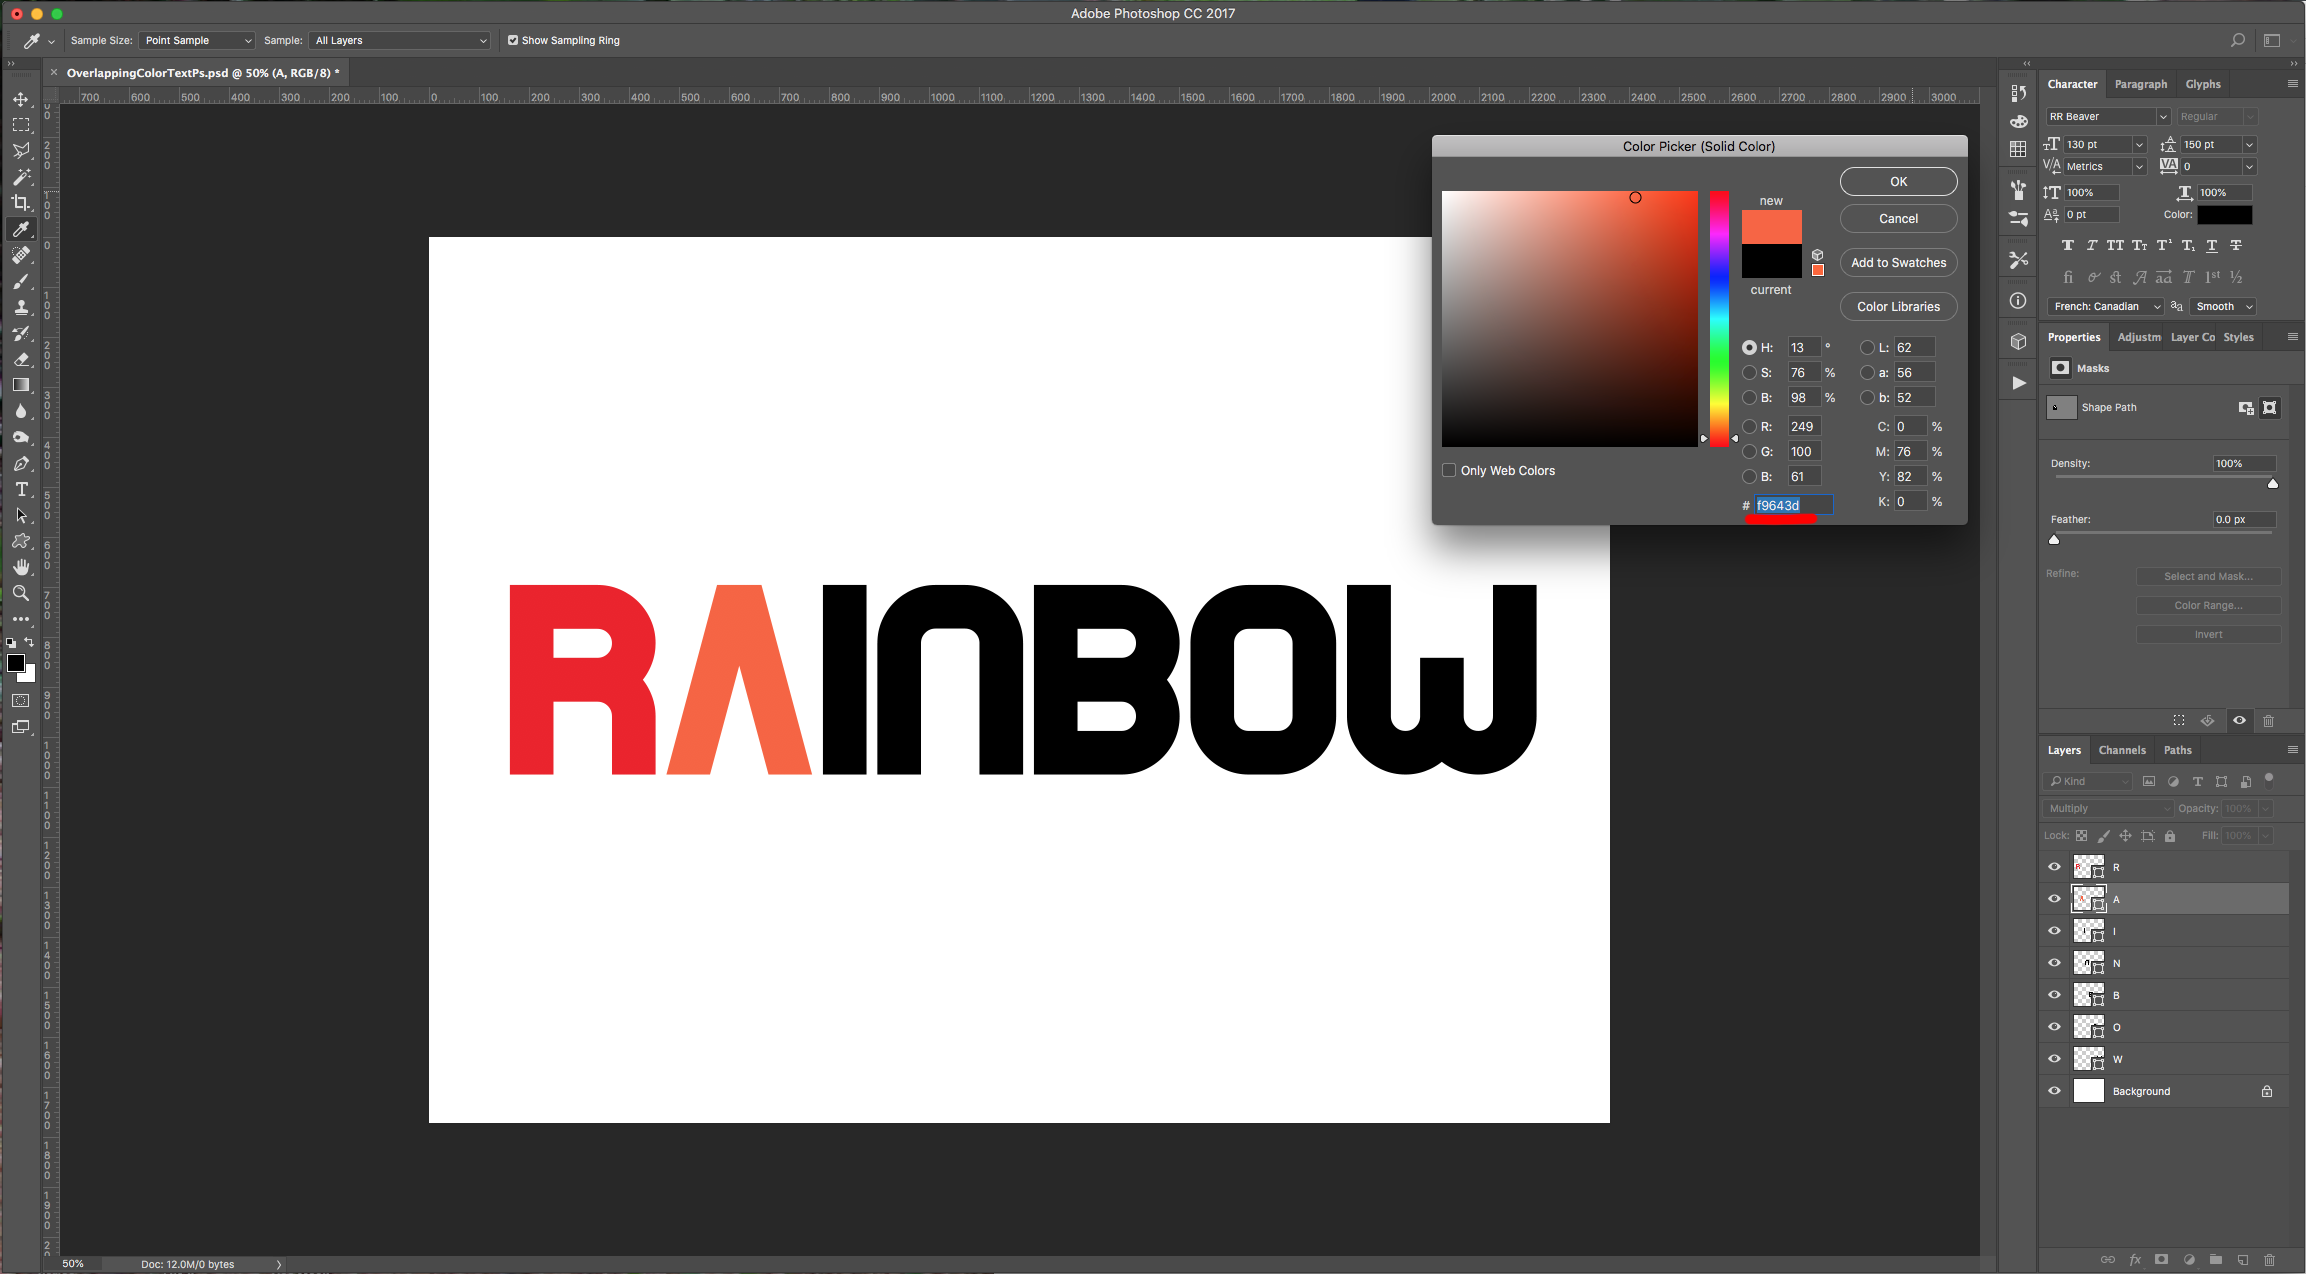
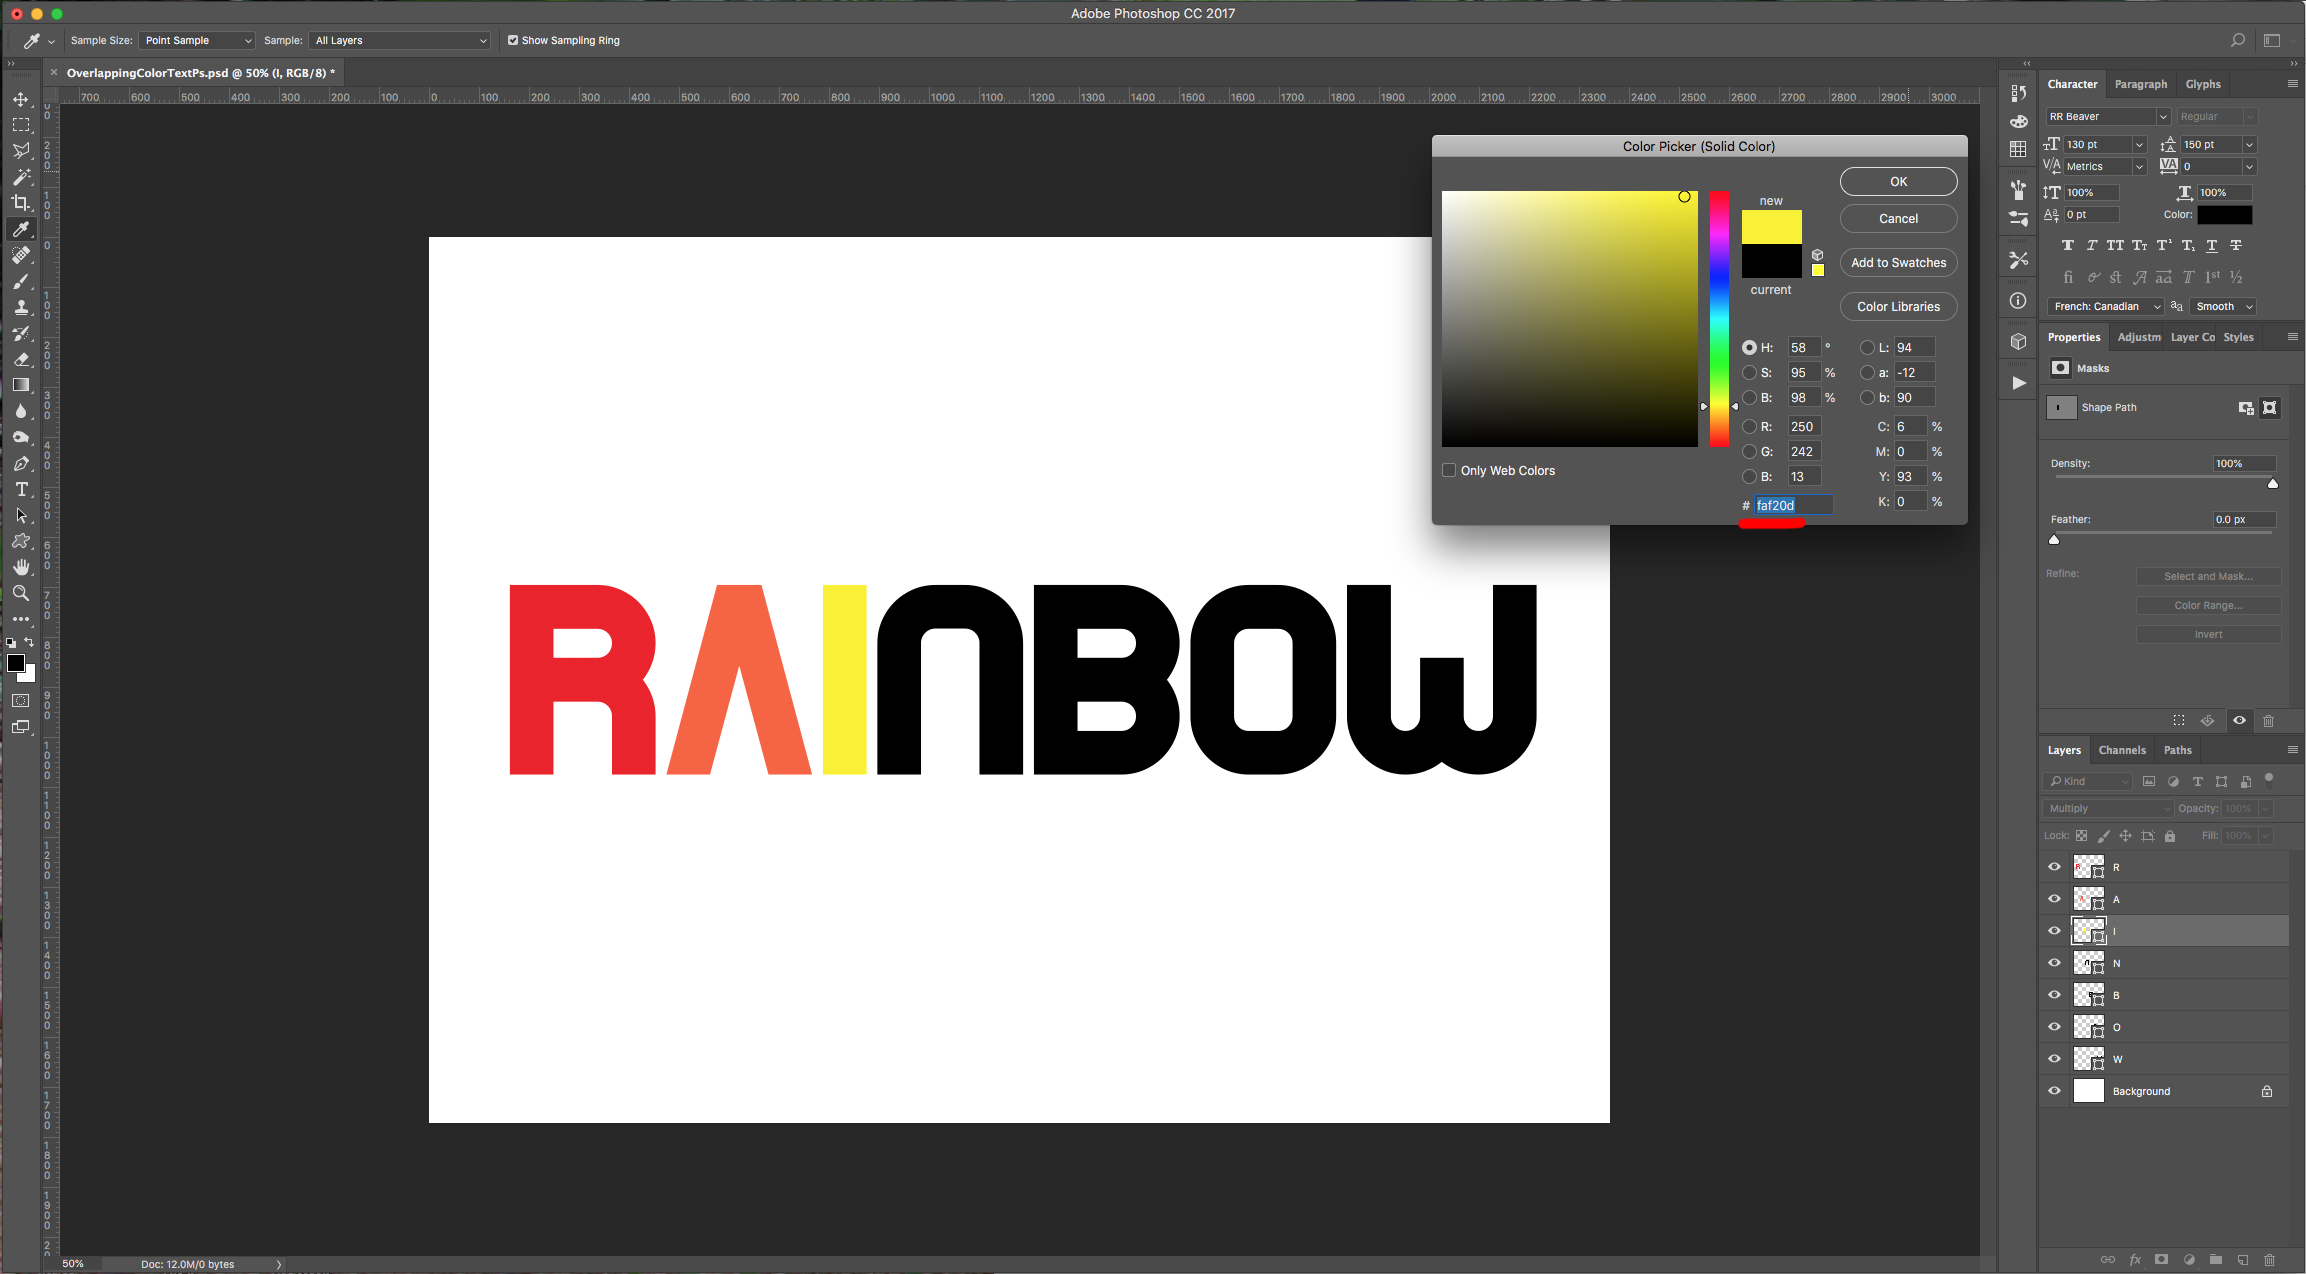
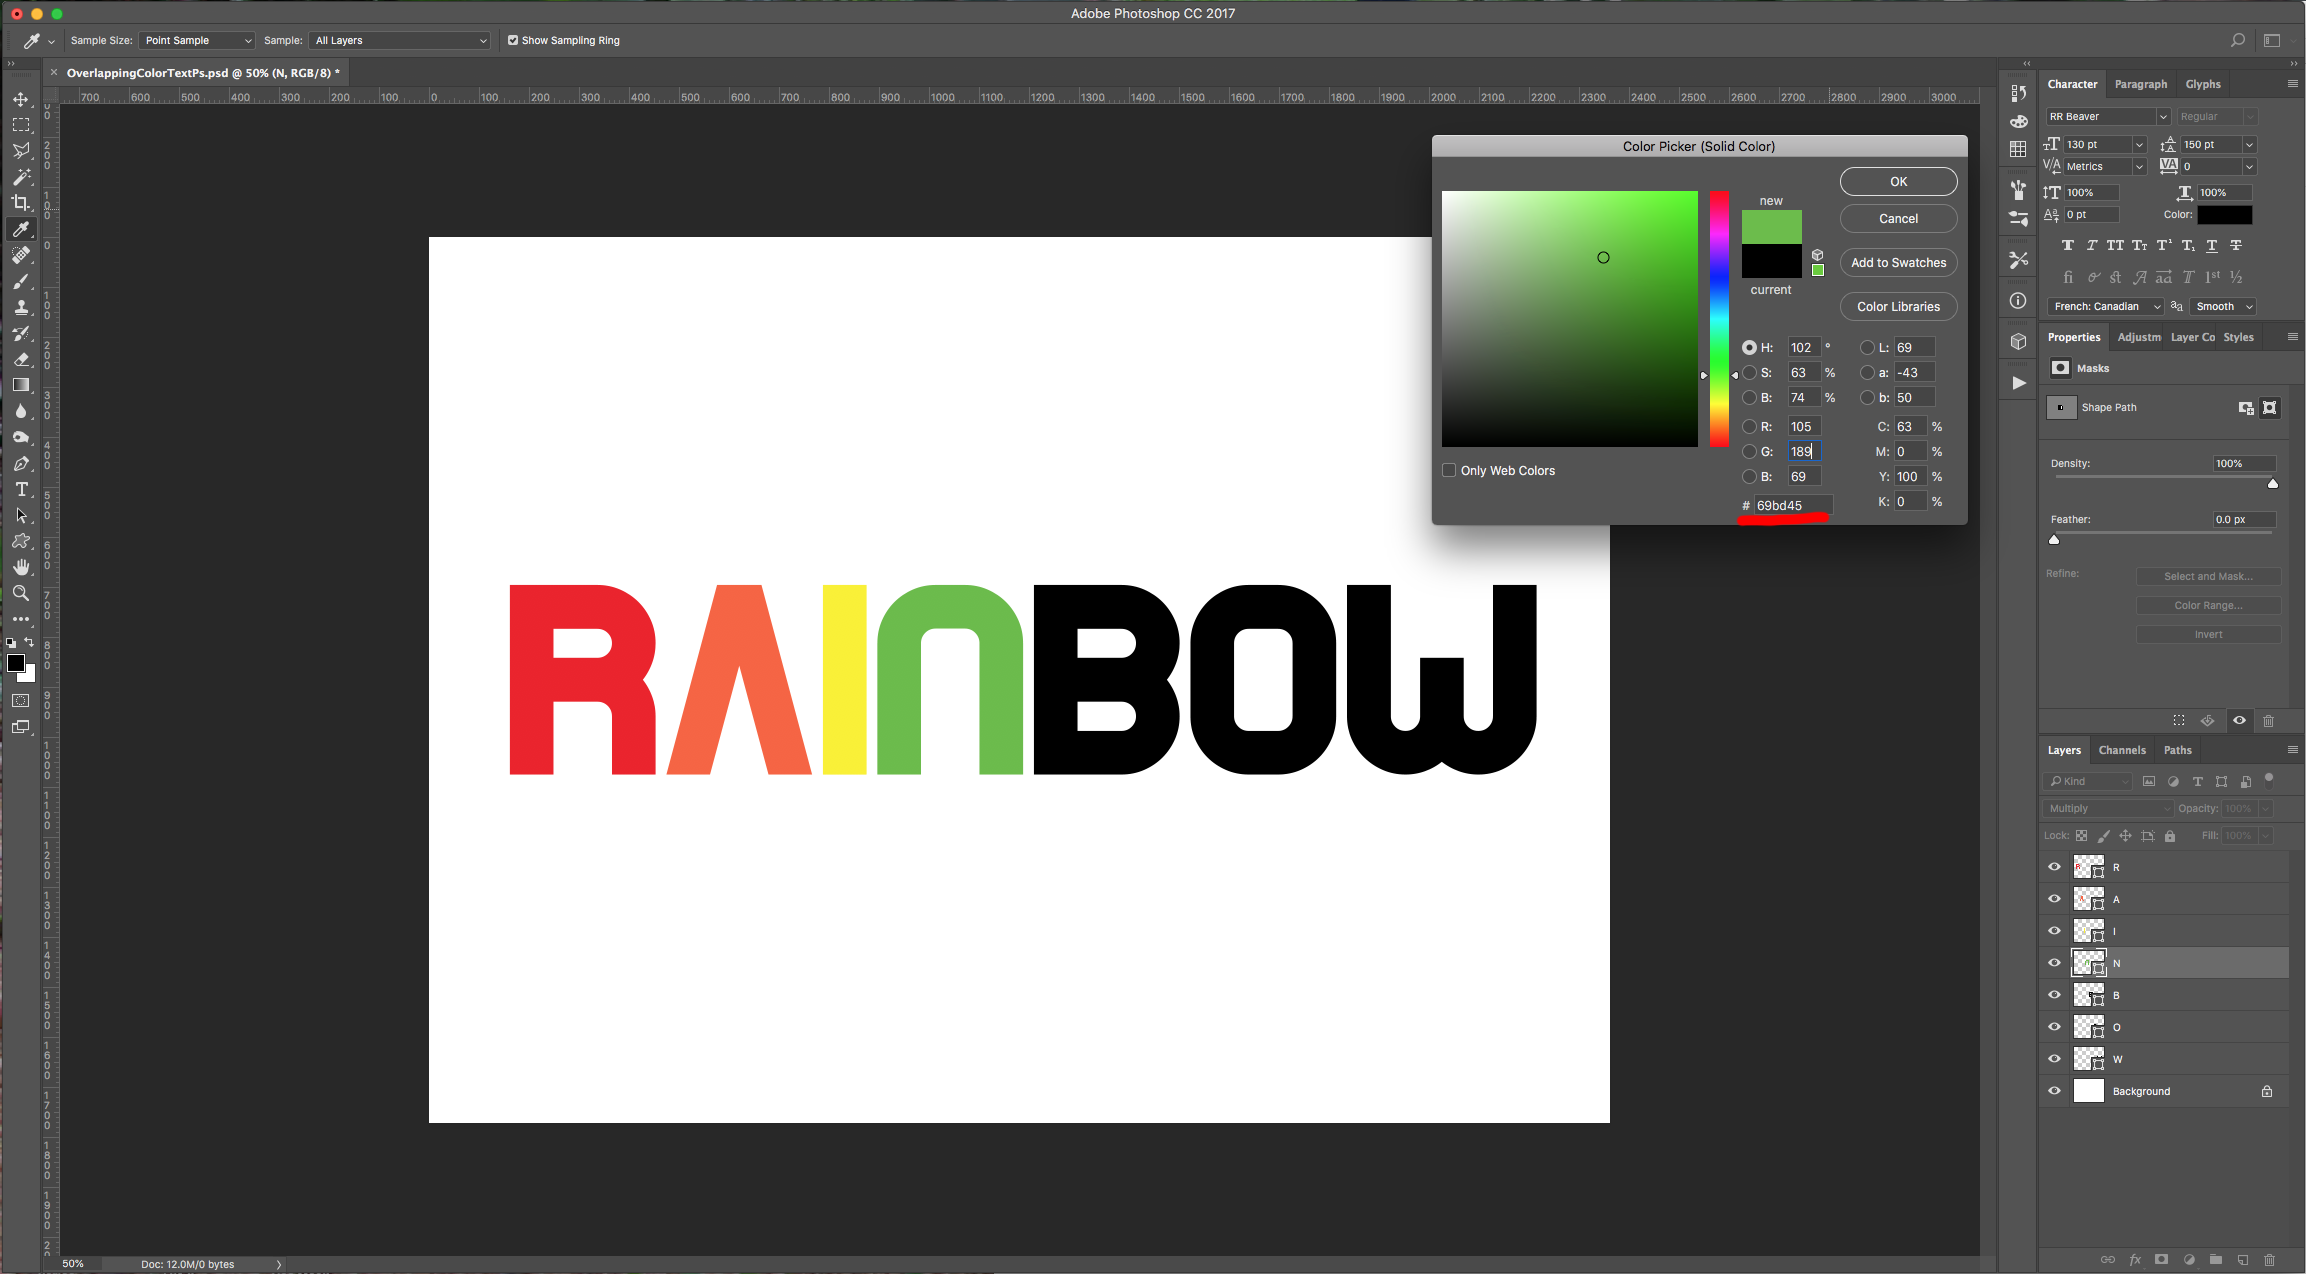
7 - Double-click on the first Letter “Shape” icon (bottom-right corner of its Thumbnail) to open the “Color Picker” Panel and choose a color. We used a shade of Red (#ed2024) since we are creating a Rainbow. Repeat with the rest of the Letters but use Orange (#f9643d), Yellow (#faf20d), Green (#69bd45), Blue (#3953a4), Indigo (#79469b) and Violet (#ae62b1).
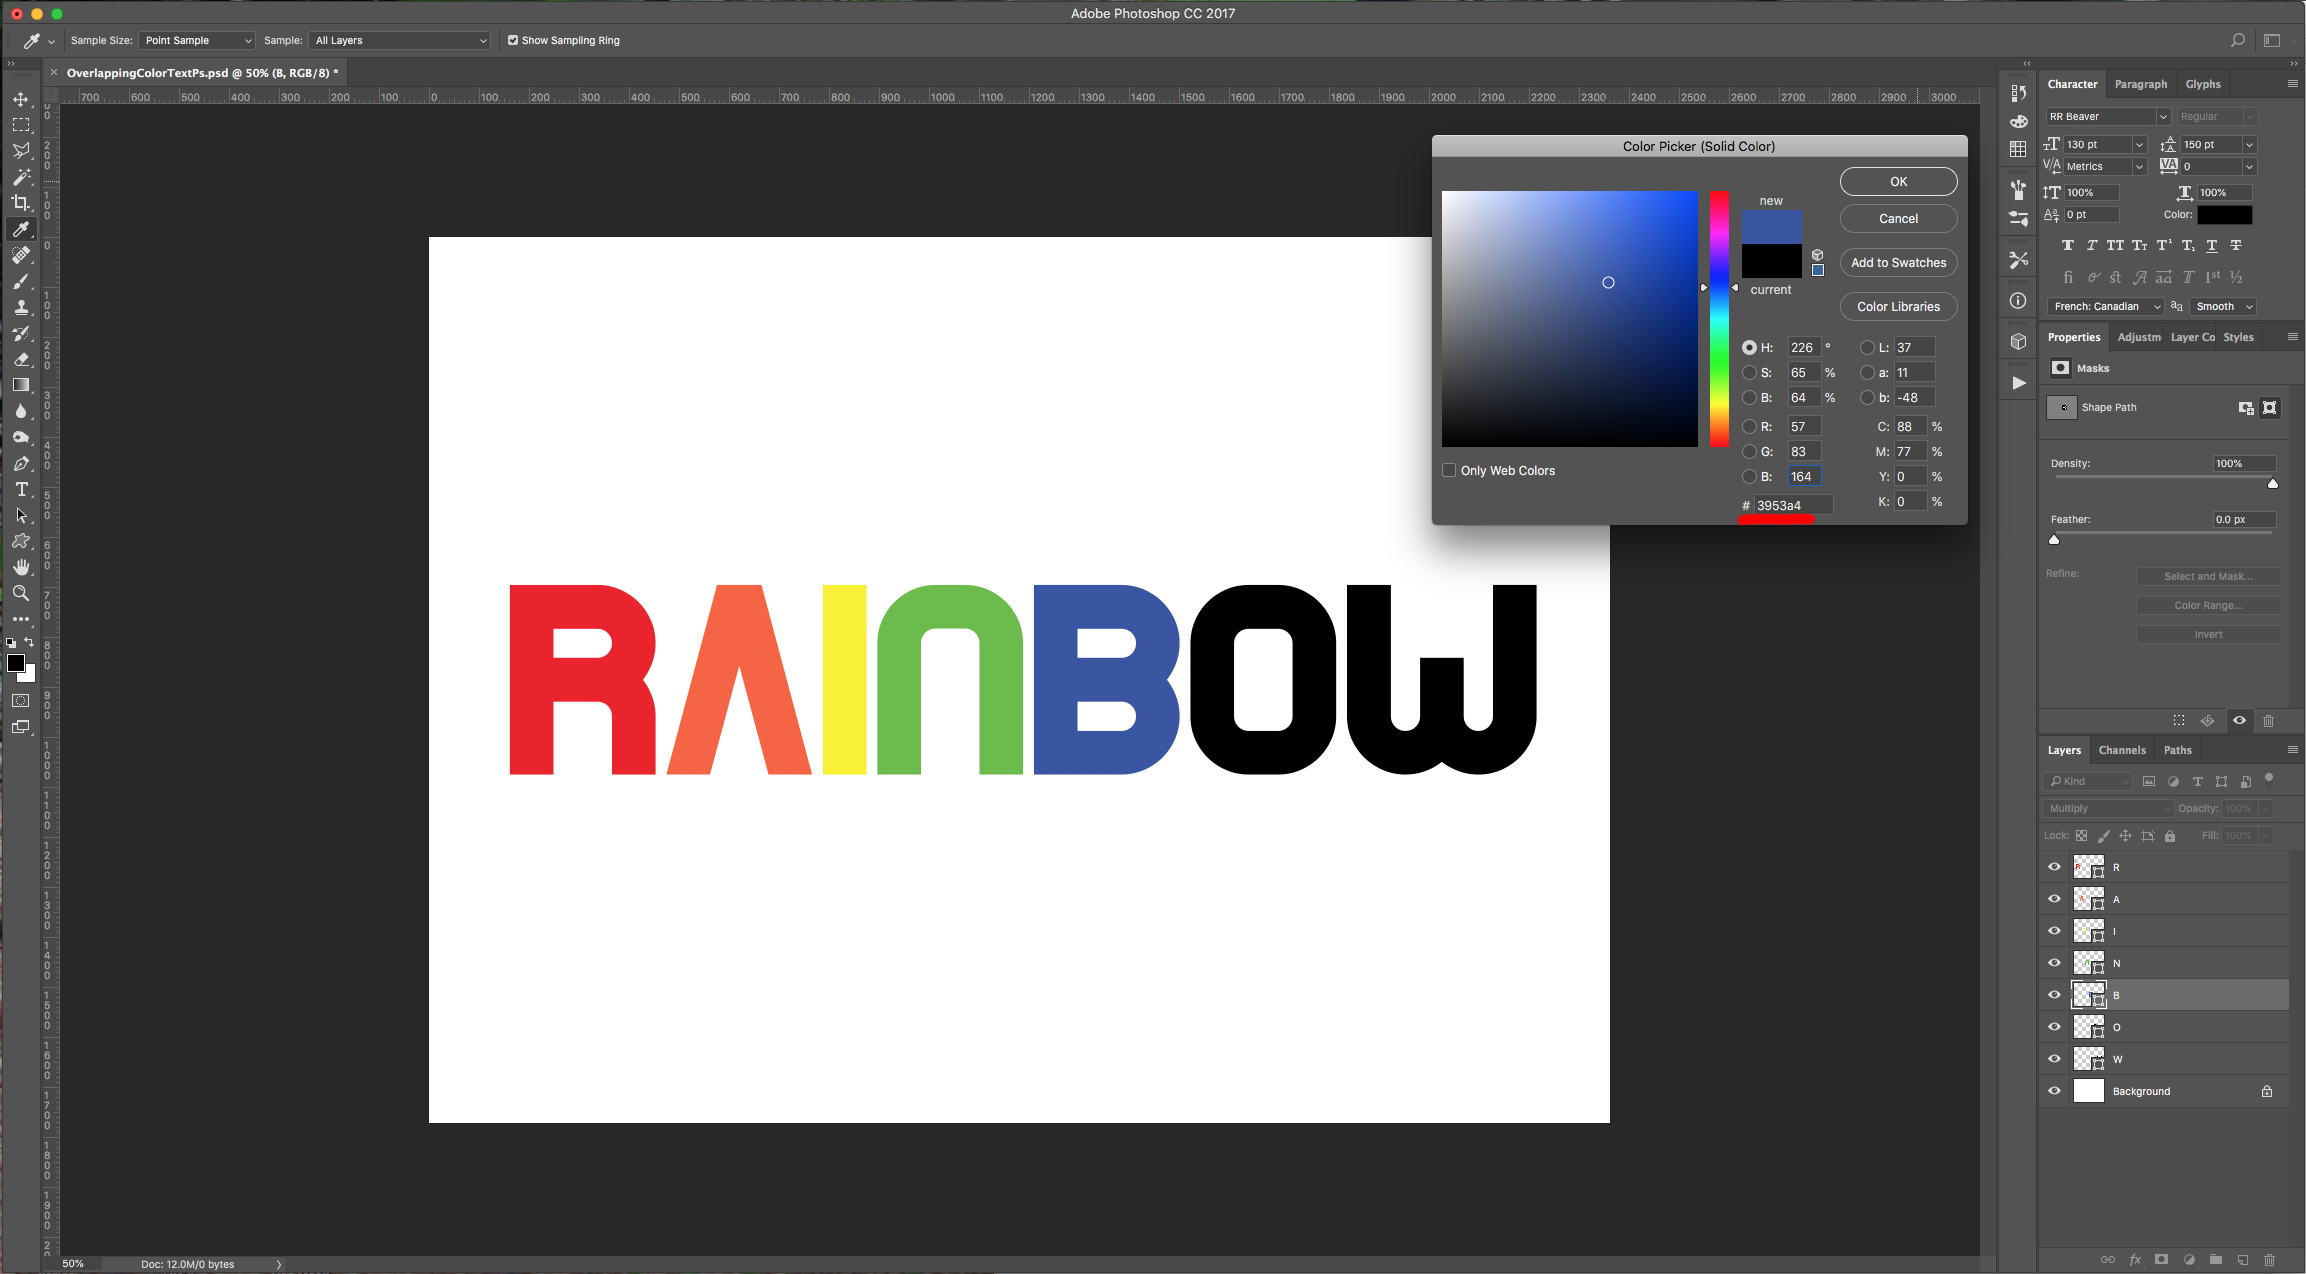
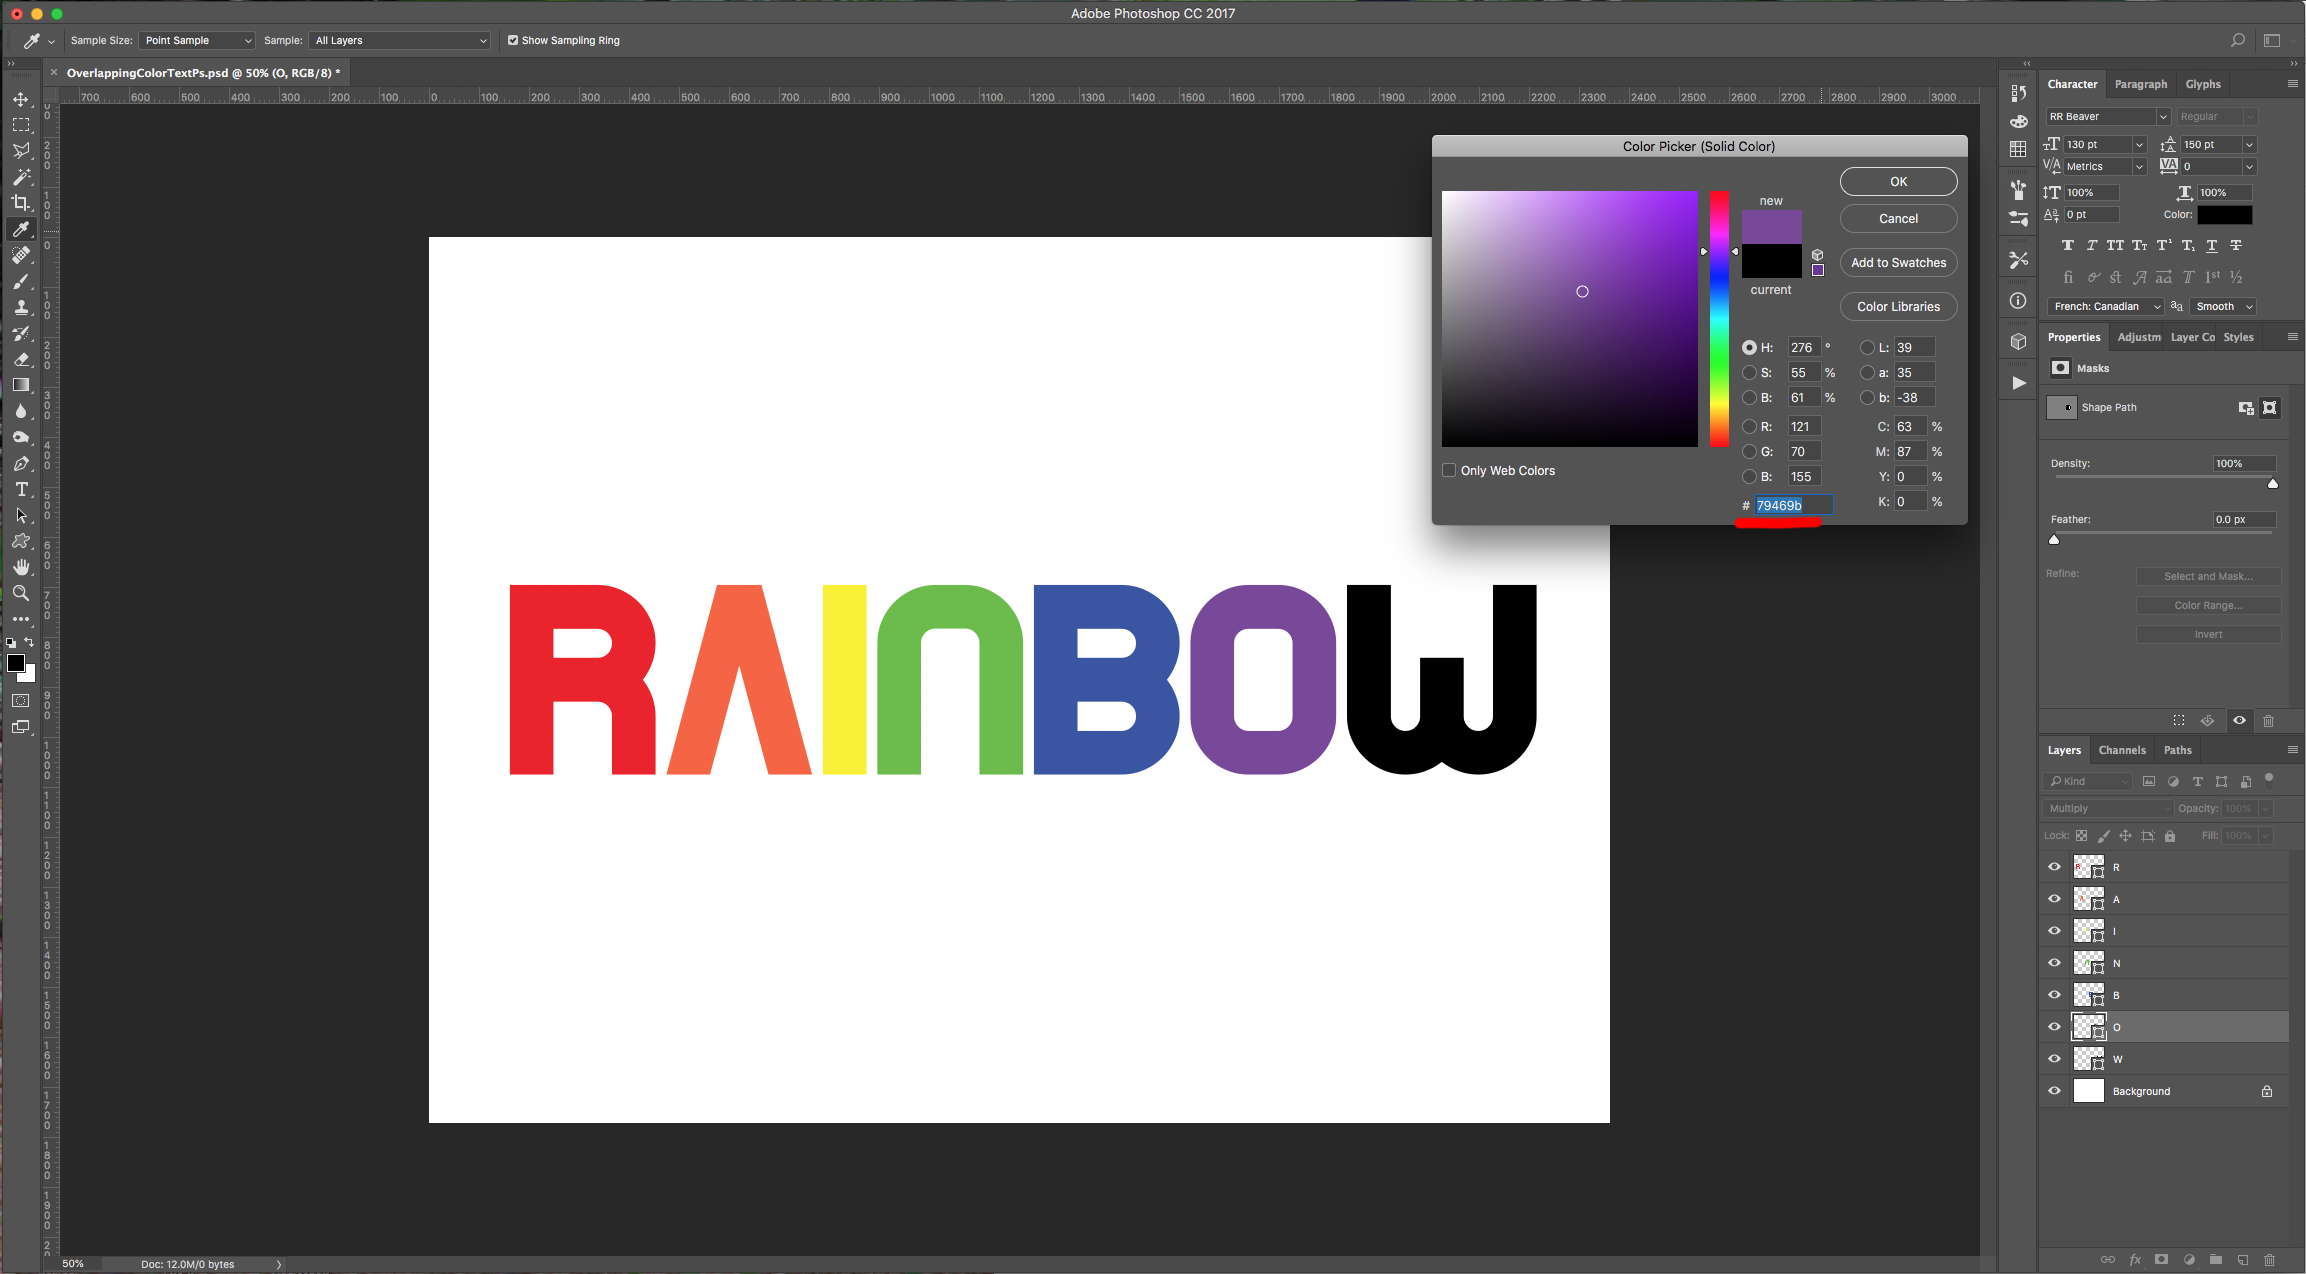
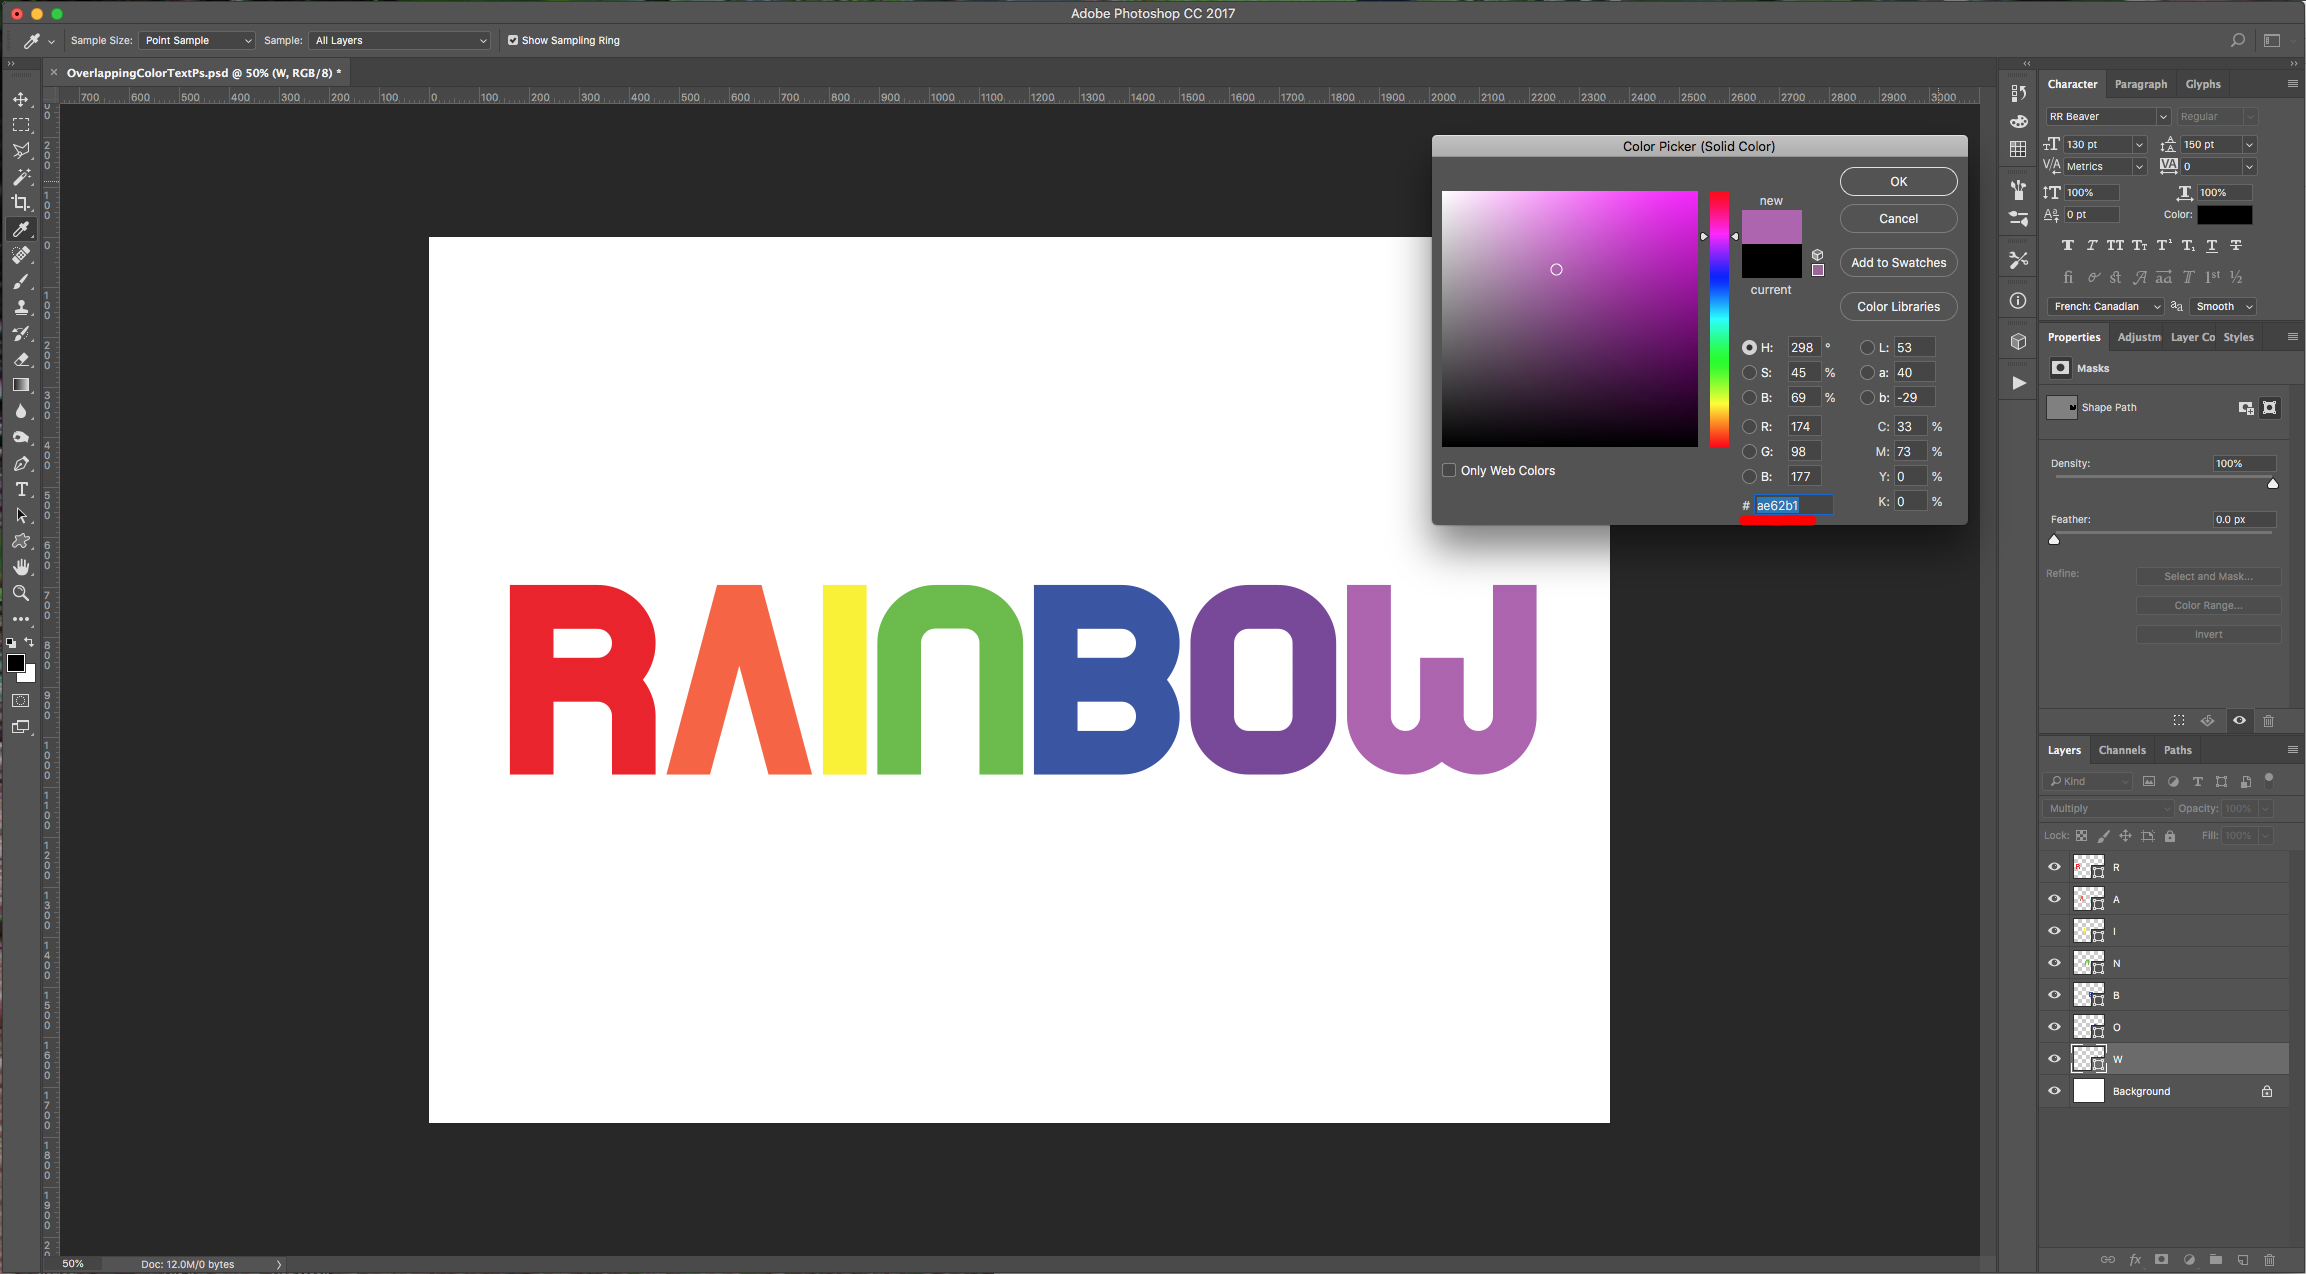
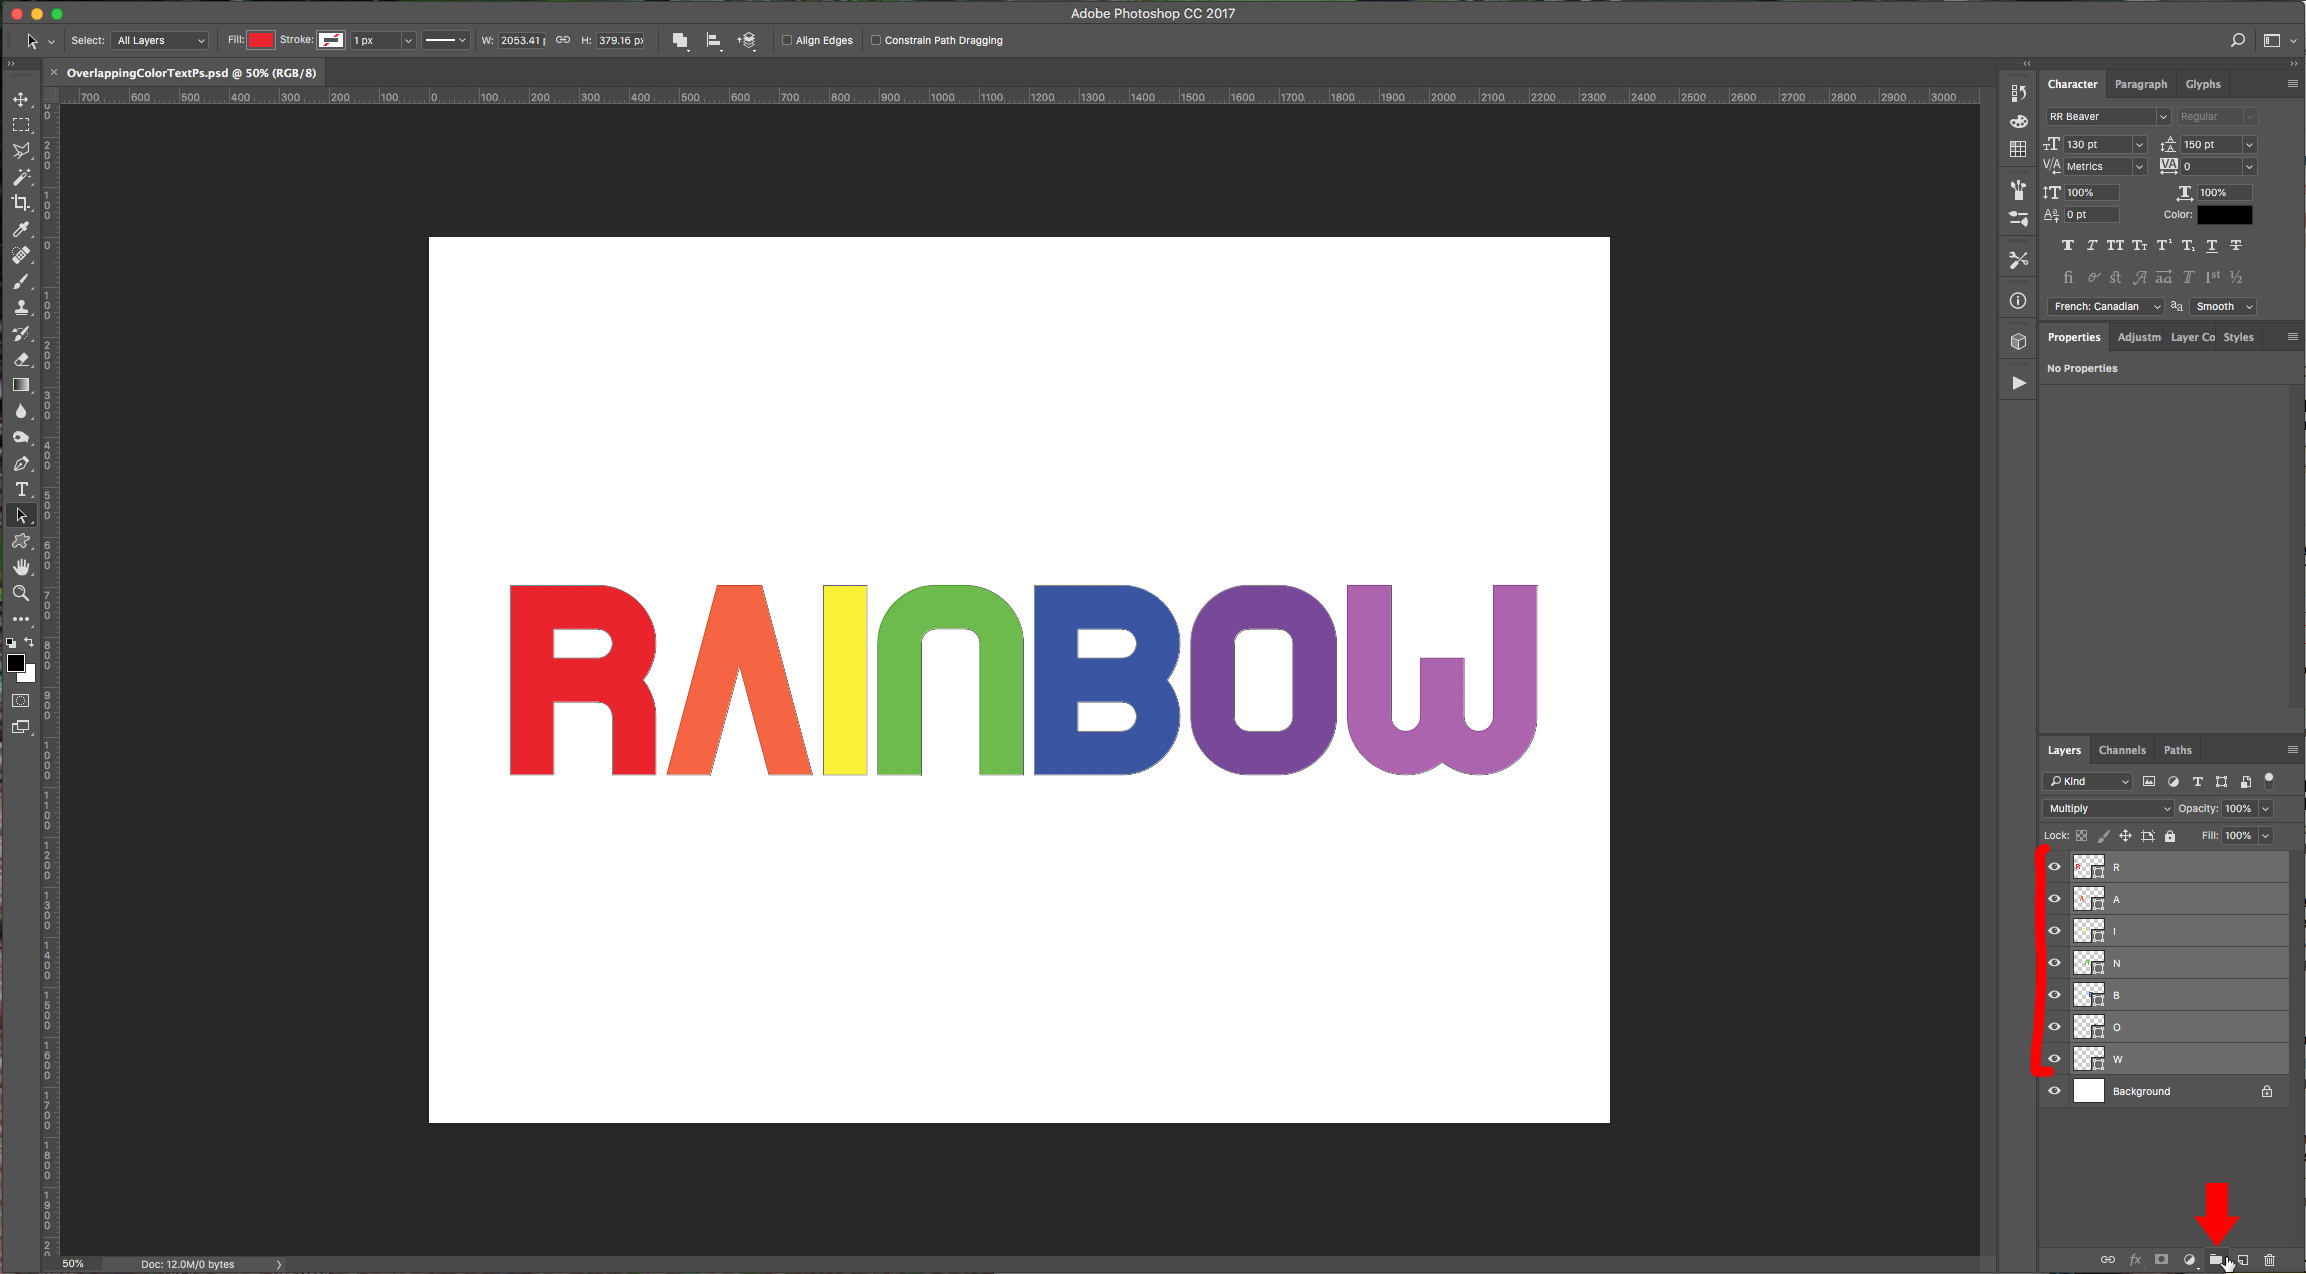
8 - Select all your Layers and “Group” them together by clicking on the small Folder icon at the bottom of the “Layers Panel”. Name the group “Rainbow”.
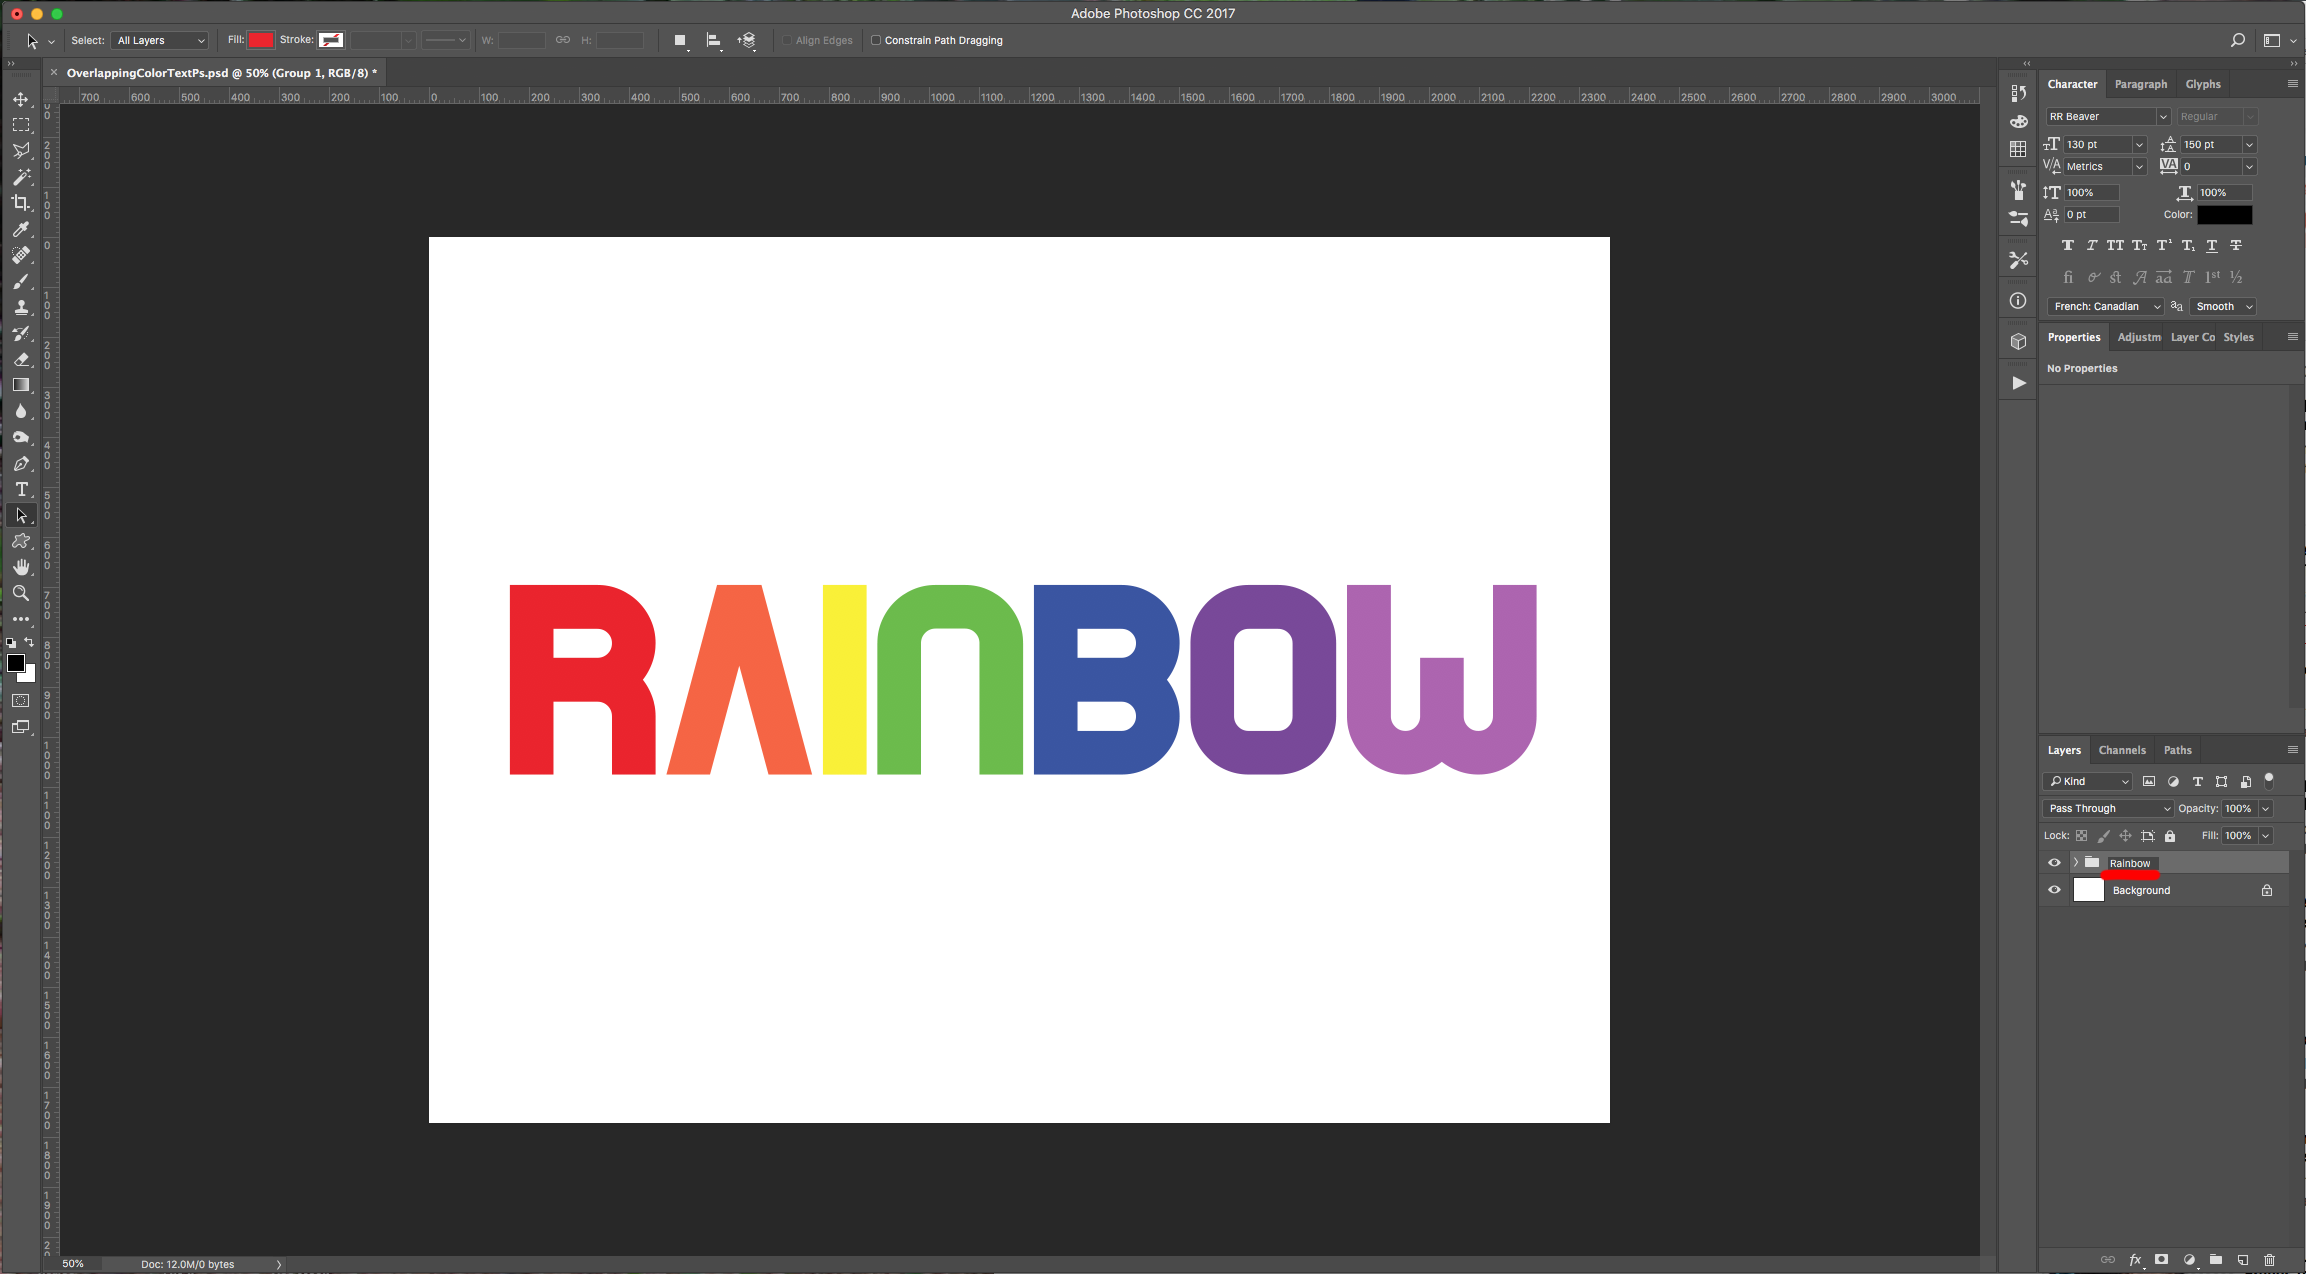
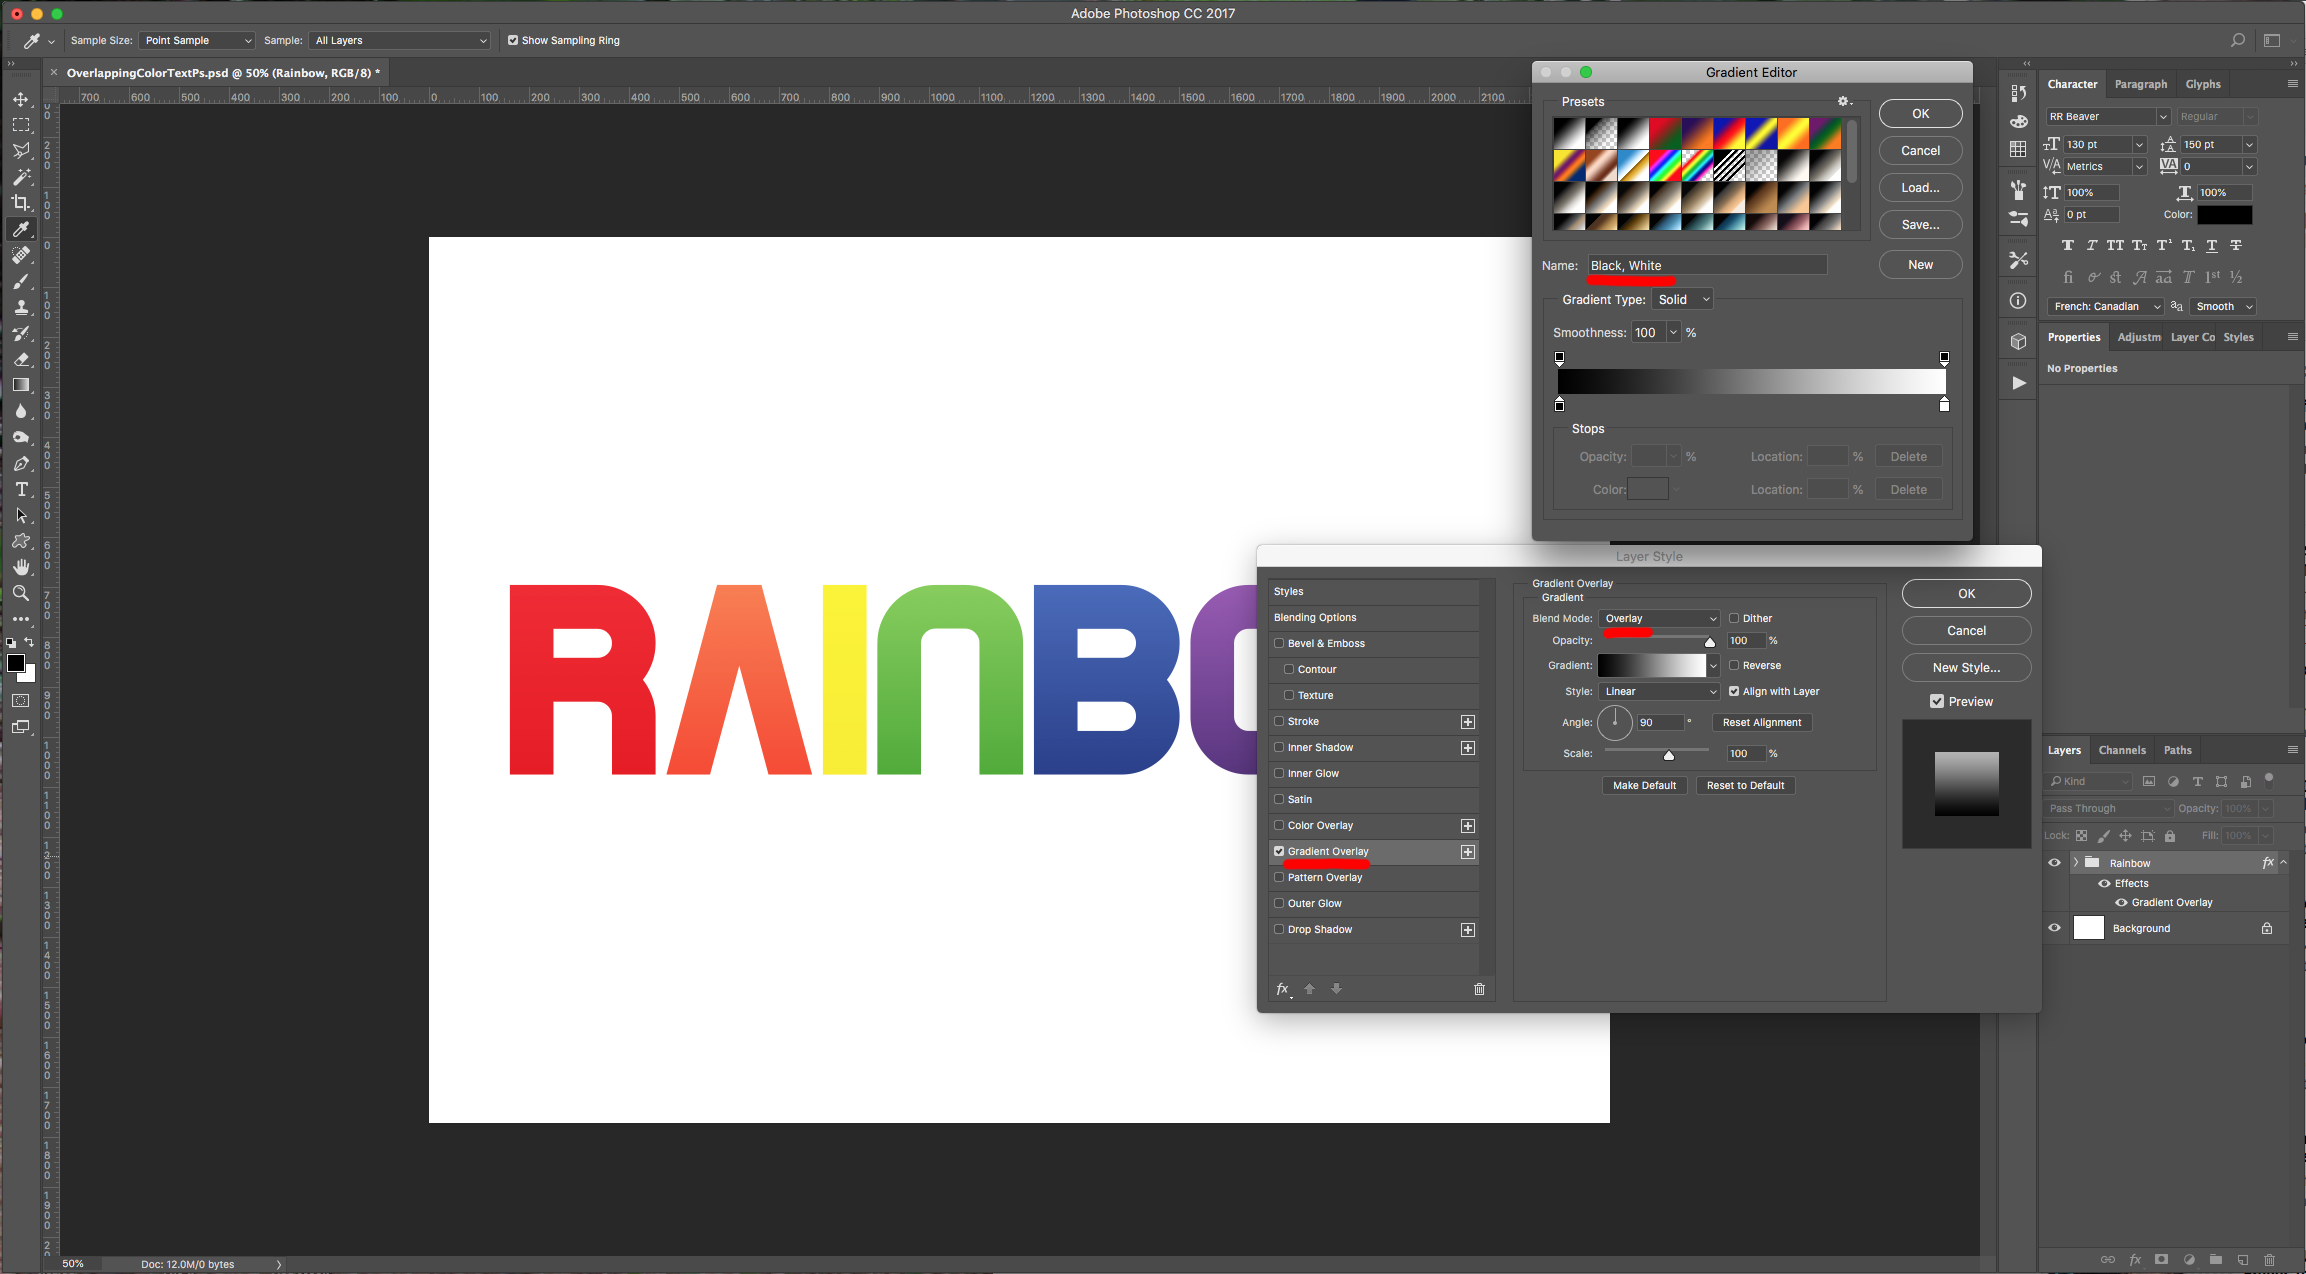
9 - Double-click on the “Rainbow” folder and apply the following “Layer Styles”:
Gradient Overlay: (Linear, from Black to White, 90° Angle, Blend Mode: Overlay)
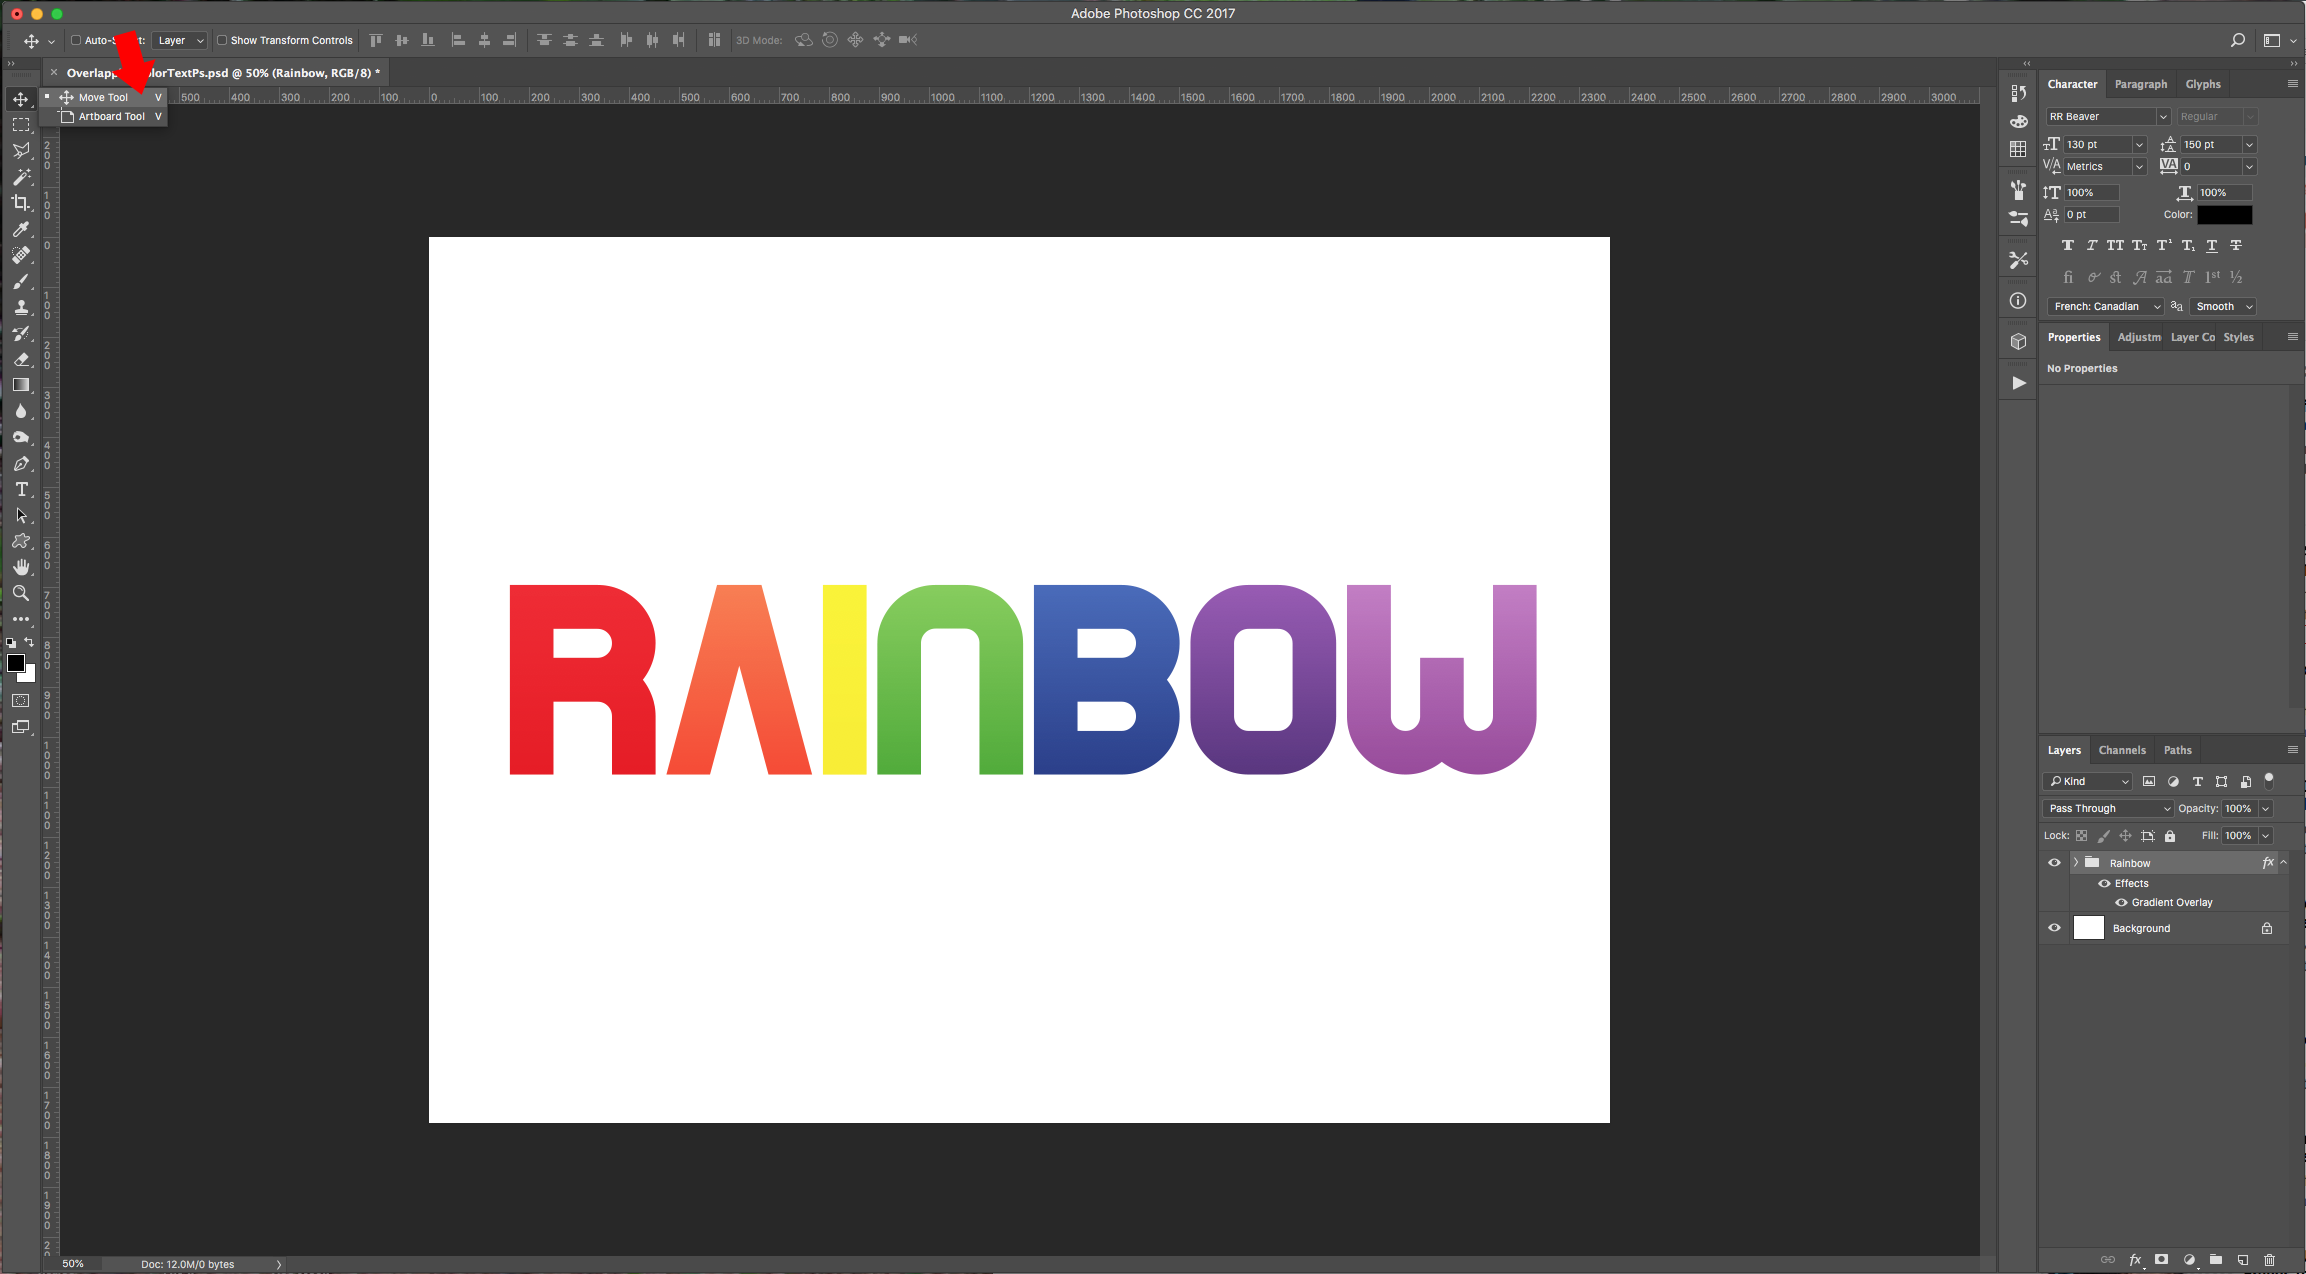
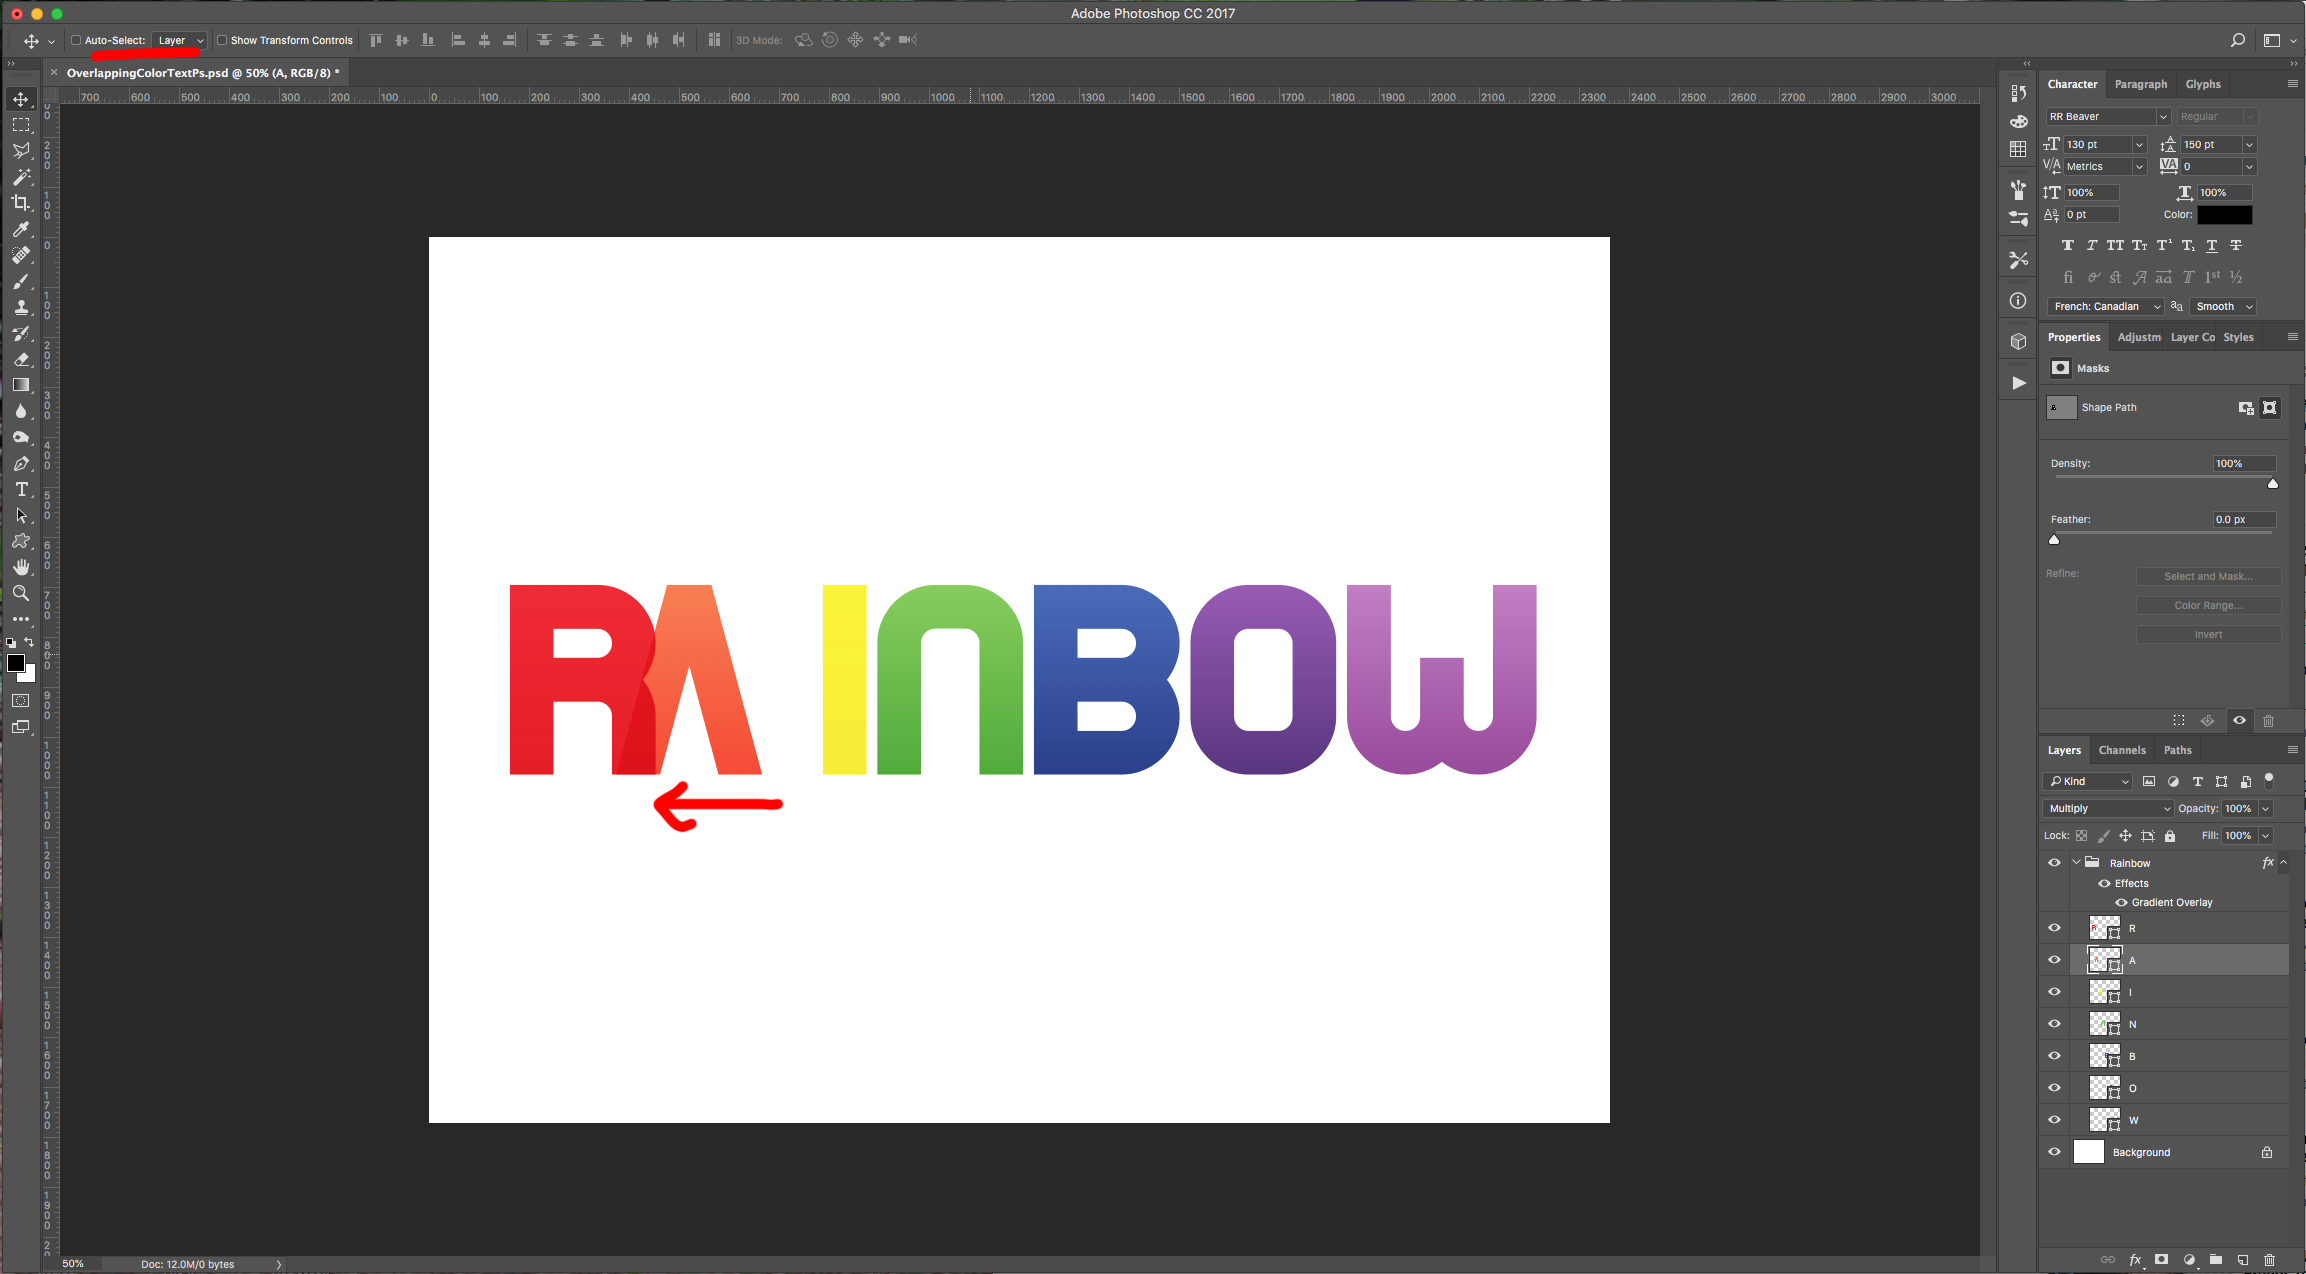
10 - Select the “Move Tool” (V) and check “Auto Select Layer”. Move the letters and overlap portions of them on top of each other.
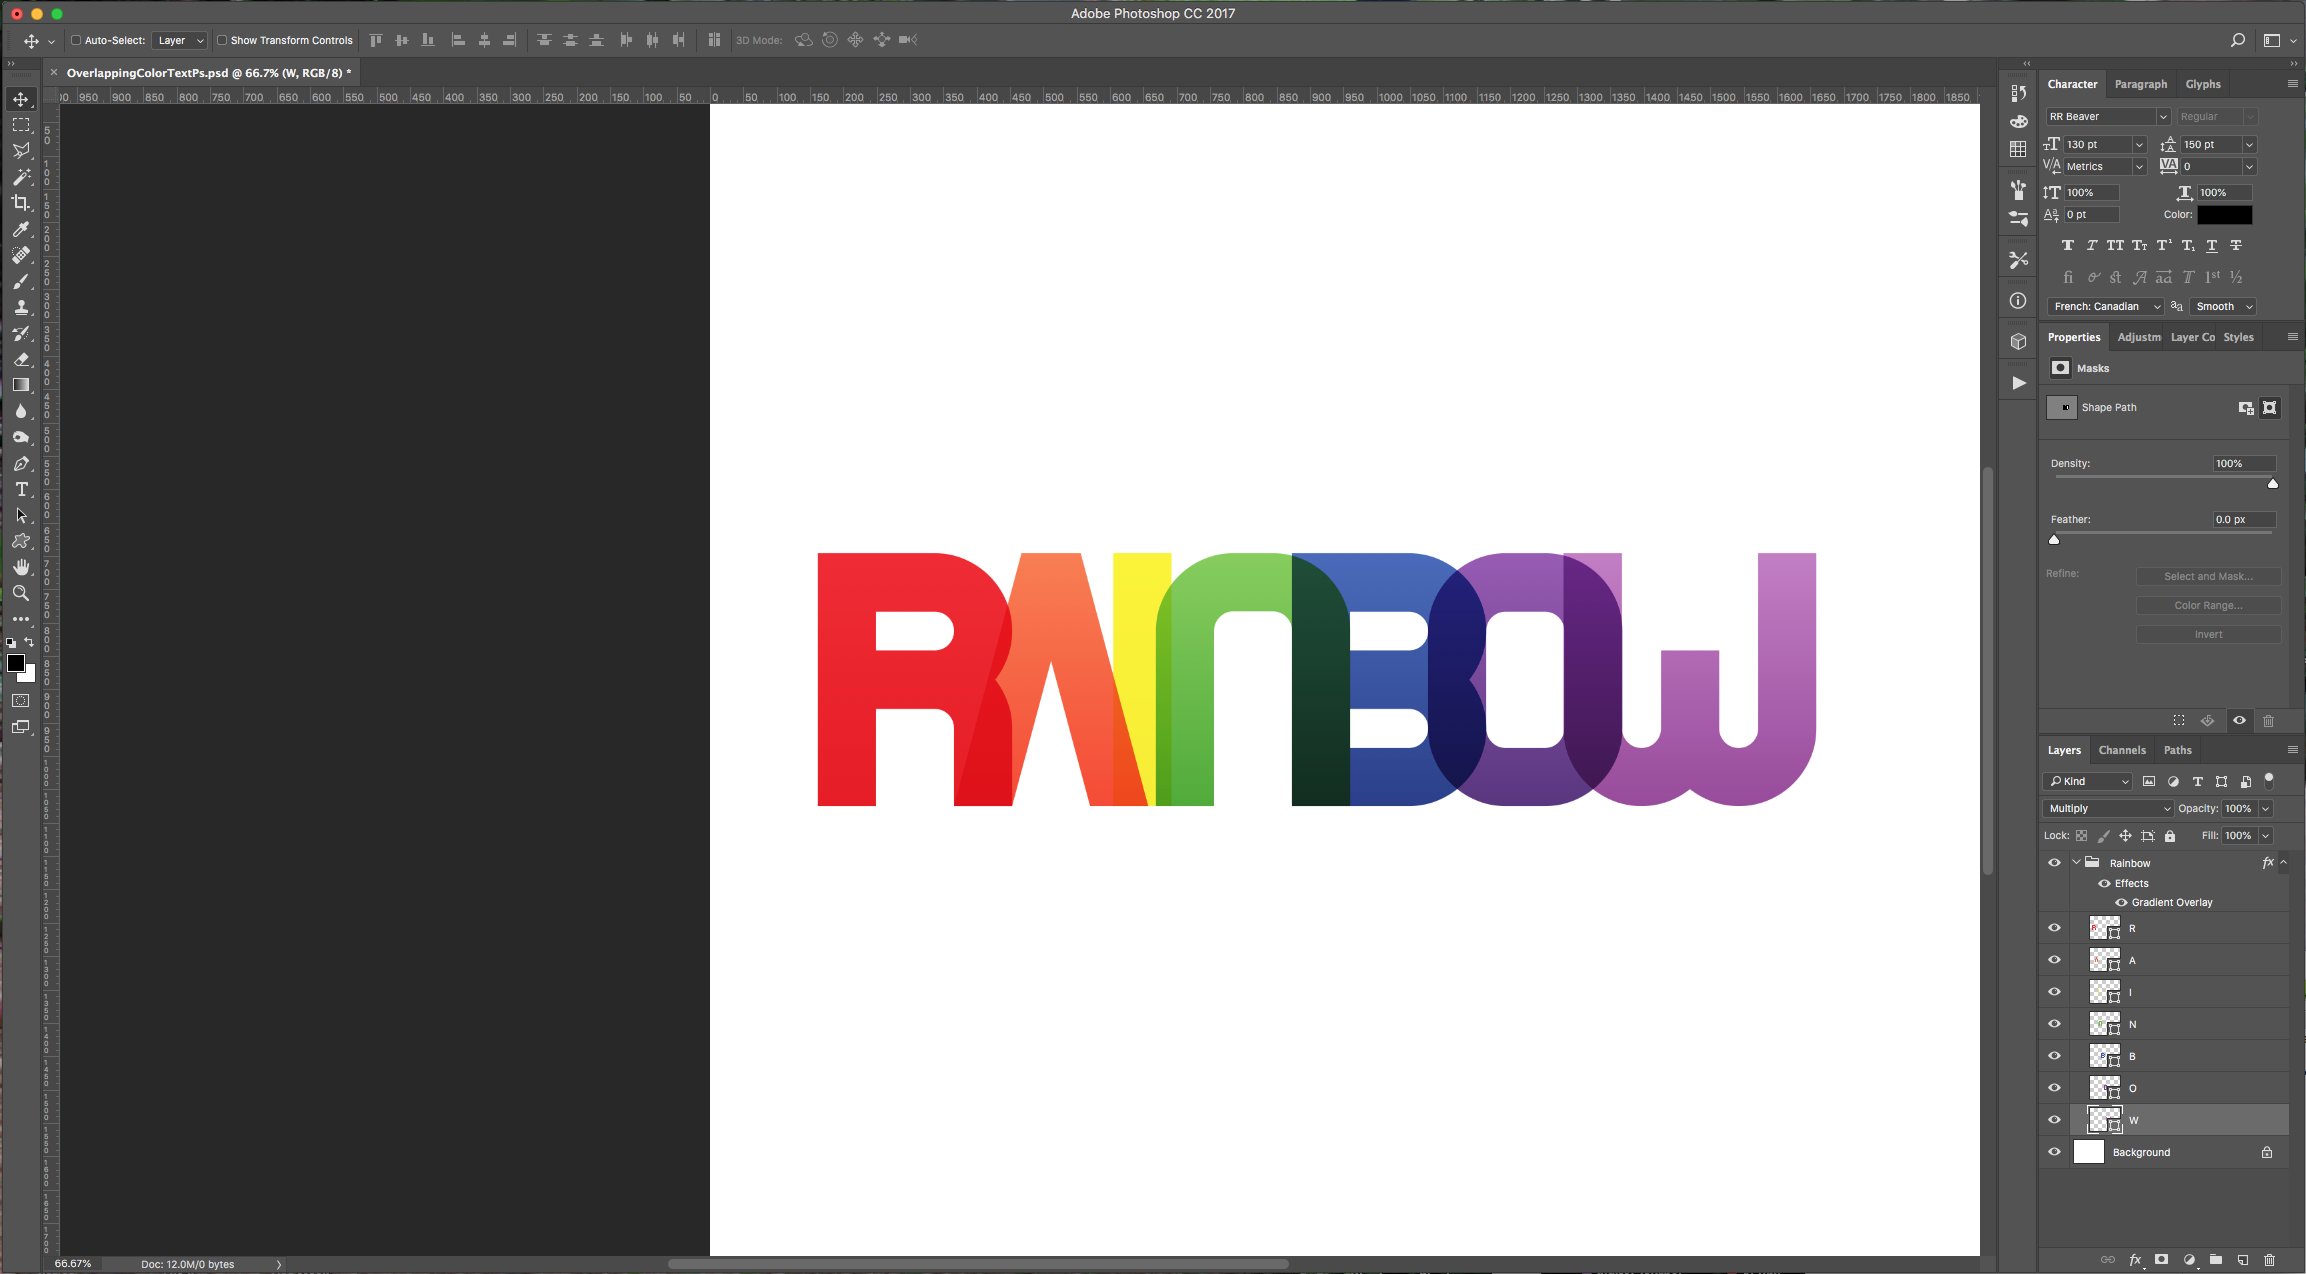
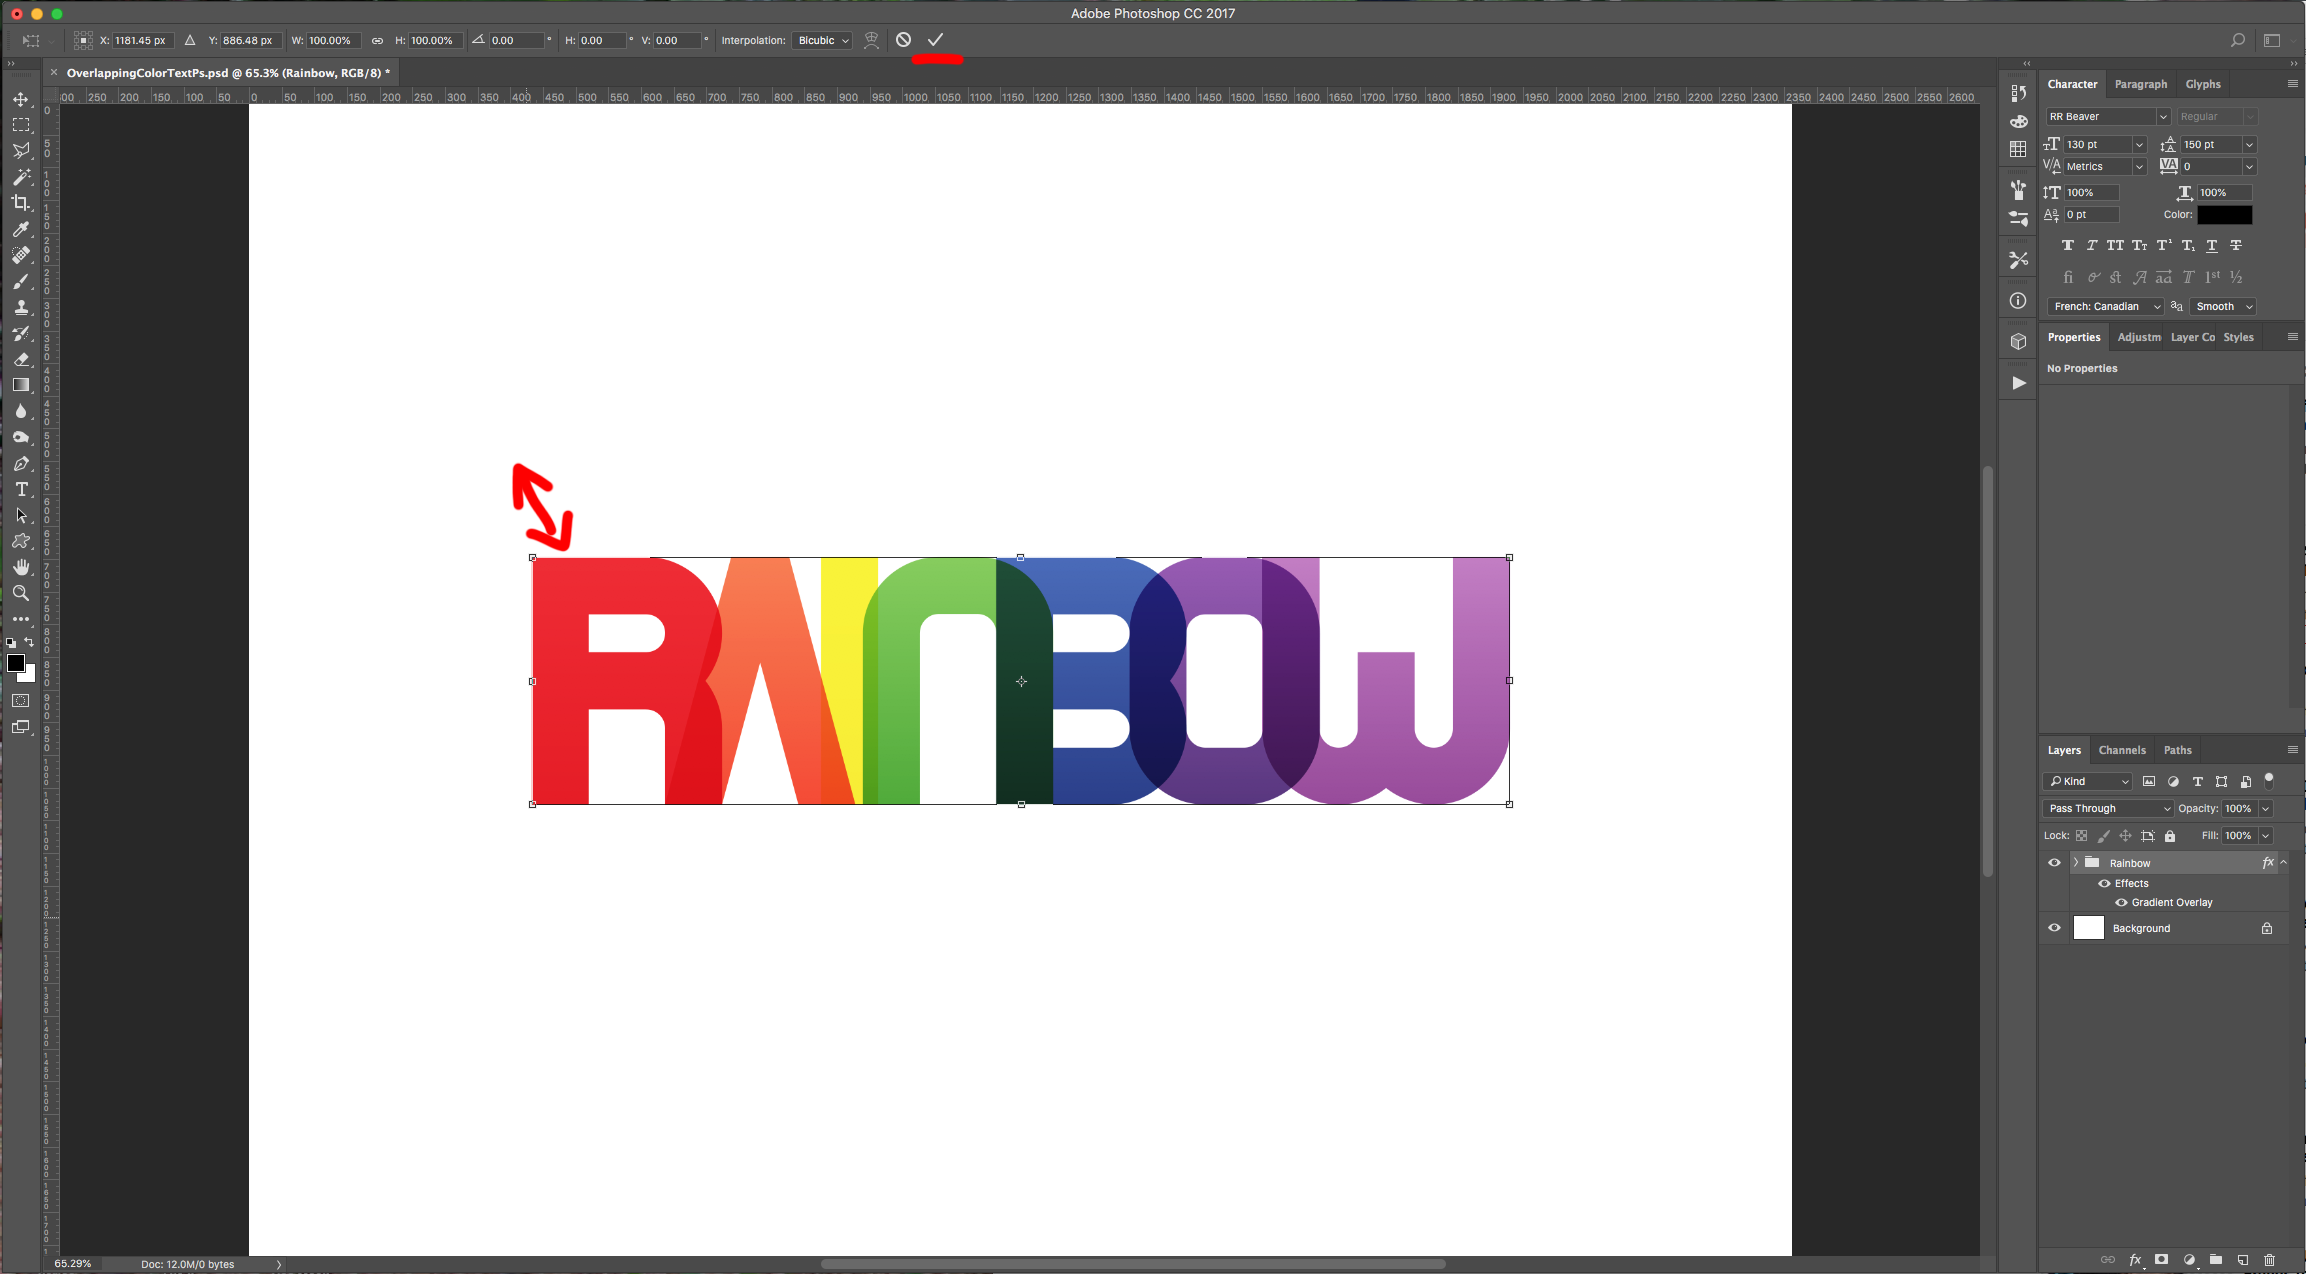
11 - Once you are happy, select them all and use “Free Transform” (Command/Control + T) to resize your word. When you are done click the “Checkmark” on the Top Menu or hit “Enter”.
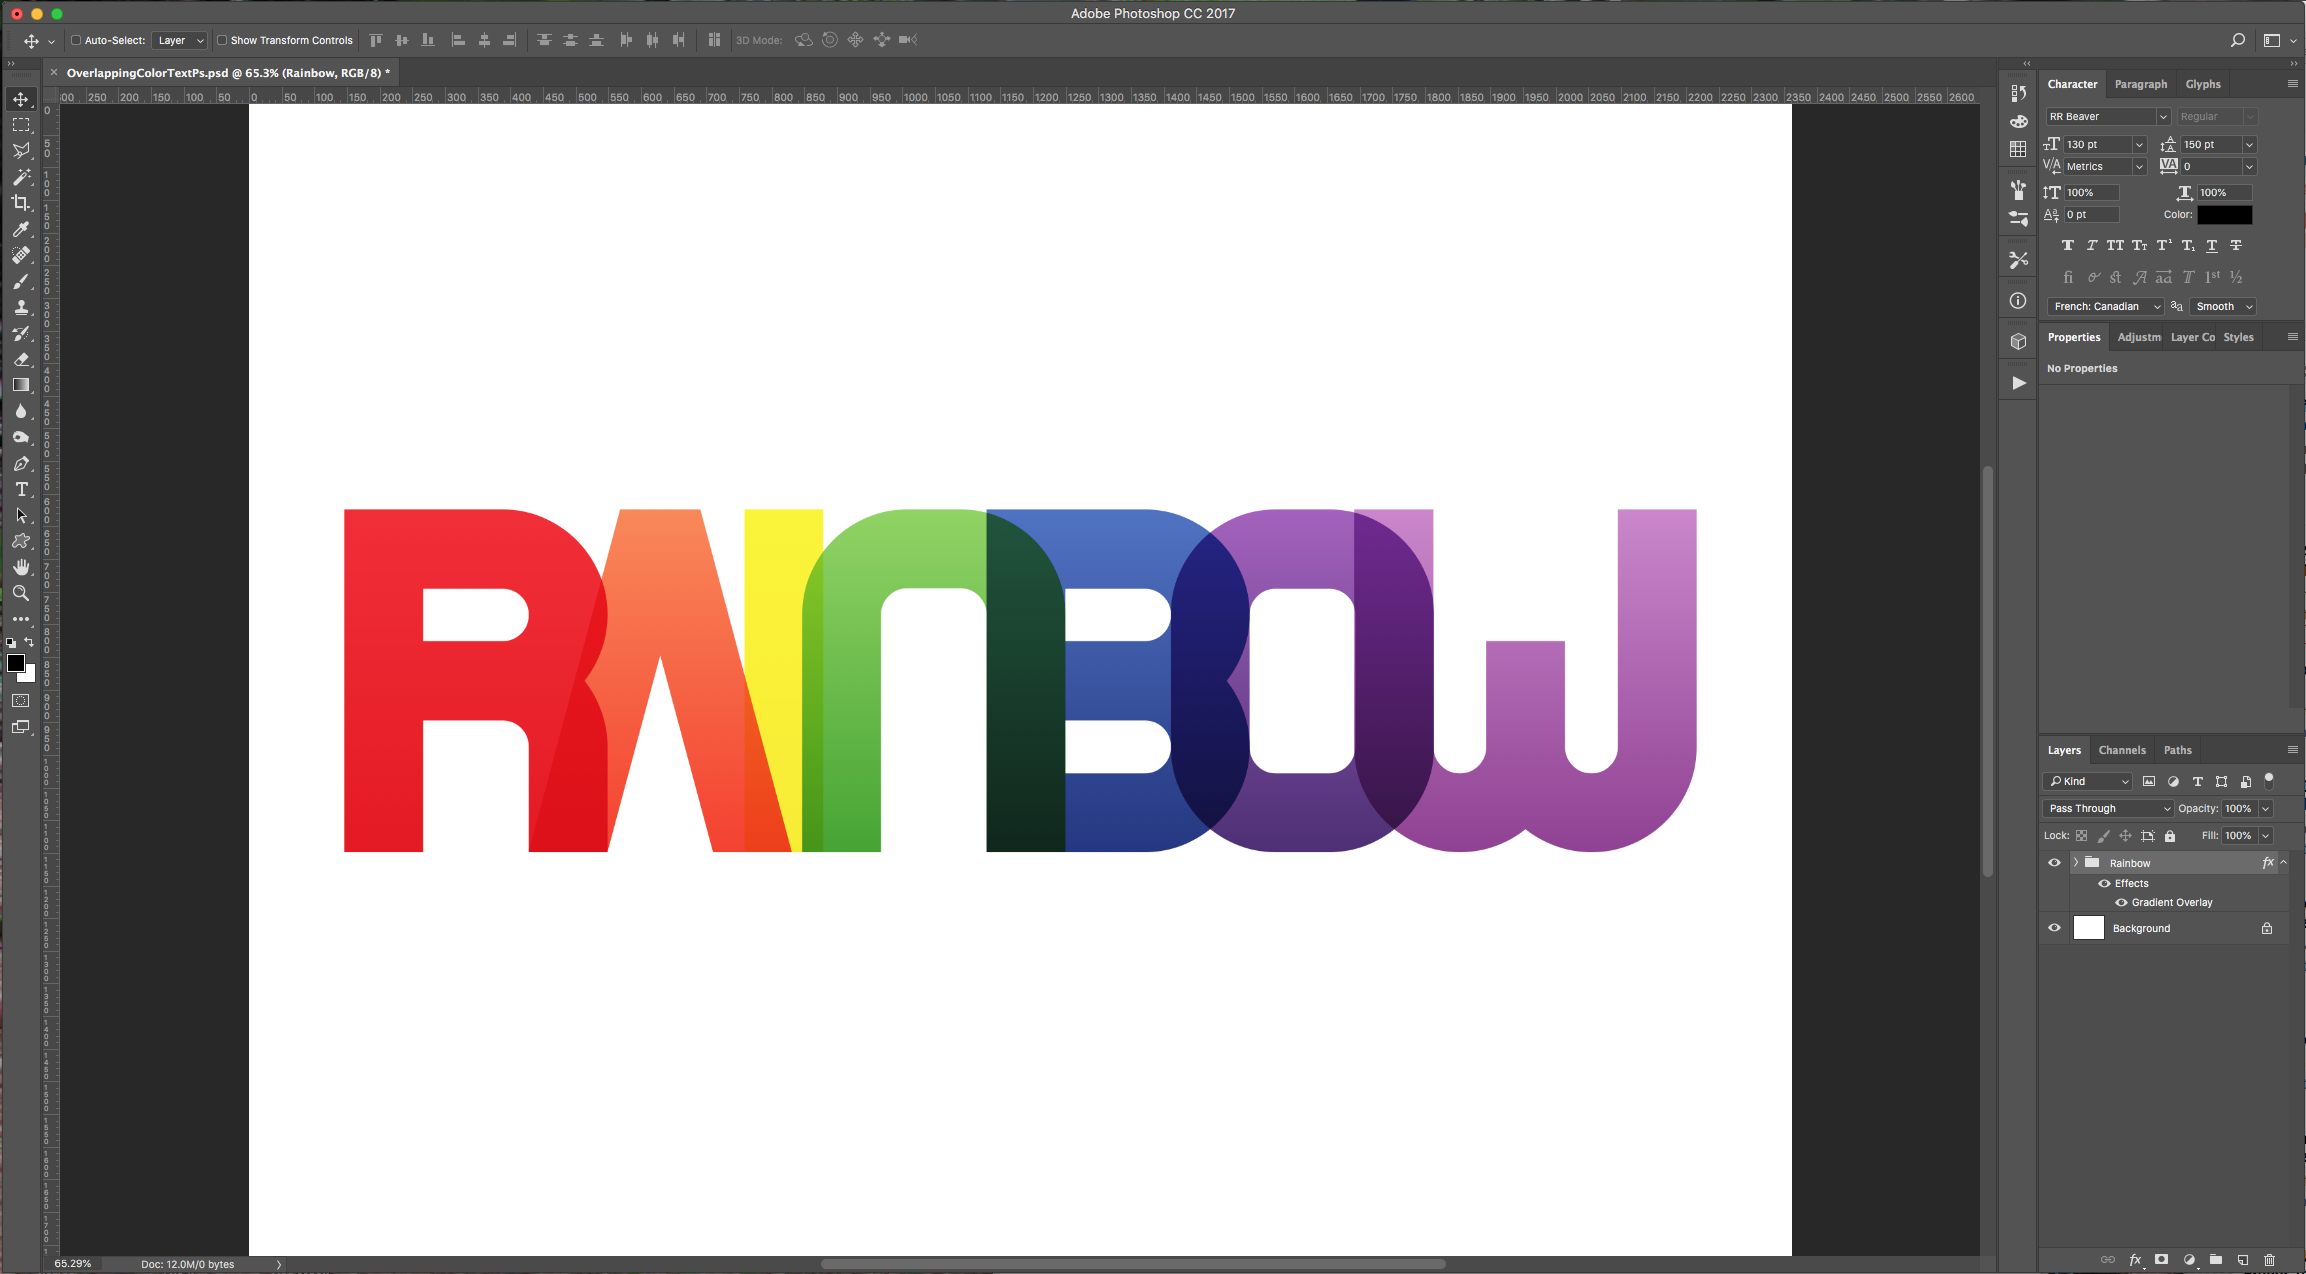
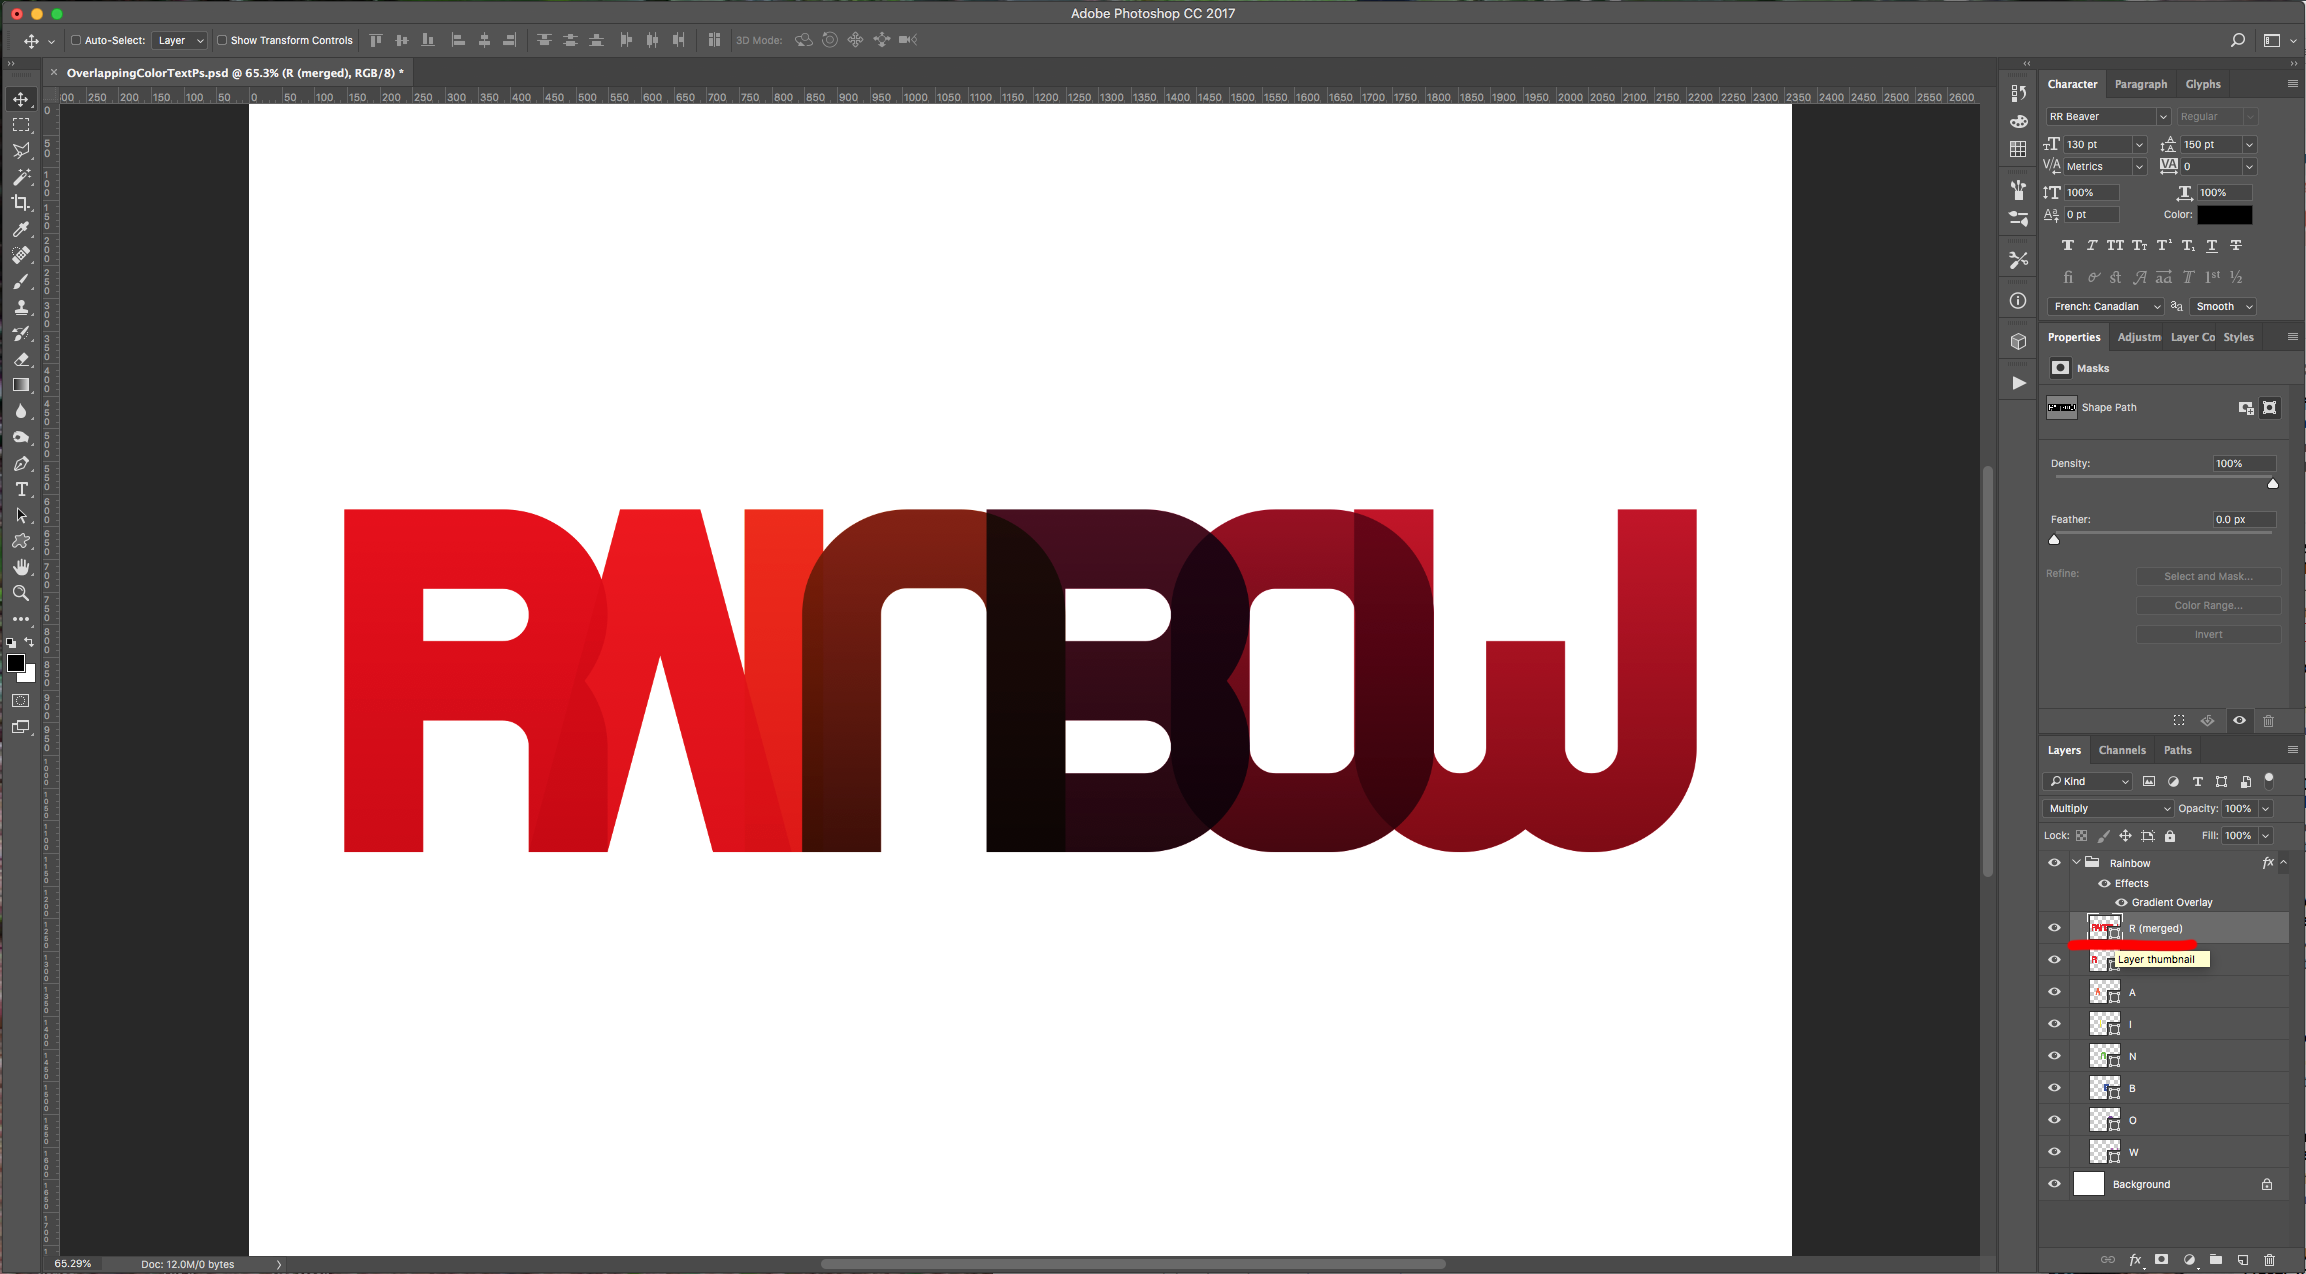
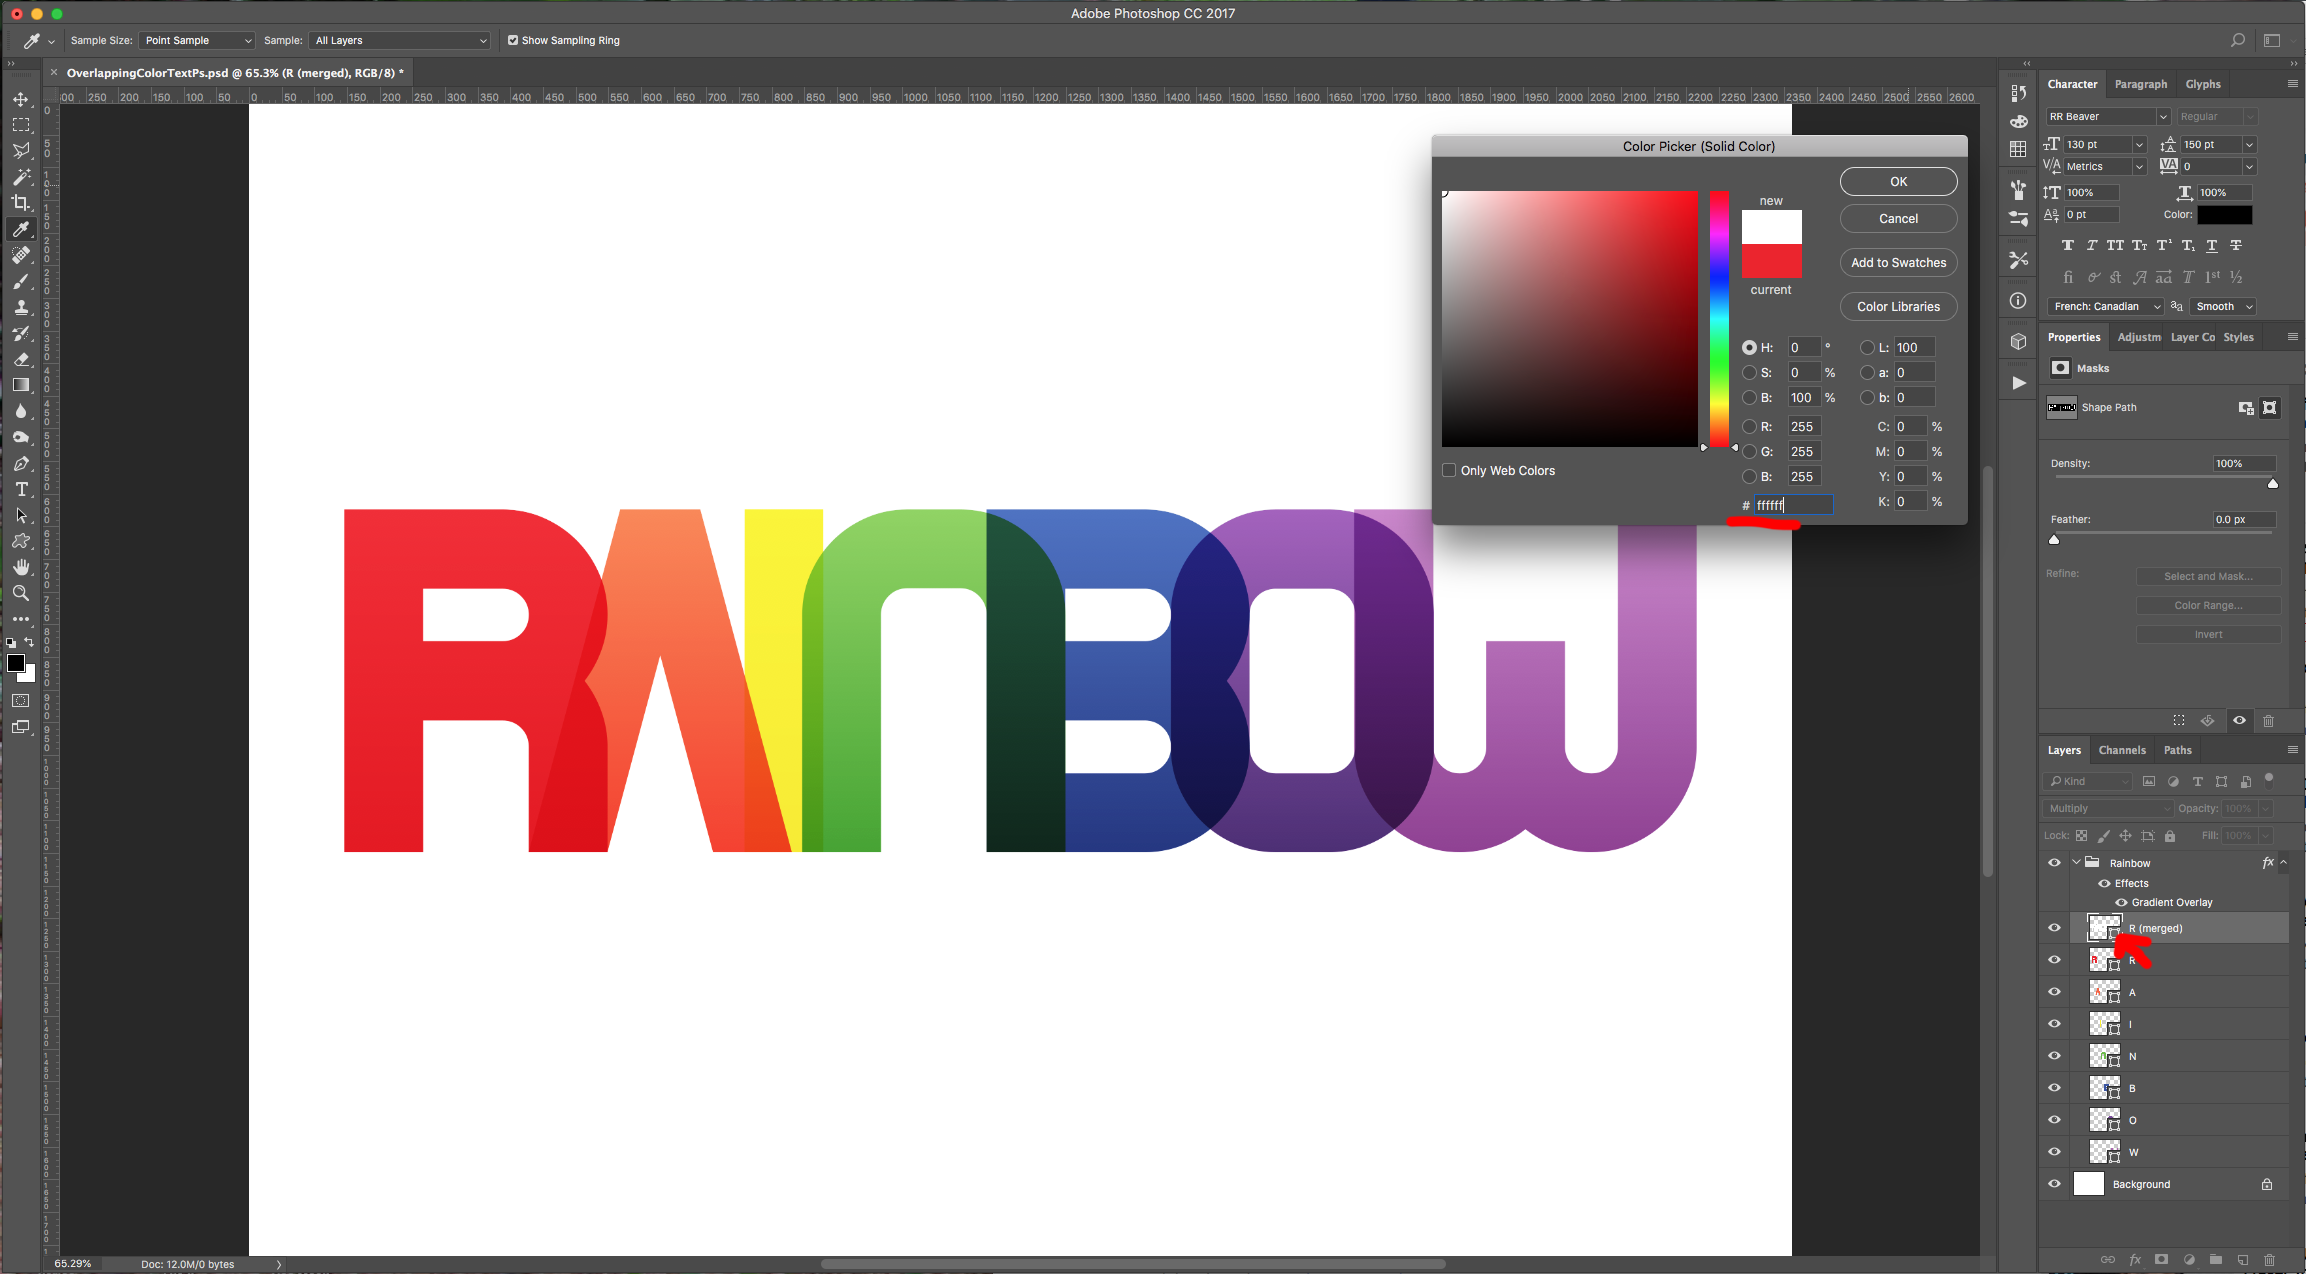
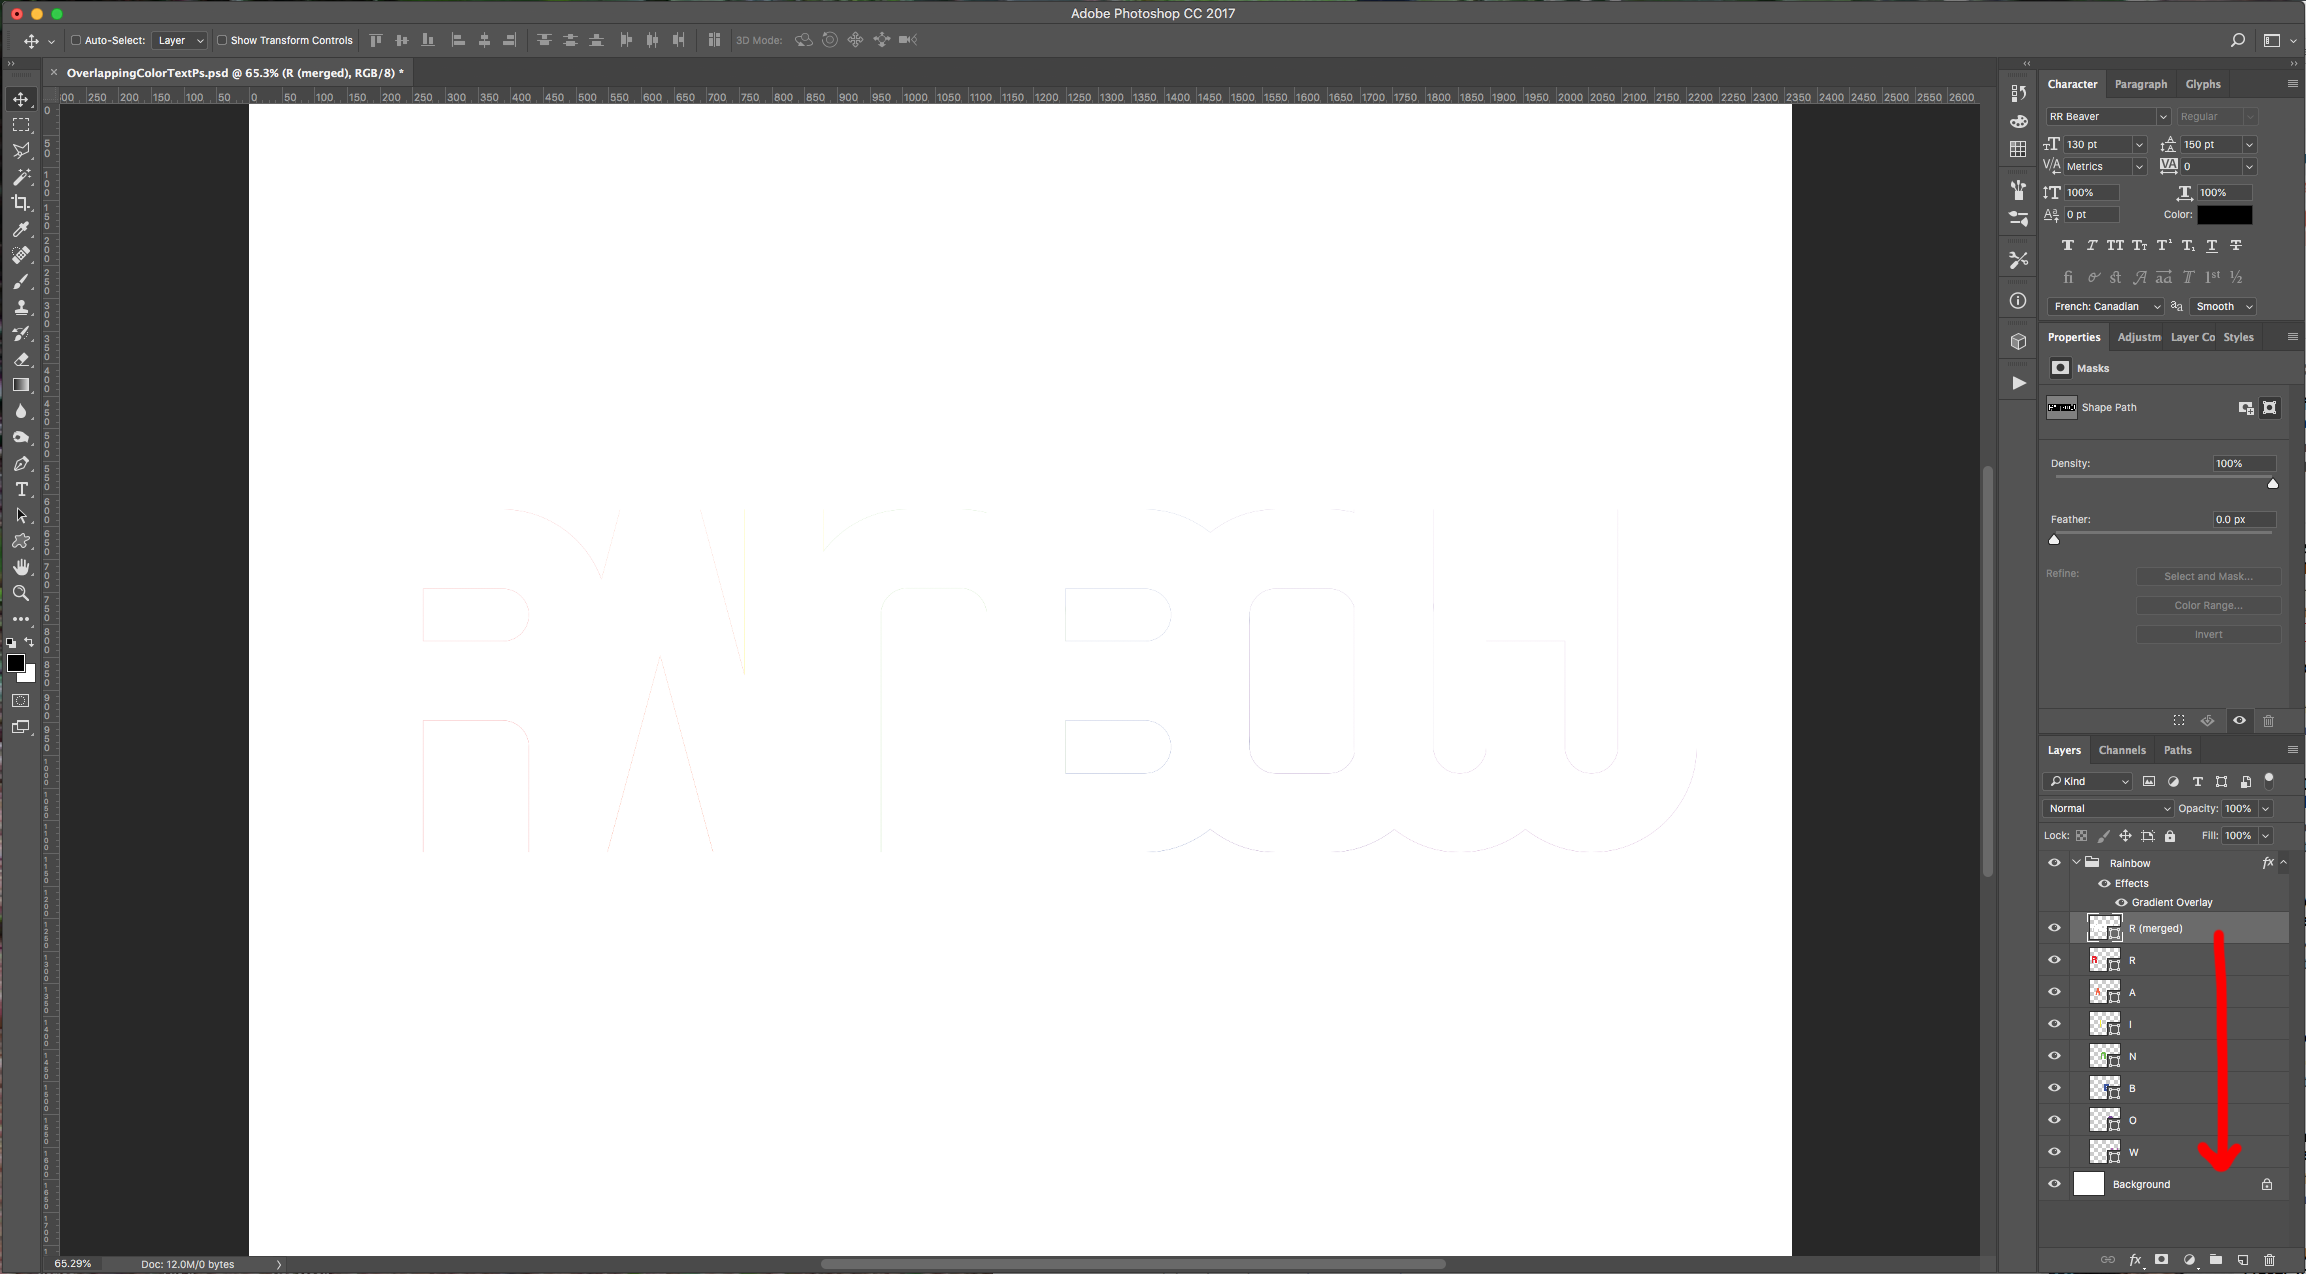
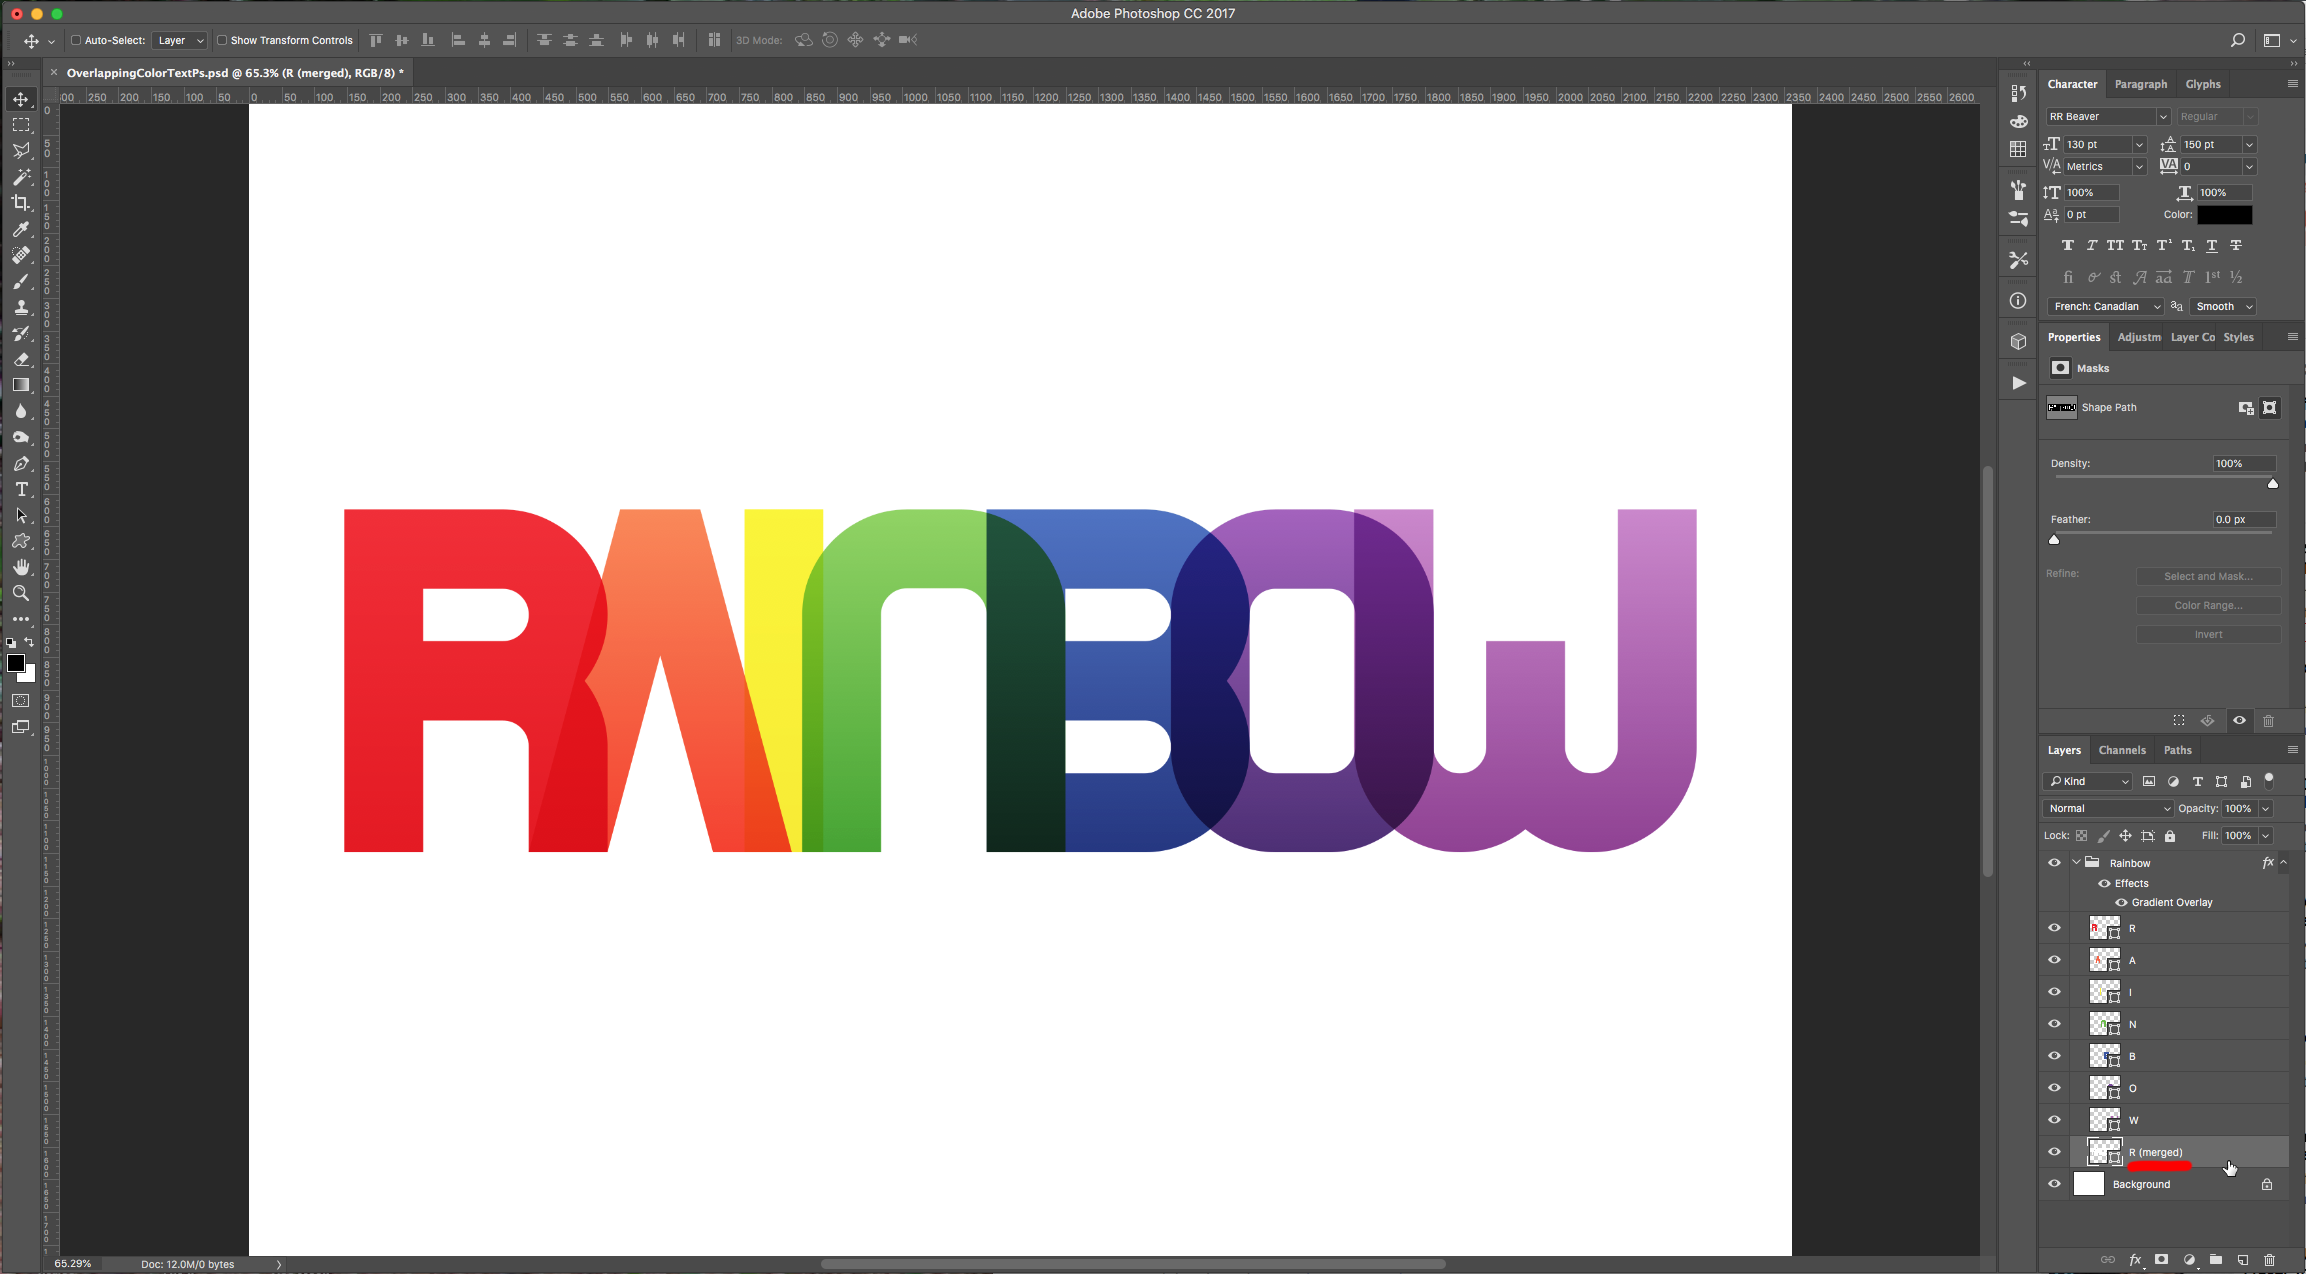
12 - To be able to change the “Background” color from White to any other color without having the Letters Blending Mode look bad. Create a “New Merged Layer” by selecting the Top Layer and clicking Command/Control + Option/Alt + Shift + E. Double-click on its “Shape” icon (bottom-right corner of its Thumbnail) to open the “Color Picker” Panel and choose White (#ffffff). Drag this Layer to the bottom of your Group, just under all the single Letters and on top of the “Background” Layer.
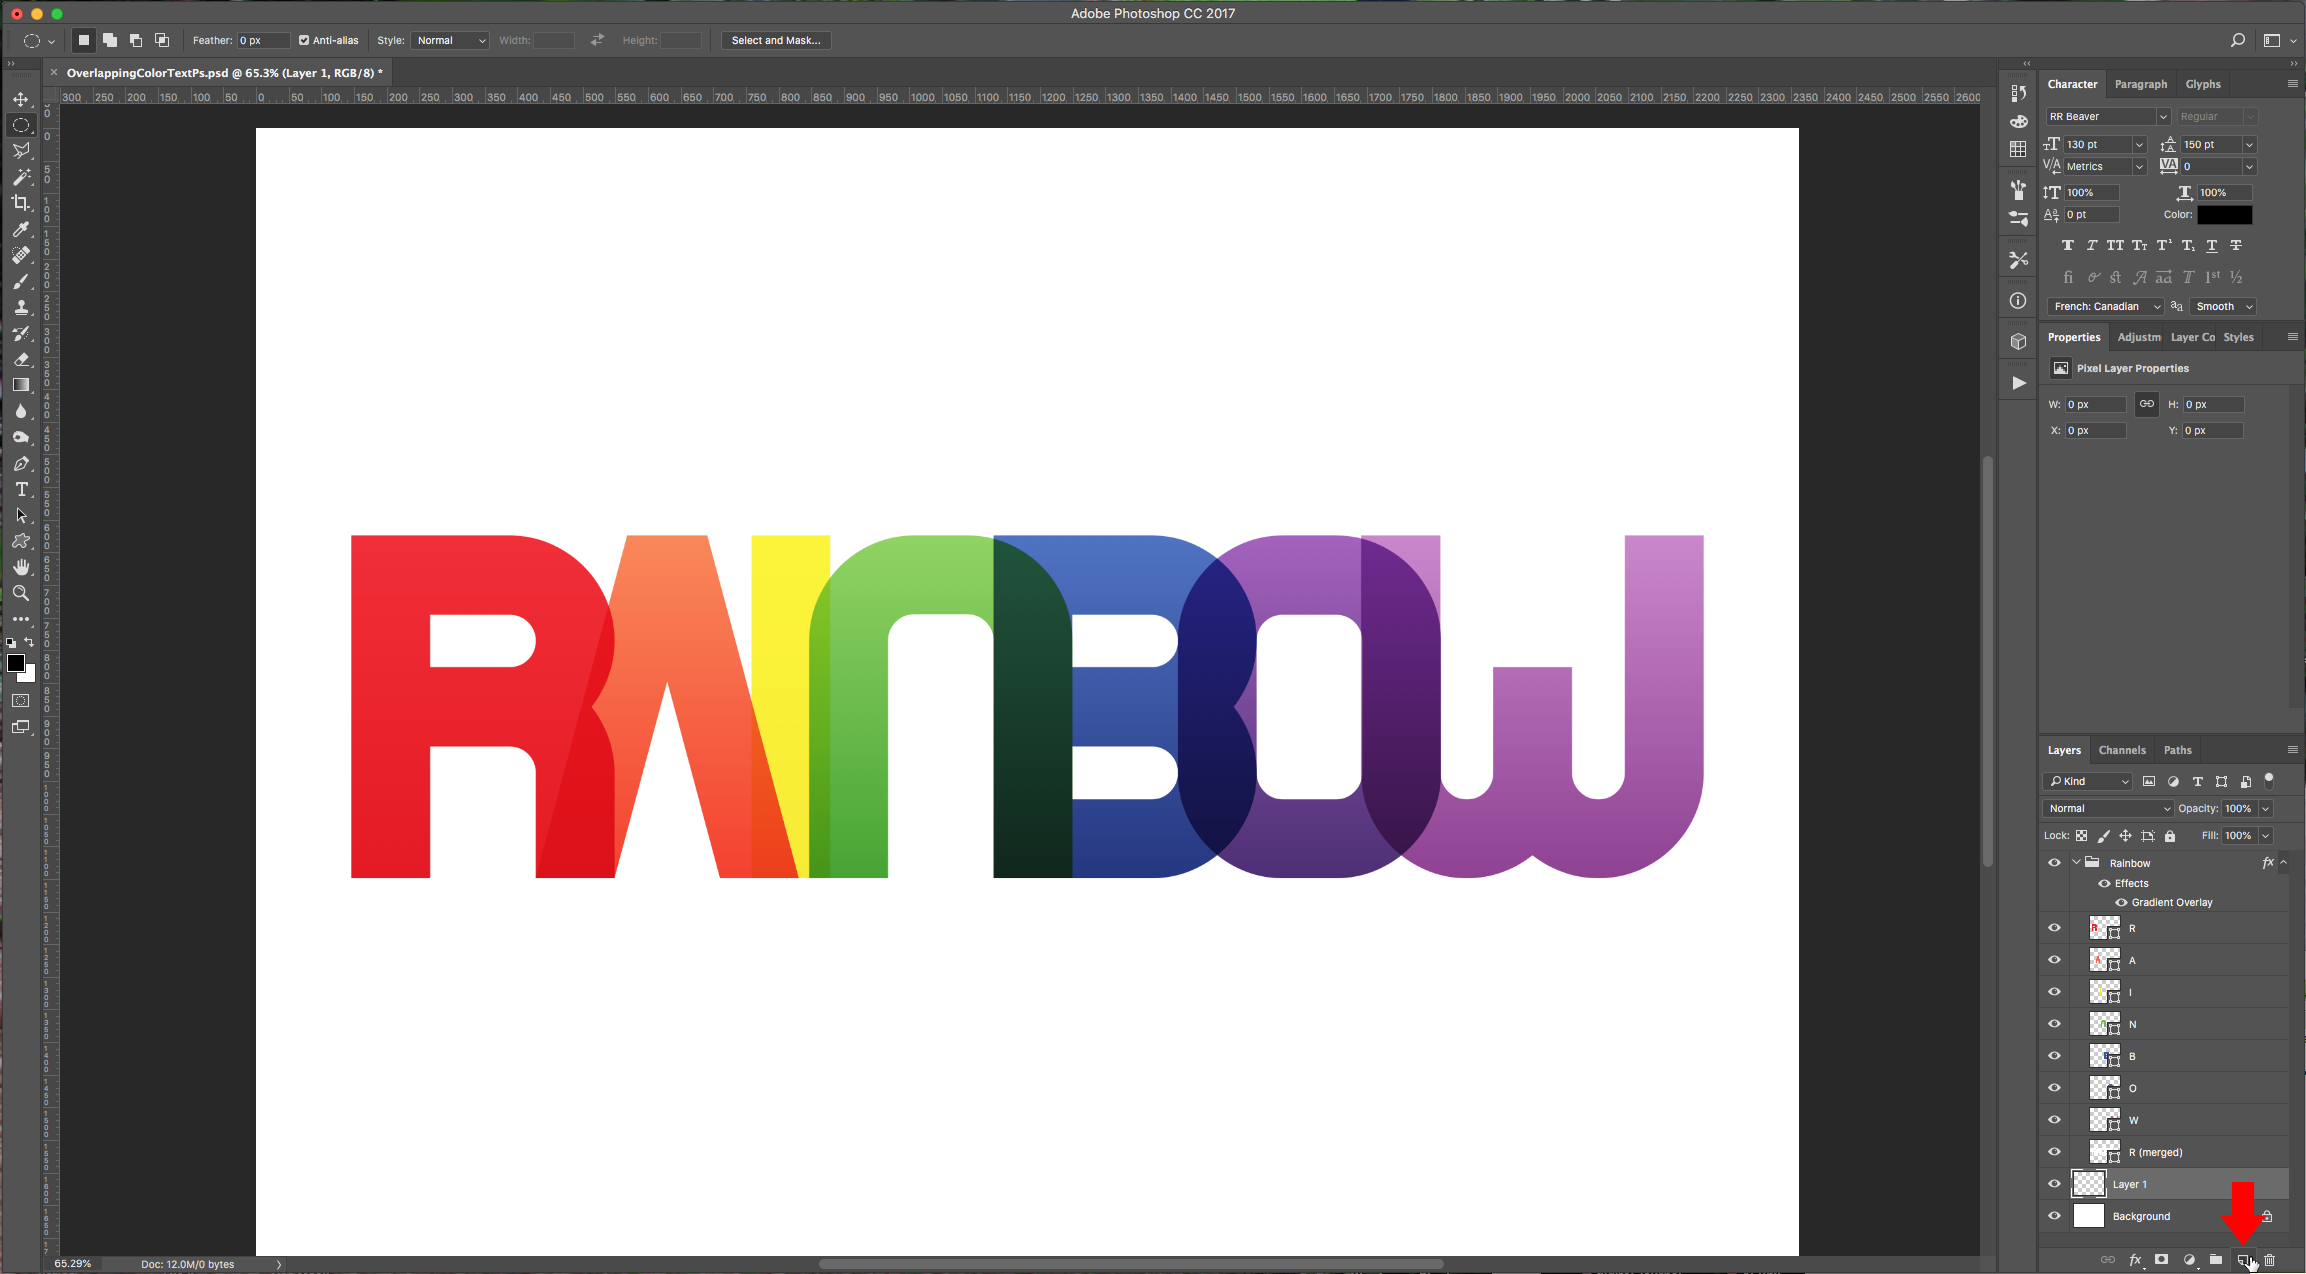
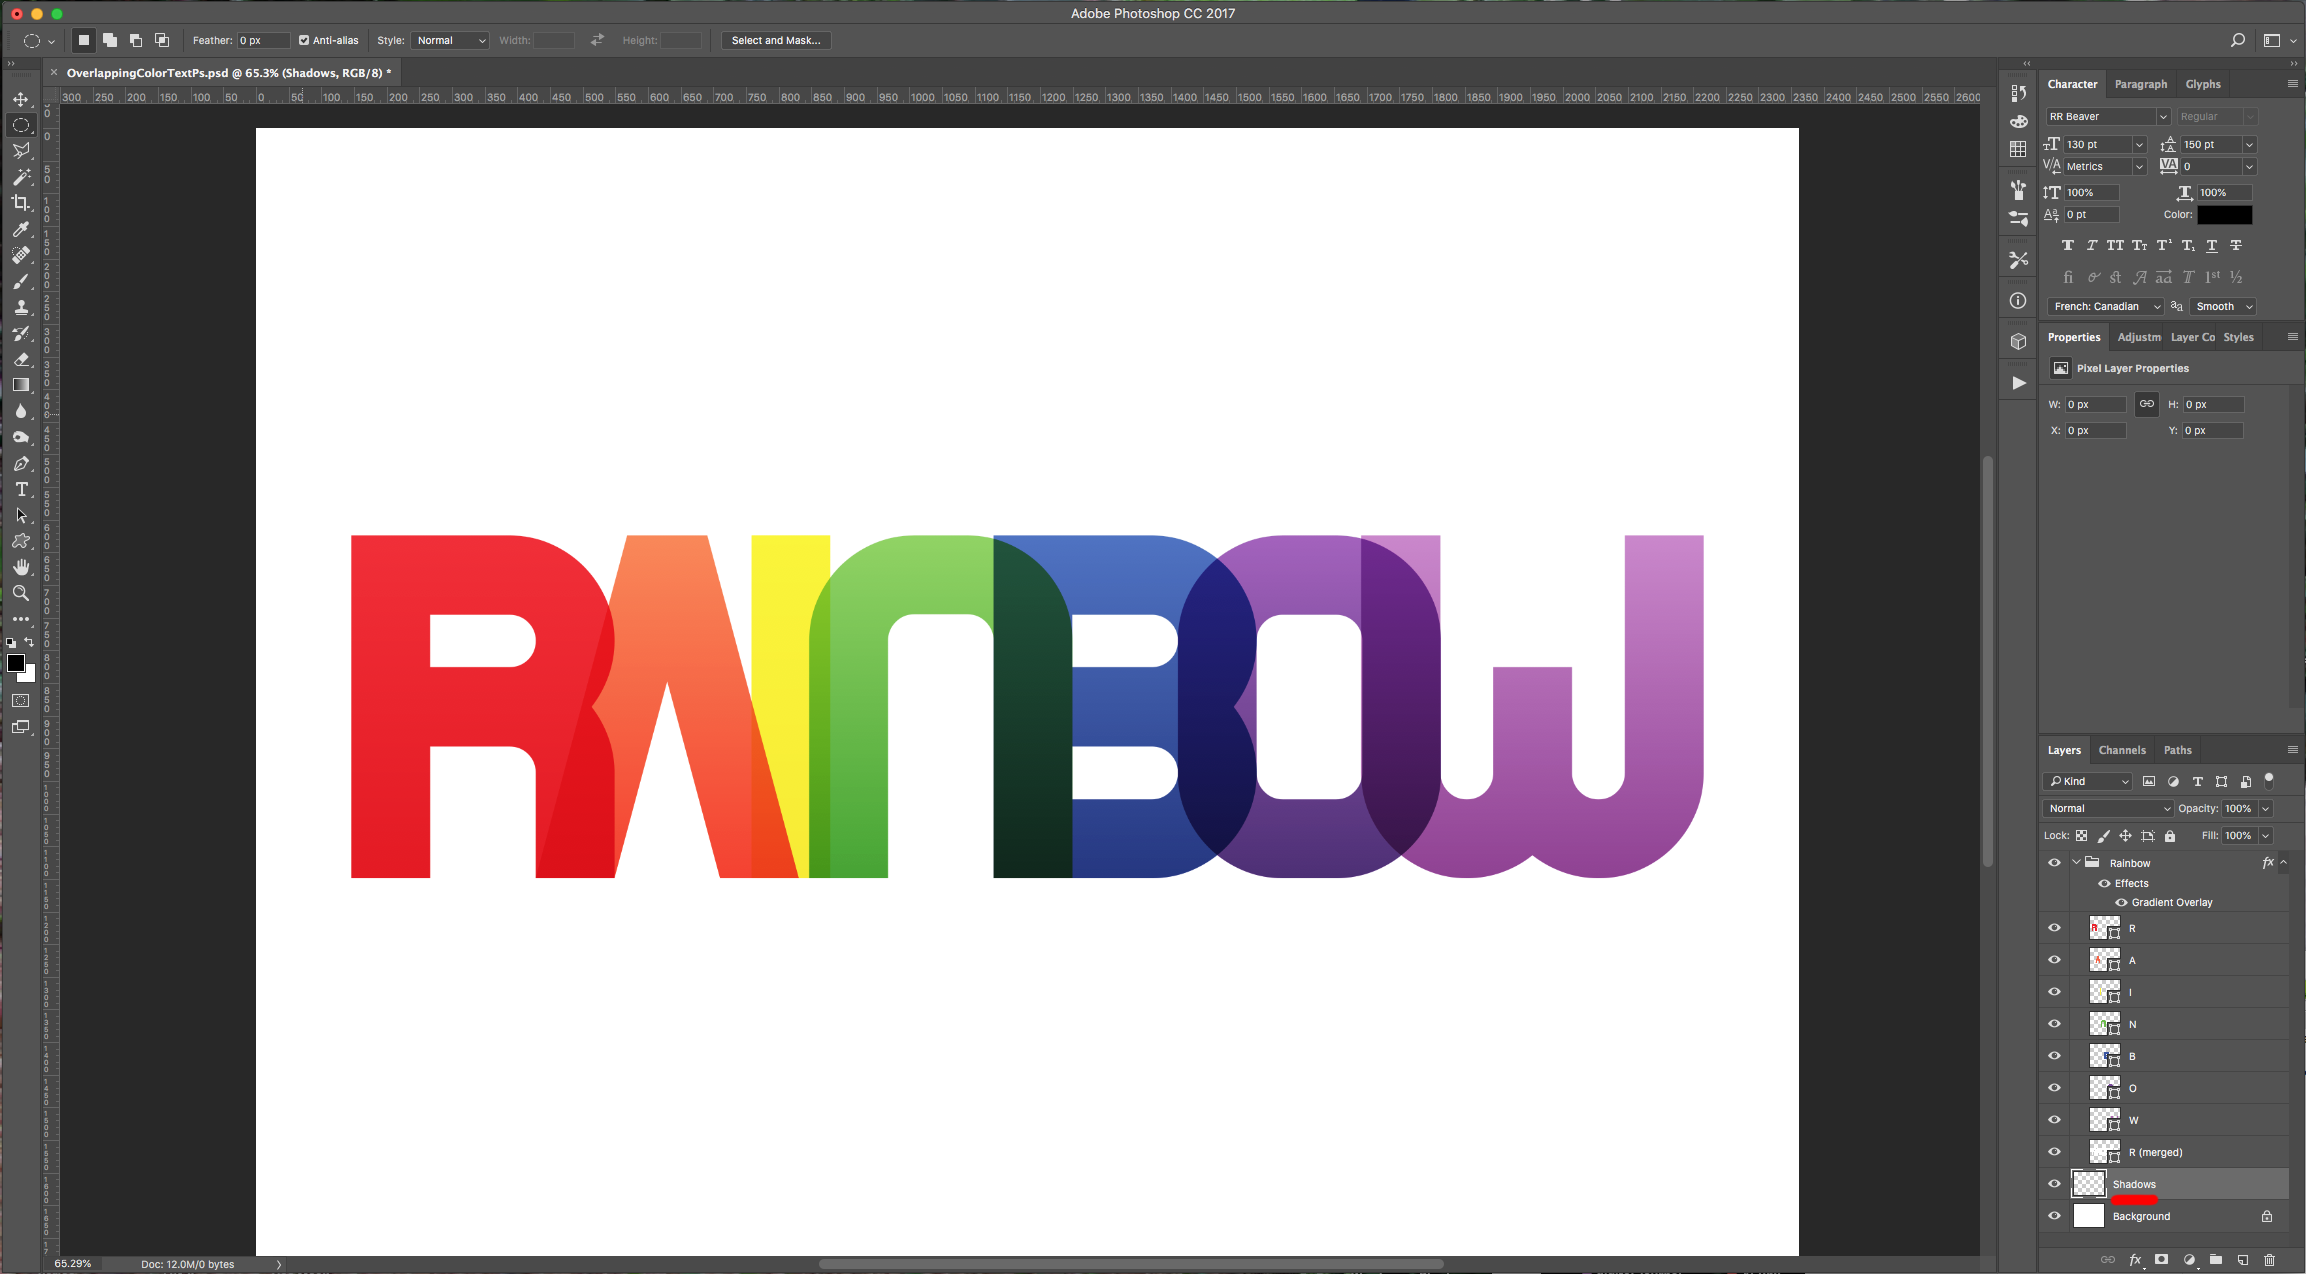
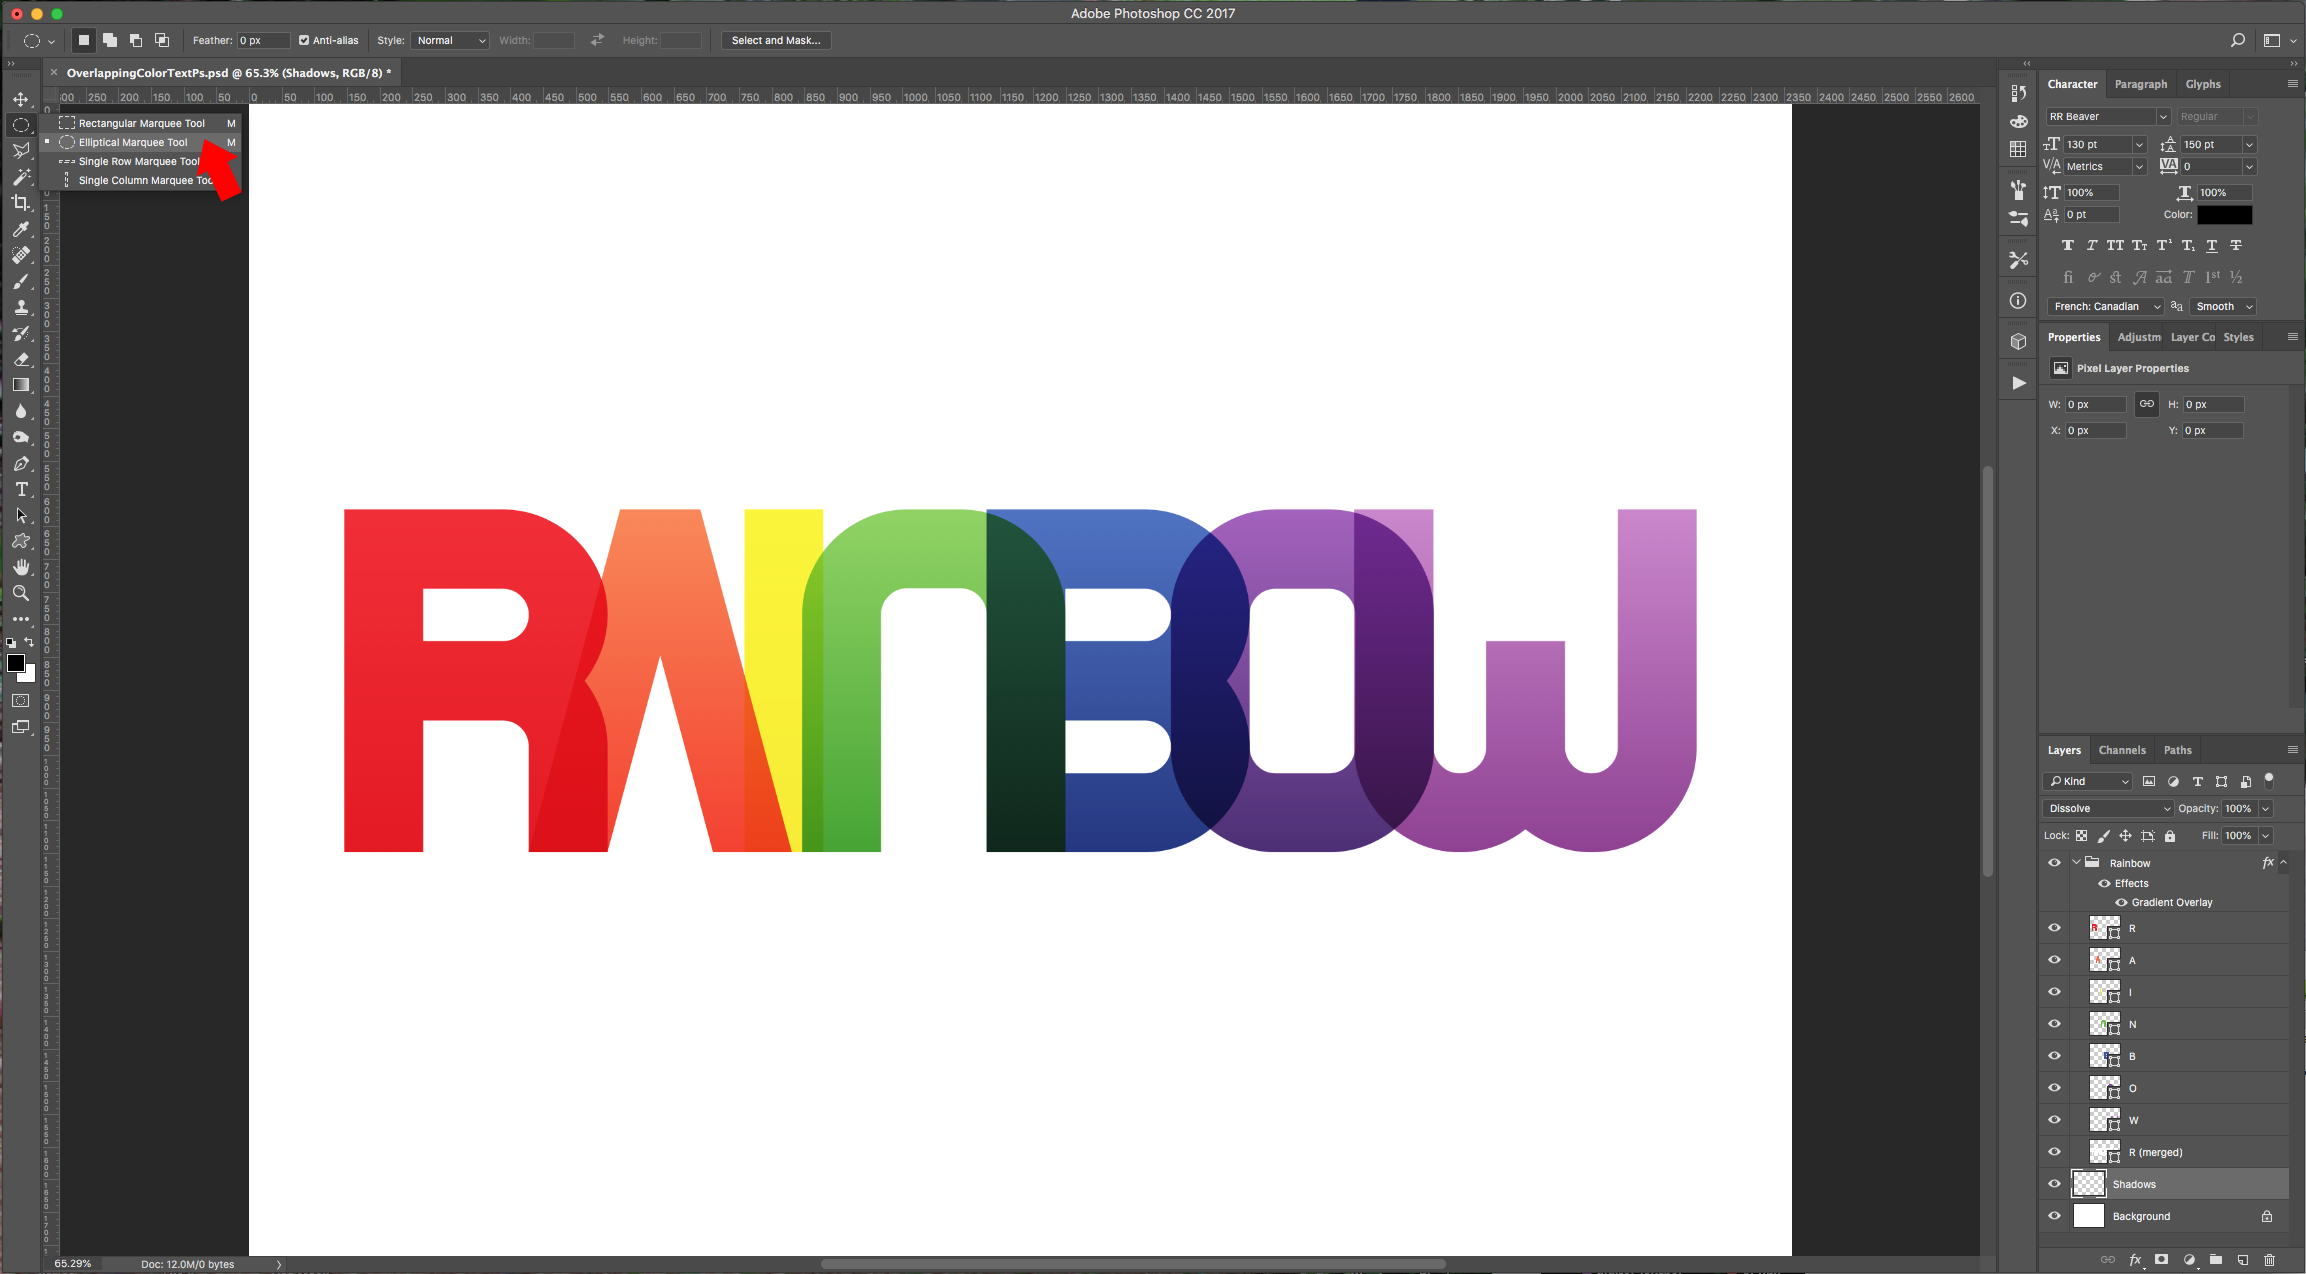
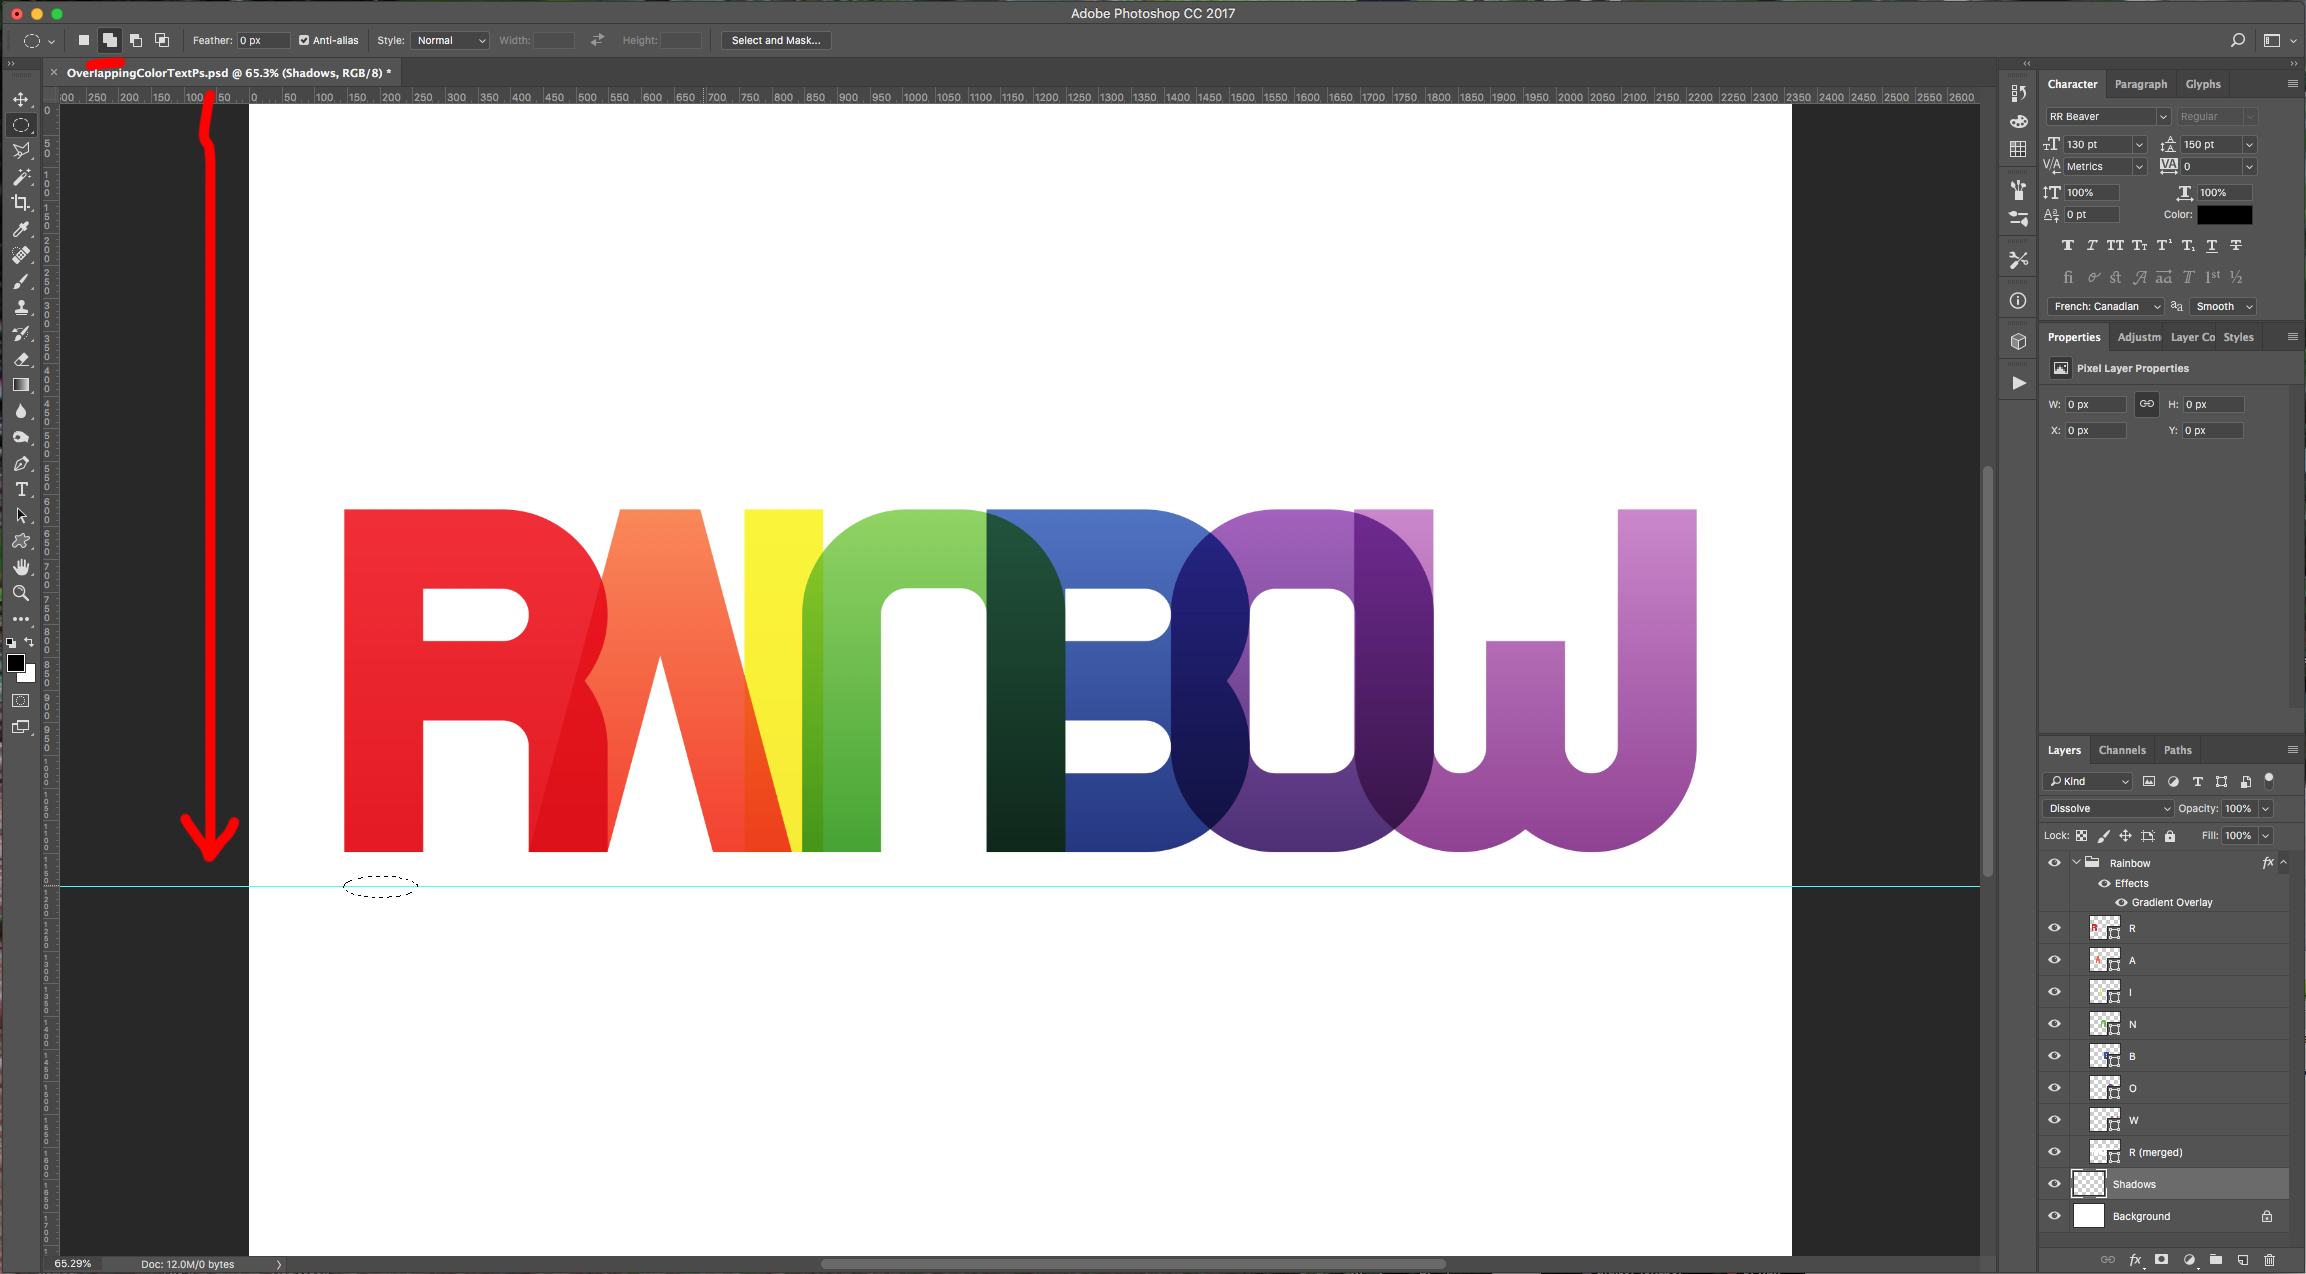
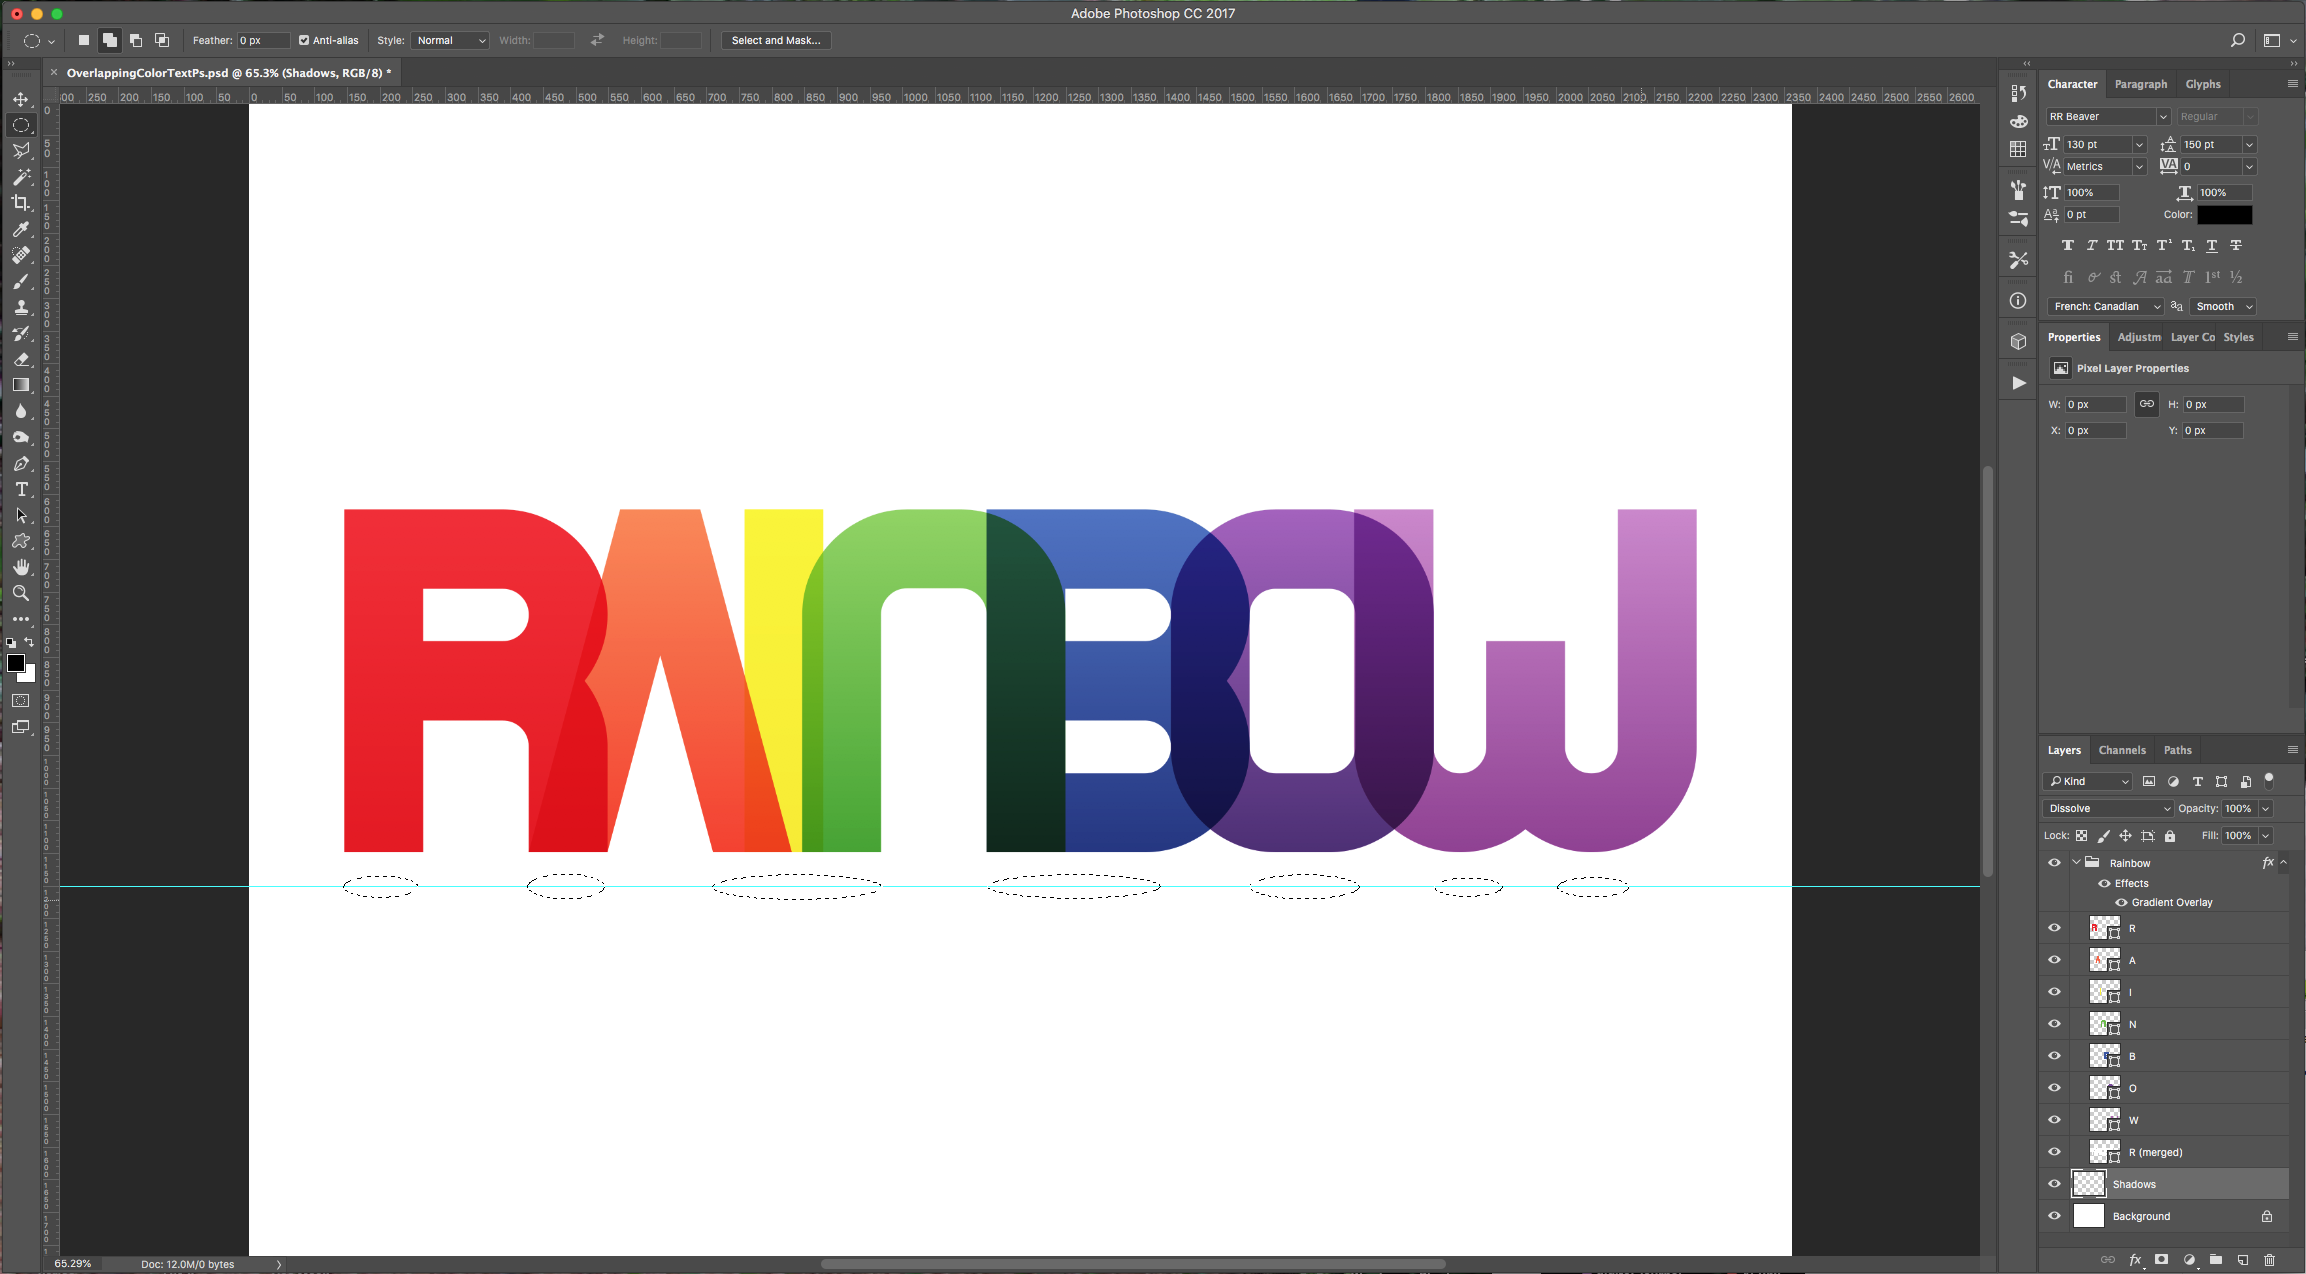
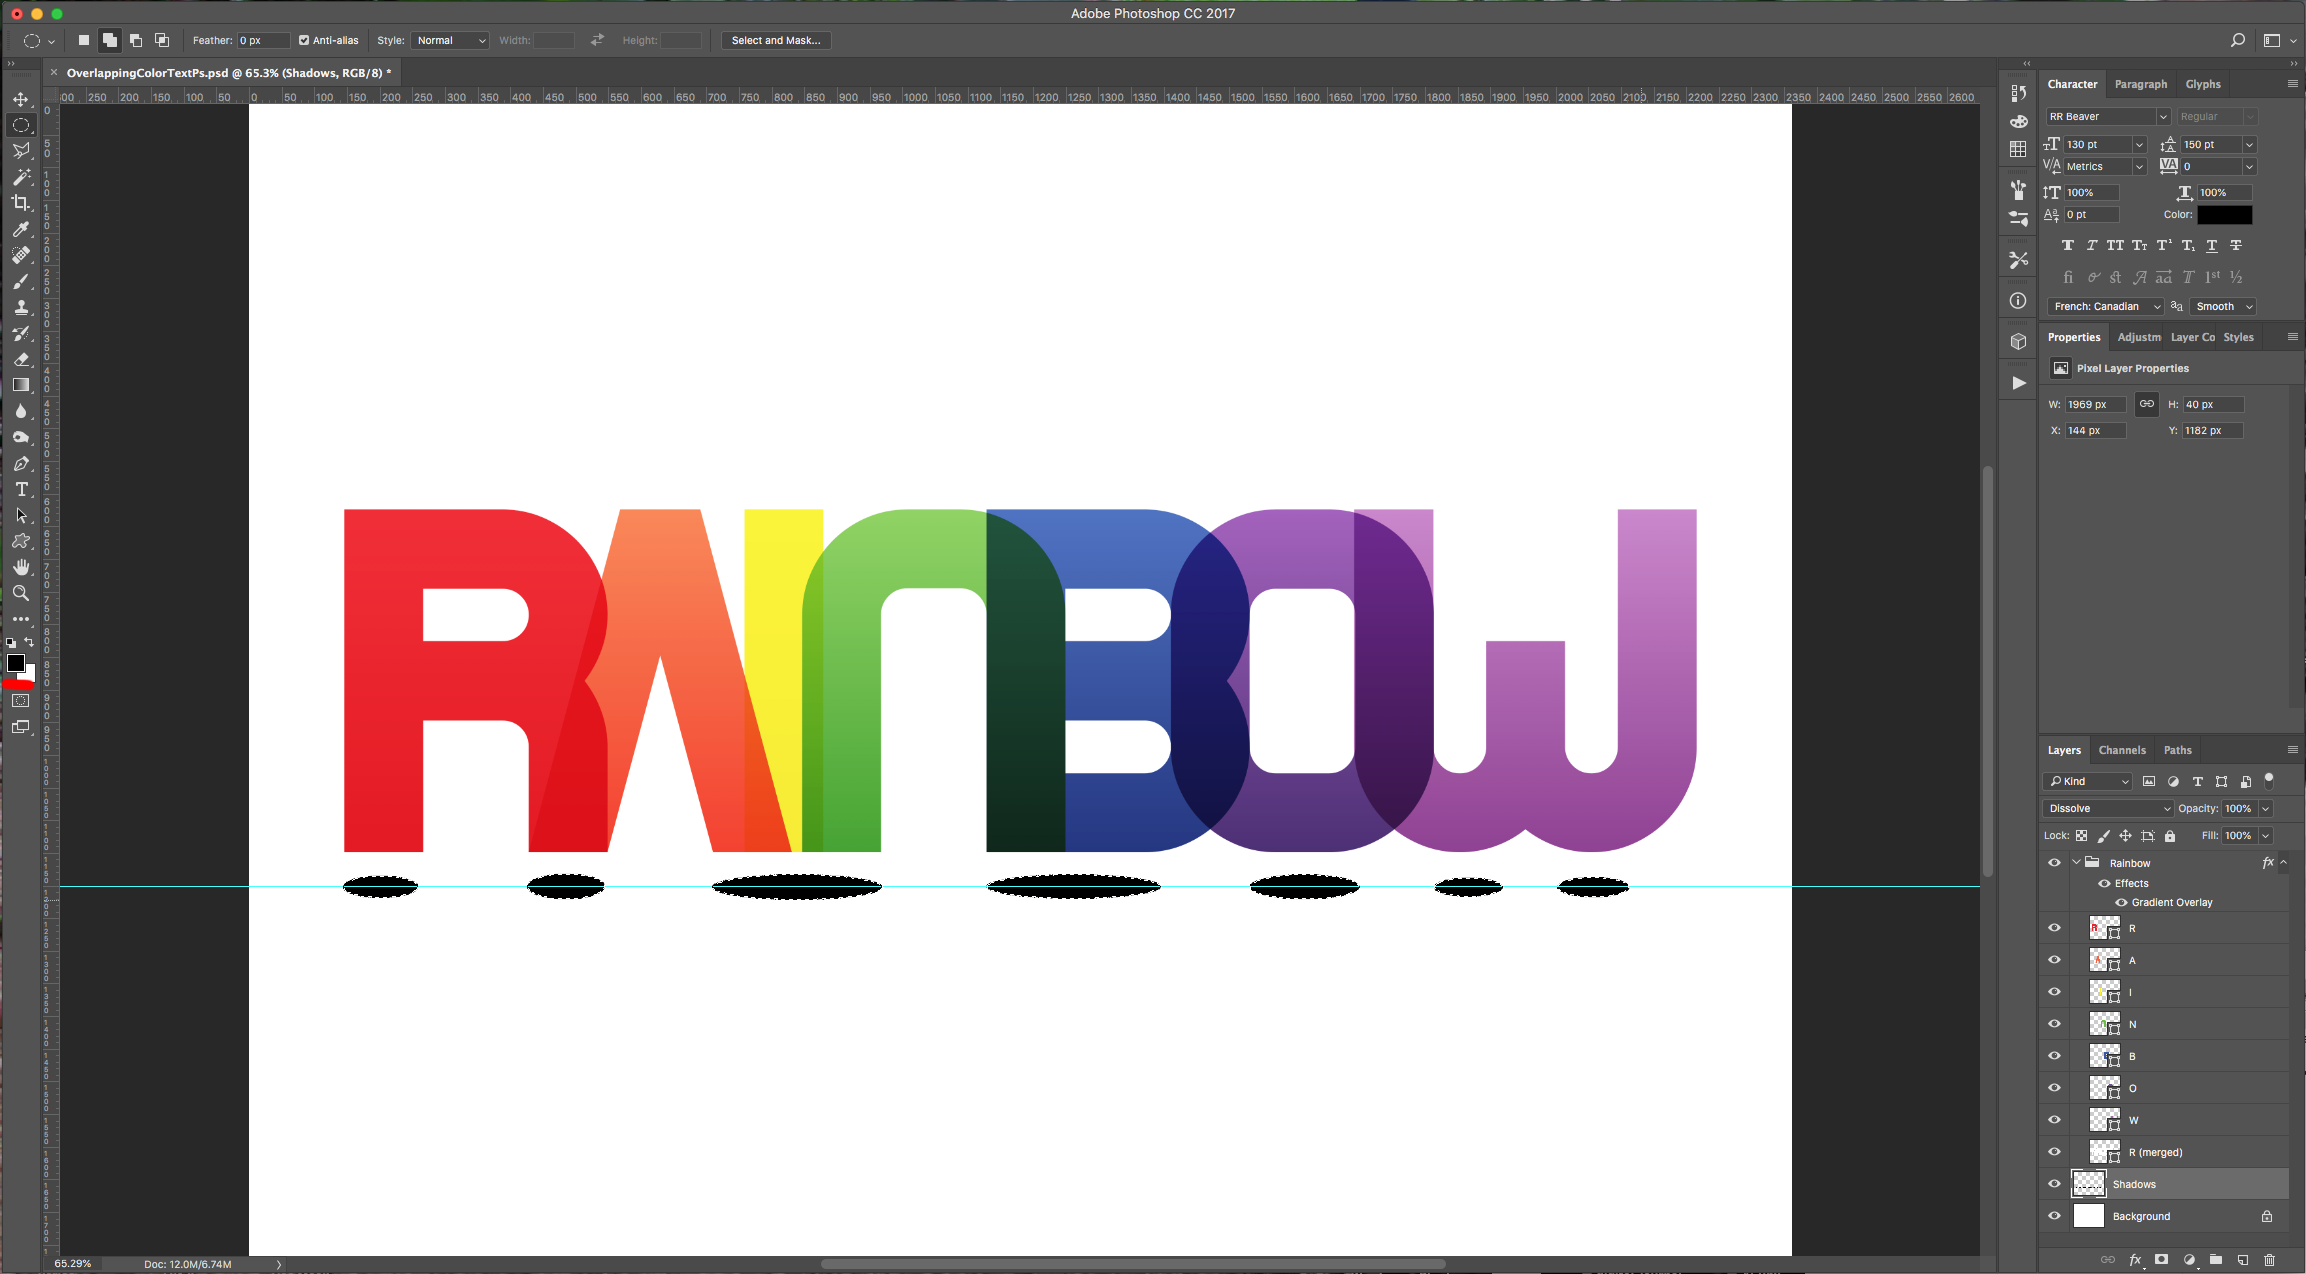
13 - Create a “New Layer” on top of the “Background” Layer and under the “Rainbow” Folder and name it “Shadows” (click on the small button at the bottom of the “Layers Panel”). Select the “Elliptical Marquee Tool” (M), make sure that “Add to Selection” is selected on the Top Menu and create a small Oval shape under one of the sides of the first letter (in our case the left leg of the “R”). Place a “Guide” to use as reference (click on the Top Ruler and drag down, then release where you want it placed). Create other Ovals under the other Letters to mimic shadows and fill them with Black or “Foreground” Color (Alt/Option + Delete). Deselect (Command/Control + D).
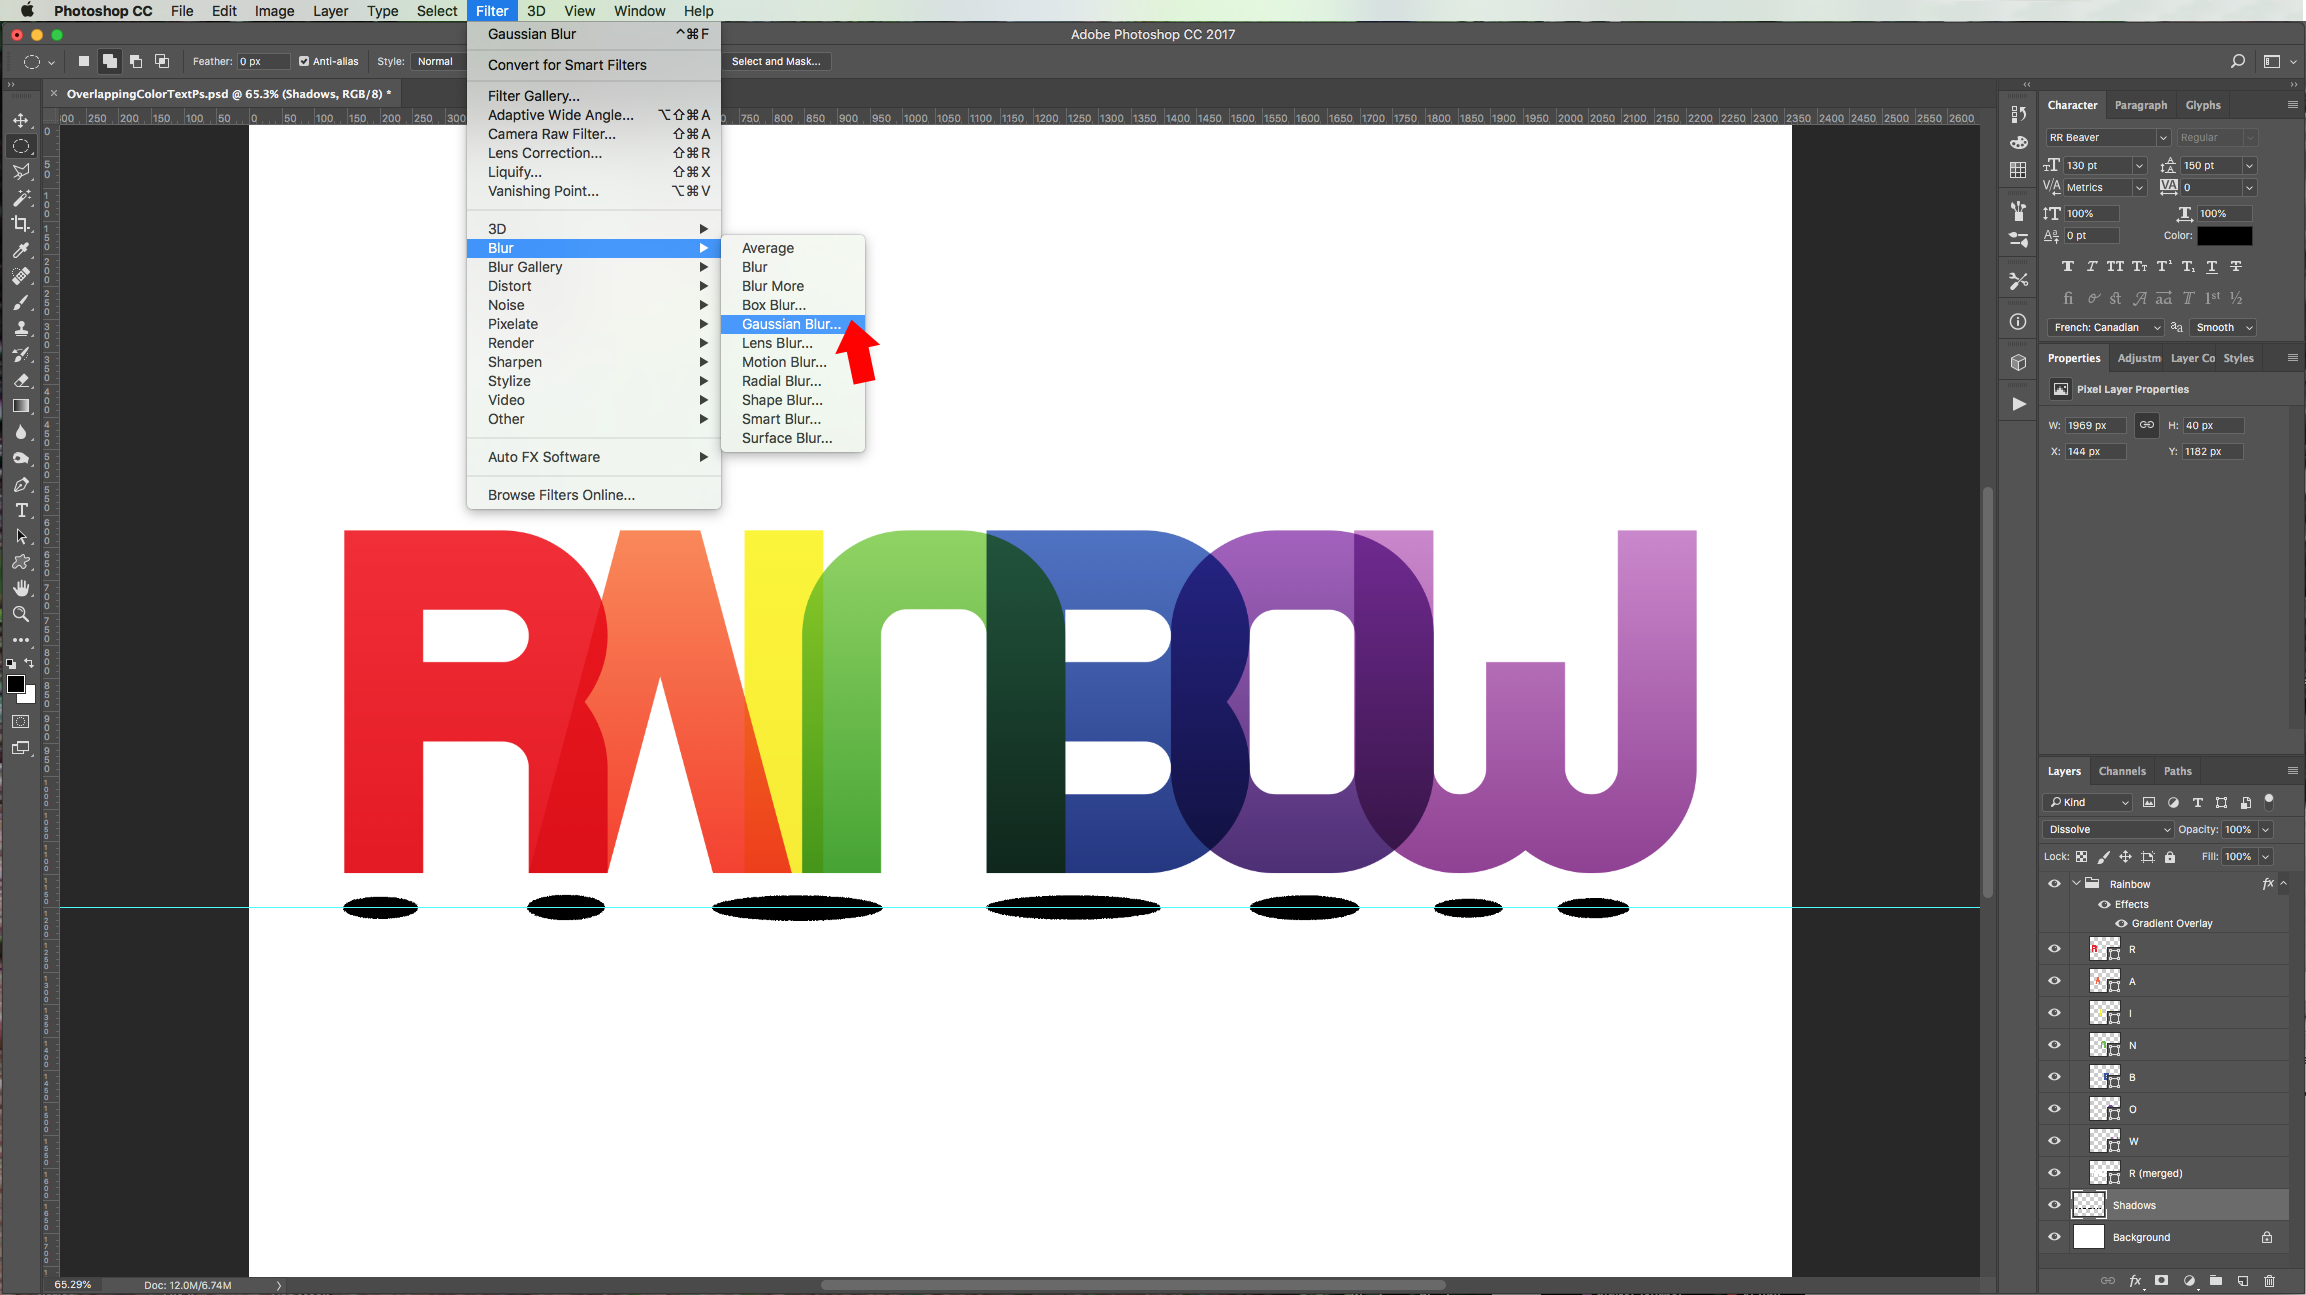
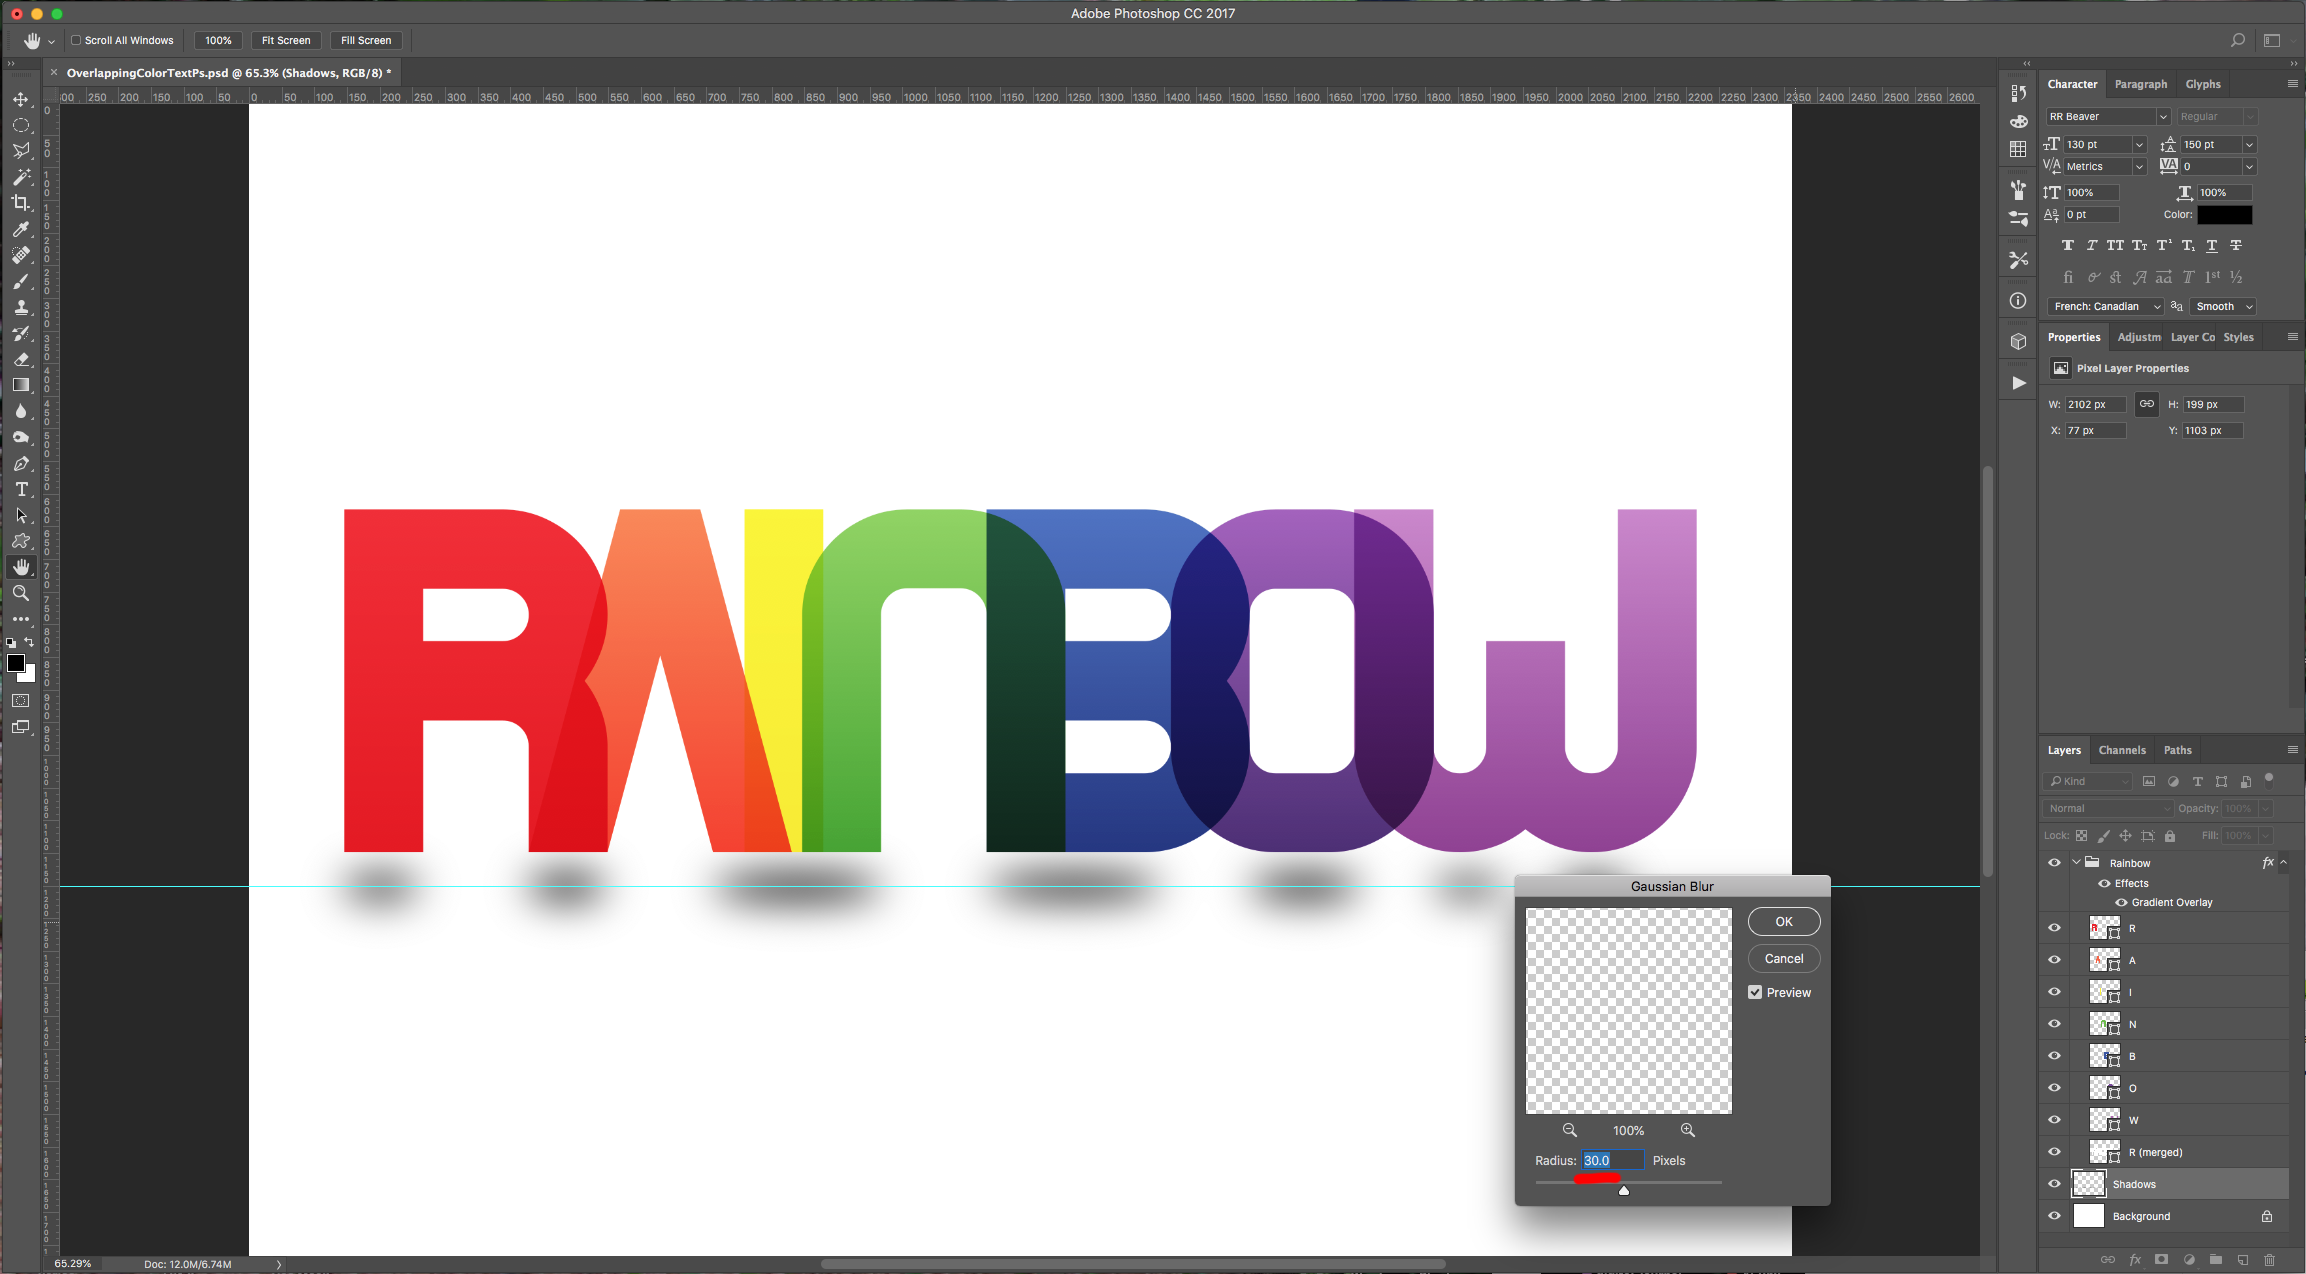
14 - Go to Filter > Blur > Gaussian Blur… and use a 30.0 Pixel “Radius”. Change the “Opacity” of the Layer to 40% and resize if needed using “Free Transform” (Command/Control + T).
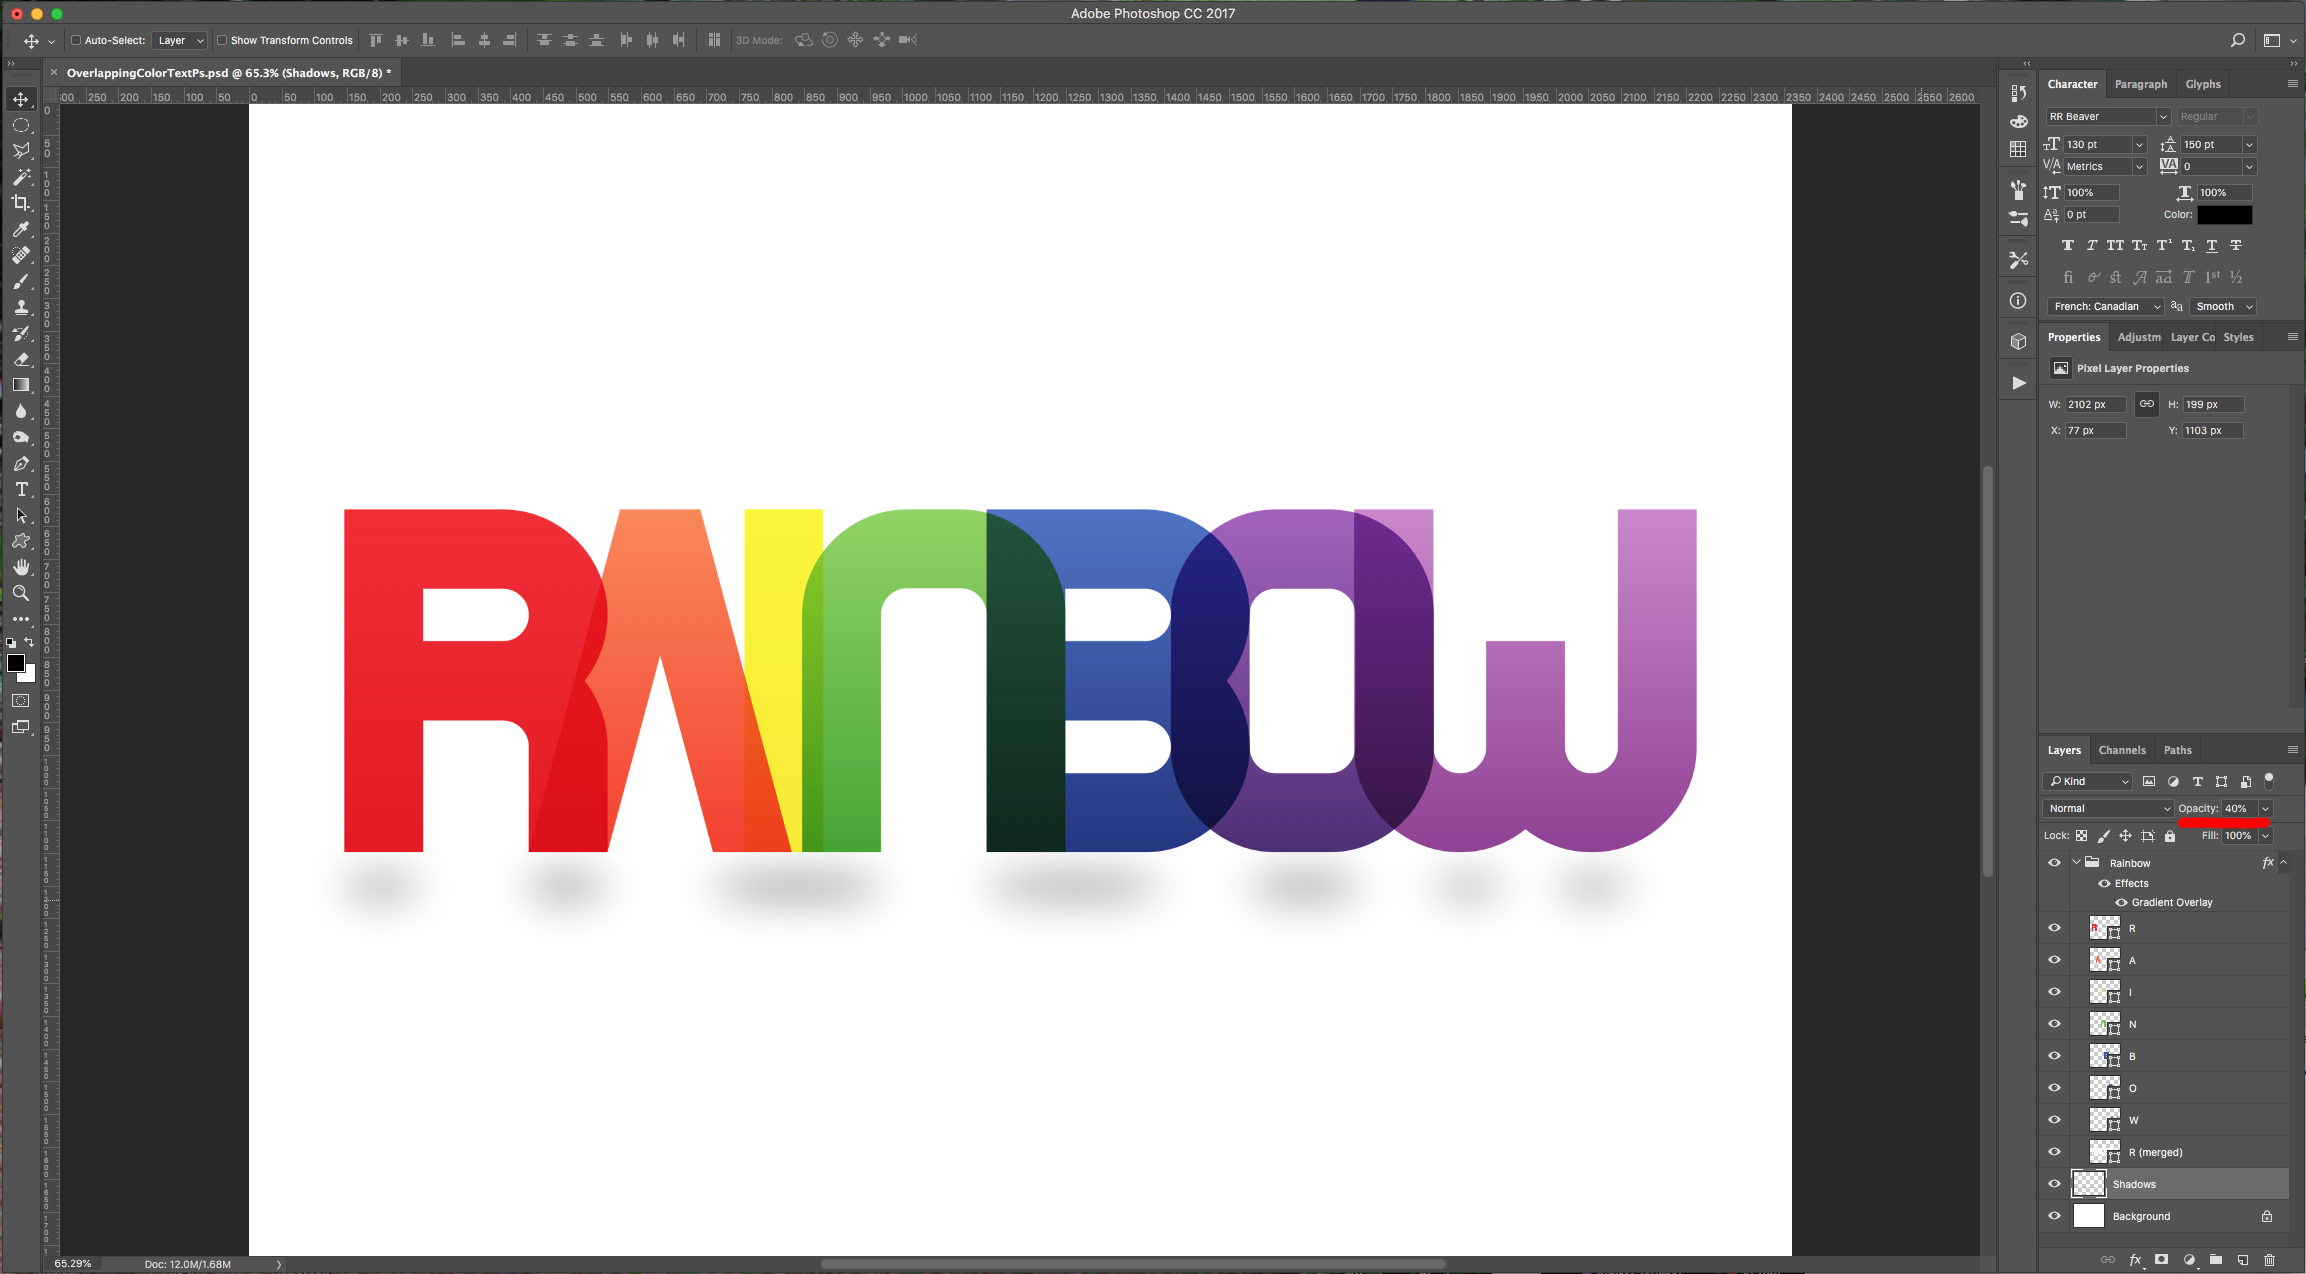
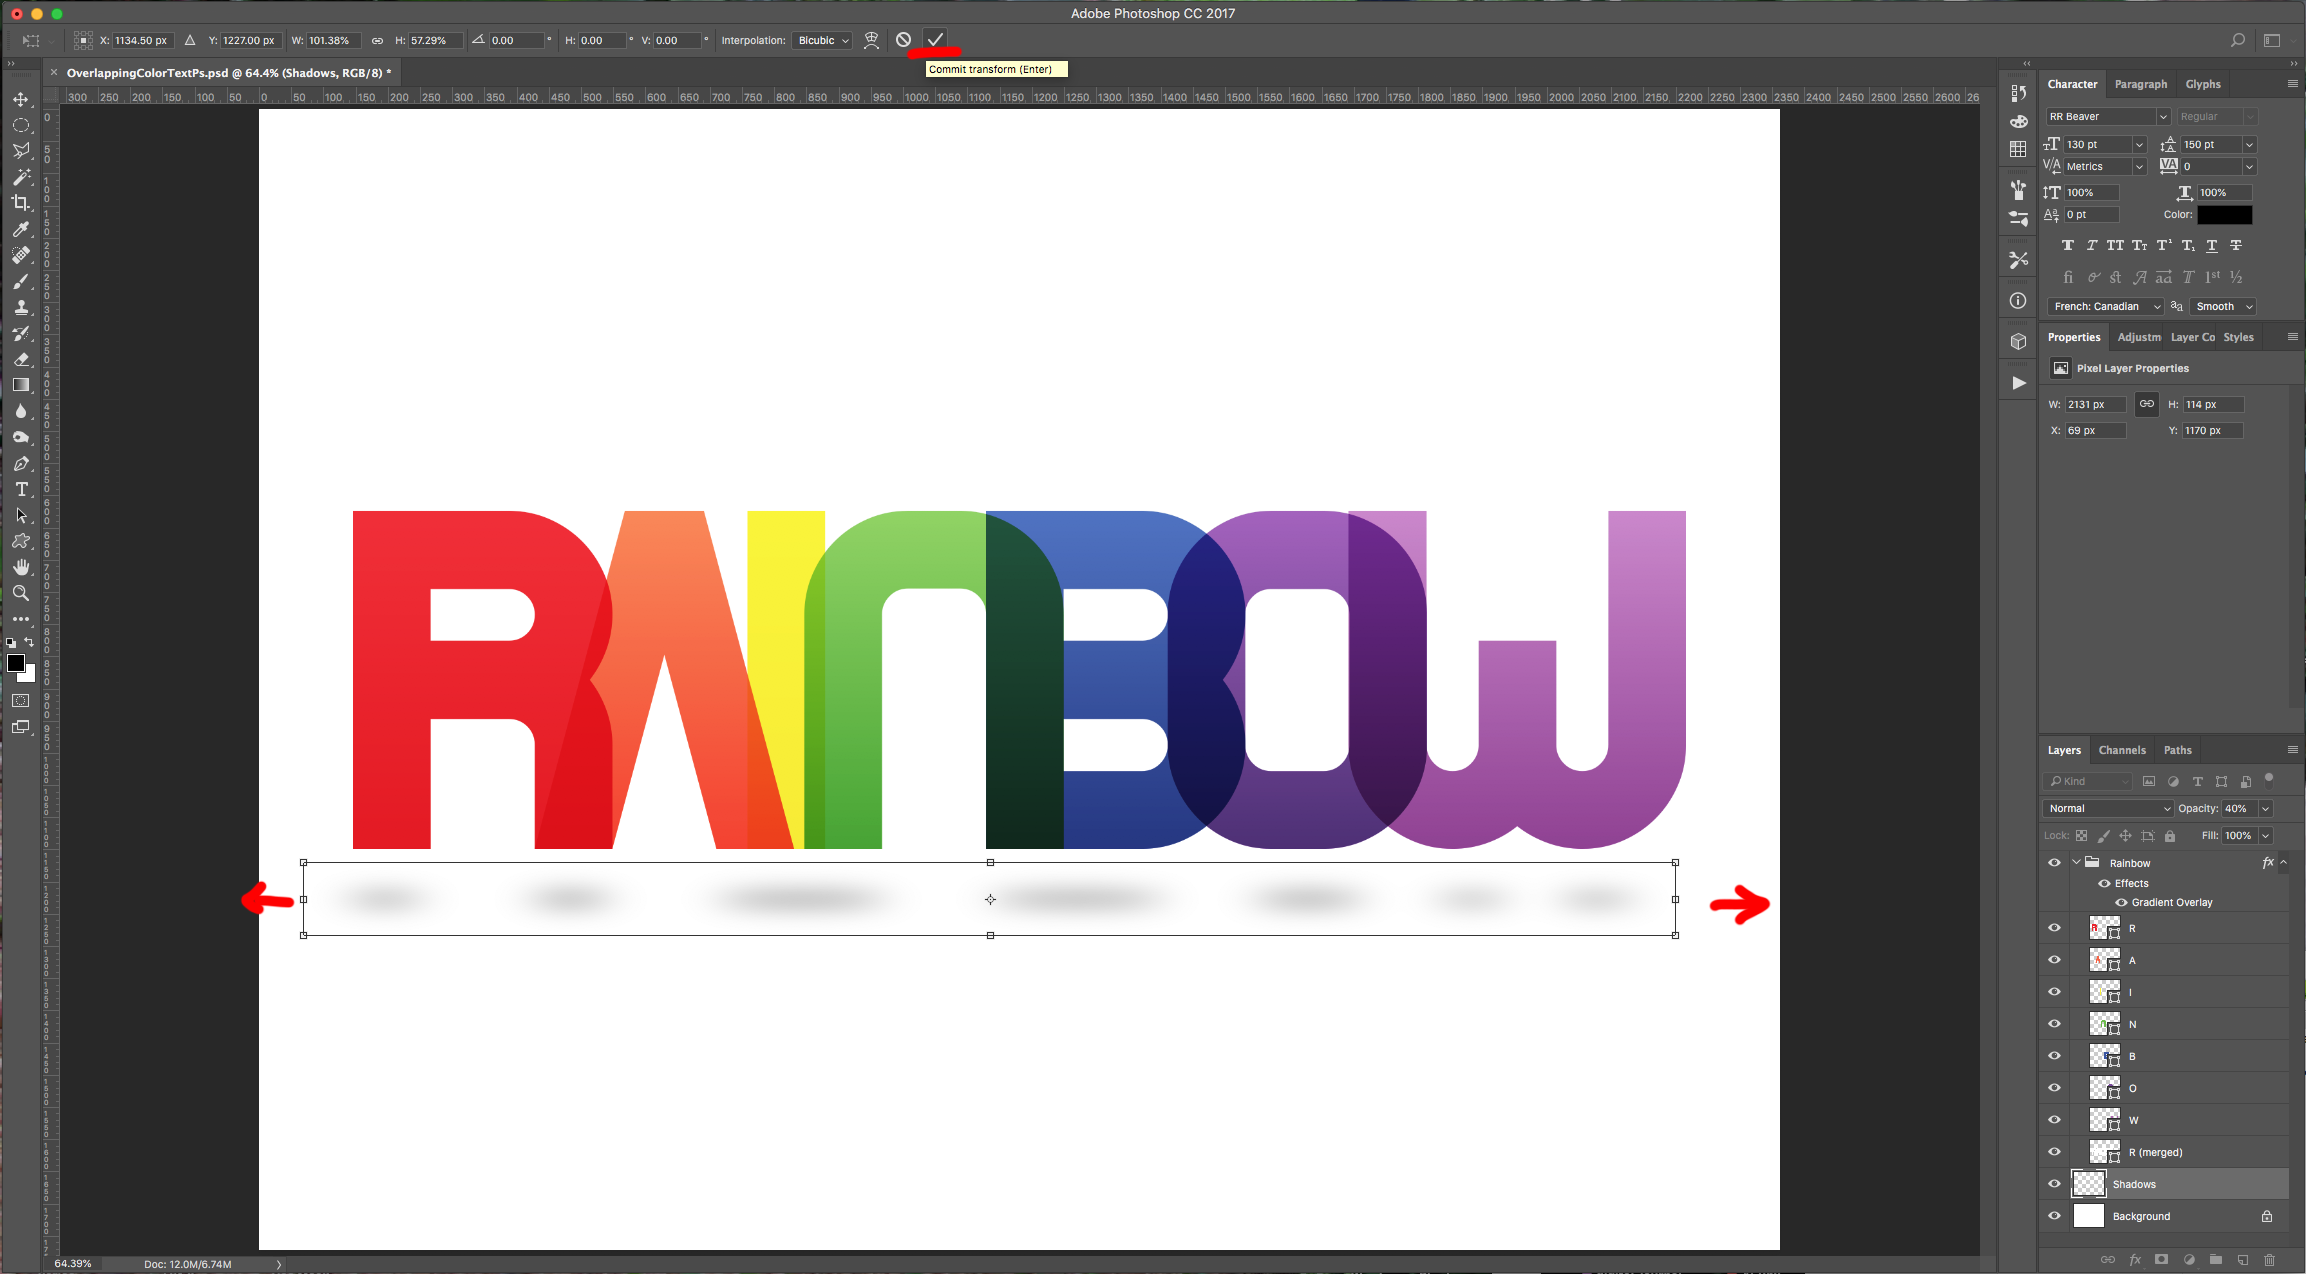
15 - Your work should be similar to this.
1 - In Photoshop, create a “New Document” and use White as your “Background” color.
2 - Select the “Type Tool” (T), choose your font (we used “Beaver”) and type your text. Use Black as “Foreground” color.
3 - Select both Layers (“Shift” key) and head to the upper Menu to “Center” your text clicking the “Horizontal and Vertical Align Centers” buttons.
4 - Right-click on top of your text layer and choose “Convert to Shape”. If you get a warning telling you that your request could not be completed because the Type Layer uses a “Faux Bold Style” click “OK”, head to the “Characters Panel” and click on the small button on the bottom-left to disable the “Faux Bold” (or any other added “Style”). Now you can “Convert to Shape”.
5 - Use the “Path Selection Tool” making sure the “Select All Layers” is selected on the Top Menu. Click on the first letter of your word to selected and go to Layer > New > Shape Layer Via Cut (Shift + Command/Control + J). This will create a “New Layer” with the letter in it. Repeat this for each letter.
6 - Rename the Layers if you want, select them all (“Shift” key) and change their “Blending Mode” to “Multiply”
7 - Double-click on the first Letter “Shape” icon (bottom-right corner of its Thumbnail) to open the “Color Picker” Panel and choose a color. We used a shade of Red (#ed2024) since we are creating a Rainbow. Repeat with the rest of the Letters but use Orange (#f9643d), Yellow (#faf20d), Green (#69bd45), Blue (#3953a4), Indigo (#79469b) and Violet (#ae62b1).
8 - Select all your Layers and “Group” them together by clicking on the small Folder icon at the bottom of the “Layers Panel”. Name the group “Rainbow”.
9 - Double-click on the “Rainbow” folder and apply the following “Layer Styles”:
Gradient Overlay: (Linear, from Black to White, 90° Angle, Blend Mode: Overlay)
10 - Select the “Move Tool” (V) and check “Auto Select Layer”. Move the letters and overlap portions of them on top of each other.
11 - Once you are happy, select them all and use “Free Transform” (Command/Control + T) to resize your word. When you are done click the “Checkmark” on the Top Menu or hit “Enter”.
12 - To be able to change the “Background” color from White to any other color without having the Letters Blending Mode look bad. Create a “New Merged Layer” by selecting the Top Layer and clicking Command/Control + Option/Alt + Shift + E. Double-click on its “Shape” icon (bottom-right corner of its Thumbnail) to open the “Color Picker” Panel and choose White (#ffffff). Drag this Layer to the bottom of your Group, just under all the single Letters and on top of the “Background” Layer.
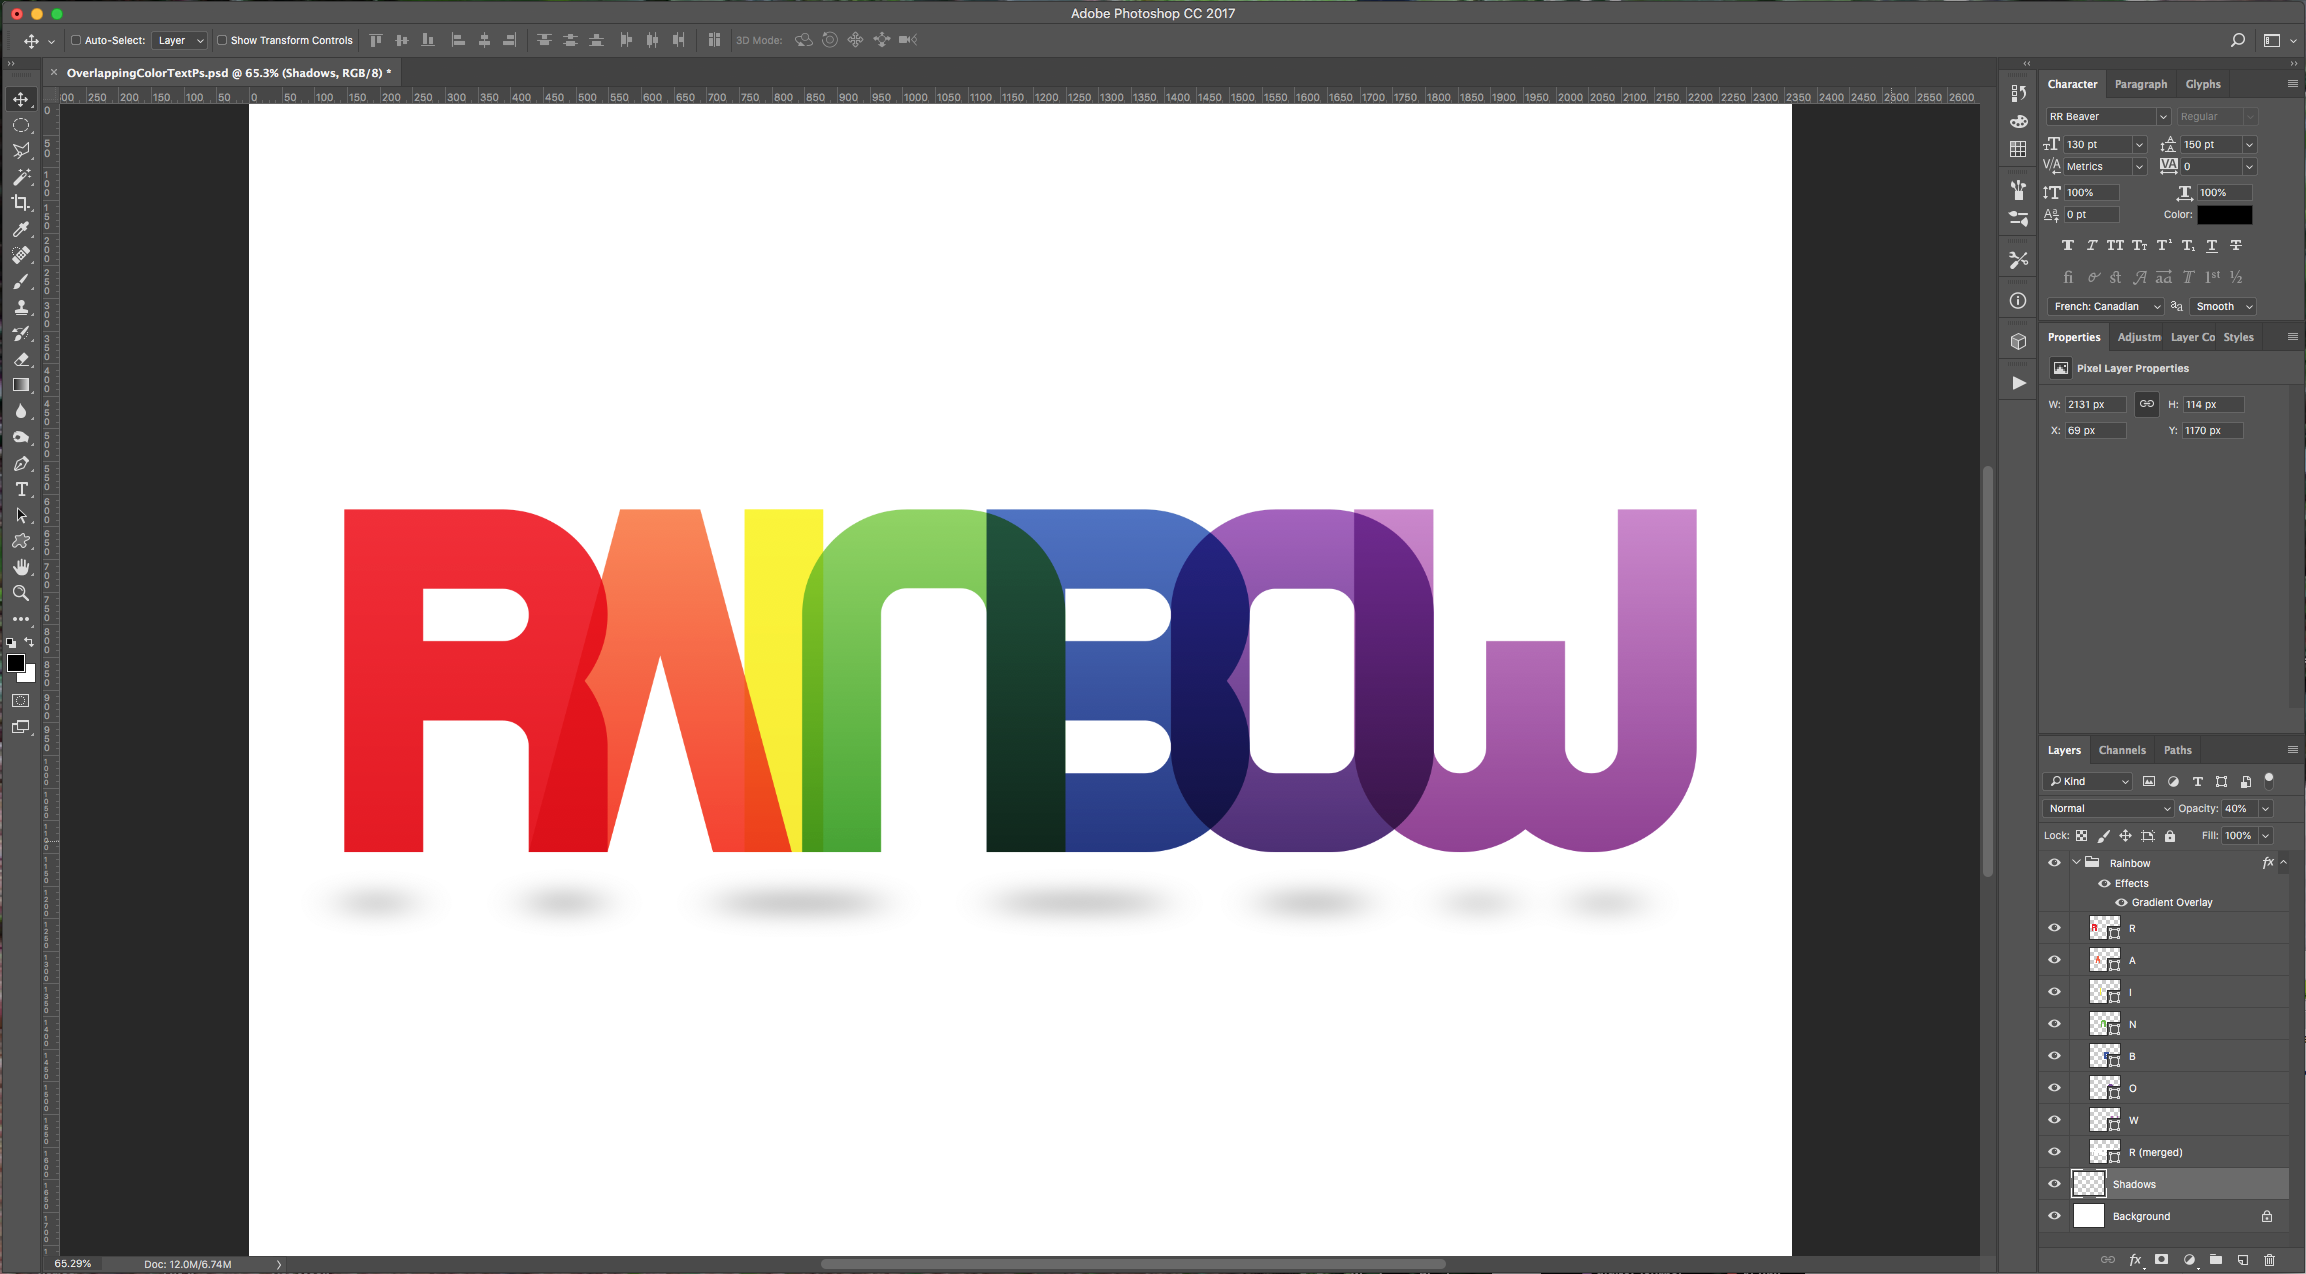
13 - Create a “New Layer” on top of the “Background” Layer and under the “Rainbow” Folder and name it “Shadows” (click on the small button at the bottom of the “Layers Panel”). Select the “Elliptical Marquee Tool” (M), make sure that “Add to Selection” is selected on the Top Menu and create a small Oval shape under one of the sides of the first letter (in our case the left leg of the “R”). Place a “Guide” to use as reference (click on the Top Ruler and drag down, then release where you want it placed). Create other Ovals under the other Letters to mimic shadows and fill them with Black or “Foreground” Color (Alt/Option + Delete). Deselect (Command/Control + D).
14 - Go to Filter > Blur > Gaussian Blur… and use a 30.0 Pixel “Radius”. Change the “Opacity” of the Layer to 40% and resize if needed using “Free Transform” (Command/Control + T).
15 - Your work should be similar to this.
by @lornacane
Related Tutorials
Photoshop Tutorials
Rainbow Cake Text Effect in Photoshop 3D Text
Photoshop Tutorials
Rainbow Cake Text Effect in Photoshop
Photoshop Tutorials
Transparent text effect in Photoshop
Photoshop Tutorials
How to Use Text Effects in Photoshop
With Photoshop Text Effects, you can create text with impact in just a few steps.
Photoshop Tutorials
Easy See through Cut Out Text in Photoshop
Create a see-through cut out text design in Photoshop with these easy to follow steps.
Photoshop Tutorials
How to Fill a Shape with Text in Photoshop
Learn how to fill a shape with text in Photoshop in seven quick steps.