By Design Bundles
Procreate Tutorials18 min
How to Draw Ribbon Lettering in Procreate
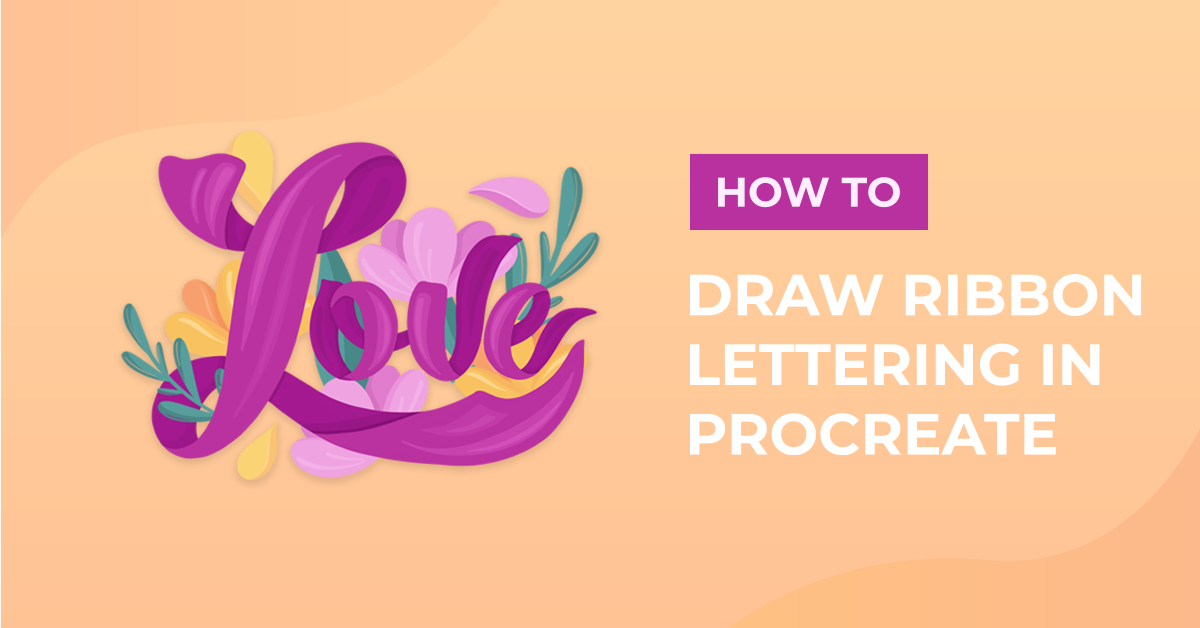
In this tutorial, we are exploring a few ways of creating Ribbon Lettering in Procreate. You can sketch and draw the ribbon from scratch, you can first write your word using a thick, broad-edged brush and then add the shadows and highlights or you can create a brush that already adds them. Each technique has its pros and cons and can be modified, or maybe combined, to fit your needs.
In this tutorial, we are using some Procreate lettering brushes as well as some brushes that come included with Procreate.
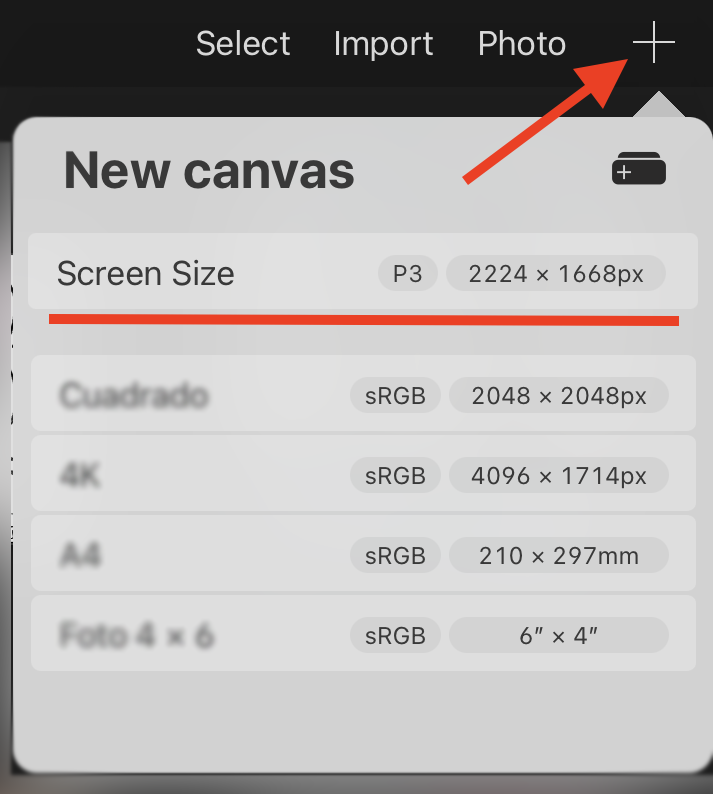
First start by creating a new Screen Size Canvas. If your design is going to be more complex you may want to give your Canvas a higher Size and/or Resolution (like 4000 x 5000 px @300 dpi) this will let you have a bigger amount of layers to work with.
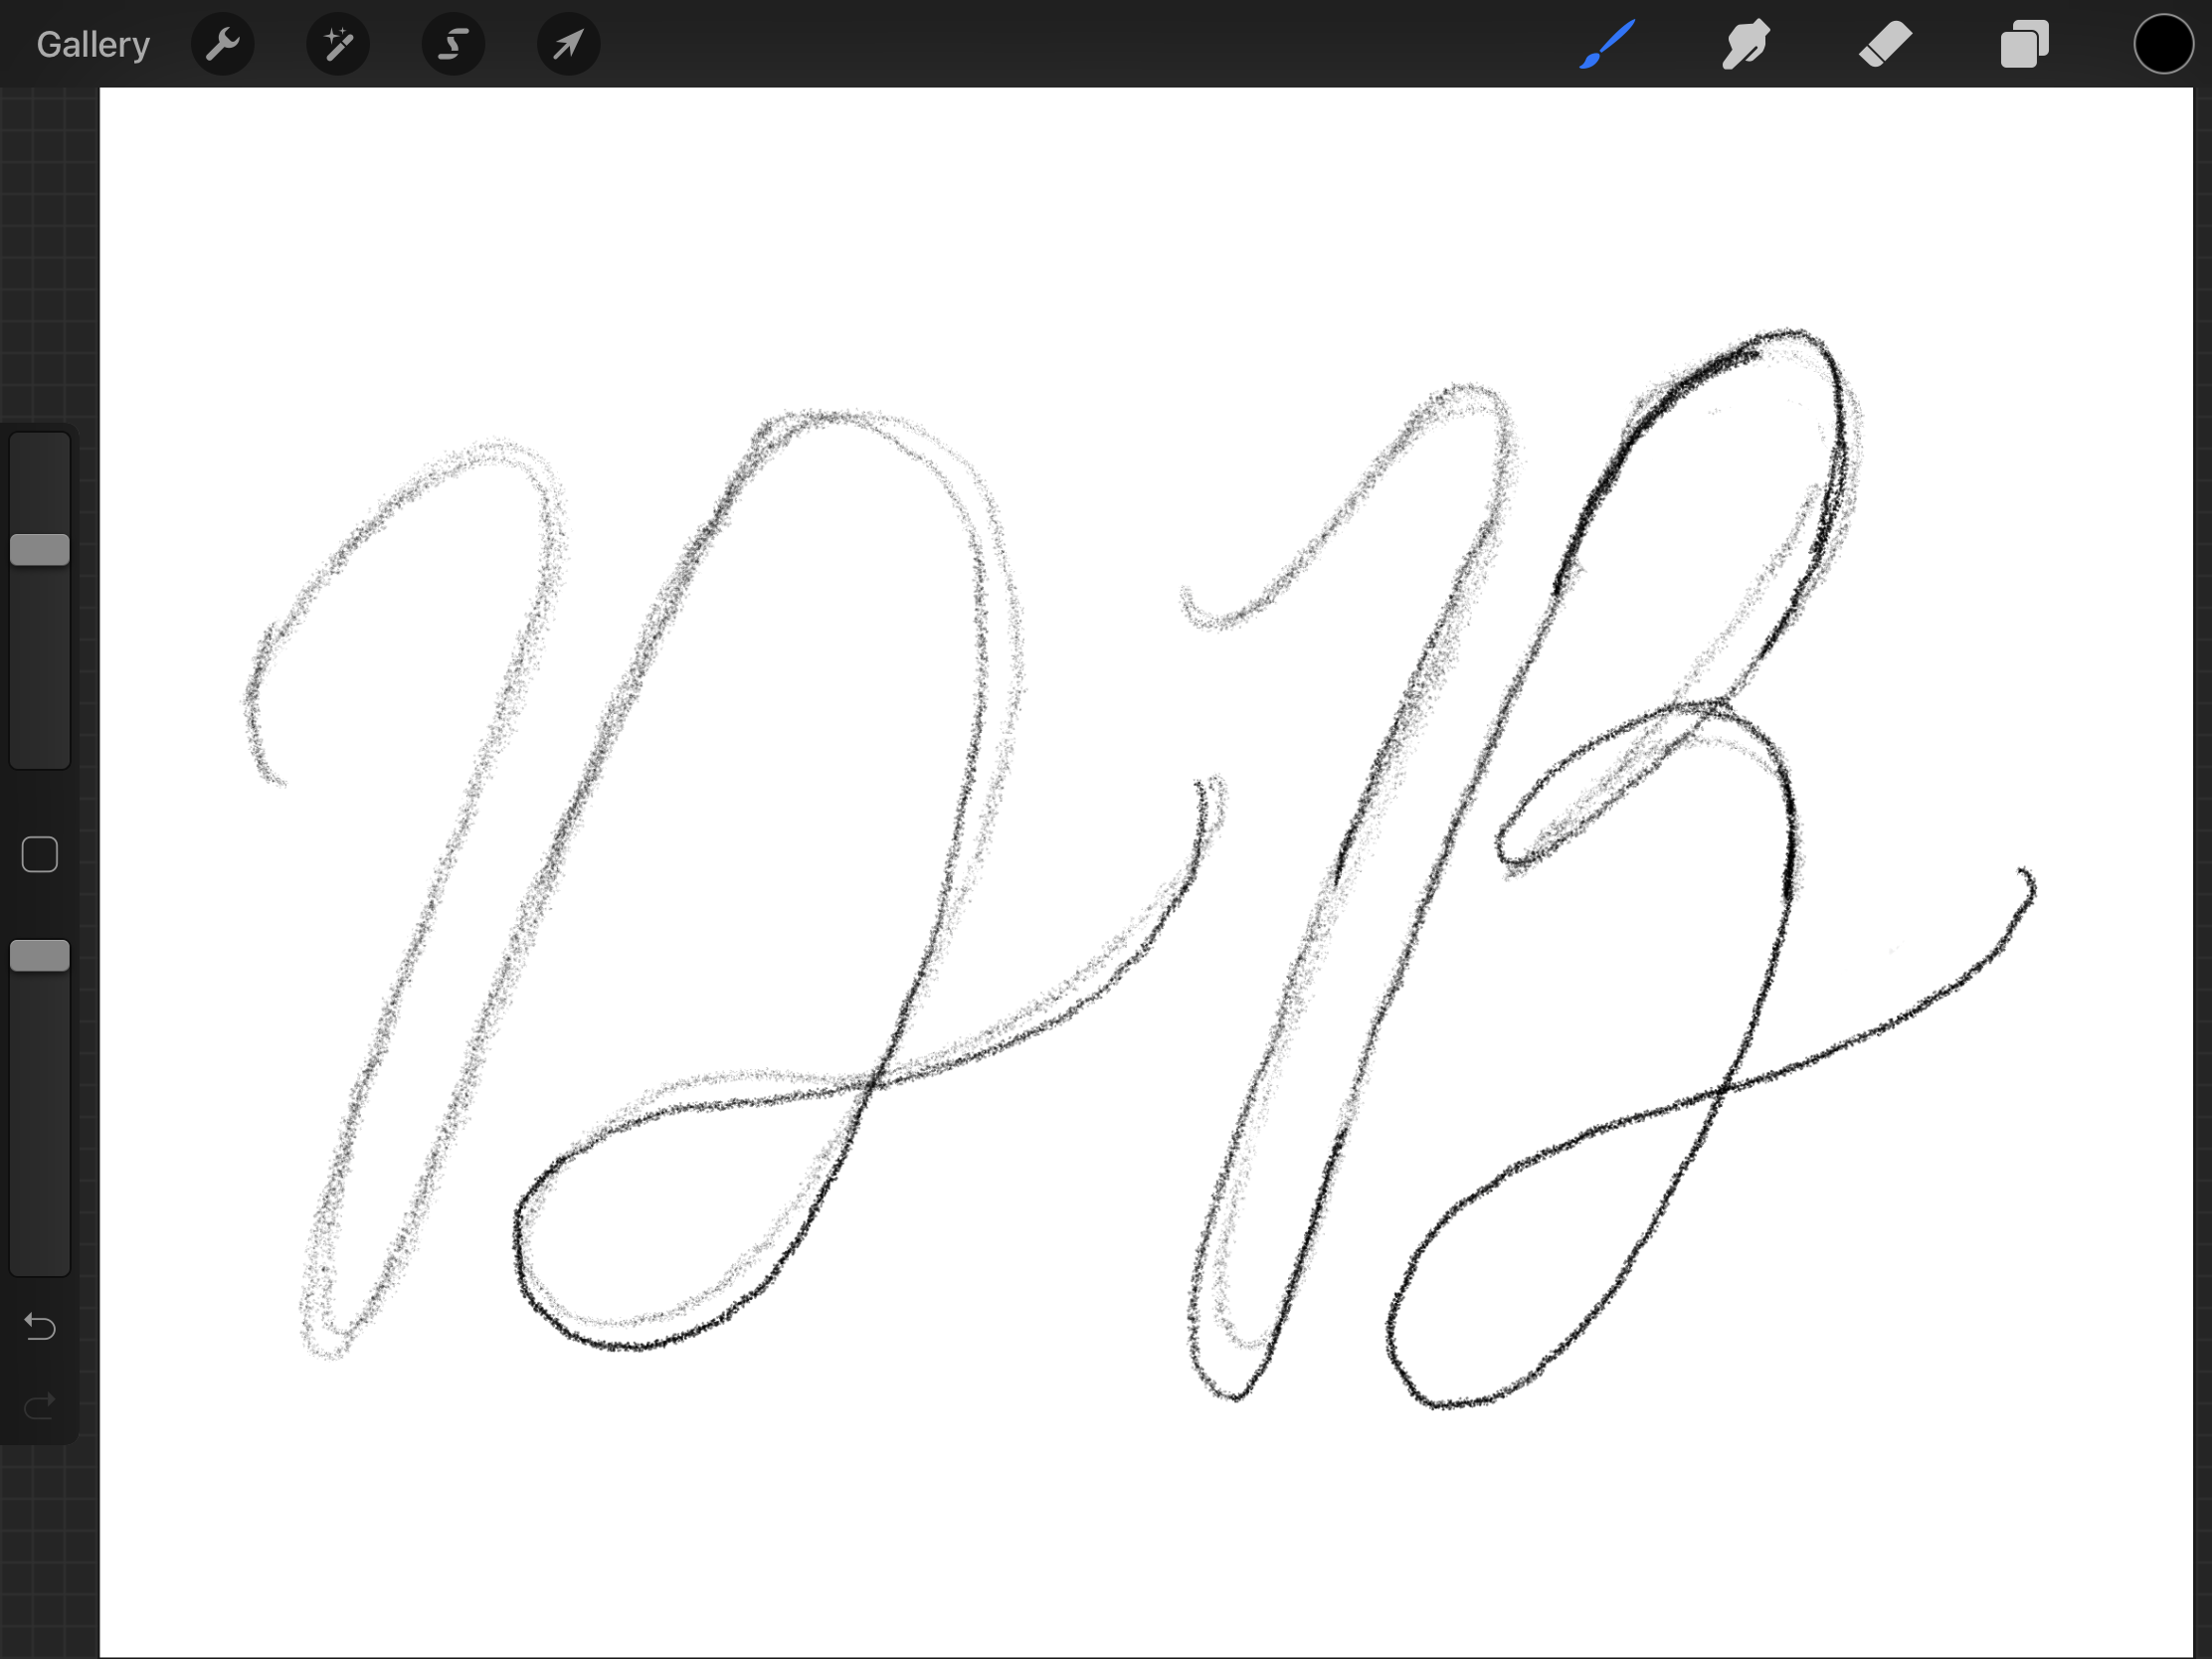
In a base layer, start by roughly sketching your design. We used a pencil brush for this.
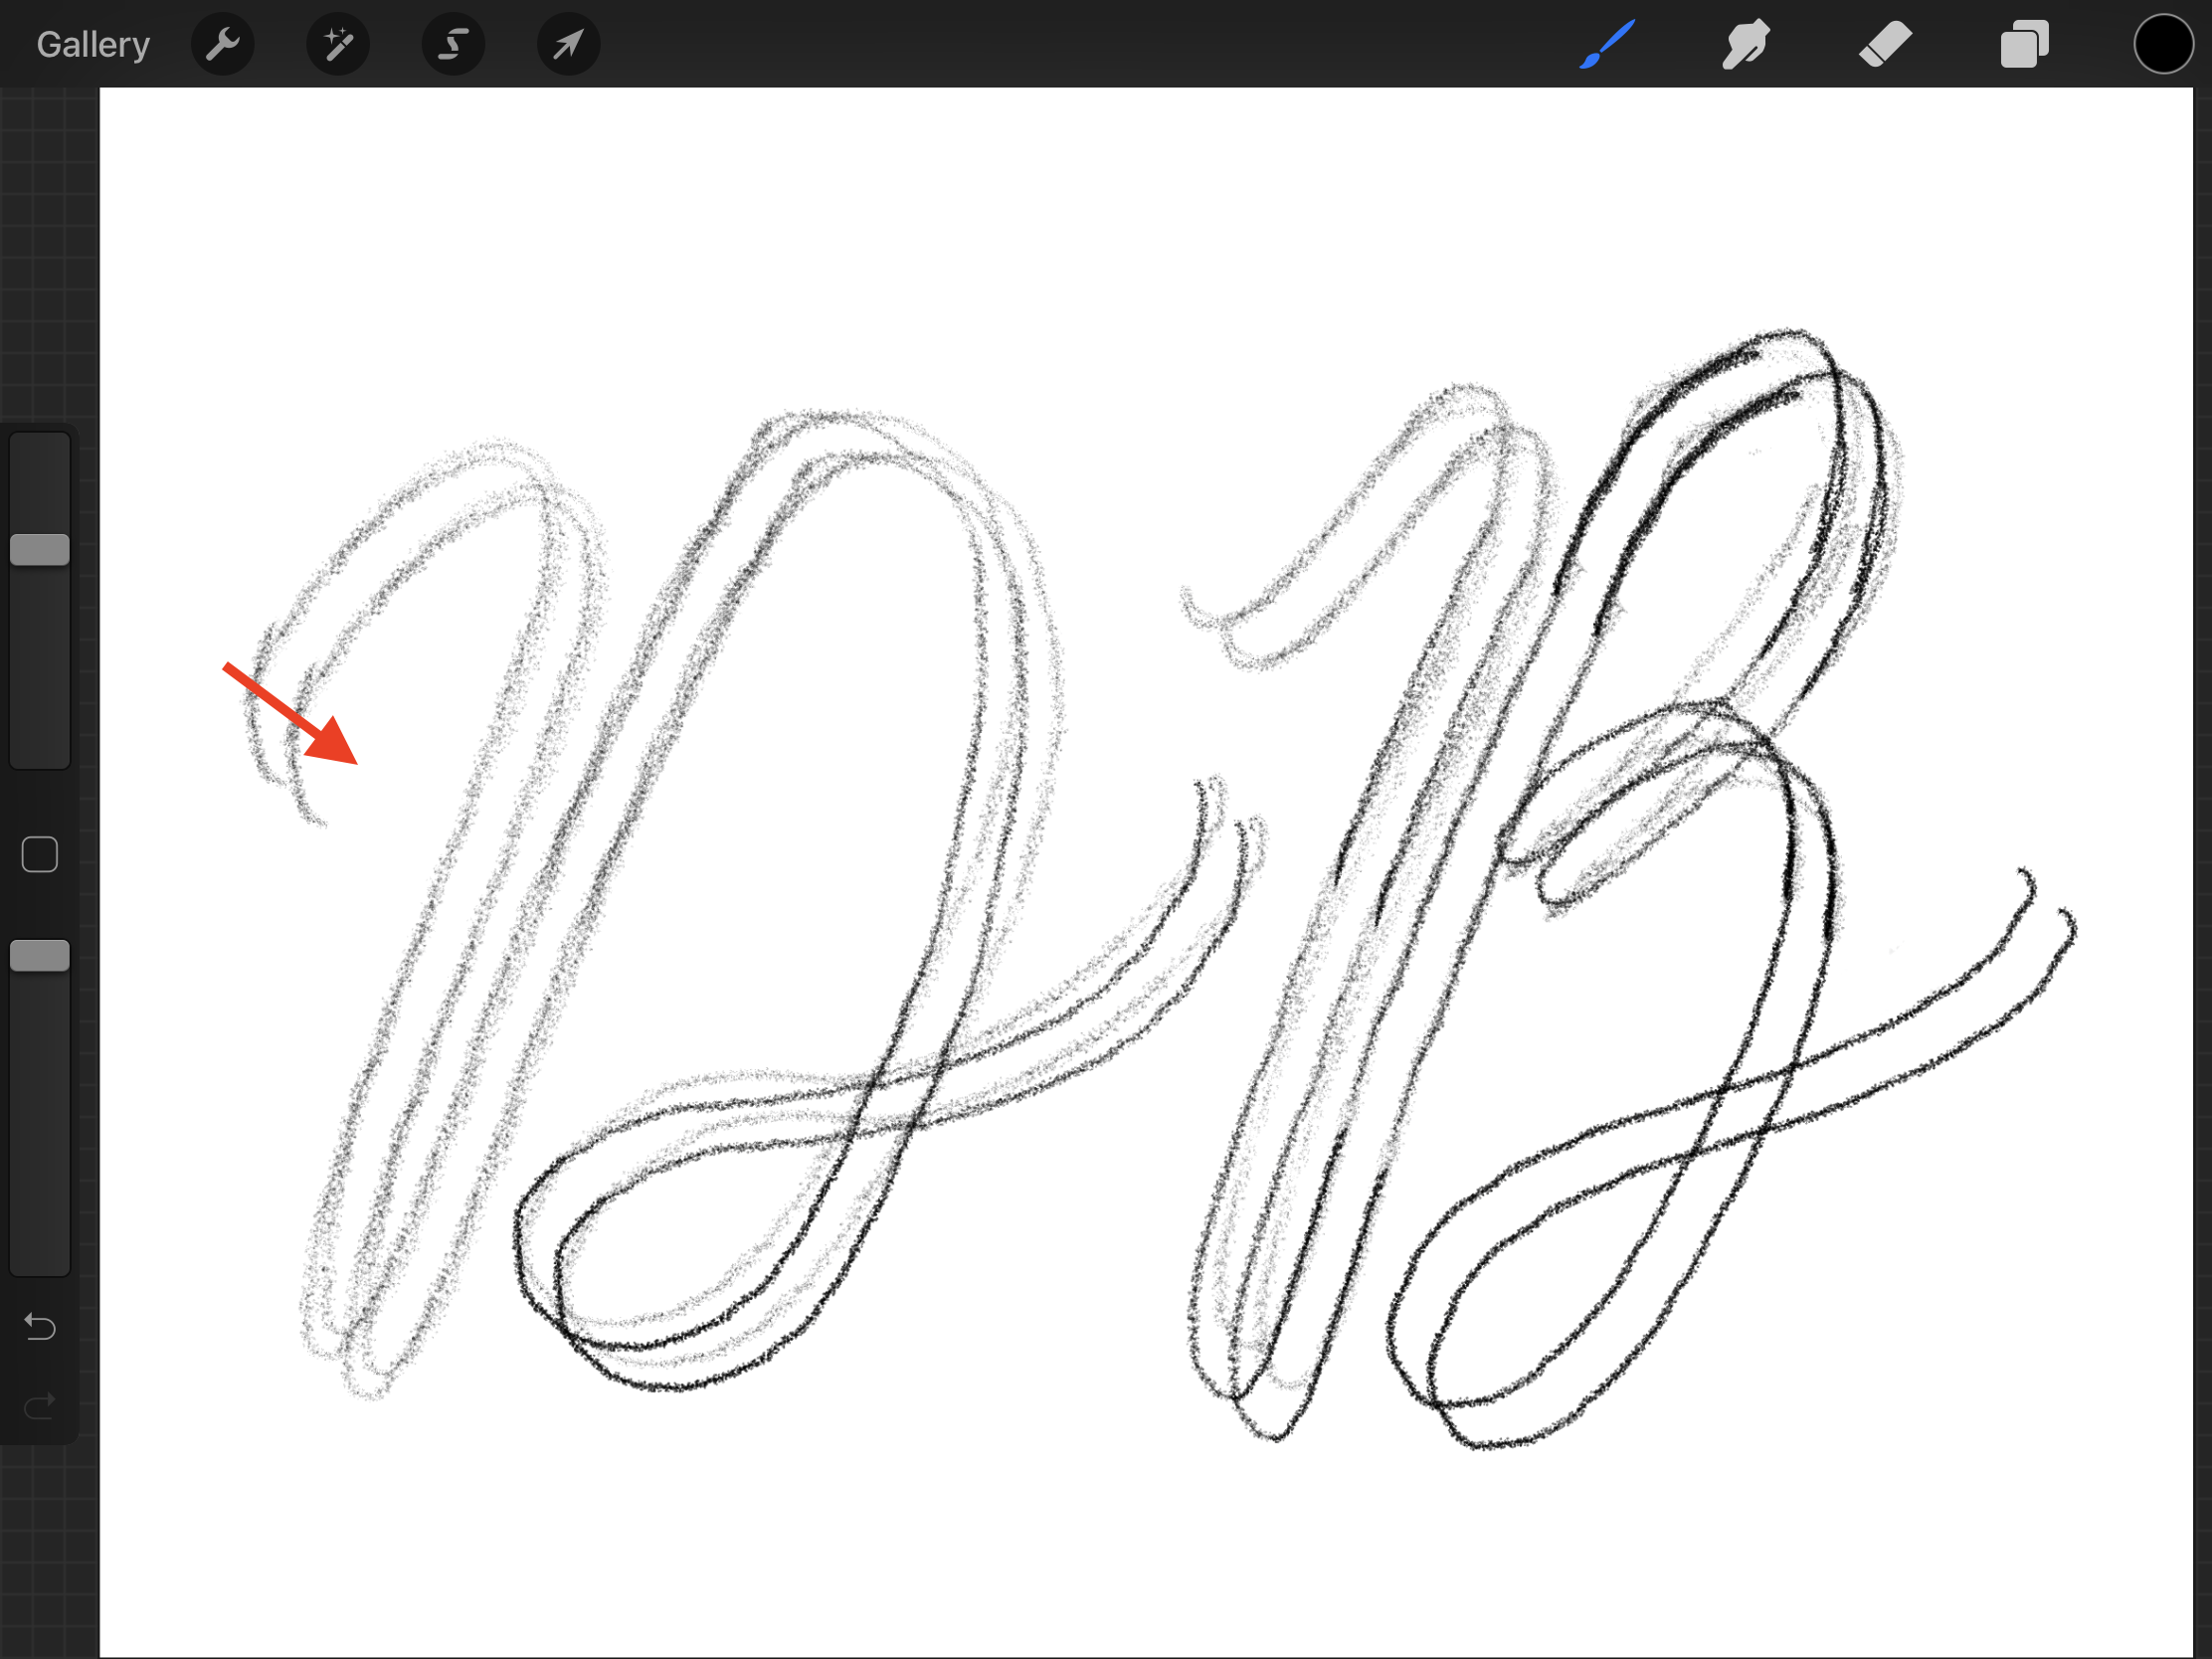
Duplicate the layer, and move it to the side to get the ribbon look. This will work as a base for your design.
Add another layer on top and create the composite look of the ribbon lettering. Remember that the downstrokes should be in the front and the upstrokes should be in the back.
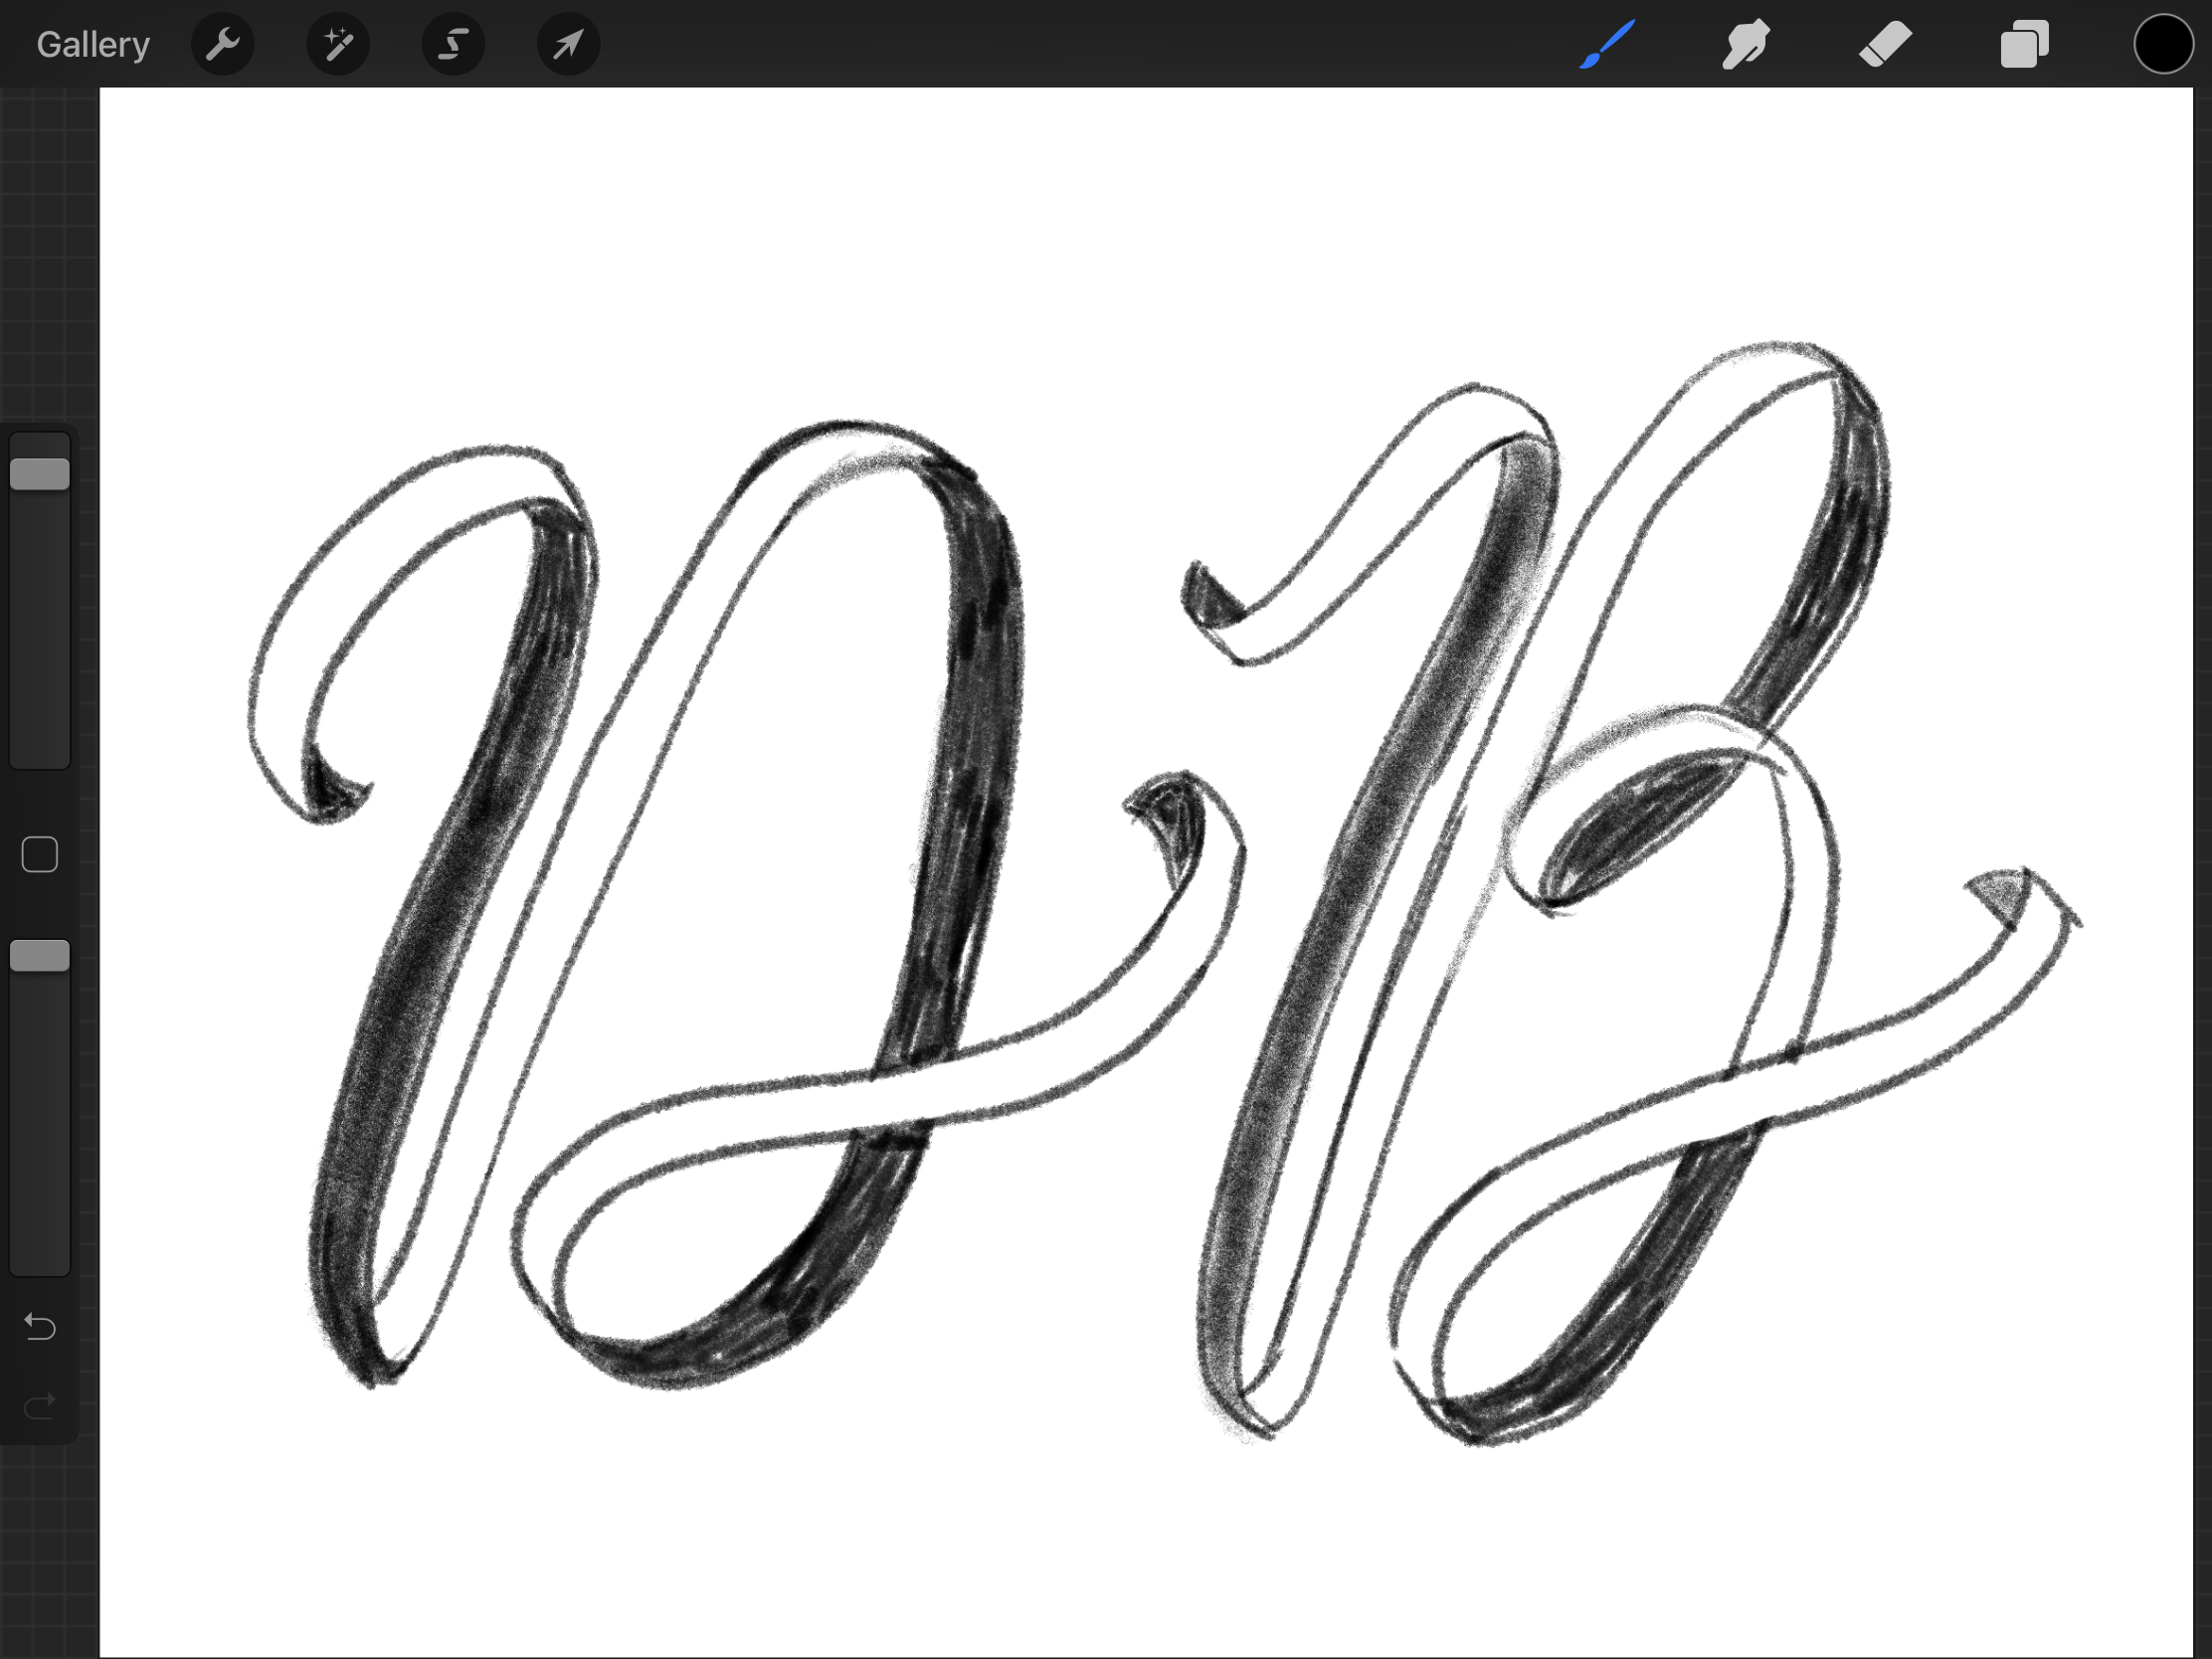
Don’t forget to add the folds. It is a good idea to color the back parts of the ribbon in black and leave the front ones in white to better visualize your letters.
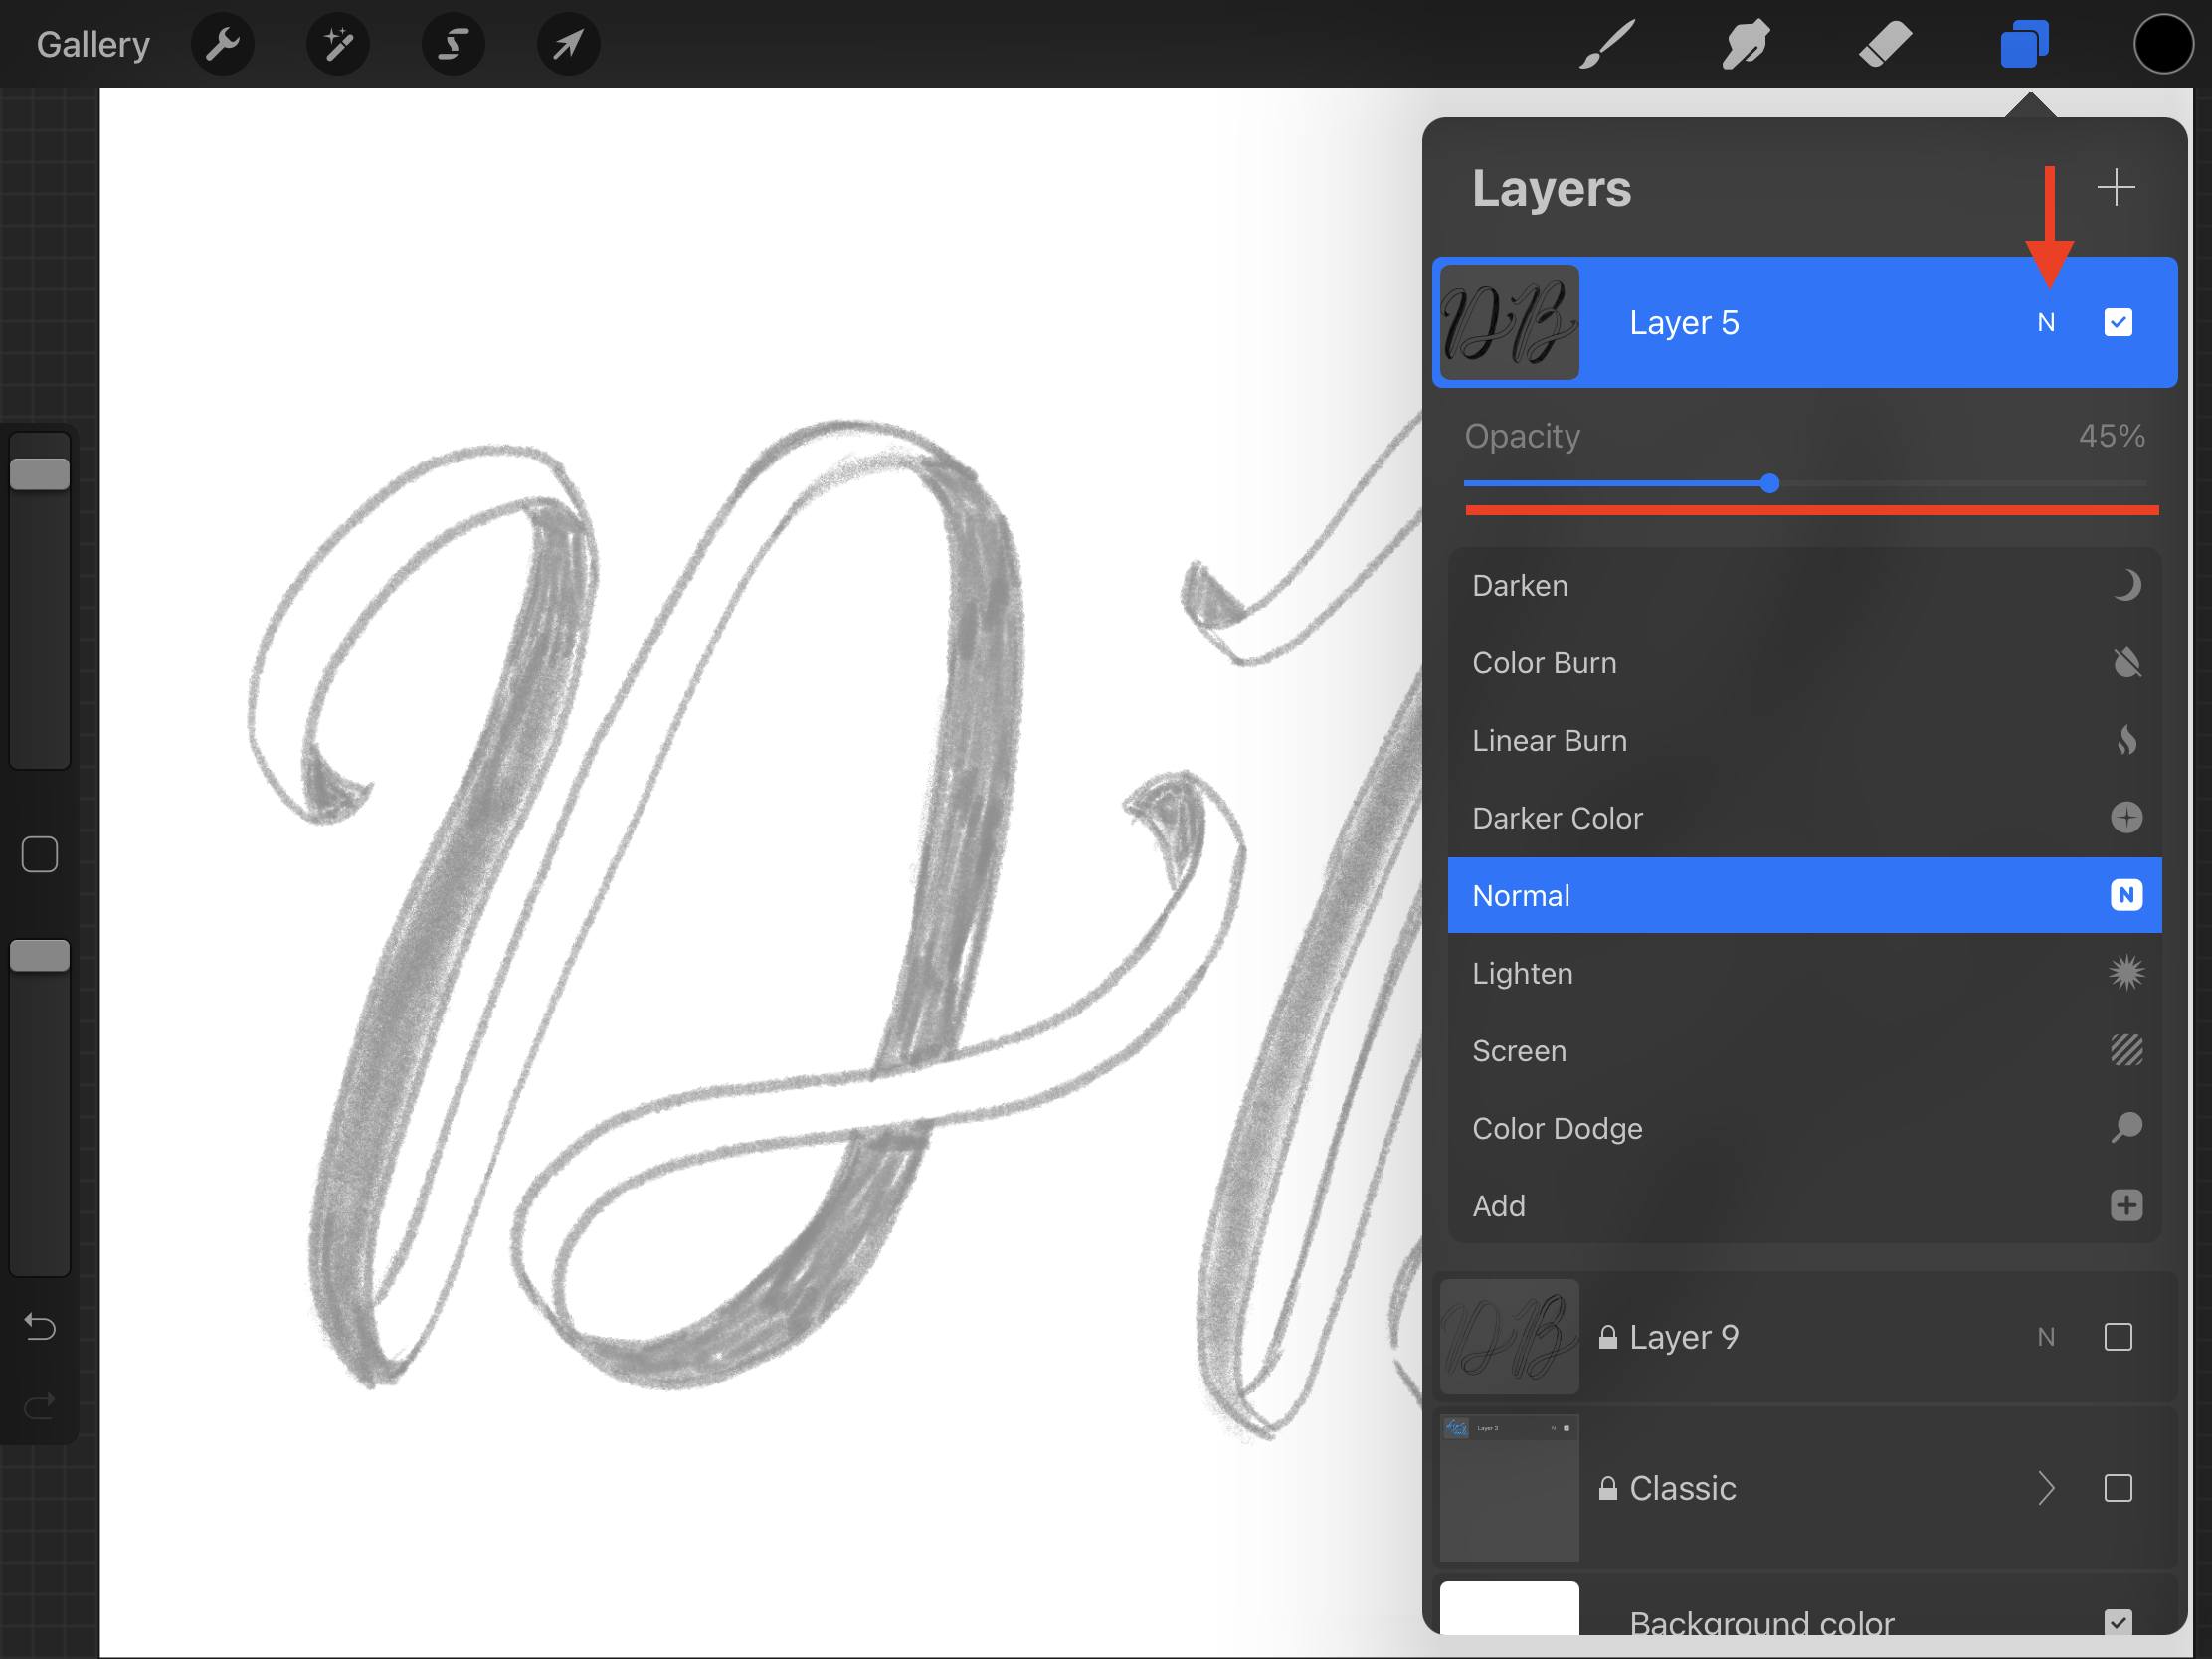
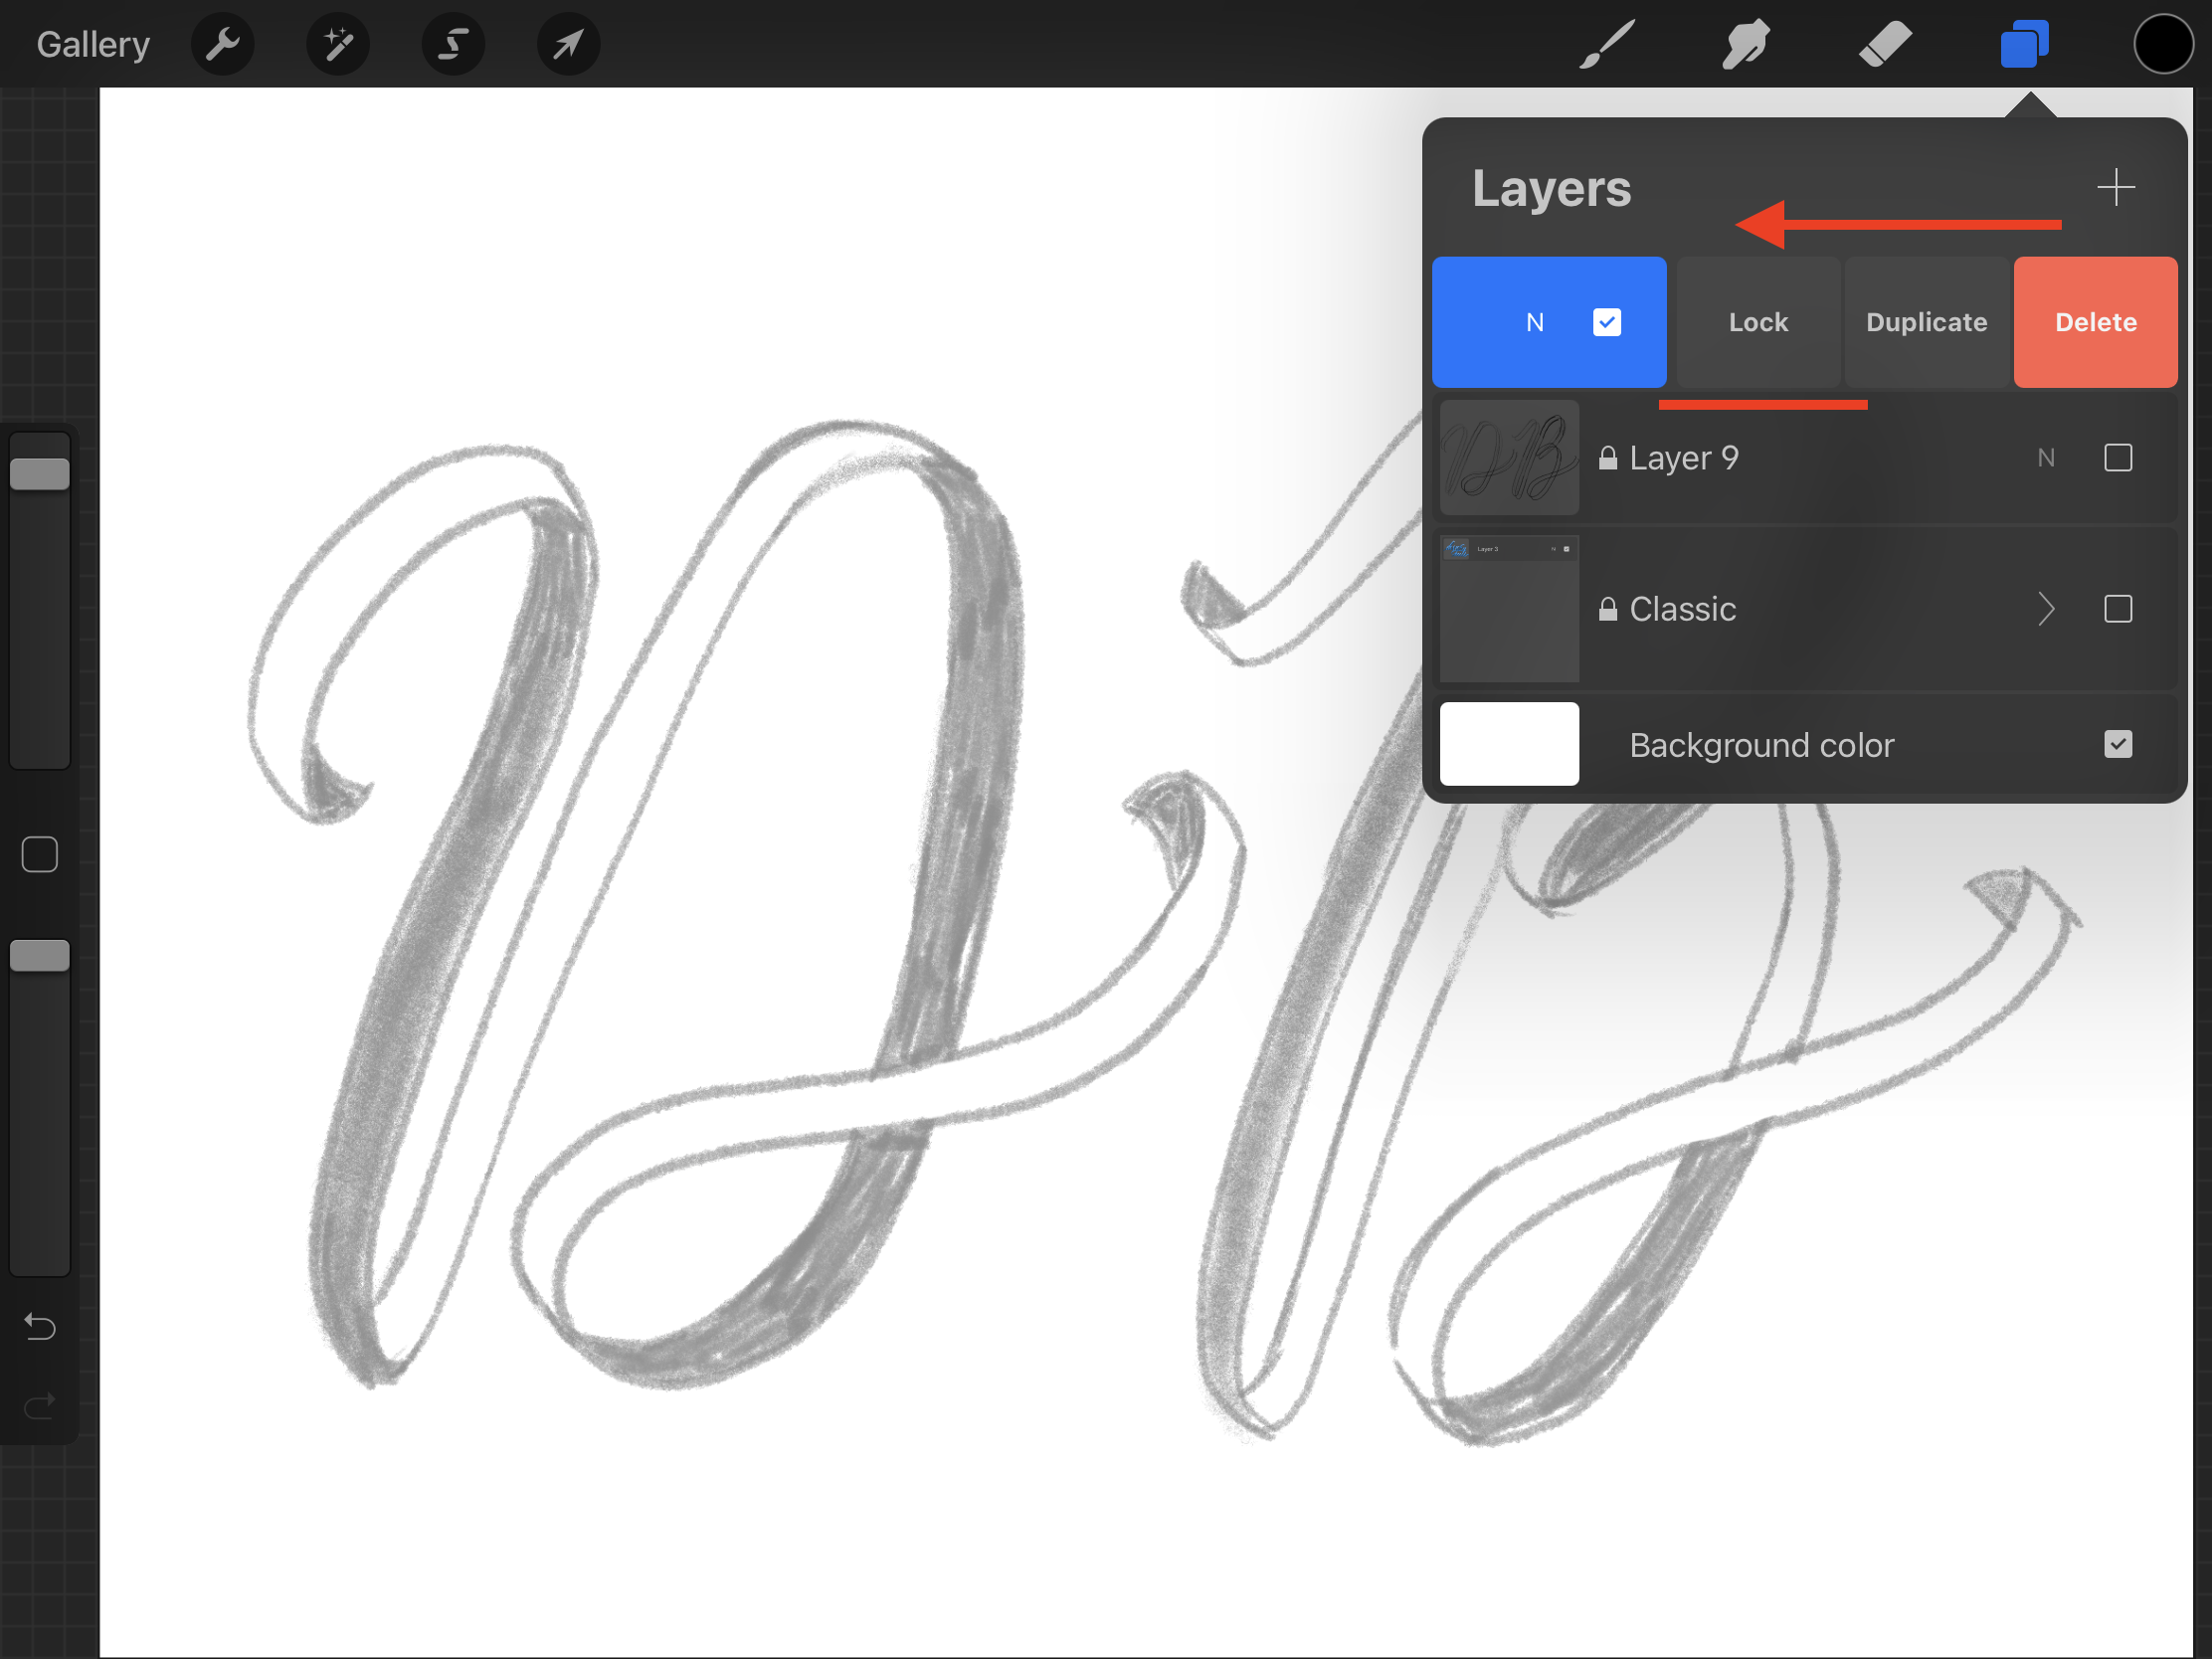
When you are happy with your sketch, lower the opacity, and lock the layer so you can use it as the base for your artwork.
Step 4 - Draw your words
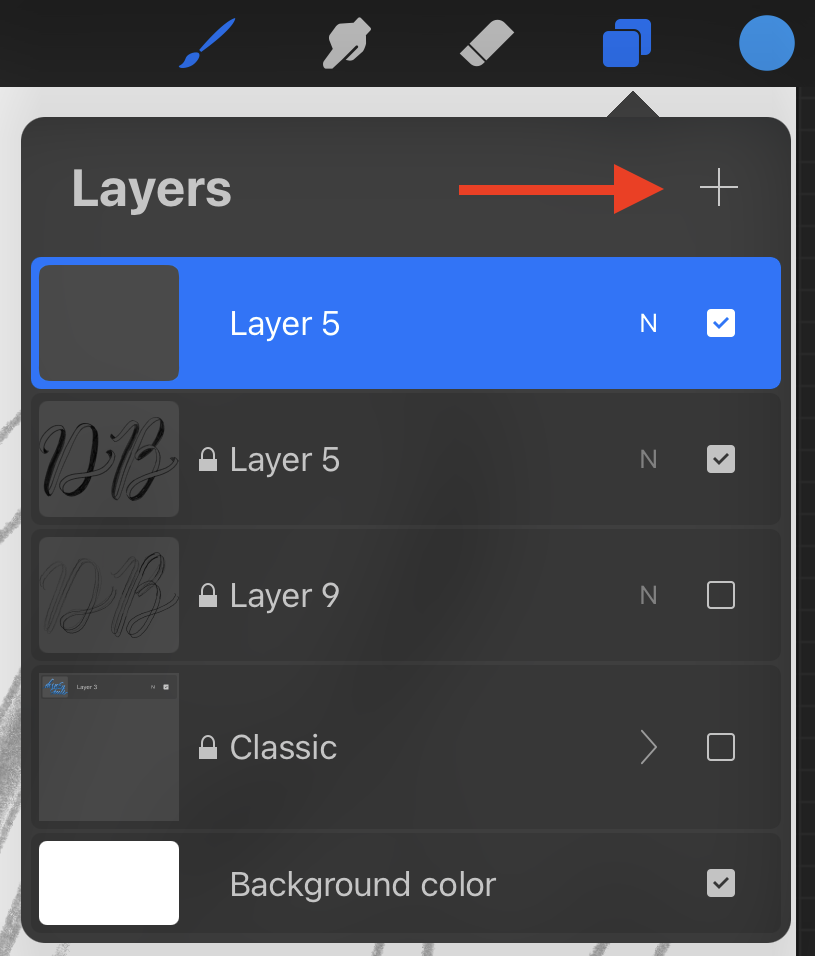
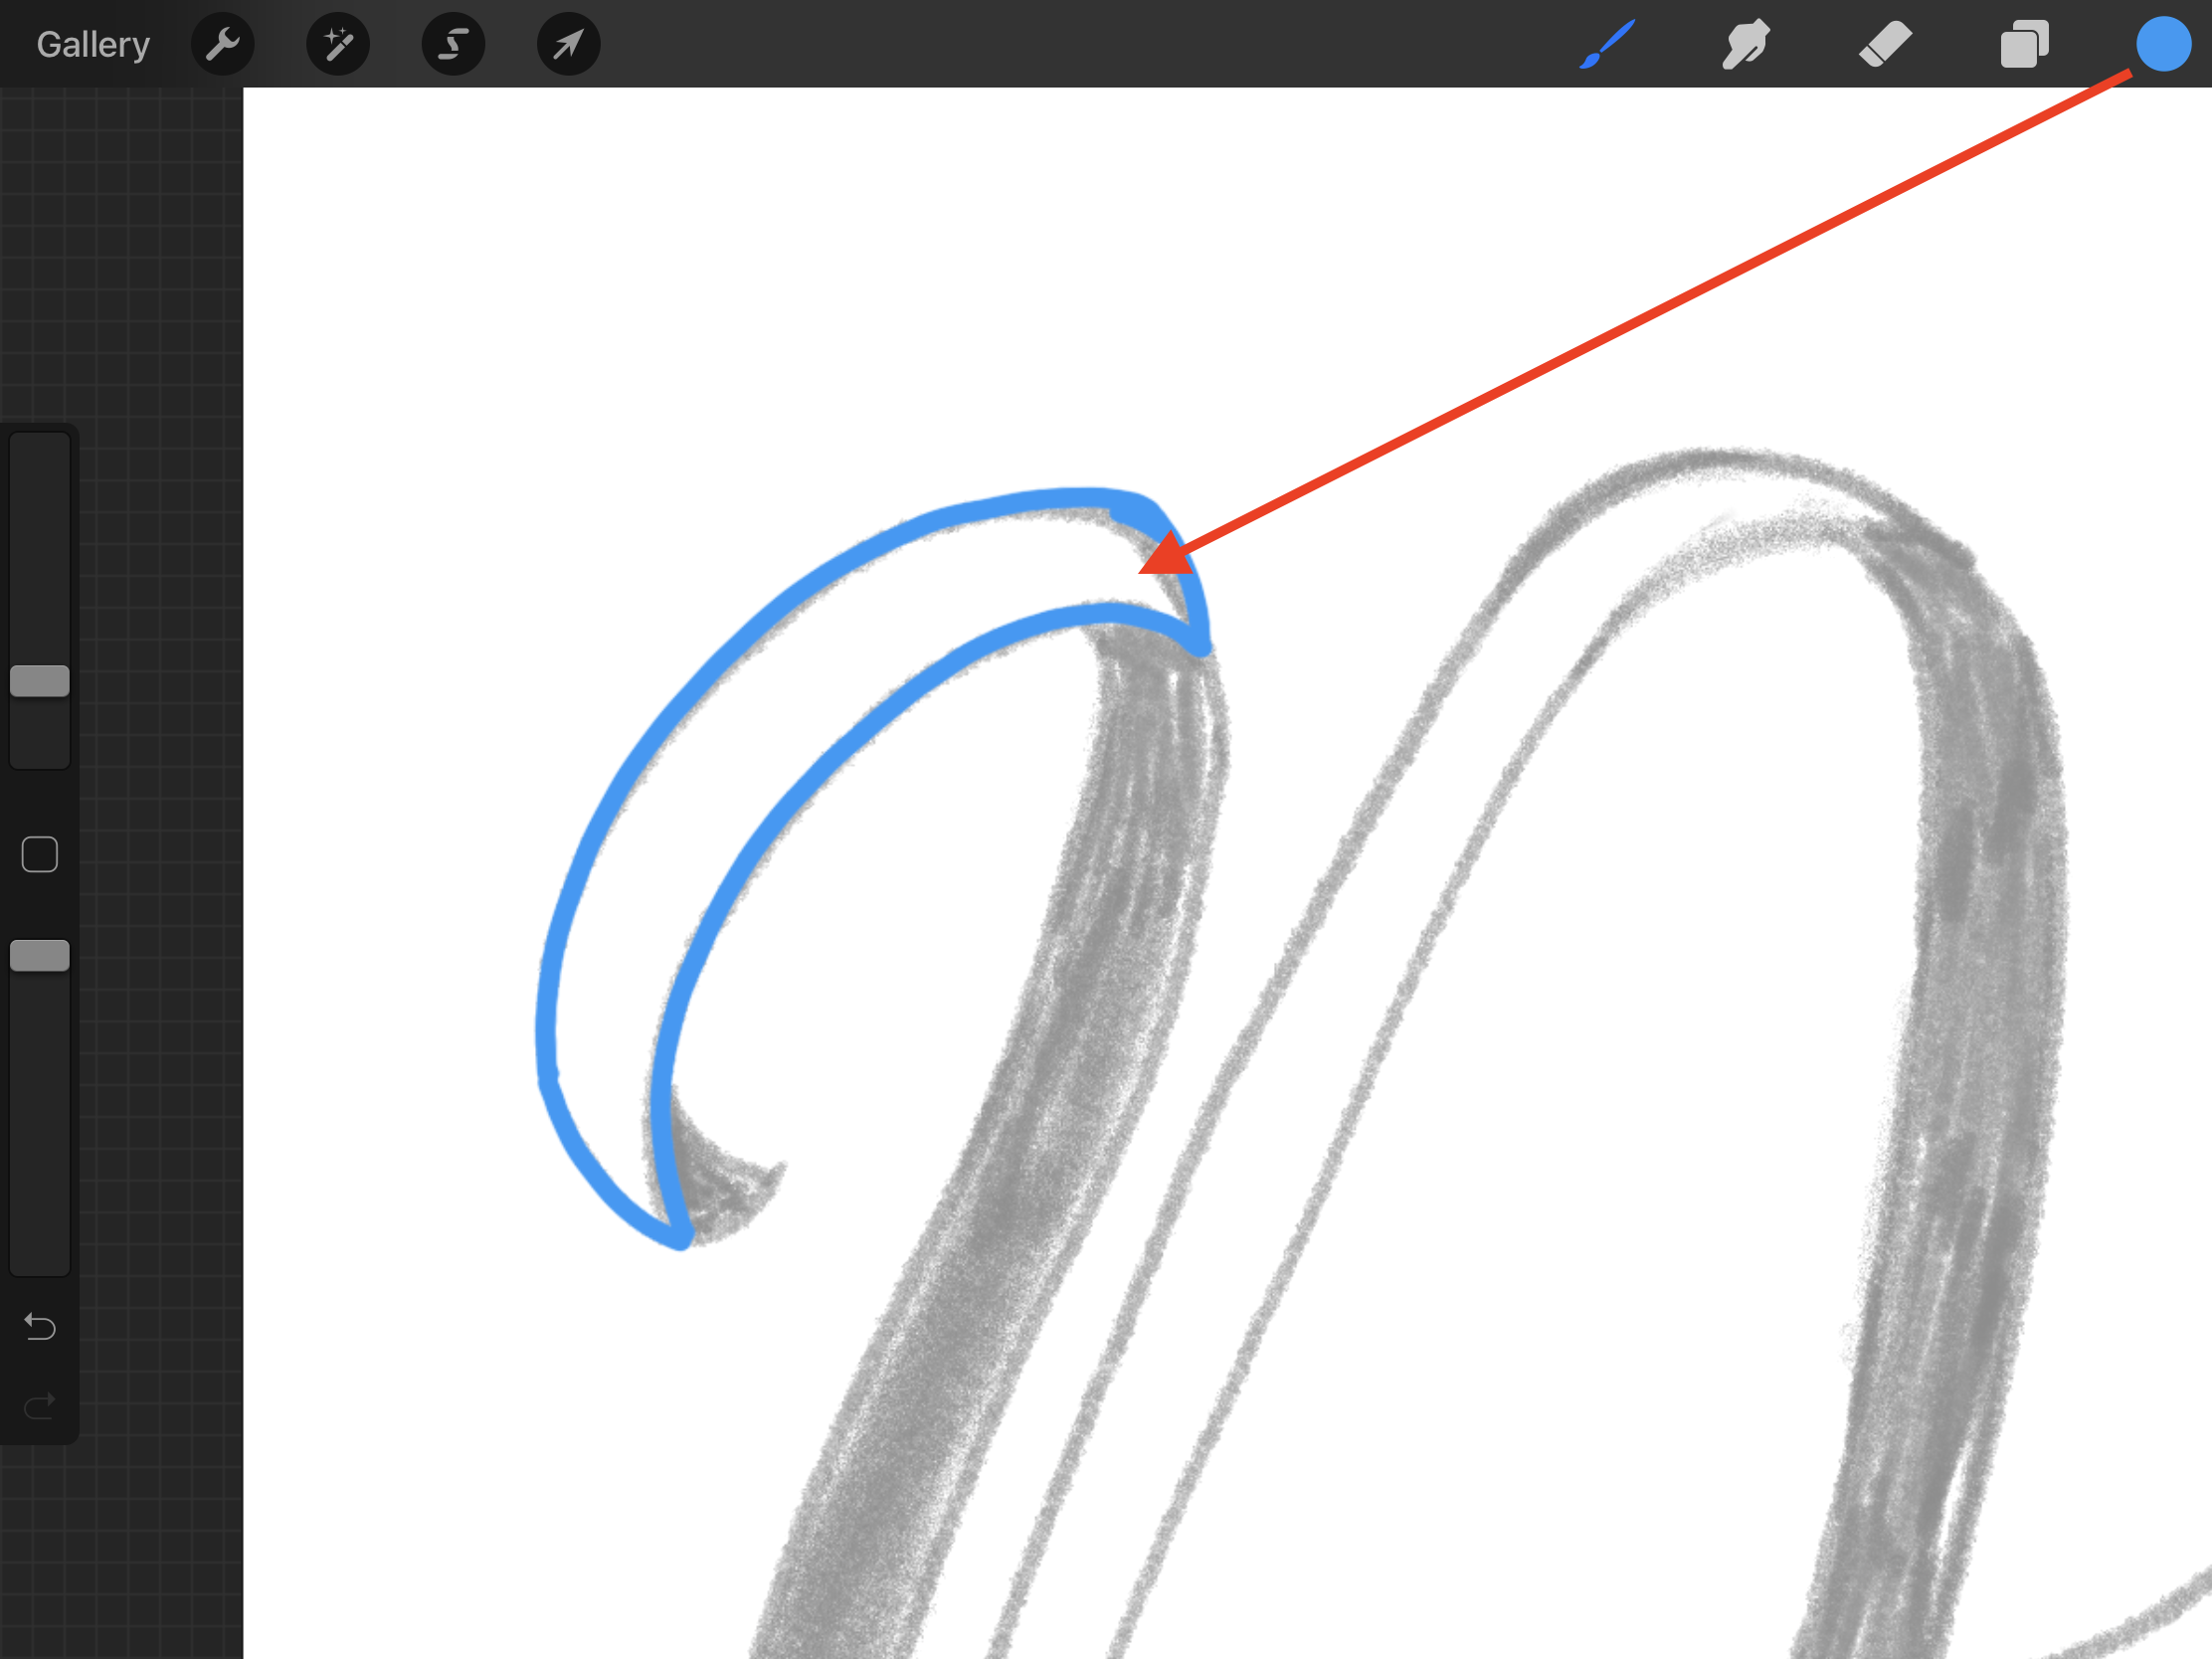
Create a new layer, select a proper brush (we used a monoline brush), choose the base color for your ribbon, and start outlining the ribbon lettering.
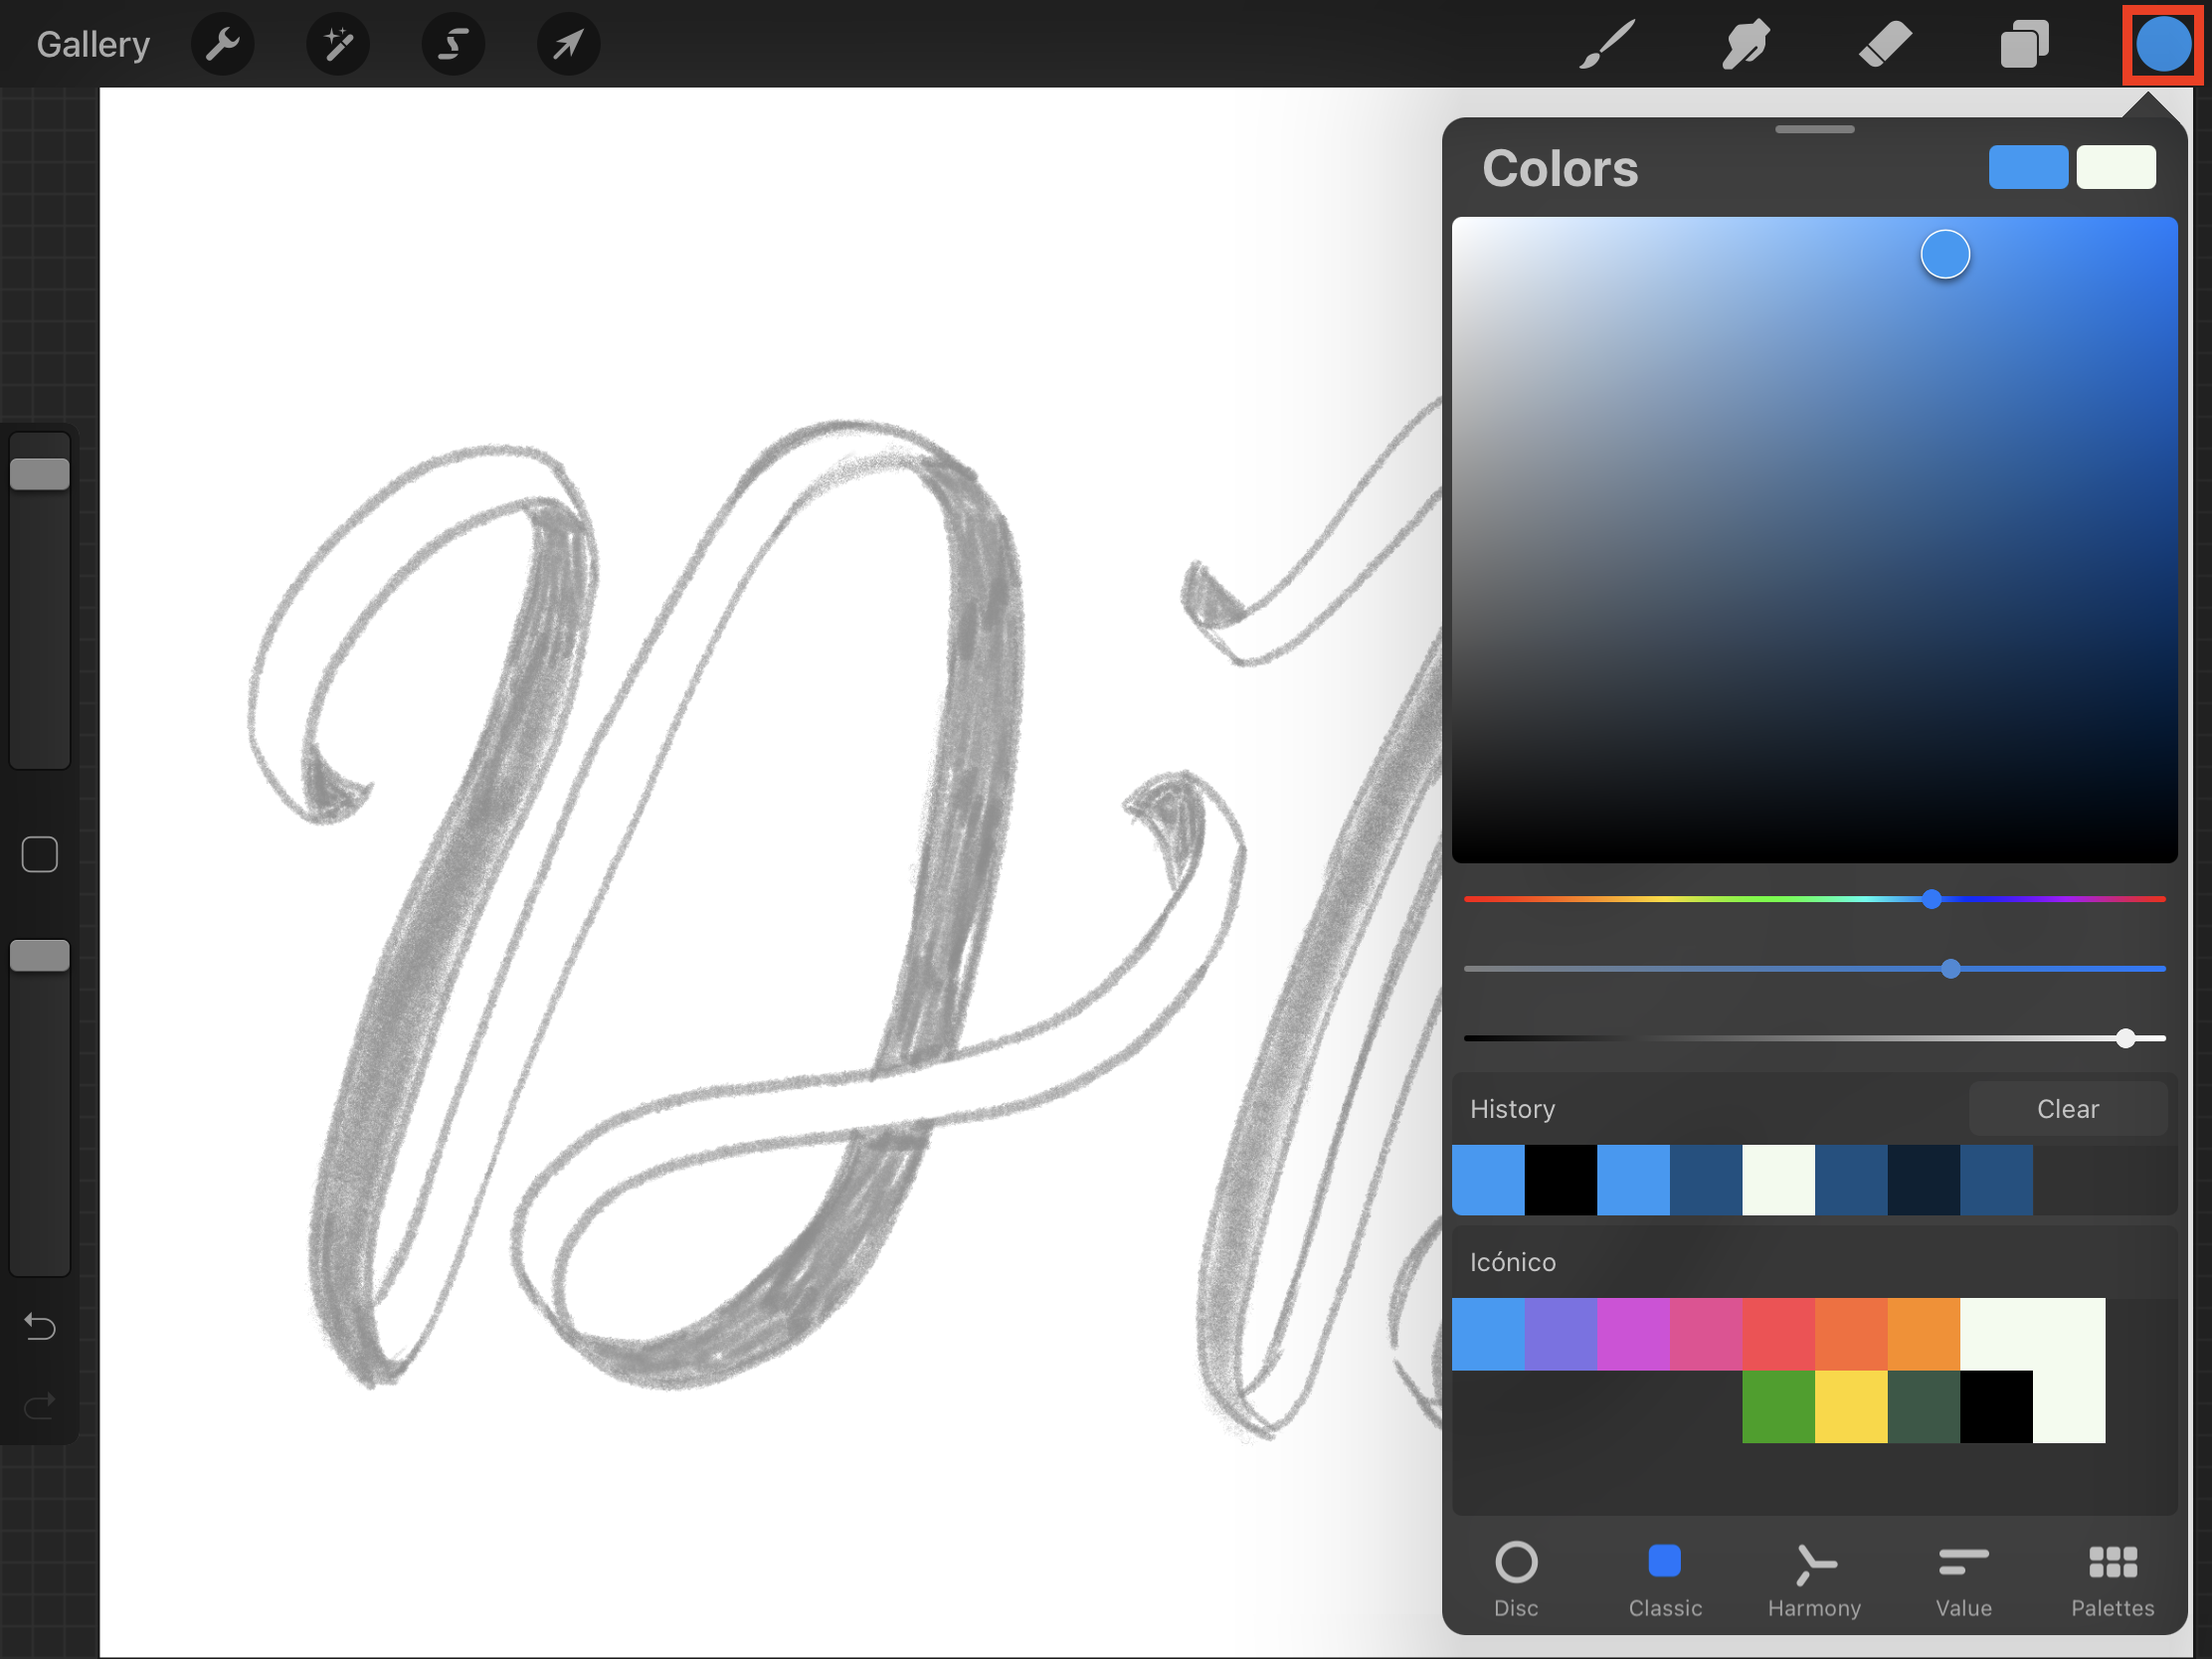
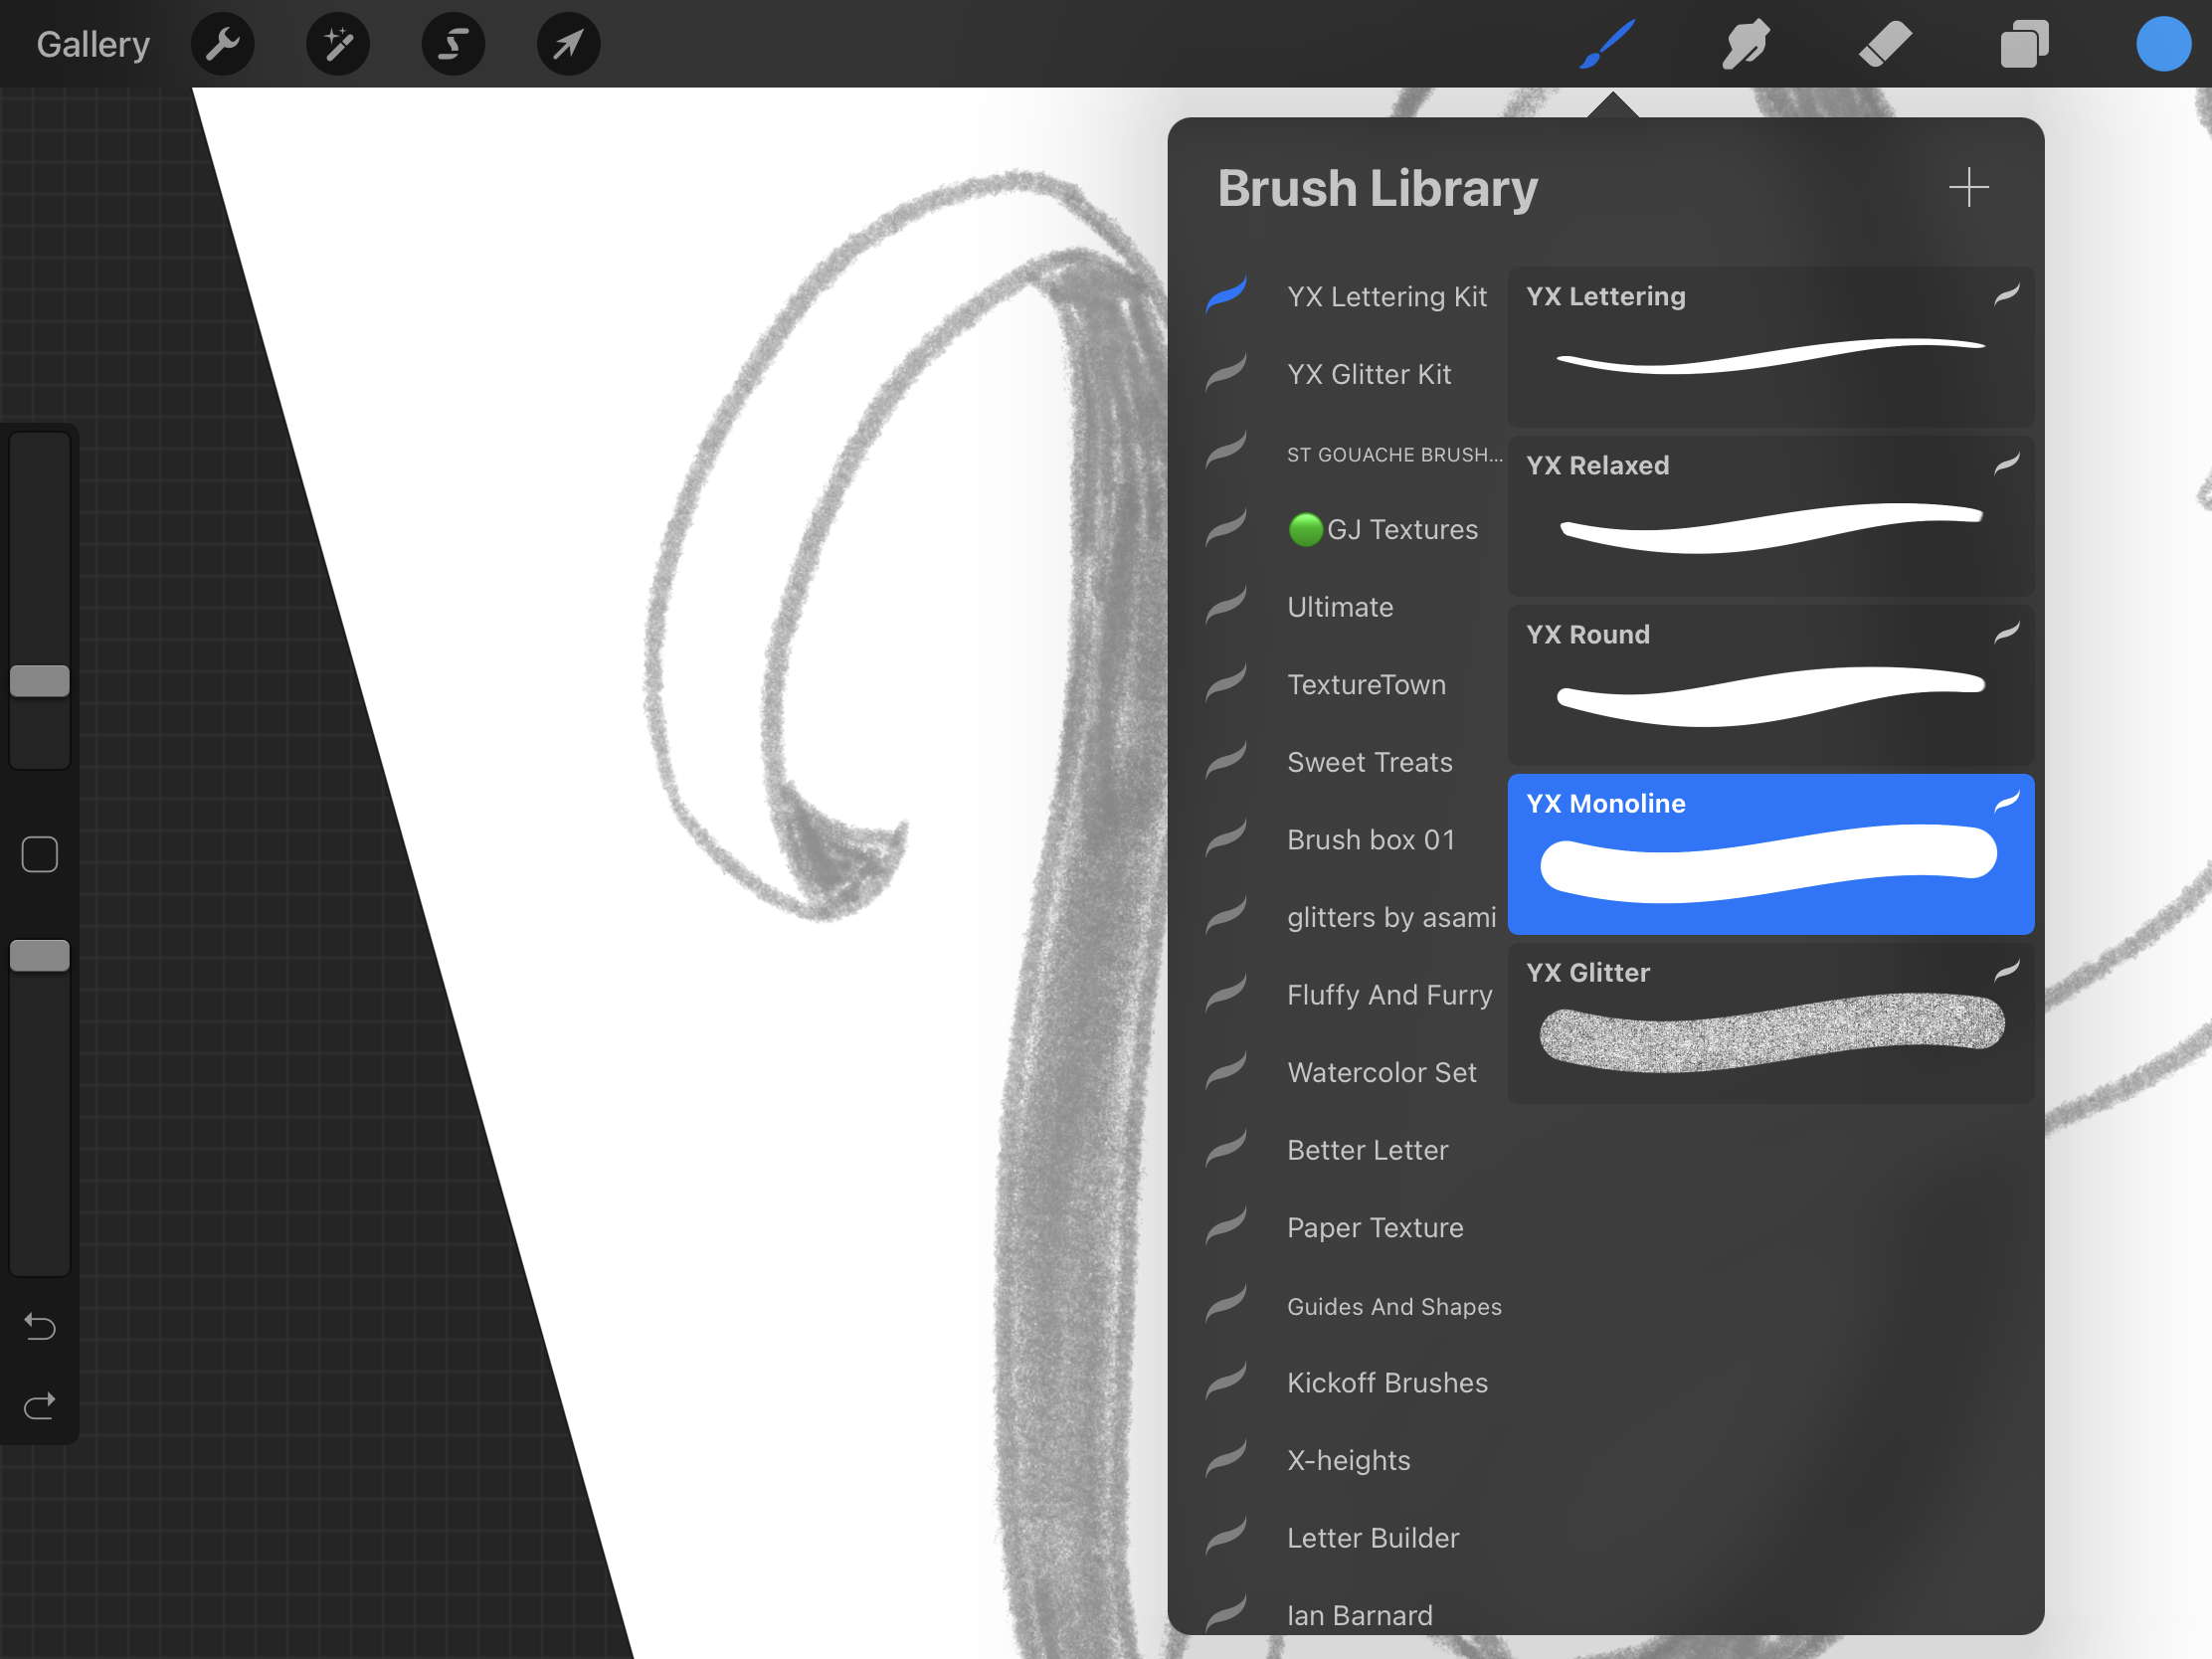
When you are done, fill in all the words in the base color regardless.
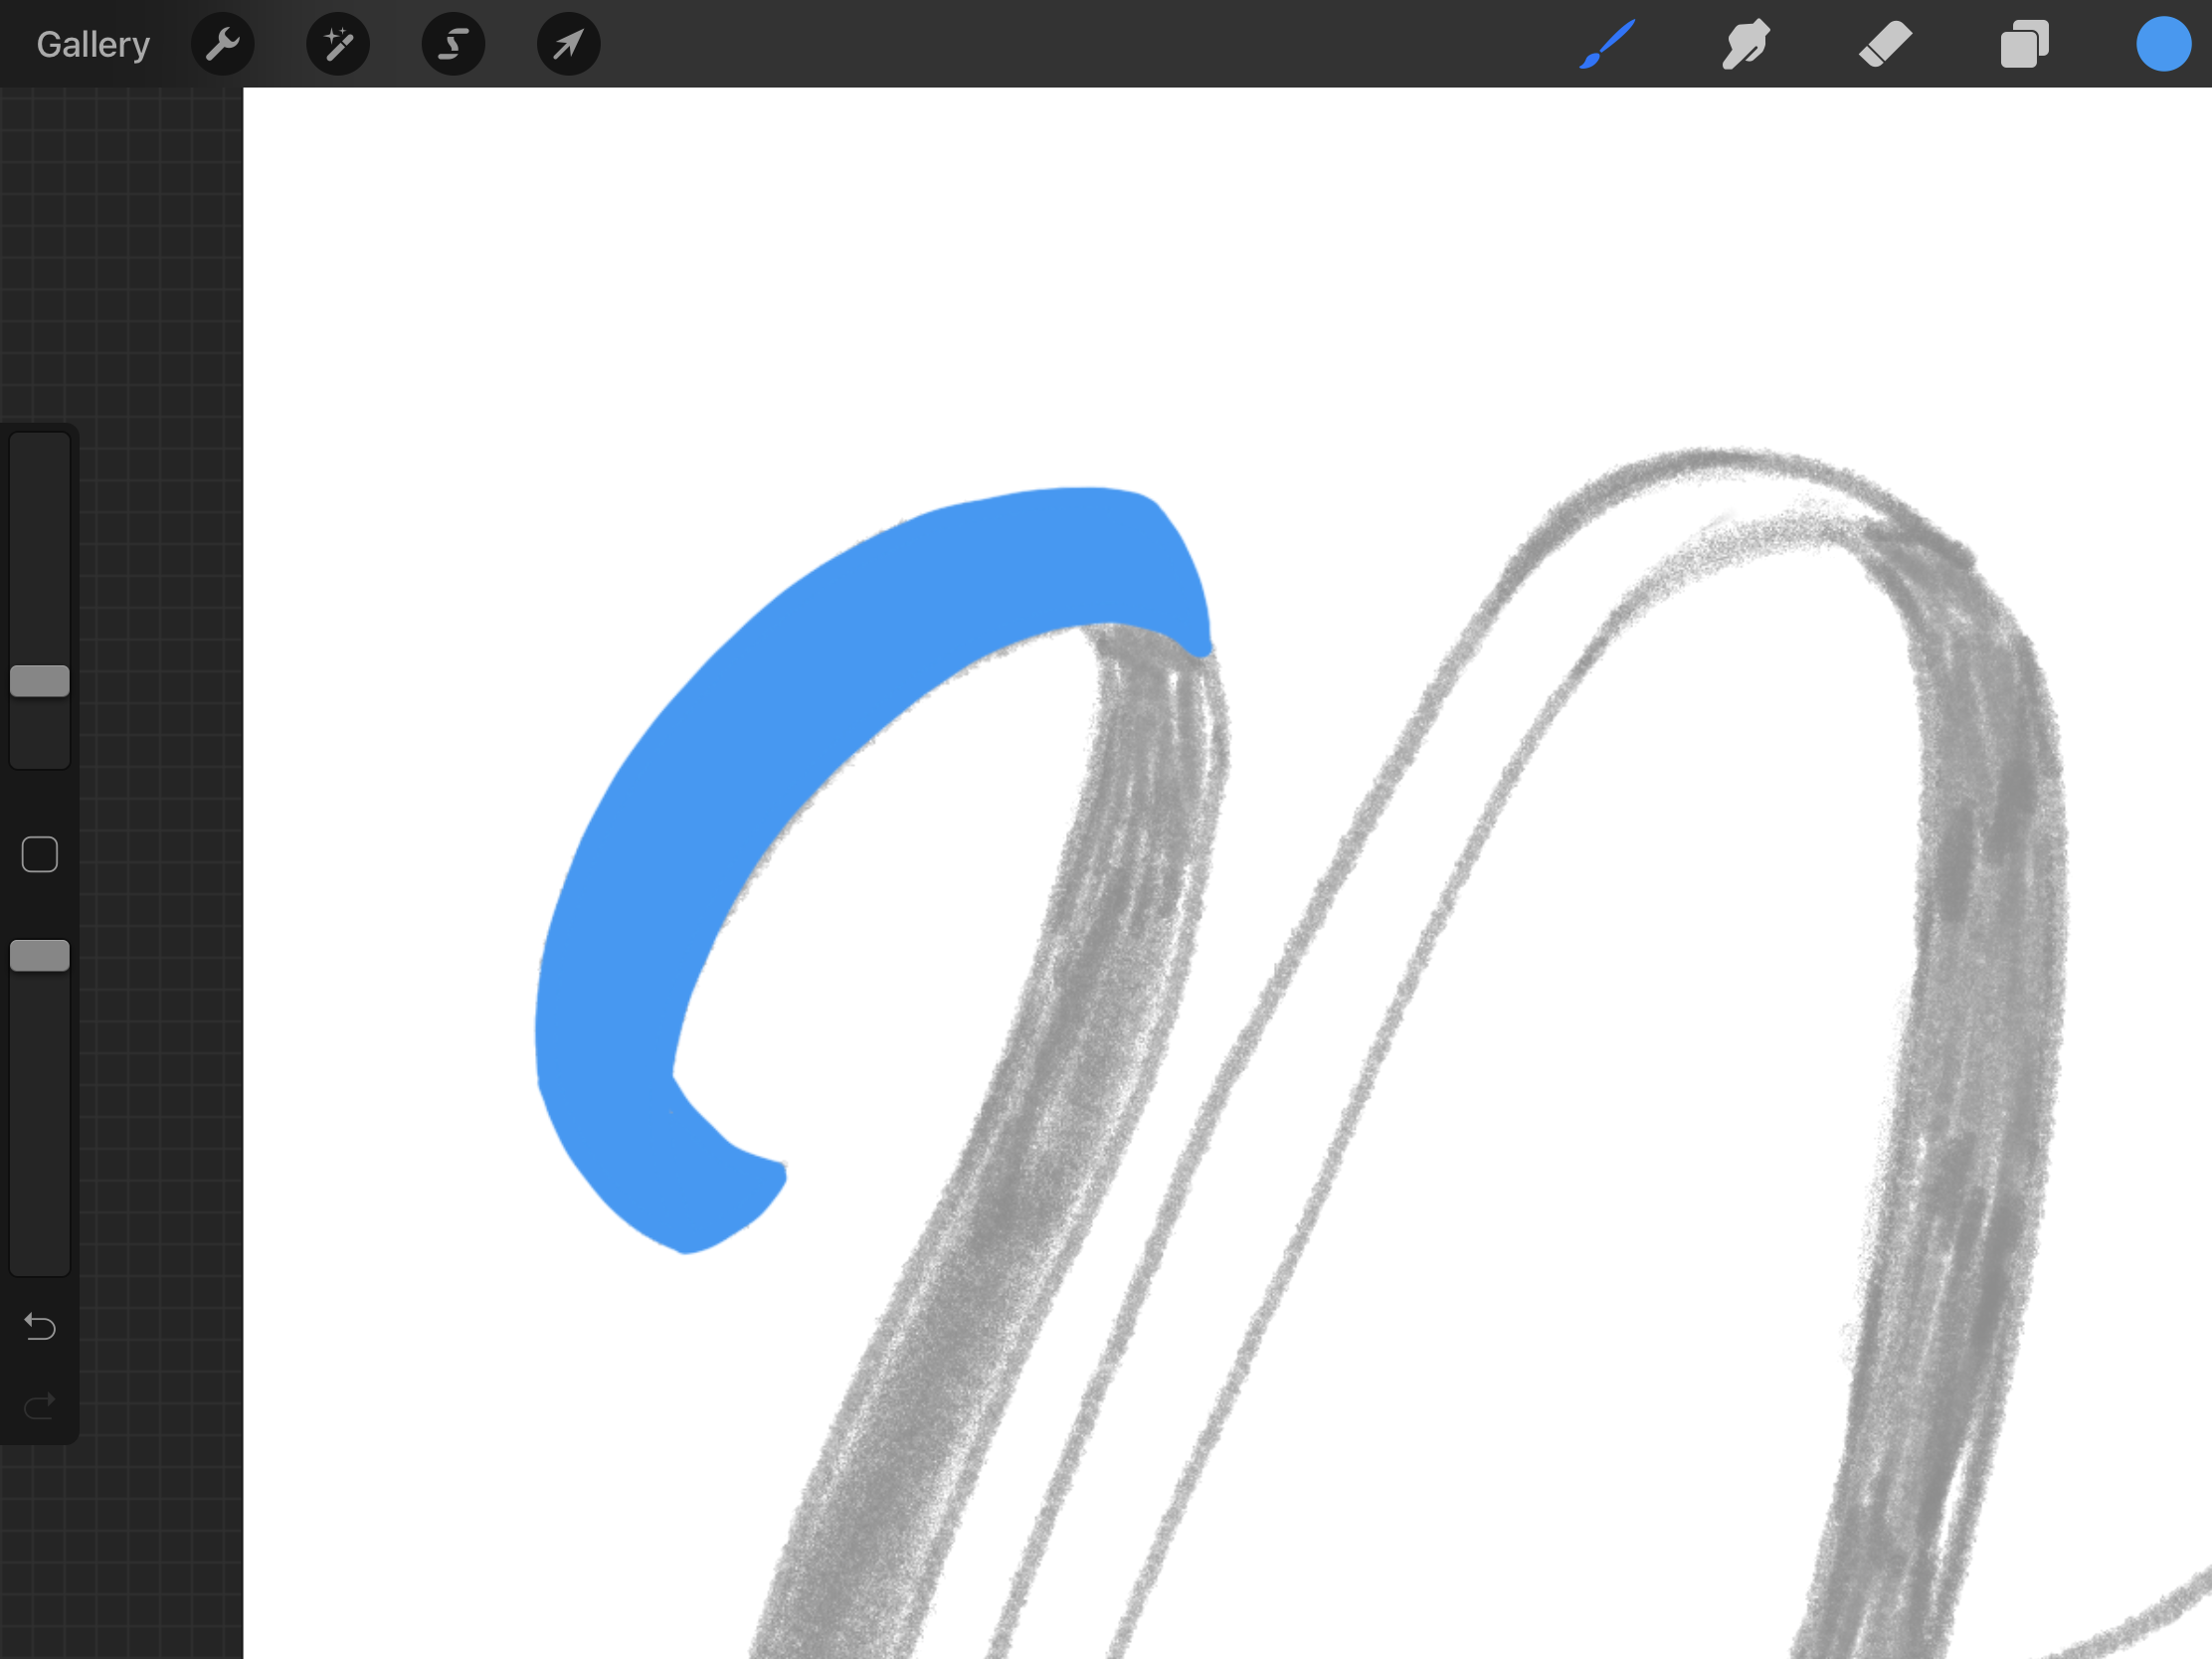
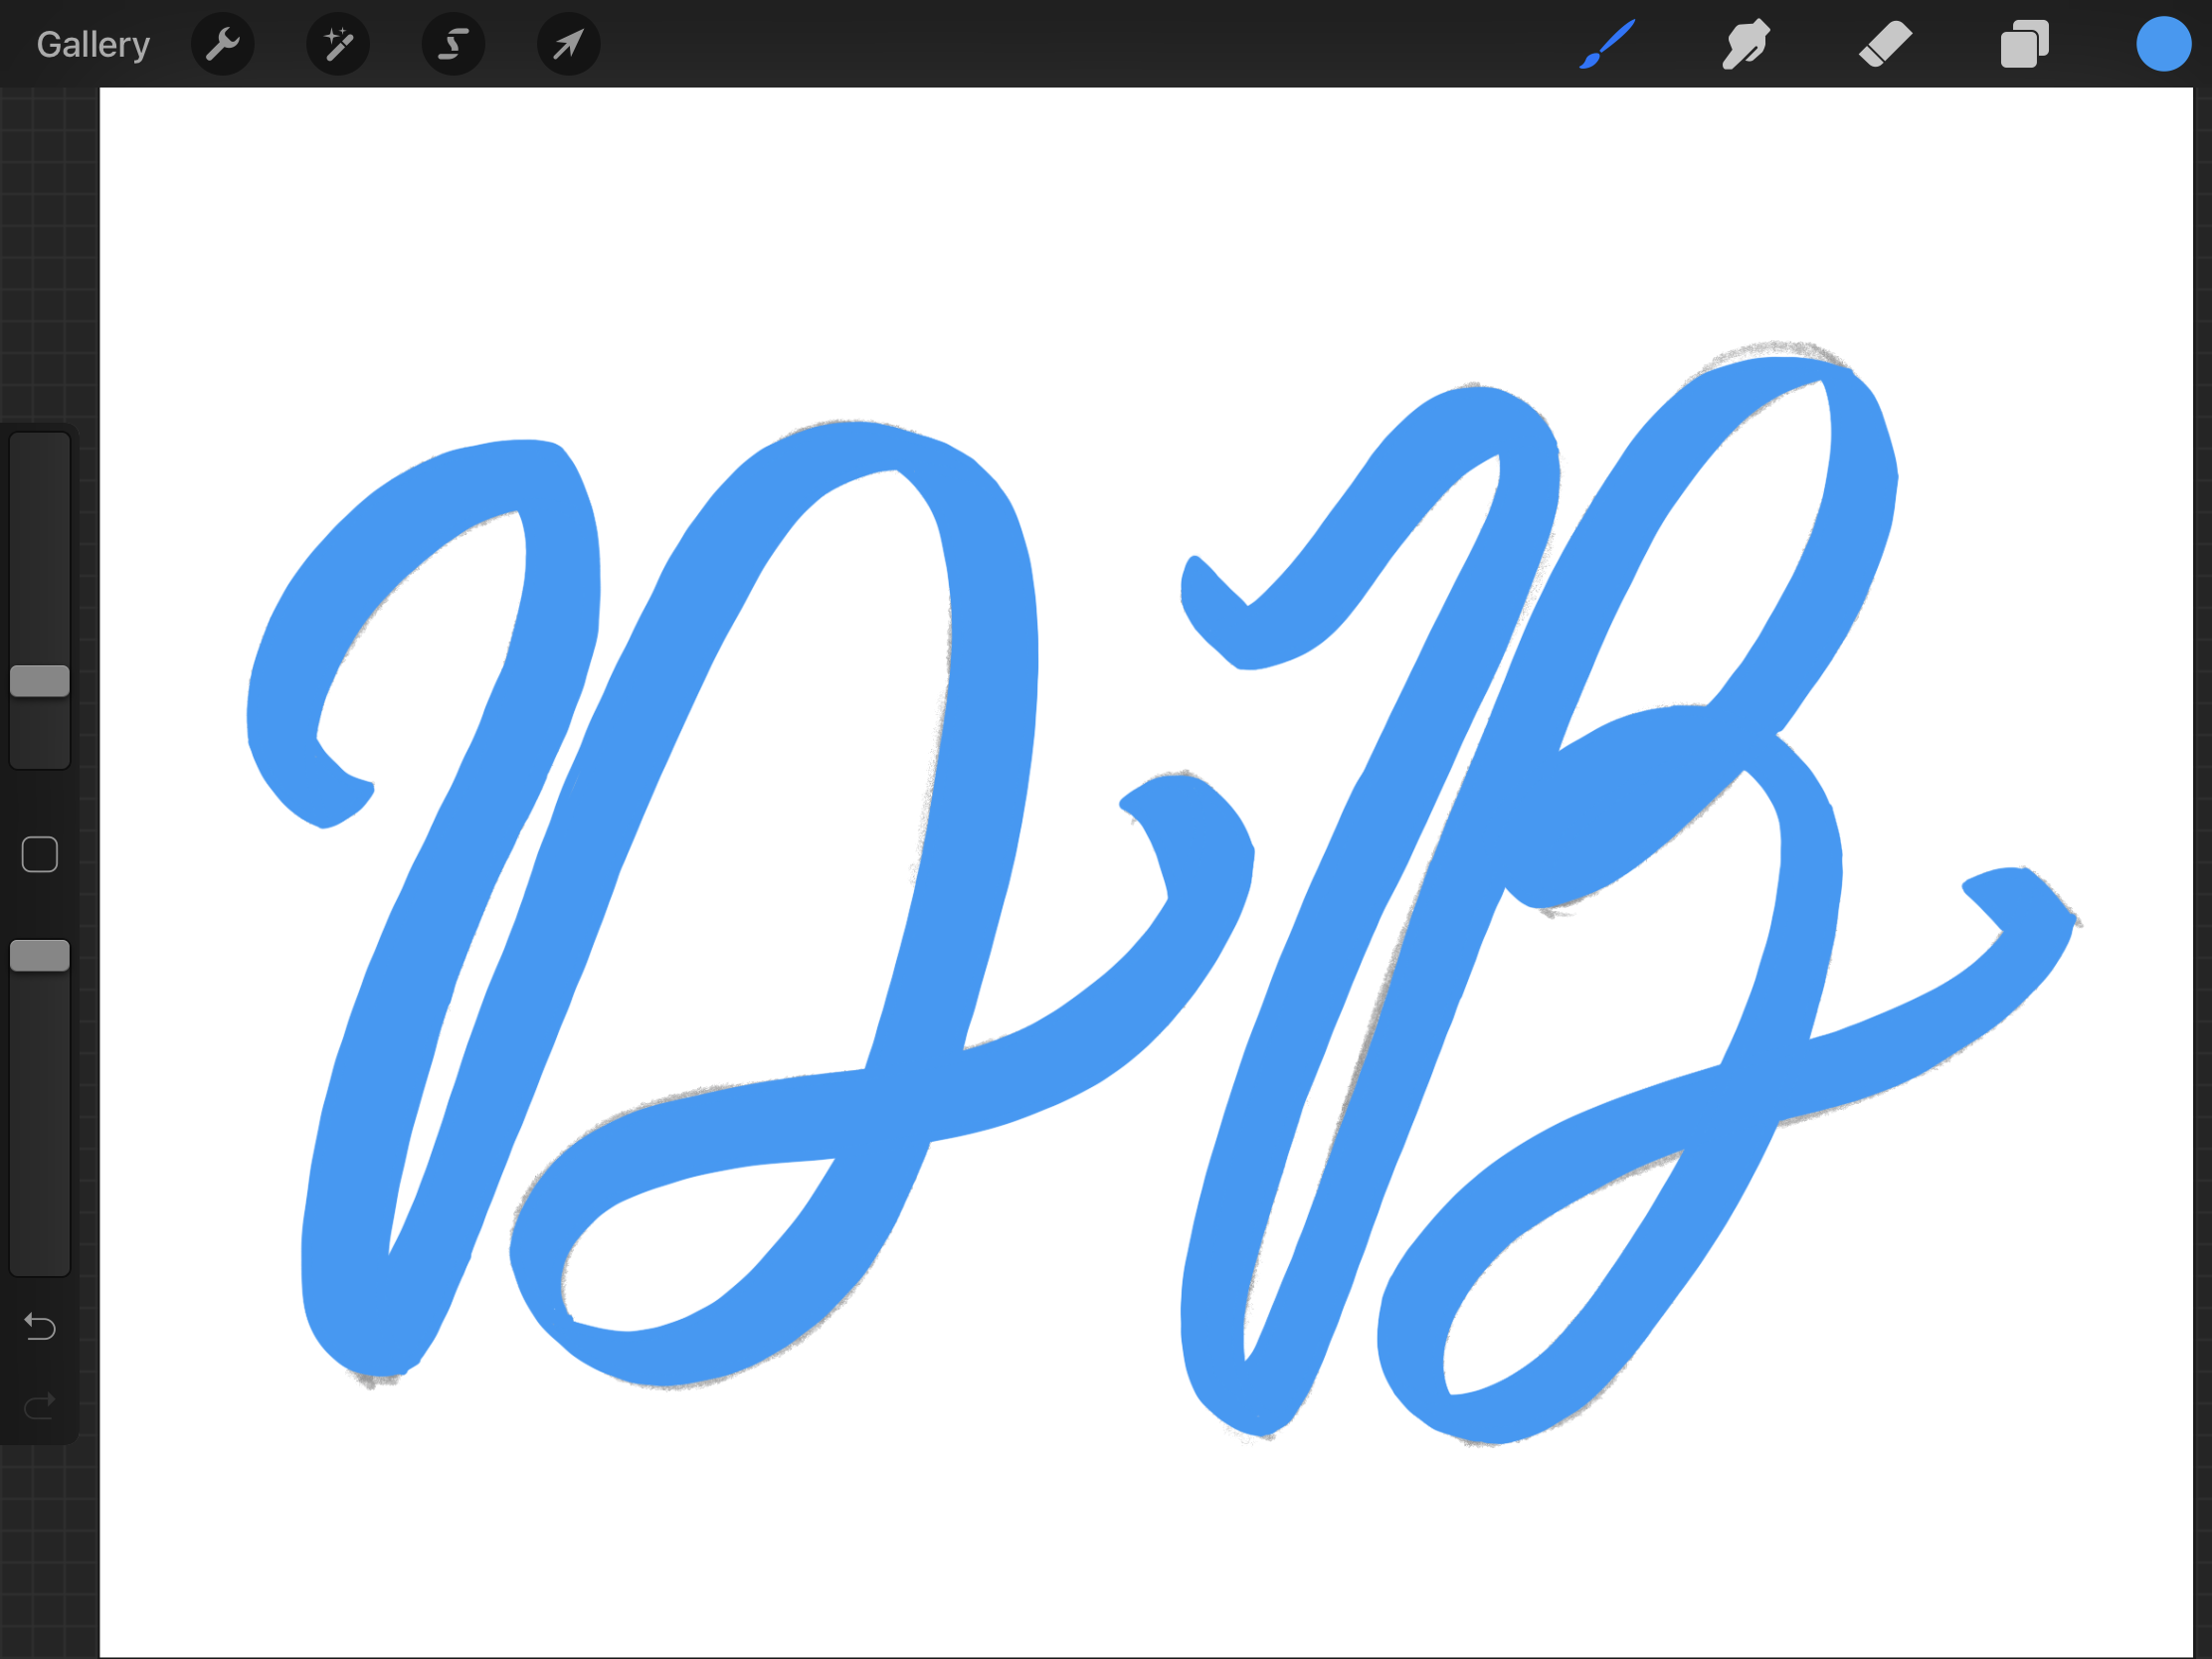
Move the sketch layer to the top so you can see where the darker and/or lighter parts should be.
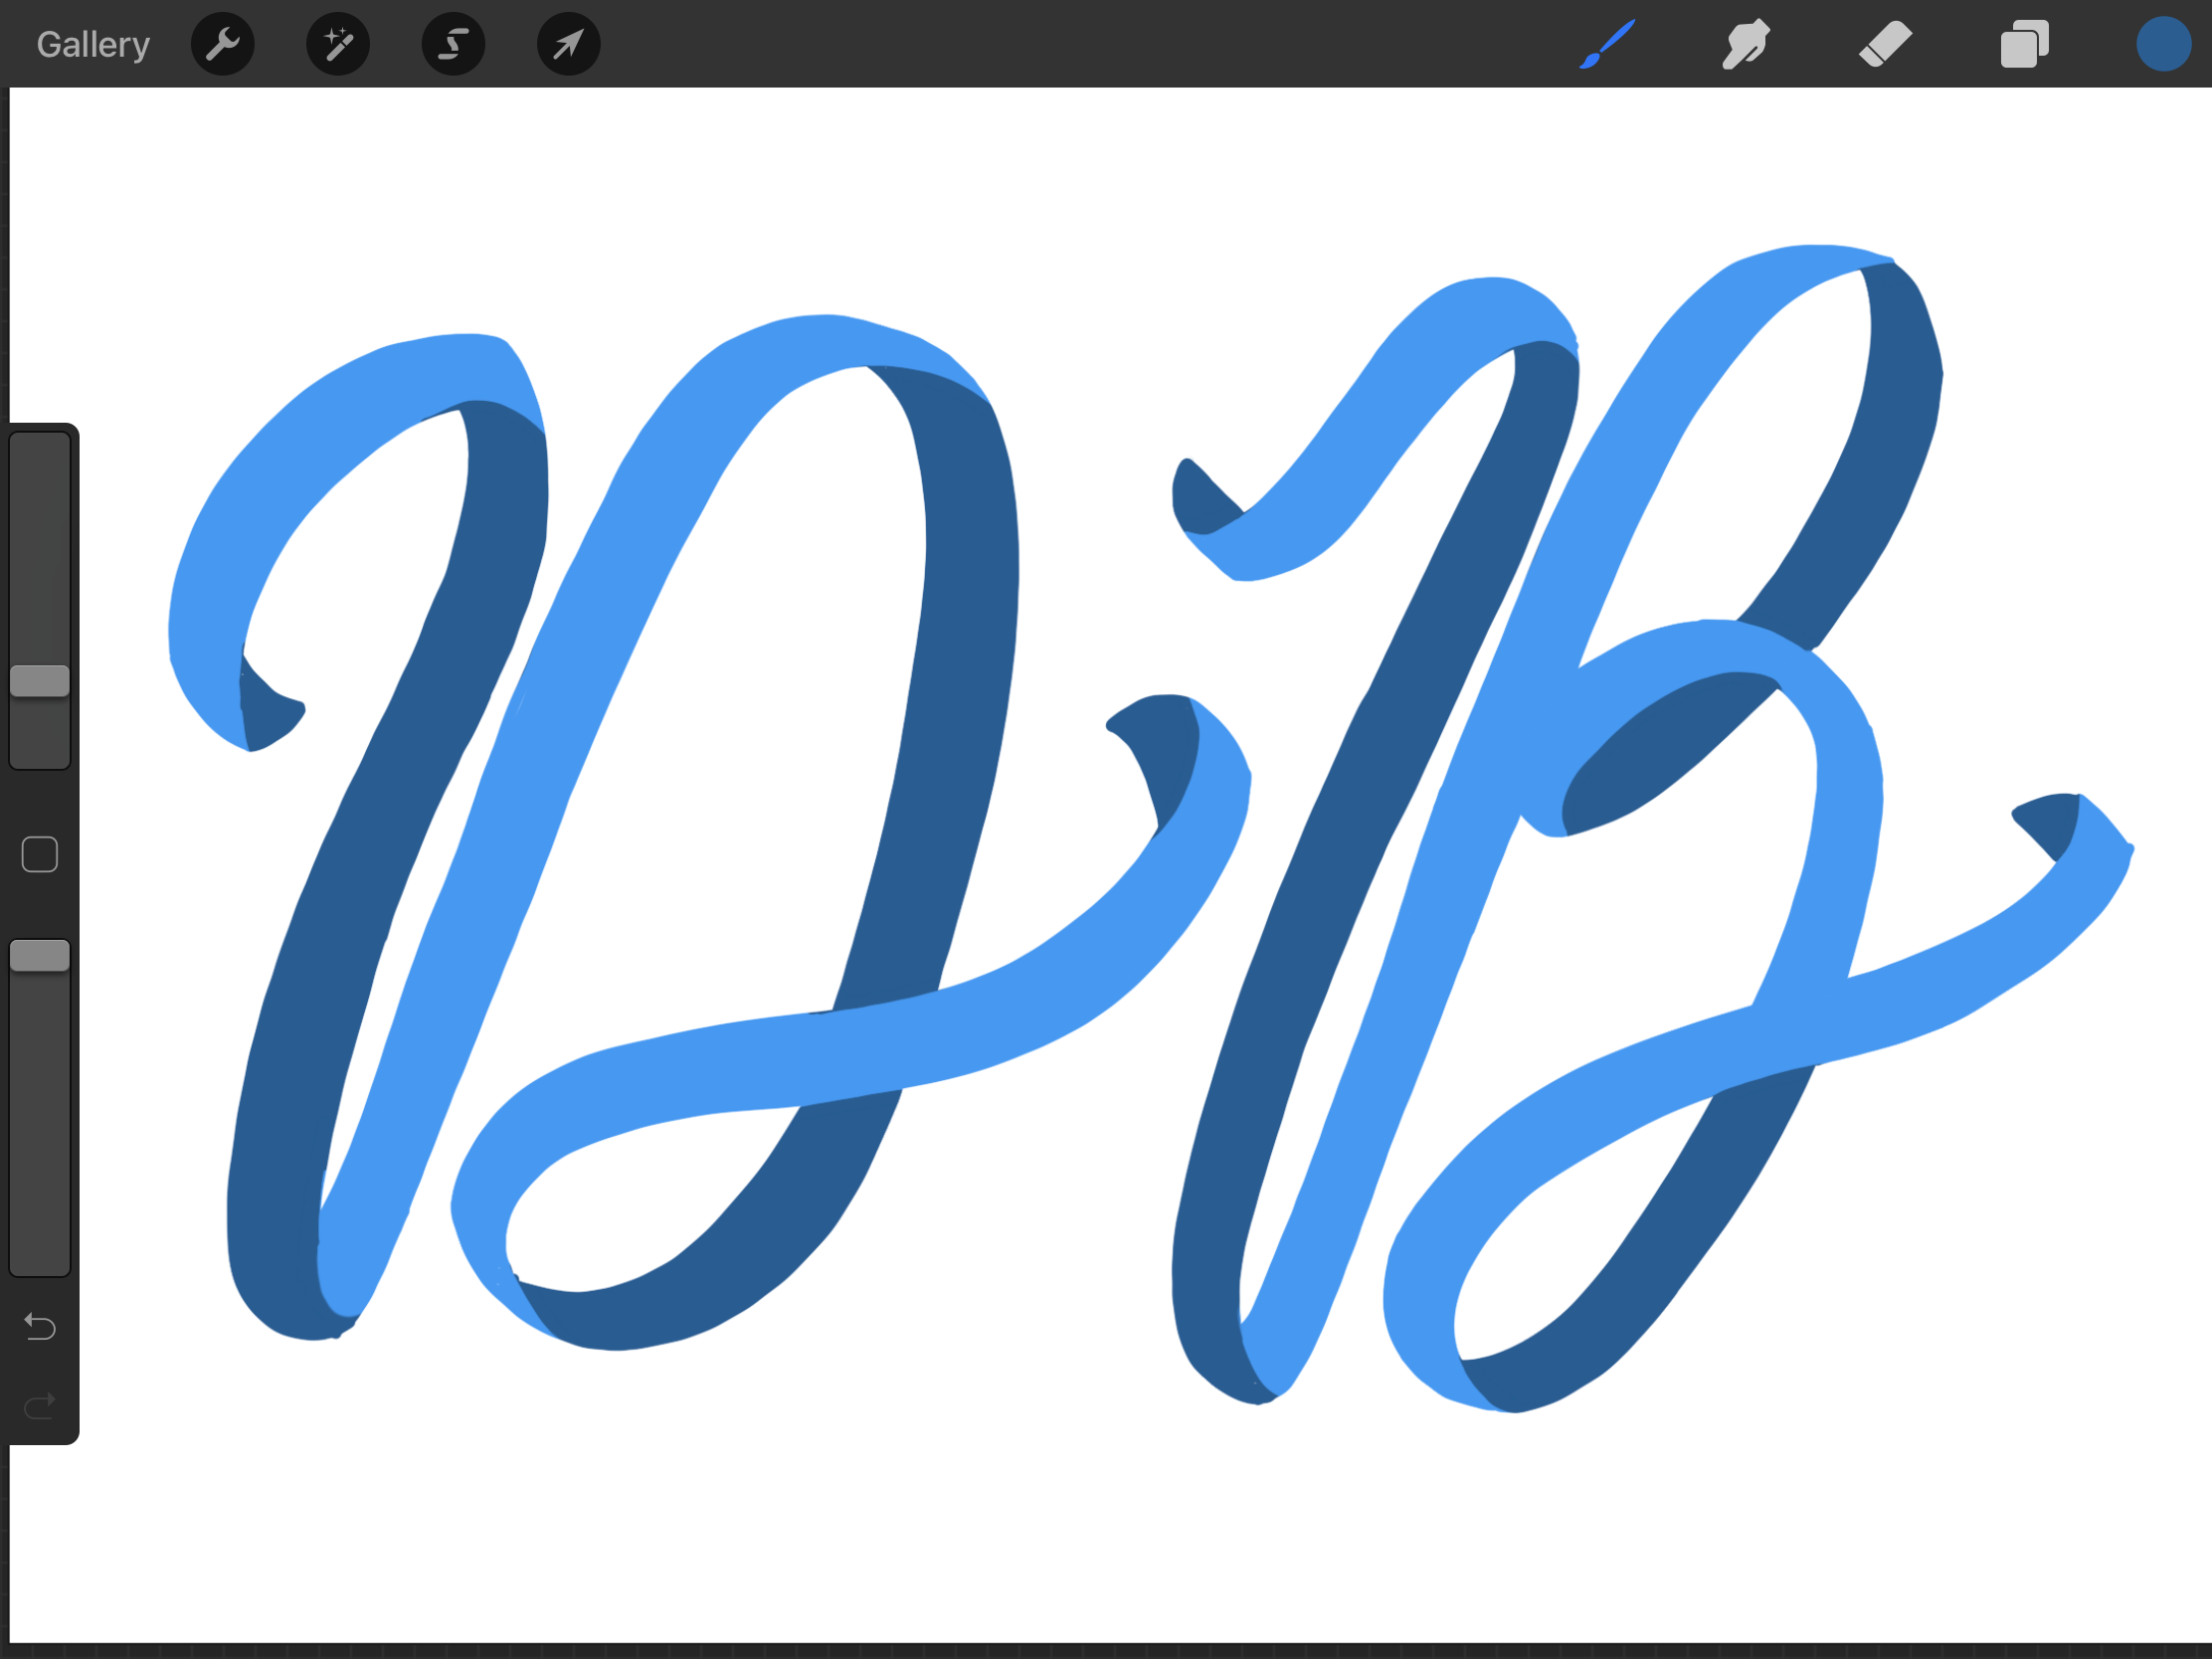
Create a new Clipping Mask layer. You can choose a darker color shade or just lower the lightness of the base color to about half and start filling the darker (back) portions of the ribbon lettering.
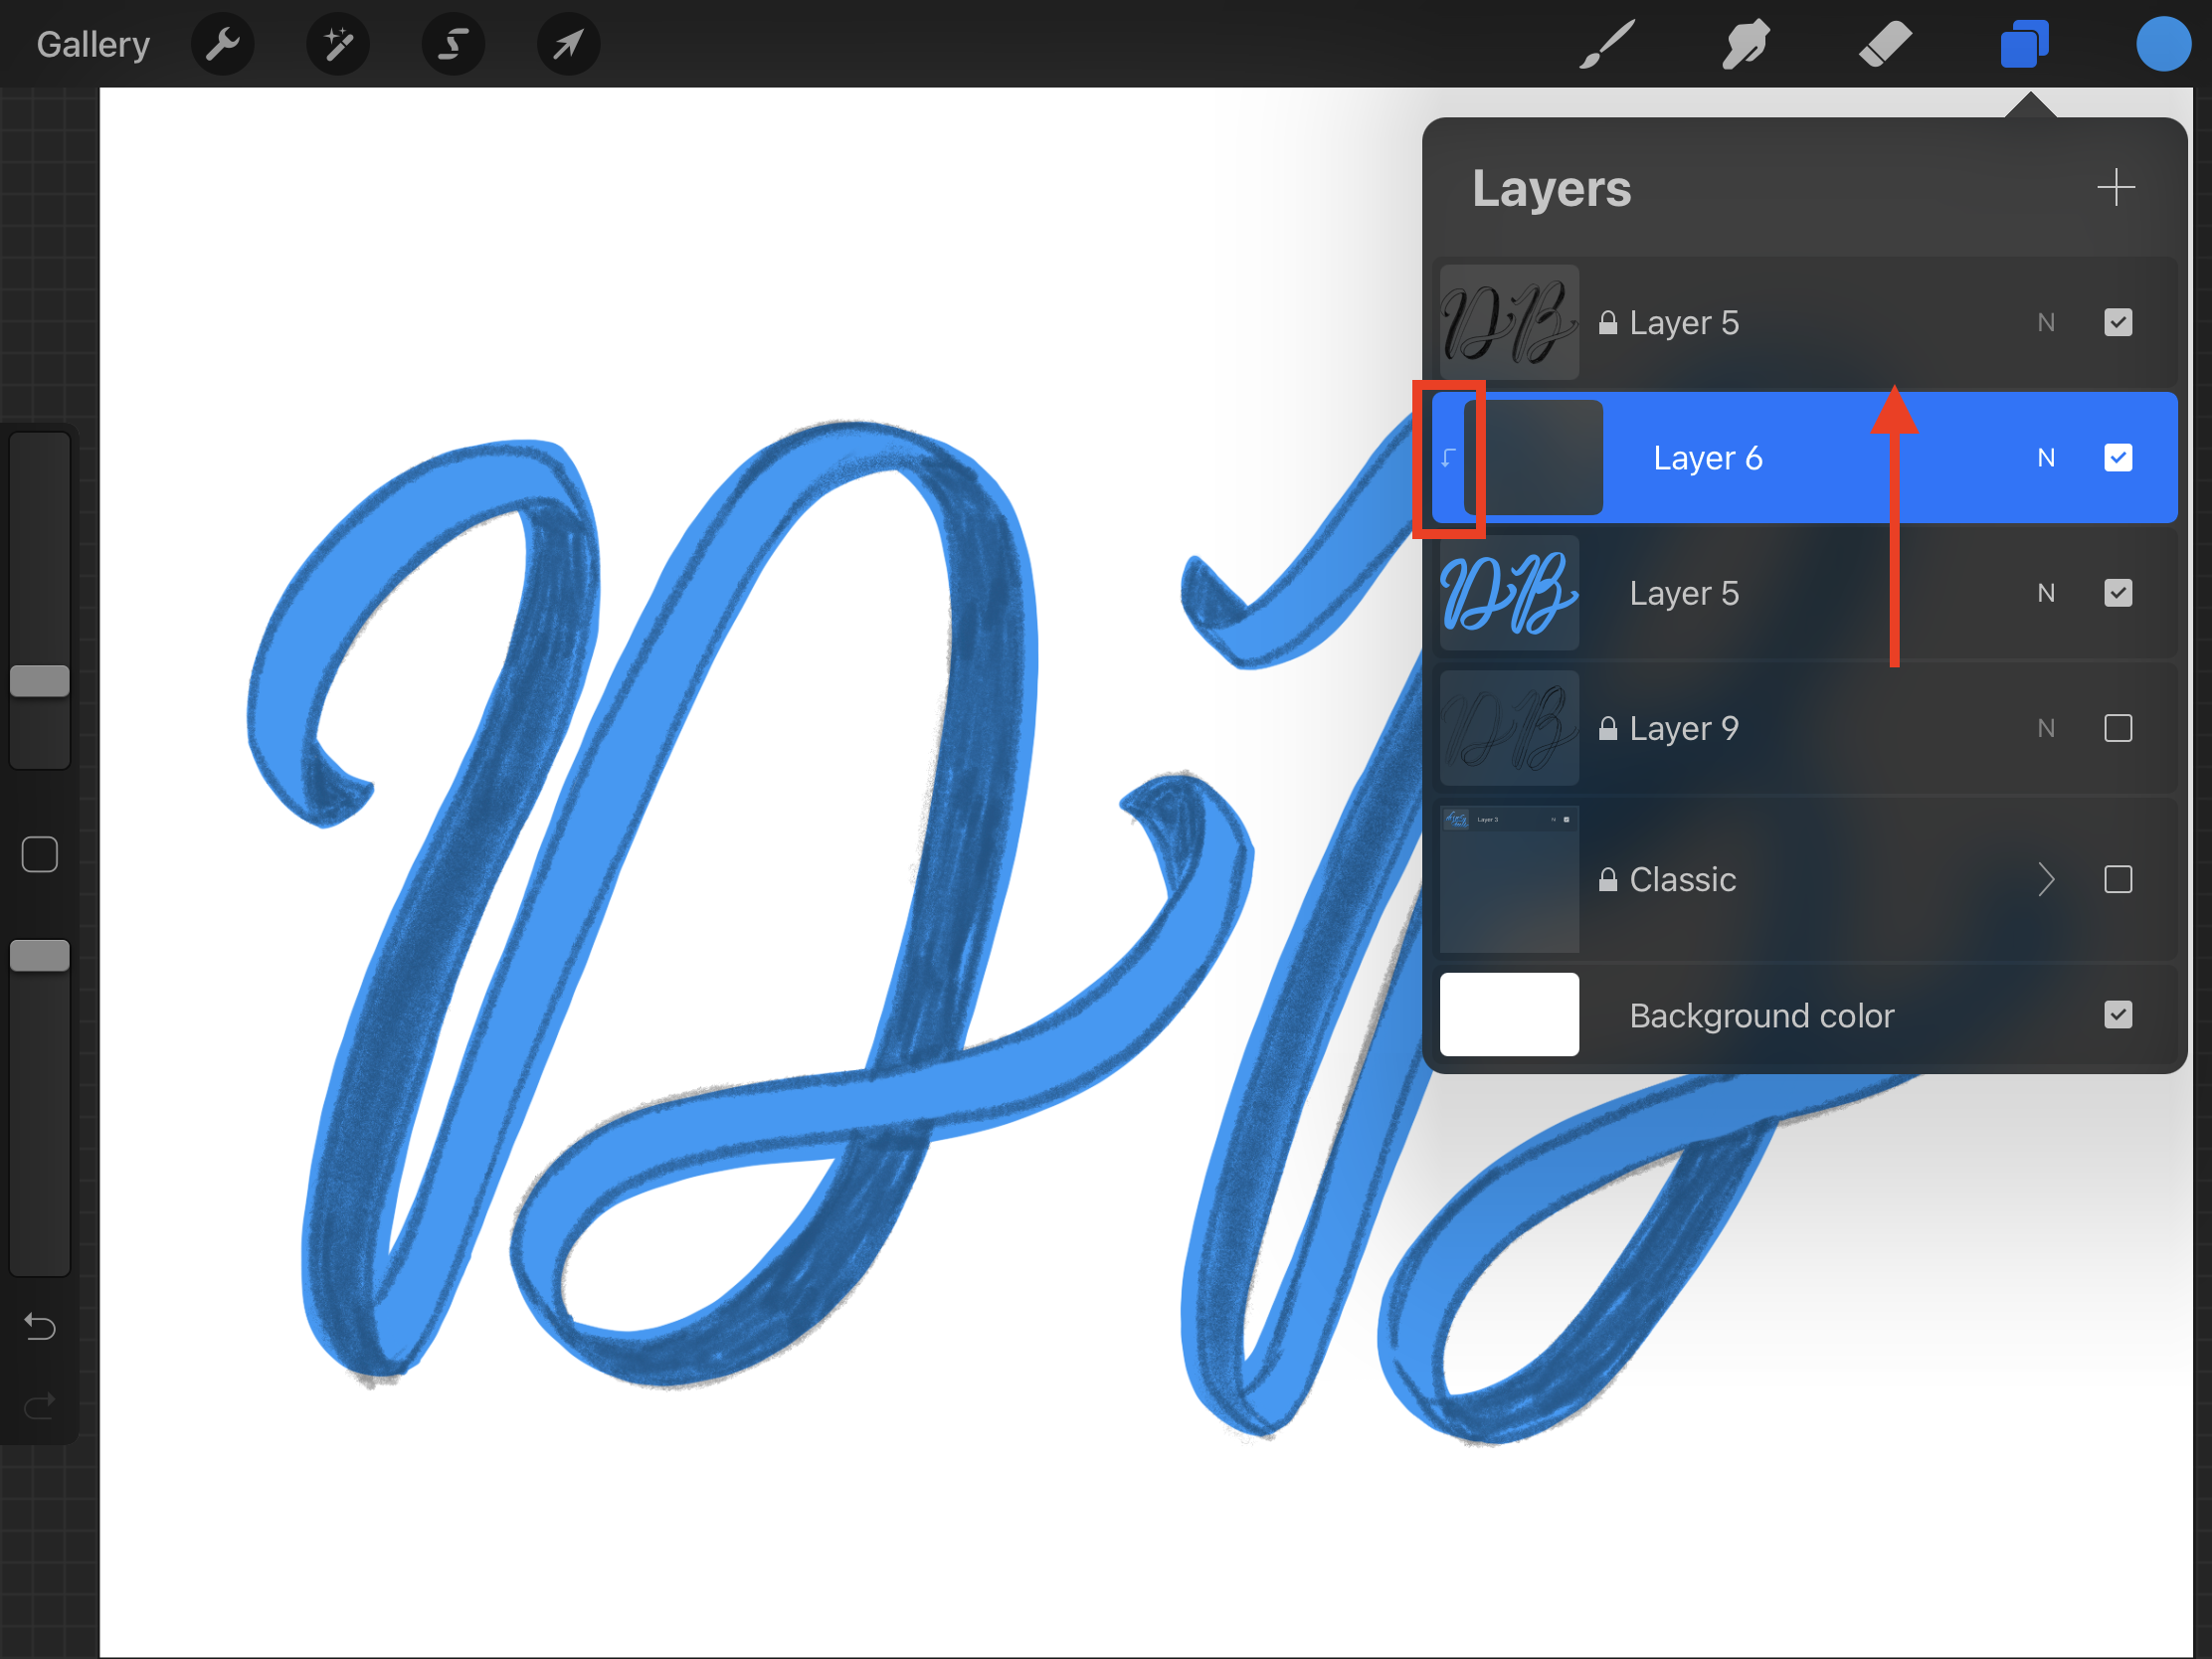
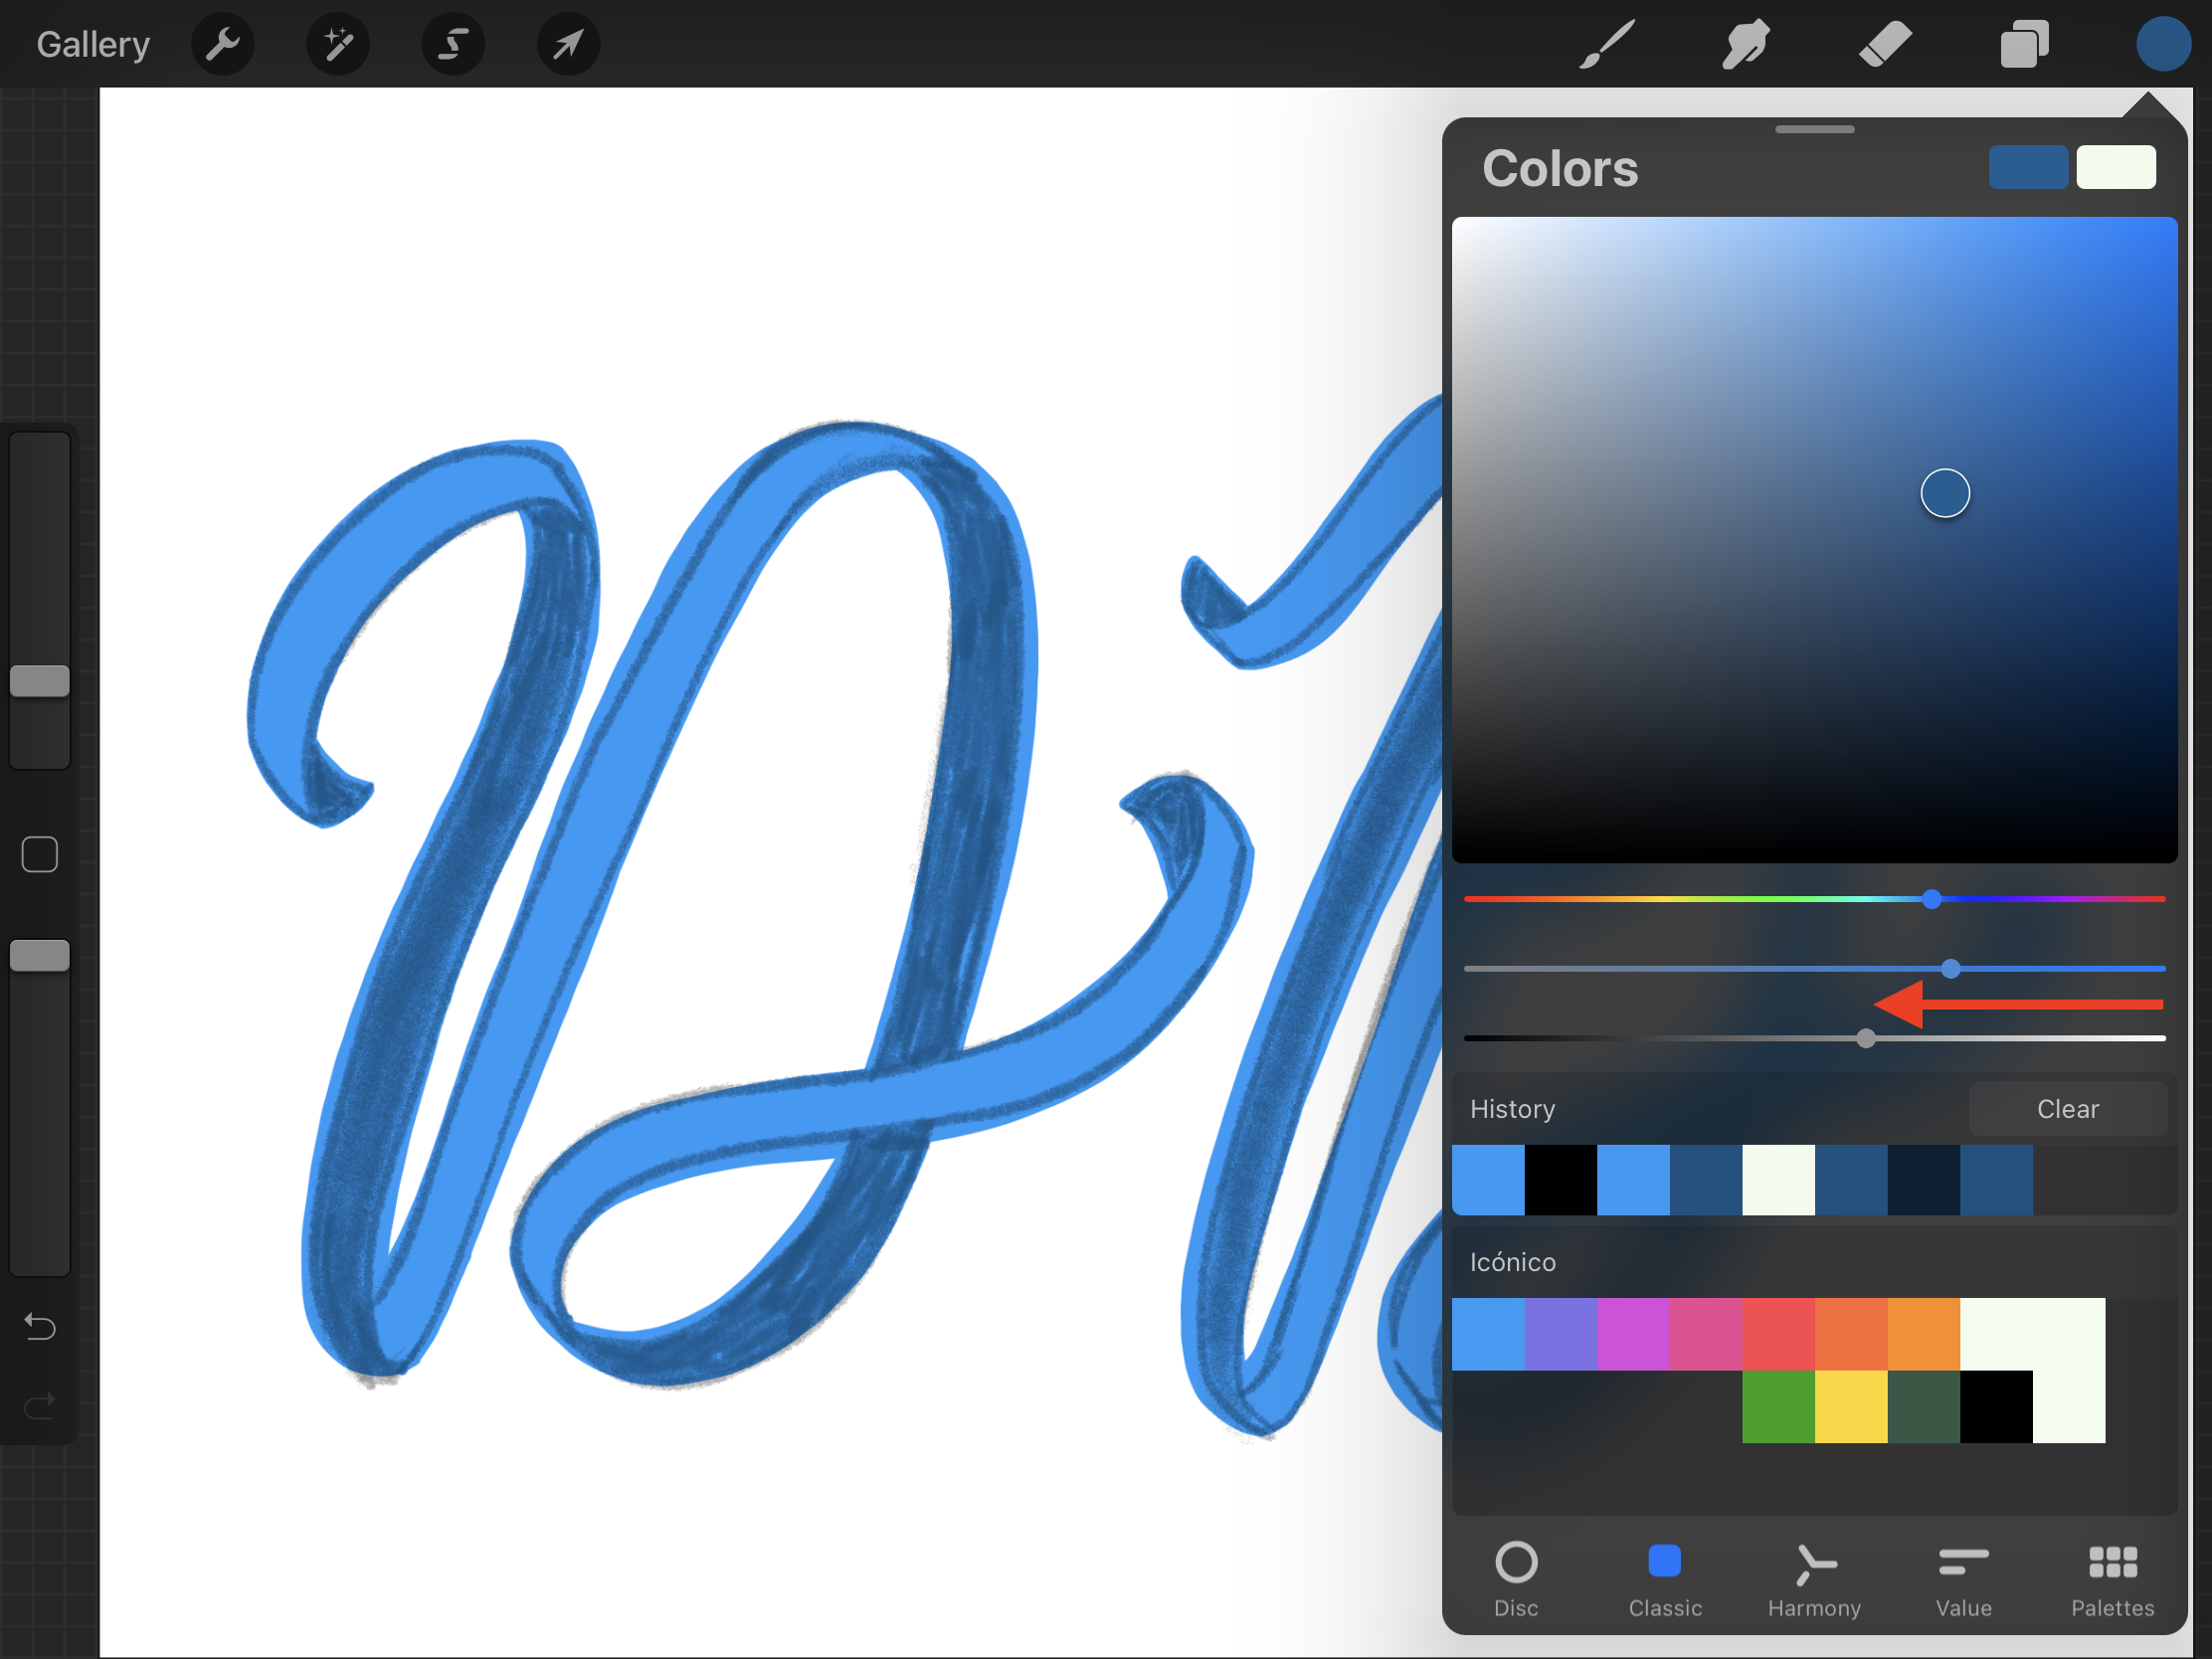
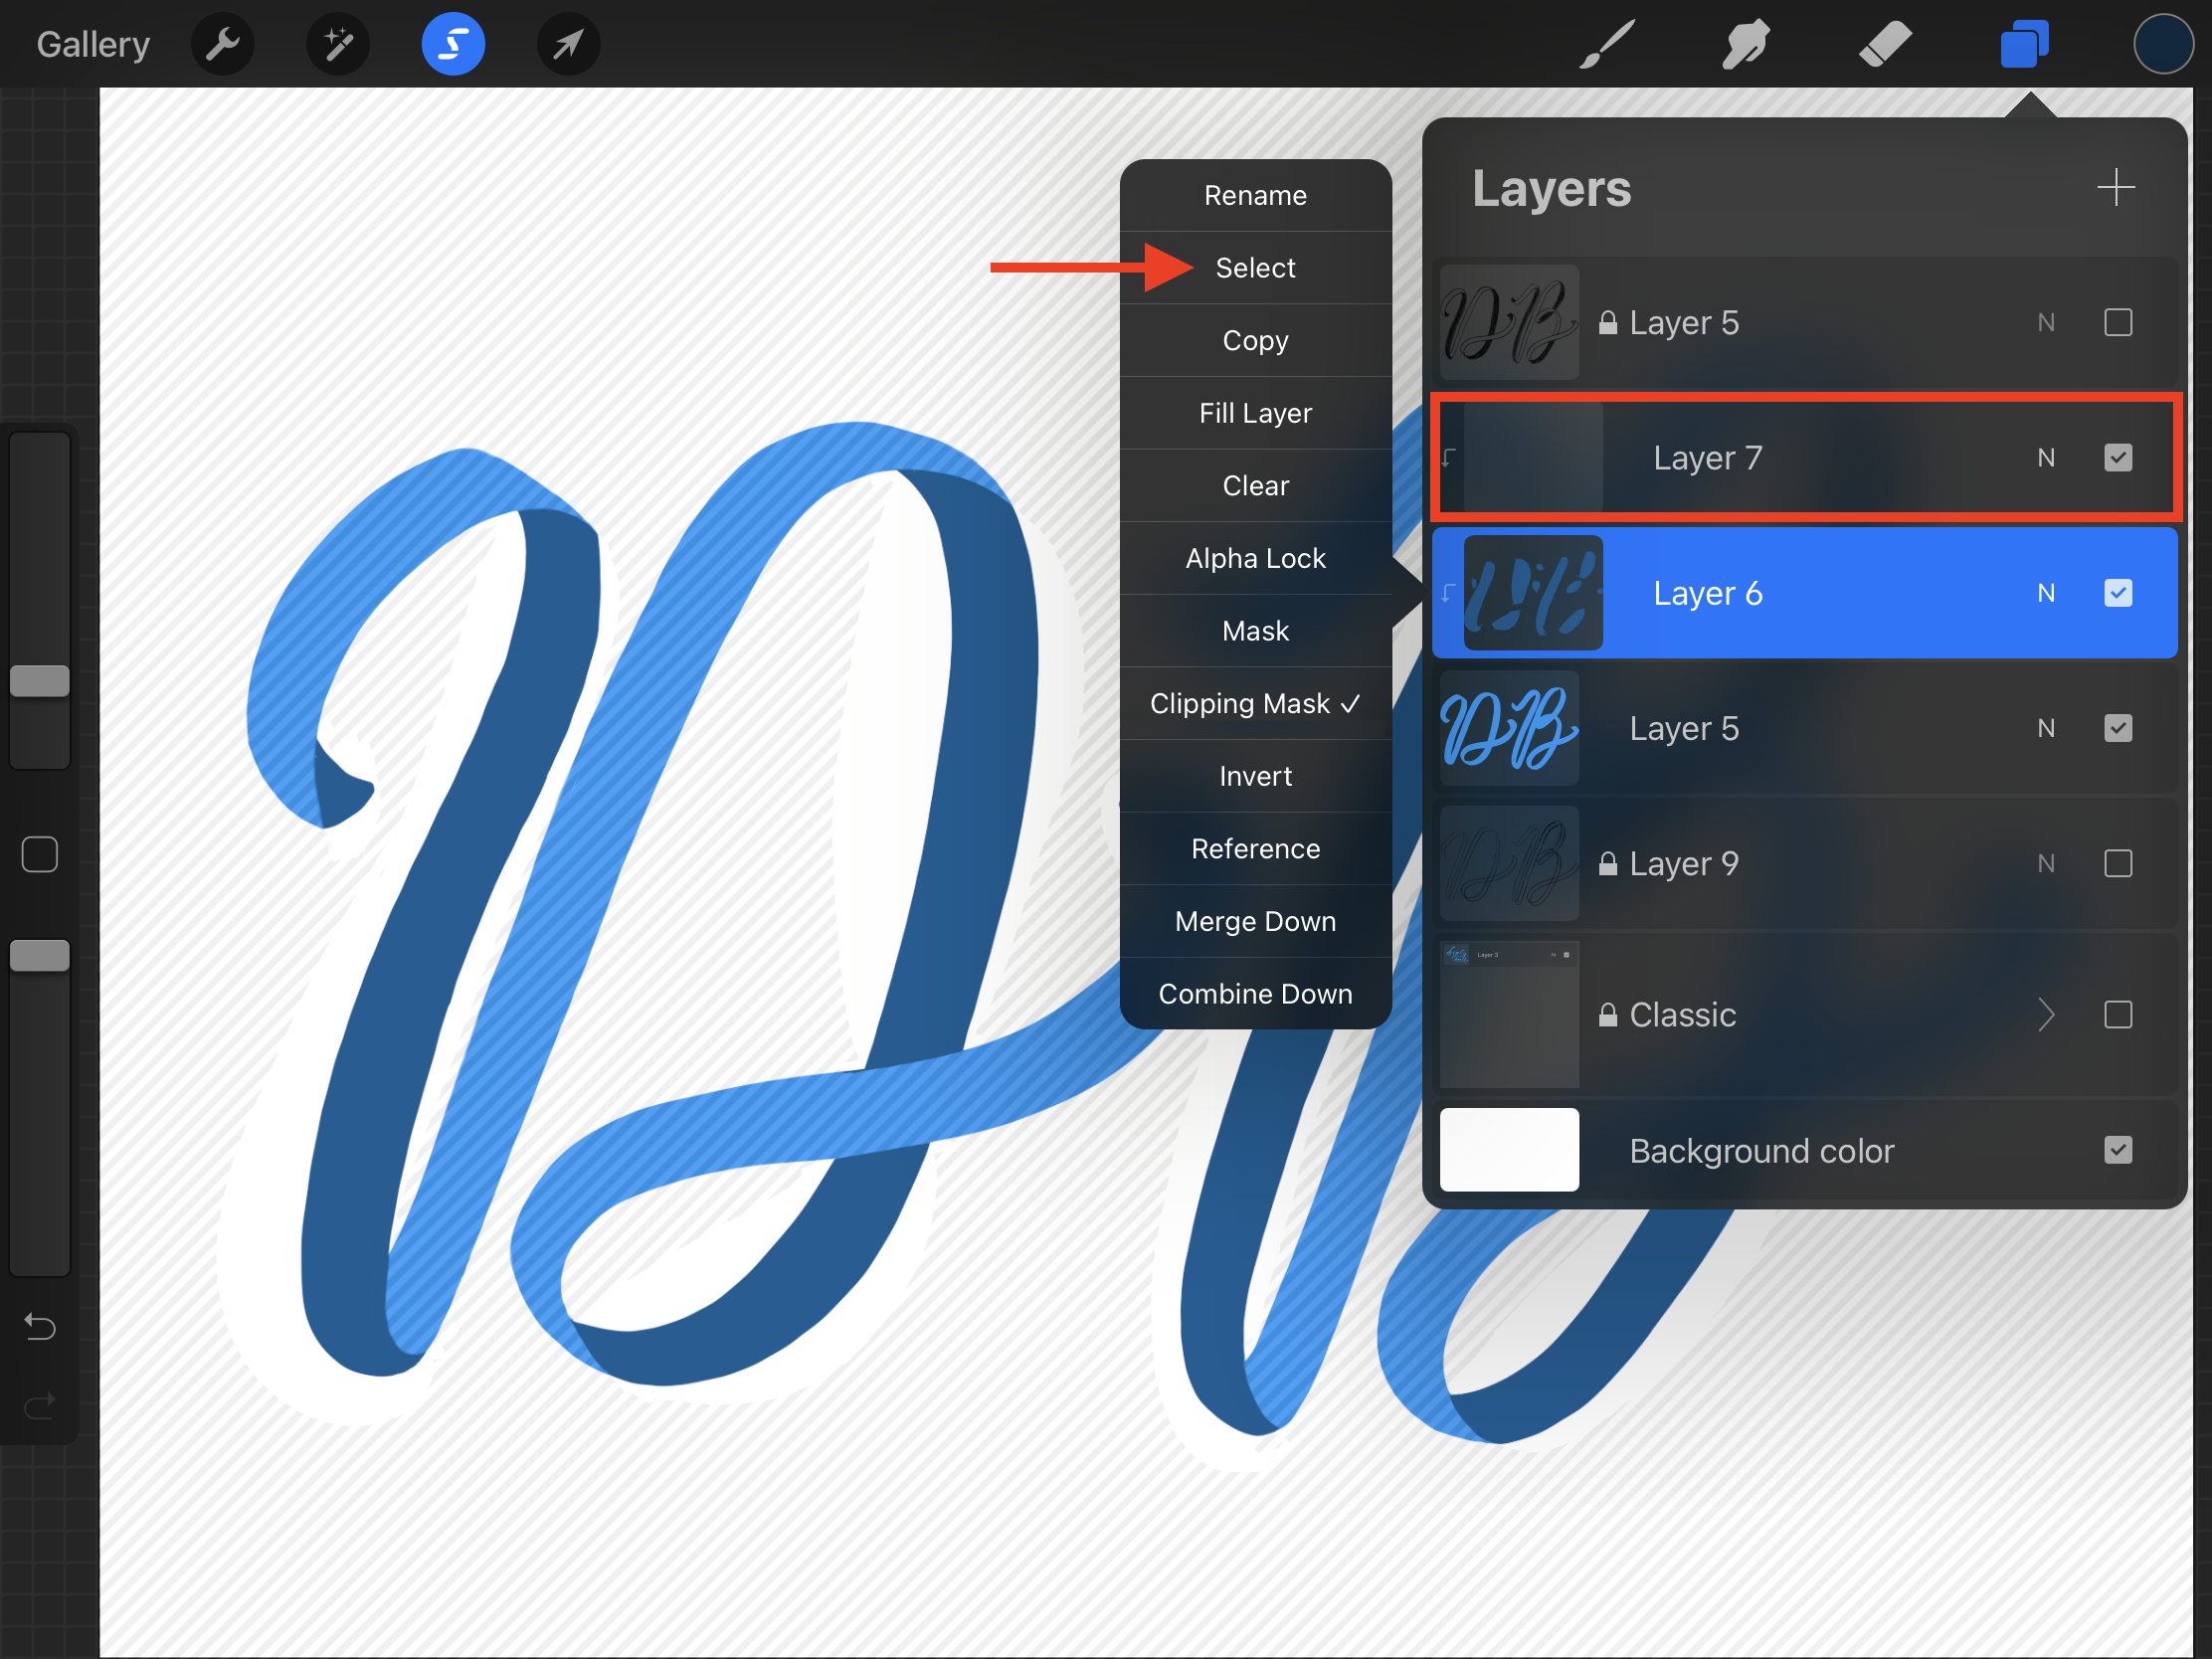
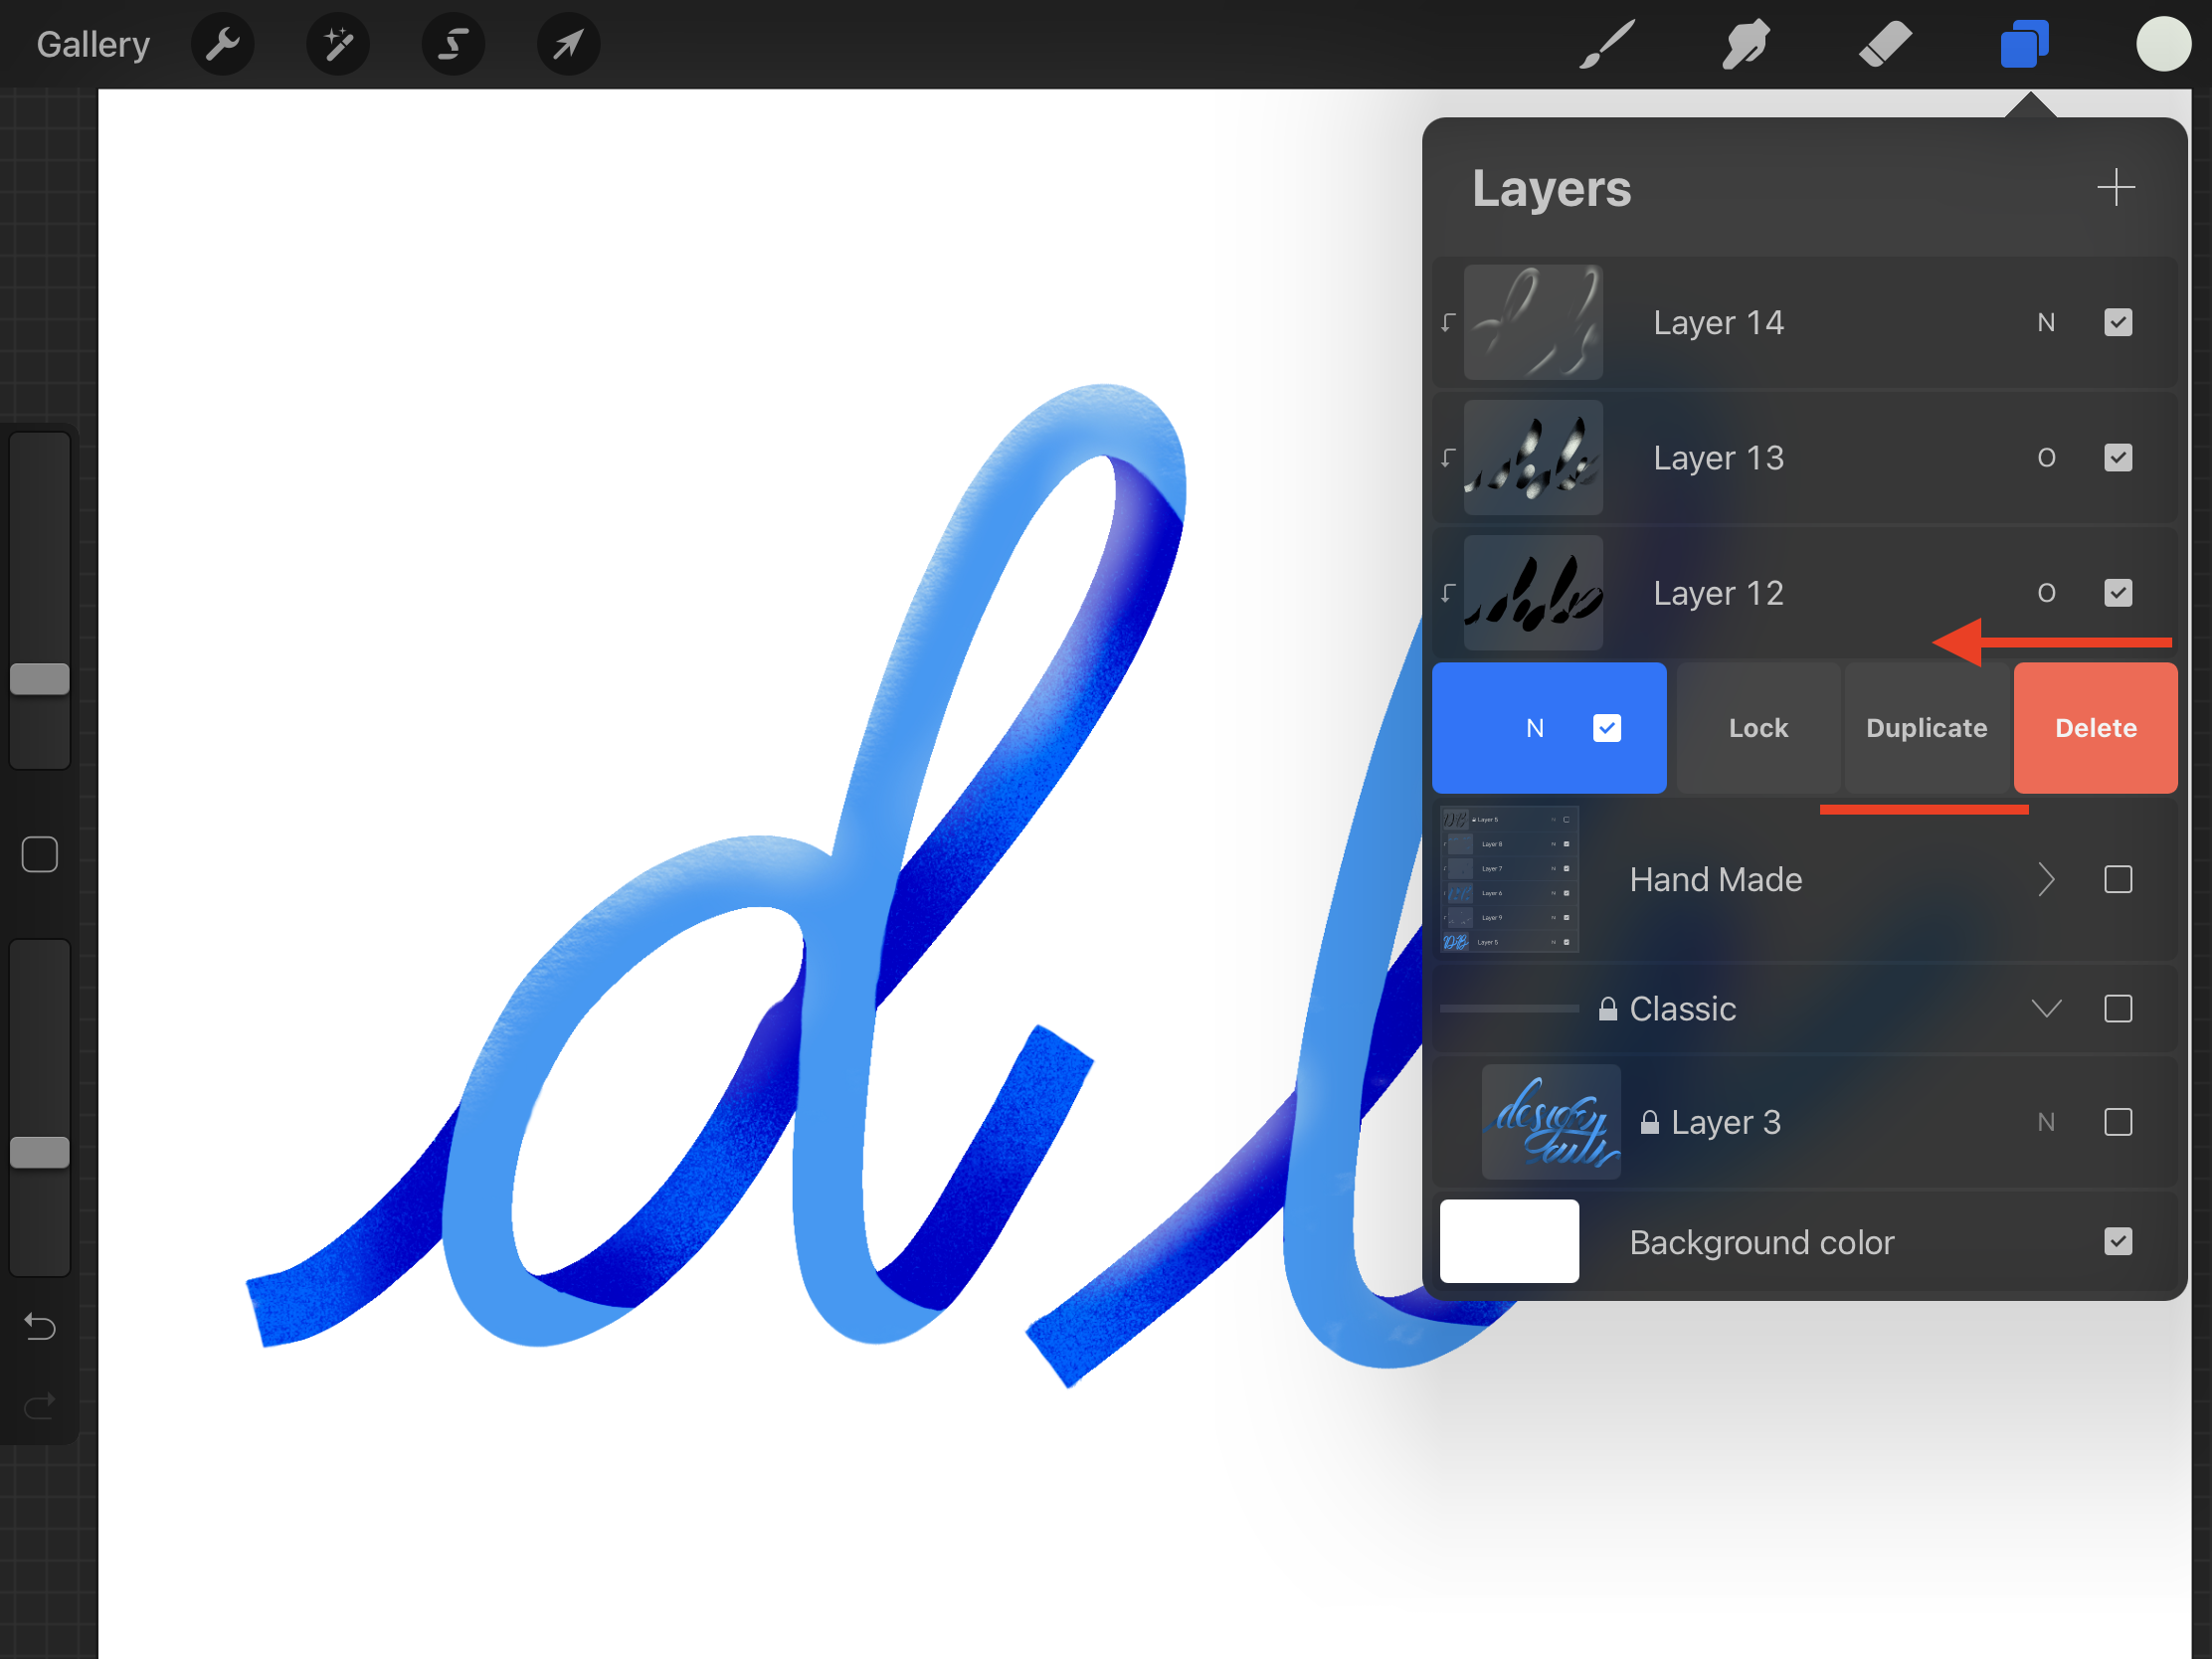
Create a separate Clipping Mask layer for Shadows. Now, you need to select the layer below (darker color), tap on it on the Layers menu open the menu and choose Select, then click on back the Clipping Mask layer so you are working on it.
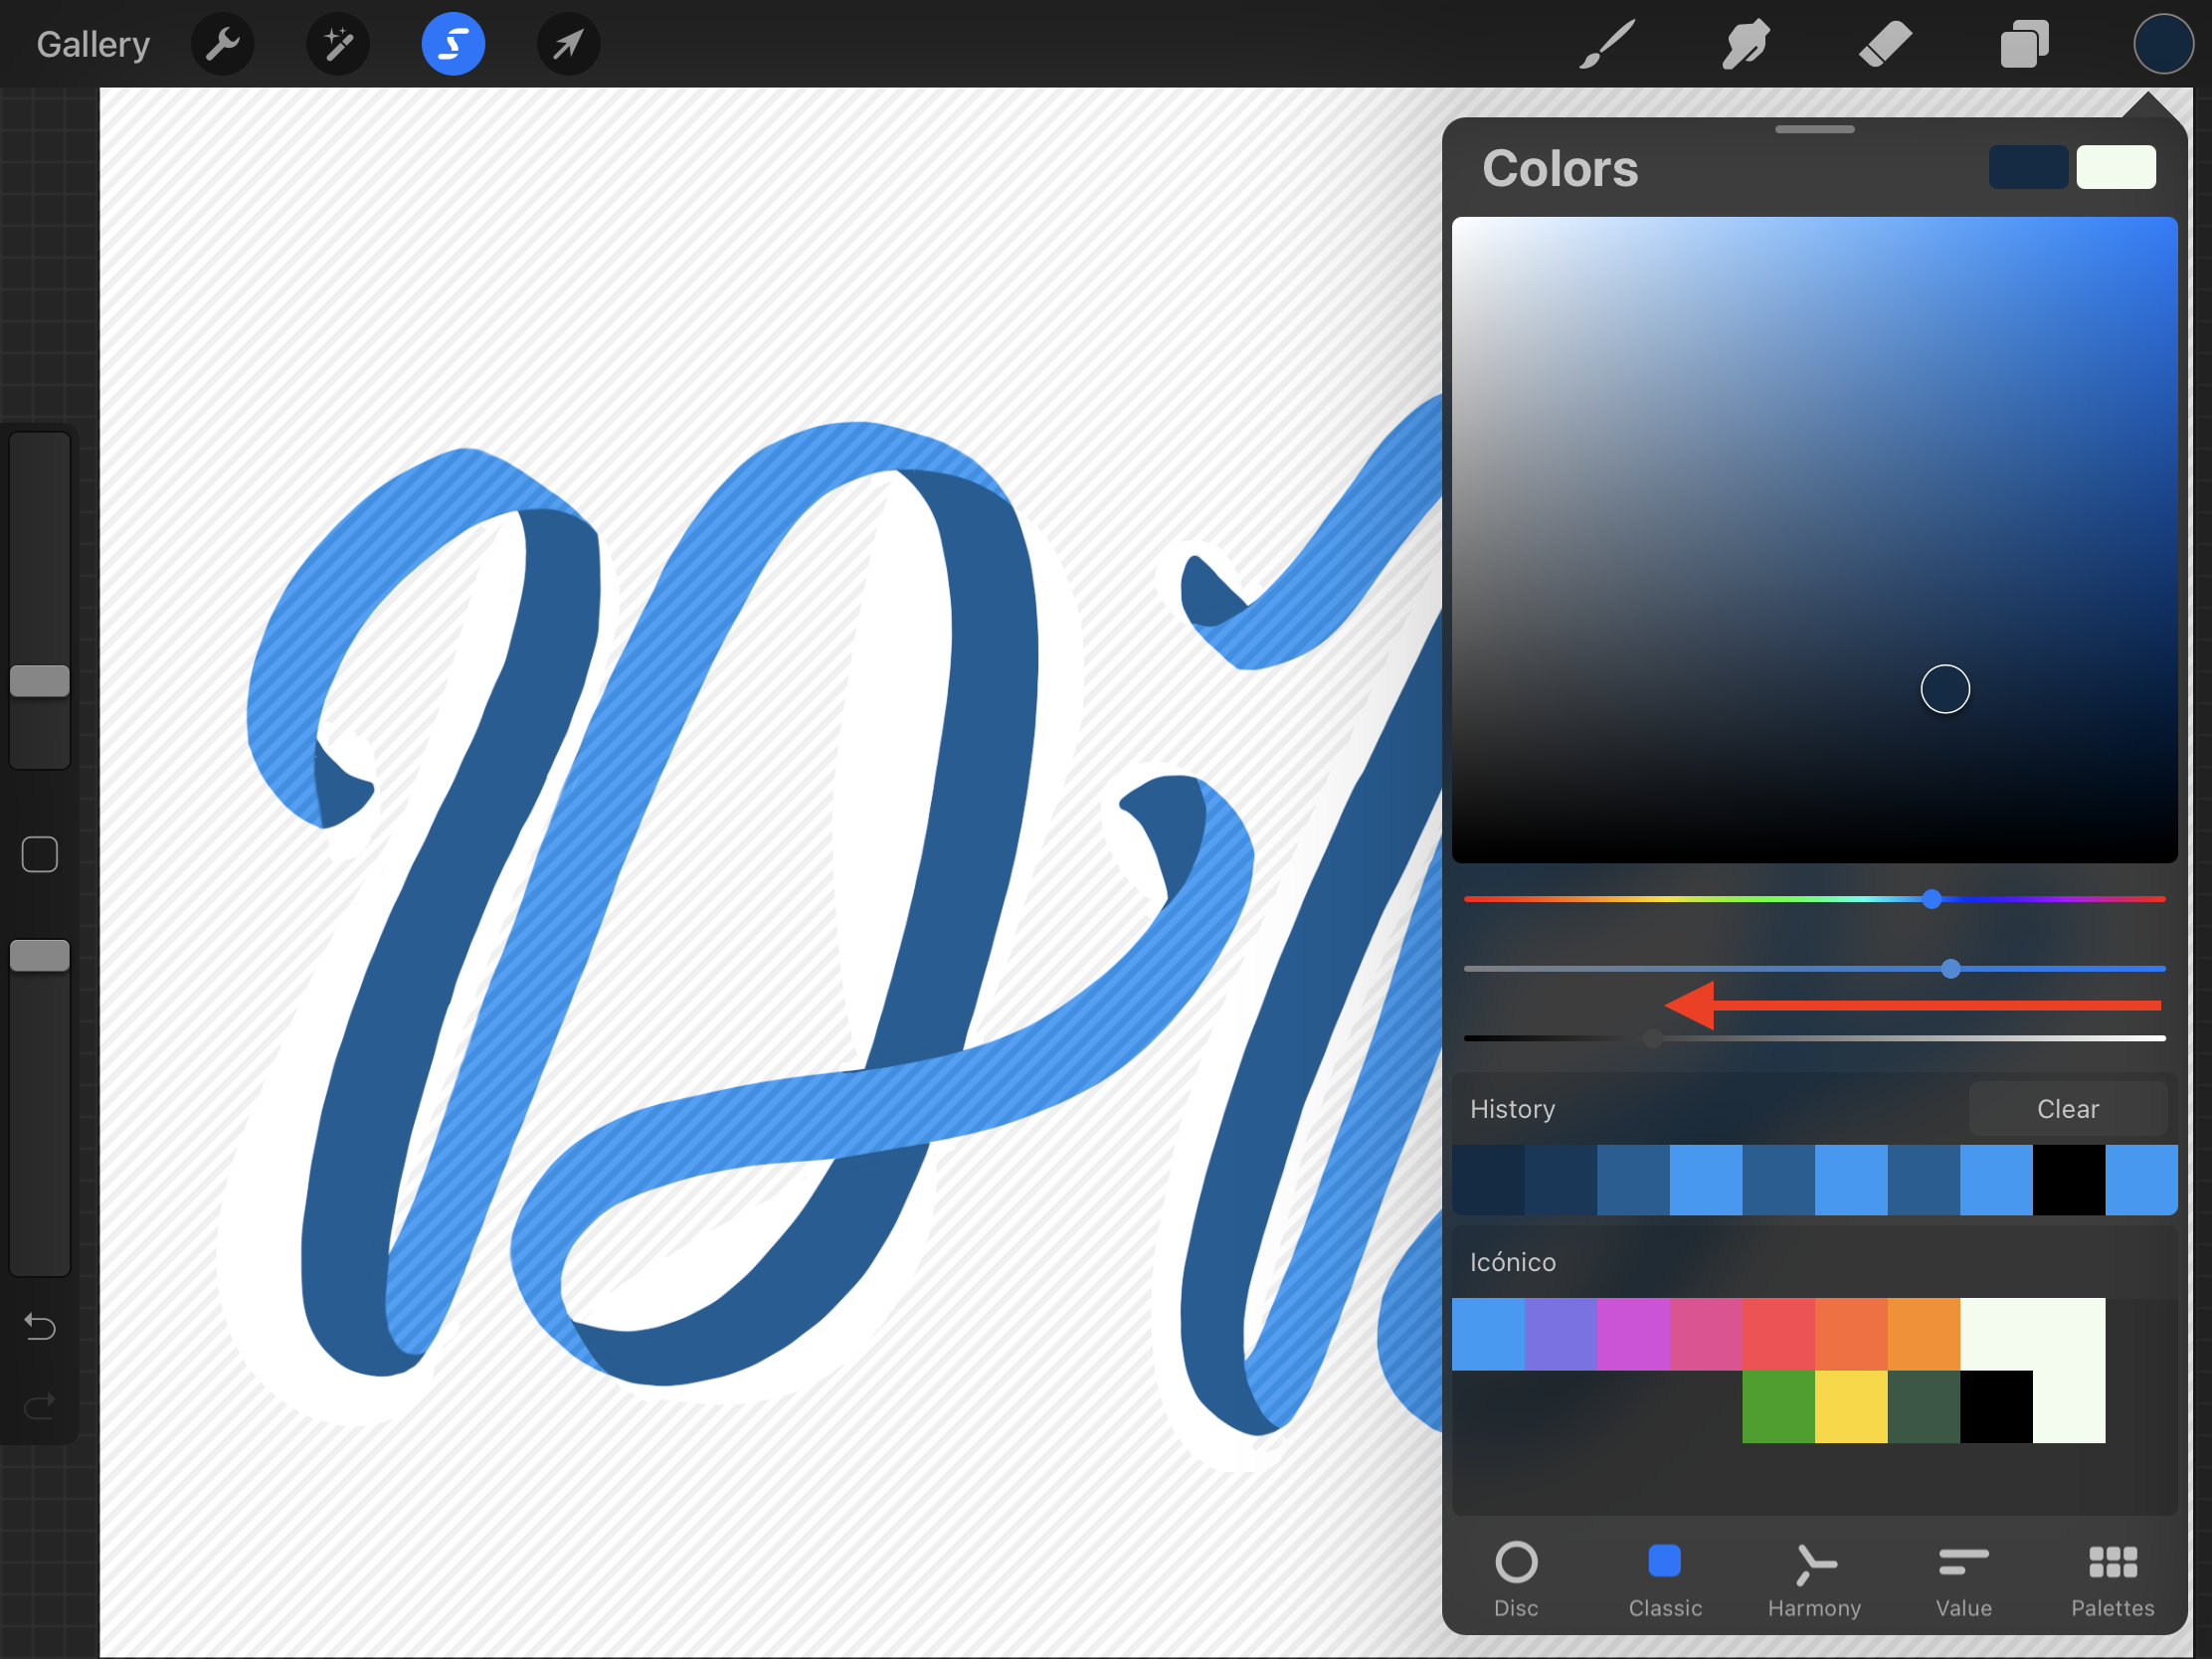
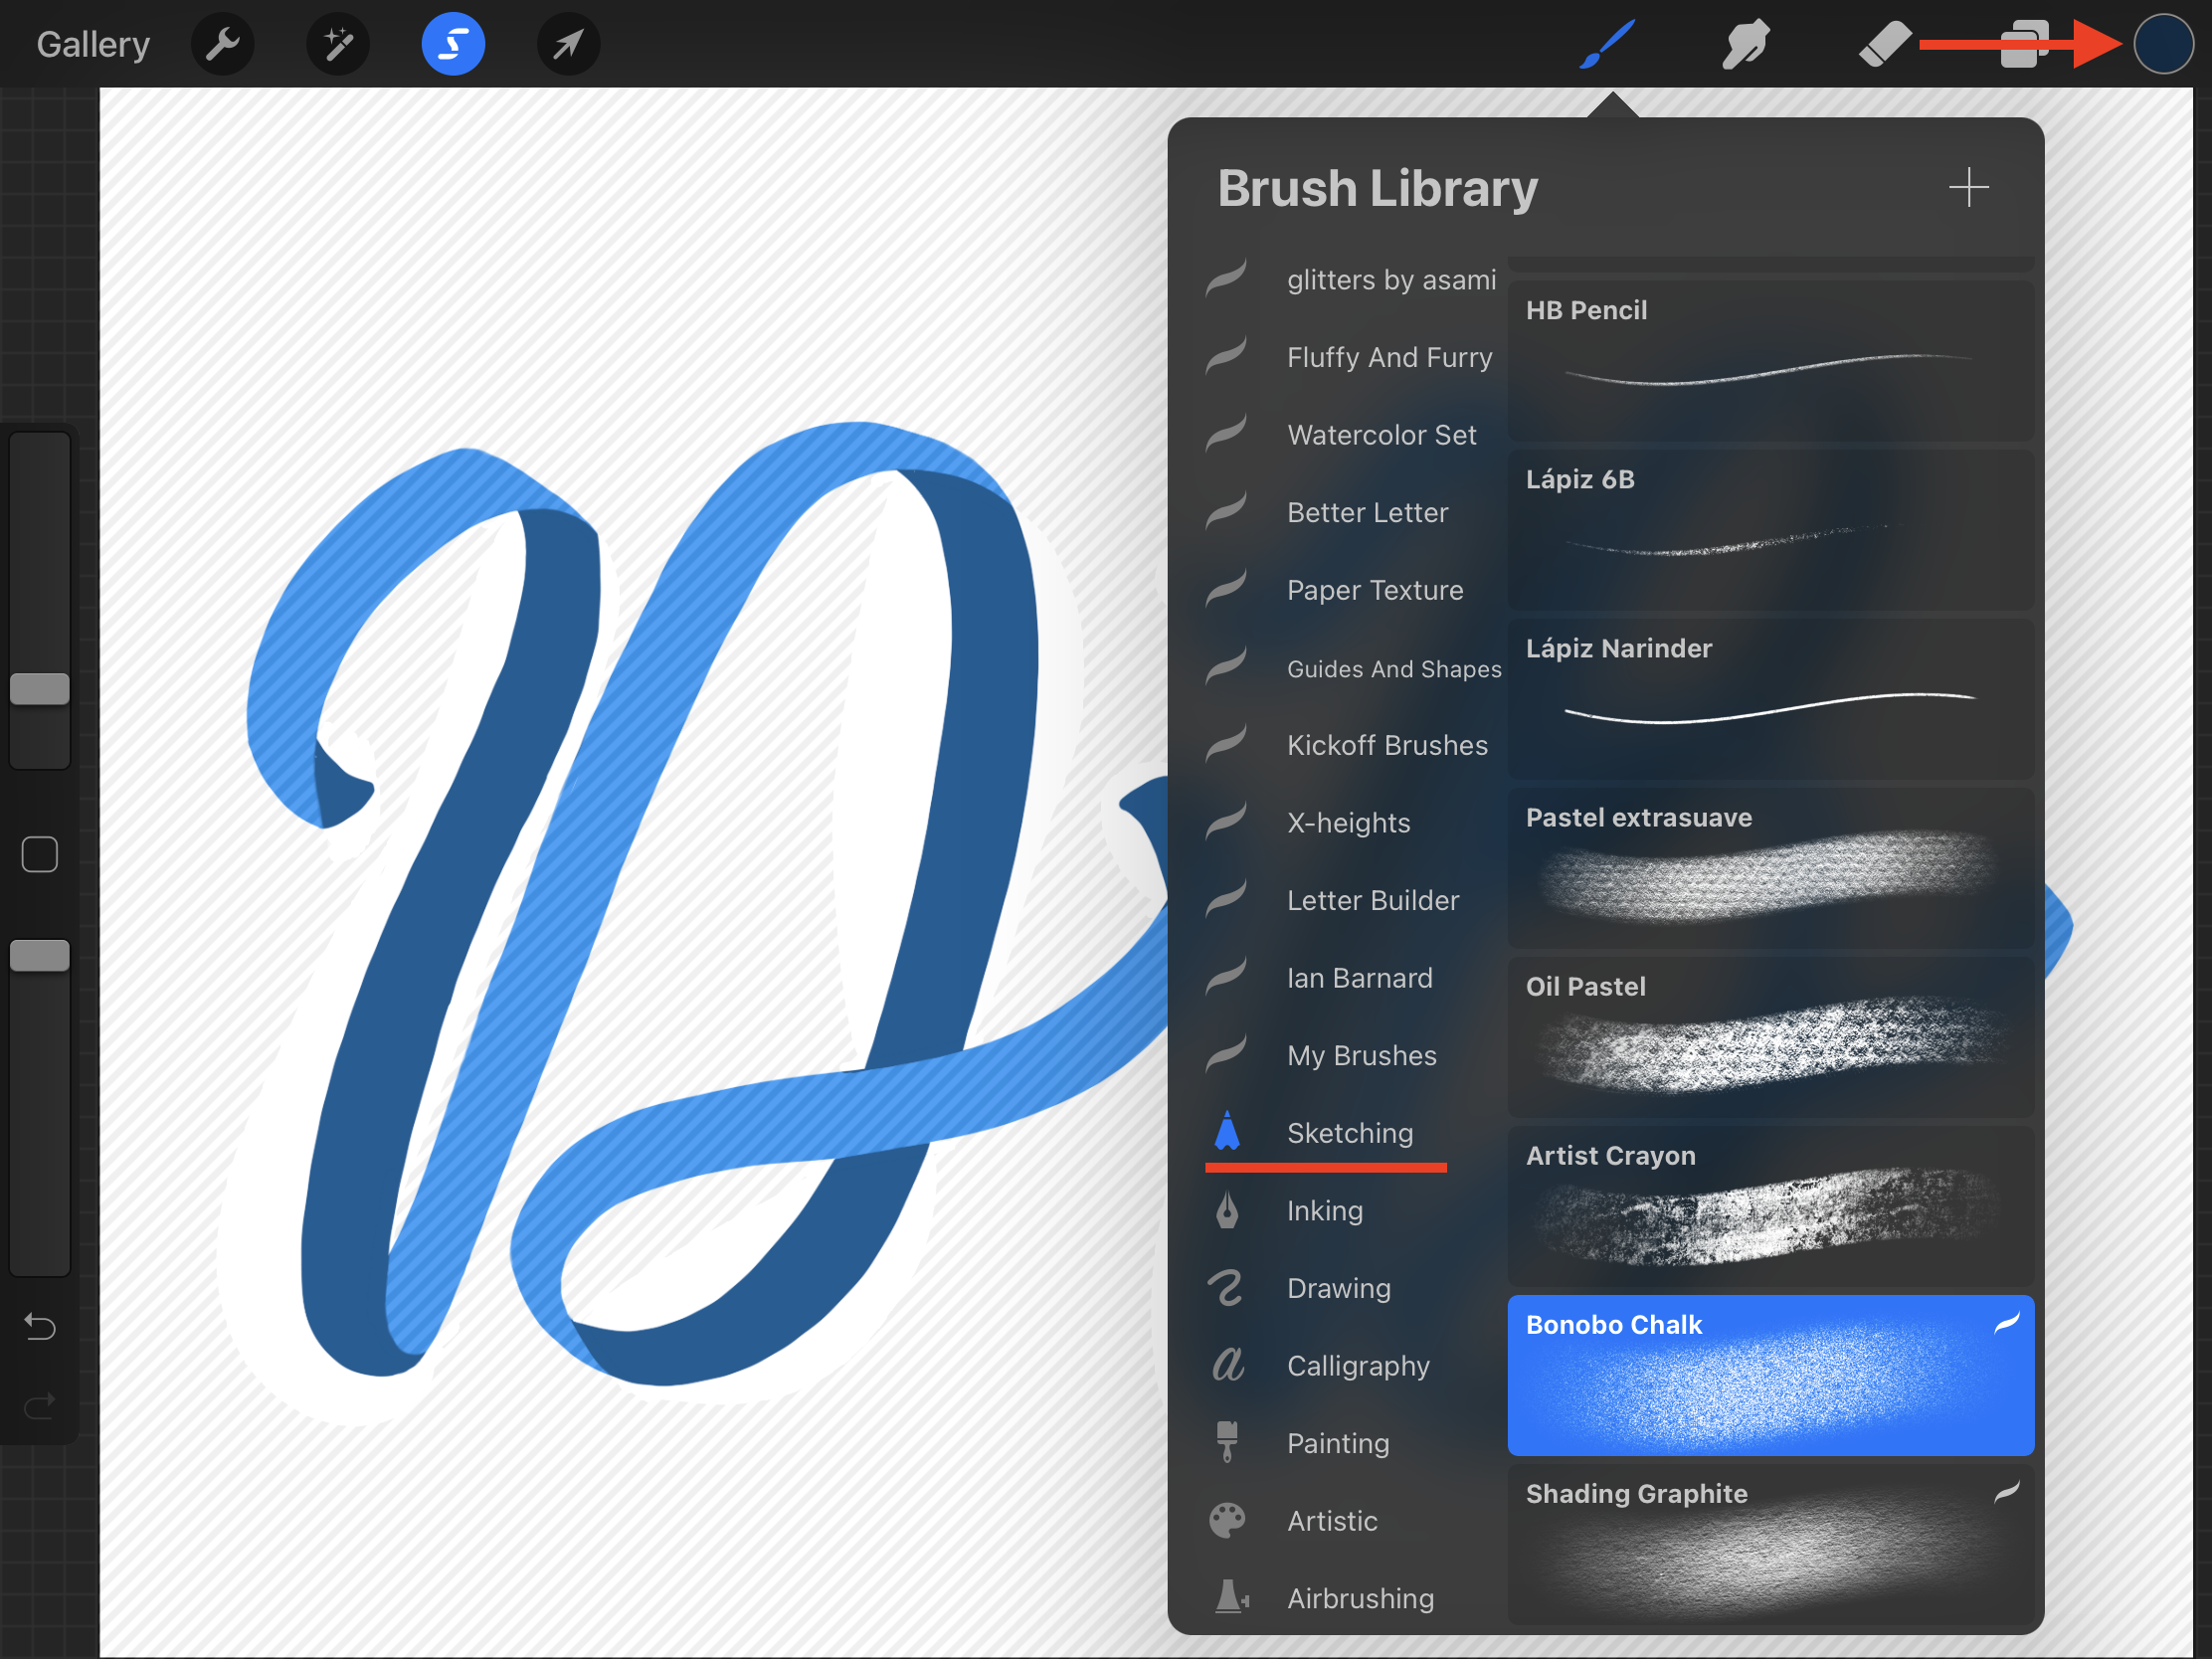
Use an even darker shade and a softer brush to add shadows to the folds and crossings.
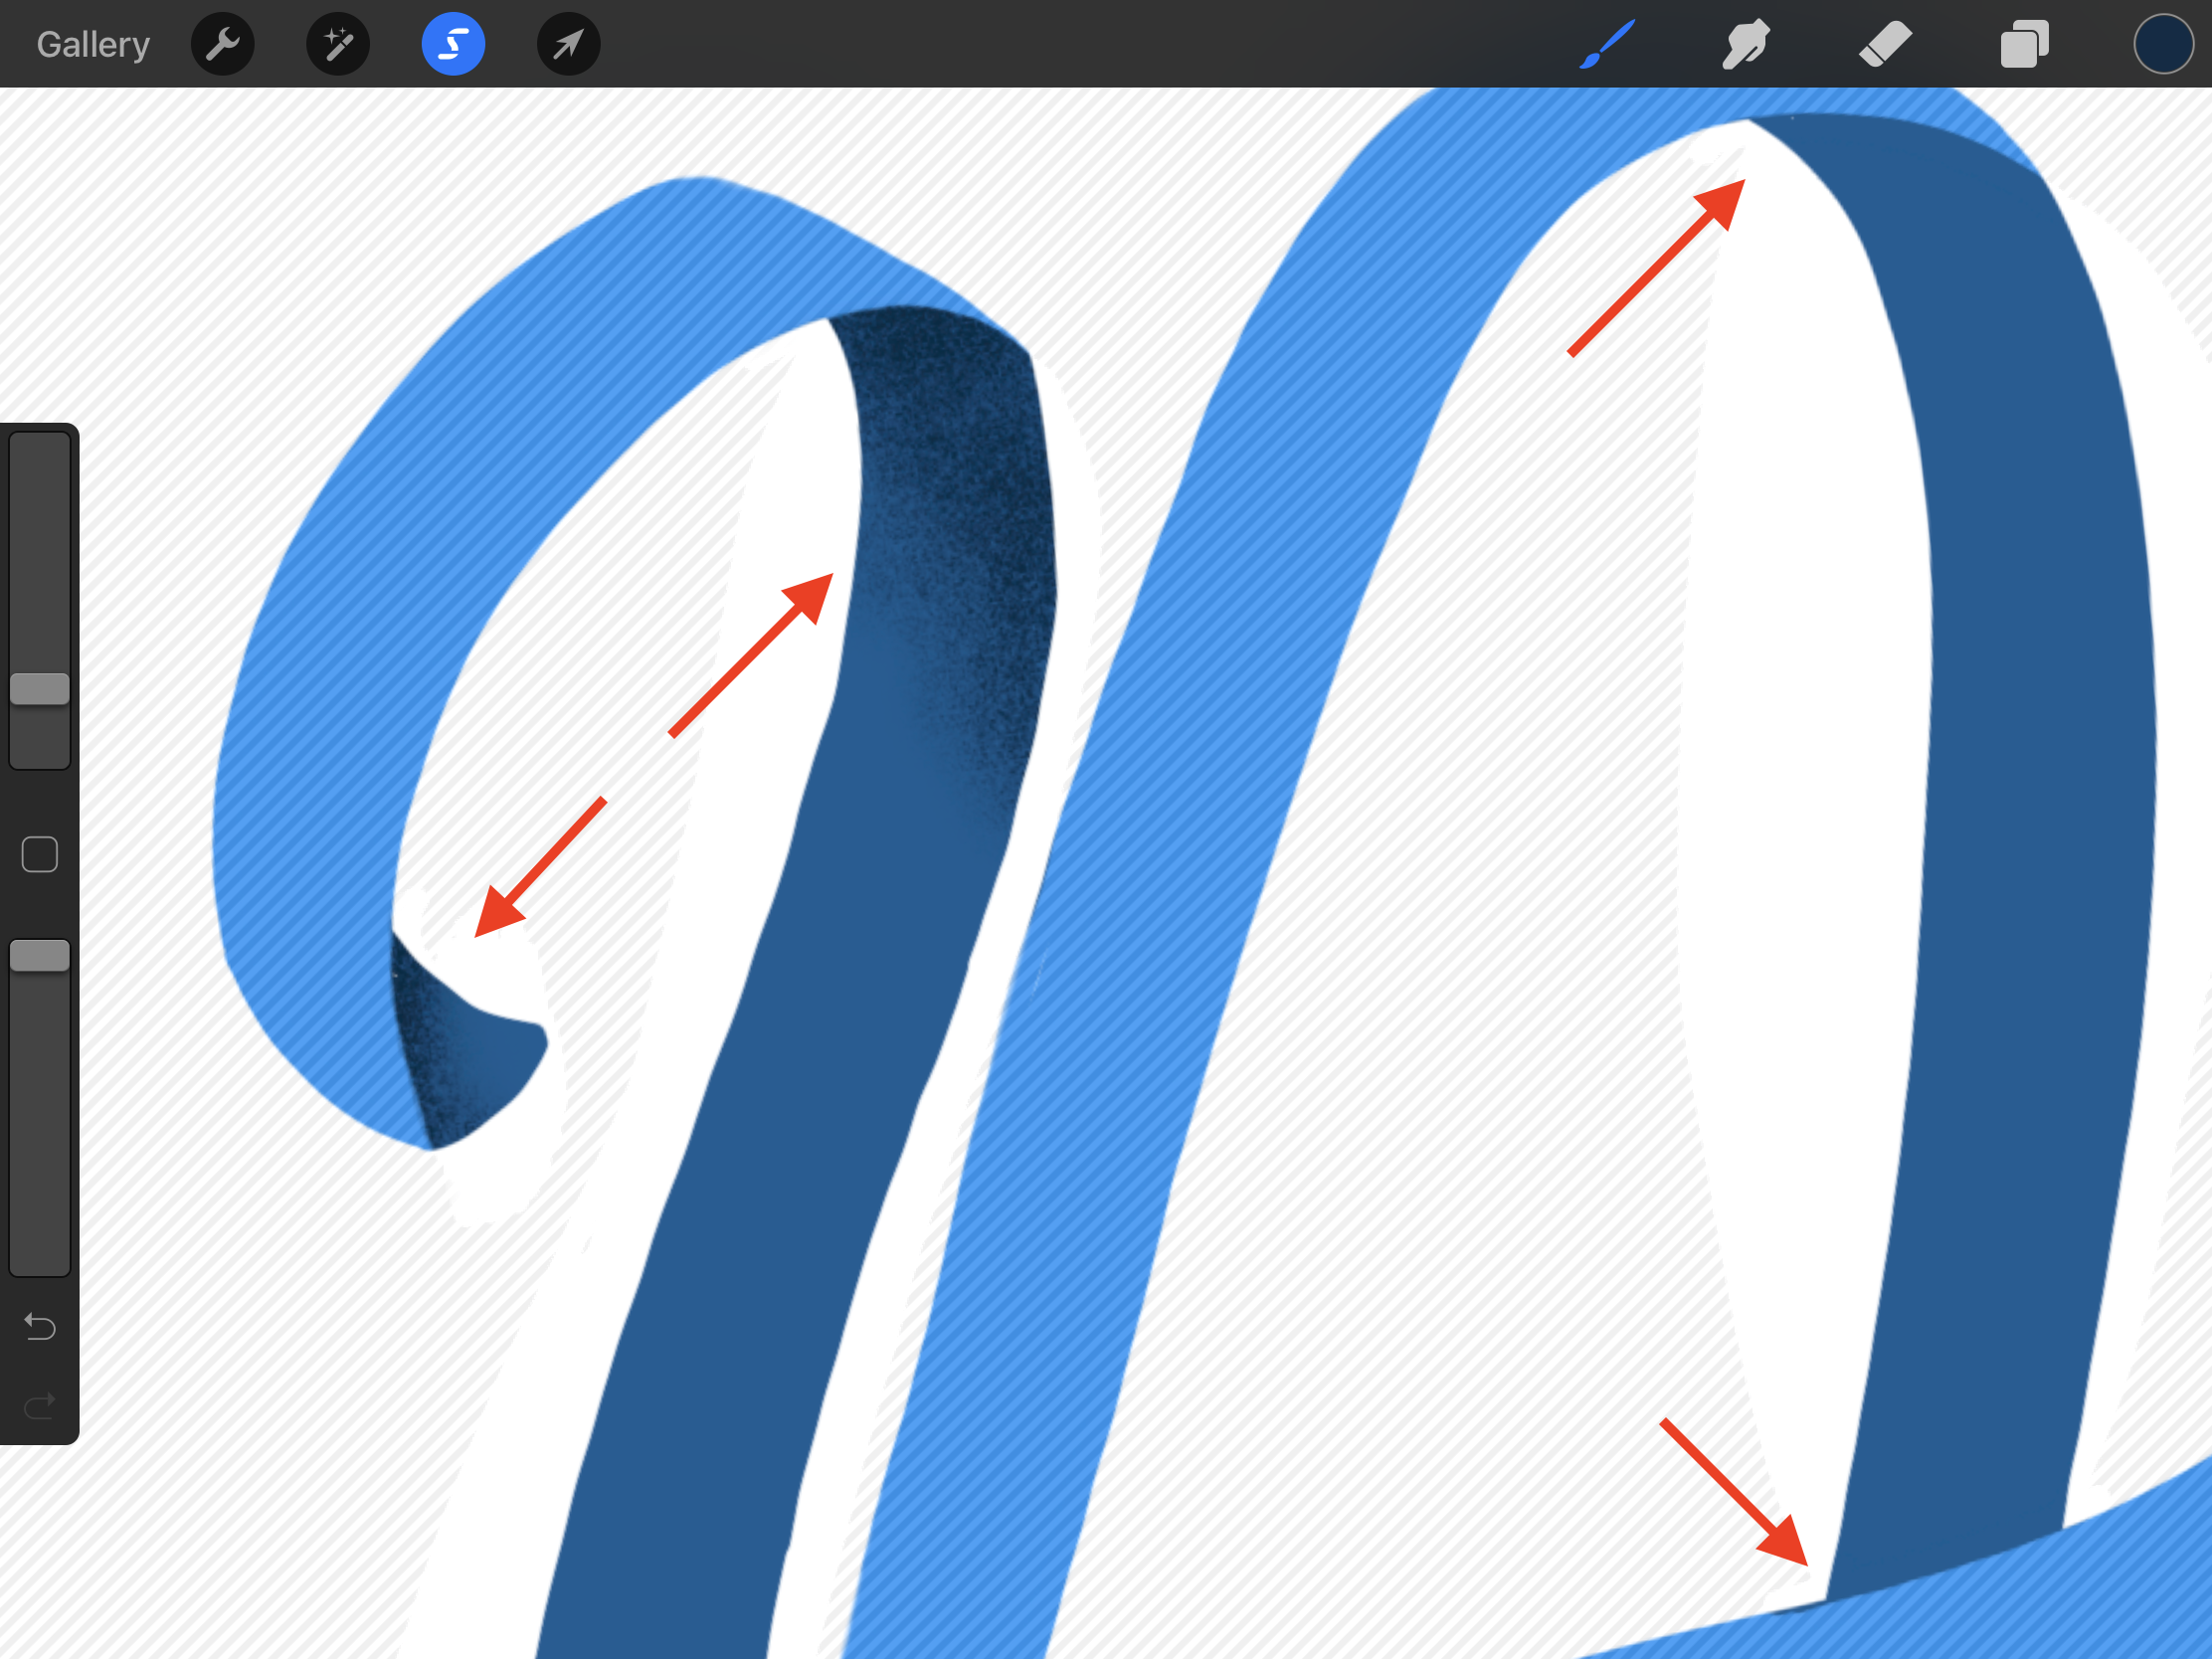
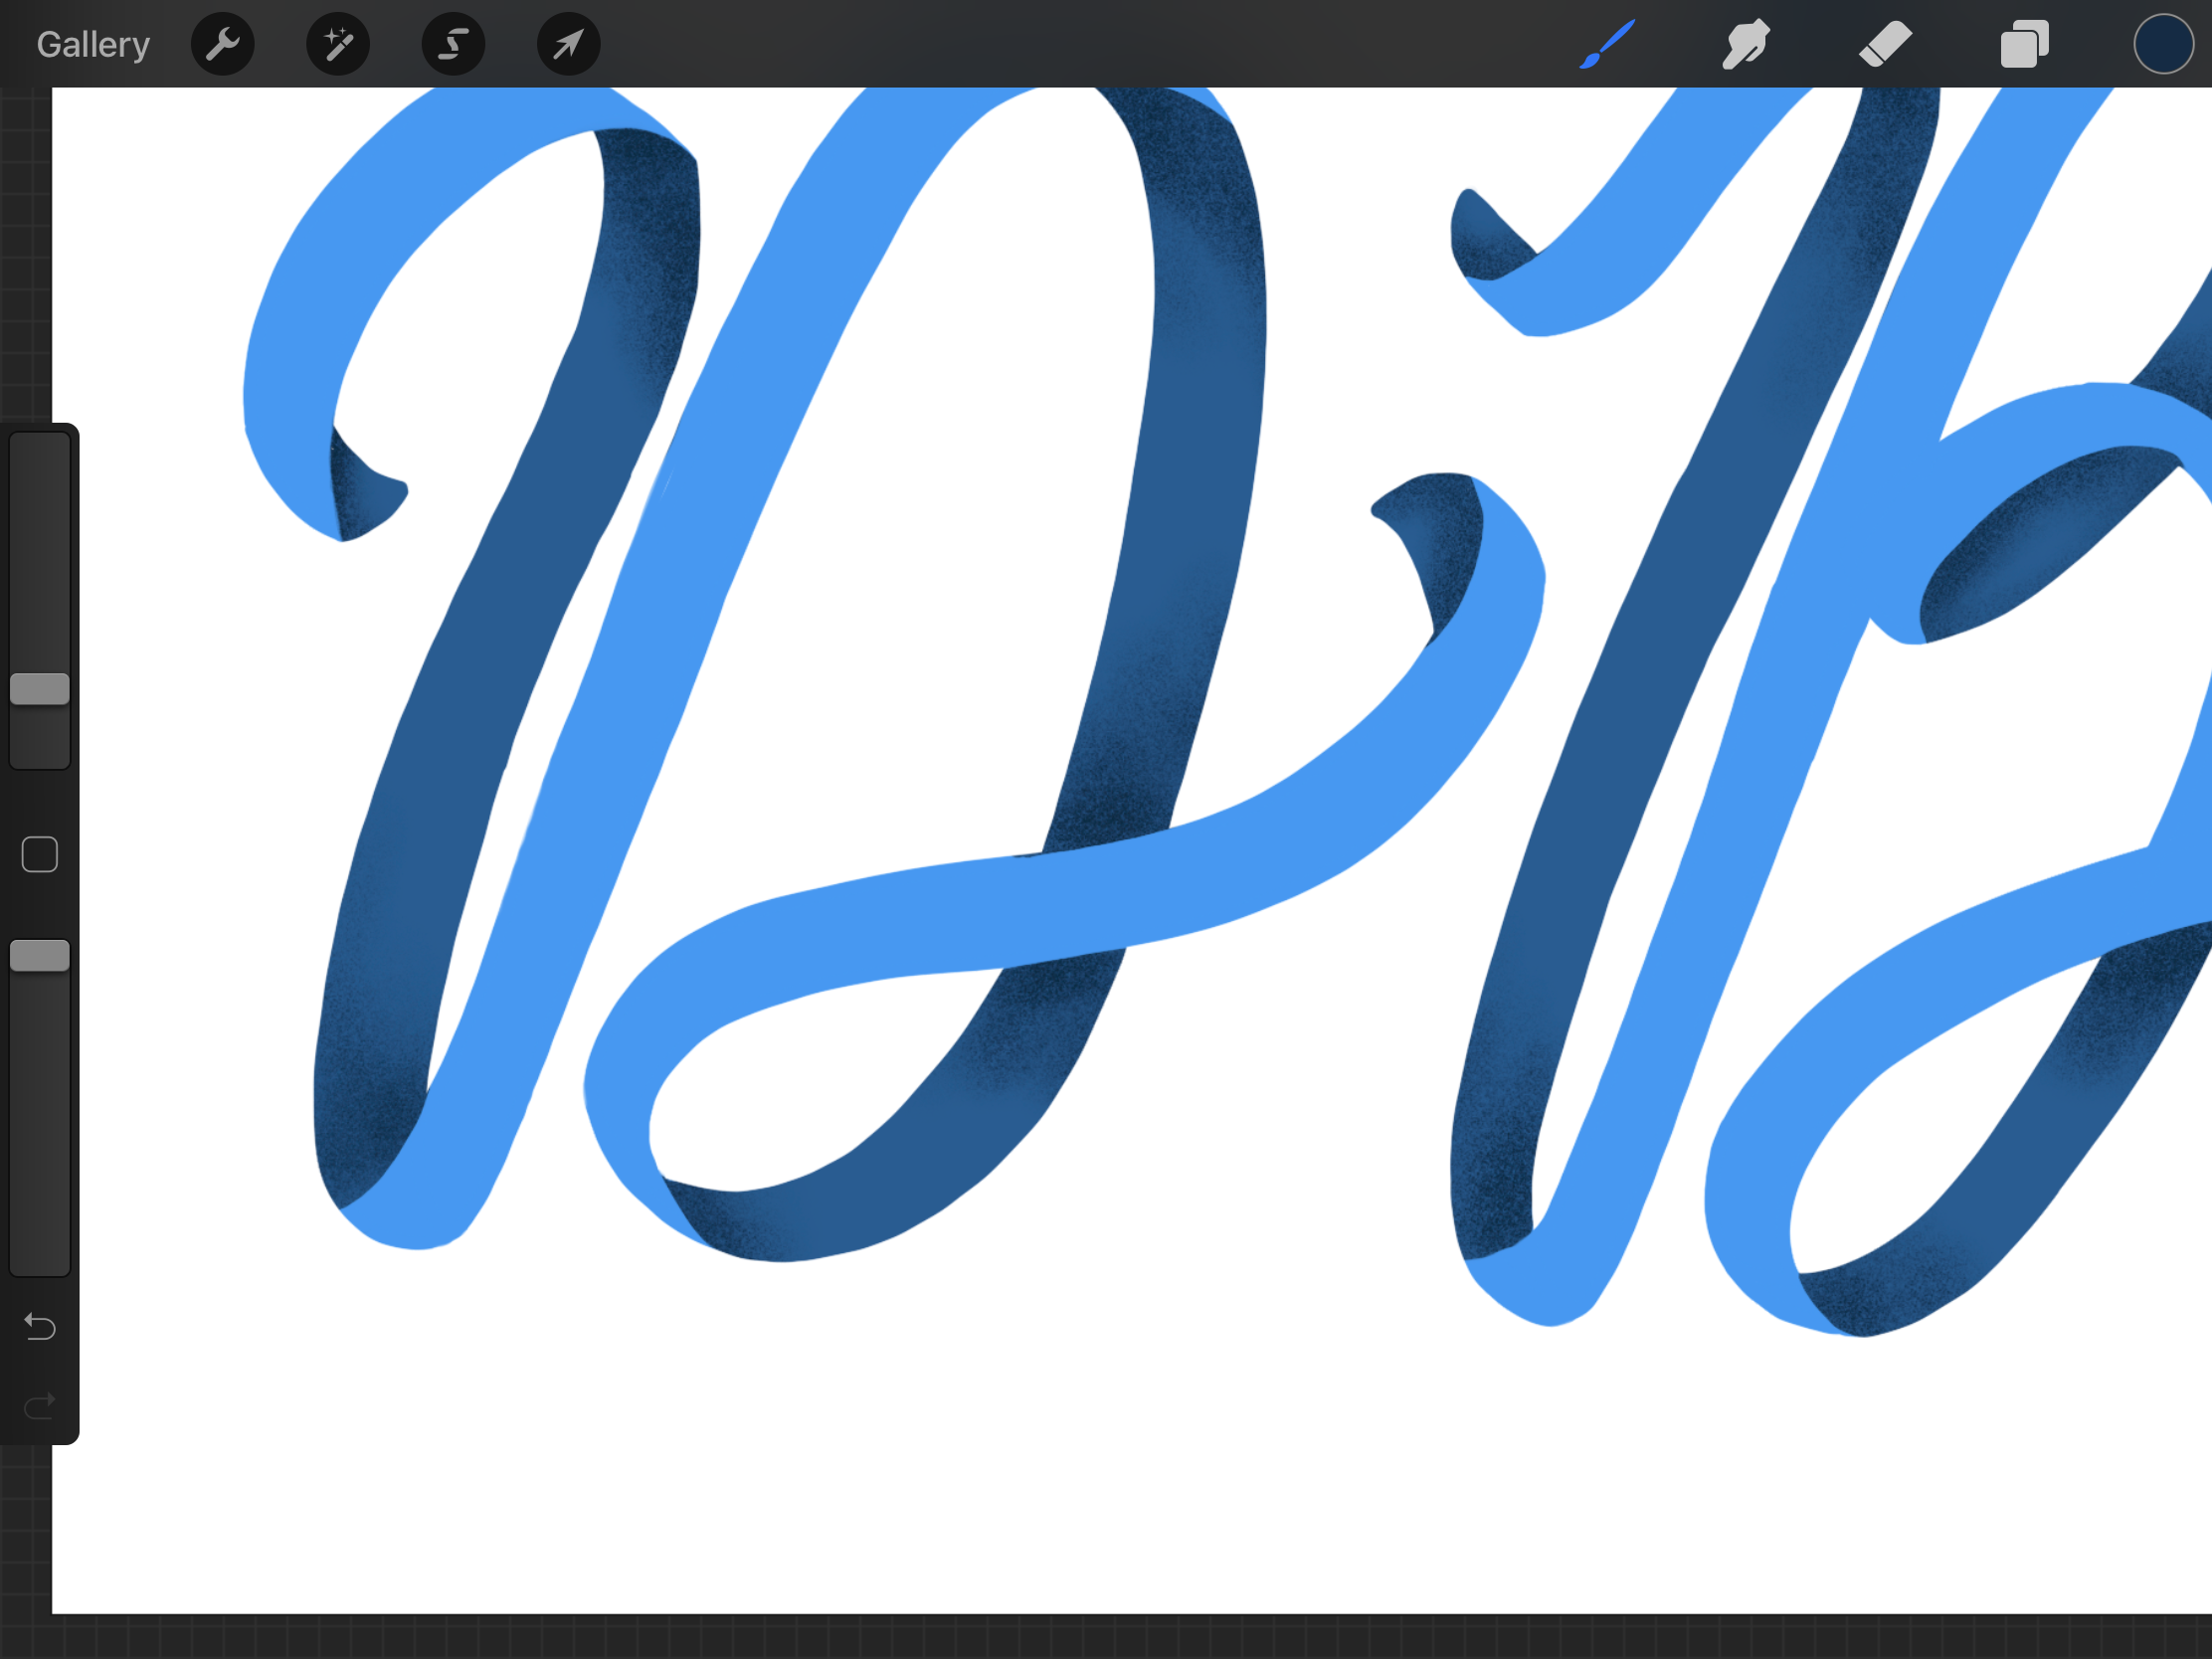
If there are some parts of the text that overlap a bit, use the Selection Tool to pick the portion that will be shaded (under). Then use the same dark color and brush to add the shadow.
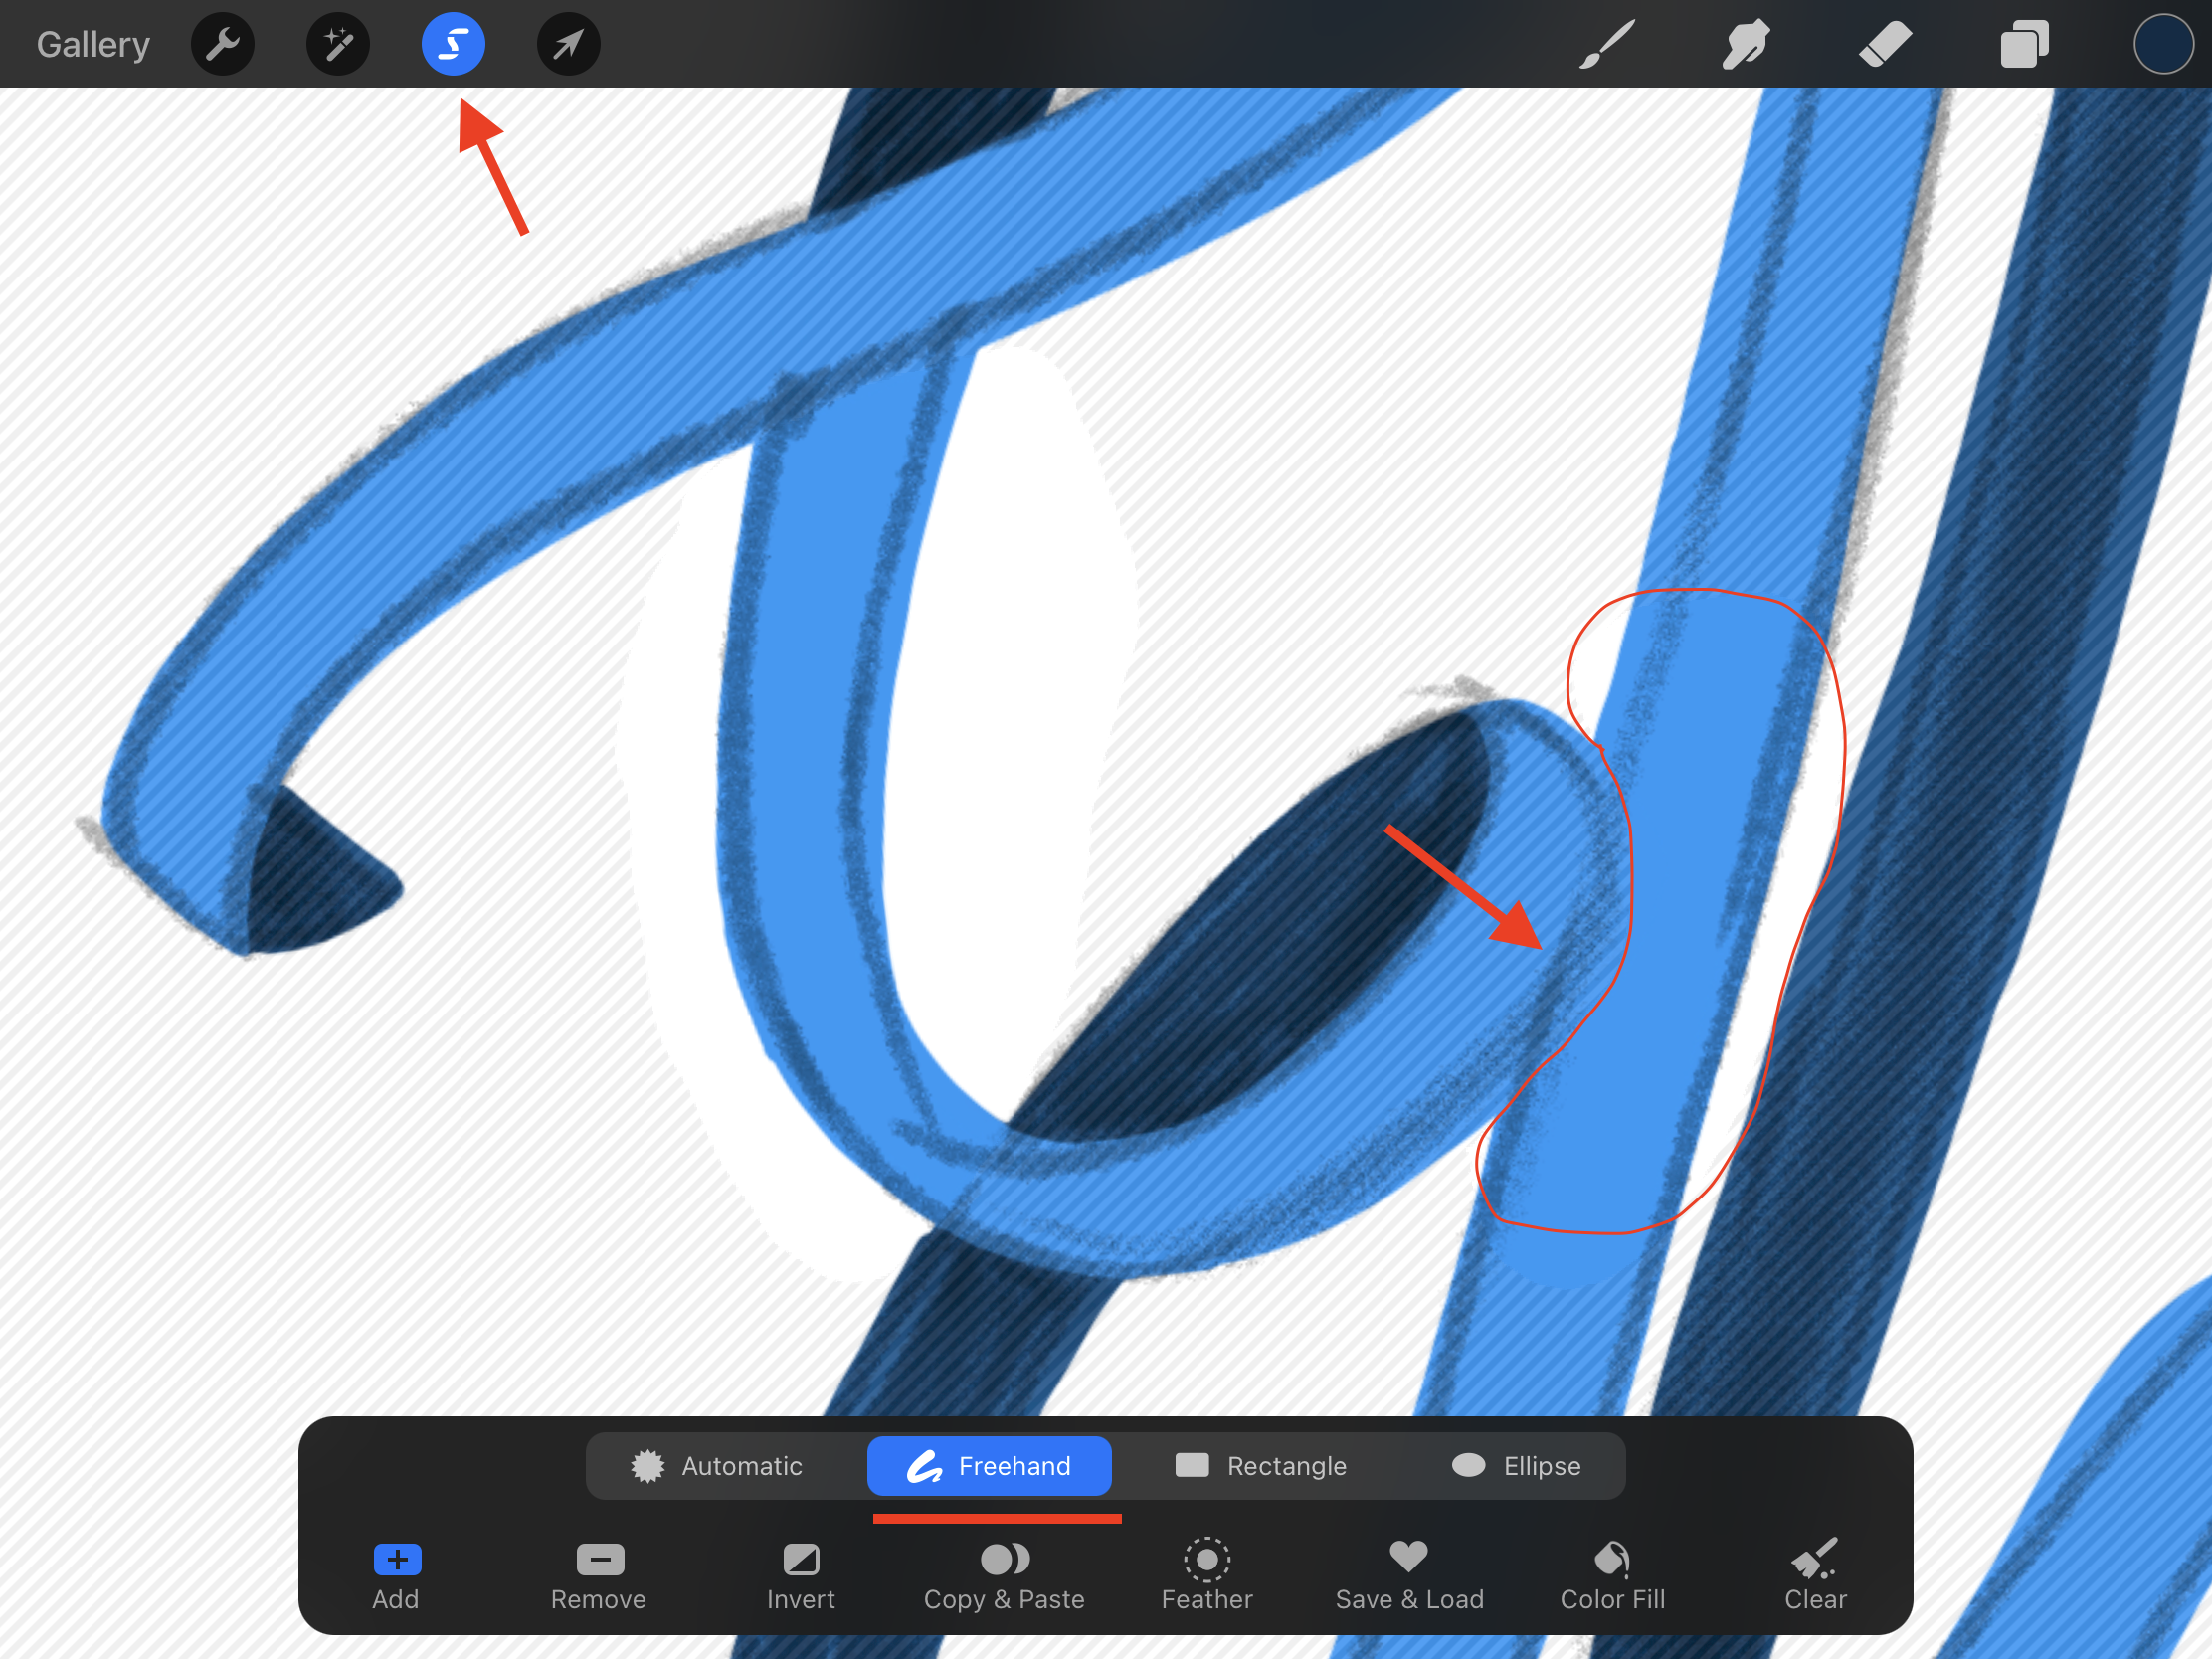
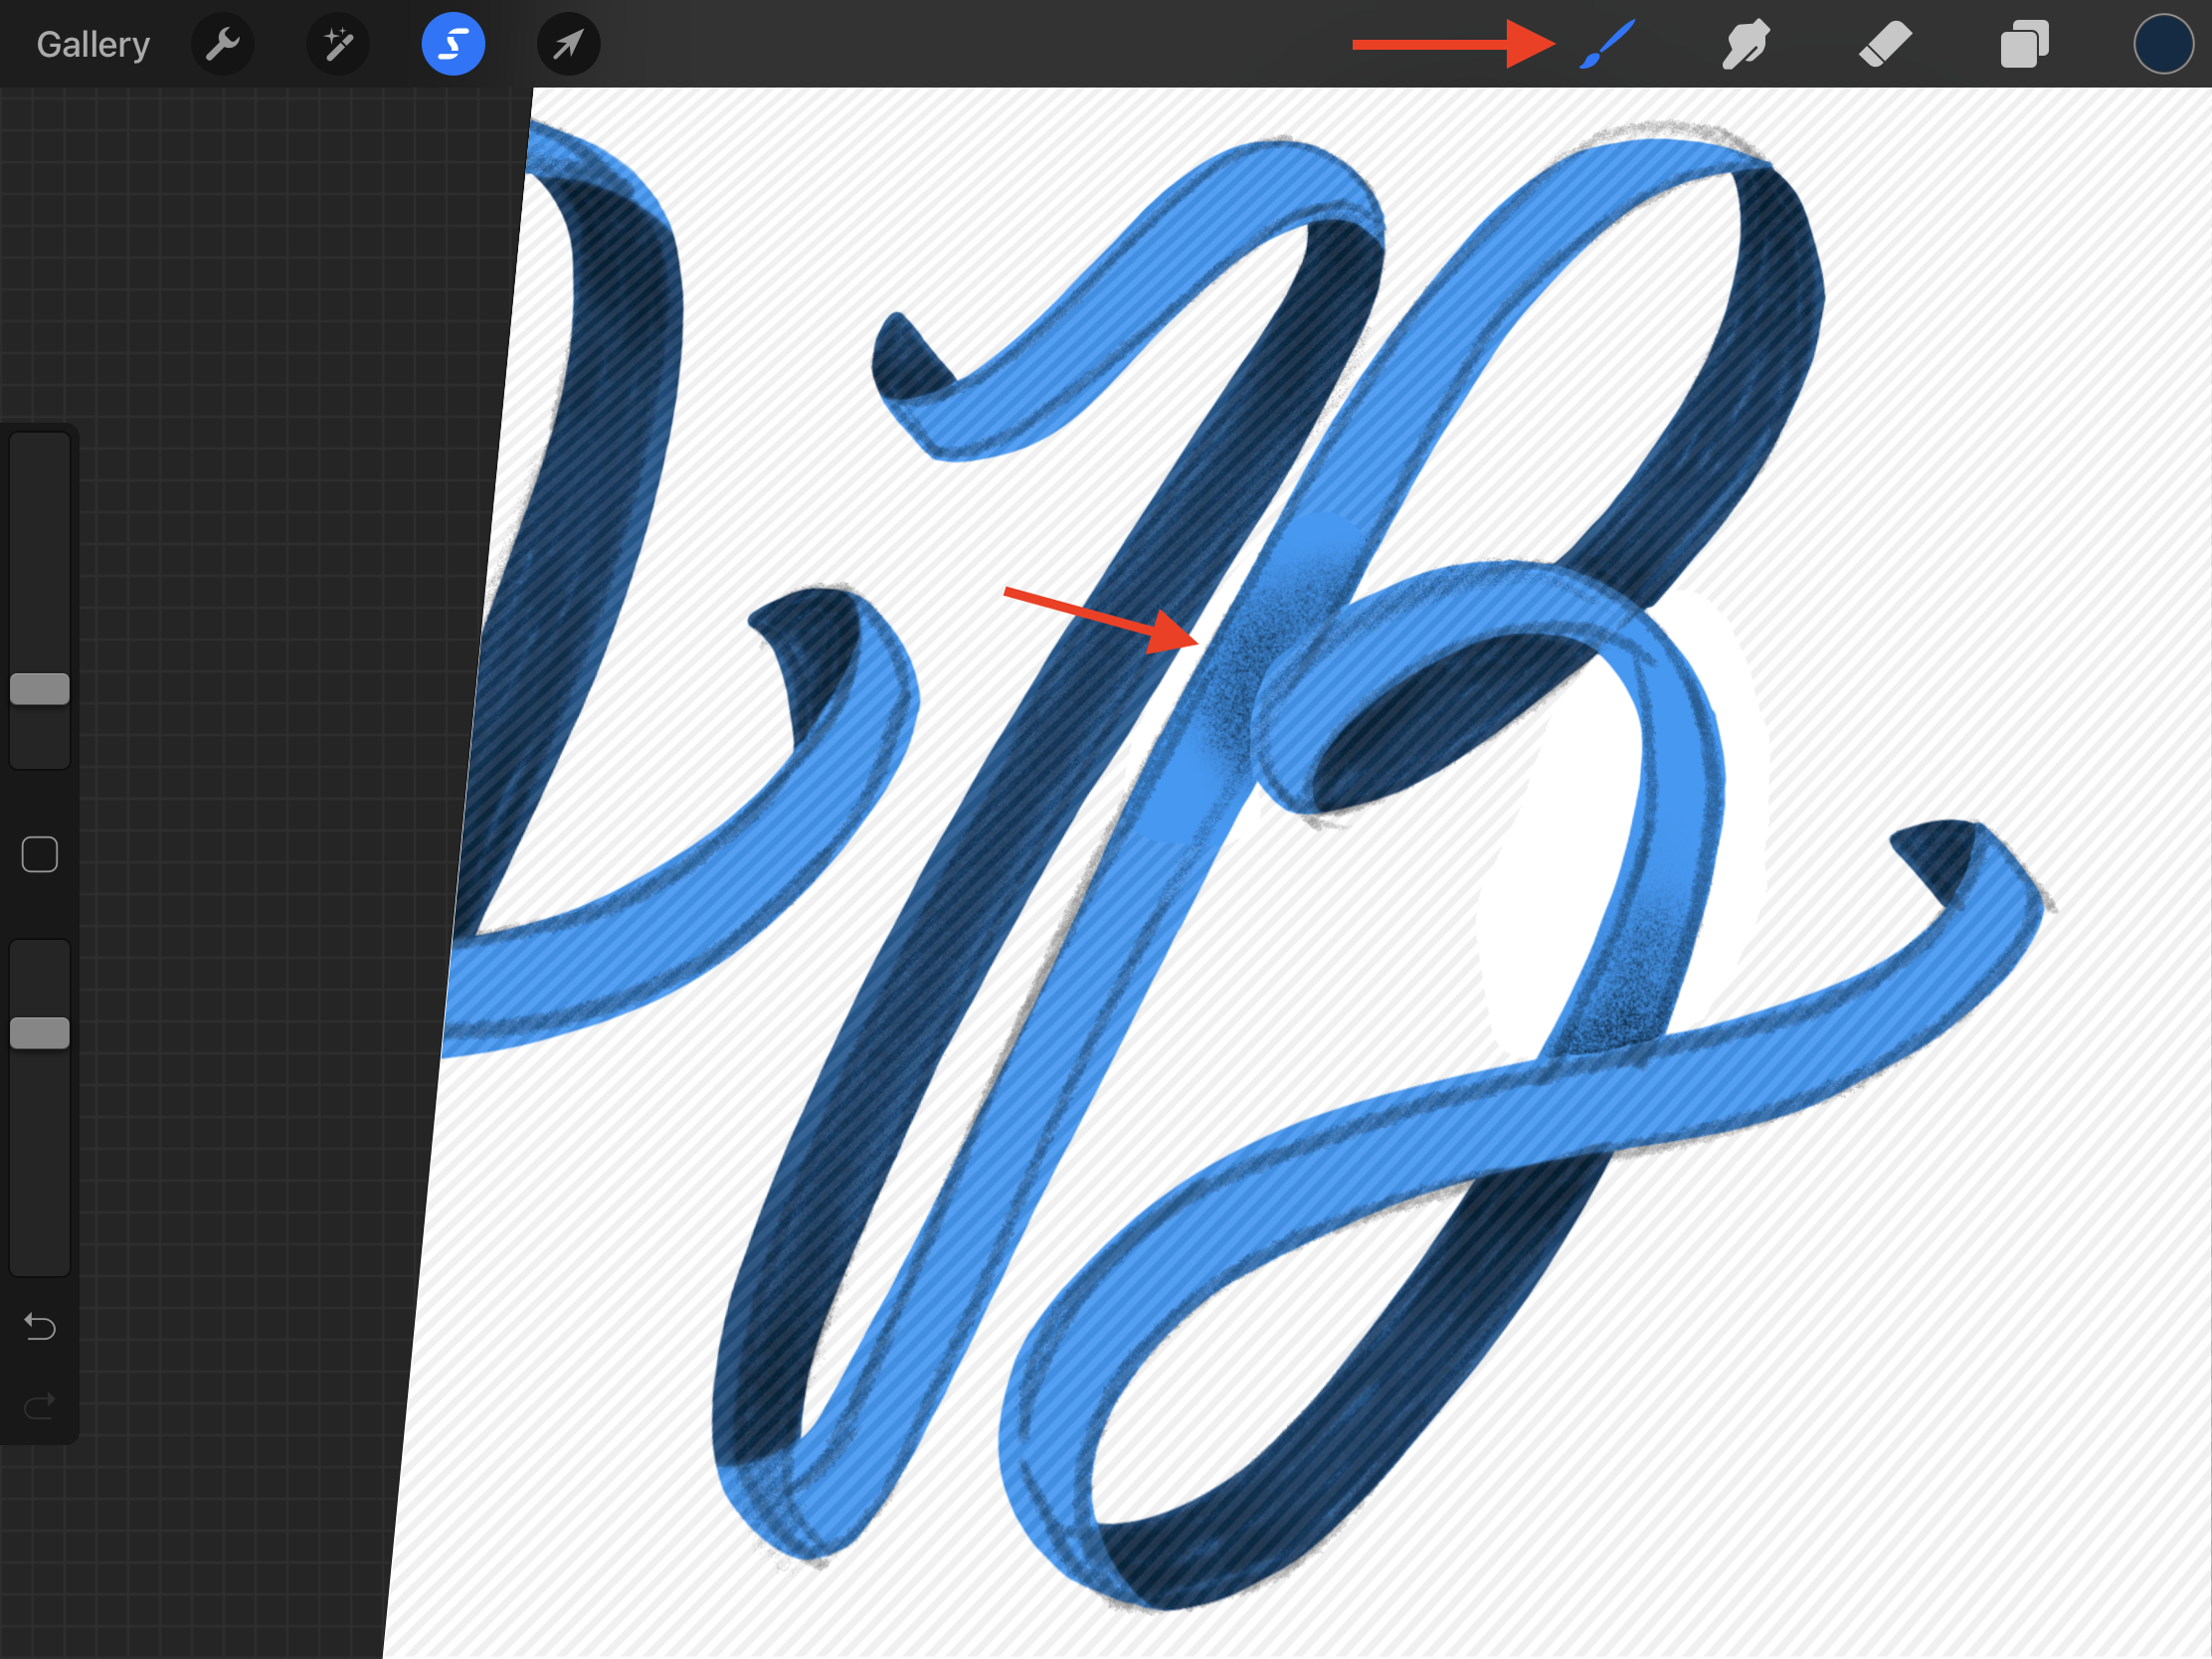
Add some more toned-down shadows to the lower parts of the ribbon and some highlights to the top to make them pop out.

Choose the brush you want to work with. For his example, we used a thick brush from Design Bundles.
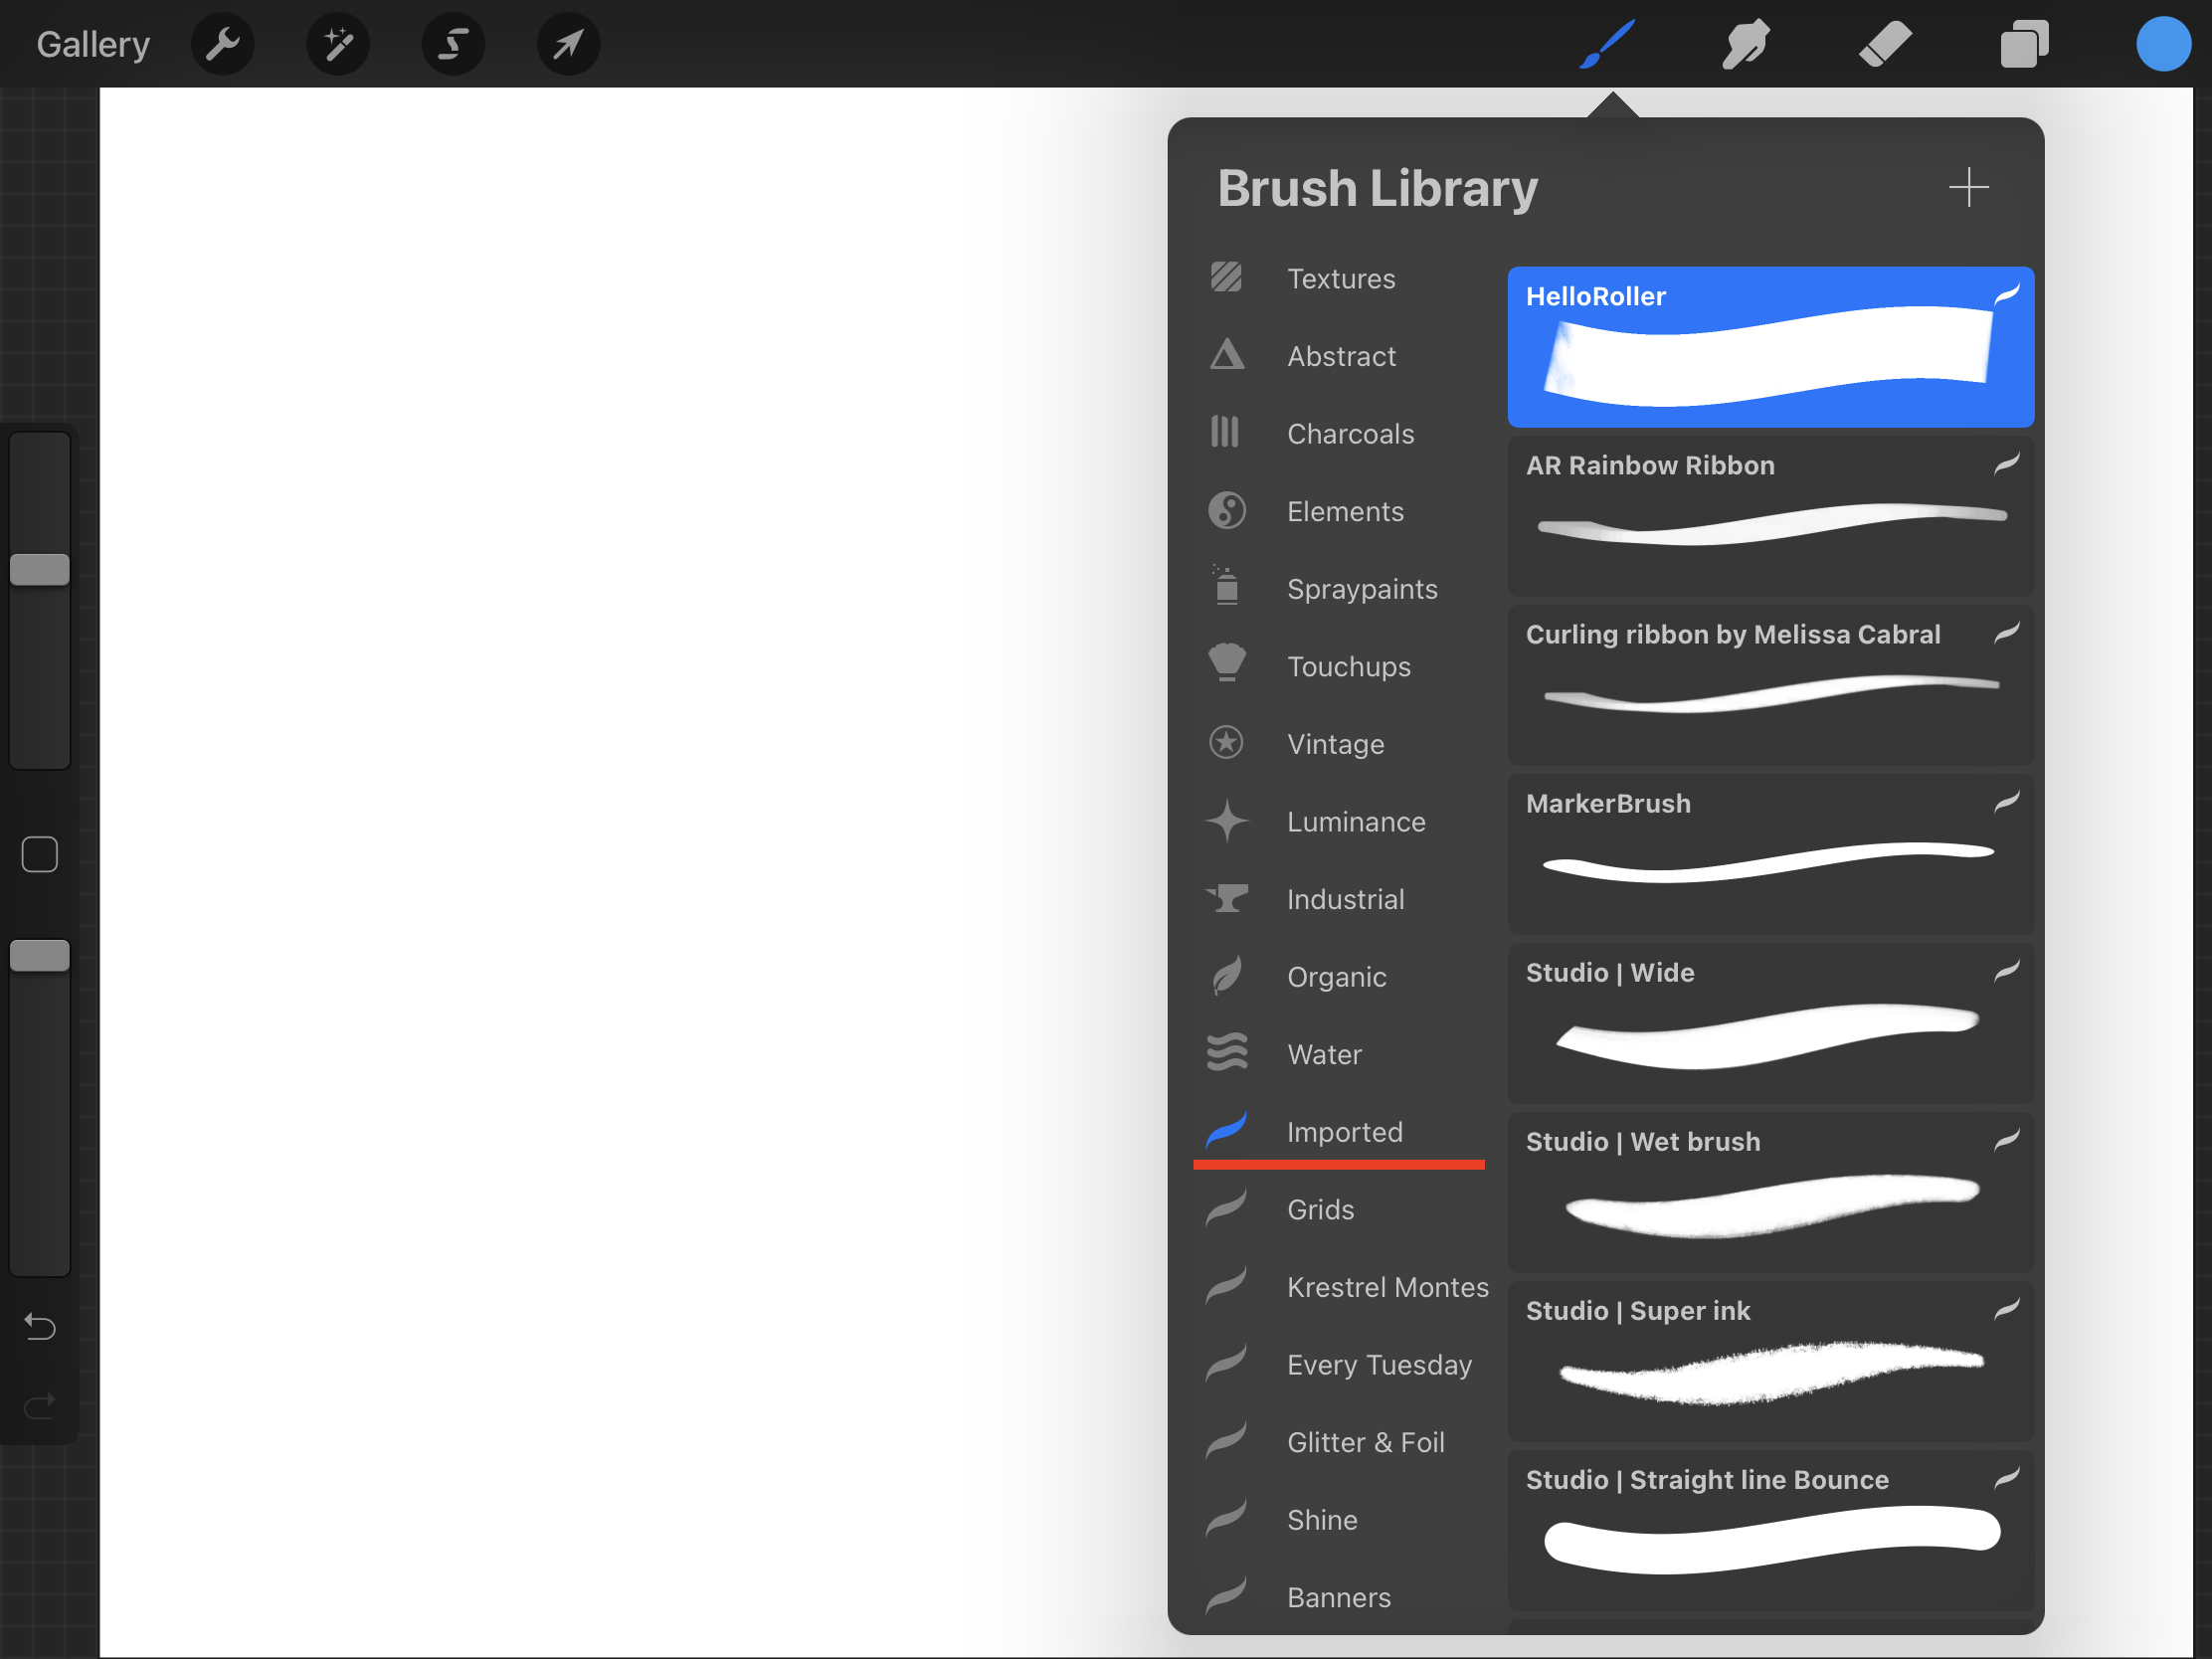
Pick the color you want to use as the base and write your text trying to get an undulated look, just like some folded ribbon.
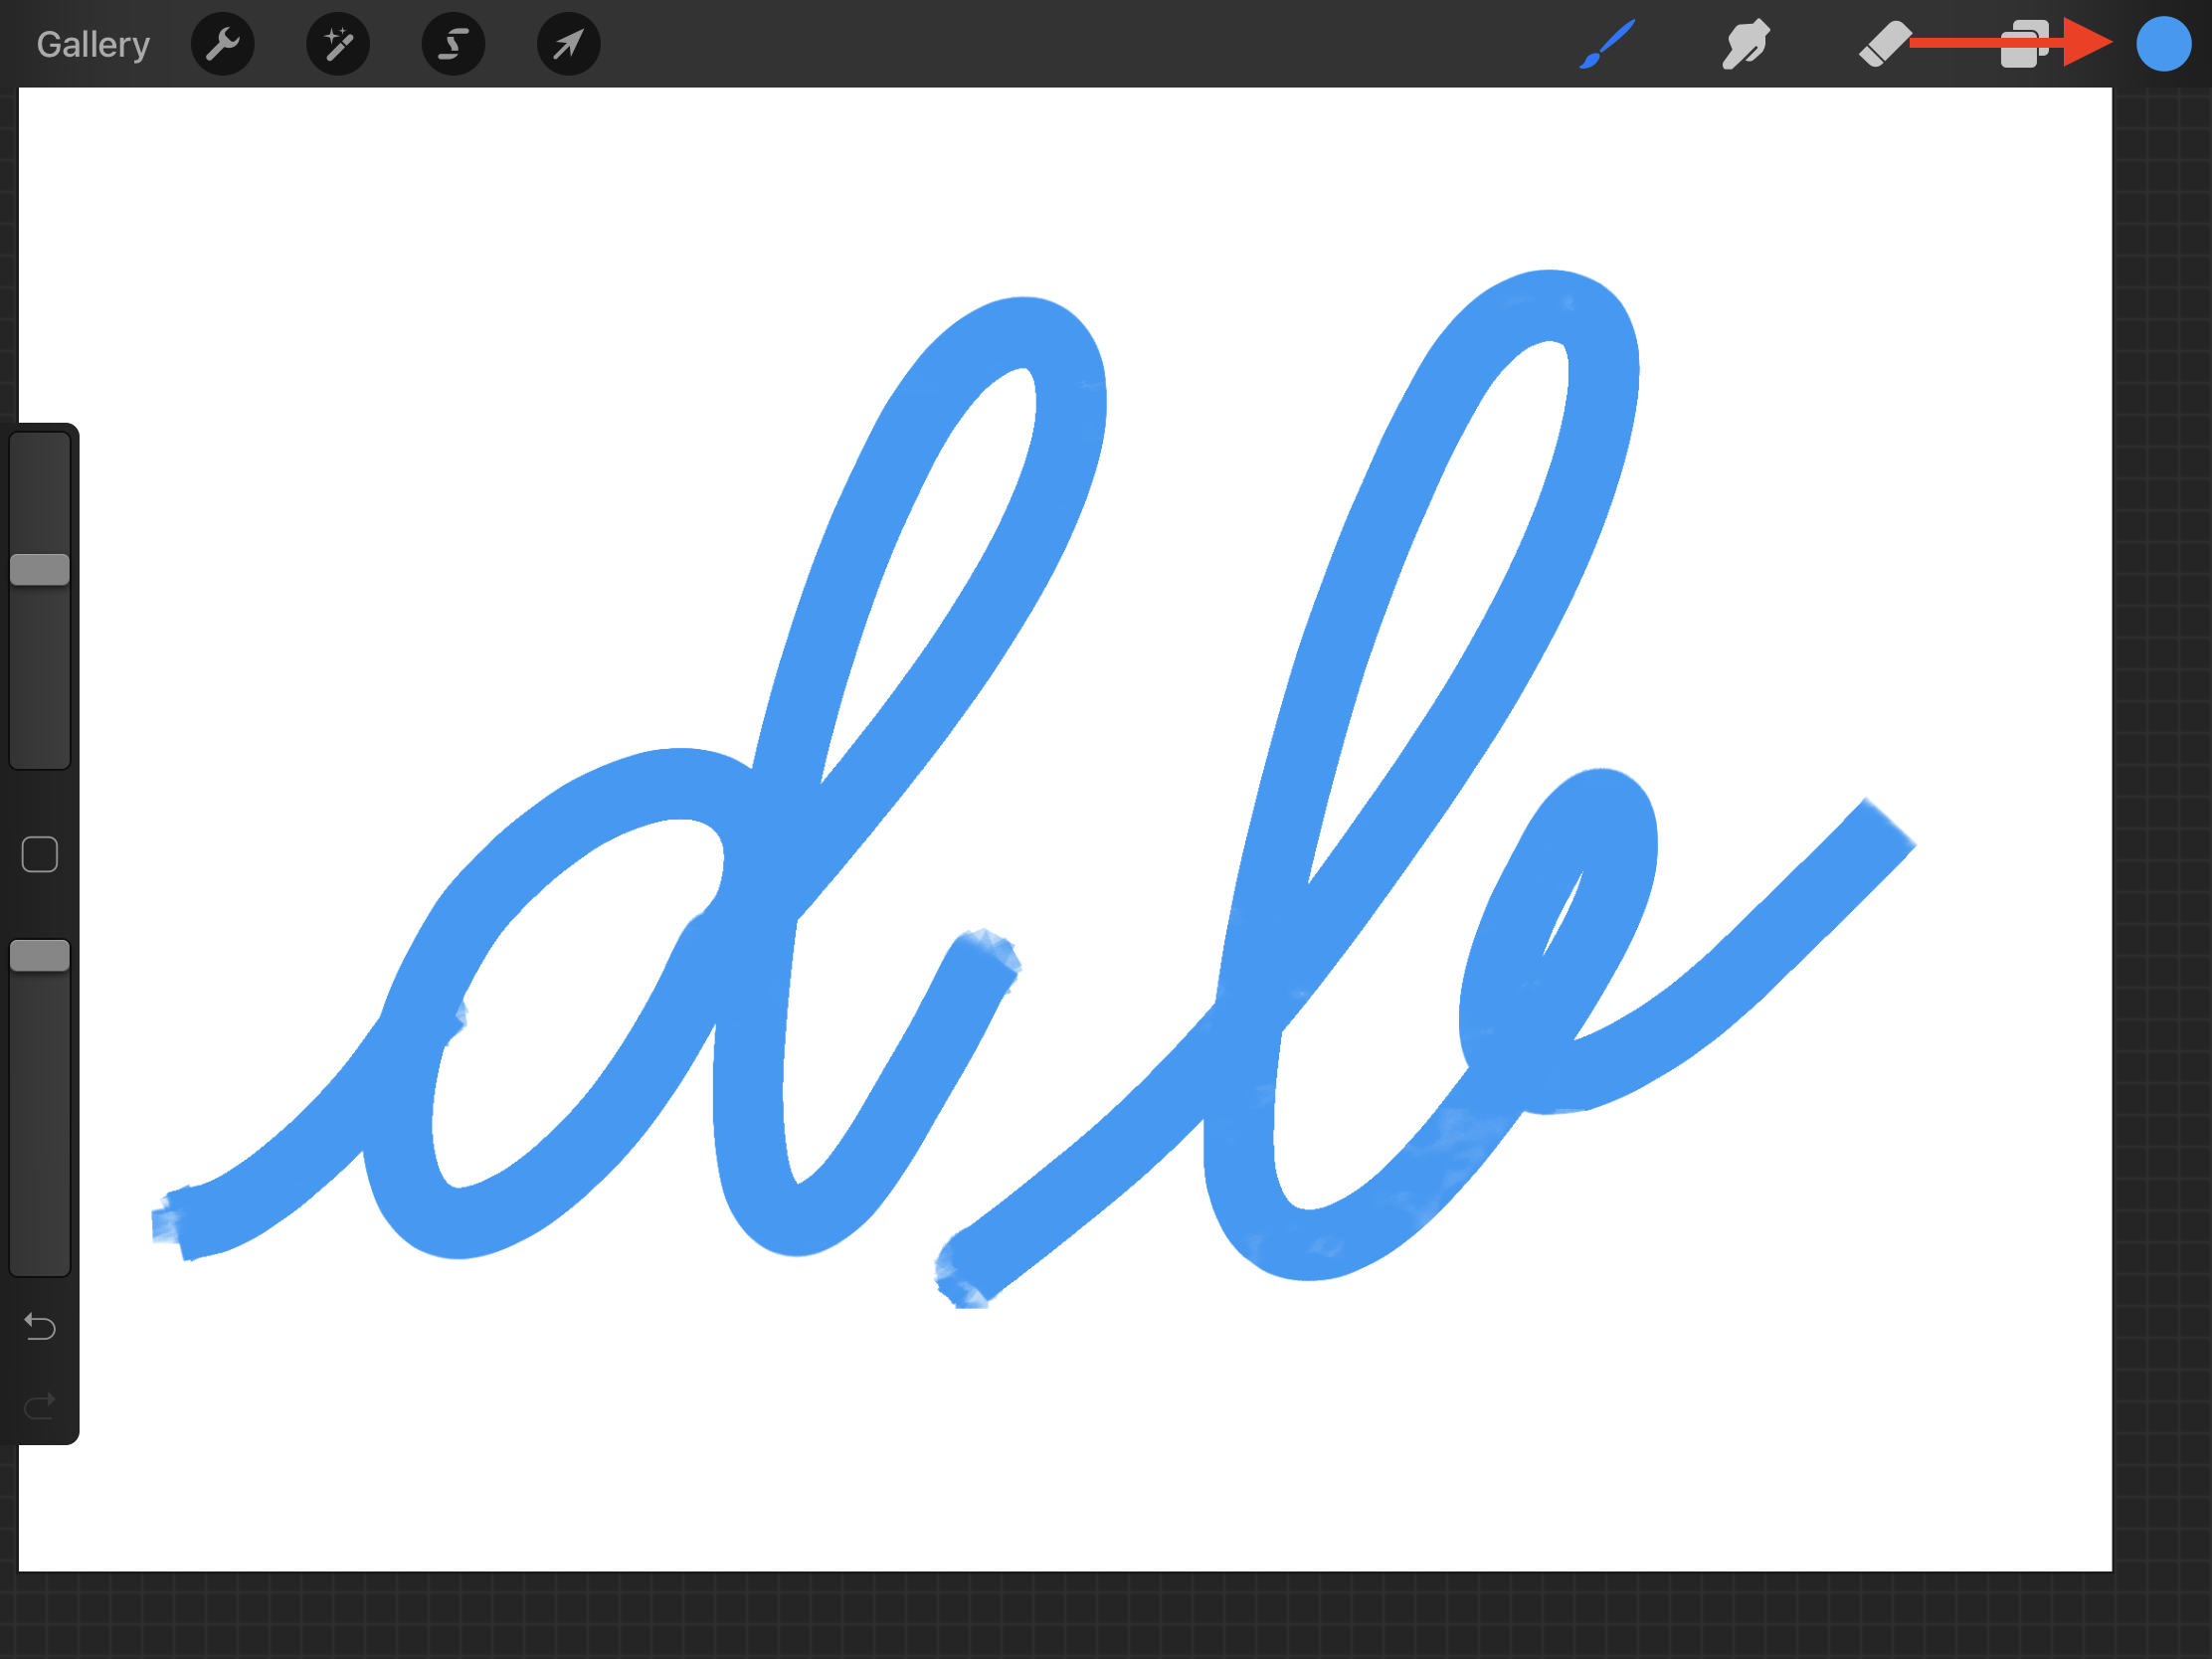
If you need to clean up your text use the Eraser.
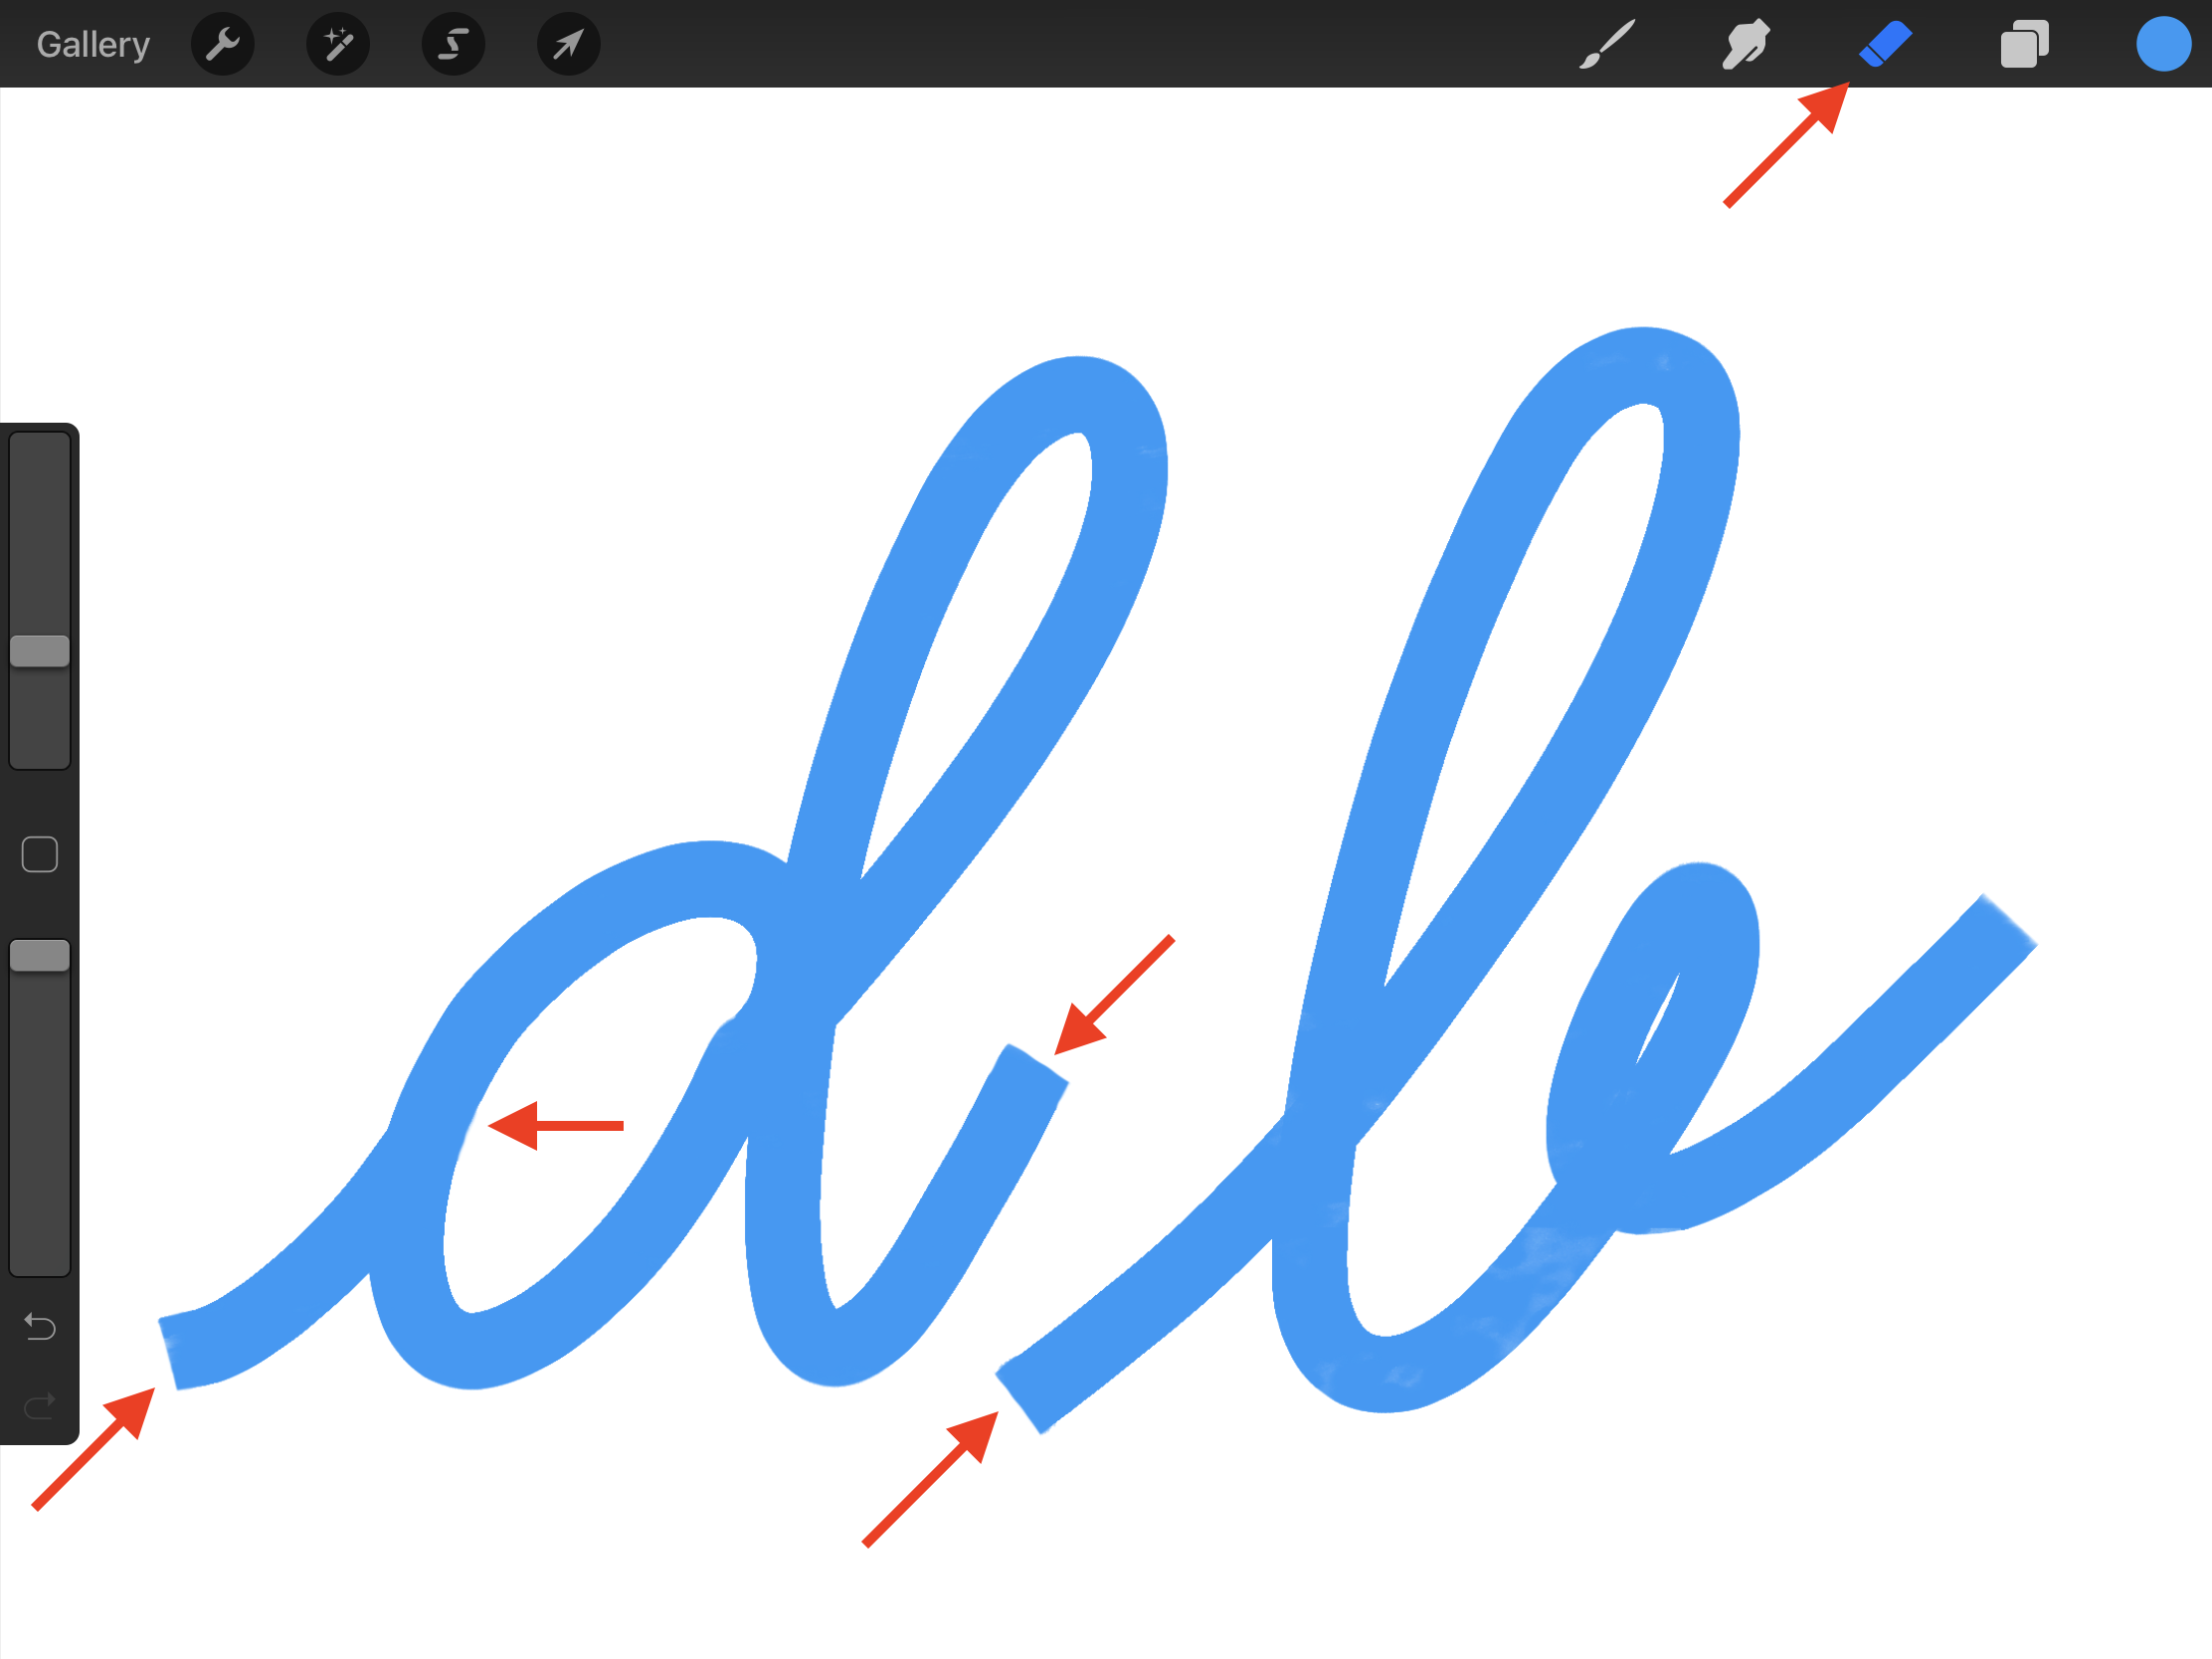
Create a new Clipping Mask layer. Click on the small N to open the menu and choose Overlay from the menu.
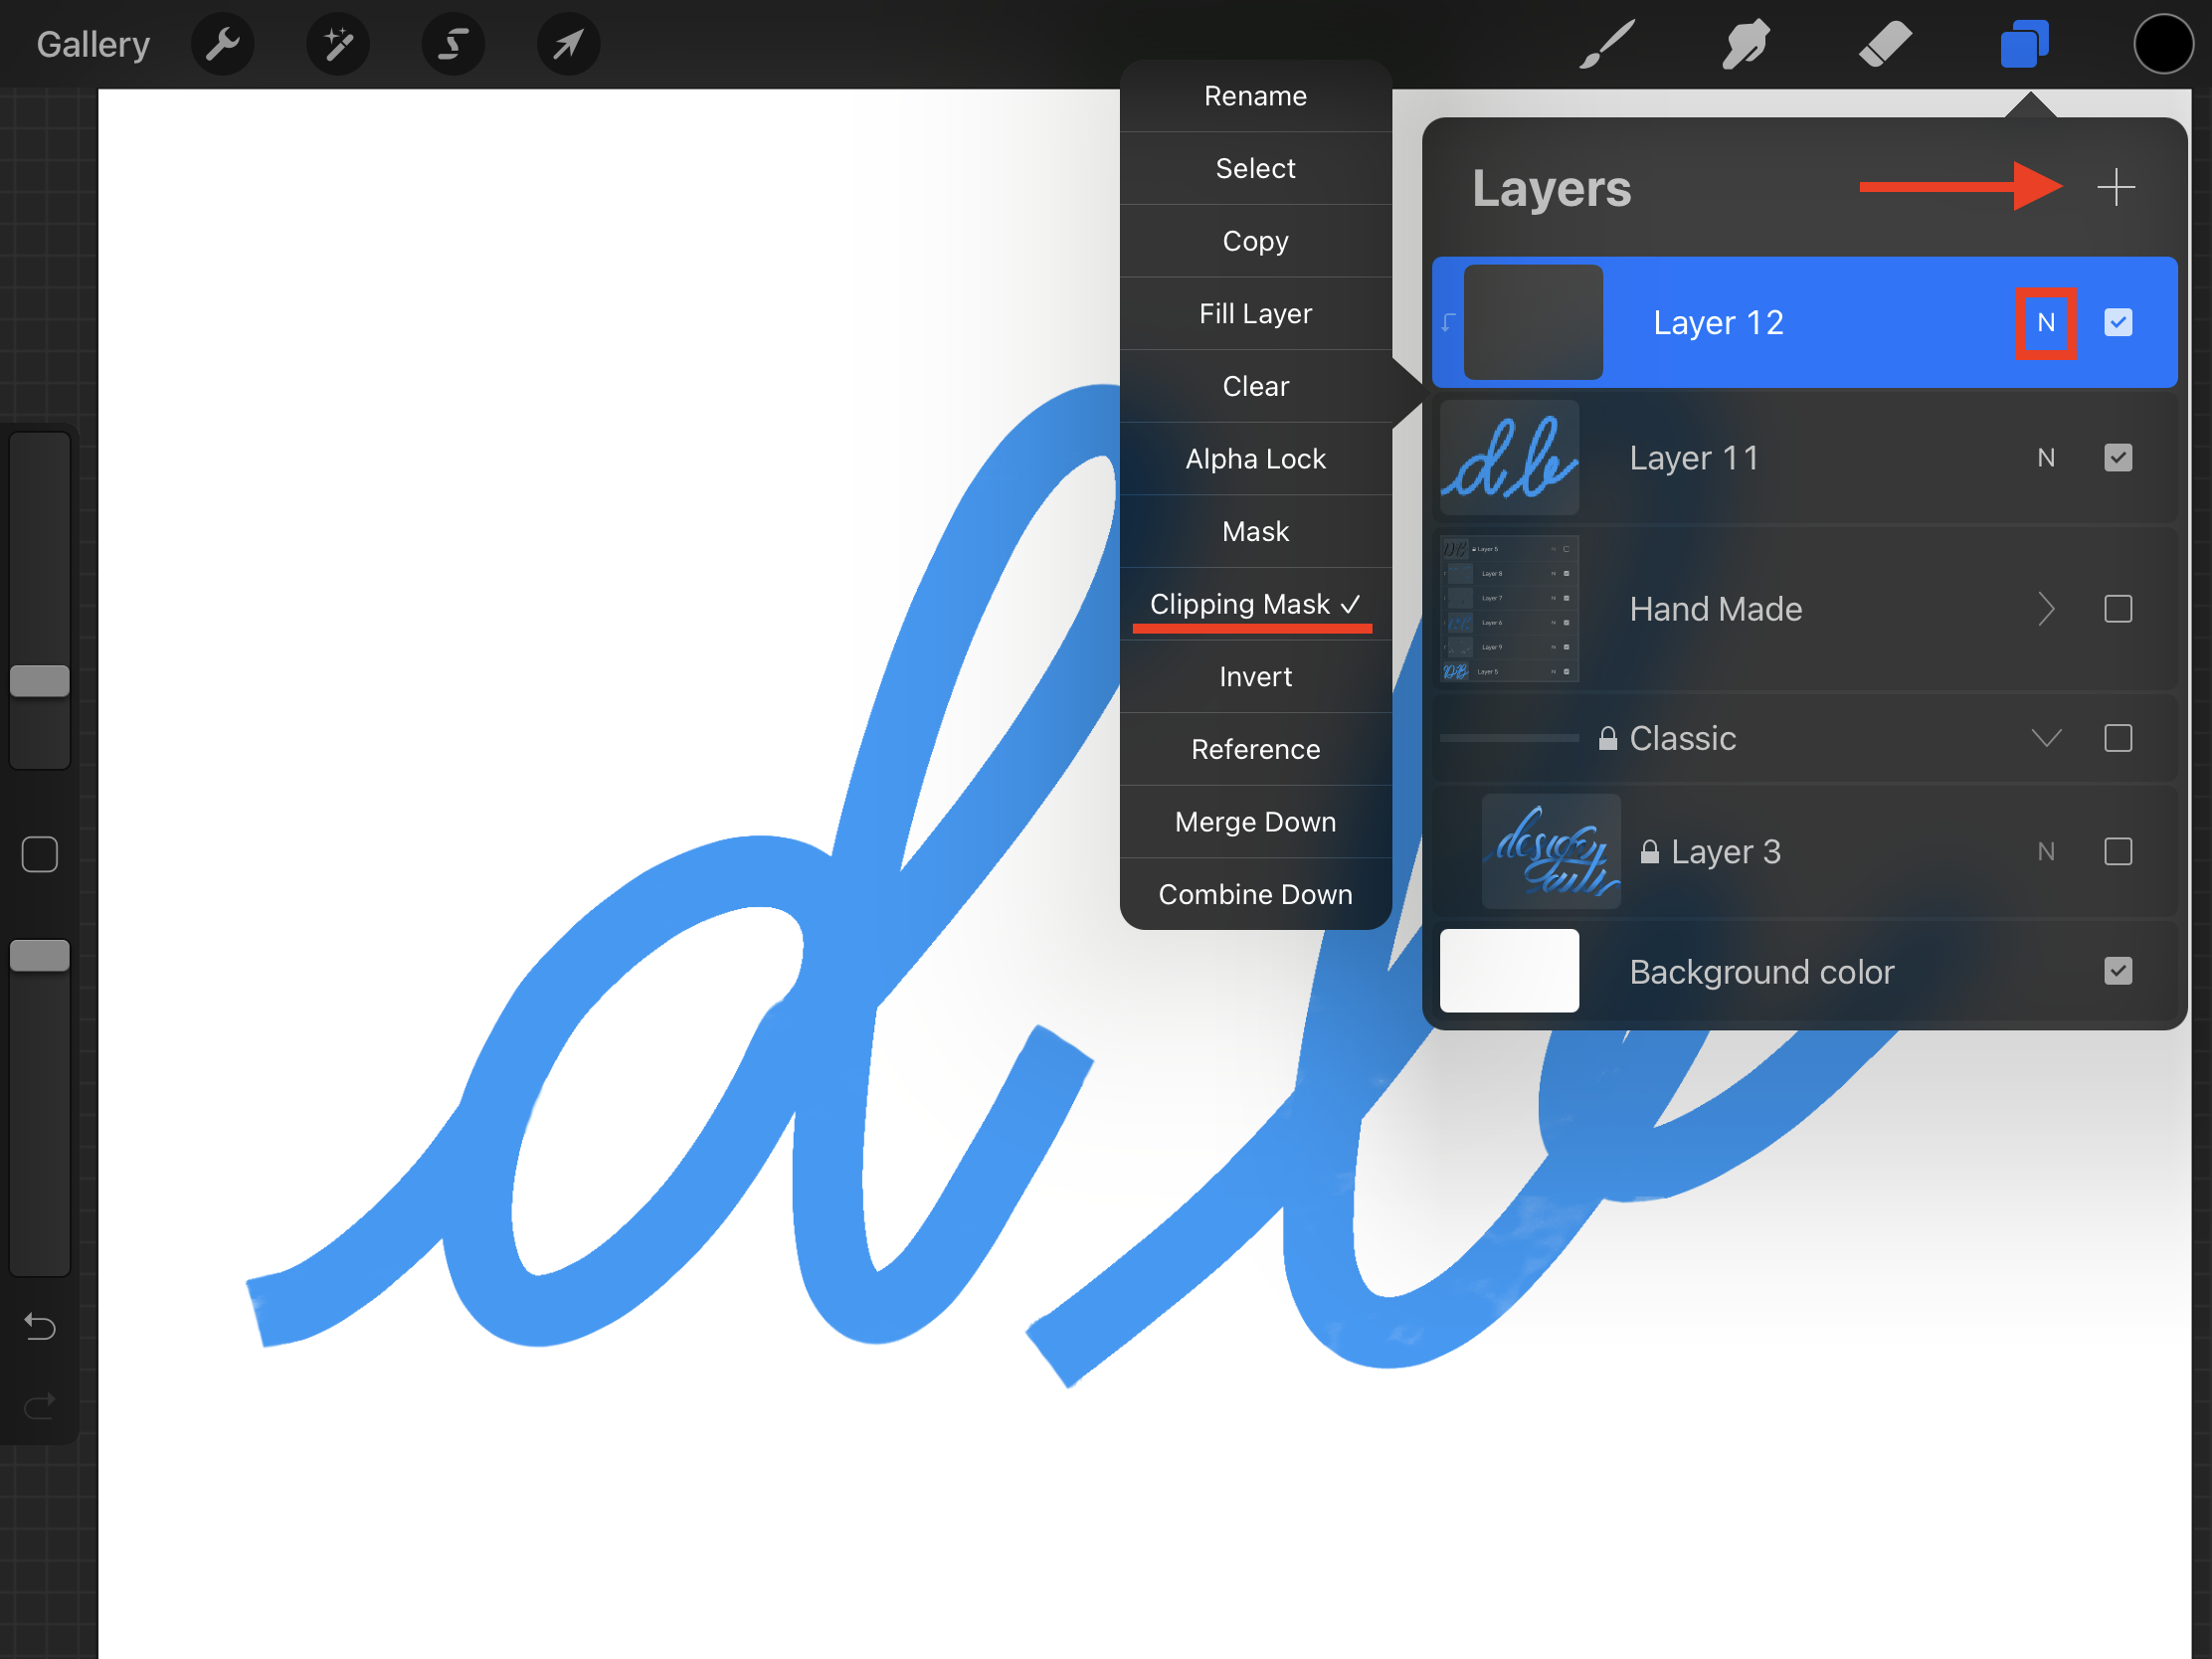
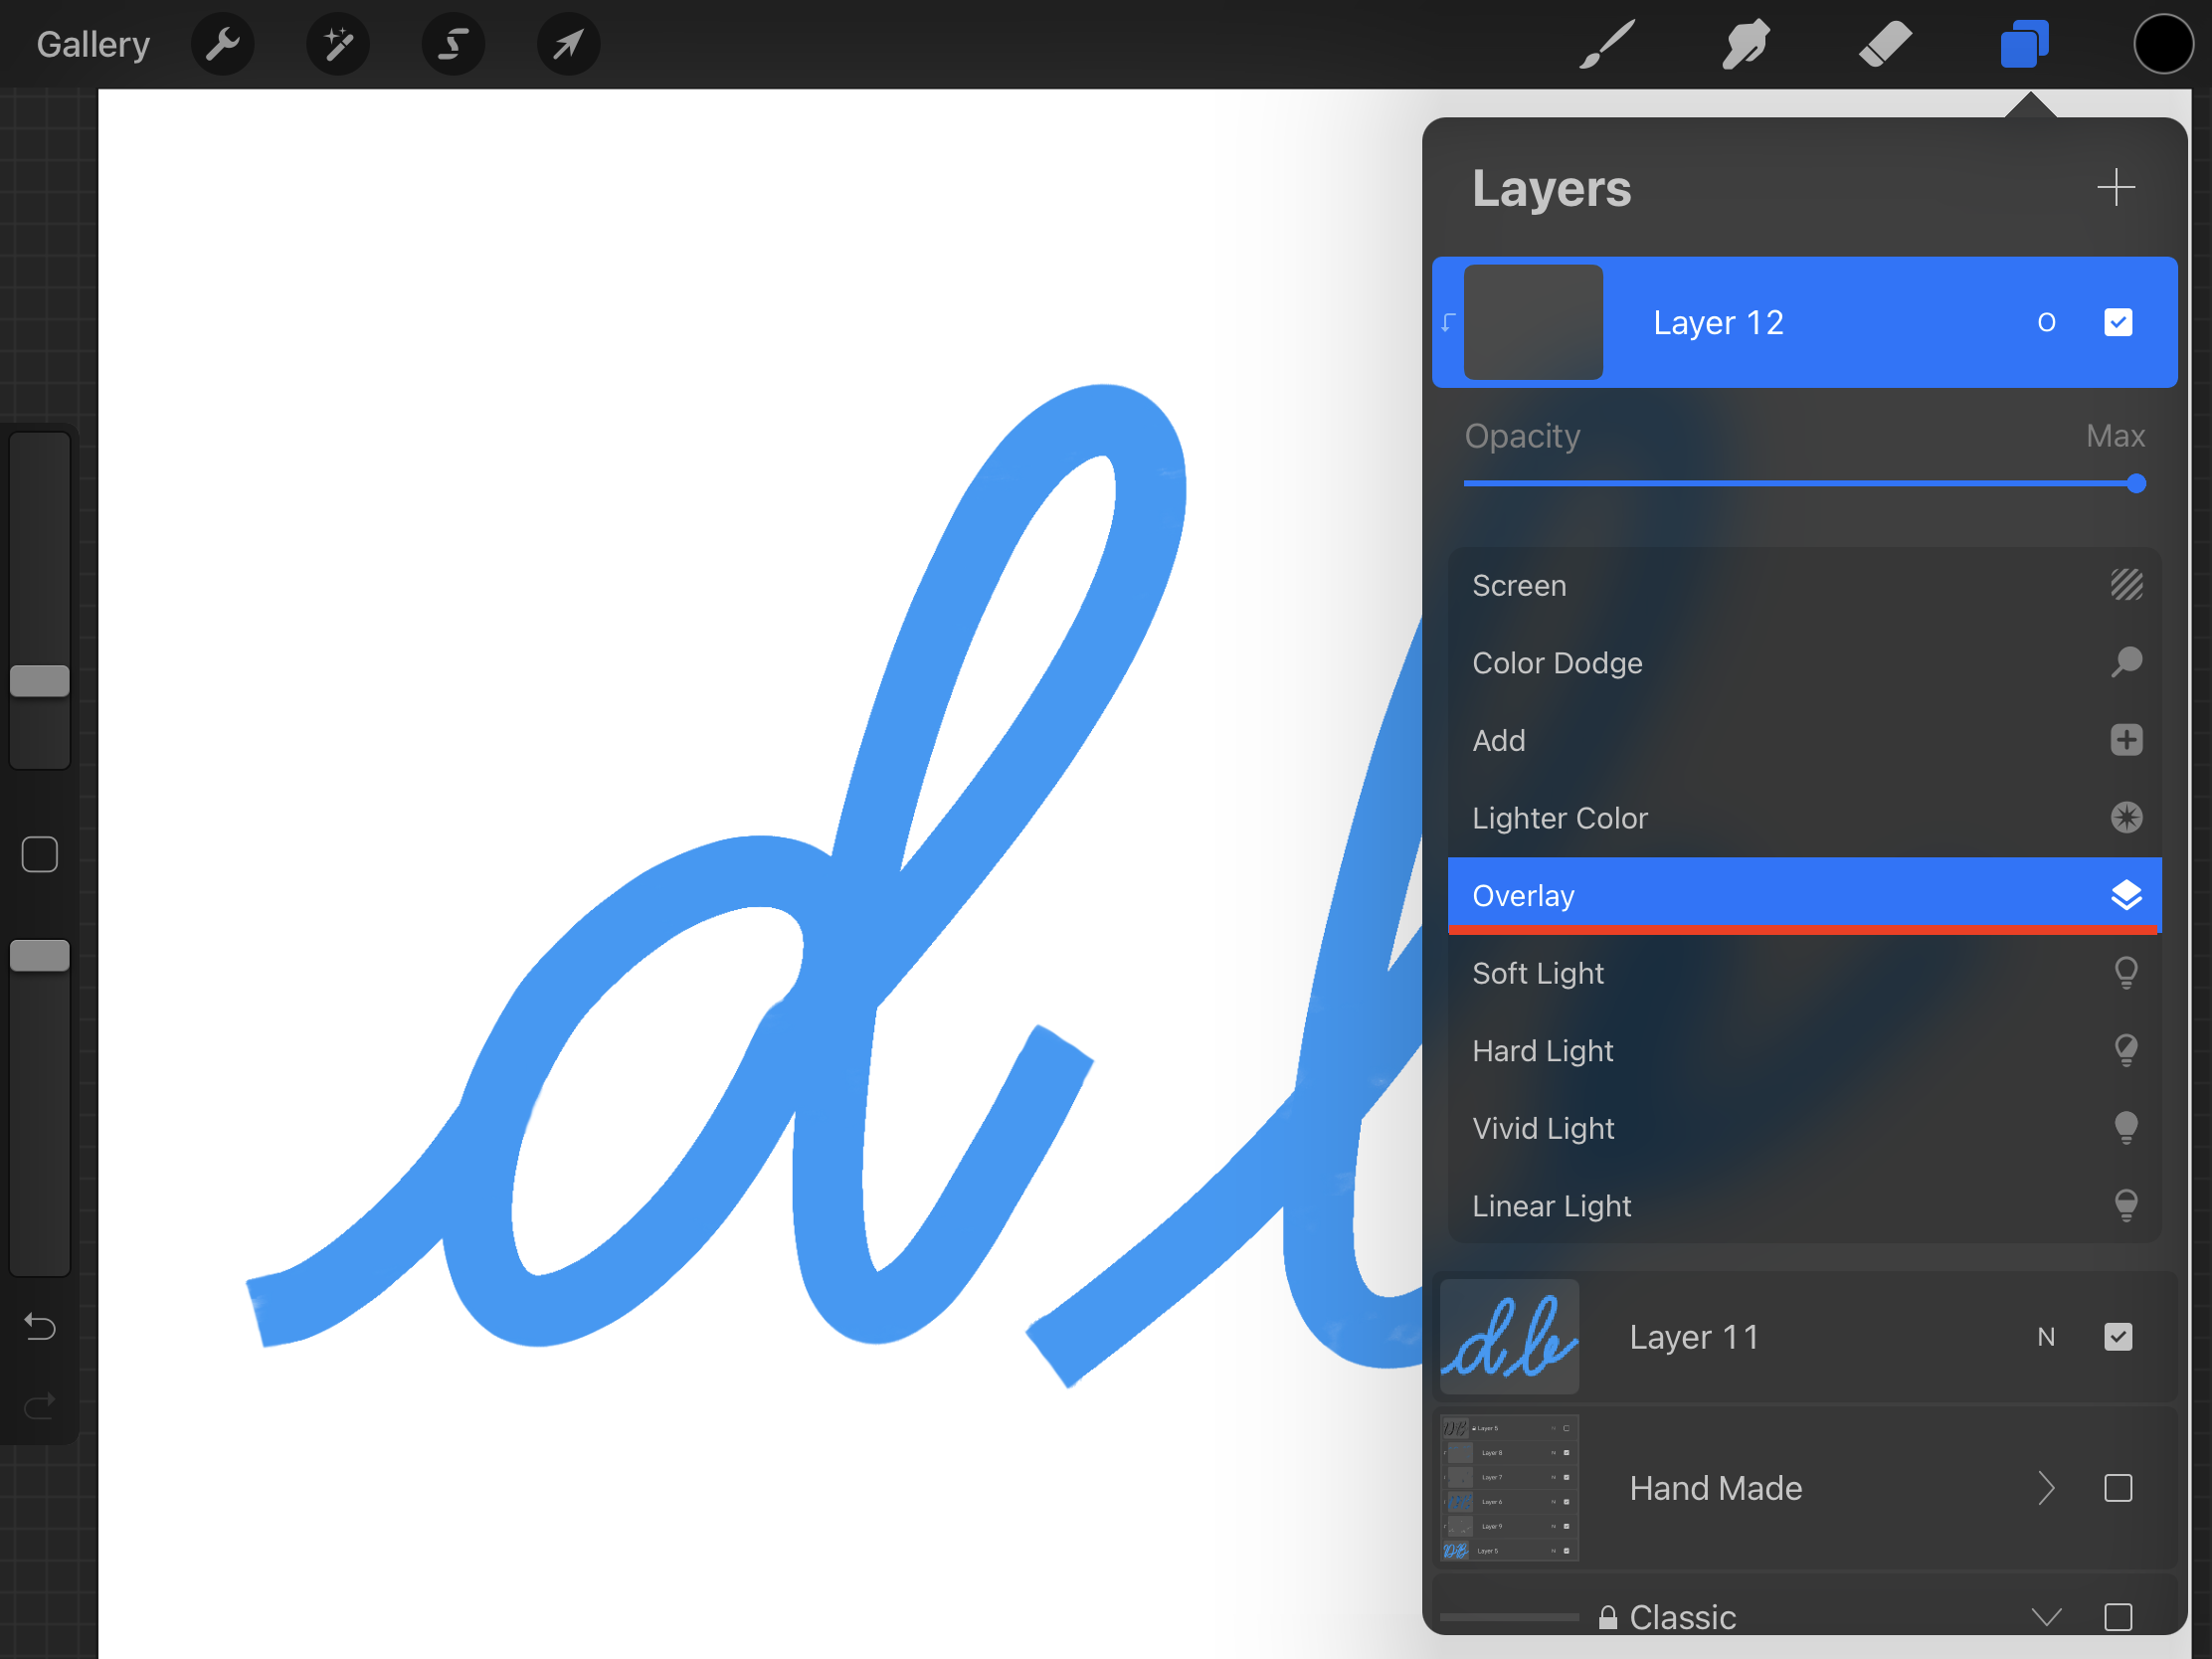
Now, use black and select a proper brush (we used a monoline brush) to outline and fill the parts of the lettering that should be dark. Since your layer has a blending mode the color should be a darker shade of the base one.

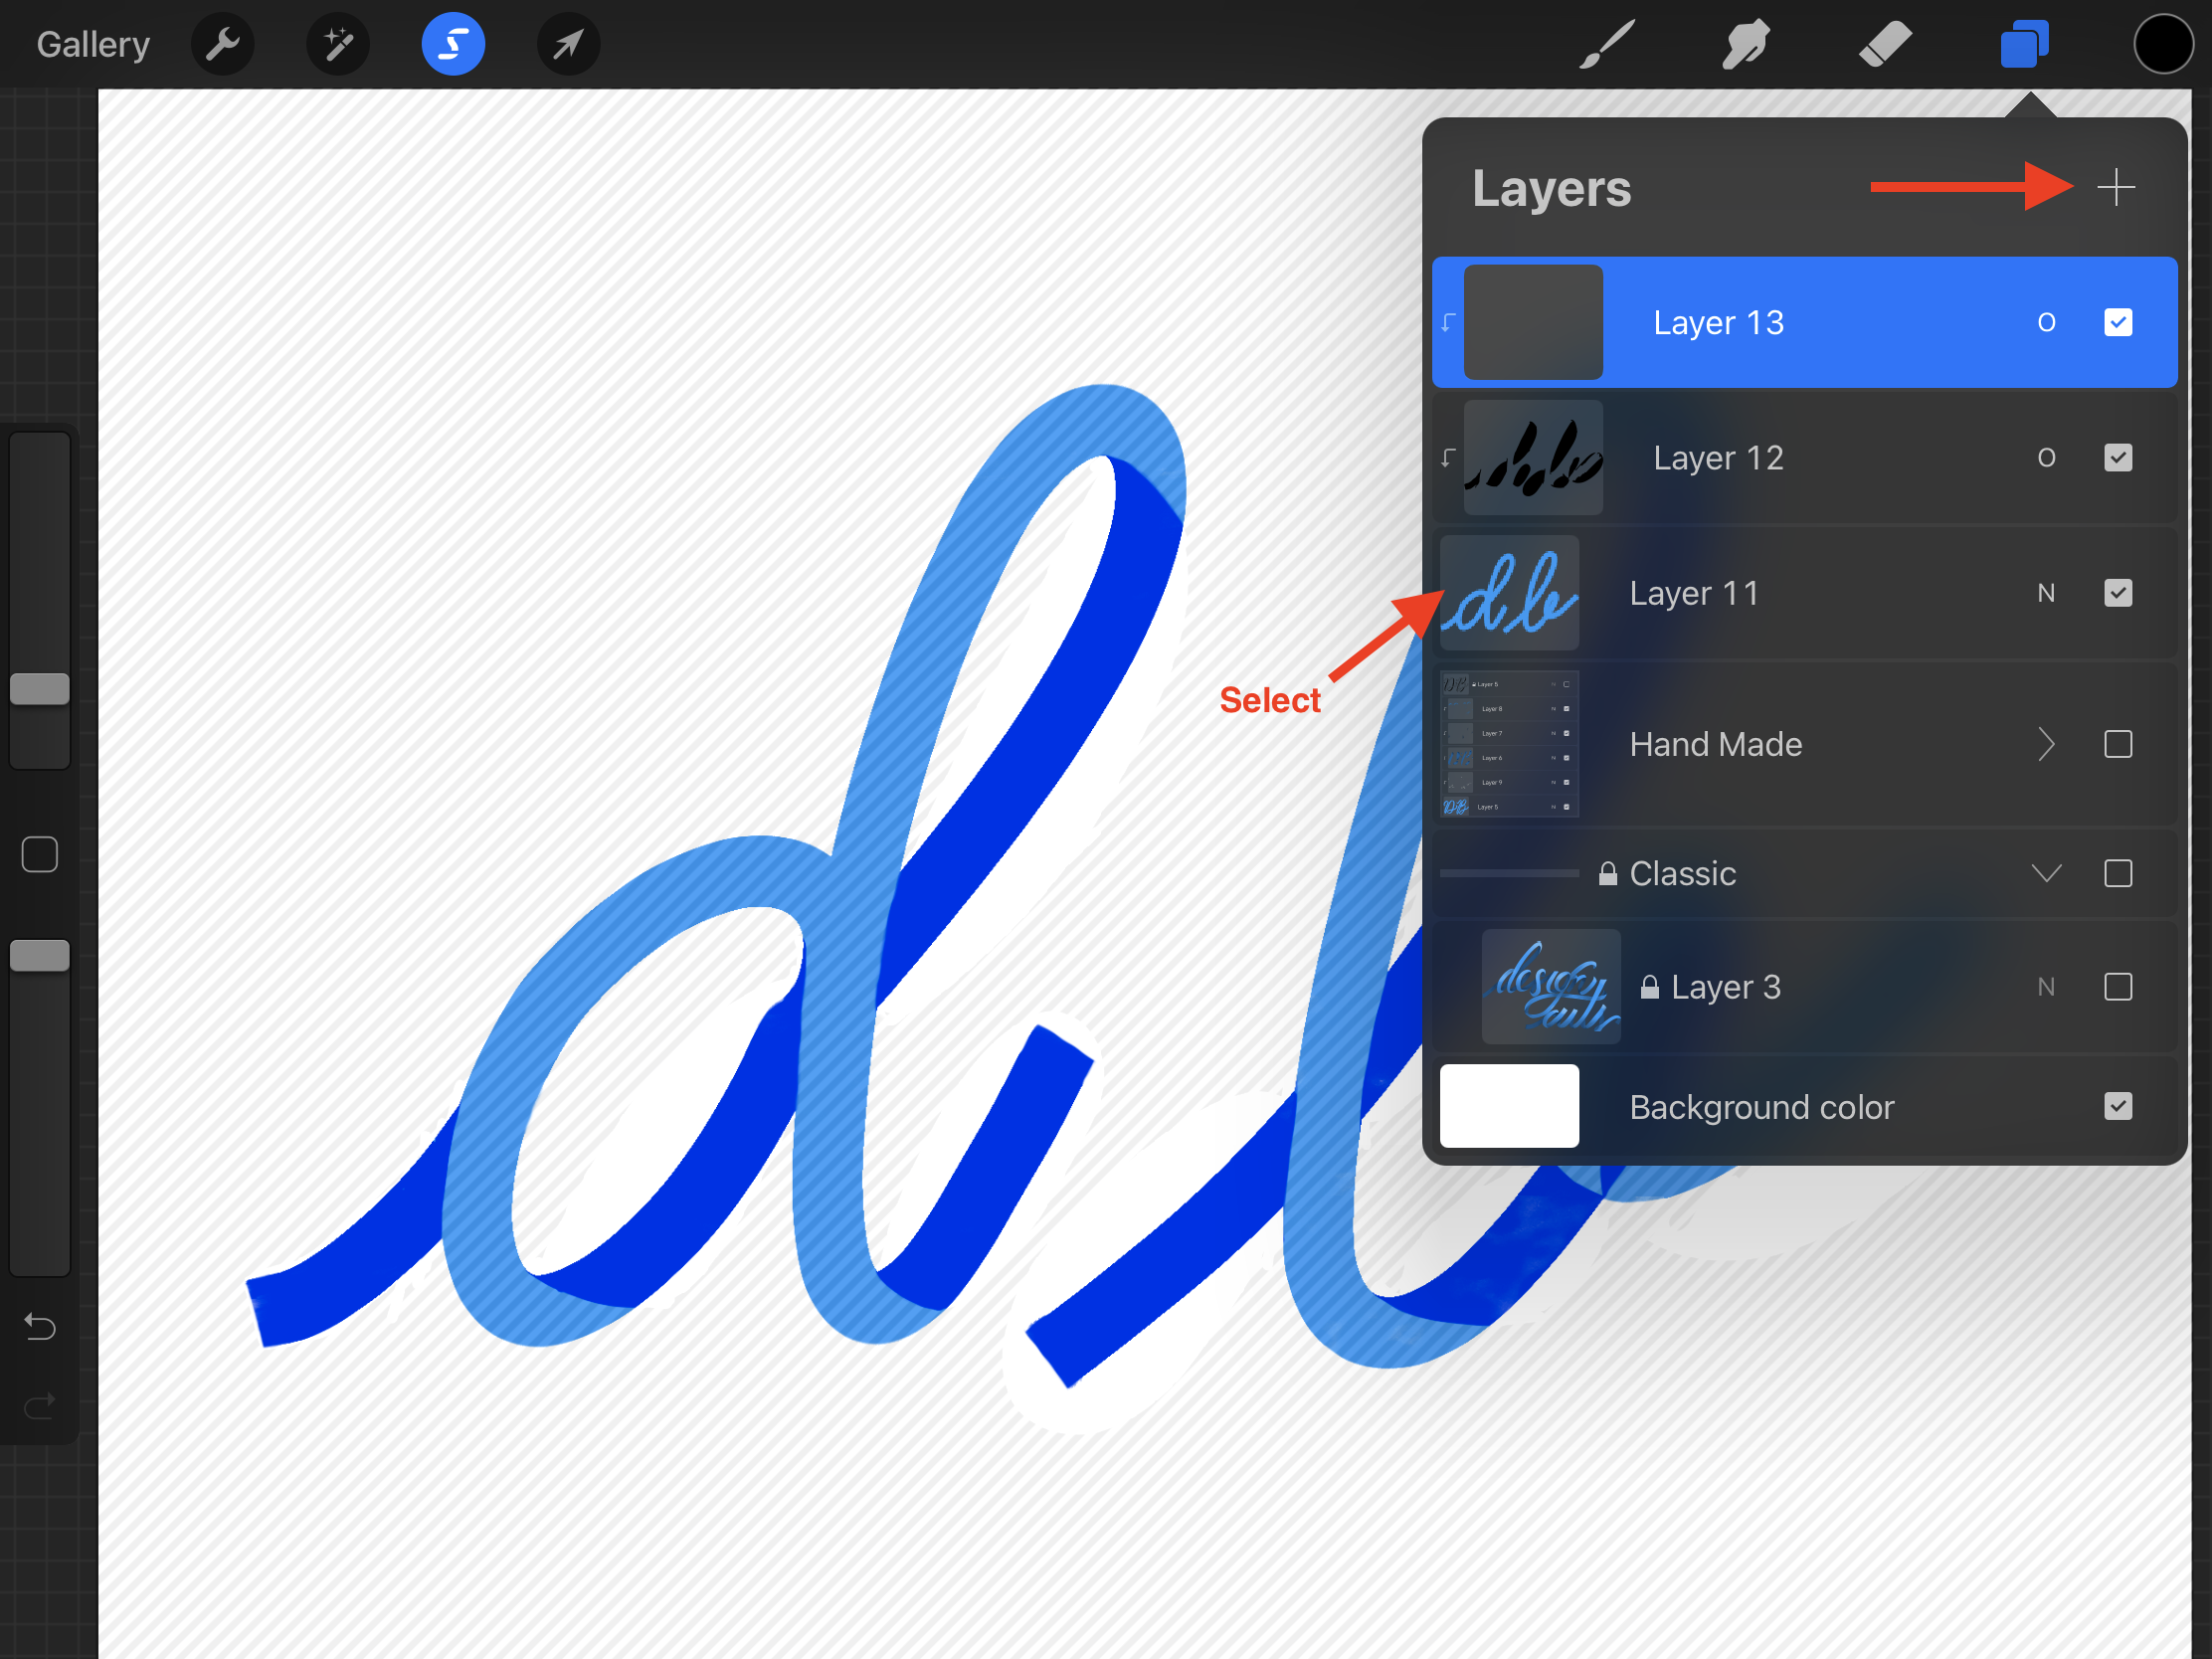
Create a separate Clipping Mask layer for Shadows. Now, you need to select the layer below (darker color), tap on it on the Layers menu open the menu and choose Select, then click on back the Clipping Mask layer so you are working on it.
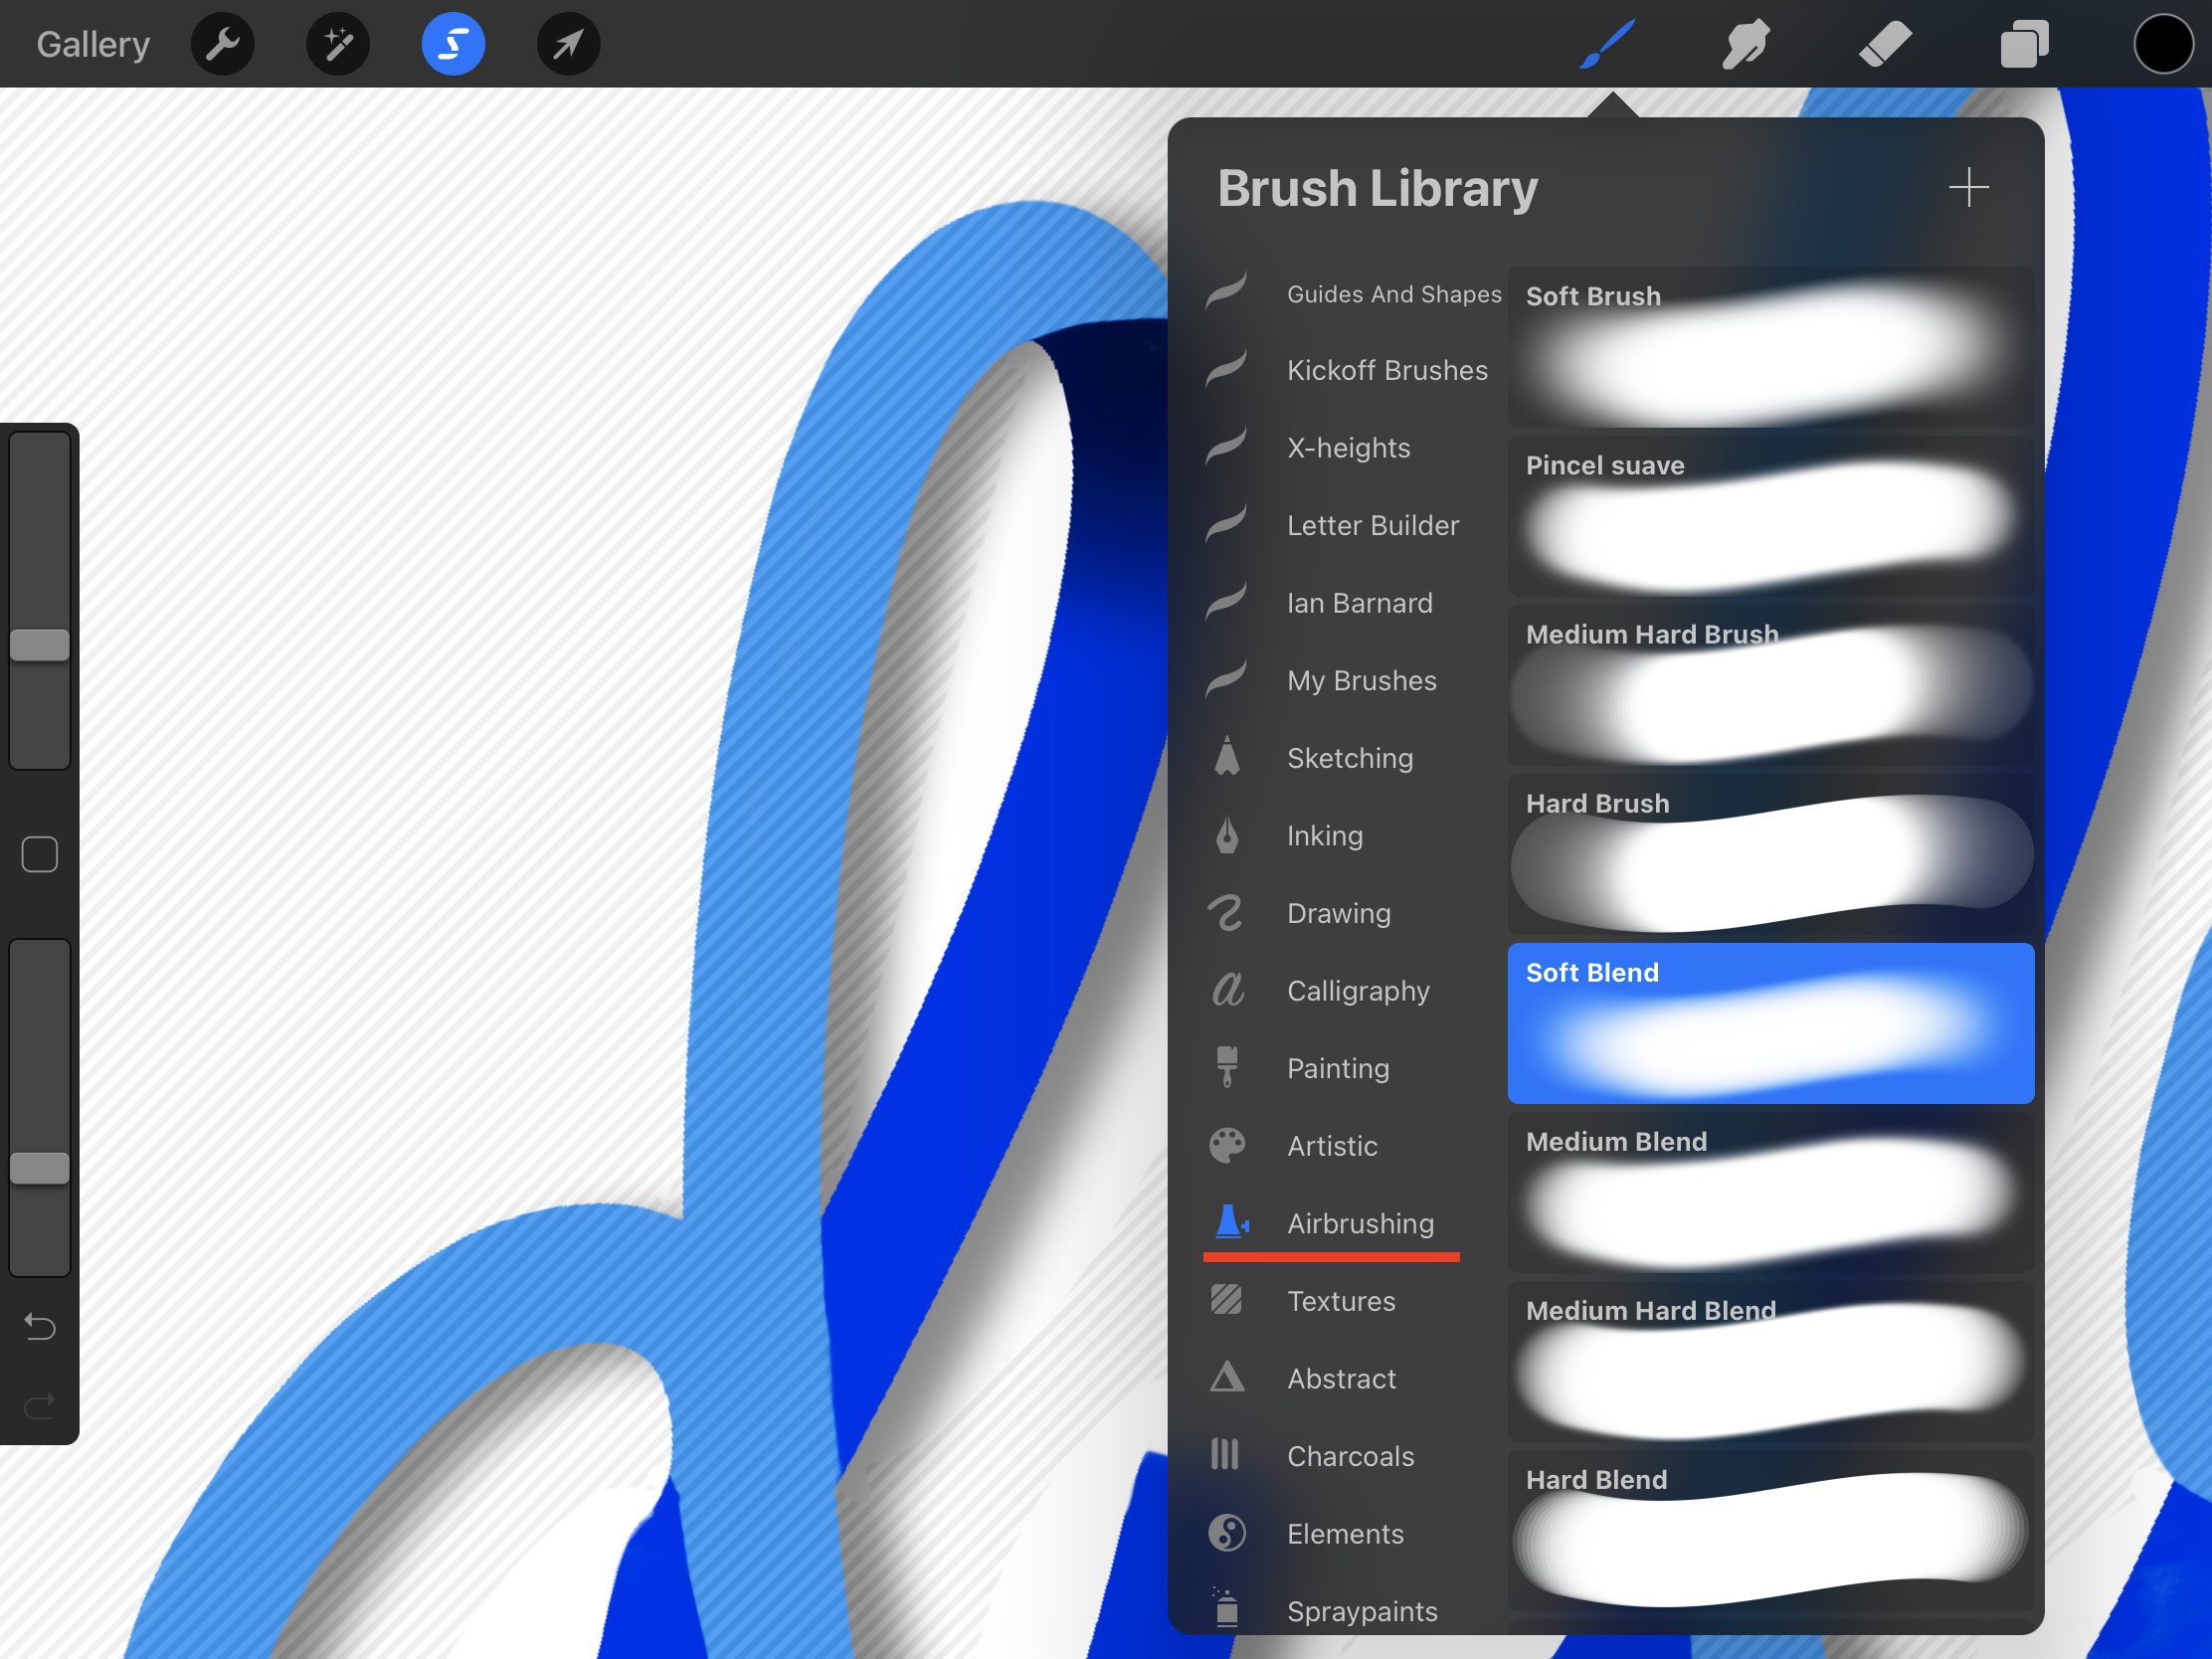
Use a soft Airbrush brush and pick Black as your color and add shadows to the folds and crossings.

Now, change the Selected layer to the original one (base color), then click on back the Clipping Mask layer so you are working on it. Change the color to White and add some Highlights to the letters. Go back and forth between selections and colors to add shadows and highlights to all the ribbon text and give it more depth.
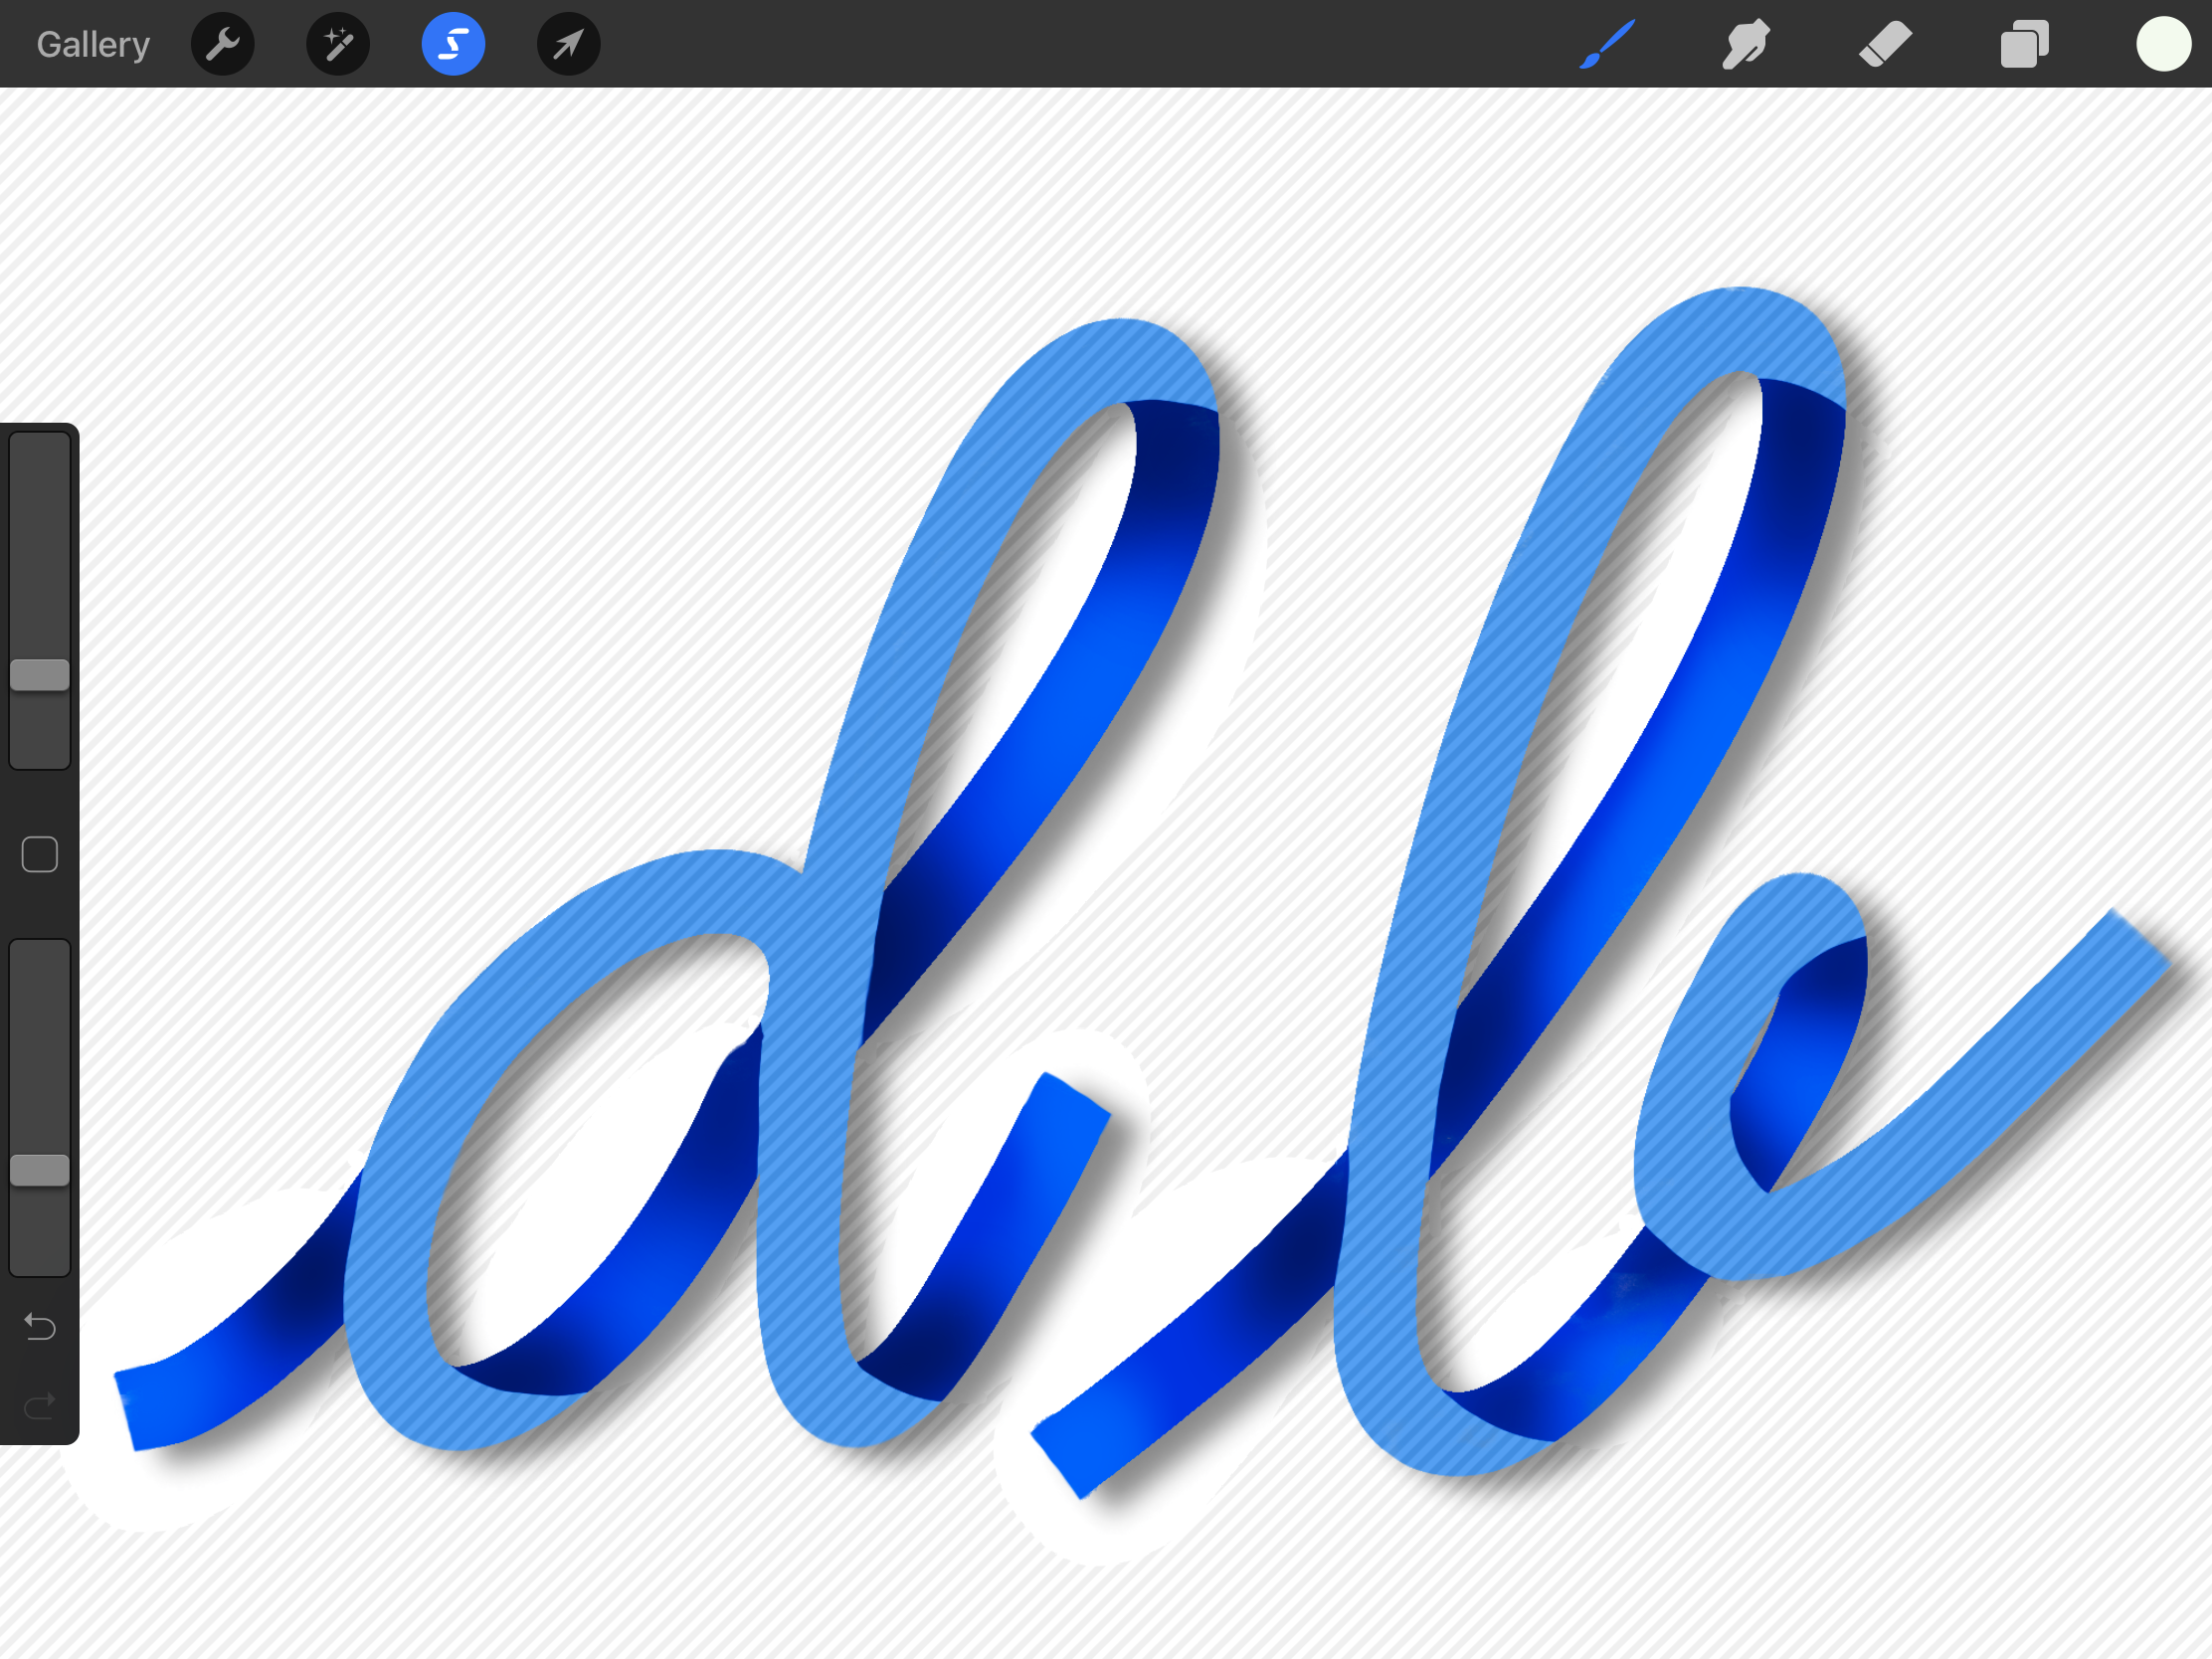
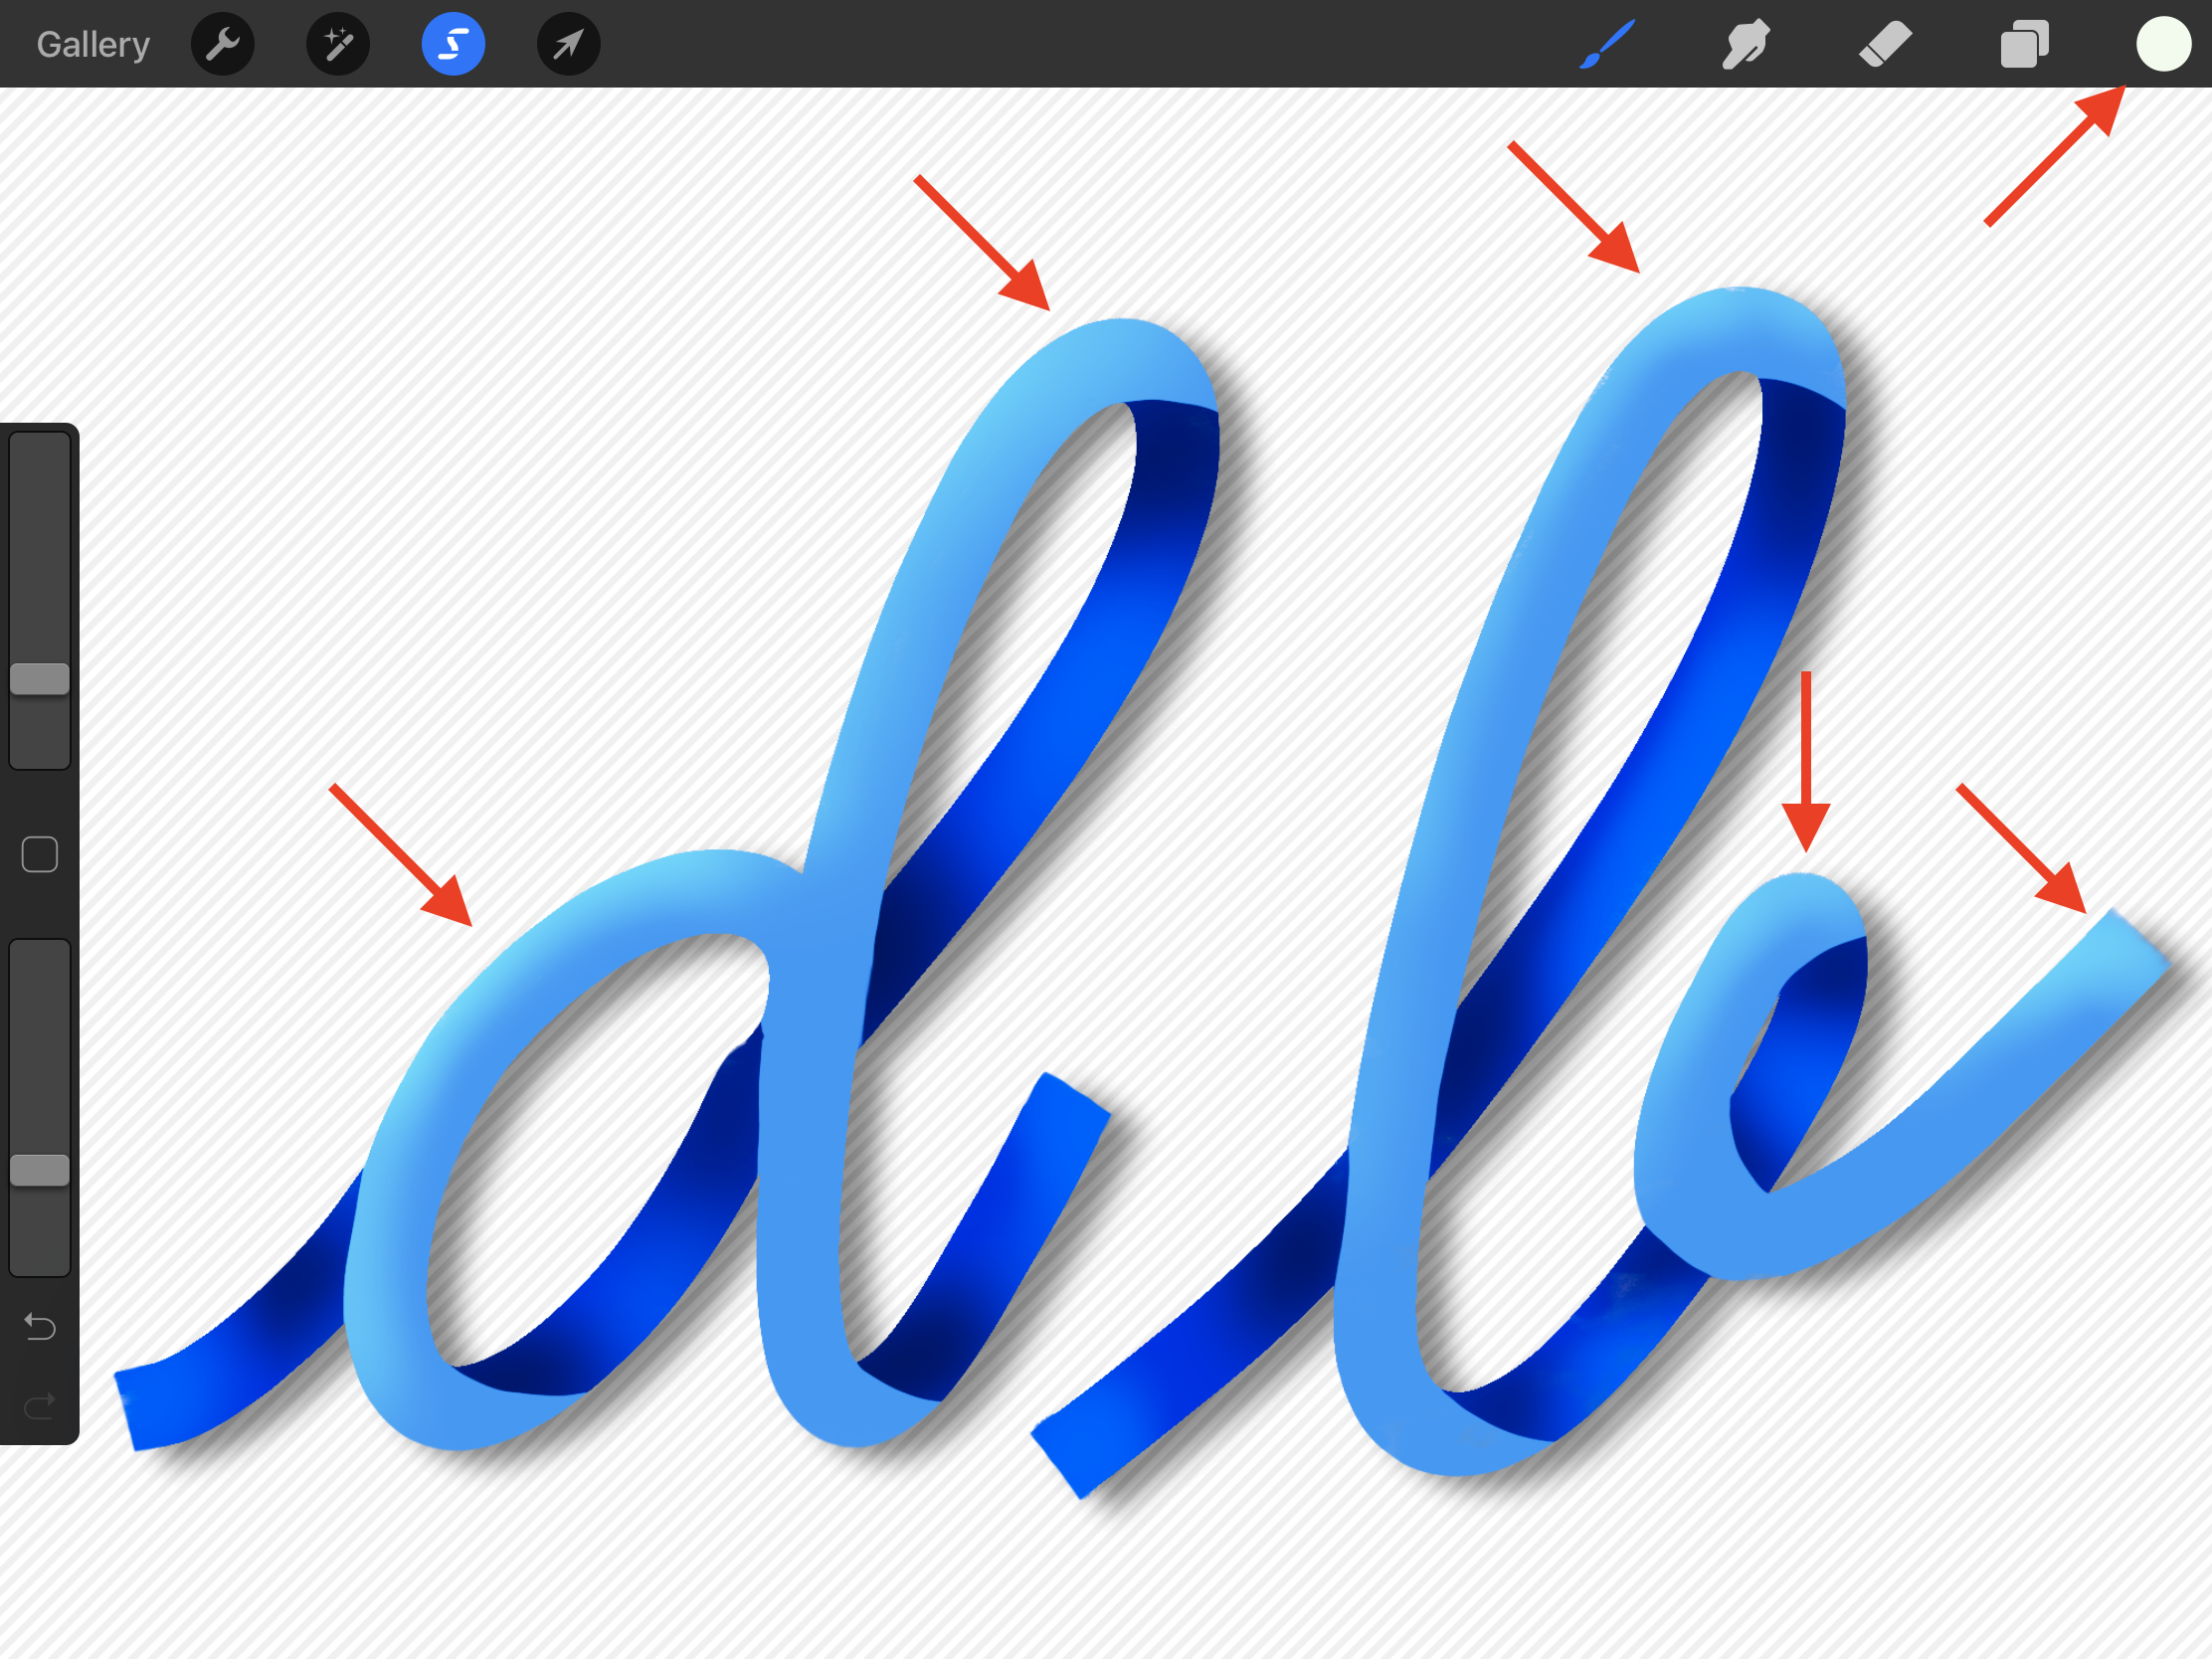
Remember to play around with the Size and Opacity of the brushes to achieve better results.
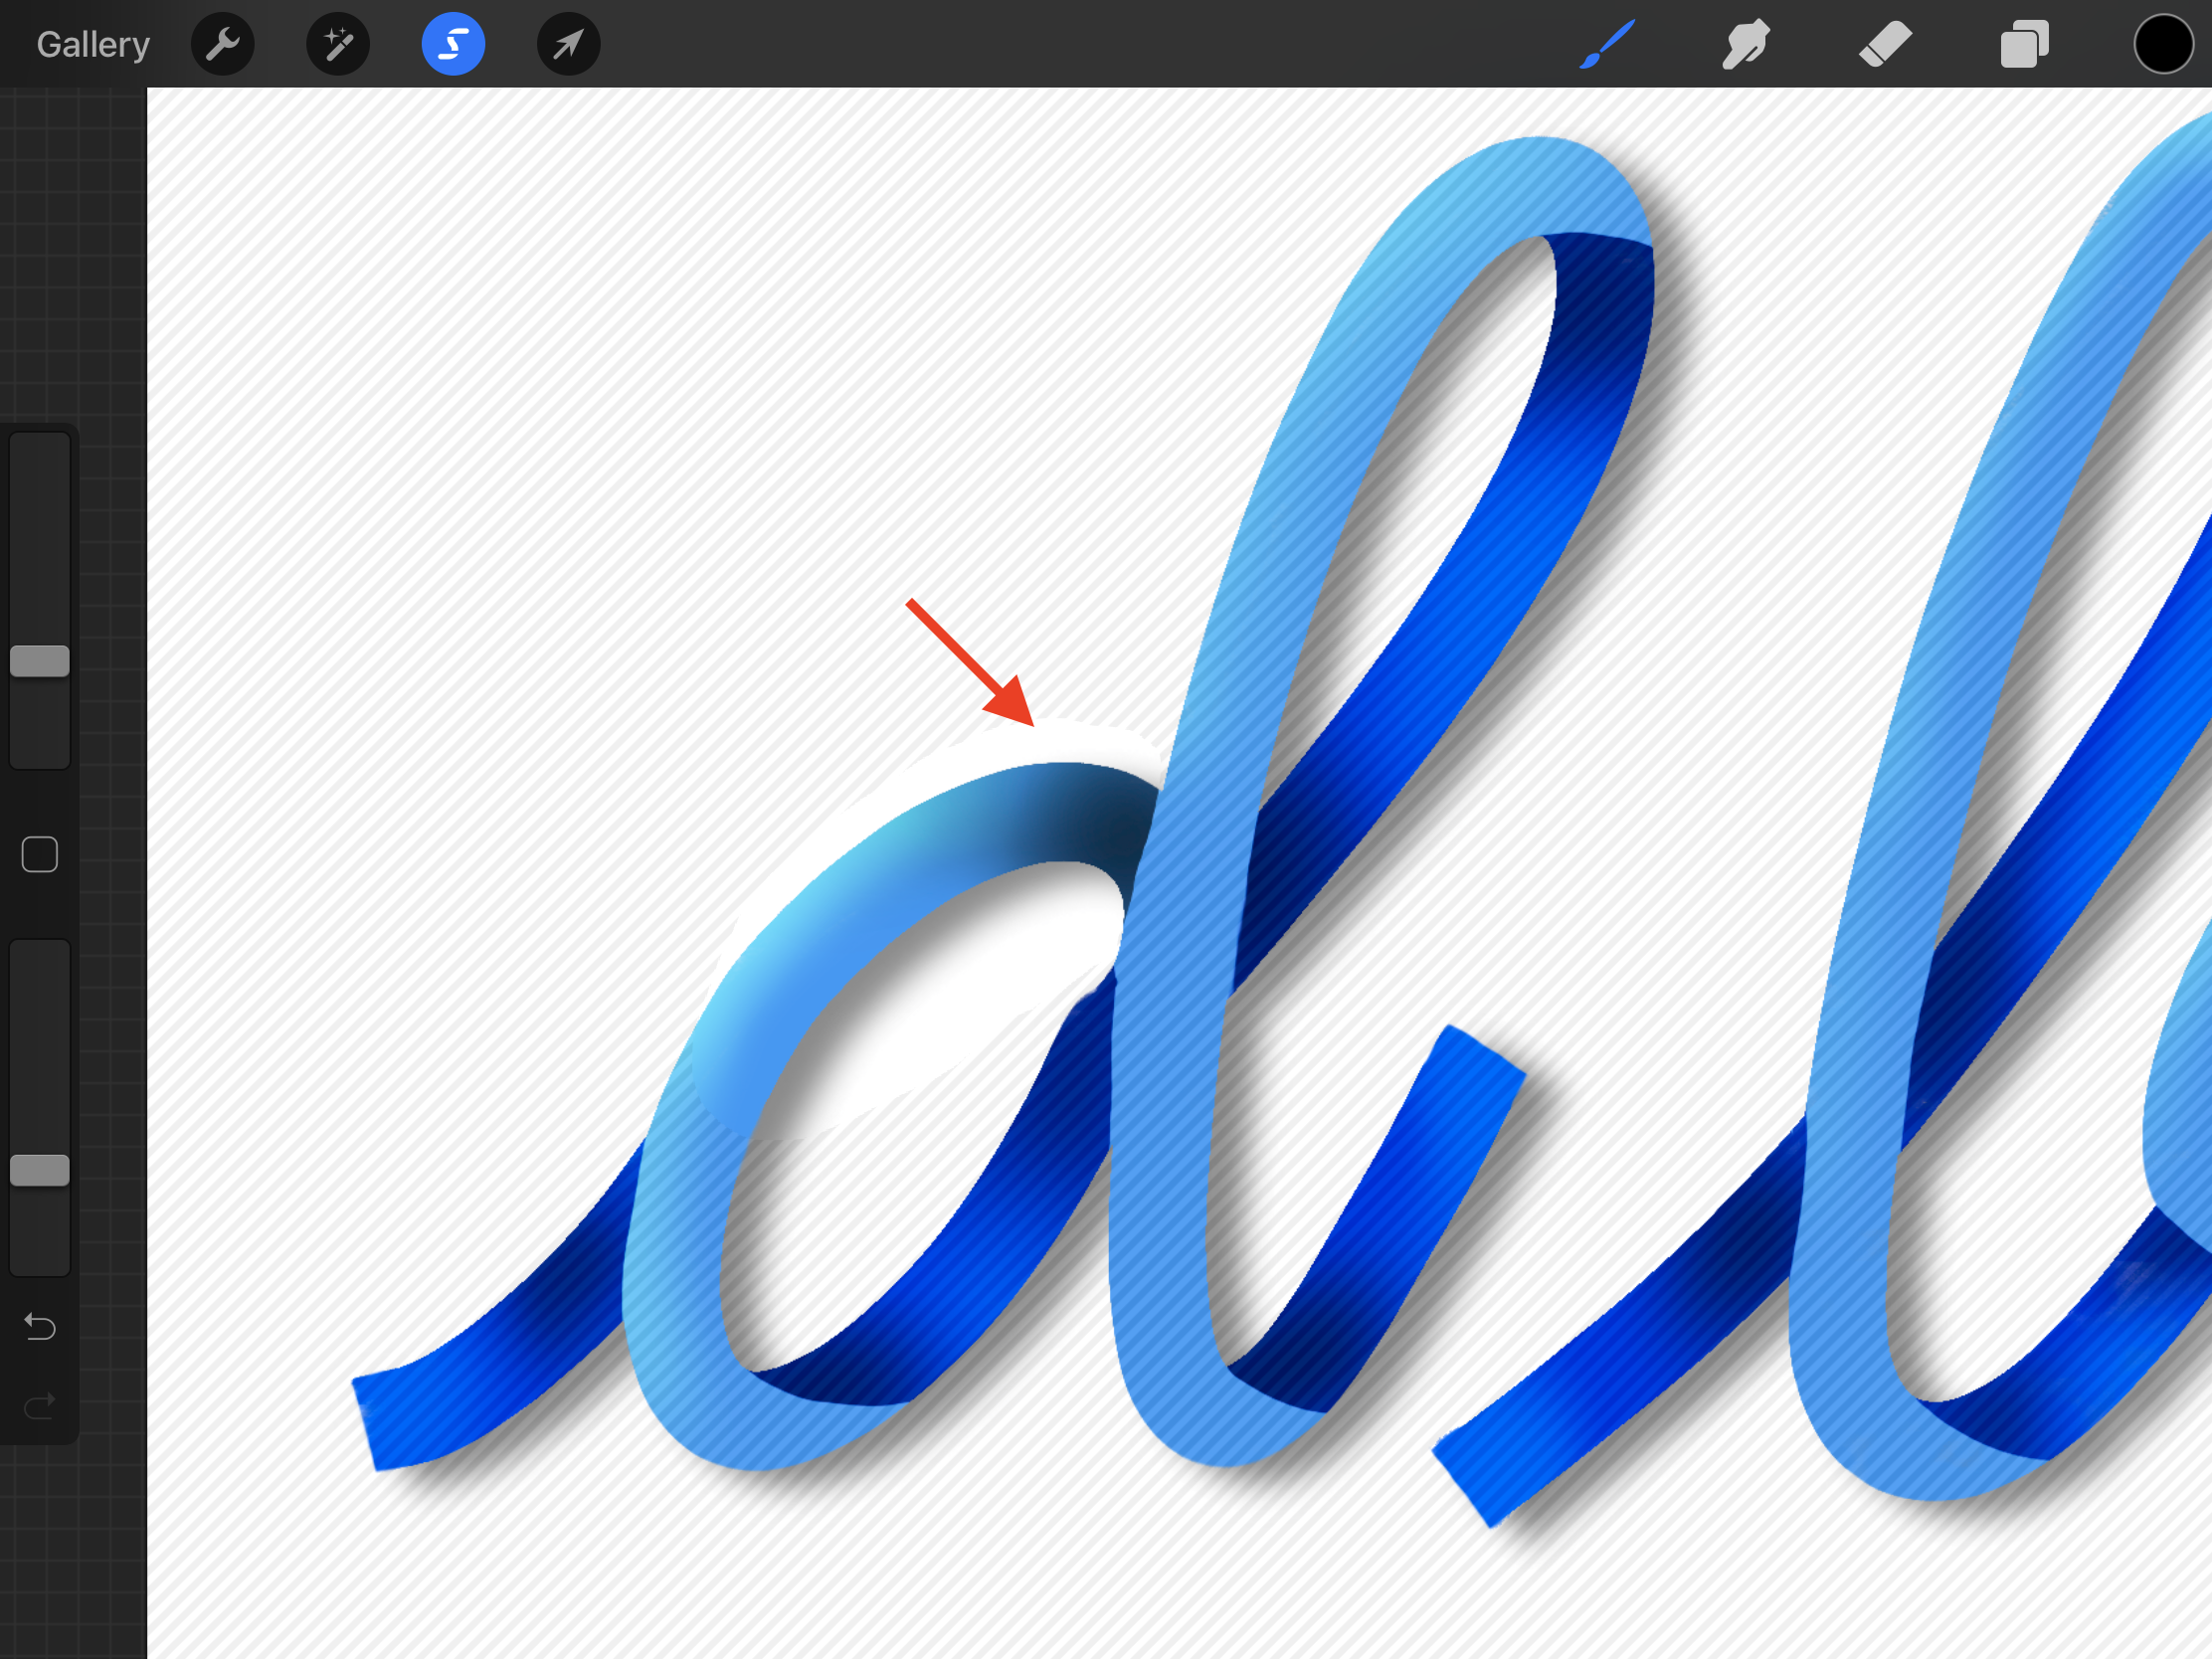
If there are some parts of the text that overlap a bit, use the Selection Tool to pick the portion that will be shaded (under). Then use the same dark color and brush to add the shadow.
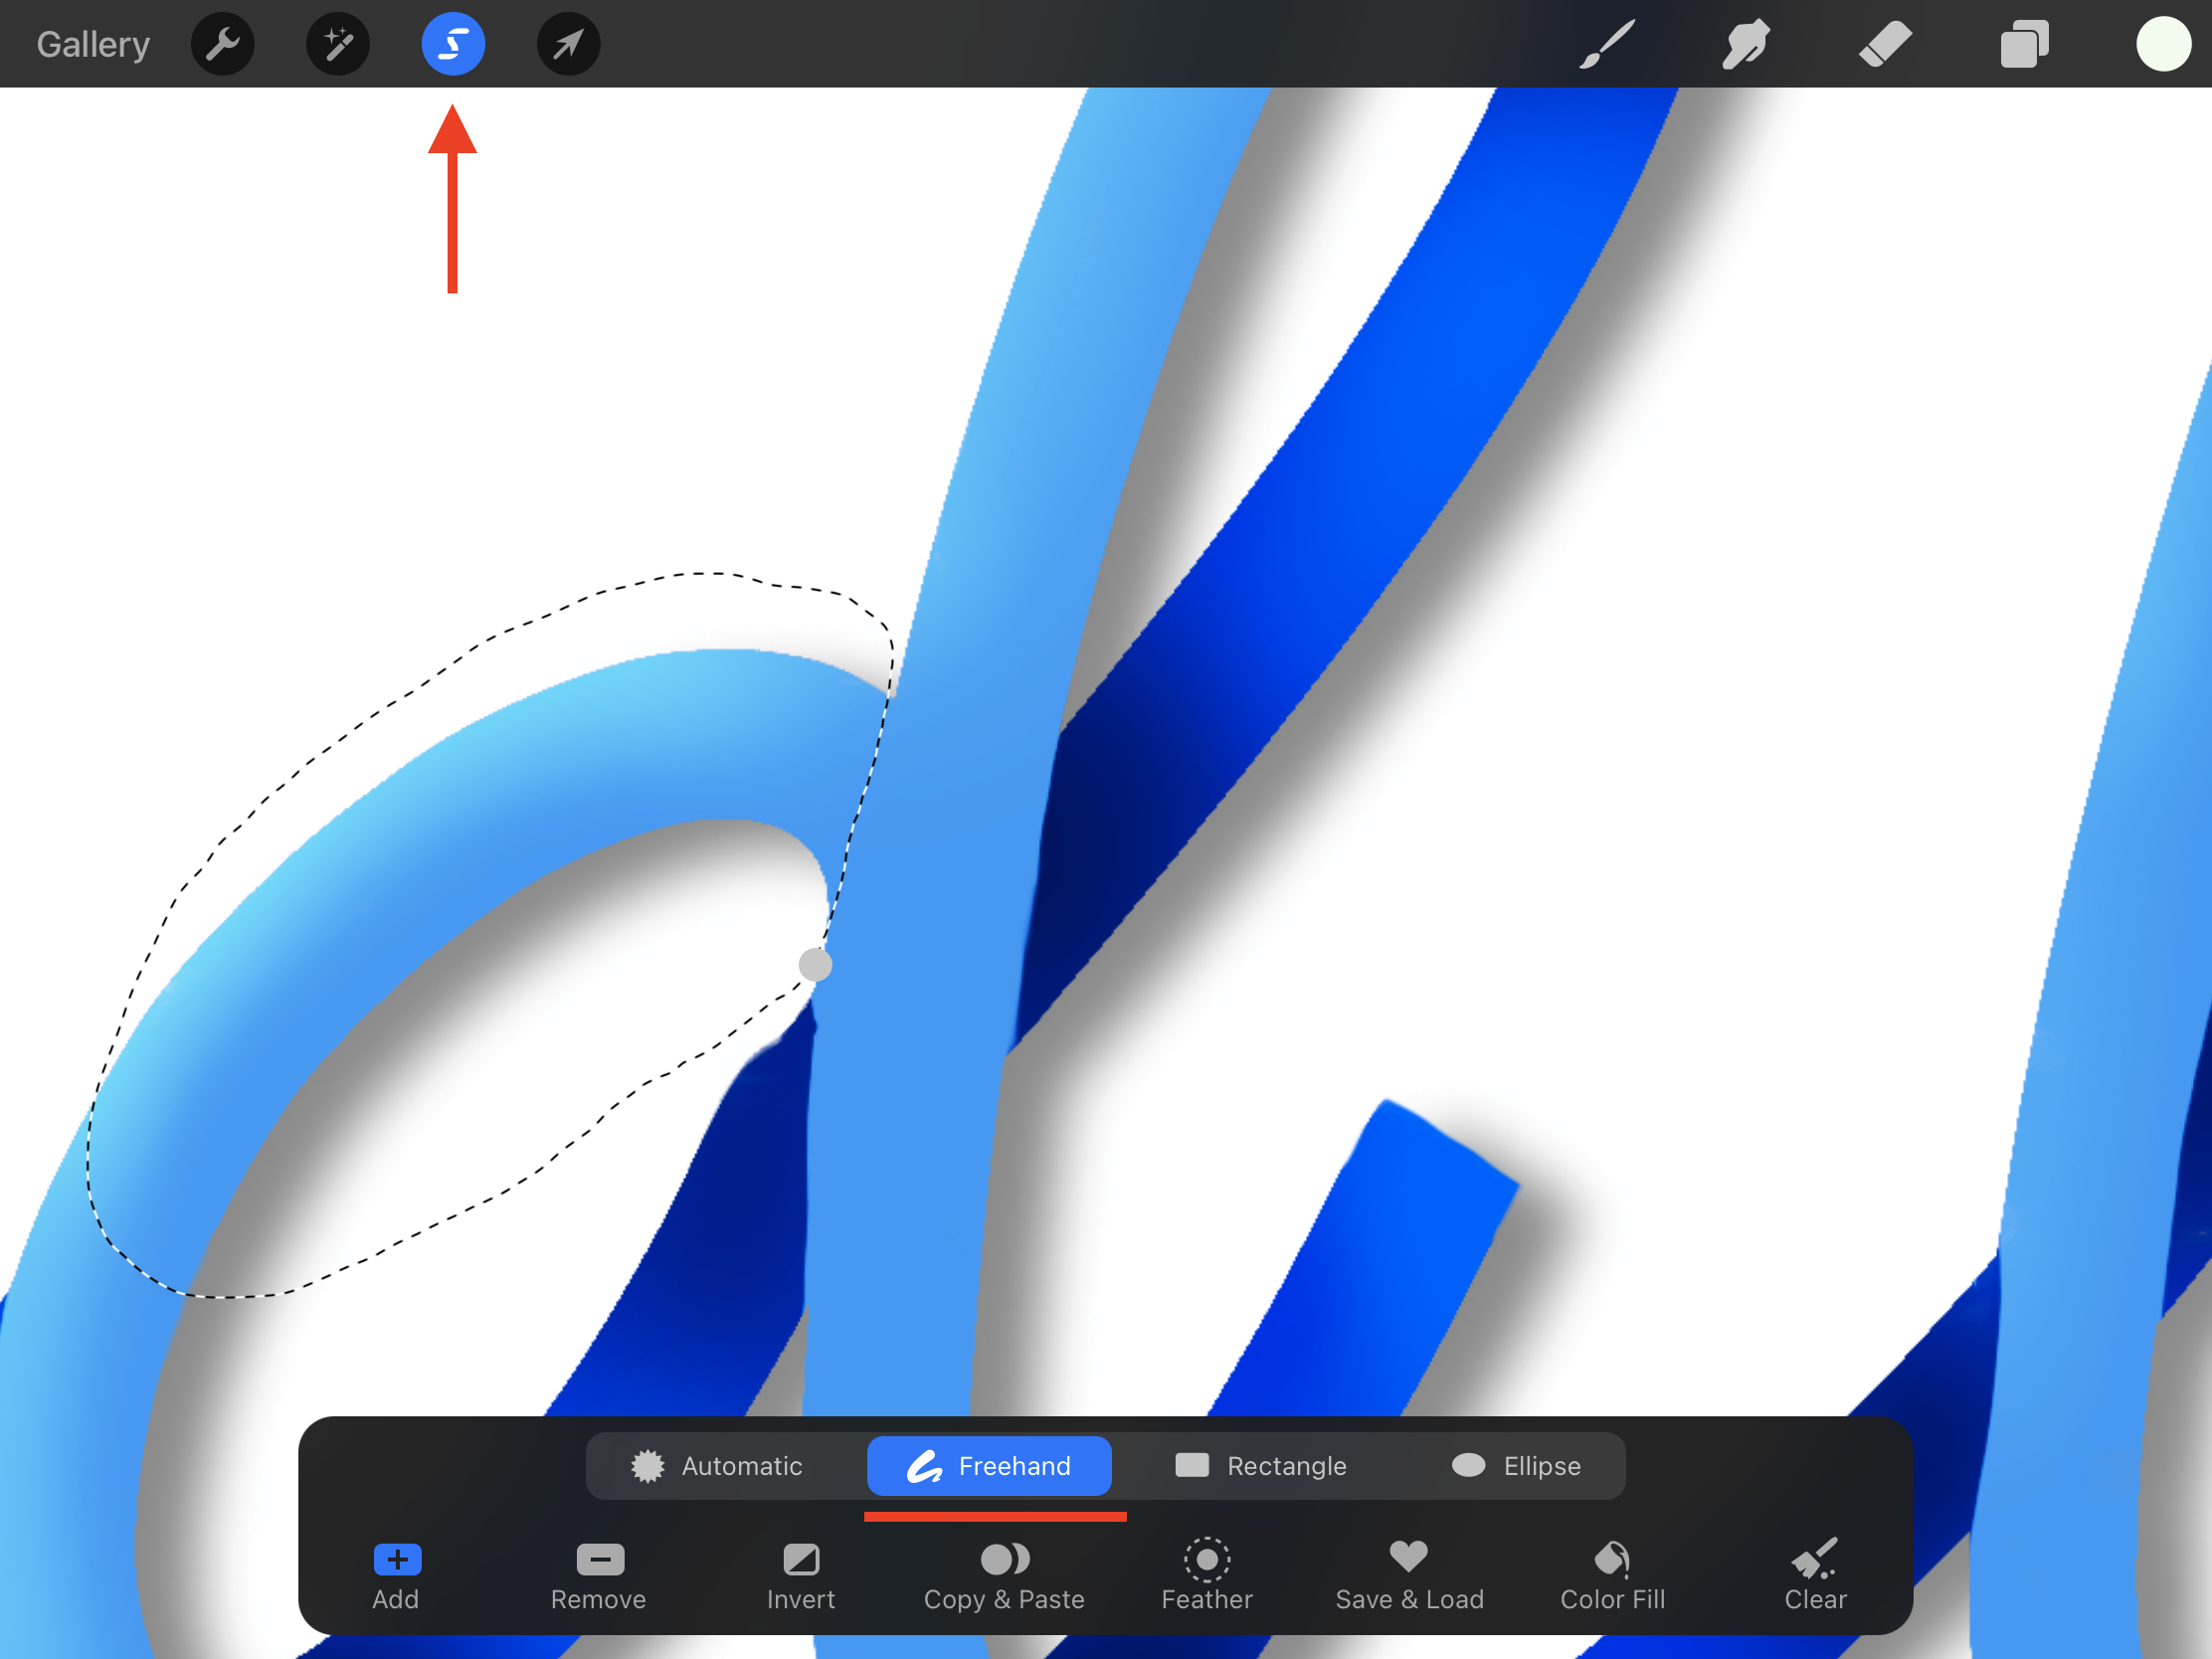
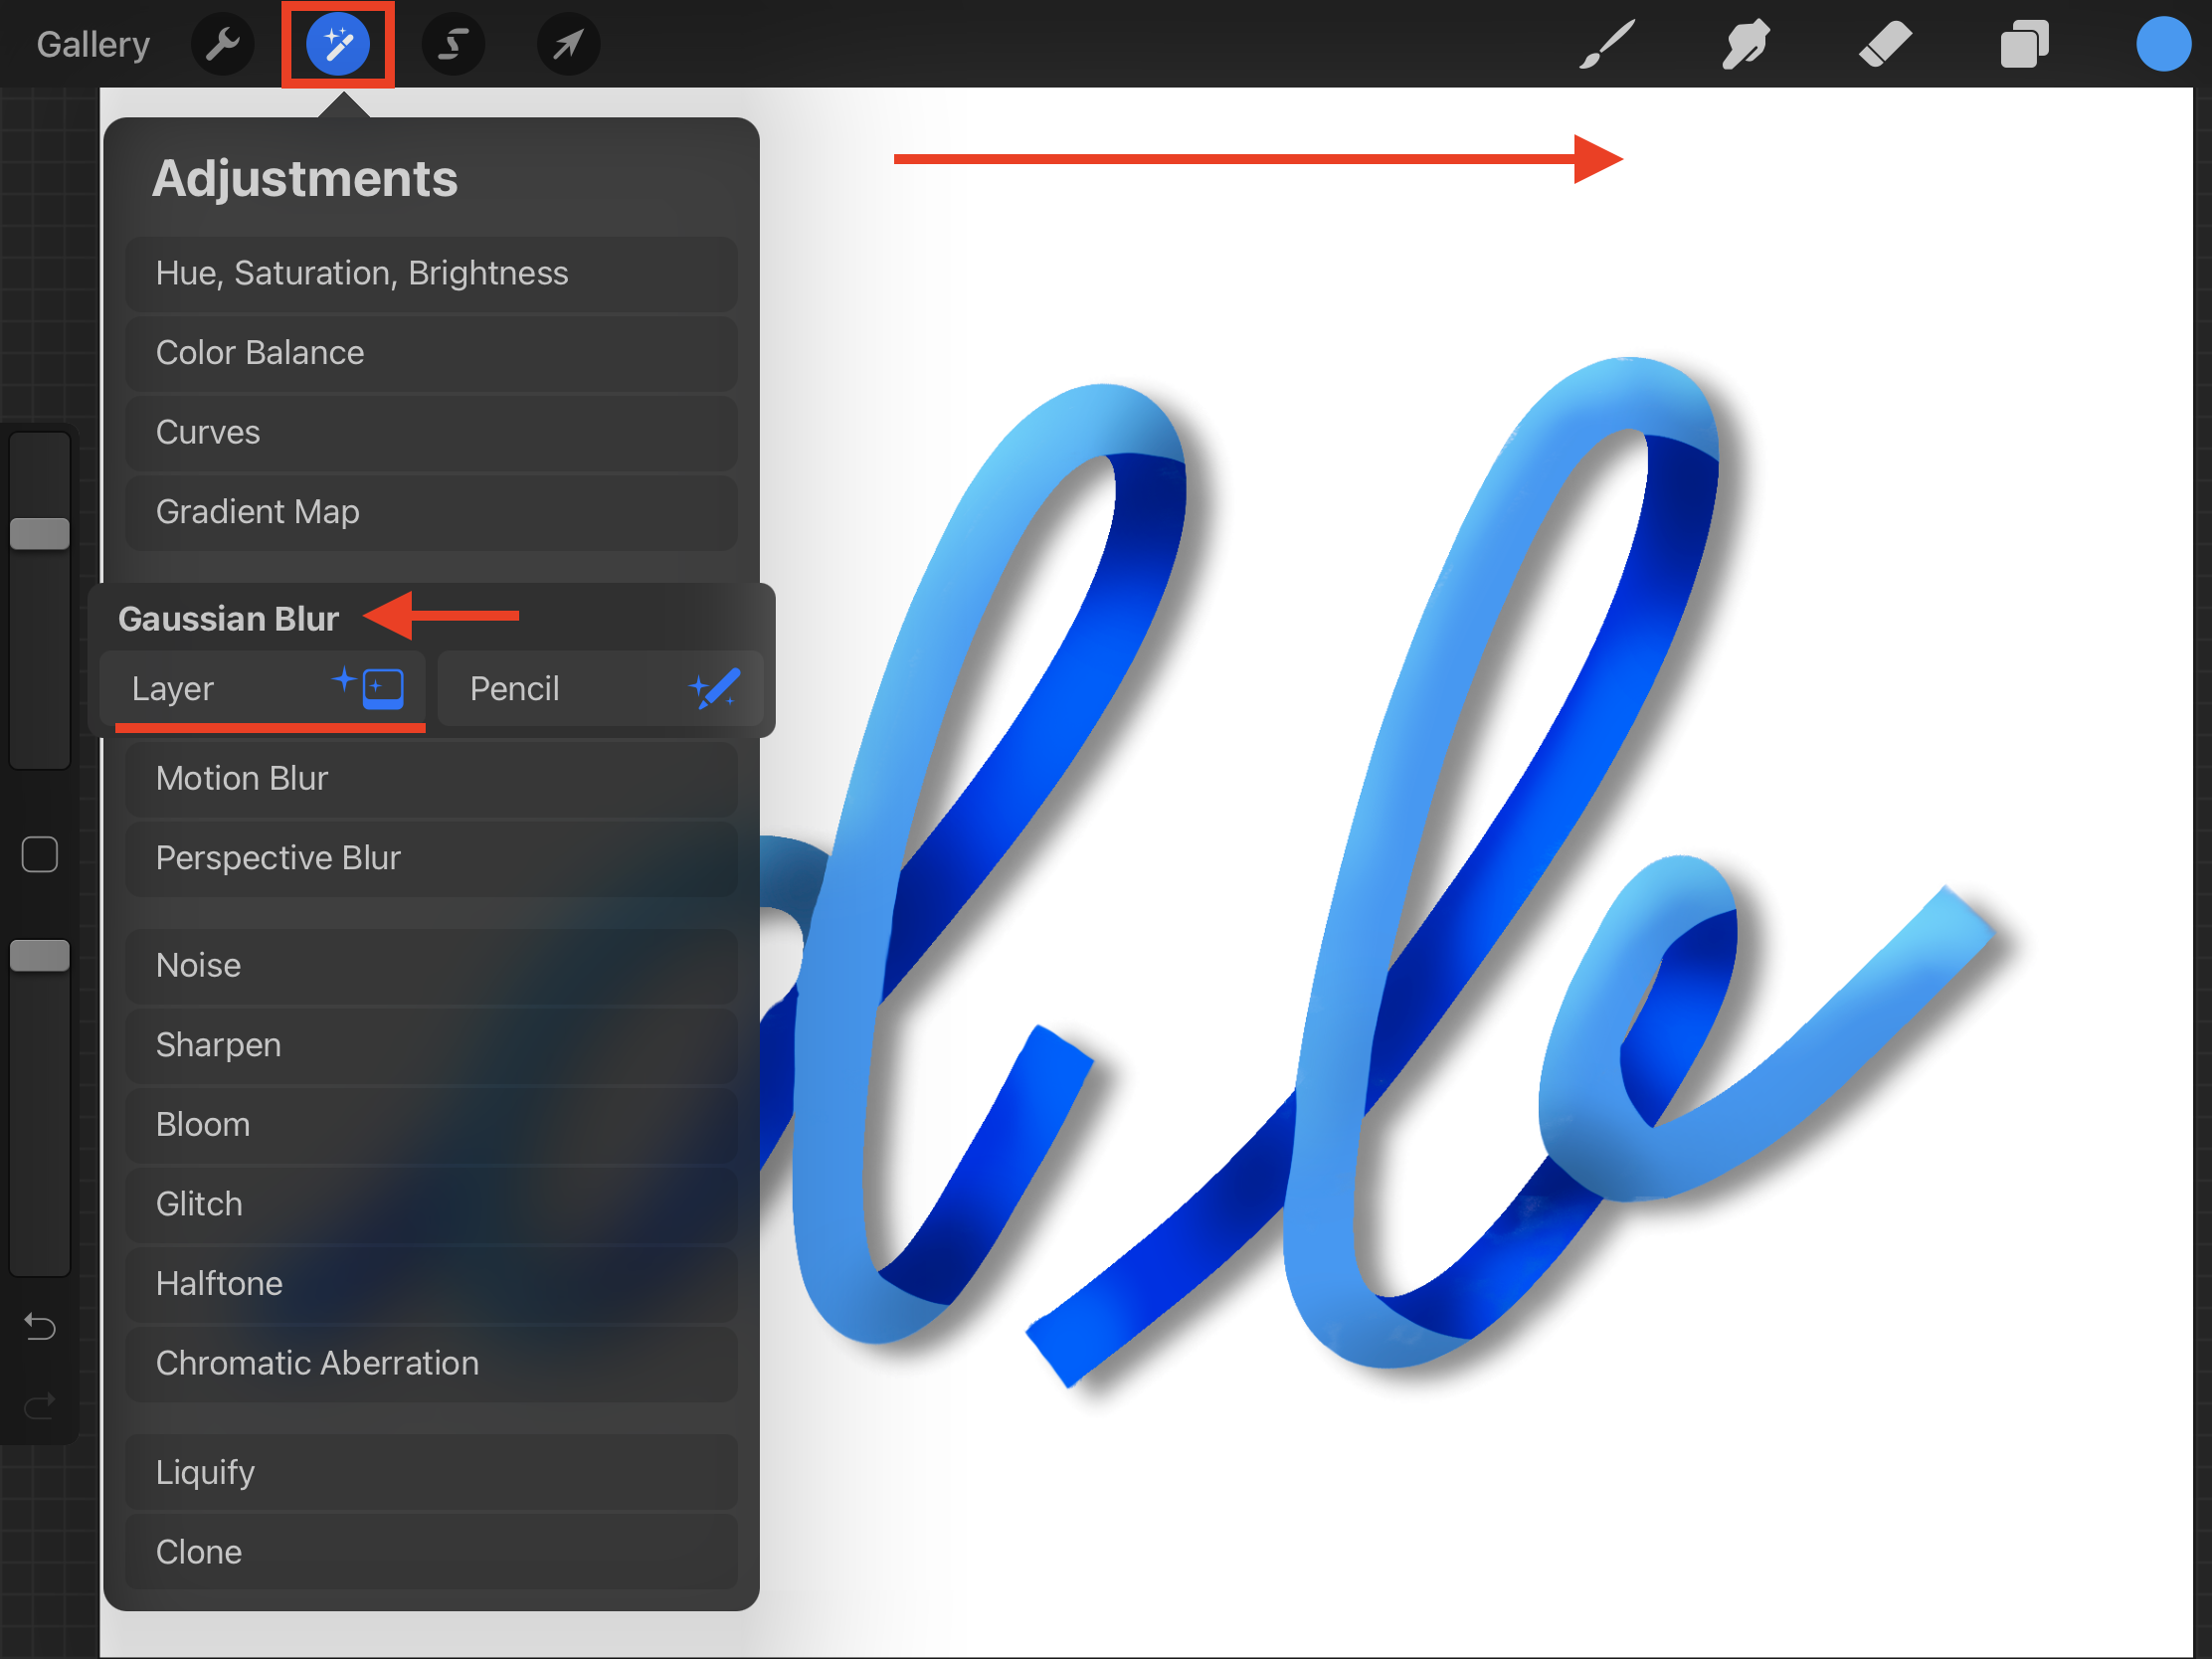
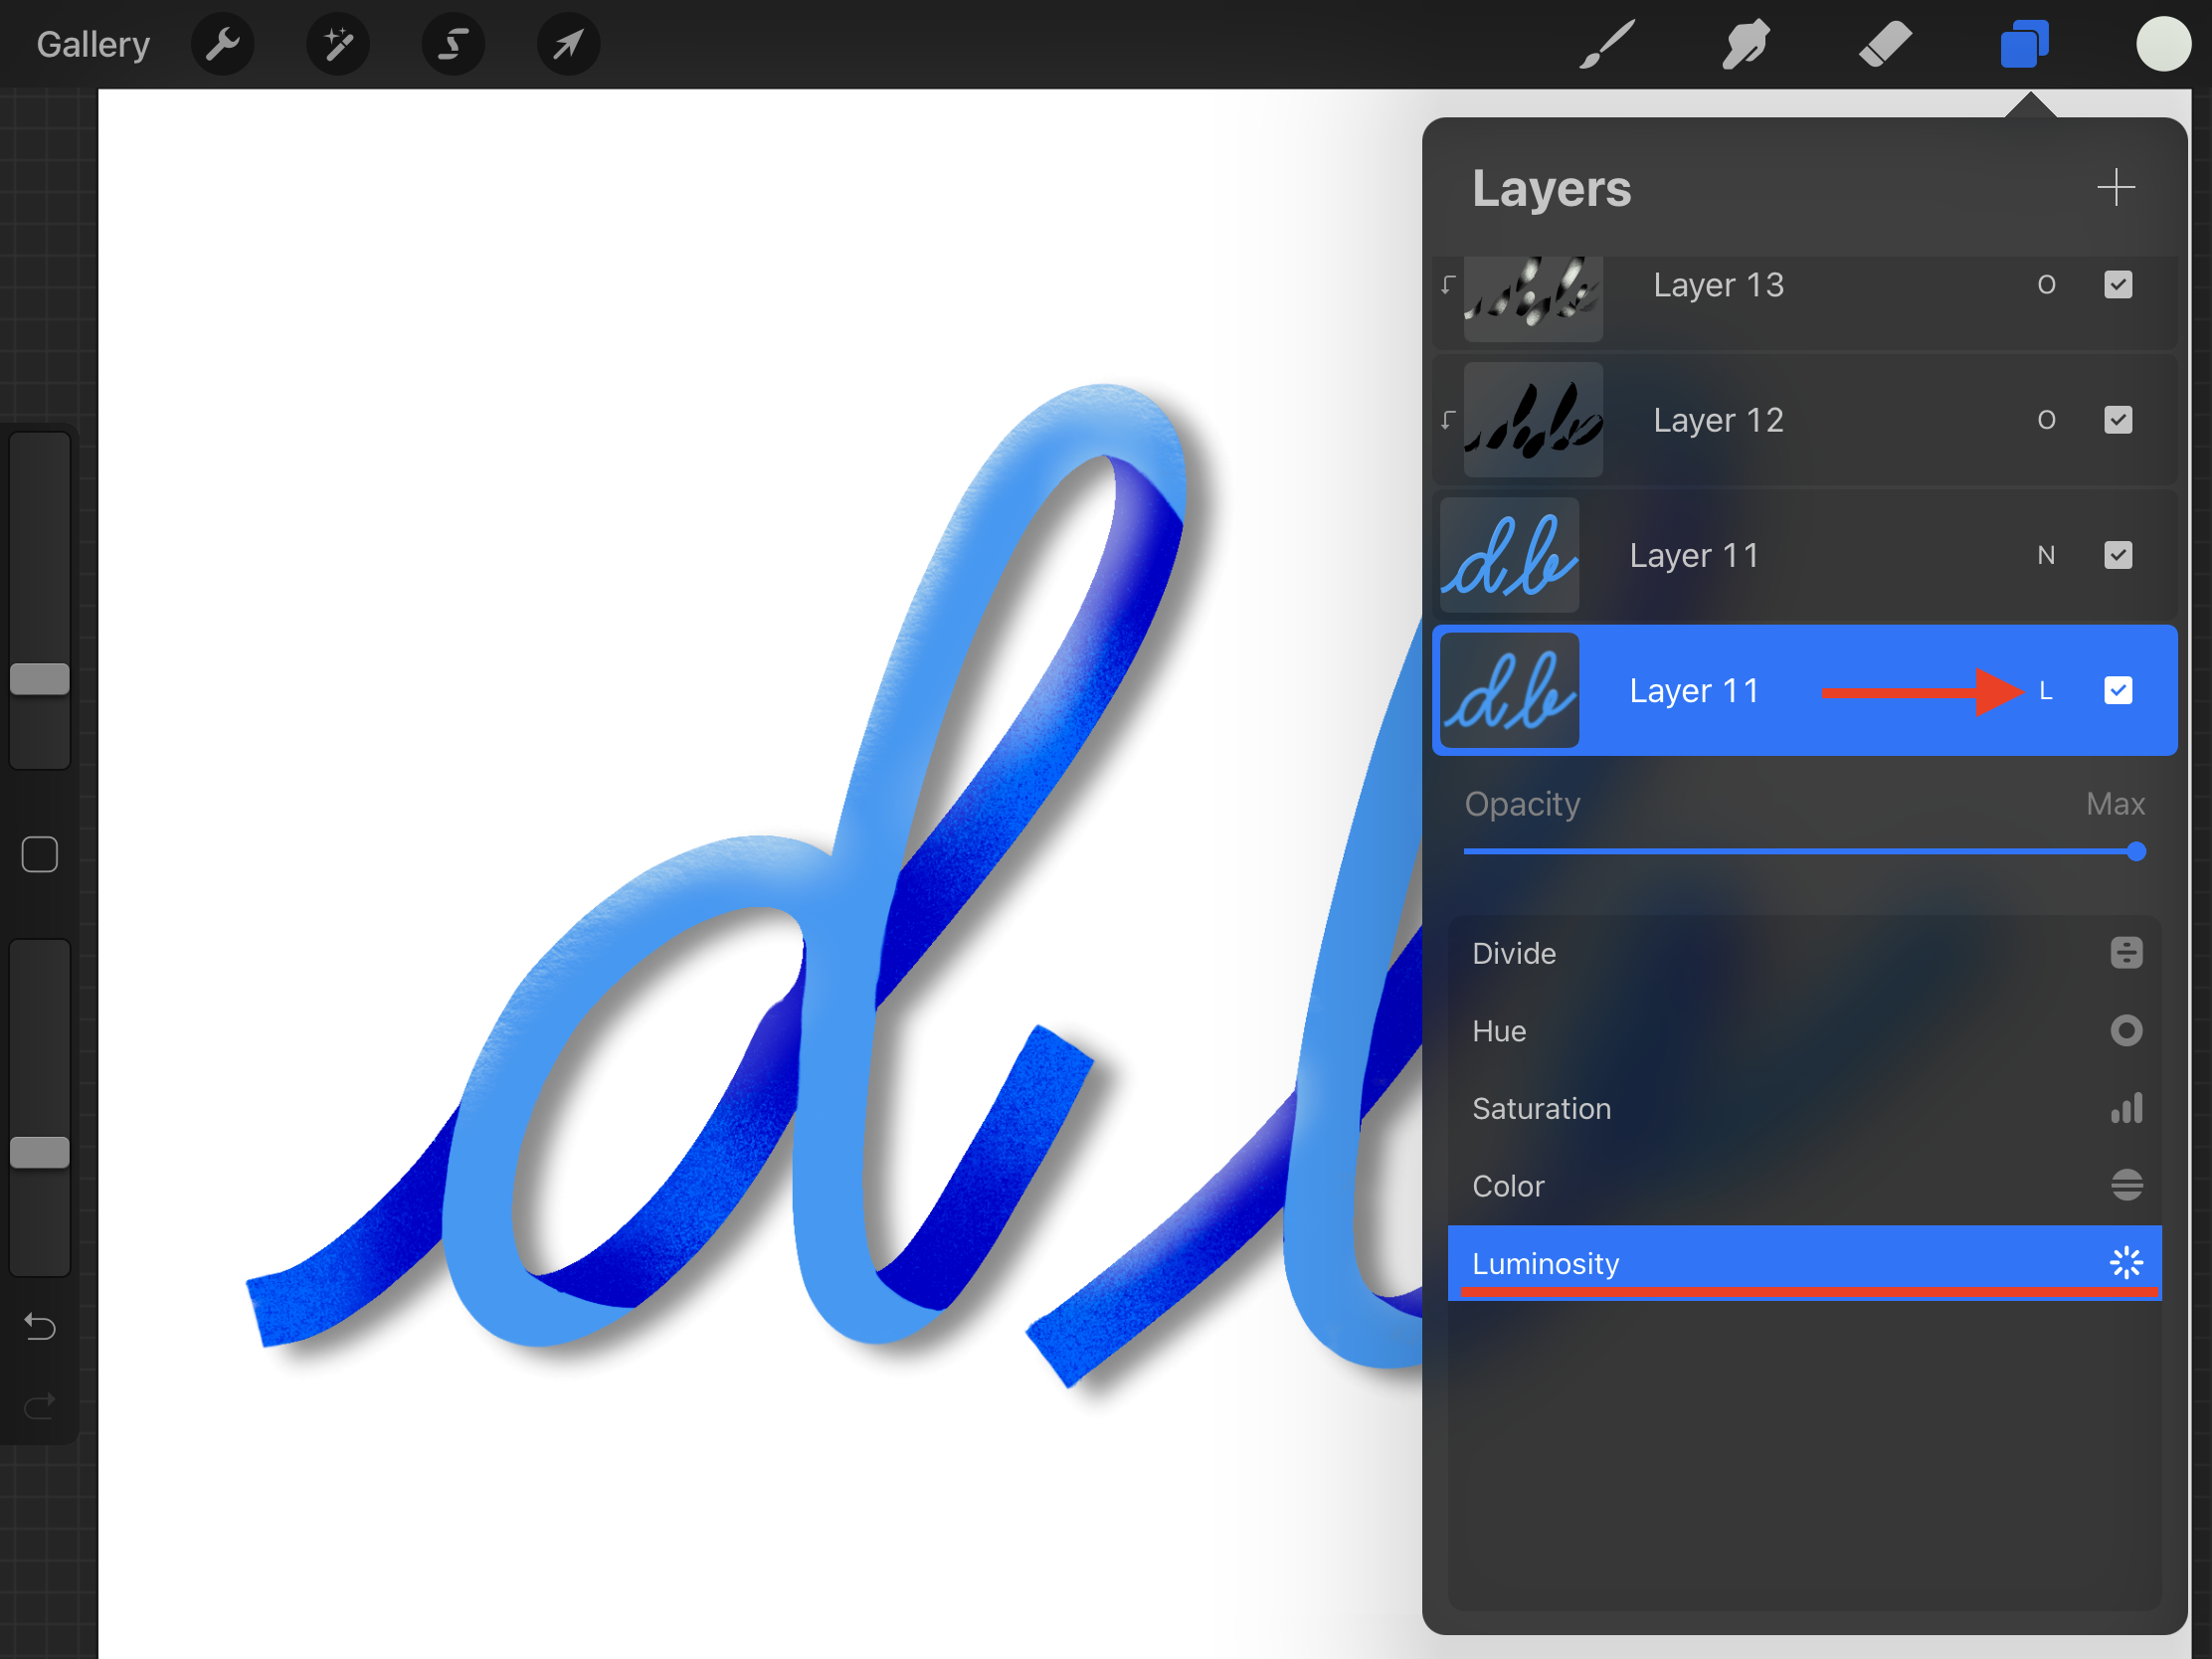
Duplicate the original layer (base color), move it down and right a bit, In the Effects menu, choose Gaussian Blur, pick Layer, and slide your finger on the right on the screen to create a Drop Shadow. Then, click on the small N to open the menu and choose Luminosity from the menu.
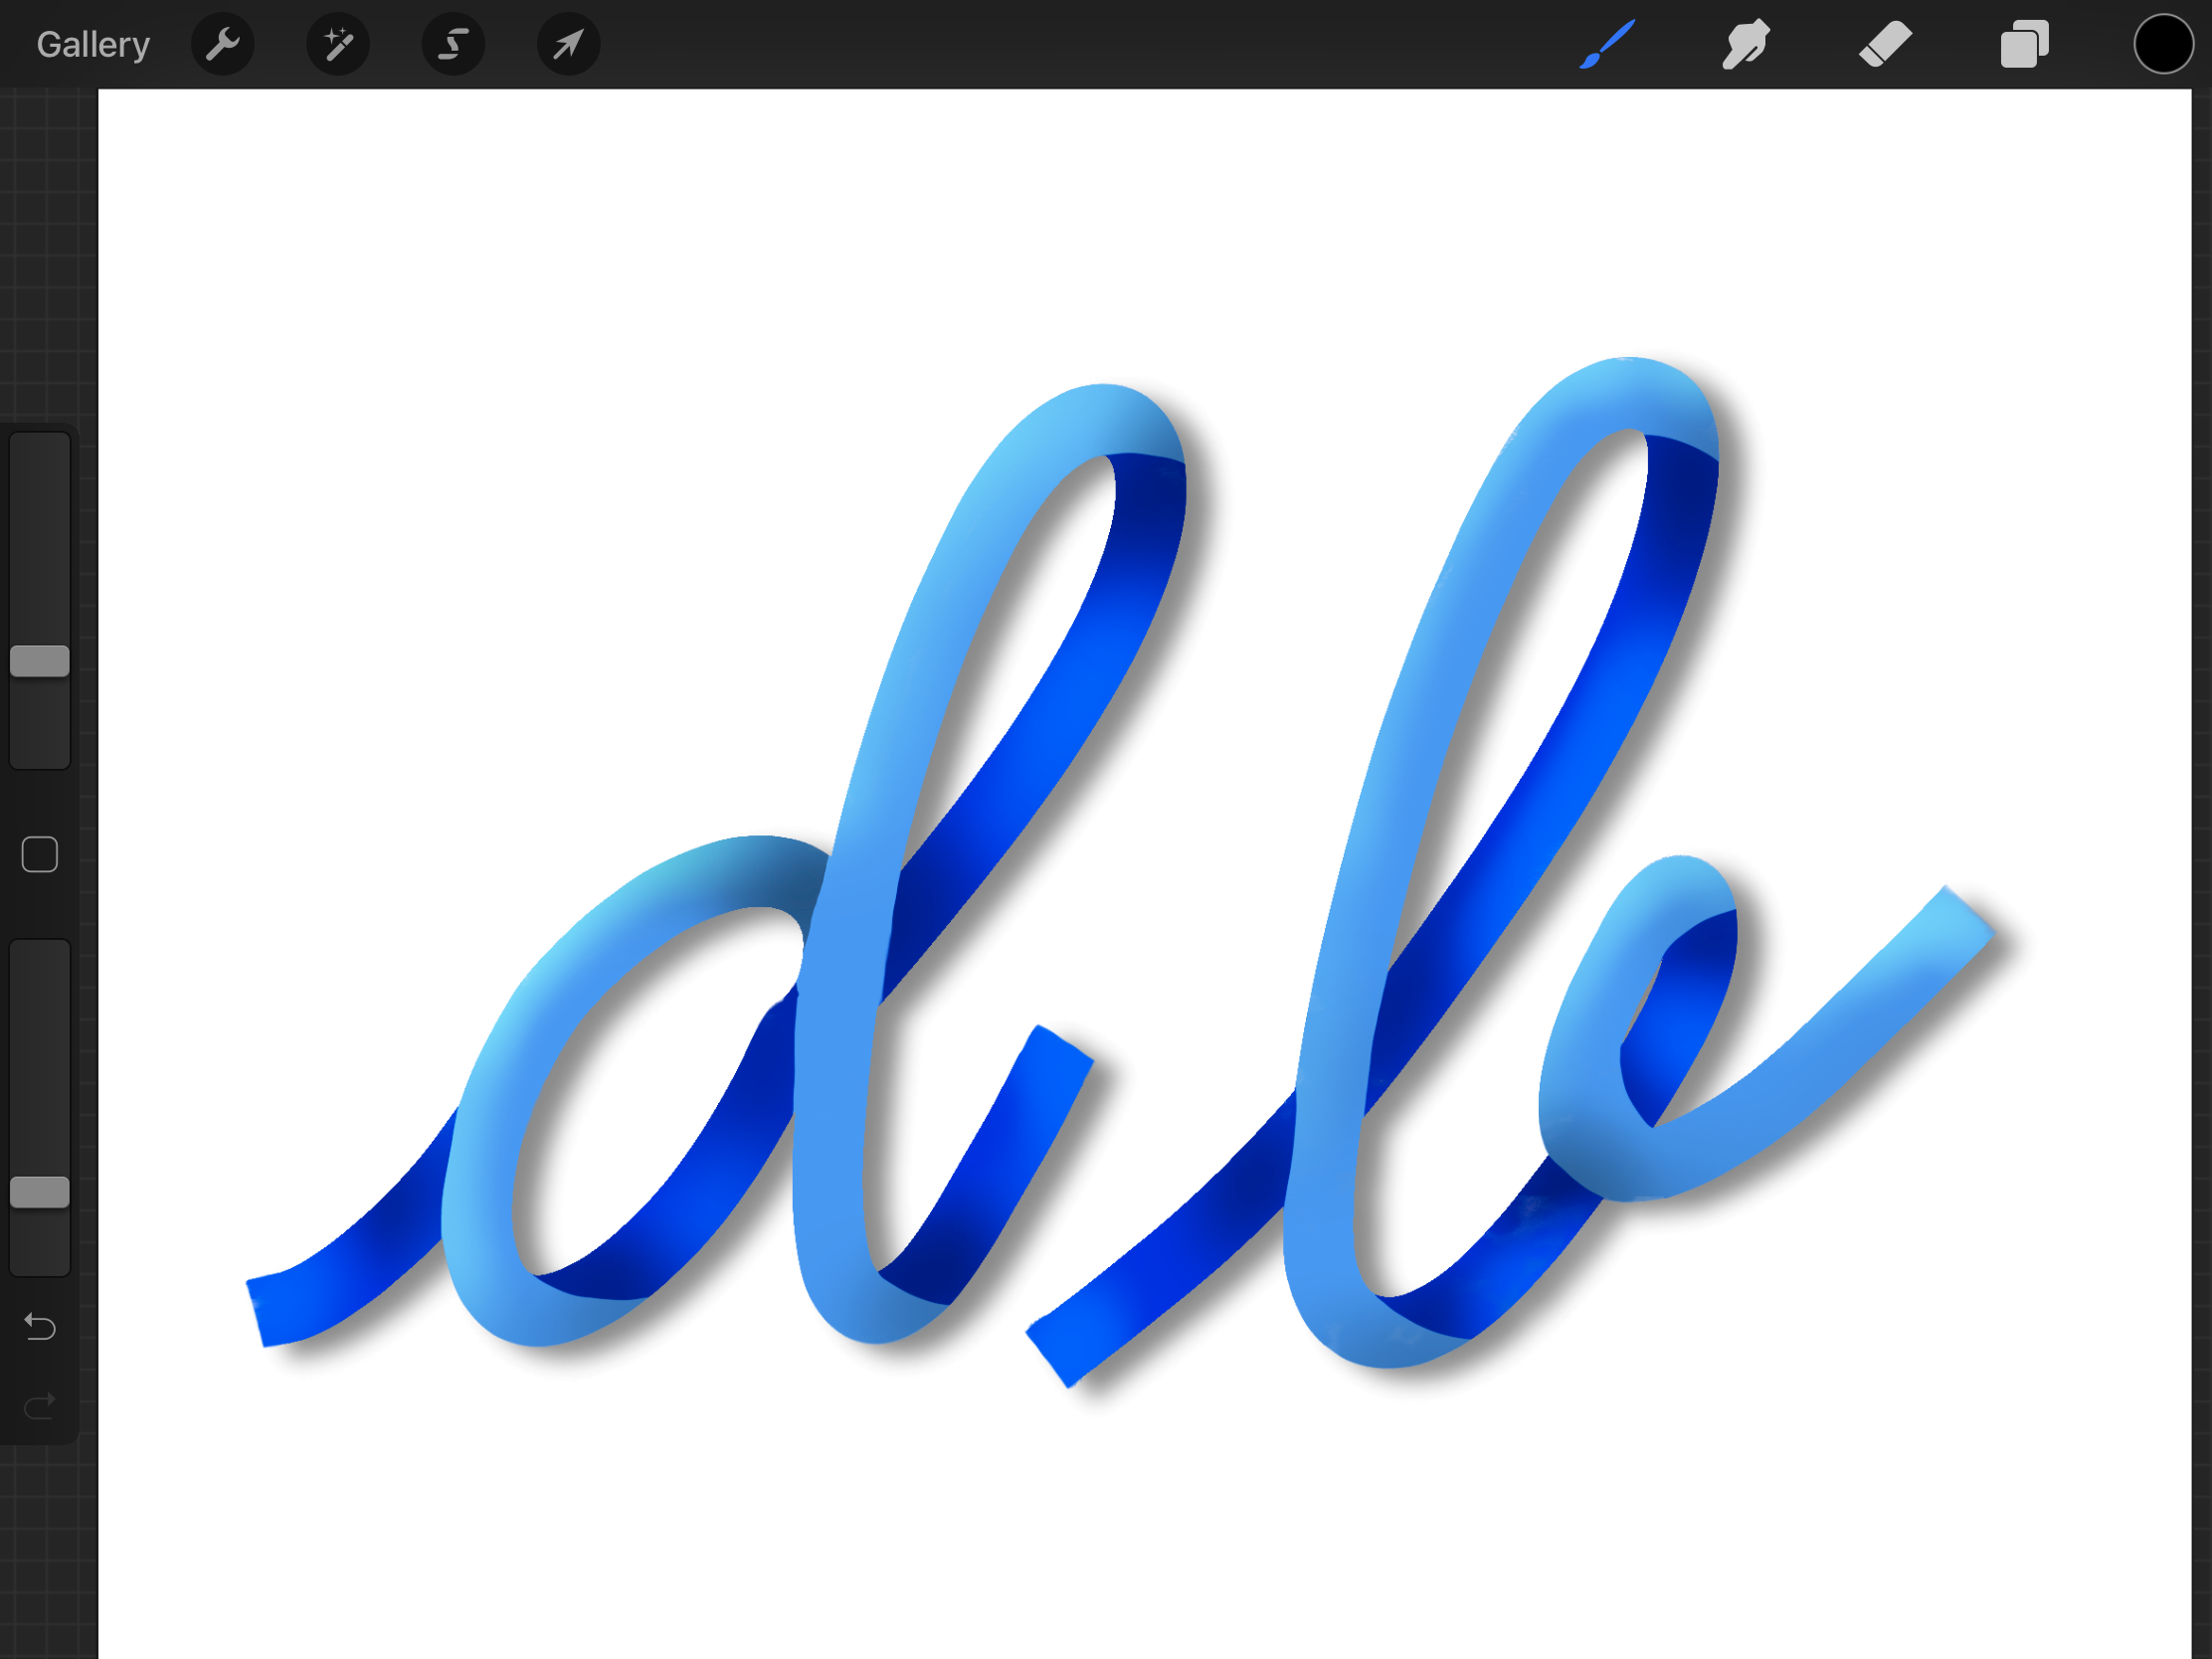
You can also create your own Ribbon Brush inside Brush Studio. Just click the white + (Plus) button on the top right side of the Brush Library to create a New Brush and use the following settings or tweak them a bit and experiment.
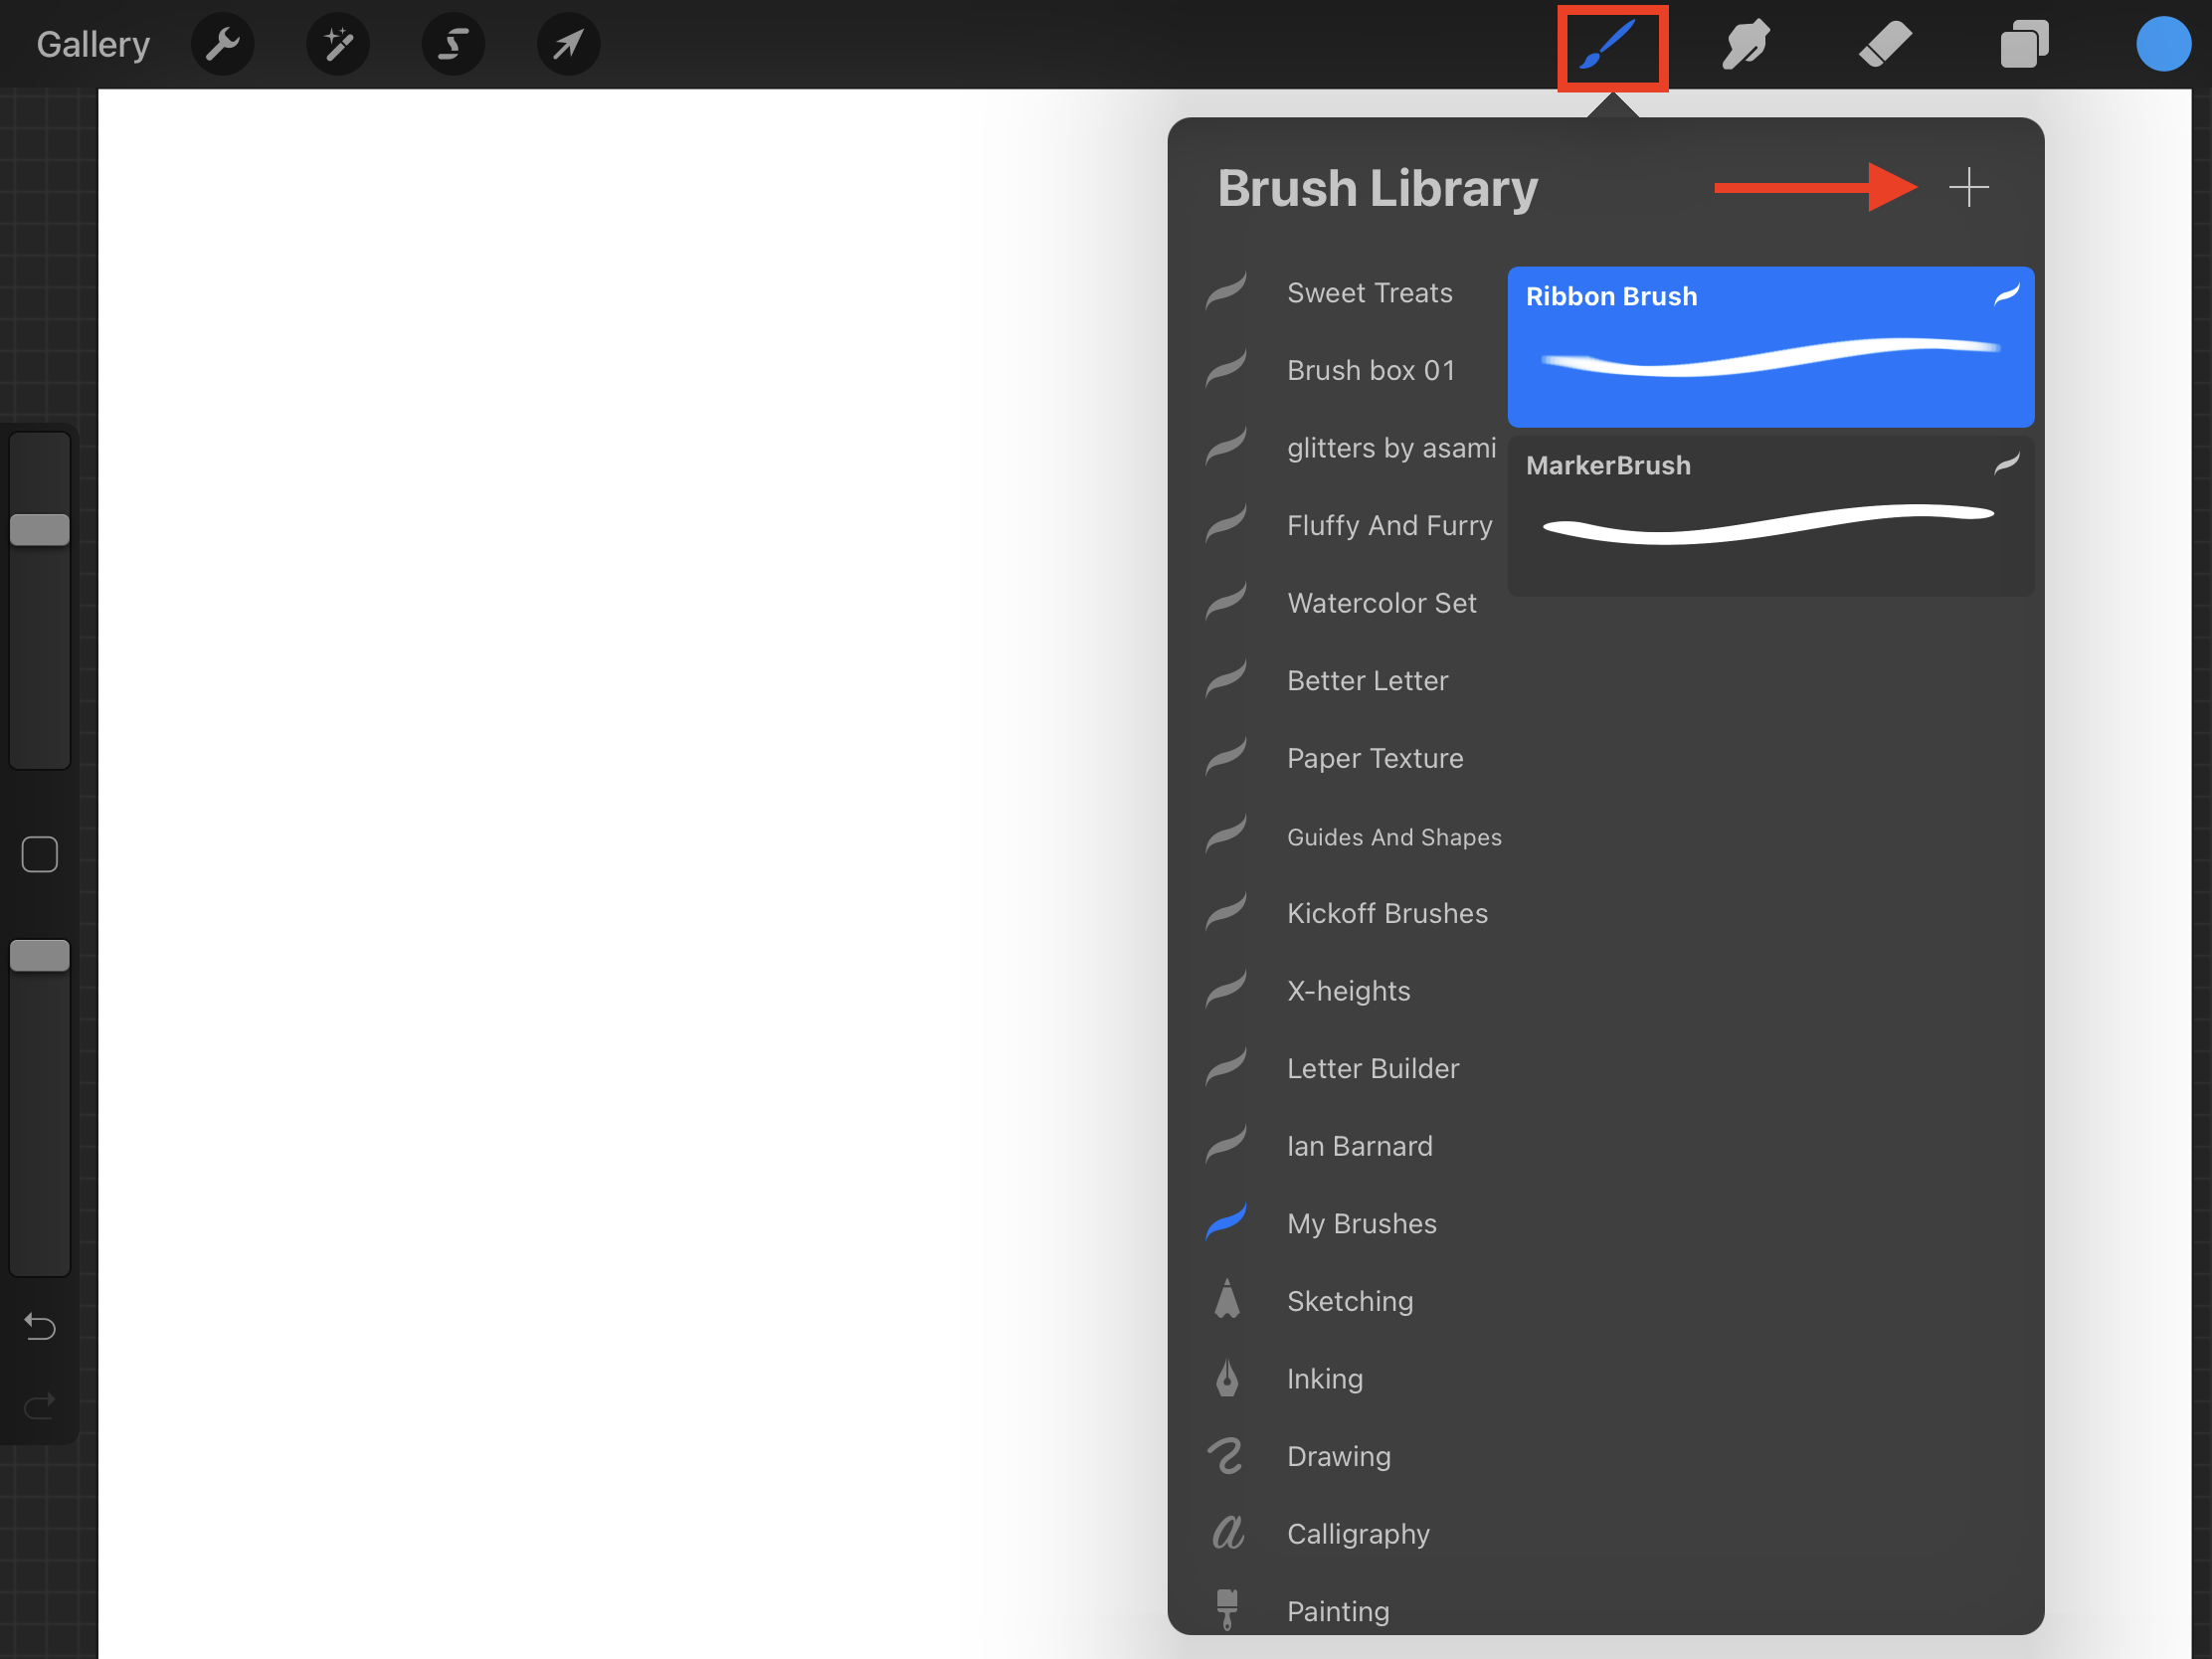
Stroke Path:
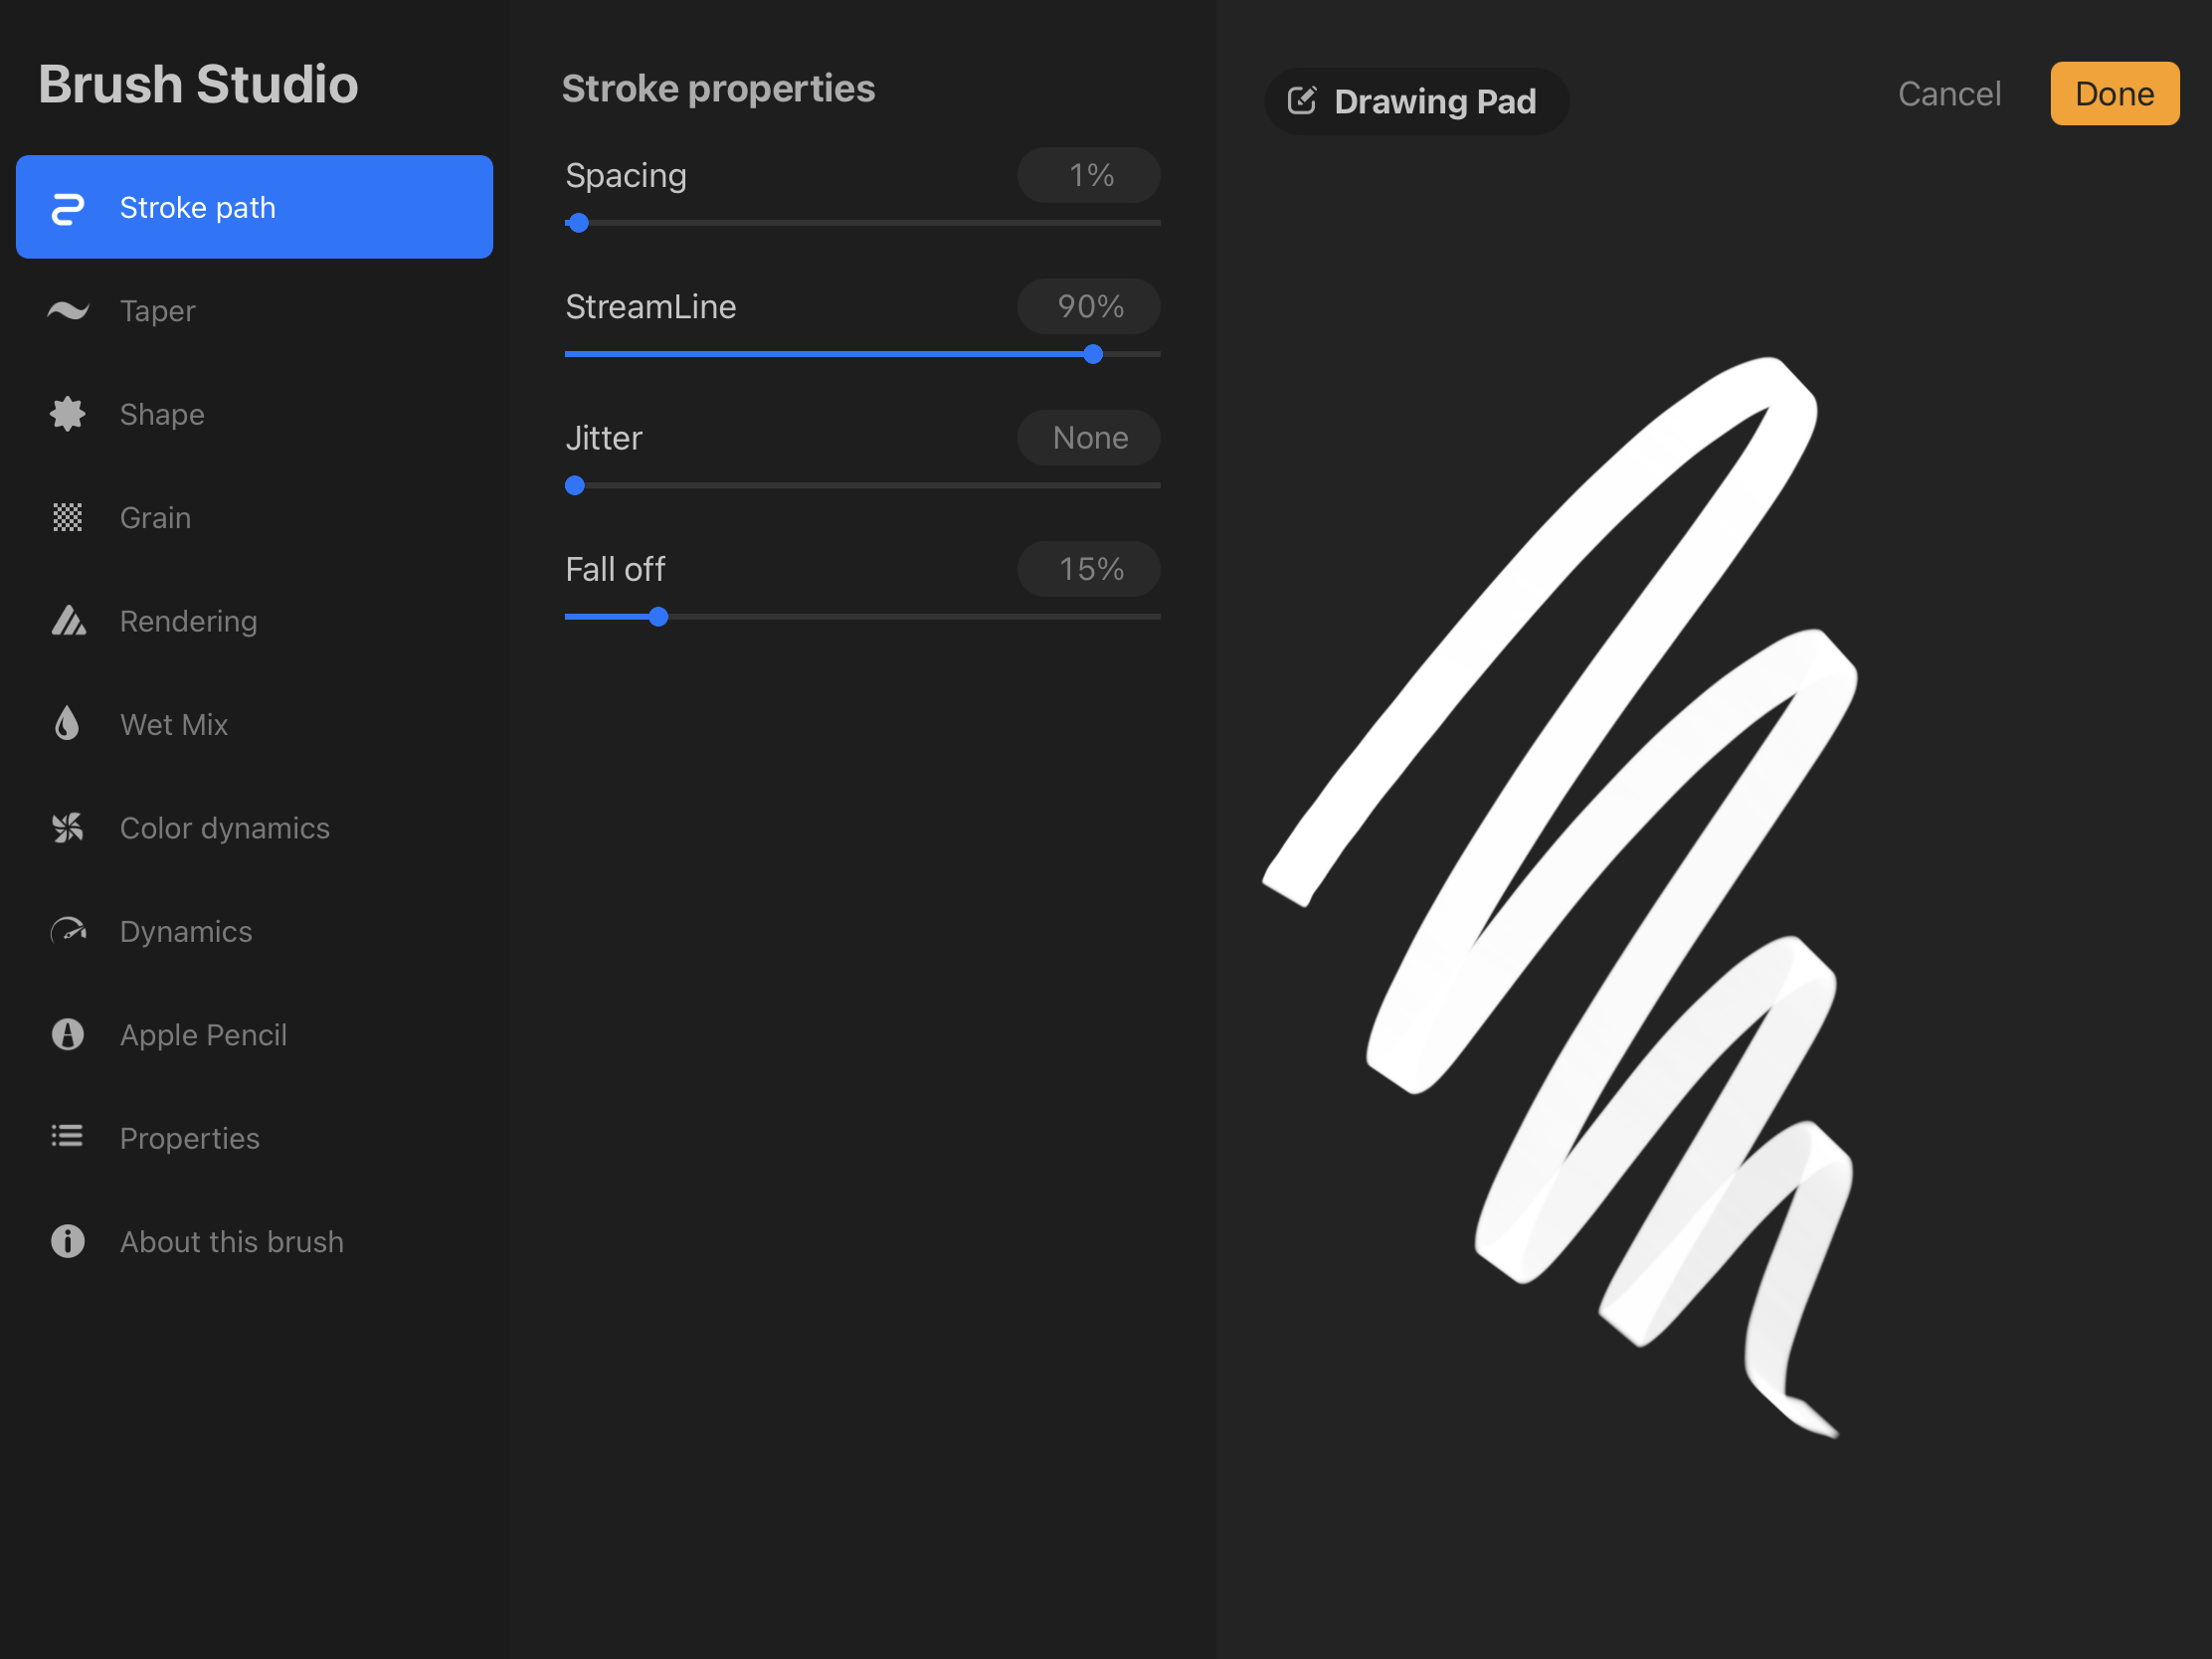
Taper:
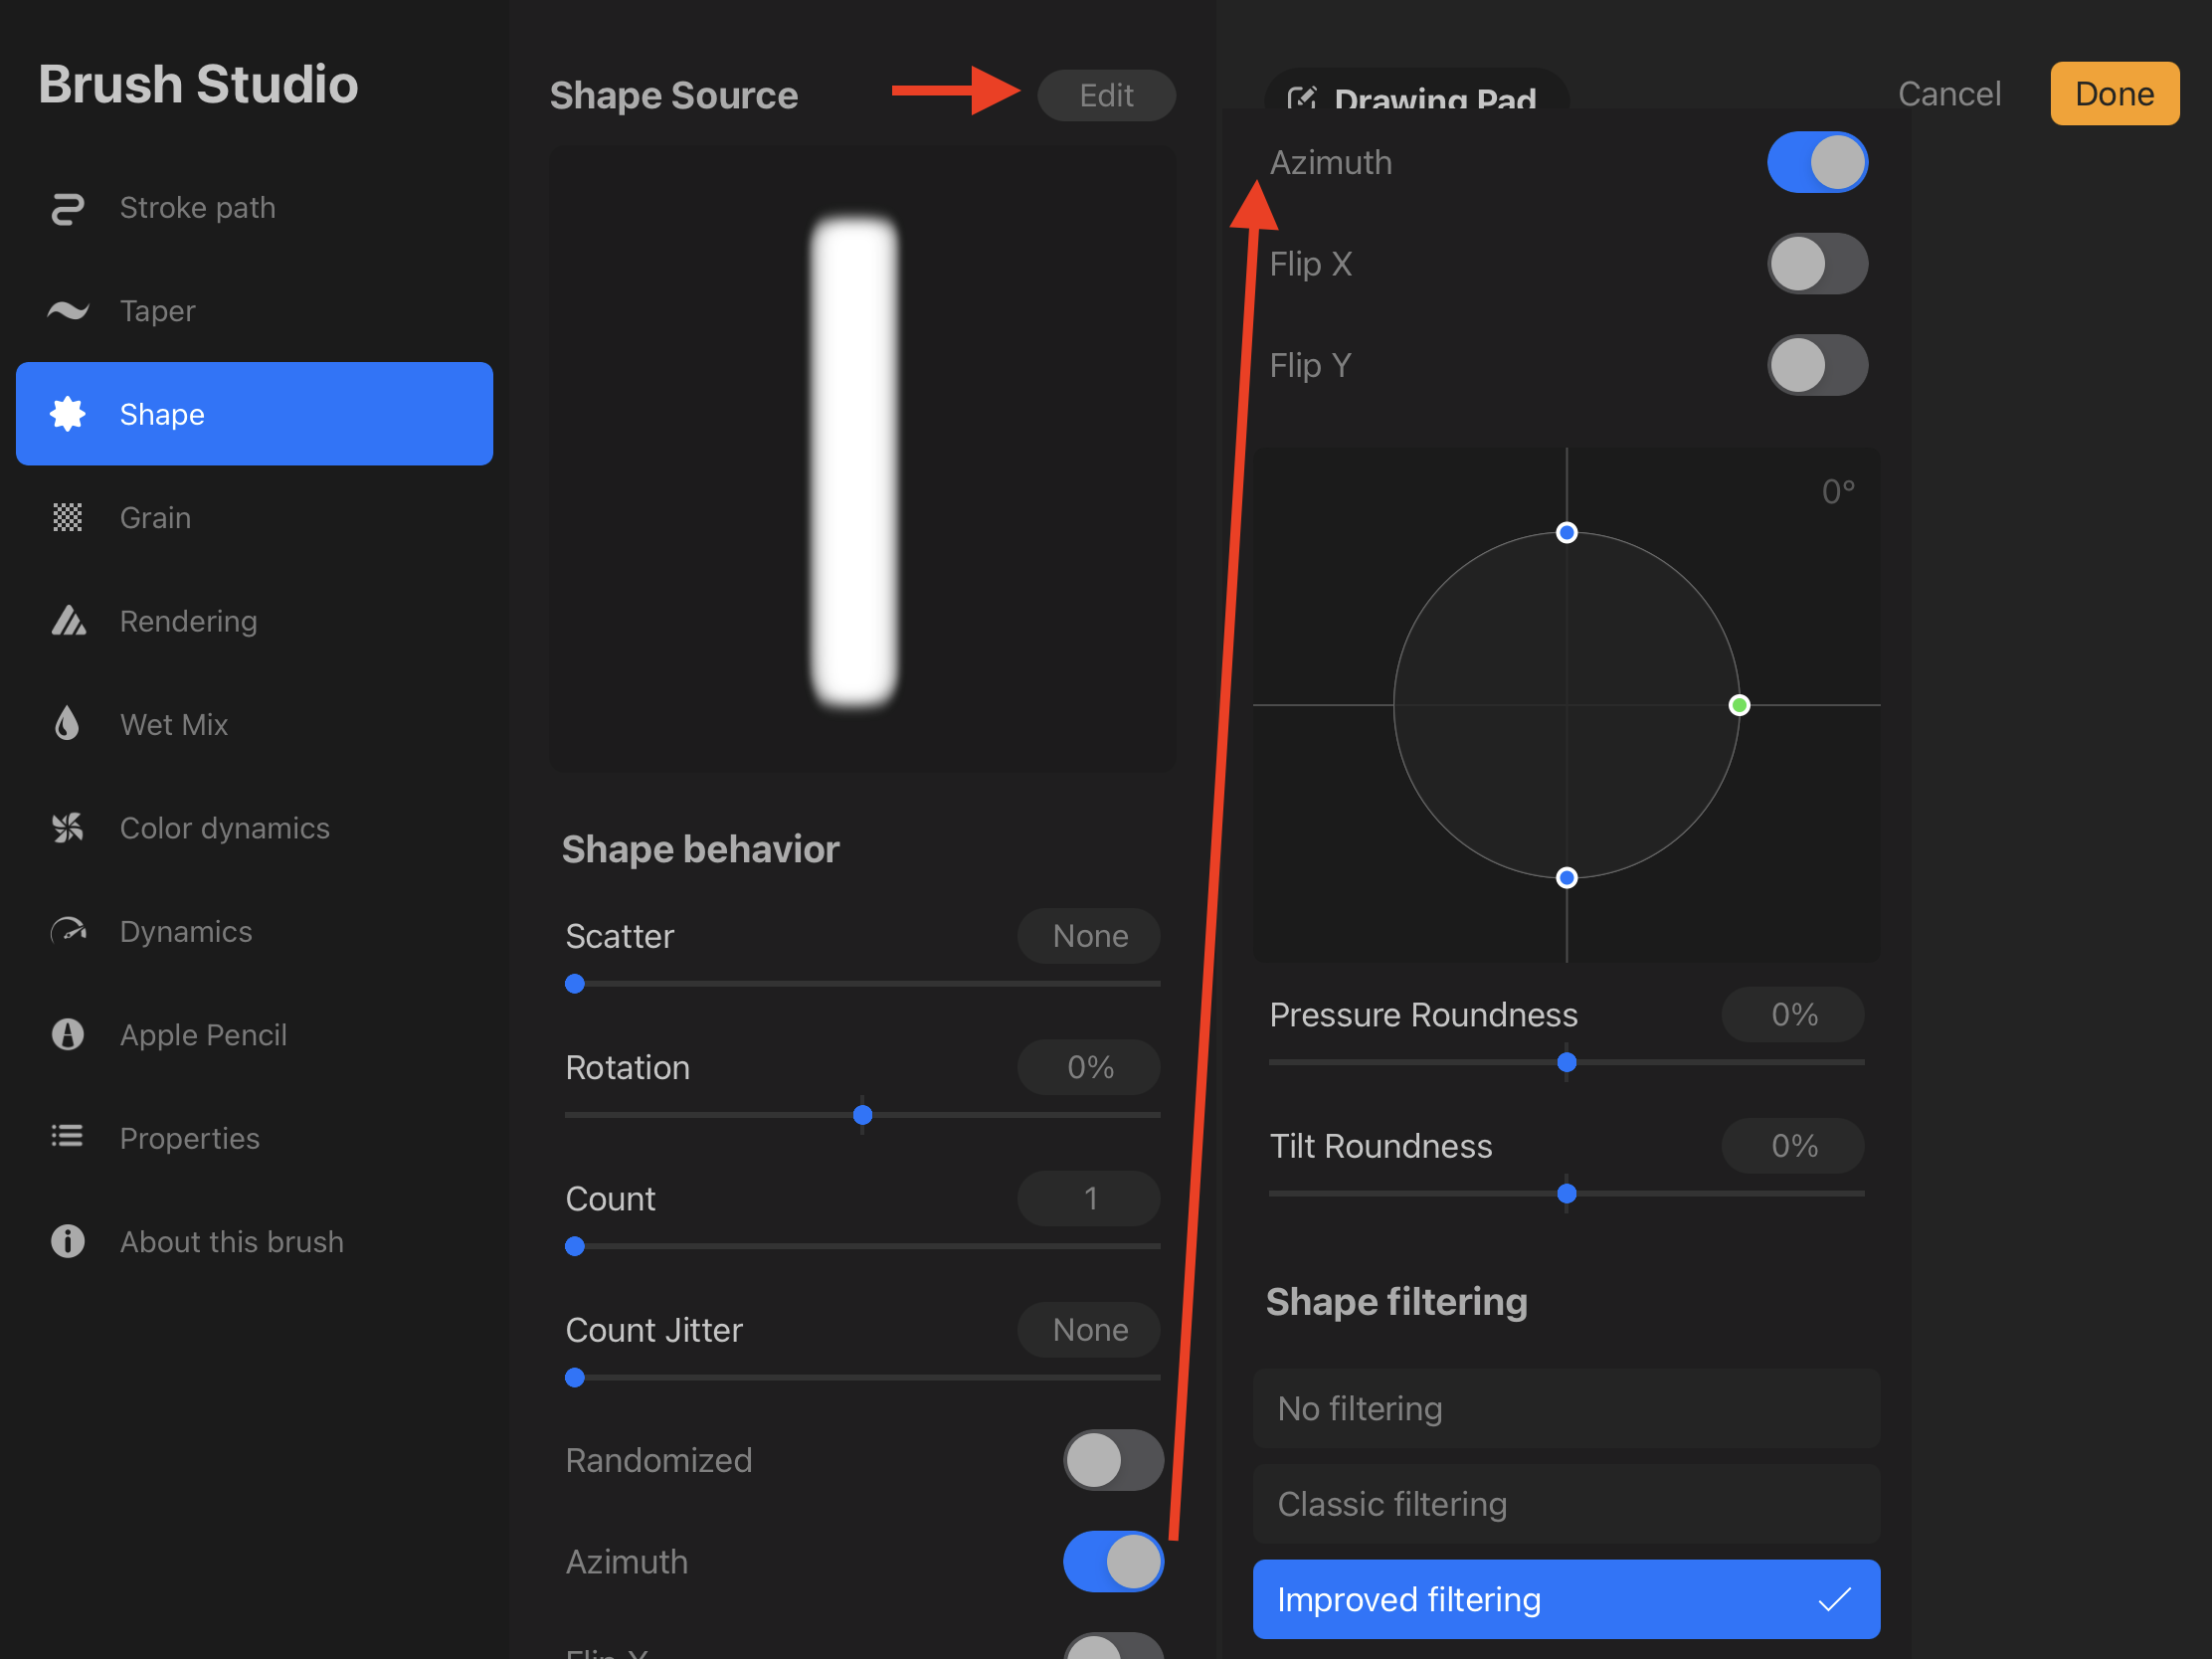
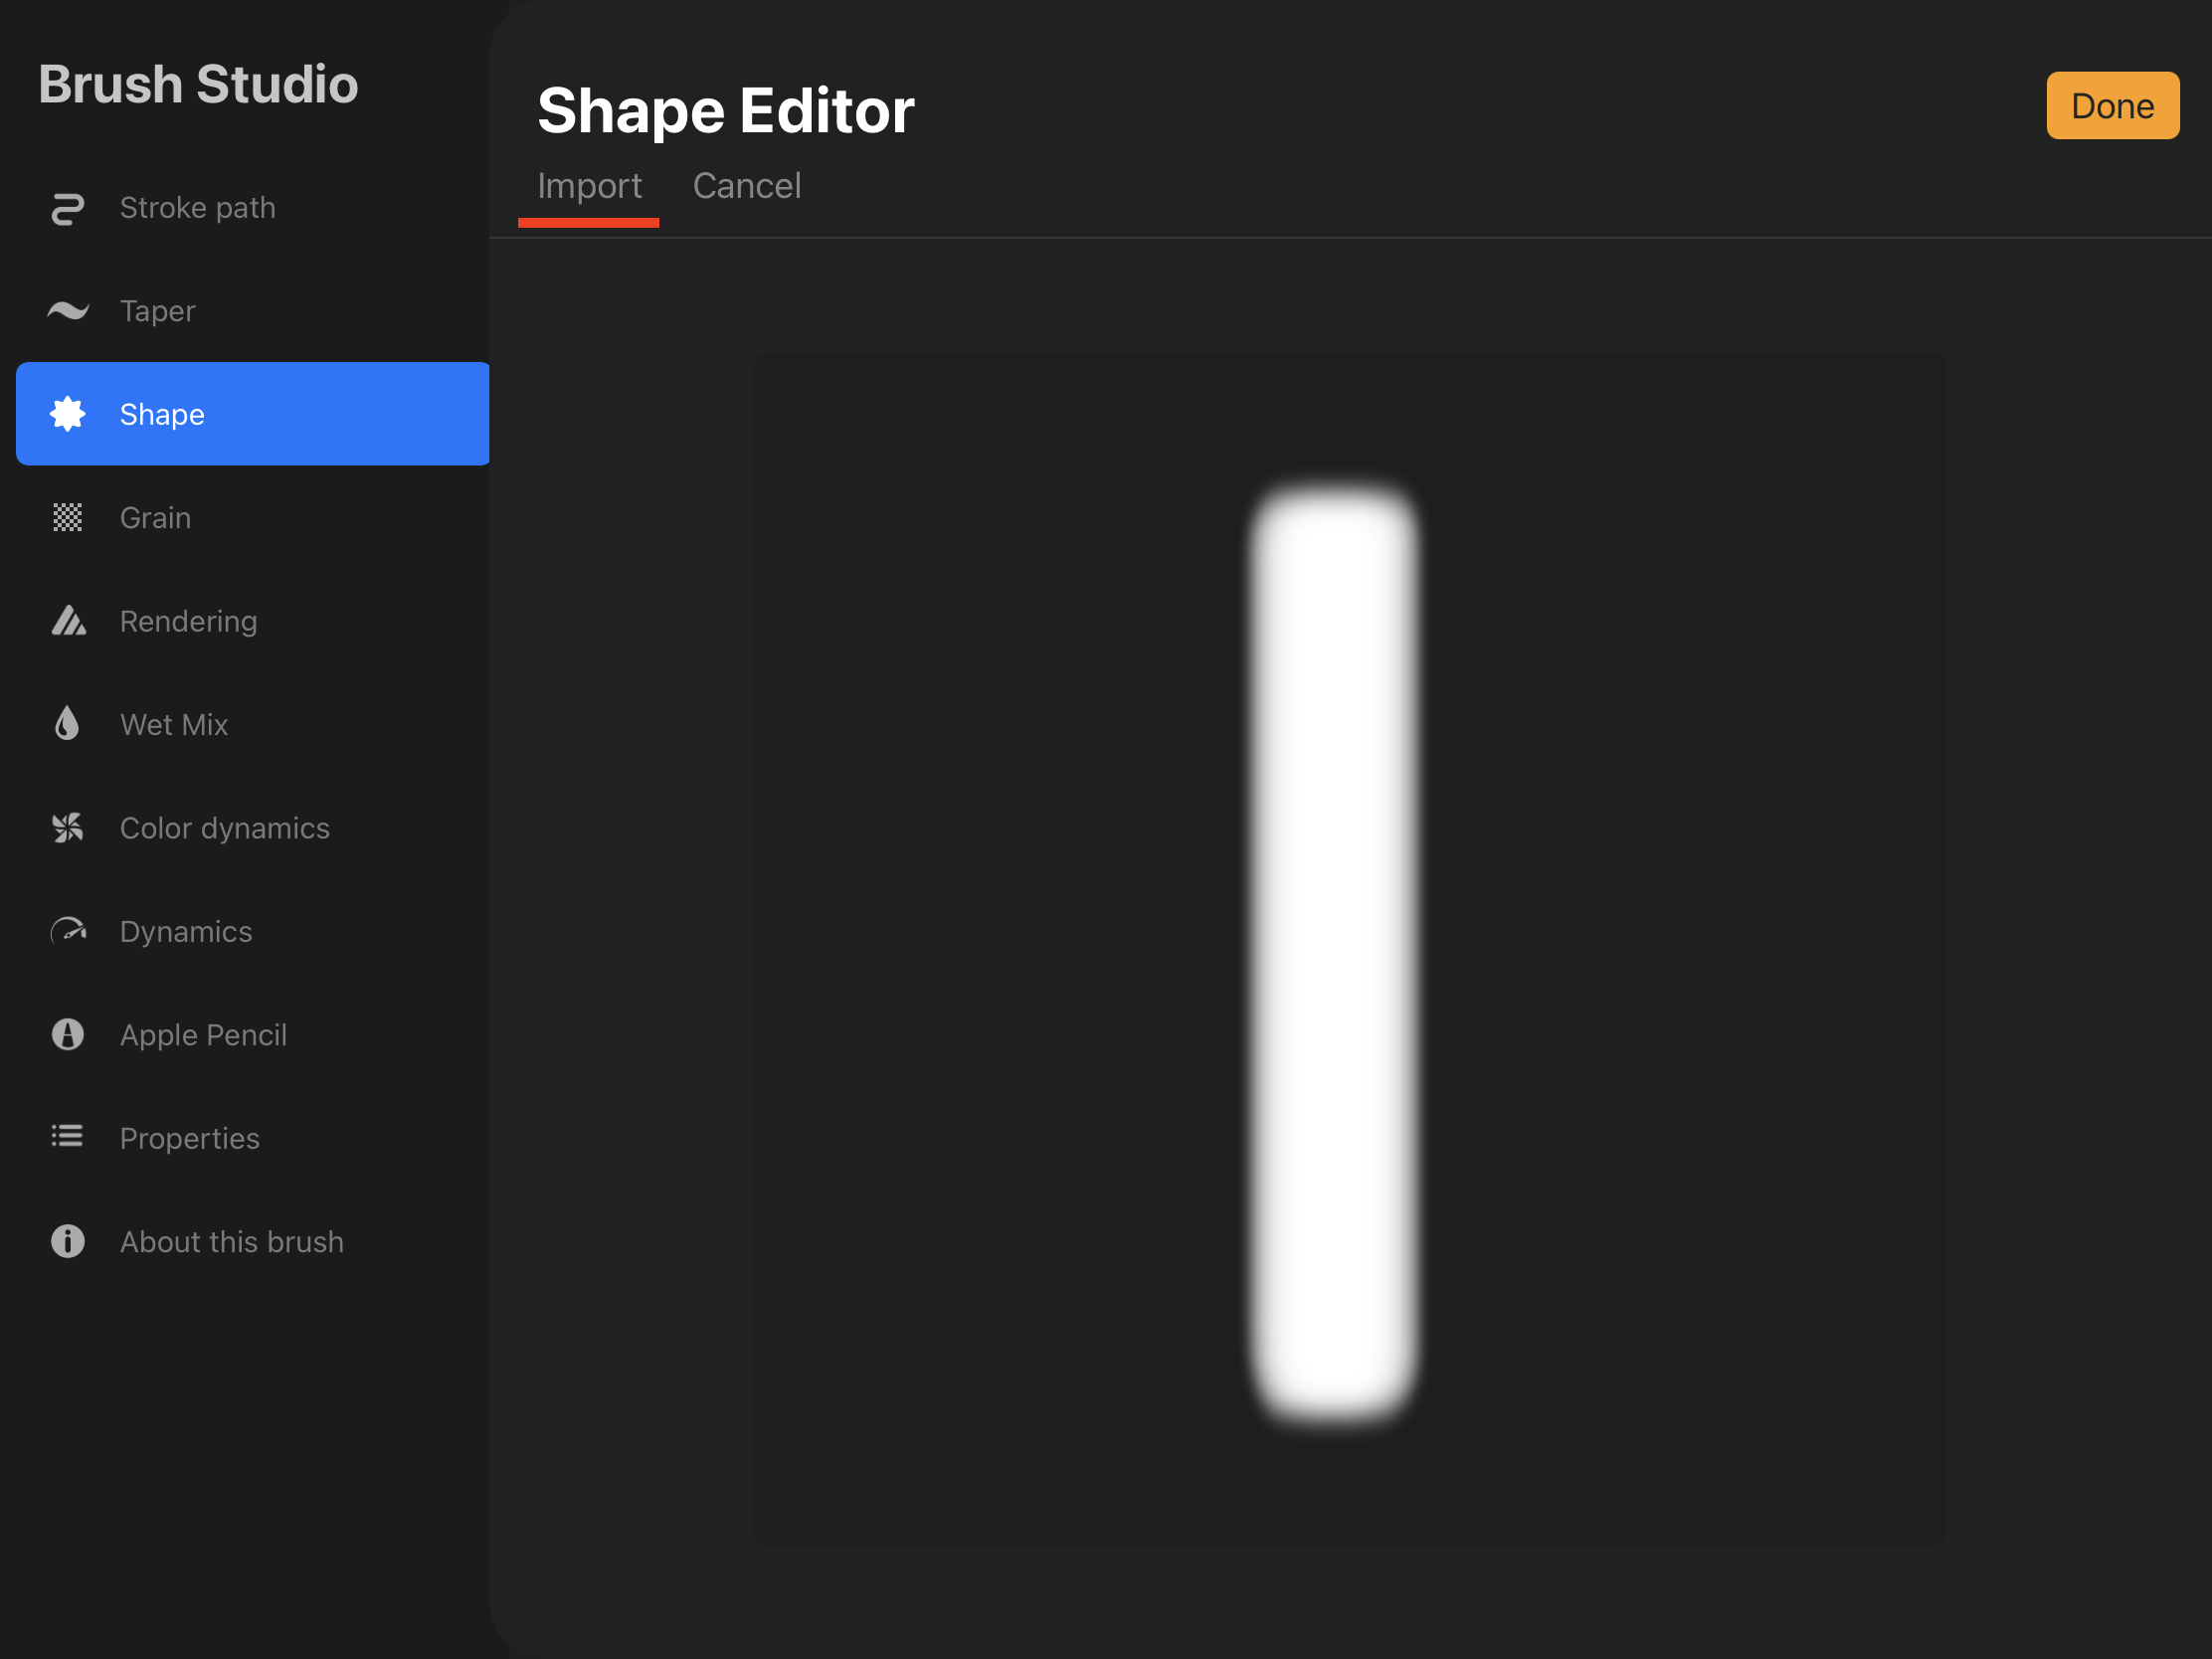
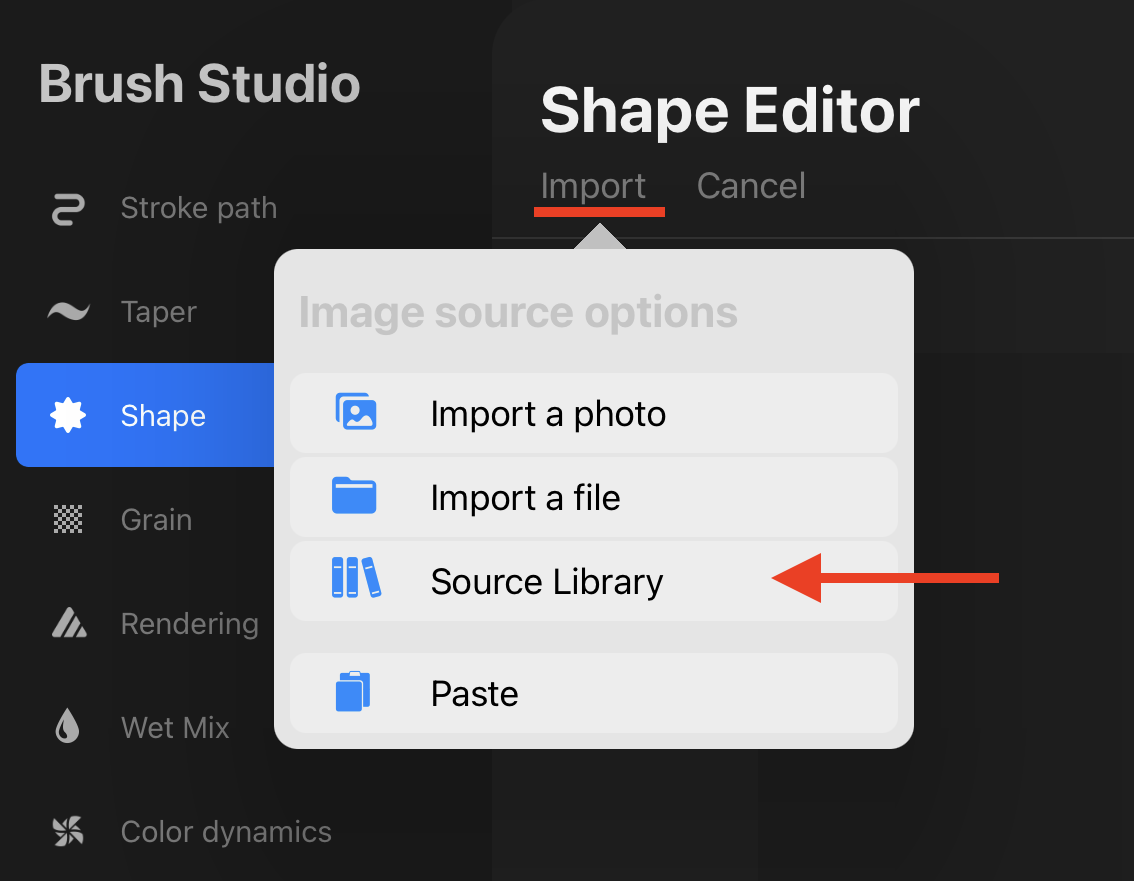
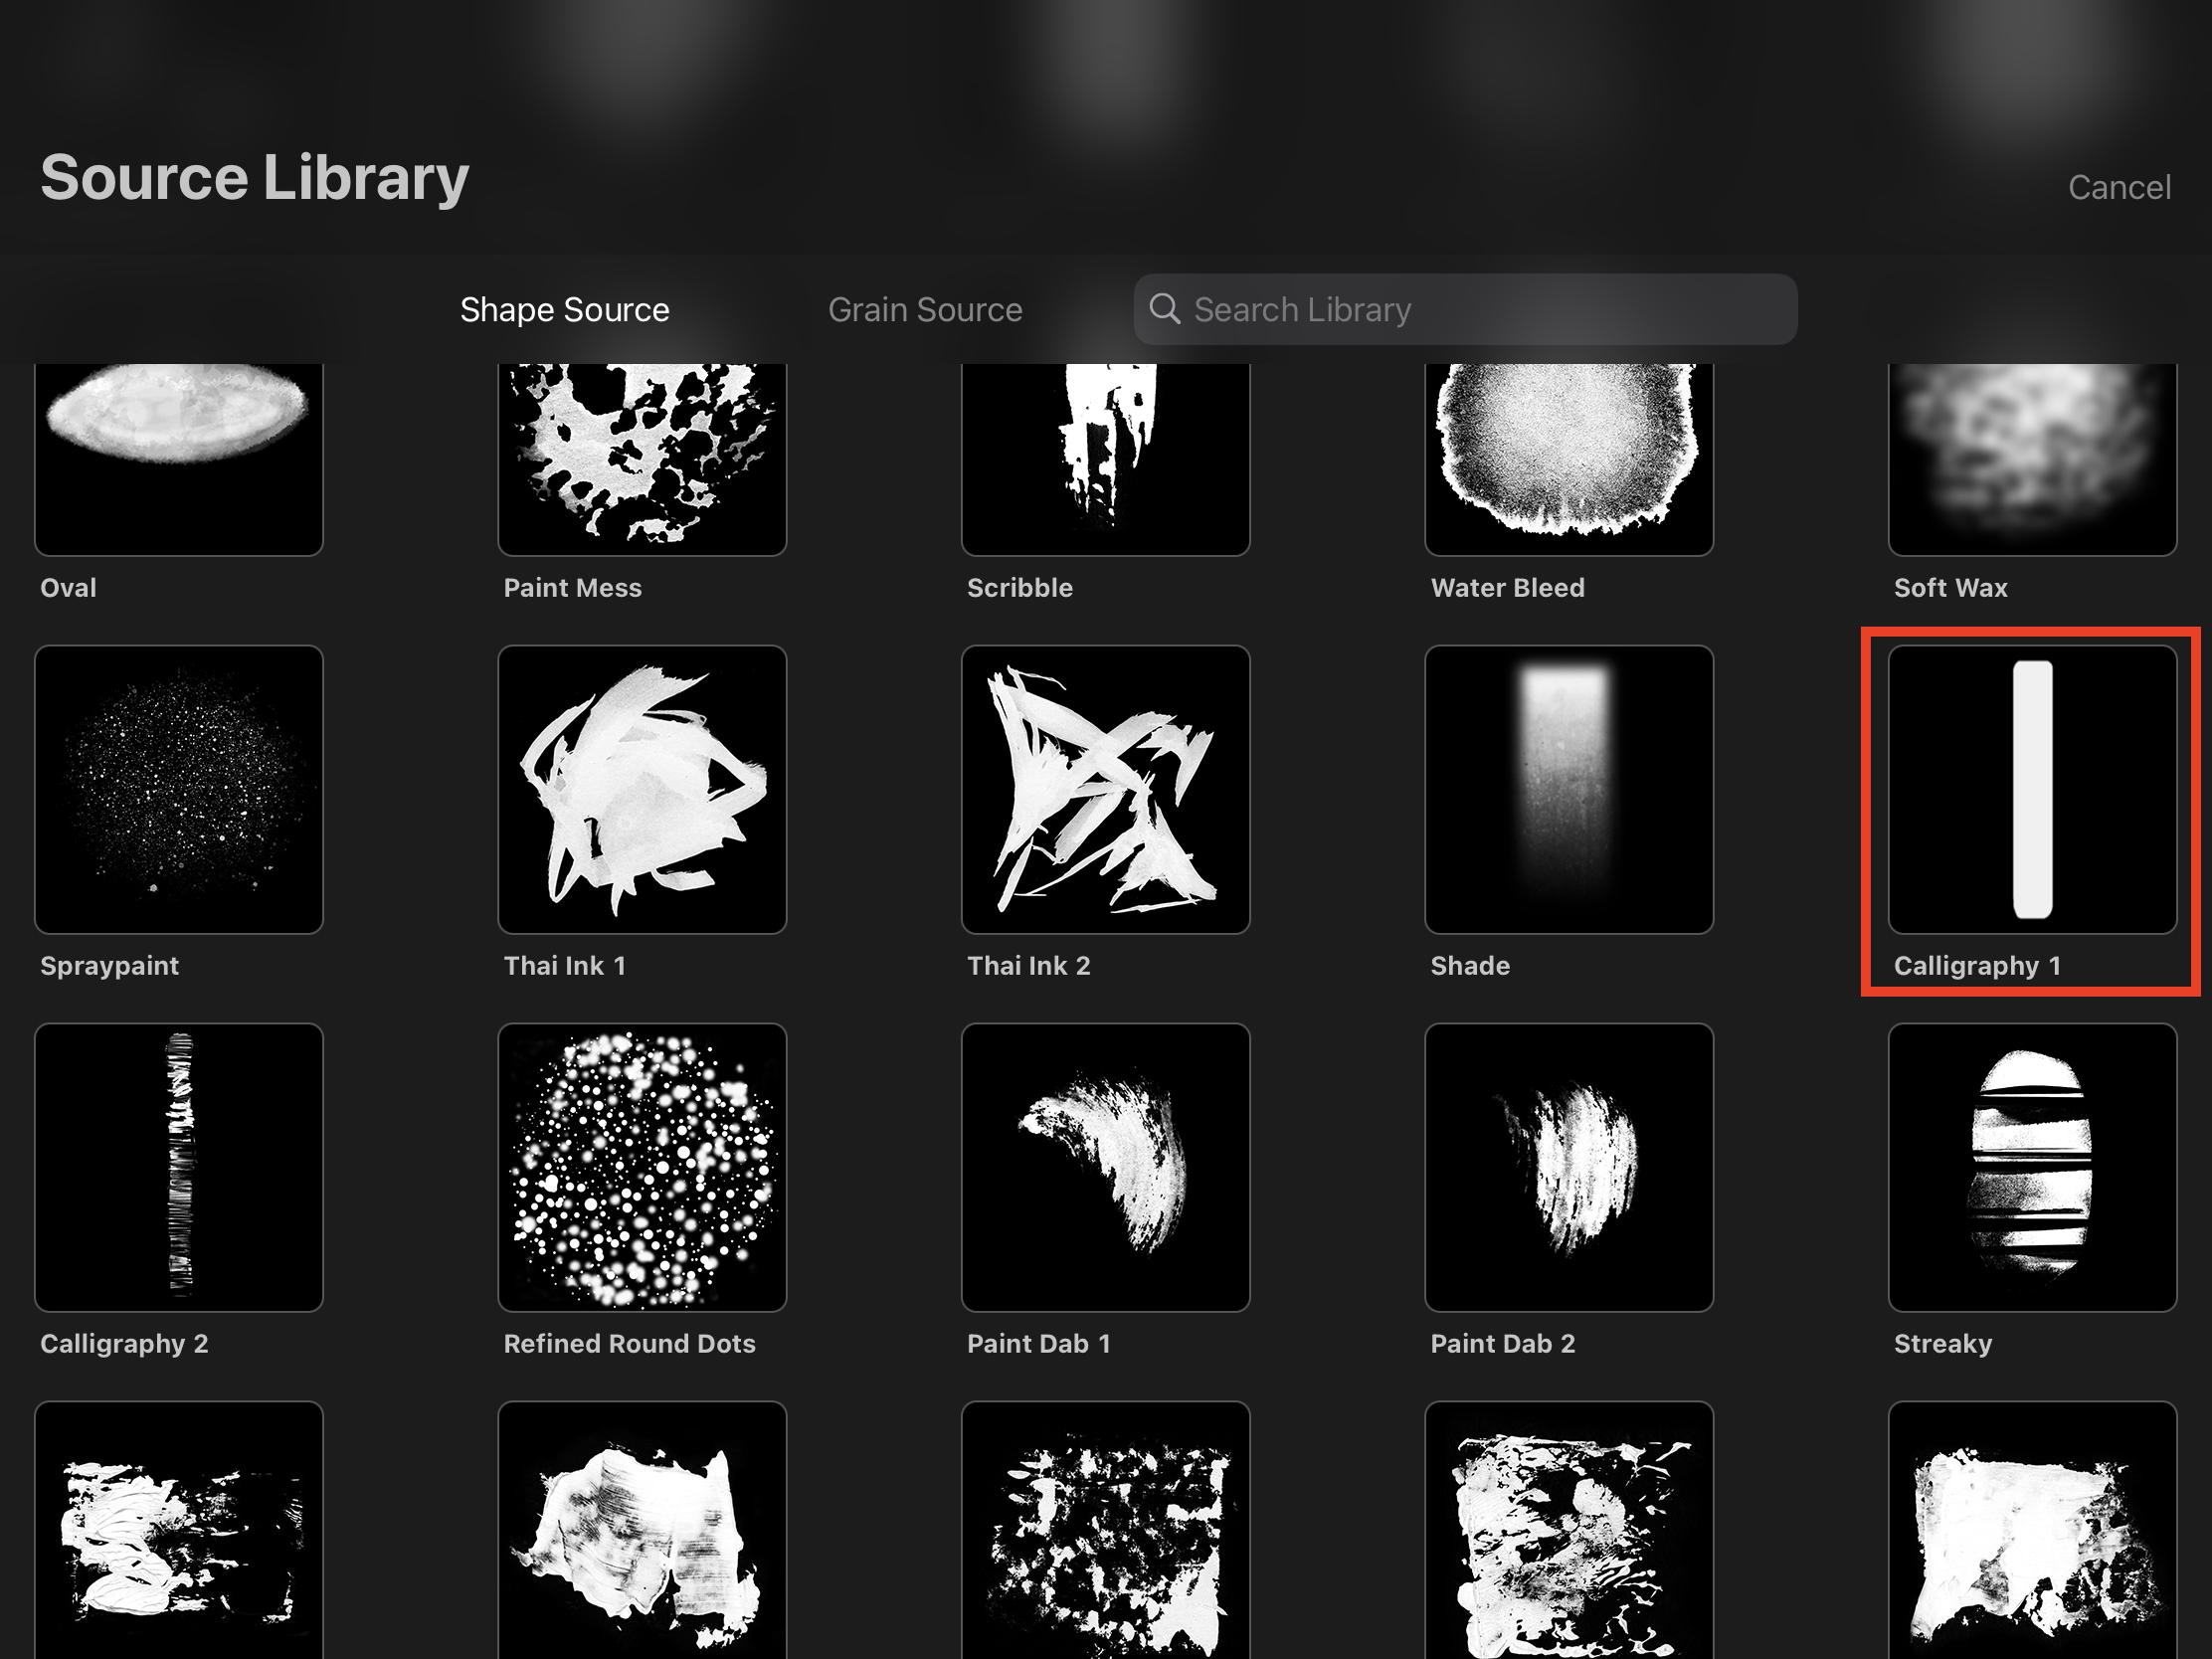
Shape: To choose a Shape Source different from the default one, click on Edit, Import, Source Library (use the one default one provided by Procreate), scroll down, and choose Calligraphy 1.
Grain:
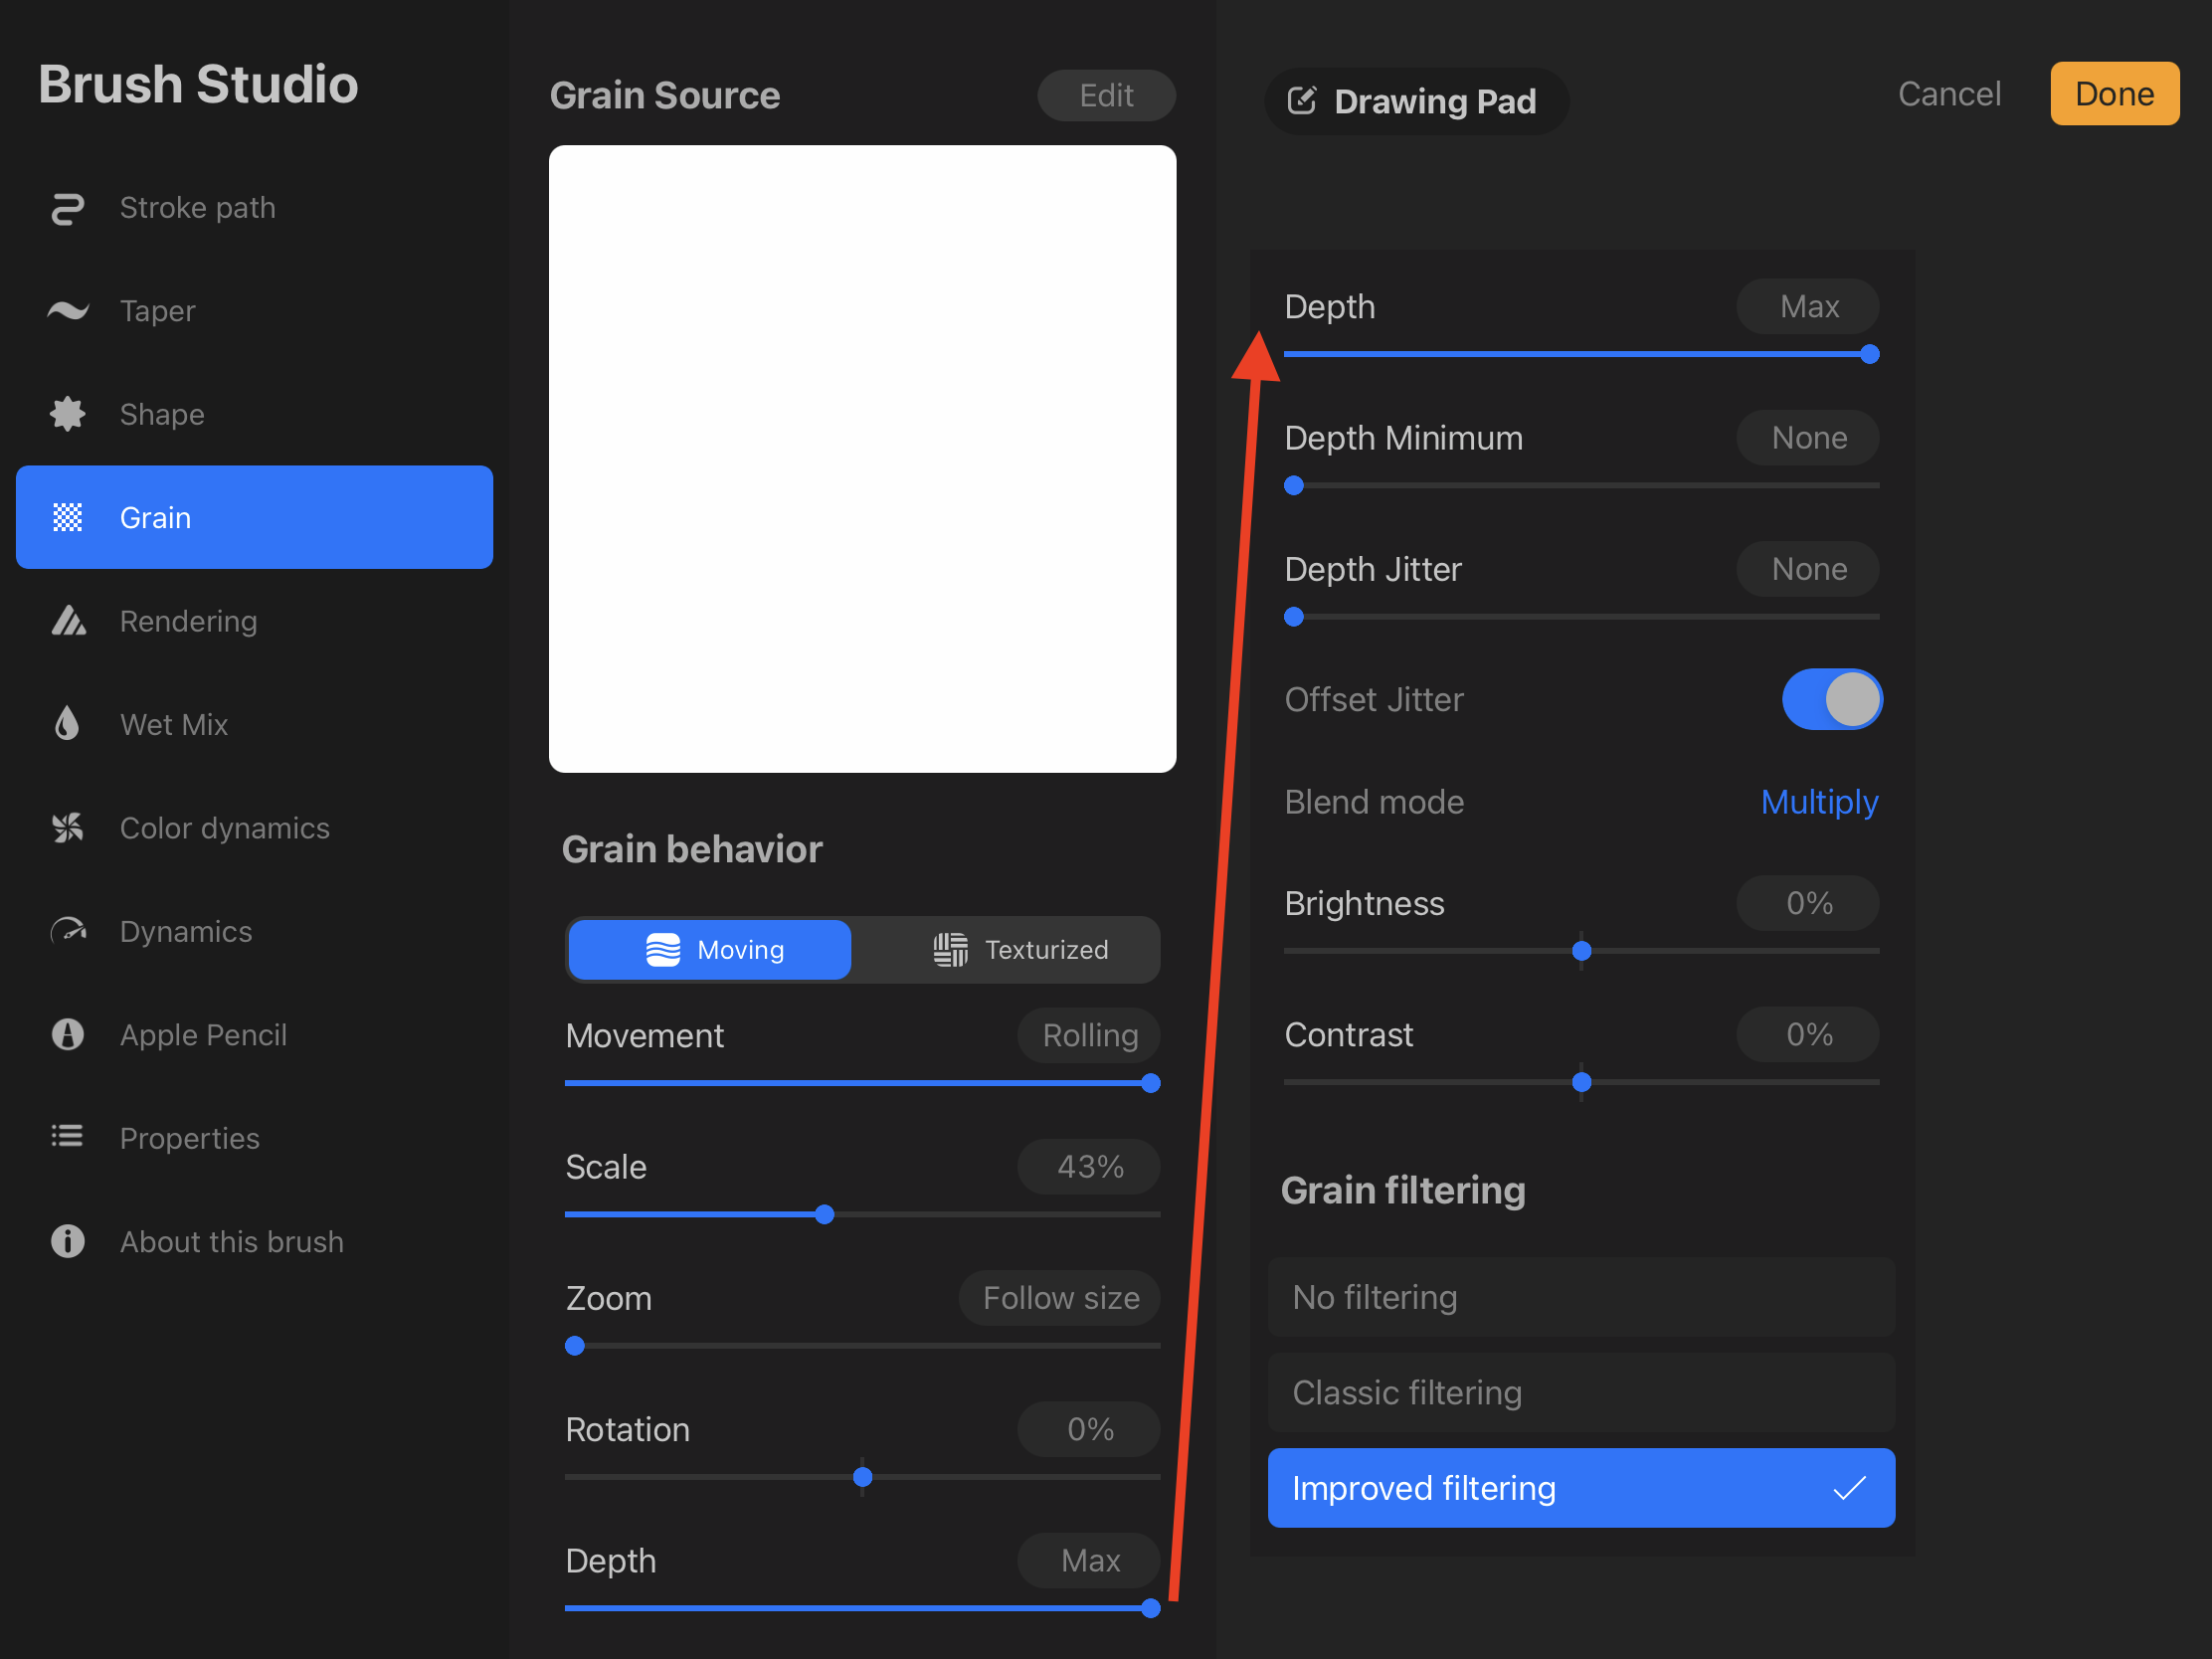
Rendering:
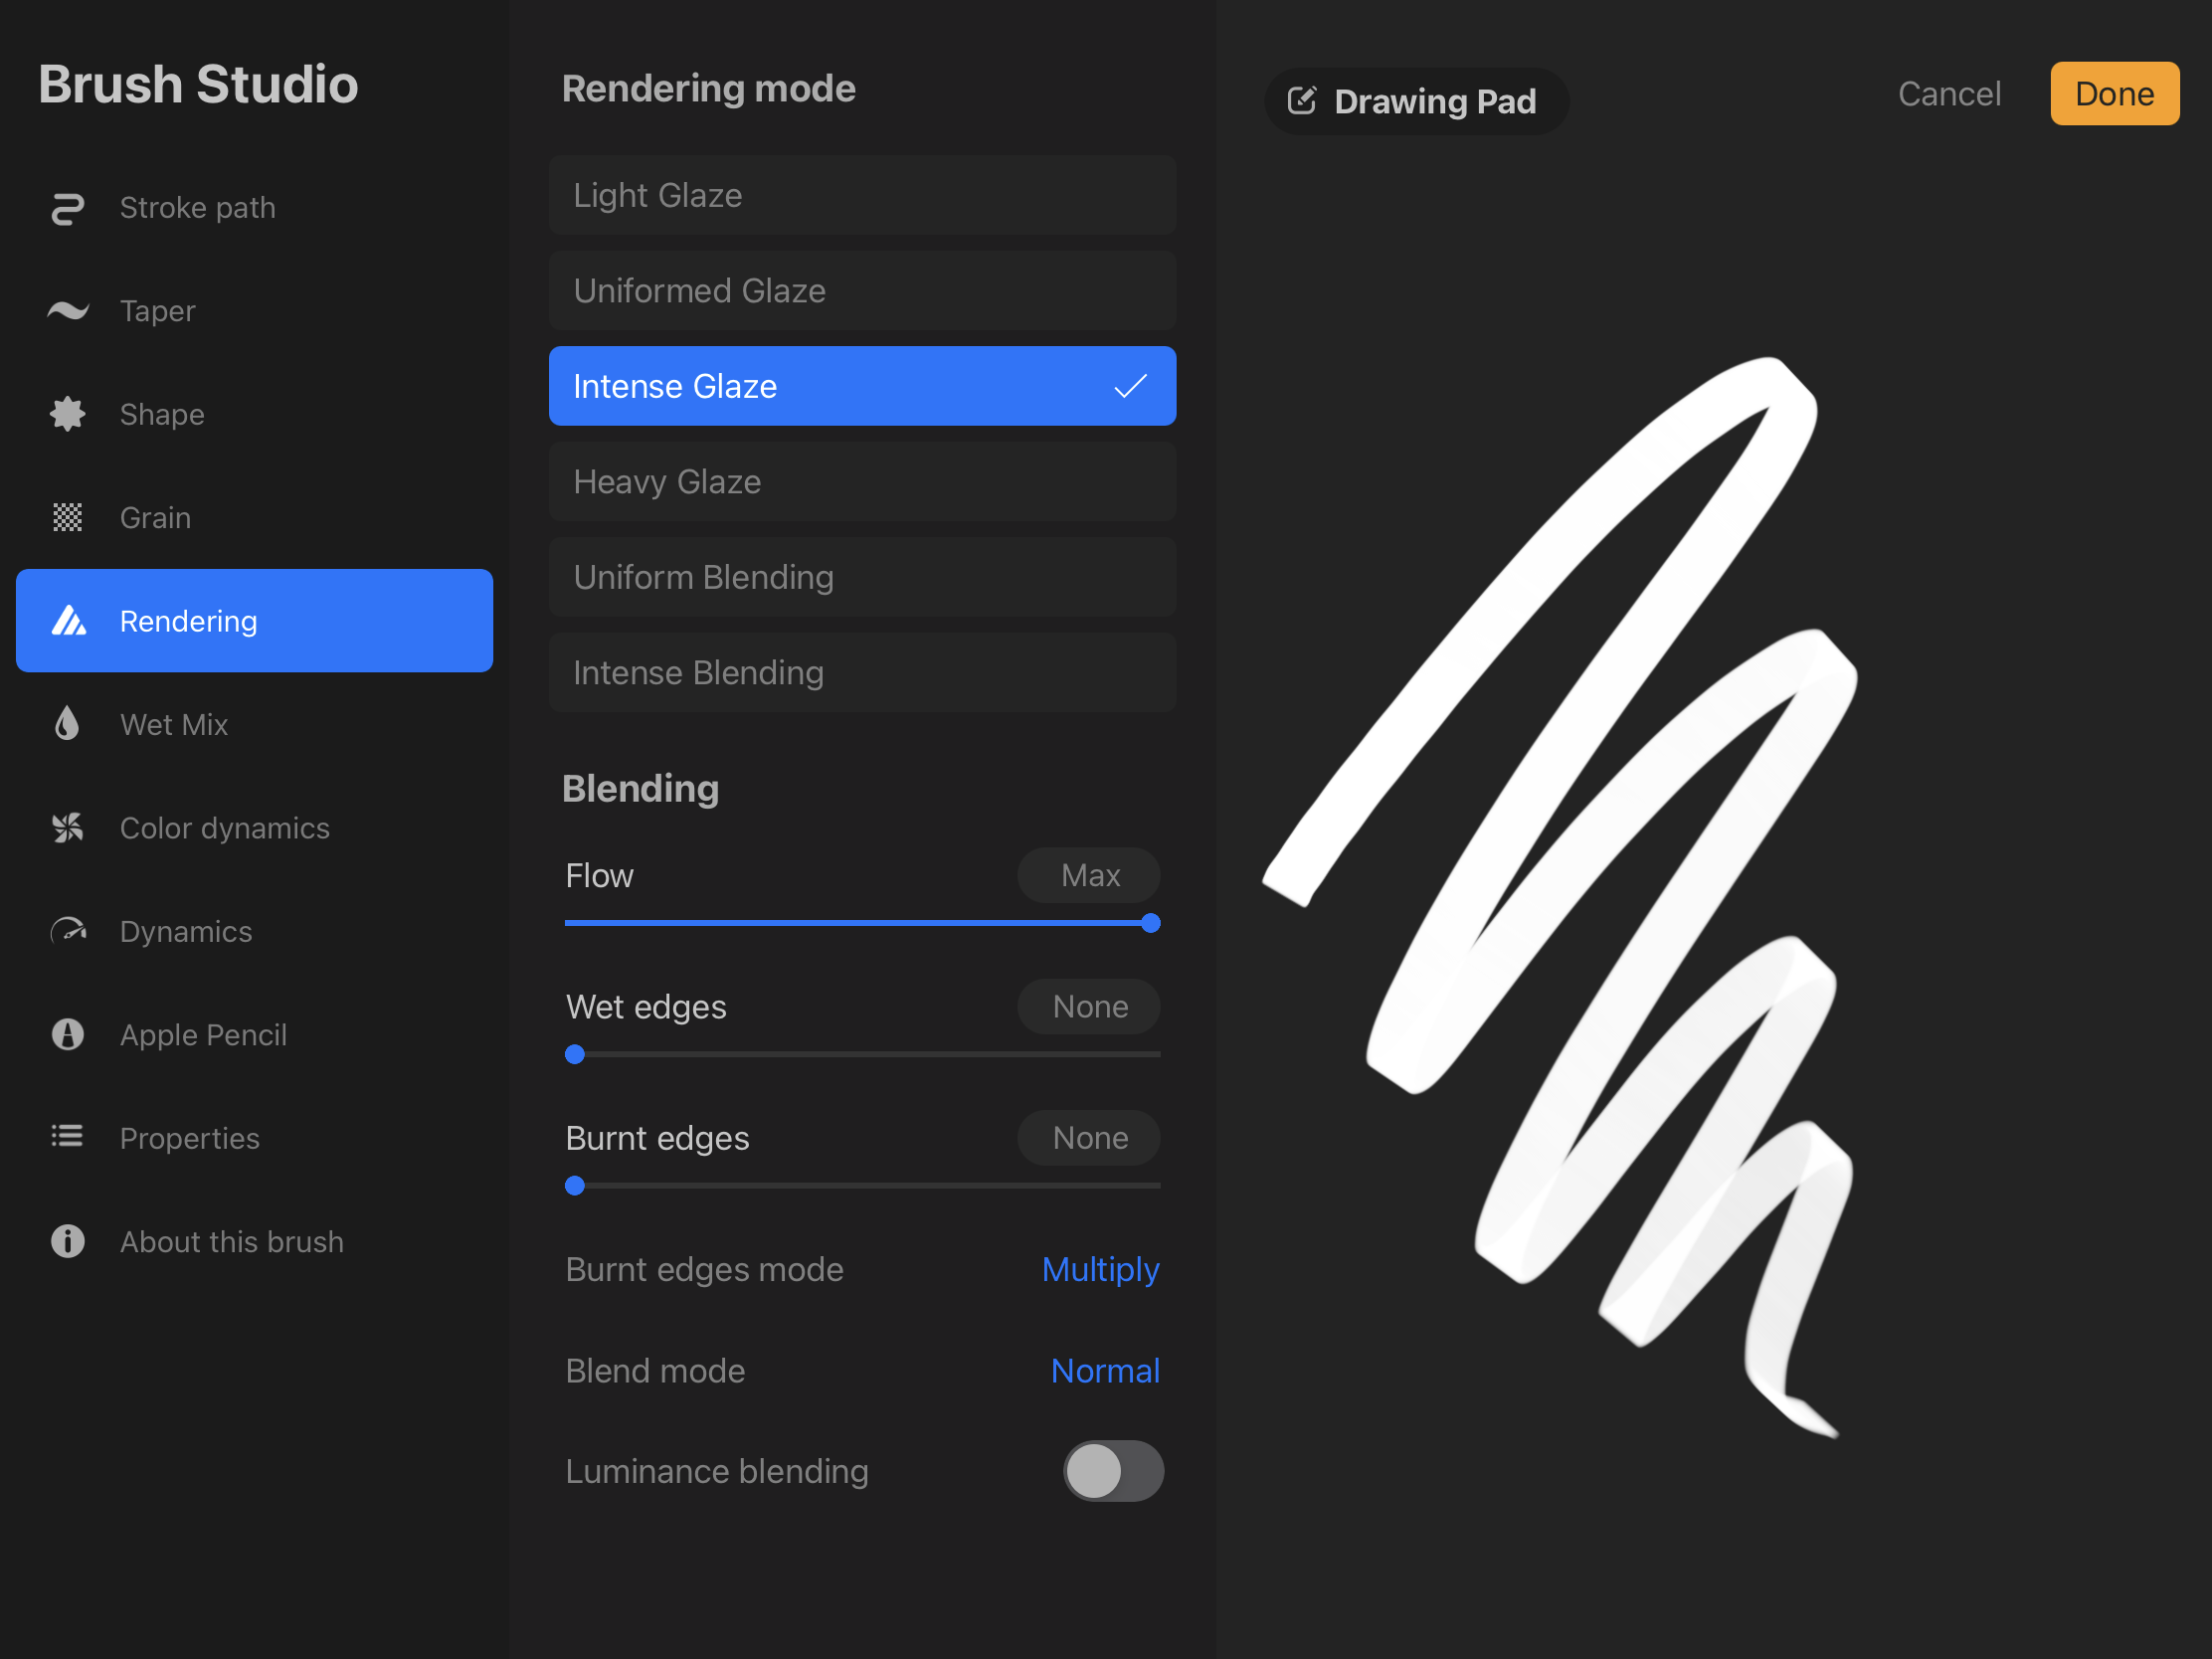
Wet Mix:
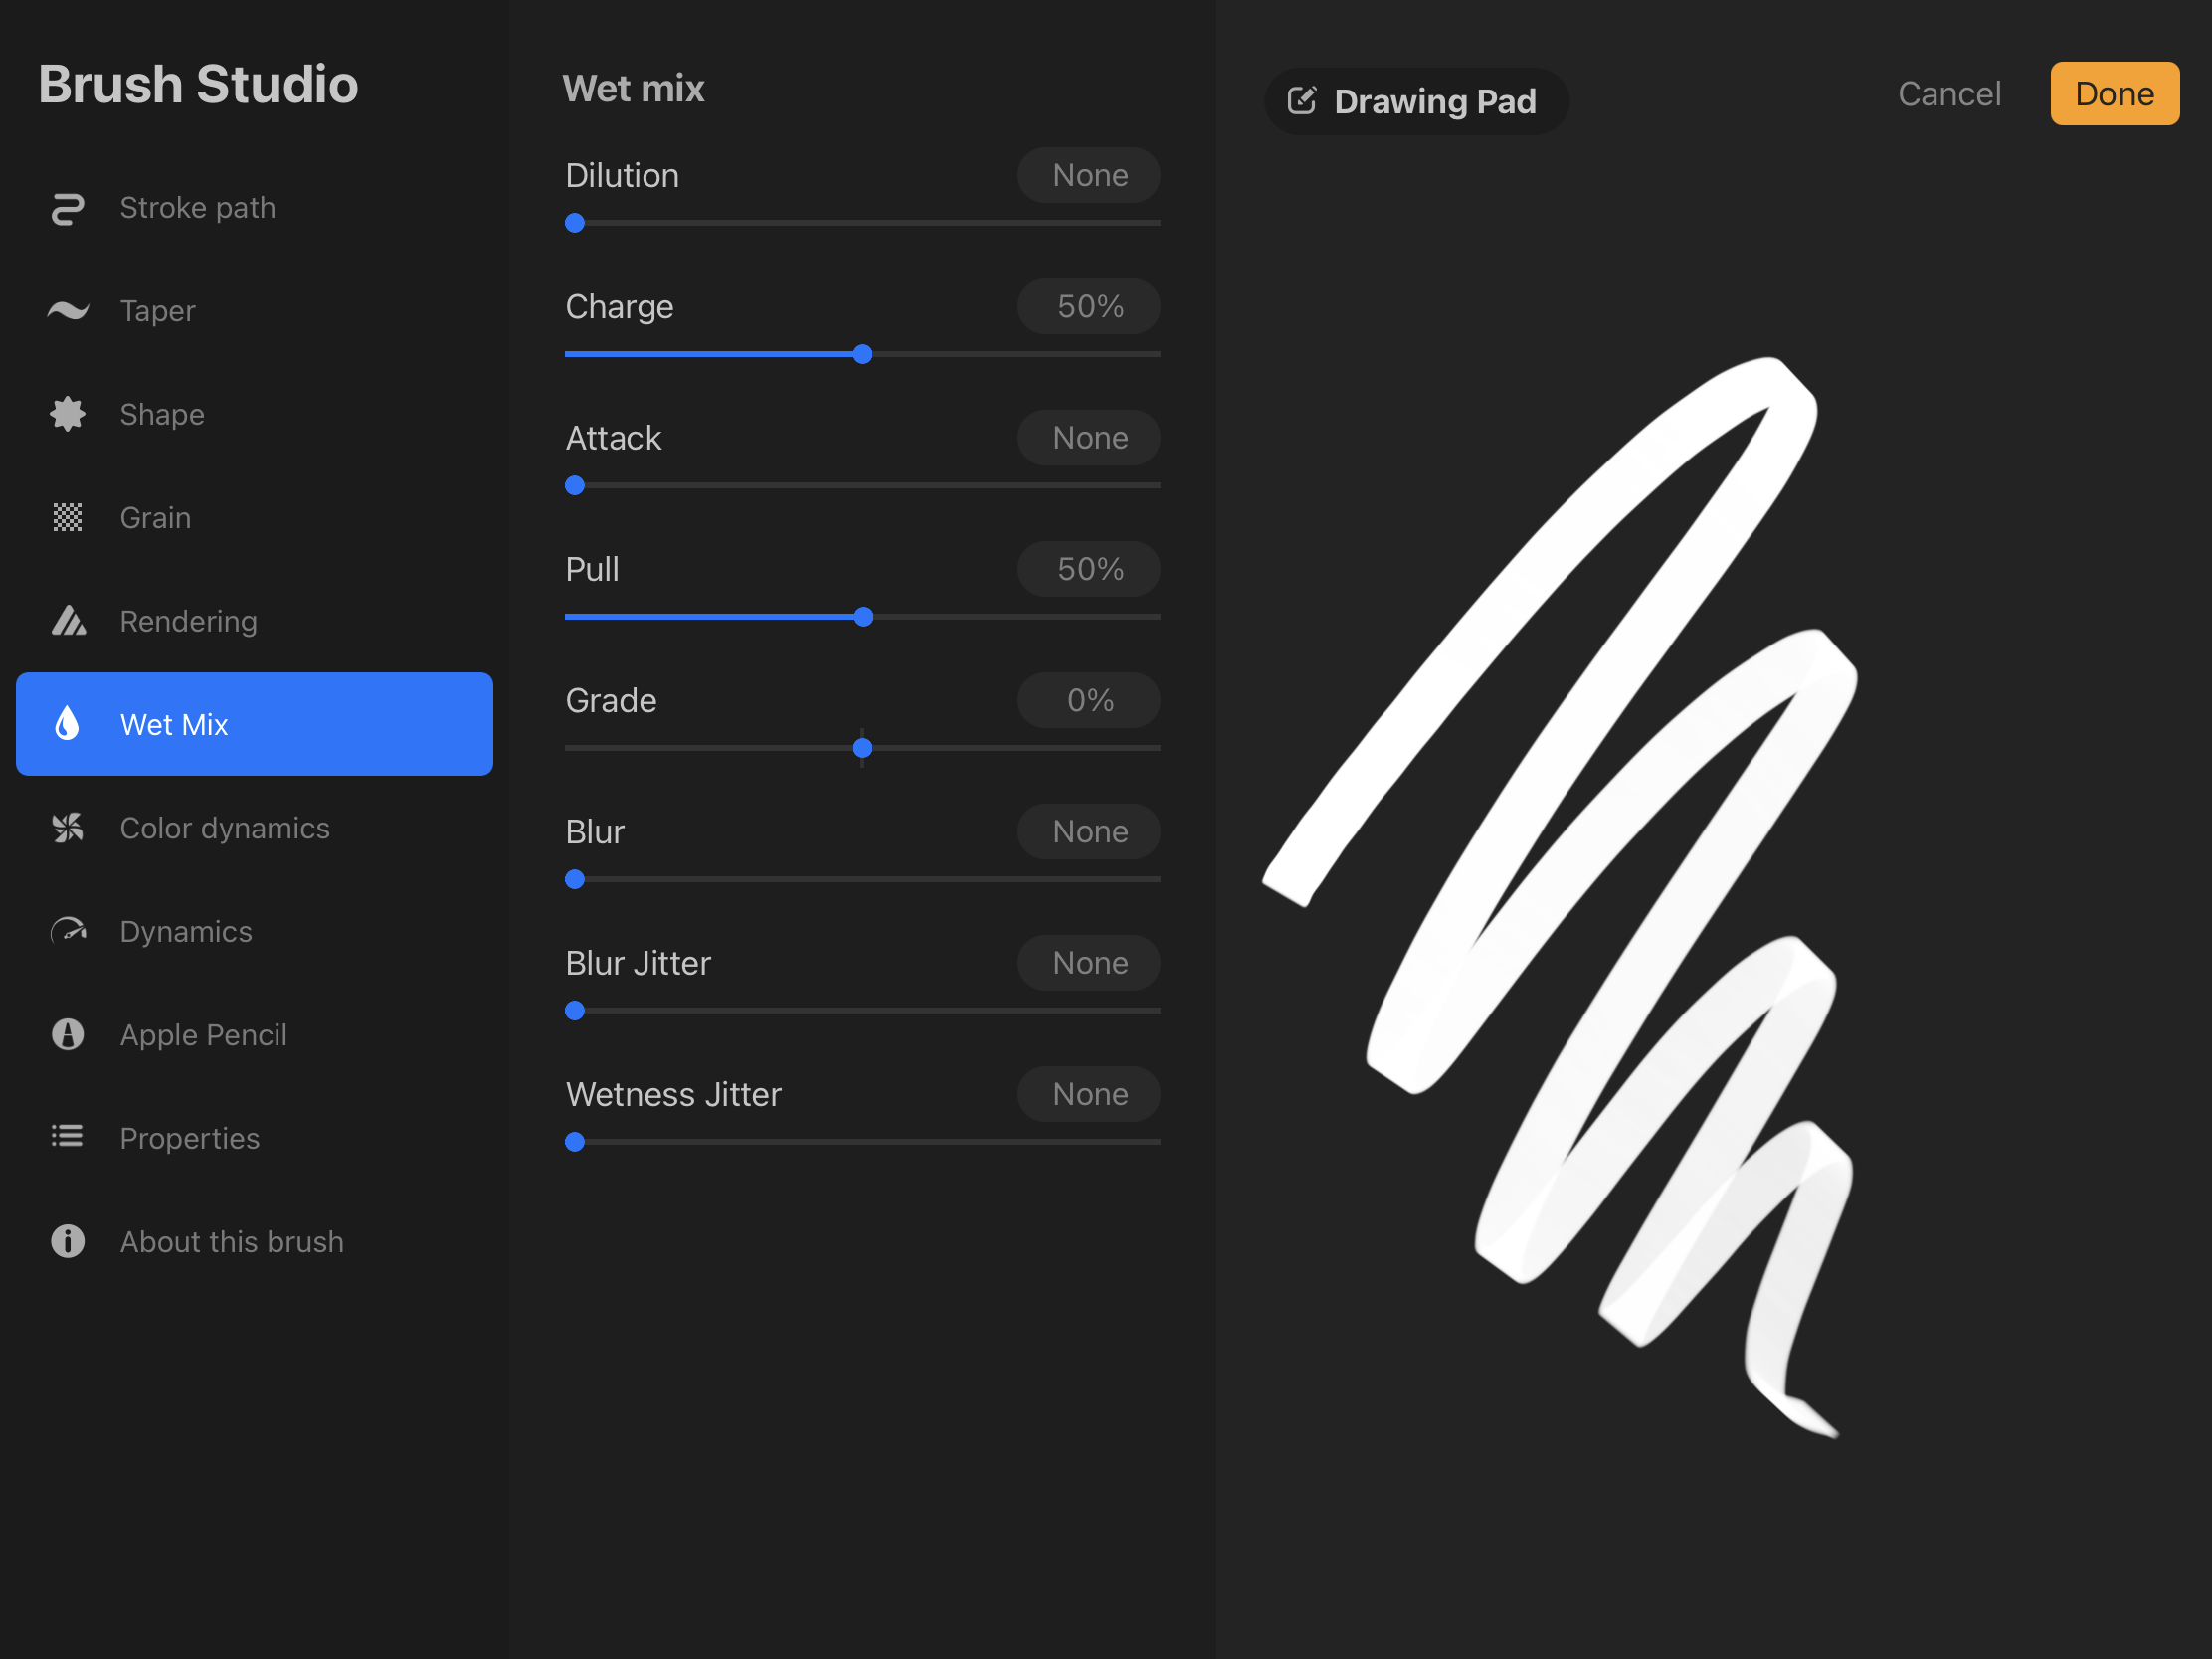
Dynamics:
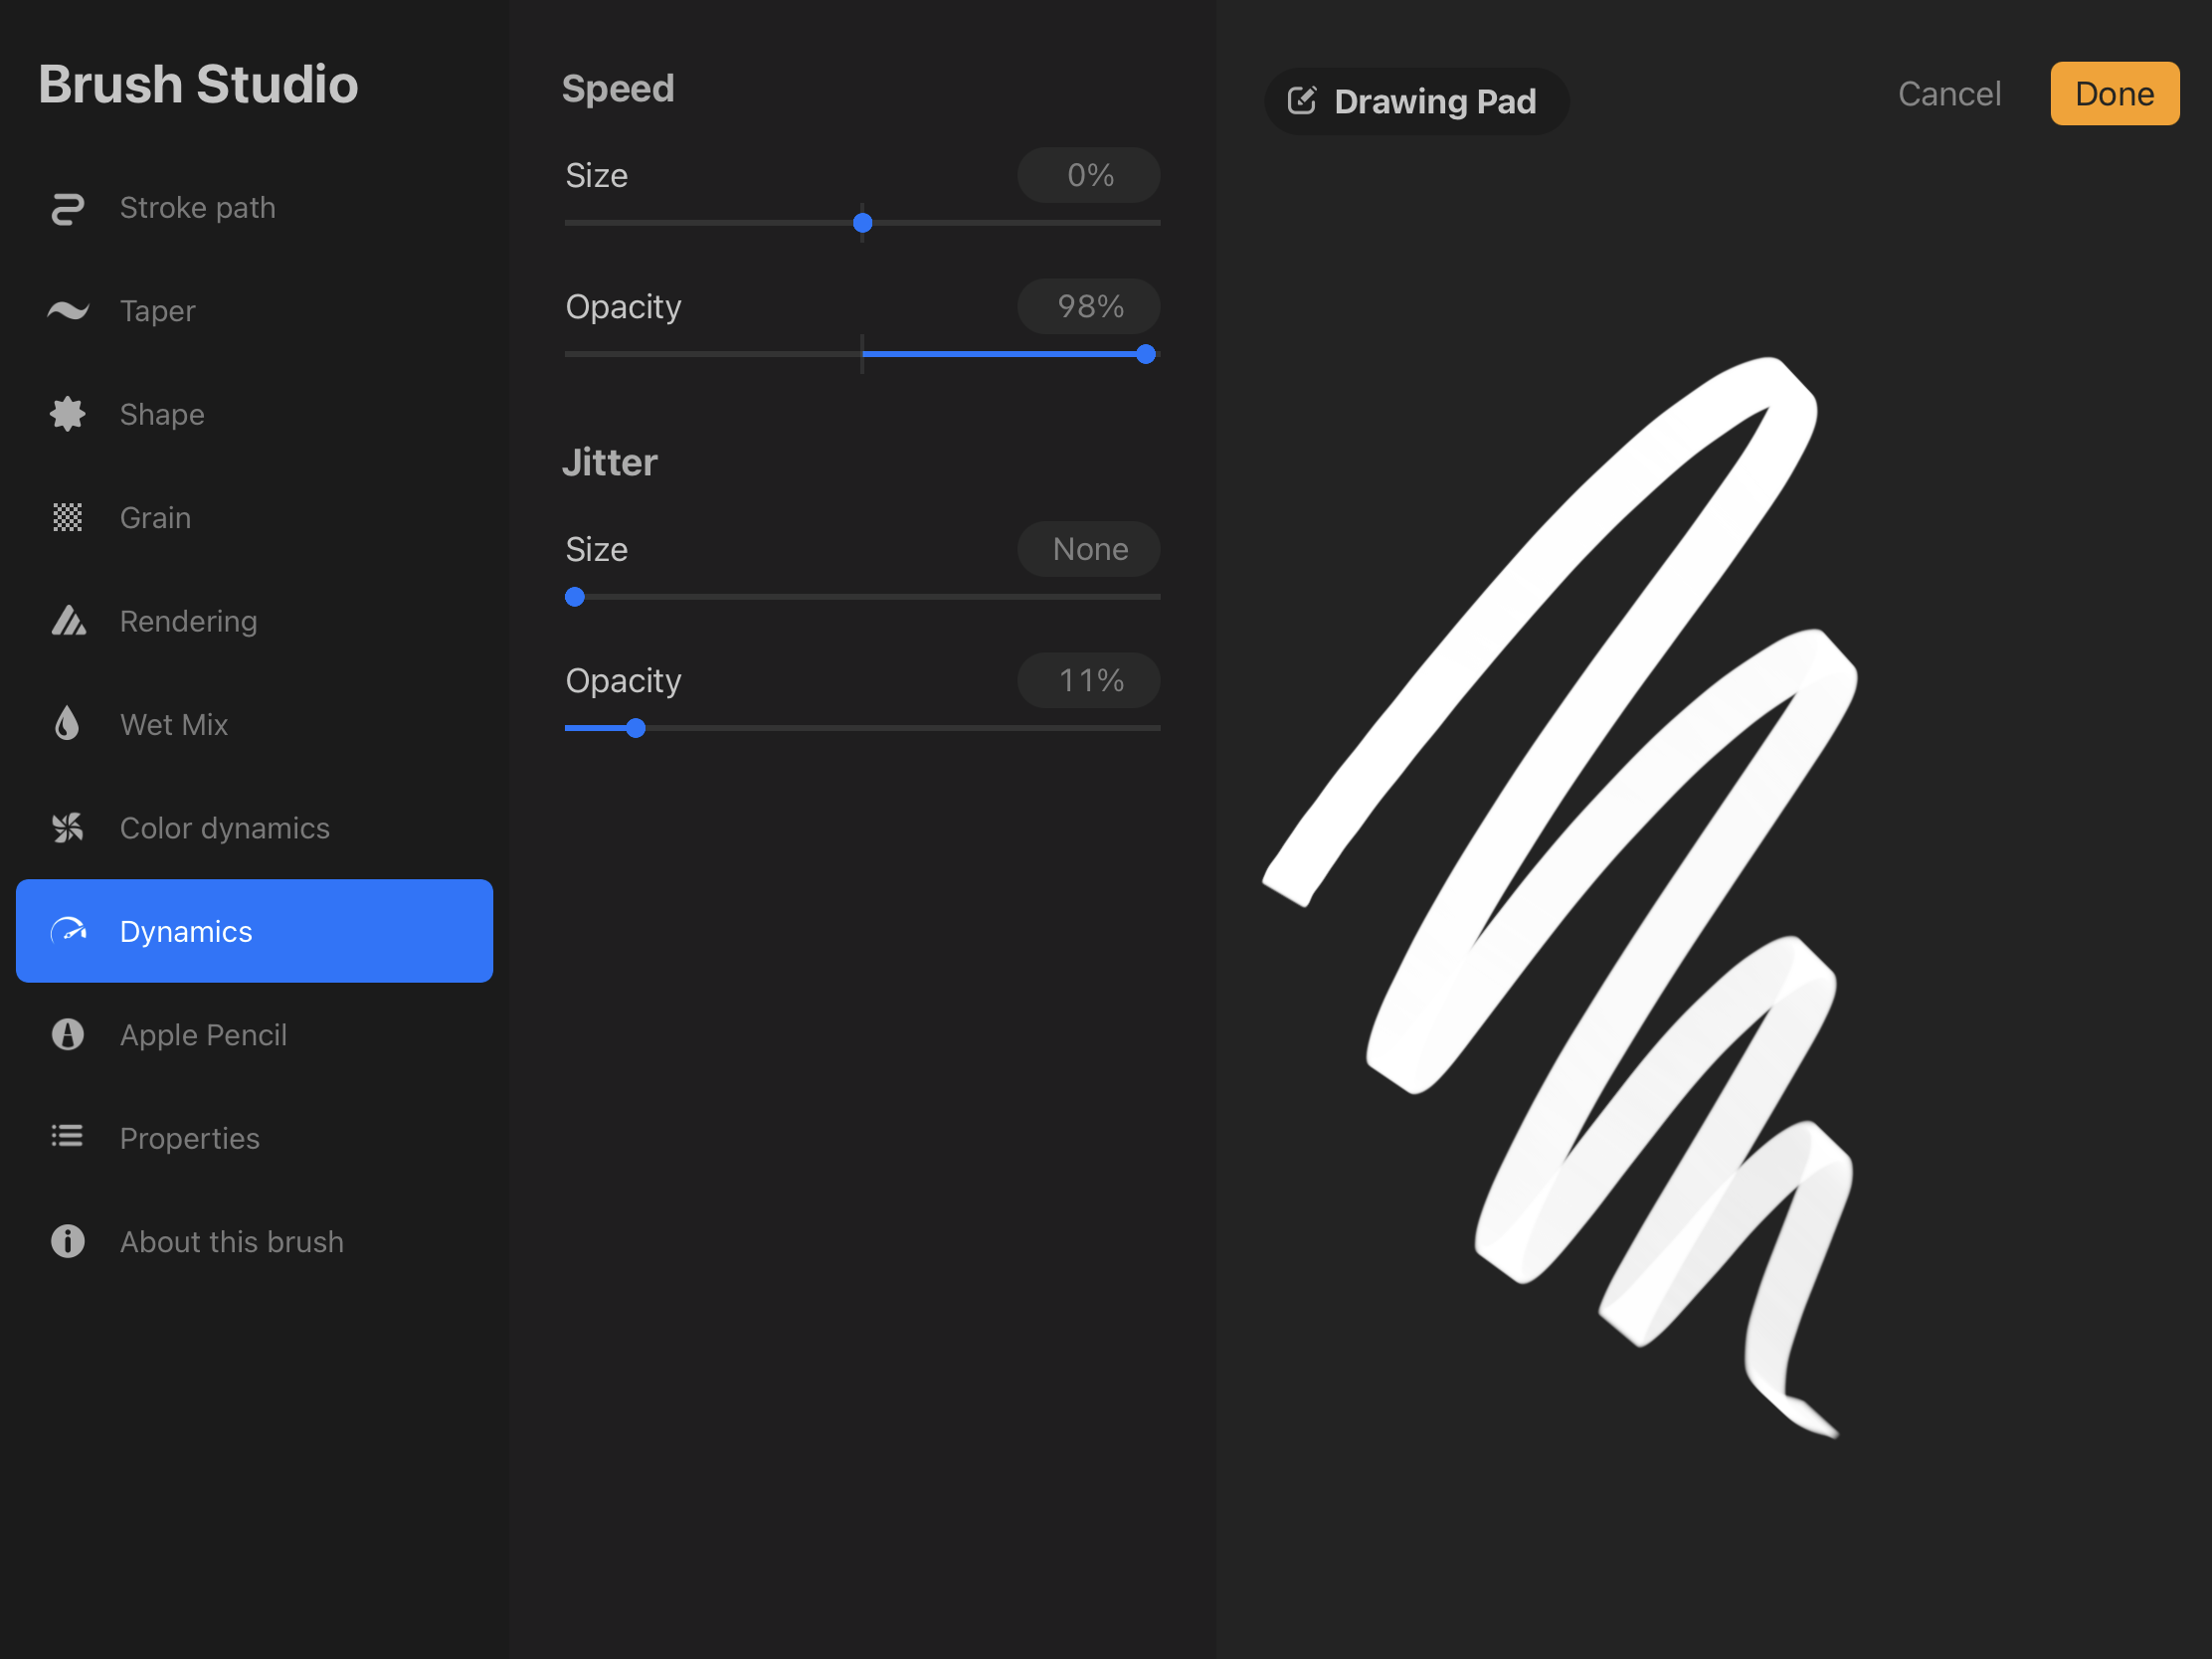
Apple Pencil:
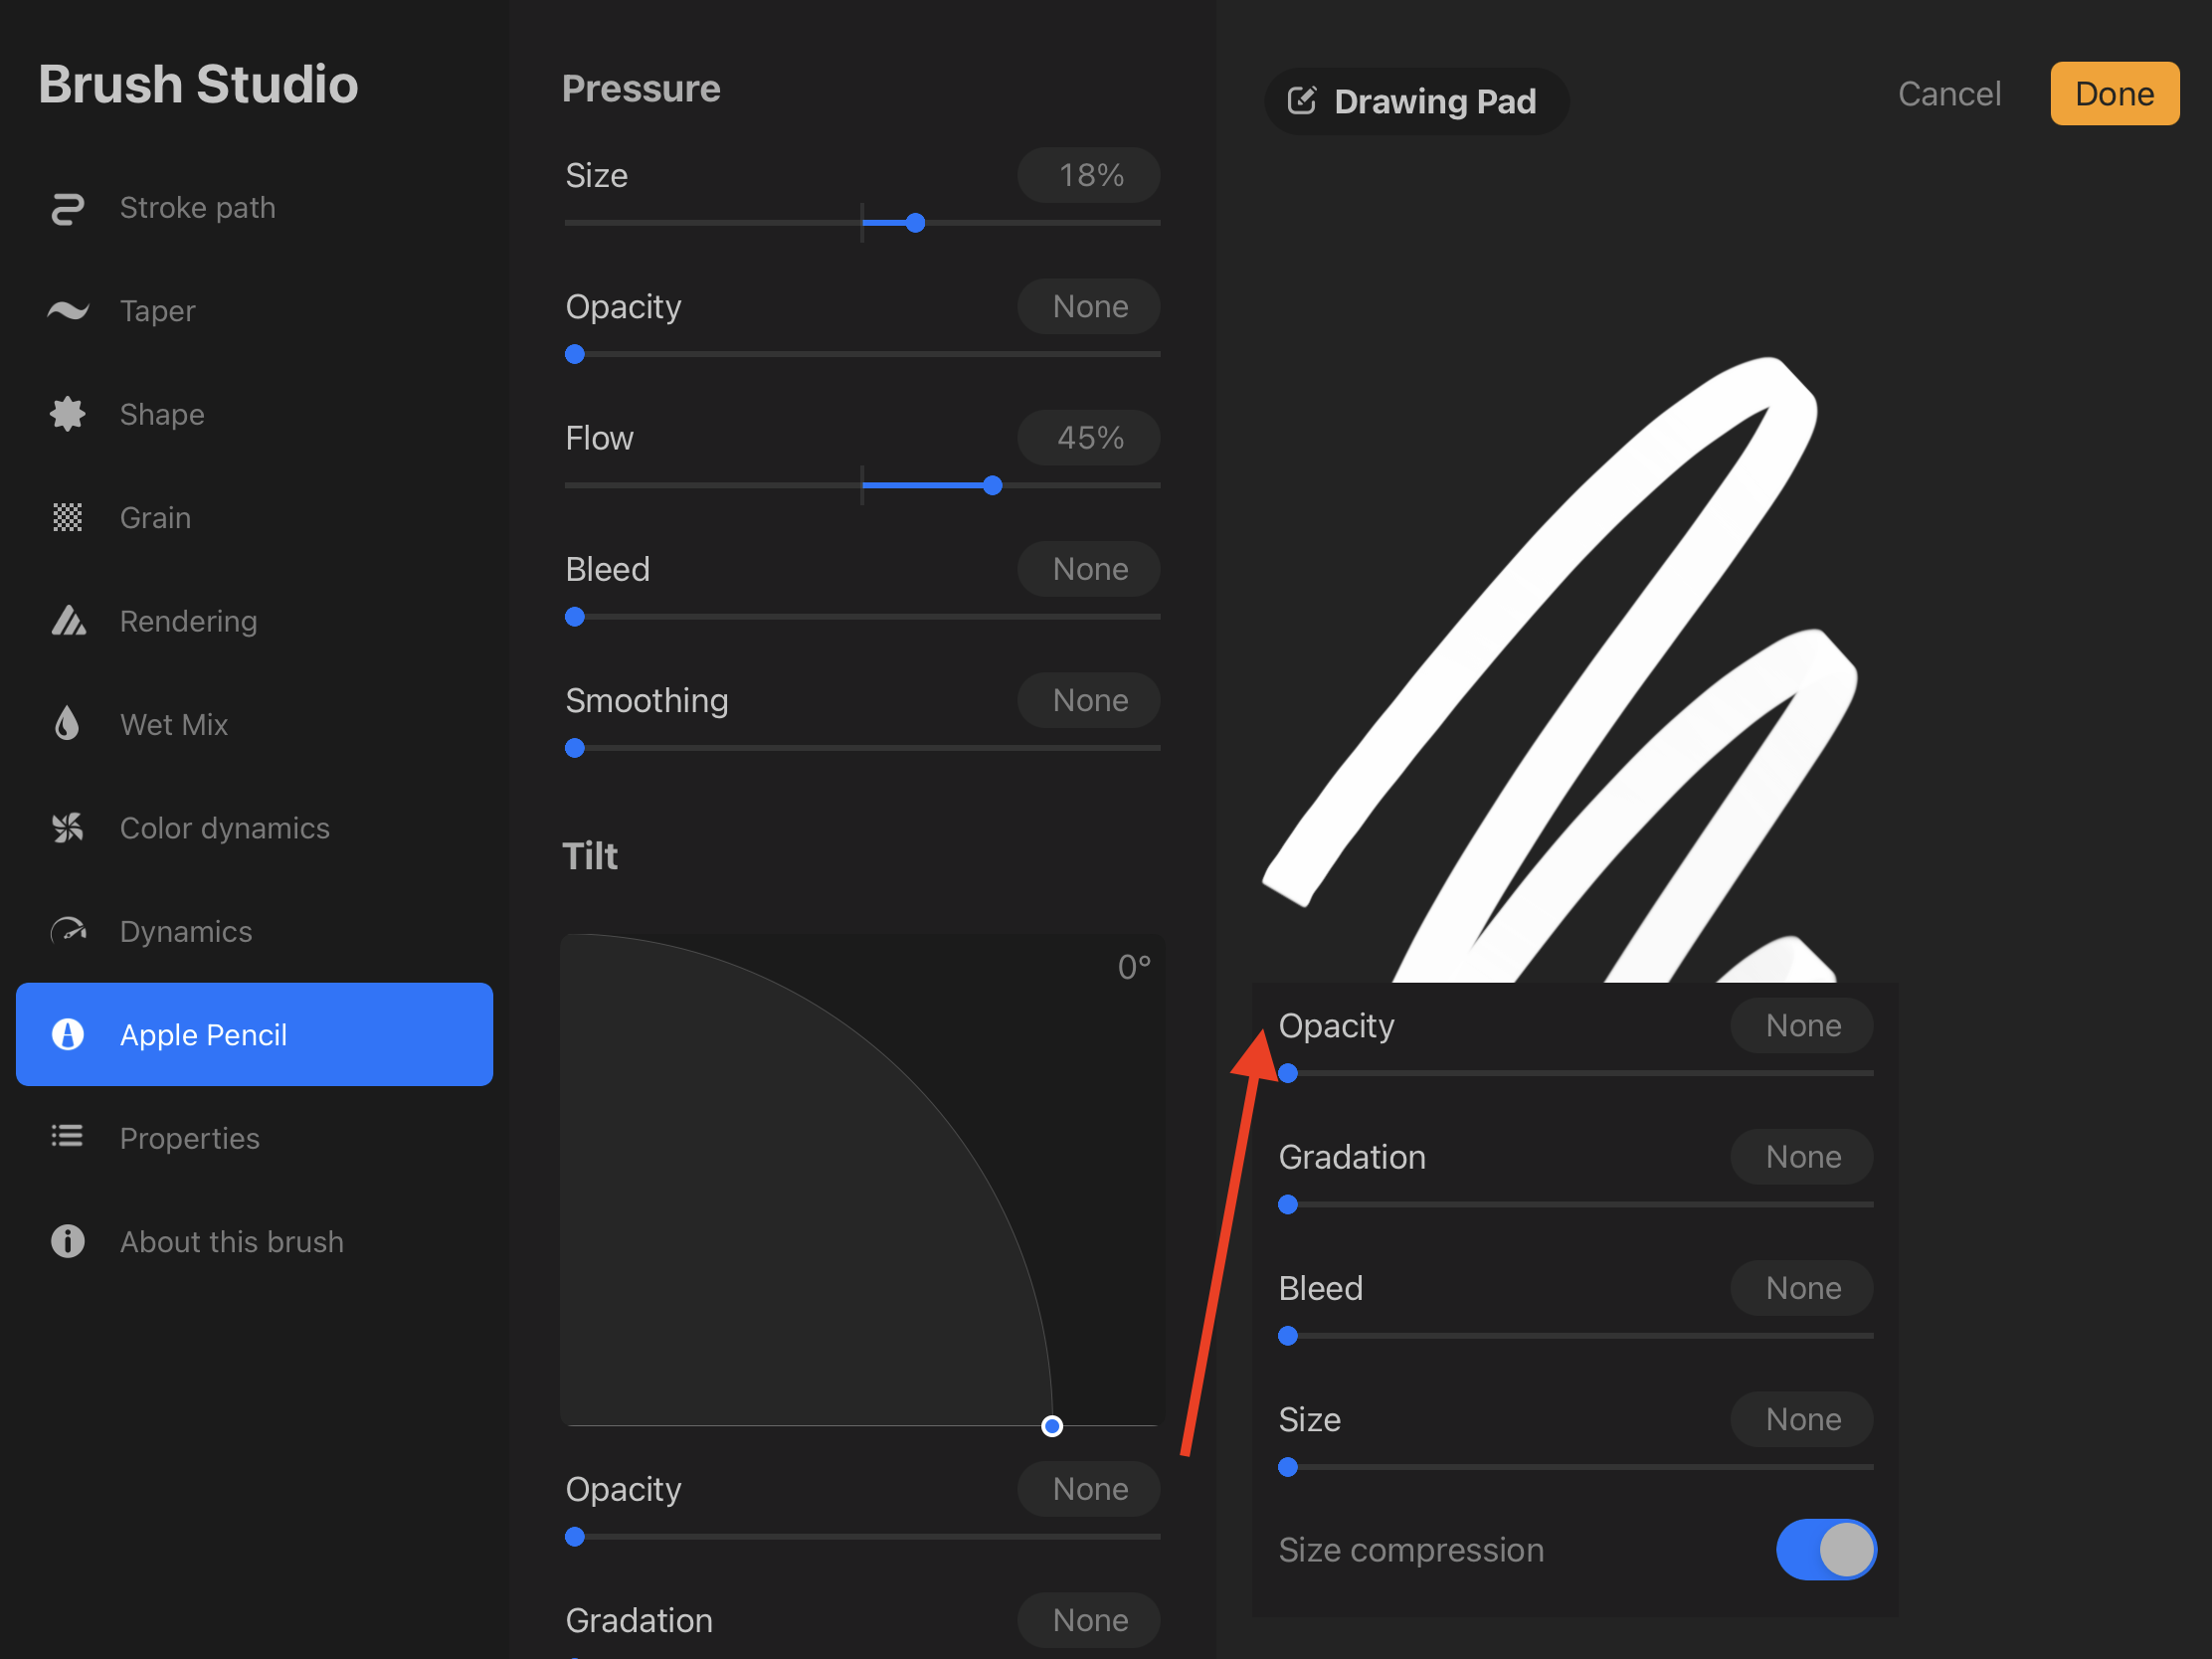
Properties:
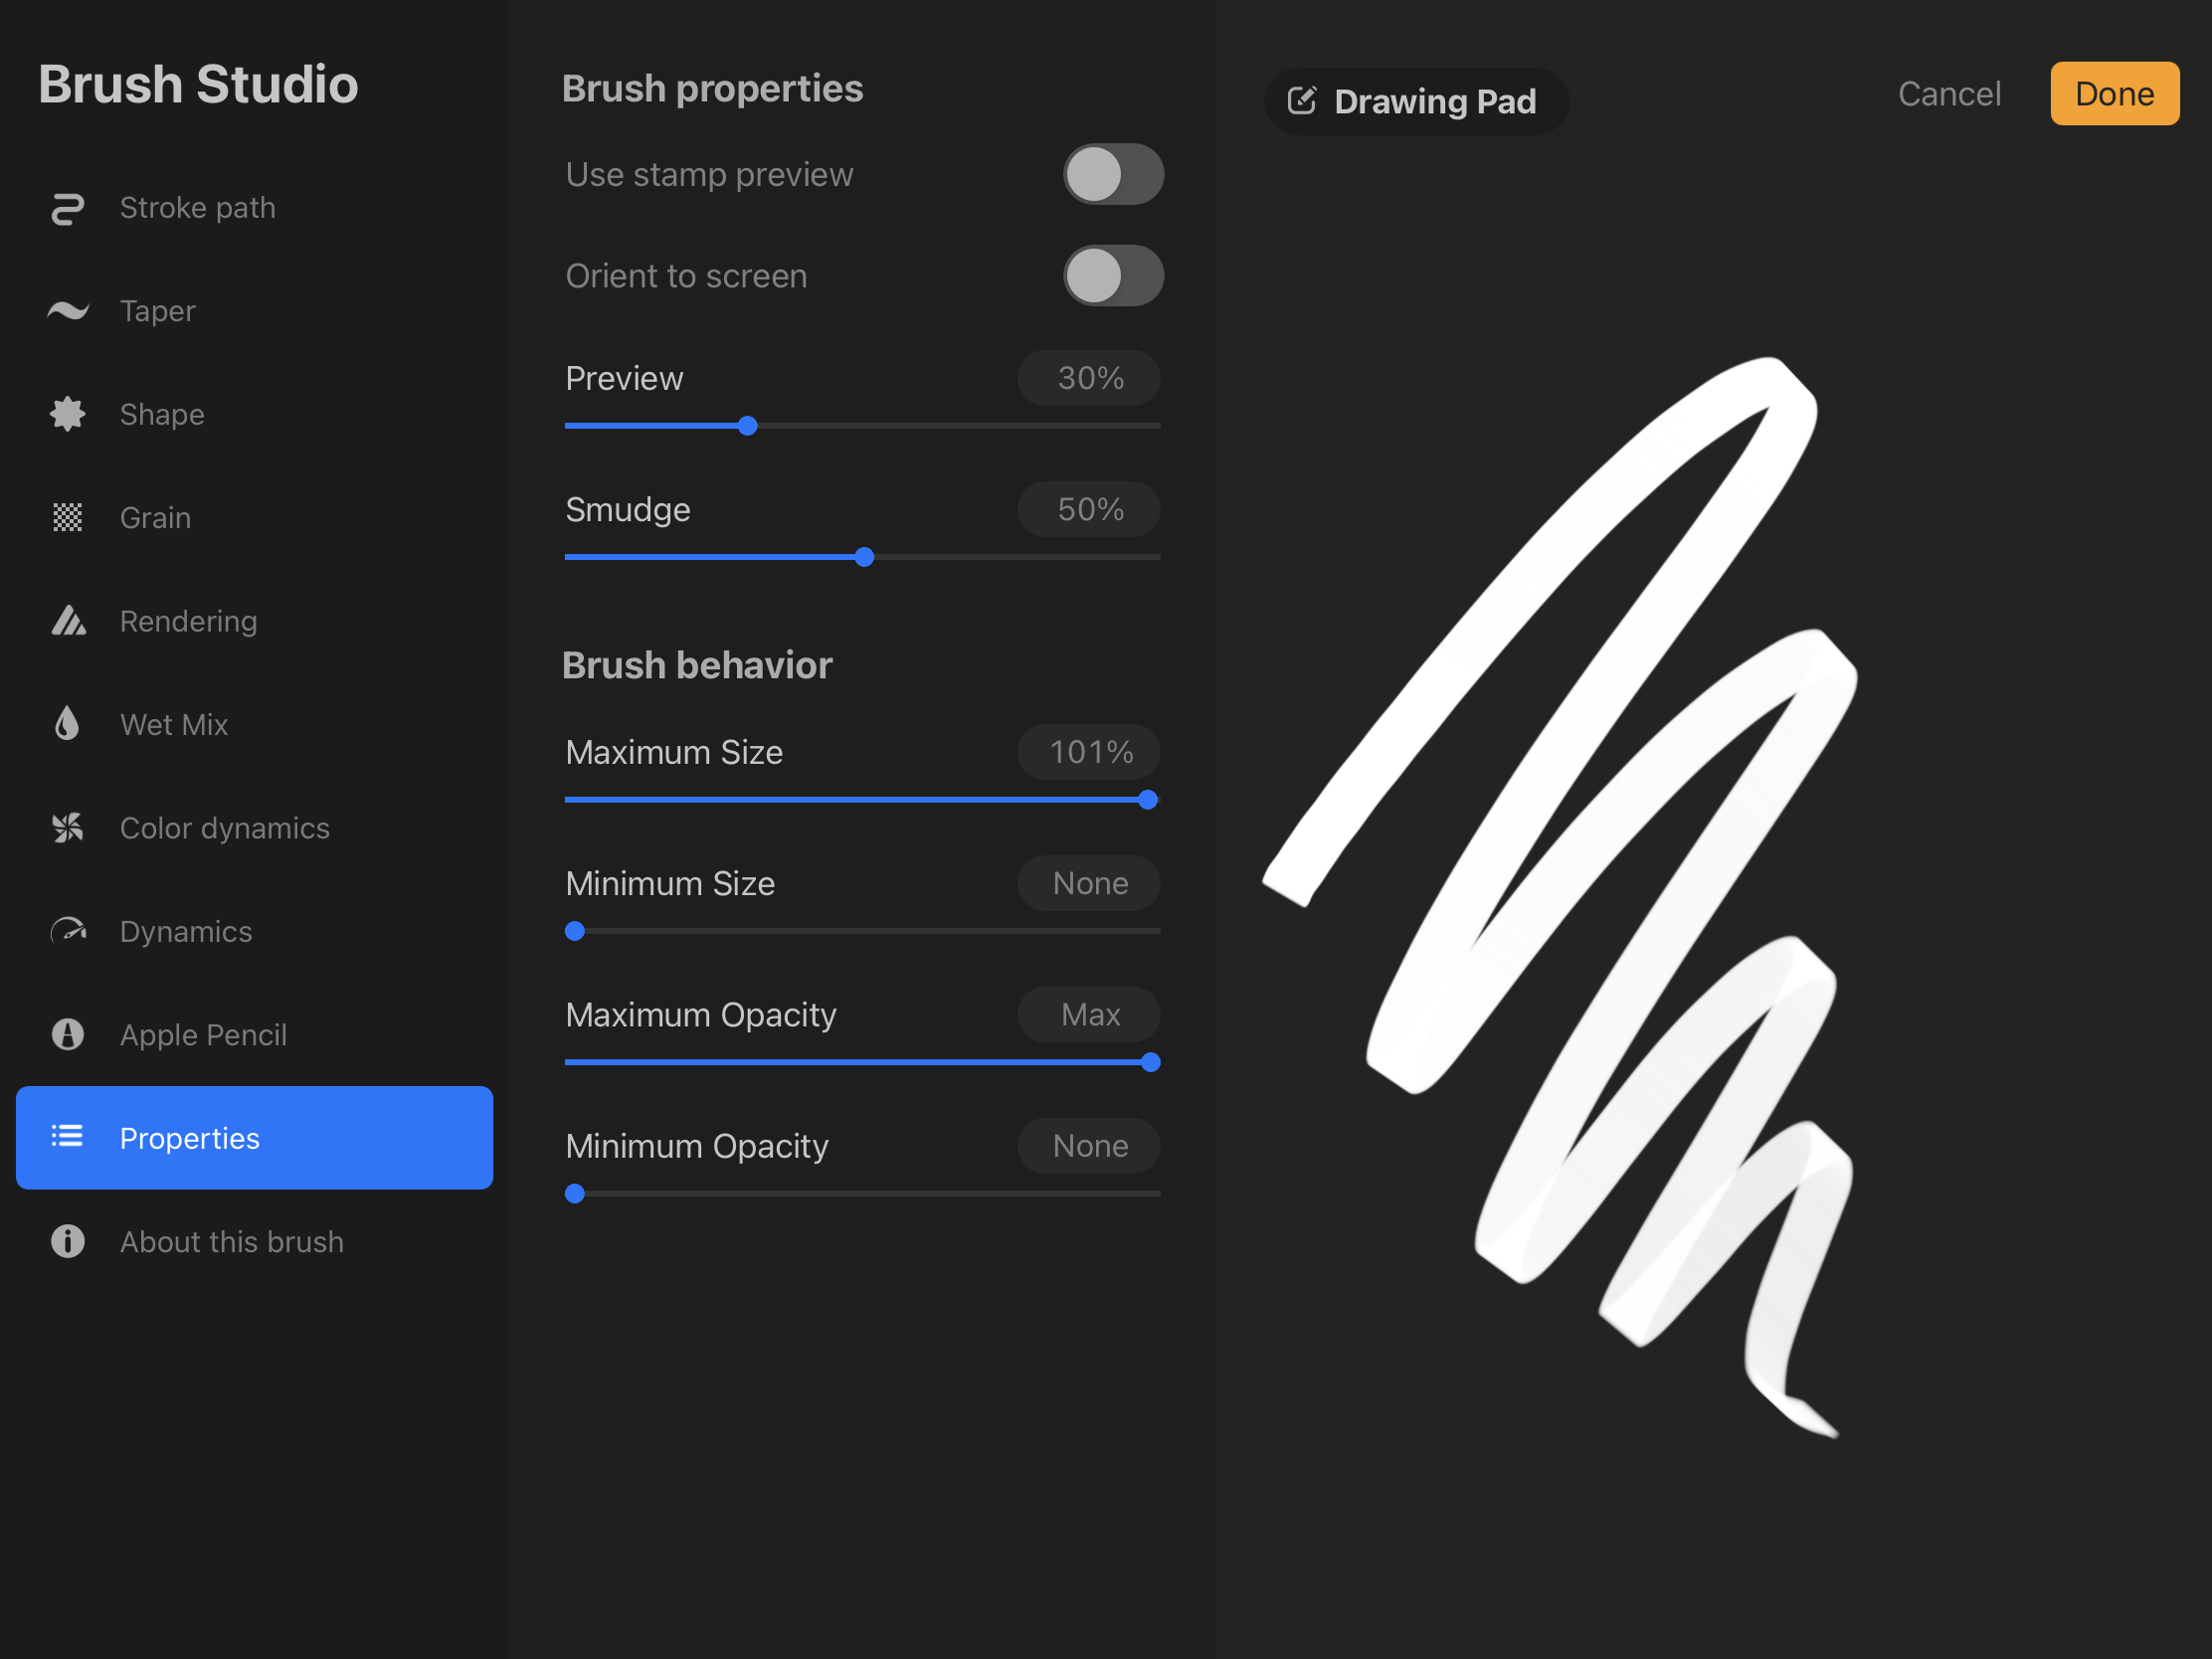
Now, test your Brush. You can tweak the settings to your liking and maybe create different versions of it.
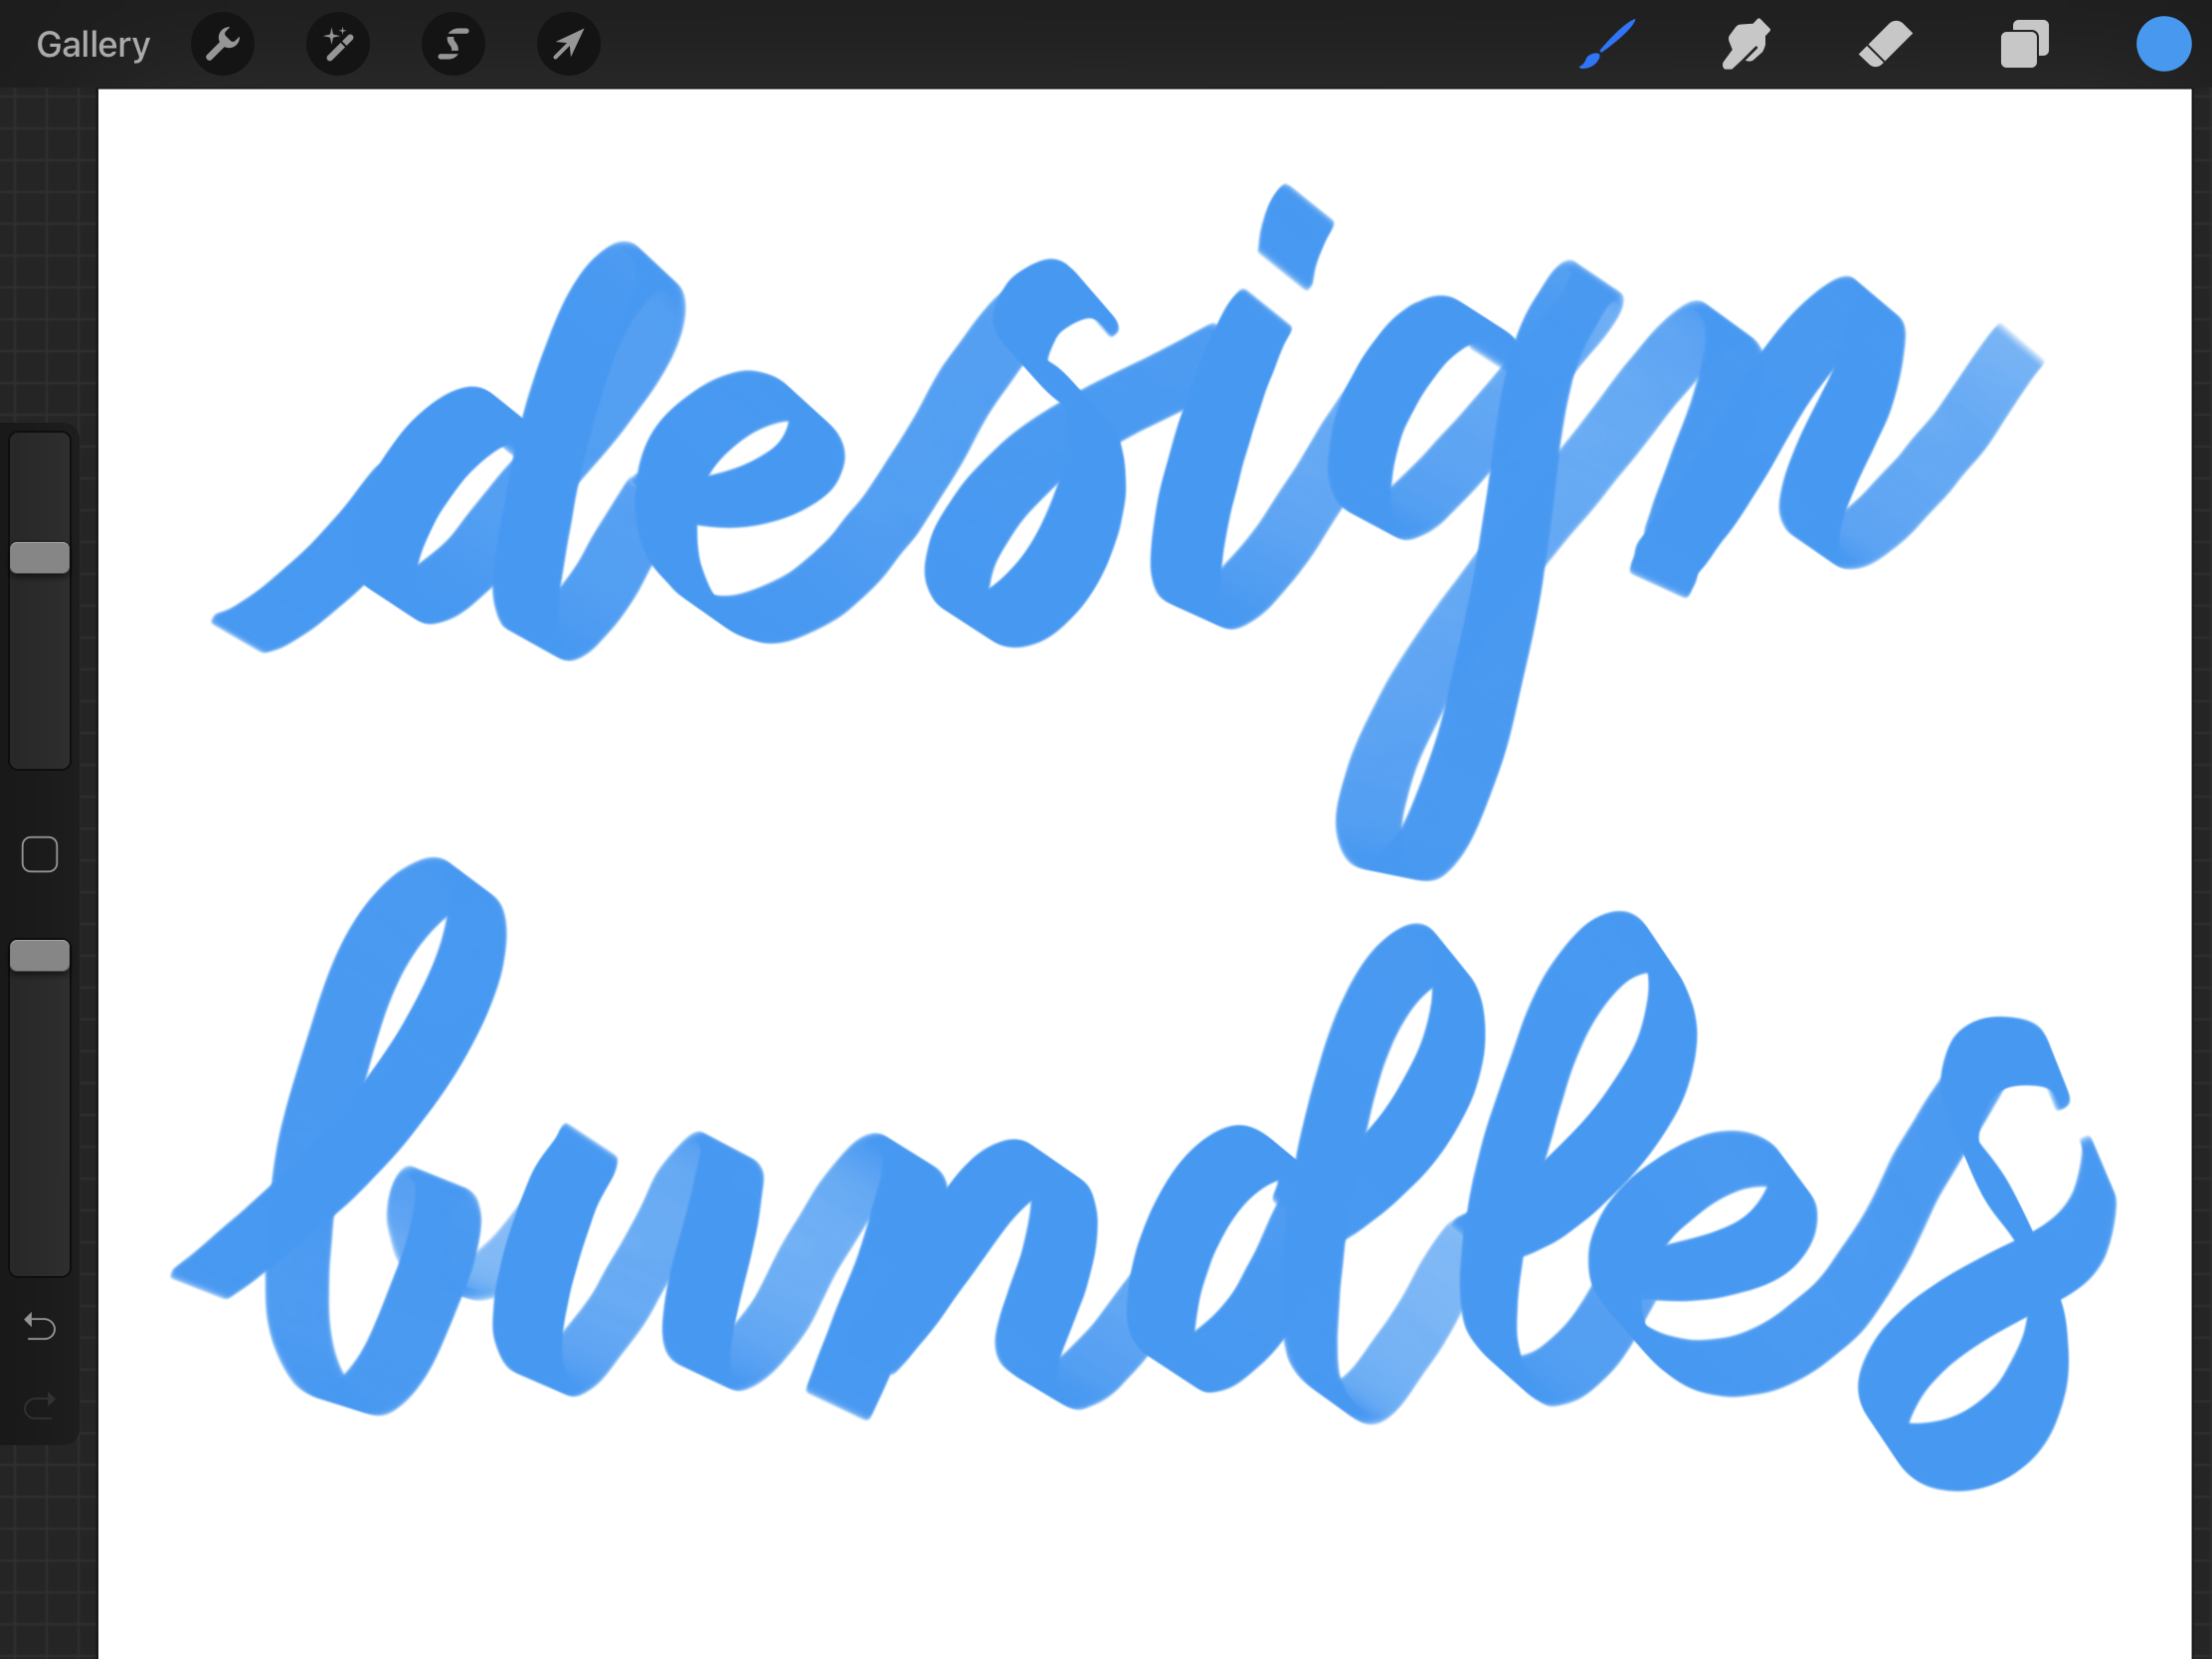
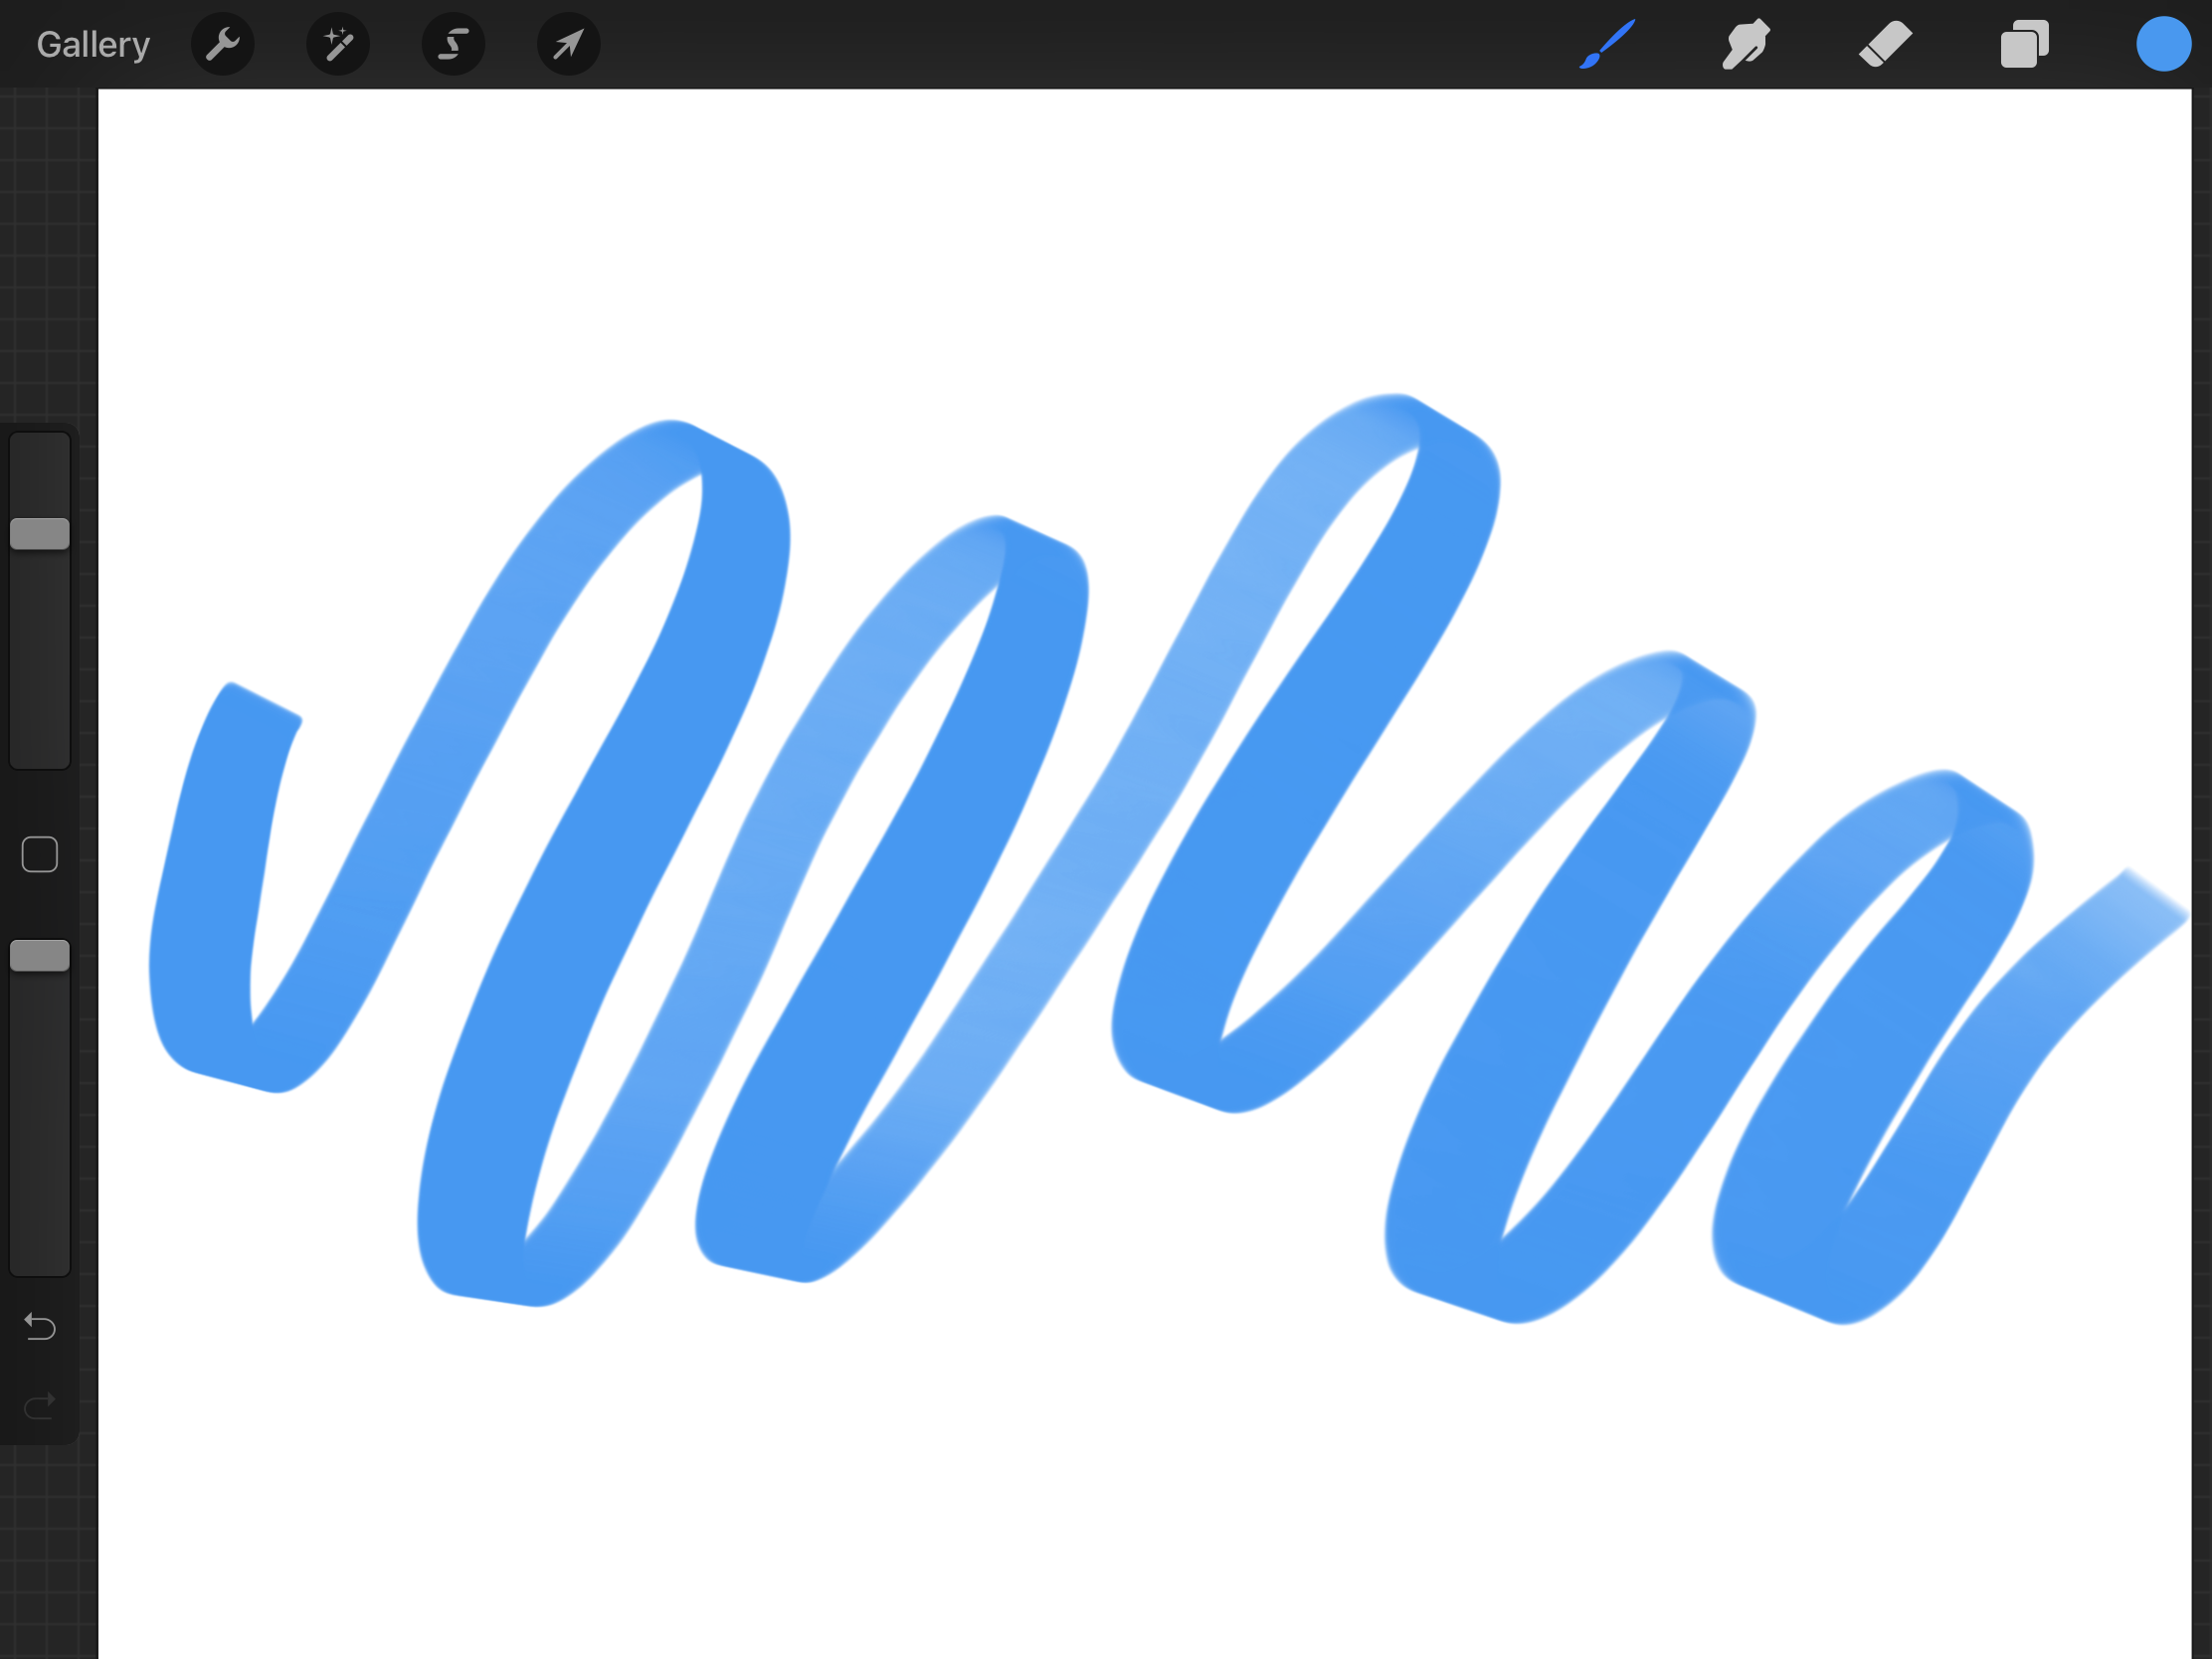
After using your Brush you can use some of the techniques used in the prior steps to add Depth, Shadows, and Highlights if you want.
If you liked this tutorial, make sure to check out our other tutorials such as how to make sublimation designs and how to create 3D typography in Procreate.
In this tutorial, we are using some Procreate lettering brushes as well as some brushes that come included with Procreate.
First start by creating a new Screen Size Canvas. If your design is going to be more complex you may want to give your Canvas a higher Size and/or Resolution (like 4000 x 5000 px @300 dpi) this will let you have a bigger amount of layers to work with.
Create ribbon text using the pencil brush
Step 1: Sketch your design
In a base layer, start by roughly sketching your design. We used a pencil brush for this.
Step 2 - Duplicate the layer
Duplicate the layer, and move it to the side to get the ribbon look. This will work as a base for your design.
Step 3 - Refine your sketch to add depth
Add another layer on top and create the composite look of the ribbon lettering. Remember that the downstrokes should be in the front and the upstrokes should be in the back.
Don’t forget to add the folds. It is a good idea to color the back parts of the ribbon in black and leave the front ones in white to better visualize your letters.
When you are happy with your sketch, lower the opacity, and lock the layer so you can use it as the base for your artwork.
Step 4 - Draw your words
Create a new layer, select a proper brush (we used a monoline brush), choose the base color for your ribbon, and start outlining the ribbon lettering.
When you are done, fill in all the words in the base color regardless.
Step 5 - Add depth, shadows, and highlights
Move the sketch layer to the top so you can see where the darker and/or lighter parts should be.
Create a new Clipping Mask layer. You can choose a darker color shade or just lower the lightness of the base color to about half and start filling the darker (back) portions of the ribbon lettering.
Create a separate Clipping Mask layer for Shadows. Now, you need to select the layer below (darker color), tap on it on the Layers menu open the menu and choose Select, then click on back the Clipping Mask layer so you are working on it.
Use an even darker shade and a softer brush to add shadows to the folds and crossings.
If there are some parts of the text that overlap a bit, use the Selection Tool to pick the portion that will be shaded (under). Then use the same dark color and brush to add the shadow.
Add some more toned-down shadows to the lower parts of the ribbon and some highlights to the top to make them pop out.
Create ribbon text using a broad-edged brush
Step 1: Choose your brush
Choose the brush you want to work with. For his example, we used a thick brush from Design Bundles.
Step 2: Color your artwork
Pick the color you want to use as the base and write your text trying to get an undulated look, just like some folded ribbon.
If you need to clean up your text use the Eraser.
Step 3: Add the shaded parts
Create a new Clipping Mask layer. Click on the small N to open the menu and choose Overlay from the menu.
Now, use black and select a proper brush (we used a monoline brush) to outline and fill the parts of the lettering that should be dark. Since your layer has a blending mode the color should be a darker shade of the base one.
Step 4: Add shadows
Create a separate Clipping Mask layer for Shadows. Now, you need to select the layer below (darker color), tap on it on the Layers menu open the menu and choose Select, then click on back the Clipping Mask layer so you are working on it.
Use a soft Airbrush brush and pick Black as your color and add shadows to the folds and crossings.
Step 5: Add highlights
Now, change the Selected layer to the original one (base color), then click on back the Clipping Mask layer so you are working on it. Change the color to White and add some Highlights to the letters. Go back and forth between selections and colors to add shadows and highlights to all the ribbon text and give it more depth.
Remember to play around with the Size and Opacity of the brushes to achieve better results.
Step 6: Fix the overlaps and details
If there are some parts of the text that overlap a bit, use the Selection Tool to pick the portion that will be shaded (under). Then use the same dark color and brush to add the shadow.
Duplicate the original layer (base color), move it down and right a bit, In the Effects menu, choose Gaussian Blur, pick Layer, and slide your finger on the right on the screen to create a Drop Shadow. Then, click on the small N to open the menu and choose Luminosity from the menu.
Create a ribbon brush to make ribbon text
Step 1: Create a new brush
You can also create your own Ribbon Brush inside Brush Studio. Just click the white + (Plus) button on the top right side of the Brush Library to create a New Brush and use the following settings or tweak them a bit and experiment.
Stroke Path:
Taper:
Shape: To choose a Shape Source different from the default one, click on Edit, Import, Source Library (use the one default one provided by Procreate), scroll down, and choose Calligraphy 1.
Grain:
Rendering:
Wet Mix:
Dynamics:
Apple Pencil:
Properties:
Step 2: Test your brush
Now, test your Brush. You can tweak the settings to your liking and maybe create different versions of it.
After using your Brush you can use some of the techniques used in the prior steps to add Depth, Shadows, and Highlights if you want.
If you liked this tutorial, make sure to check out our other tutorials such as how to make sublimation designs and how to create 3D typography in Procreate.
Related Tutorials
Procreate Tutorials
How to Draw Ribbon Banners in Procreate
Discover how to draw many different Ribbon Banners using Procreate.
Procreate Tutorials
How to Draw 3D Lettering in Procreate
Procreate Tutorials
How to Outline Lettering in Procreate
Learn how to add outlines to your lettering or design in Procreate on your iPad.
Procreate Tutorials
How to Draw People in Procreate
In this Step-by Step tutorial you will learn how to draw people with Procreate.
Procreate Tutorials
How to Draw Hair in Procreate
Discover the basic skills you need to draw hair in Procreate with this step by step tutorial.
Procreate Tutorials
How to Draw a Butterfly in Procreate
Using these techniques, you can easily create some beautiful Butterflies and intricate Mandalas.