

By Design Bundles
SCAL Tutorials4 min
How to Create Foiled Sticker File in SCAL4 to Use in Cricut Design Space
1- Open SCAL4. Select the import icon on the top.
2- Select the design you would like to use on your stickers.
3- Next go to the library, select a circle for the cut part of the file.
4- Place the circle around the design.
5- go to the document icon and change the paper size from 12x12 to A4
6- Resize the the design to the sticker size you need.
7- Right click object then duplicate. A new window will appear. Select the number of rows and columns. Click OK.
8- Using the layers tab on the left select all of the designs without the cut circle lines then right click - group.
9- Now select all the cut circle lines together on the layers tab and right click - group.
10- Once you are happy with the sticker placement etc, go to file - export. Save as a SVG file.
11- To use the file in cricut design space, open the program. Click upload.
12- Click on upload then browse.
13- Select and save your design. Upload to the design space.
14- Separate the 2 parts of the design. Select the circles and right click. Send to the back.
15- Next select the design within the circles and go to line type and select draw. with all the design selected select attach.
16- When you go to the make screen, you will see 2 mats, one to foil and one to cut. Foil the design first, then cut the file.

2- Select the design you would like to use on your stickers.

3- Next go to the library, select a circle for the cut part of the file.
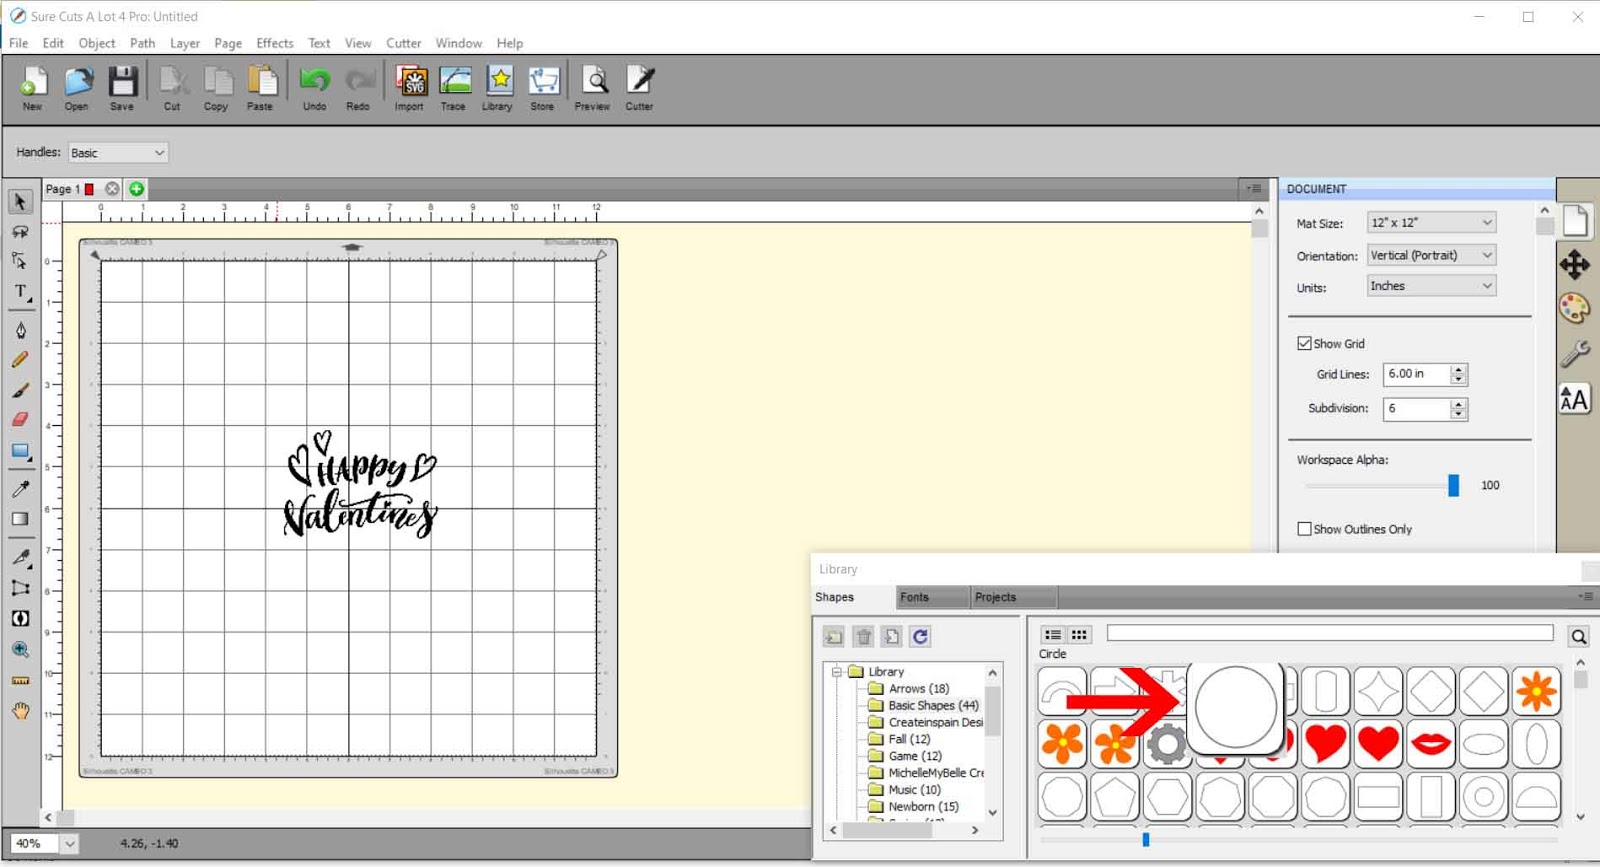
4- Place the circle around the design.

5- go to the document icon and change the paper size from 12x12 to A4
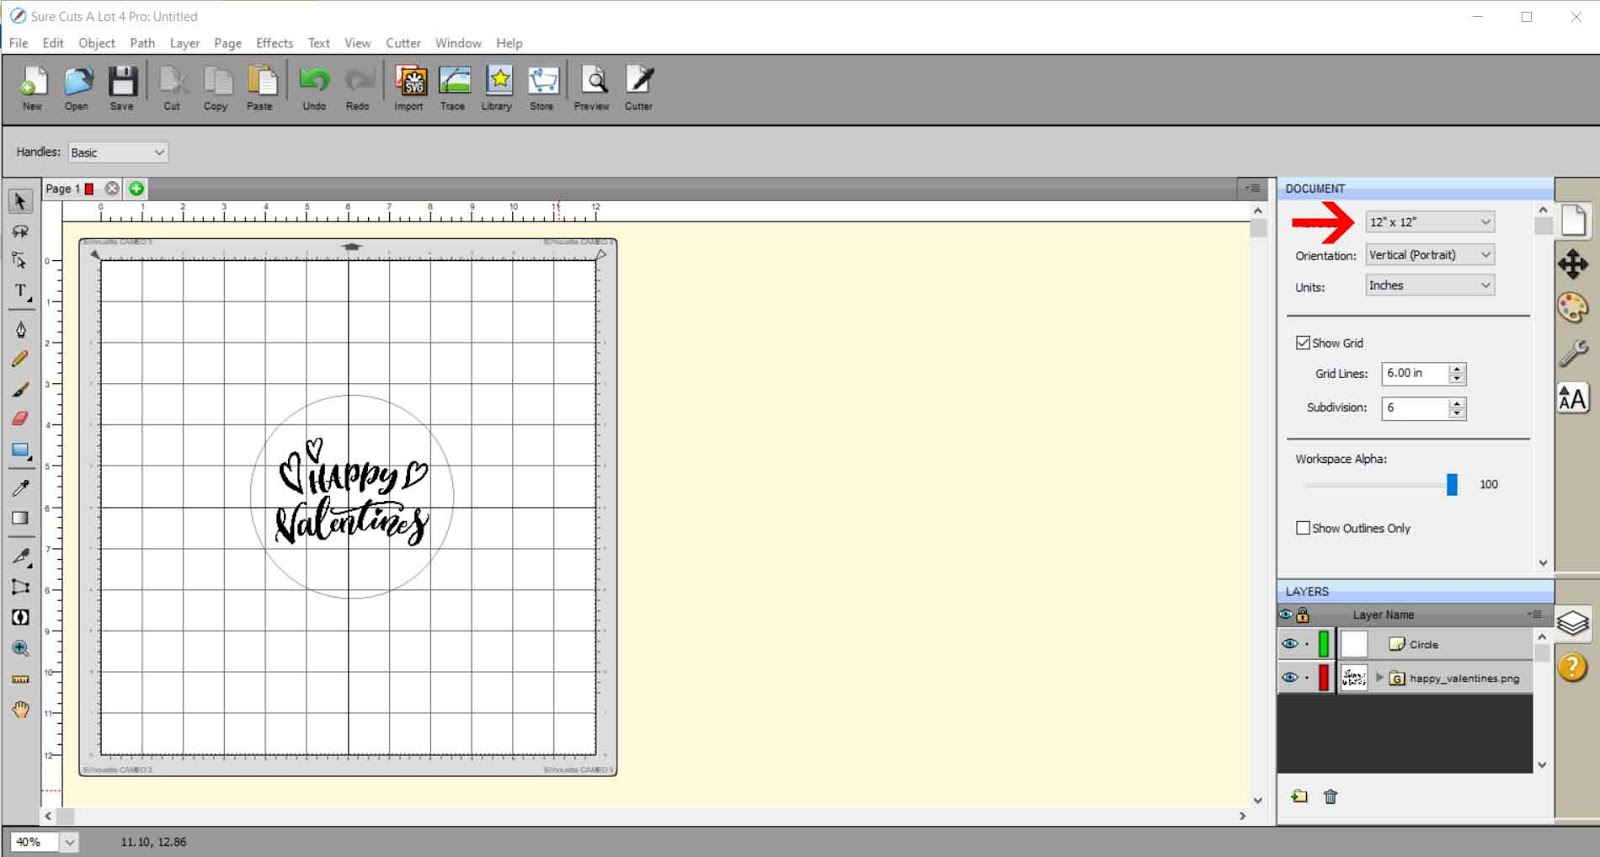
6- Resize the the design to the sticker size you need.

7- Right click object then duplicate. A new window will appear. Select the number of rows and columns. Click OK.

8- Using the layers tab on the left select all of the designs without the cut circle lines then right click - group.

9- Now select all the cut circle lines together on the layers tab and right click - group.

10- Once you are happy with the sticker placement etc, go to file - export. Save as a SVG file.

11- To use the file in cricut design space, open the program. Click upload.
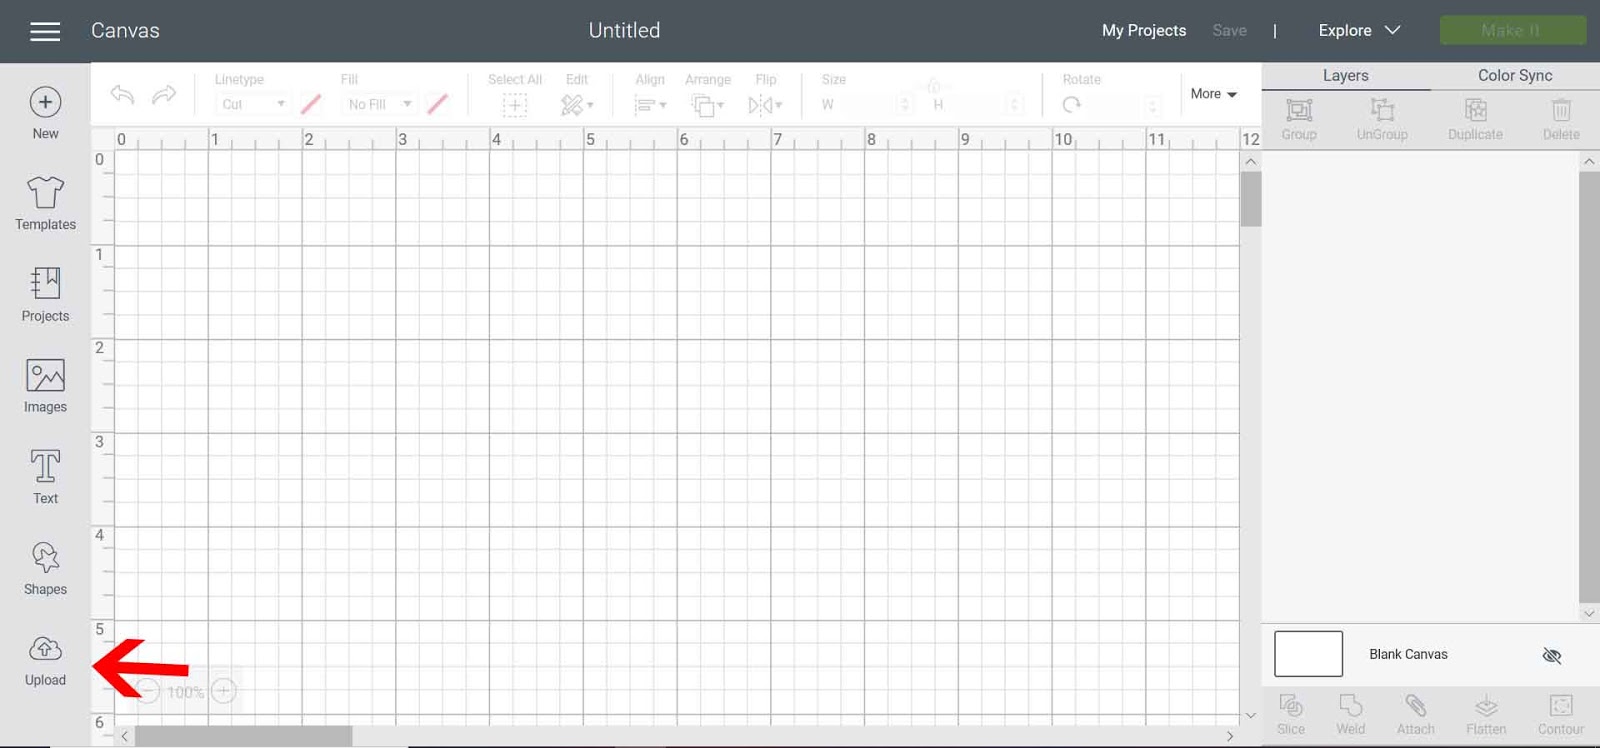
12- Click on upload then browse.

13- Select and save your design. Upload to the design space.
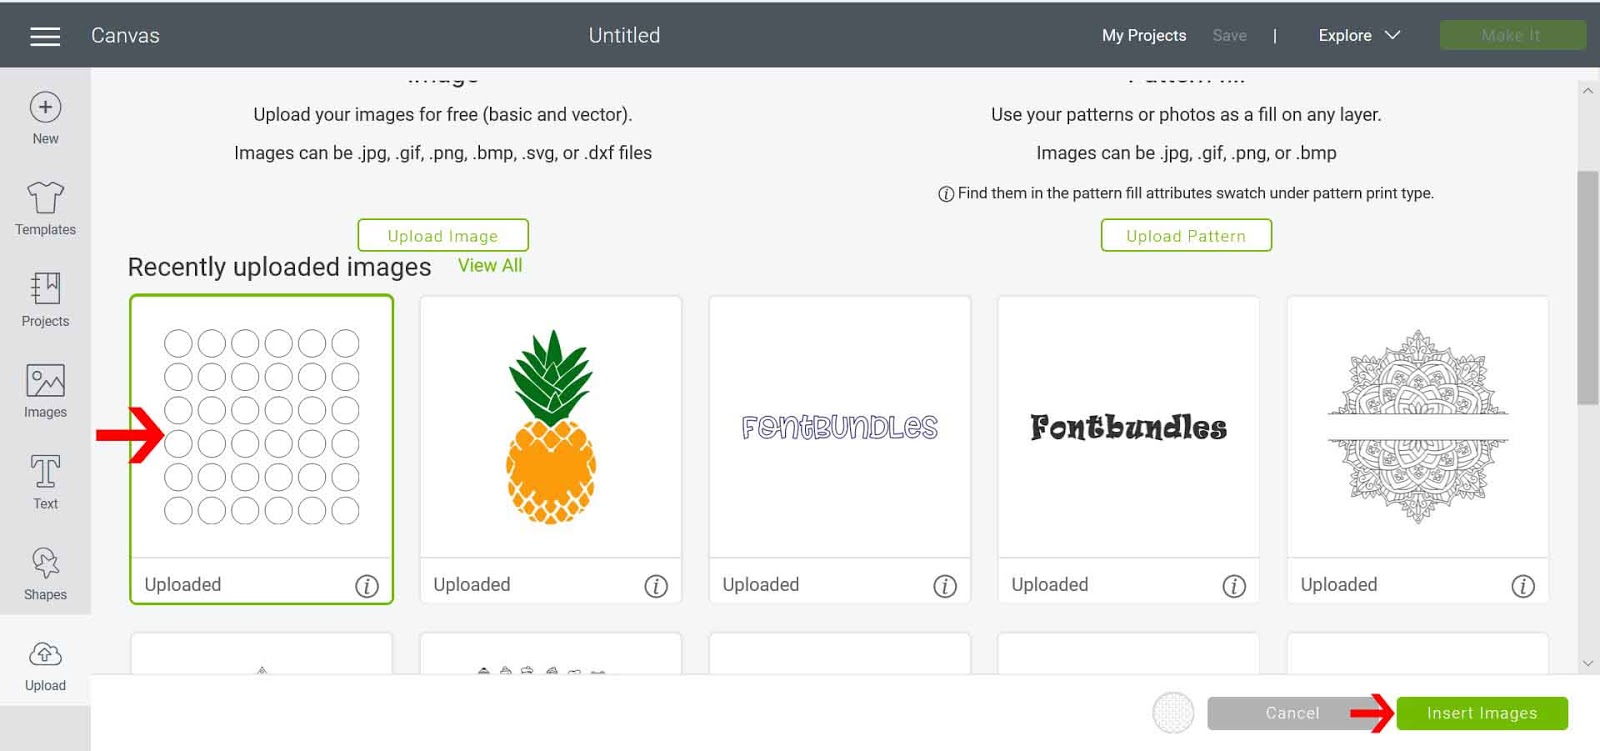
14- Separate the 2 parts of the design. Select the circles and right click. Send to the back.

15- Next select the design within the circles and go to line type and select draw. with all the design selected select attach.

16- When you go to the make screen, you will see 2 mats, one to foil and one to cut. Foil the design first, then cut the file.

Related Tutorials
Cricut Tutorials
How to Use a PDF File in Cricut Design Space
In this tutorial we guide you through the steps on using a PDF file in Cricut Design Space.
Silhouette Tutorials
How to Use Silhouette Files in Cricut Design Space
Discover how you can use your Silhouette Studio file in Cricut Design Space.
Cricut Tutorials
How to Use SVG Files in Cricut Design Space
Cricut Tutorials