By Design Bundles
Scan N Cut Tutorials4 min
How to Fill in a Preset Pattern in Brother Scan n Cut
*CM900 machine used.
1- Turn on Brother scan n cut and select the pattern option.
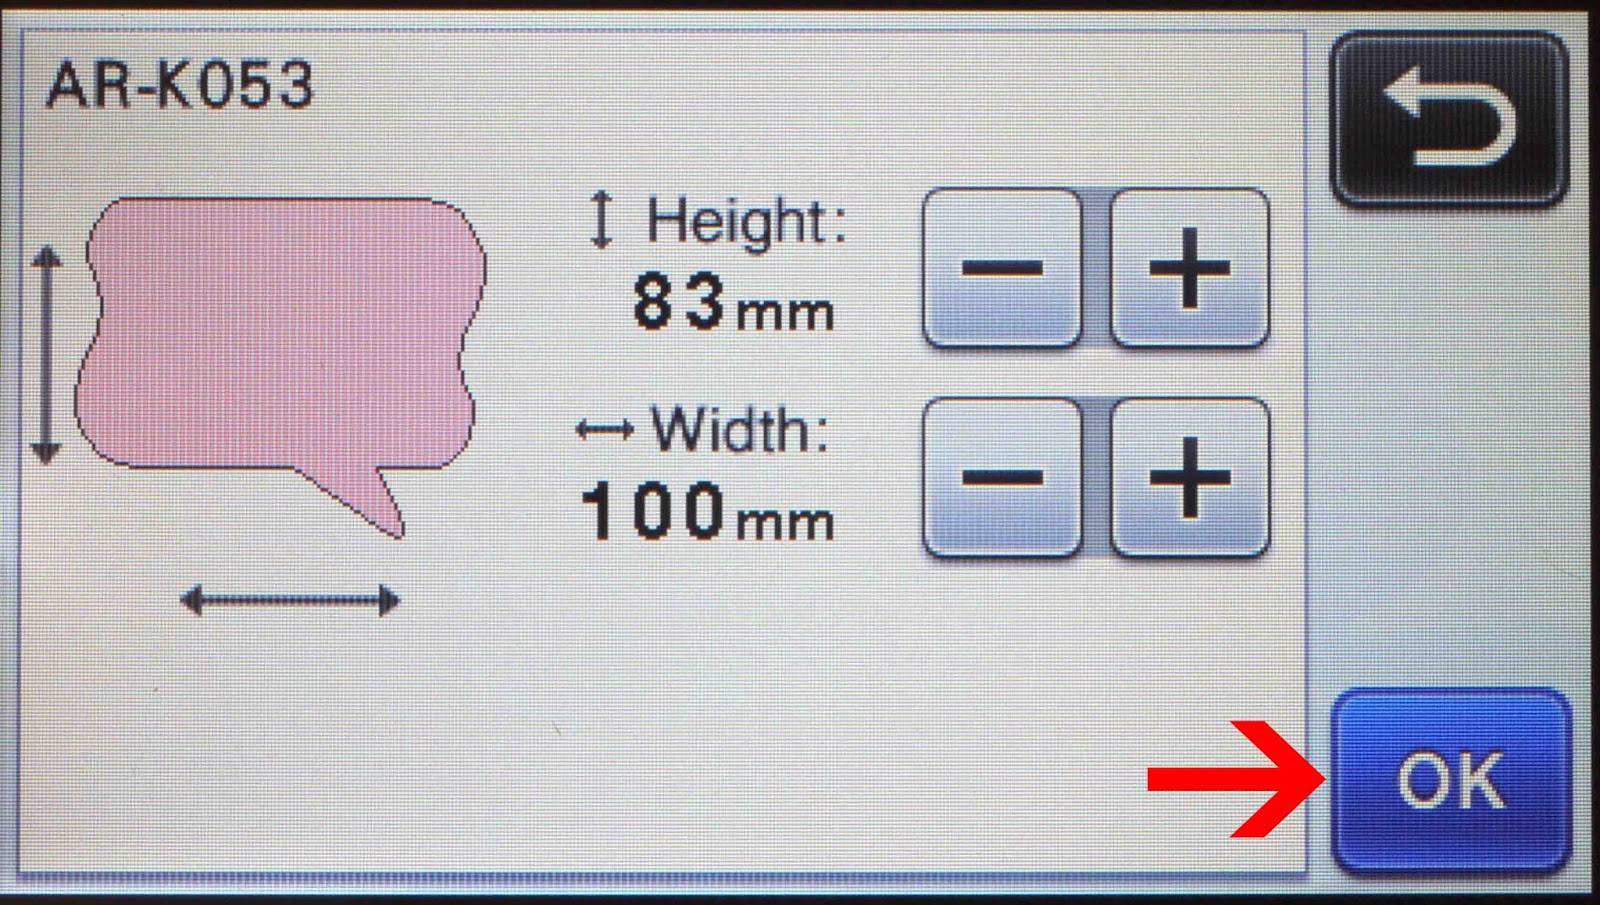
2- Find the pattern you want to fill in, adjust the size and select OK.
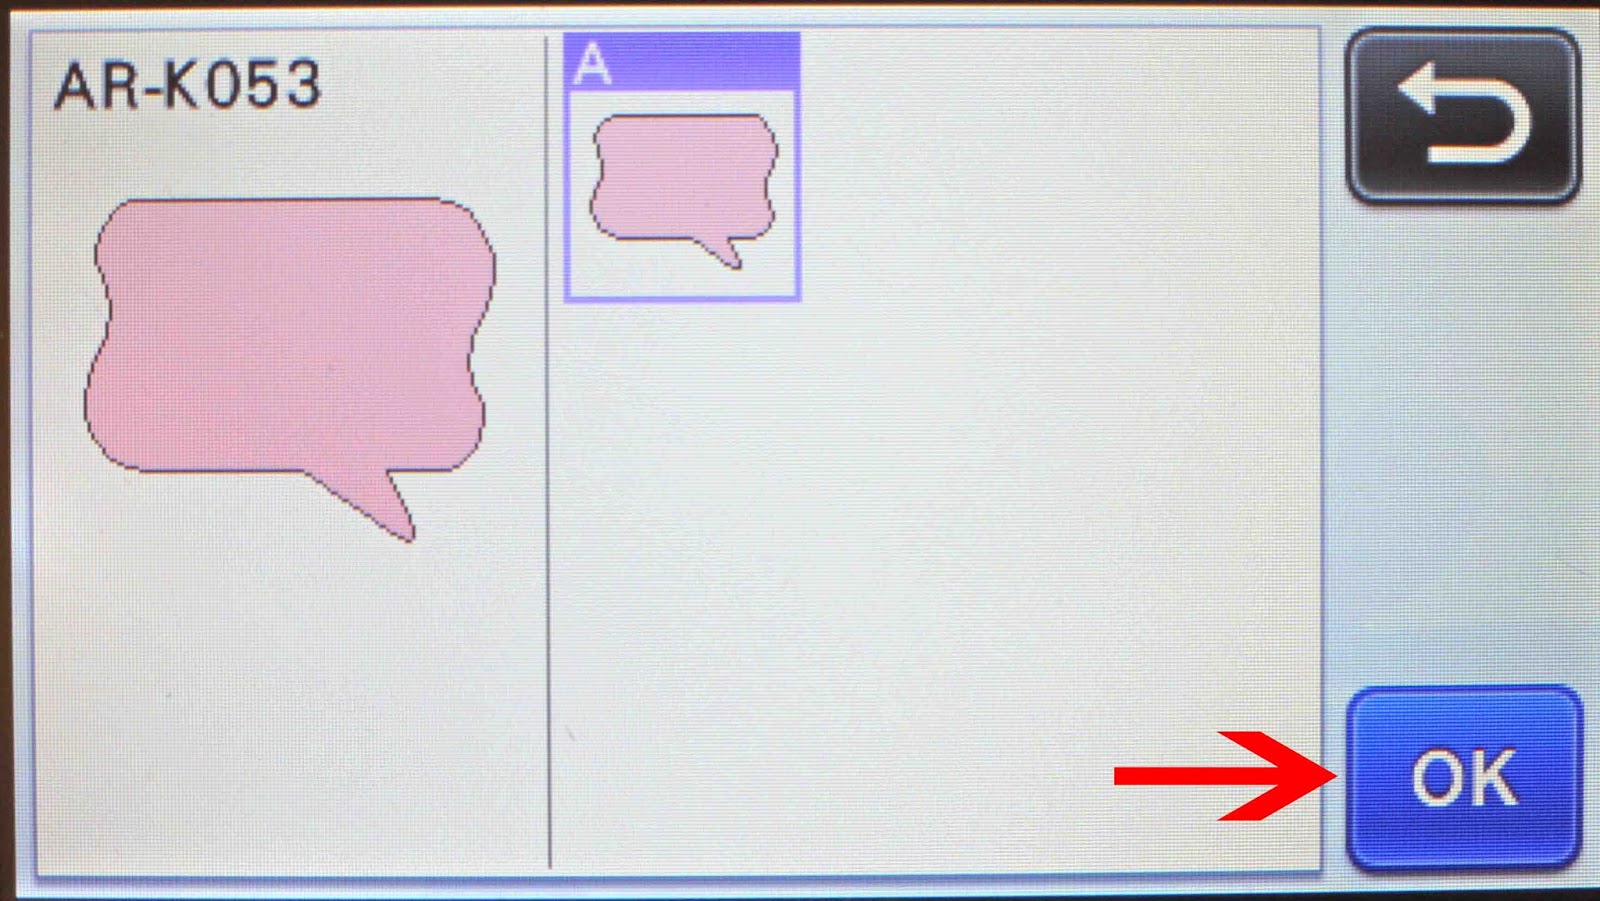
3- On the next screen confirm the image by selecting OK again.
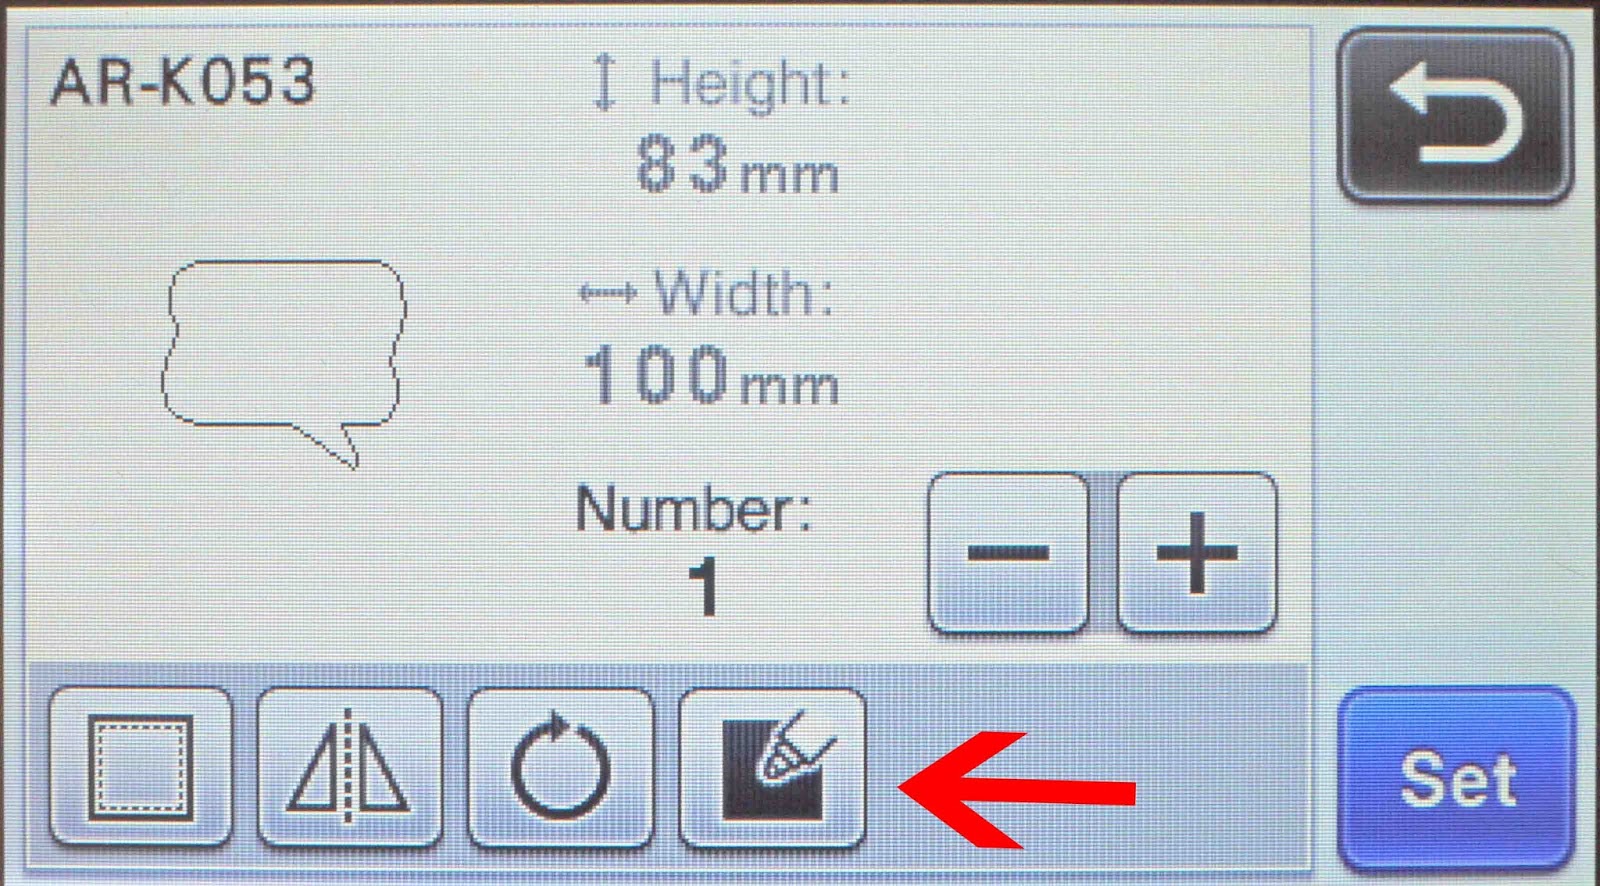
4- Adjust the number of copies you want and then select the fill icon.
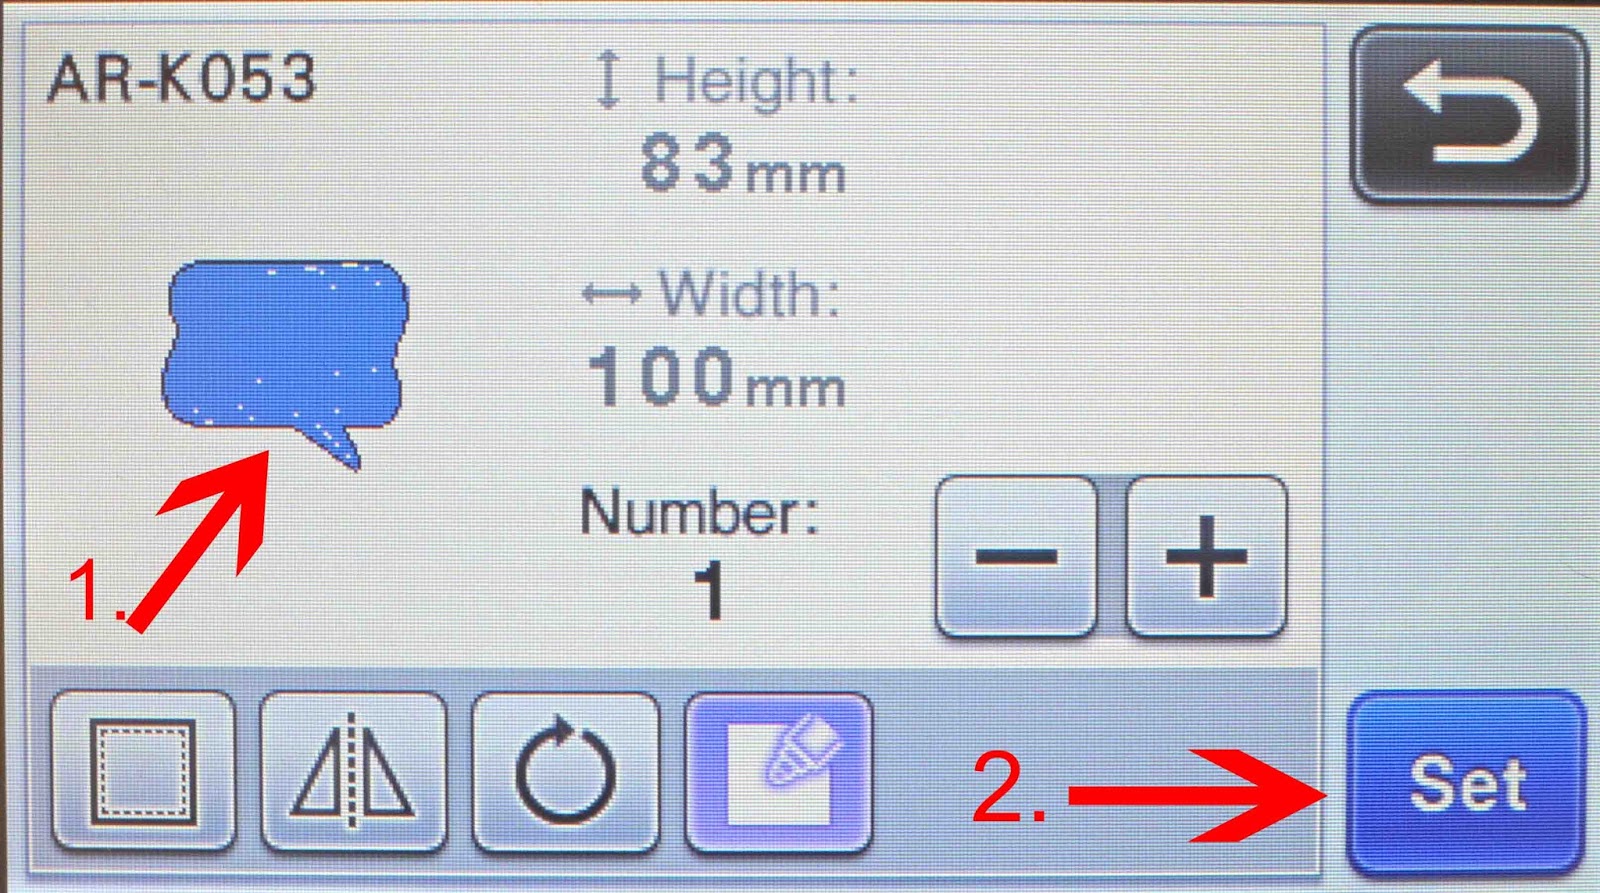
5- You will now see that the image is now filled in with a blue colour. This is showing you that when you go to draw the image it will colour the image in also.(1) Click on set (2).
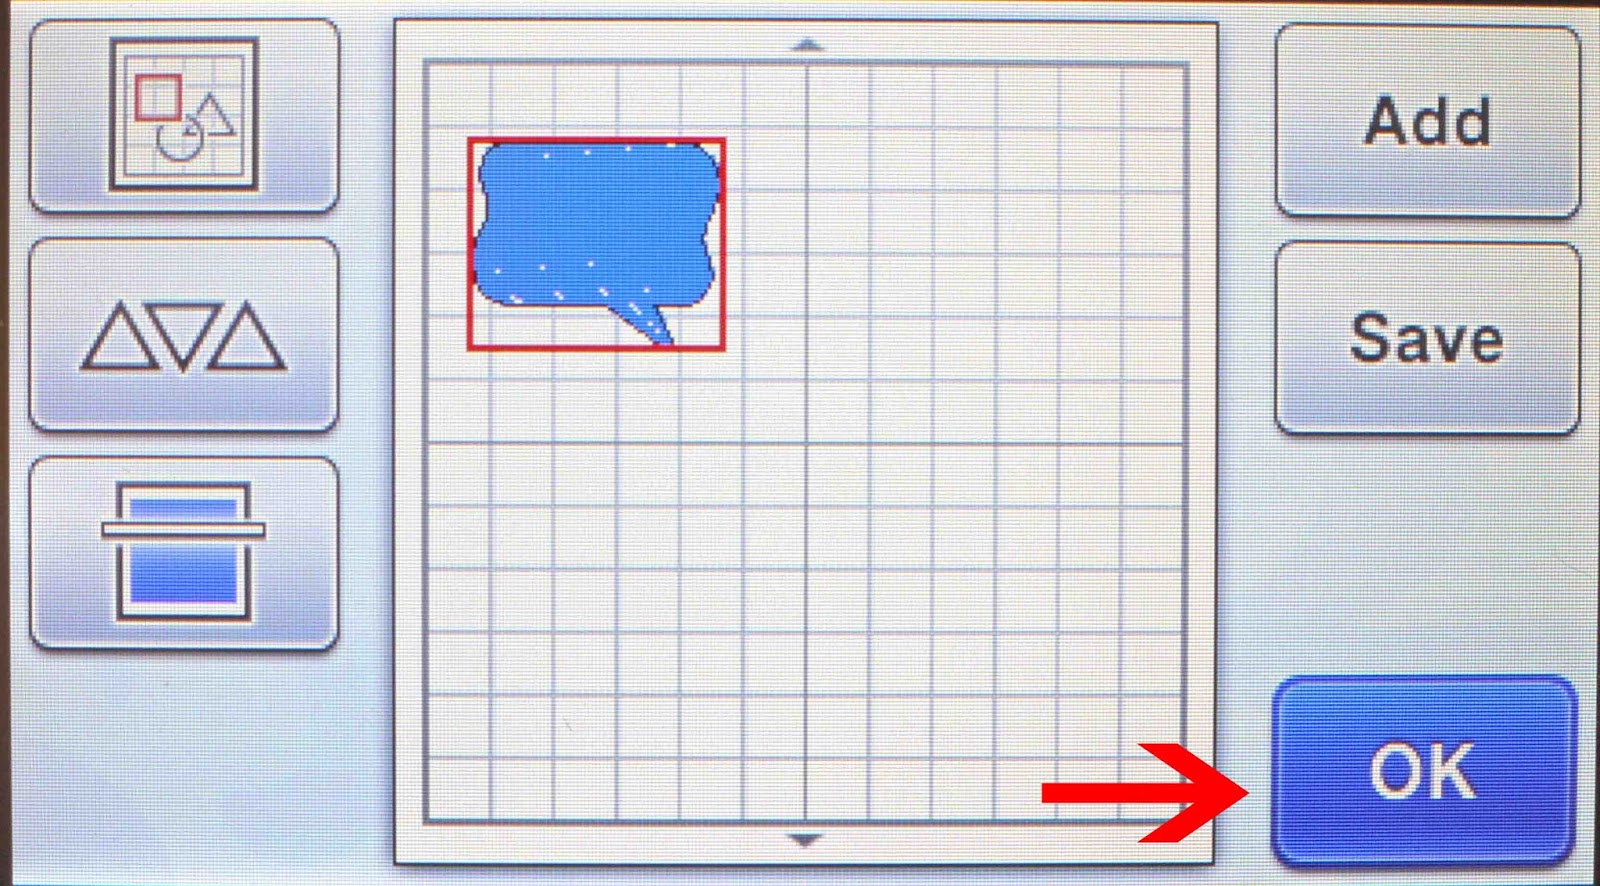
6- At this point you can add any more images you would like or save your work. Once you are happy with the image click on OK.
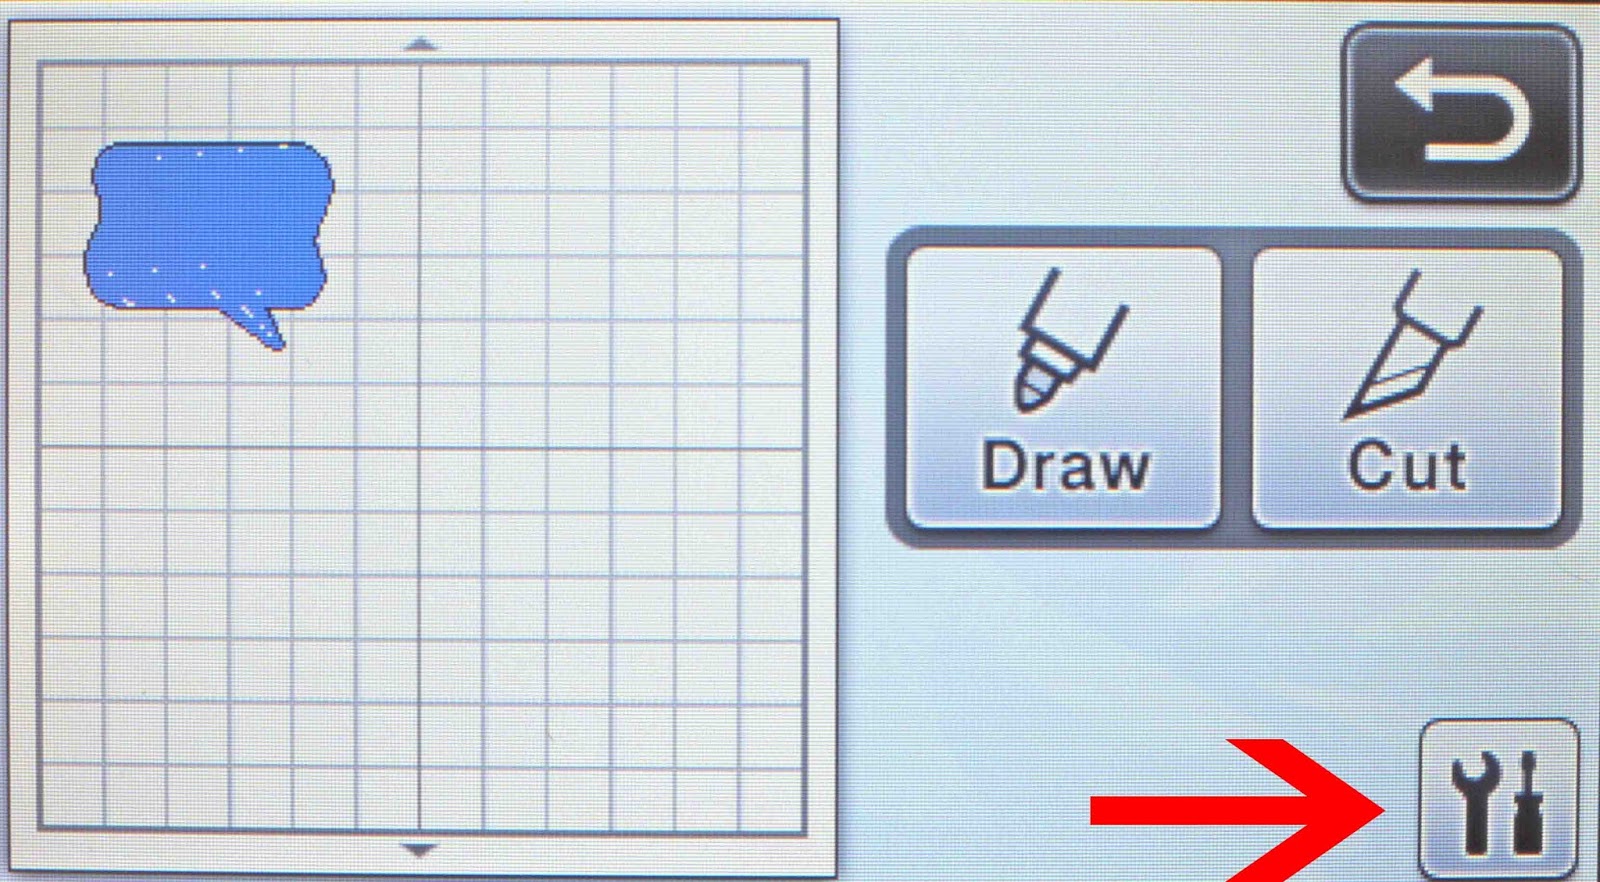
7- You will now have the option to draw with a full fill option or you can change it to a pattern. To change the fill to a pattern go to the setting toolbox and click on it.
8- Scroll through the menu till you see the fill pattern option. Select the toolbox icon.
9- You now have the different fill pattern options.
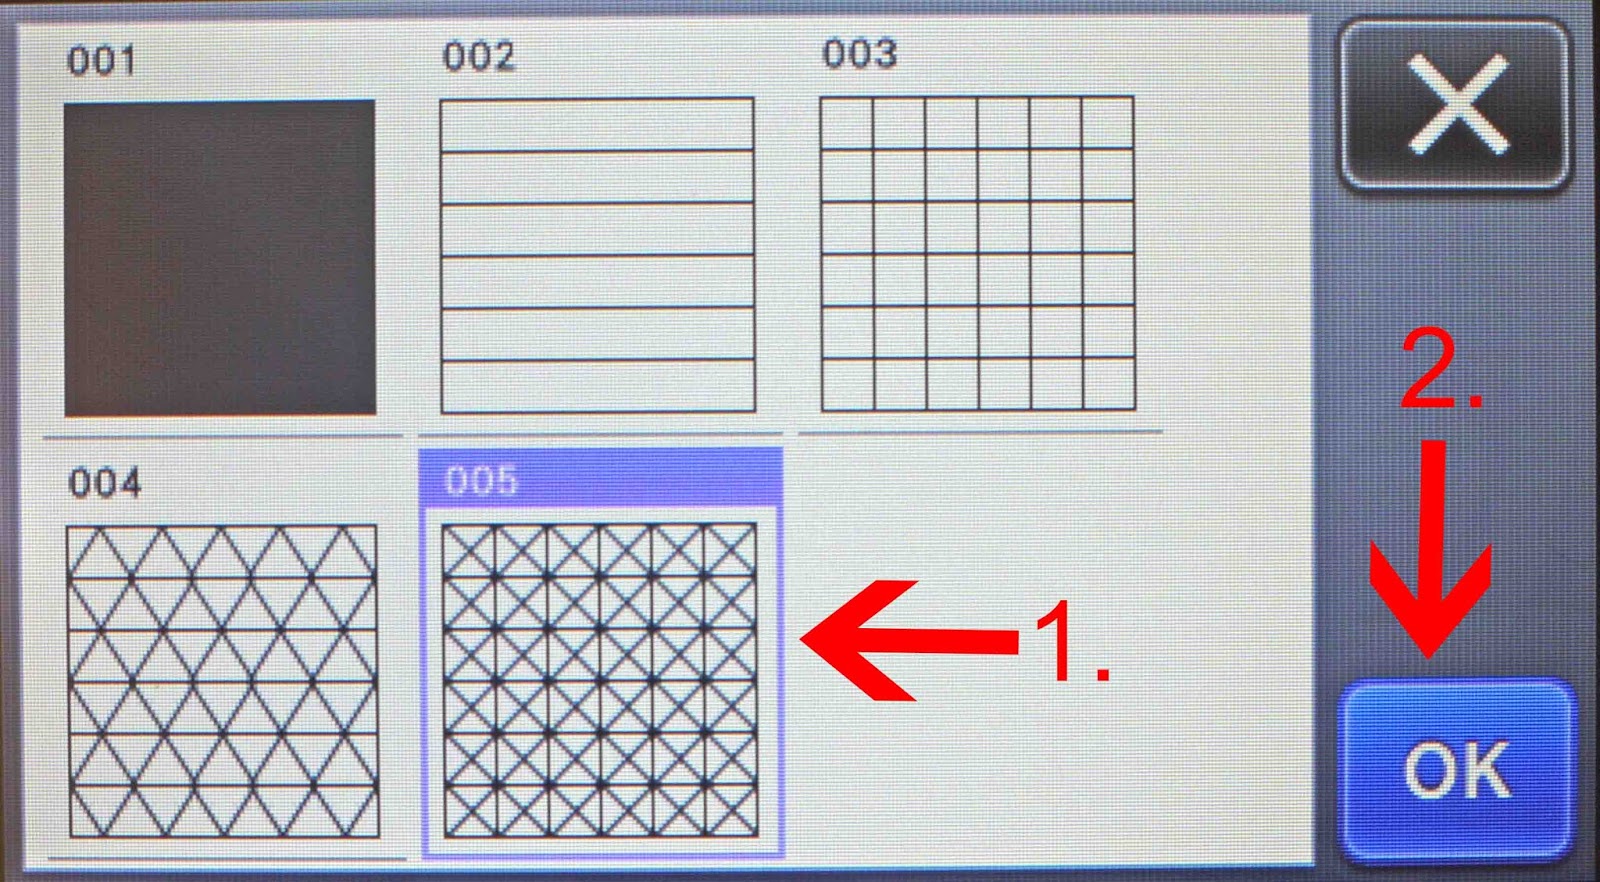
10- Select the fill pattern you would like(1) and click OK(2).
11- Click OK again.
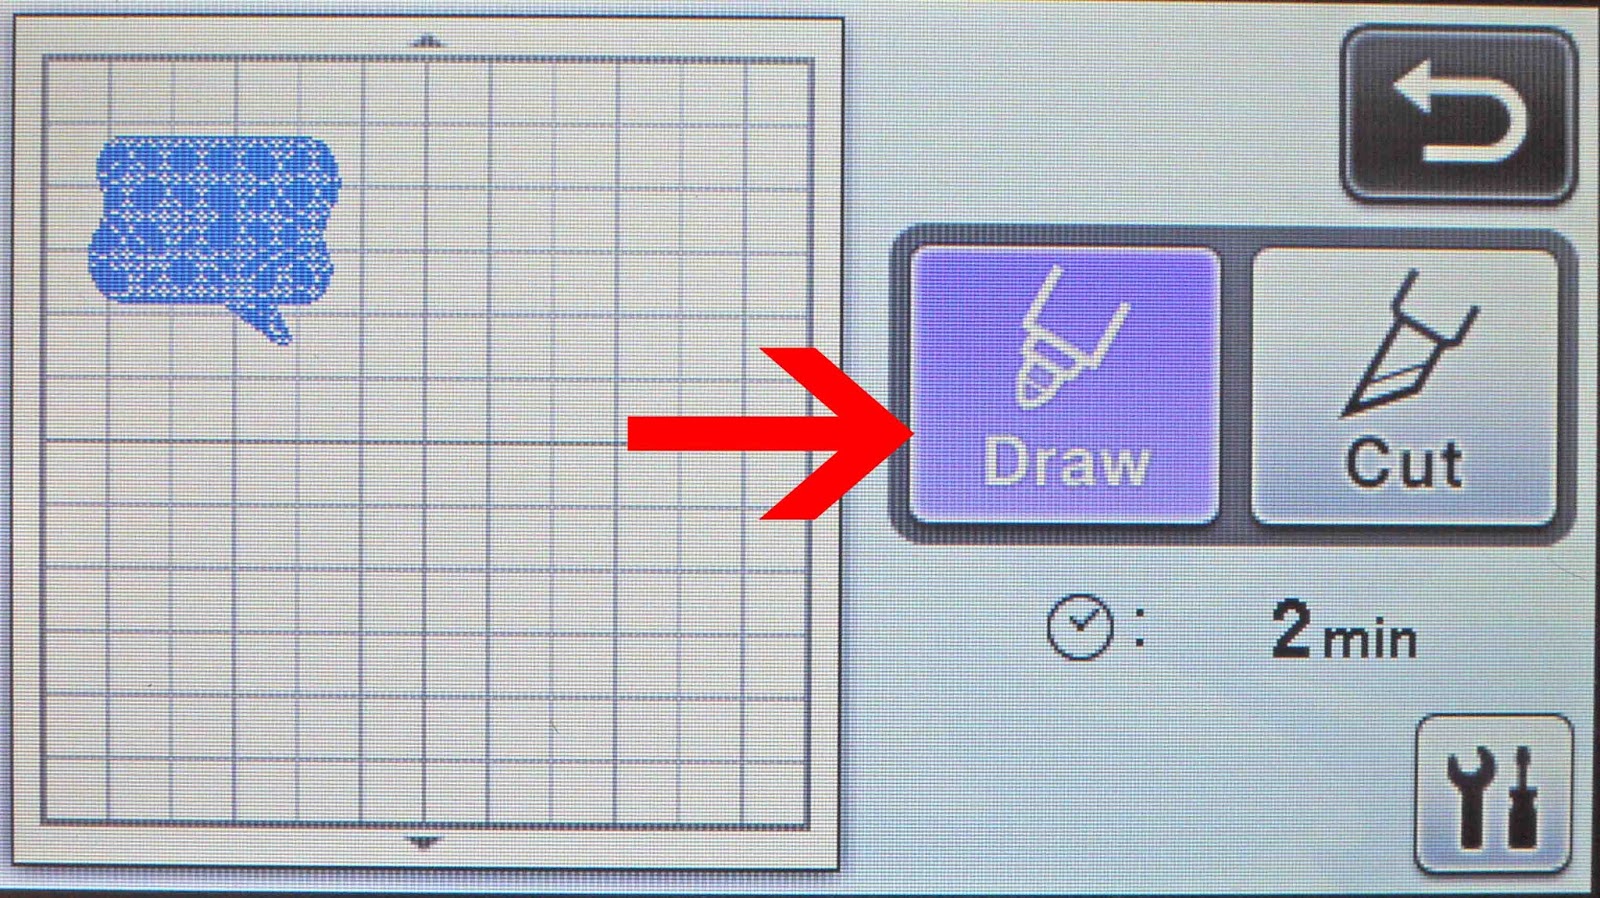
12- The new fill pattern will appear in your image. If you are happy with the fill pattern. follow the manufacture instructions on how to assemble the draw holder and markers, install them and then click on draw.
1- Turn on Brother scan n cut and select the pattern option.
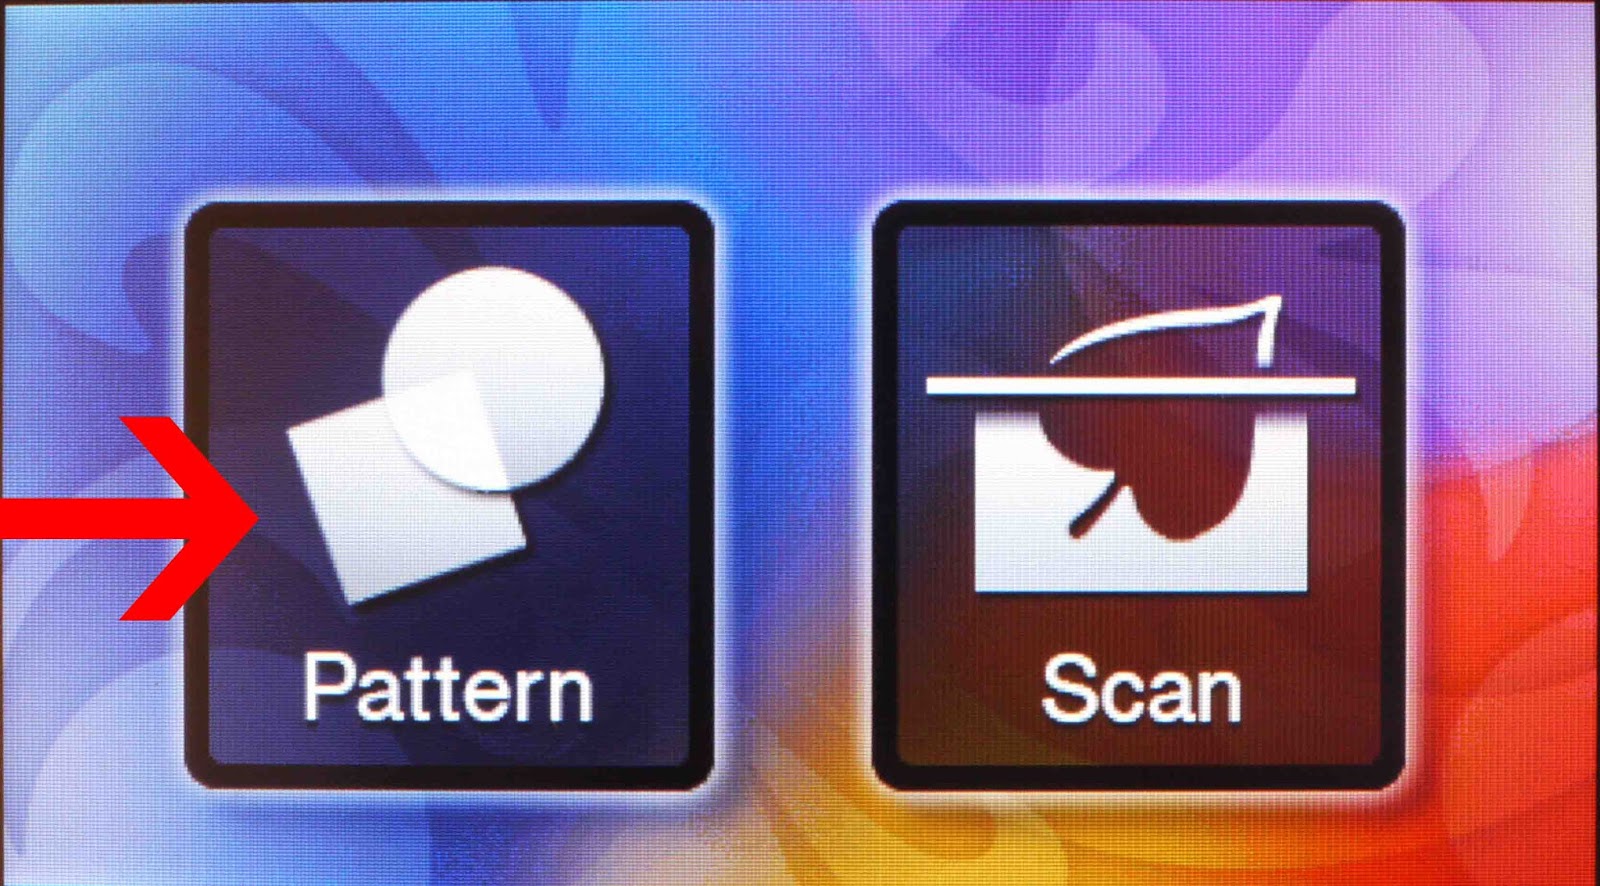
2- Find the pattern you want to fill in, adjust the size and select OK.
3- On the next screen confirm the image by selecting OK again.
4- Adjust the number of copies you want and then select the fill icon.
5- You will now see that the image is now filled in with a blue colour. This is showing you that when you go to draw the image it will colour the image in also.(1) Click on set (2).
6- At this point you can add any more images you would like or save your work. Once you are happy with the image click on OK.
7- You will now have the option to draw with a full fill option or you can change it to a pattern. To change the fill to a pattern go to the setting toolbox and click on it.
8- Scroll through the menu till you see the fill pattern option. Select the toolbox icon.
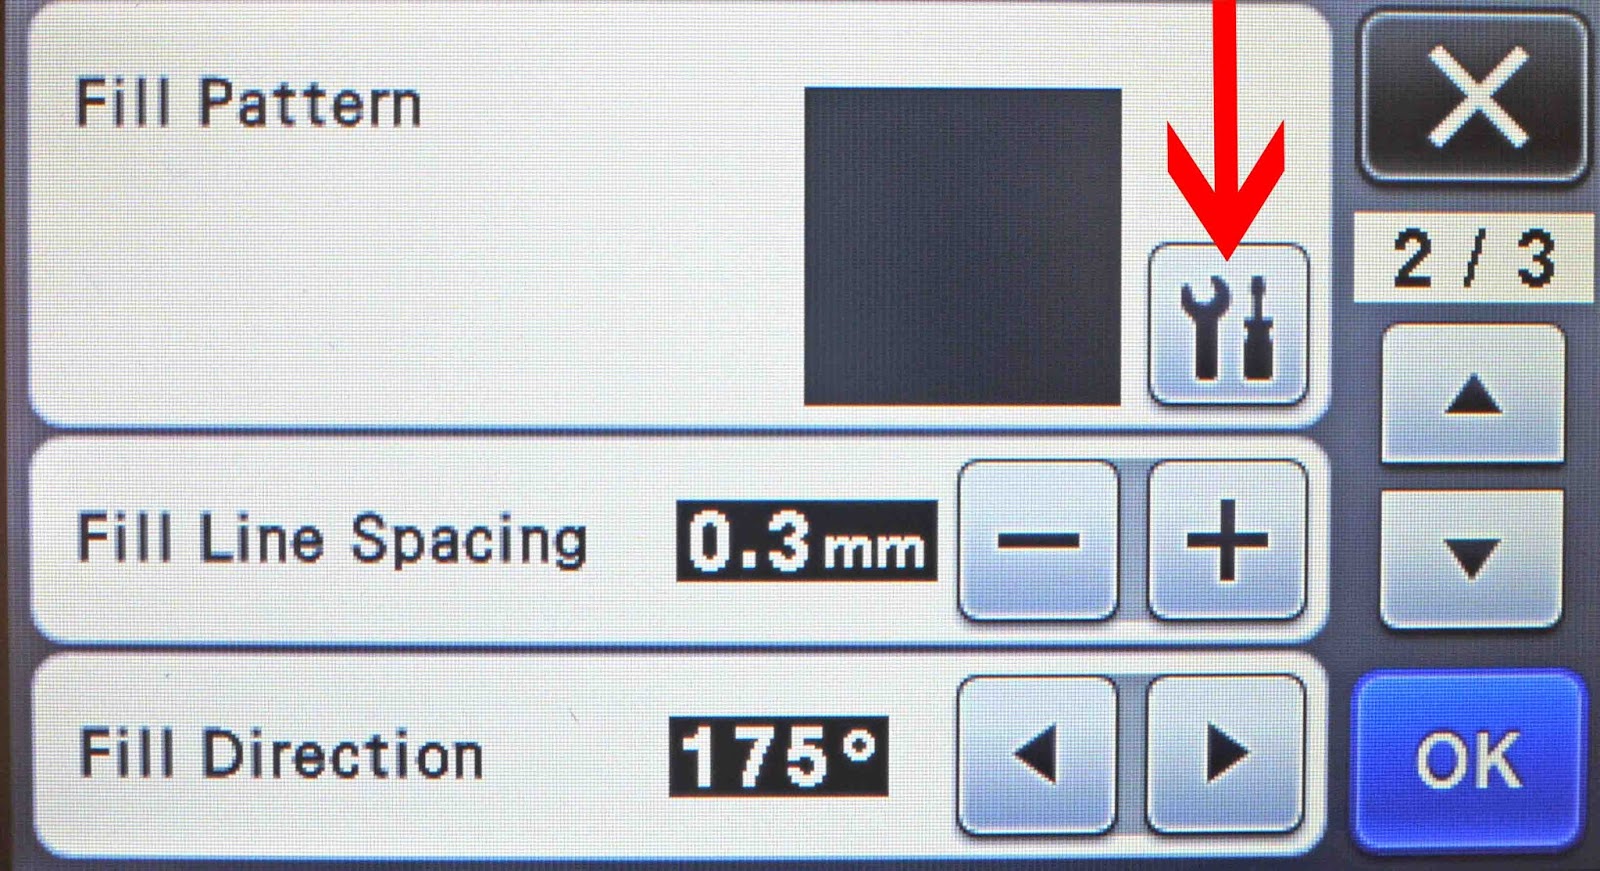
9- You now have the different fill pattern options.
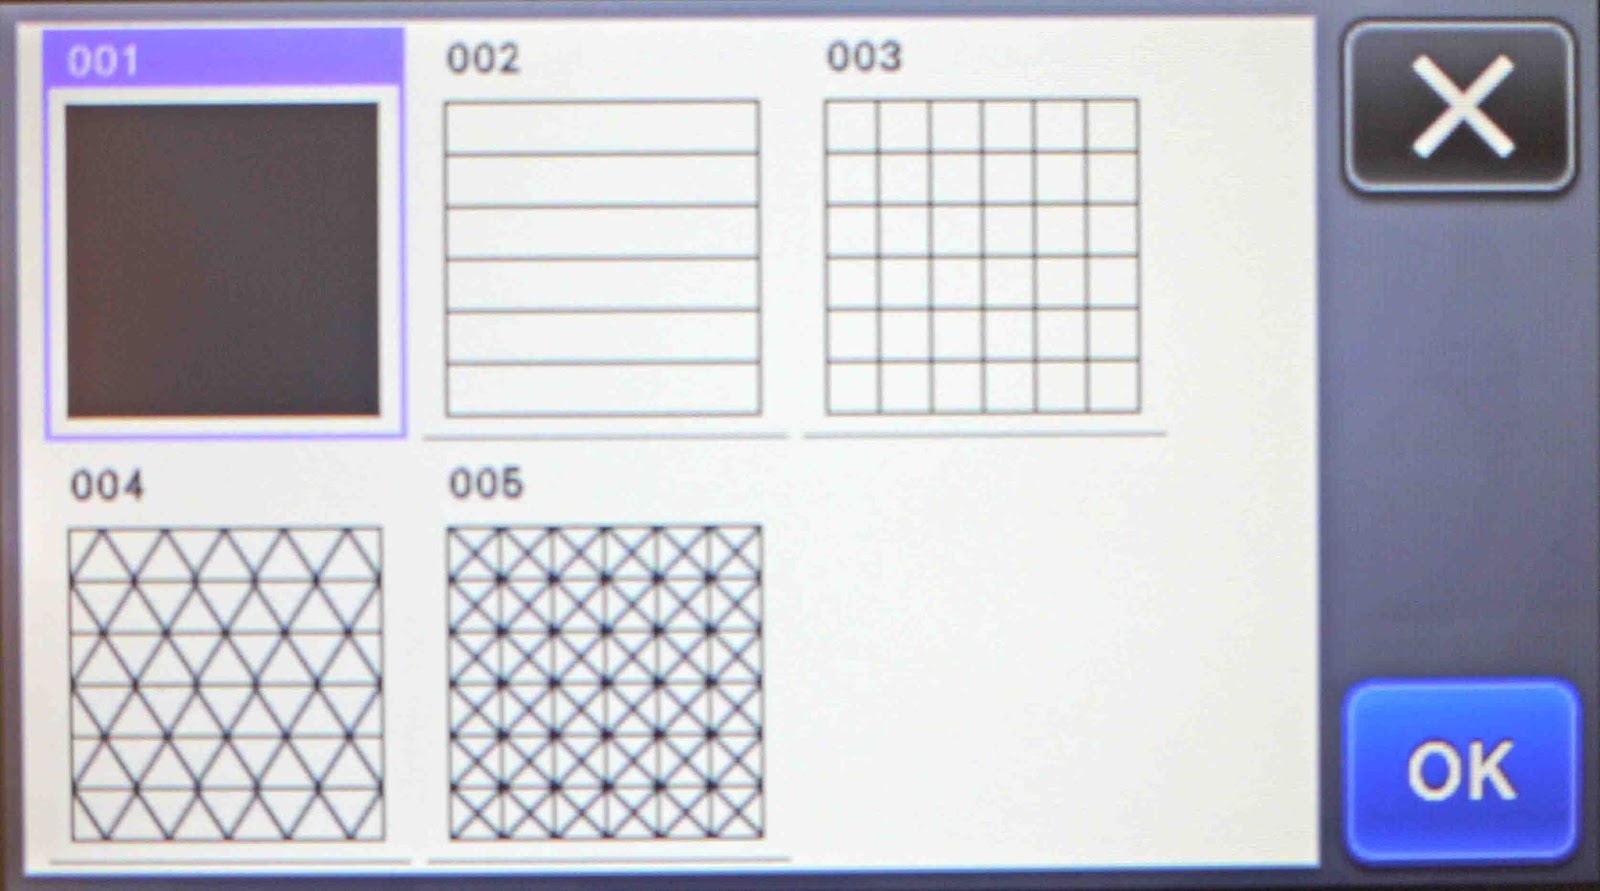
10- Select the fill pattern you would like(1) and click OK(2).
11- Click OK again.
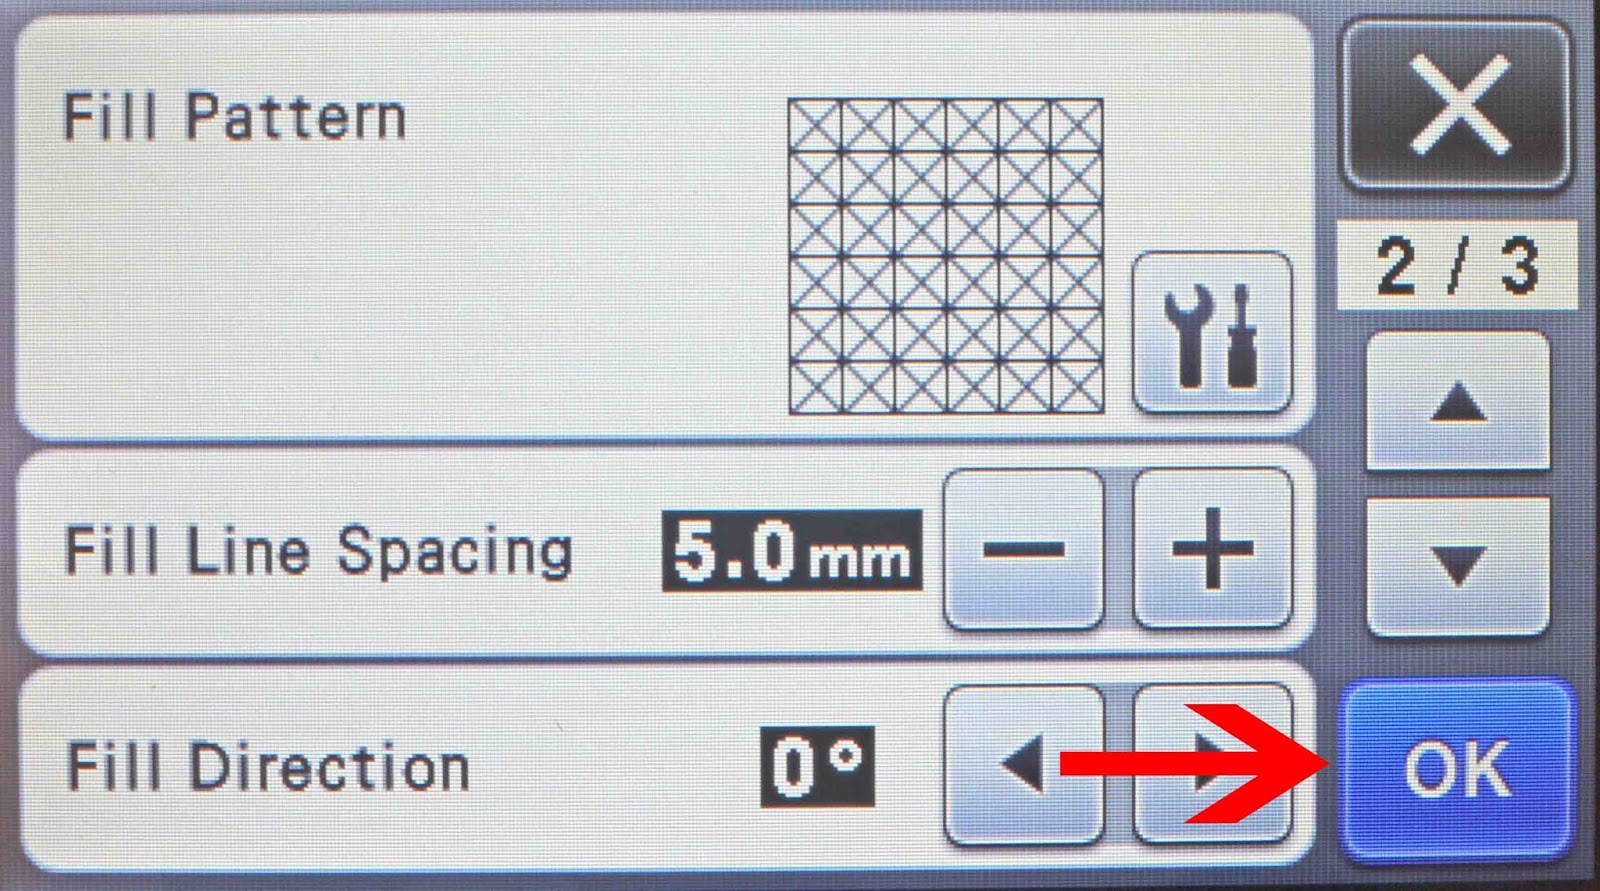
12- The new fill pattern will appear in your image. If you are happy with the fill pattern. follow the manufacture instructions on how to assemble the draw holder and markers, install them and then click on draw.
Related Tutorials
Scan N Cut Tutorials
How to create a custom fill pattern in brother scan and cut canvas workspace
Scan N Cut Tutorials
How to Fill a User Designed Image on Brother Scan n Cut
Scan N Cut Tutorials
How to Fill text in Brother scan and cut canvas workspace with the foil quill
Scan N Cut Tutorials
Brother Scan N Cut- Pattern selection tool
Scan N Cut Tutorials
How to make a image larger than your cutting mat in Brother Scan N Cut canvas workspace
Learn how to cut designs larger than your cutting mat in Brother Scan N Cut canvas.
Scan N Cut Tutorials