By Design Bundles
Scan N Cut Tutorials6 min
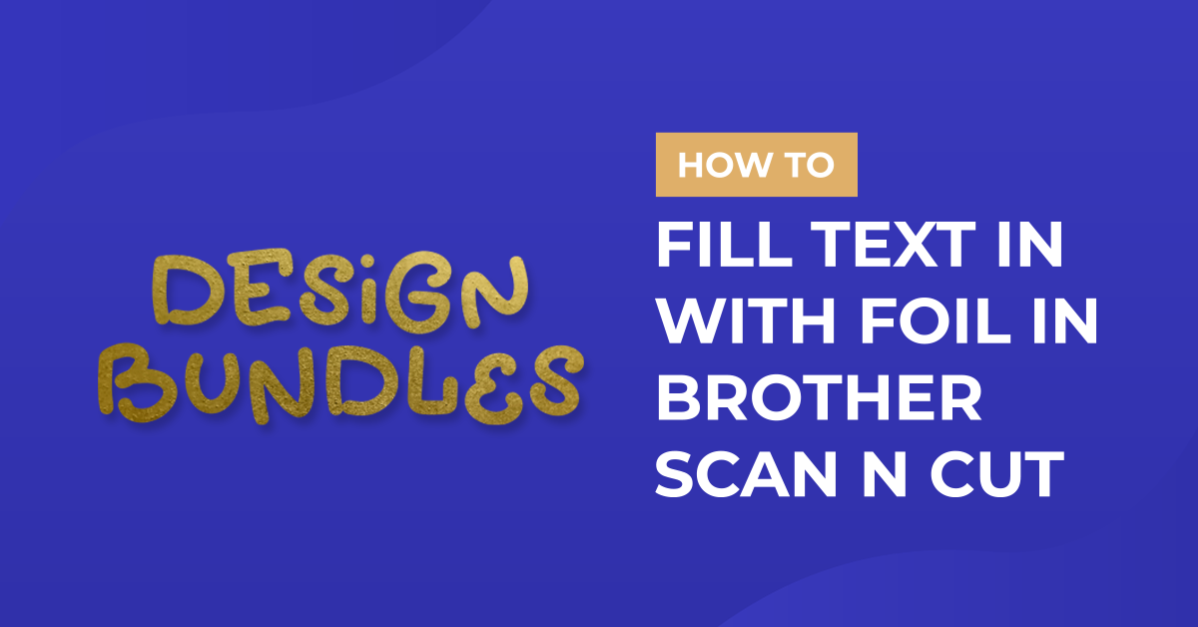
How to Fill text in Brother scan and cut canvas workspace with the foil quill
*CM900 used.
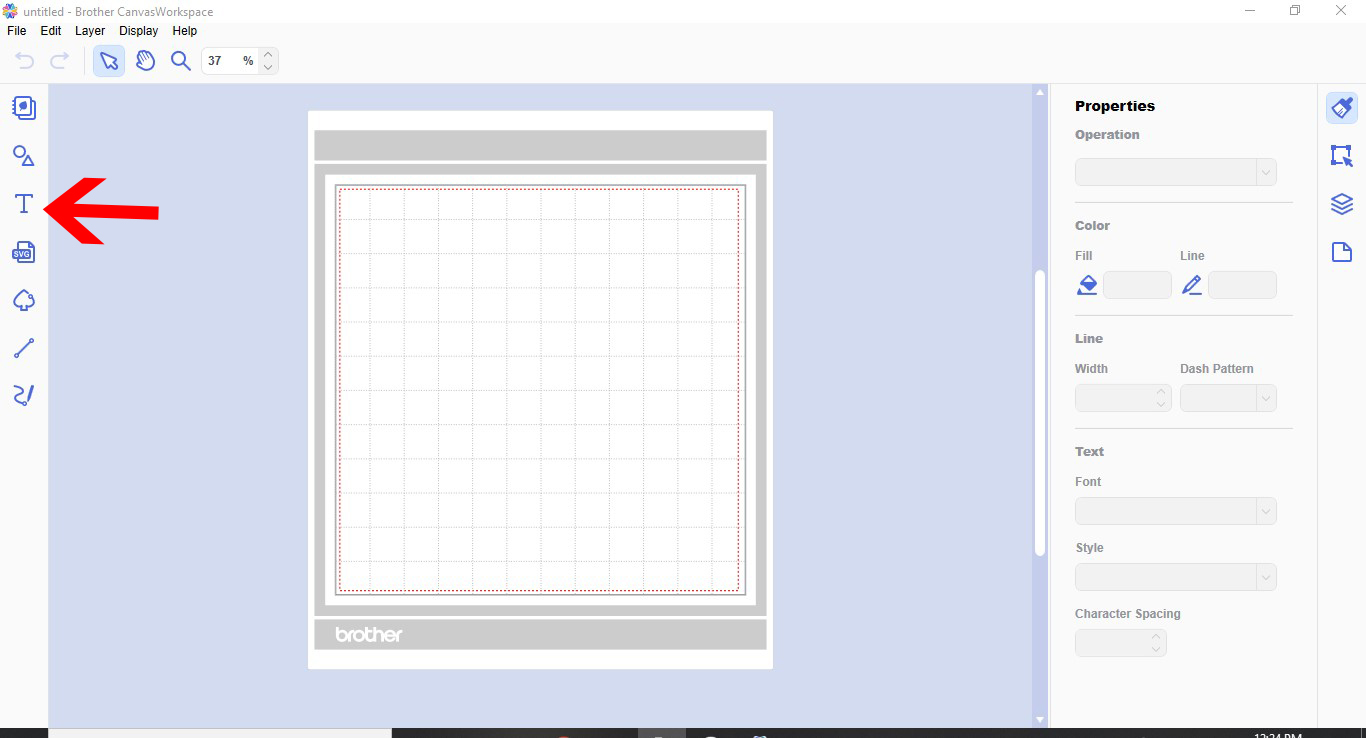
1- Open canvas workspace. Click on the text icon.
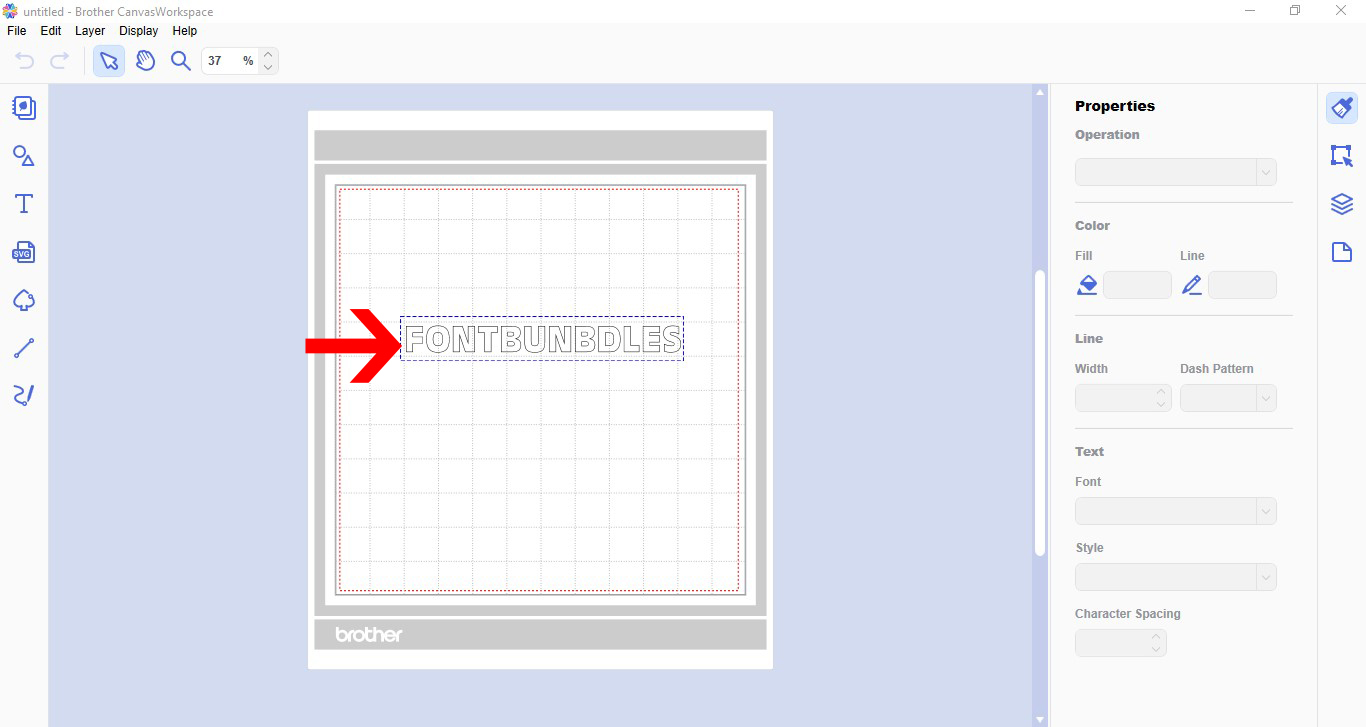
2- Type your text.
3- Change your font. I am using Garlic butter font from Font Bundles.
4- If any letters are overlapping, click on the weld tool. Once all welded, click on offset.
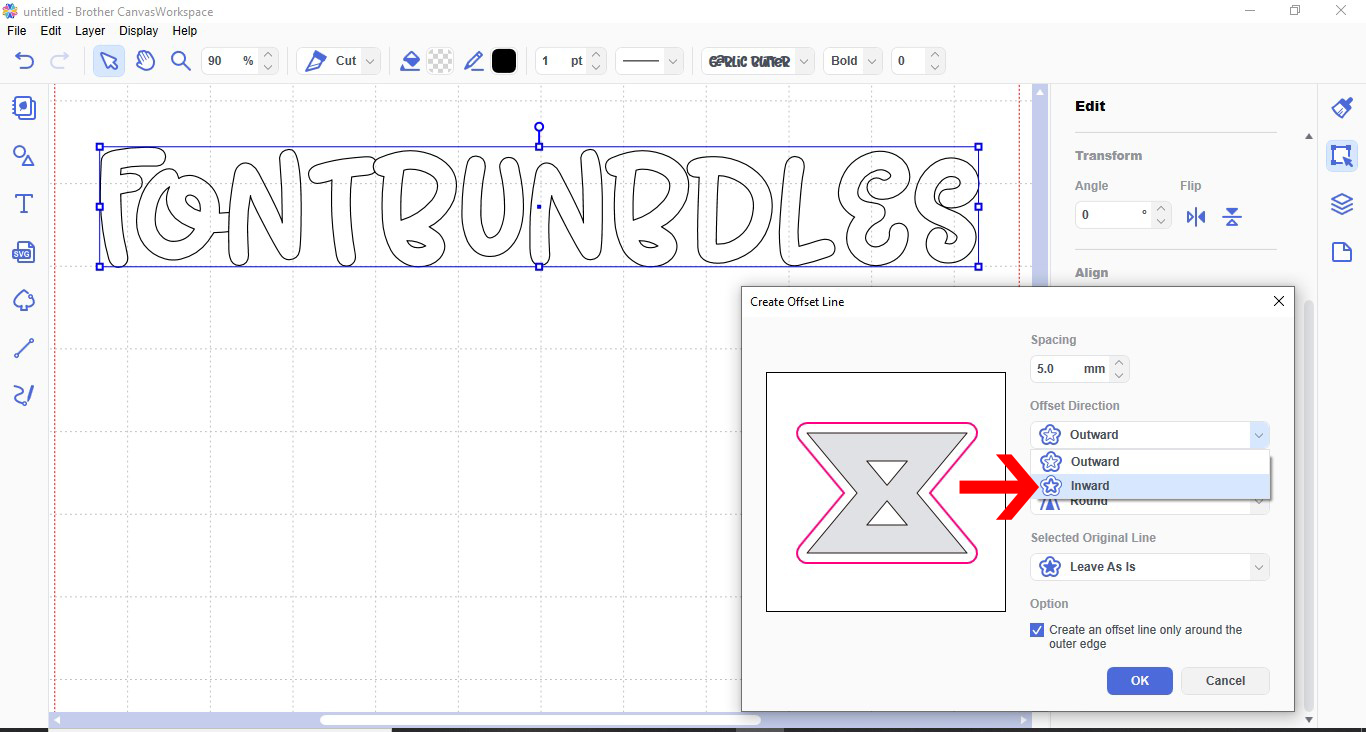
5- In the offset window, change the offset from external to internal.
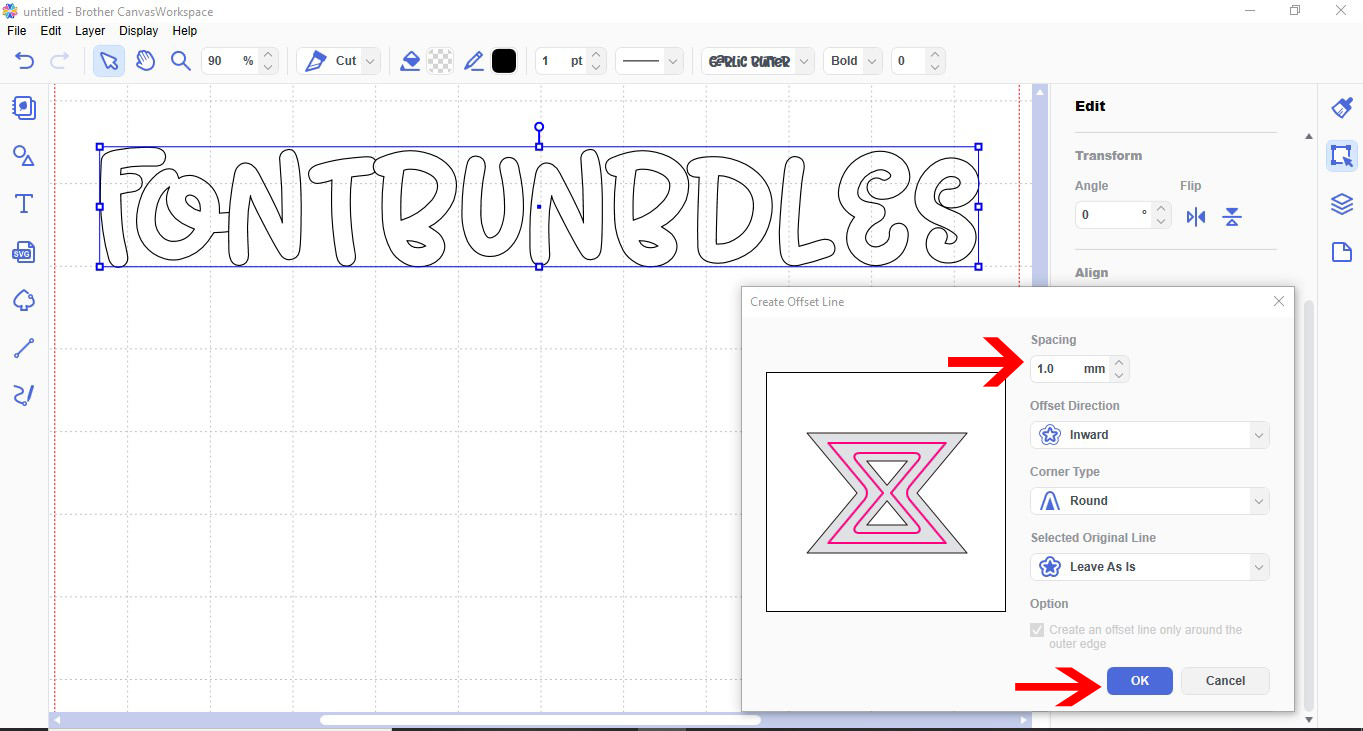
6- Change the offset to the smallest possible (1mm). Click OK.
7- You will see your internal offset. It will look very close to the outer edge of the text.
8- With the offset still highlighted, click on the offset icon again.
9- Repeat the same settings for another offset. Click OK.
10- Repeat the above internal offset until your text is filled.
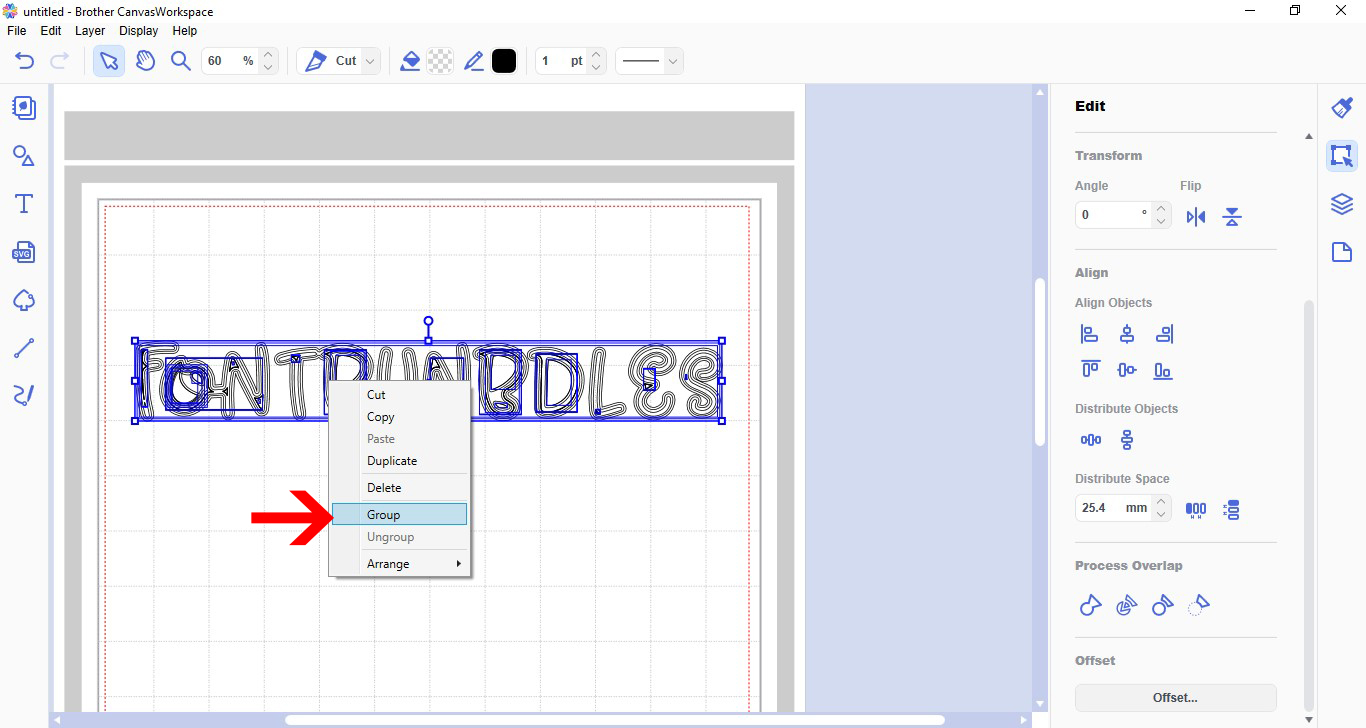
11- Select all the text and offsets. Right click and group.
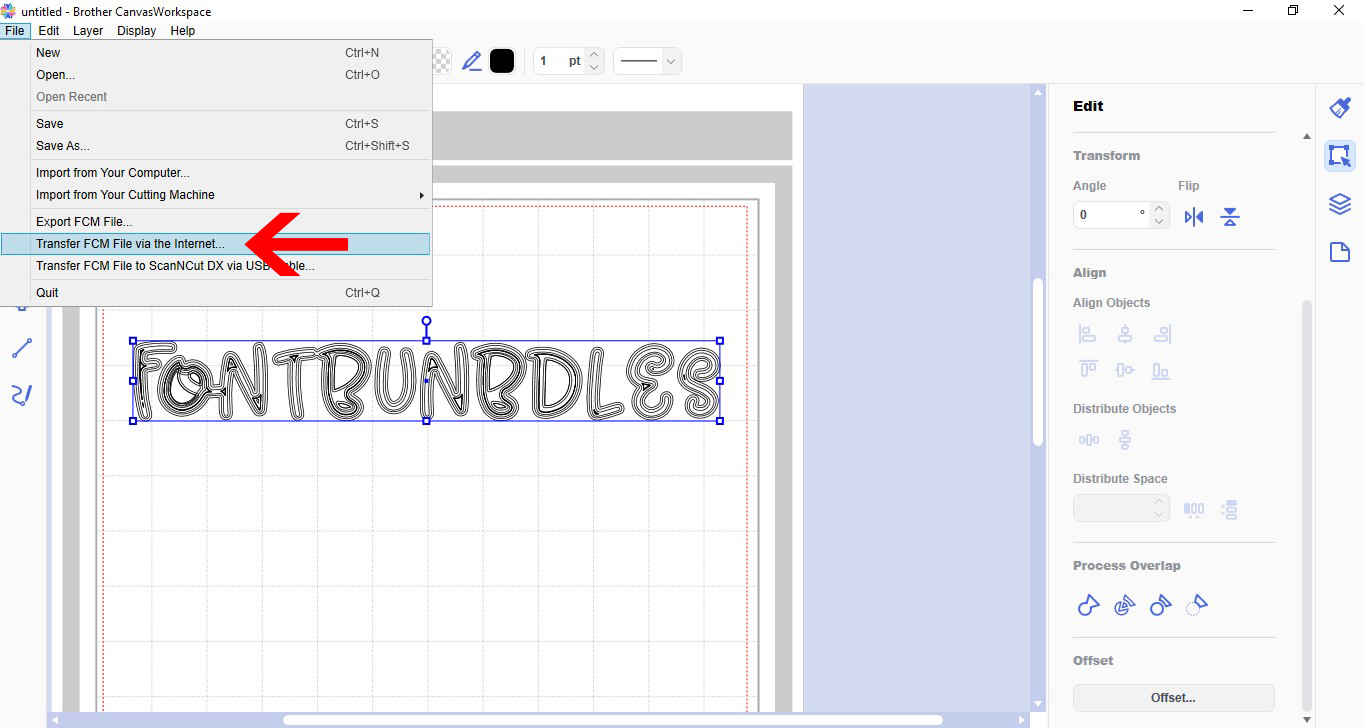
12- Once your text is filled you need to send it to your Brother scan and cut machine. Go to file and click transfer FCM file to the internet.
If you do not have a wifi model, save your design to a USB and transfer that way.
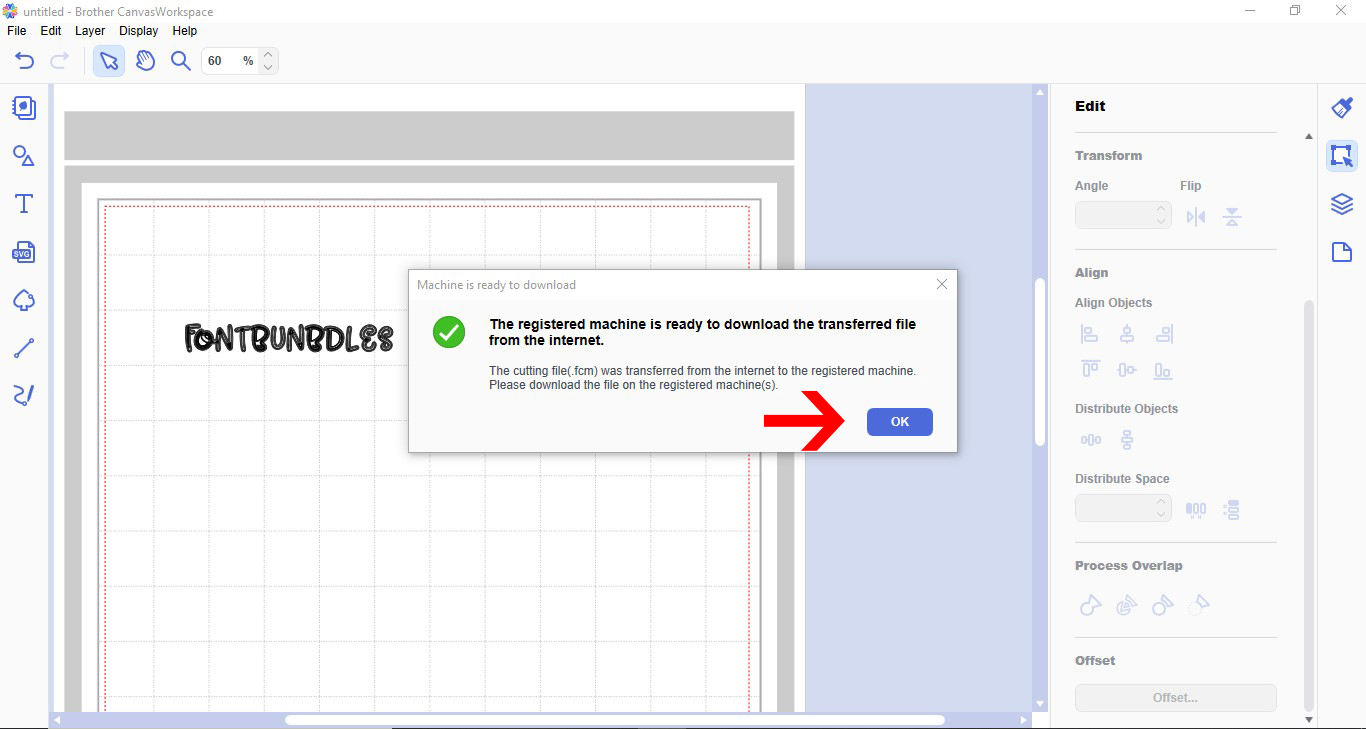
13- Once transferred A pop up window will let you know. Click OK
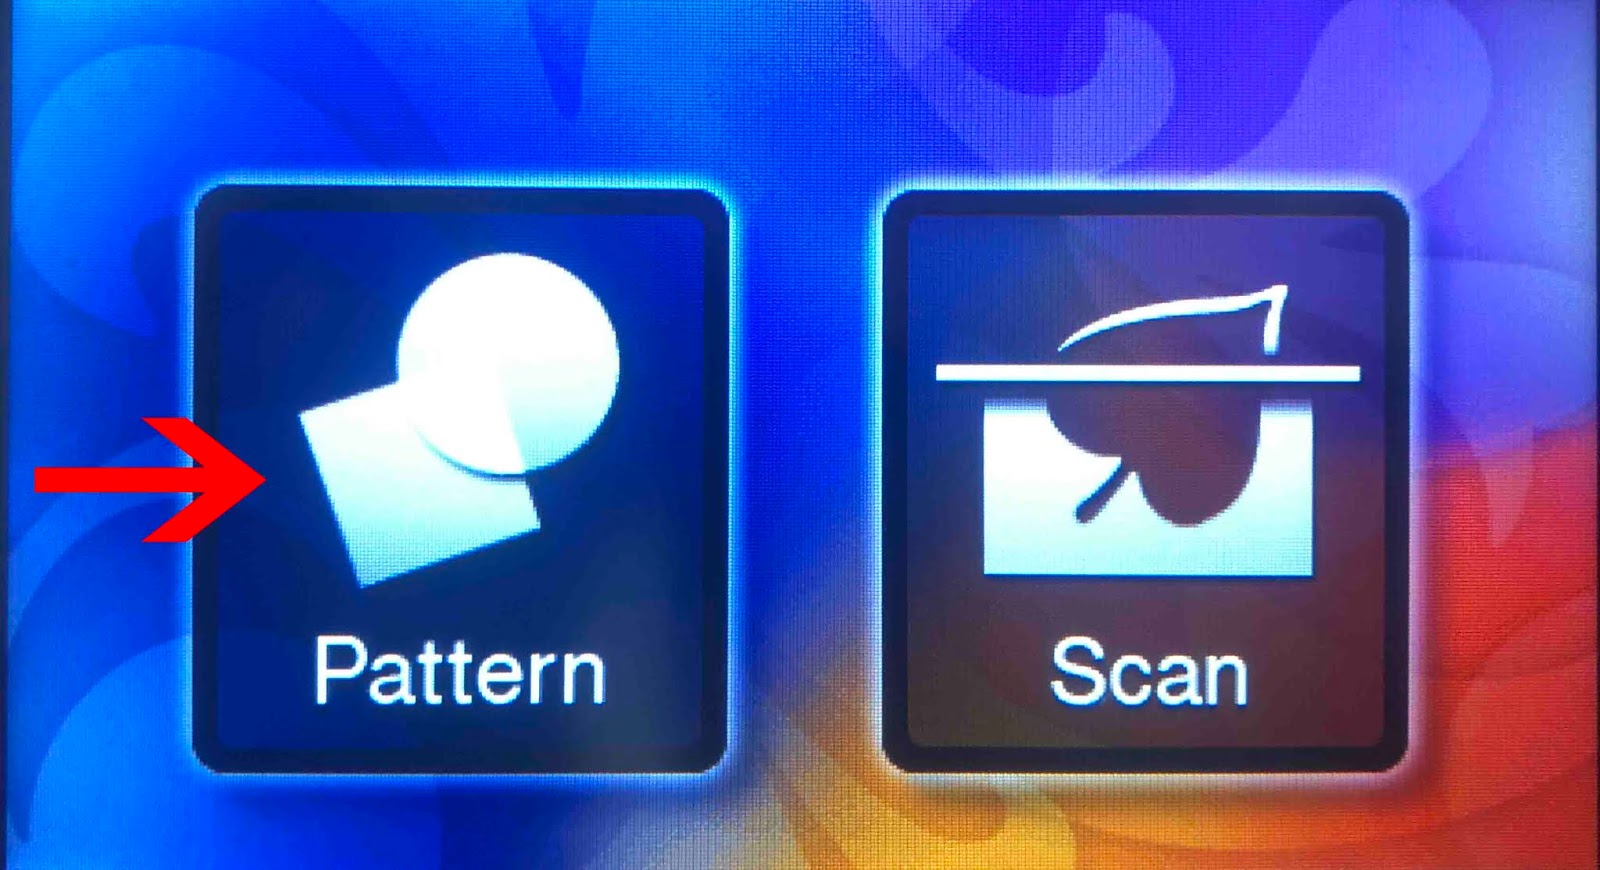
14- On your scan and cut machine, tap the pattern option.
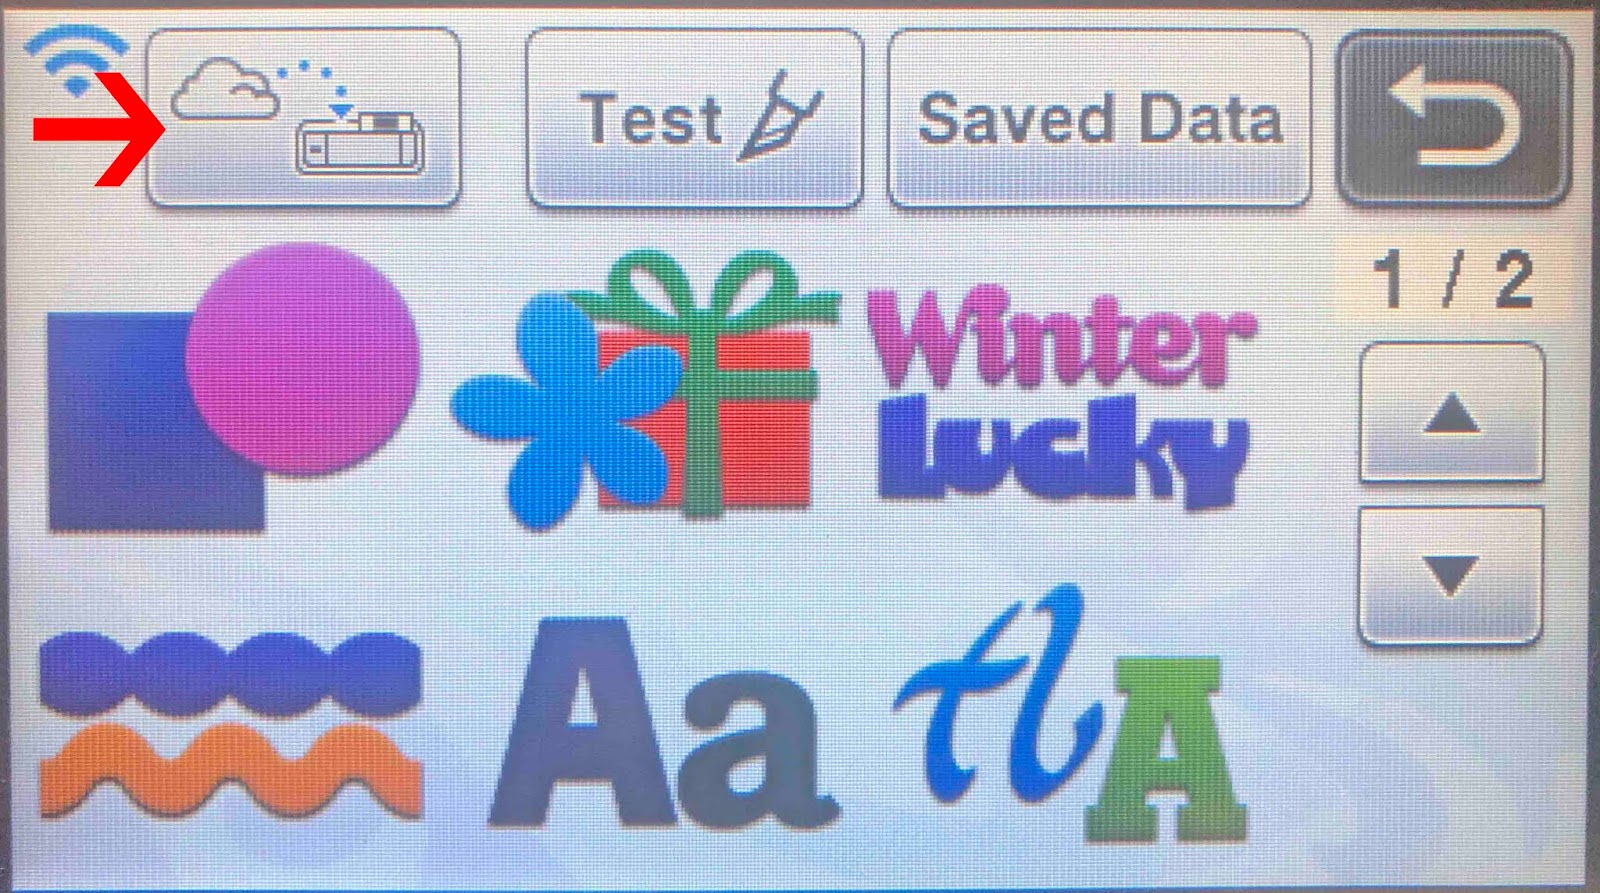
15- Click on the import icon.
16- Your design will load. Scan your cut mat with the media and foil attached.
17- Your foil will appear on the screen. Click OK.
18- Move your design onto the foiled area. Click OK.
19- Click on draw.
20- With the draw icon selected, click on the setting tool.
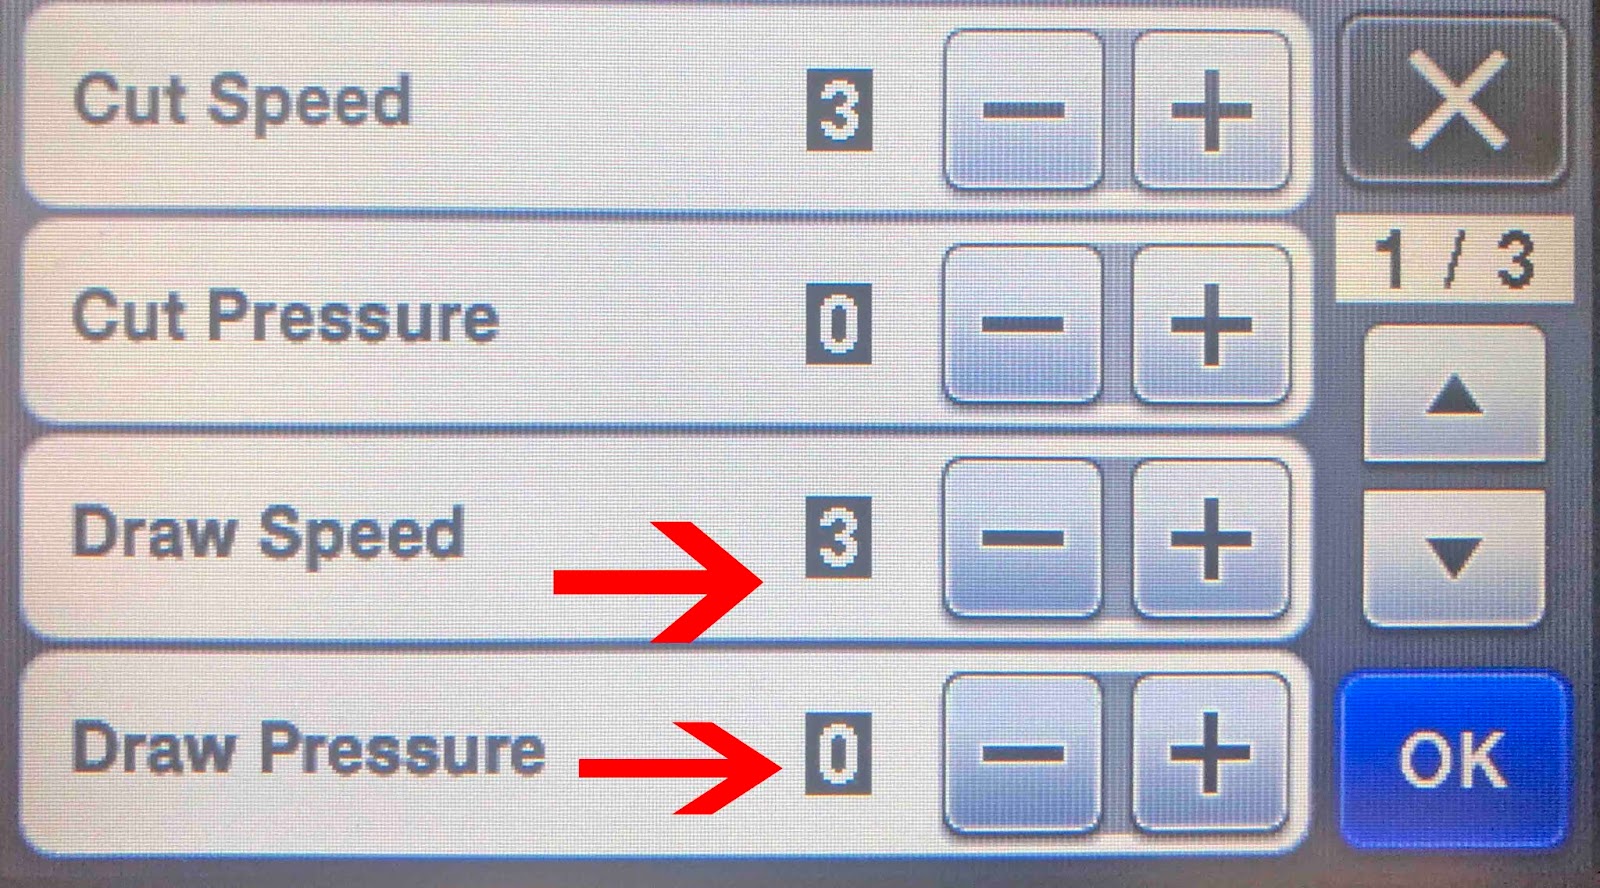
21- Make sure your draw settings are set to match your media. I am using card so i have set the speed to 3 and the pressure to 0
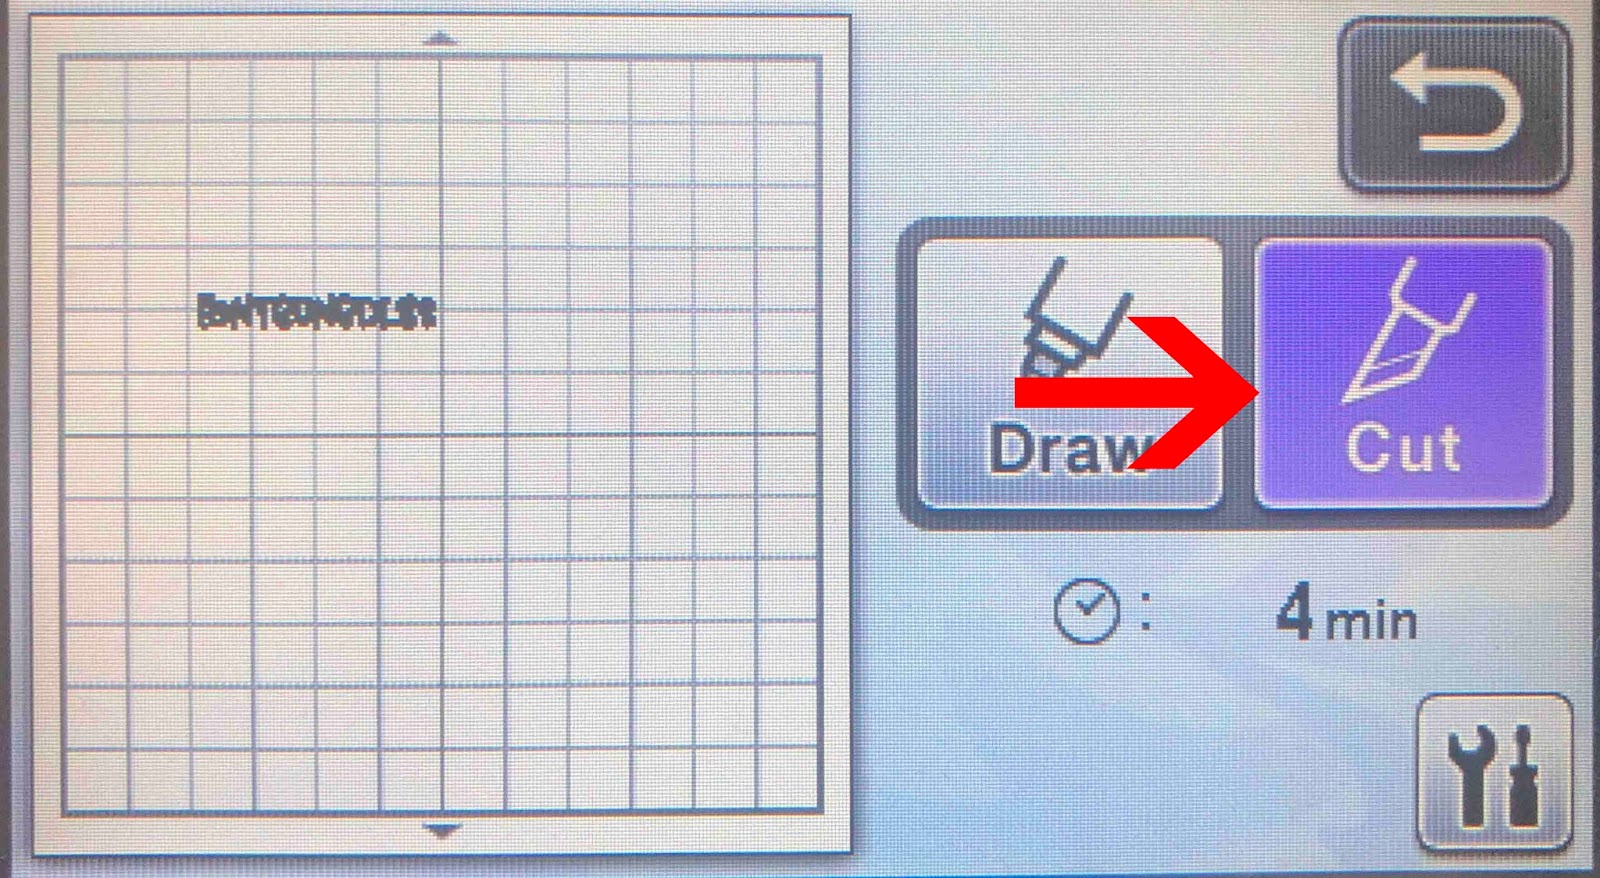
22- When you click on the draw icon to start the foil quill, if the design is small you may get this warning. Click ok.
23- You can get around this by clicking the cut icon instead. Make sure the cut settings are set the same as your draw settings. Start your machine.
24- Your machine will start foiling.
25- Your text is now filled and foiled.
1- Open canvas workspace. Click on the text icon.
2- Type your text.
3- Change your font. I am using Garlic butter font from Font Bundles.
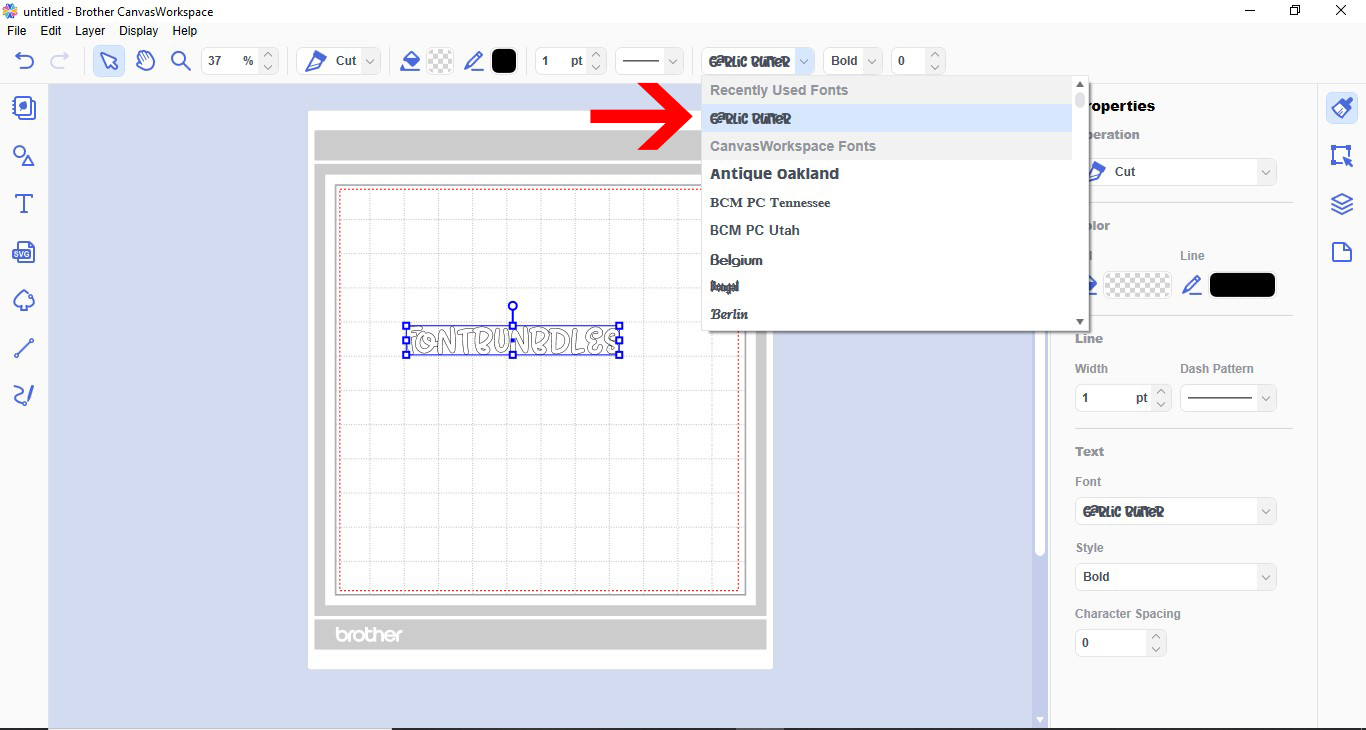
4- If any letters are overlapping, click on the weld tool. Once all welded, click on offset.
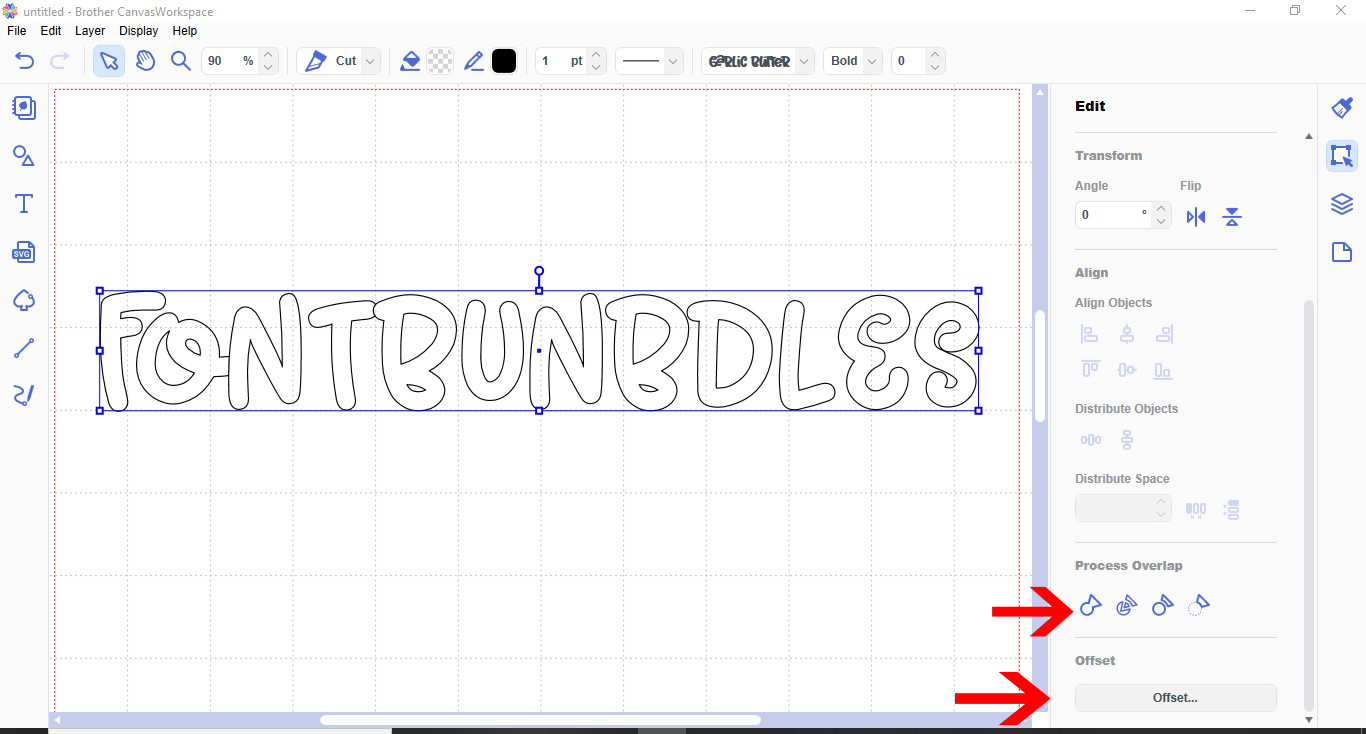
5- In the offset window, change the offset from external to internal.
6- Change the offset to the smallest possible (1mm). Click OK.
7- You will see your internal offset. It will look very close to the outer edge of the text.
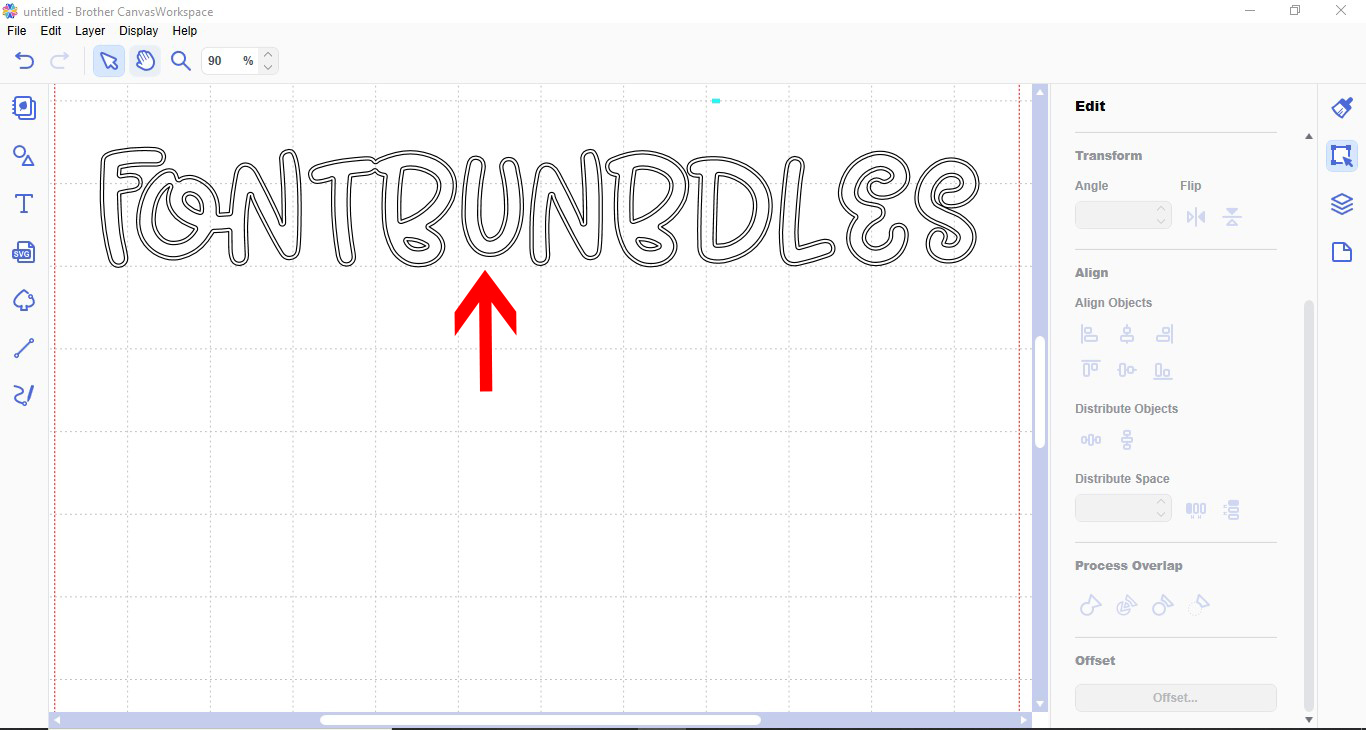
8- With the offset still highlighted, click on the offset icon again.

9- Repeat the same settings for another offset. Click OK.
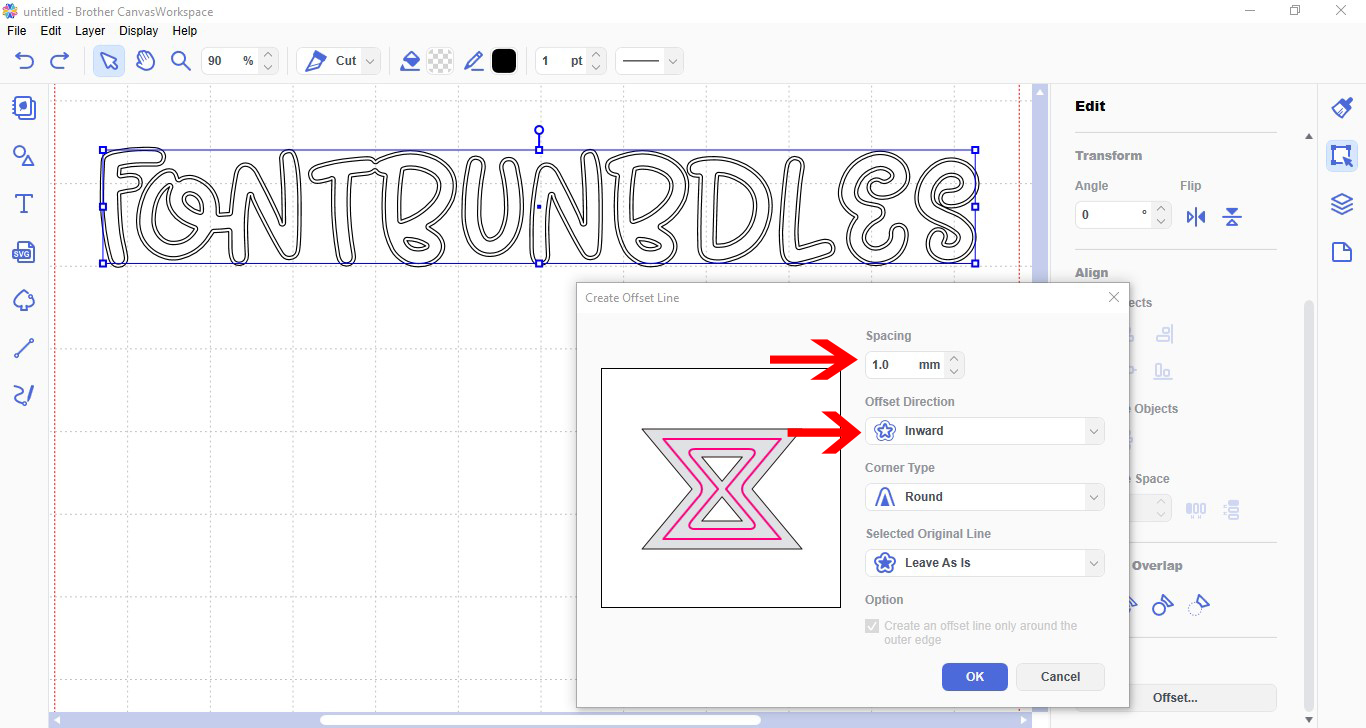
10- Repeat the above internal offset until your text is filled.
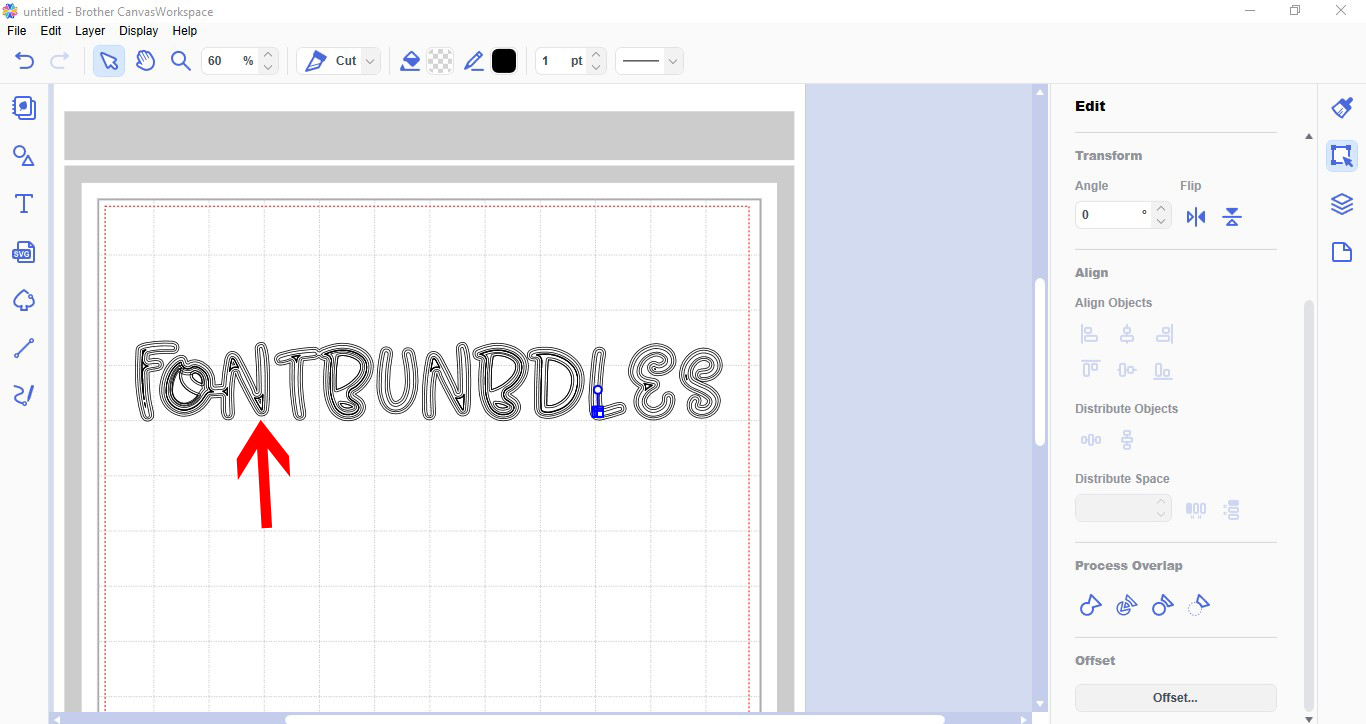
11- Select all the text and offsets. Right click and group.
12- Once your text is filled you need to send it to your Brother scan and cut machine. Go to file and click transfer FCM file to the internet.
If you do not have a wifi model, save your design to a USB and transfer that way.
13- Once transferred A pop up window will let you know. Click OK
14- On your scan and cut machine, tap the pattern option.
15- Click on the import icon.
16- Your design will load. Scan your cut mat with the media and foil attached.
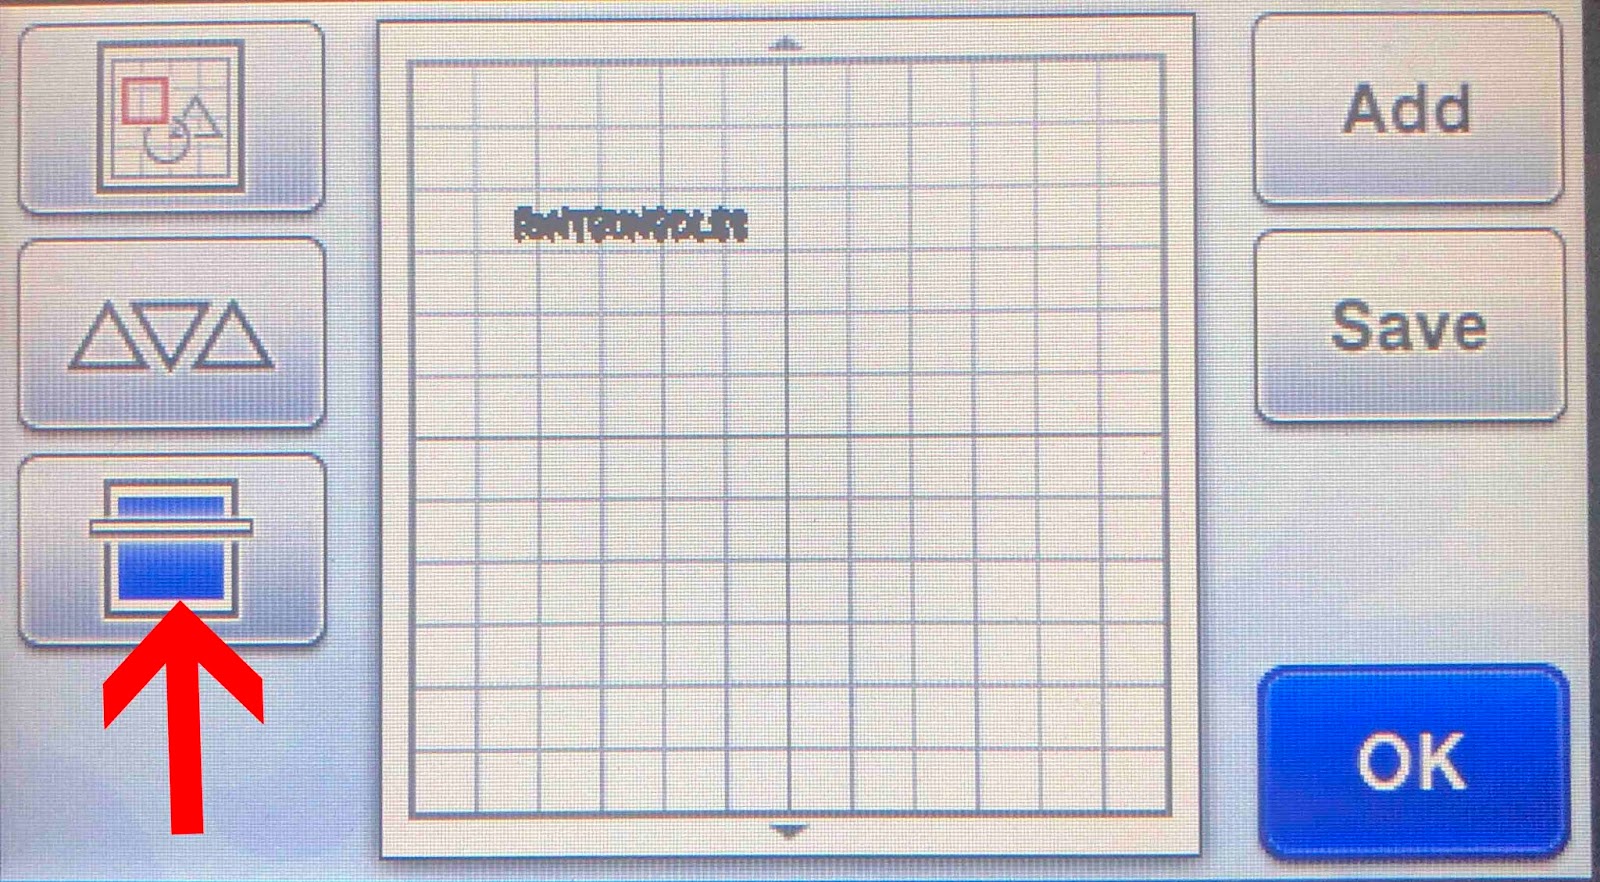
17- Your foil will appear on the screen. Click OK.

18- Move your design onto the foiled area. Click OK.

19- Click on draw.
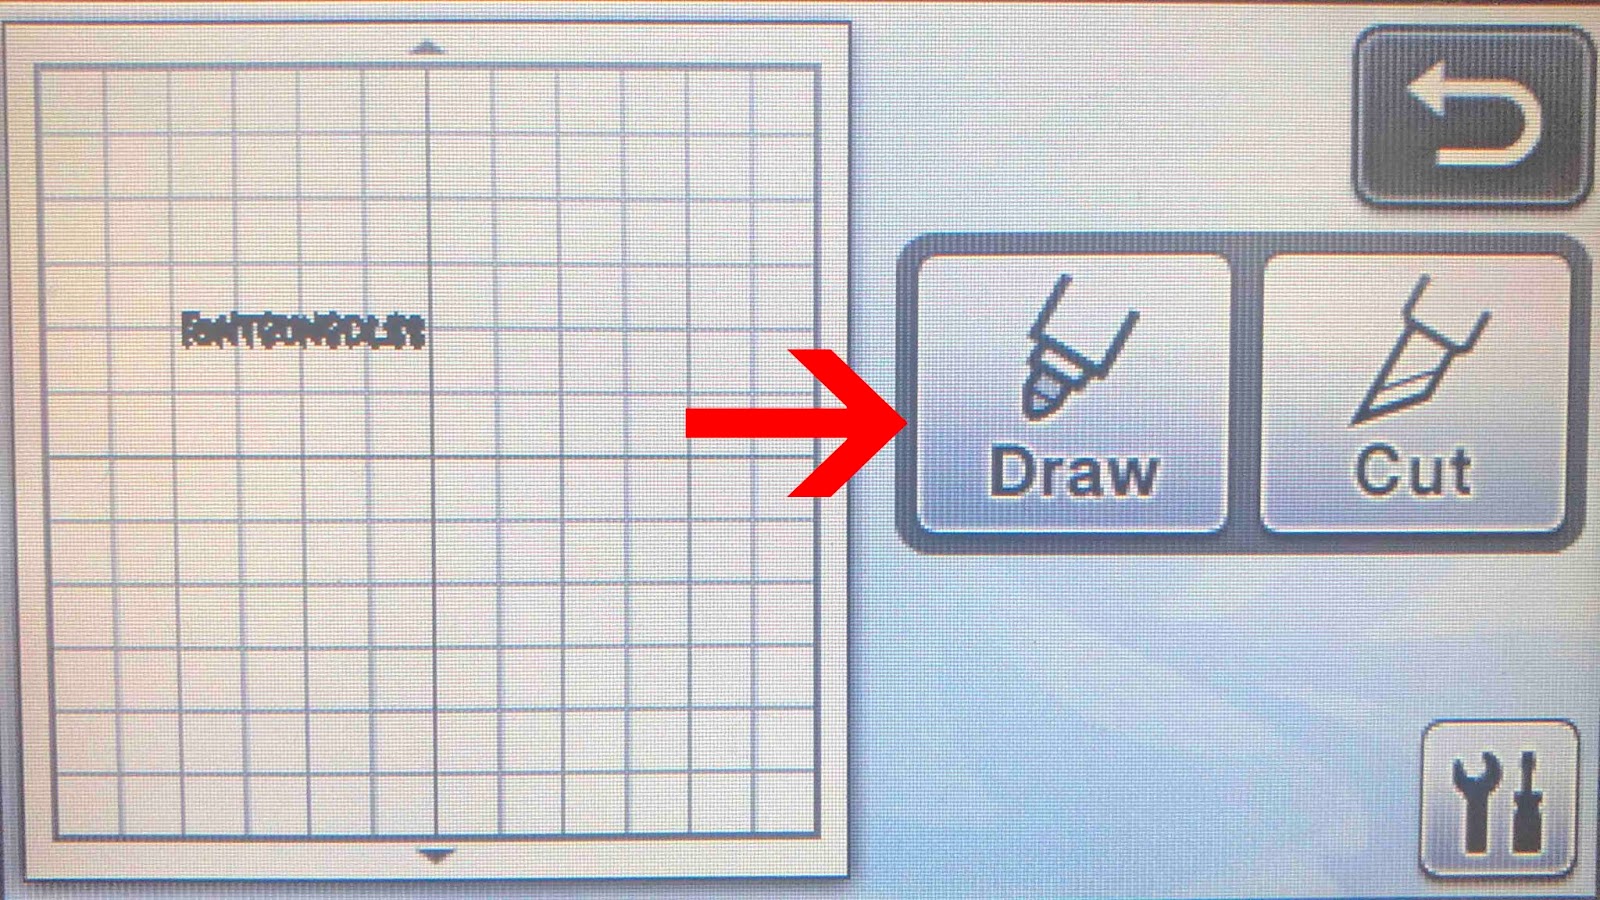
20- With the draw icon selected, click on the setting tool.

21- Make sure your draw settings are set to match your media. I am using card so i have set the speed to 3 and the pressure to 0
22- When you click on the draw icon to start the foil quill, if the design is small you may get this warning. Click ok.

23- You can get around this by clicking the cut icon instead. Make sure the cut settings are set the same as your draw settings. Start your machine.
24- Your machine will start foiling.

25- Your text is now filled and foiled.

Related Tutorials
Scan N Cut Tutorials
How to Create an Offset Using the Foil Quill in Brother Scan and Cut Canvas Workspace
Scan N Cut Tutorials
How to foil basic text with Brother scan and cut canvas workspace
Scan N Cut Tutorials
Create a decorative border using the foil quill in Brother scan and cut canvas workspace
Scan N Cut Tutorials
How to create curved text in brother scan and cut canvas workspace
Learn how to curve text in Brother Scan N Cut
Scan N Cut Tutorials