By Design Bundles
Scan N Cut Tutorials5 min
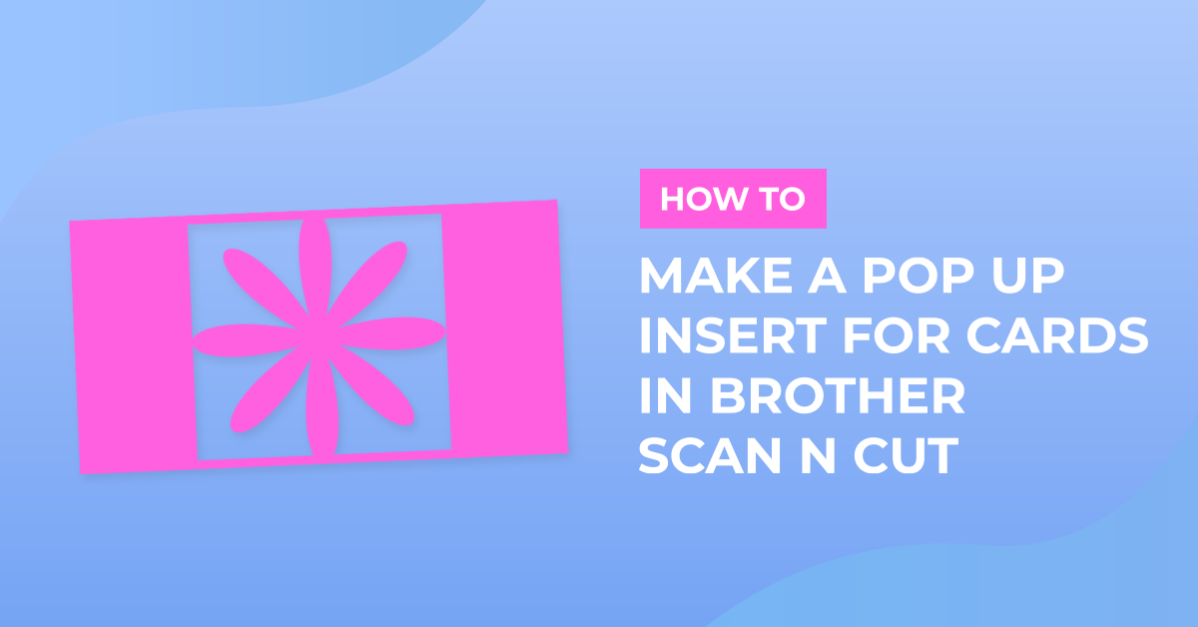
How to make a pop up insert for a card in brother scan and cut canvas workspace
1- Open scan and cut canvas. Click on the shape icon.
2- Pick the shape you would like to use for your pop up. You can use a shape or a welded word.
3- Next select a square.
4- Place the square over the shape. You need the left and right side to slightly overlap the rectangle. this will be the points where the pop up is attached to the rest of the card.
5- Next adjust the square to make the top and bottom of it cover your shape and have a snall amount of extra space above and below.
6- Select both and click on the centre align tool.
7- Next click on the middle align tool.
8- With the square selected, right click and go to arrange - send to back.
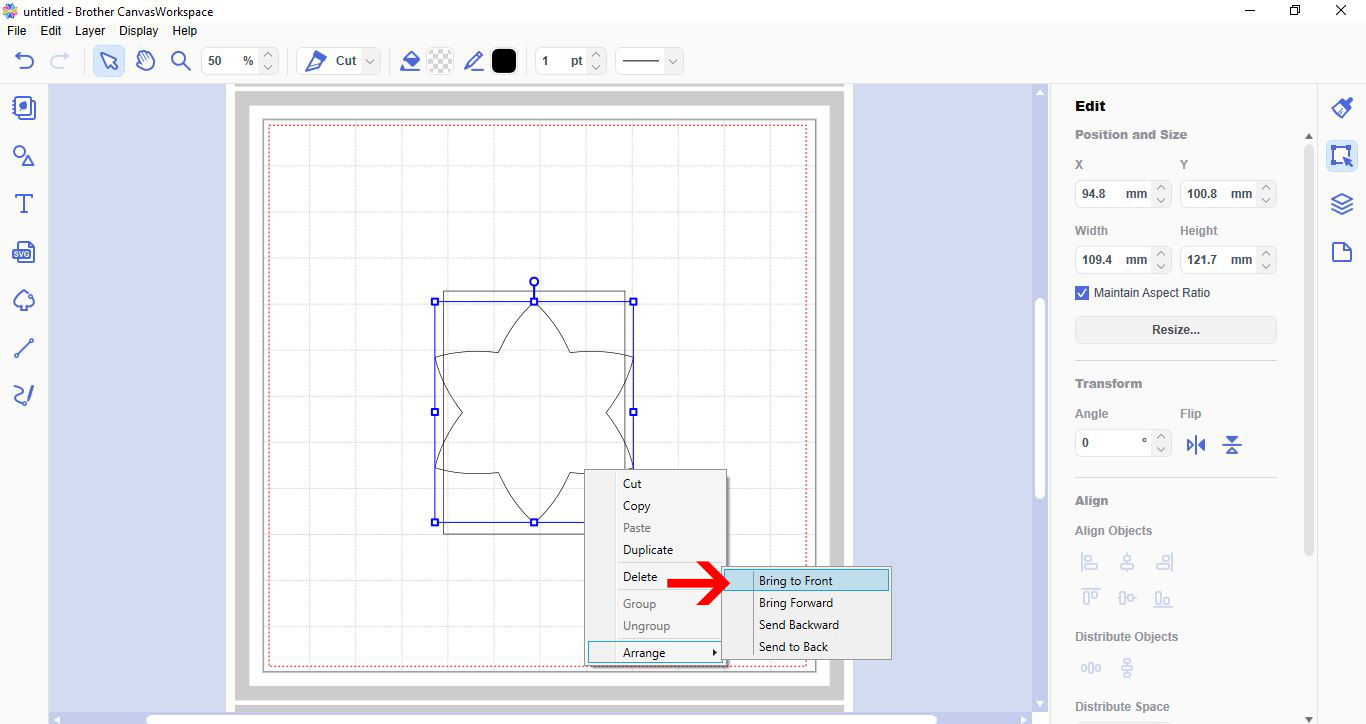
9- Select the shape and right click. Next select arrange - bring to front.
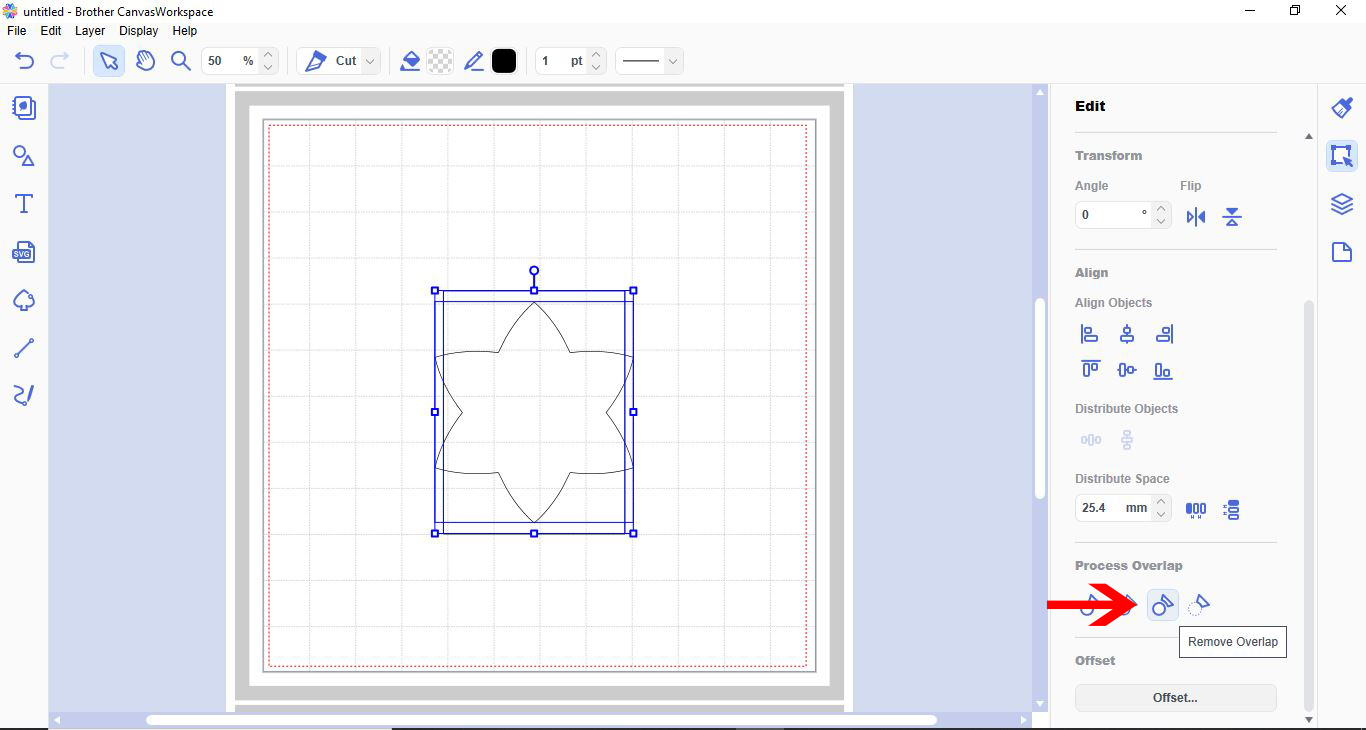
10- With both the square and shape selected, go to process overlap and select - remove overlap.
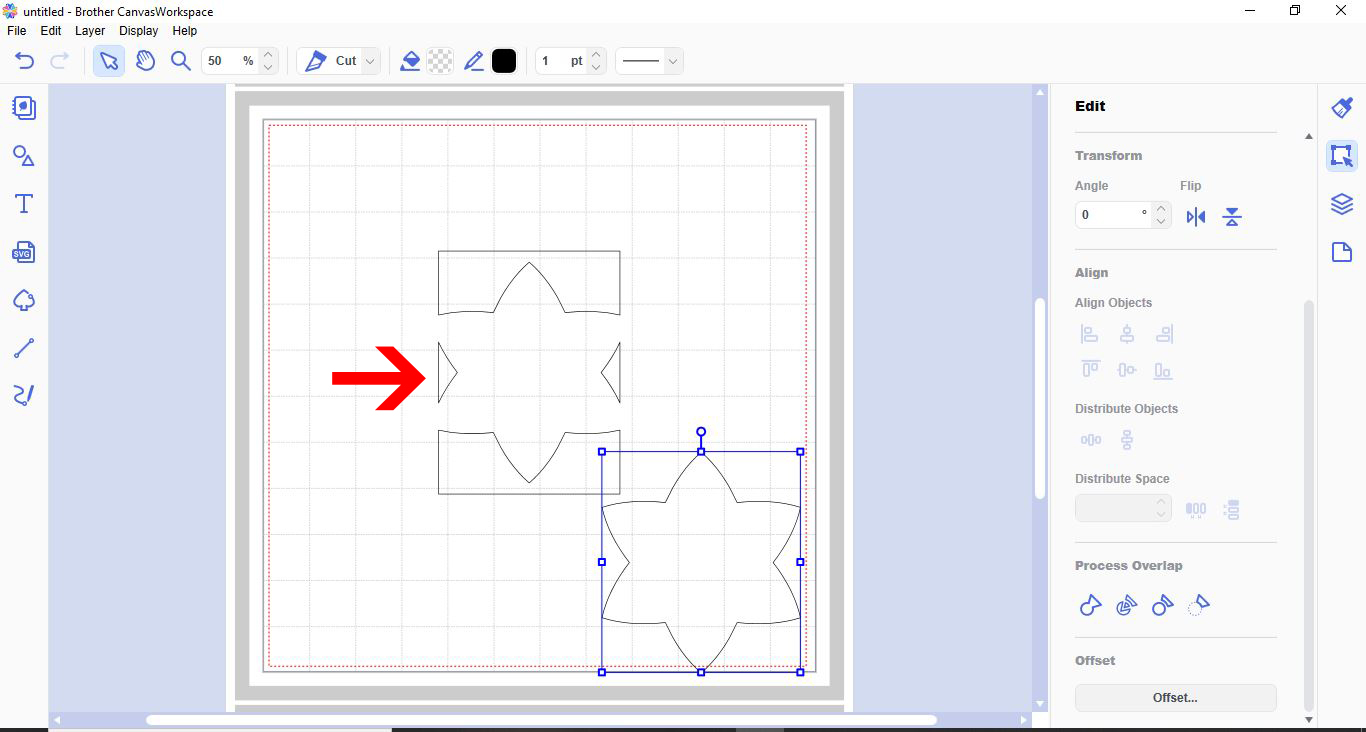
11- Remove the shape from the cut out.
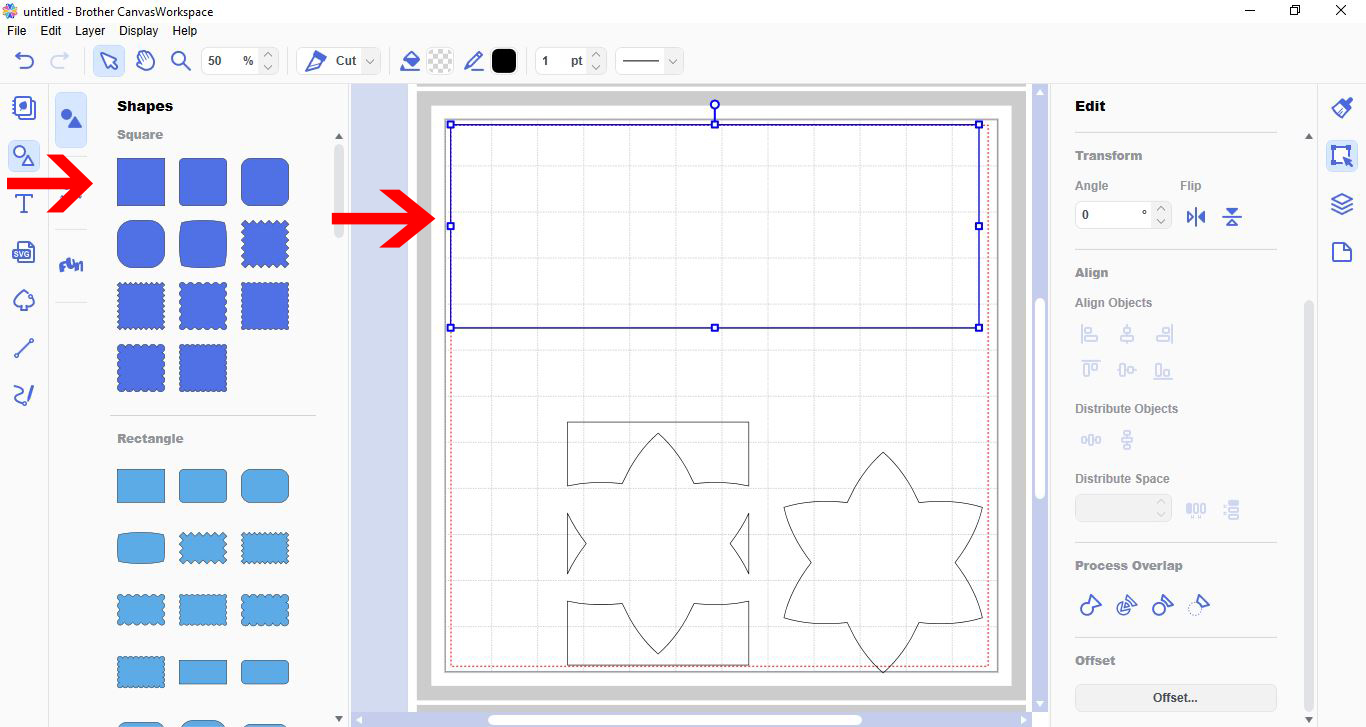
12- Click on the shape tool and create a large rectangle the size of the inside of the card.
13- Place the cut out in the middle of the rectangle. Using the align tool, align the cutout centre and middle.
14- Reduce the size of the cut out at the top and the bottom to create a slight edge around the cut out.
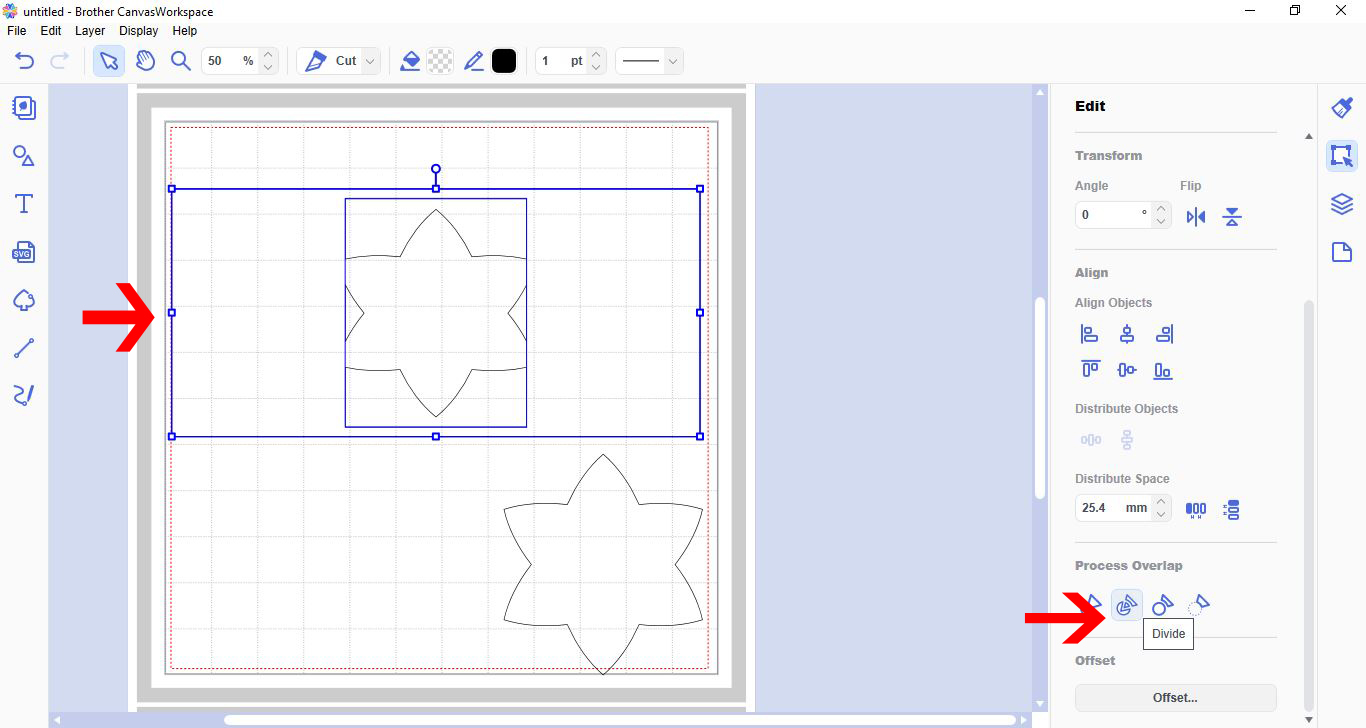
15- Select both the cutout and the rectangle. Go to process overlap and select divide.
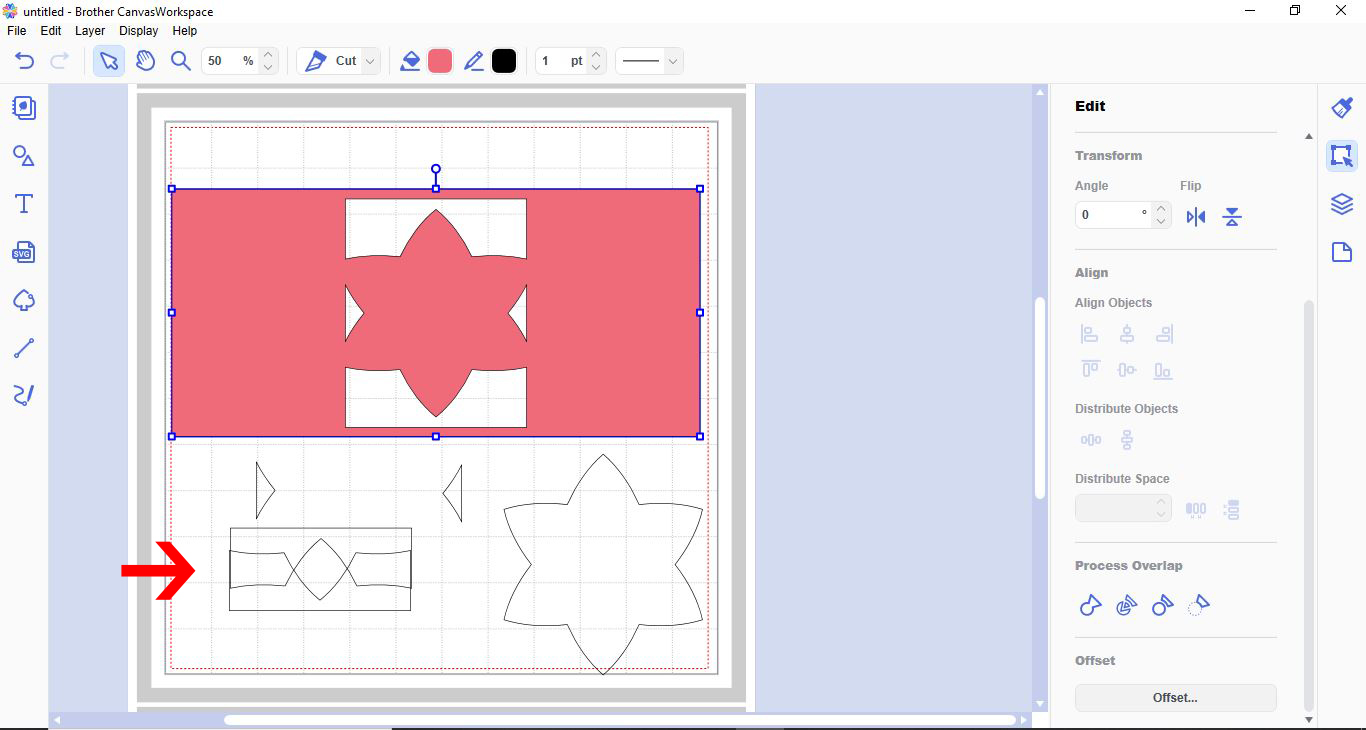
16- Your insert pop up is now created. Once cut fold in half so when the card opens the shape will pop out.
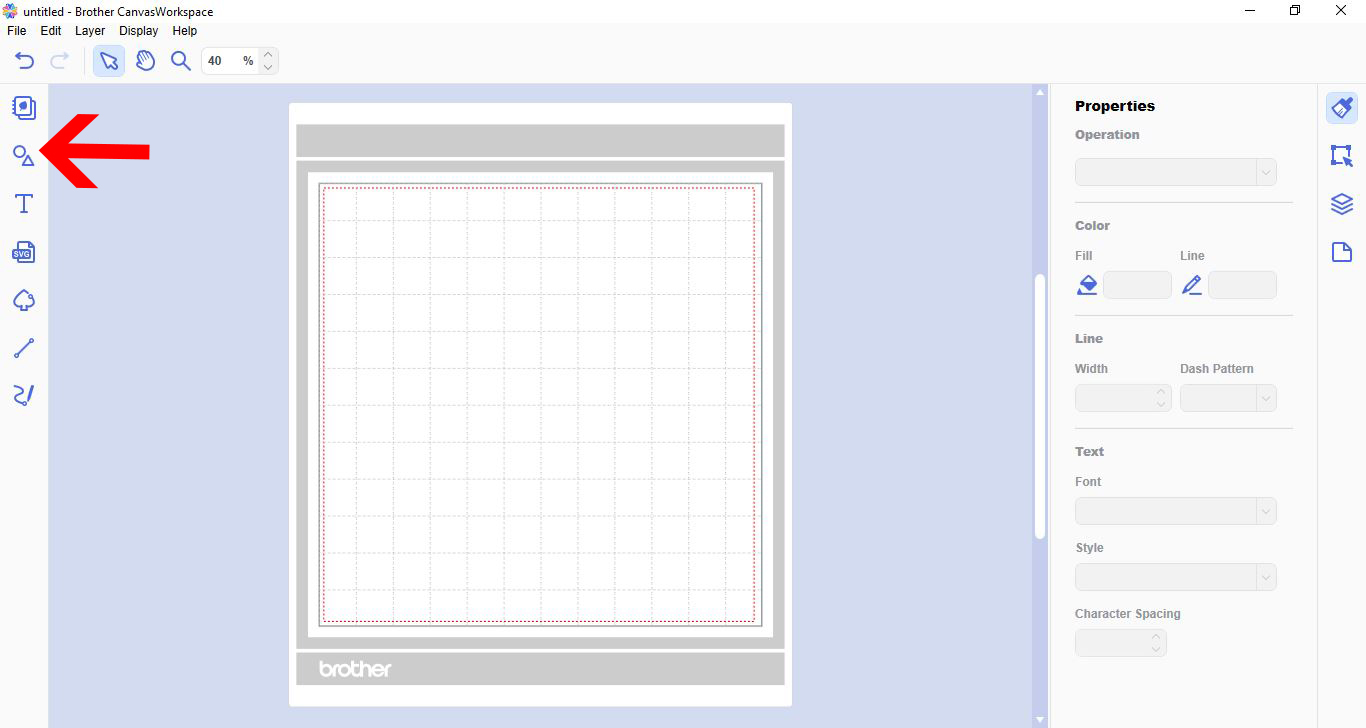
2- Pick the shape you would like to use for your pop up. You can use a shape or a welded word.
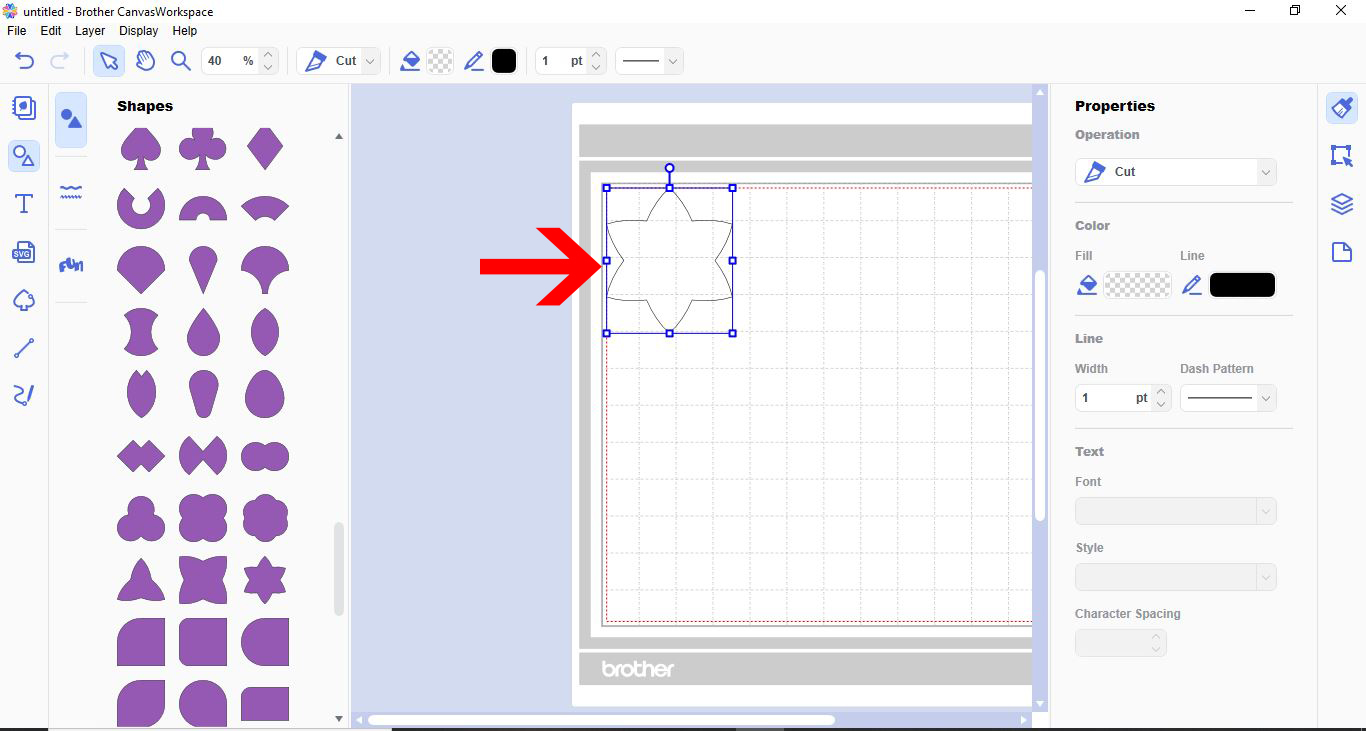
3- Next select a square.
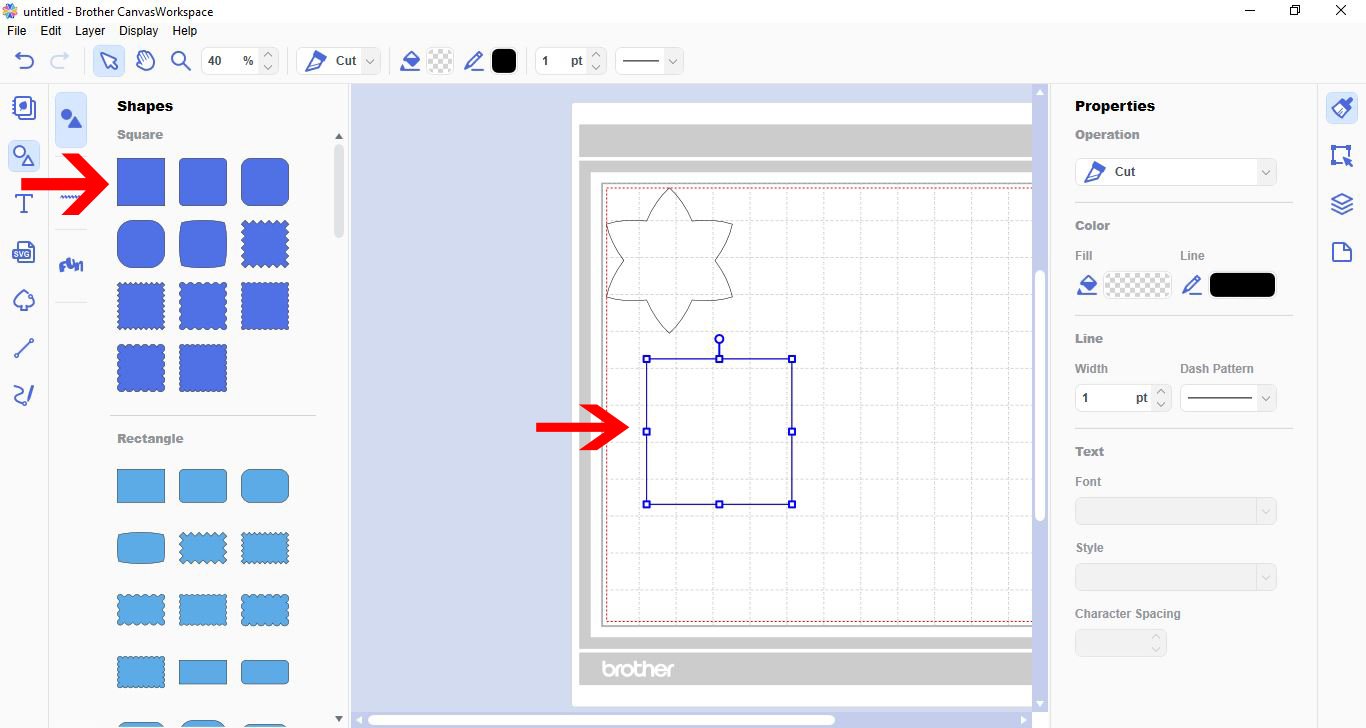
4- Place the square over the shape. You need the left and right side to slightly overlap the rectangle. this will be the points where the pop up is attached to the rest of the card.
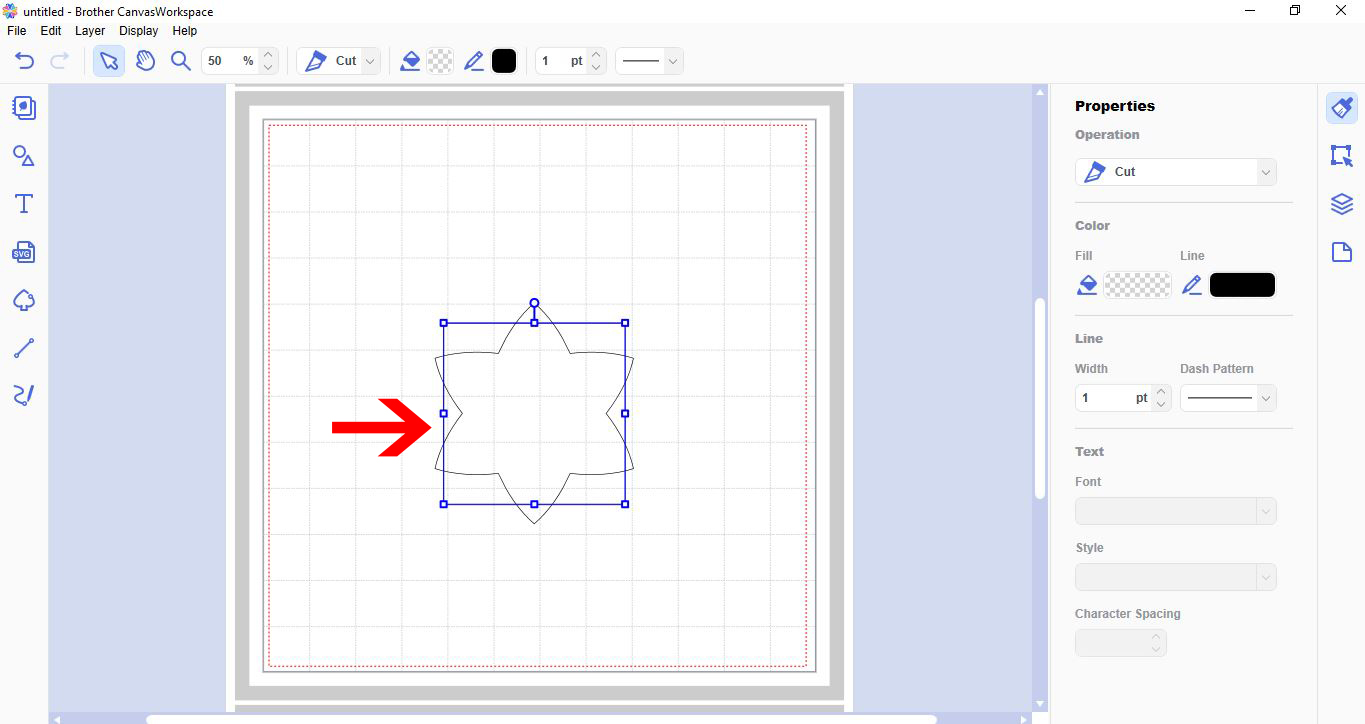
5- Next adjust the square to make the top and bottom of it cover your shape and have a snall amount of extra space above and below.
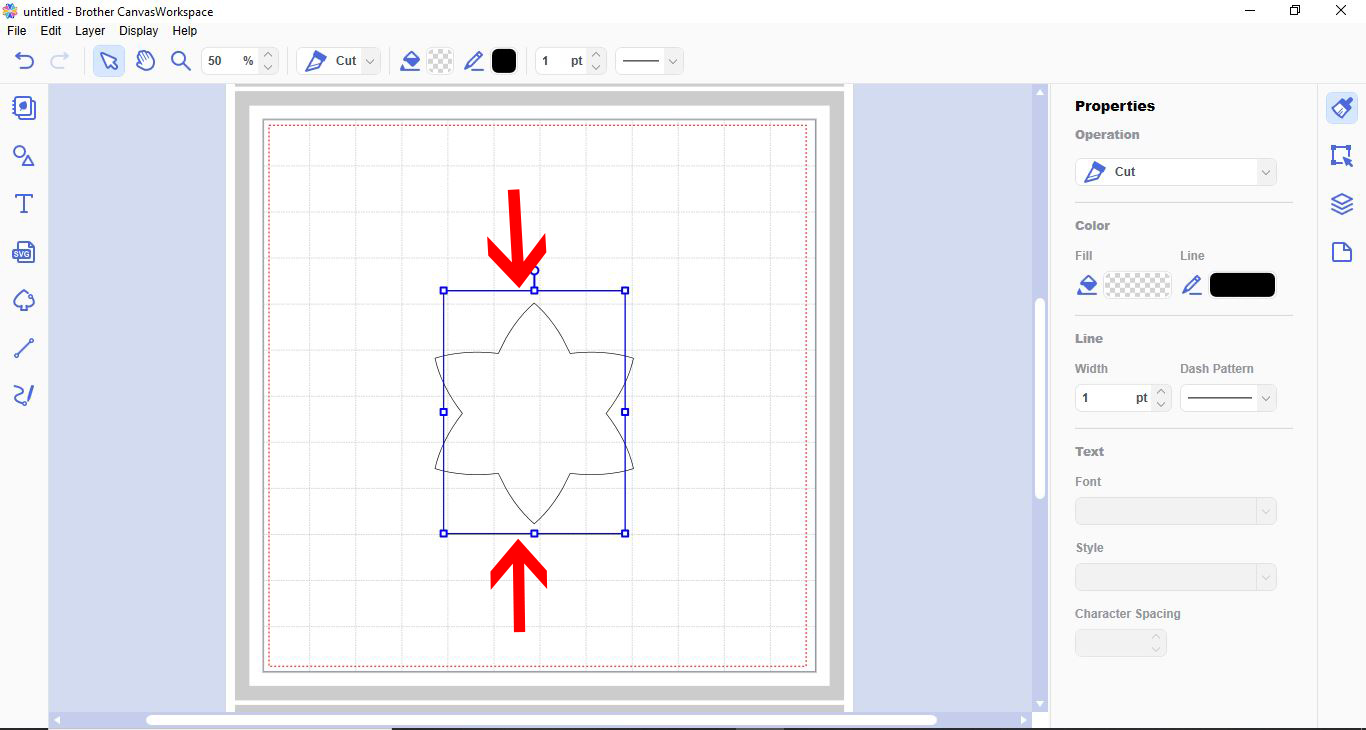
6- Select both and click on the centre align tool.
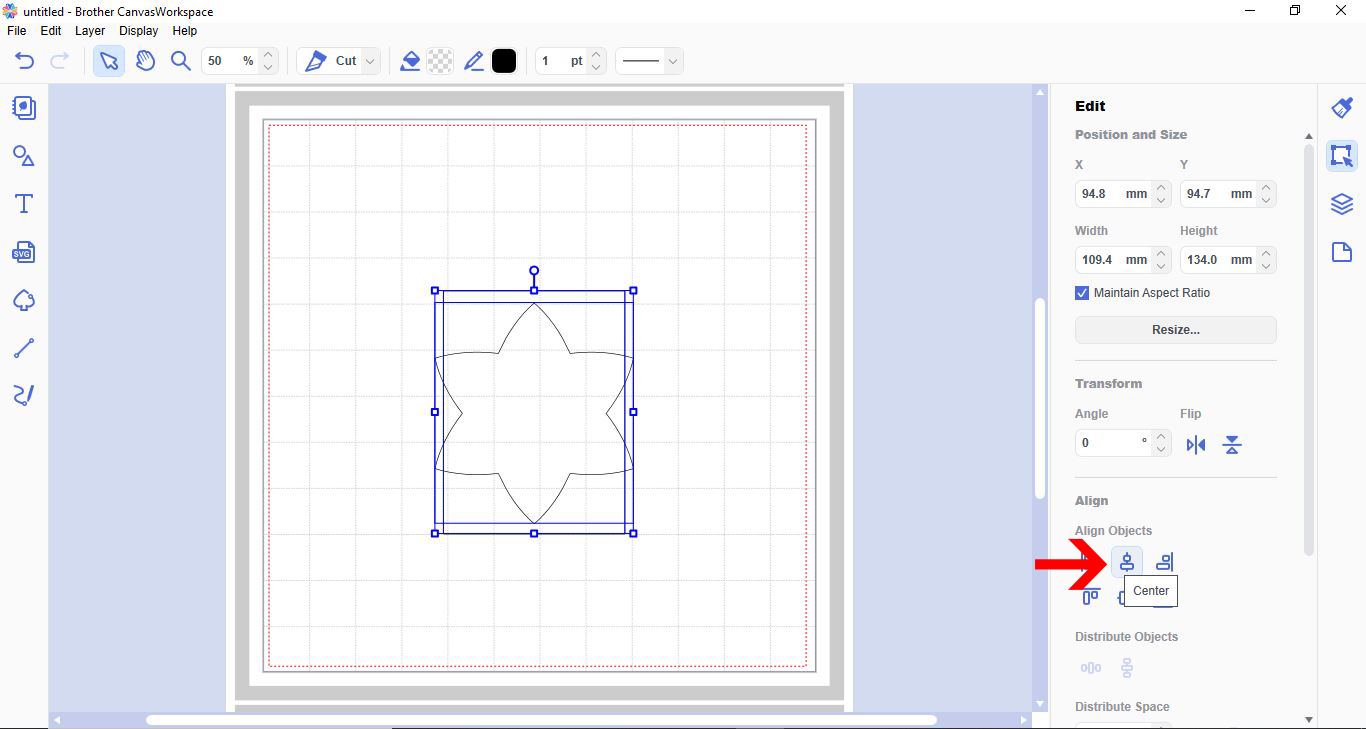
7- Next click on the middle align tool.
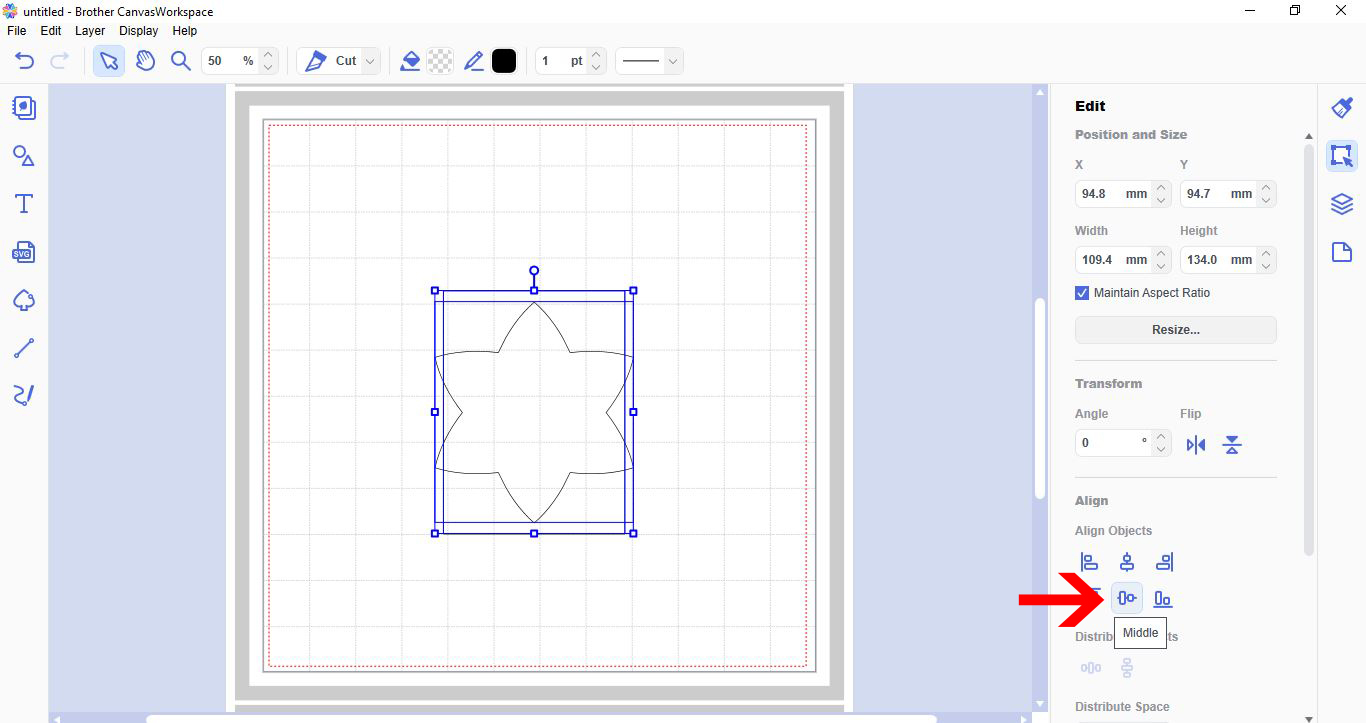
8- With the square selected, right click and go to arrange - send to back.
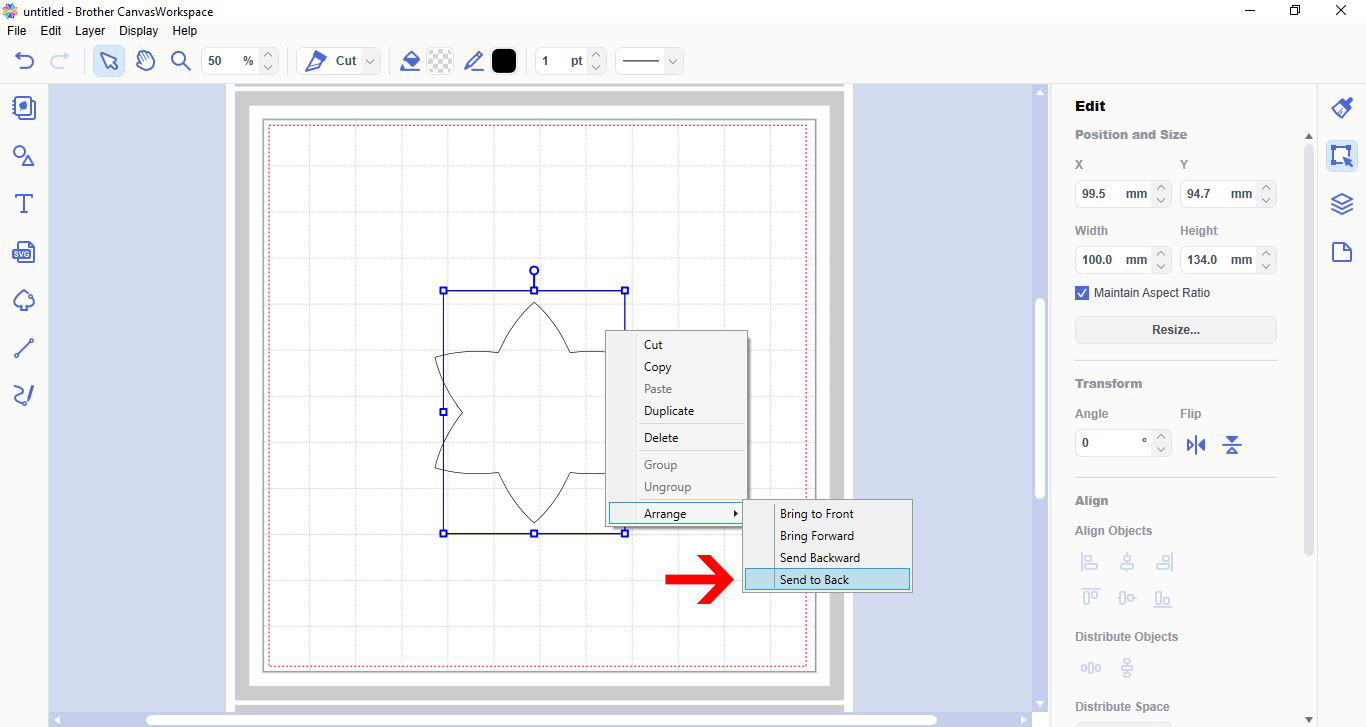
9- Select the shape and right click. Next select arrange - bring to front.
10- With both the square and shape selected, go to process overlap and select - remove overlap.
11- Remove the shape from the cut out.
12- Click on the shape tool and create a large rectangle the size of the inside of the card.
13- Place the cut out in the middle of the rectangle. Using the align tool, align the cutout centre and middle.
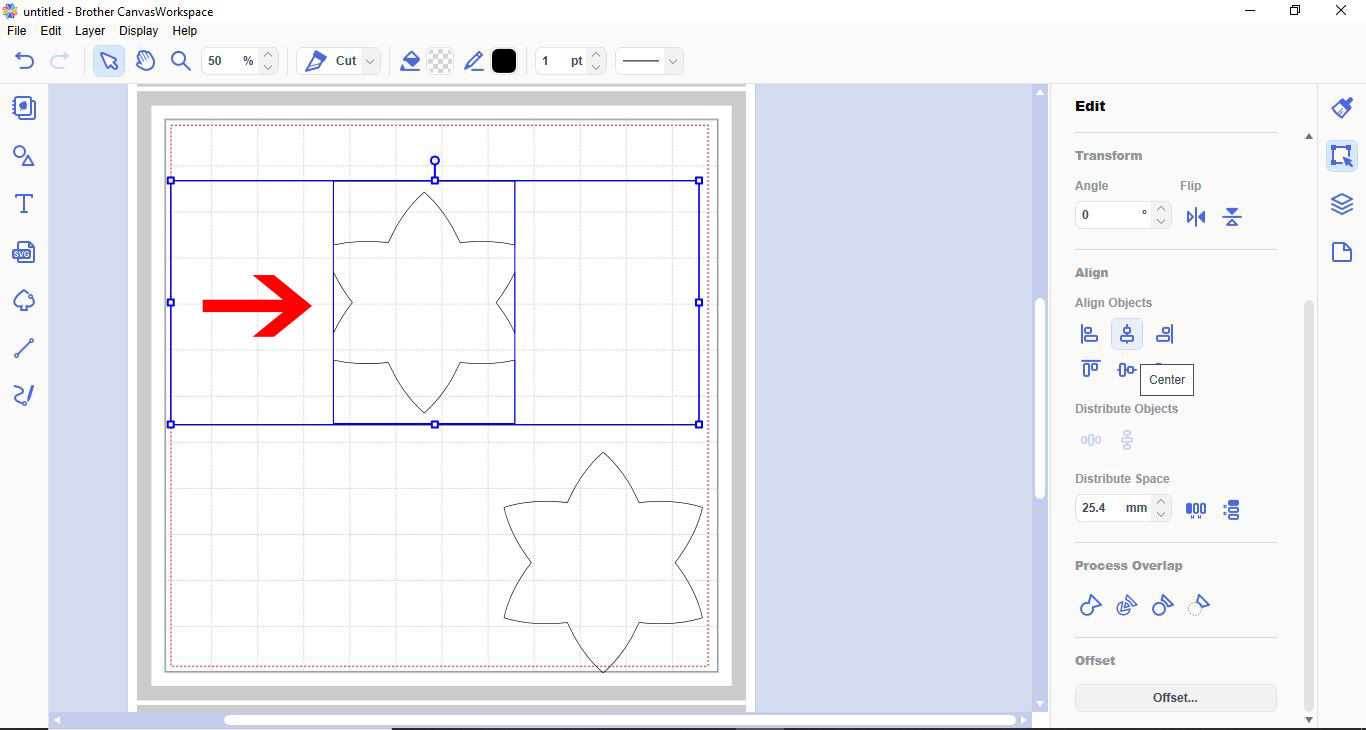
14- Reduce the size of the cut out at the top and the bottom to create a slight edge around the cut out.
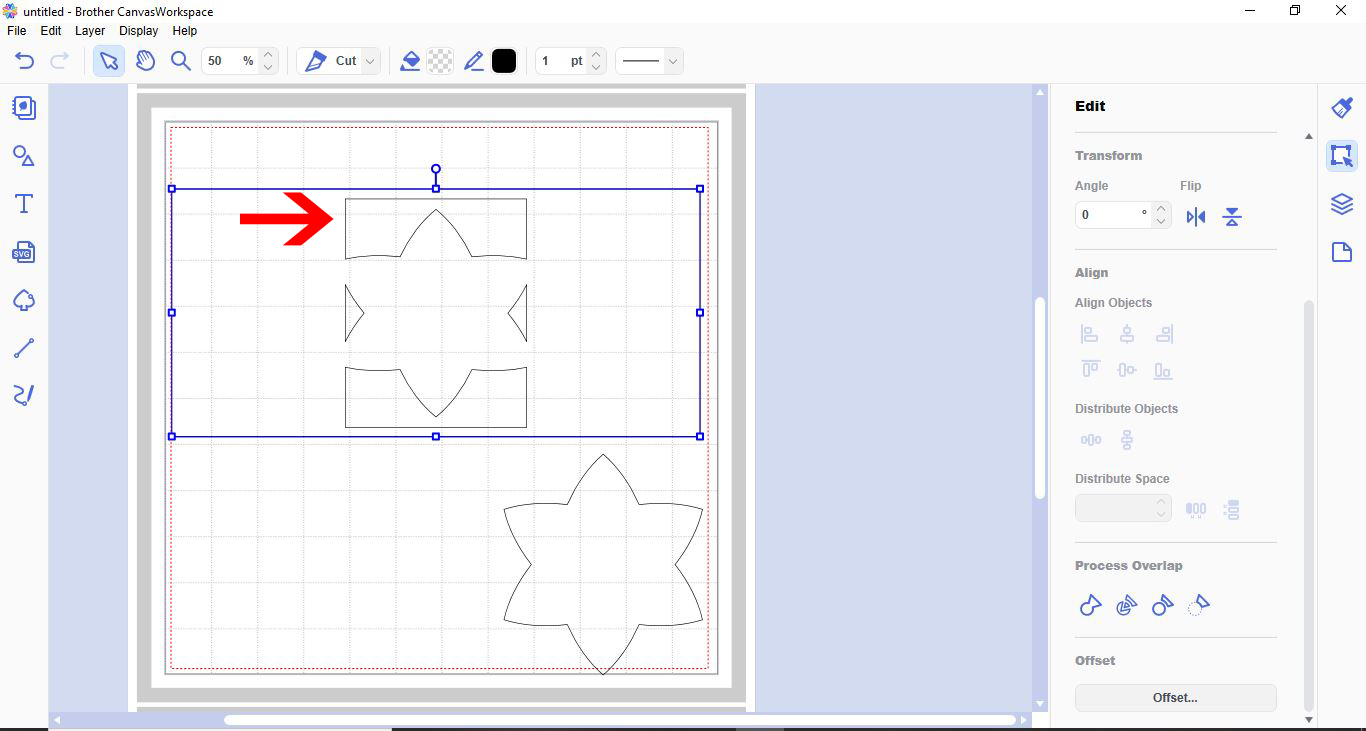
15- Select both the cutout and the rectangle. Go to process overlap and select divide.
16- Your insert pop up is now created. Once cut fold in half so when the card opens the shape will pop out.
Related Tutorials
Scan N Cut Tutorials
Designing pop up cards in brother scan and cut canvas workspace
Scan N Cut Tutorials
How to make a image larger than your cutting mat in Brother Scan N Cut canvas workspace
Learn how to cut designs larger than your cutting mat in Brother Scan N Cut canvas.
Scan N Cut Tutorials
How to make a simple and detailed stencil stencil in brother scan and cut canvas workspace
Scan N Cut Tutorials
How to create a shaped word card in brother scan and cut canvas workspace
Scan N Cut Tutorials
How to create curved text in brother scan and cut canvas workspace
Learn how to curve text in Brother Scan N Cut