By Design Bundles
Scan N Cut Tutorials2 min
Installing the Foil quill for the first time In Brother scan and cut machine
*CM900 used.
1-Open the front of your Brother scan and cut machine. Lift the tab at the front of the blade holder.
2- Carefully remove the blade and casing.
3- Screw on the B adapter to the foil quill. Plug into a USB power bank. The light should come on if power is getting through to the quill.
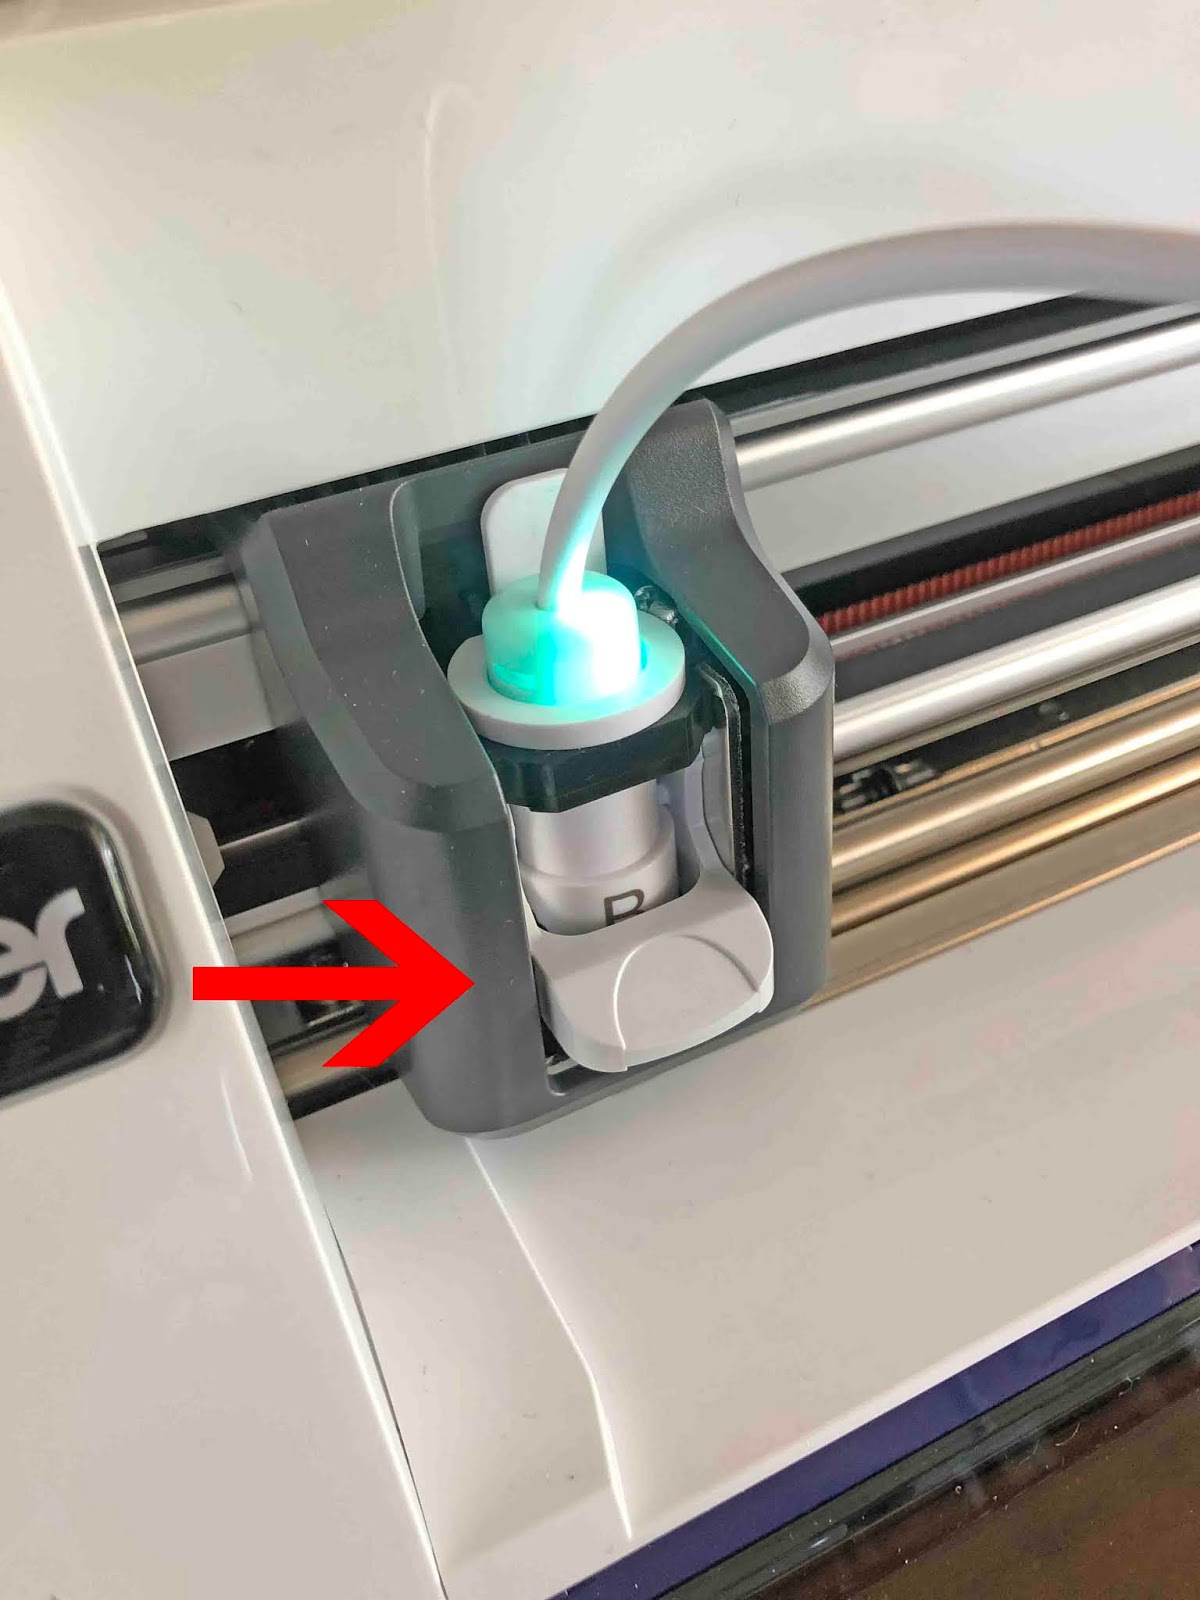
4- Carefully place the adapter with the foil quill into the blade holder. Clip the tab down to lock in place. The quill is now ready to use after it has 5 min to heat up.
1-Open the front of your Brother scan and cut machine. Lift the tab at the front of the blade holder.
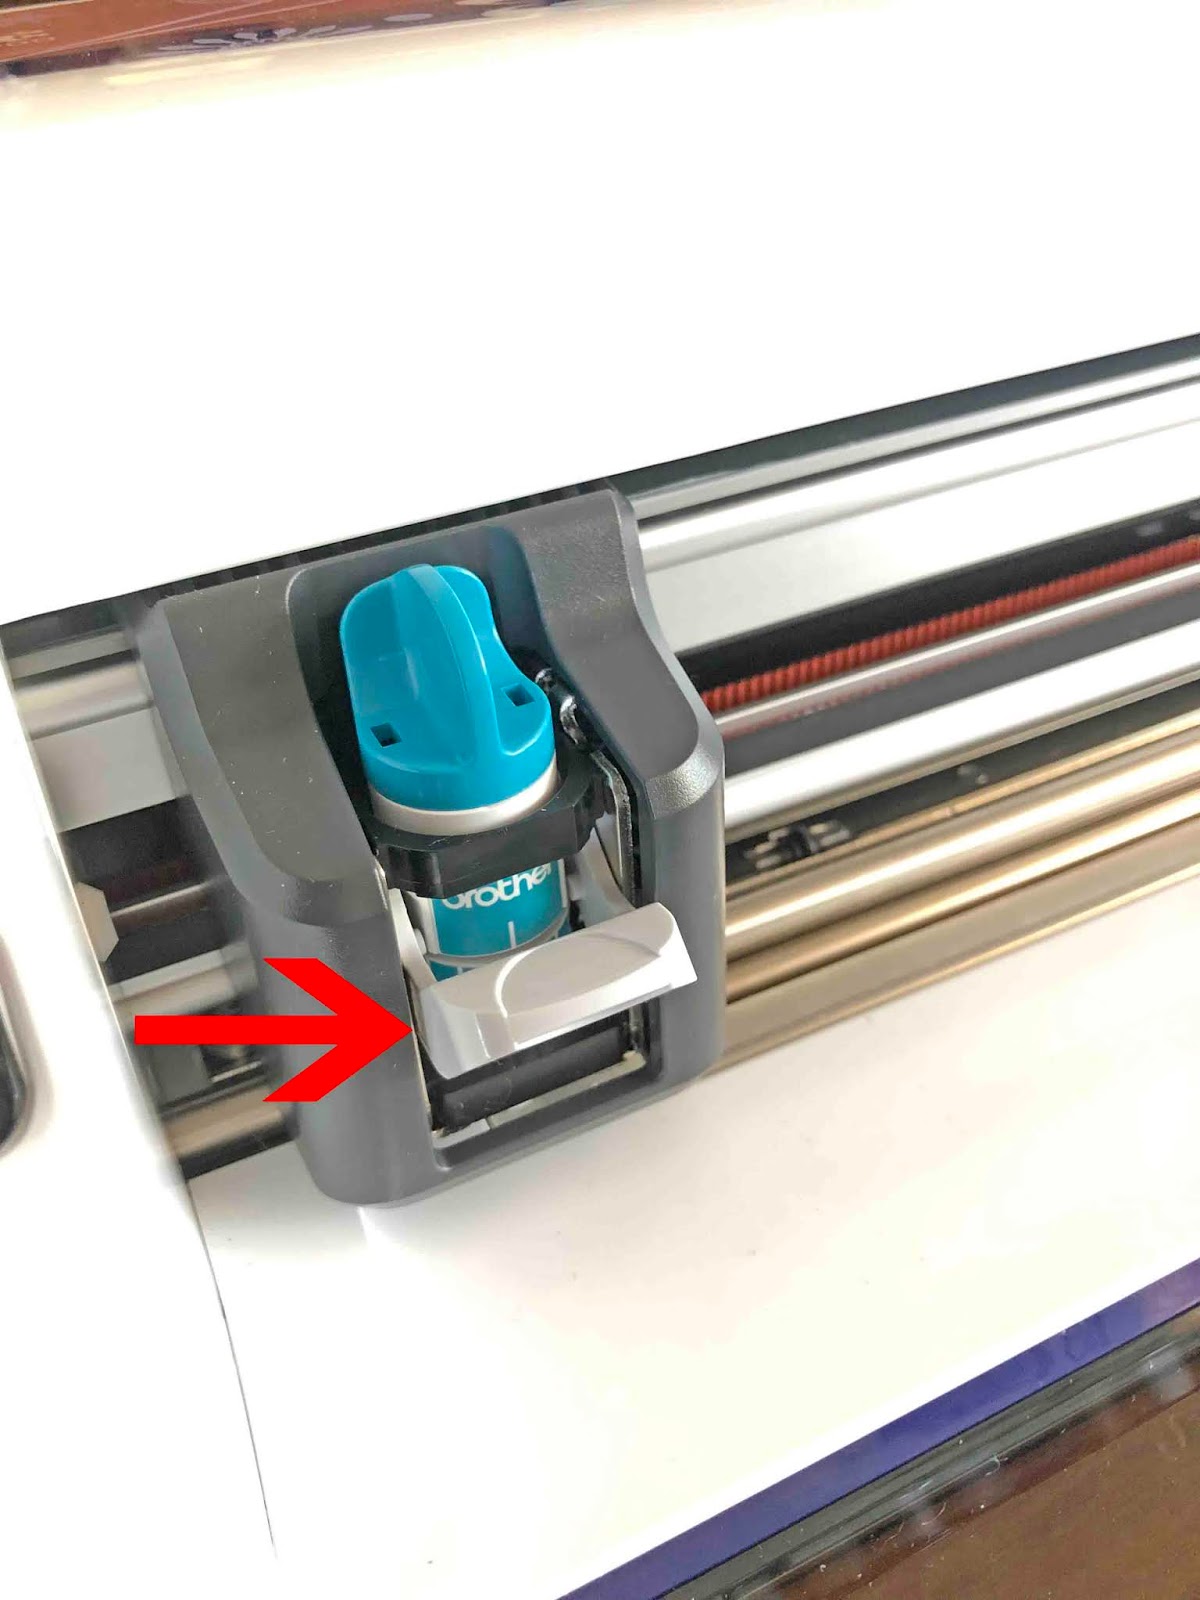
2- Carefully remove the blade and casing.
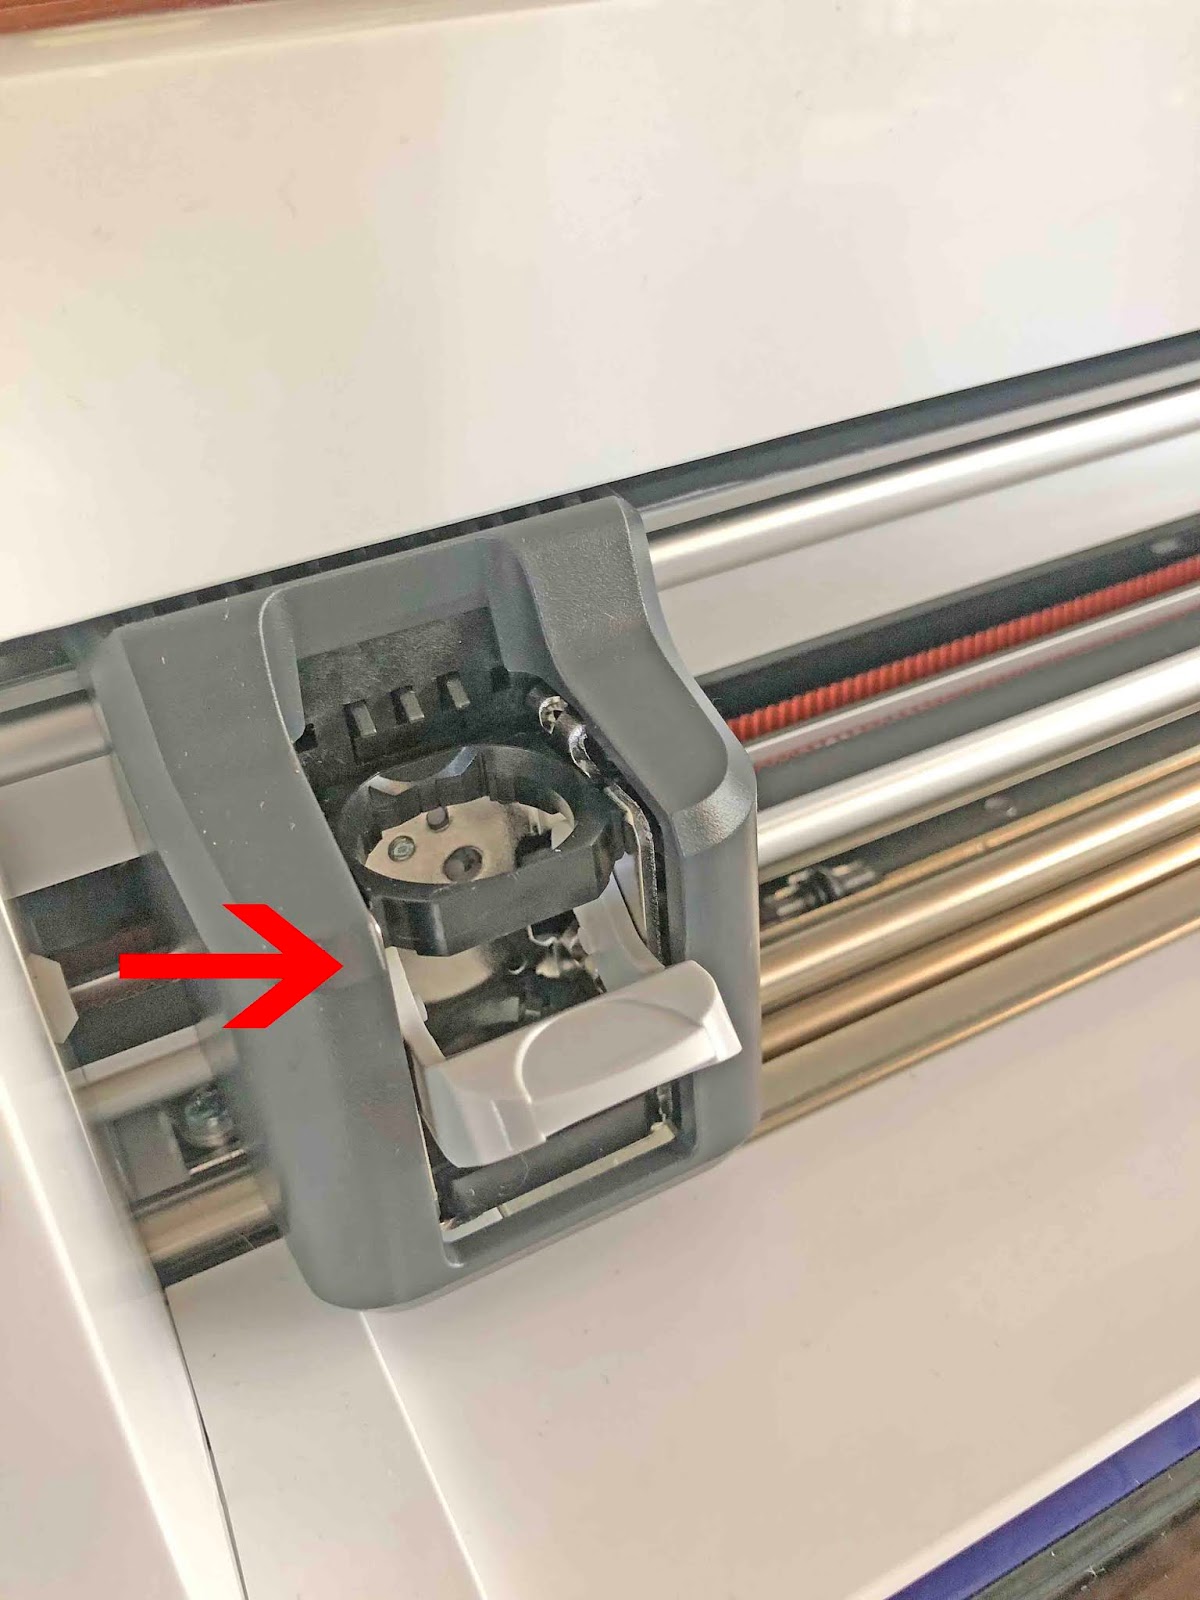
3- Screw on the B adapter to the foil quill. Plug into a USB power bank. The light should come on if power is getting through to the quill.
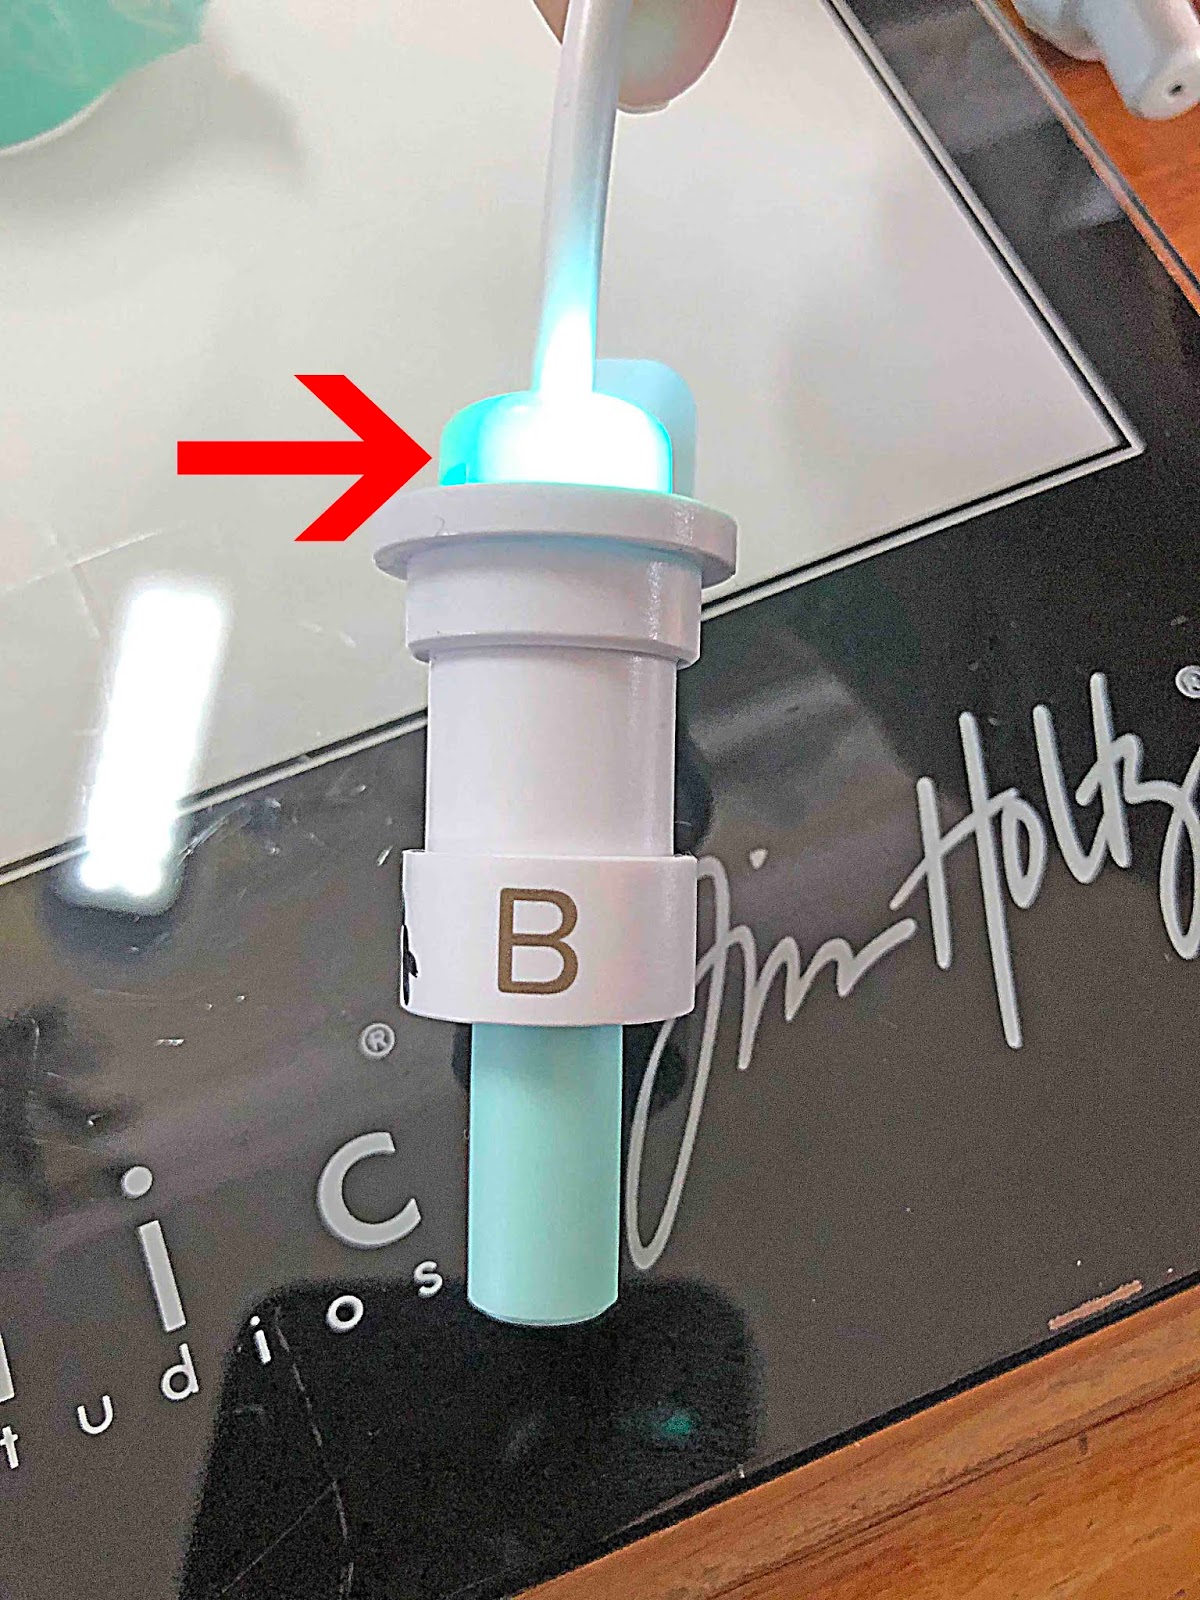
4- Carefully place the adapter with the foil quill into the blade holder. Clip the tab down to lock in place. The quill is now ready to use after it has 5 min to heat up.
Related Tutorials
Scan N Cut Tutorials
Creating a foiled candle with brother scan n cut machine using the foil quill
Scan N Cut Tutorials
Using the foil quill on ribbon with Brother scan and cut machine
Scan N Cut Tutorials
How to Foil a JPEG Image with Brother Scan n Cut Machine Using the Foil Quill
Scan N Cut Tutorials
Foiling on vellum in brother scan and cut machine using the foil quill
Scan N Cut Tutorials
Using the foil quill on acetate with the Brother scan and cut machine
Scan N Cut Tutorials