By Design Bundles
How to Use a Coloring in Book Page in Silhouette Studio
Coloring books are a fun way to create designs for cut files. In Silhouette Studio you can convert a coloring page into a cut file using the Trace panel. You can then add color and cut the design. In our tutorial we will show you how to use a coloring book page in Silhouette Studio.
For this tutorial we will be using a monster coloring book. If you would rather use ready made cut files we have a wonderful selection of SVG files on Design Bundles.
Step 1 - Import Your Coloring Book Page
Open Silhouette Studio and go to File > Open. Choose the coloring page you want and click Ok. We chose to use this cute image of a monster.

Step 2 - Use the Trace Panel
Before we can use this design as a cut file, we need to prepare it first. We will be using the Trace Panel to create a traced area of the design.
Select Trace Area
On the right-hand side, click on the Trace Panel to open the options. Once the panel is open, click on Select Trace Area. Then, click + drag a trace box around the coloring design.

Adjust the Trace Area
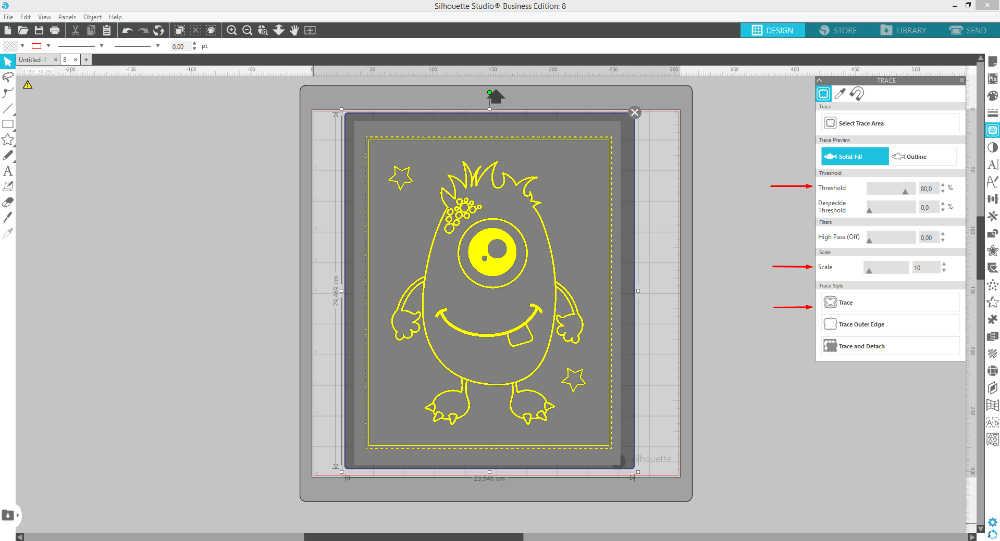
Now release your mouse button. Everything that will be traced will be highlighted in yellow. Adjust the Threshold and the Scale to get a clear yellow line. We set the Threshold to 80% and the Scale to 4. Next, click on Trace.
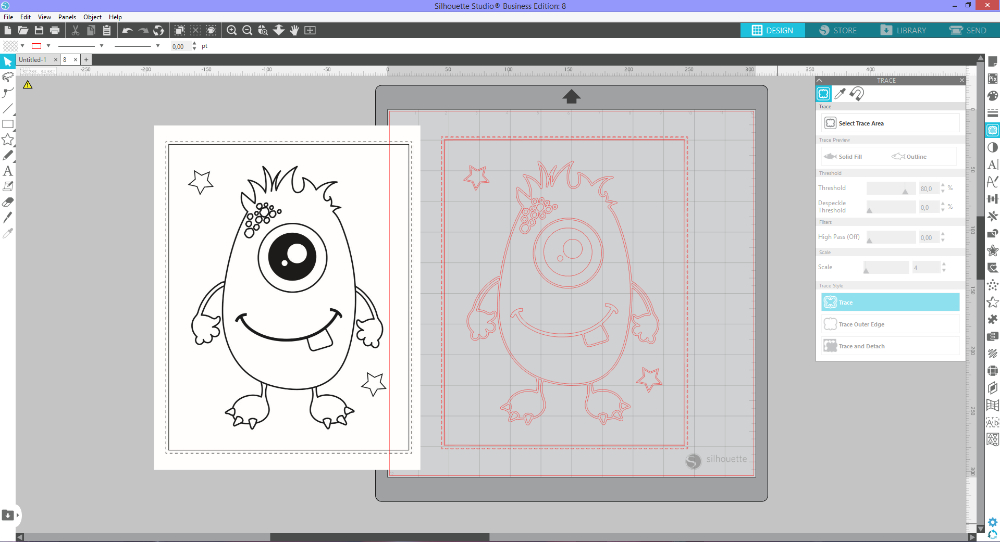
We shifted the original coloring page design to the left in order to see the traced area. The trace has created red cut lines. You can go ahead and delete the original coloring page as it’s no longer needed.
Step 3 - Release the Compound Path
In order for us to be able to add color, we need to release the compound path. This will split the design into individual pieces. Select the cut lines, right-click > Release Compound Path. We don’t want to use the border that was traced, so we will select it and delete it.

You can see now that the traced area has been separated into individual parts.

Step 4 - Fill the Design With Color
The design is ready to be filled with any color of your choice. On the right-hand side click on the Fill panel. Now click on each part of the design, then fill it with a color.

To create the black outline, select the outermost area of the design and fill with black. We filled this area last. This is because it can be difficult to see the other objects when filled with black at the beginning. In the image below we shifted this area to the side to show you. You don’t need to do this.

Step 5 - Group Objects of the Same Color
To make the cutting process simpler, we want to group all of the same colors together. In this case, all of the blue areas were selected and grouped. Select your areas by holding down Shift + clicking. Then right-click > Group.
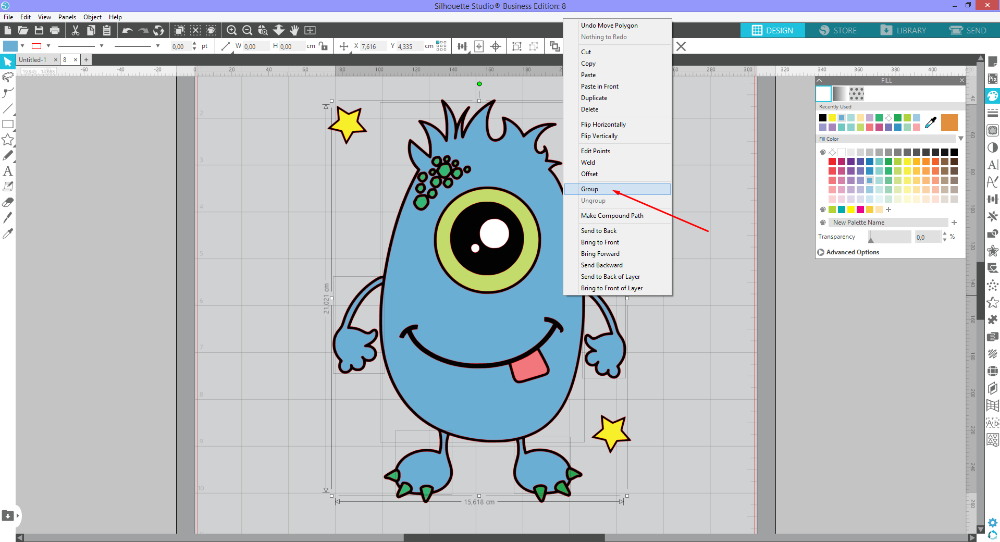
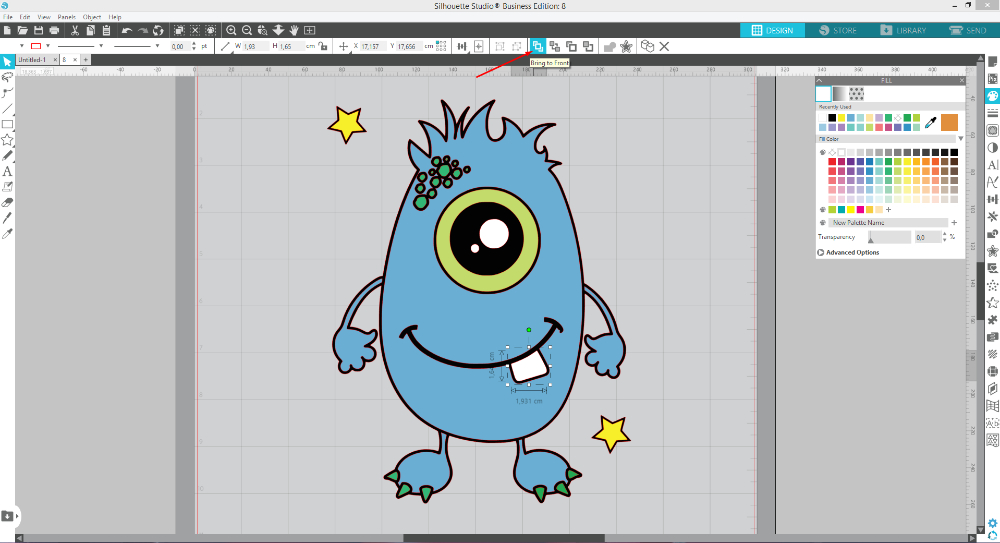
When grouping colors you may run into some issues depending on how the object is positioned. For this design, we selected the outermost part, the iris, and the mouth outline to group as one. But when doing this the tooth vanished. This is because it was now under the grouped selection. So we first selected the tooth then clicked on Bring to Front at the top of the screen. This placed the tooth area above the mouth outline.
We carried on to group colors and also changed the fill color for the tooth to white. Grouping colors also helps with quickly editing multiple objects at once.
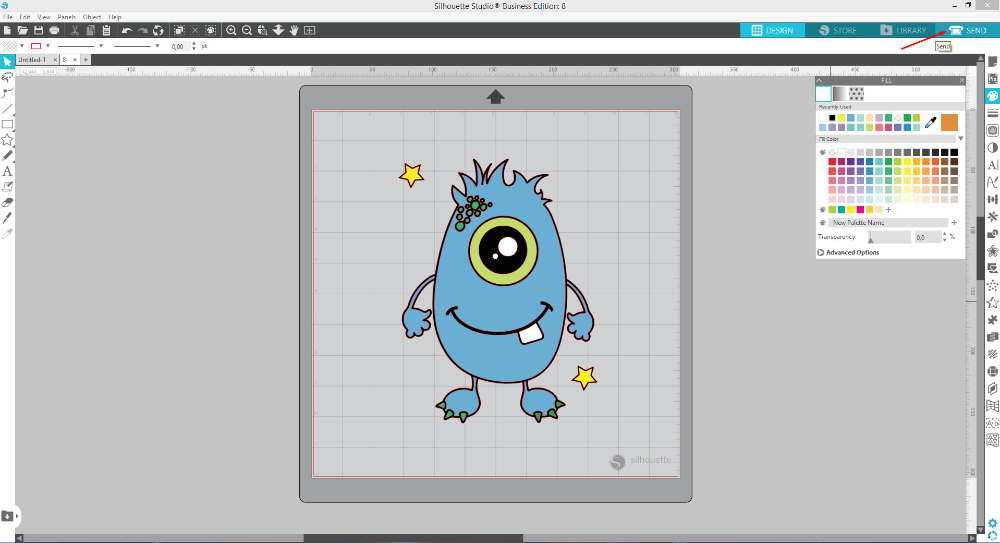
If you want, you can choose to group the final design. It will help should you need to reposition it. Next, go to the Send panel top right.
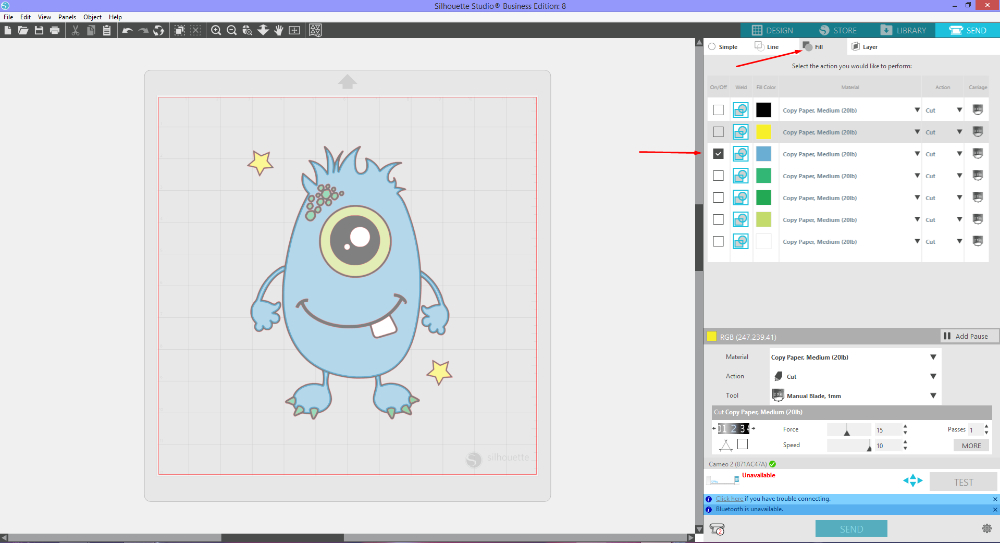
In the Send panel, click on the Fill Option. Here you will be able to select the color that you want to cut, as well as Material, Action, and Tool for each color. In the image below we have selected to cut the Blue color first, which is shown with a tick under the On/Off column.
When you are ready, click the Send button at the bottom to cut. Congratulations on creating a cut file from a coloring book page in Silhouette Studio.
If you enjoyed this tutorial, we have more fun tutorials to follow such as creating a sheet of stickers and using the Puzzle Feature in Silhouette Studio.