By Design Bundles
How to Use a EPS file in the Silhouette Alta 3D software
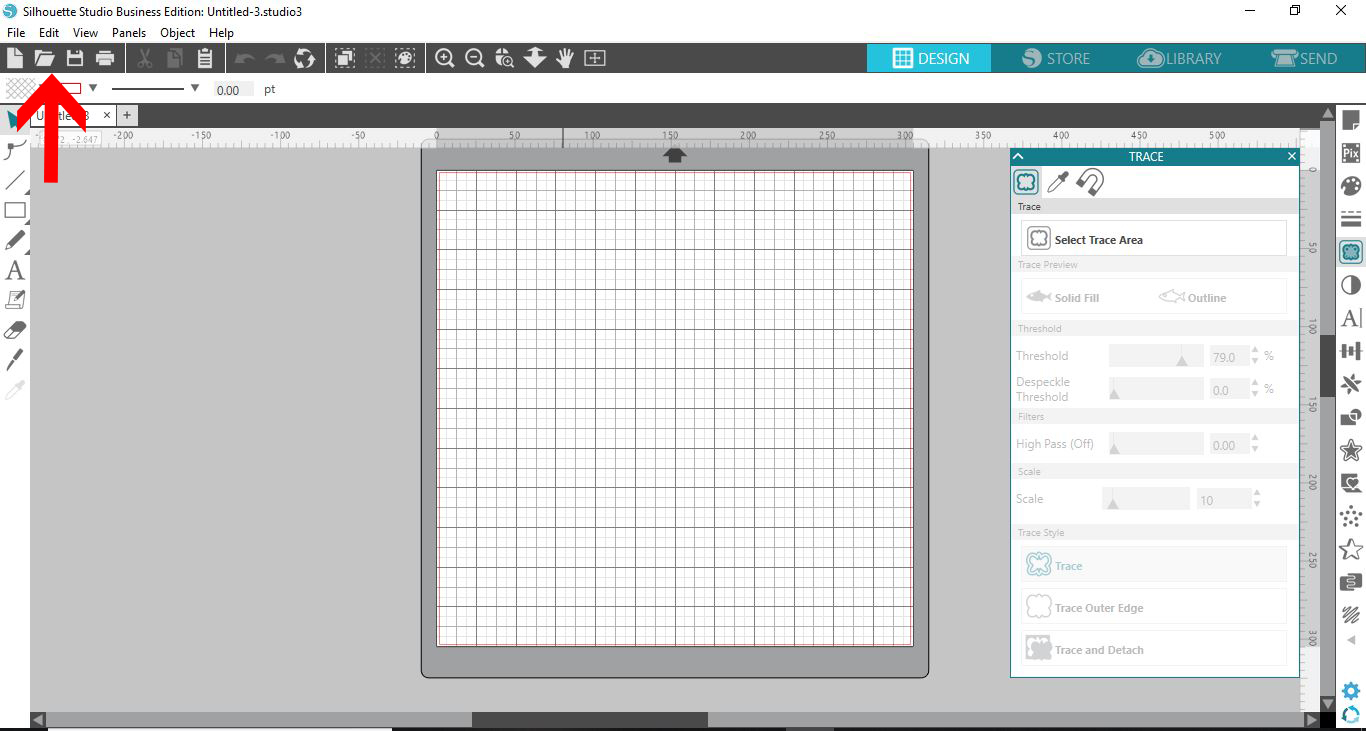
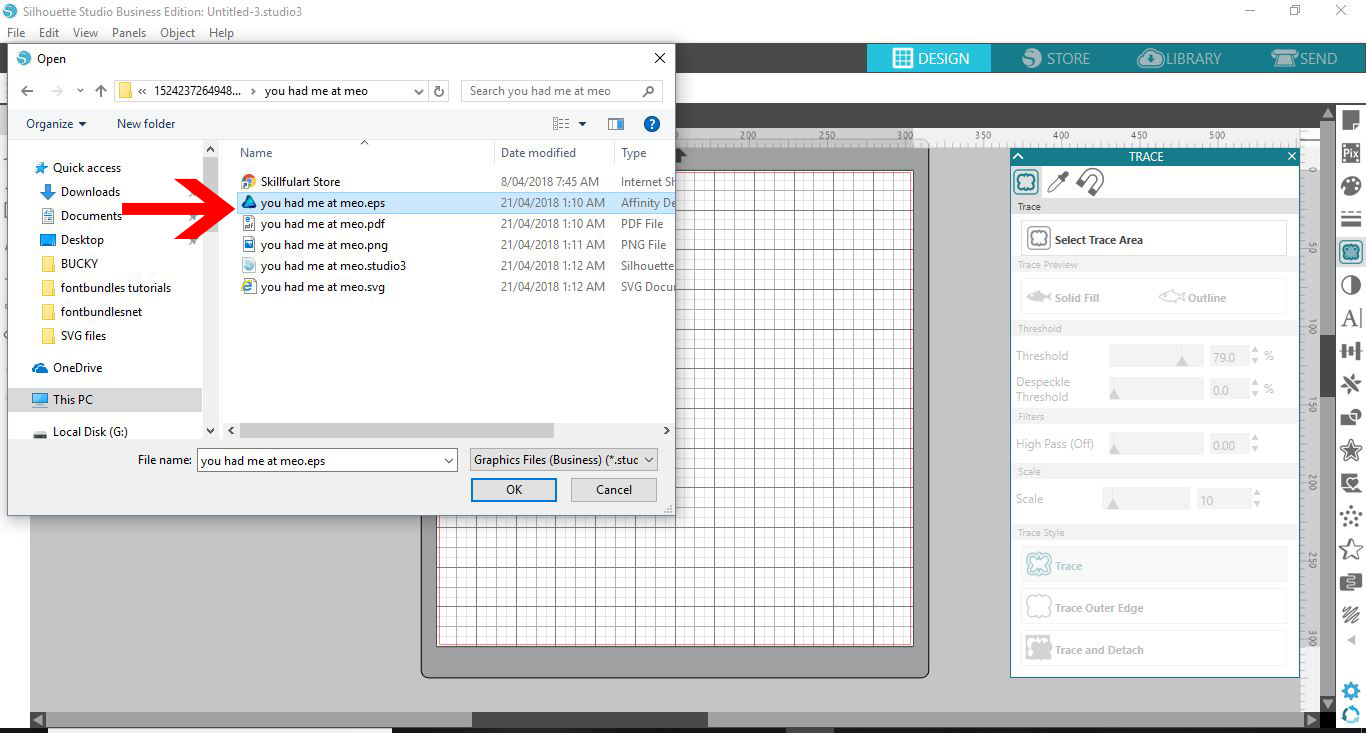
1- Ope Silhouette Studio Software (Business Edition). Click on the open folder icon.
2- Find your EPS file and open it. I am using acat lover svgfrom designbundles.net
3- Your file has now imported to the design space.
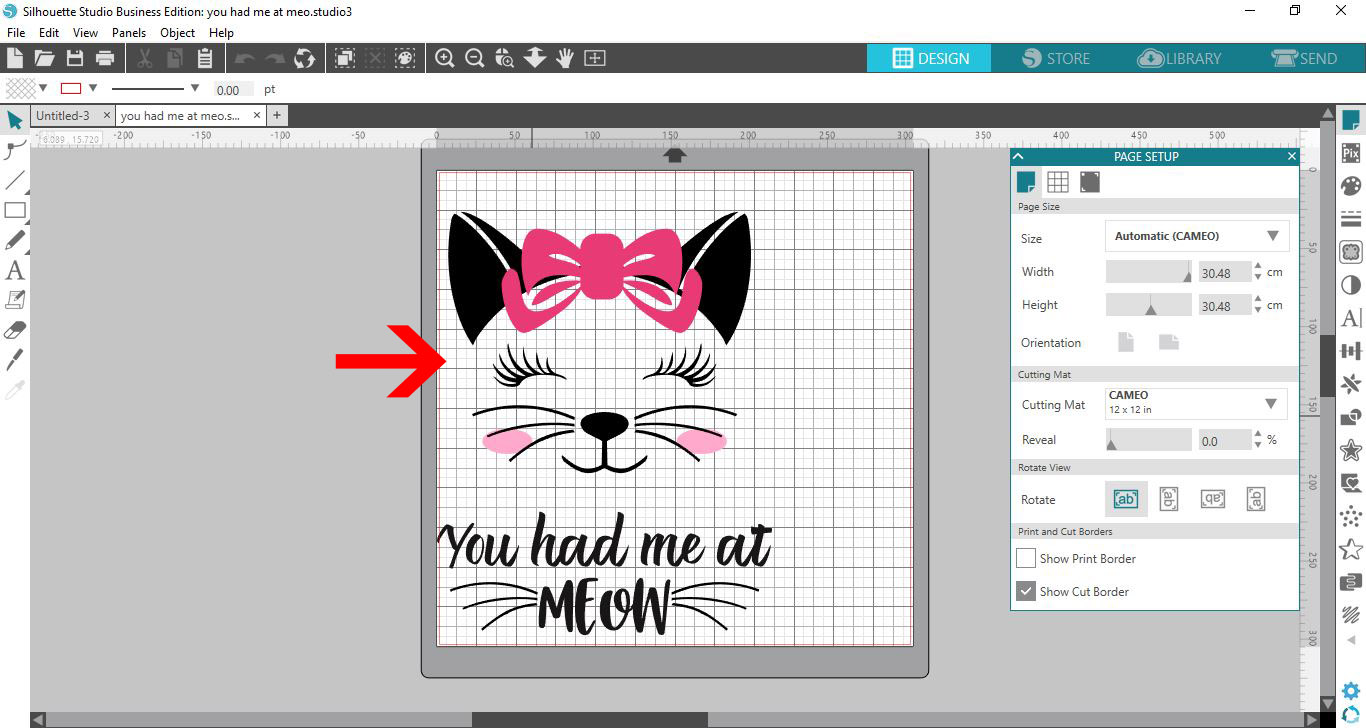
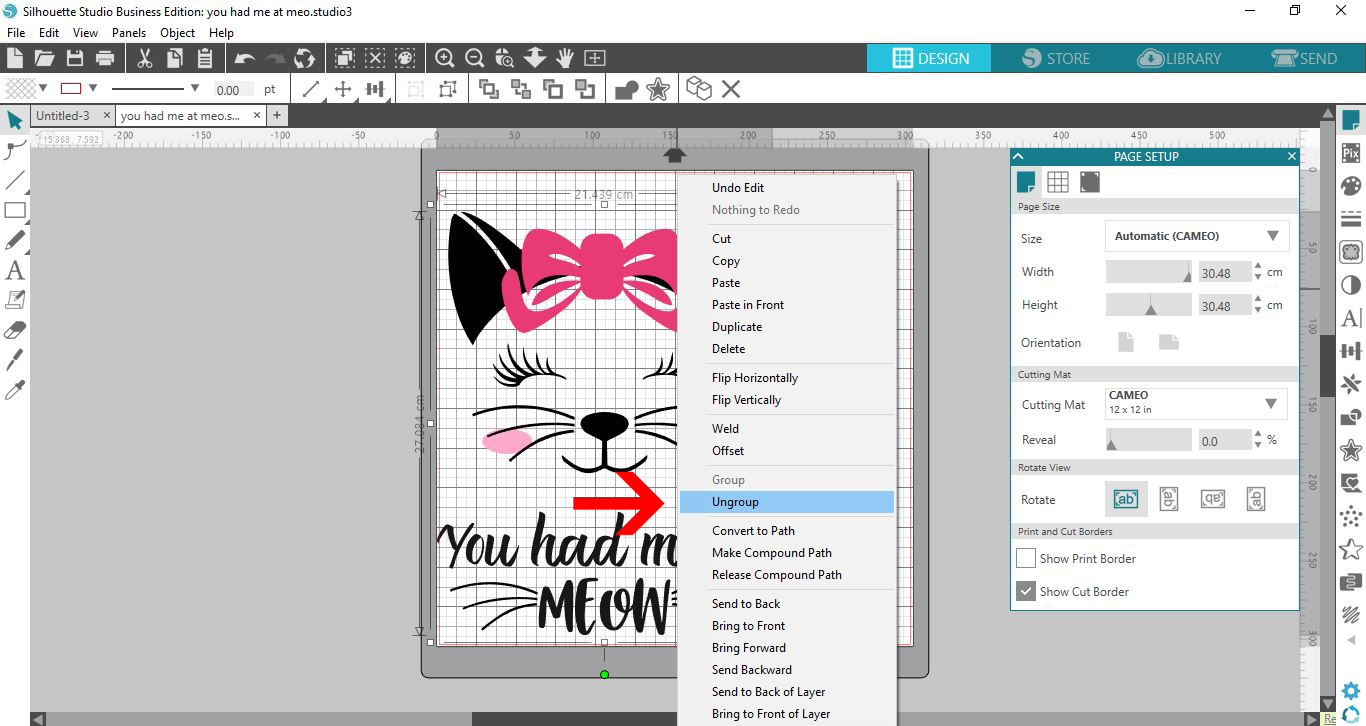
4- Select the image and right click and check ungroup.
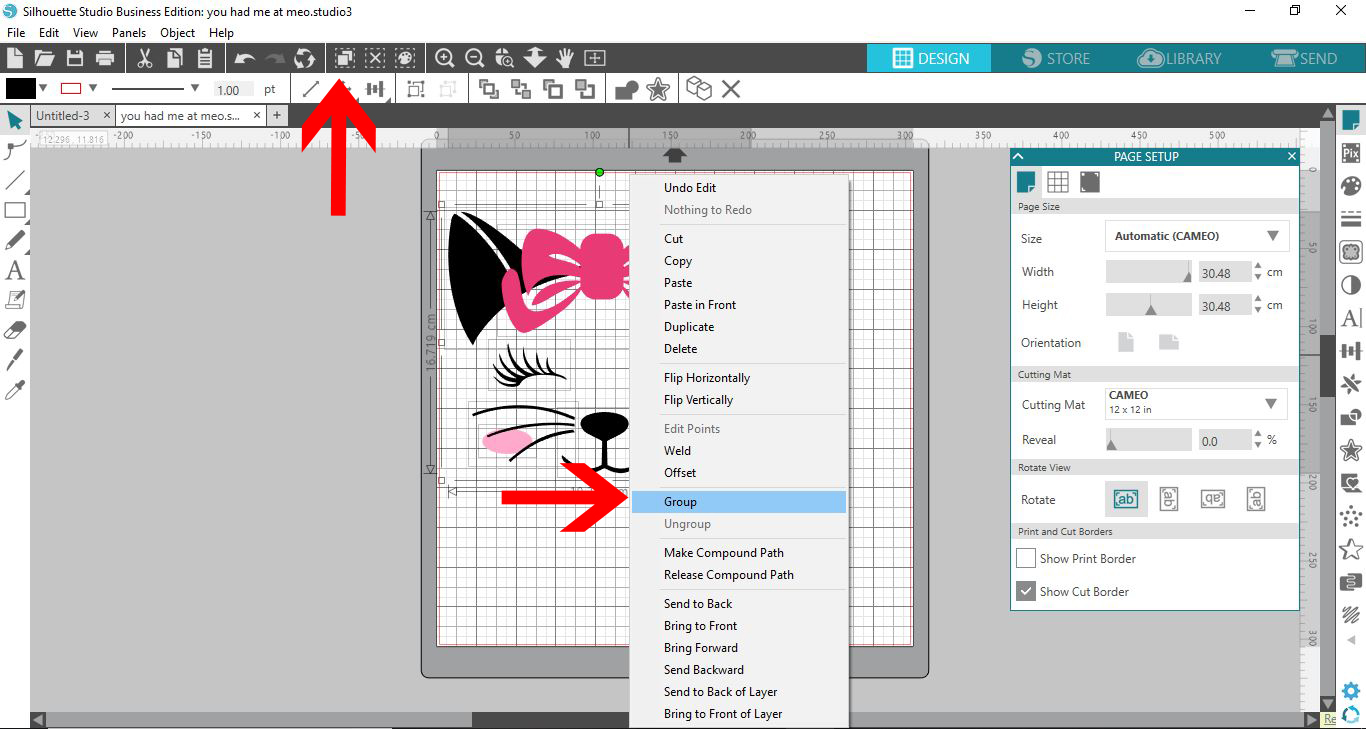
5- Remove any part of the design you do not want to 3D print.

6- Click the select all icon, then right click and select the group option.
7-Go to file - save as - save to hard drive.
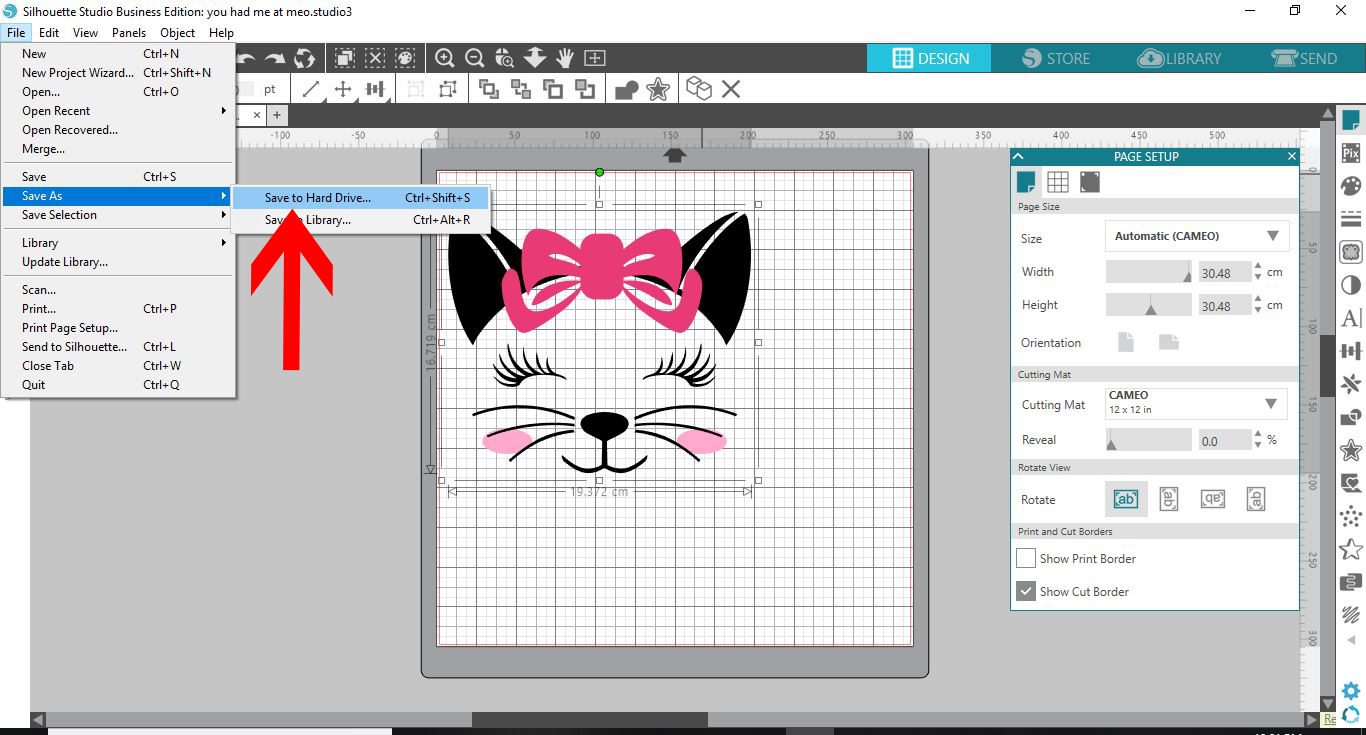
8- Open the Silhouette Alta 3D software. Click on the open folder icon.
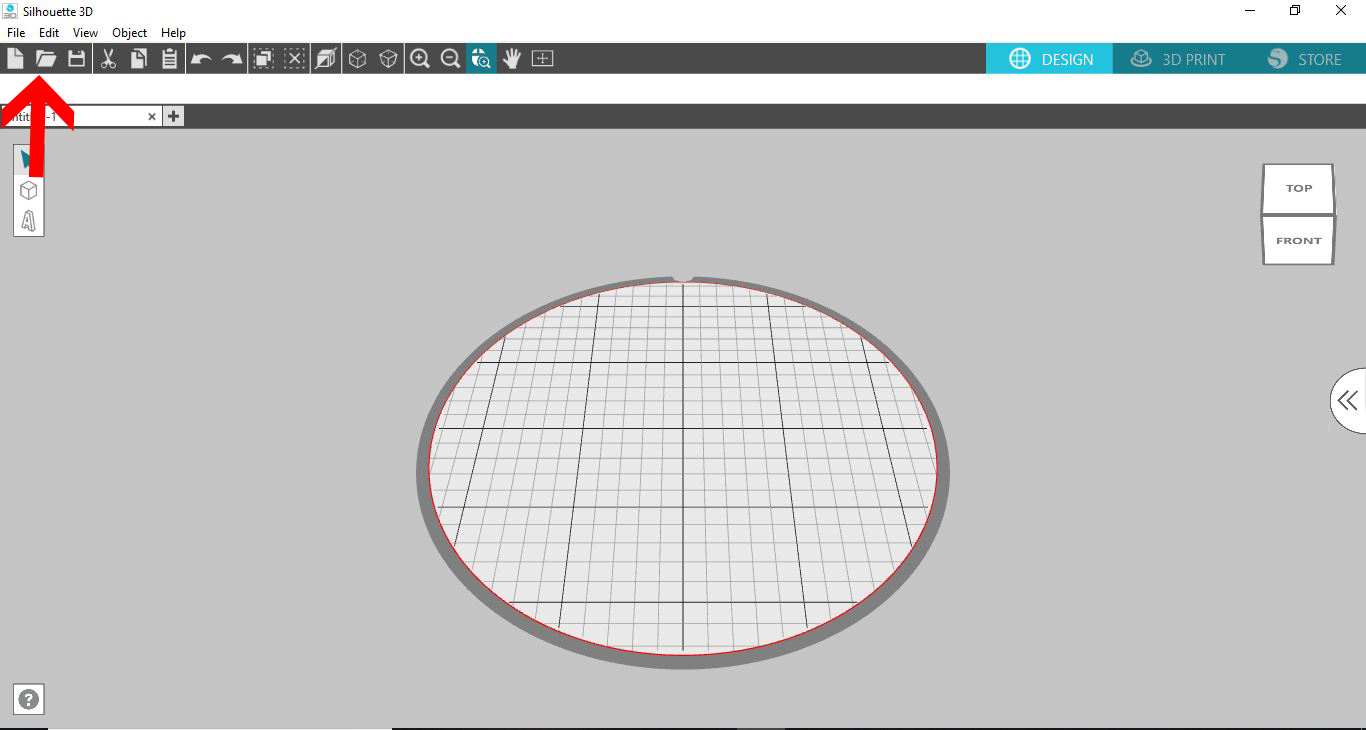
9- Select the file you have just saved.

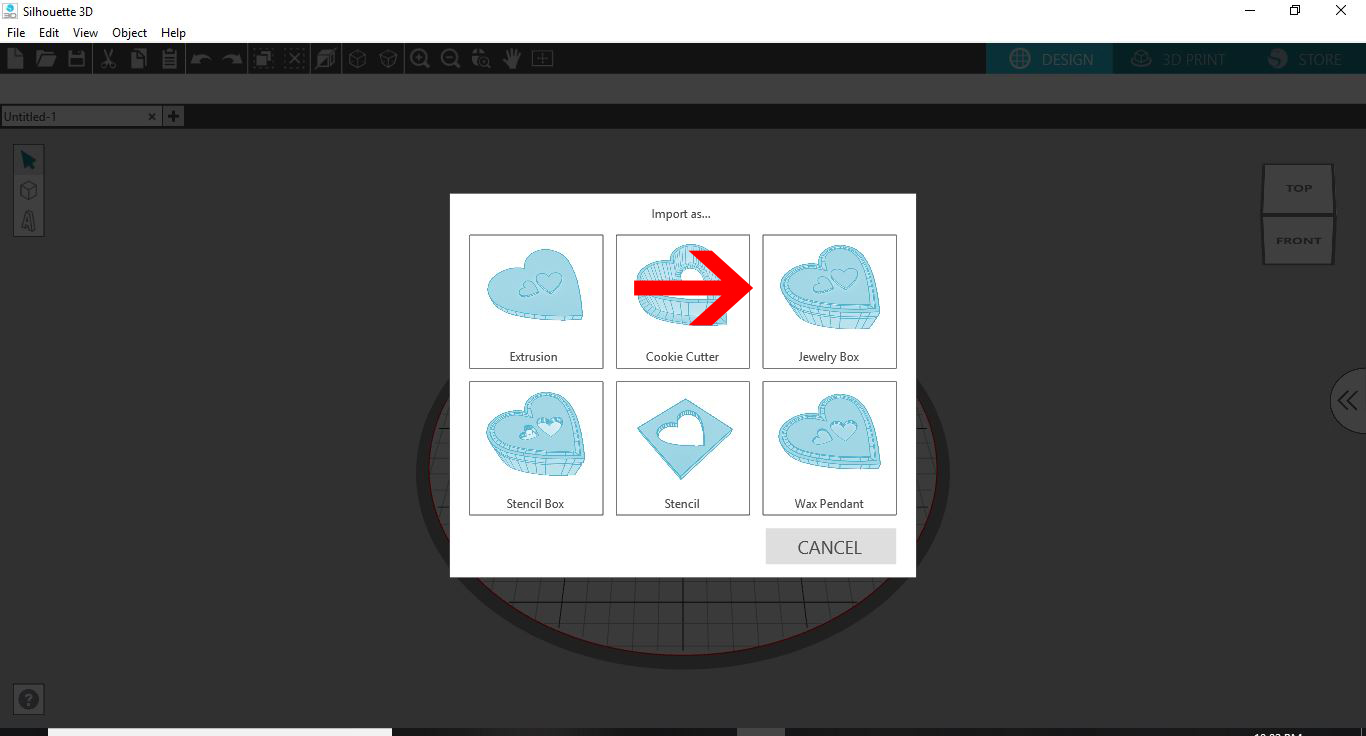
10- A new window will appear. you can select what format you would like your design converted to. I have chosen the jewelry box option.
11- The design is now been created as a jewelry box. You can at this point adjust the design or as to it.
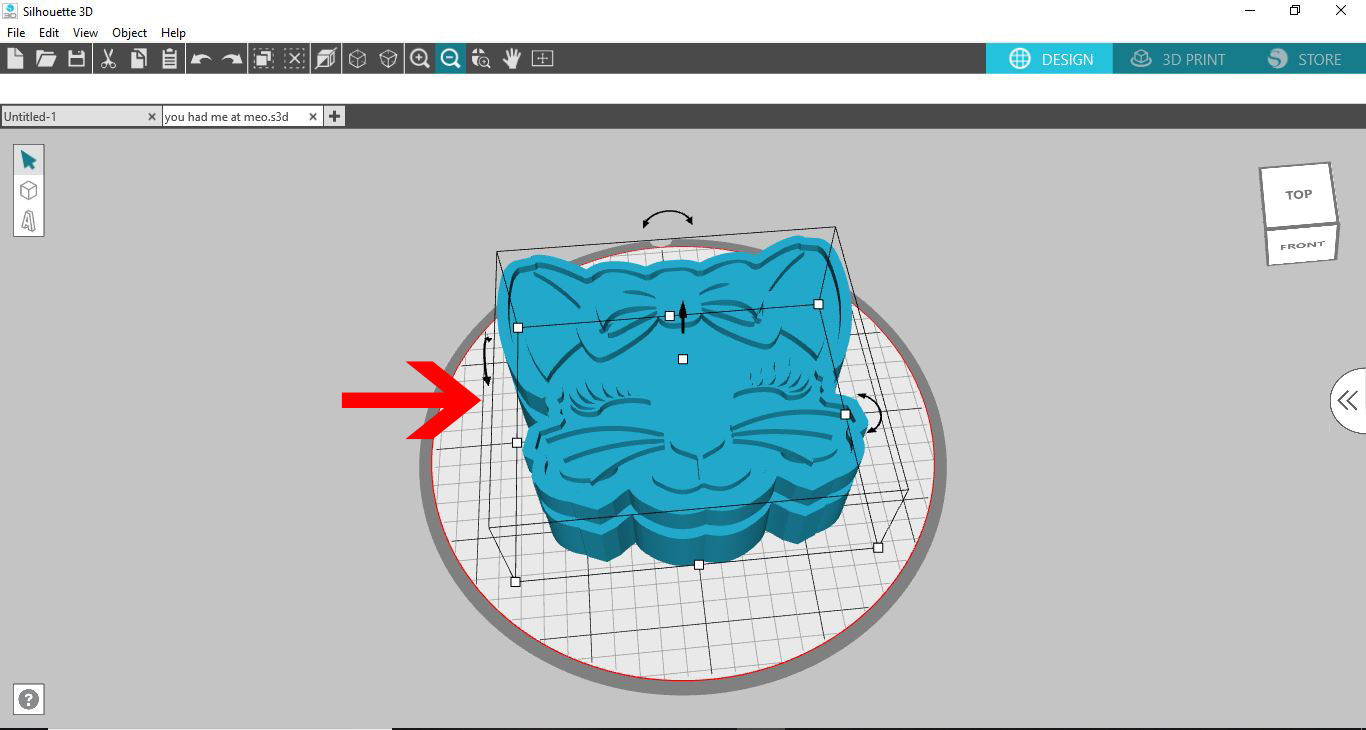
12- Click on 3D print. You can now print your design in 2 parts. top and bottom of the box.
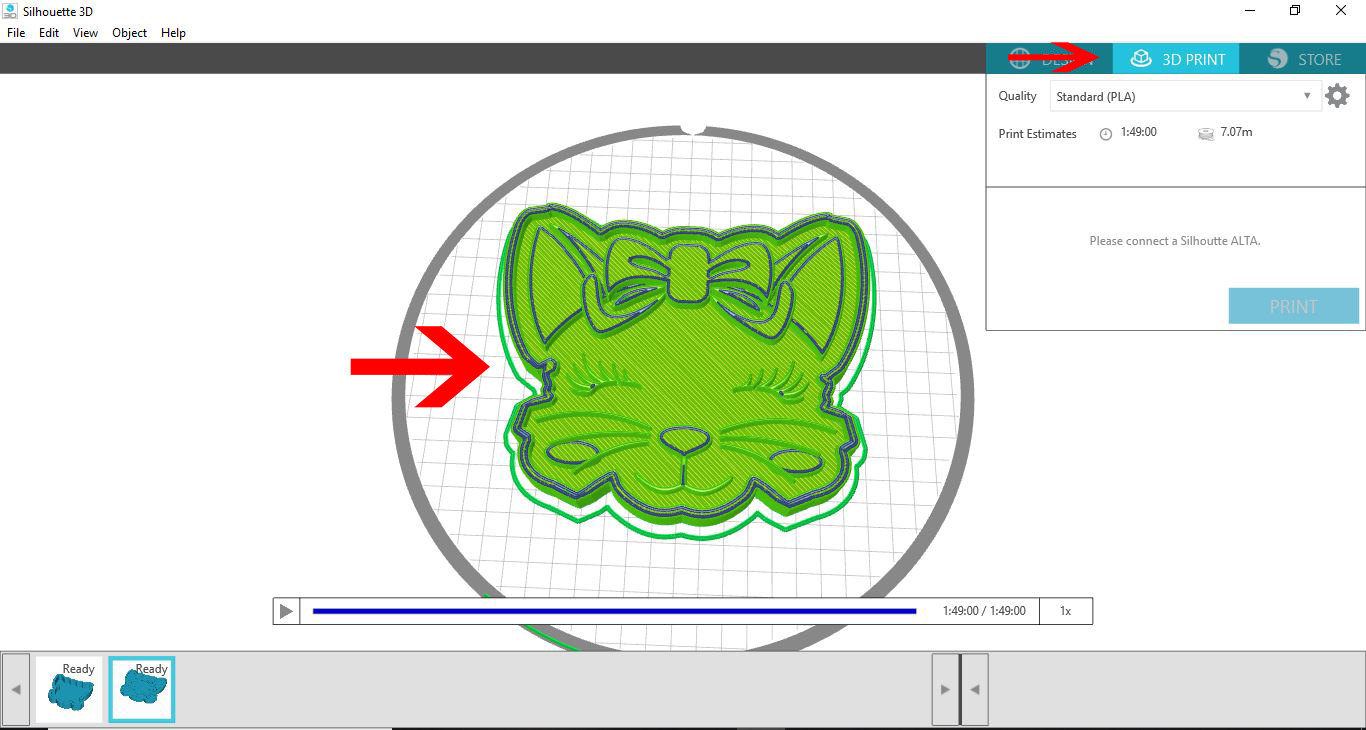
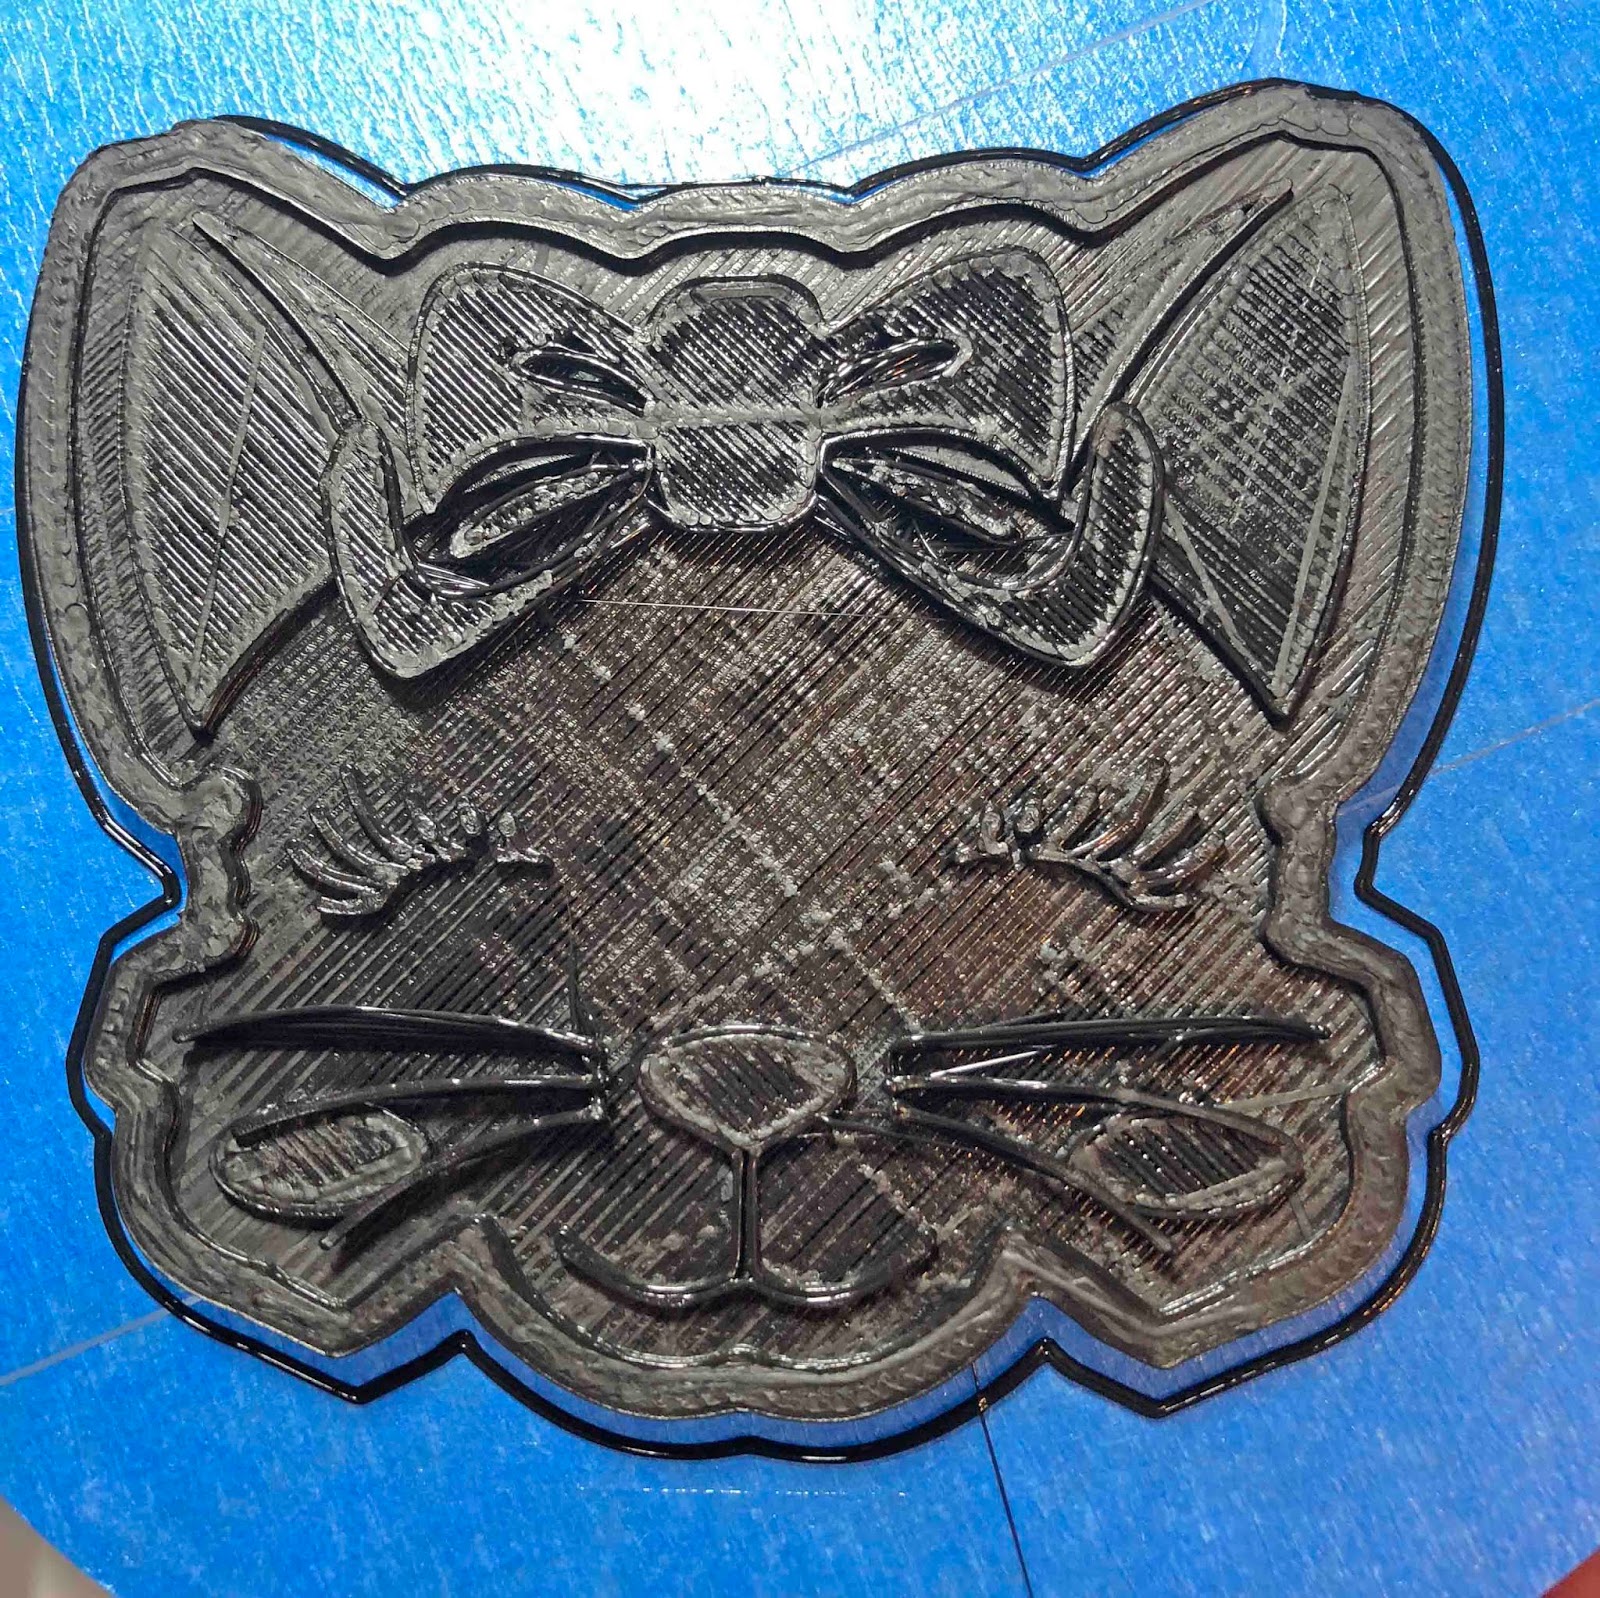
13- Your design is printed.