By Design Bundles
Silhouette Tutorials6 min
How to Use AutoTrace Feature in Silhouette Studio
AutoTrace is a new function in Silhouette Studio 4.4 that will automatically show your cut lines for any PNG that is transparent.
If you are a visual learner, this video is a great reference on how to use the auto trace feature. Find written instructions below.
In this tutorial we will teach you how to use the auto trace feature and how to turn it off, it you prefer to not use it. We are using an American Flag Heart PNG design from our Plus Hub.
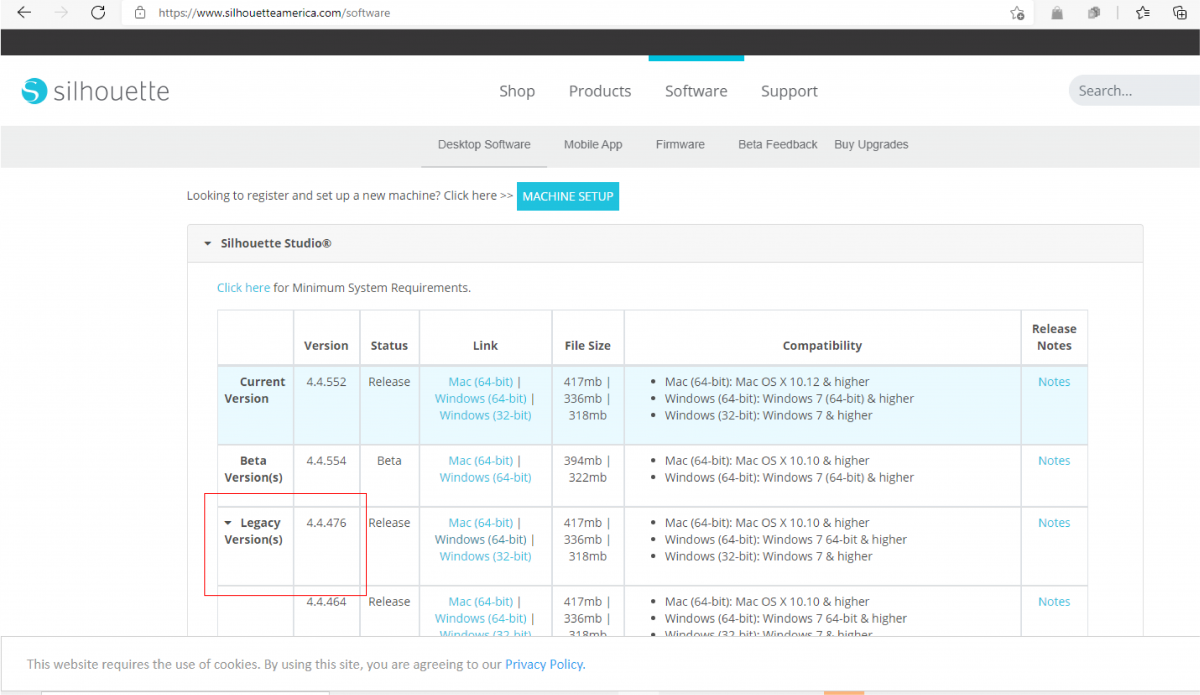
You can check or upgrade to 4.4 by going to silhouetteamerica.com and selecting Software > Desktop Software > Legacy Version > 4.4
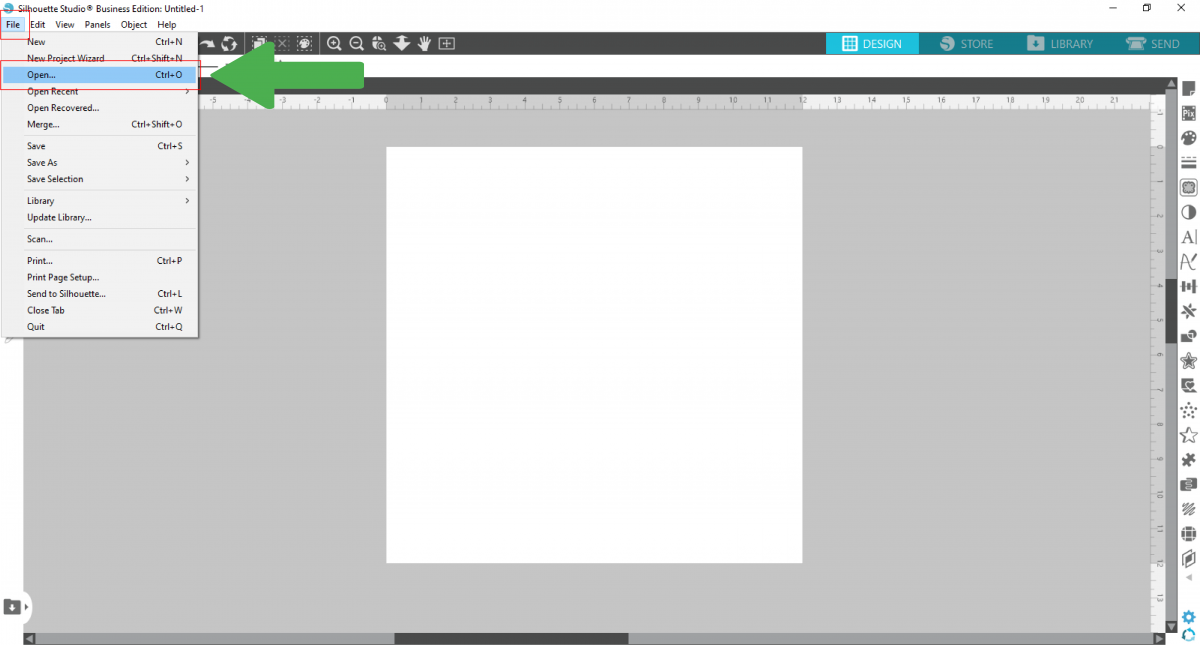
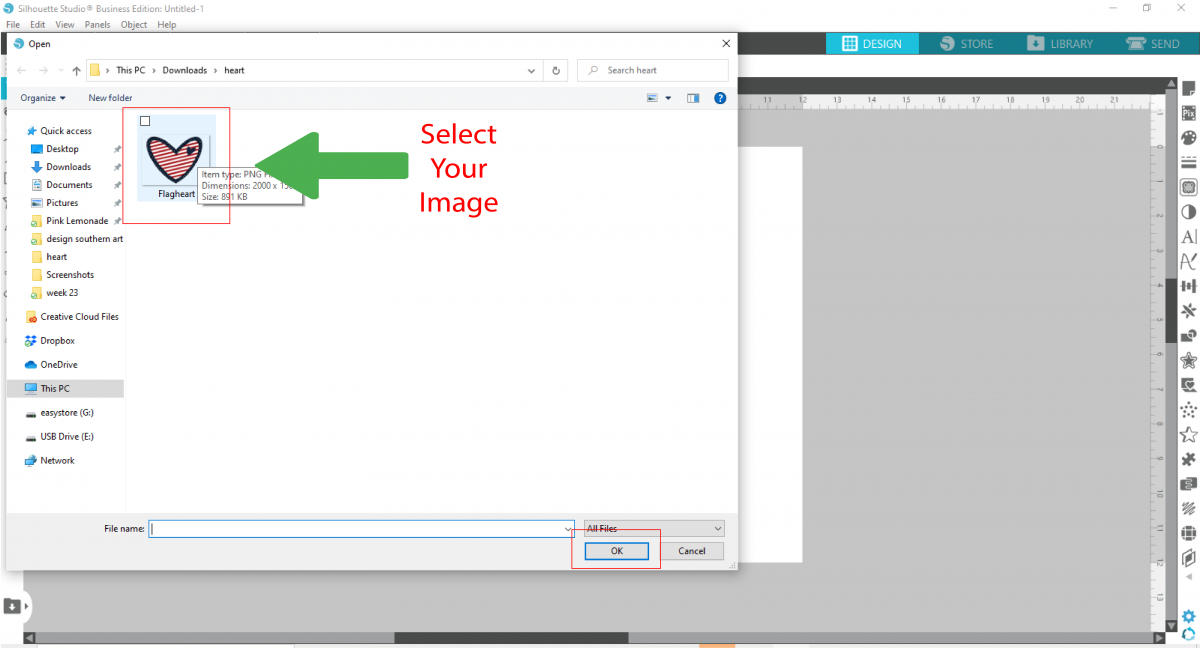
Inside silhouette studio, select "file" and "open." Browse to find your PNG. Once selected, select open. Make sure the PNG you open, has a transparent background.
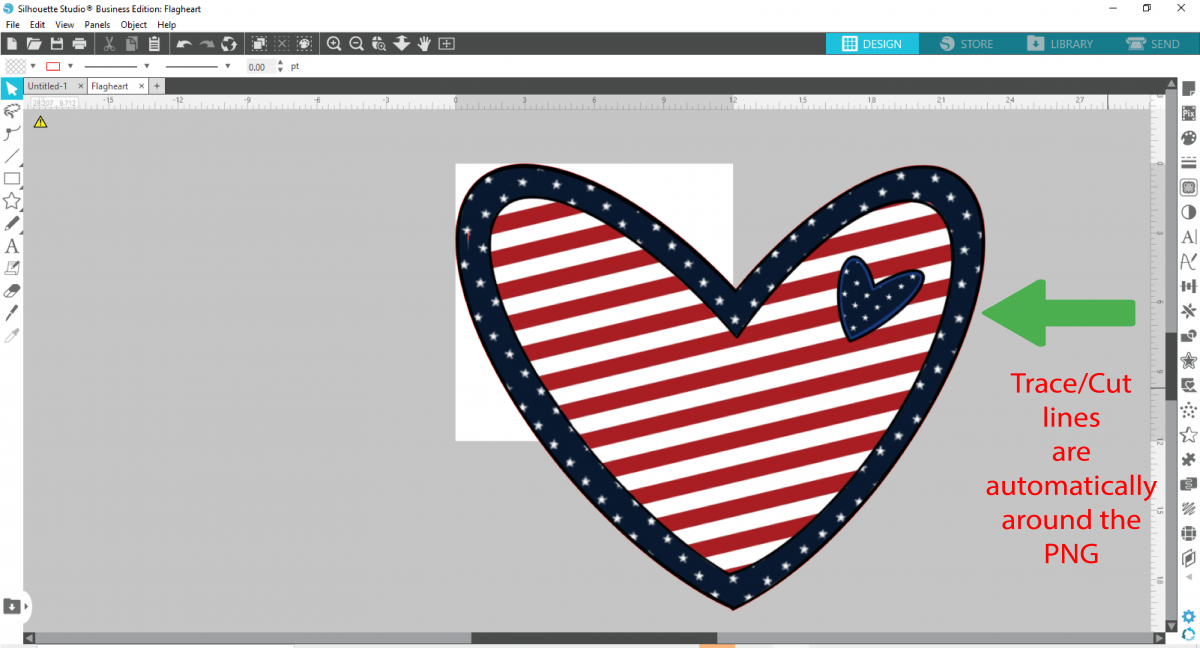
You should immediately see red trace lines around the outside of the image and the areas it is transparent.
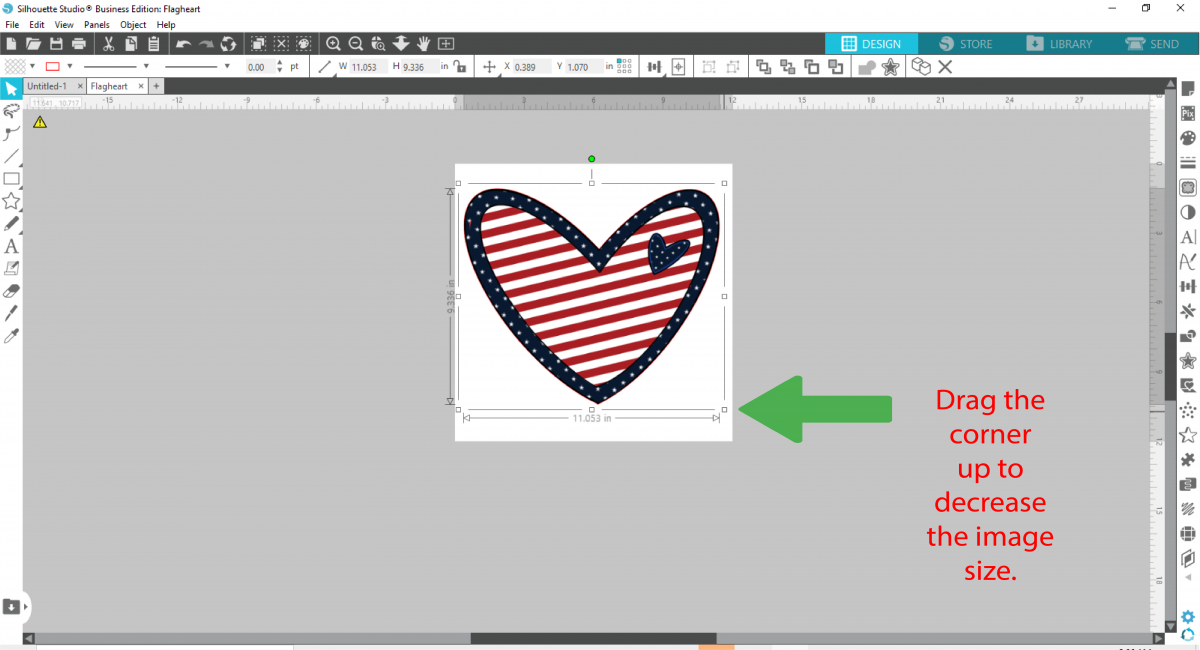
Resize the image to fit in the cut board by "selecting" the image and dragging the corner up.
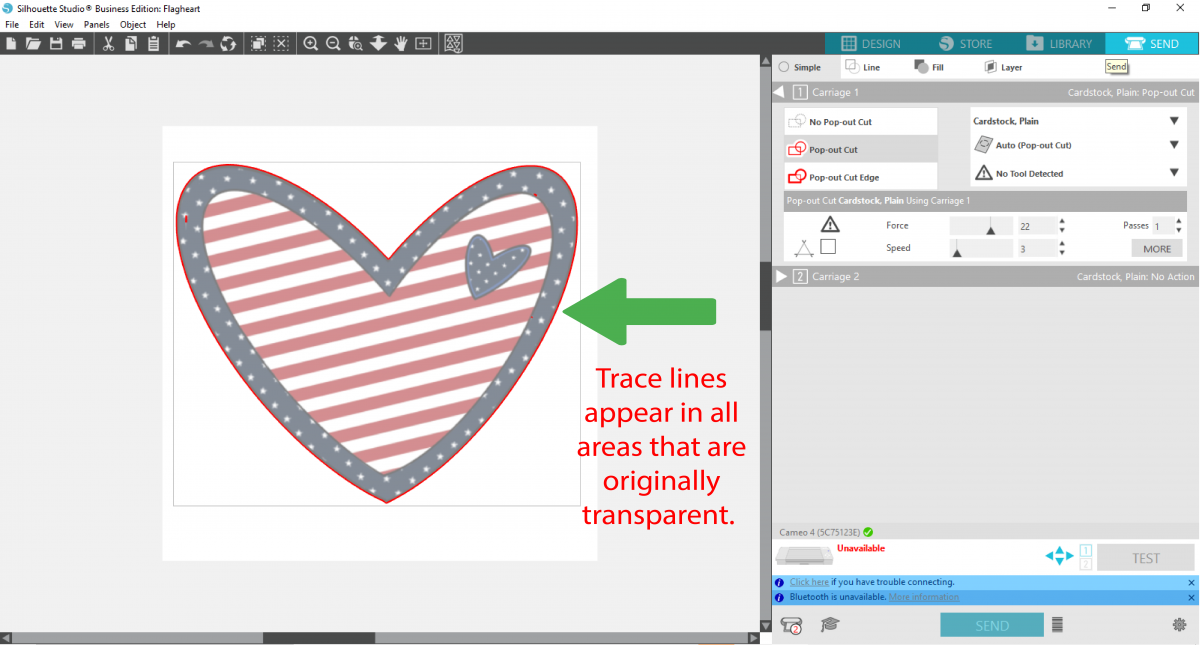
Select "send" in the top right corner. This will allow clearer trace lines to be shown.
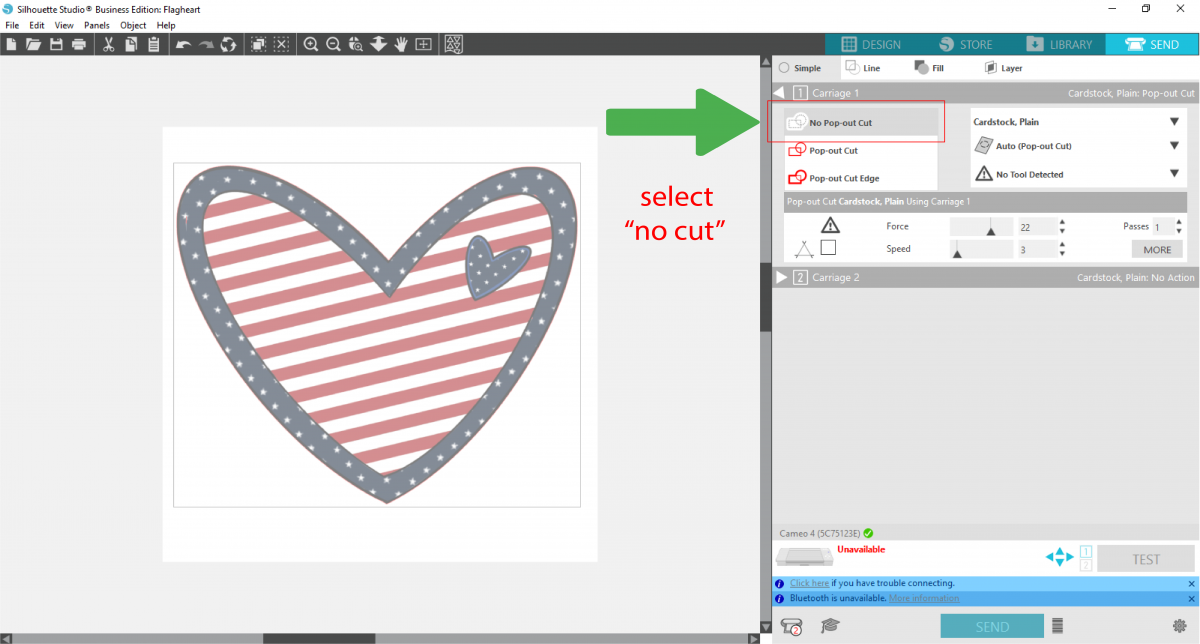
If you don't want the trace lines, it is easy to turn off. While in the "send" option, simply select "no cut."
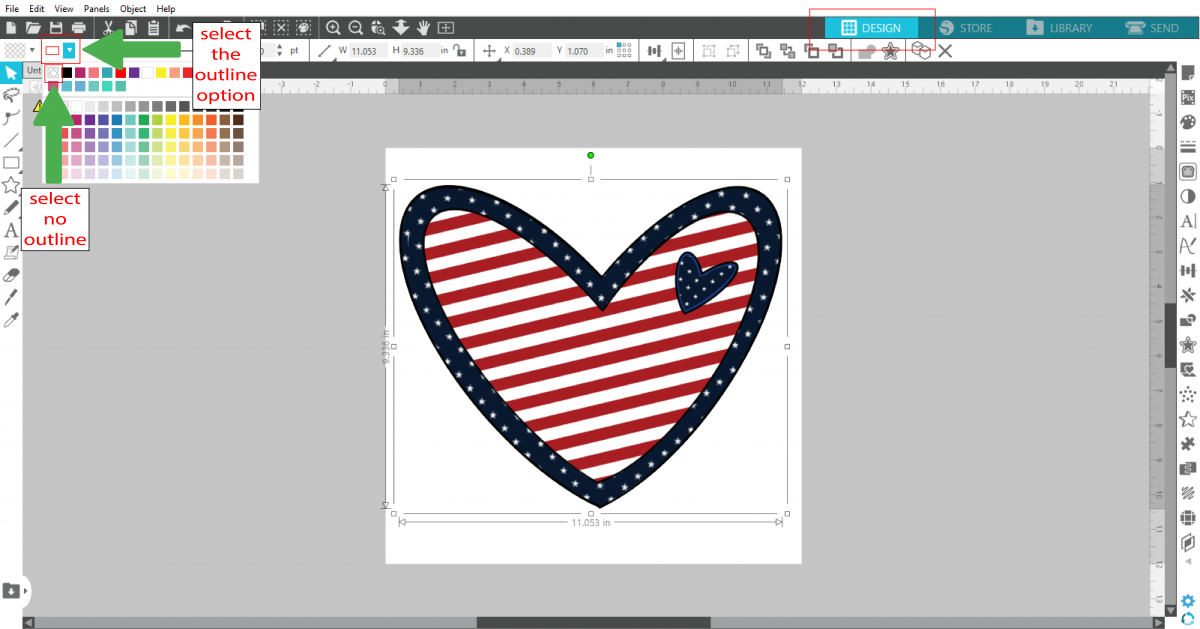
If you step back to the design screen by selecting "design" in the top right corner, you will see the lines are still there. You easily cut them off by selecting your image and then changing the "outline color" to no outline.
If you liked this tutorial make sure to check out our other beginner Silhouette tutorials such as how to use digital papers and how to make a print and cut.
If you are a visual learner, this video is a great reference on how to use the auto trace feature. Find written instructions below.
In this tutorial we will teach you how to use the auto trace feature and how to turn it off, it you prefer to not use it. We are using an American Flag Heart PNG design from our Plus Hub.
Step 1 - Make sure you have 4.4 Silhouette software.
You can check or upgrade to 4.4 by going to silhouetteamerica.com and selecting Software > Desktop Software > Legacy Version > 4.4
Step 2 - Open your "PNG."
Inside silhouette studio, select "file" and "open." Browse to find your PNG. Once selected, select open. Make sure the PNG you open, has a transparent background.
Step 3 - Check trace lines.
You should immediately see red trace lines around the outside of the image and the areas it is transparent.
Step 4- Resize image.
Resize the image to fit in the cut board by "selecting" the image and dragging the corner up.
Step 5- Send to cut.
Select "send" in the top right corner. This will allow clearer trace lines to be shown.
Step 6 - Turn off auto trace in the cut screen.
If you don't want the trace lines, it is easy to turn off. While in the "send" option, simply select "no cut."
Step 7 - Turn off auto trace in the design screen.
If you step back to the design screen by selecting "design" in the top right corner, you will see the lines are still there. You easily cut them off by selecting your image and then changing the "outline color" to no outline.
If you liked this tutorial make sure to check out our other beginner Silhouette tutorials such as how to use digital papers and how to make a print and cut.
Related Tutorials
Silhouette Tutorials
How to Use the Puzzle Feature in Silhouette Studio
In just 4 easy to follow steps discover how to use the Puzzle Feature in Silhouette Studio.
Silhouette Tutorials
How to Use Advanced Color Settings in Silhouette Studio
Discover the Advanced Color Settings in Silhouette Studio!
Silhouette Tutorials
How to Use Your Silhouette Studio Library on More Than One Computer
Learn how to access your Silhouette Studio Design Edition library on up to 3 different devices!
Silhouette Tutorials
How to Use Point Editing in Silhouette Studio
Silhouette Tutorials
How to Use Compound Paths in Silhouette Studio
Silhouette Tutorials
How to use SVG Files in Silhouette Studio
In this tutorial, learn how to upload and use SVG file in Silhouette Studio.