
By Design Bundles
How To Use the Pixscan Mat In Silhouette Studio
The Pixscan mat is a tool that allows you to scan in designs and create precise cuts. It is a great tool for hand drawn works of art or printed designs. You can use the Pixscan mat as an alternative option to registration marks. In our tutorial, we will show you how to use the Pixscan mat in Silhouette Studio.
Iwill beusing the design,Valentine's Day Doodles, but we have a range of cute clipart designs to choose from.
Step 1 - Upload your Pixscan image
Your designs, when printed or hand drawn, are placed onto the Pixscan mat. A photo is taken of the mat and loaded into the Pixscan option. So let us begin by opening Silhouette Studio.
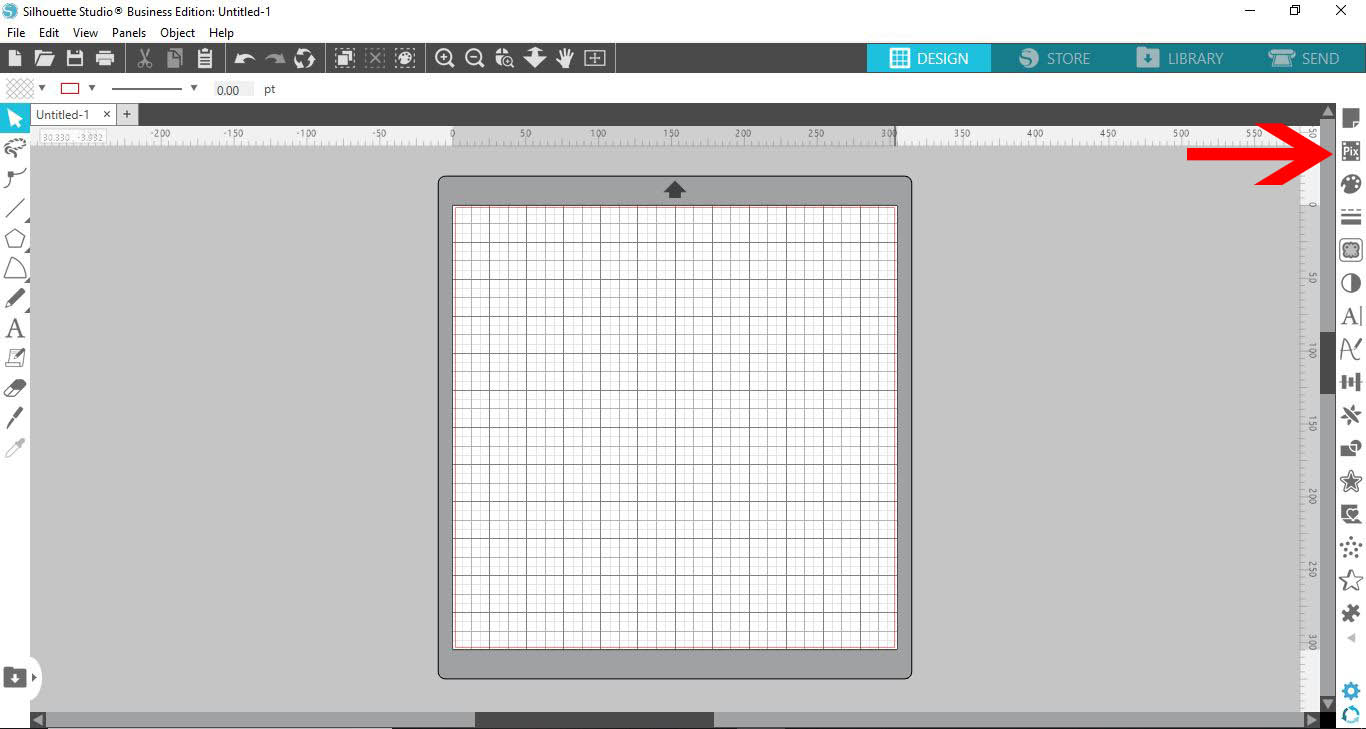
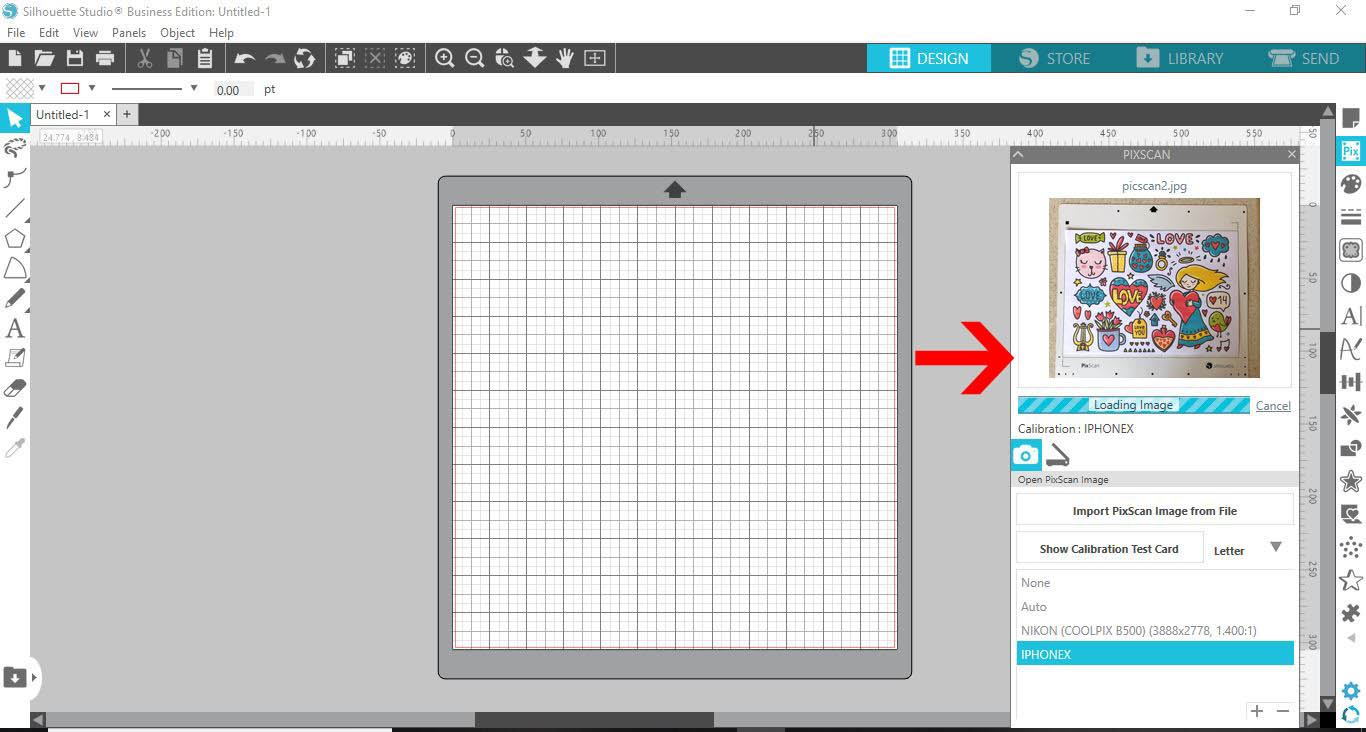
Next, click on the Pixscan panel on the right hand side.
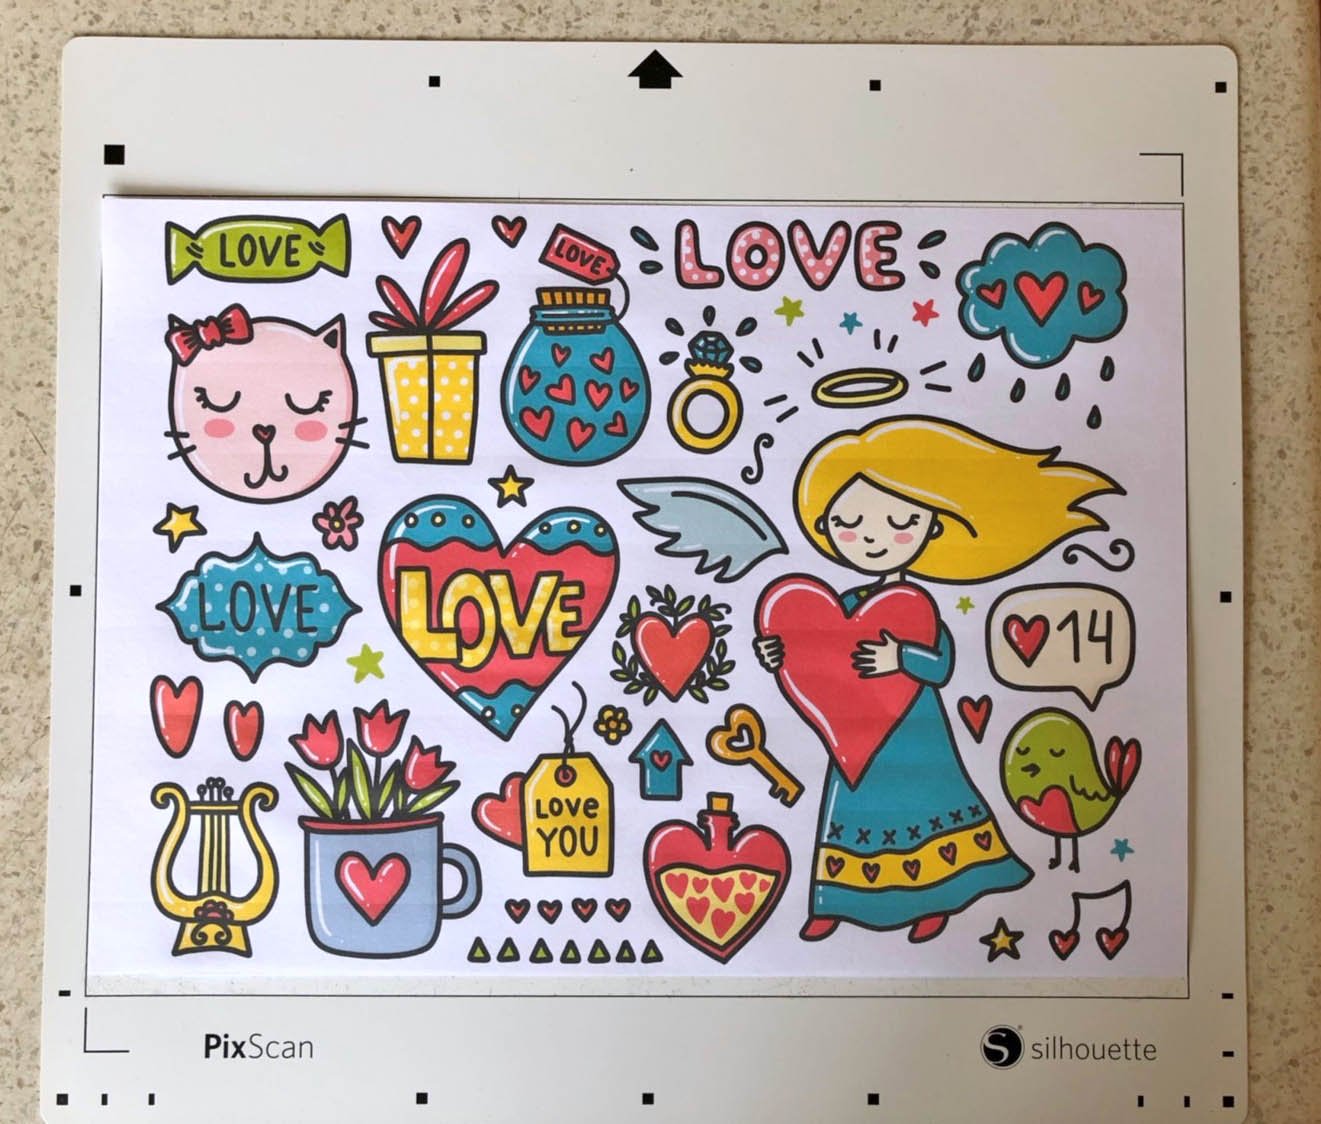
Place the designs that you want to cut out onto your Pixscan mat. Take a clear photo of the mat and images. It may help to take more than one photo just in case. Import the photos into a file on your PC.
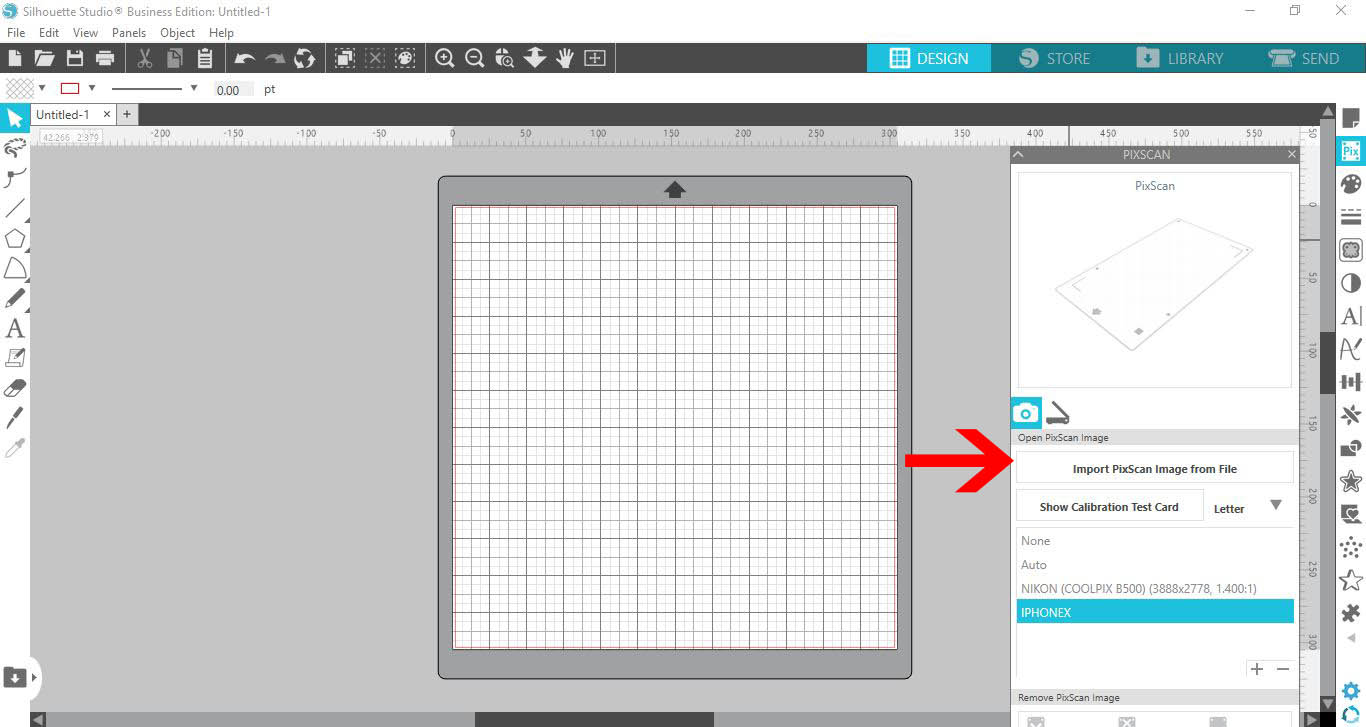
With the Pixscan panel open, click on Import Pixscan Image from File.
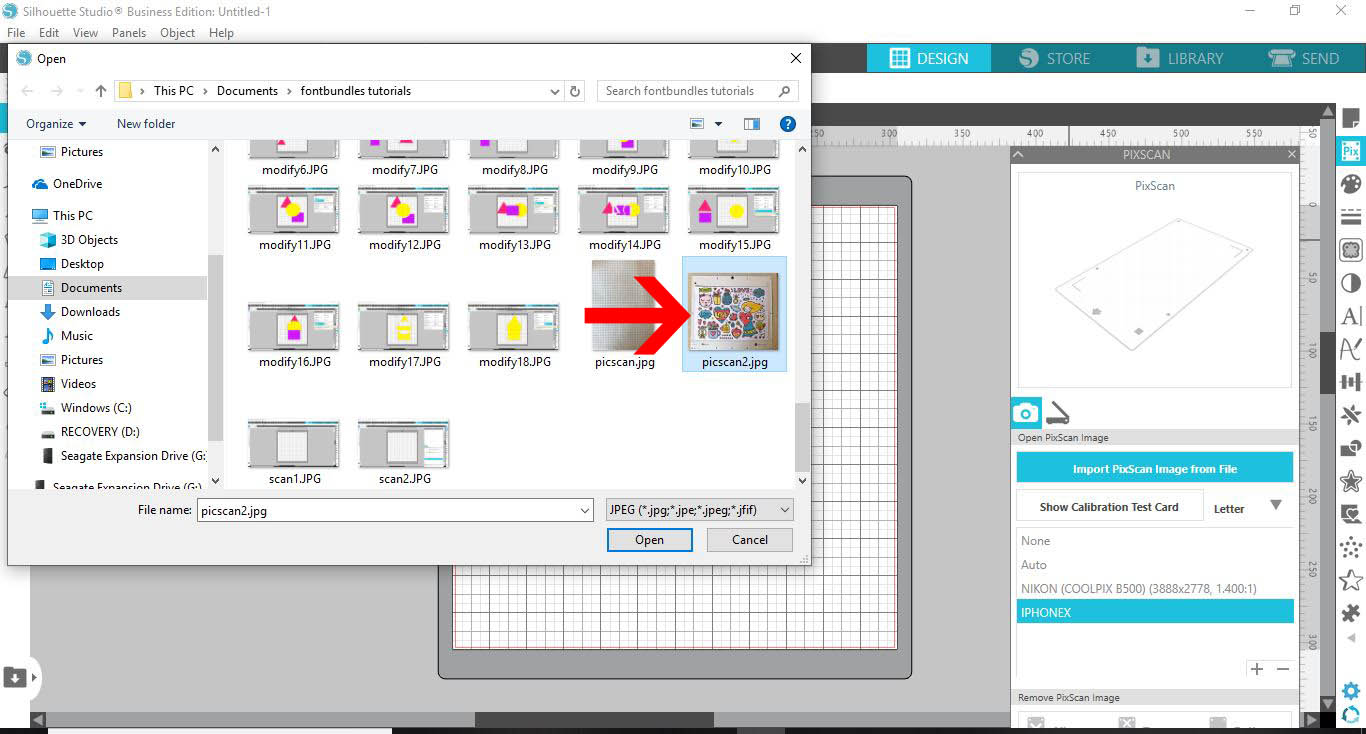
Locate where your images are stored, choose one and click Open to upload.
You will see the image in your Pixscan panel. It may take a few minutes to upload depending on the size of the file.
Step 2 - Use the Trace option to create cut lines
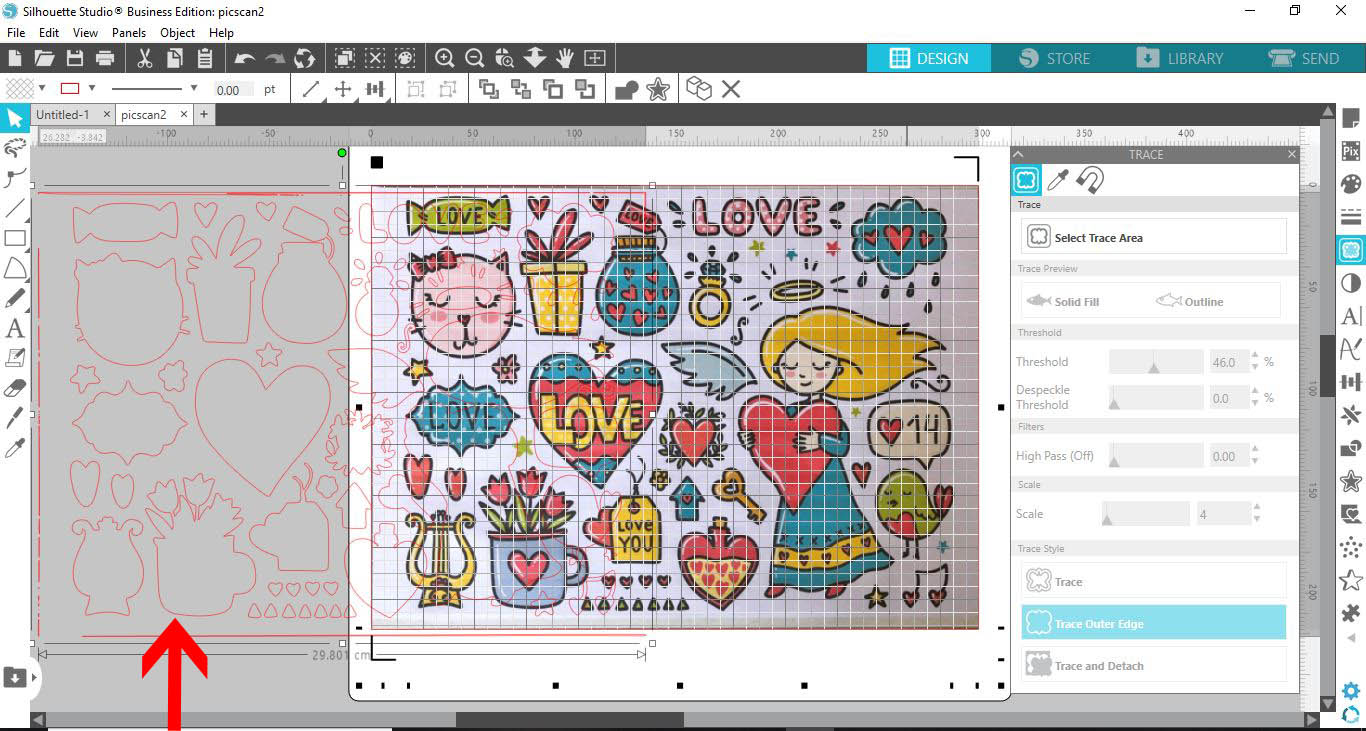
After uploading the image, we will use the Trace option to create cut lines. Once uploaded, the file will appearas a Pixscan mat in the Silhouette Studio.
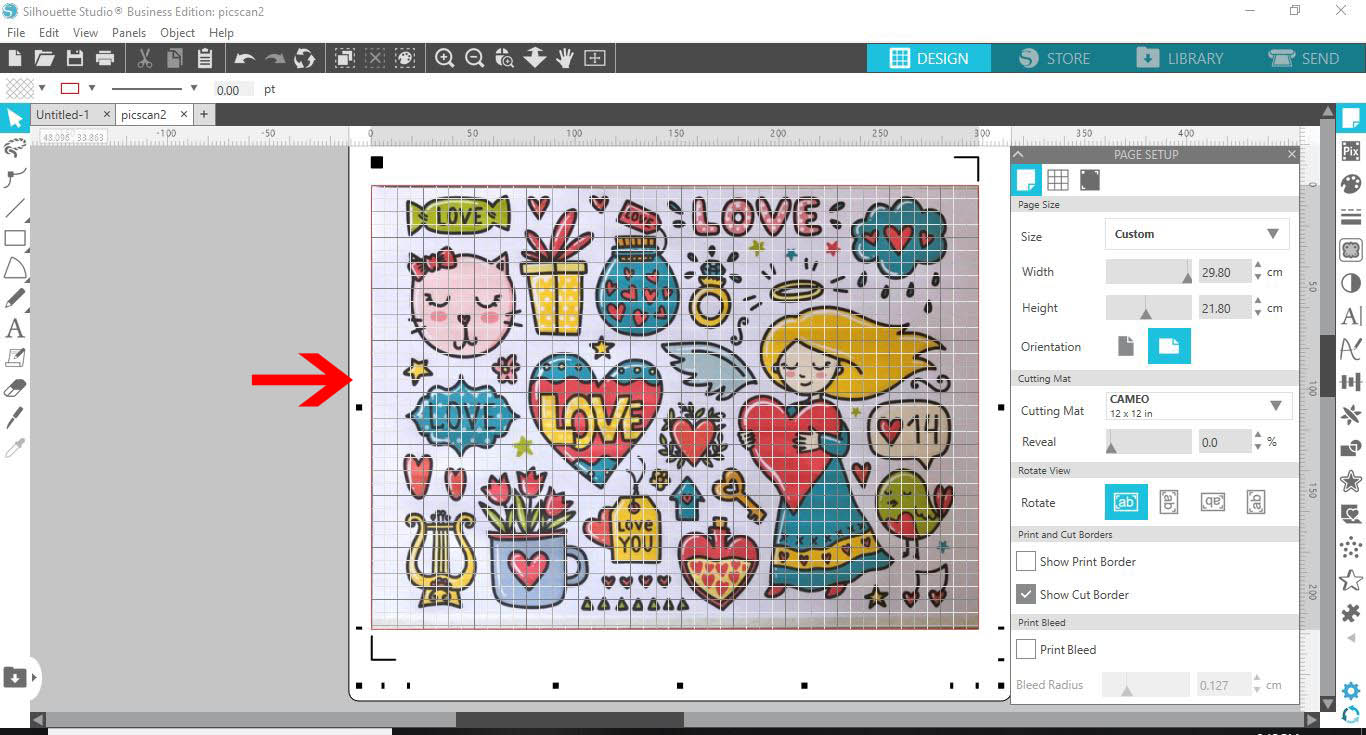
On the left side panel click on the Trace panel icon. Next, click on Select Trace Area.
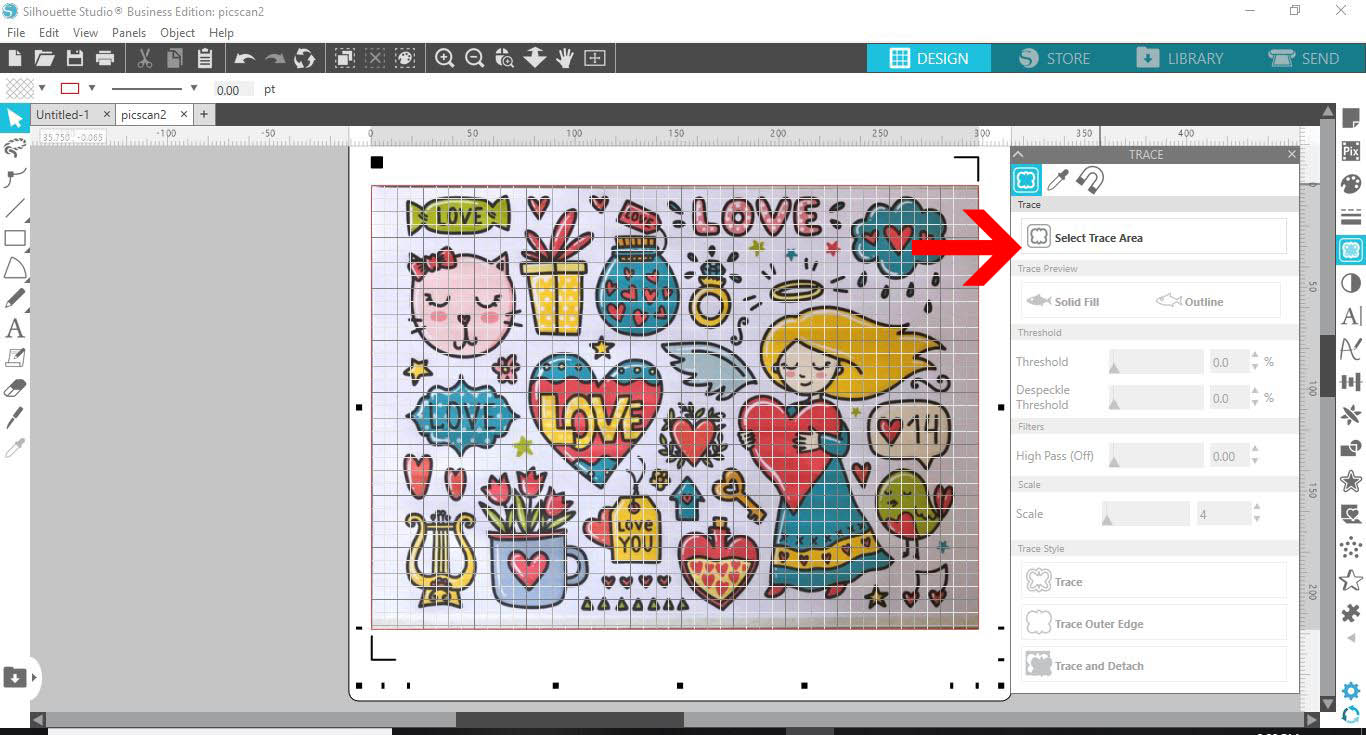
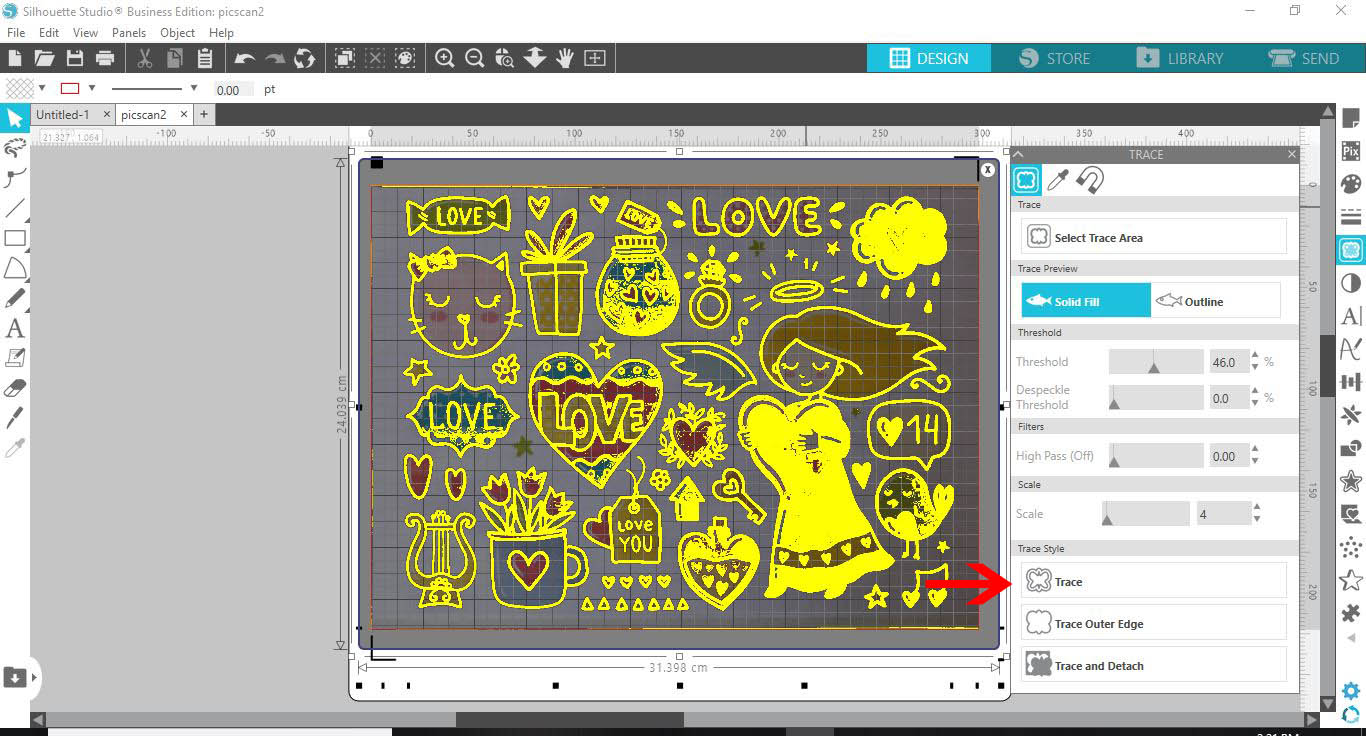
You may need to adjust the Threshold as we did so everything is highlighted in yellow. Now, click on the Trace option at the bottom of the panel. If you have never used the Trace Panel before, we have a great tutorial on how to trace in Silhouette Studio.
Step 3 - Adjust the cut lines and Send to cut
When tracing is complete, you will see red cut lines around your images. There may be areas that need to be removed as some artifacts can occur. We shifted our lines to the side, removed the excess areas, and repositioned back over the Pixscan mat.
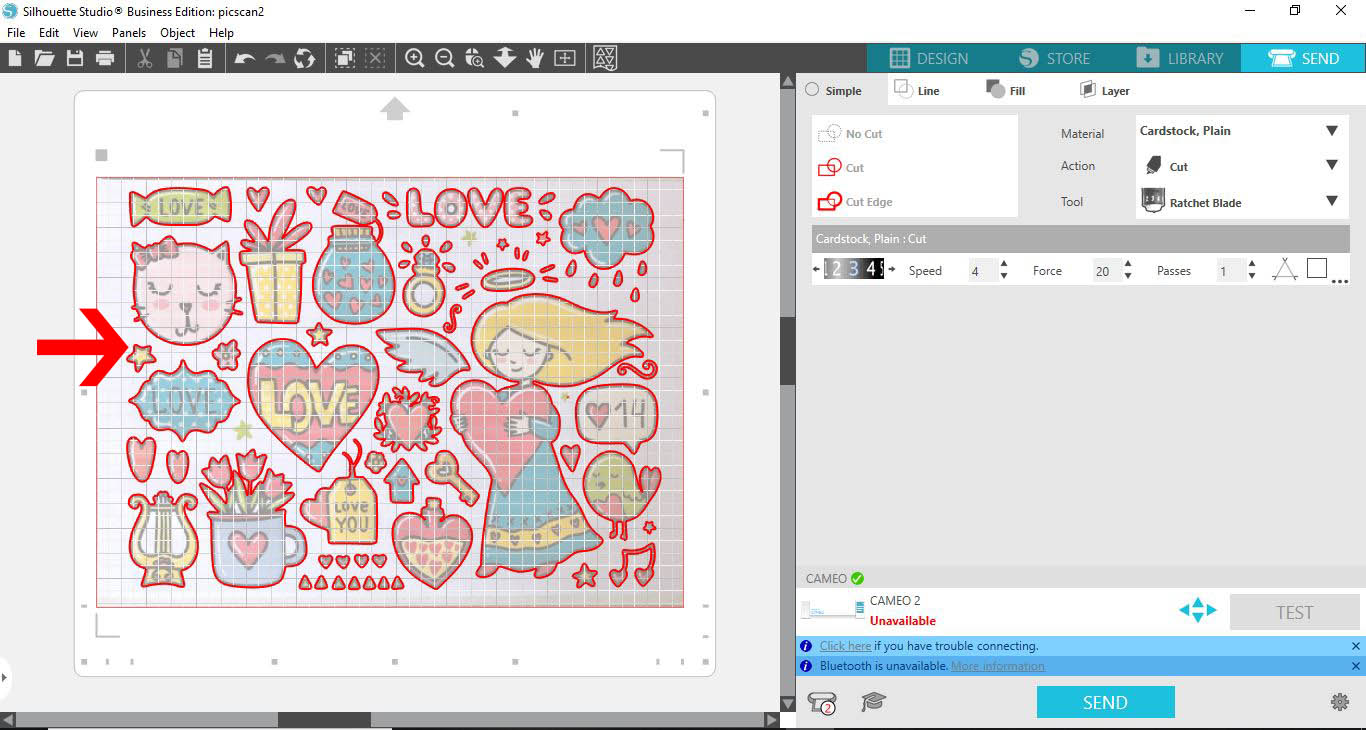
Go to the Send panel top right of the screen. Here you will find your cut settings. The cut lines will be highlighted in red. Adjust your cut settings for your material and when ready click the Send button at the bottom.
We hope you enjoyed following this tutorial. If you did, be sure to have a look at tracing multi color imagesand importing patterns into your library in Silhouette Studio.