By Design Bundles
Silhouette Tutorials7 min
Segment Overcut Feature in Silhouette V4.1
The Segment Overcut feature in Silhouette V4.1 helps you get cleaner cuts on sharp corners. As the blade moves, it cuts past the point, lifts up and comes back to the point. It then carries on cutting from that point. This prevents ripping of material where the blade would be forced to turn. Follow our tutorial as we guide you on how to use the Line Segment Overcut feature in Silhouette V4.1
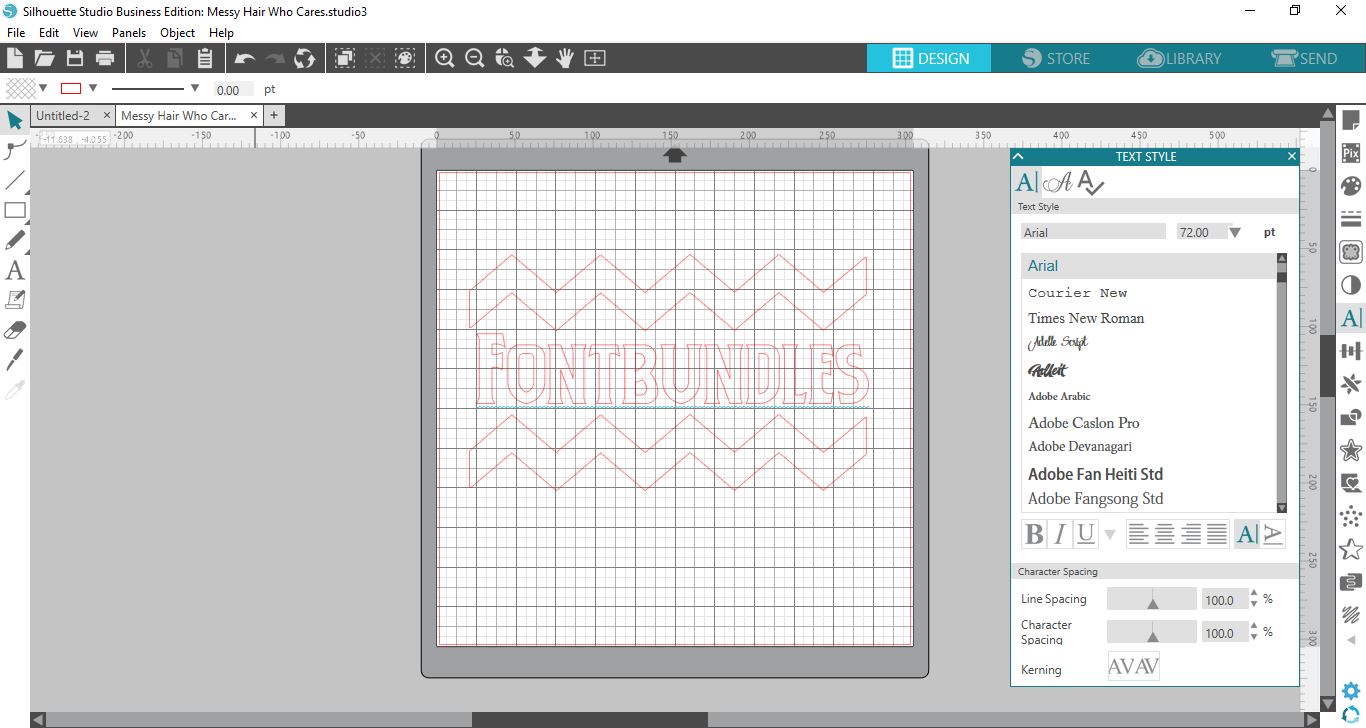
We created a quick design using Flexi shapes and a bold Gothic style font. If you would like to learn more, check out using Flexi shapes in Silhouette Studio. You can also browse our awesome selection of Gothic fonts if needed.
In Silhouette Studio, create your design or import a design you would like to use. If you would like to use a ready made design have a look at our Banner SVGs for more inspiration. Here we have our design all set up and ready to go.
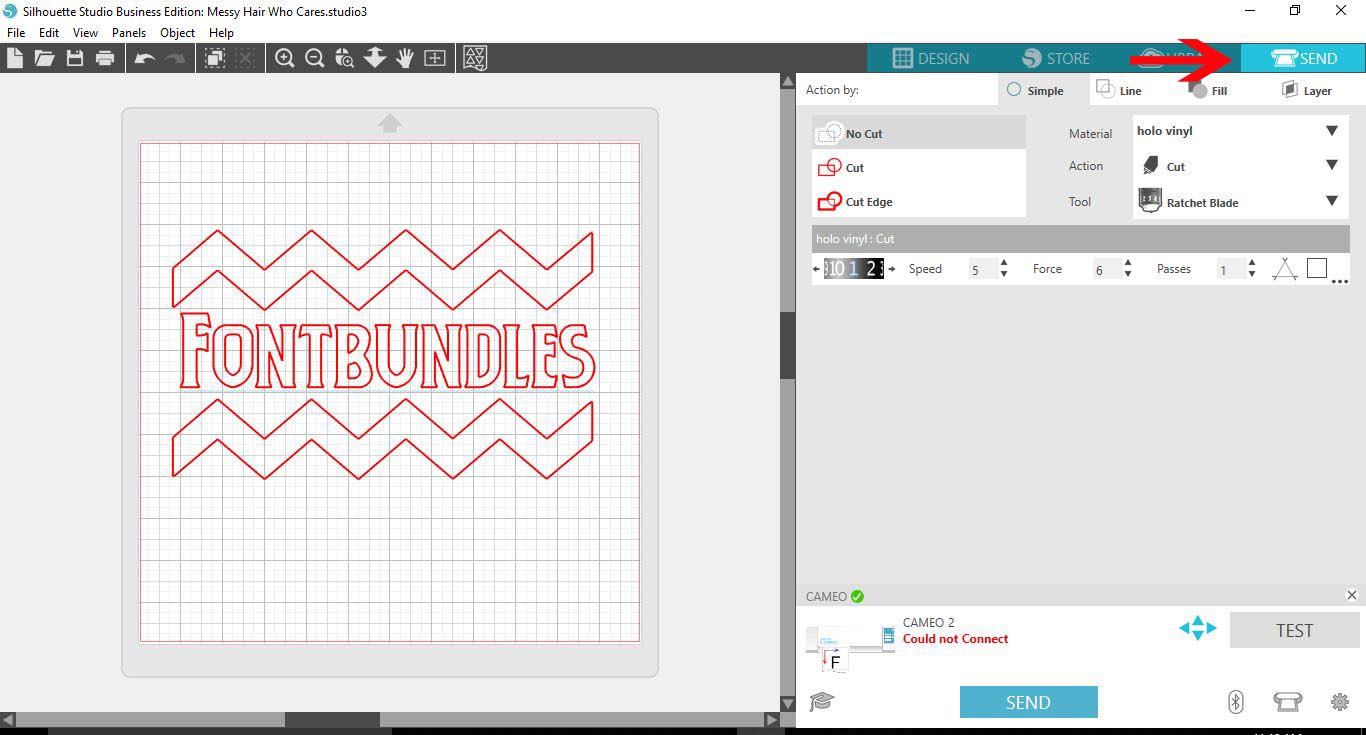
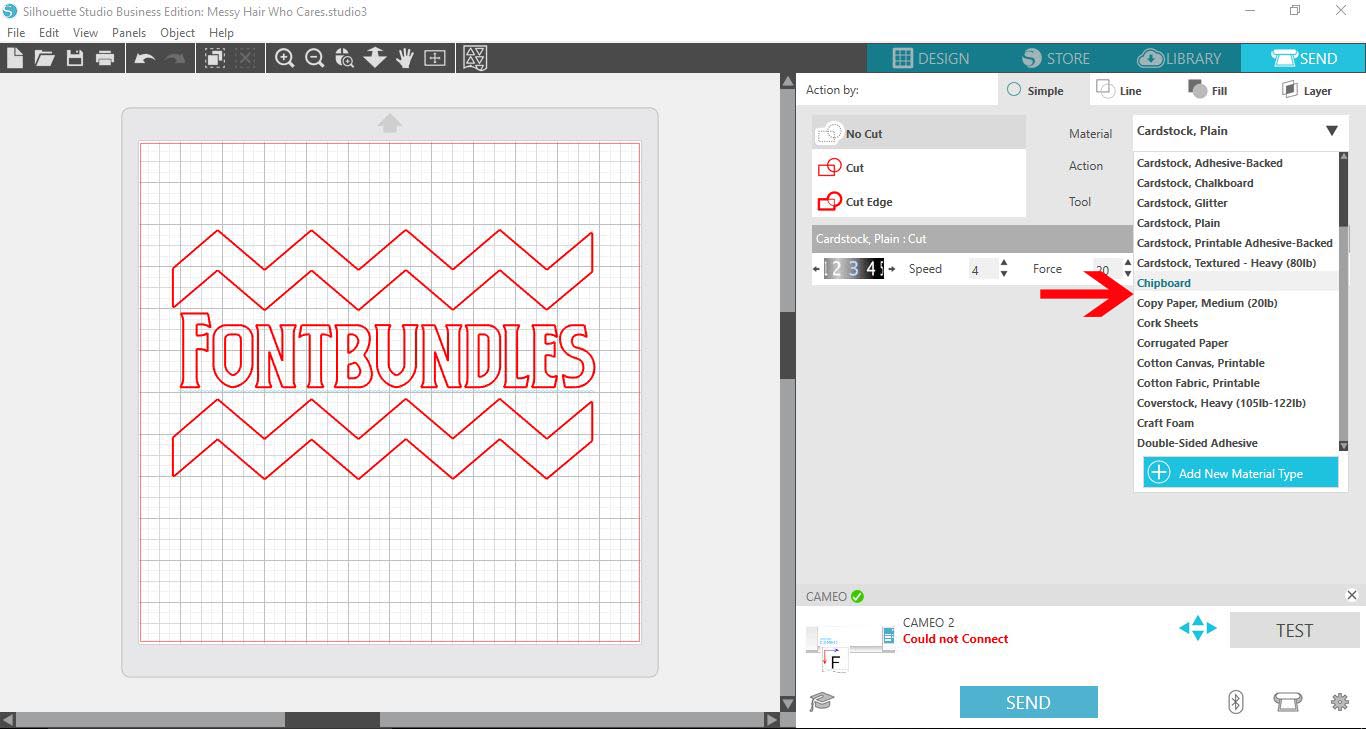
The Send panel is where you will find your cut and material settings. Here you will be able to adjust according to your needs. Next to the Material option select your media. Make sure Action is set to cut and then choose your Tool.
Tick the box next to Line Segment Overcut. Once the box is ticked, the options for the Line Segment Overcut will appear. You can adjust the overcut at the Start and the End. This means that the End point is where the blade will stop cutting and lift up. The Start point is where the blade will start again.
The overcut will only extend where there are straight corners. It will also only extend depending on the mm amount you input. We have found that 0.50mm is a good starting point. Once finished click on Save As.
While in the Material Settings panel you can rename this new settings. Click to select the setting, right click > Rename. Each time you use this setting the overcut will be applied.
We created a quick design using Flexi shapes and a bold Gothic style font. If you would like to learn more, check out using Flexi shapes in Silhouette Studio. You can also browse our awesome selection of Gothic fonts if needed.
Step 1 - Go to the Send panel
In Silhouette Studio, create your design or import a design you would like to use. If you would like to use a ready made design have a look at our Banner SVGs for more inspiration. Here we have our design all set up and ready to go.
Next, click on the Send icon to access the material cut settings.
Step 2 - Select and adjust cut settings
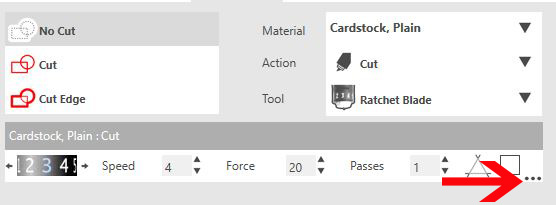
The Send panel is where you will find your cut and material settings. Here you will be able to adjust according to your needs. Next to the Material option select your media. Make sure Action is set to cut and then choose your Tool.
Depending on your software, you will either see three small dots next to the cut settings or the word More. Click on this to open the options for the Line Segment Overcut.
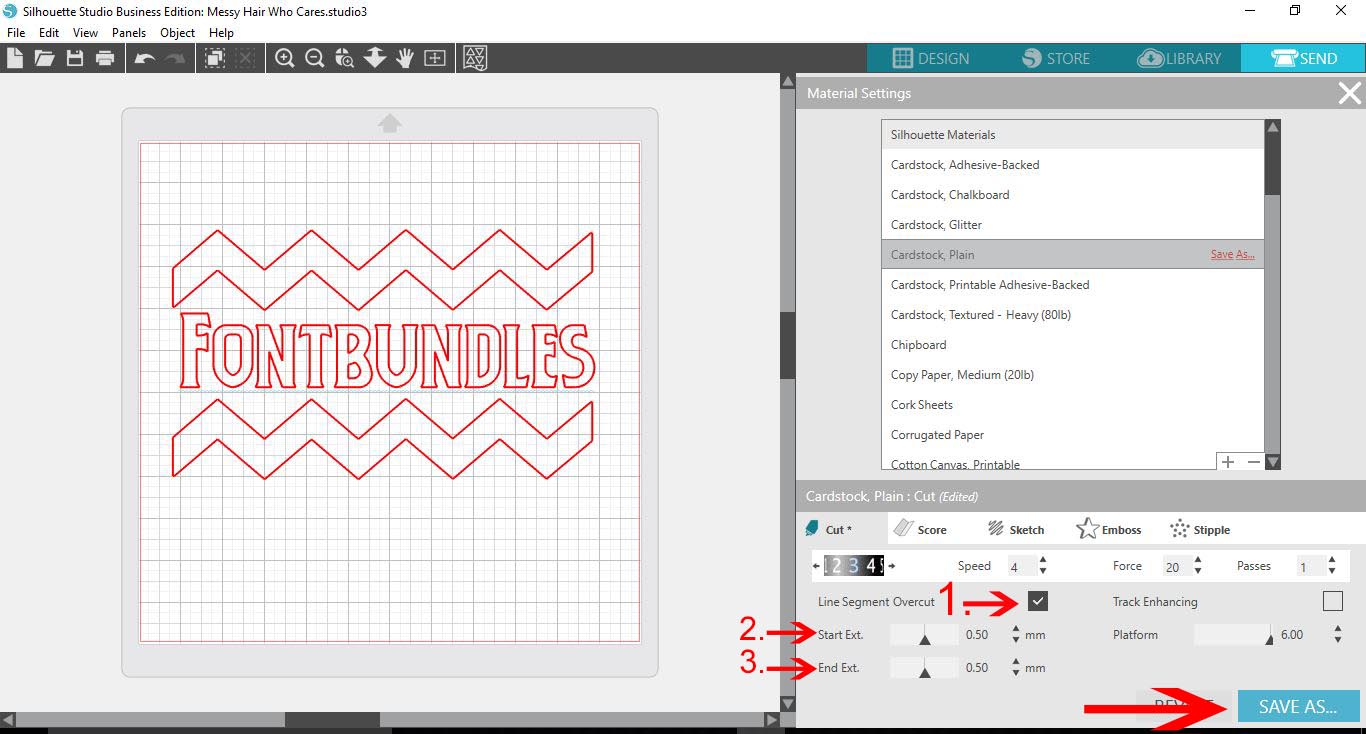
Tick the box next to Line Segment Overcut. Once the box is ticked, the options for the Line Segment Overcut will appear. You can adjust the overcut at the Start and the End. This means that the End point is where the blade will stop cutting and lift up. The Start point is where the blade will start again.
The overcut will only extend where there are straight corners. It will also only extend depending on the mm amount you input. We have found that 0.50mm is a good starting point. Once finished click on Save As.
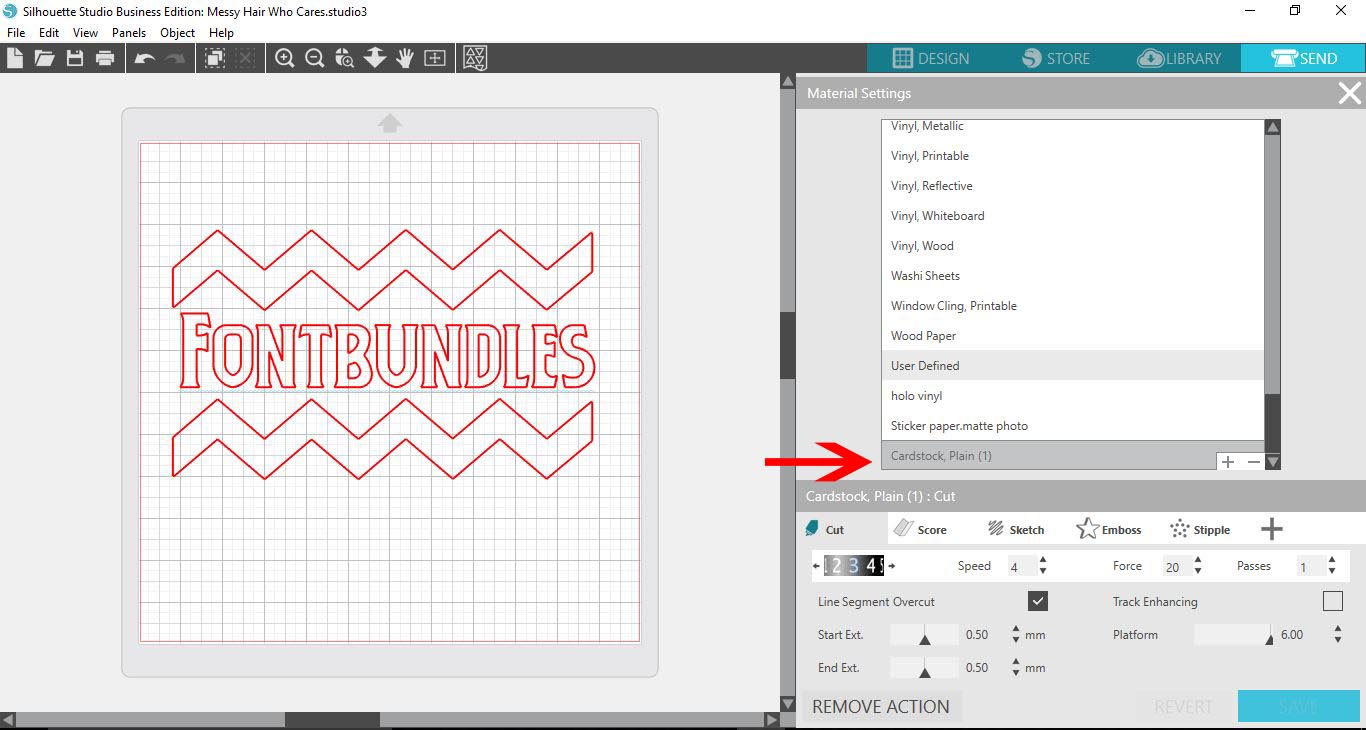
While in the Material Settings panel you can rename this new settings. Click to select the setting, right click > Rename. Each time you use this setting the overcut will be applied.
If you found this tutorial helpful, we have more excellent tutorials including importing patterns to your library, creating a print and cut and using the Lasso tool in Silhouette Studio.Save
Related Tutorials
Silhouette Tutorials
Drop Shadow Feature in Silhouette V4.1
Silhouette Tutorials
Nesting Feature in Silhouette V4.1
In this easy to follow guide you will learn how to use the Nesting feature in Silhouette Studio.
Silhouette Tutorials
Tiling Feature in Silhouette V4.1
Learn how to use the tiling feature with this Silhouette Studio tutorial.
Silhouette Tutorials
Font Management Feature in Silhouette V4.1
Discover how to quickly organize fonts with the font management feature in Silhouette Studio V4.1.
Silhouette Tutorials
Multiple Undo Feature in Silhouette Business Edition V4.1
Silhouette Tutorials