
By Design Bundles
Affinity Tutorials13 min
How to Create Isometric Text in Affinity Designer
Isometric Text or Perspective Text can be daunting to create, but Affinity Designer offers a simple way to get great effects with this type of text.
In this lesson, we'll be using the font Cedric which is available in the Plus Member Section, and Bohema Spirit which is available for purchase on Font Bundles.
You can create your document any size but make sure you give yourself plenty of space to work. I chose to create a 5000 pixel square document.
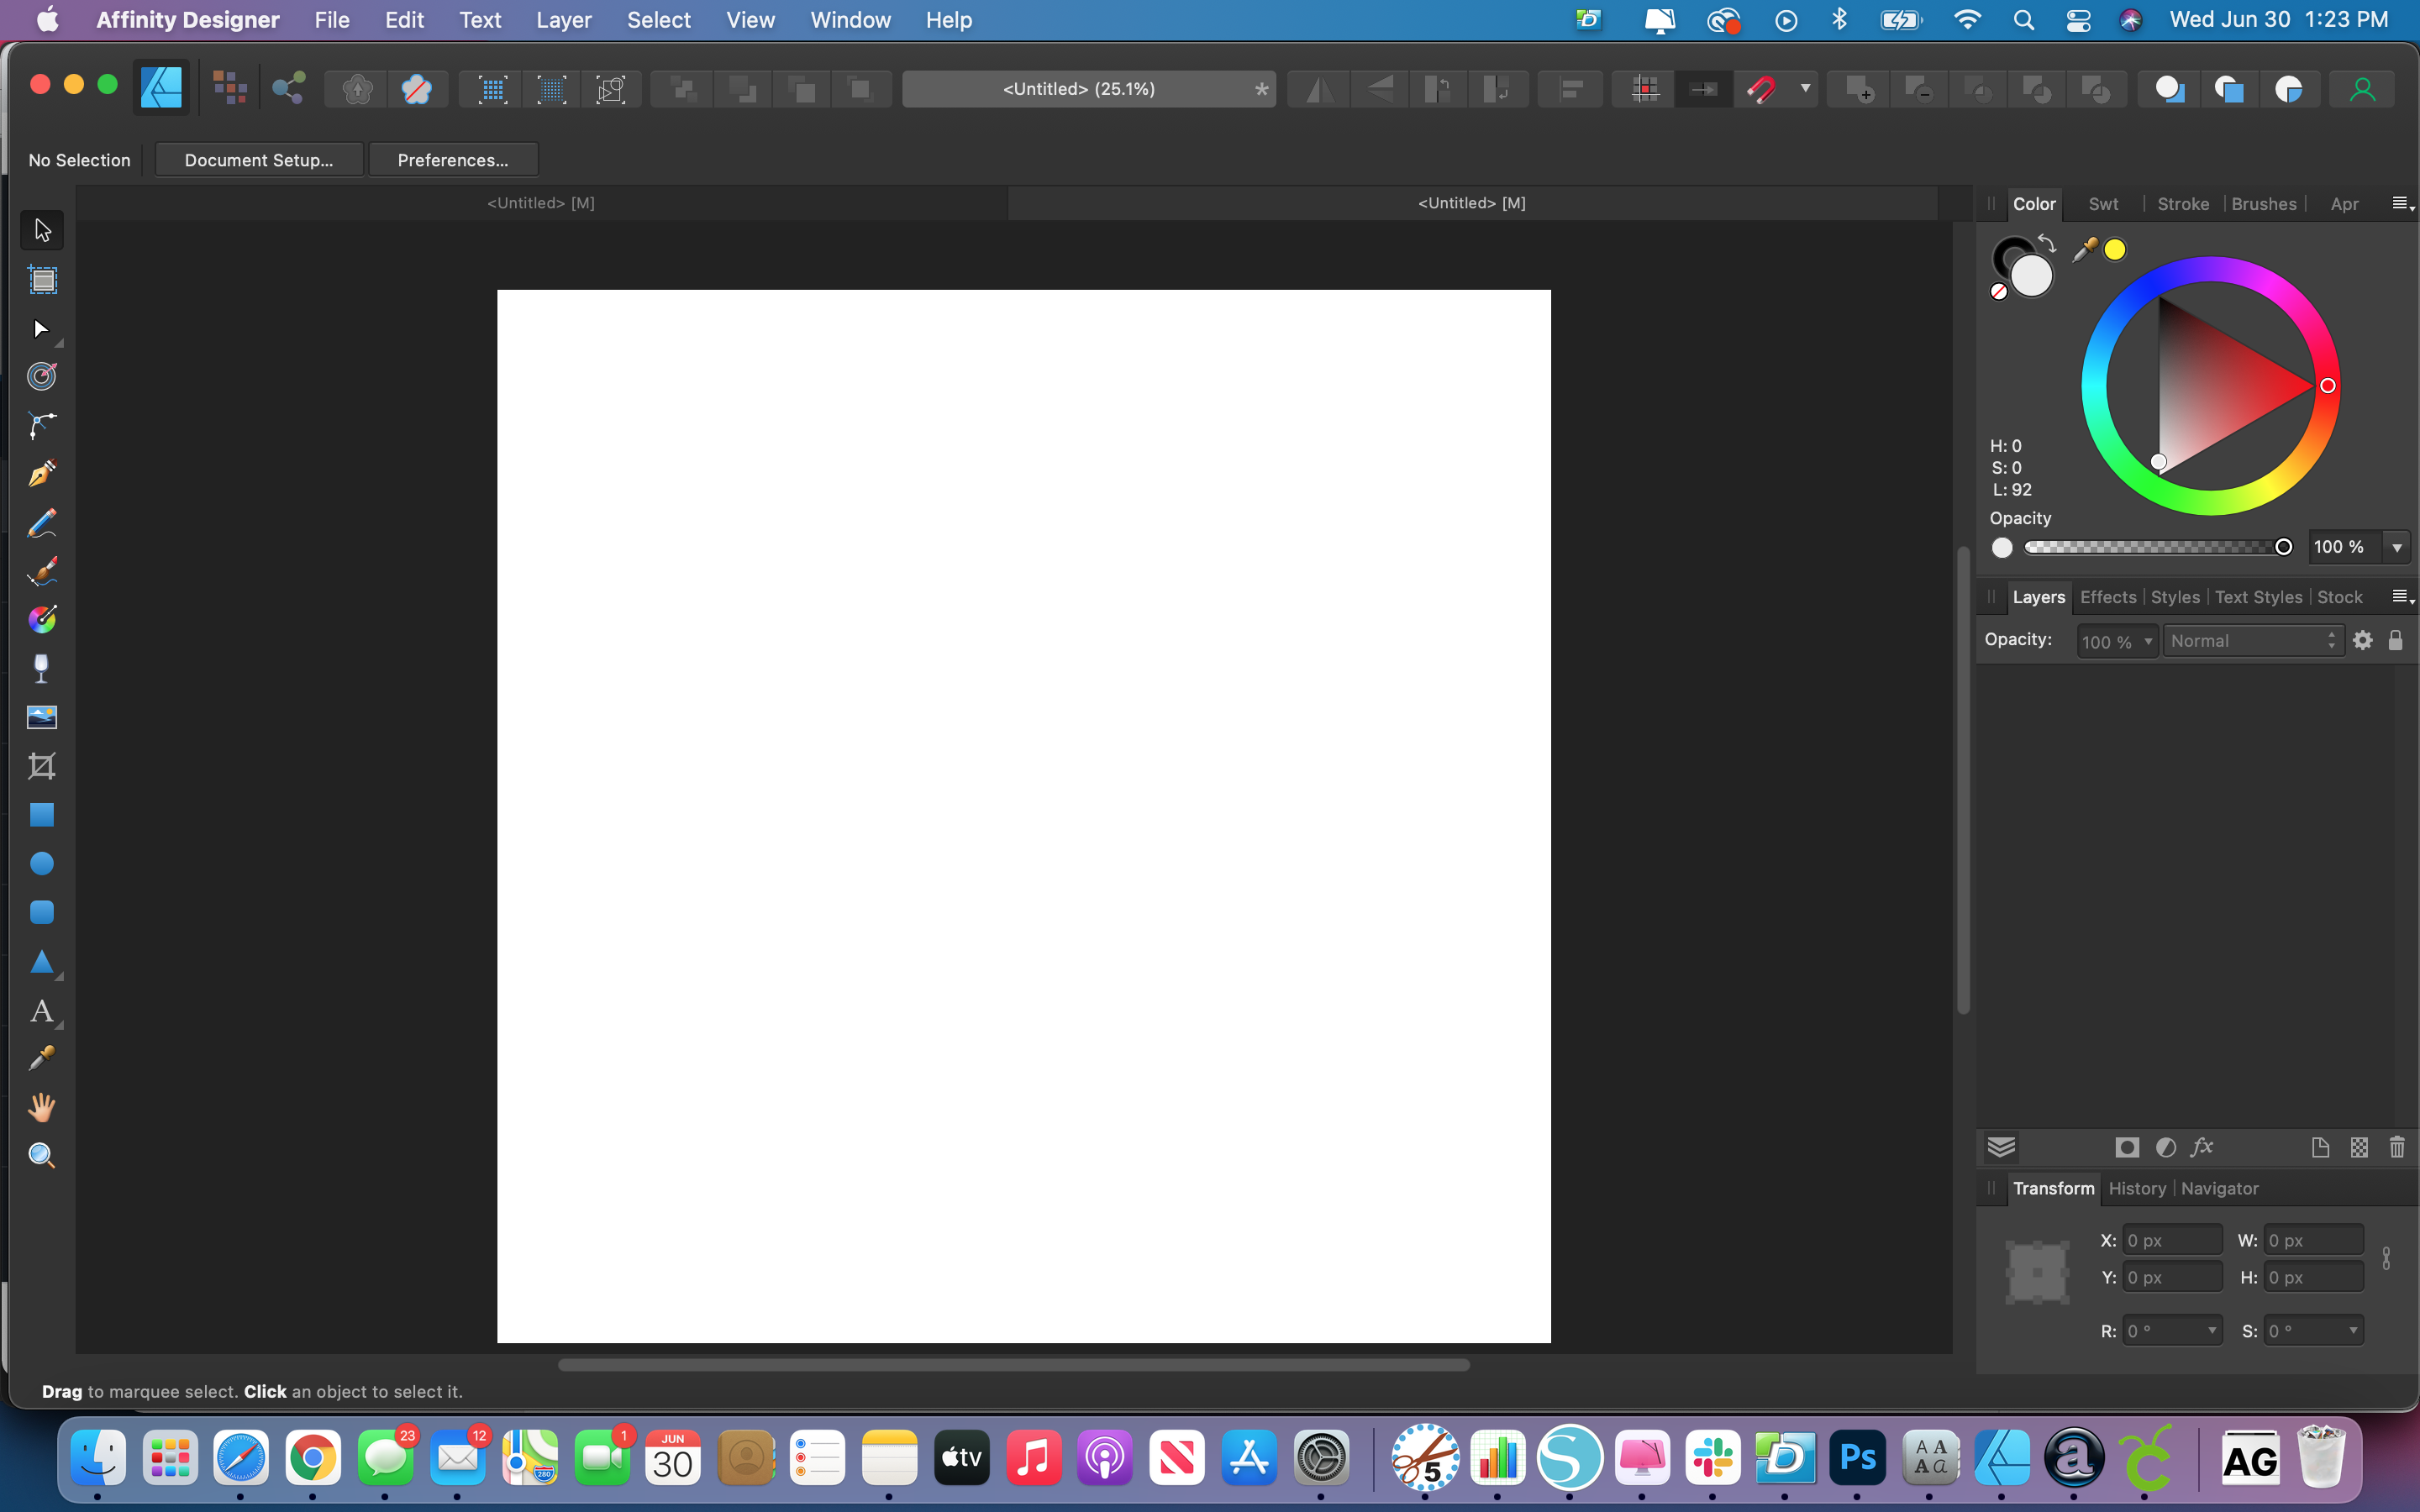
You'll need a grid to work with your text. Open up the View menu and then go to Grid and Axis Manager.
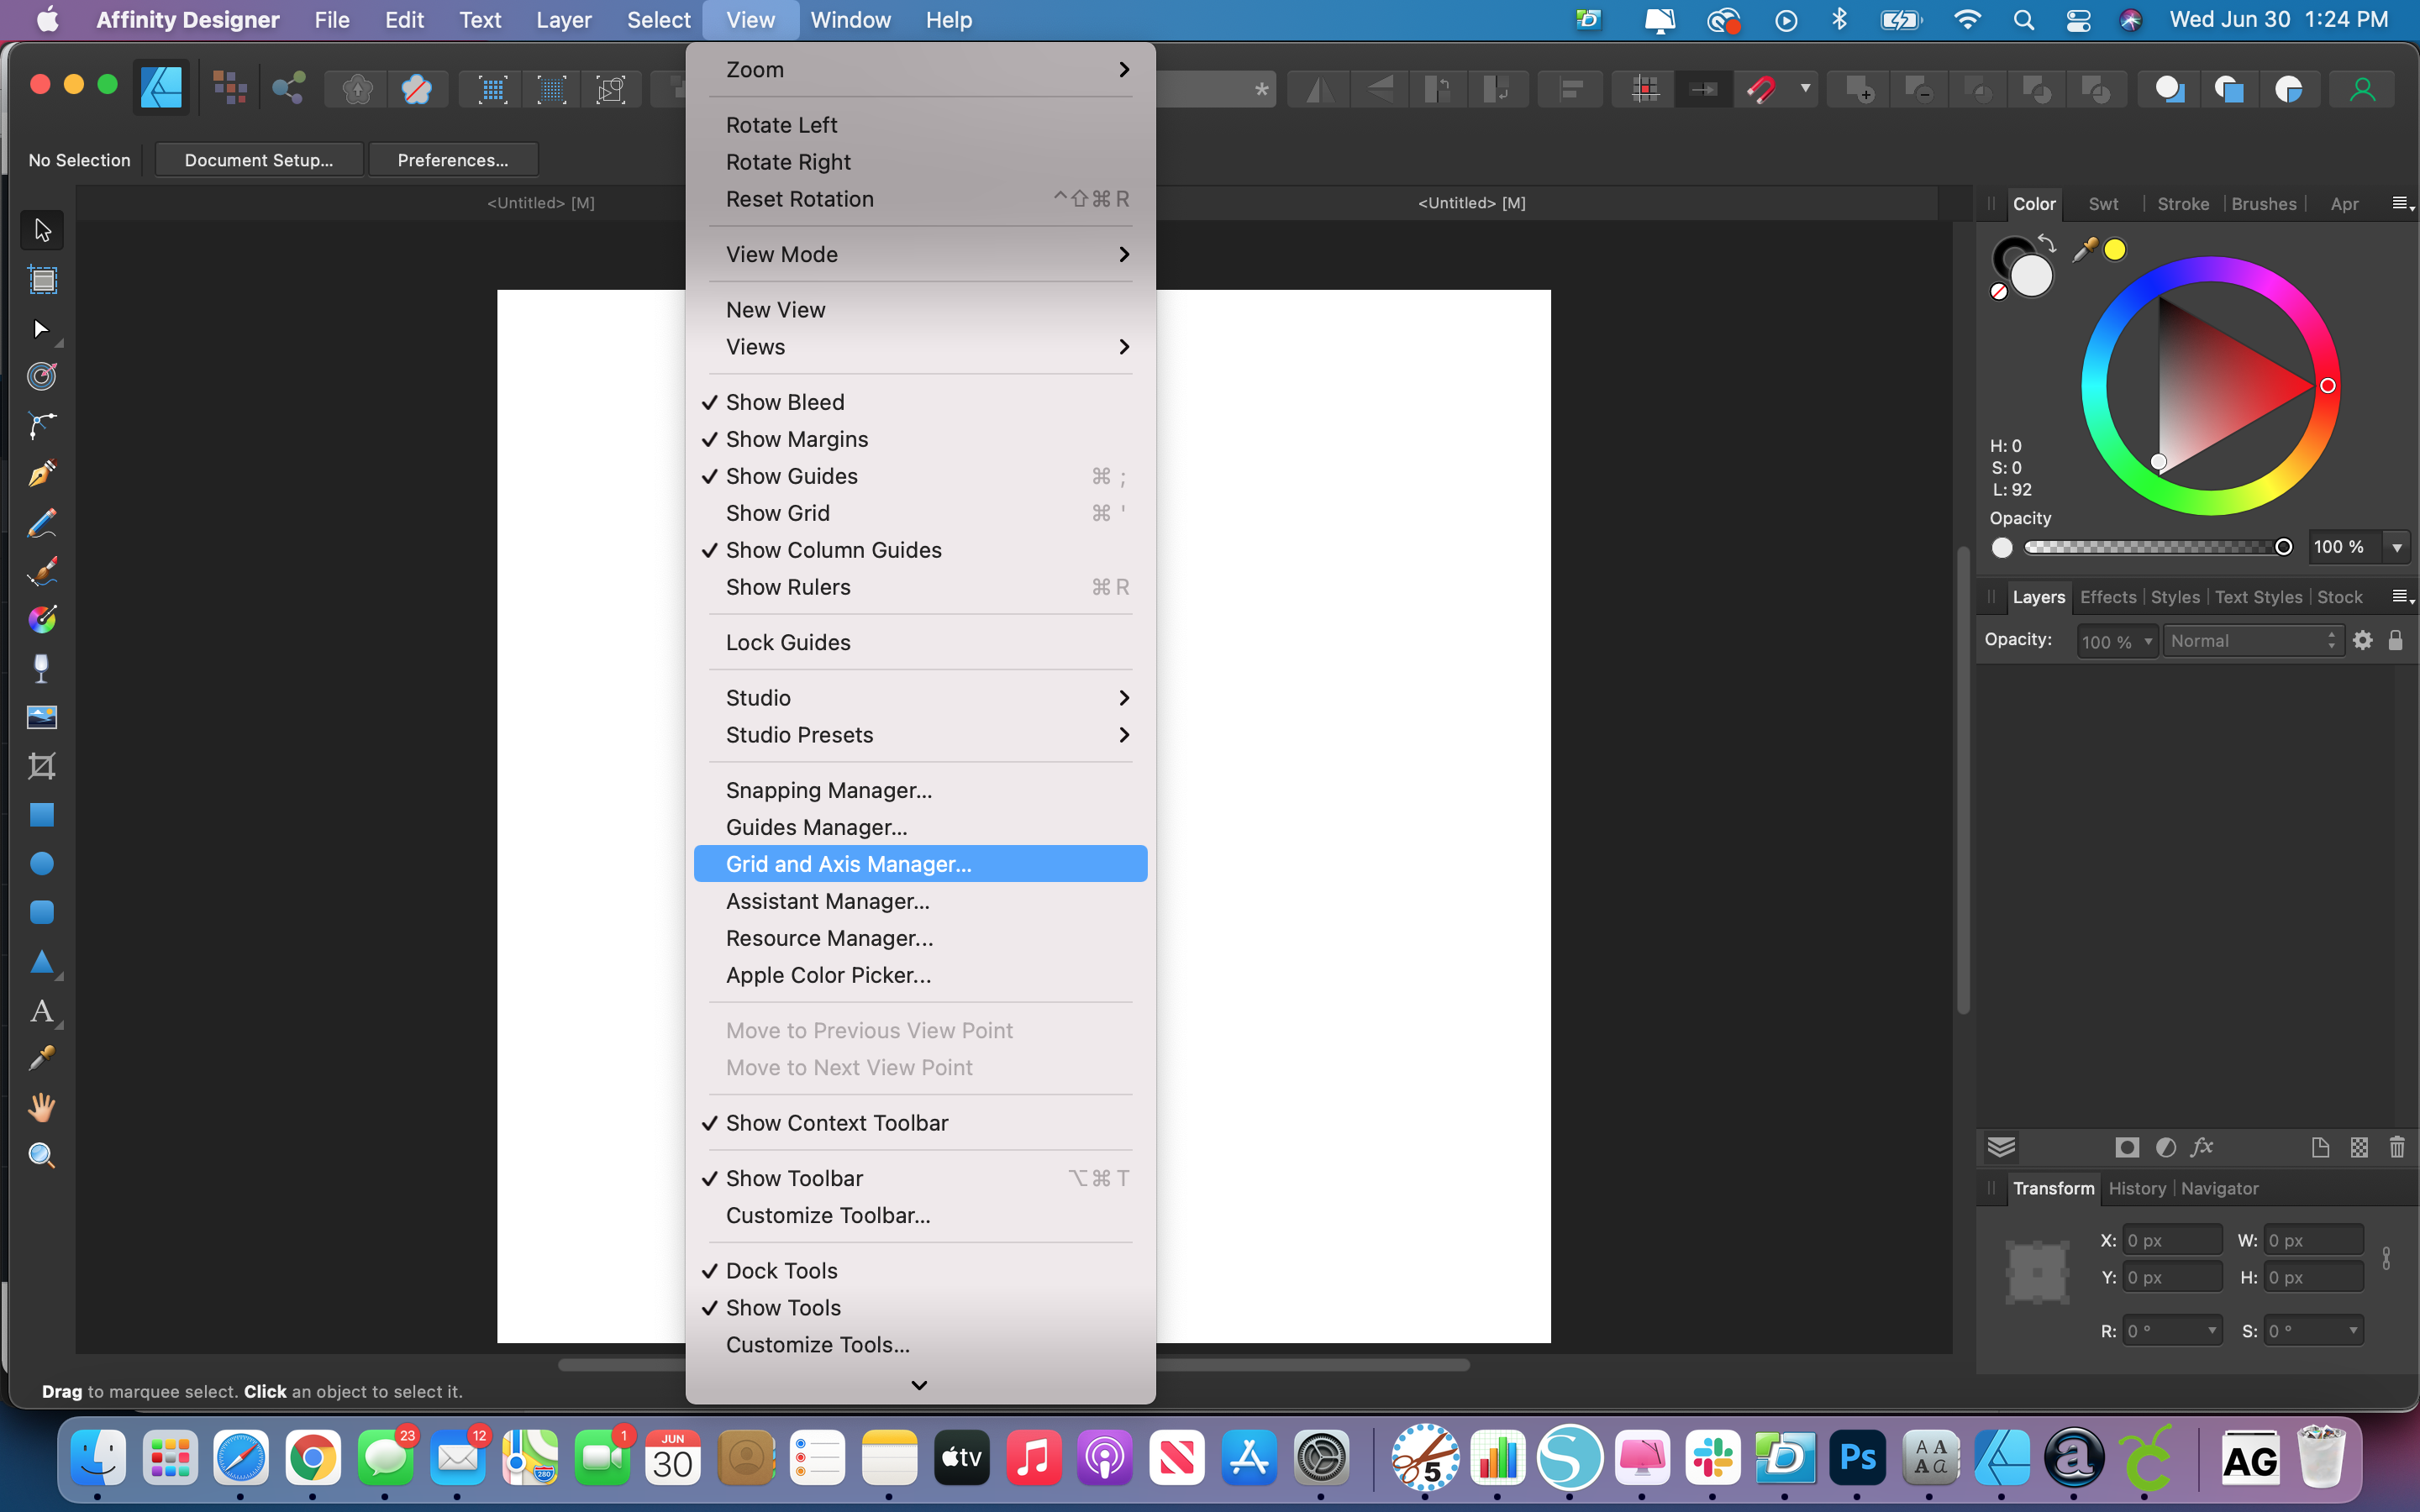
Click on Show Grid to make the grid visible. Select Advanced to see more settings. Select Isometric for the Grid Type, and set your spacing settings to 256 px. The spacing settings can be changed based on the look of the text you want. Lastly, you can change the color of your grid lines if you want to at the bottom of the window. Click on Create Plane Set and then Close.
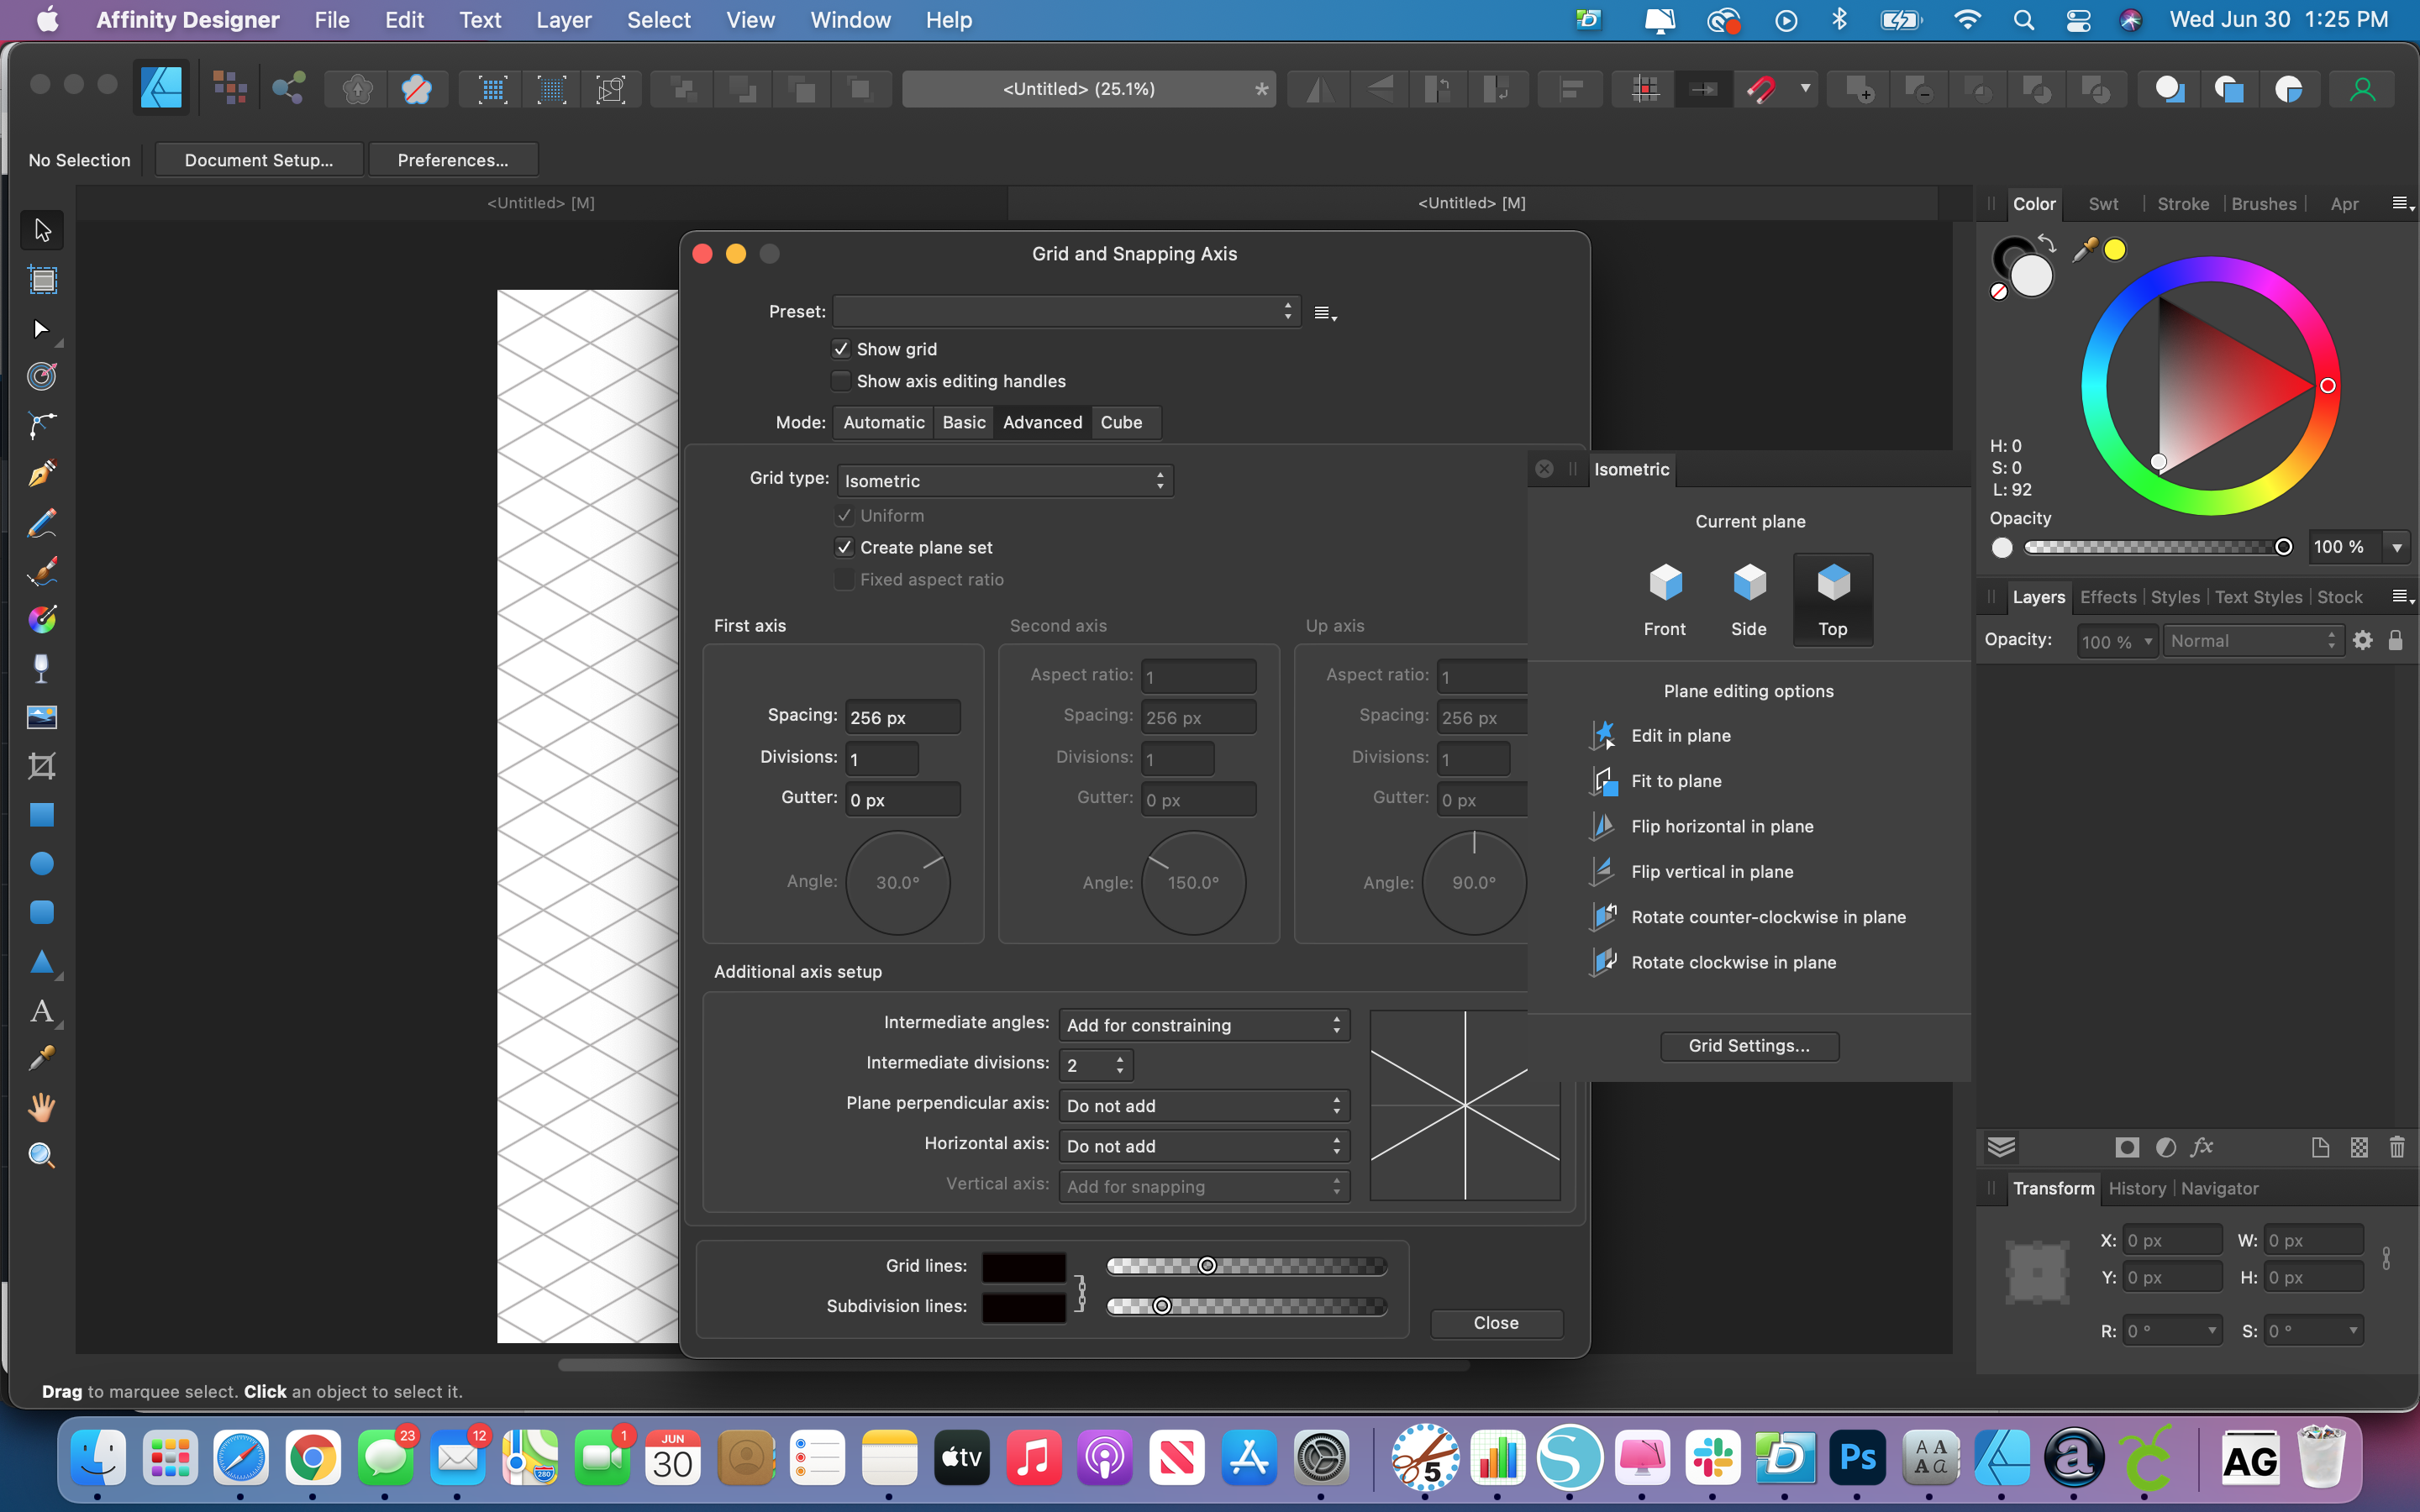
Type out your wording in the Cedric font. Isometric text looks better when there is more space between the letters so adjust the kerning and spacing to your liking.
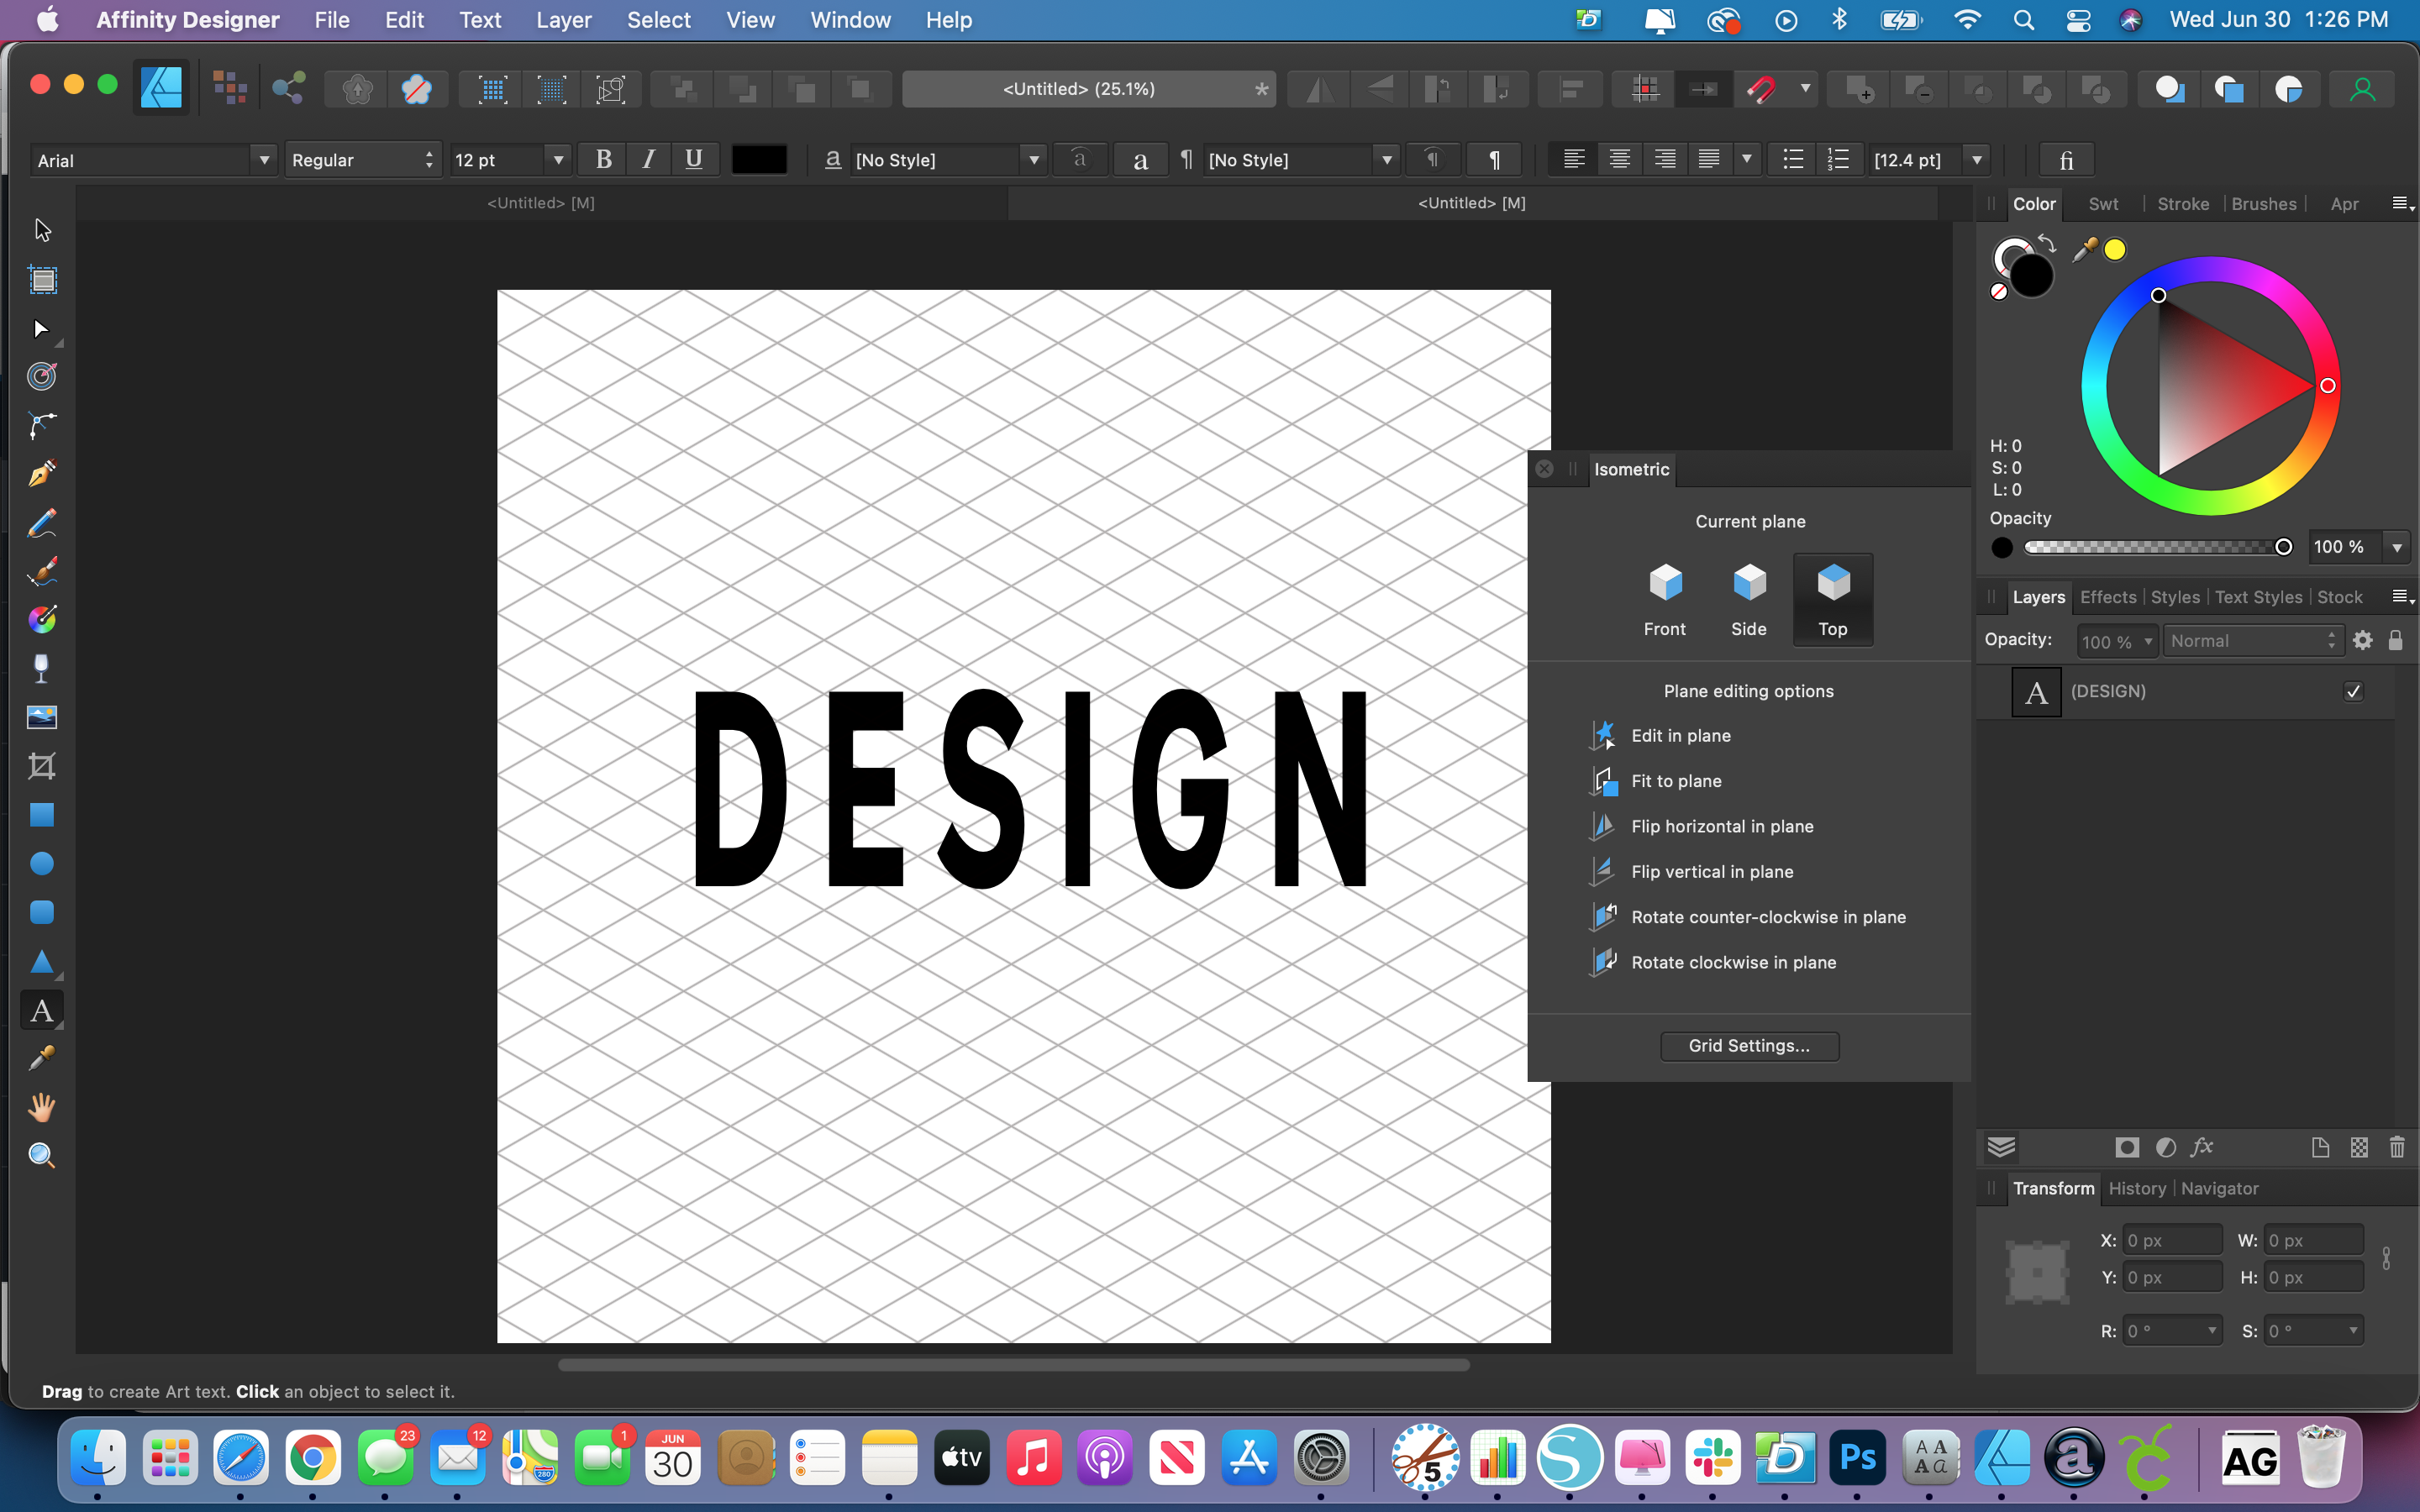
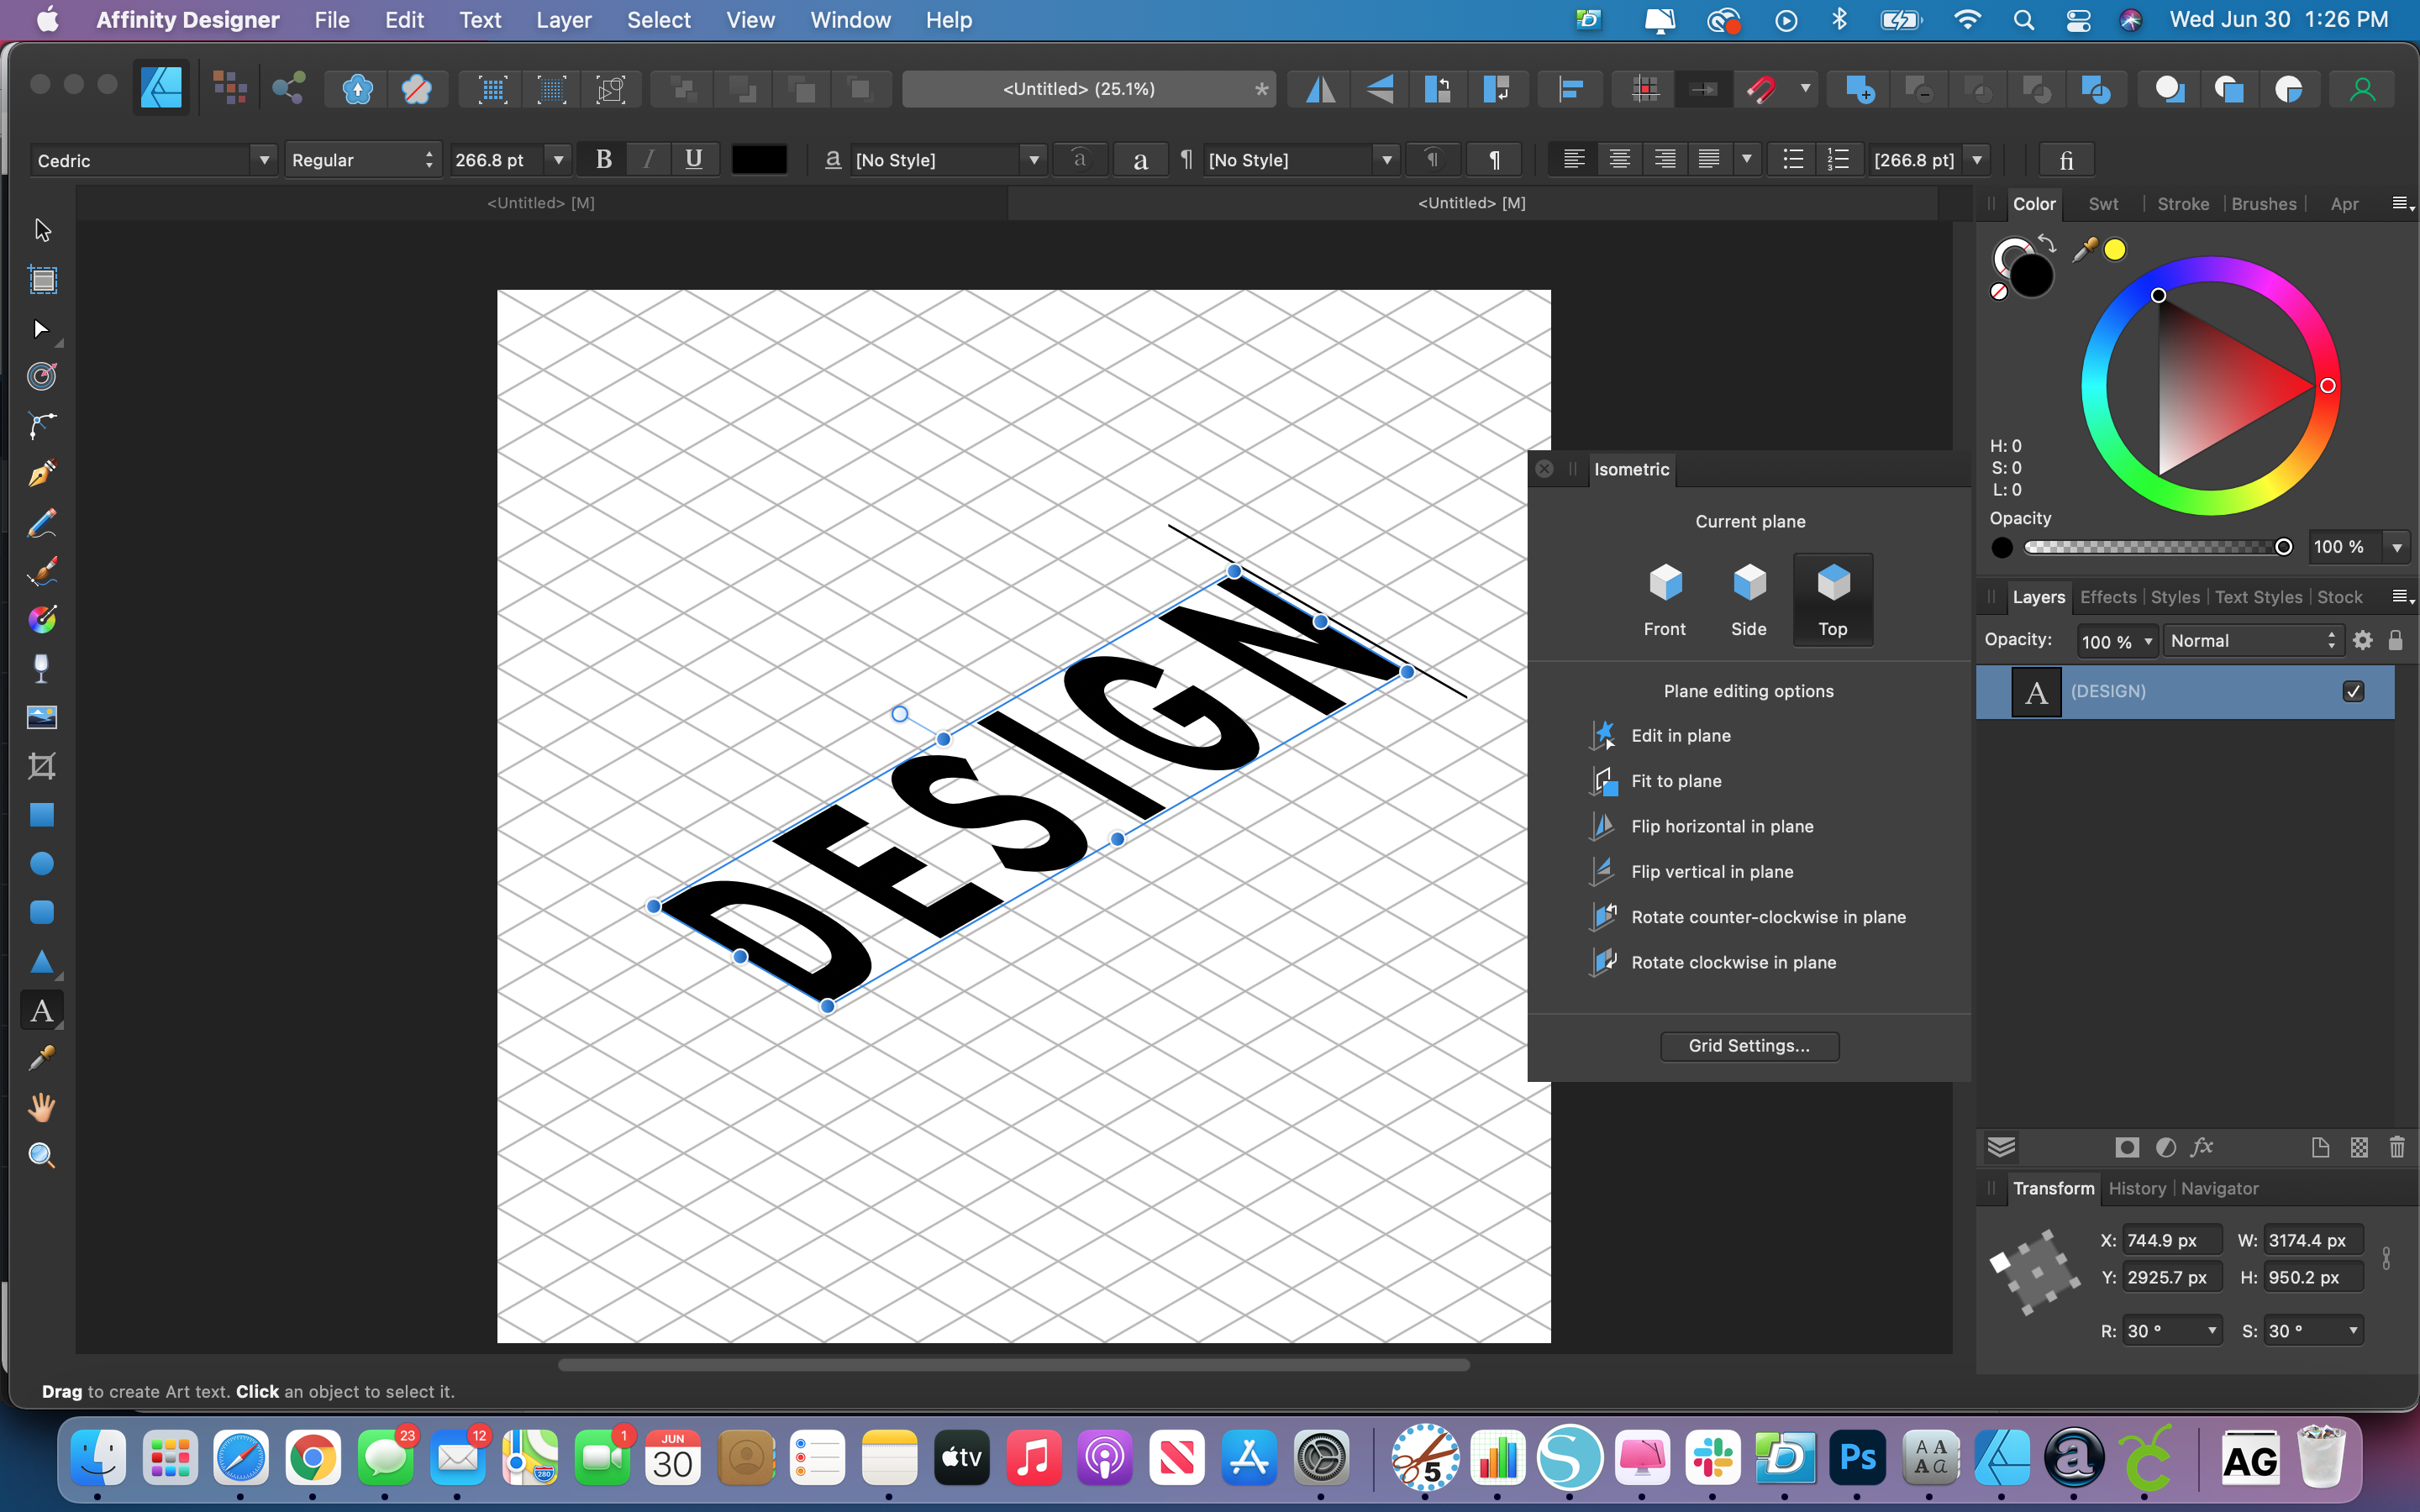
Select your wording and then make sure that the top plane is selected within the Isometric window and then click Fit To Plane.
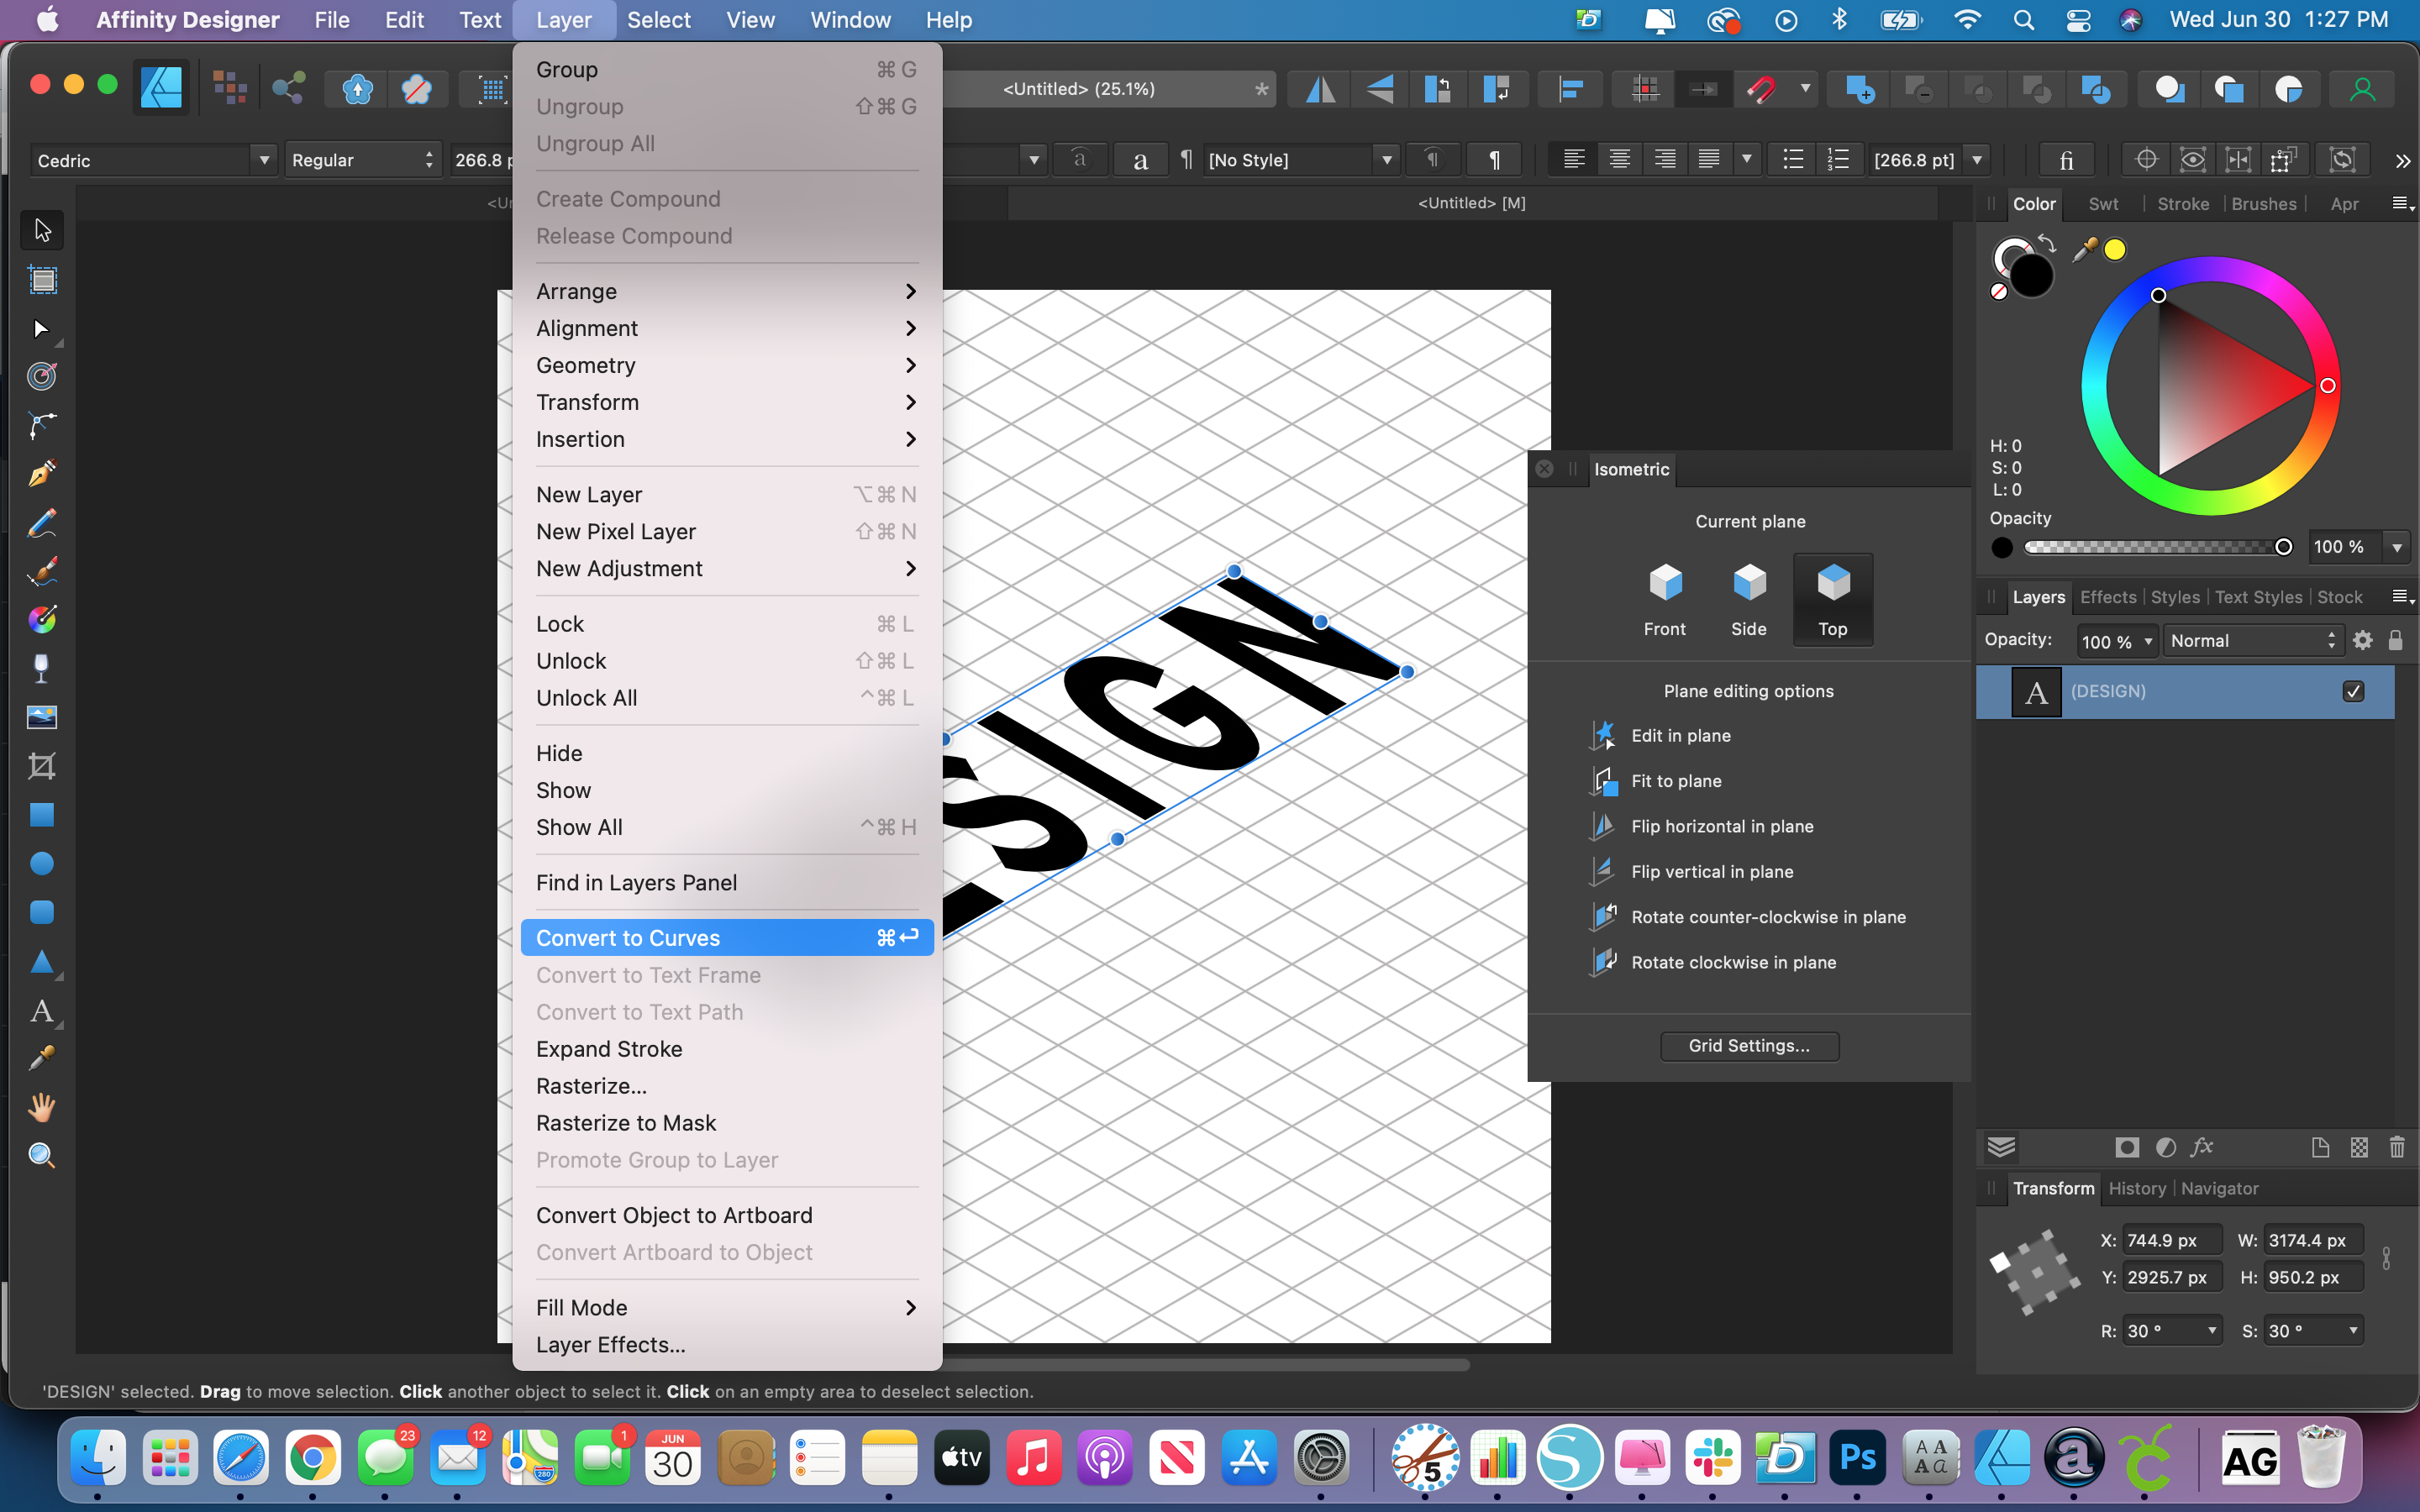
Select the text then go to the Layer menu and select Convert To Curves. This will change your text from an editable text to a group of curves.
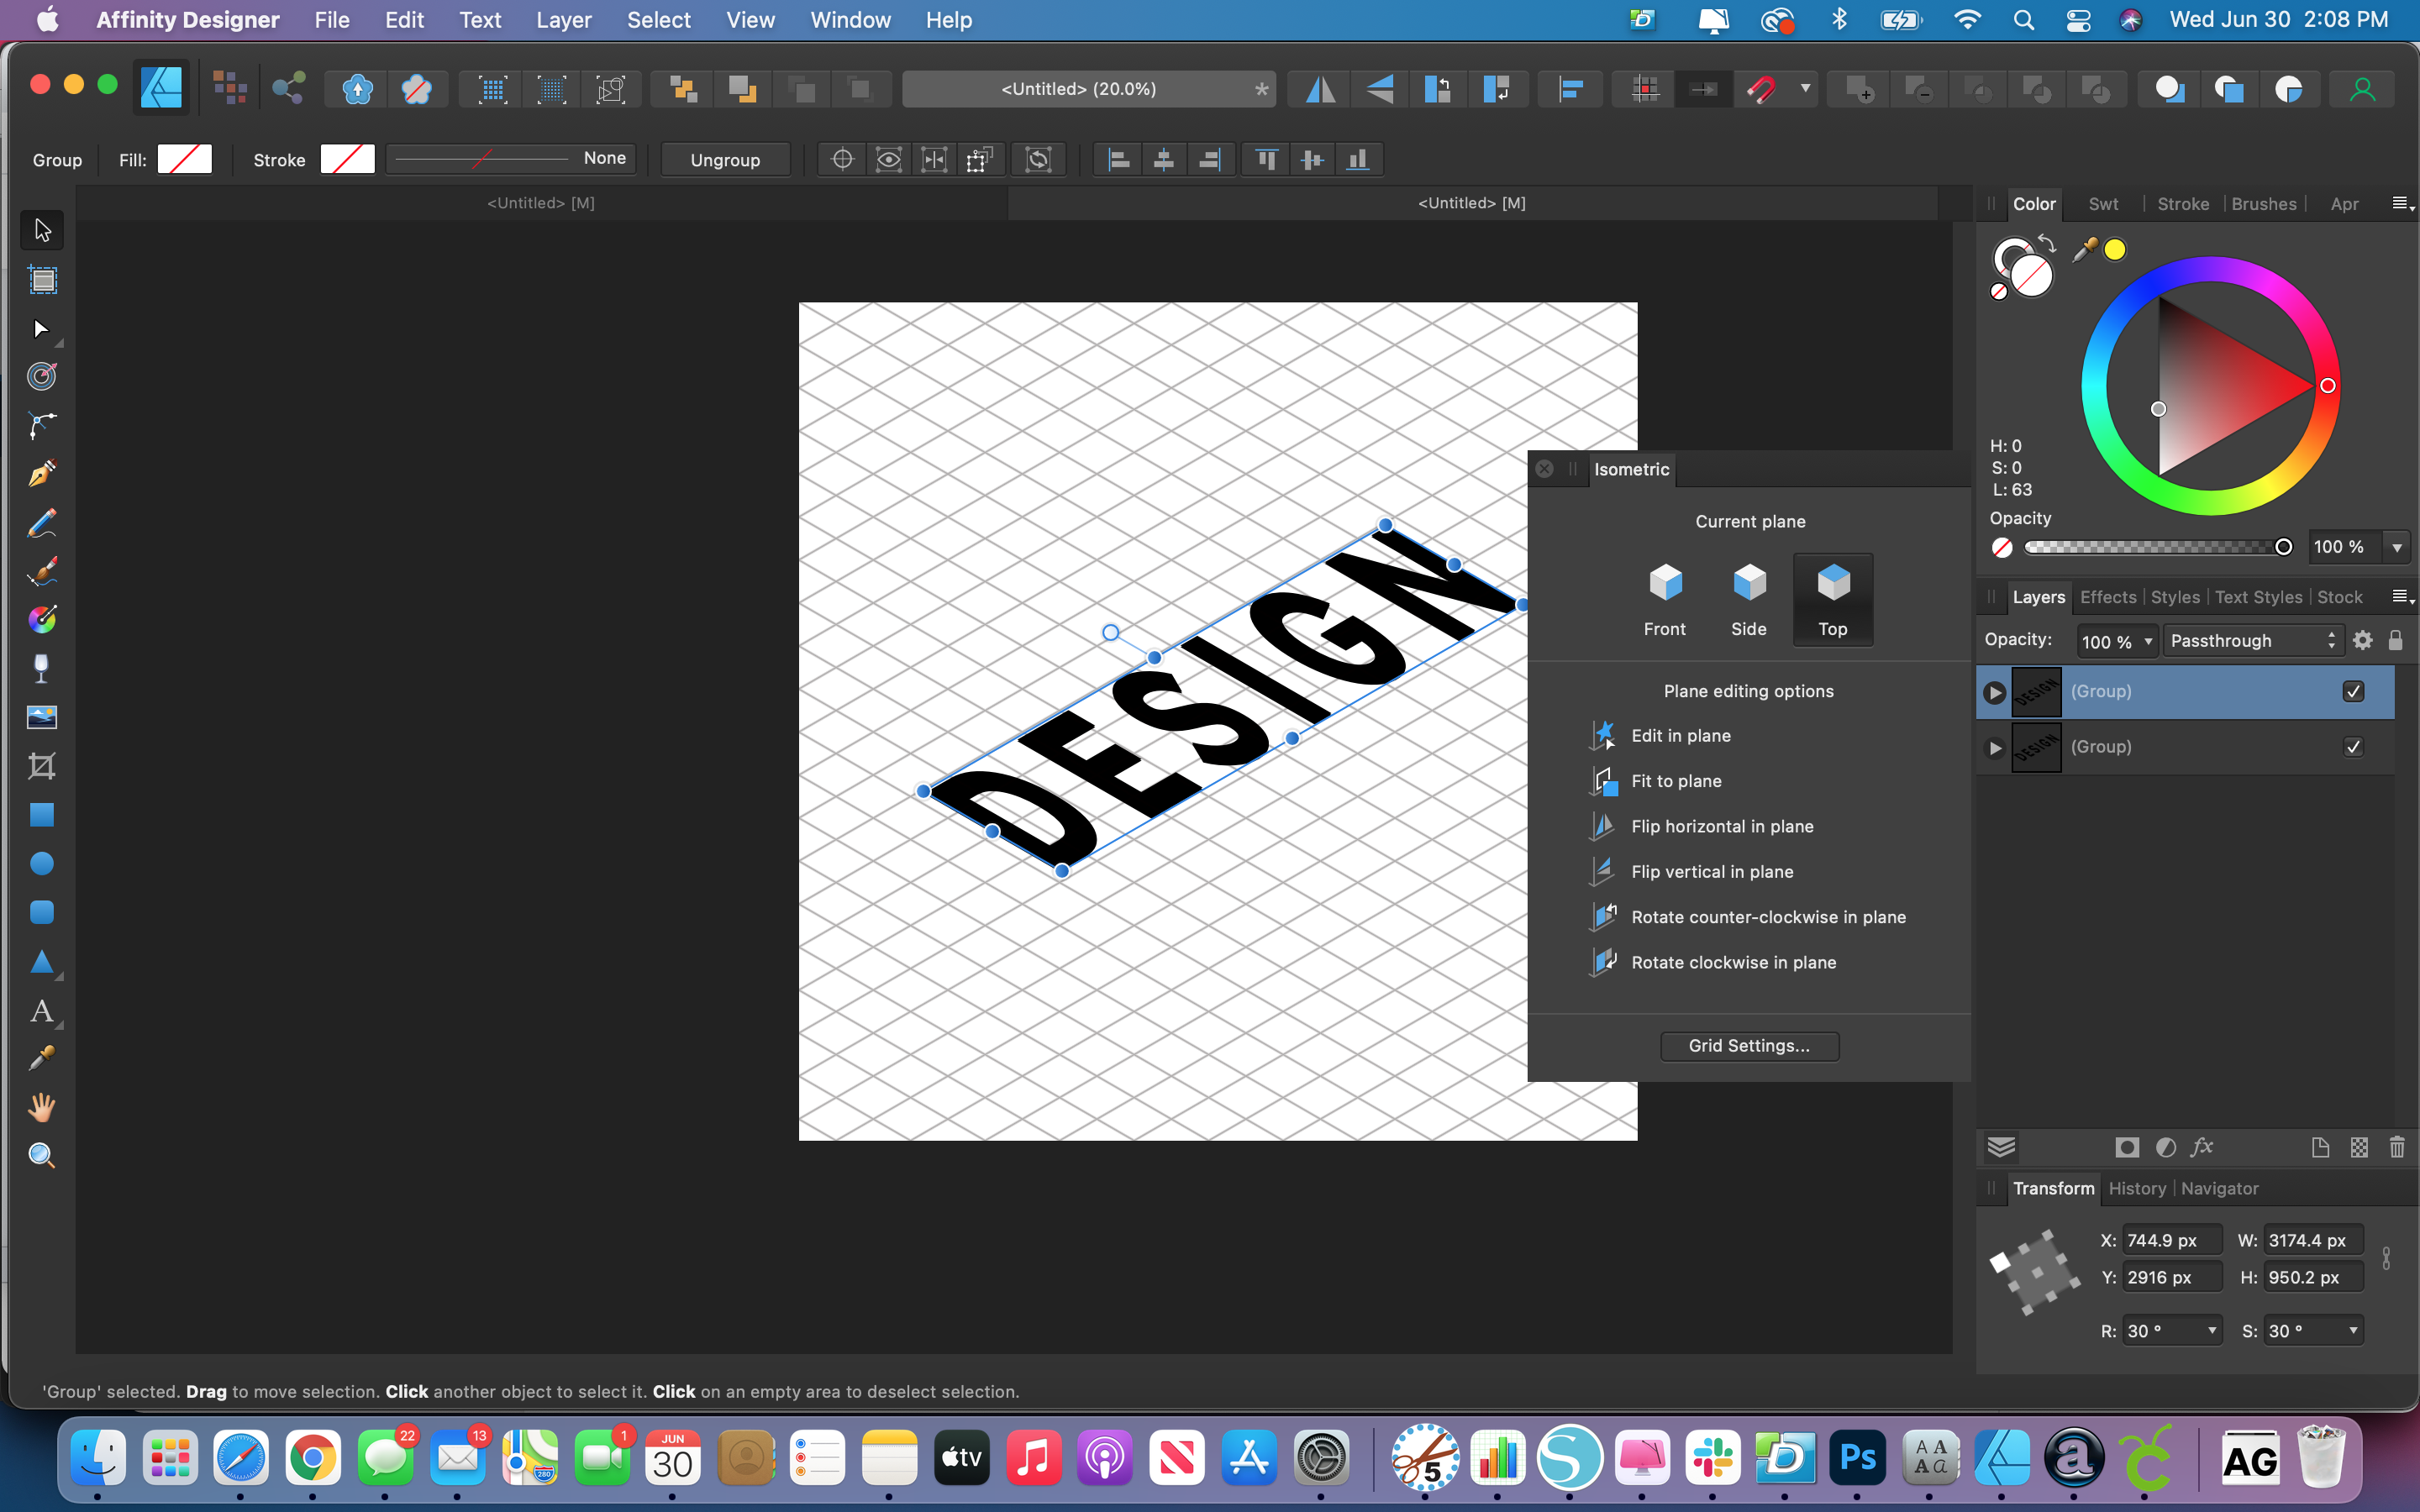
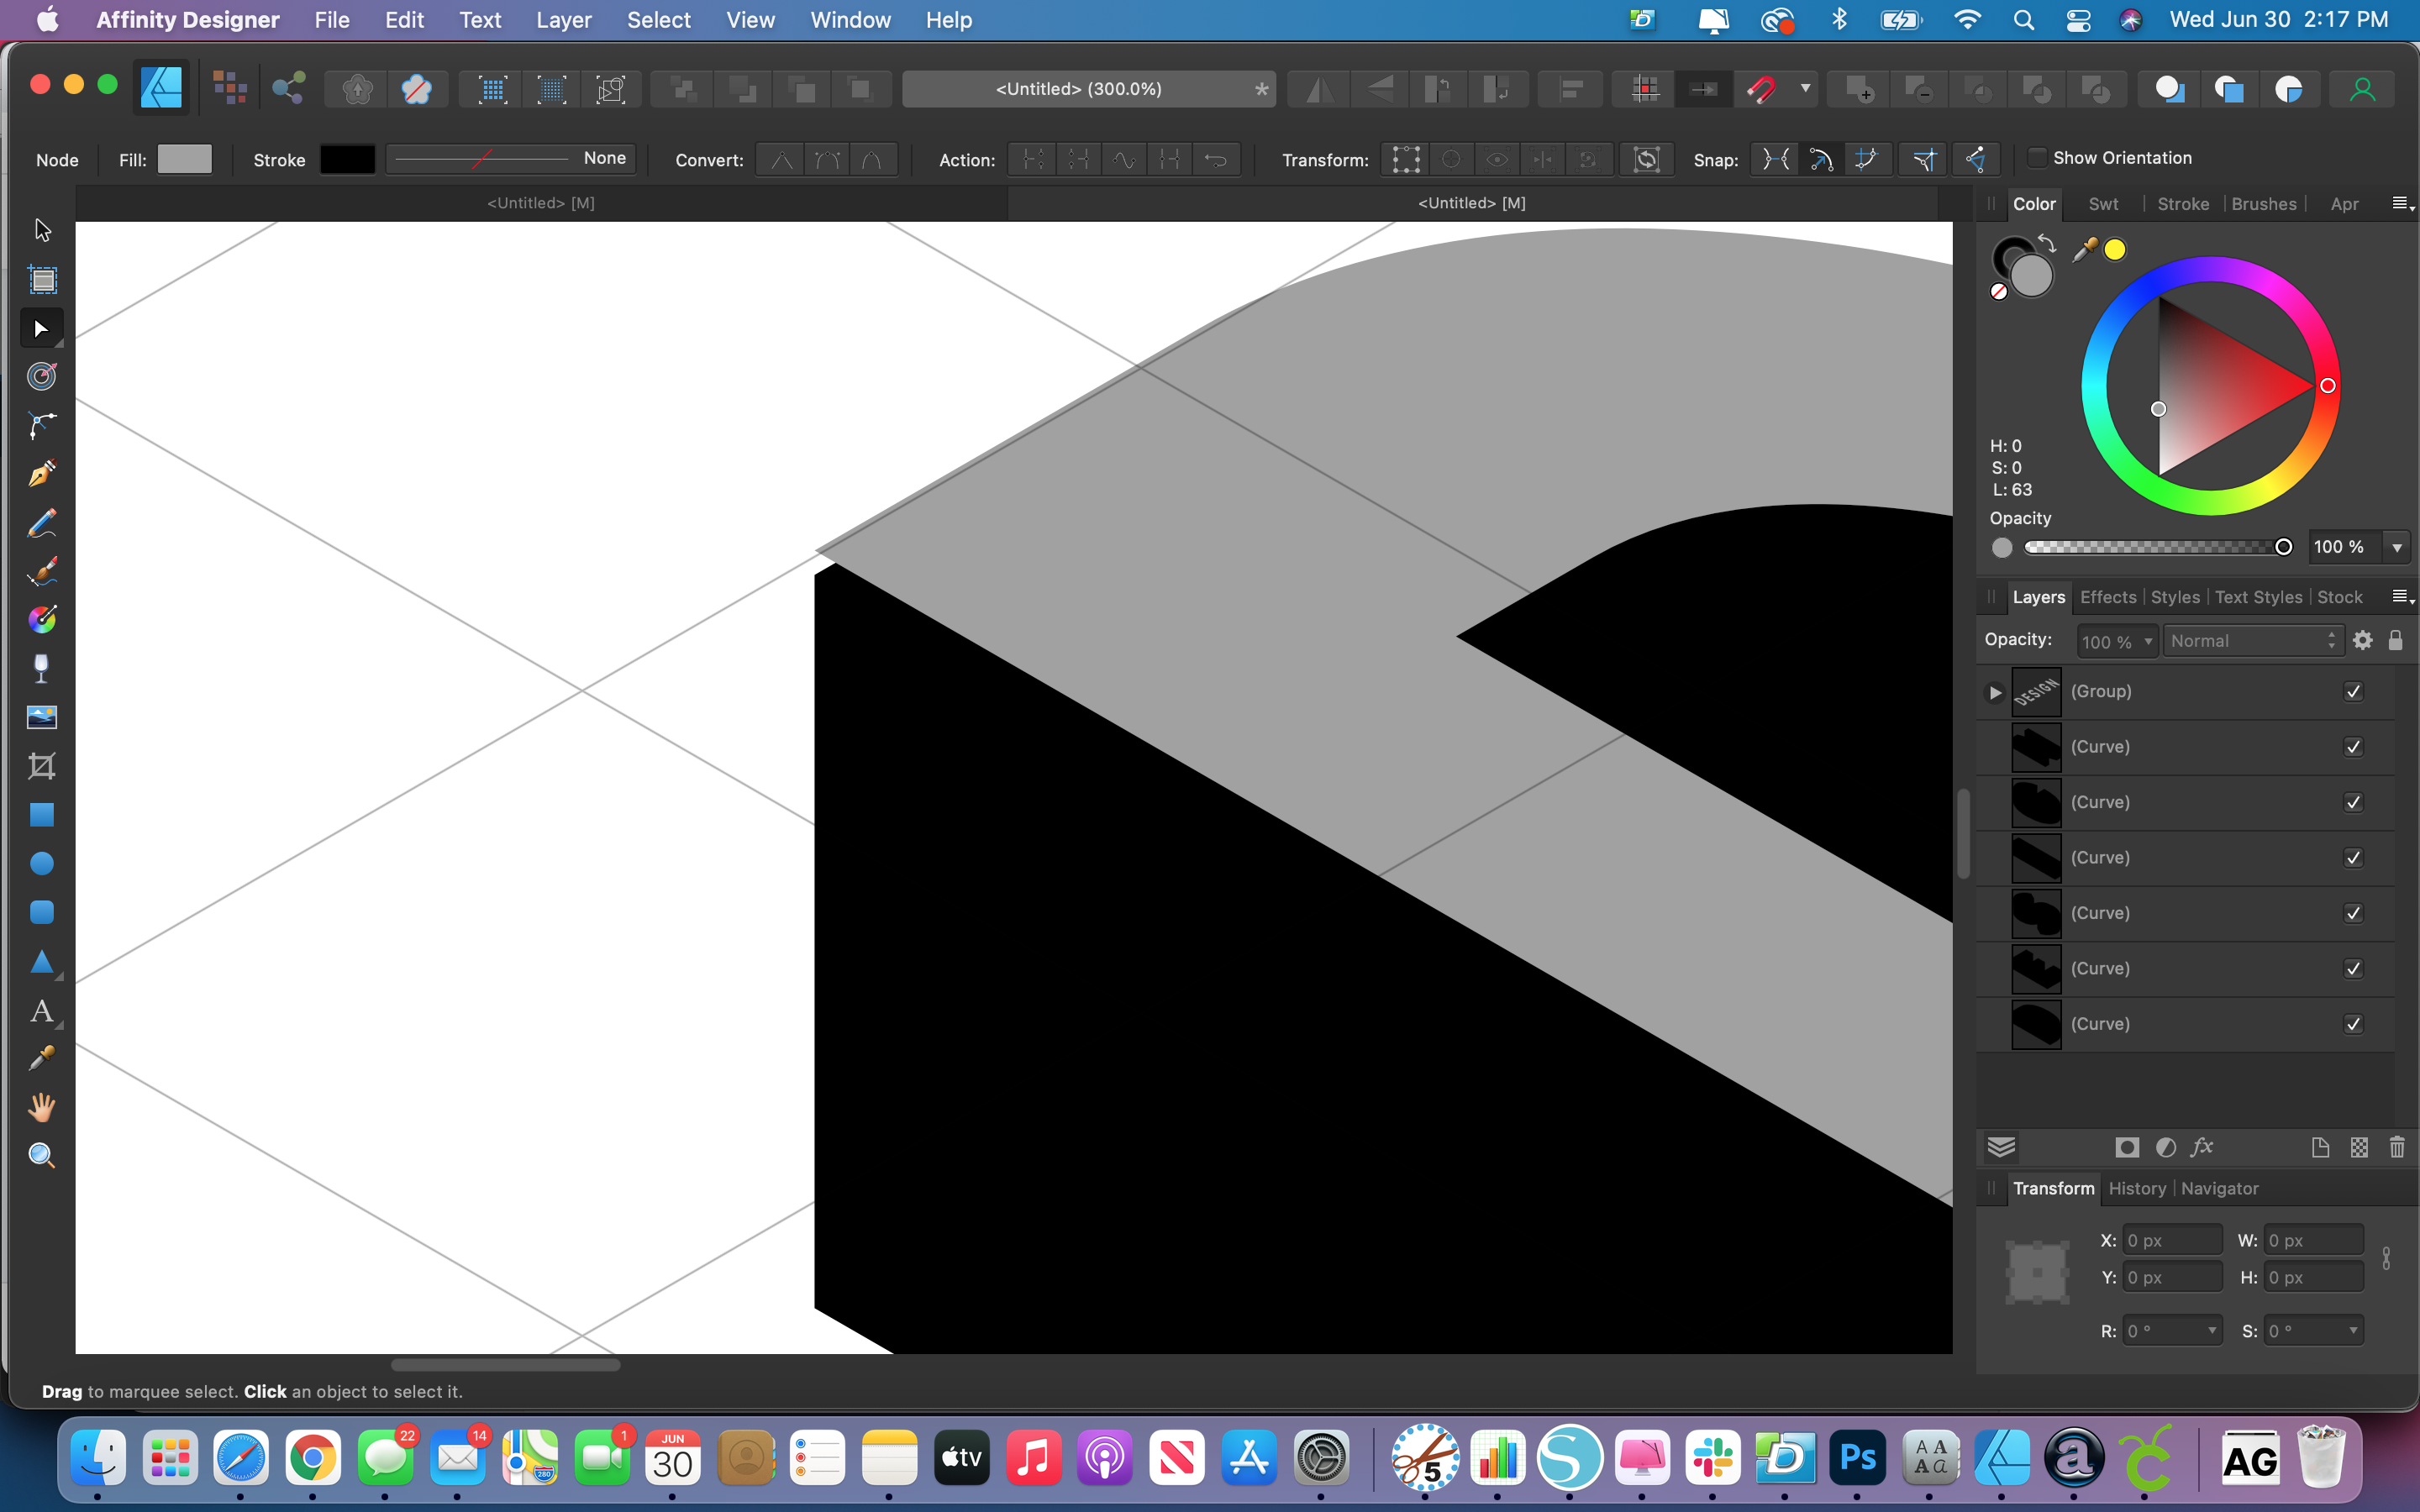
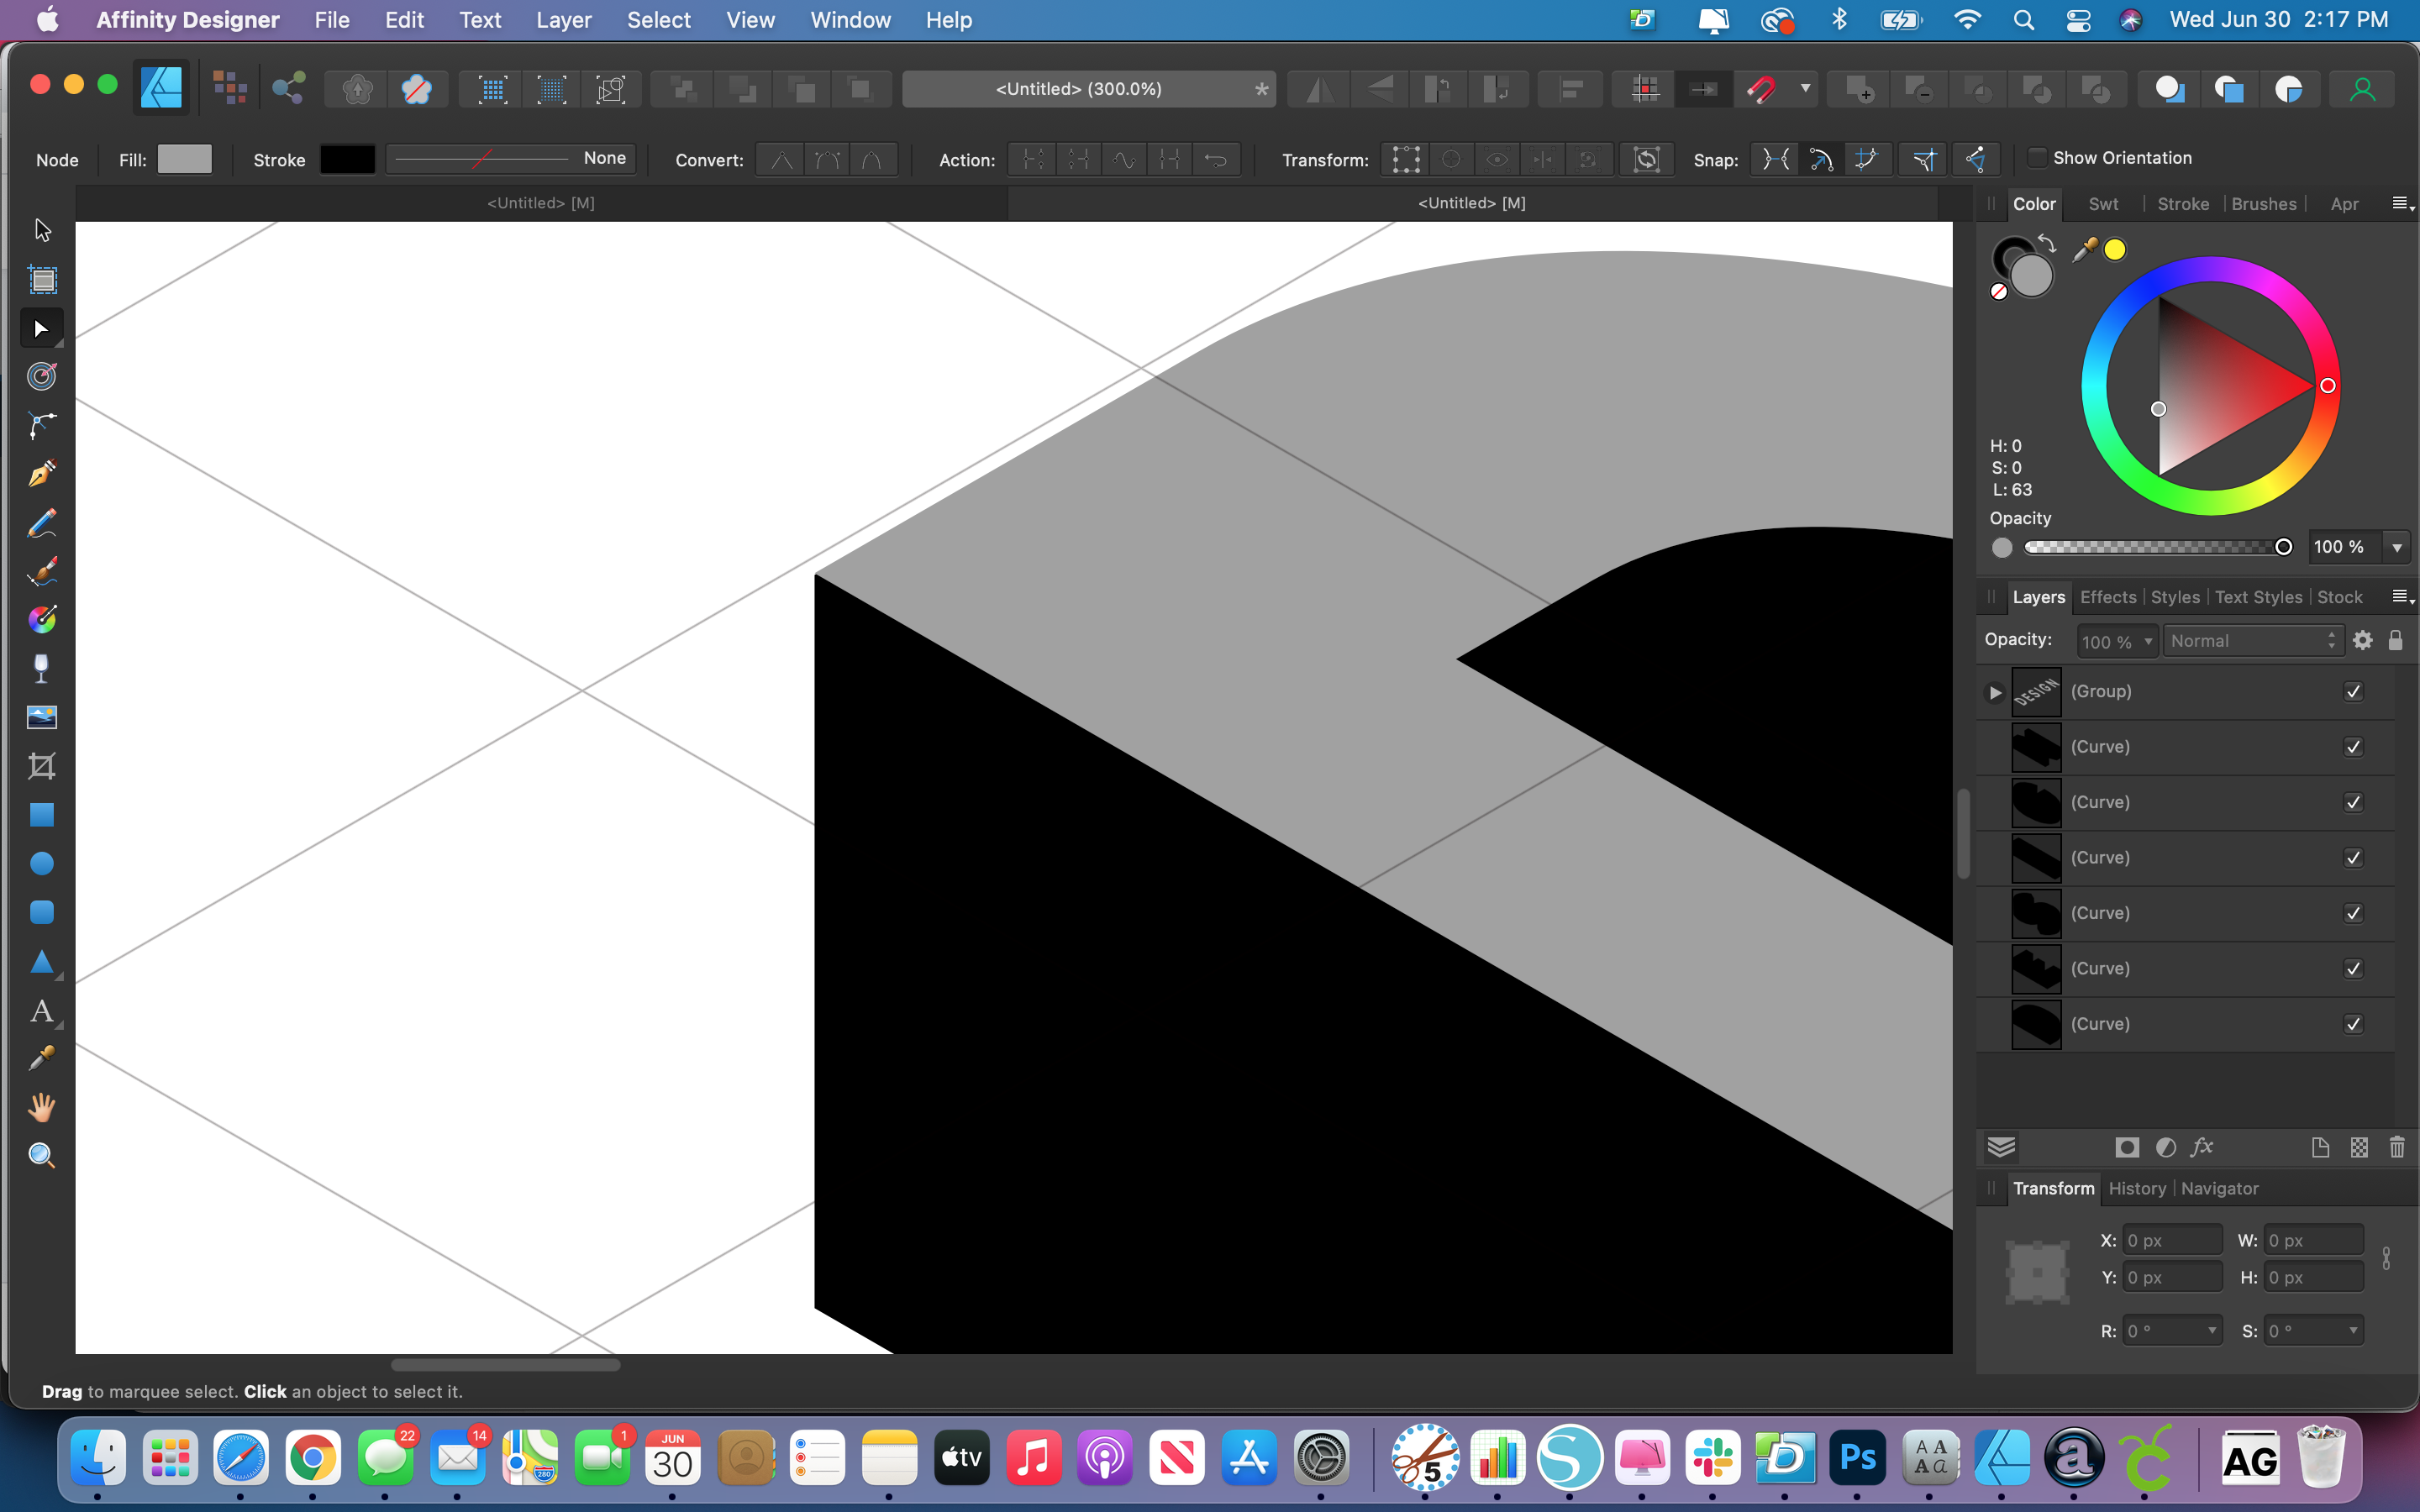
First, duplicate your text layer. Then zoom in really close on the top left corner of the text and whilst holding down the Shift key, drag the top layer up by a few pixels. You can also Nudge the top layer up with the arrow keys.
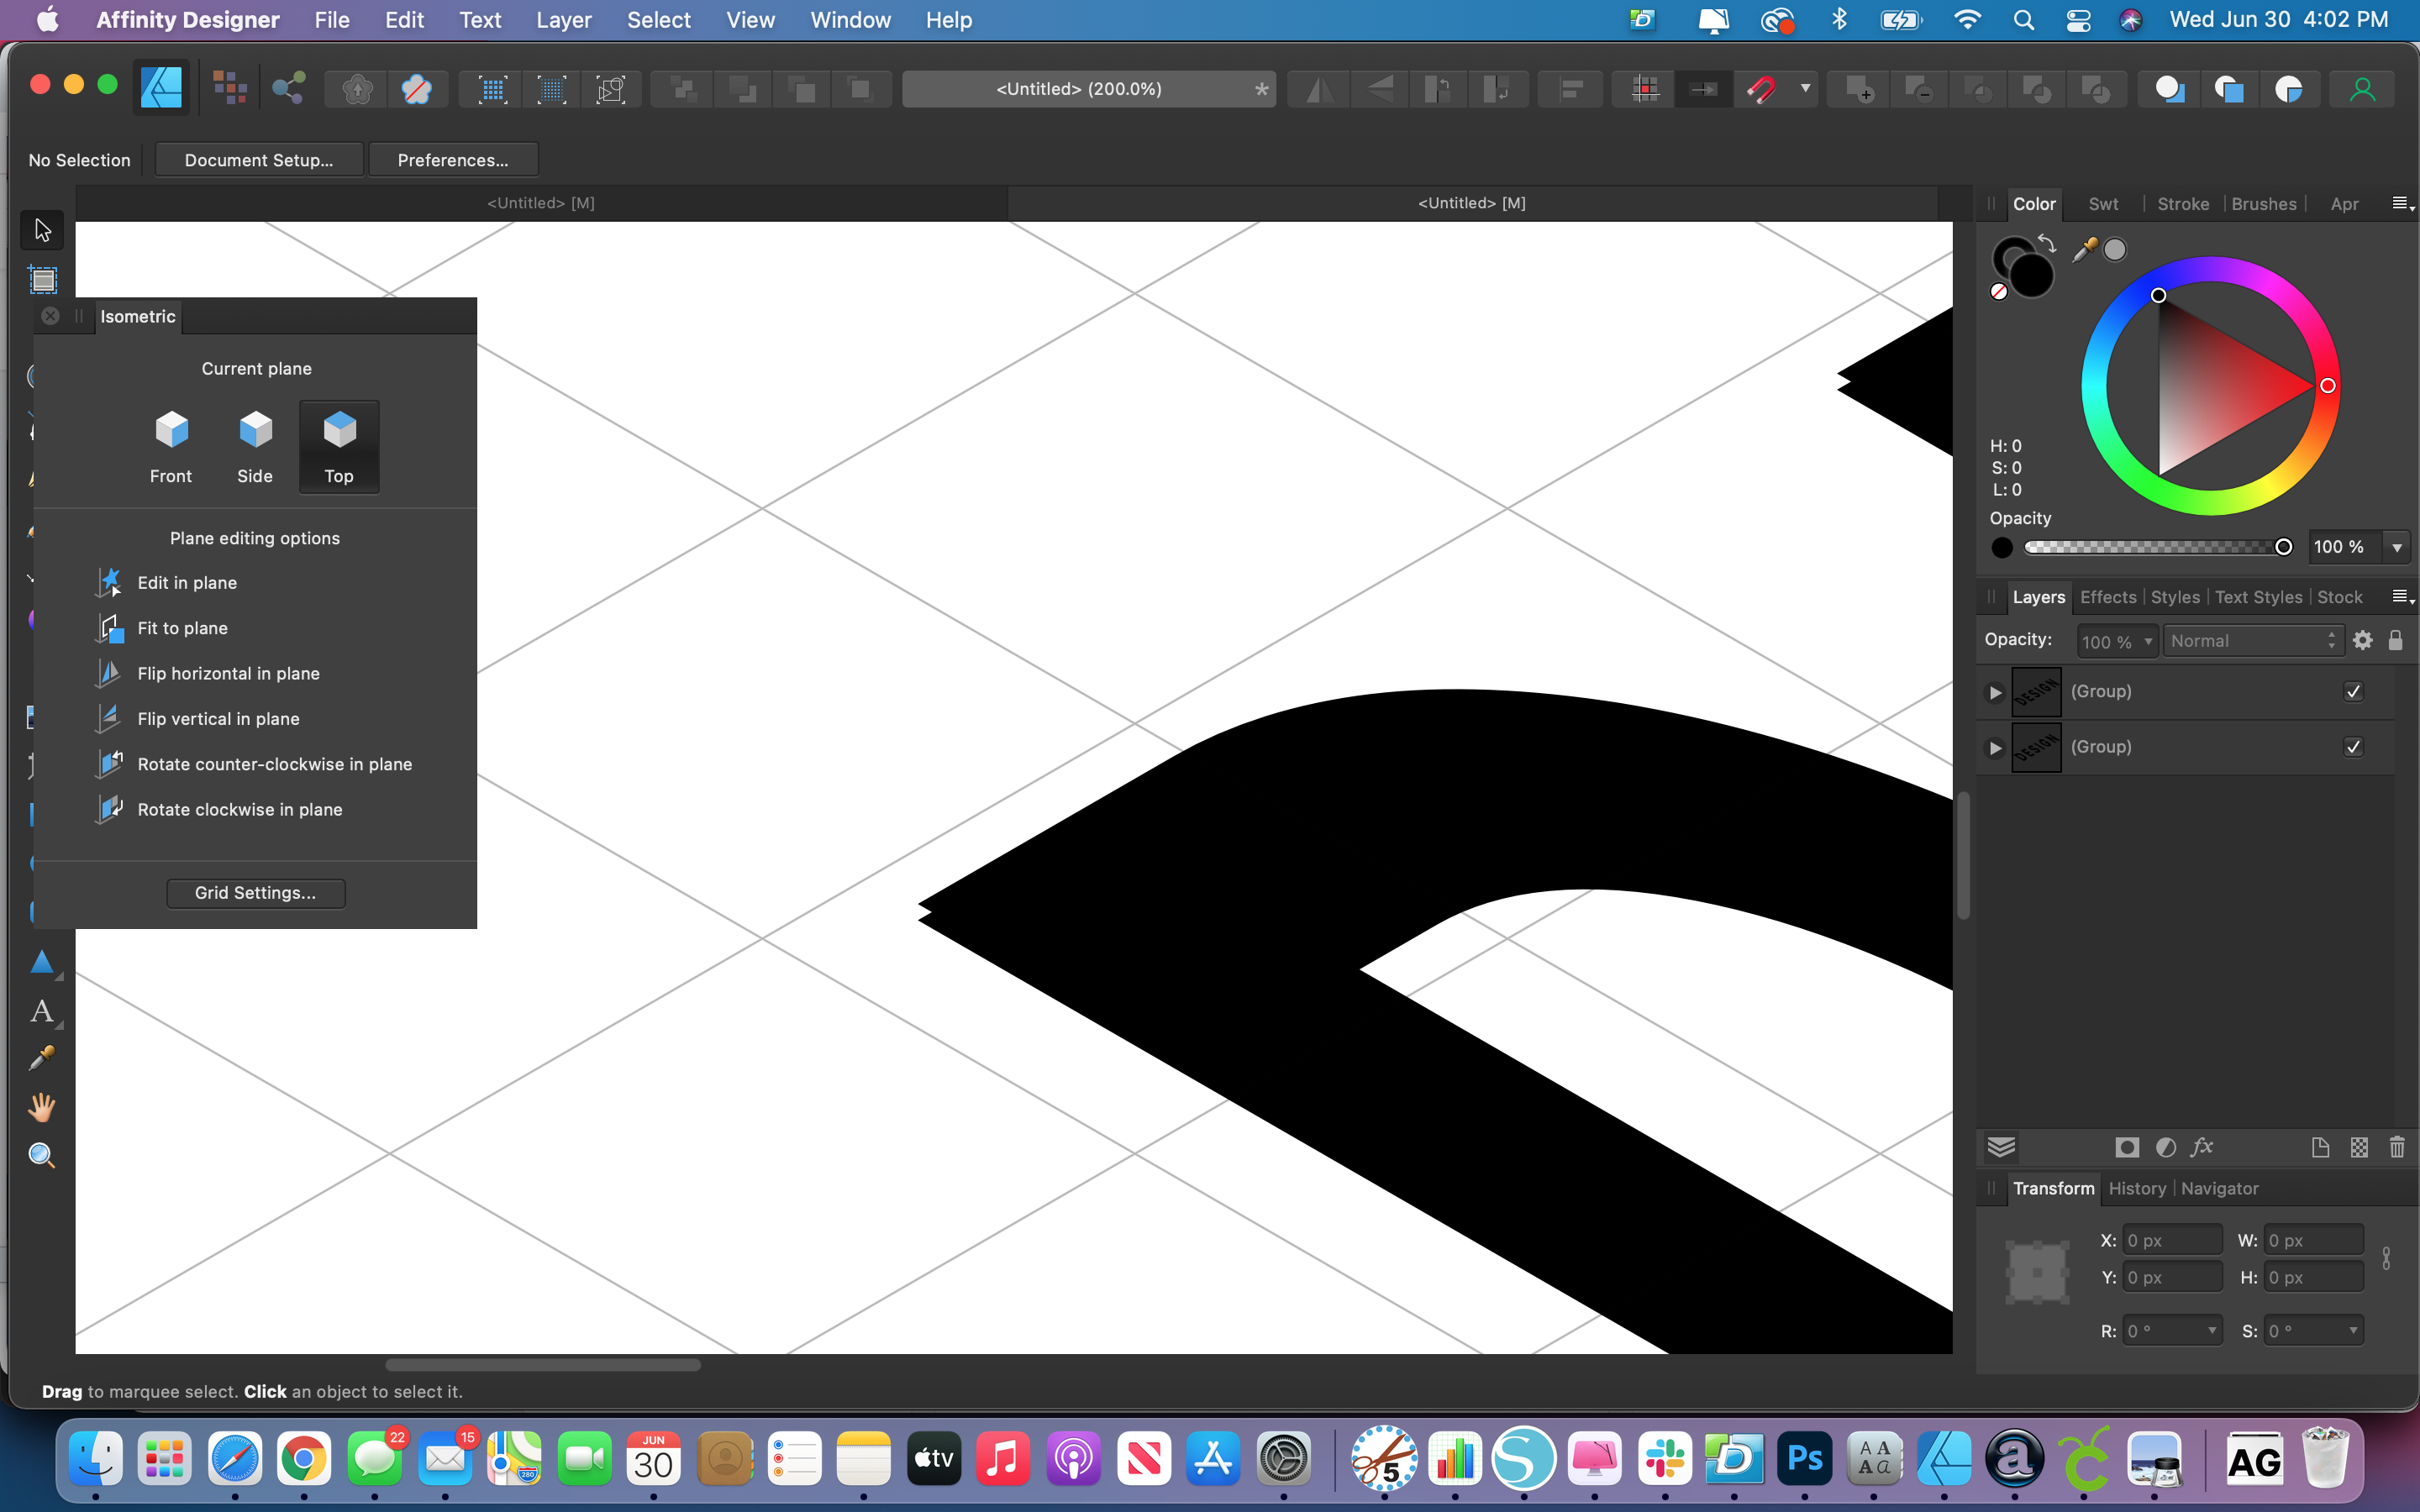
Affinity Designer has a Power Duplicate feature. After duplicating a layer and moving it any layer that you duplicate after that will have the same properties. CTRL+J or CMD+J is the keyboard shortcut for Power Duplicate. Add as many layers as you need to get the look you are going for.
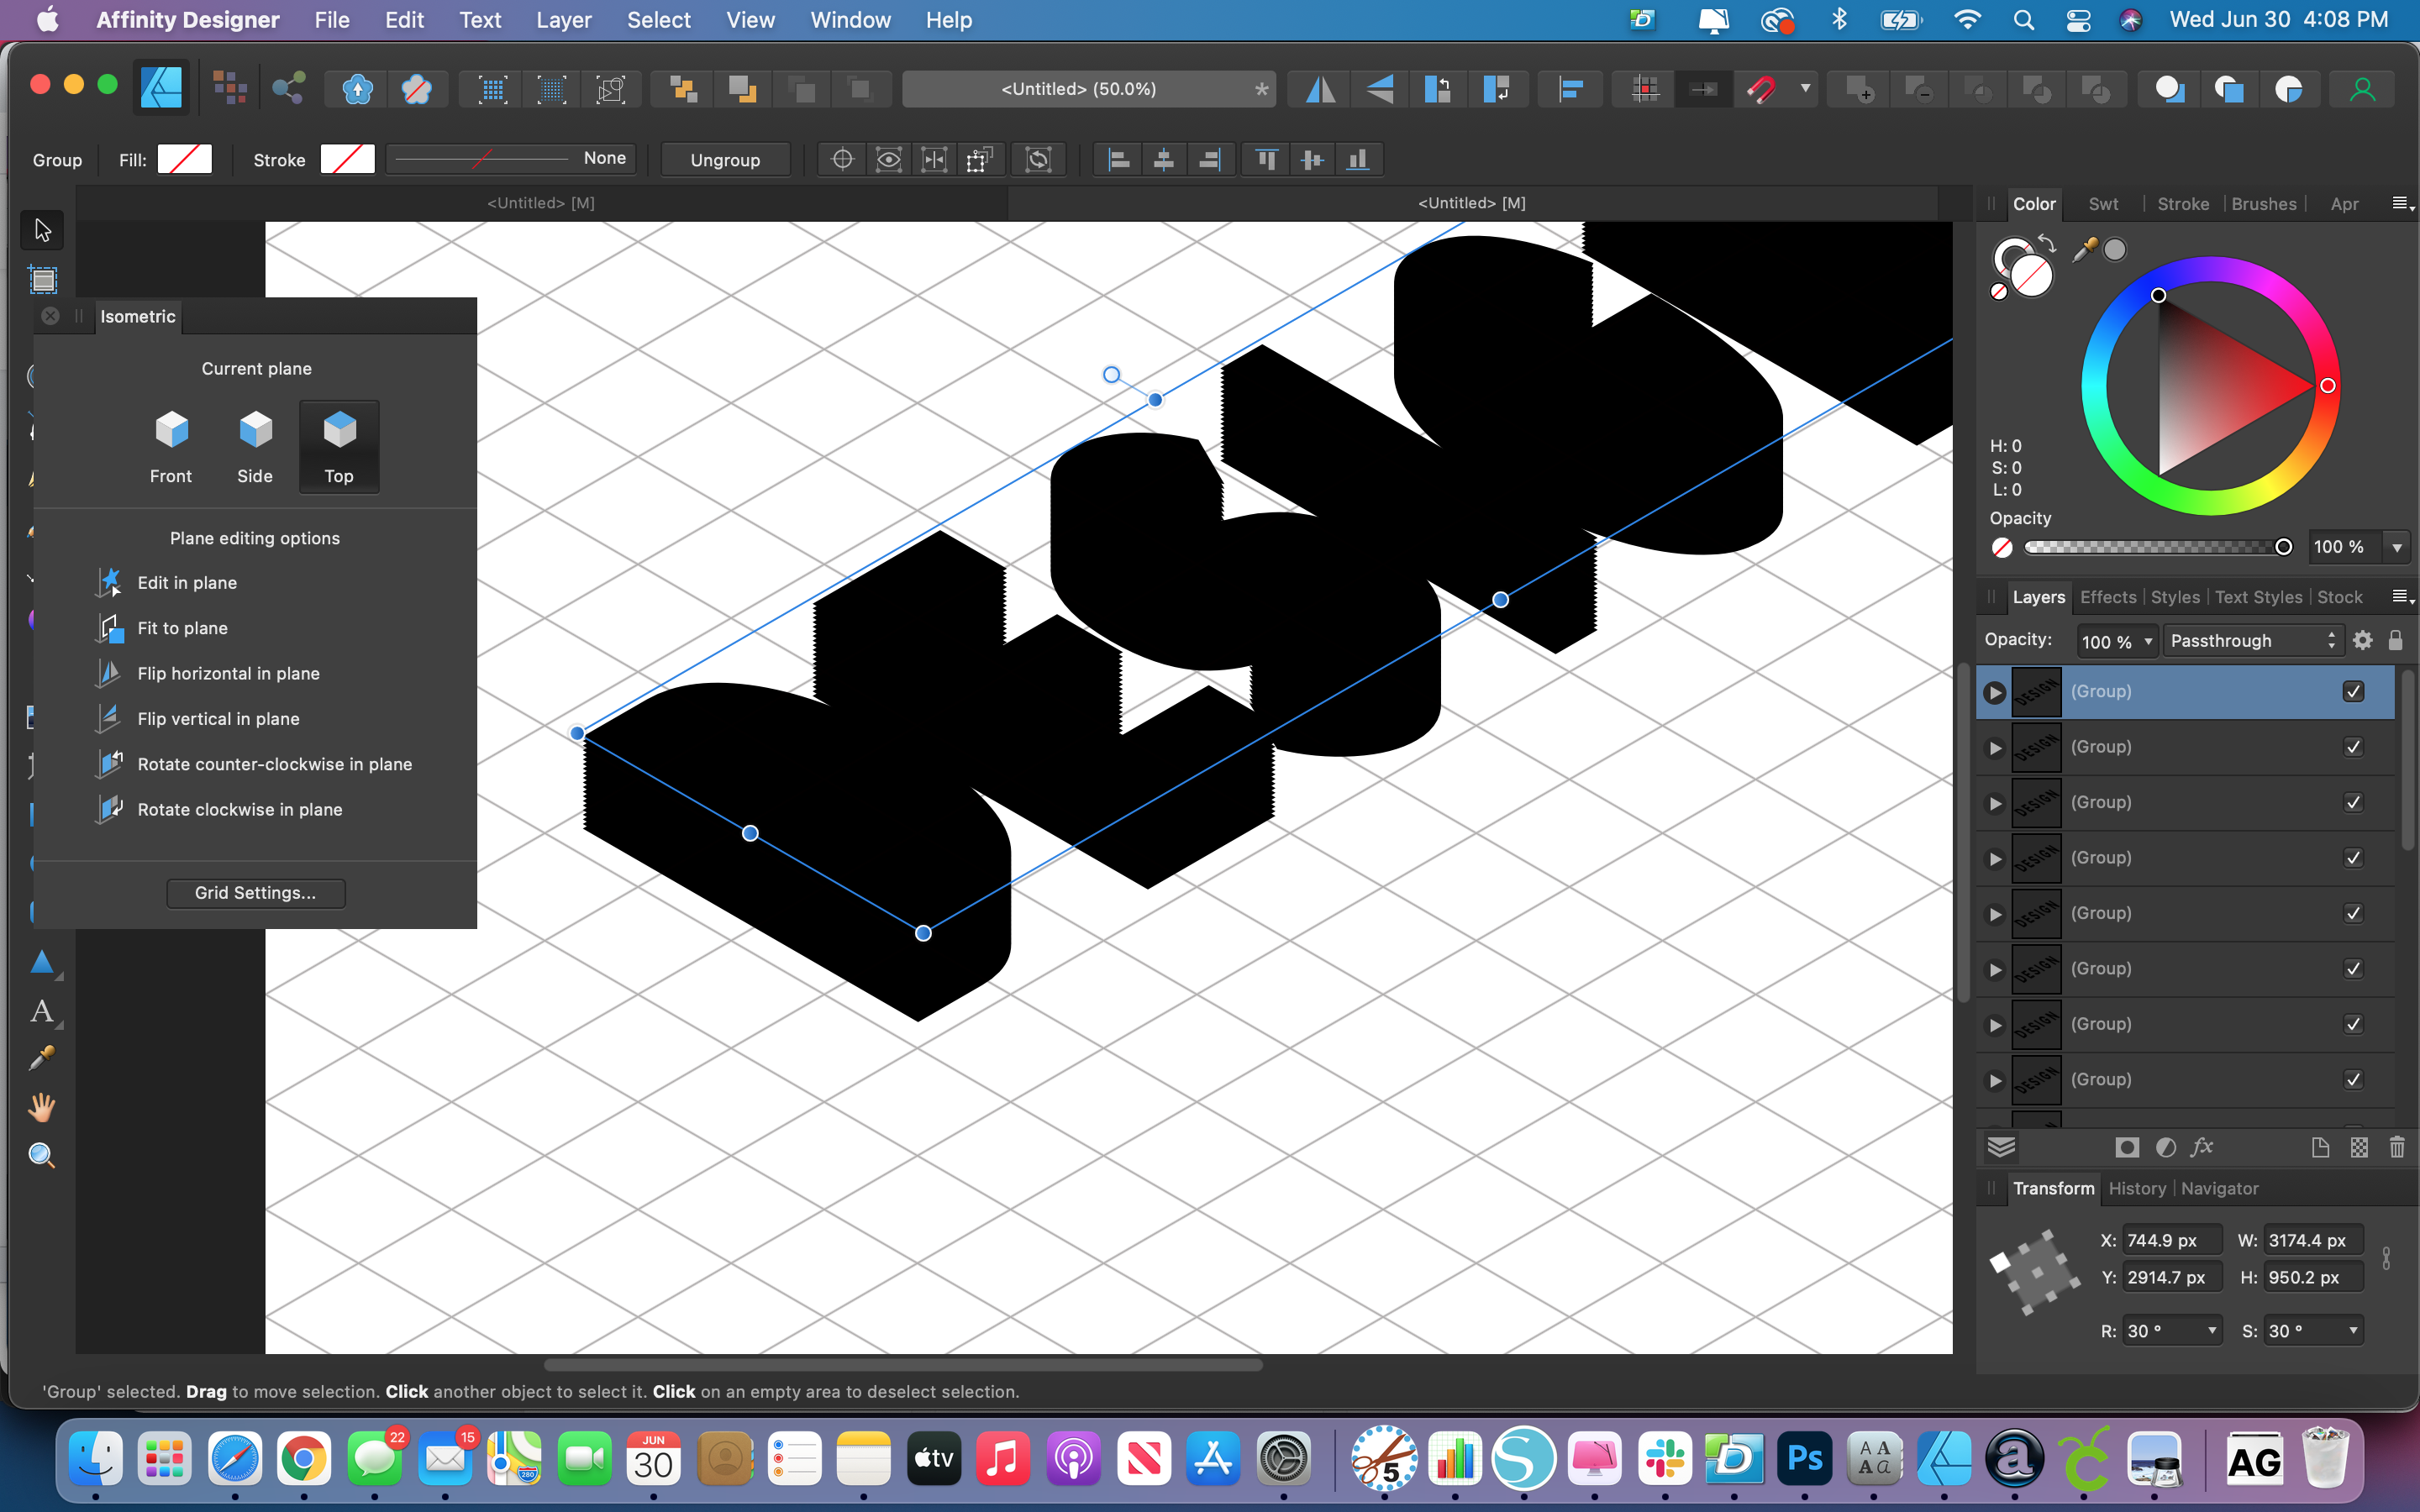
Select the top layer in the Layers panel and change the fill color to see your perspective text.
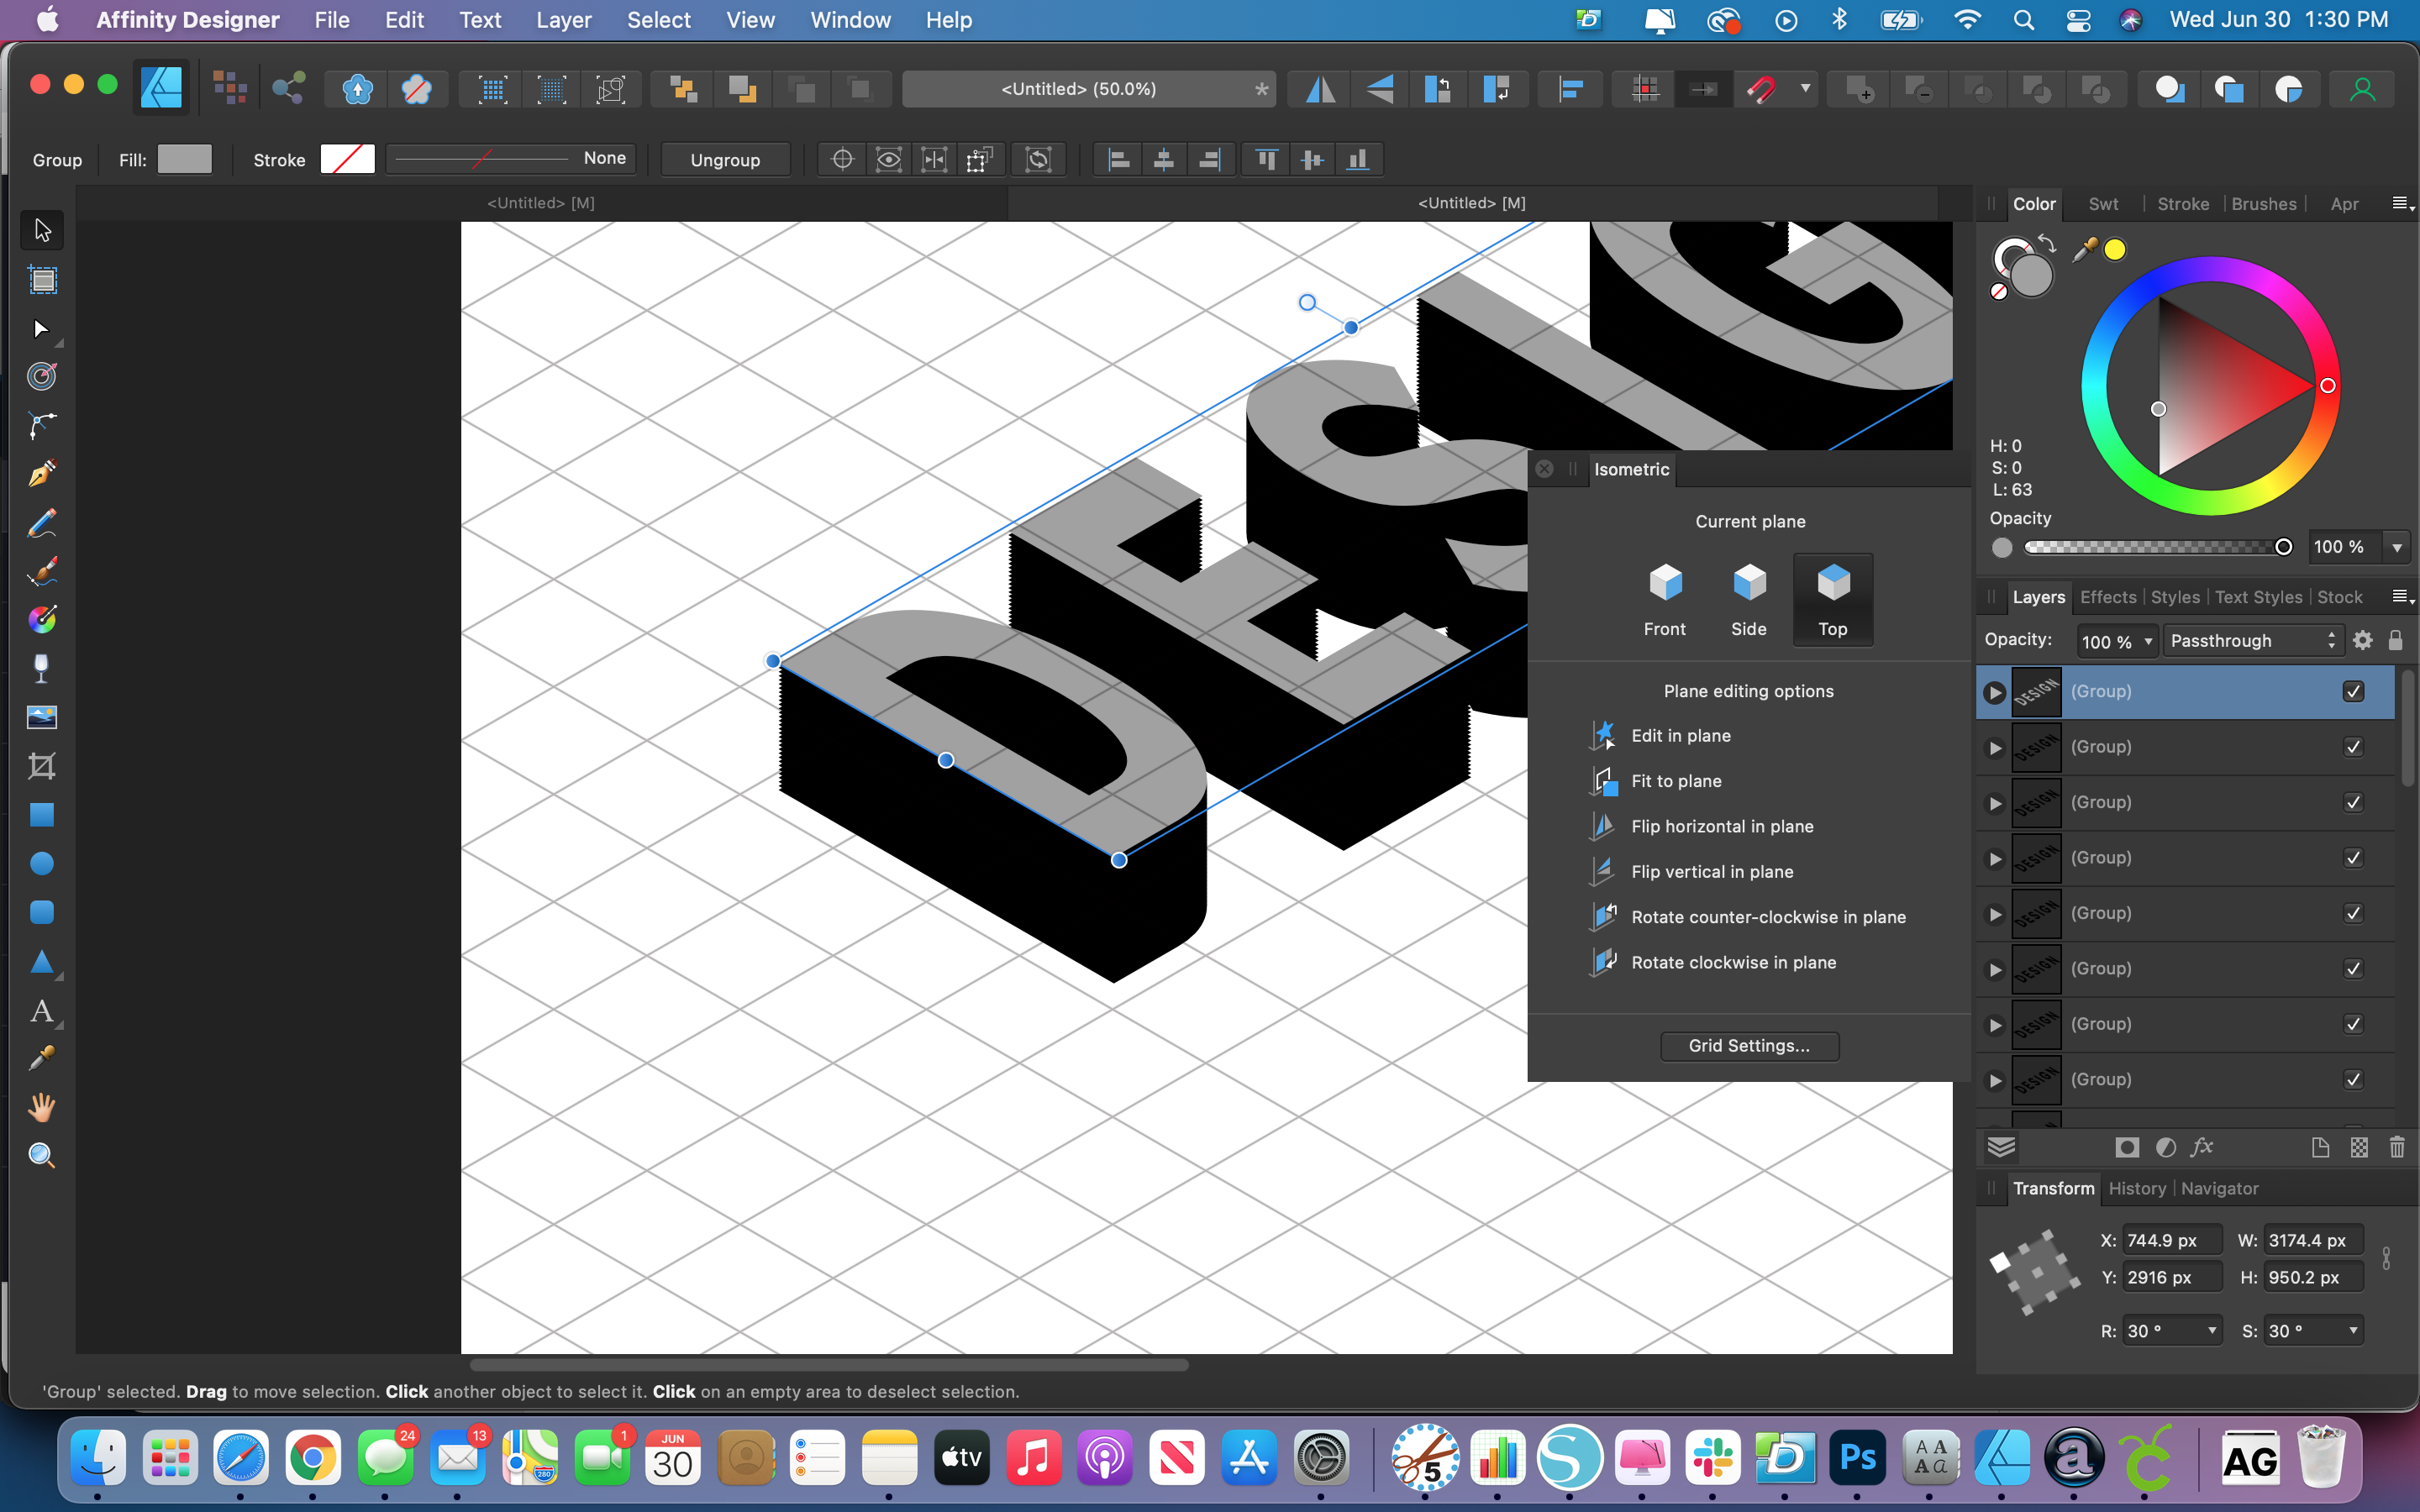
Hide the top layer by clicking on the check box in the Layers panel. Select all the other layers by dragging your mouse around the entire design. Go to the Layer menu and select Ungroup All.
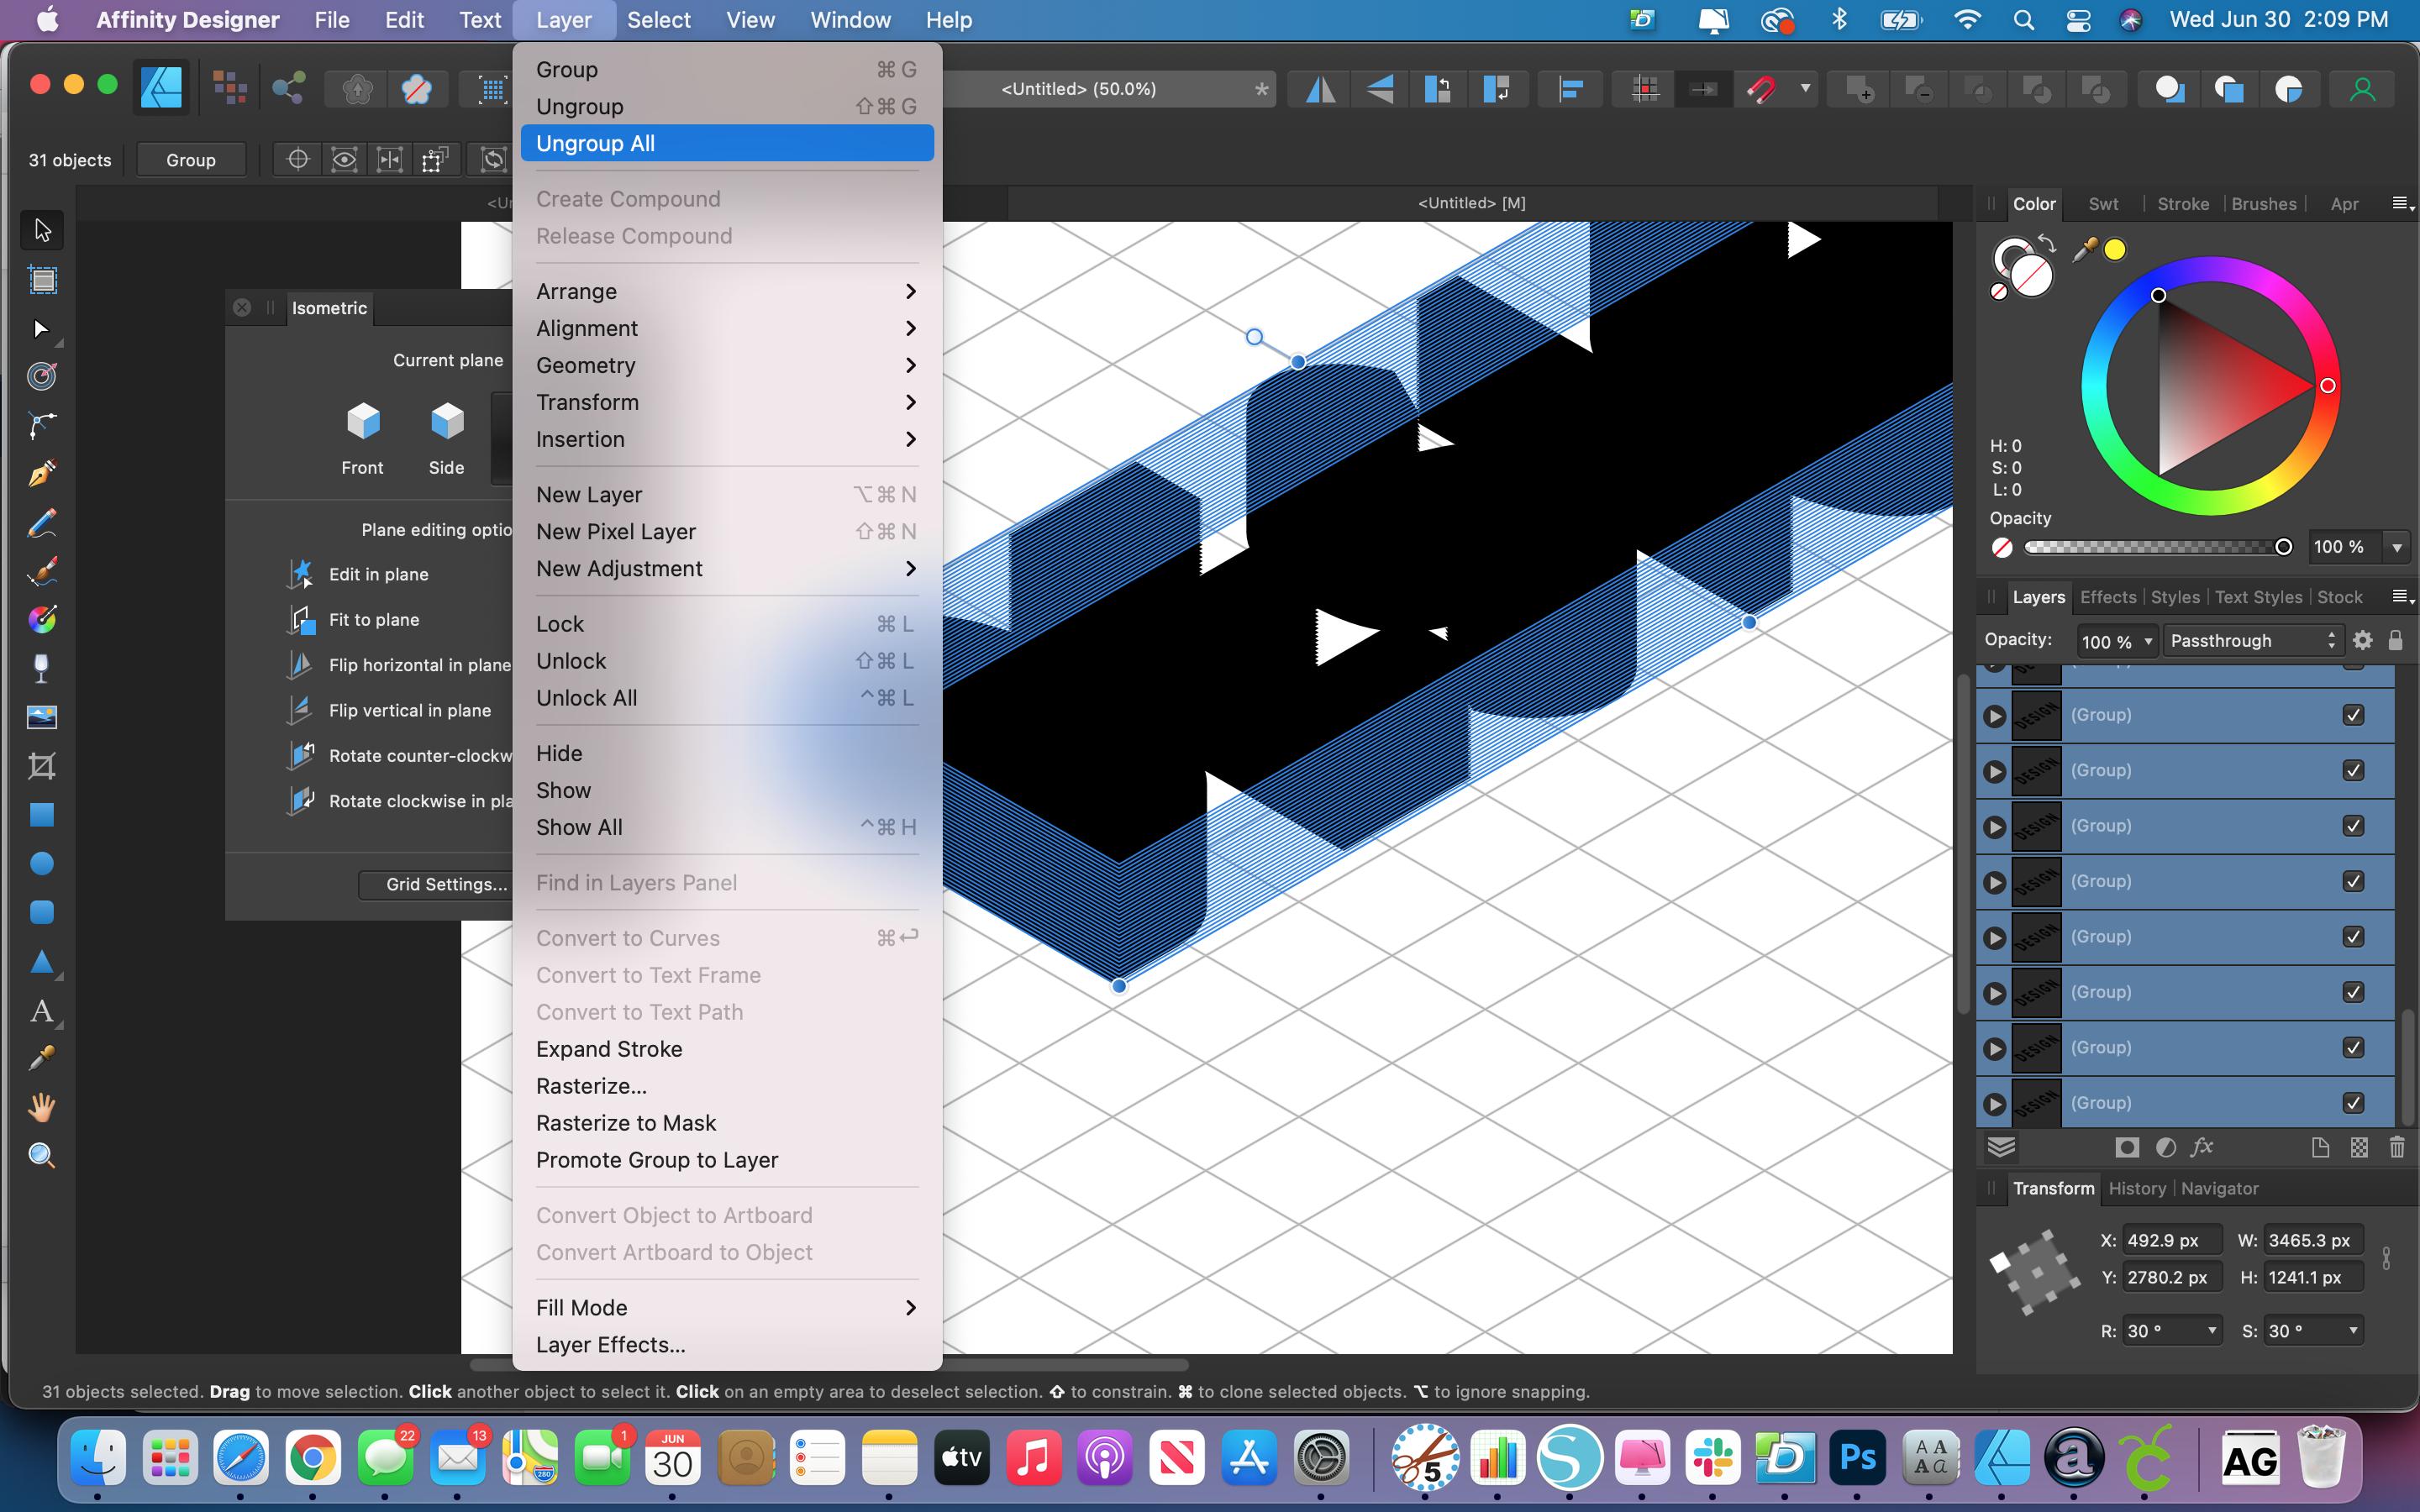
Drag your mouse around all the layers of the first letter in the text. Go to the Boolean Operations buttons and select Add. Do the same thing for each individual layer. You can hide layers as you go to make it easier if you wish.
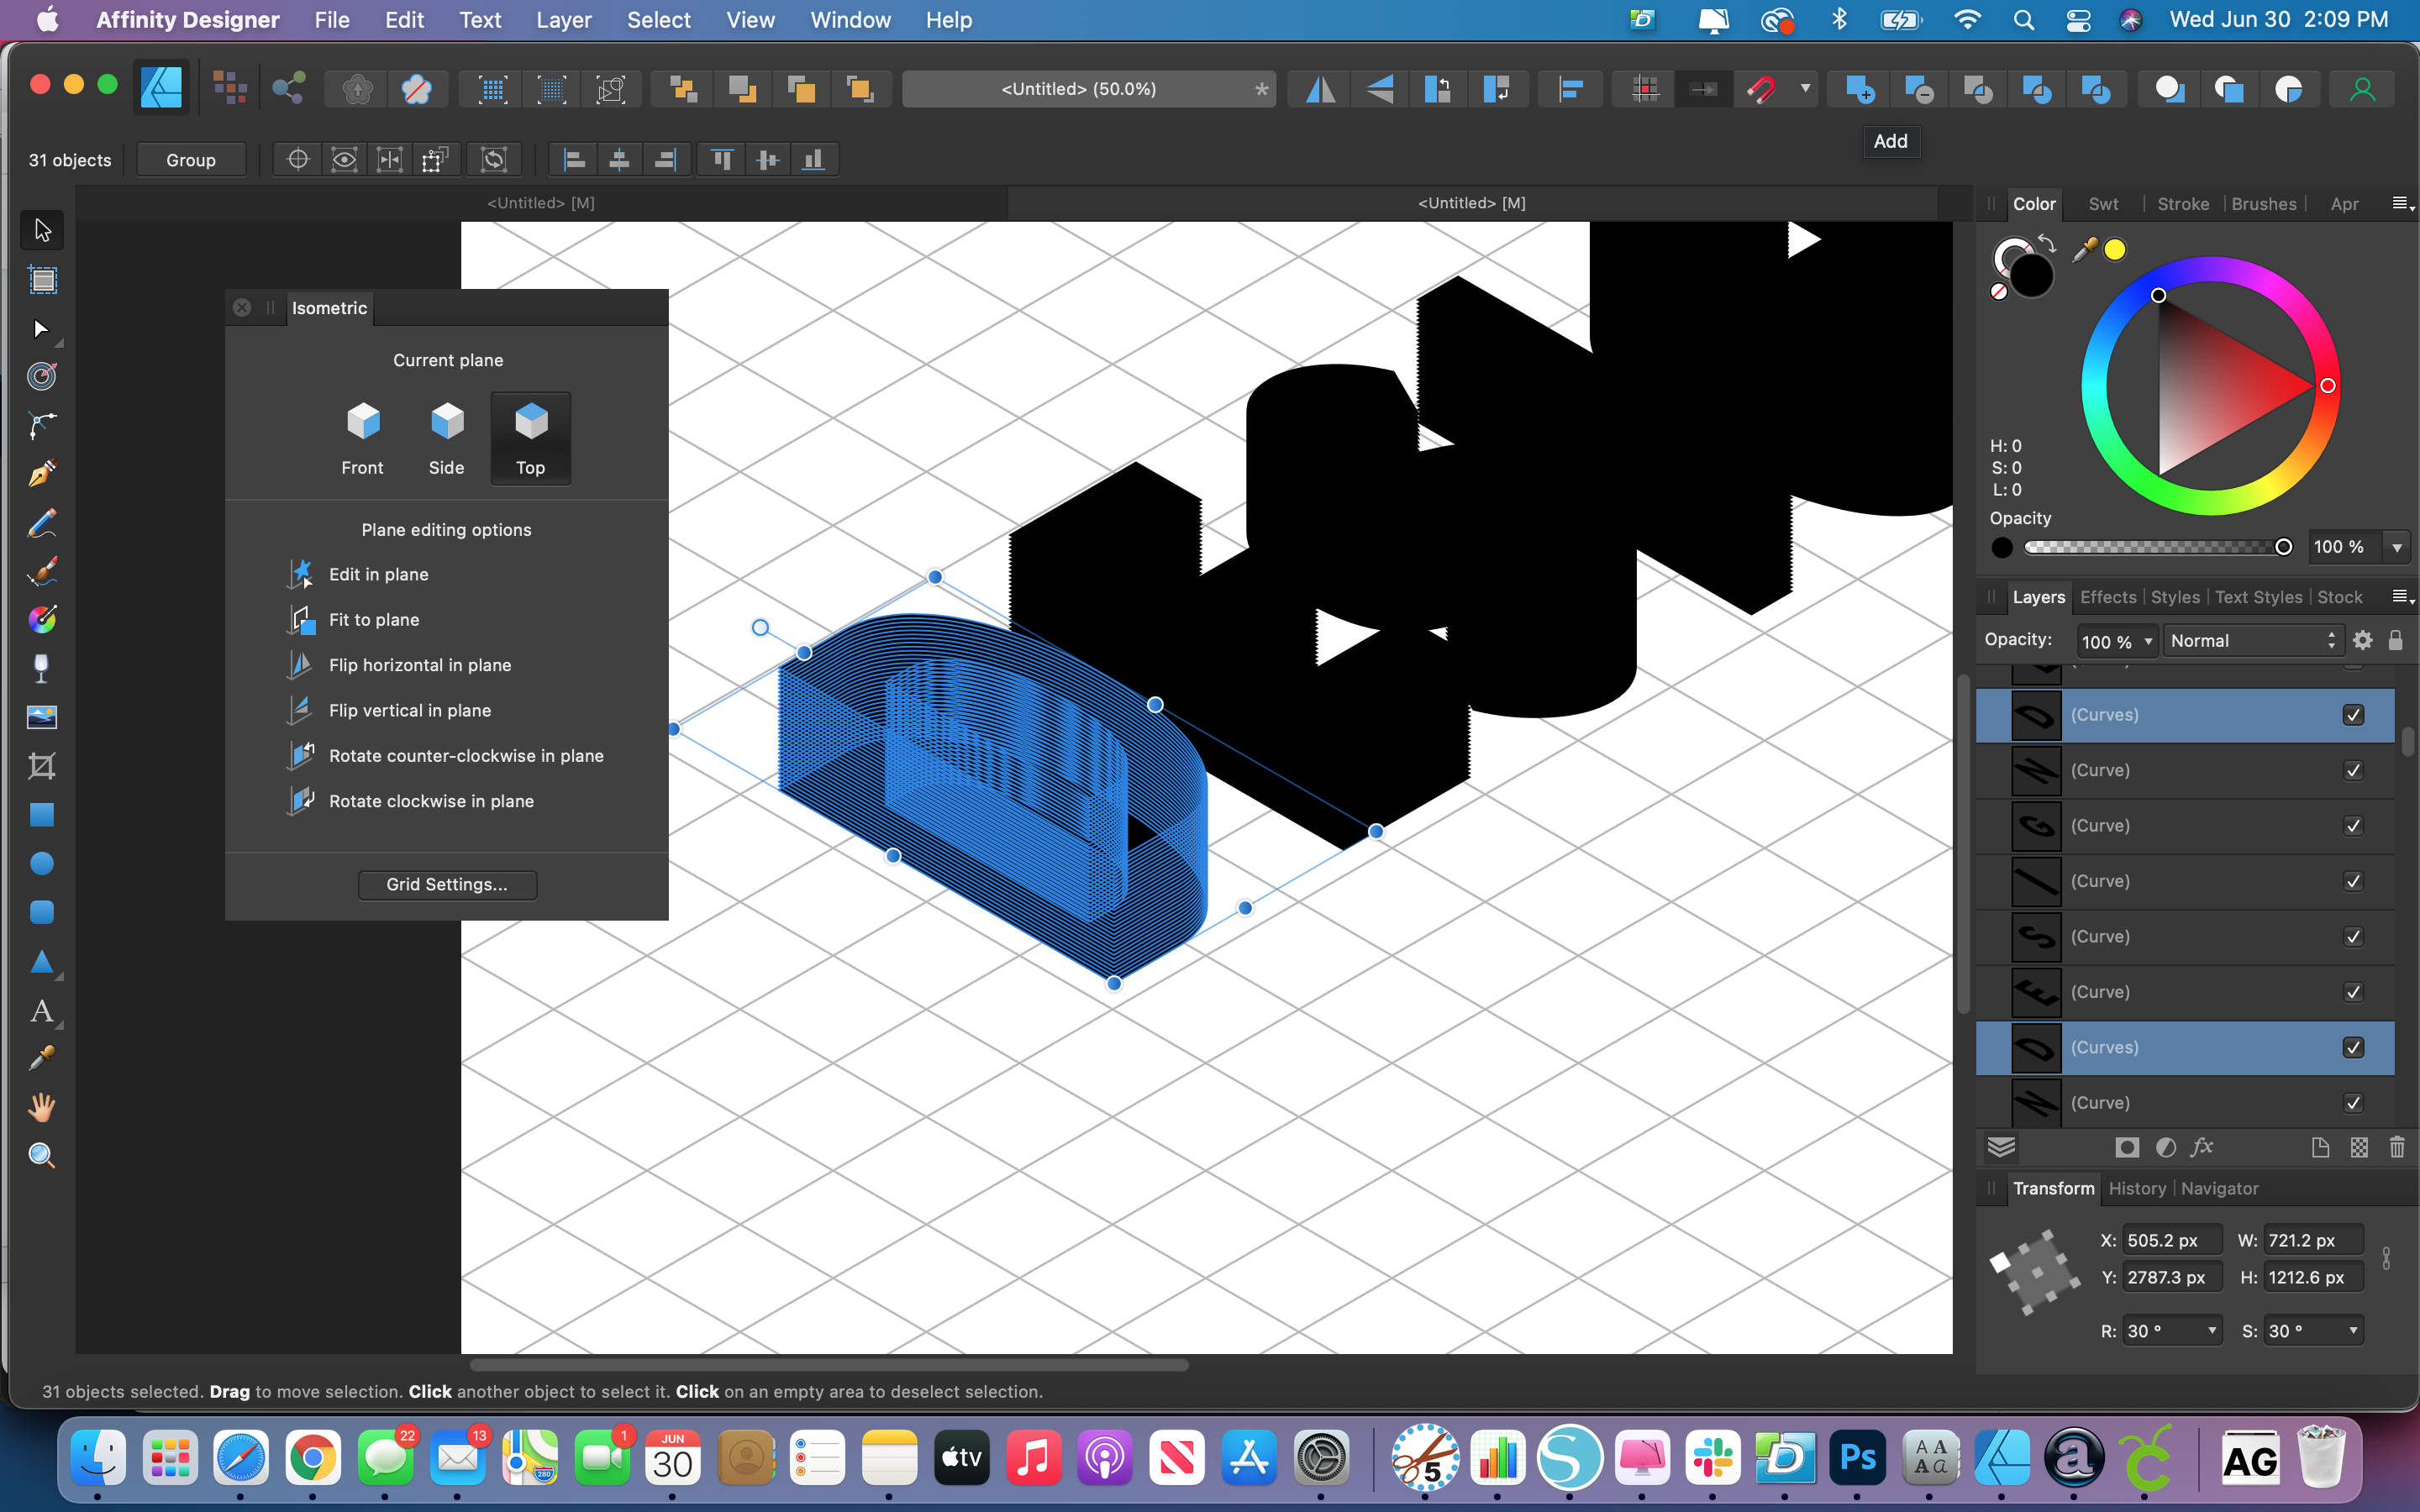
If you zoom in on your design, you will notice that some of the edges look jagged on the letters. We can fix that by node editing.
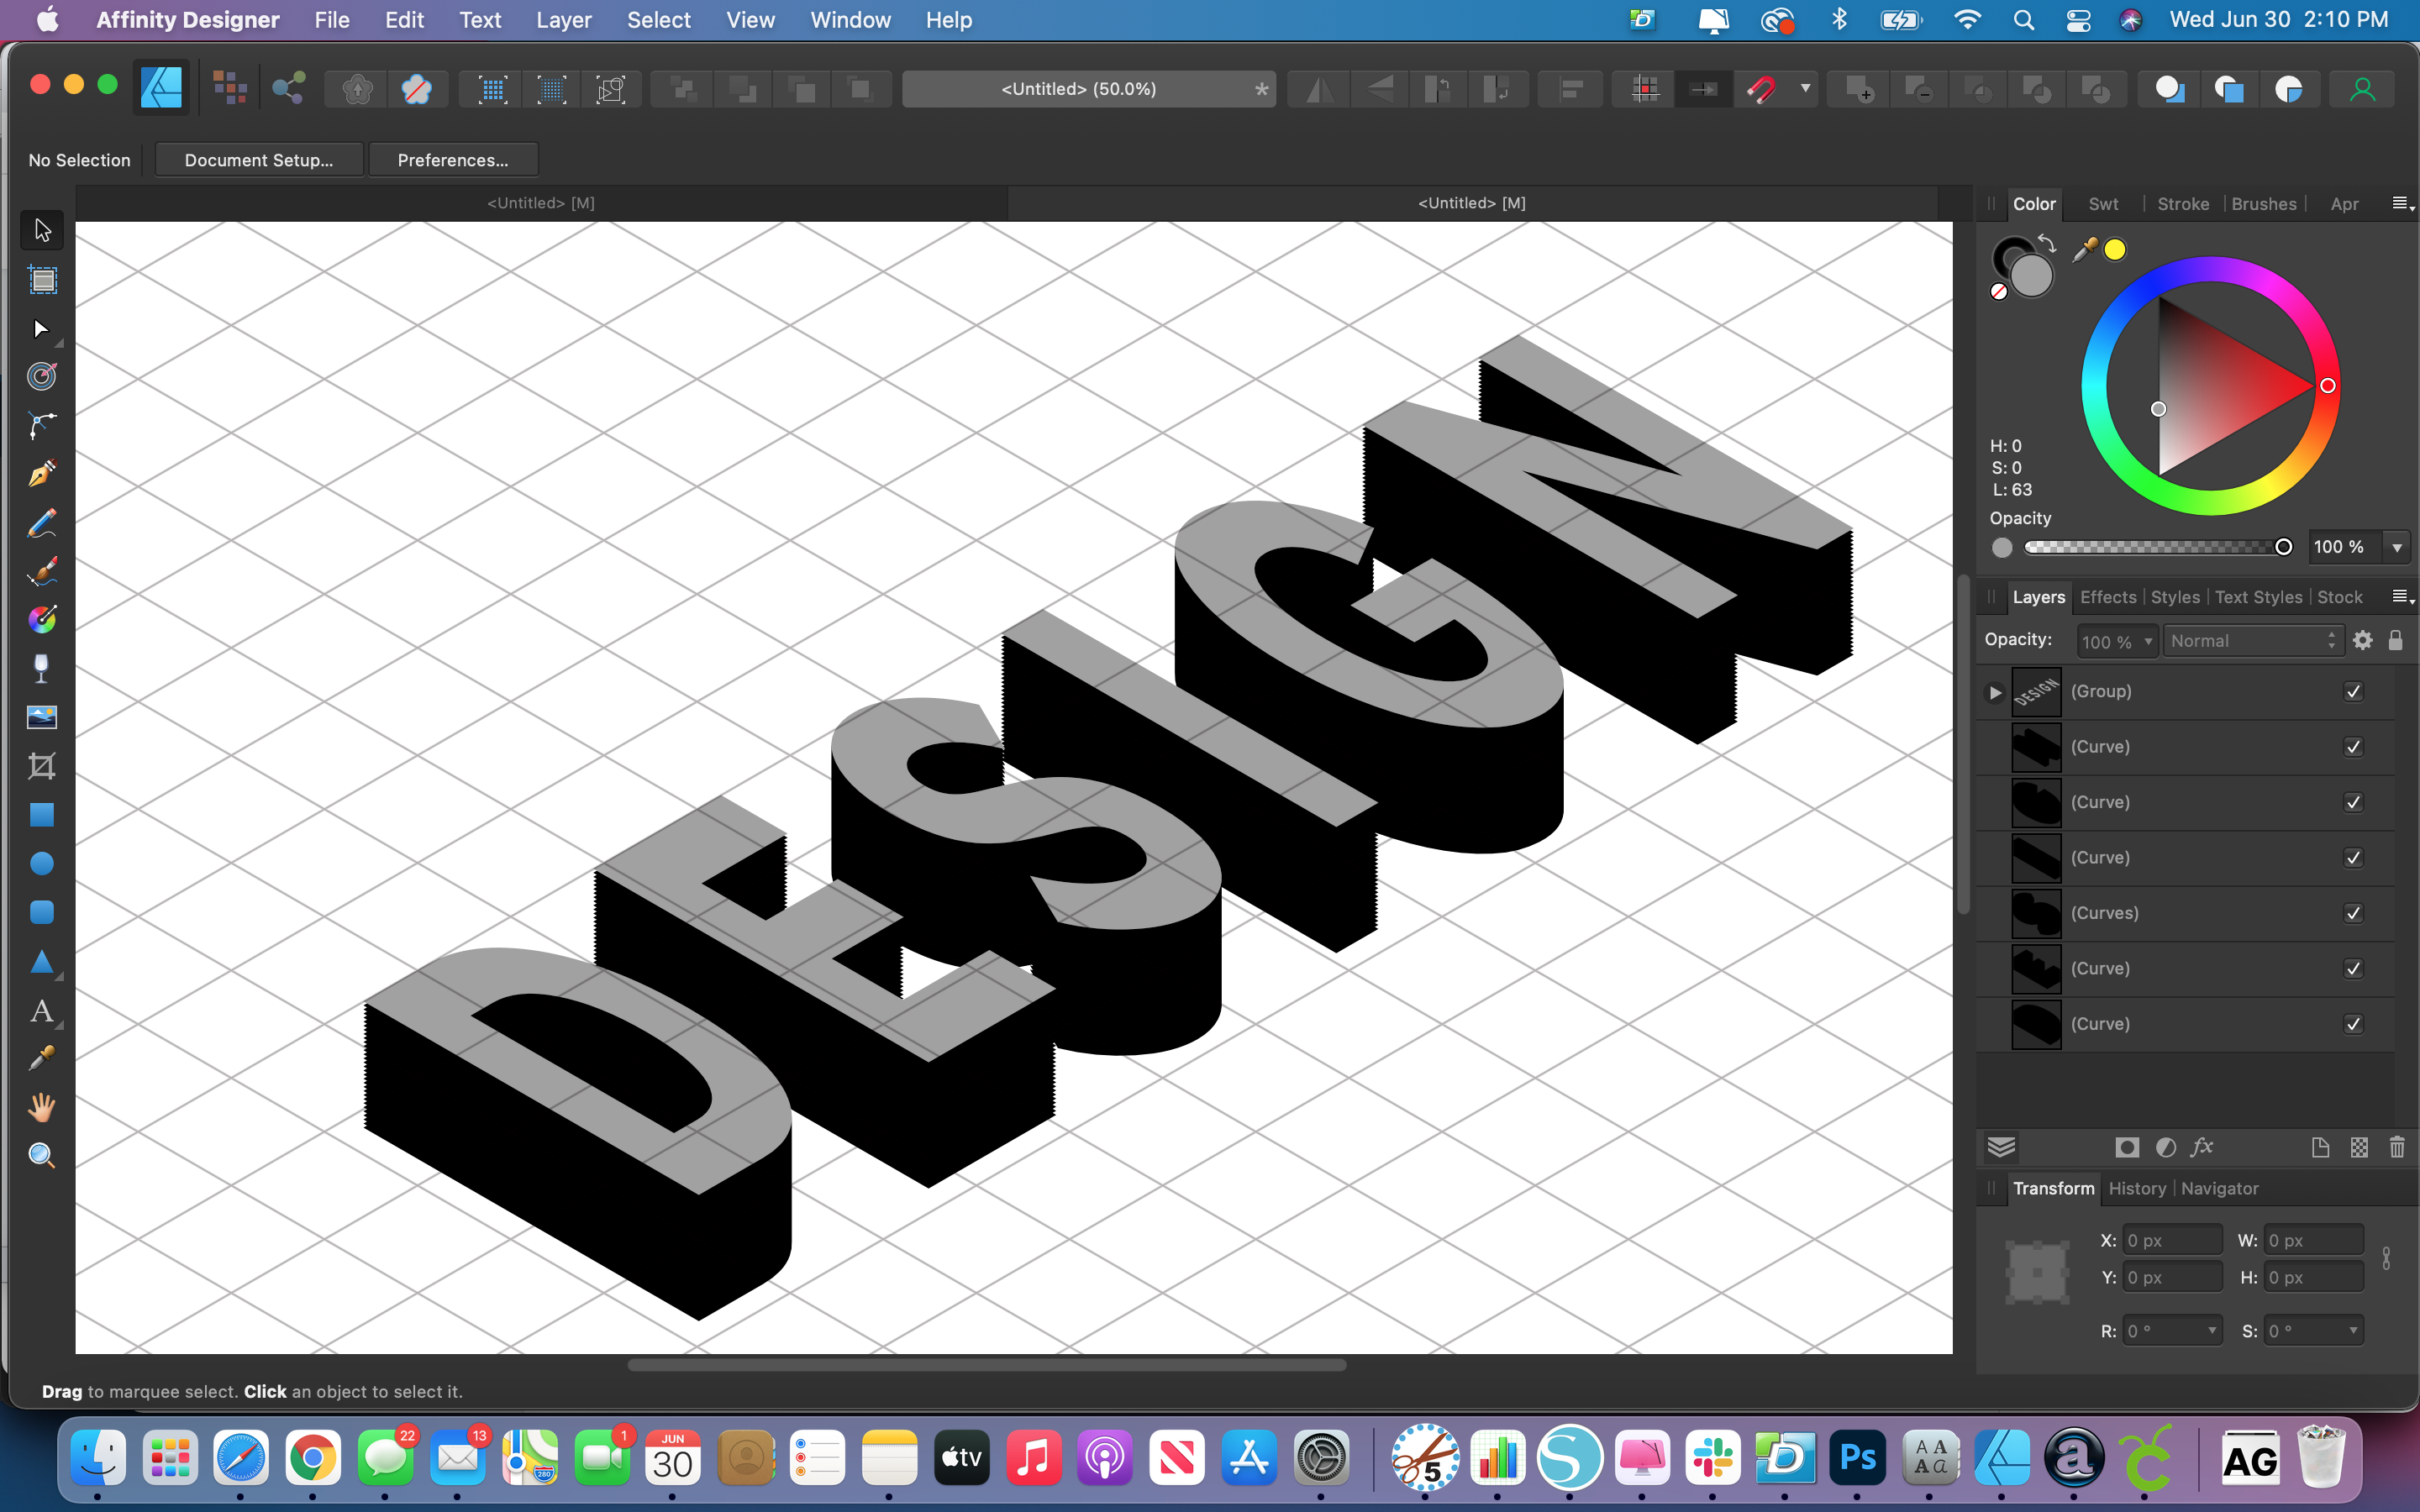
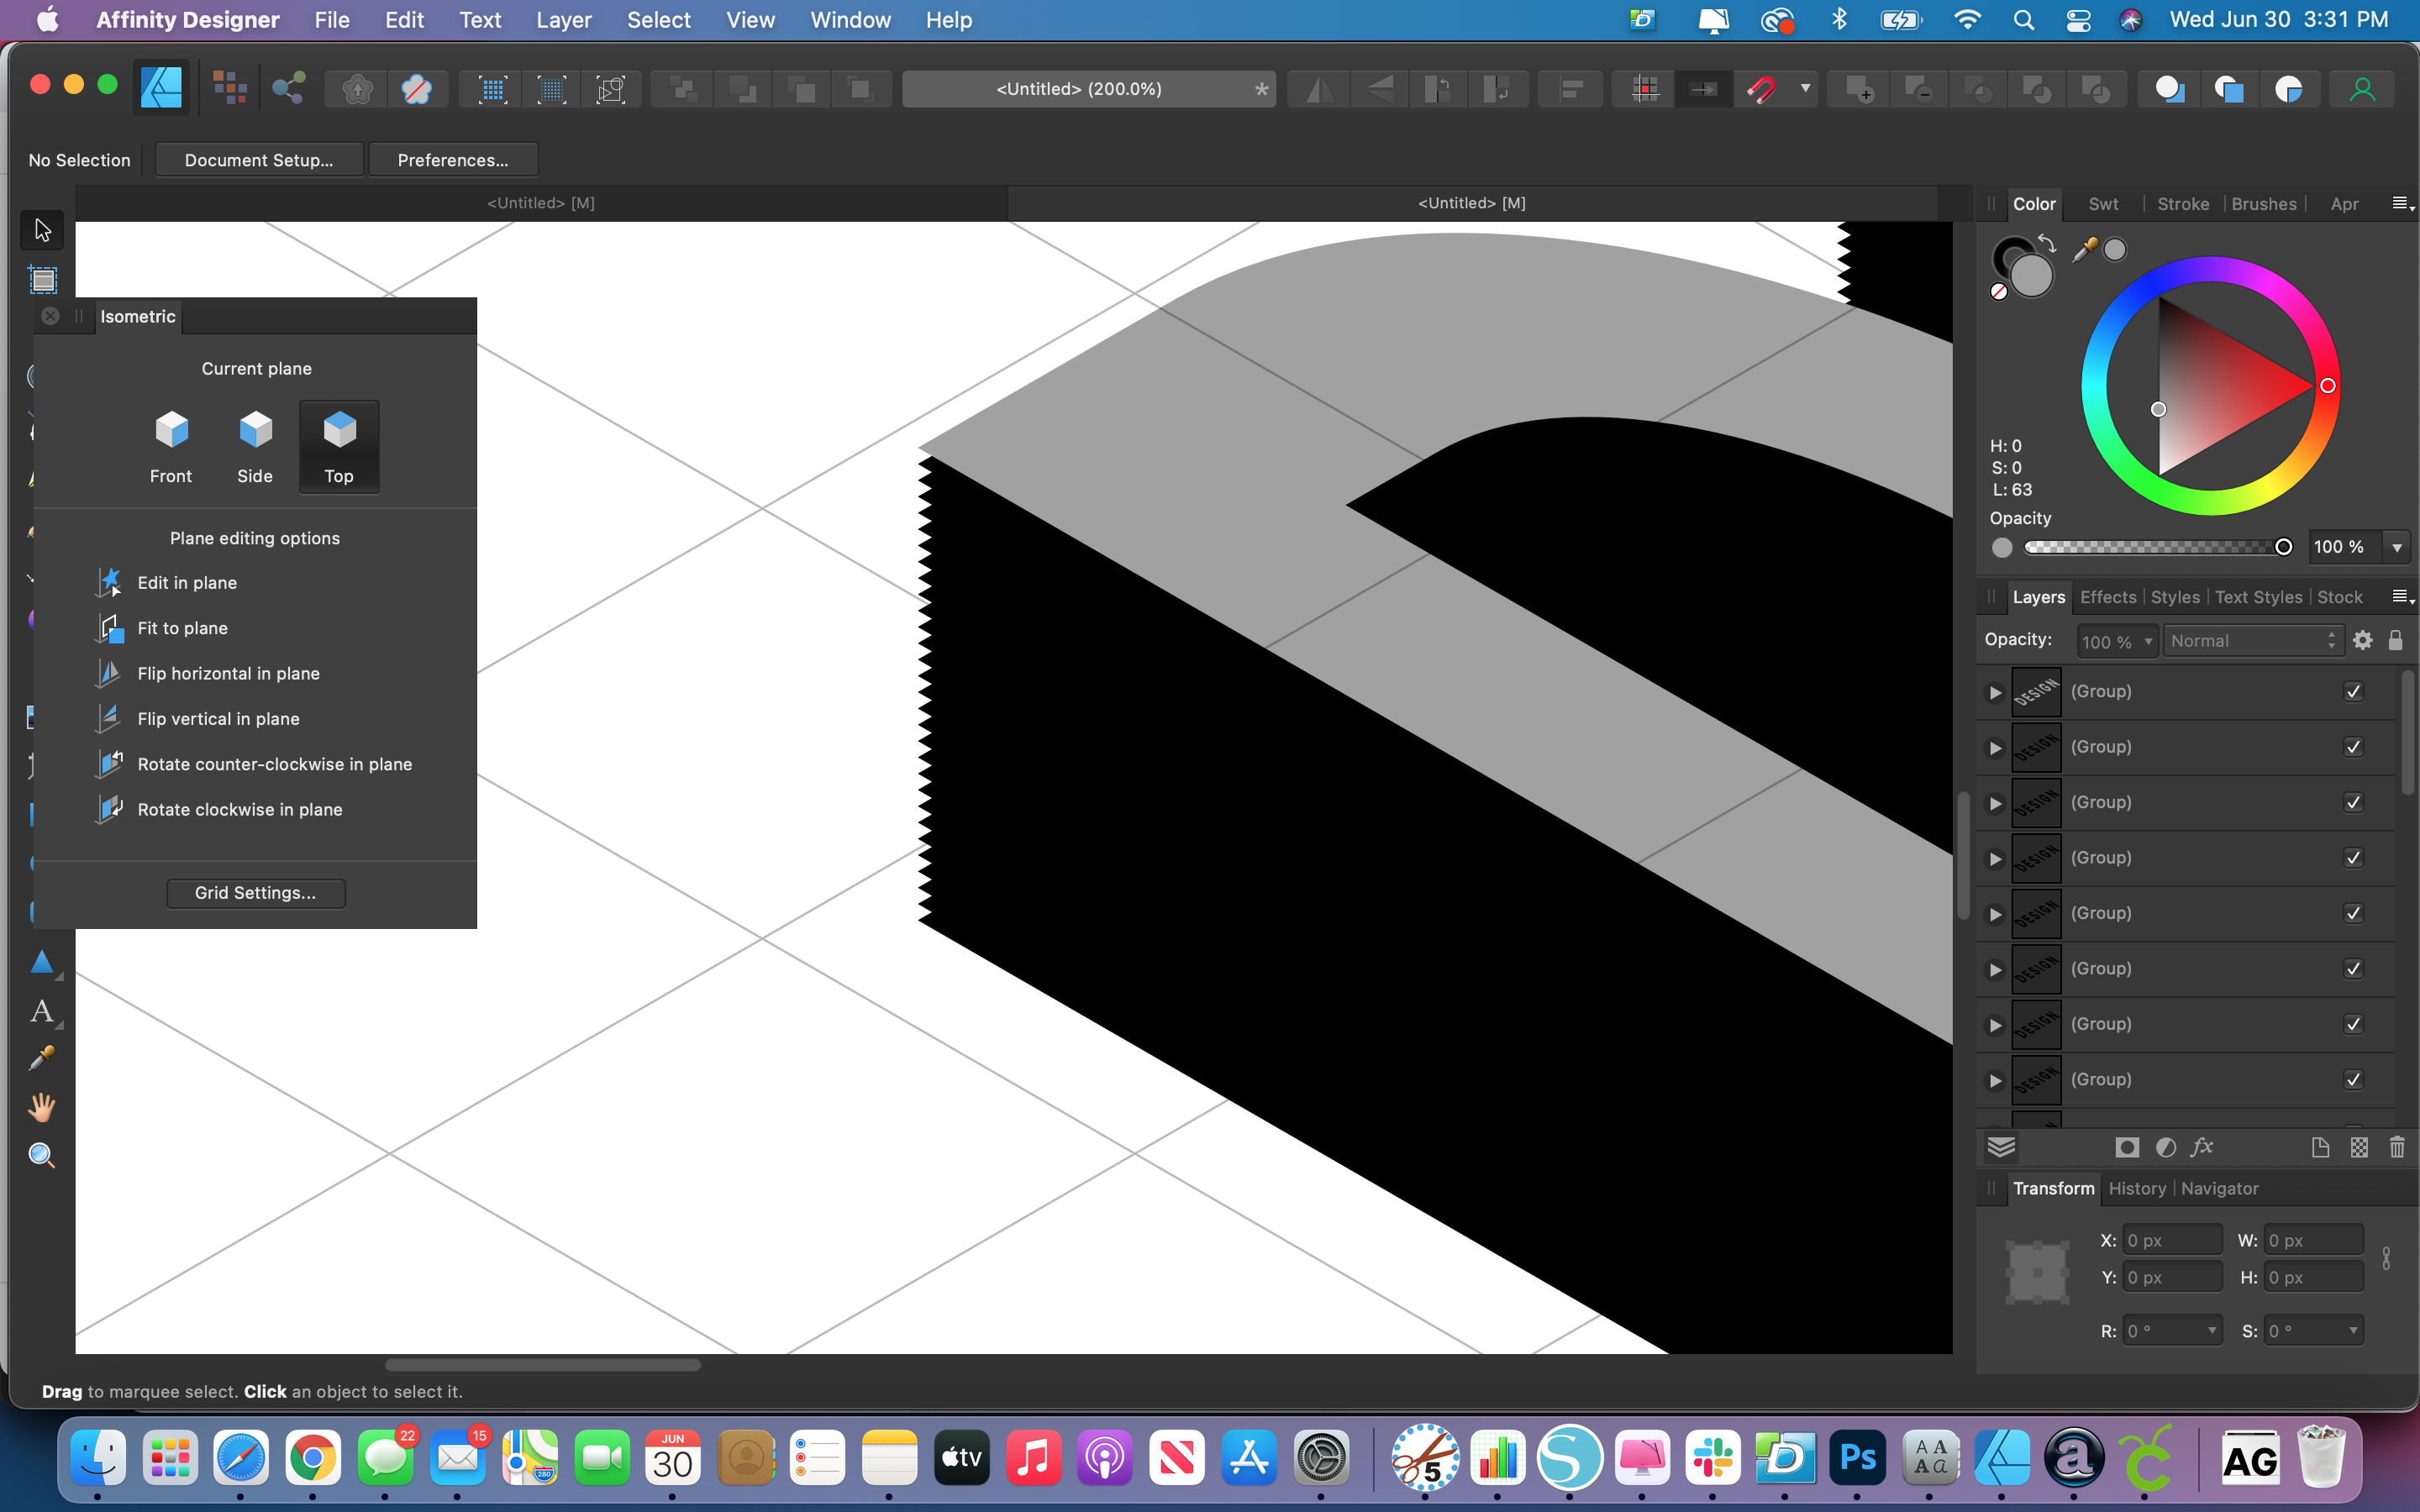
Select the Node Editing tool. You can find this in the left-hand toolbar depicted by a small white solid arrow. Click on the letter you want to edit, and you will see all the extra nodes that can be removed. Highlight them and hit delete. Do the same process with all the other letters.
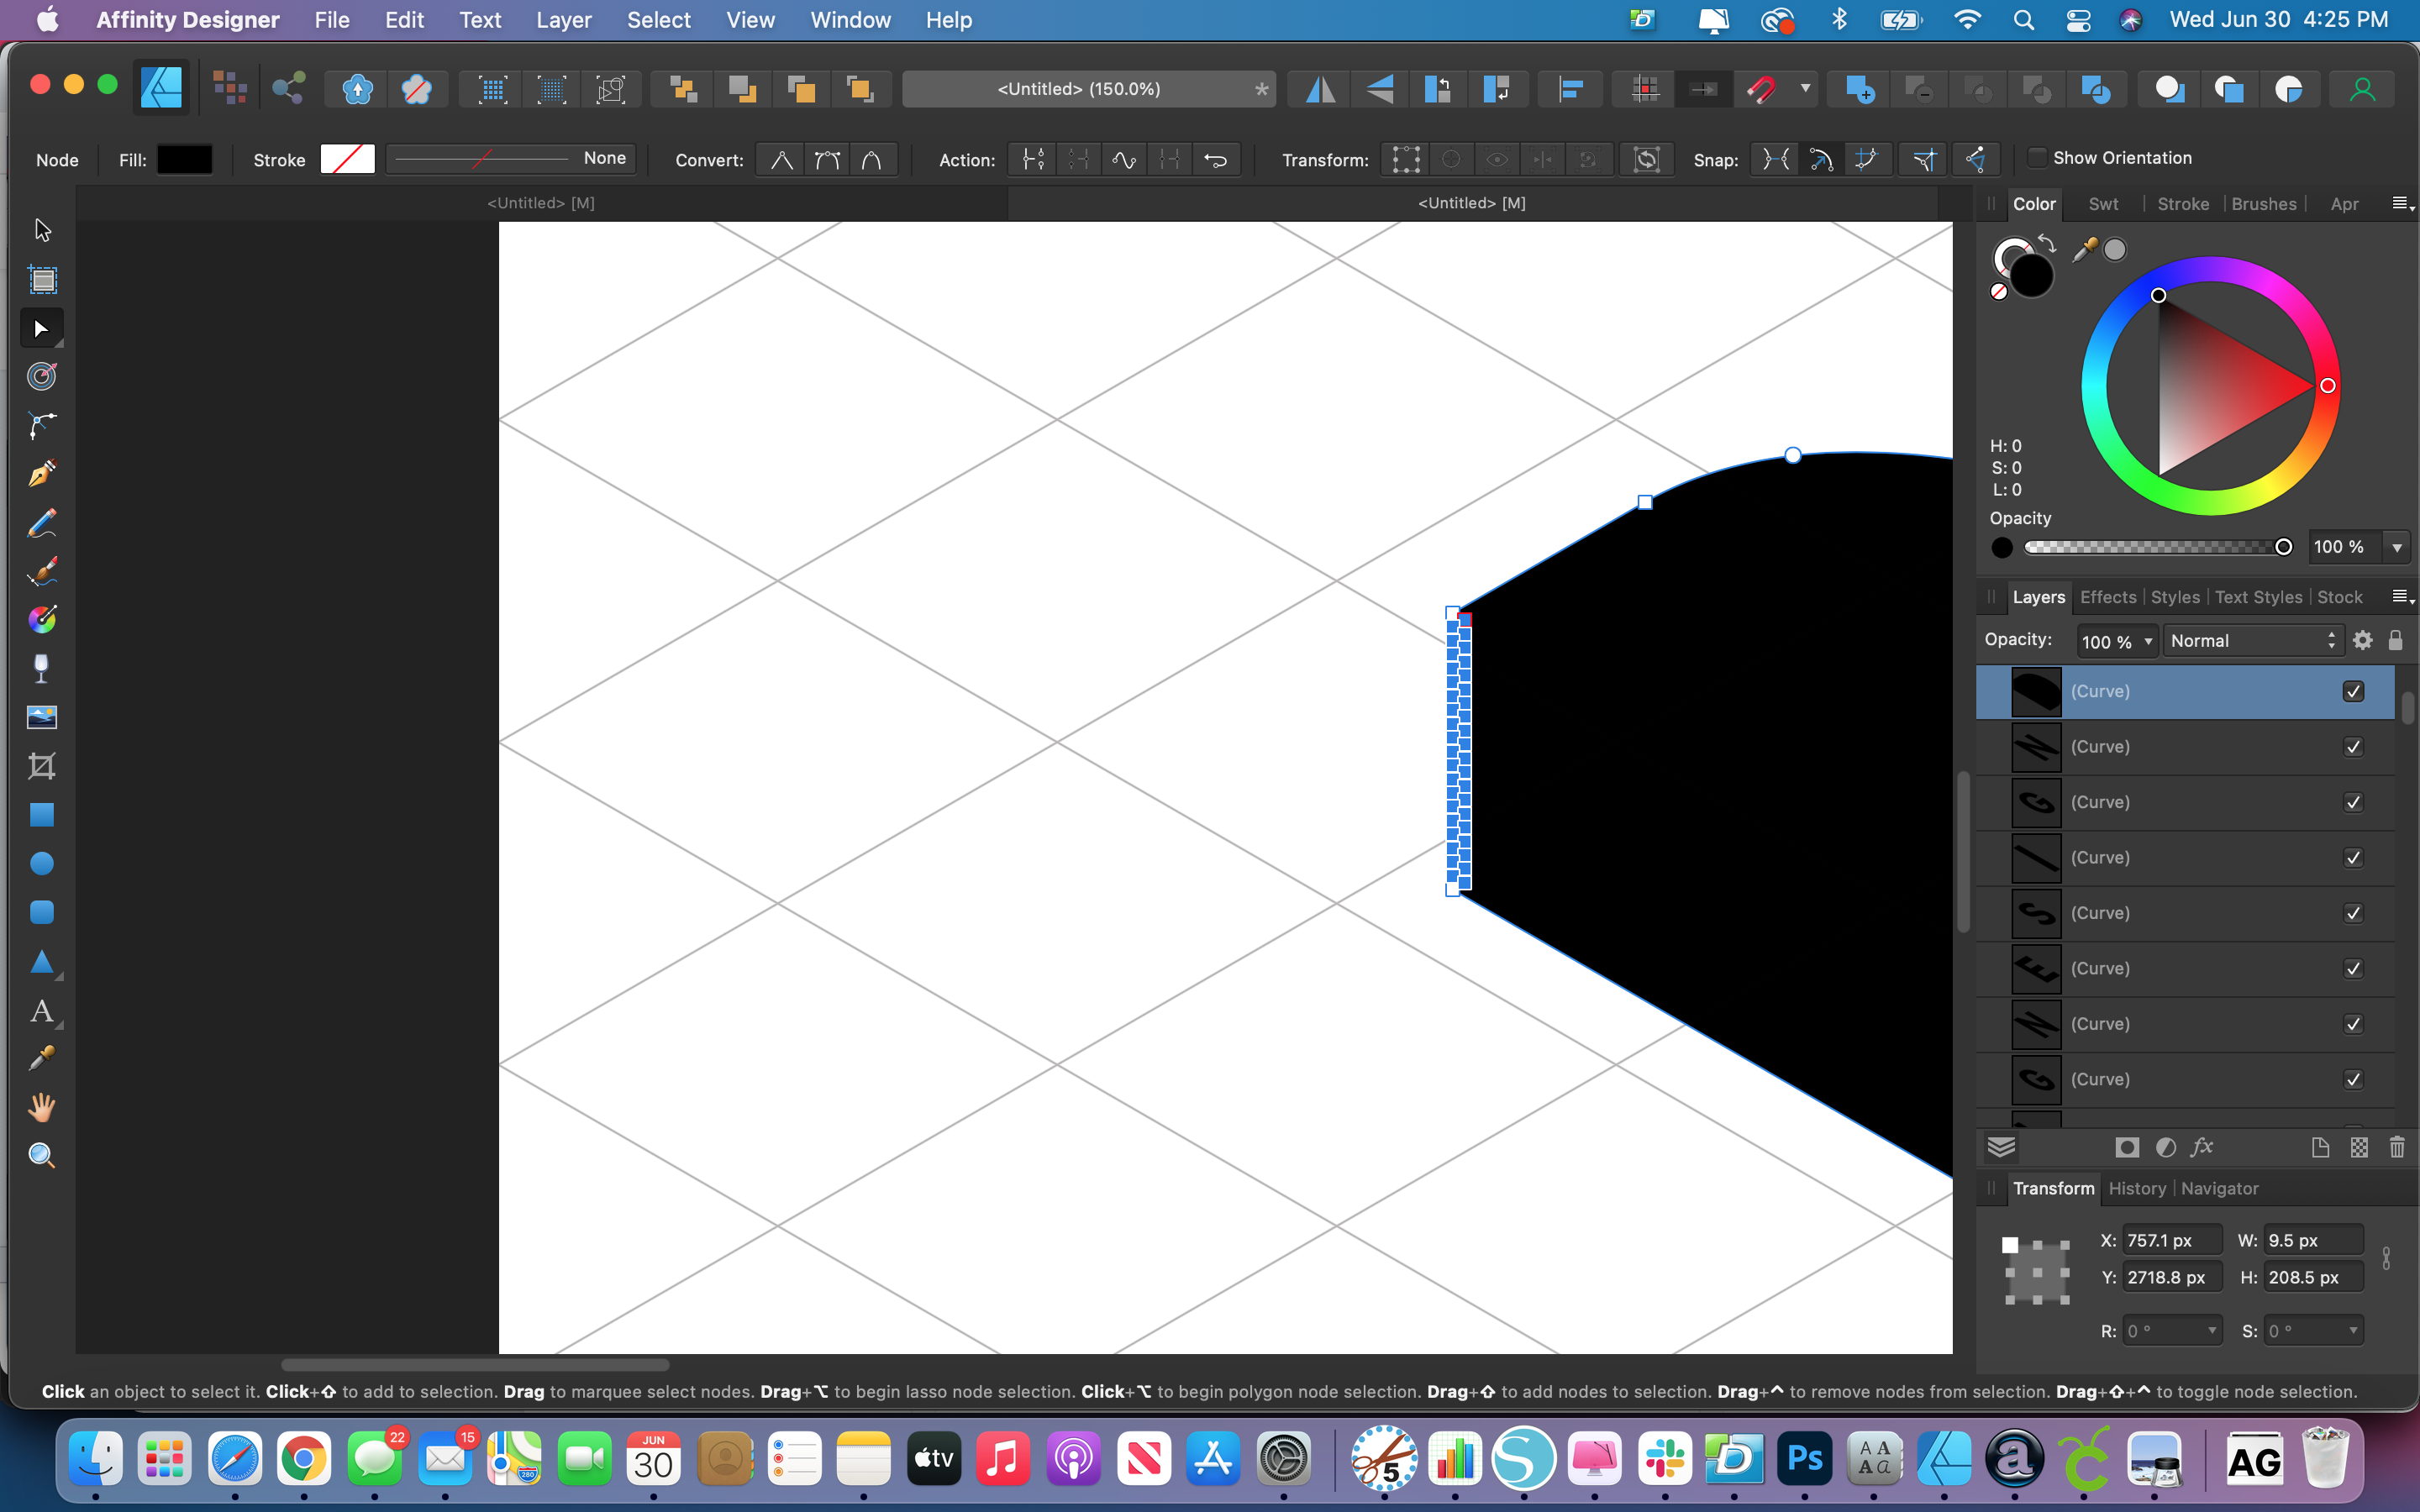
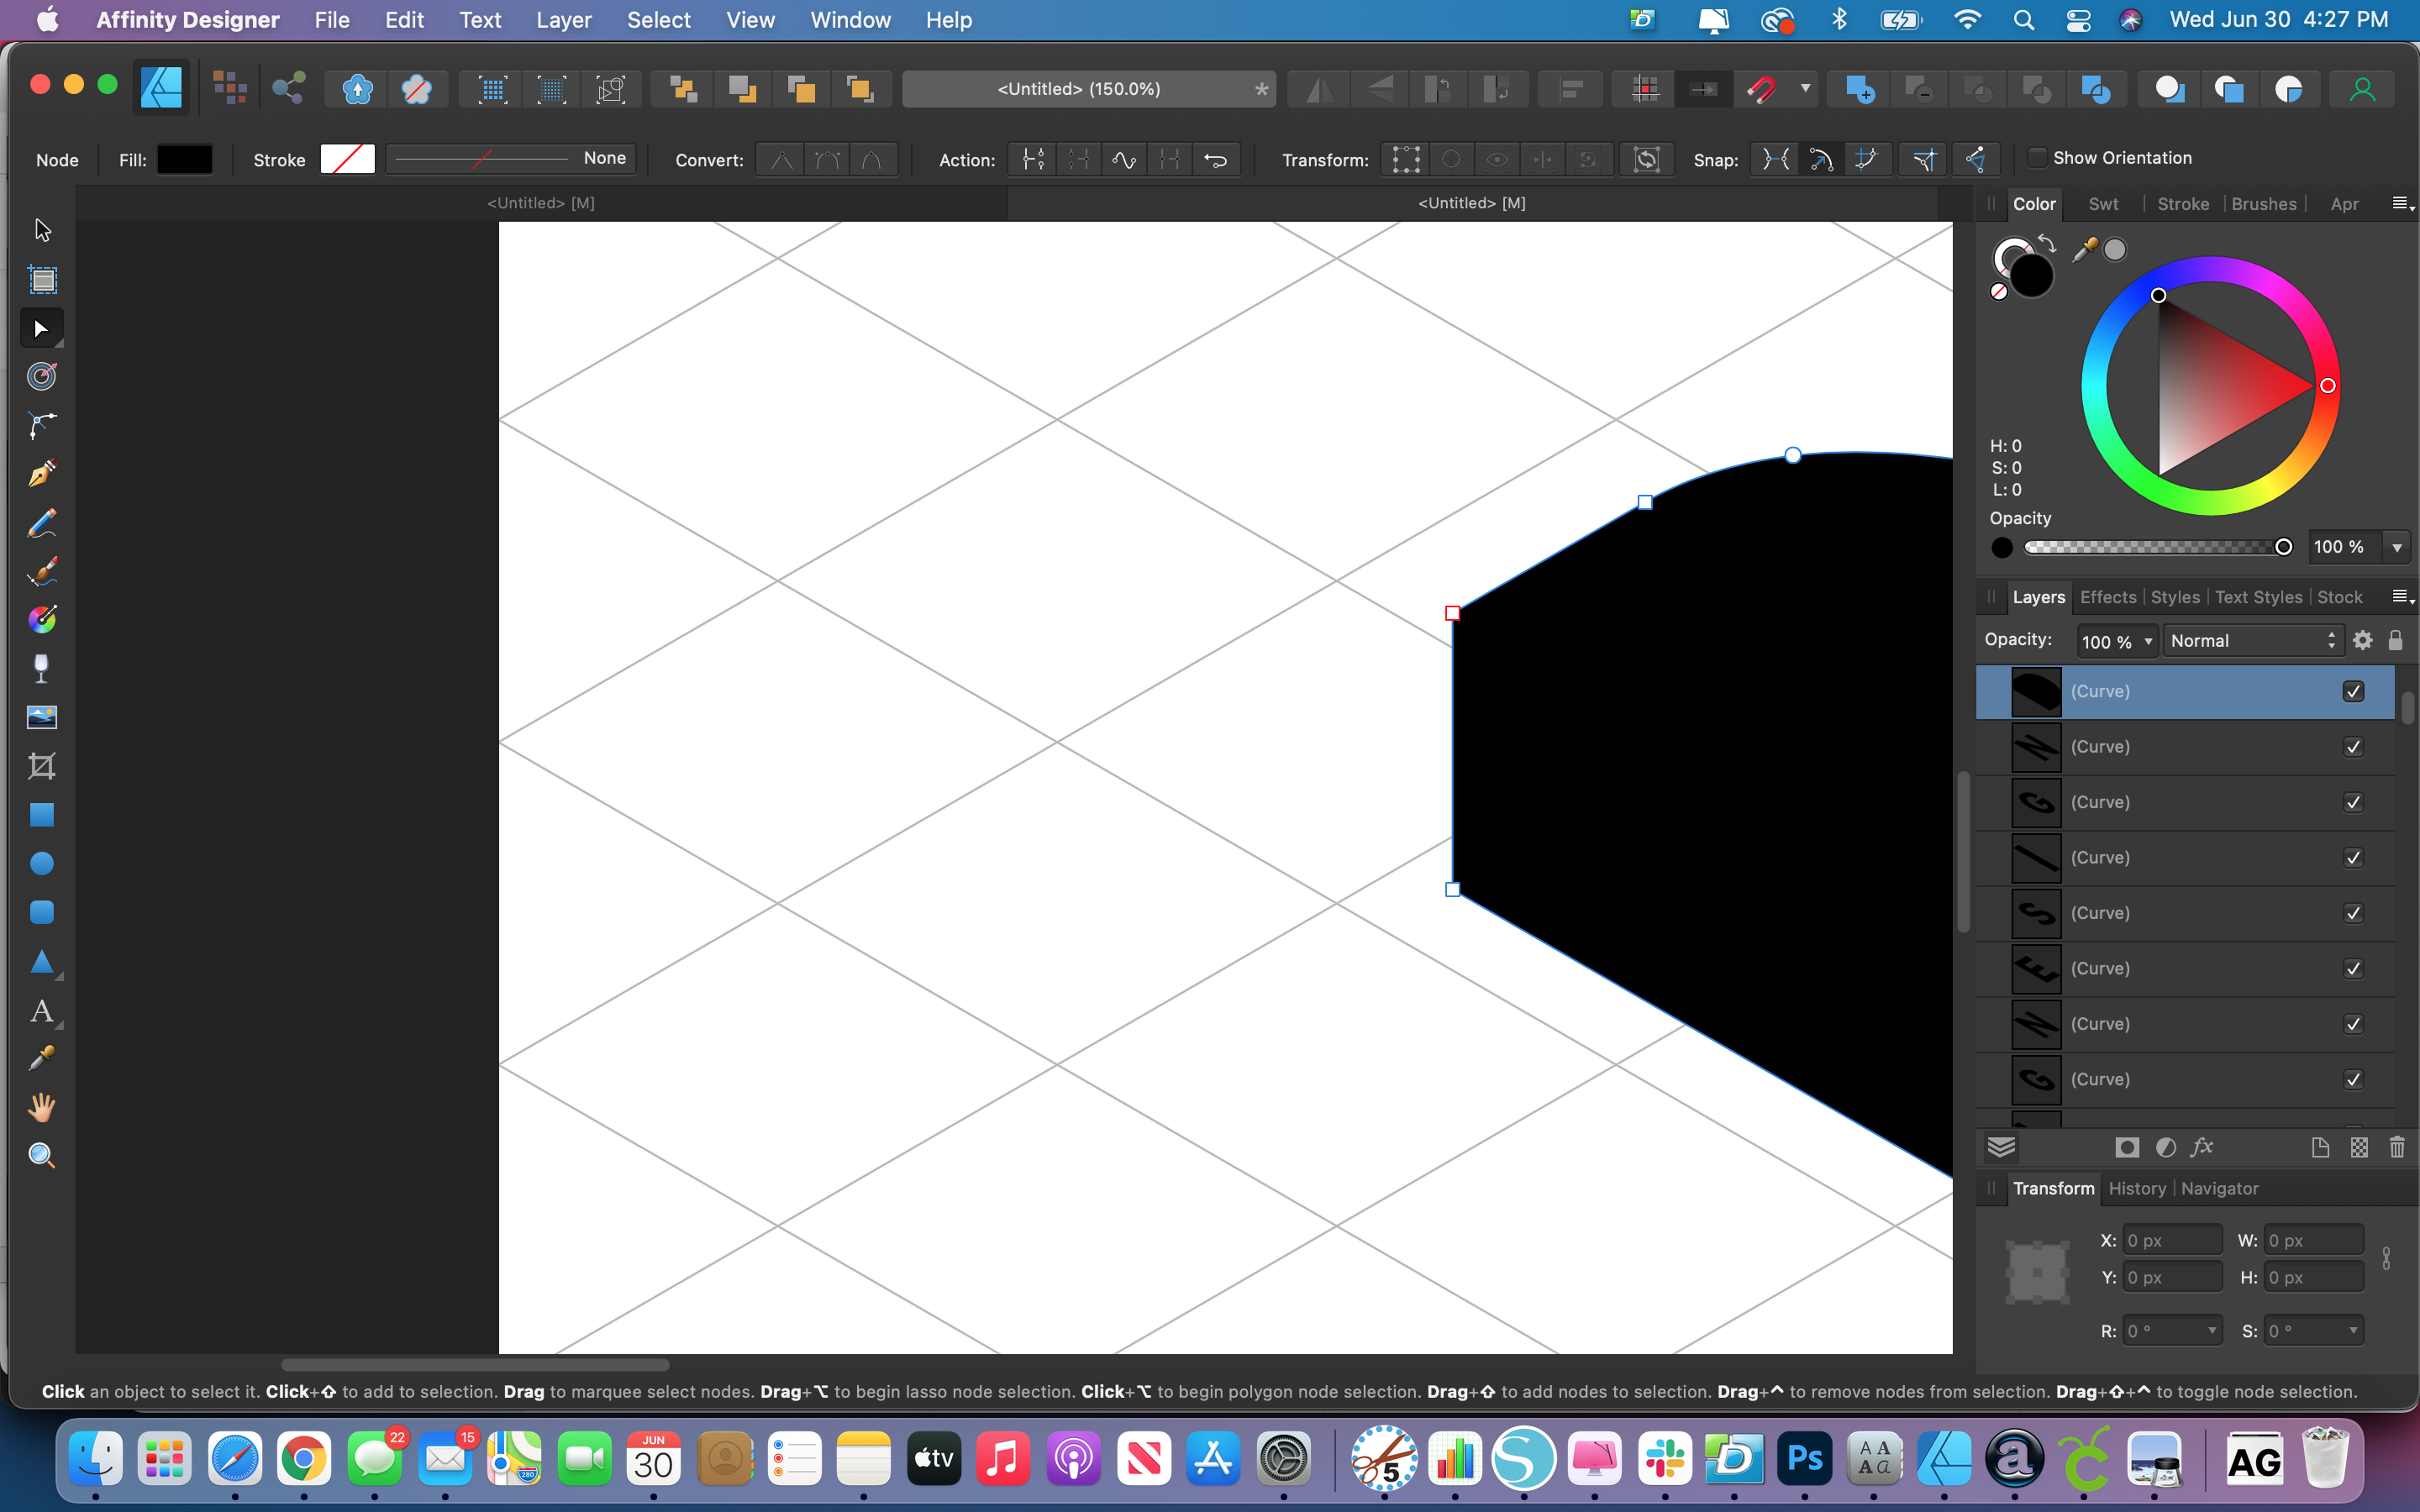
Make your top layer visible again, and you will see that it's not quite lined up with the solid part of the text. You can either hold down Shift and drag it down to line up, or you can Nudge it down with the arrow keys.
From here you can make any changes you want. You might want to add some additional text or change fill colors. You may have to do some additional welding or grouping depending on what you decide to do with the final design. I chose to add some extra text, colors, and a gradient background to the finished design.

If you enjoyed this tutorial or are new to Affinity Designer and want to know more, make sure to check out some of our other tutorials like how to put text in shapes, how to make a gradient and everything you need to know about the preferences panel.
In this lesson, we'll be using the font Cedric which is available in the Plus Member Section, and Bohema Spirit which is available for purchase on Font Bundles.
Step 1. Open a New Document
You can create your document any size but make sure you give yourself plenty of space to work. I chose to create a 5000 pixel square document.
Step 2. Create Your Isometric Grid
Step 1. Open the Grid and Axis Manager
You'll need a grid to work with your text. Open up the View menu and then go to Grid and Axis Manager.
Step 2. Select Your Settings
Click on Show Grid to make the grid visible. Select Advanced to see more settings. Select Isometric for the Grid Type, and set your spacing settings to 256 px. The spacing settings can be changed based on the look of the text you want. Lastly, you can change the color of your grid lines if you want to at the bottom of the window. Click on Create Plane Set and then Close.
Step 3. Add Your Text
Type out your wording in the Cedric font. Isometric text looks better when there is more space between the letters so adjust the kerning and spacing to your liking.
Step 4. Put Your Text On the Plane
Select your wording and then make sure that the top plane is selected within the Isometric window and then click Fit To Plane.
Step 5. Converting to Curves
Select the text then go to the Layer menu and select Convert To Curves. This will change your text from an editable text to a group of curves.
Step 6. Extruding The Text
First, duplicate your text layer. Then zoom in really close on the top left corner of the text and whilst holding down the Shift key, drag the top layer up by a few pixels. You can also Nudge the top layer up with the arrow keys.
Step 7. Power Duplicate the Text
Affinity Designer has a Power Duplicate feature. After duplicating a layer and moving it any layer that you duplicate after that will have the same properties. CTRL+J or CMD+J is the keyboard shortcut for Power Duplicate. Add as many layers as you need to get the look you are going for.
Step 8. Change the Fill Color on the Top Layer
Select the top layer in the Layers panel and change the fill color to see your perspective text.
Step 9. Ungroup the Text
Hide the top layer by clicking on the check box in the Layers panel. Select all the other layers by dragging your mouse around the entire design. Go to the Layer menu and select Ungroup All.
Step 10. Weld the Individual Letters
Drag your mouse around all the layers of the first letter in the text. Go to the Boolean Operations buttons and select Add. Do the same thing for each individual layer. You can hide layers as you go to make it easier if you wish.
Step 11. Cleaning Up Nodes
If you zoom in on your design, you will notice that some of the edges look jagged on the letters. We can fix that by node editing.
Step 12. Deleting the Extra Nodes
Select the Node Editing tool. You can find this in the left-hand toolbar depicted by a small white solid arrow. Click on the letter you want to edit, and you will see all the extra nodes that can be removed. Highlight them and hit delete. Do the same process with all the other letters.
Step 13. Edit the Top Layer
Make your top layer visible again, and you will see that it's not quite lined up with the solid part of the text. You can either hold down Shift and drag it down to line up, or you can Nudge it down with the arrow keys.
Step 14. Finishing the Design
From here you can make any changes you want. You might want to add some additional text or change fill colors. You may have to do some additional welding or grouping depending on what you decide to do with the final design. I chose to add some extra text, colors, and a gradient background to the finished design.
If you enjoyed this tutorial or are new to Affinity Designer and want to know more, make sure to check out some of our other tutorials like how to put text in shapes, how to make a gradient and everything you need to know about the preferences panel.
Related Tutorials
Affinity Tutorials
How to Create a Neon Text Effect in Affinity Designer
Affinity Tutorials
How to Create Stacked Text in Affinity Designer
Affinity Tutorials
How to Curve Text in Affinity Designer
In this tutorial learn how to curve text in Affinity Designer in only 5 steps!
Affinity Tutorials
How to Warp Text in Affinity Designer
In this step by step tutorial we will learn how to warp text in Affinity Designer.
Affinity Tutorials
How to Convert Text to Path in Affinity Designer
Converting text to path in Affinity Designer takes only a few steps.
Affinity Tutorials
Text basics in Affinity Designer
Learn the text basics in Affinity Designer with this beginner tutorial.