By Design Bundles
Affinity Tutorials11 min
How to Create Stacked Text in Affinity Designer
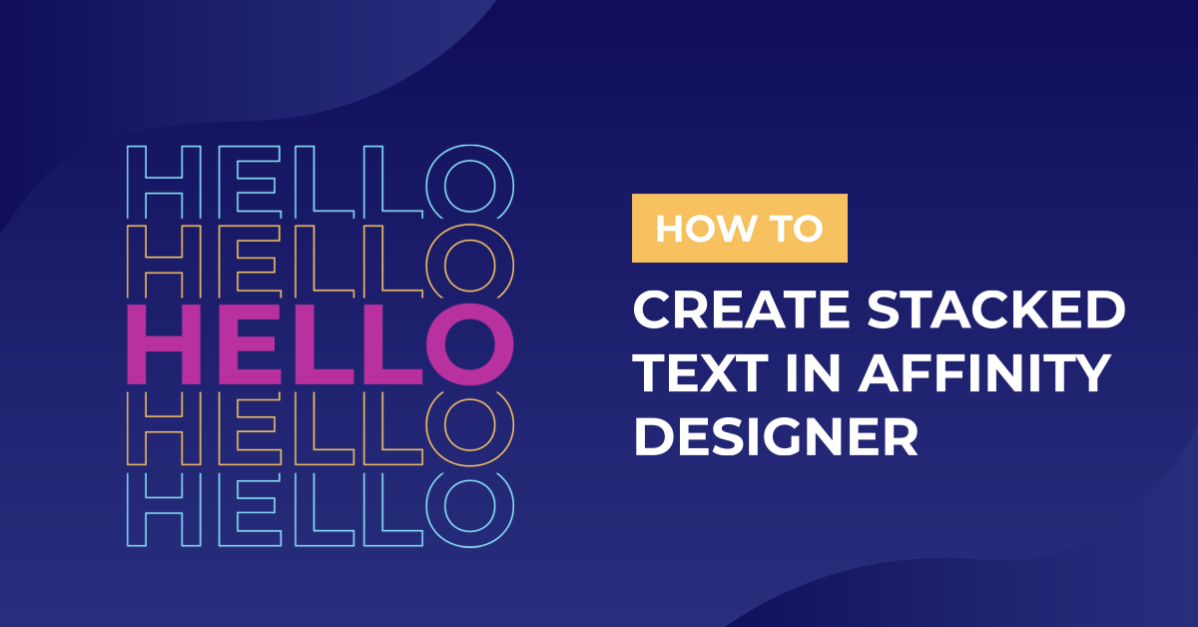
Stacked text has a solid main text object with partial text that is duplicated on both sides. This effect is extremely popular for sports related items. In this tutorial we will be creating stacked text in Affinity Designer.
For the text we will be using Gontano font. The text will be Masked and Rasterized then saved as a PNG. Open Affinity Designer and select New Document. Choose an A4 document size as the design requires more height than width. Click Create.
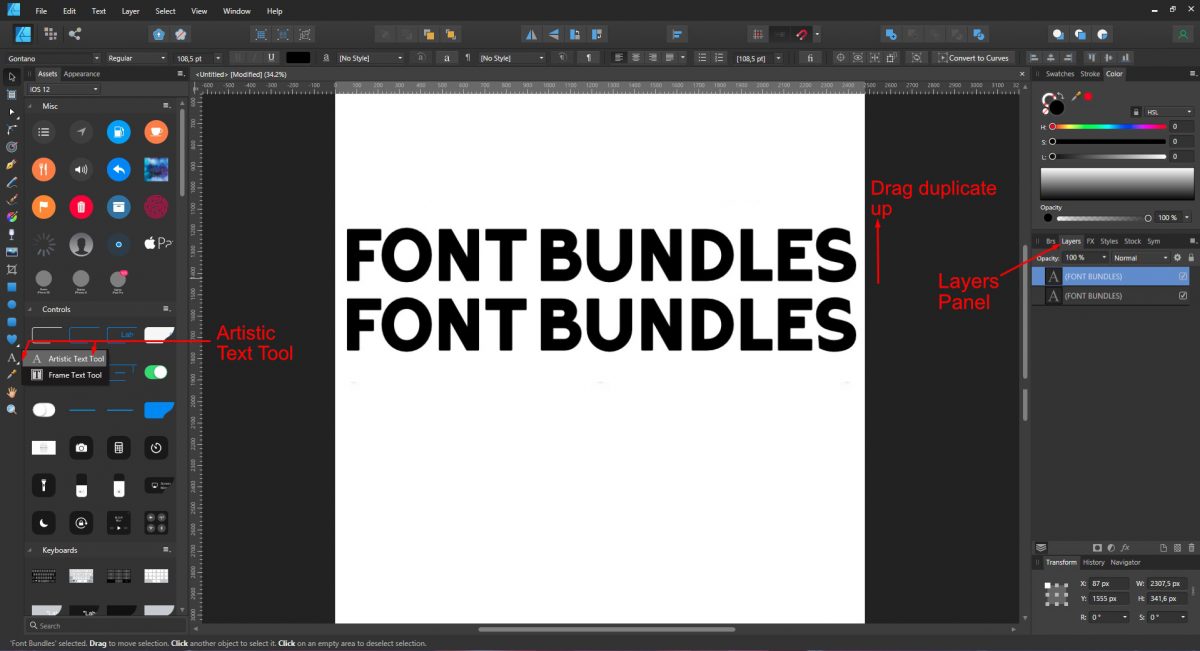
Click on the Artistic Text tool on the left side panel. If the Text Frame Tool shows, click on the little white arrow to open the selection menu. We have an awesome tutorial on using the Artistic Text Tool in Affinity Designer.
Type out your text and change the font top left of the screen. Press Ctrl + J to duplicate. Next, Click + drag the duplicate up above the original text layer. Leave a small gap between the two layers for the next step.
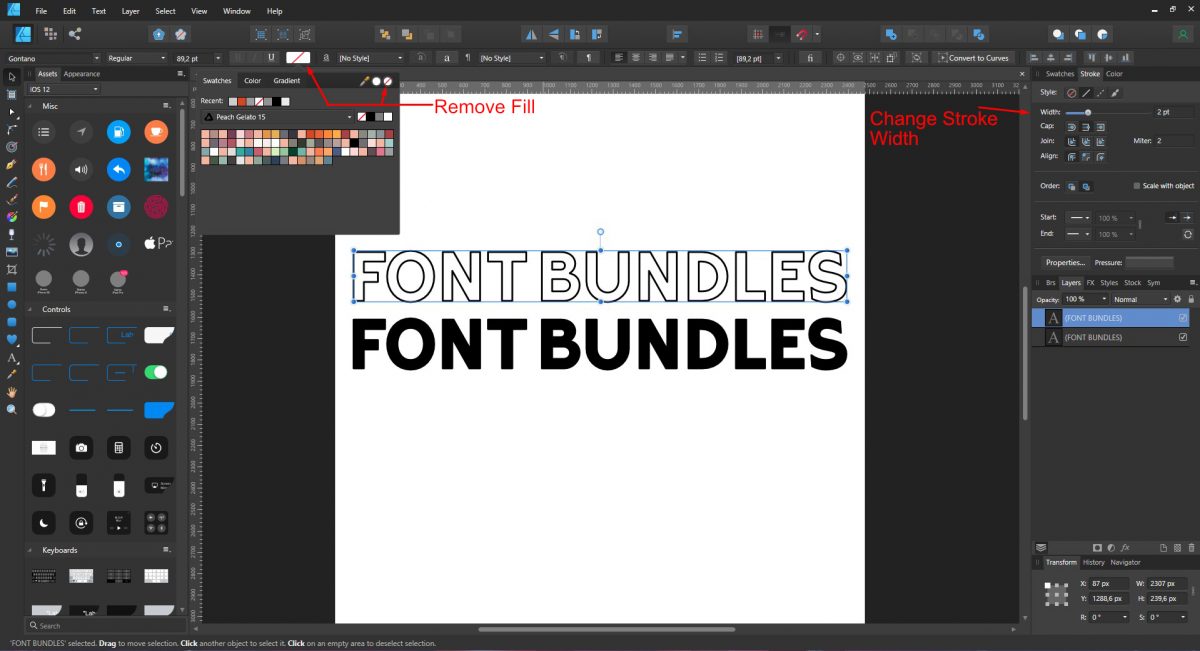
Remove the color from the duplicate by clicking on the color selection at the top. Click on the circle with a red line through it. Adjust the stroke width under the Stroke panel on the right hand side.
We want to cut out part of the text to create a partial version of the original. Click on the Rectangle Tool on the left and Click + drag out the shape. Size the rectangle so it's the same length but just over half the width of the text. Place the rectangle at the to of the duplicate text.
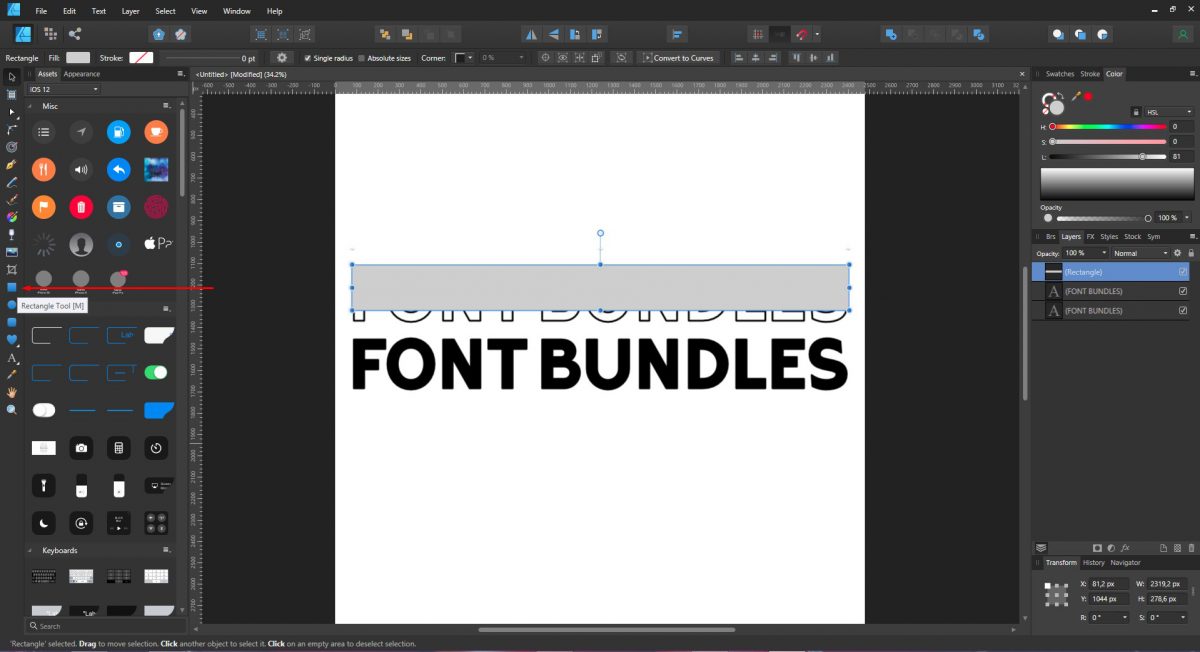
Under the Layers panel on the right, right click on the Rectangle layer and select Mask to below. The rectangle will be masked to the text and sit beneath the text layer.
You can still adjust the rectangle at this point. Click on the rectangle and adjust using the handles. Be sure to finalize editing the rectangle before proceeding with the next action.
Click the grouped layers and select Rasterize and trim. Once it has been rasterized the rectangle can no longer be edited.
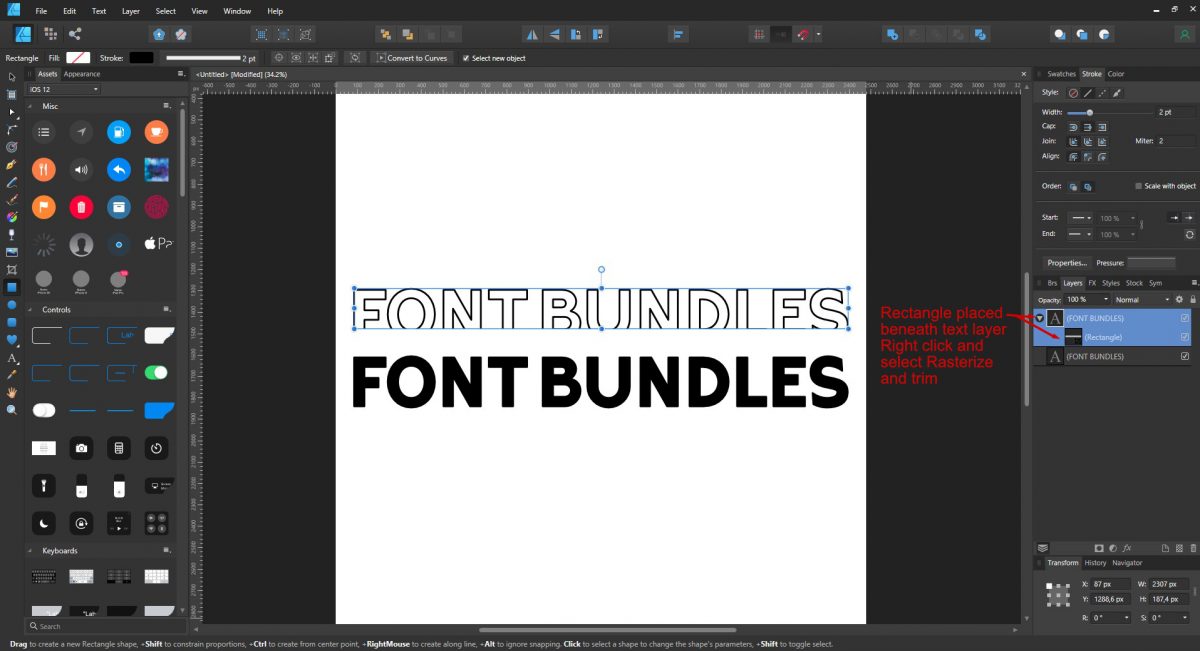
The layer will be renamed Pixel. Shift this layer up so it's just above the original text layer. Duplicate the Pixel layer. Next, Shift+ click and drag the duplicate just above the Pixel layer.
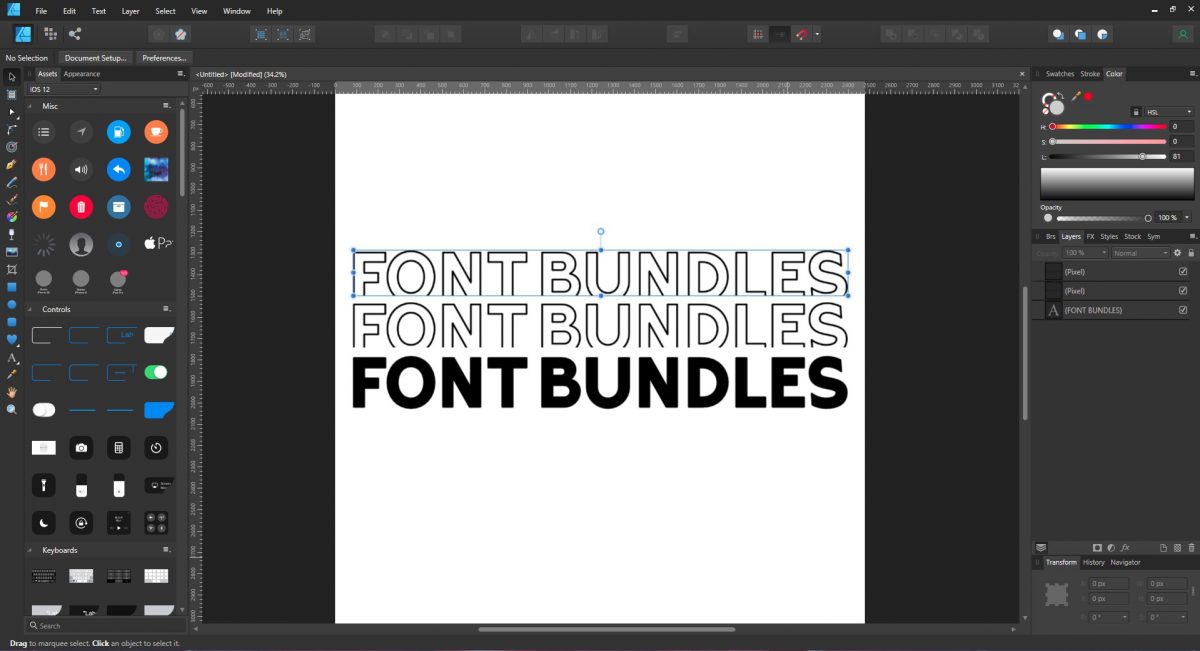
Now we need to create the bottom half of the stacked text design. Duplicate the original text and move it down. Remove the Fill and change the Stroke width.
Repeat Step 2 but this time place the rectangle on the lower part of the duplicate text. The text layer needs to be moved up under the Layers Panel. Click on the text then at the top click on Move Forward One. Repeat until the layer sits beneath the Rectangle layer in the Layers Panel.
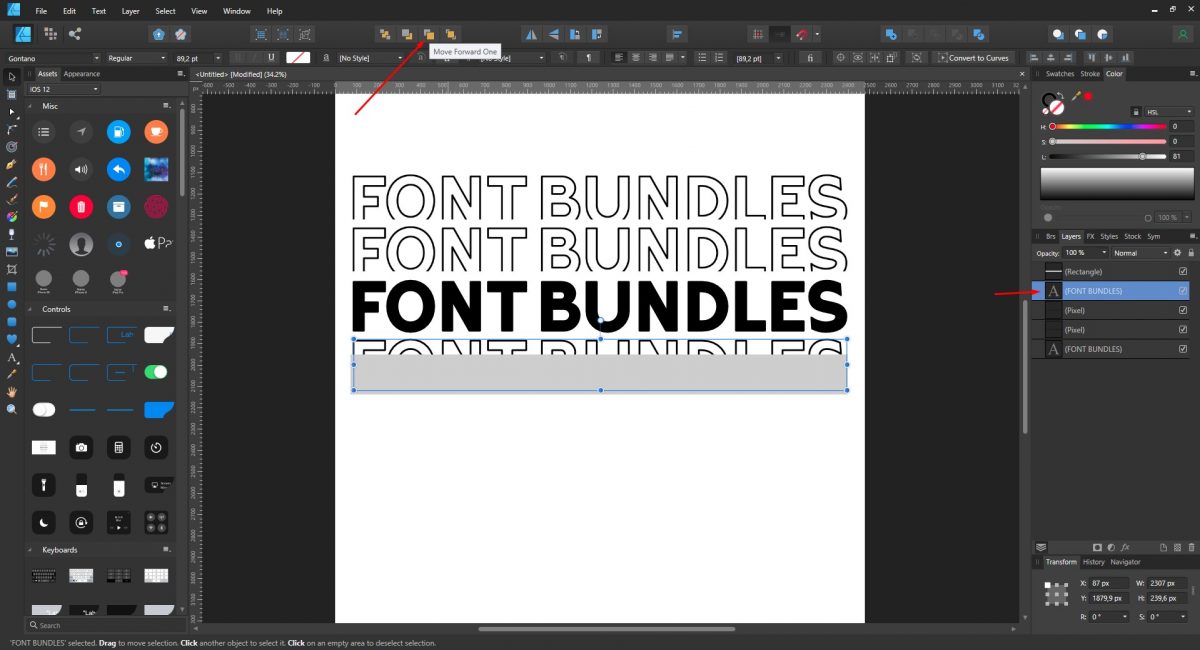
Right click the Rectangle layer and Mask to below. Remember that you can still adjust the rectangle size at this point. Right click one more time and Rasterize and Trim.
Duplicate the Pixel layer and shift down. Change the color of the main text to make it stand out.
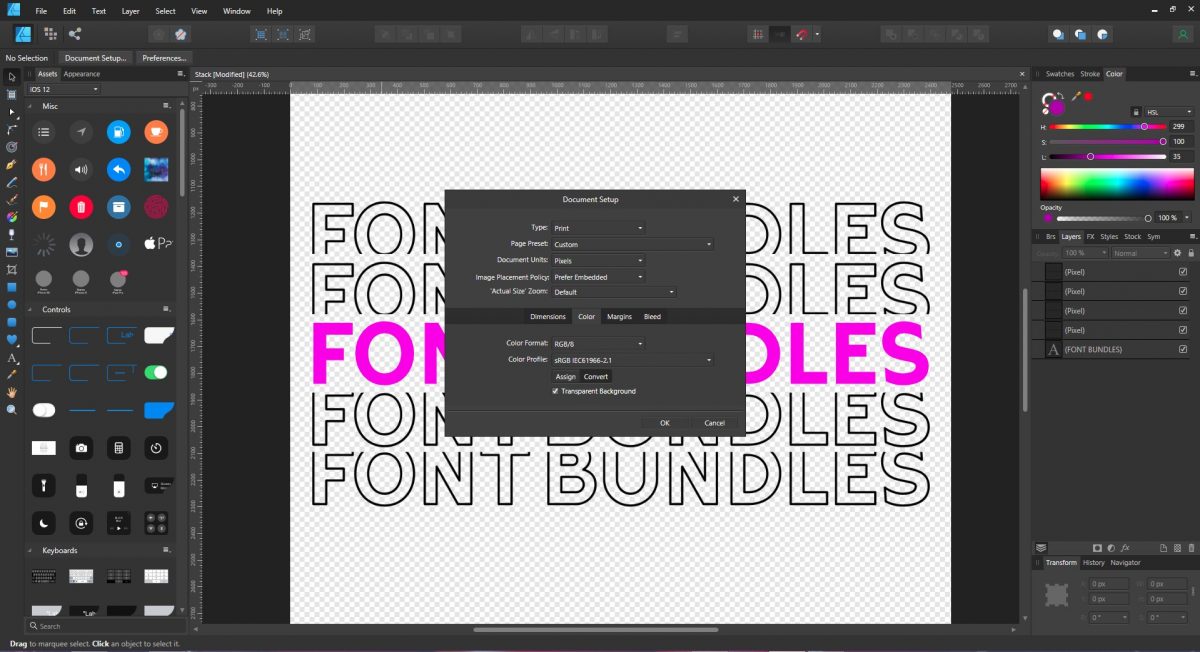
The stacked text will be saved as a PNG image but we want a transparent background. On the initial page setup you can tick the Transparent Background option. But if you forget, it can easily be changed at a later stage. Click on File then Document Setup. Select the Color option and tick Transparent Background. Click Ok.
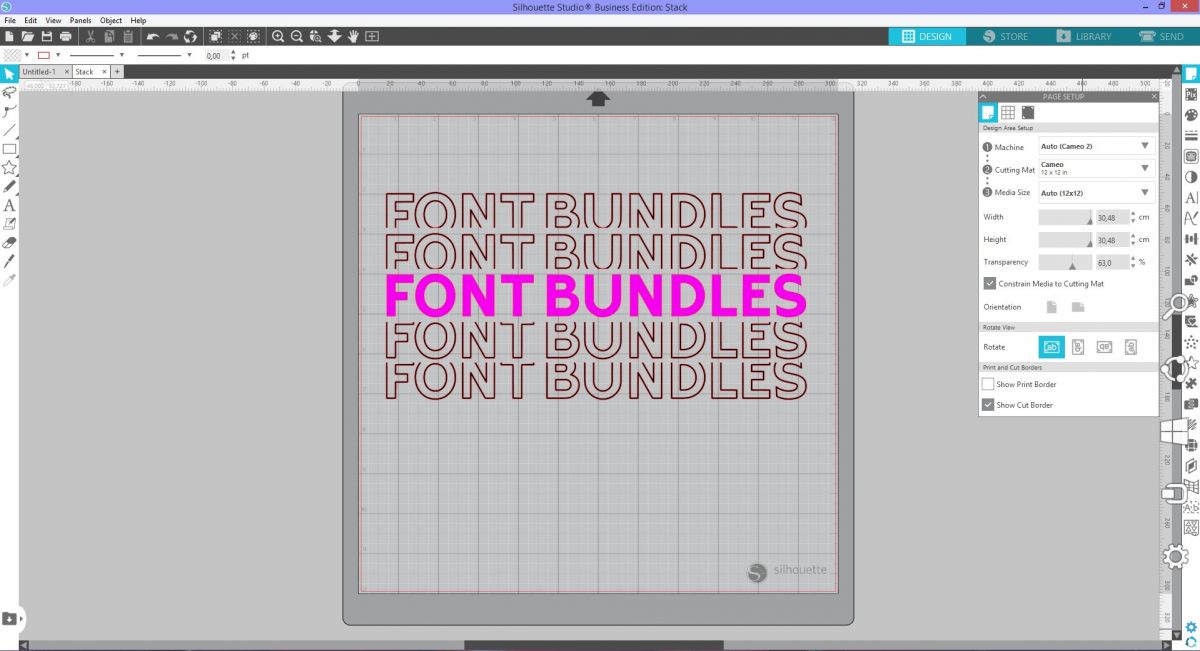
Click on File then Export. Select PNG and click Export. Choose your location and click Save. Your file is now ready to be used in other programs like Silhouette Studio.
Learn more about Affinity Designer with our other great tutorials like how to outline text, warping text and placing text in shapes.
For the text we will be using Gontano font. The text will be Masked and Rasterized then saved as a PNG. Open Affinity Designer and select New Document. Choose an A4 document size as the design requires more height than width. Click Create.
Step 1 - Create text object and duplicate
Click on the Artistic Text tool on the left side panel. If the Text Frame Tool shows, click on the little white arrow to open the selection menu. We have an awesome tutorial on using the Artistic Text Tool in Affinity Designer.
Type out your text and change the font top left of the screen. Press Ctrl + J to duplicate. Next, Click + drag the duplicate up above the original text layer. Leave a small gap between the two layers for the next step.
Remove the color from the duplicate by clicking on the color selection at the top. Click on the circle with a red line through it. Adjust the stroke width under the Stroke panel on the right hand side.
Step 2 - Create partial text
We want to cut out part of the text to create a partial version of the original. Click on the Rectangle Tool on the left and Click + drag out the shape. Size the rectangle so it's the same length but just over half the width of the text. Place the rectangle at the to of the duplicate text.
Under the Layers panel on the right, right click on the Rectangle layer and select Mask to below. The rectangle will be masked to the text and sit beneath the text layer.
You can still adjust the rectangle at this point. Click on the rectangle and adjust using the handles. Be sure to finalize editing the rectangle before proceeding with the next action.
Click the grouped layers and select Rasterize and trim. Once it has been rasterized the rectangle can no longer be edited.
The layer will be renamed Pixel. Shift this layer up so it's just above the original text layer. Duplicate the Pixel layer. Next, Shift+ click and drag the duplicate just above the Pixel layer.
Step 3 - Create partial text for bottom half of design
Now we need to create the bottom half of the stacked text design. Duplicate the original text and move it down. Remove the Fill and change the Stroke width.
Repeat Step 2 but this time place the rectangle on the lower part of the duplicate text. The text layer needs to be moved up under the Layers Panel. Click on the text then at the top click on Move Forward One. Repeat until the layer sits beneath the Rectangle layer in the Layers Panel.
Right click the Rectangle layer and Mask to below. Remember that you can still adjust the rectangle size at this point. Right click one more time and Rasterize and Trim.
Duplicate the Pixel layer and shift down. Change the color of the main text to make it stand out.
The stacked text will be saved as a PNG image but we want a transparent background. On the initial page setup you can tick the Transparent Background option. But if you forget, it can easily be changed at a later stage. Click on File then Document Setup. Select the Color option and tick Transparent Background. Click Ok.
Click on File then Export. Select PNG and click Export. Choose your location and click Save. Your file is now ready to be used in other programs like Silhouette Studio.
Learn more about Affinity Designer with our other great tutorials like how to outline text, warping text and placing text in shapes.
Related Tutorials
Affinity Tutorials
How to Create a Neon Text Effect in Affinity Designer
Affinity Tutorials
How to Create Isometric Text in Affinity Designer
Affinity Tutorials
How to Curve Text in Affinity Designer
In this tutorial learn how to curve text in Affinity Designer in only 5 steps!
Affinity Tutorials
How to Warp Text in Affinity Designer
In this step by step tutorial we will learn how to warp text in Affinity Designer.
Affinity Tutorials
How to Convert Text to Path in Affinity Designer
Converting text to path in Affinity Designer takes only a few steps.
Affinity Tutorials
Text basics in Affinity Designer
Learn the text basics in Affinity Designer with this beginner tutorial.