By Design Bundles
Canva Basics
In our tutorial, you will learn all about Canva basics. Canva is an easy-to-use online graphic design tool. Anyone can create beautiful graphics, even if you don’t have any design training. These graphics can then be used across social media, as email banners and so much more.
Before jumping in and designing, you will need to know how to use Canva first. In this beginner-friendly tutorial, we explain many of the Canva functionalities. These include effects and techniques you can use to create engaging graphics.
Step 1 - Sign up and Log in to Canva
You have four different options to sign up in Canva. You can use Google, Facebook, Apple, or traditionally with an email address. We will continue with the email sign-up.
Step 2 - Create a Design
There are three ways you can create a design in Canva. We will explore them below.
Create from Scratch
Create a new document from scratch with customized dimensions. Do this by tapping the Custom Size button and entering your preferred dimension. You can set the value to pixels, inches, millimeters, or centimeters. Next, click the Create new design button.
Use Purchased Canva Template
Design Bundles has a selection of Canva templates available that you can customize according to your needs. We also have a great tutorial on how to use purchased templates in Canva to get you started.
Use a Canva Template
On Canva’s homepage, you have different options in choosing your template. You can access the templates from the main navigation panel on the left with the Home button. If you click the drop-down arrow of the Template button, it will show you the available templates categorized in different types.
Alternatively, you can also go to the search bar and type in the specific template you have in mind. This is one of the quickest ways to find templates and different designs with specific dimensions.
For instance, to quickly create an Instagram post, just type in Instagram. It will give you a few different options with more specific designs for Instagram.

Now choose your Template type. In our case, we chose “Instagram Post”. This will bring you to a page of several pre-made Instagram post templates. You can filter the options according to style, theme, price, and color. Scroll through the results, and tap on a template you like. We clicked this “Cream Fashion and Retail Instagram Post”.

Step 3 - Navigate the Editor Panel
The editor panel on the left enables you to edit your design in just a few clicks. Let us discuss the different tabs in this panel below.
Elements Tab
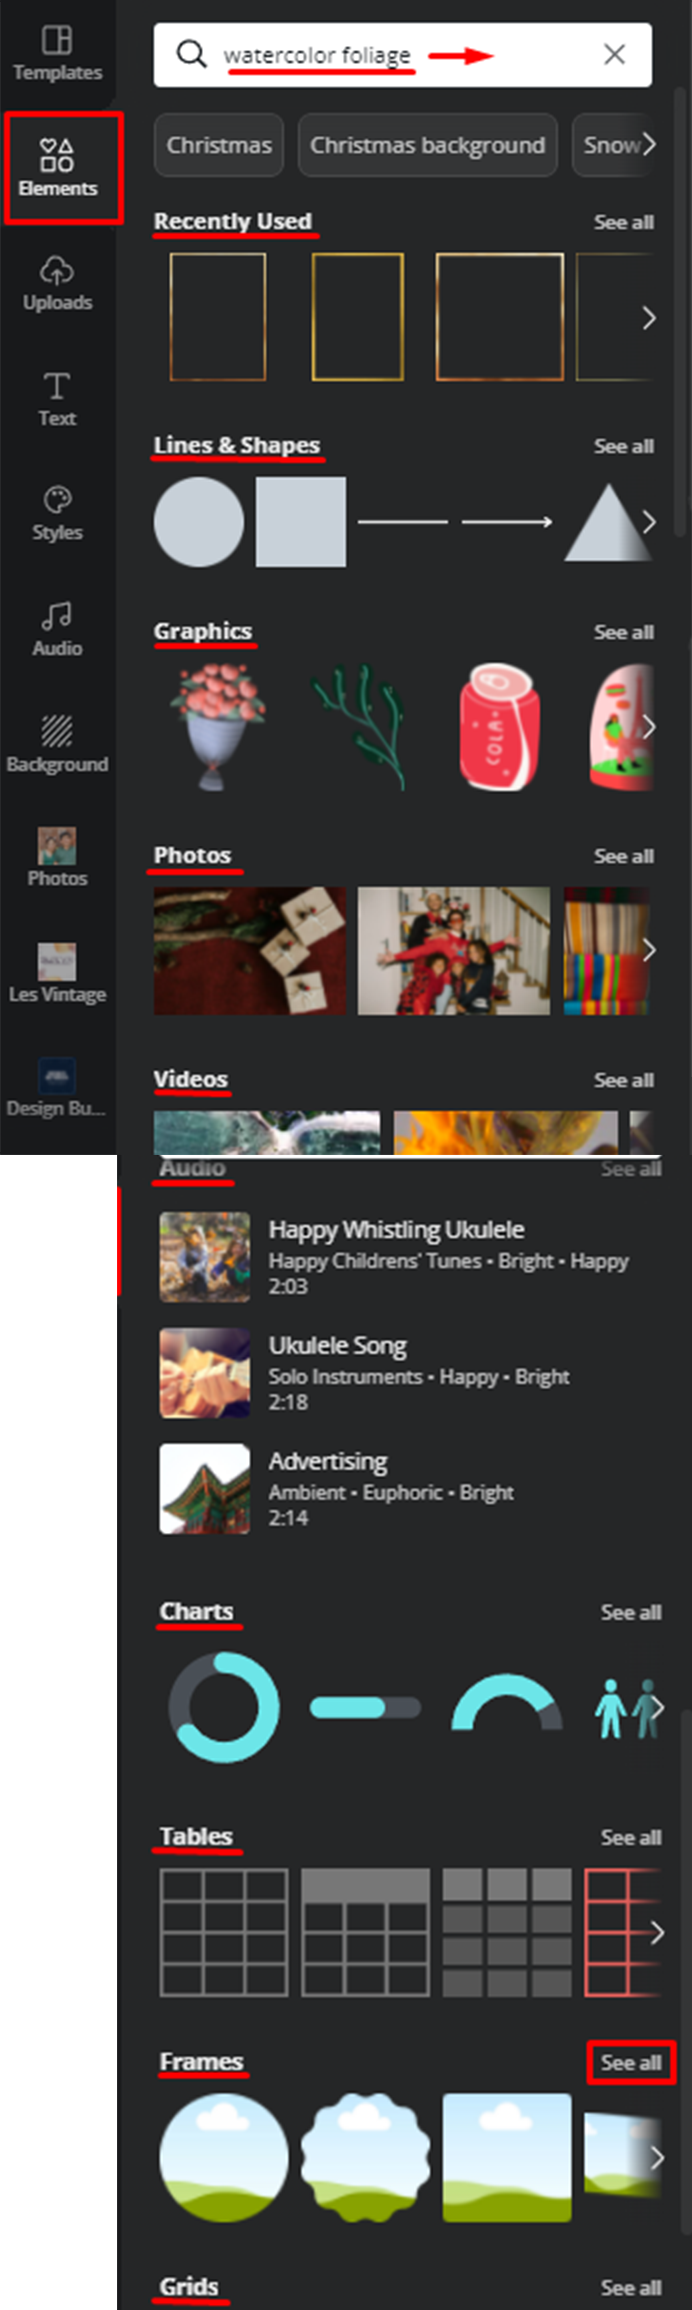
The Elements tab is a library of various elements. This tab shows your recently used elements. You can also access different lines and shapes, graphics, photos, videos, audio, charts, tables, frames, and grids. You can click the See all button to view all of the available elements in each category.
If you would like to know more, check out creating charts, making a table, and using grids in Canva.
You can also search for something in particular by typing in the keywords on the search bar, then pressing Enter.
Upoads Tab
The Uploads tab lets you upload your own photo or purchased graphics from Design Bundles.
Click on the Uploads tab and then click on Upload Media. Once uploaded, your image file will then show up in the Gallery tab. Tap on the image you just uploaded, it will be added to your design.

Text Tab Option
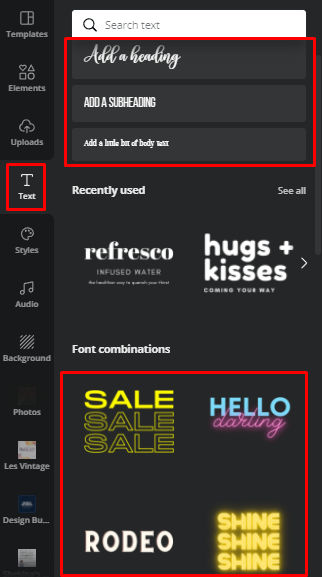
The Text tab lets you add a heading, subheading, or body text. You can also select pre-designed texts to use.
Styles Tab
The Styles tab lets you select a trending style. This includes matching font combinations and color palettes. These are then applied to all pages of your design in just one click.
Audio Tab
Canva also allows you to edit videos and add audio. Using the Audio tab, you can add music that is available in Canva's repository.
Background Tab
The Background tab allows you to select a background for your design. The background can be a solid color or graphic that is available in this tab. There are many images available like landscapes, patterns, gradients, abstract, food, textures, flowers, nature and so much more.

Step 4 - Edit Image
Once an image is selected, you can access Canva’s basic photo editing features from the toolbar. These features include cropping and flipping, animating, as well as adjusting the brightness, contrast, saturation, tint, etc.
For Canva Pro users, you have the option to remove the background of an image with just one click.
You can also use preset filters such as Epic, Festive, Summer, and many more.

Step 5 - Edit Text
When selecting any text, a new toolbar becomes available. With this toolbar, you can edit the text style according to your liking. This includes the fonts, colors, and sizes.
You can change all the settings shown on the toolbar. You can click Effects to access Canva’s cool text effects feature, or Animate to give life to your text with Canva's animated text. You can also upload your own fonts if you choose.

Step 6 - Additional Editing Options
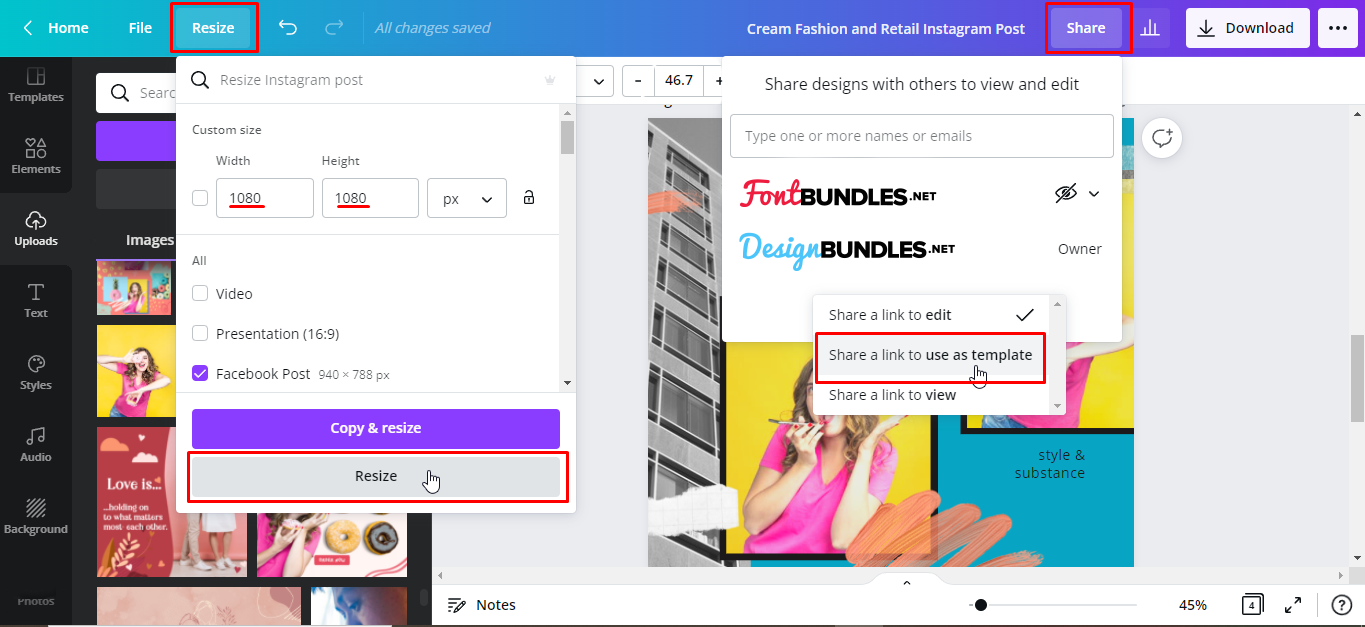
You have an option to resize your design. You can share your design with other people to view, edit or use as template.
Step 7 - Download Your Design
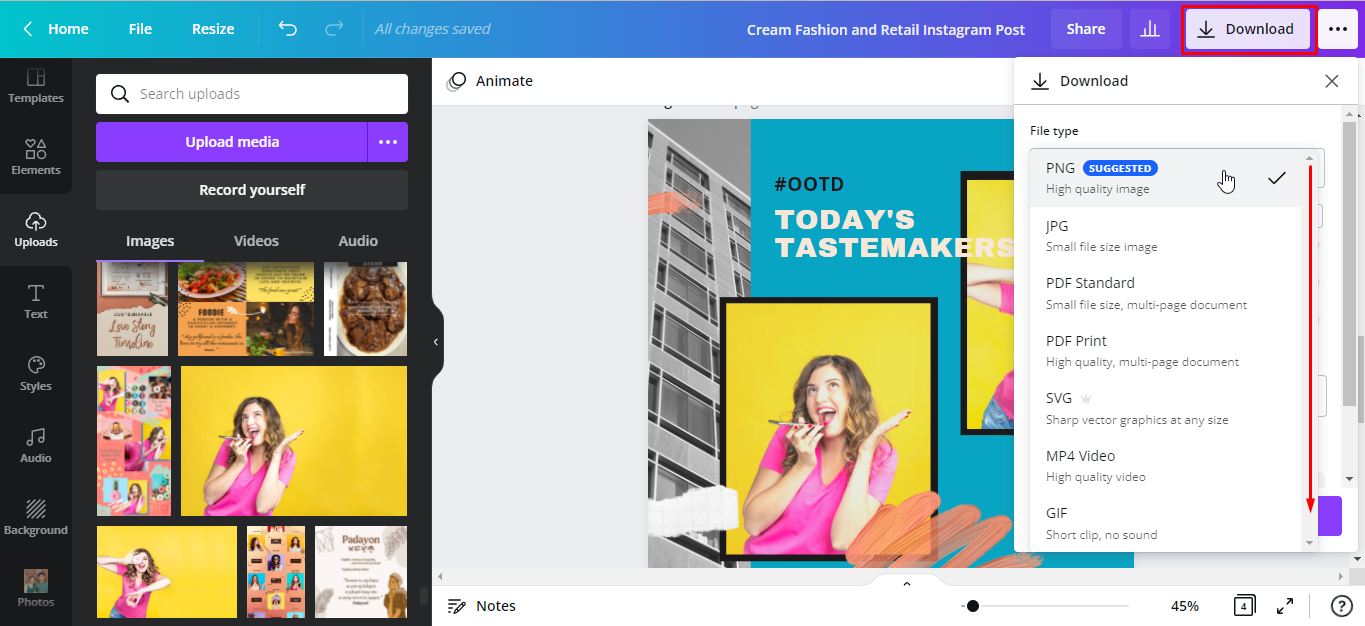
If you’re satisfied with your design, you can now download the file in your desired format. Click the Download icon in the upper-right of the menu bar. Then click on the down arrow under File type to scroll through the different file types.
Through this guide on Canva basics, you now have a better understanding when navigating your way around. We hope that it has inspired you to explore and create your own designs.