By Design Bundles
Cricut Tutorials6 min
How to Manually Adjust Kerning in Cricut Design Space App
So, you may be wondering; what exactly is kerning?
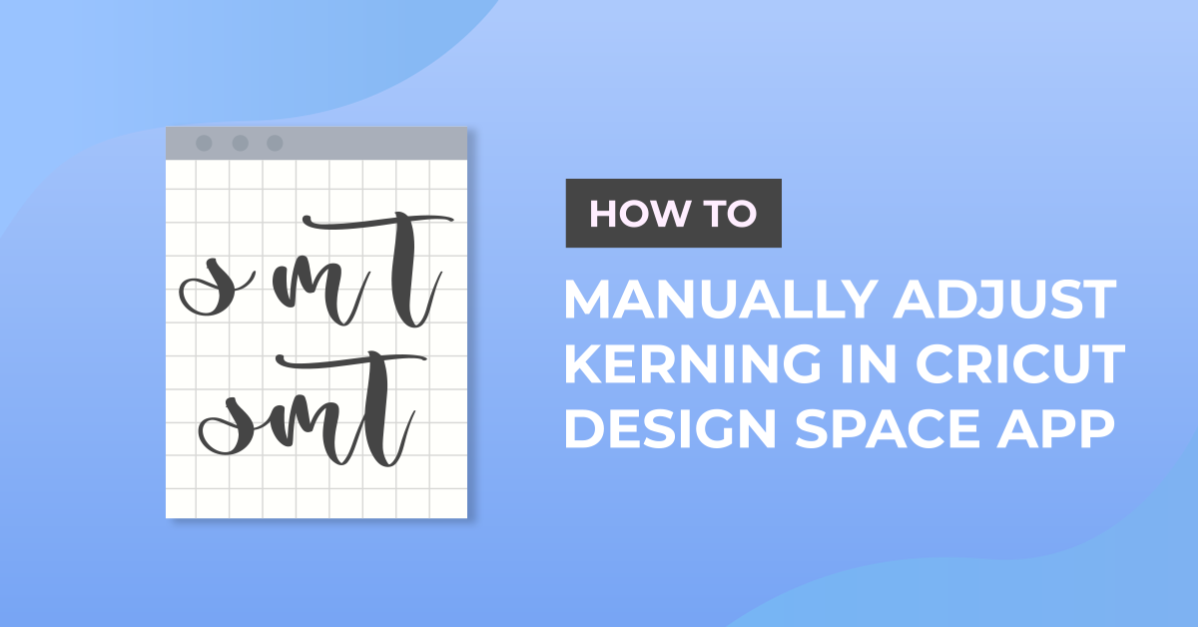
Kerning is simply the space between two letters. That space can be adjusted automatically if the system you are working with allows it, or manually by moving the letters around. Today we'll focus on how to manually adjust the space between letters in Cricut Design Space App, and I guarantee, it's super easy to do.
Type out your text using your Text tool. This can be located on the lower left side of your Design Space App. We have a more in-depth tutorial on how to use your Text tool if needed. Today, I'll type out a simple wording using Country Kitchen by KA Designs.
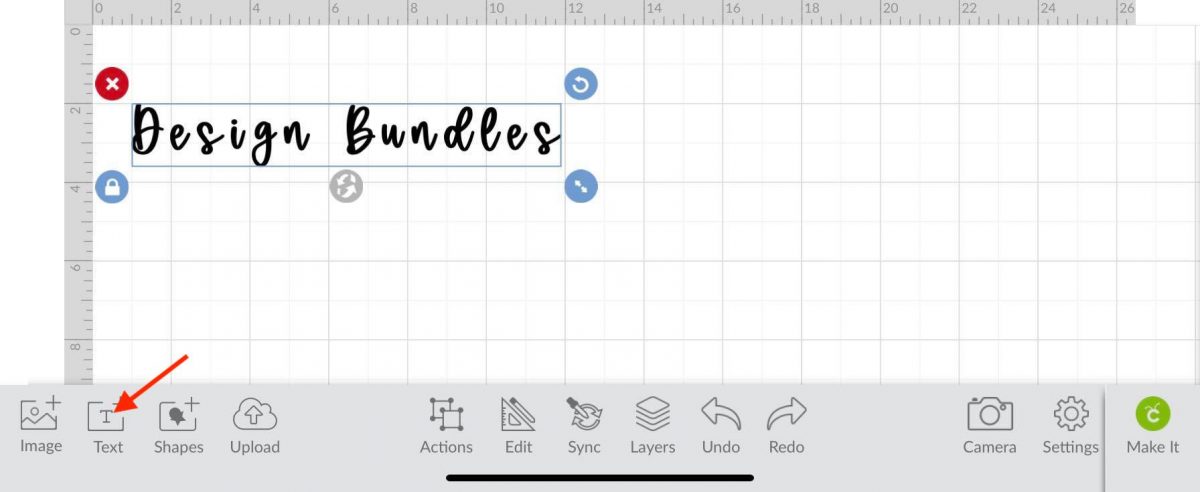
Once you have type out your text locate the Edit tool. This will bring up a toolbar that will allow you to easily make changes to your font.
We are mainly focusing on adjusting the space between the letters. Fortunately, Design Space has a letter spacing feature that will easily allow us to do just that.
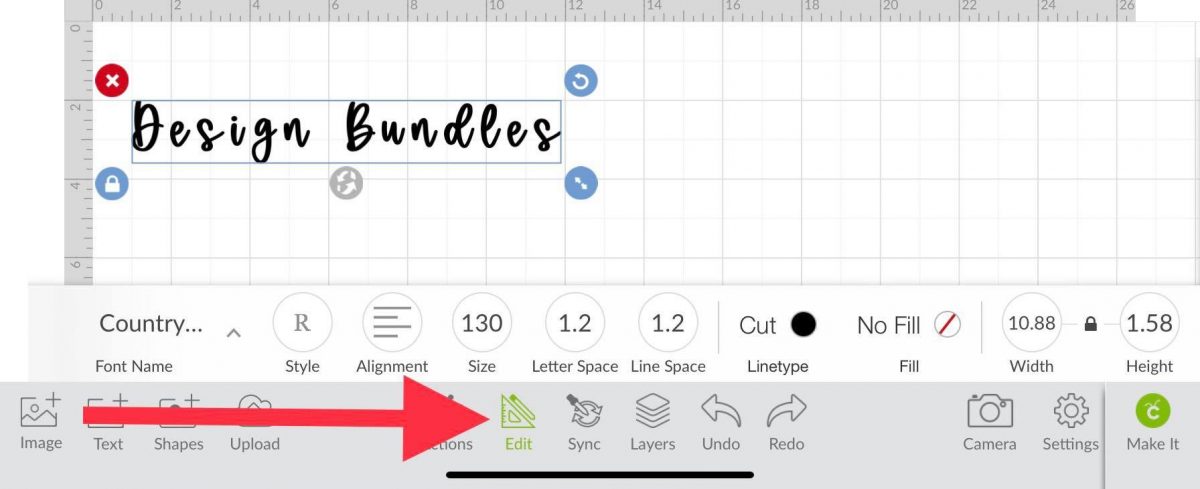
Within the toolbar click on Letter Space. Once you click on it a box will pop up and you can now adjust the spacing.
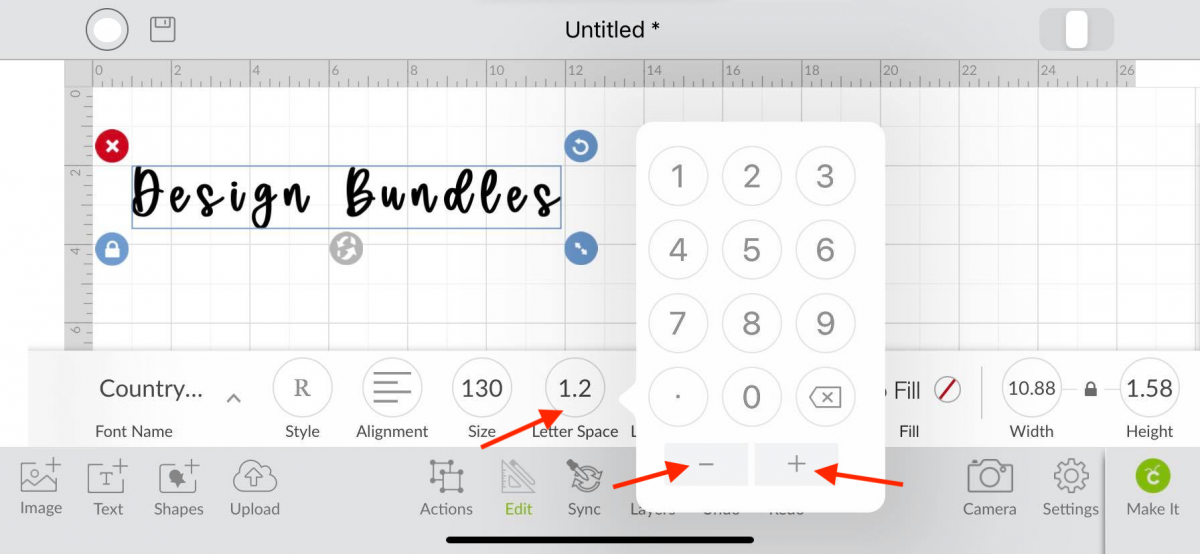
Click the Minus button to decrease the amount of space between each letter, and click the Plus button to increase the space between each letter. Today I want to decrease the spacing between my letters so they can all connect.
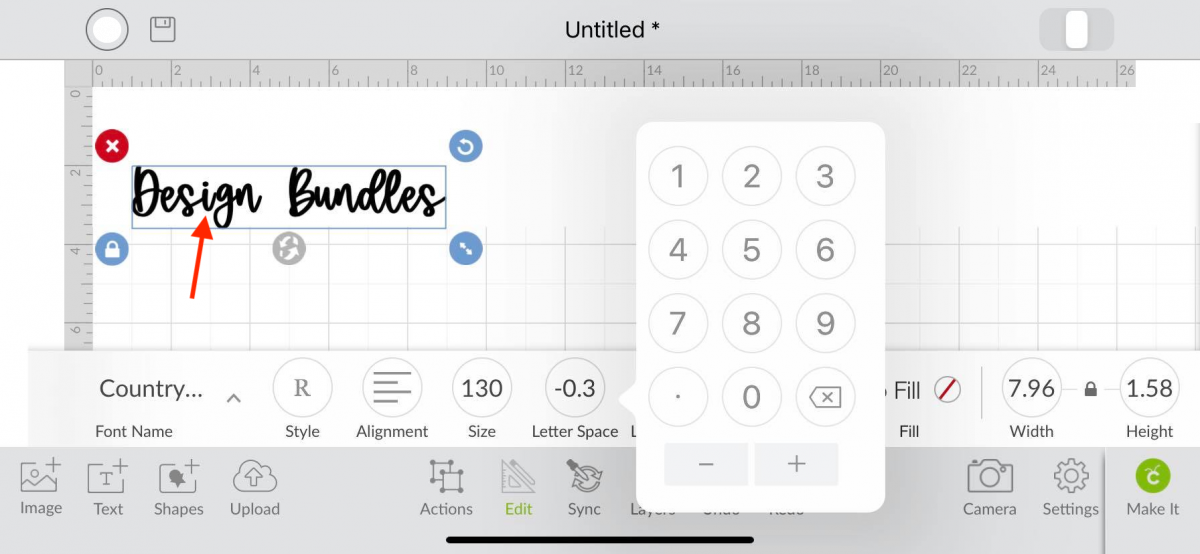
You can now finish the kerning process by welding the adjusted letters. Click onto Action which is next to your edit tool. Another toolbar will pop up. You can now click on Weld.
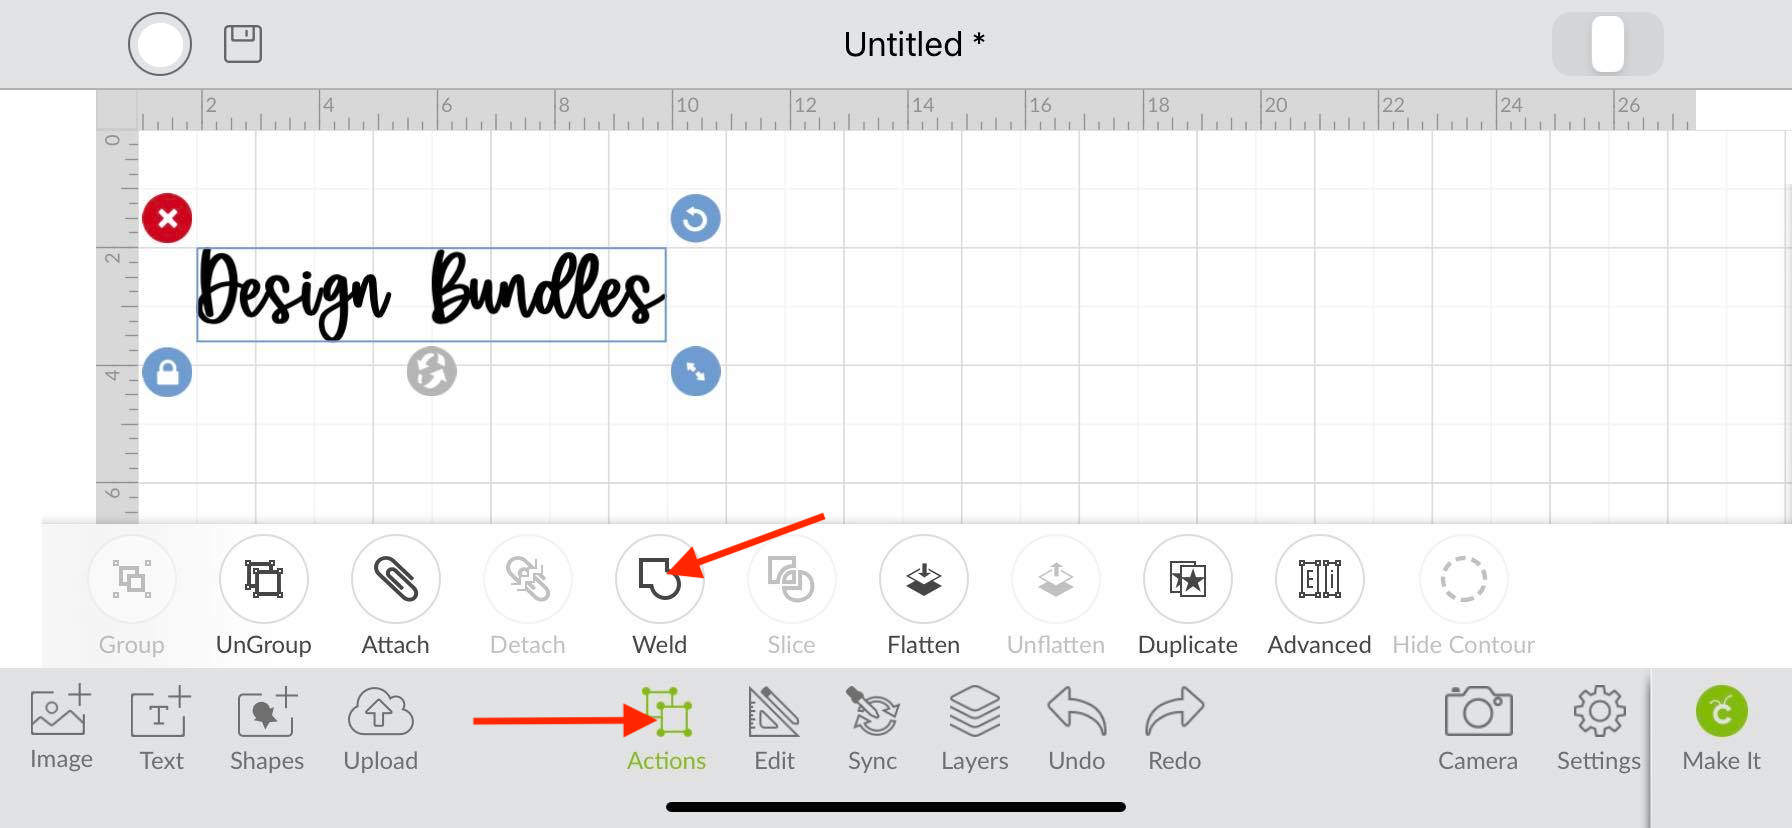
This is a simple and easy way to kern font in Cricut Design Space App.
If you are using Cricut Design Space desktop version, I have great news for you! Cricut released a feature called Automatic Kerning. This will basically delete the need to manually kern font.
Kerning is simply the space between two letters. That space can be adjusted automatically if the system you are working with allows it, or manually by moving the letters around. Today we'll focus on how to manually adjust the space between letters in Cricut Design Space App, and I guarantee, it's super easy to do.
Step 1. Type out Your Text
Type out your text using your Text tool. This can be located on the lower left side of your Design Space App. We have a more in-depth tutorial on how to use your Text tool if needed. Today, I'll type out a simple wording using Country Kitchen by KA Designs.
Step 2. Adjust Font With Letter Spacing.
Once you have type out your text locate the Edit tool. This will bring up a toolbar that will allow you to easily make changes to your font.
We are mainly focusing on adjusting the space between the letters. Fortunately, Design Space has a letter spacing feature that will easily allow us to do just that.
Within the toolbar click on Letter Space. Once you click on it a box will pop up and you can now adjust the spacing.
Click the Minus button to decrease the amount of space between each letter, and click the Plus button to increase the space between each letter. Today I want to decrease the spacing between my letters so they can all connect.
Step 3. Weld Font
You can now finish the kerning process by welding the adjusted letters. Click onto Action which is next to your edit tool. Another toolbar will pop up. You can now click on Weld.
This is a simple and easy way to kern font in Cricut Design Space App.
If you are using Cricut Design Space desktop version, I have great news for you! Cricut released a feature called Automatic Kerning. This will basically delete the need to manually kern font.
Related Tutorials
Cricut Tutorials
How to Curve Text in Cricut Design Space Mobile App
Today we’ll focus on how to curve Text in Cricut Design Space App....
Cricut Tutorials
How to Print then Cut in Cricut Design Space Mobile App
Learn how to easily use the Print then Cut Feature in Cricut Design Space Mobile App.
Cricut Tutorials
Text Options in Cricut Design Space Mobile App
Cricut Tutorials
How to Weld Text in Cricut Design Space Mobile App
In this tutorial we will show you how to weld text in the Cricut Design Space App.
Cricut Tutorials
How to Use the Slice Tool in Cricut Design Space Mobile App
Discover how to slice in Cricut Design Space Mobile App using the Slice Tool.
Cricut Tutorials