By Kia Lor
How to Use SVG Color Fonts in Illustrator
Have you ever heard of SVG fonts? Today, we’ll tell you a little bit about SVG fonts and how to use them in Illustrator. SVG fonts, also known as color fonts, are a fairly new kind of OpenType format. They can currently be used in applications such as Illustrator, Photoshop, Affinity Designer, and a few others.

Like the examples below, a glyph or character can contain several colors, patterns, or transparencies. Many people think SVG fonts work like SVG cut files, but they don’t.

Step 1 - Install Your SVG Font
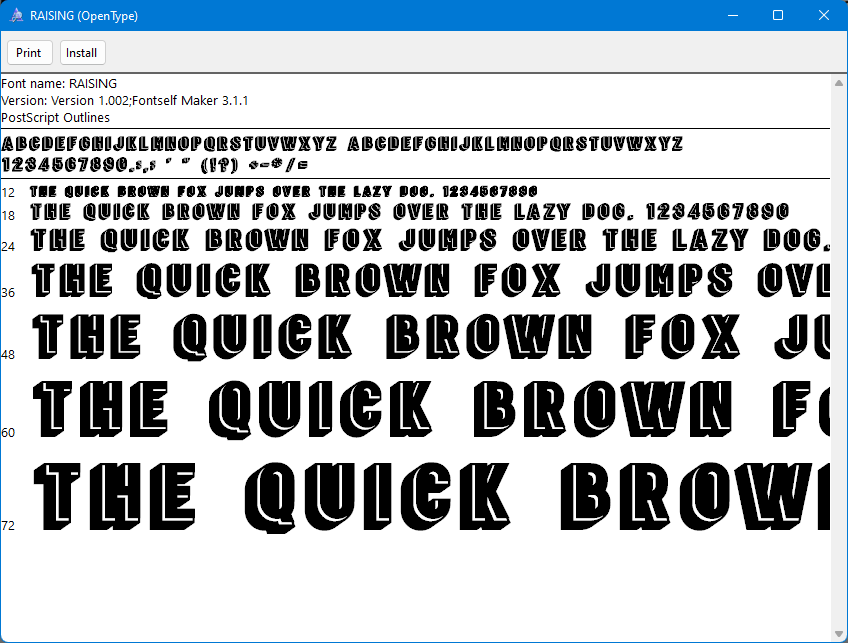
Downloading and installing an SVG font is done the same way as any other font, so you can look at our guide on how to install fonts if needed. You’ll notice that when you open an SVG font file, the font is shown in solid black even if it actually has color. See our example below of the two-color SVG font, Raising.
We’ll be using a simple SVG font called Ultrasound for the rest of this tutorial. Now let’s get into using our SVG font in Illustrator.
Step 2 - Add Text
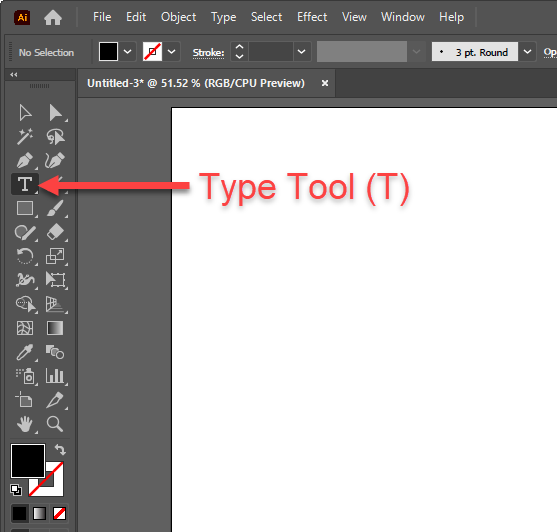
Select the Type Tool
Select the Type Tool (T) from the left toolbar with a document open in Illustrator.
Edit Font Options
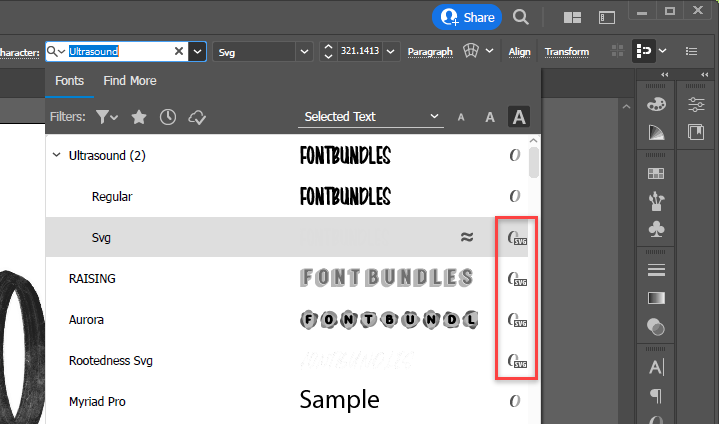
You can edit the font settings in the Control panel at the top, or open the Character panel (Window > Type > Character) for even more settings such as leading, kerning, etc.

When selecting your font, notice that all SVG fonts are labeled in the list with the following icon.
Type Your Text
Click on the artboard and enter your text. You can see in the following image that the text appears to have been written with an actual marker. This is what makes SVG fonts so amazing.

Step 3 - Change the Color of the Text
When using SVG fonts, you can't simply change the text color by changing its fill. We’ll show you how to change the color of your text when using SVG fonts in Illustrator.
Create a Transparent Rasterized Layer
Select your text and go to Object > Rasterize.

In the Rasterize dialog, select Transparent and click OK.

Change the Color of the Rasterized Layer
With the rasterized layer selected, click on Edit > Edit Colors > Adjust Color Balance.

In the Adjust Colors dialog, click the Preview checkbox to see the color changes in real-time. Then move the sliders until you get the color you want. Press OK when you’re happy with the results.

We hope this tutorial helped you get more comfortable with using SVG fonts as they can open the door to many more opportunities and options for you!