By Design Bundles
Using Fonts in Affinity Designer
In this Affinity Designer font tutorial, we will show you how to use the fonts installed on your system. This even includes glyphs that come with your fonts. Fonts are an essential tool for creating a visually informative way of communicating with viewers. In today’s tutorial, we will give you a quick guide on how to use fonts in Affinity Designer.
For this super easy tutorial we will be using the Toddler Tantrums font. We have more hand lettering fonts to choose from if you want something a little different.
We need to download and install our fonts before opening Affinity Designer. Once done, open Affinity Designer and create a new document.
Step 1 - Select your Font
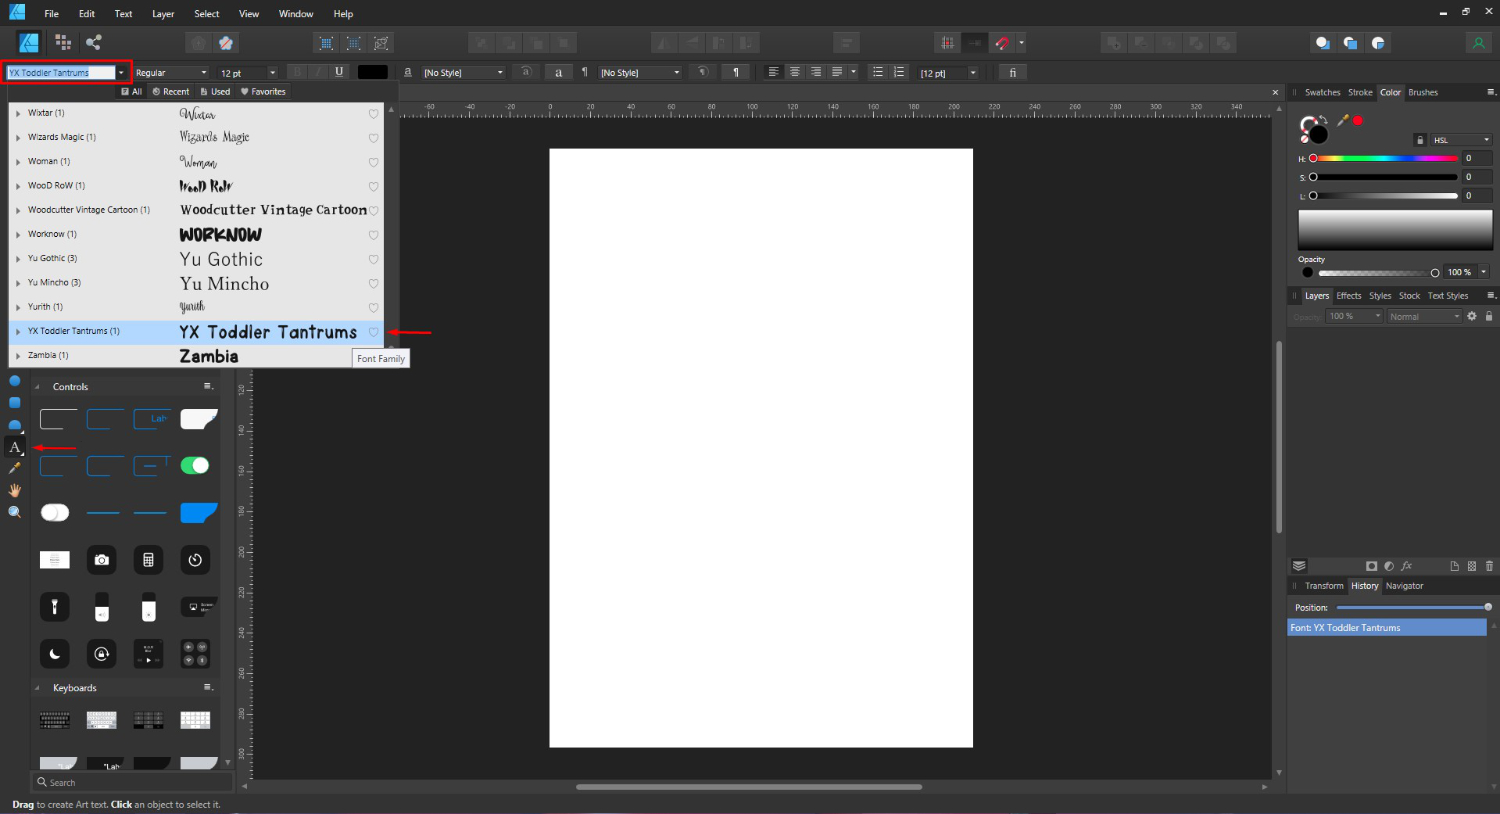
To add text you will need to either use the Artistic or Frame text tool, found on the left side toolbar. We chose to use the Artistic Text tool. Once you have chosen the text tool, go to the Font Family top left to select your font.
You can click on the drop down arrow and choose from the selection of fonts. You can also type in the name of the font to be taken straight to it.
Step 2 - Type out Your Text
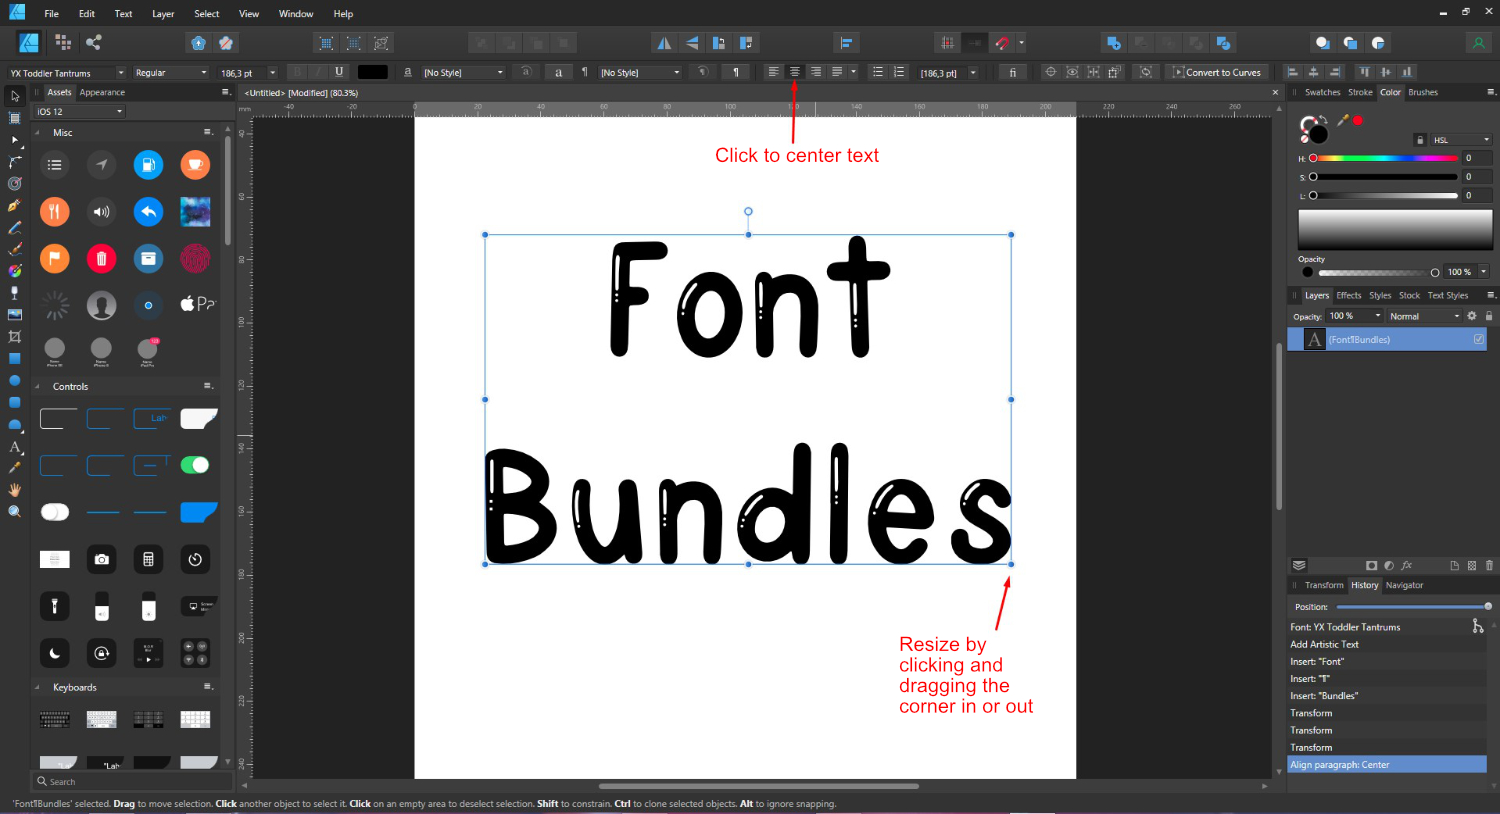
With the font selected, click + drag out your mouse anywhere on the document. Clicking + dragging will size the text when using the Artistic Text tool. Now start typing out your text.
The font size can be adjusted by changing the size on the top toolbar.

If your font contains a set of styles like Bold and Italics, you will find it under the Font Style option on the top toolbar.

Here we chose to resize the text by clicking + dragging a corner handle out. We also centered our text.
Why not take your text a step further by adding glyphs if your font contains them?
A font that is easy to read is best suited when using the Frame Text tool. A fancy and fun font works great for headings when using the Artistic Text tool. We have a great in depth tutorial on text basics in Affinity Designer if you would like to learn more.