By Design Bundles
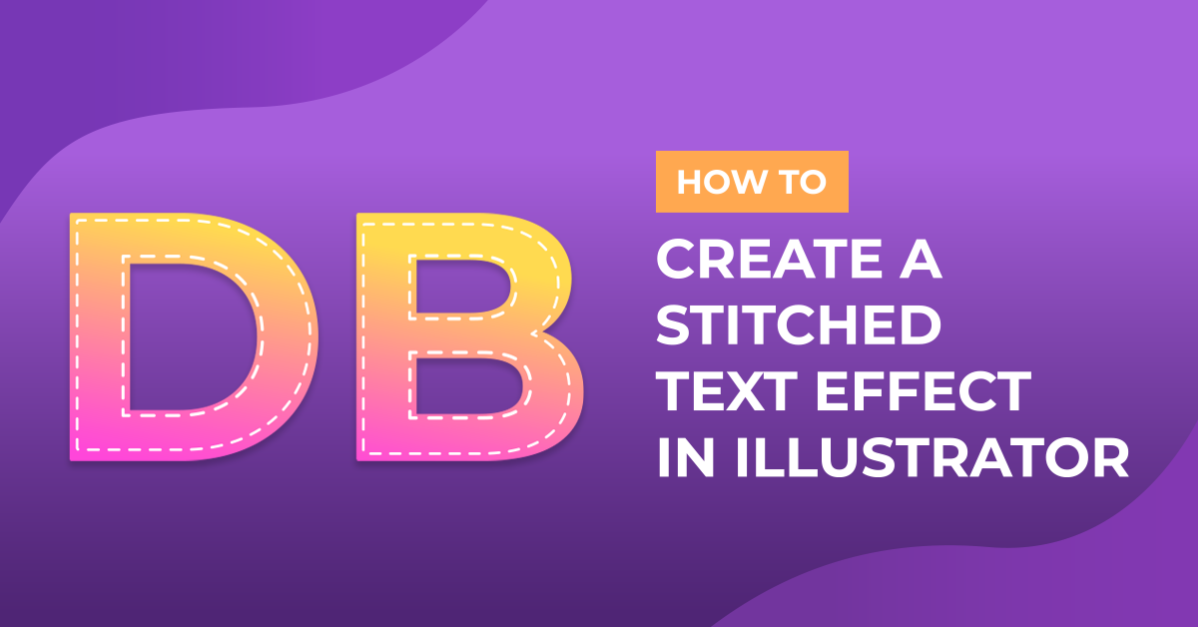
Stitched Text Effect in Illustrator
For this tutorial, we are going to use “Dallon” font from Fontbundles.net https://fontbundles.net/on-the-spot-studio/7342-dallon
1 – Create a New Document in Illustrator, select the “Type Tool” (T) and write your text. Choose a font of your liking (for this treatment is better to use heavier fonts).
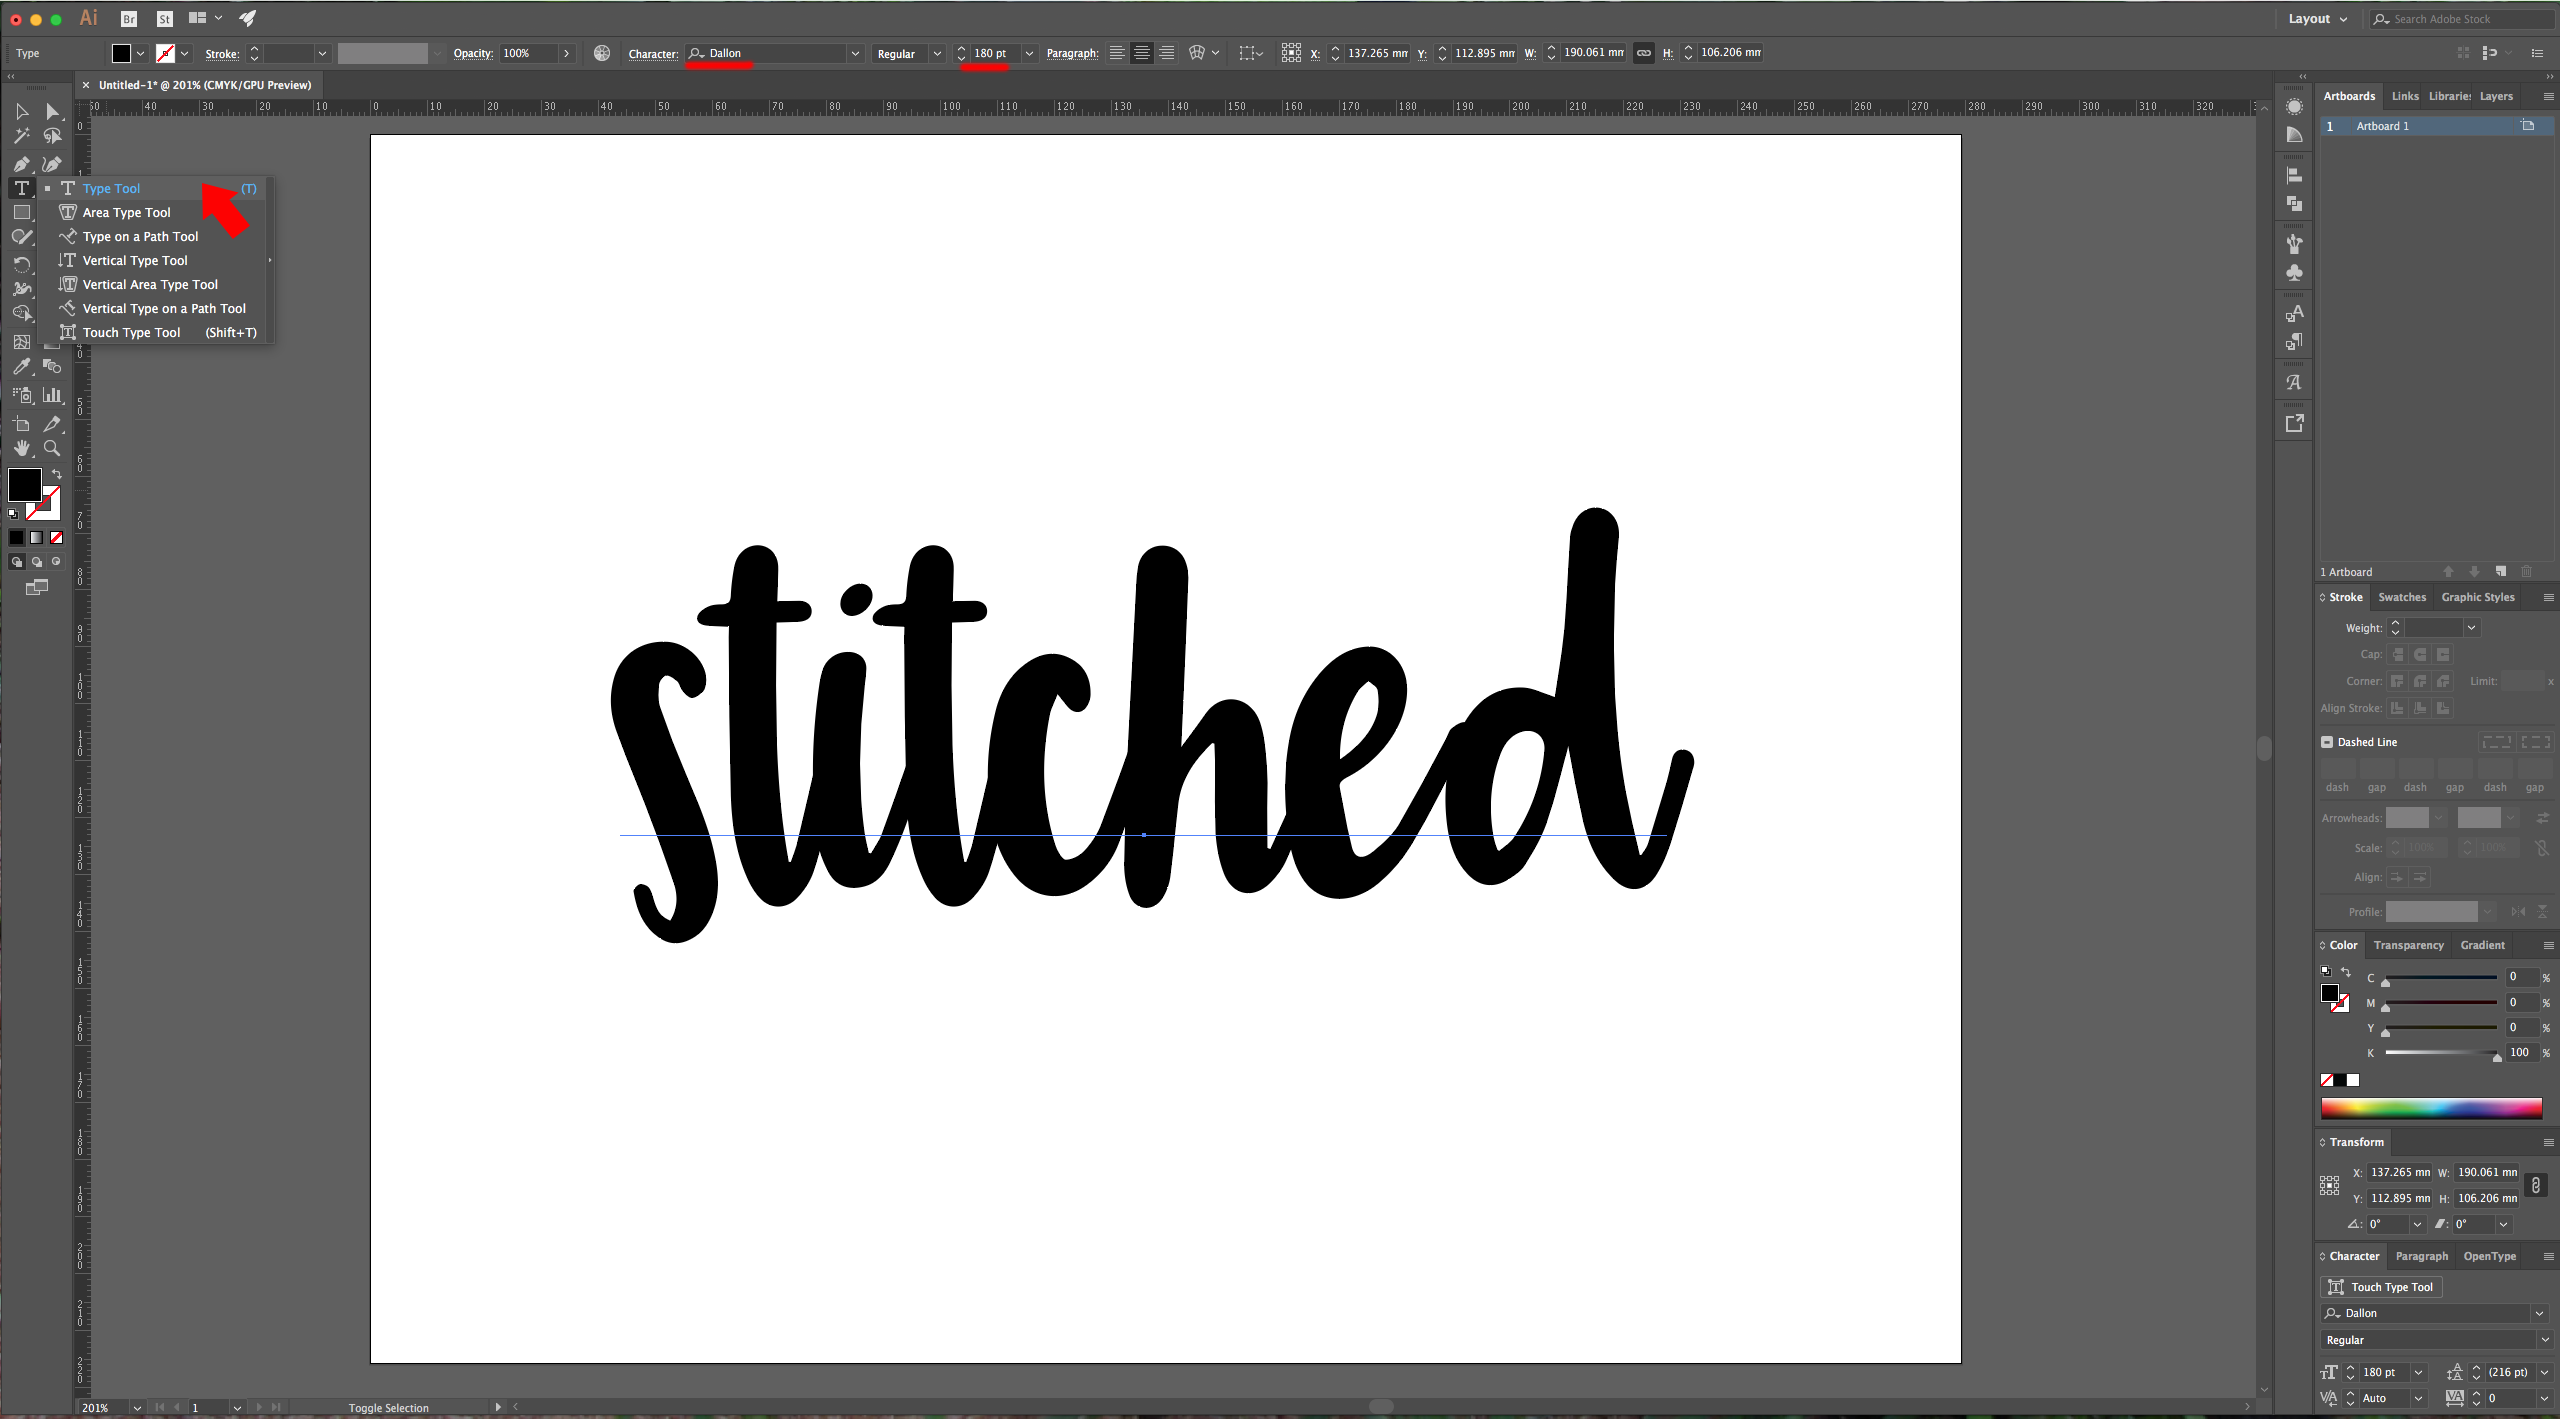
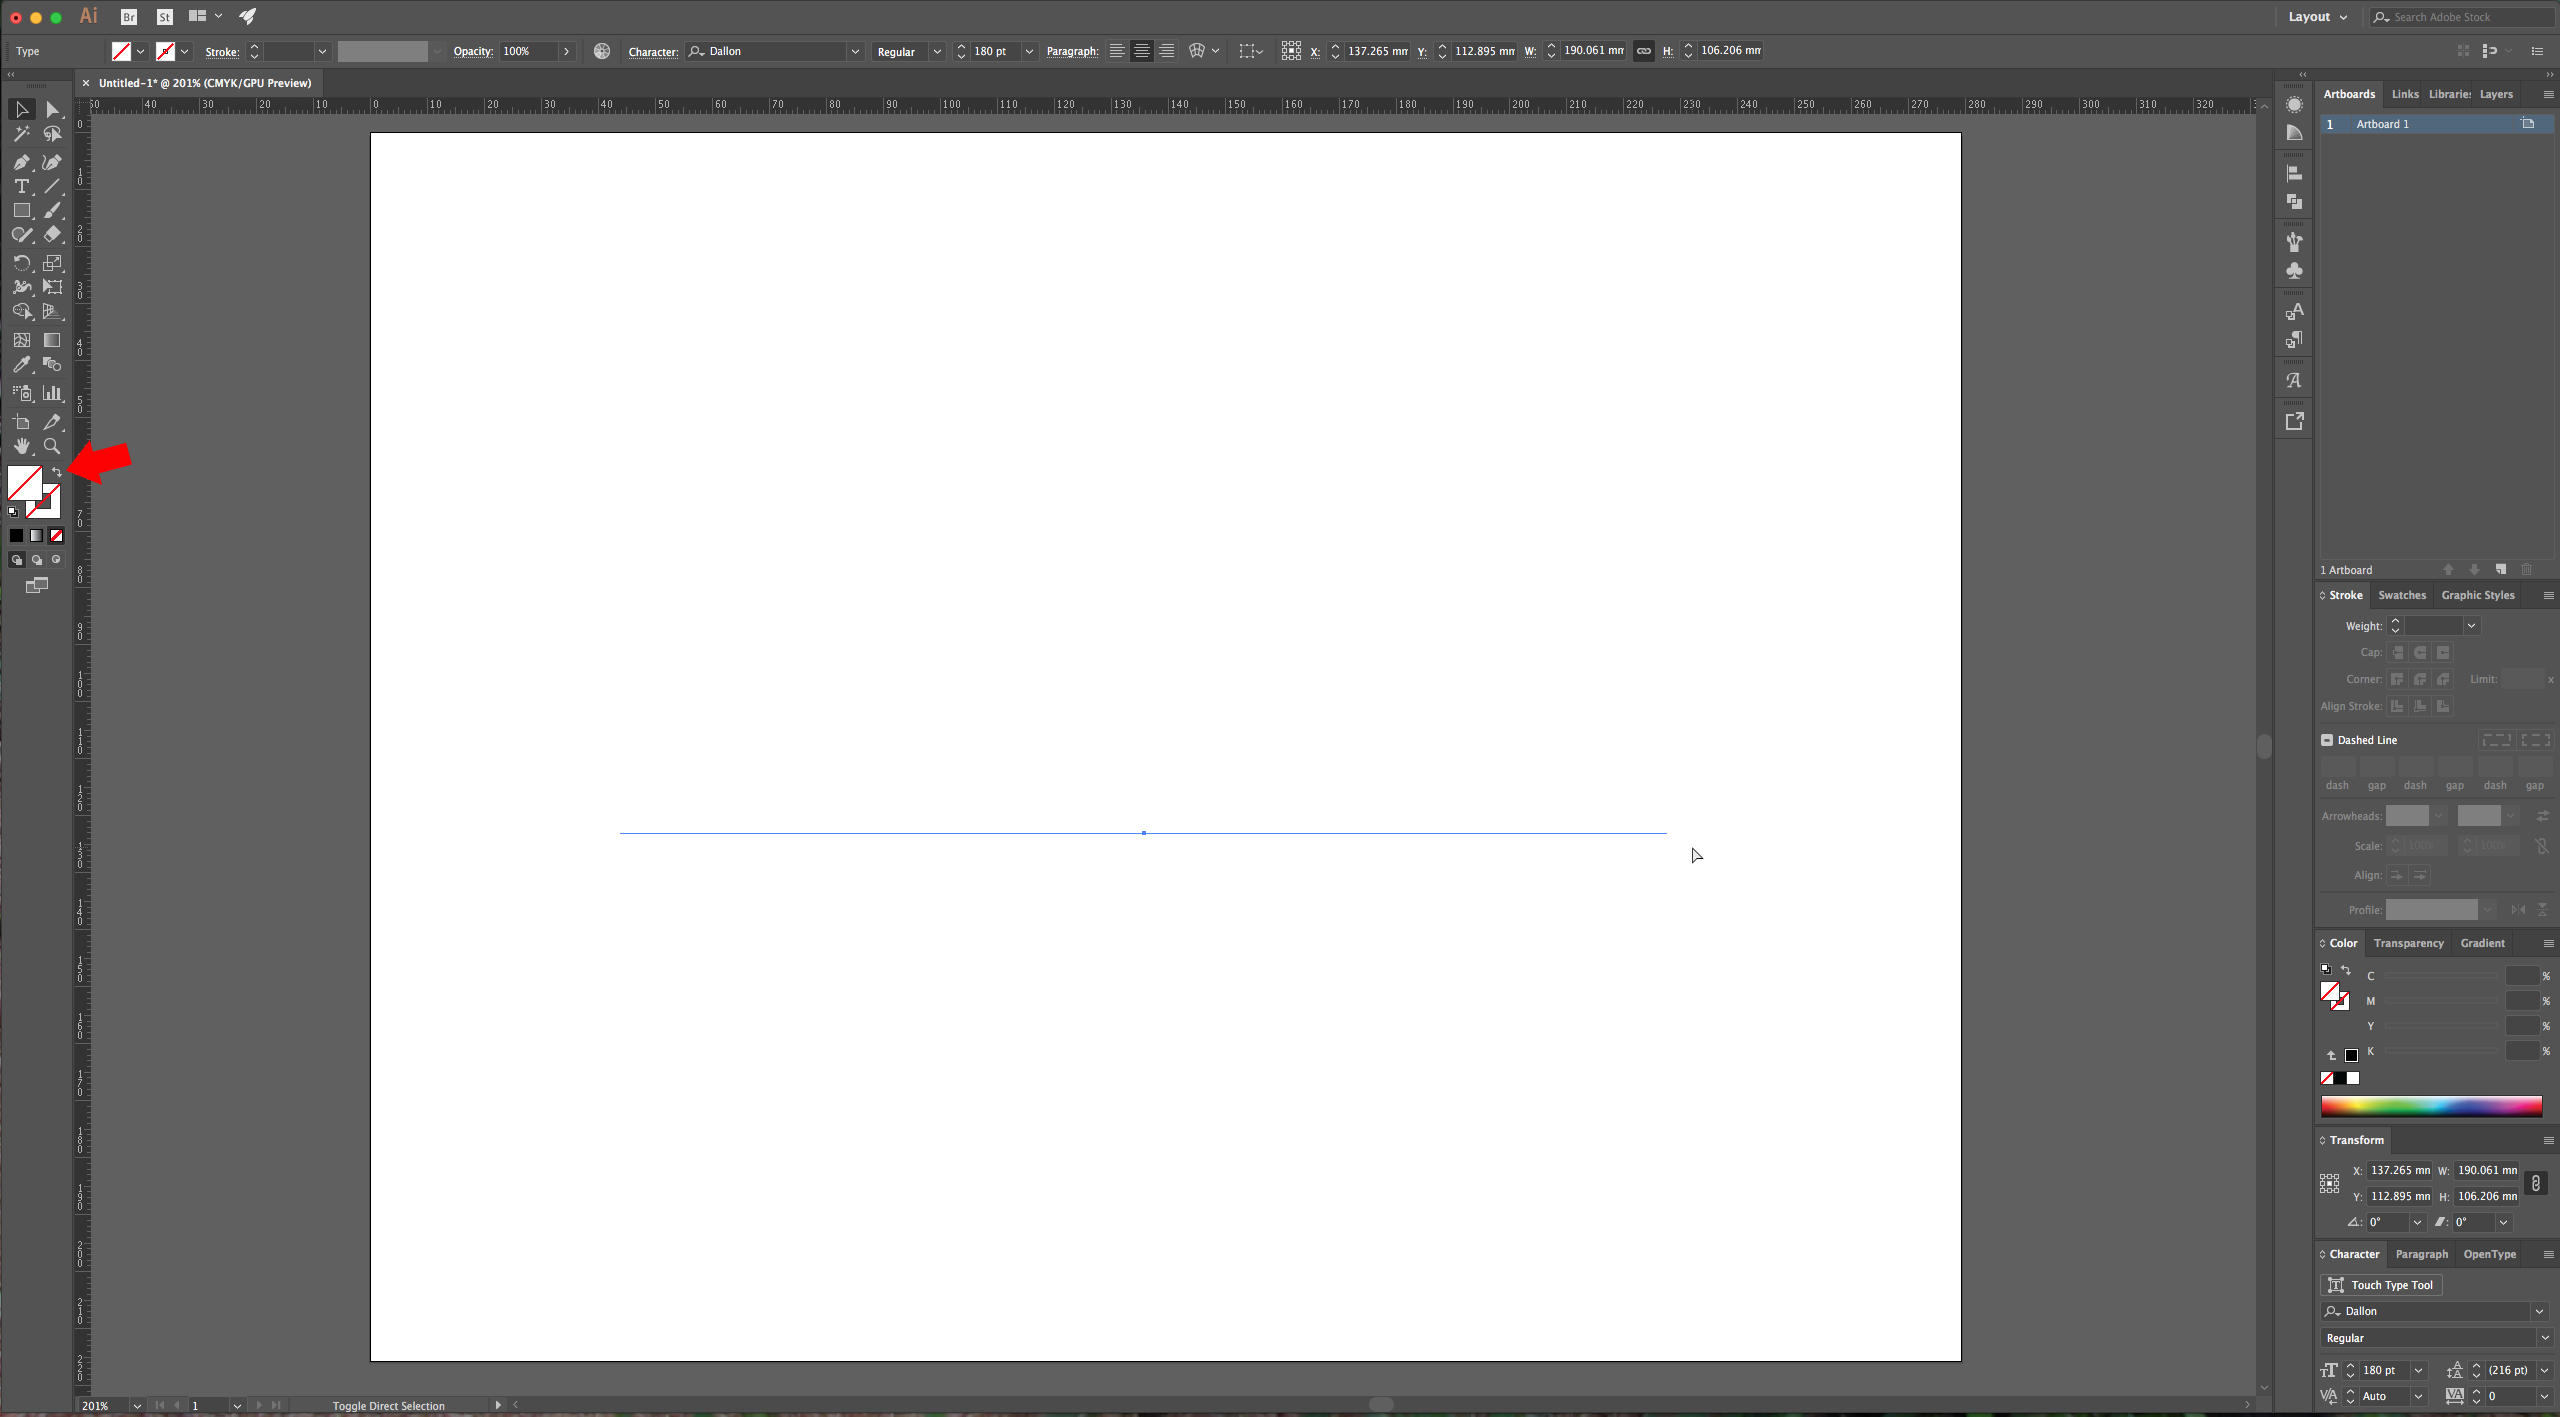
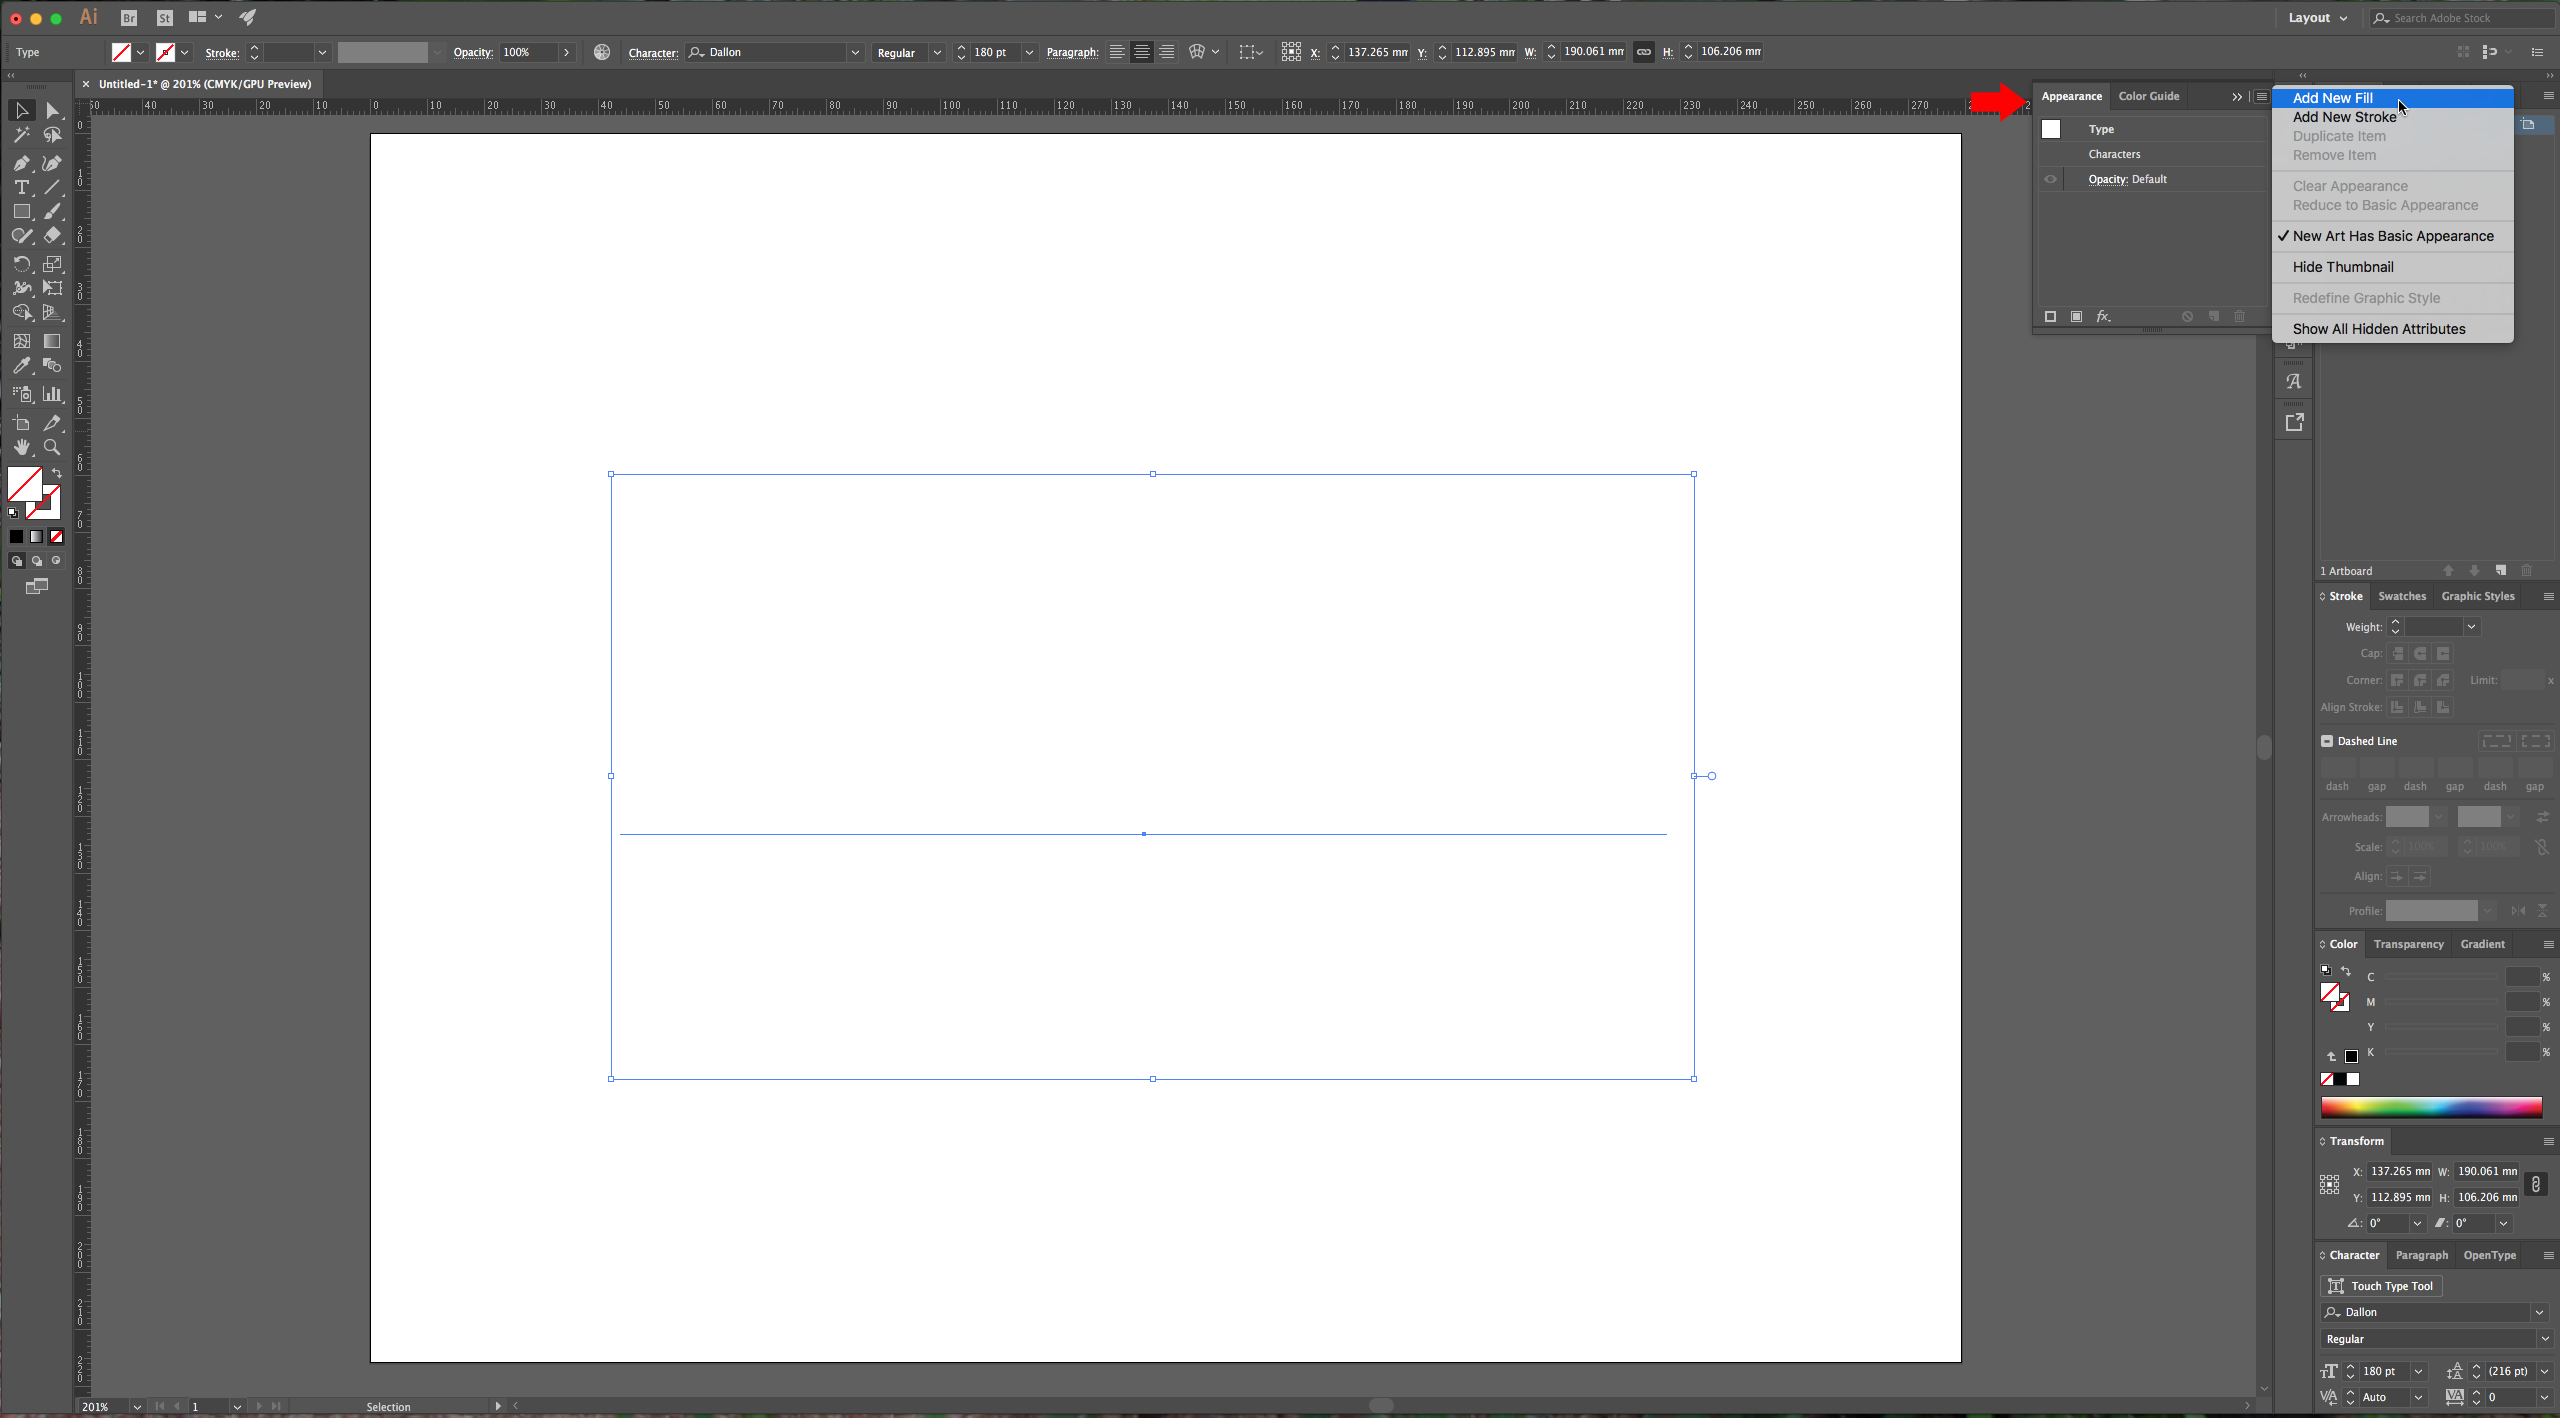
2 – Select the text and turn the “Fill” and “Stroke” colors to none. Go to the “Appearance” Panel (Window > Appearance) and select “New Fill” from the popup menu. Use a linear gradient as fill.
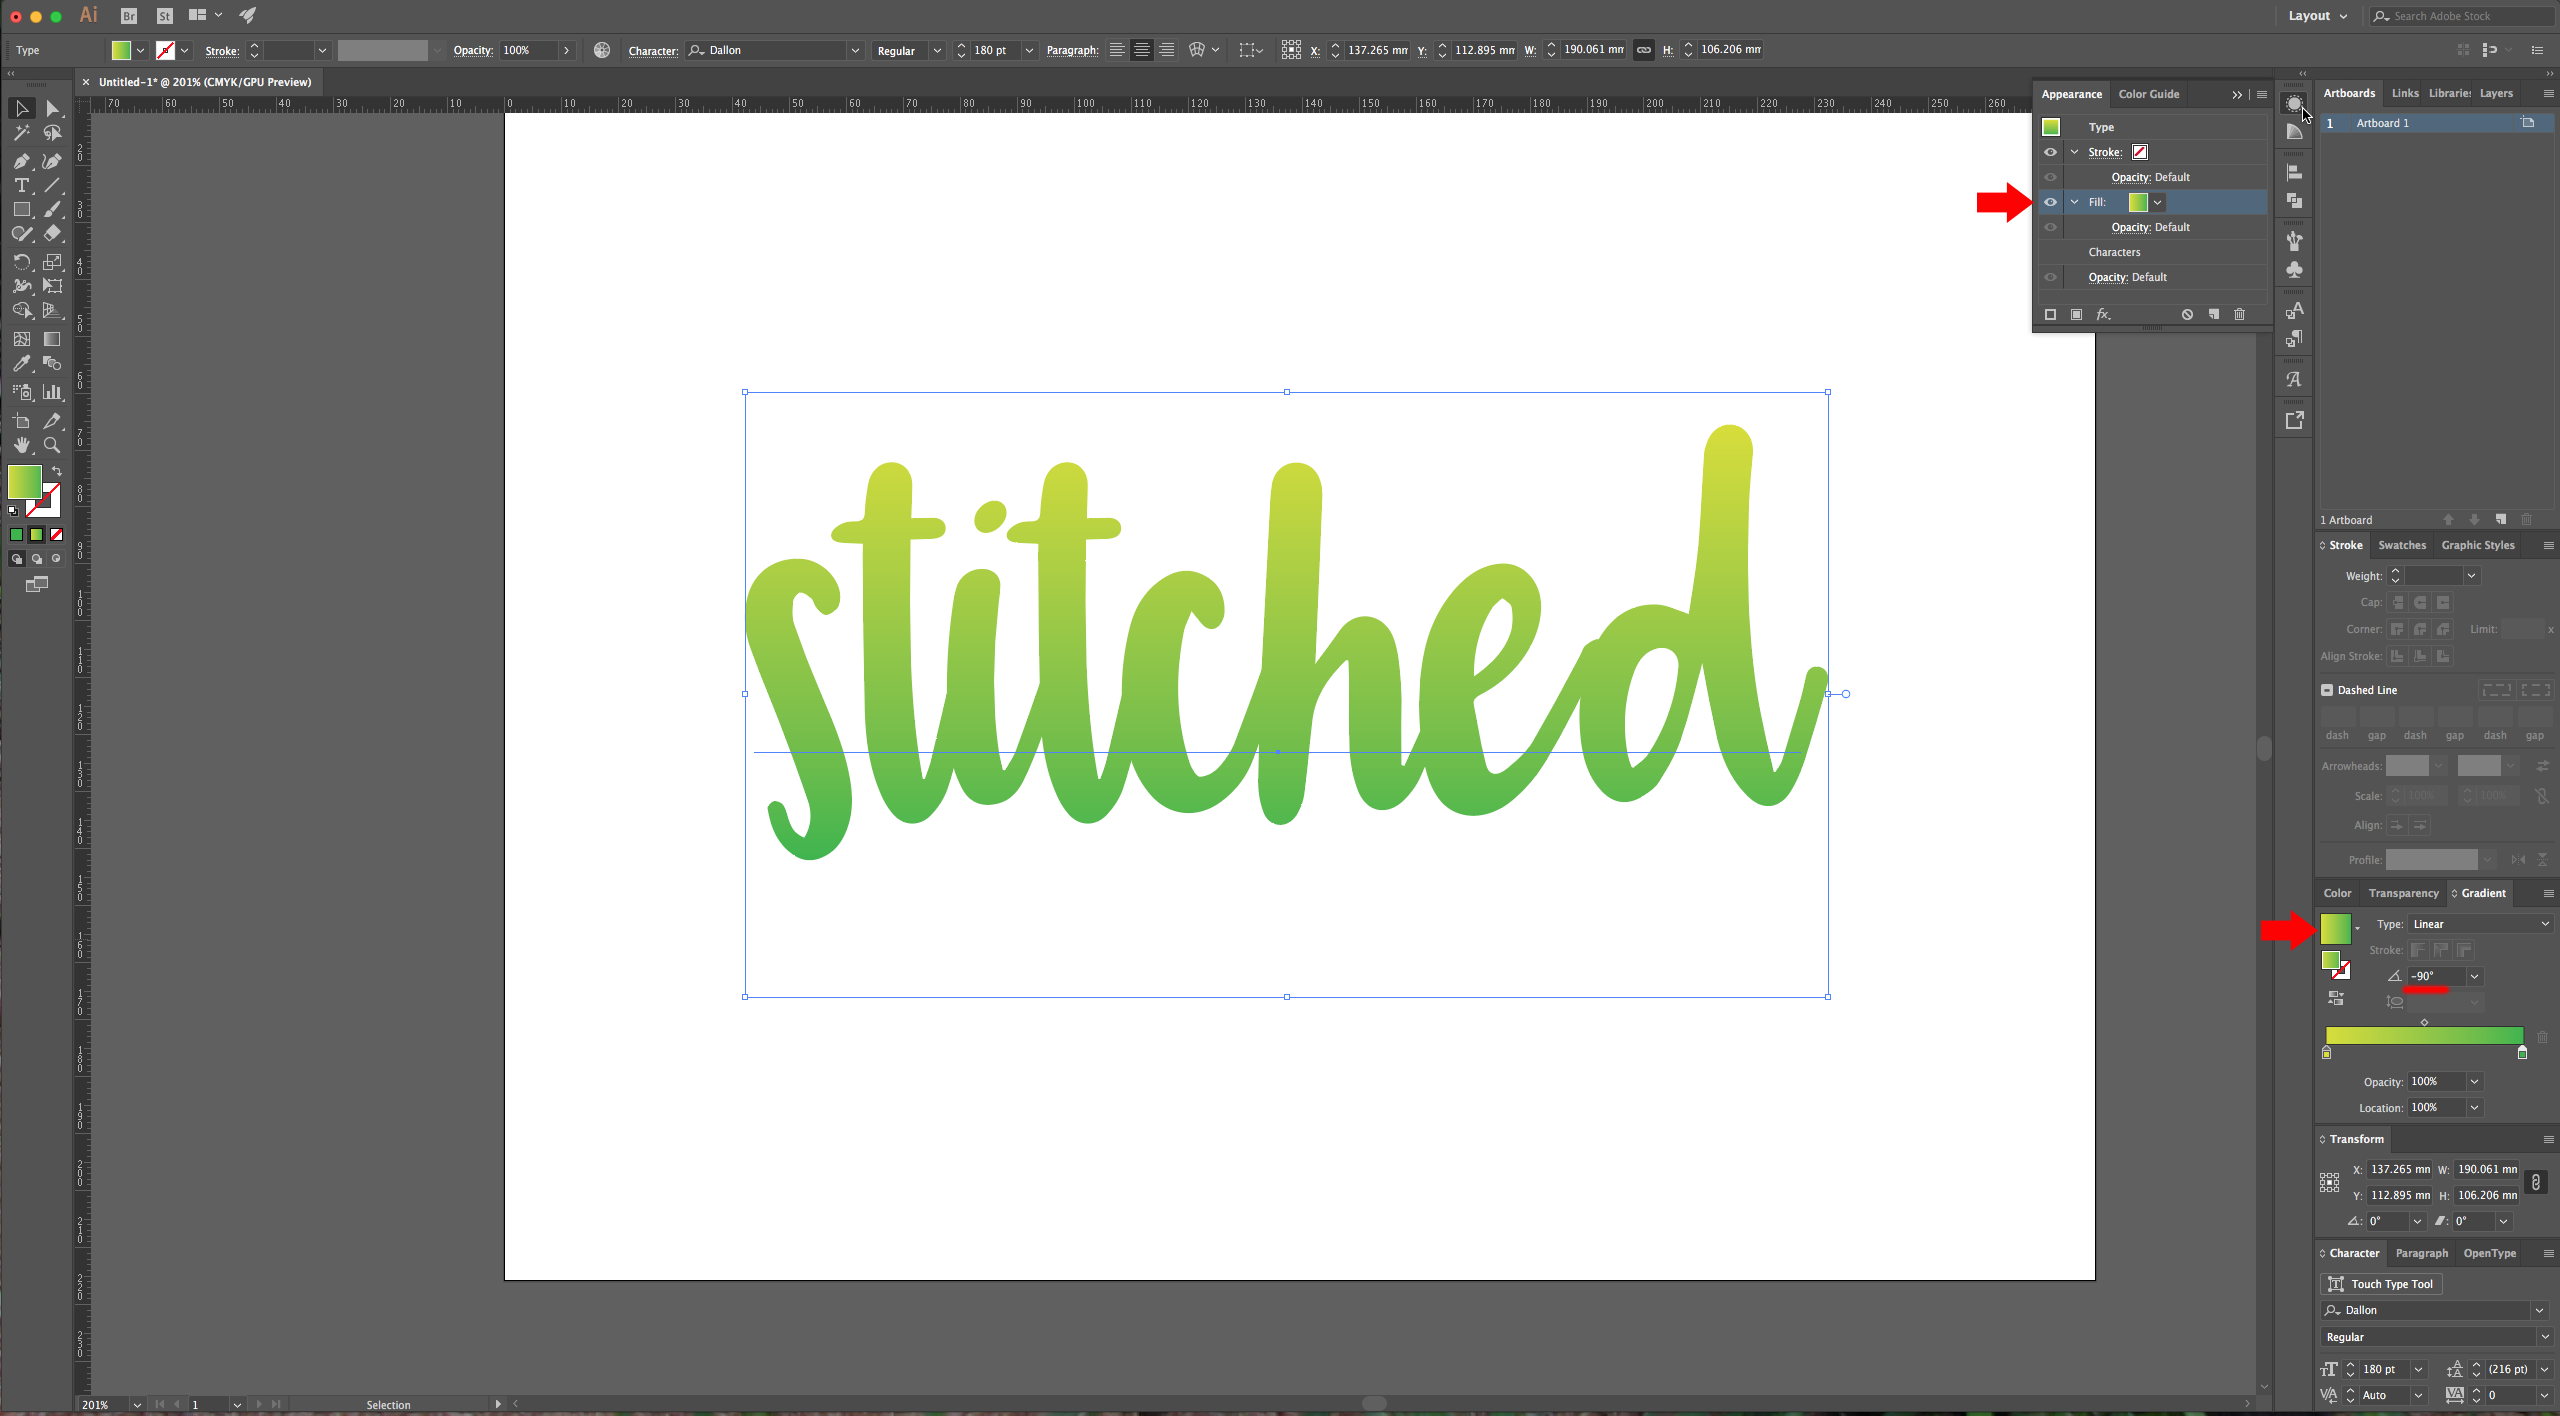
3 – In the “Gradient” panel select the colors and angle for your gradient. We used some from the “Colors” panel and changed the “Angle” to -90°.
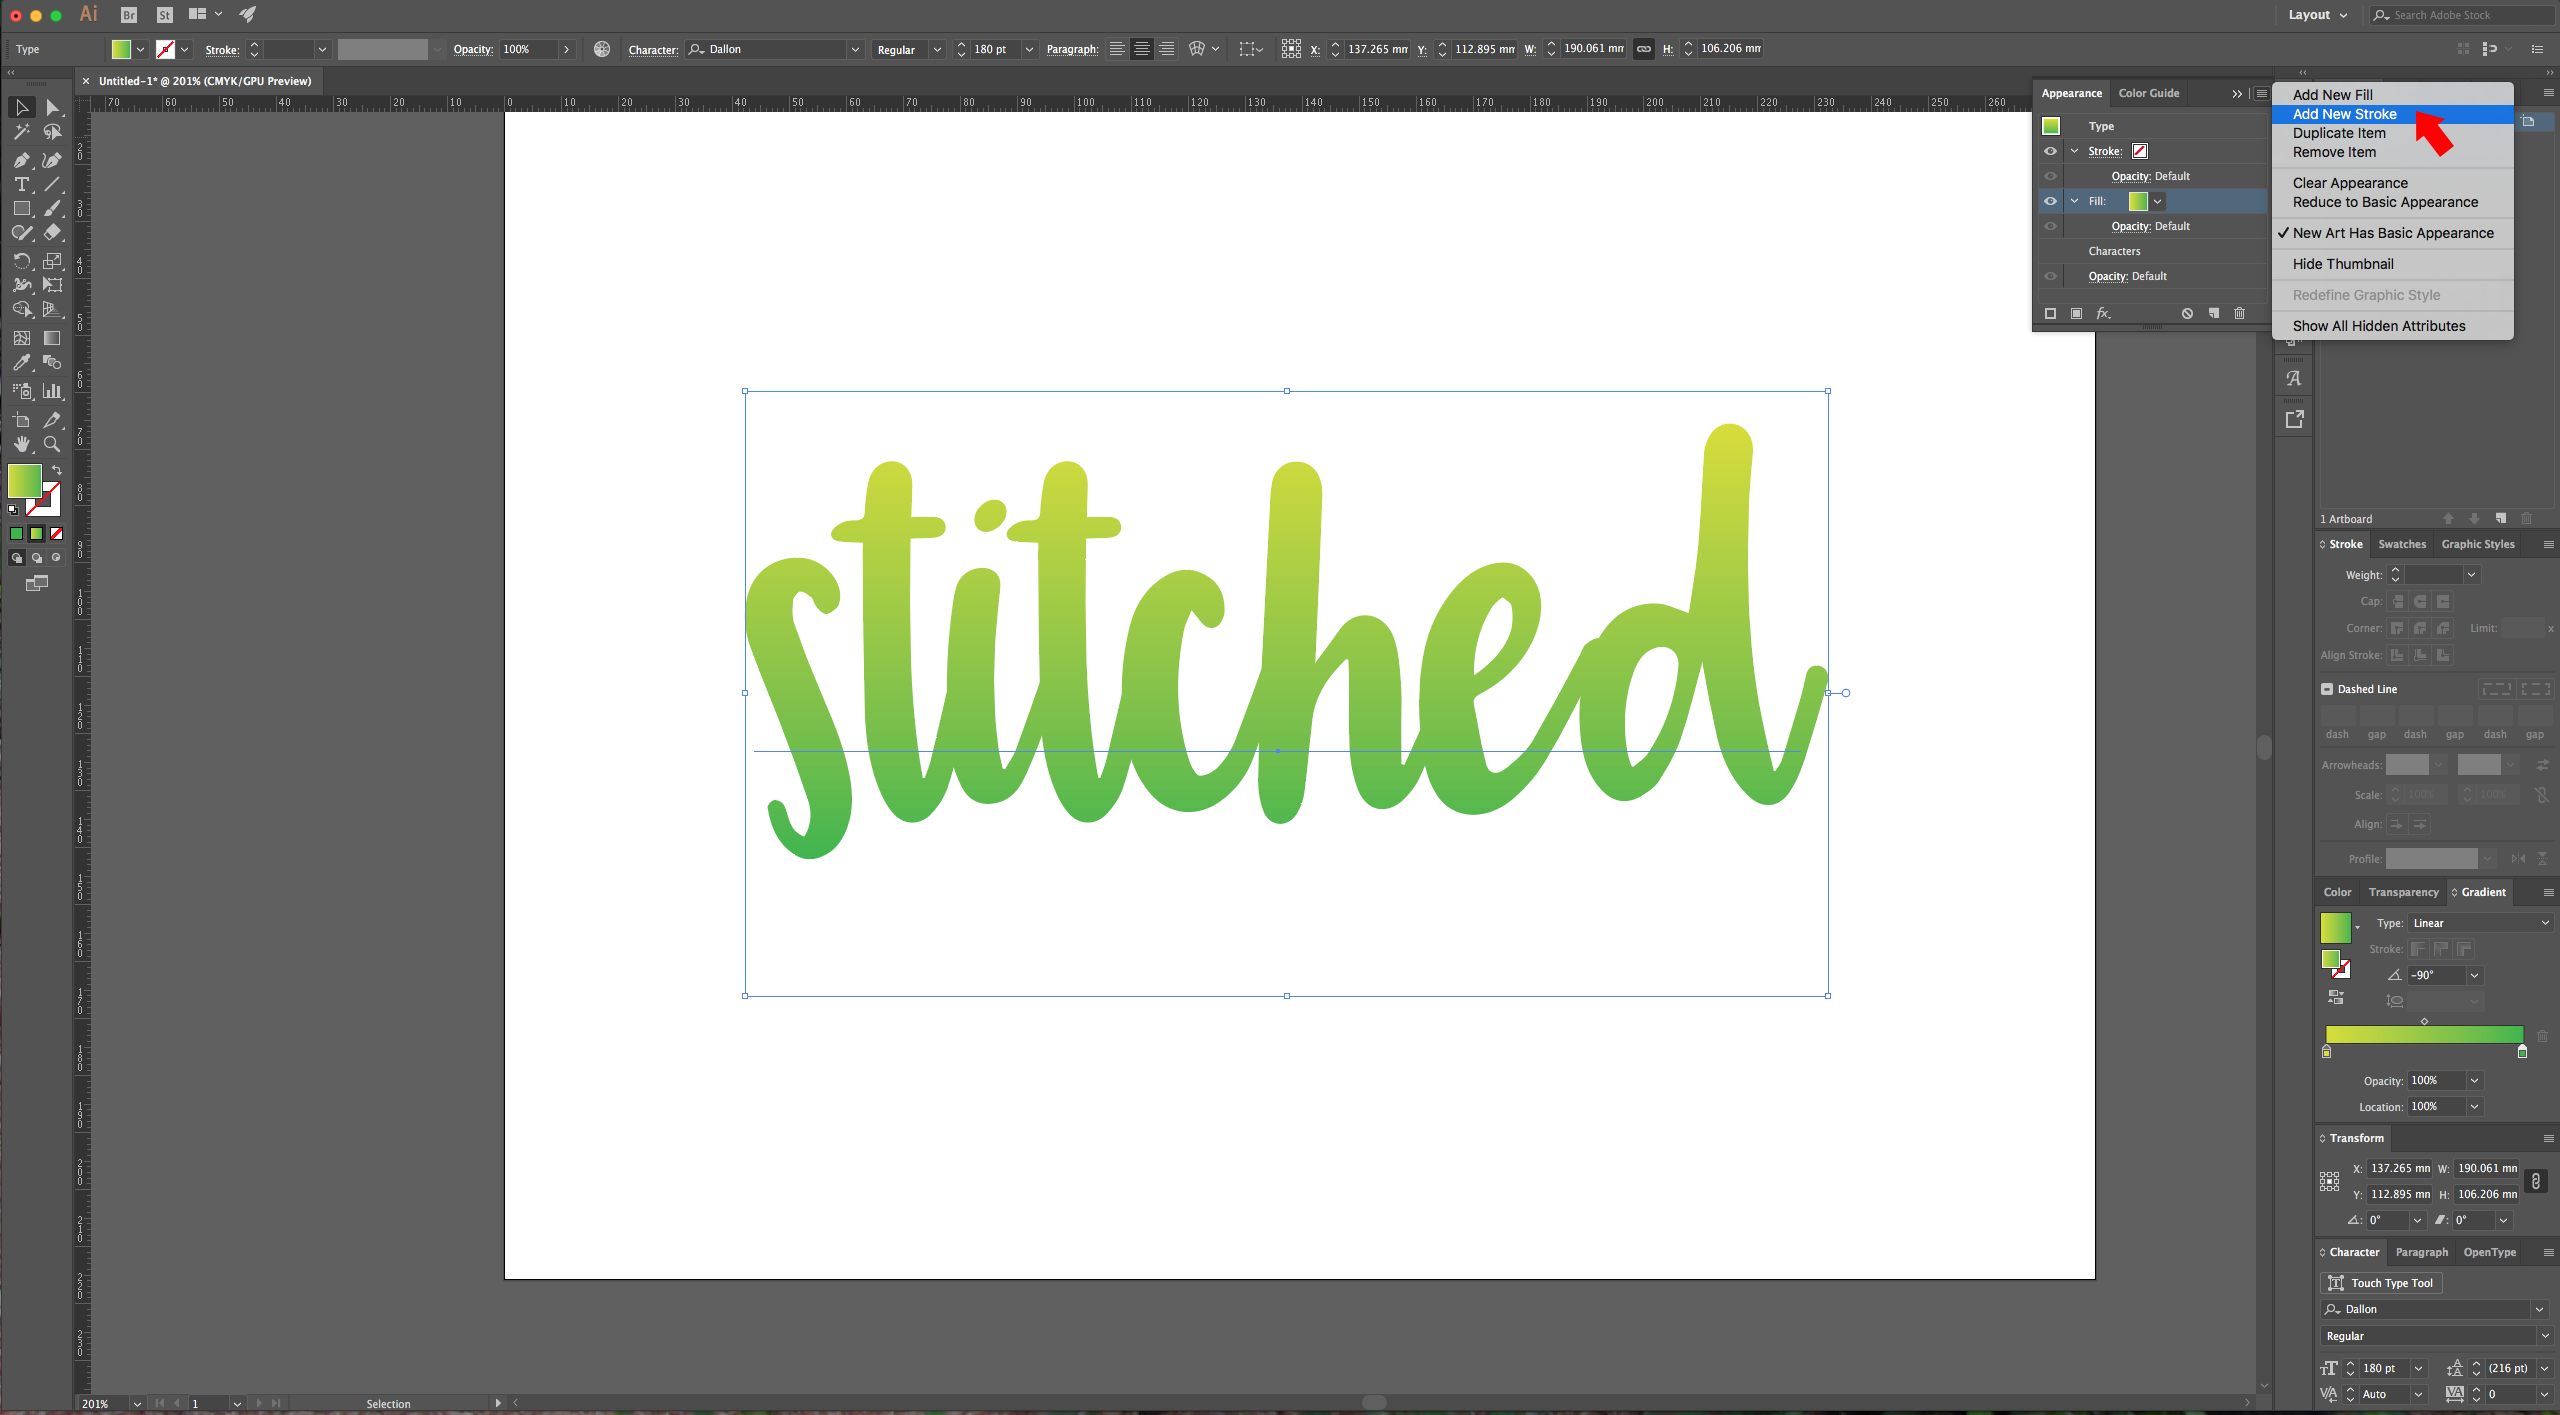
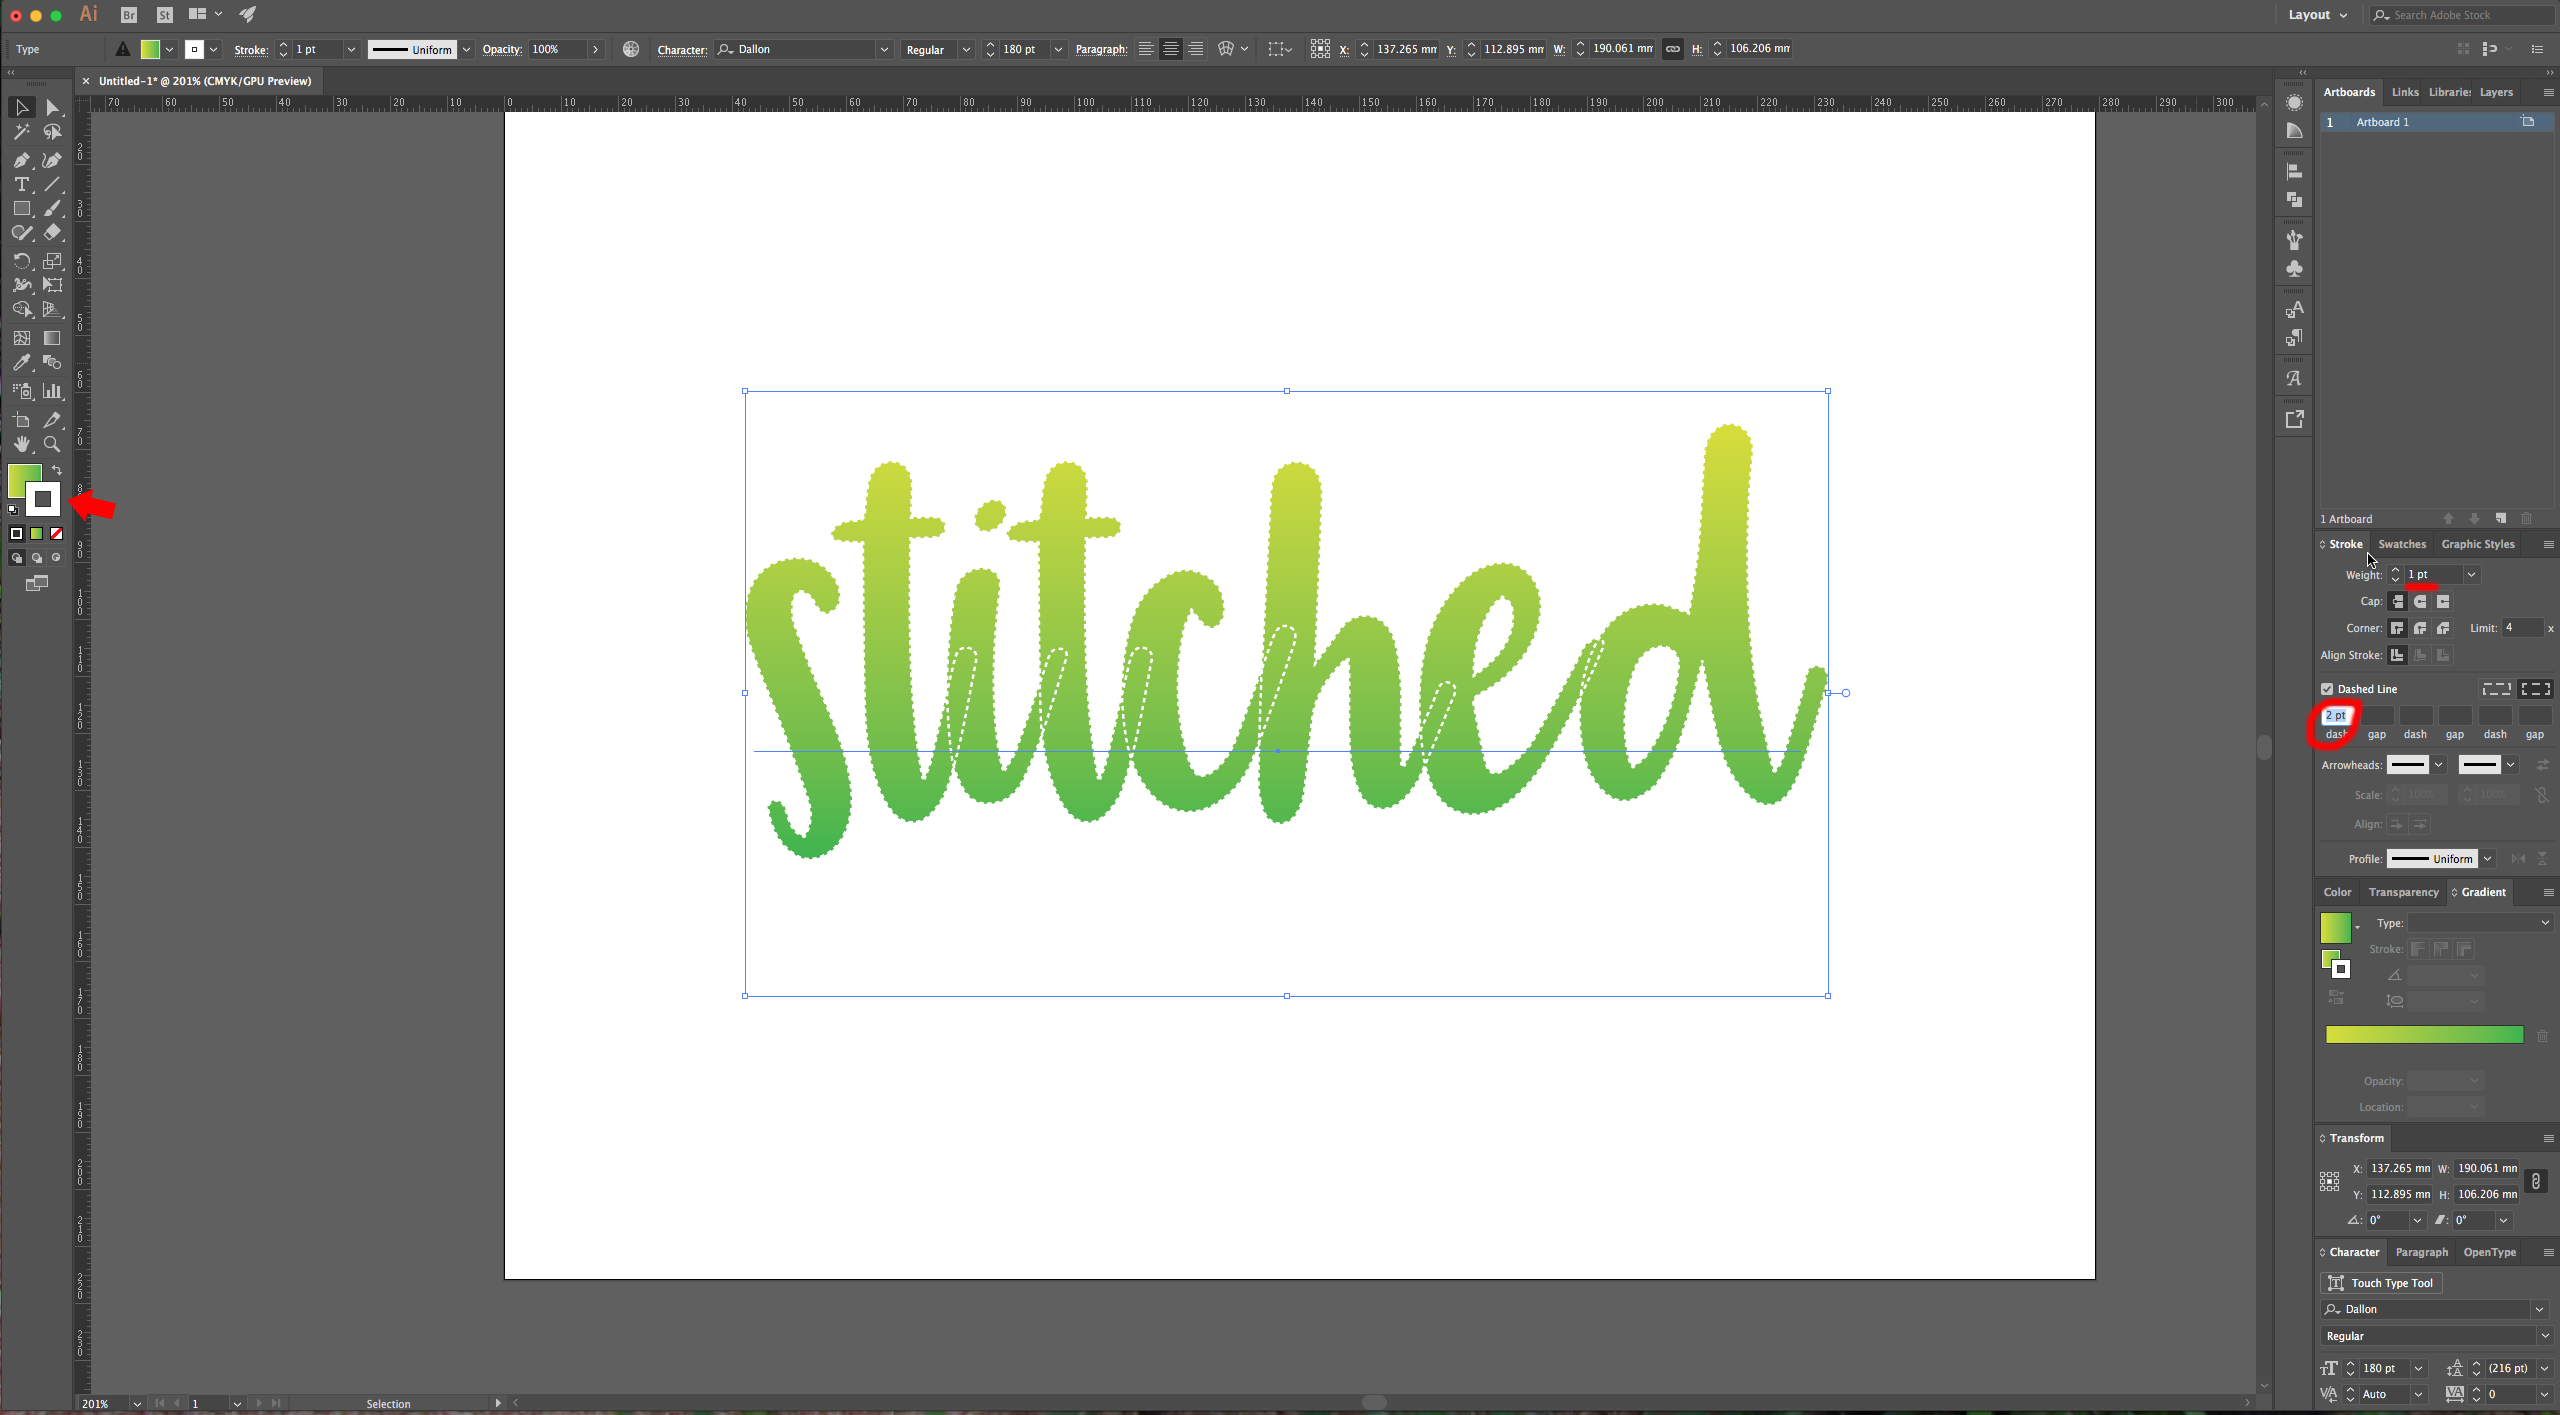
4 – With your text selected choose “New Stroke” from the popup menu in the “Appearance” Panel and change the color of the stroke to white (or whatever color you like), set the “Weight” to 1 point, check the “Dashed Line” box, and use 2 pt in the first “dash” box.
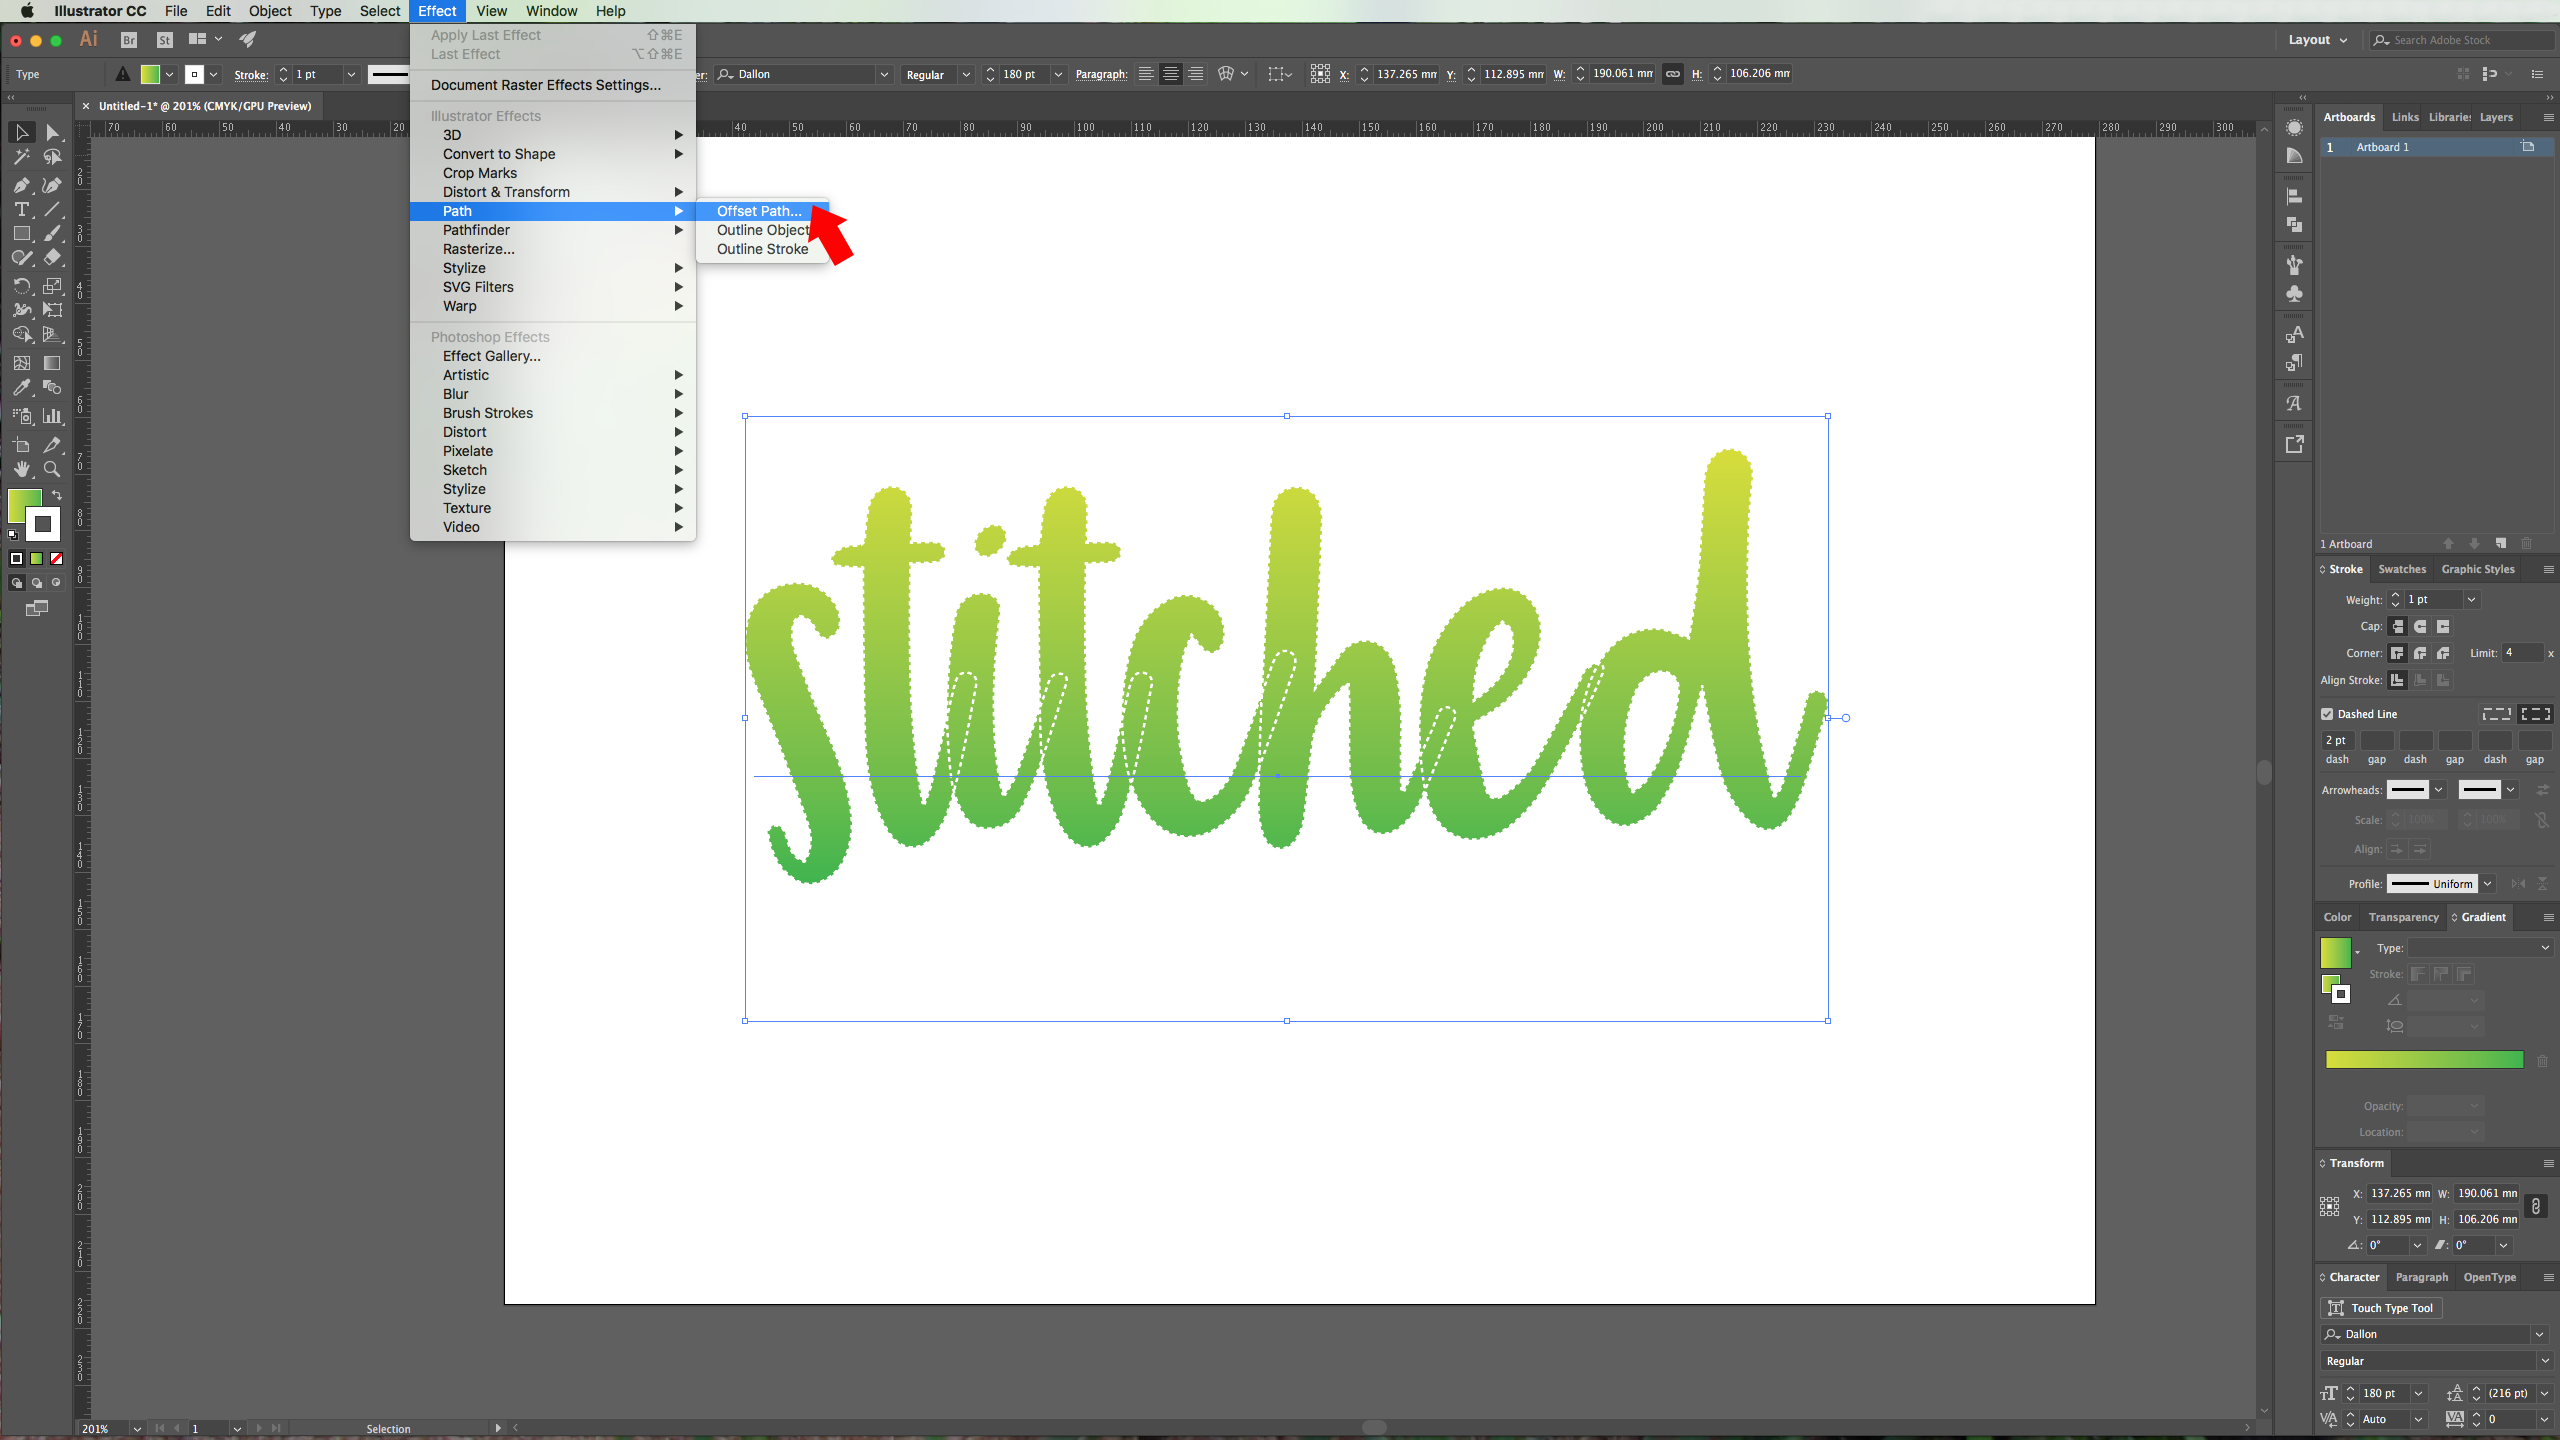
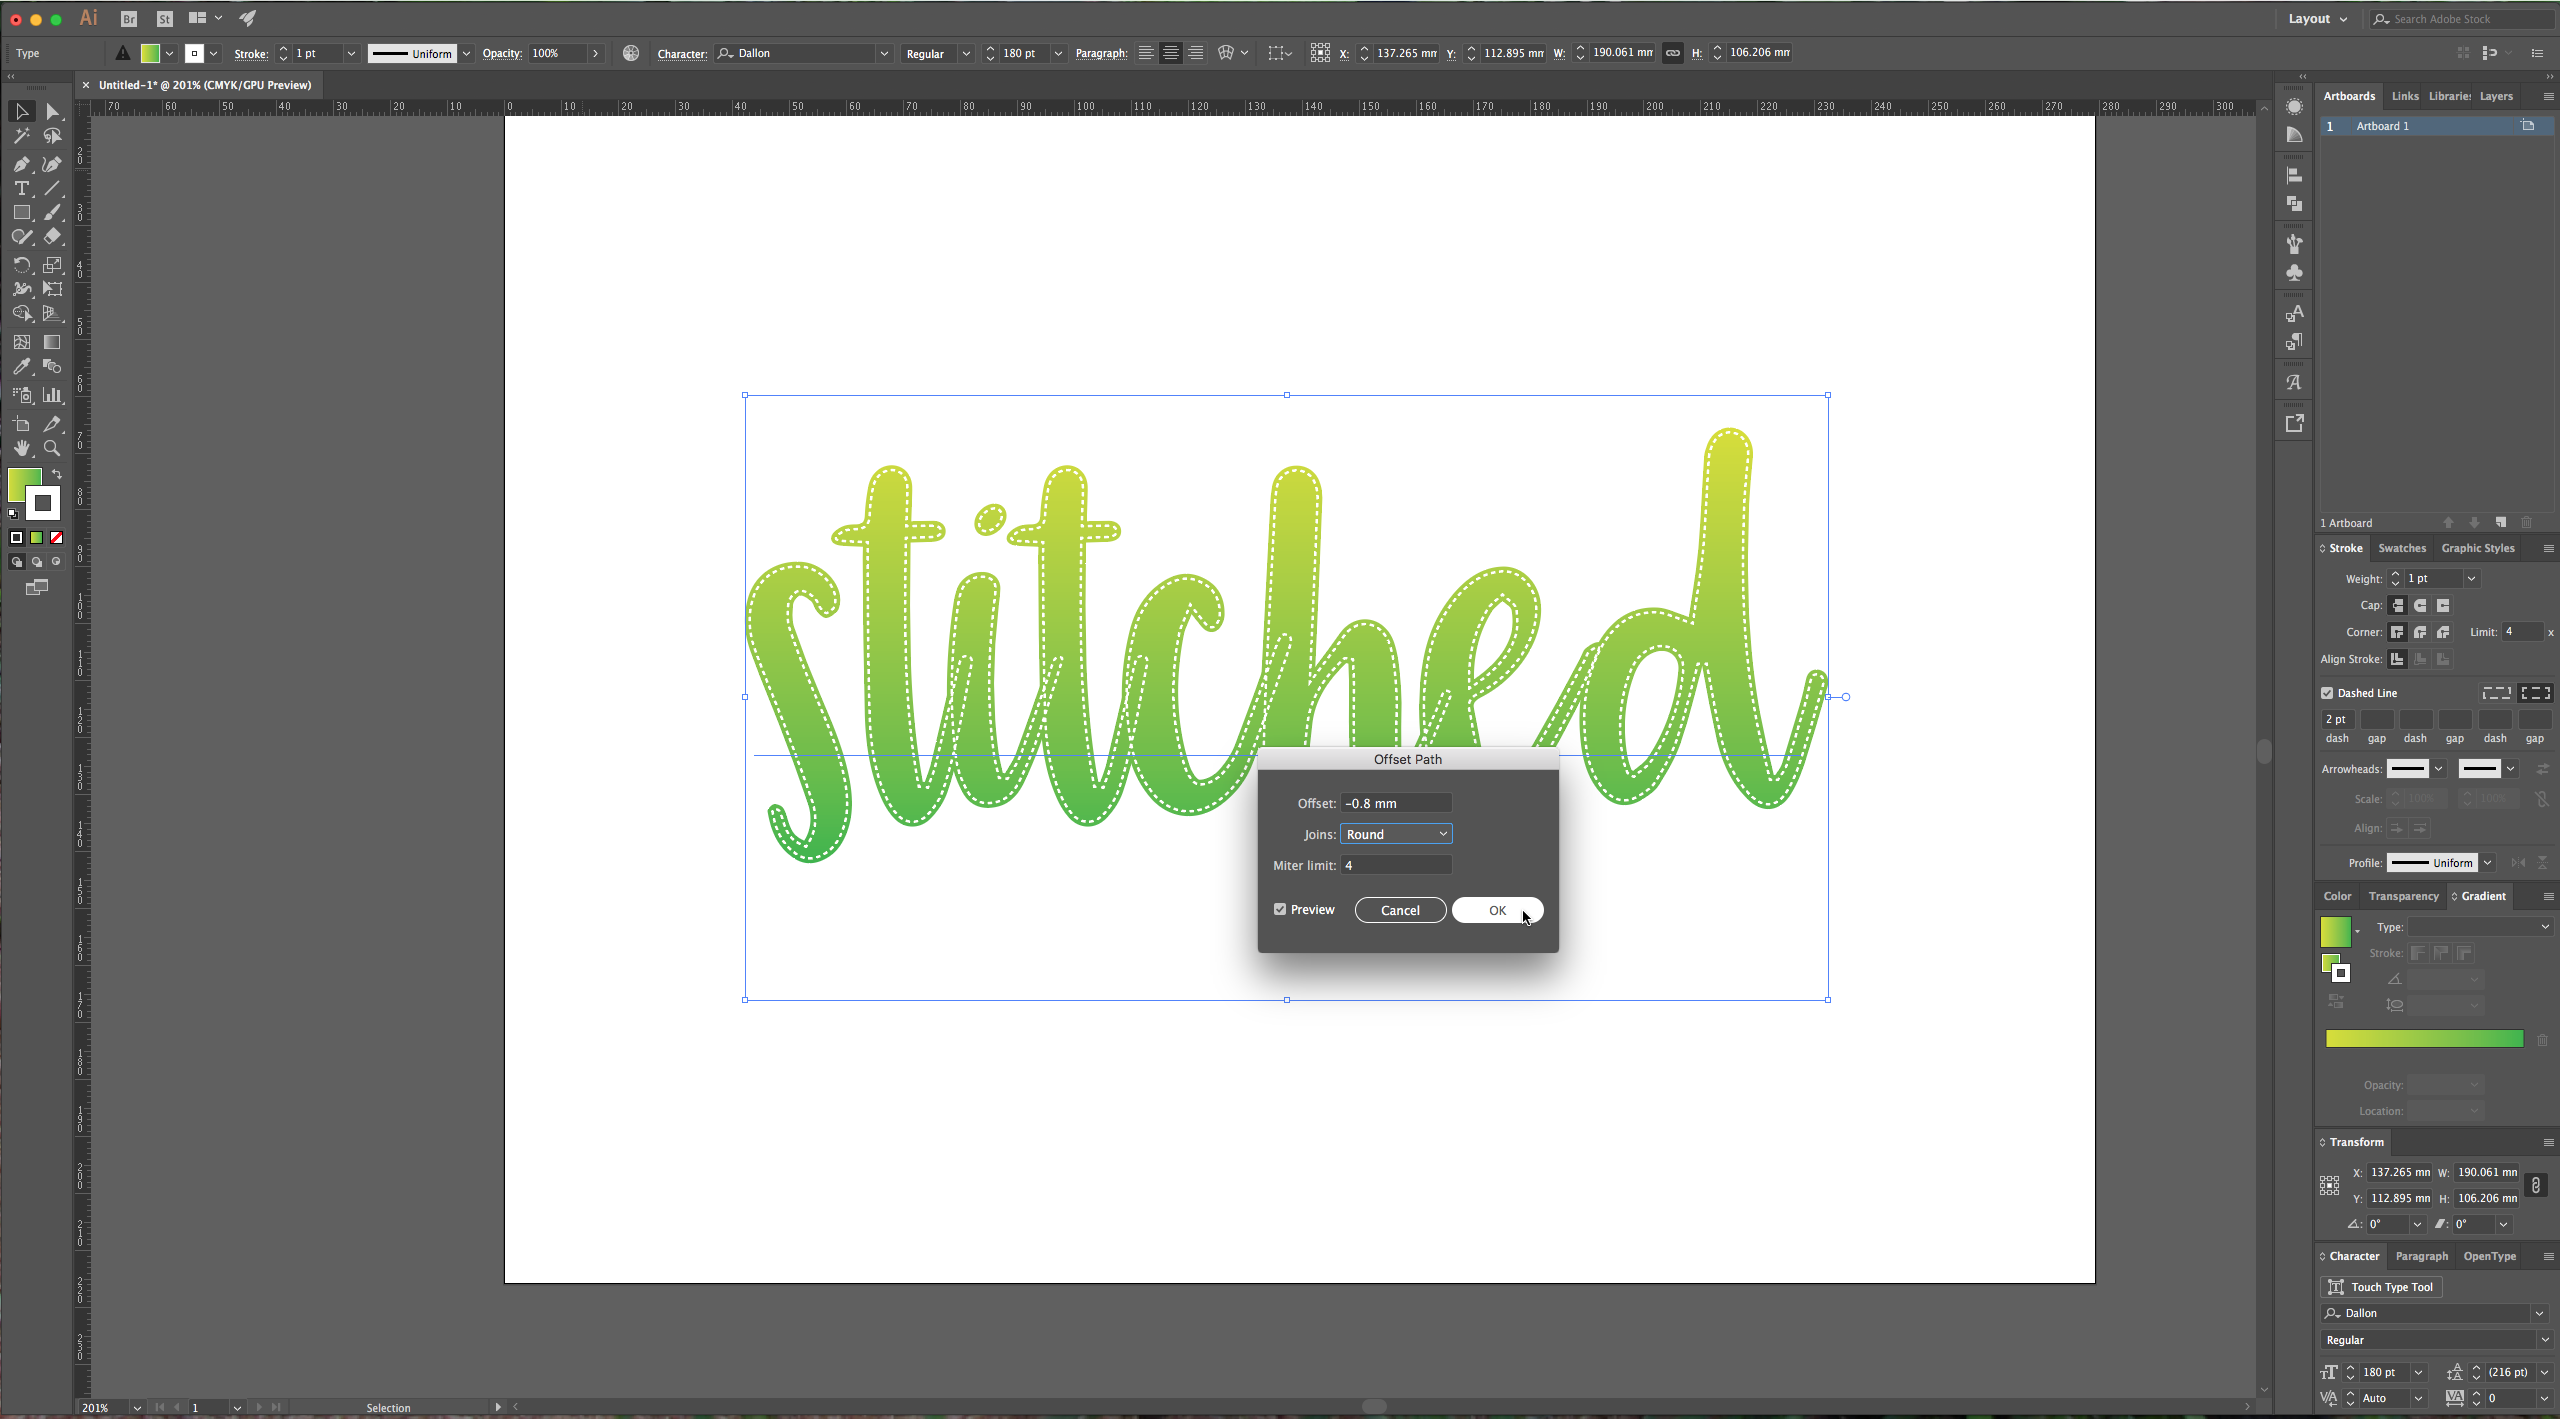
5 – Go to Effect > Path > Offset Path and use a value of -0.8 mm for “Offset” in the dialog and leave the rest of the values as default. Since our text has rounded corners we went back (double-click) on the “Offset Path” in the “Appearance” Panel and changed the “Joins” to “Round”.
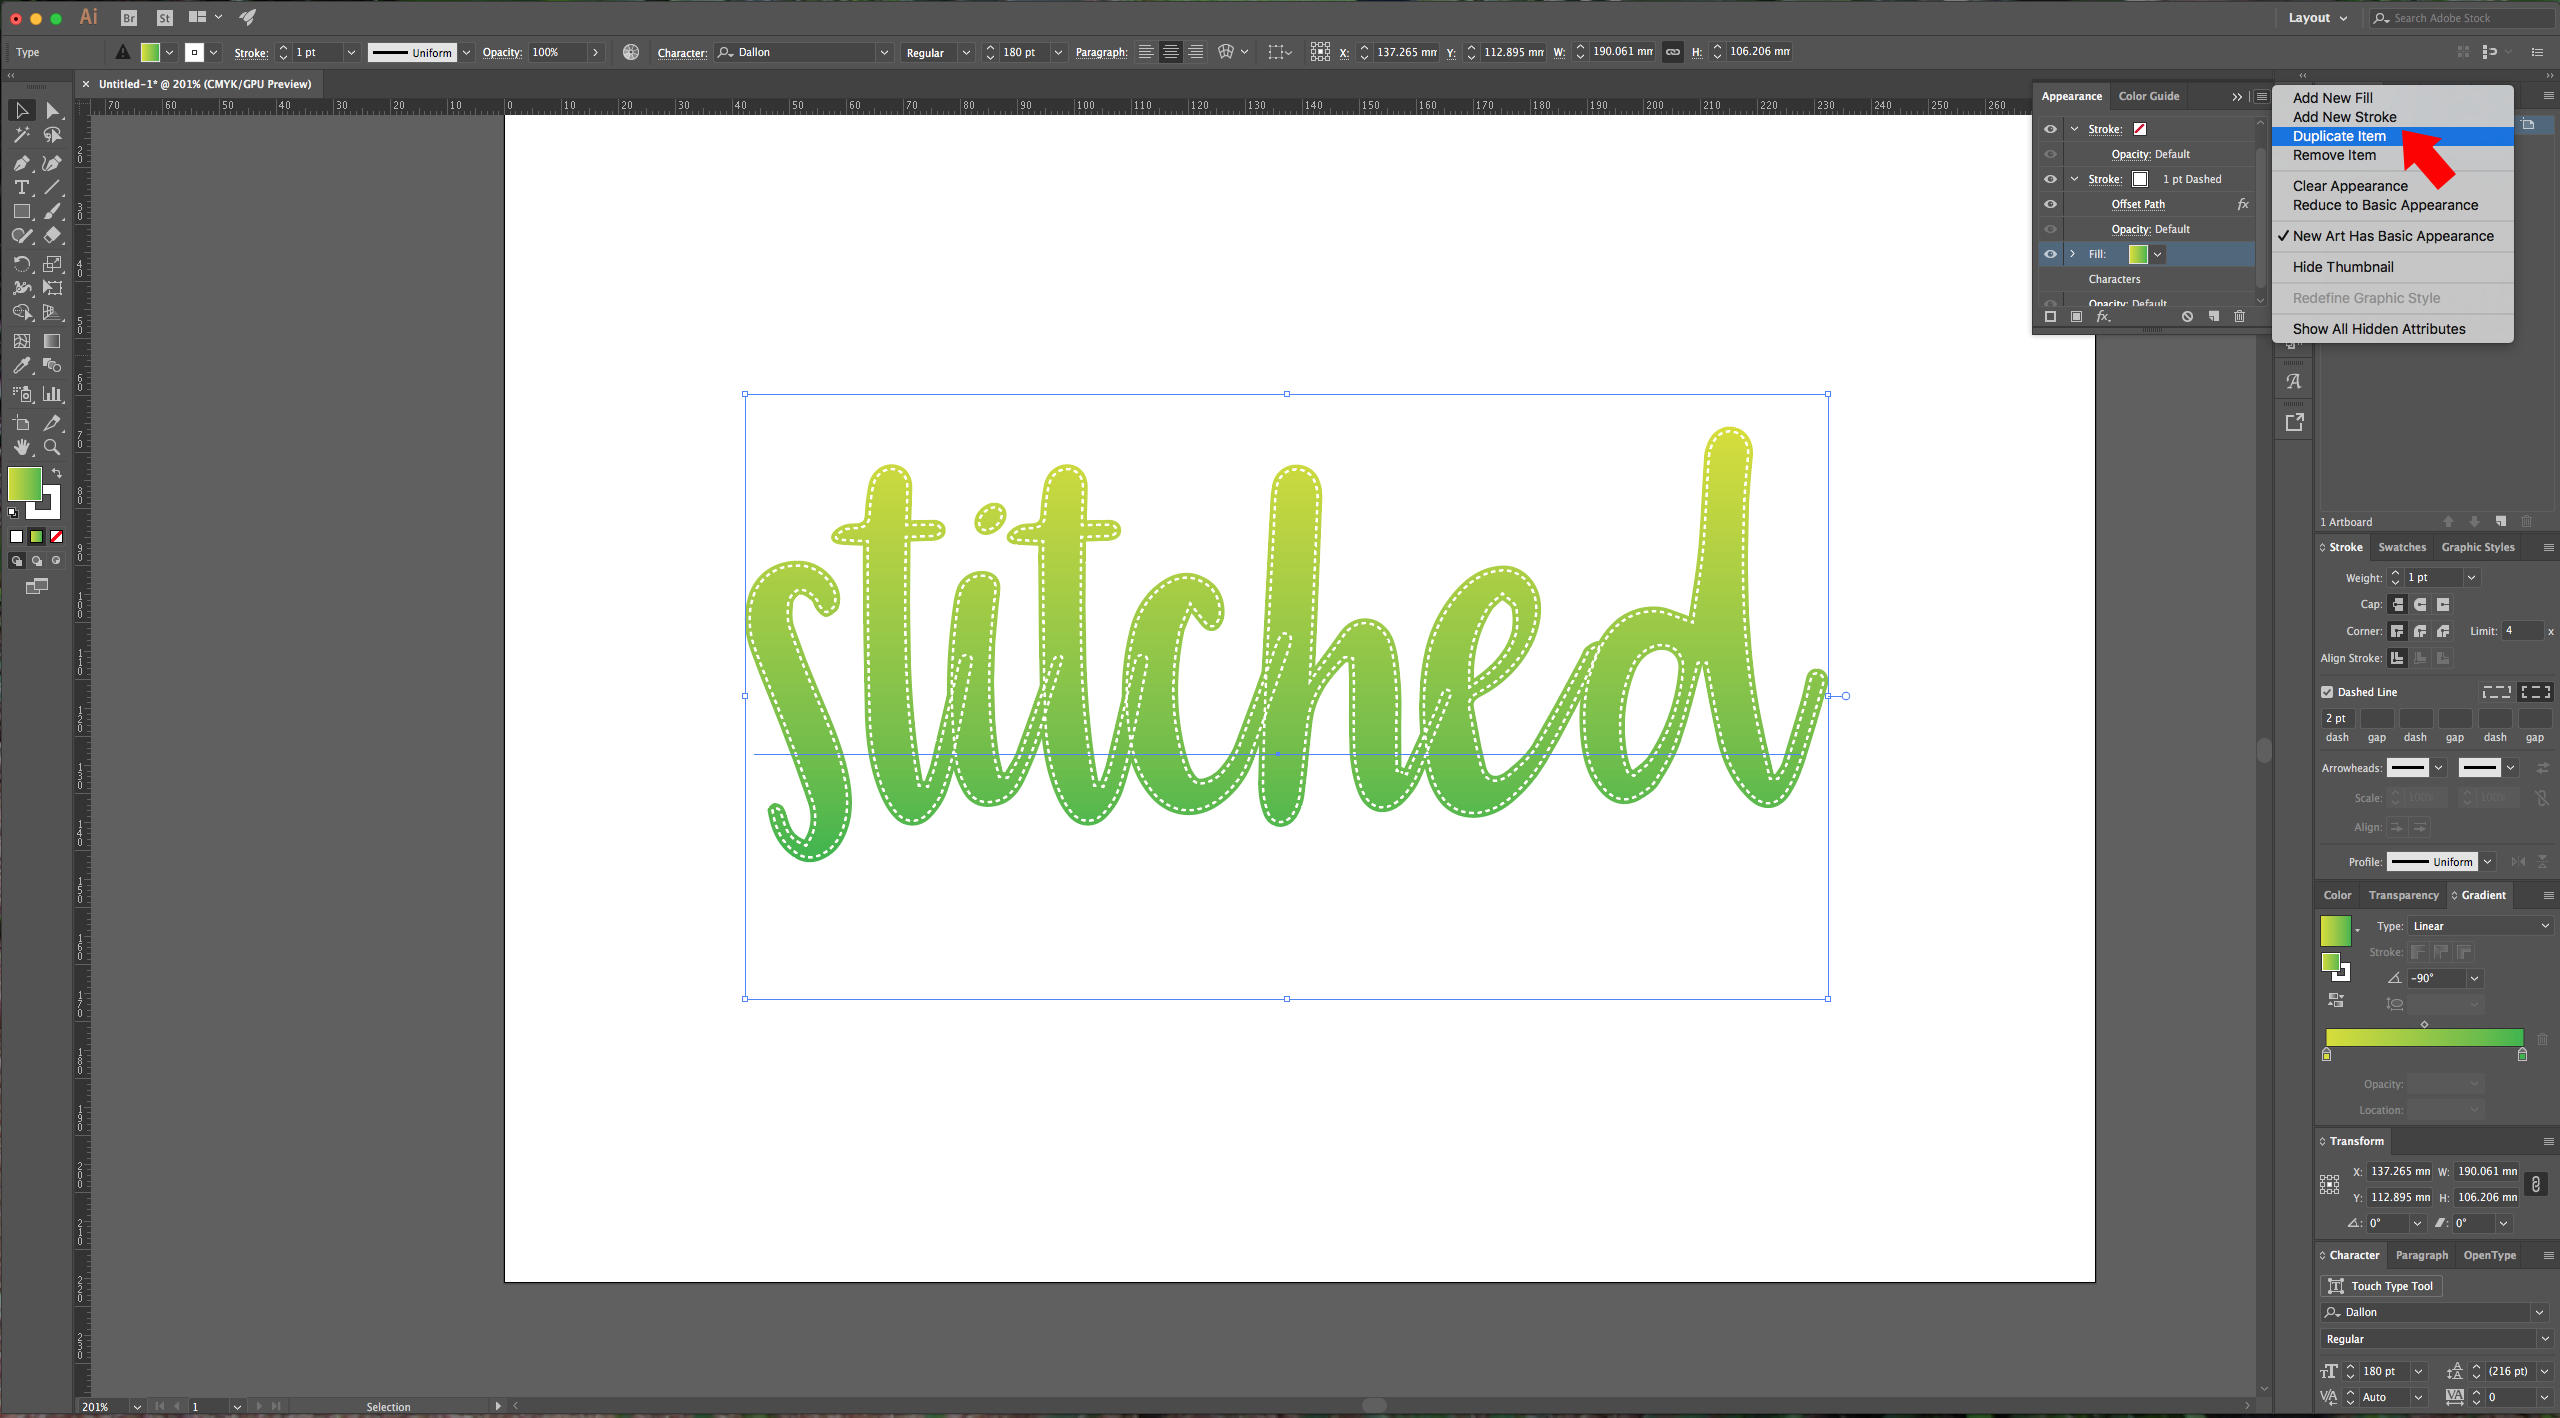
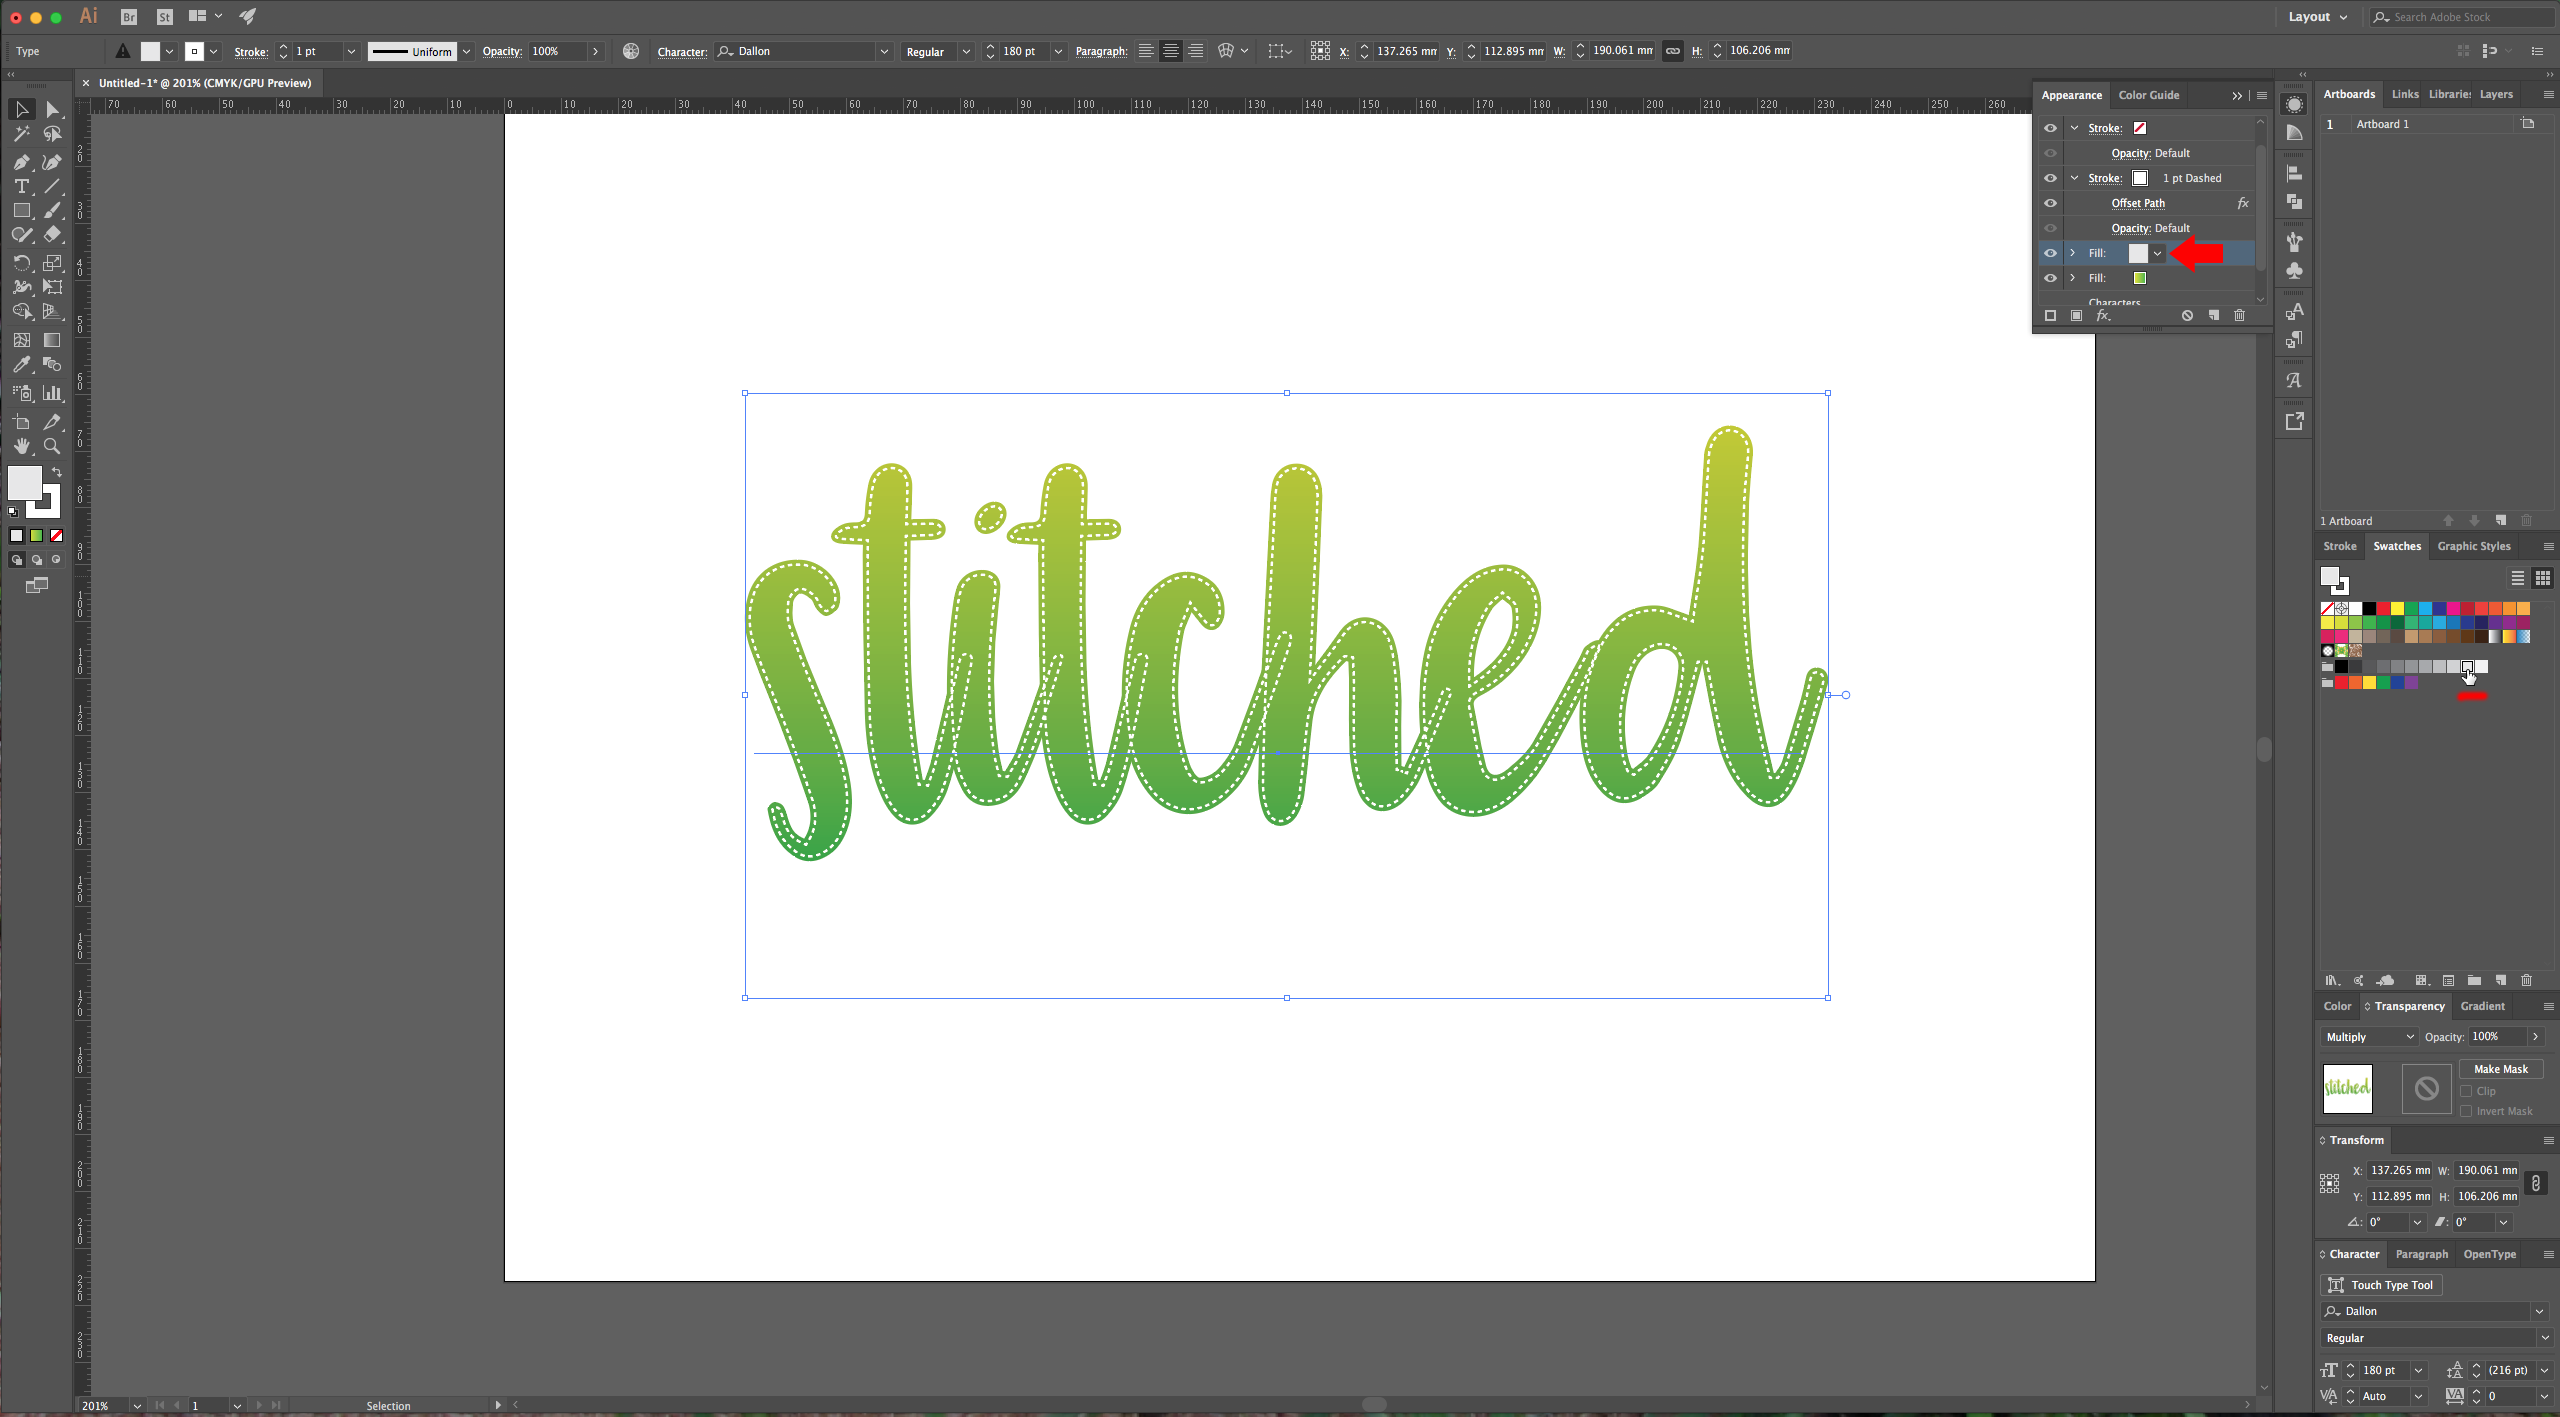
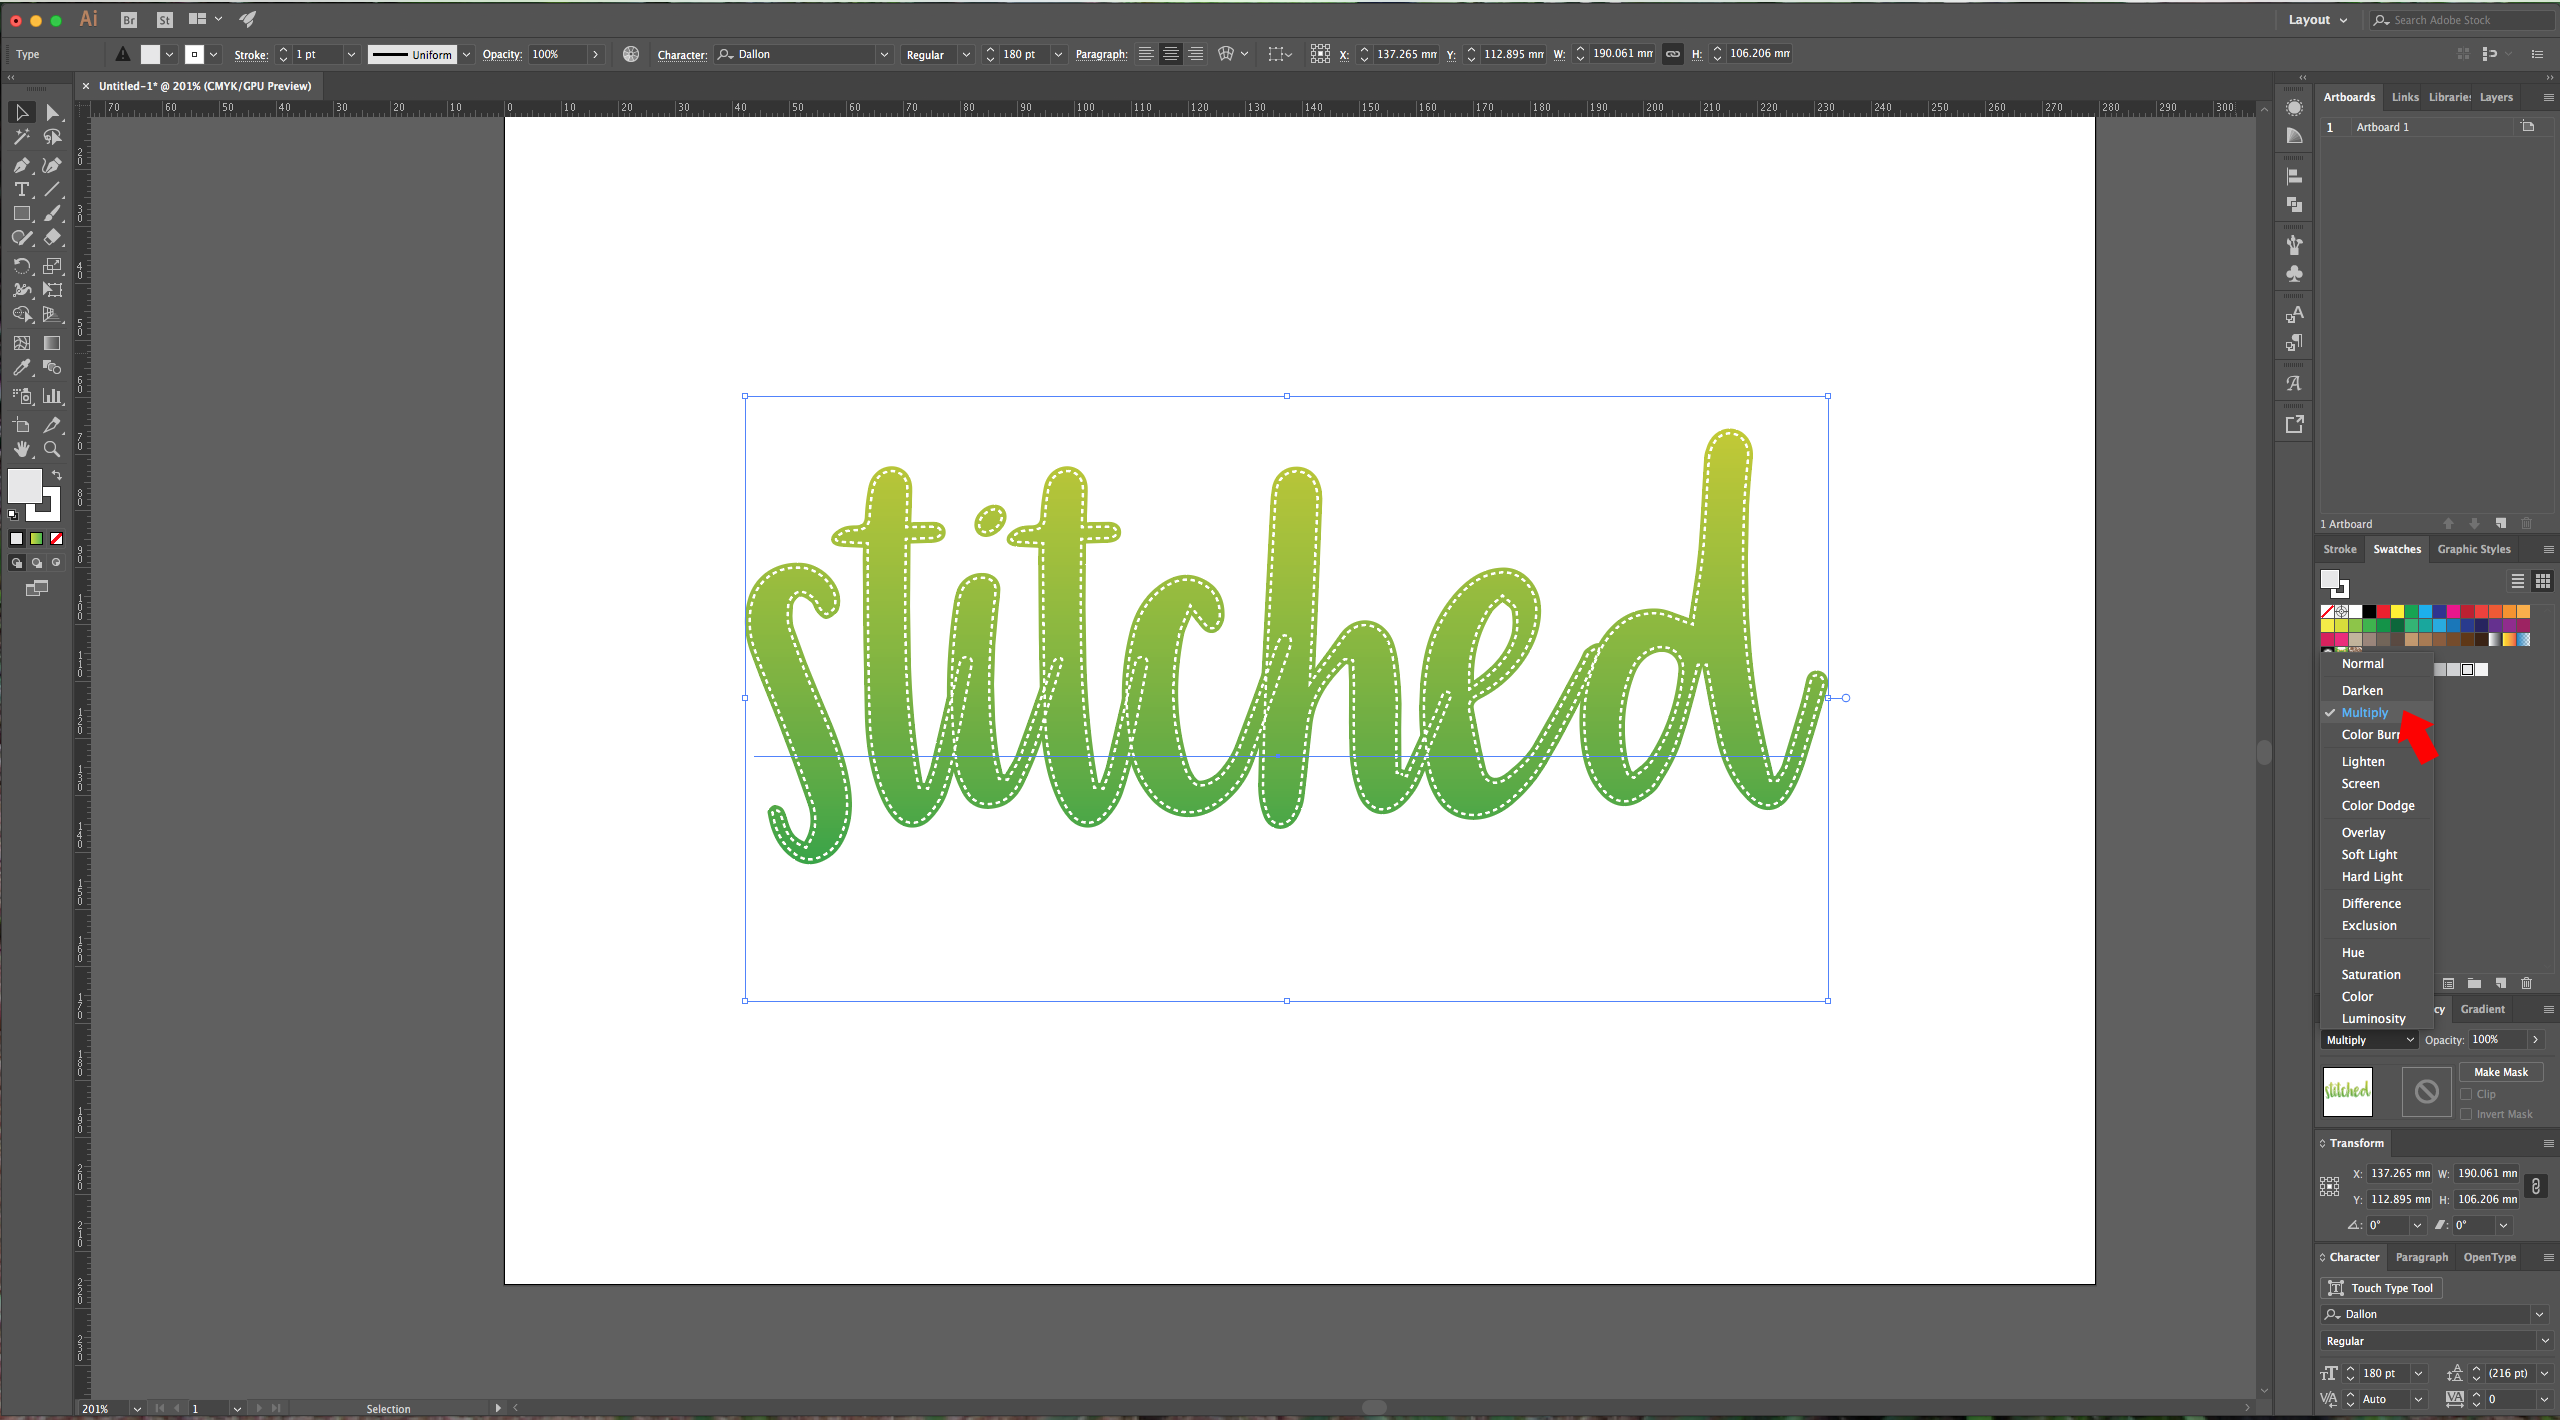
6 – Select the main text linear gradient fill in the “Appearance” Panel and click the “Duplicate Selected” button. Select the gradient on top and fill it with a light gray and choose “Multiply” as “Blending Mode” in the “Transparency” Panel.
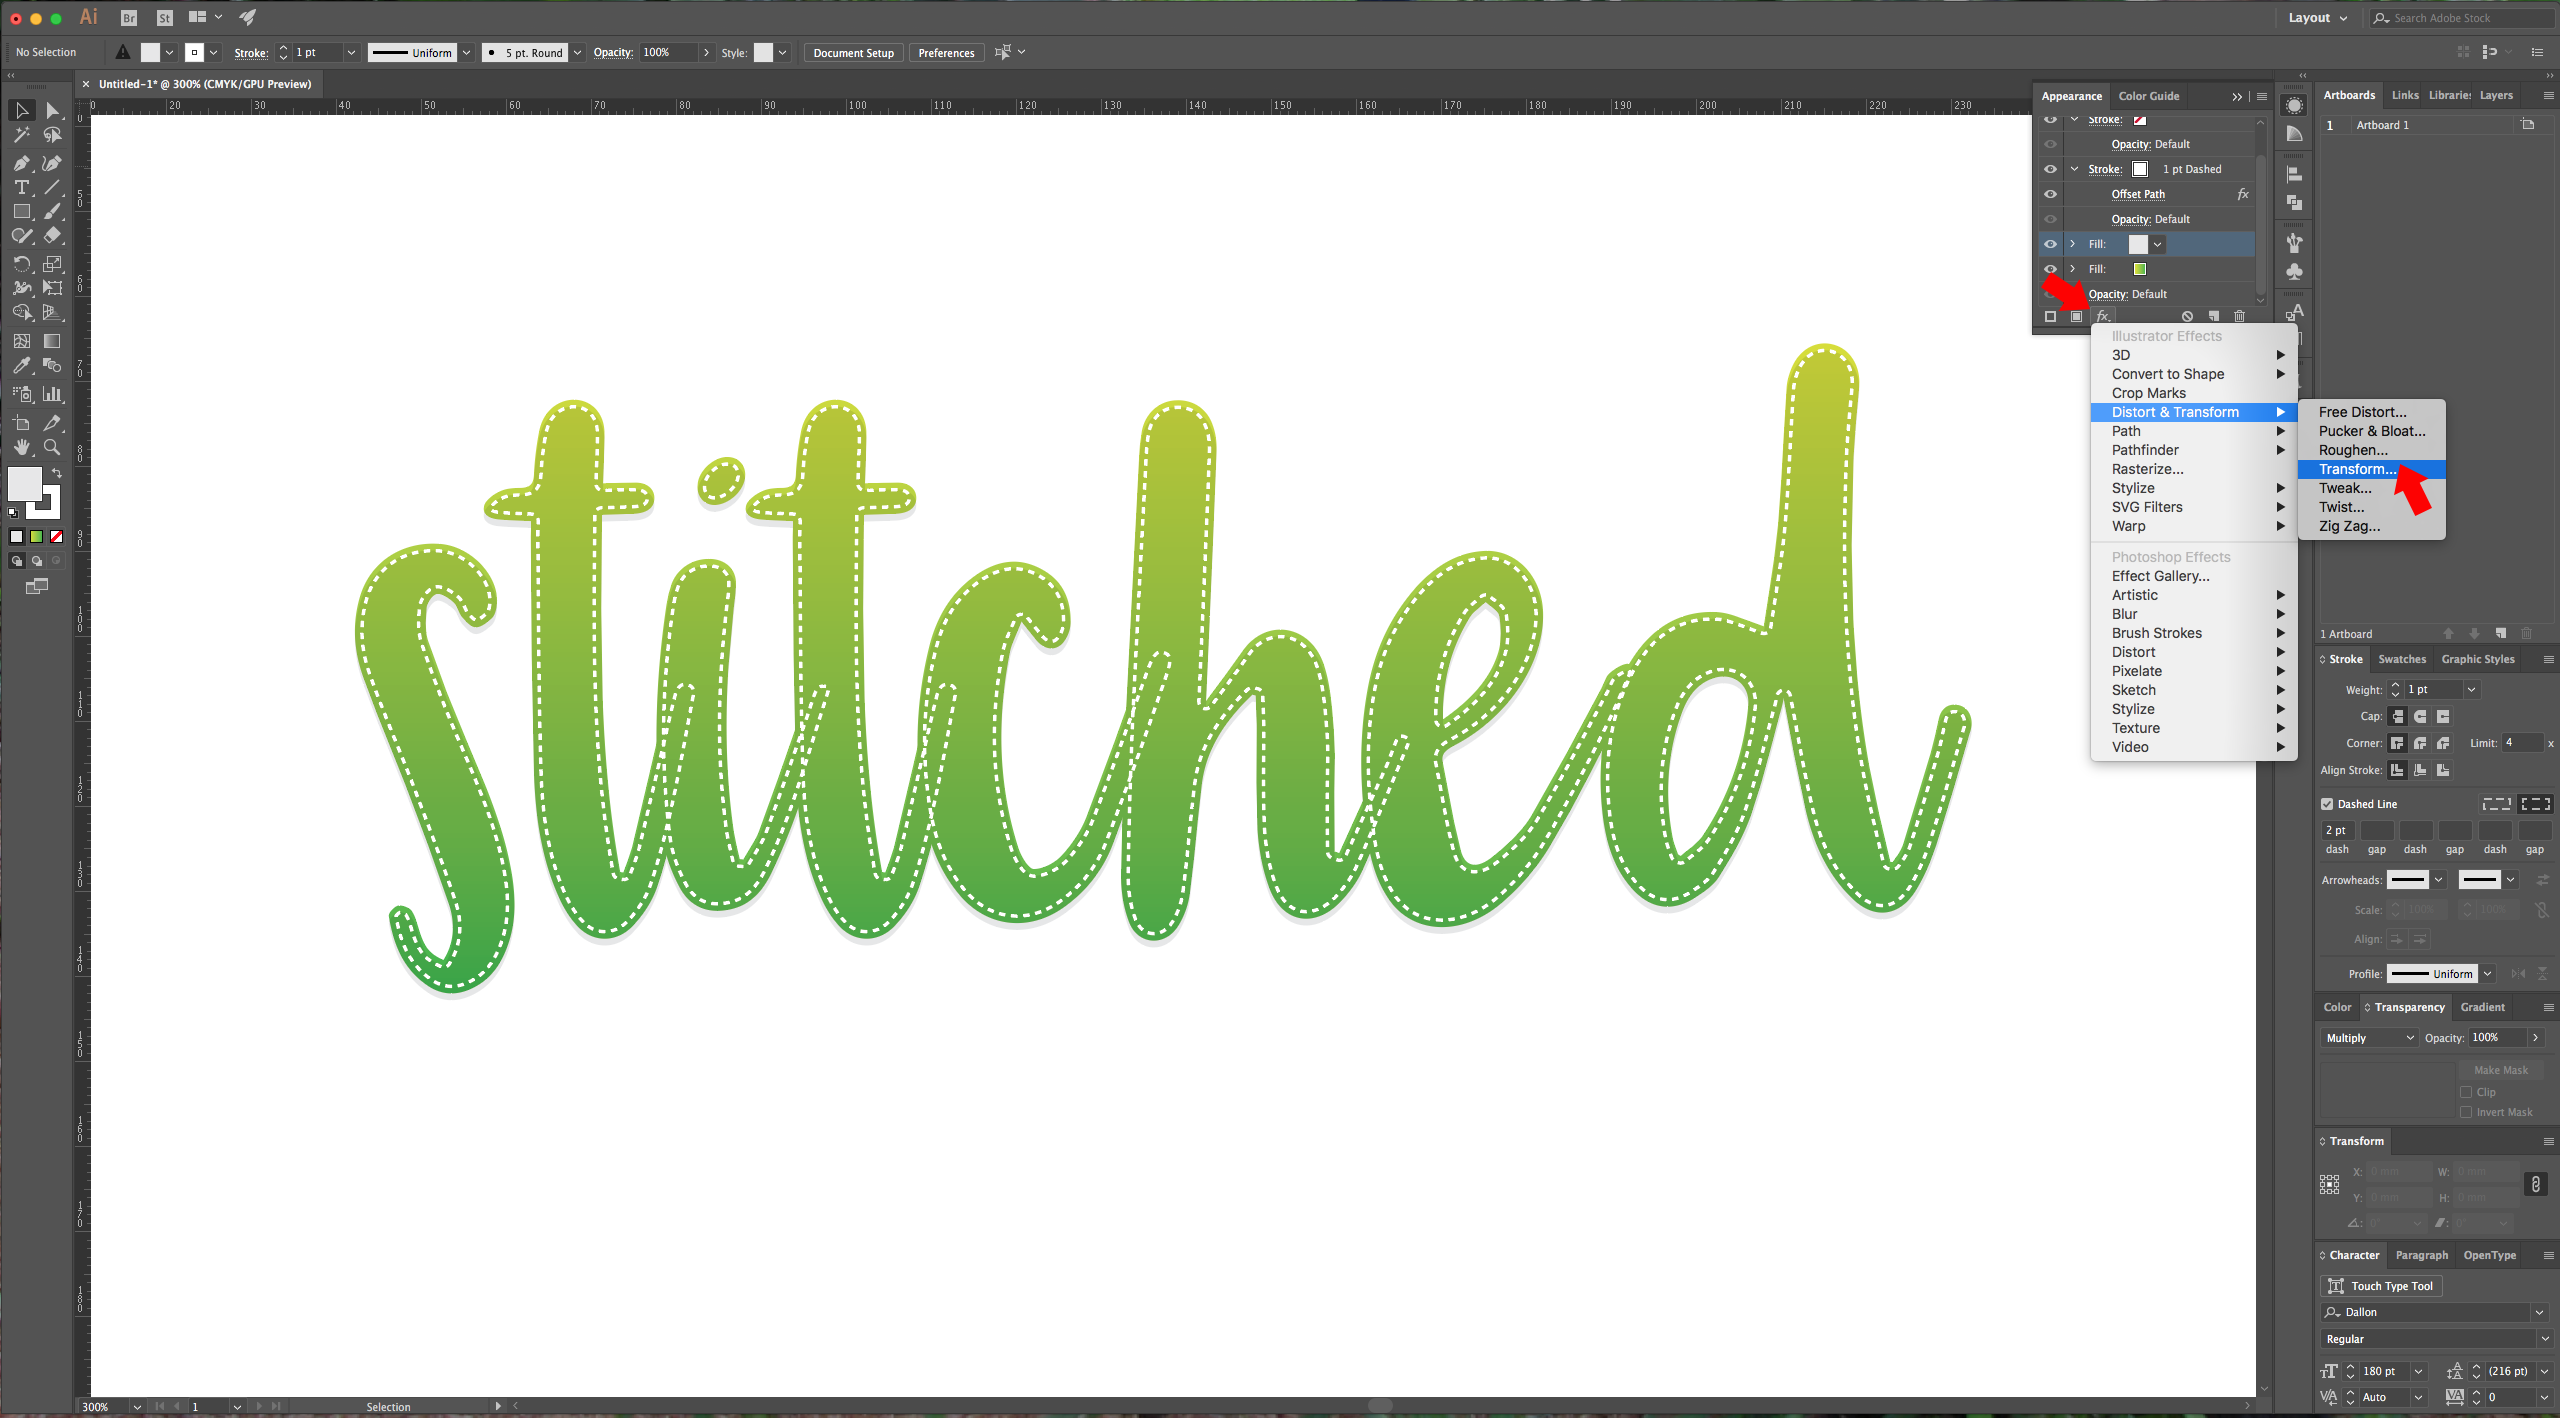
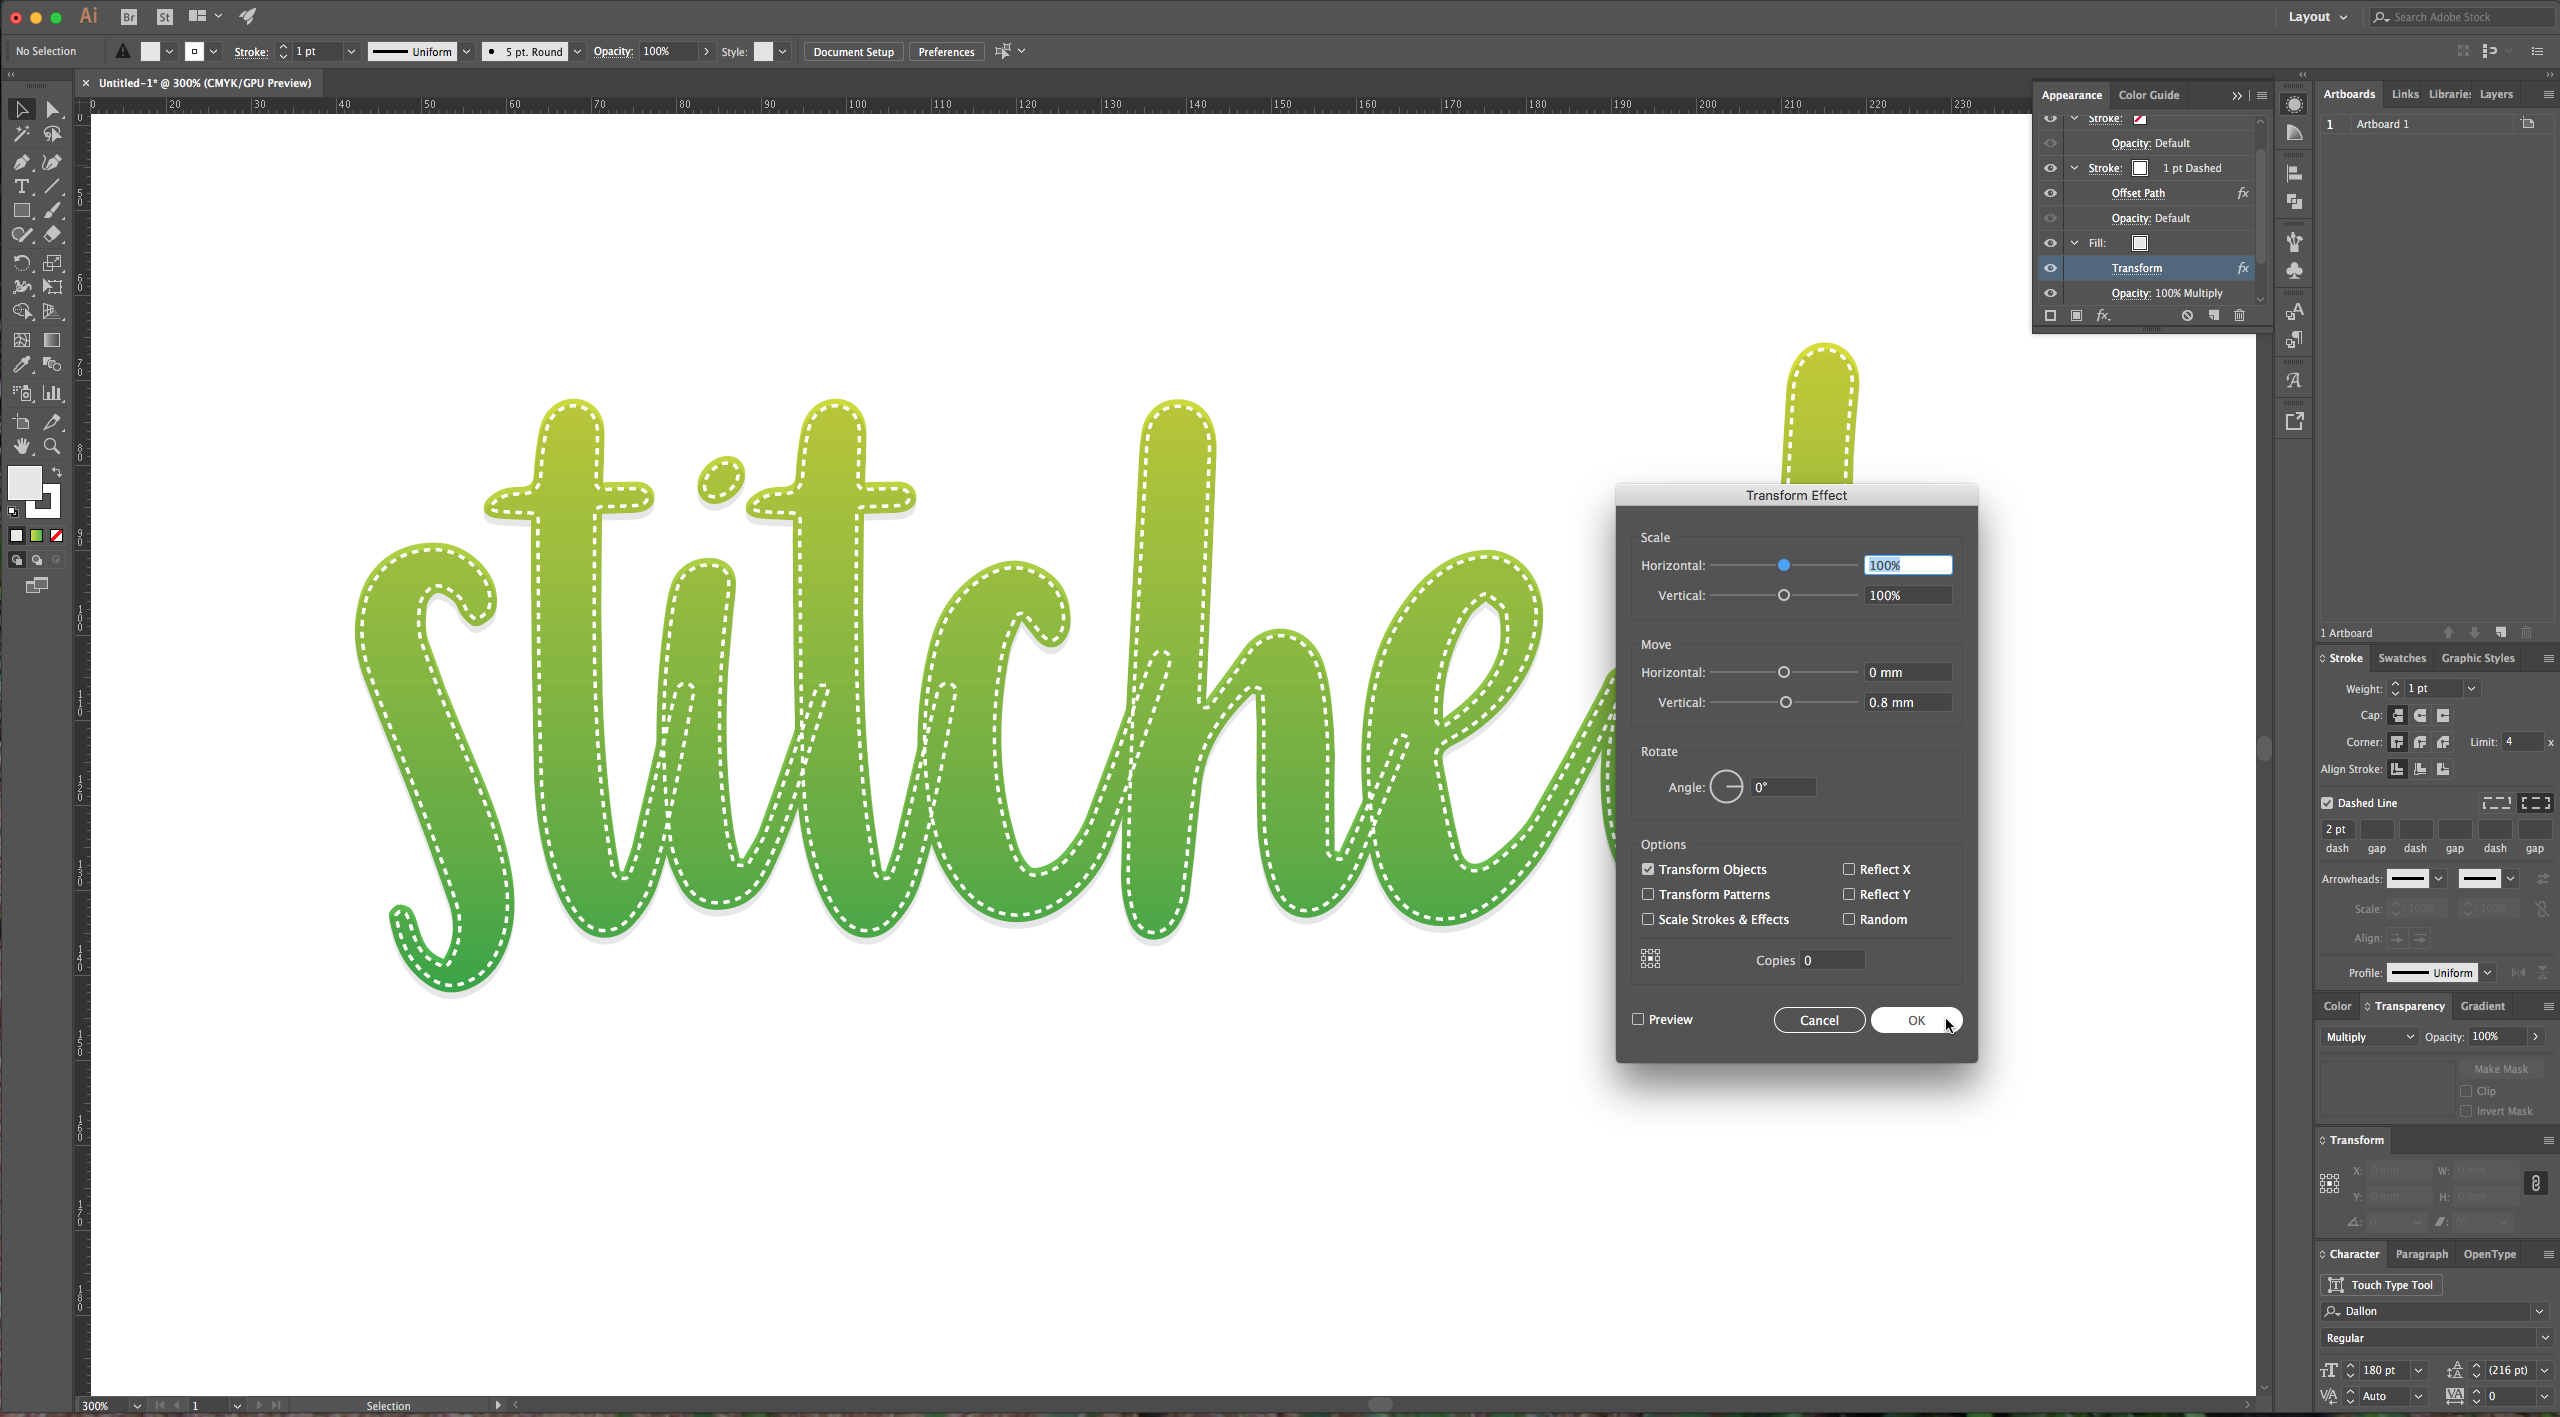
7 – Go to Effect > Distort & Transform > Transform, and change the “Vertical Move” to 0.8 mm.
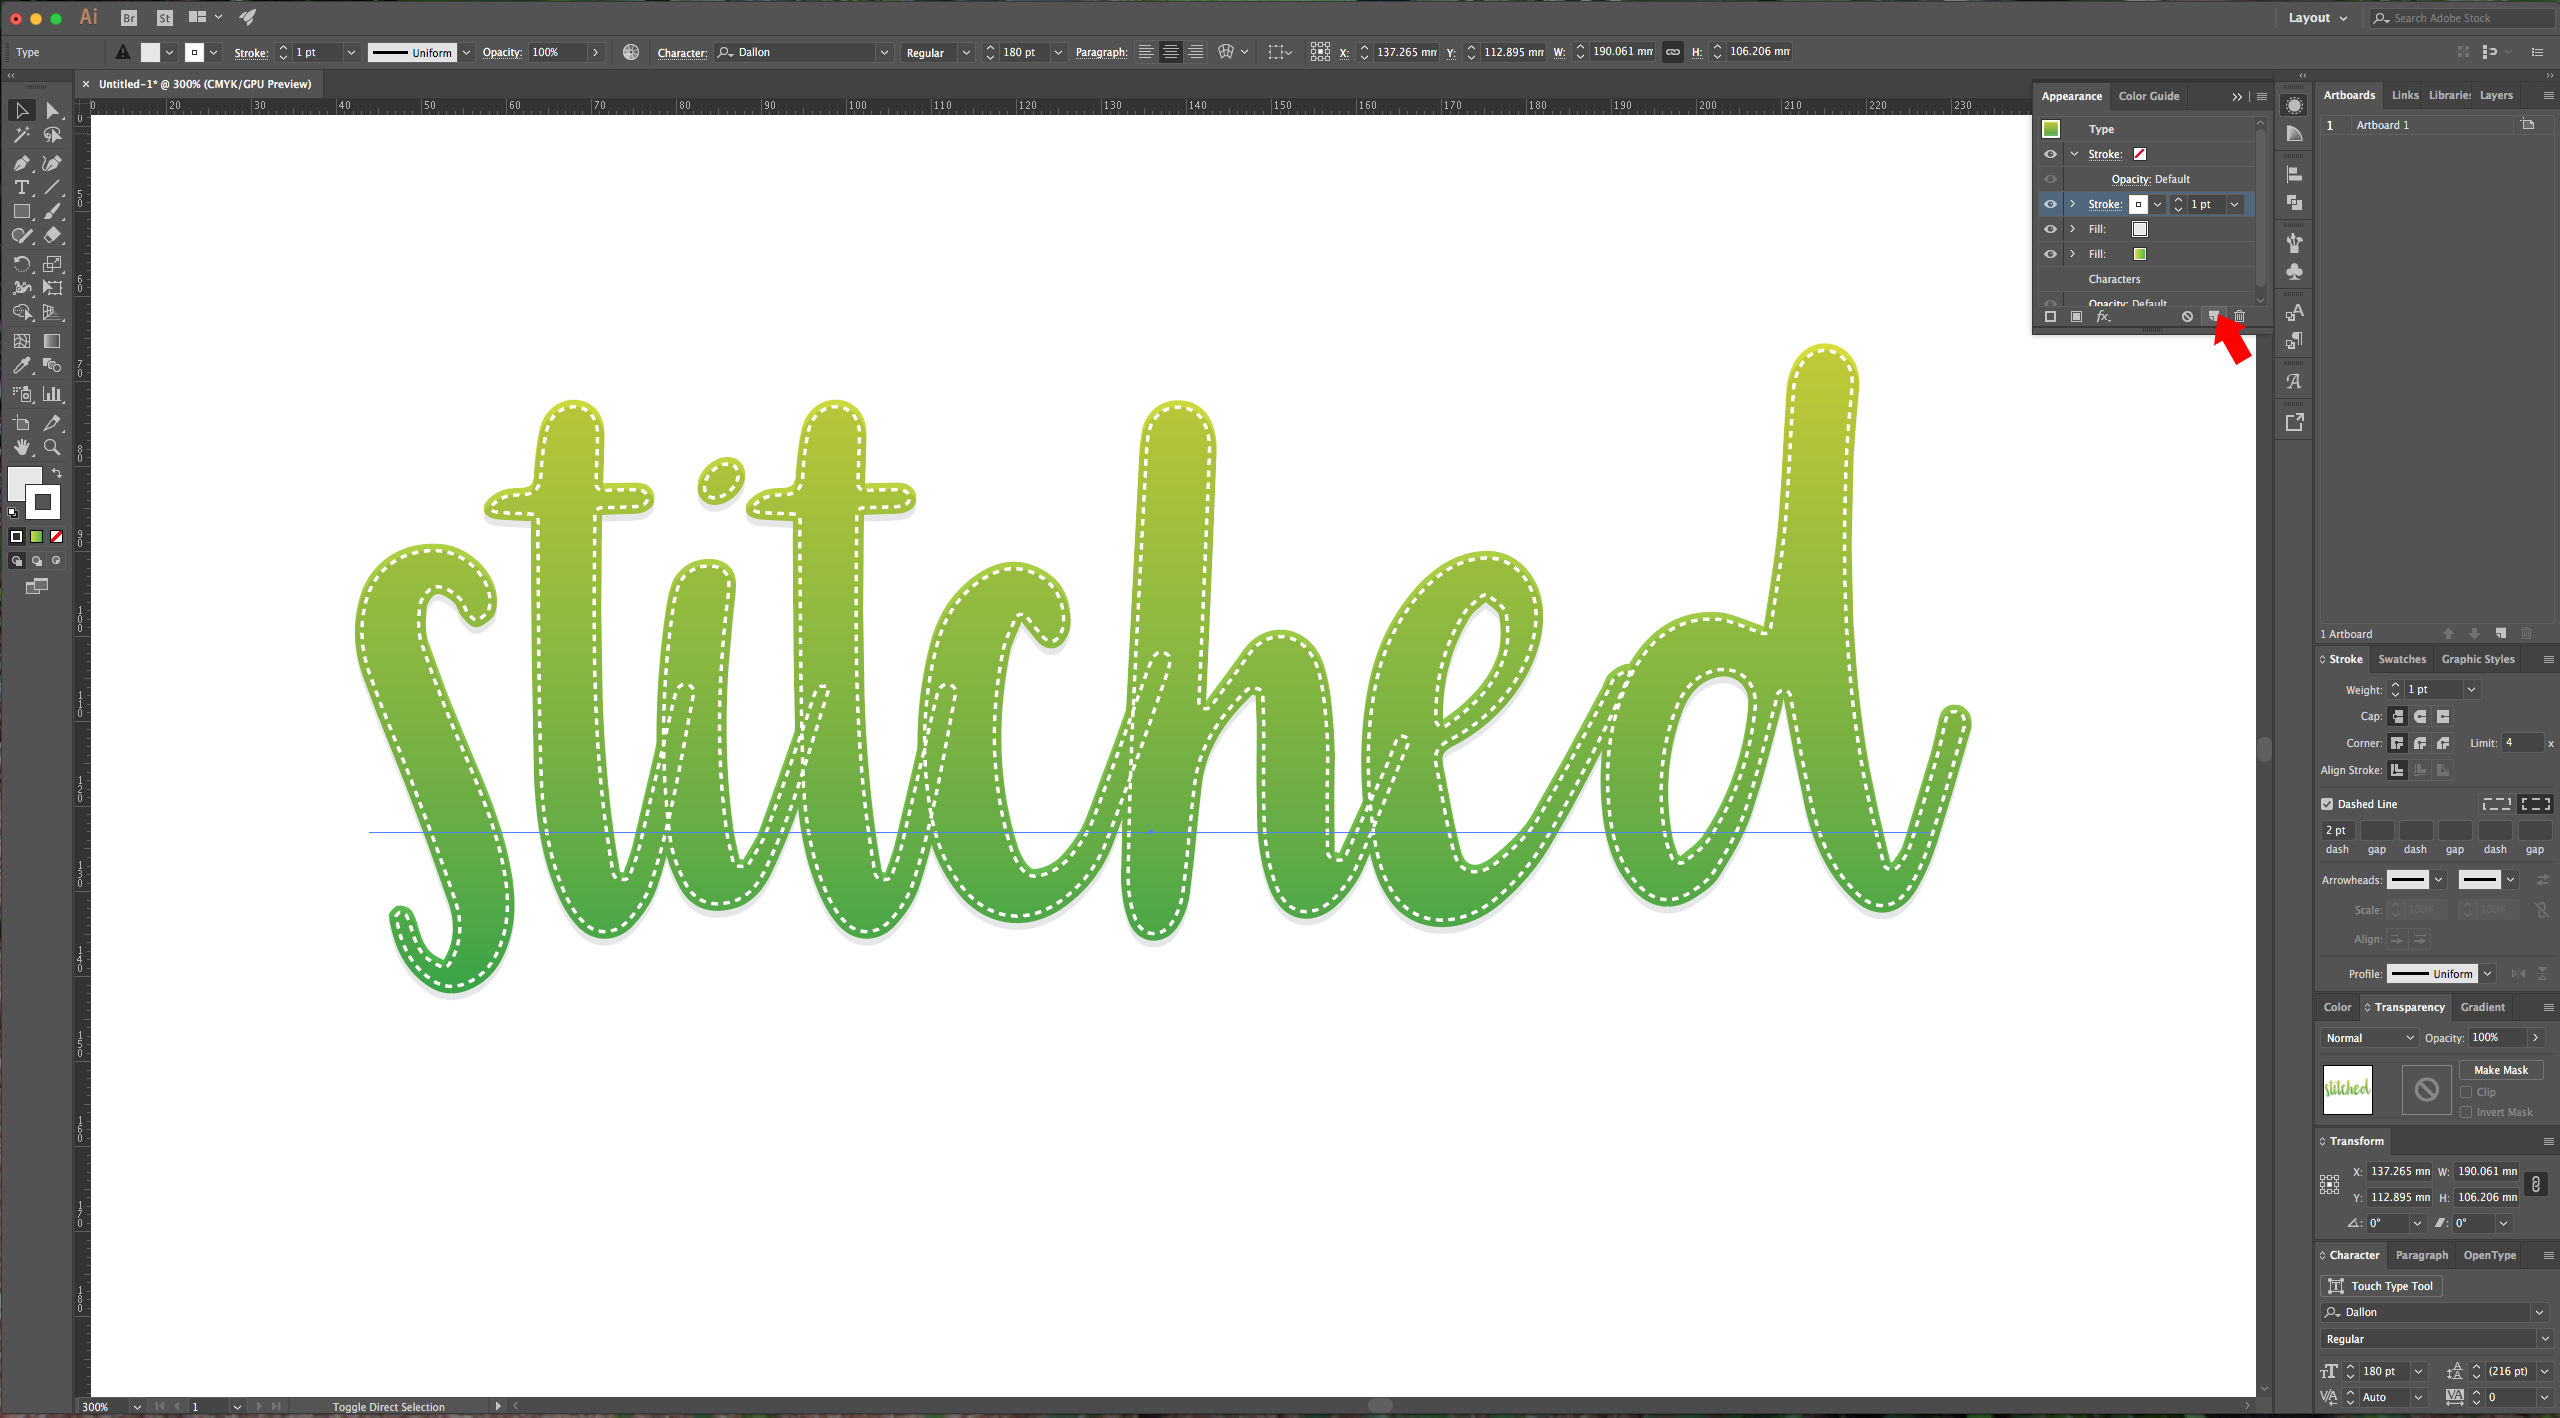
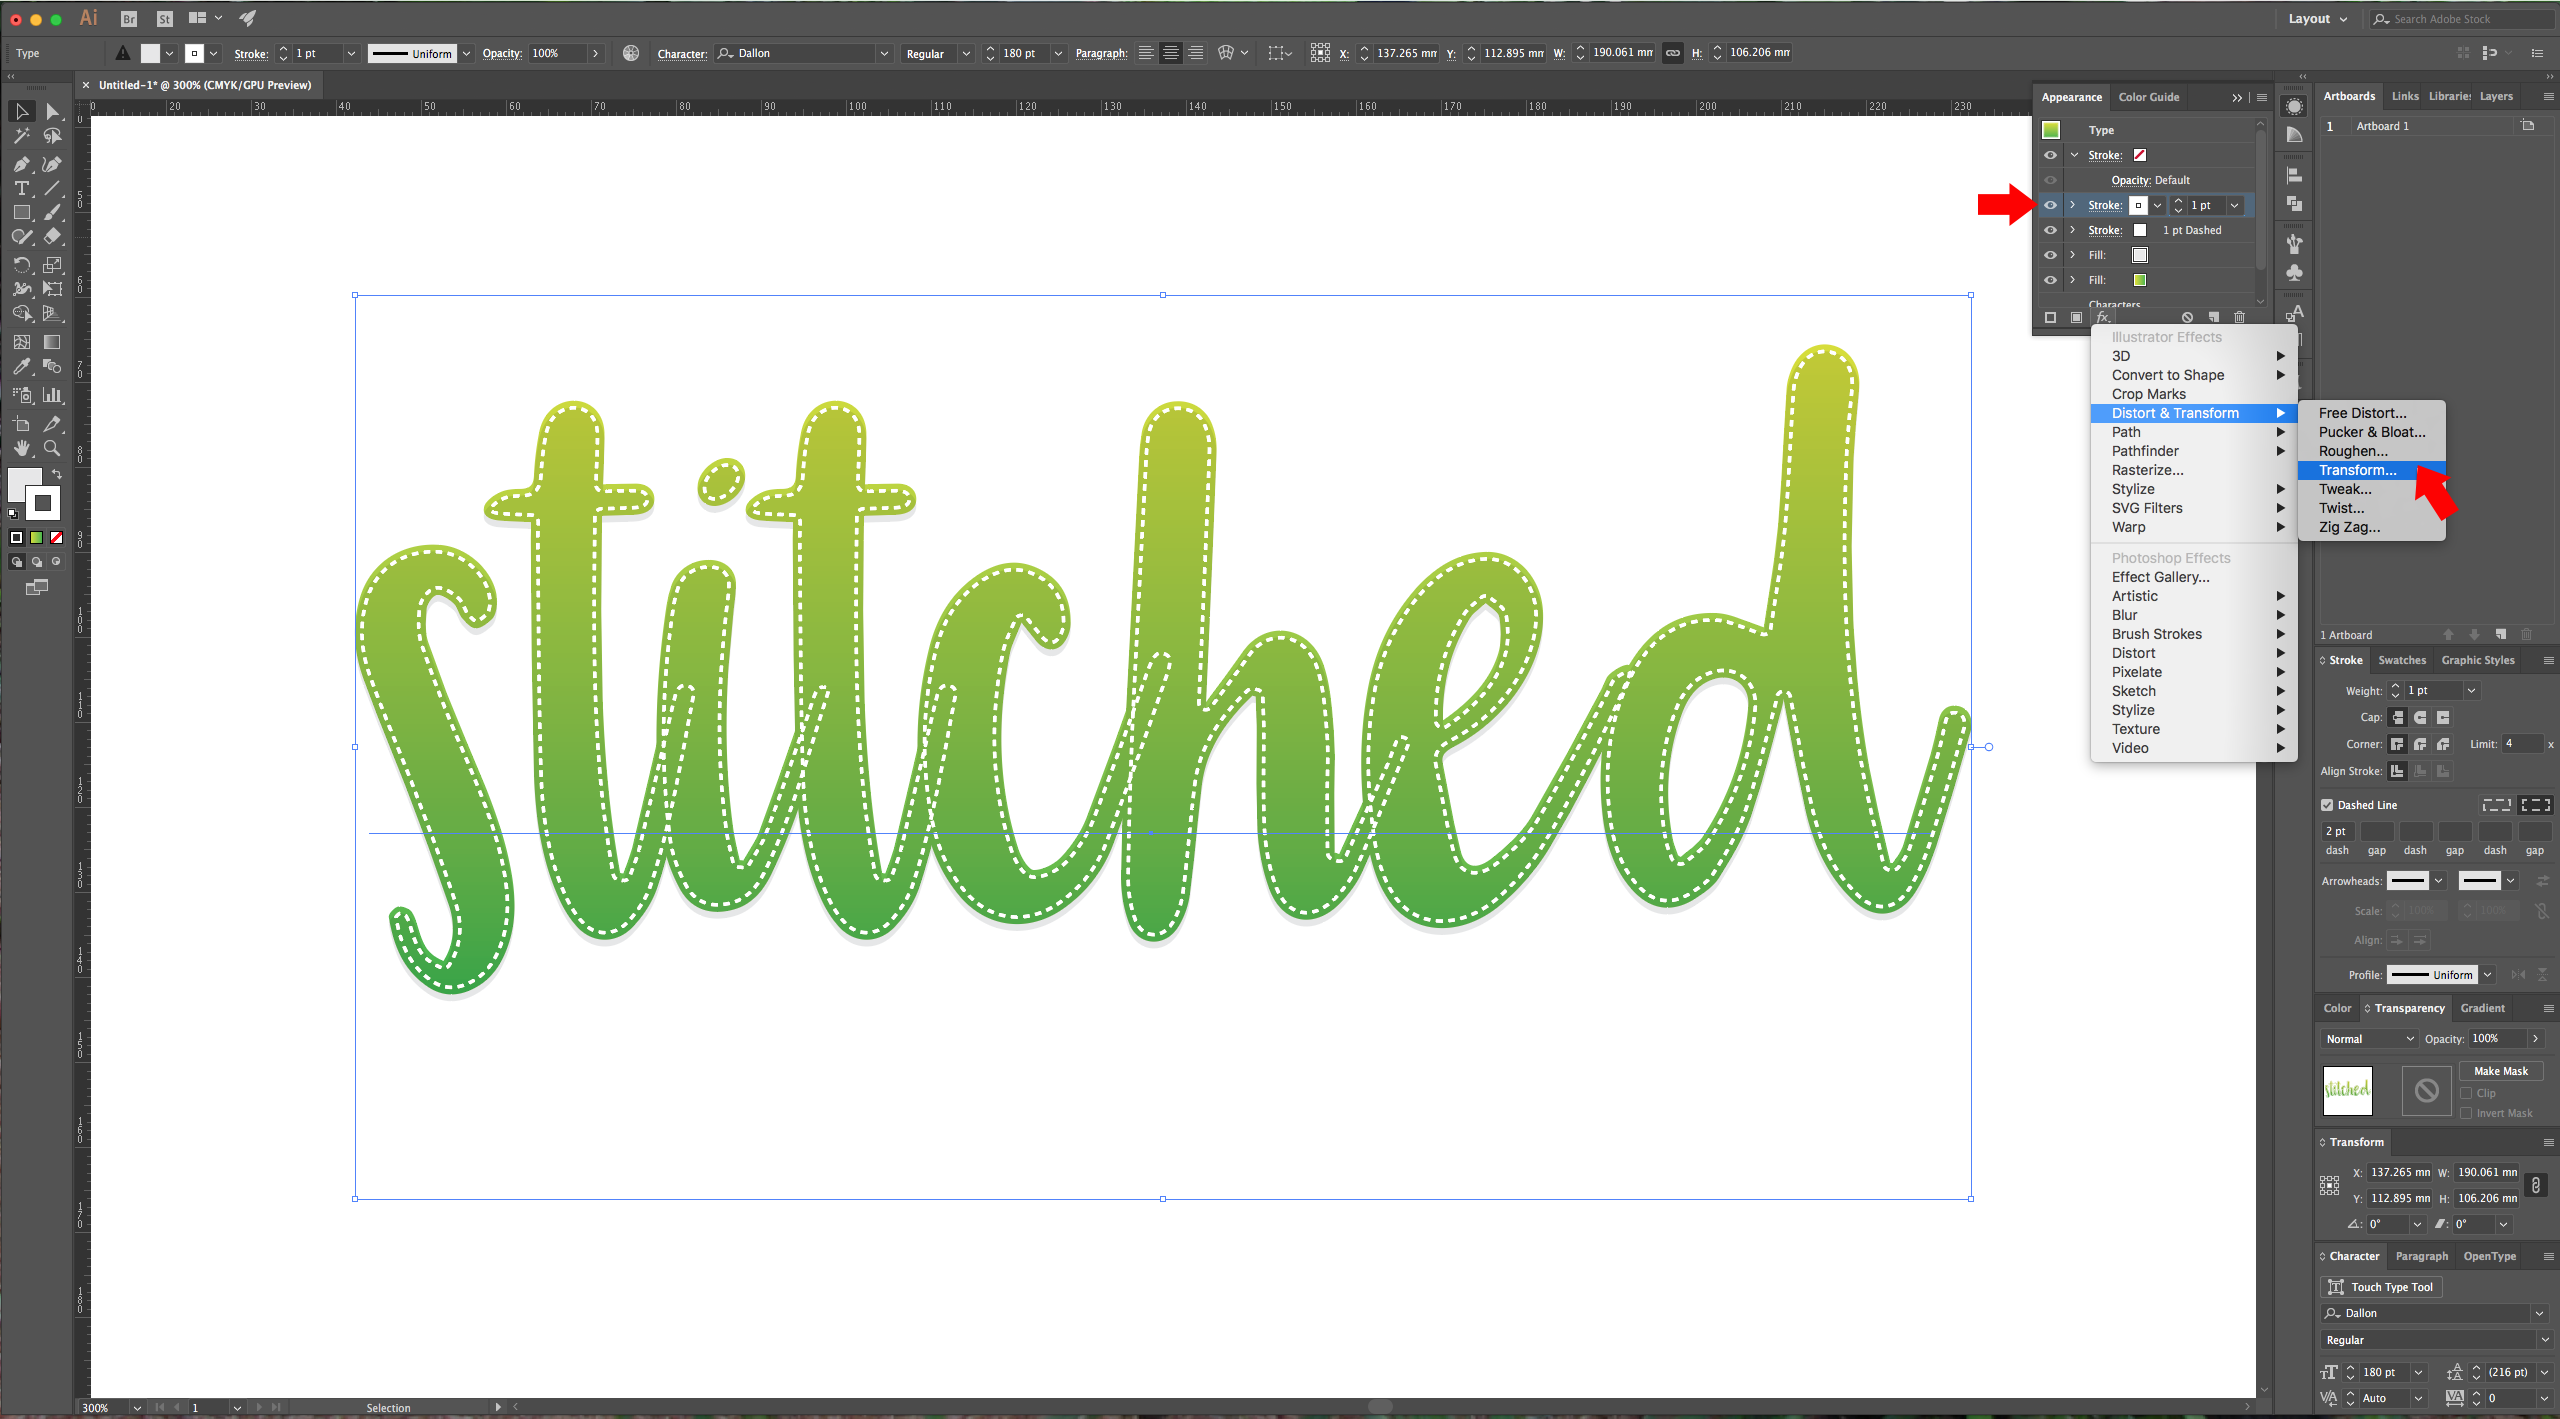
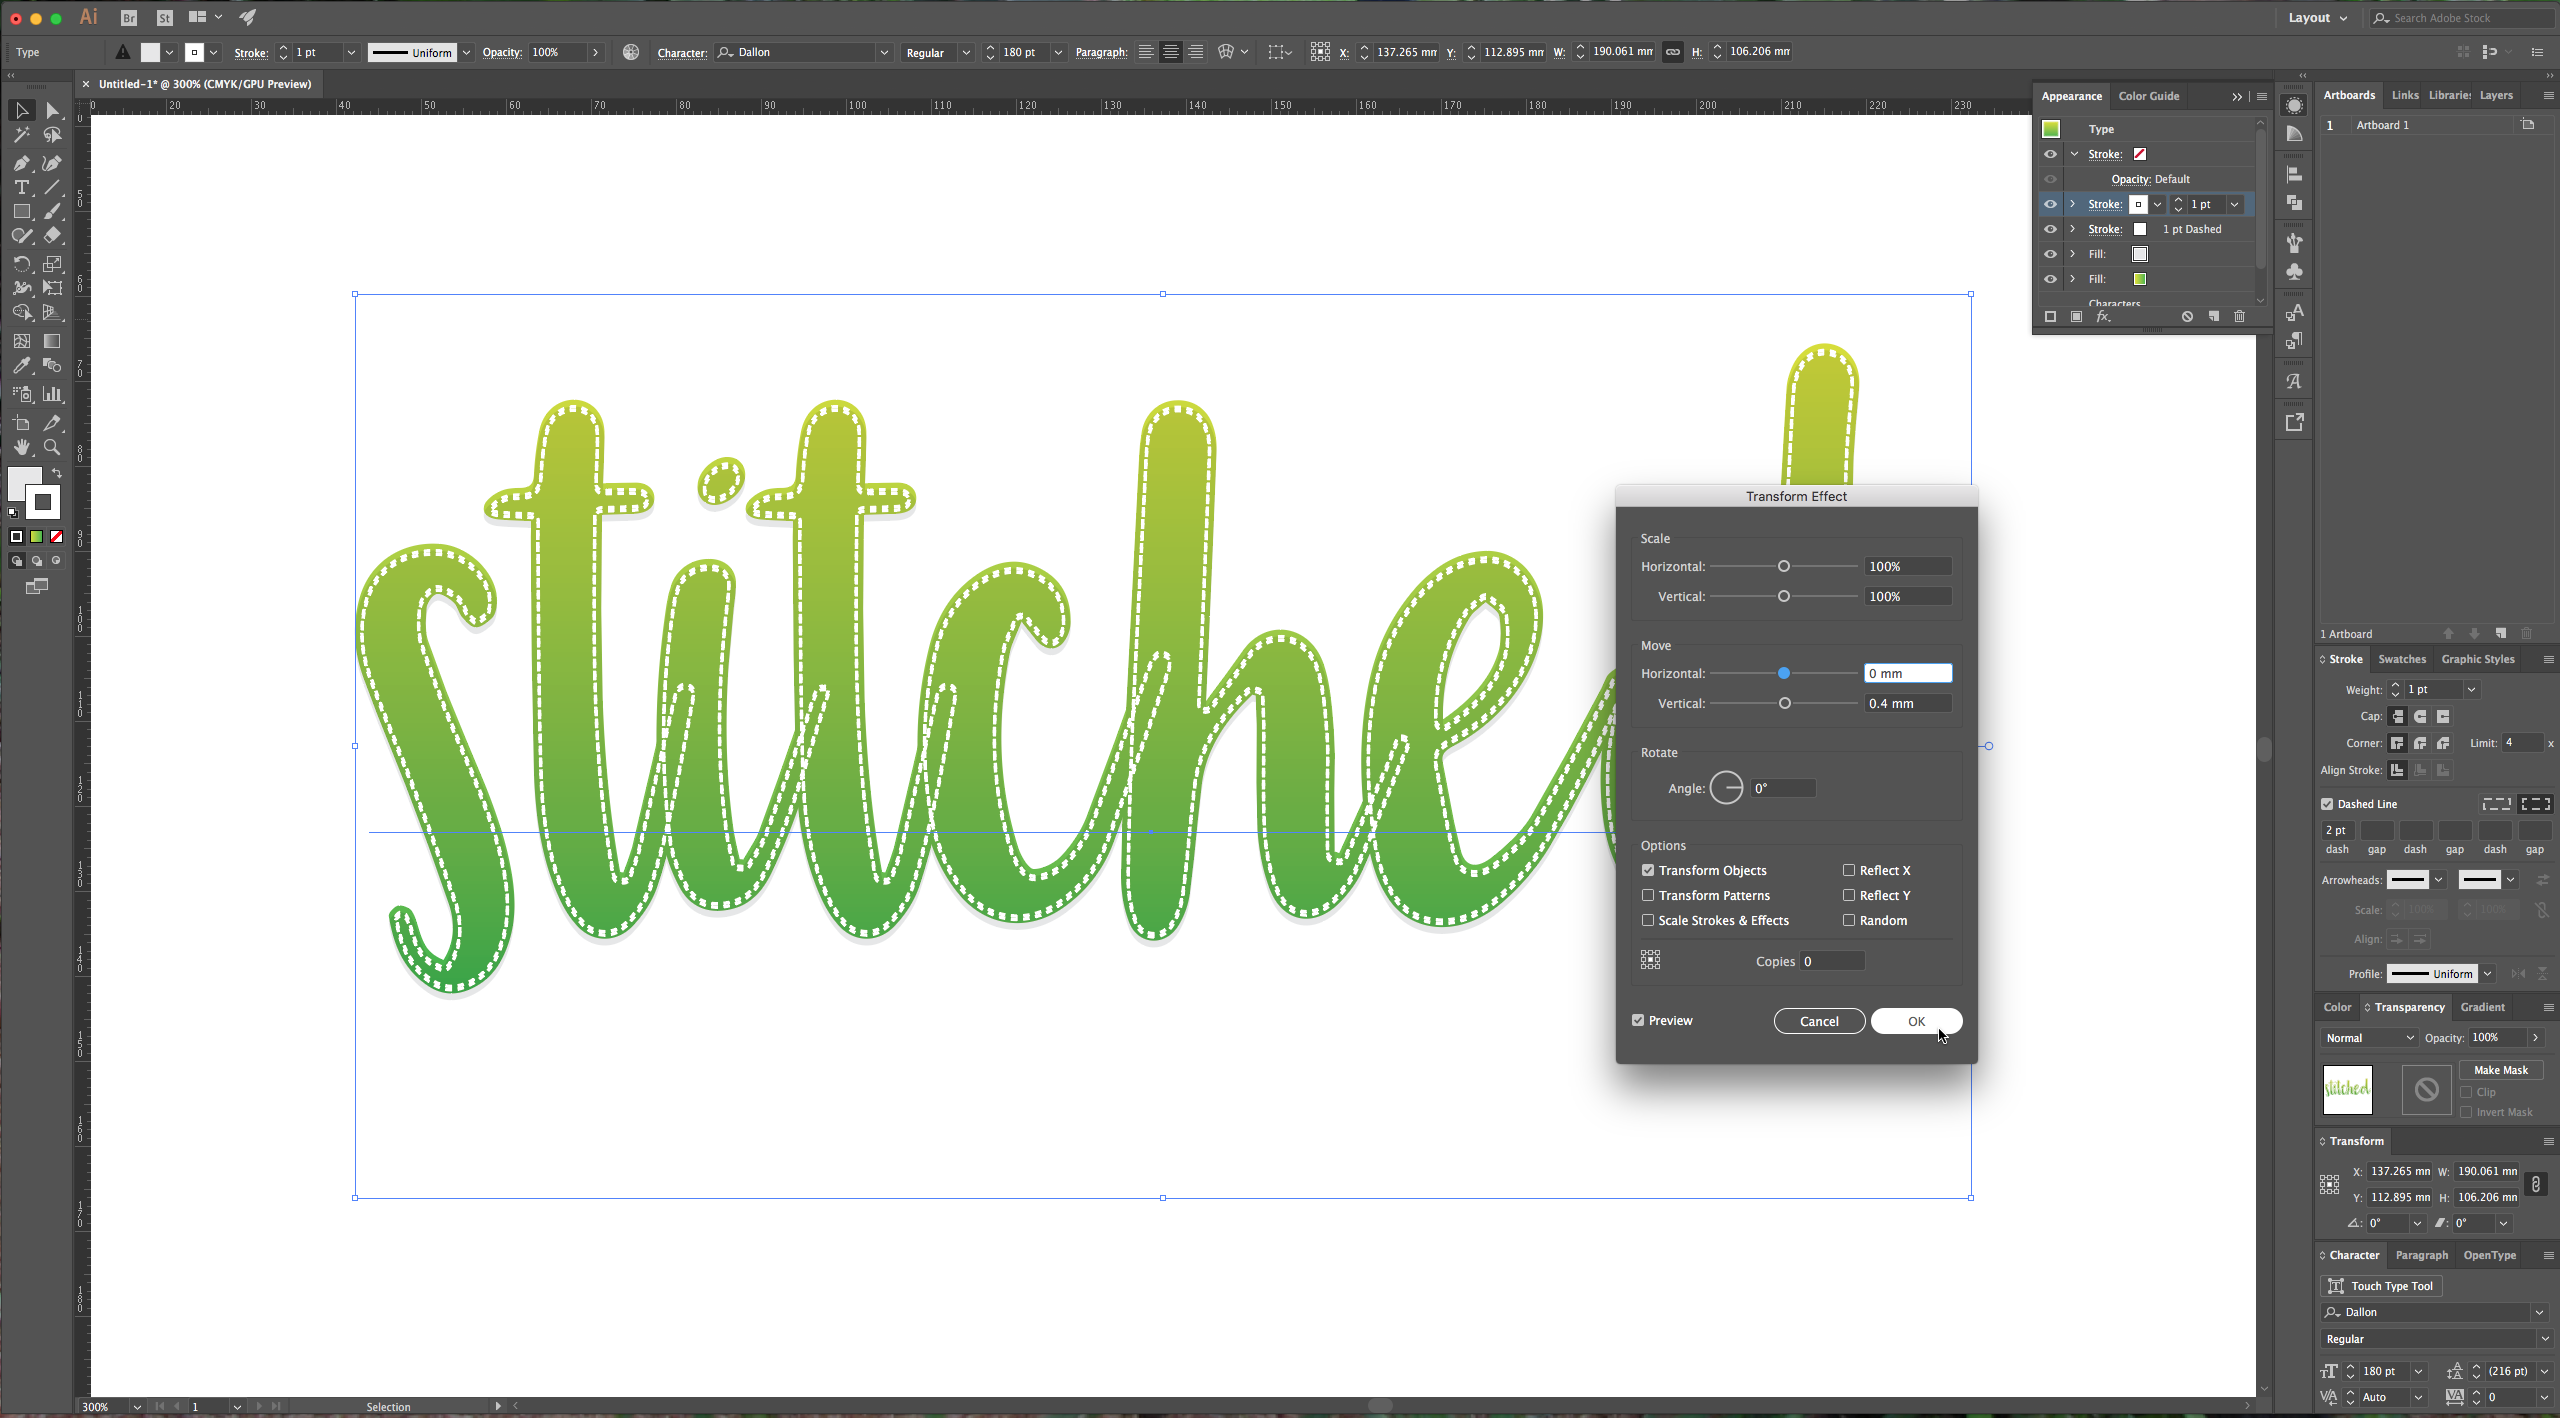
8 – Select your “Stroke” in the “Appearance” Panel and click the “Duplicate” button at the bottom of the Panel. with the duplicate selected go to Effect > Distort & Transform > Transform and use a “Vertical Move” value of 0.8 mm, change its color to a medium gray and set the “Blending Mode” to “Multiply”.
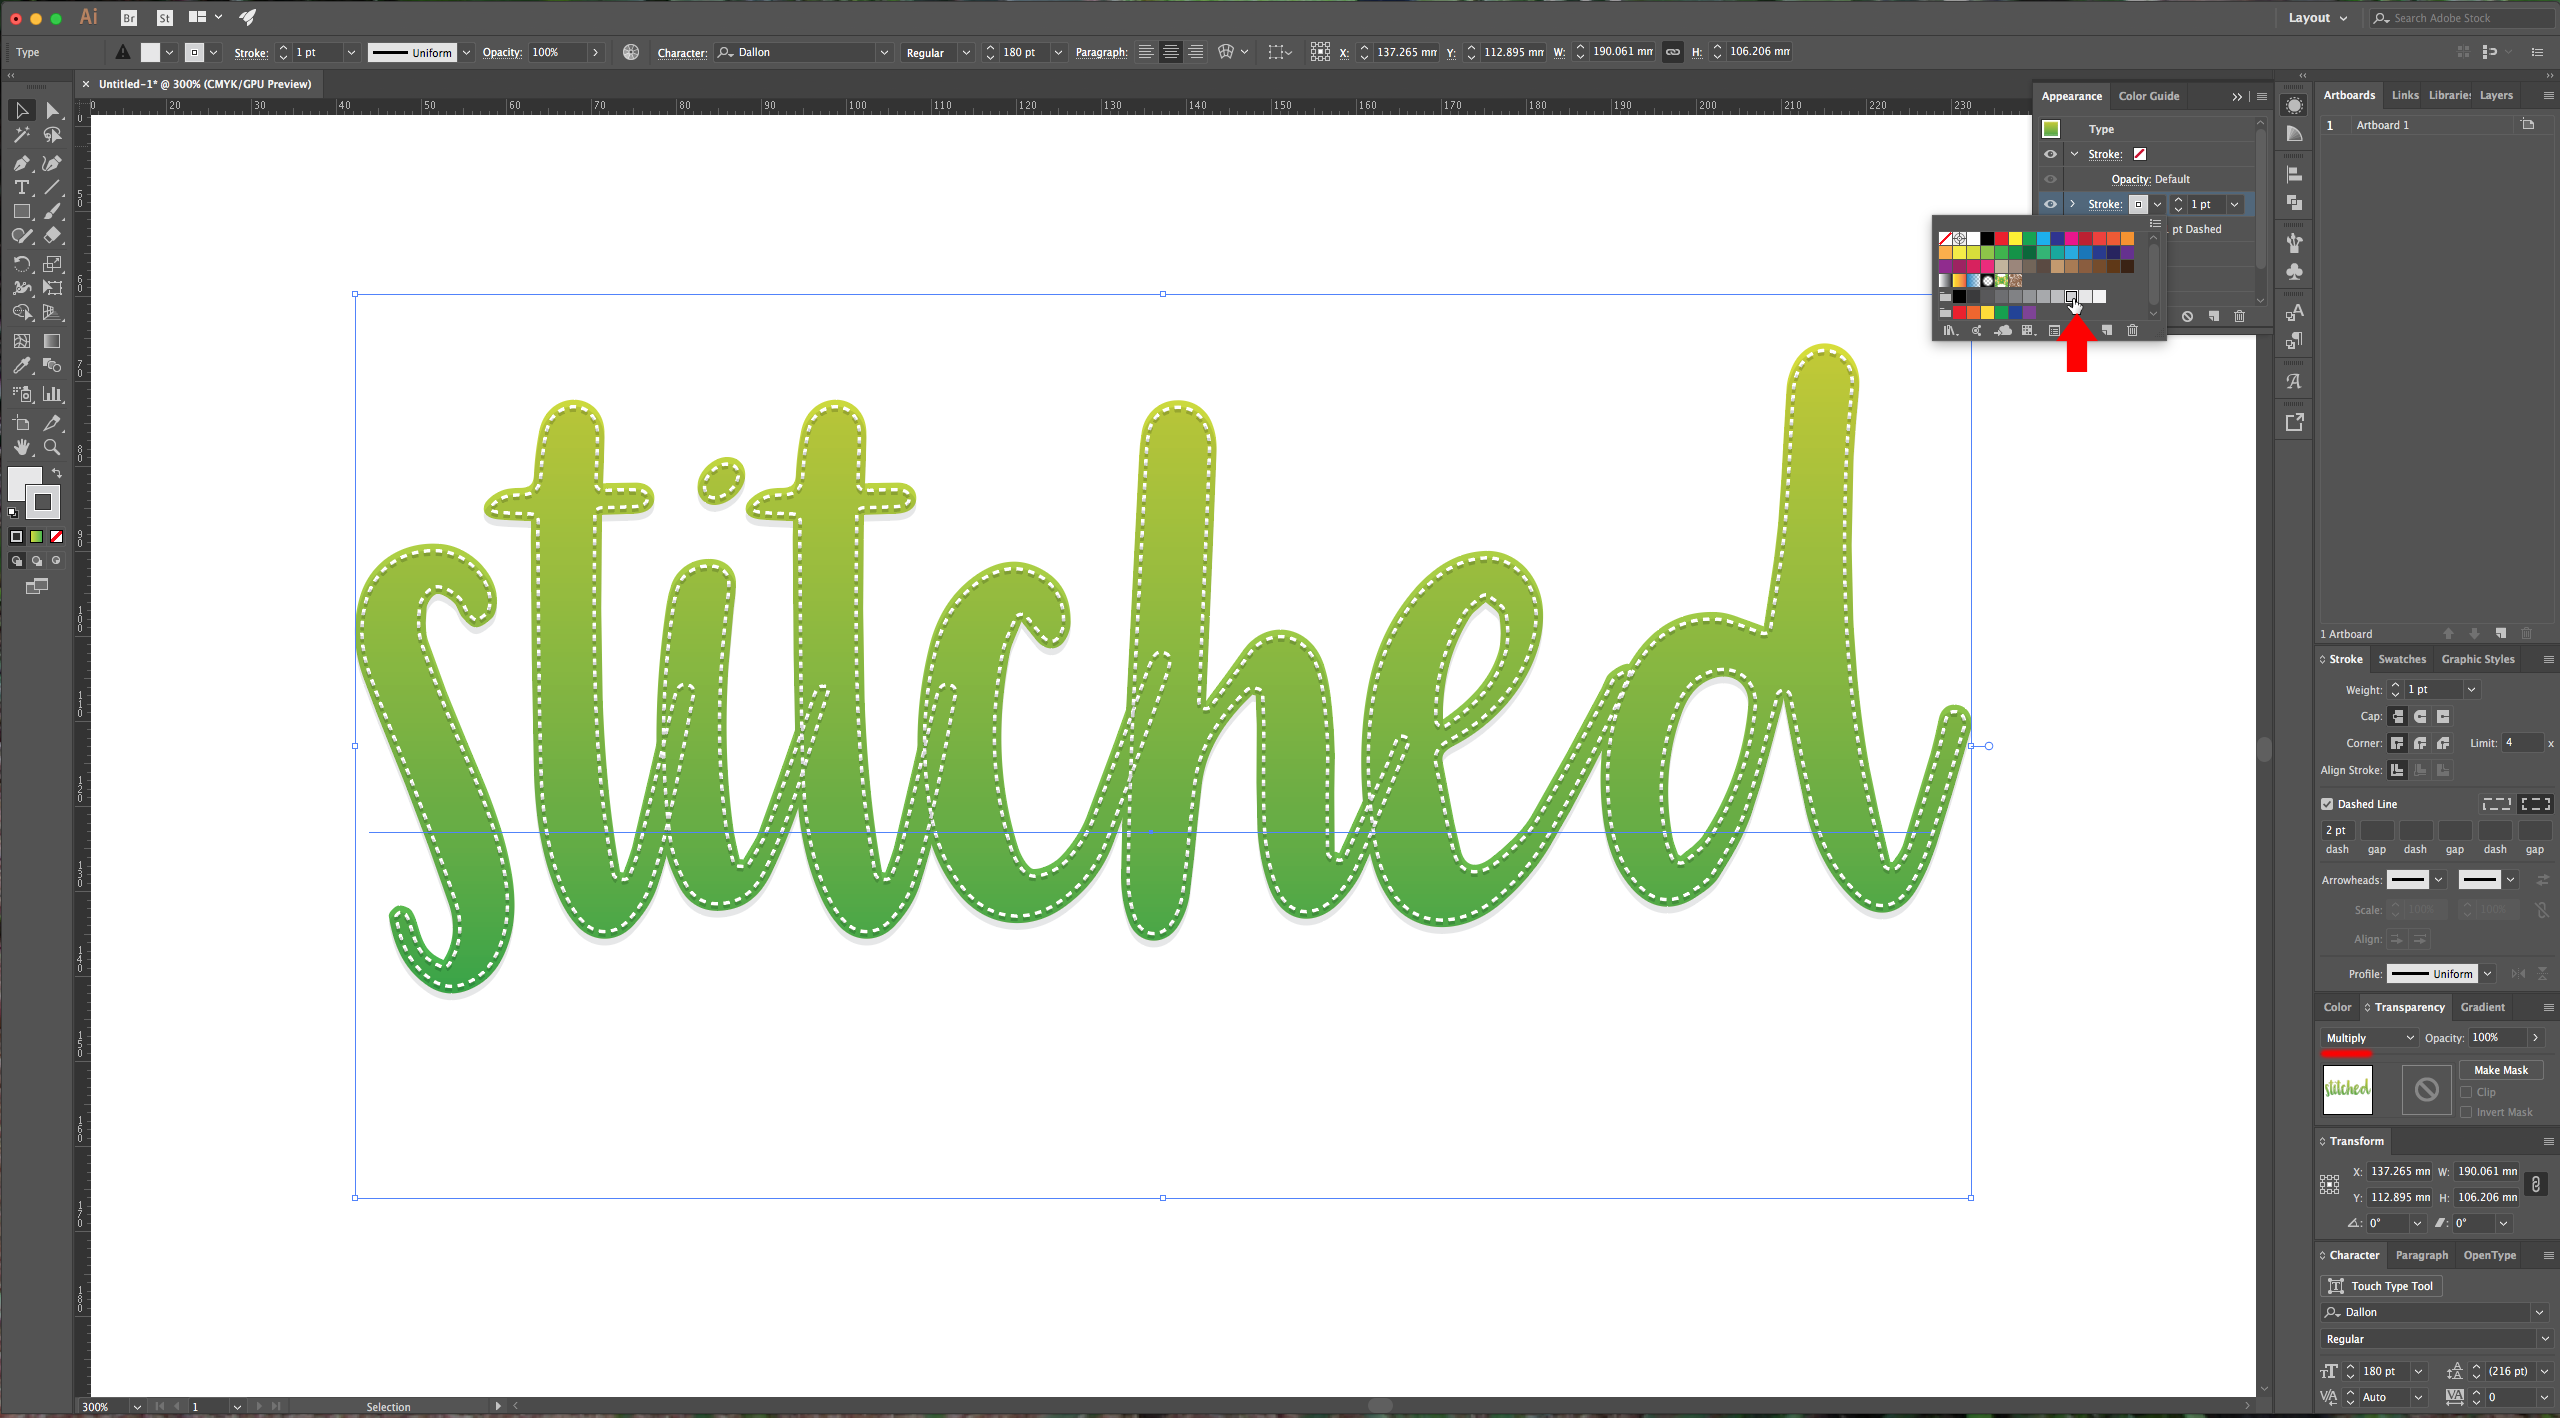
9 – With these settings you can change the font and/or the colors used and maintain the “Stitched” effect. You can even apply it to vector objects.
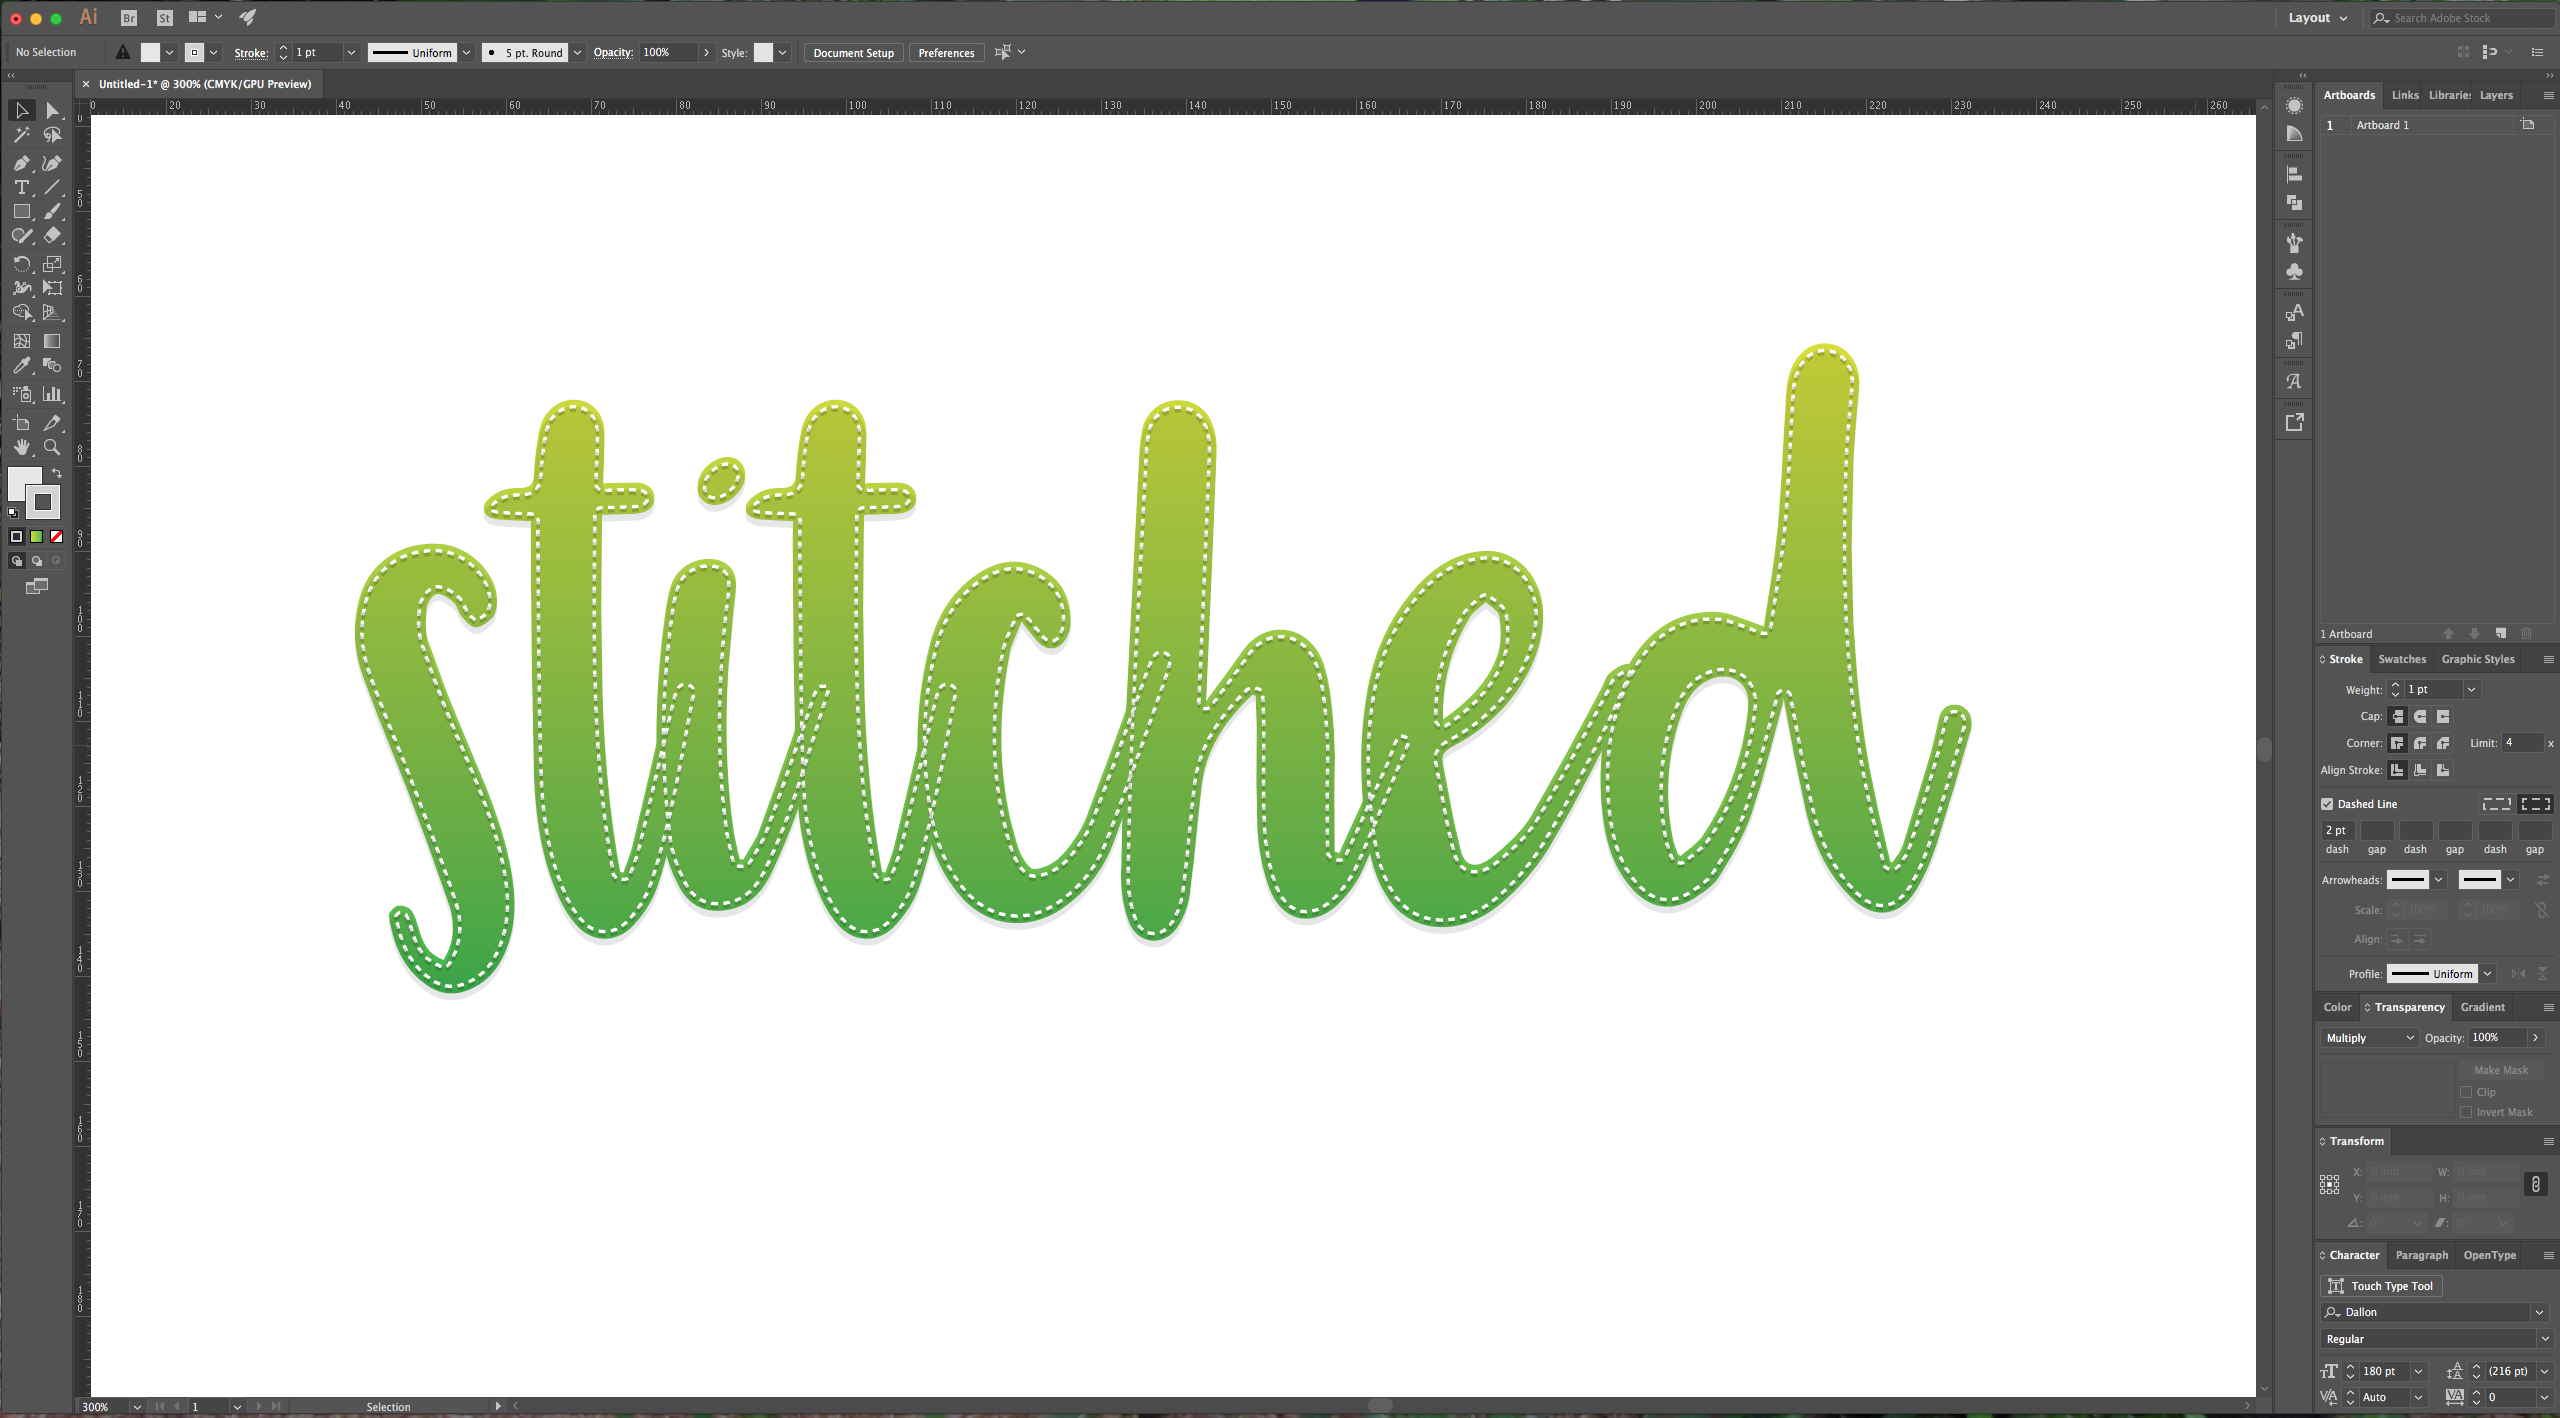
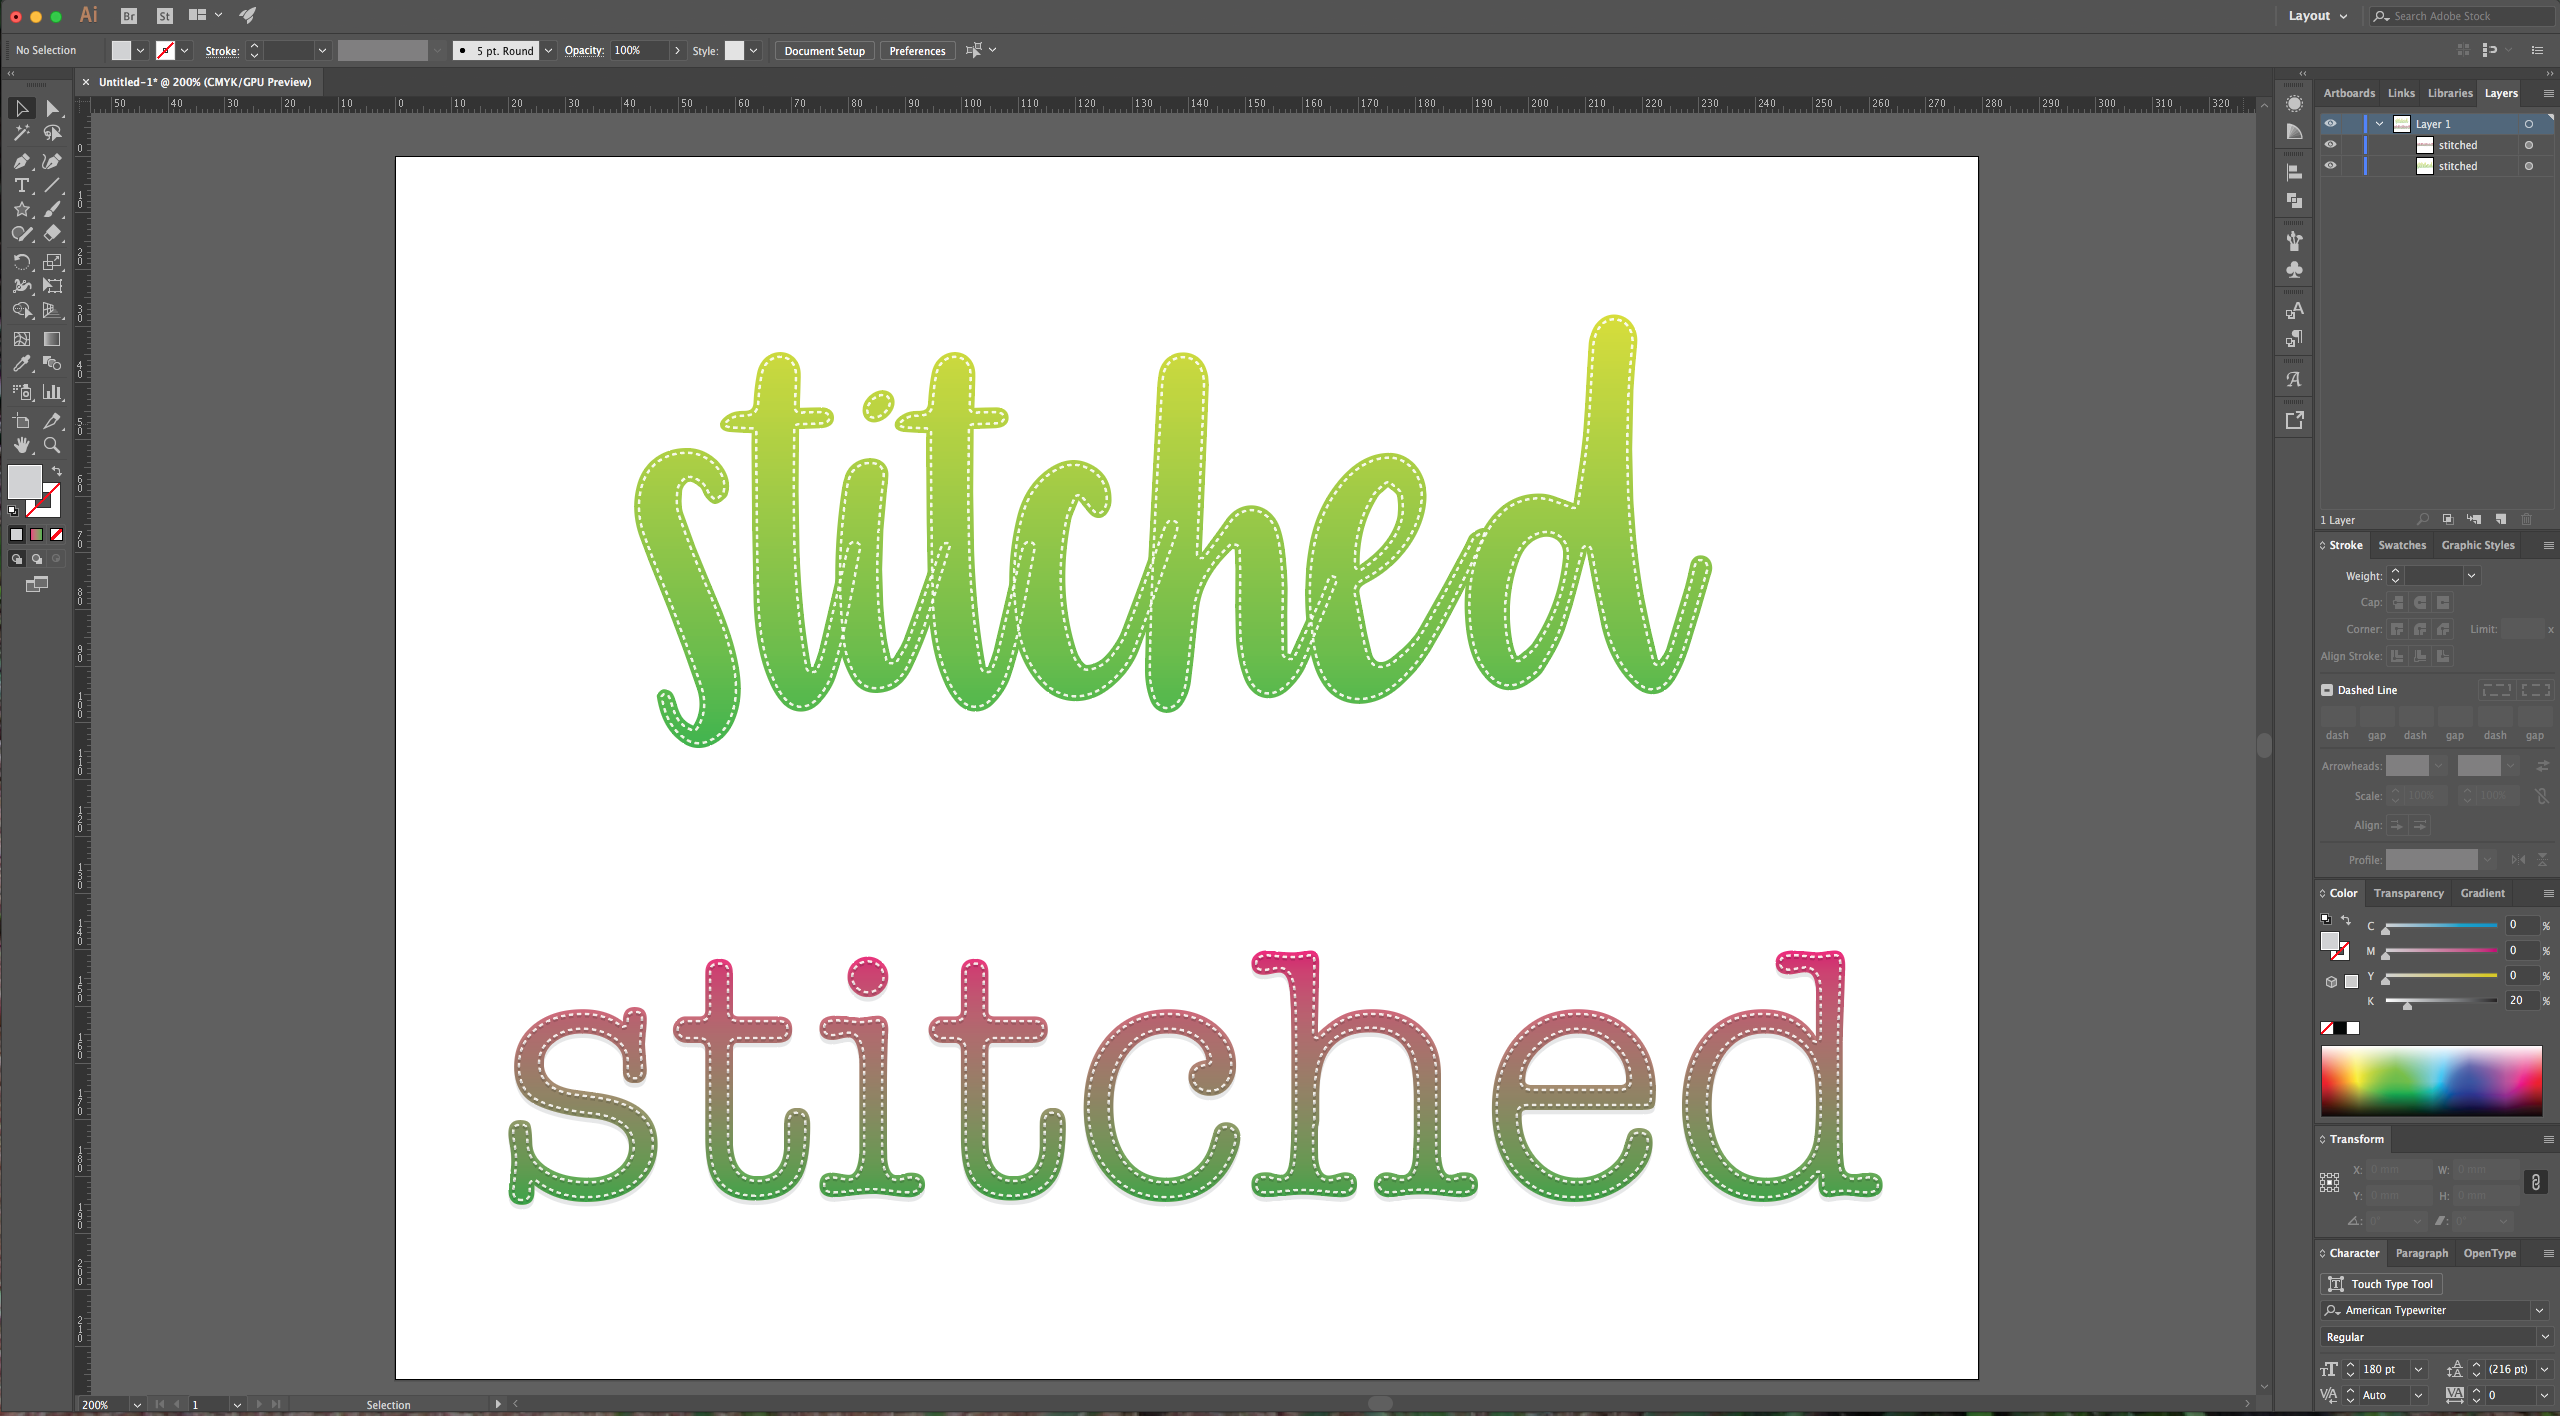
10 – To copy the “Attributes” to another object go to the “Layers” Panel and select the item you wish to copy from, then, while holding the “Alt” key drag the little grey circle to the right of your thumbnail onto the circle of the object you want to copy to. This will give it the same “Attributes”.
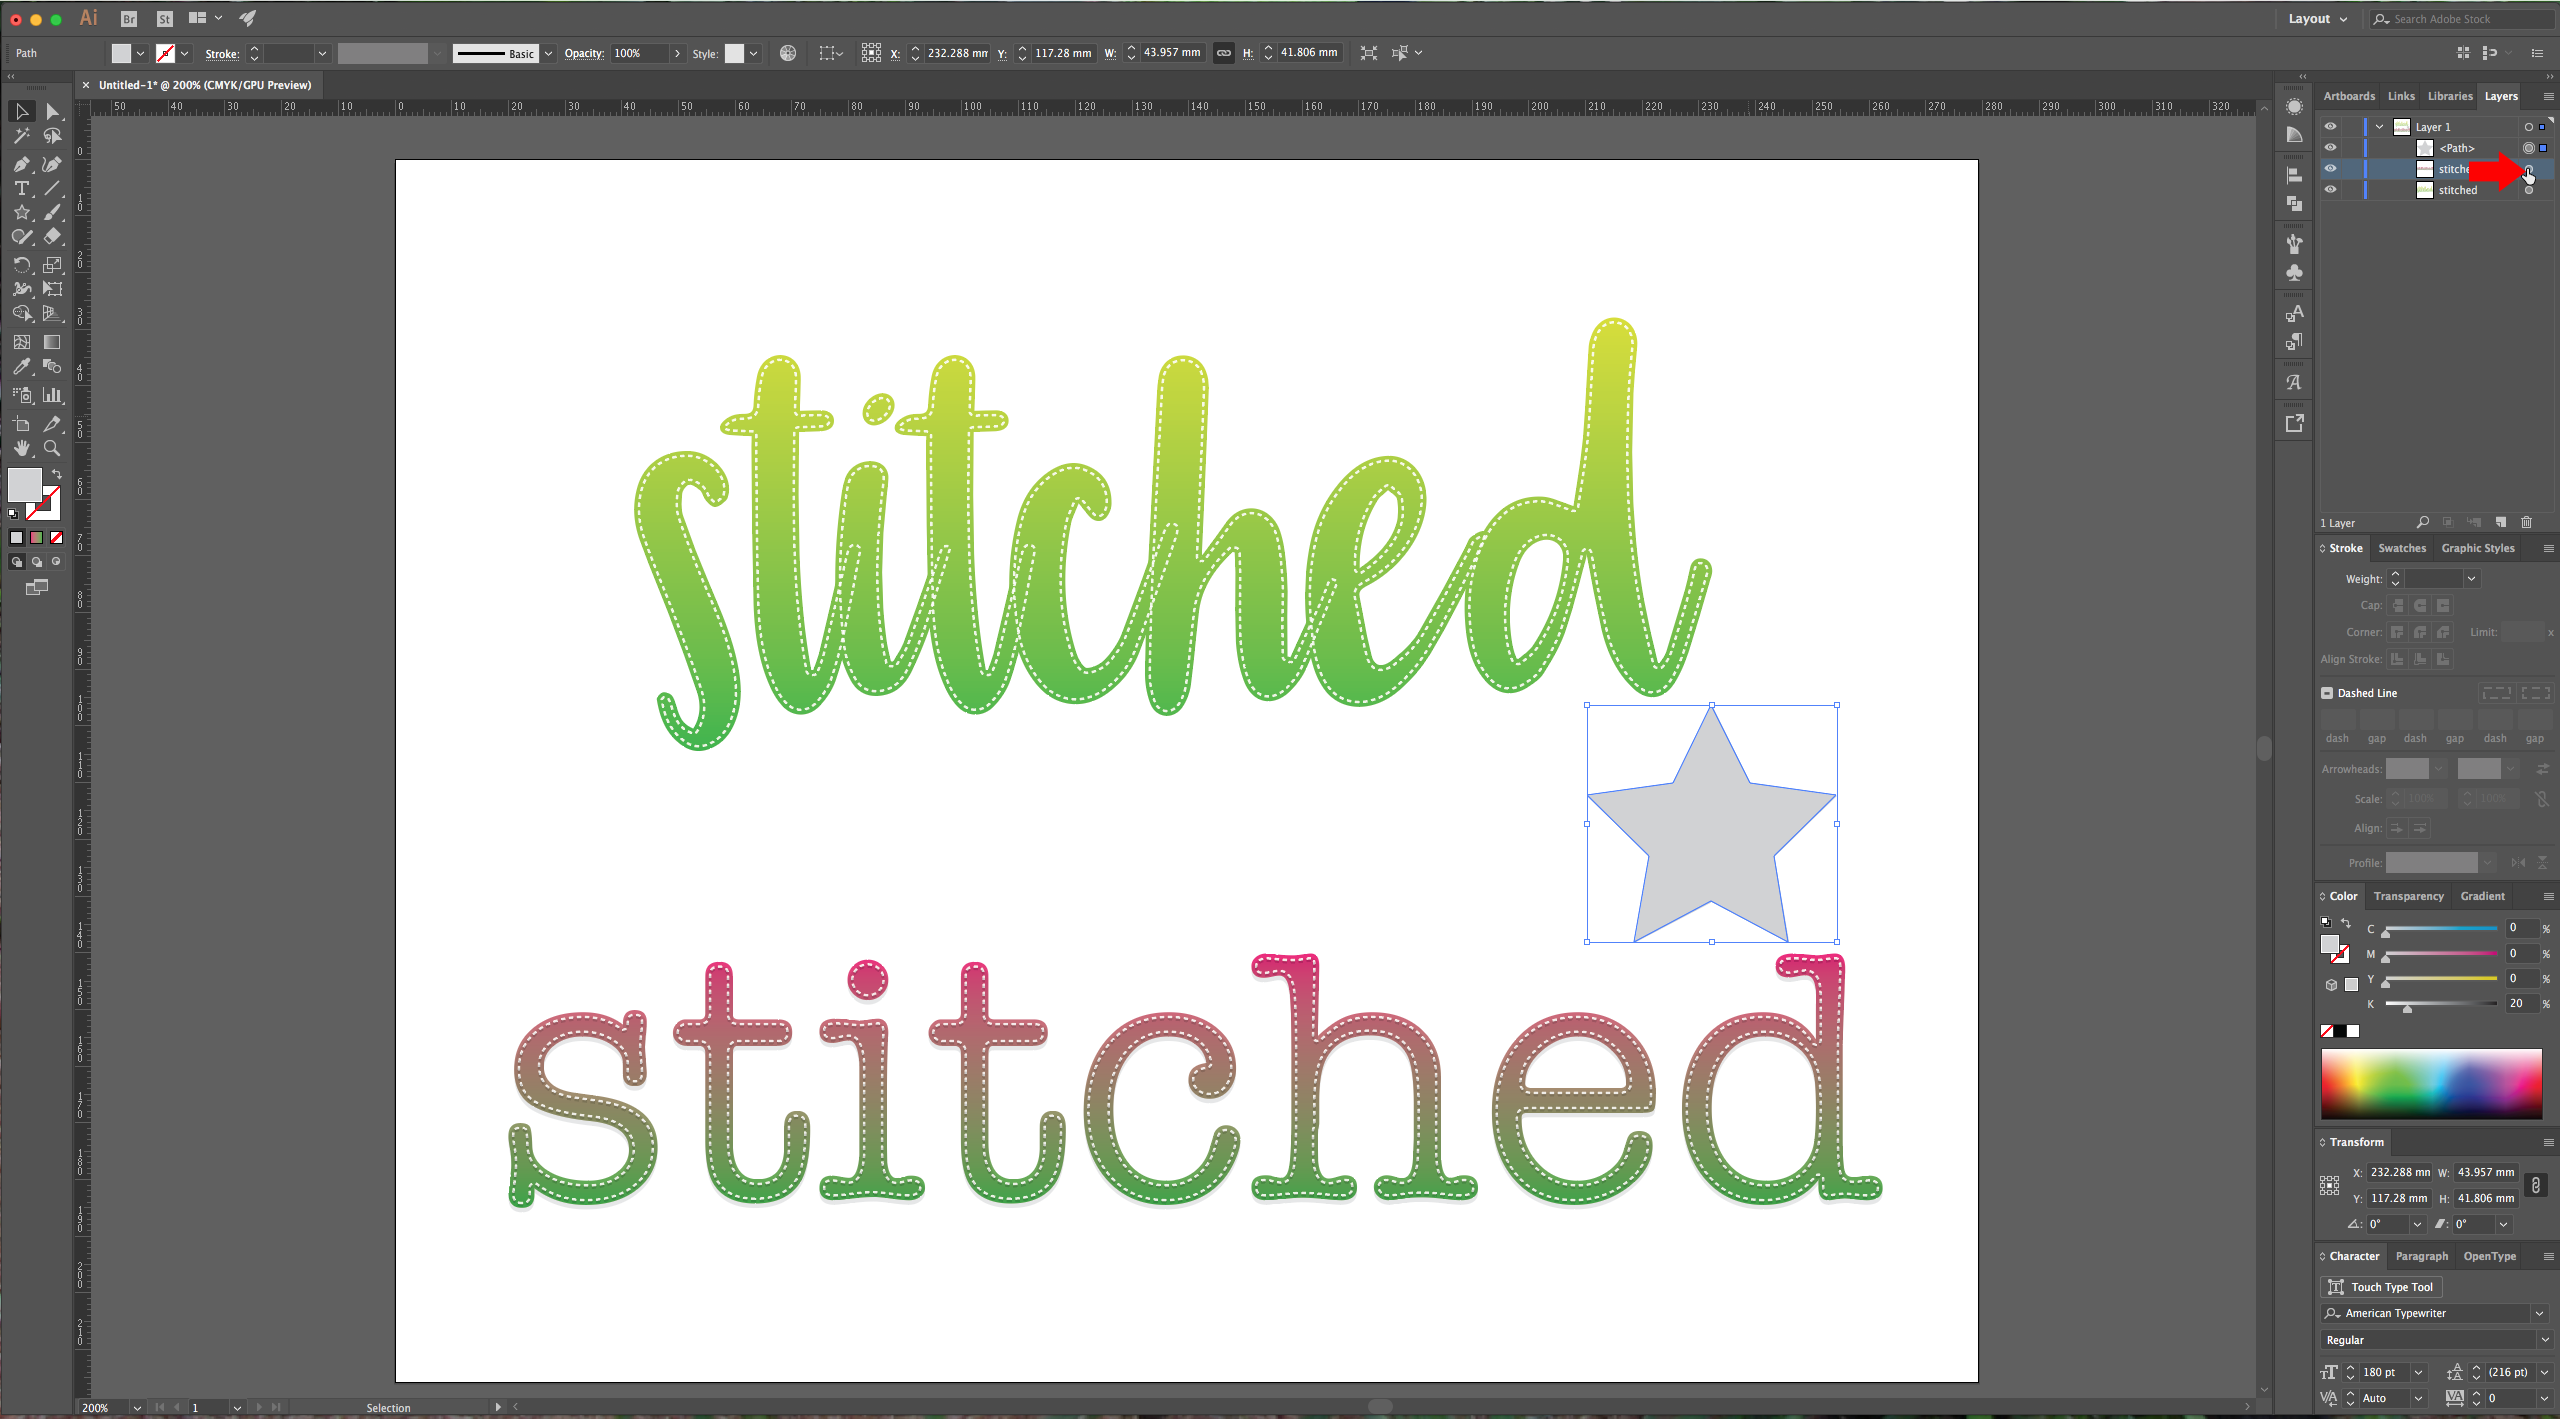
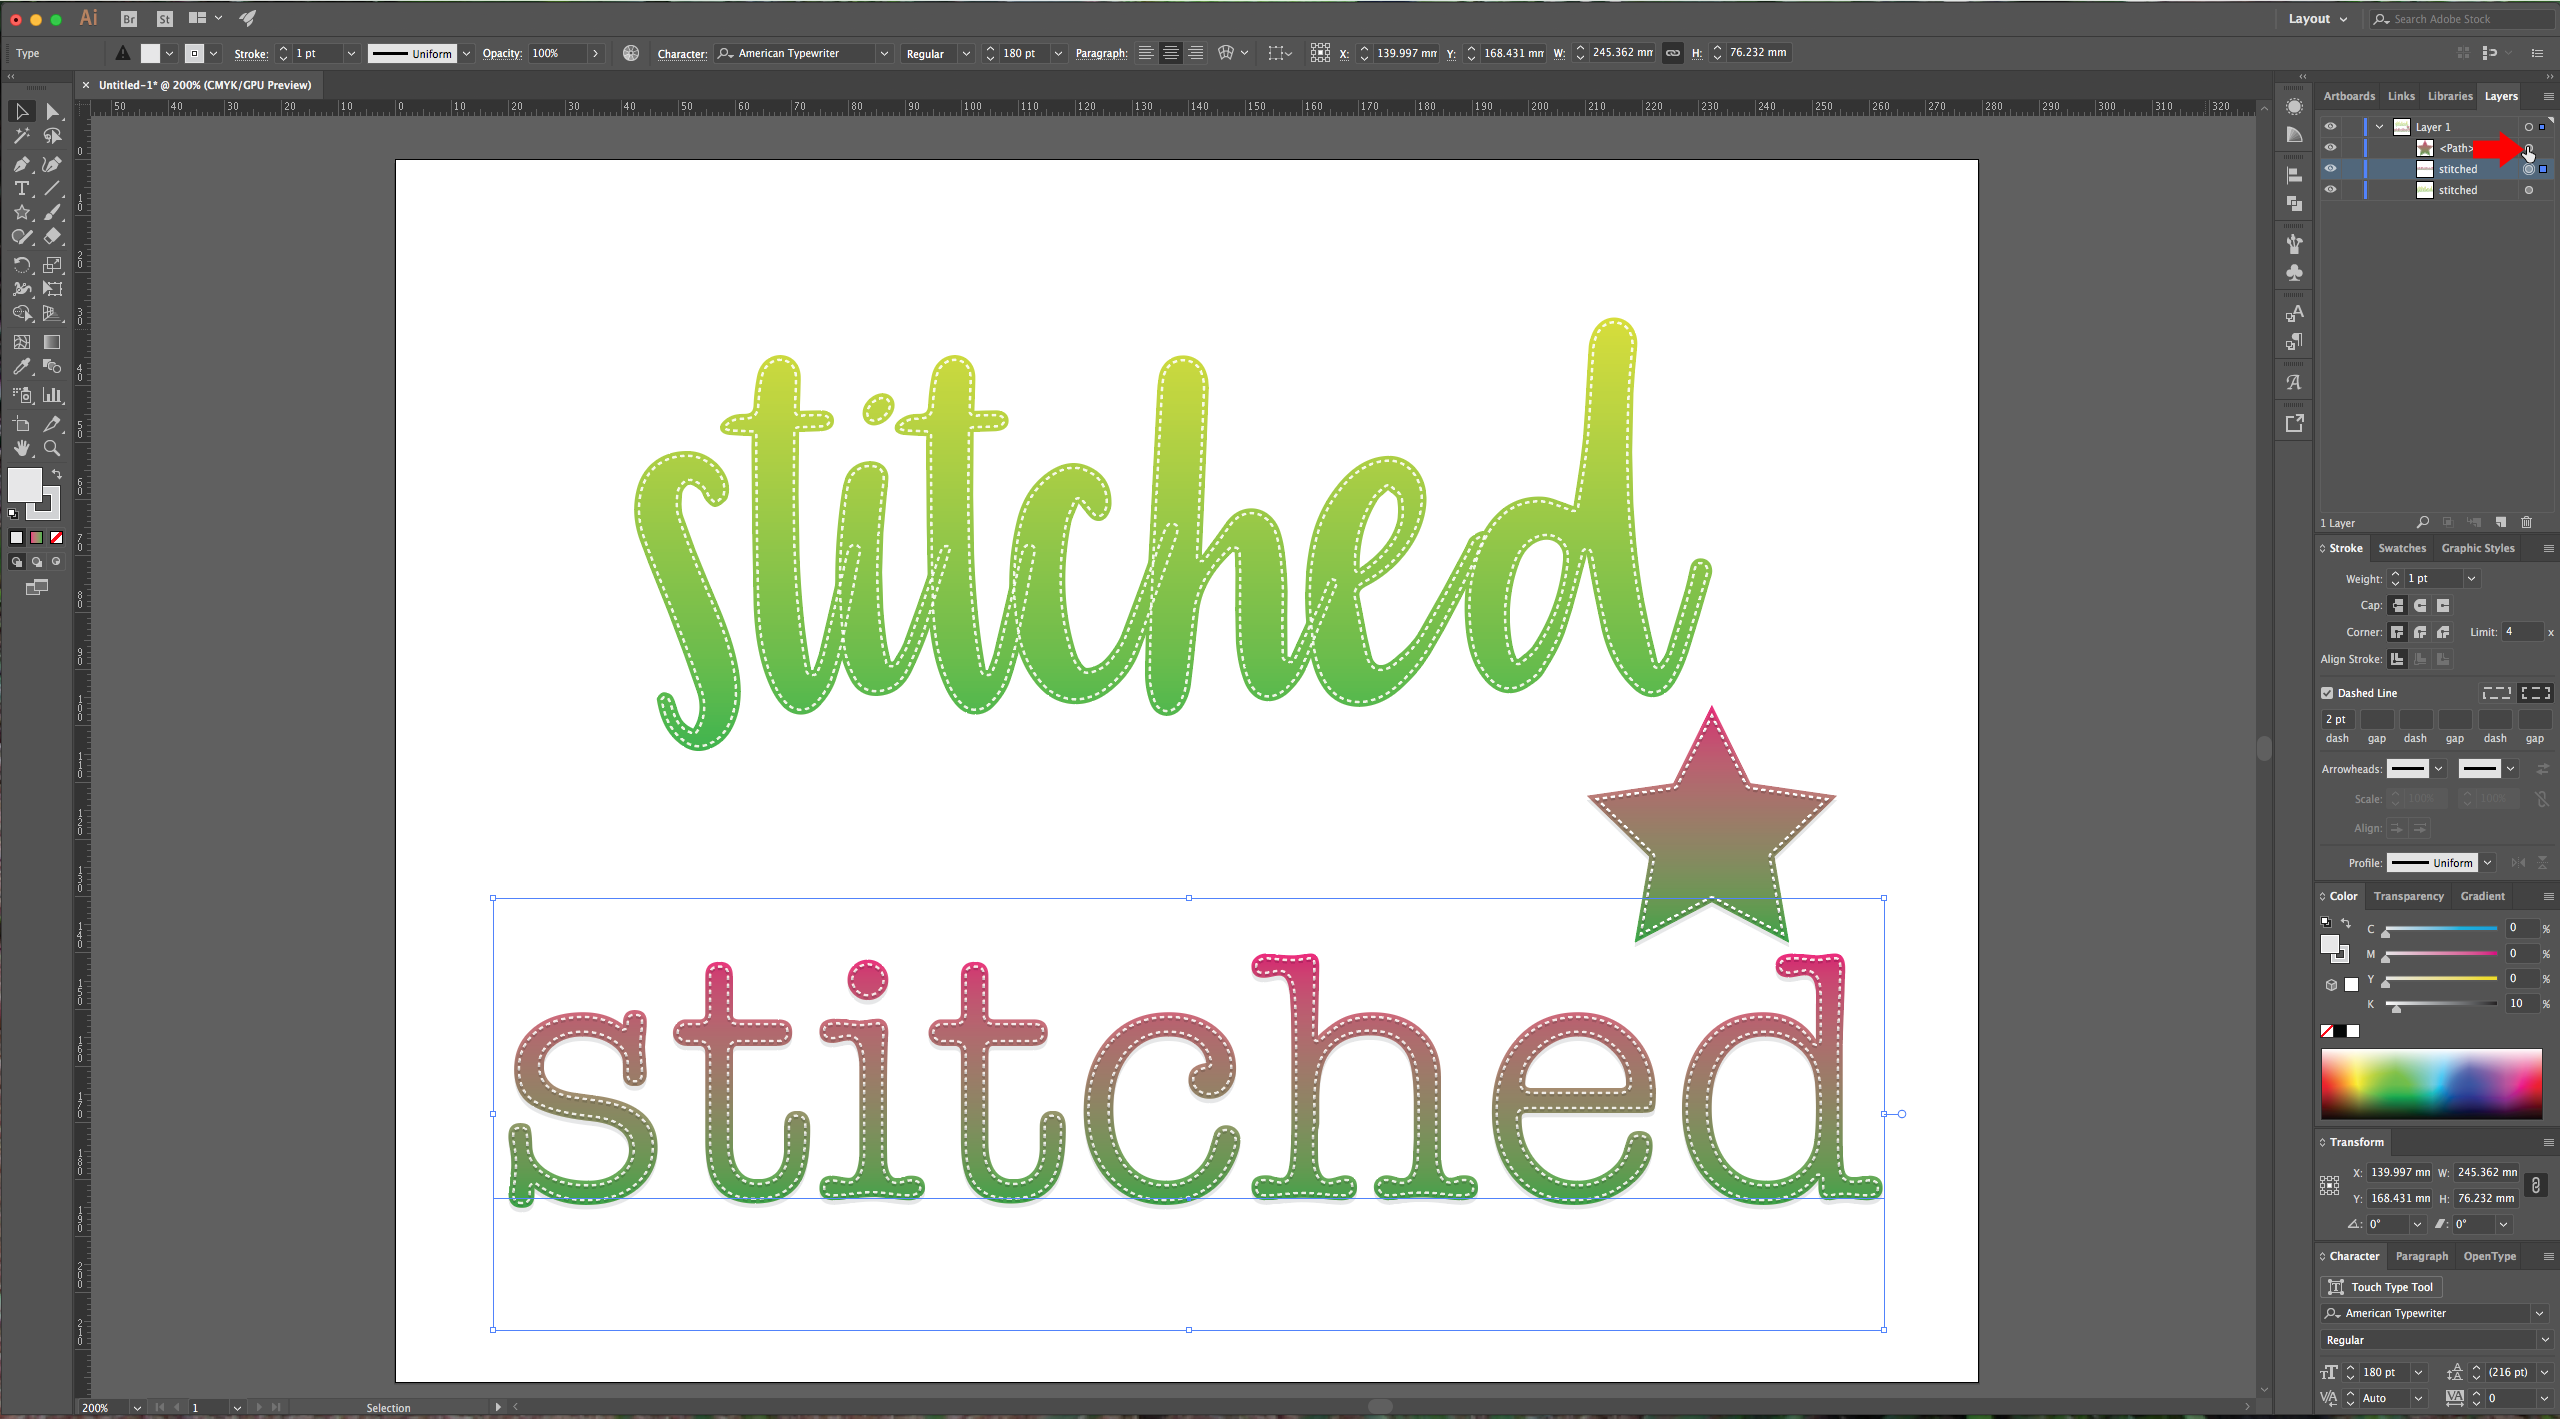
11 – Check your work.
1 – Create a New Document in Illustrator, select the “Type Tool” (T) and write your text. Choose a font of your liking (for this treatment is better to use heavier fonts).
2 – Select the text and turn the “Fill” and “Stroke” colors to none. Go to the “Appearance” Panel (Window > Appearance) and select “New Fill” from the popup menu. Use a linear gradient as fill.
3 – In the “Gradient” panel select the colors and angle for your gradient. We used some from the “Colors” panel and changed the “Angle” to -90°.
4 – With your text selected choose “New Stroke” from the popup menu in the “Appearance” Panel and change the color of the stroke to white (or whatever color you like), set the “Weight” to 1 point, check the “Dashed Line” box, and use 2 pt in the first “dash” box.
5 – Go to Effect > Path > Offset Path and use a value of -0.8 mm for “Offset” in the dialog and leave the rest of the values as default. Since our text has rounded corners we went back (double-click) on the “Offset Path” in the “Appearance” Panel and changed the “Joins” to “Round”.
6 – Select the main text linear gradient fill in the “Appearance” Panel and click the “Duplicate Selected” button. Select the gradient on top and fill it with a light gray and choose “Multiply” as “Blending Mode” in the “Transparency” Panel.
7 – Go to Effect > Distort & Transform > Transform, and change the “Vertical Move” to 0.8 mm.
8 – Select your “Stroke” in the “Appearance” Panel and click the “Duplicate” button at the bottom of the Panel. with the duplicate selected go to Effect > Distort & Transform > Transform and use a “Vertical Move” value of 0.8 mm, change its color to a medium gray and set the “Blending Mode” to “Multiply”.
9 – With these settings you can change the font and/or the colors used and maintain the “Stitched” effect. You can even apply it to vector objects.
10 – To copy the “Attributes” to another object go to the “Layers” Panel and select the item you wish to copy from, then, while holding the “Alt” key drag the little grey circle to the right of your thumbnail onto the circle of the object you want to copy to. This will give it the same “Attributes”.
11 – Check your work.
by @lornacane
Related Tutorials
Illustrator Tutorials
Repeating Outline Text Effect in Illustrator
Discover how to make a repeating outline text effect in Illustrator.
Illustrator Tutorials
How to Create a Marquee Sign Text Effect in Illustrator
Illustrator Tutorials
Plastic Text Effect in Illustrator
Illustrator Tutorials
Glitch Text Effect in Illustrator
Learn how to create a glitch effect in Illustrator following these techniques.
Illustrator Tutorials
Blood Text Effect in Illustrator
Illustrator Tutorials