By Design Bundles
How to remove an image from a background with inkscape
In today’s tutorial we will show you how to remove an image from a background with Inkscape. This is especially helpful when you want to extract specific elements from an image. During this tutorial we will make use of the Bezier Curve Tool.
Before we begin, make sure that your file has been downloaded and unzipped to your PC. We are using these watercolor Winter landscapes for this tutorial.
Step 1 - Use Bezier Curve to Trace Image
Once in Inkscape, open the image containing the elements.

Next, we are going to use the Bezier Curve tool to draw around the image. The Bezier Curve Tool can be found on the left hand side toolbar.

With the tool selected, roughly trace the image that you want to remove from the background.

Now, zoom into your image using the Zoom option on the left side toolbar. In this toolbar you will also find the Node editing tool. Click on this tool to select and edit the nodes. Nodes are the little squares or triangles.
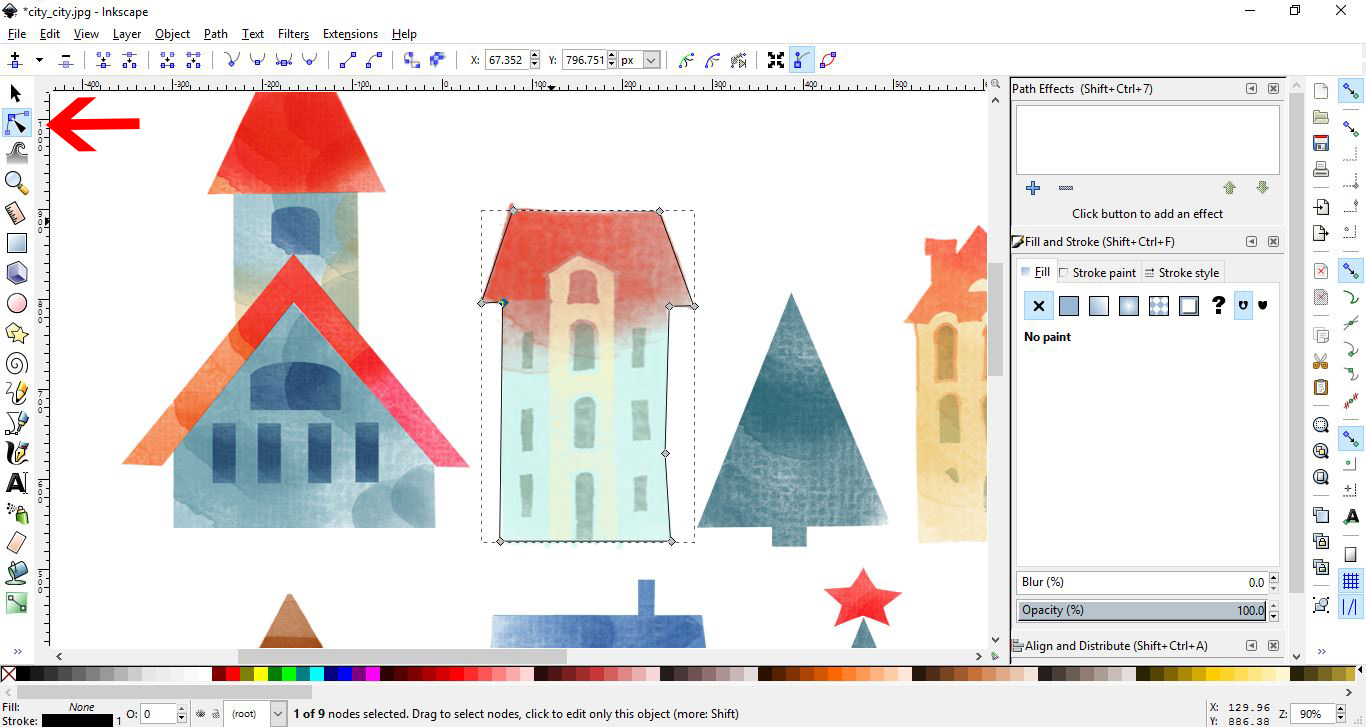
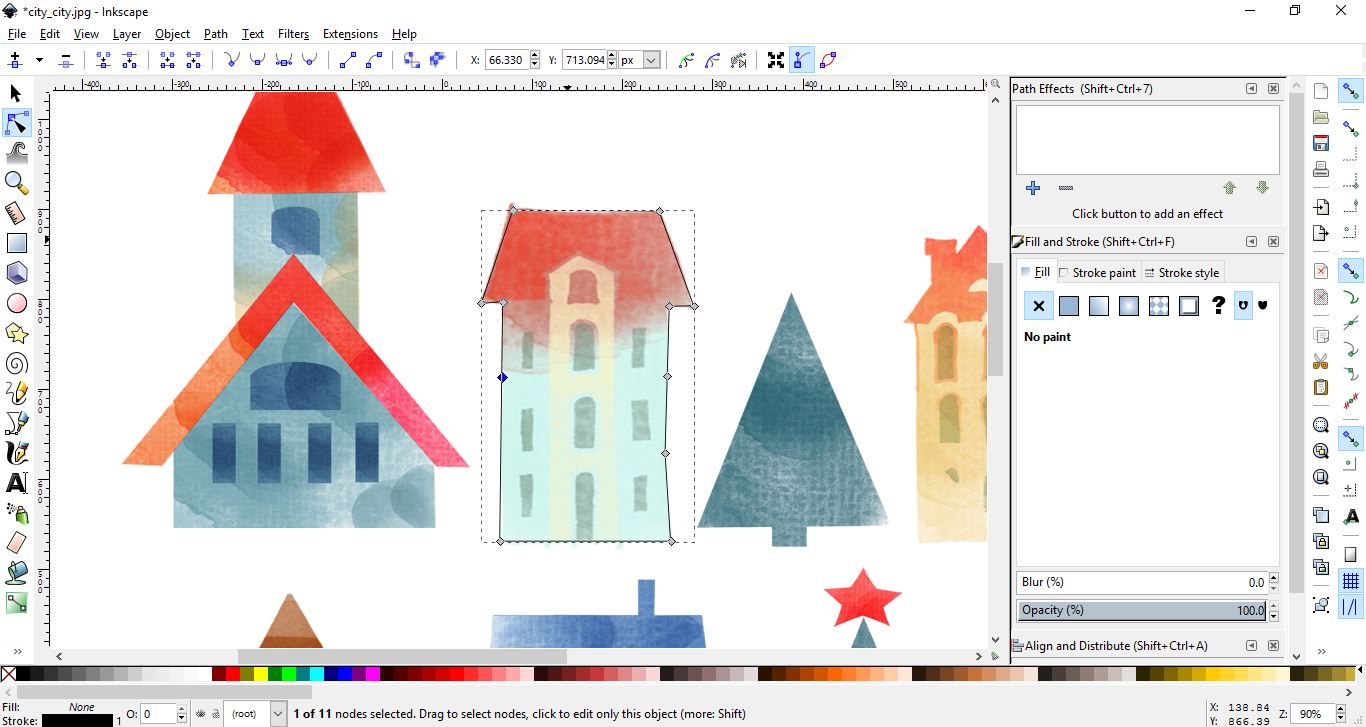
Click on a selected node and reposition it around the image. To have greater flexibility and more accurate tracing, you can add more nodes. Do this by double clicking a line between two nodes to add a new one. Move the new nodes around by clicking + dragging as needed.
Step 2 - Copy Trace to a New Layer
We are going to create a duplicate of the trace and move it to a new layer. This trace will be used as a cut line later on. With the trace still selected, press Ctrl+D to duplicate it.

To bring up the Layers panel, press Ctrl + Shift + L.
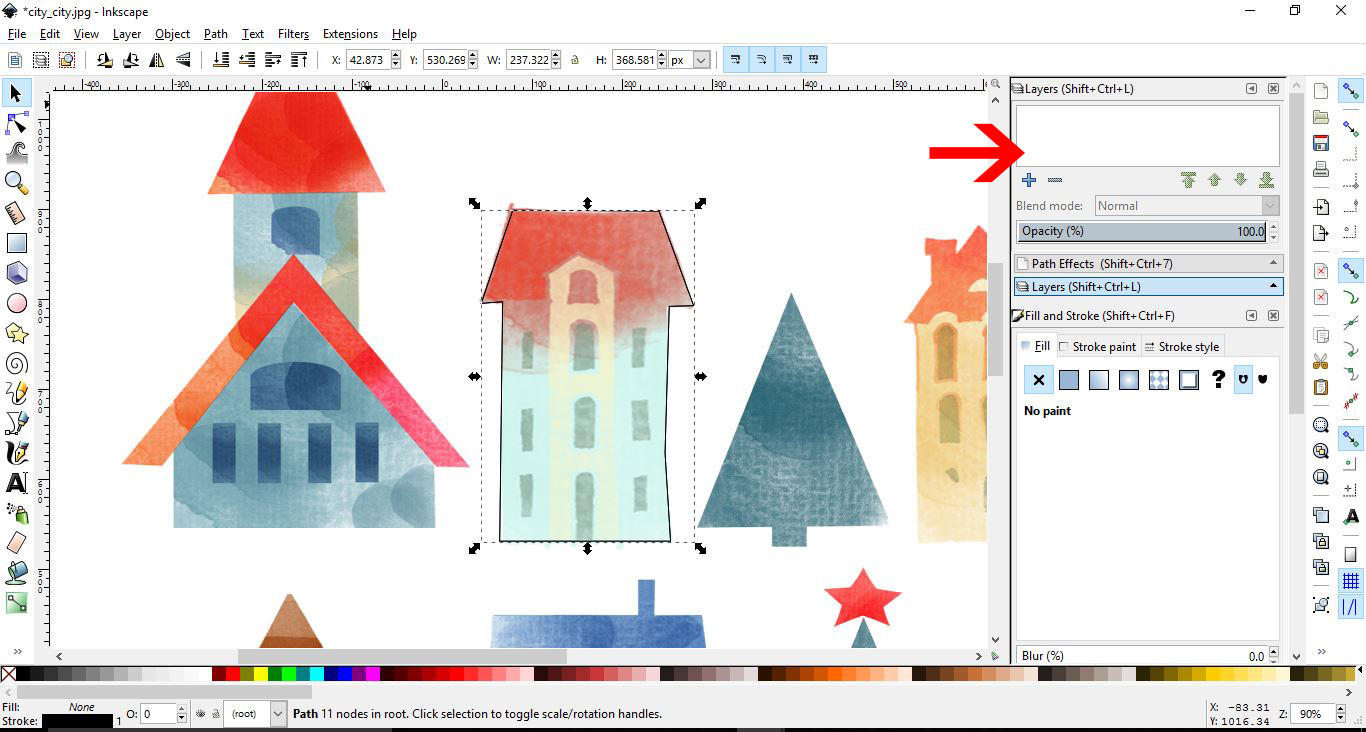
In the Layers panel, click on the ”+” icon to create a new layer. Give this layer a name.
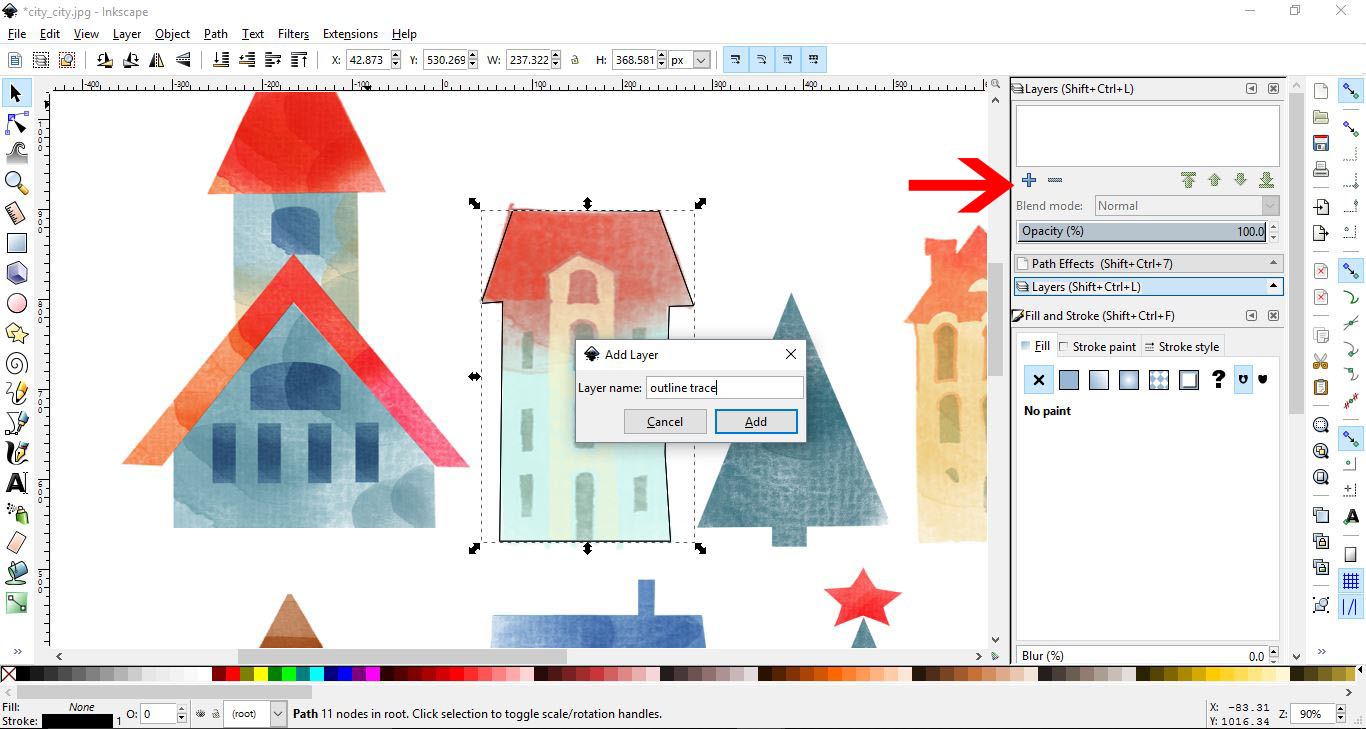
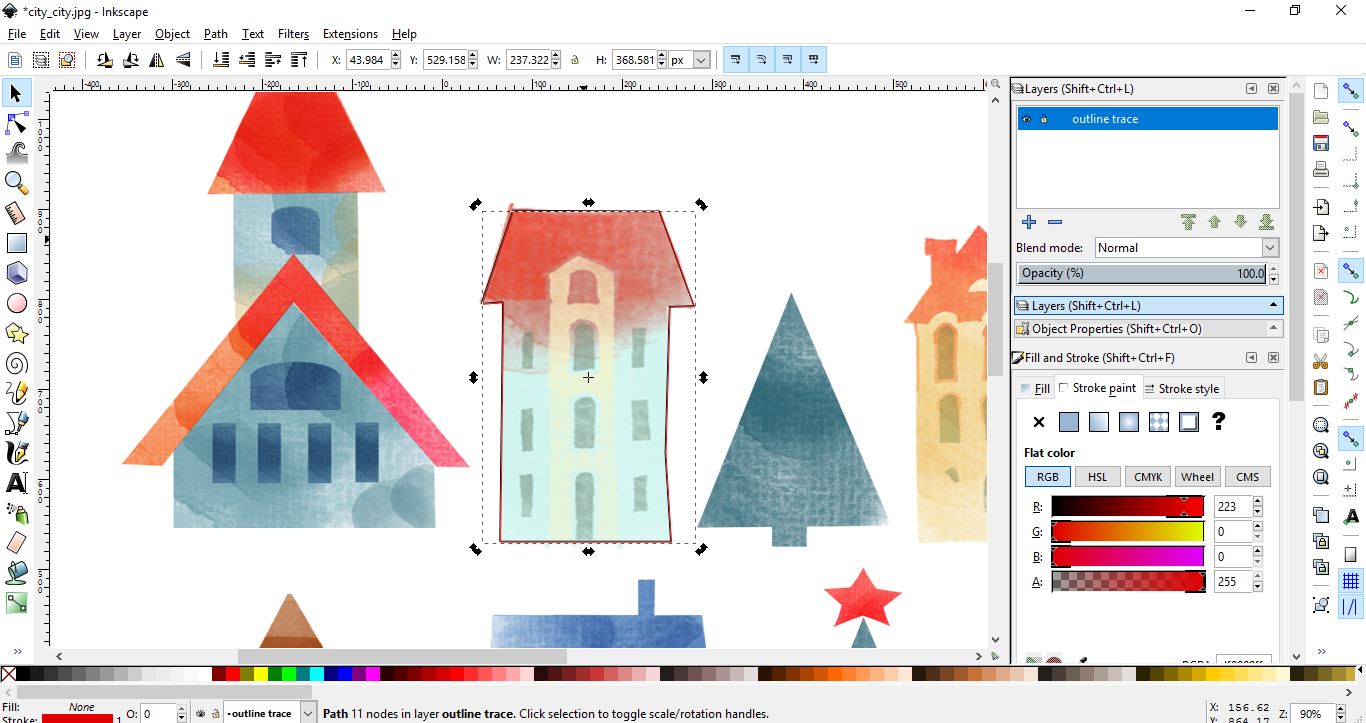
Make sure the trace is selected, then right click > Move to Layer. A new window will appear, select the layer you just created and click Move.
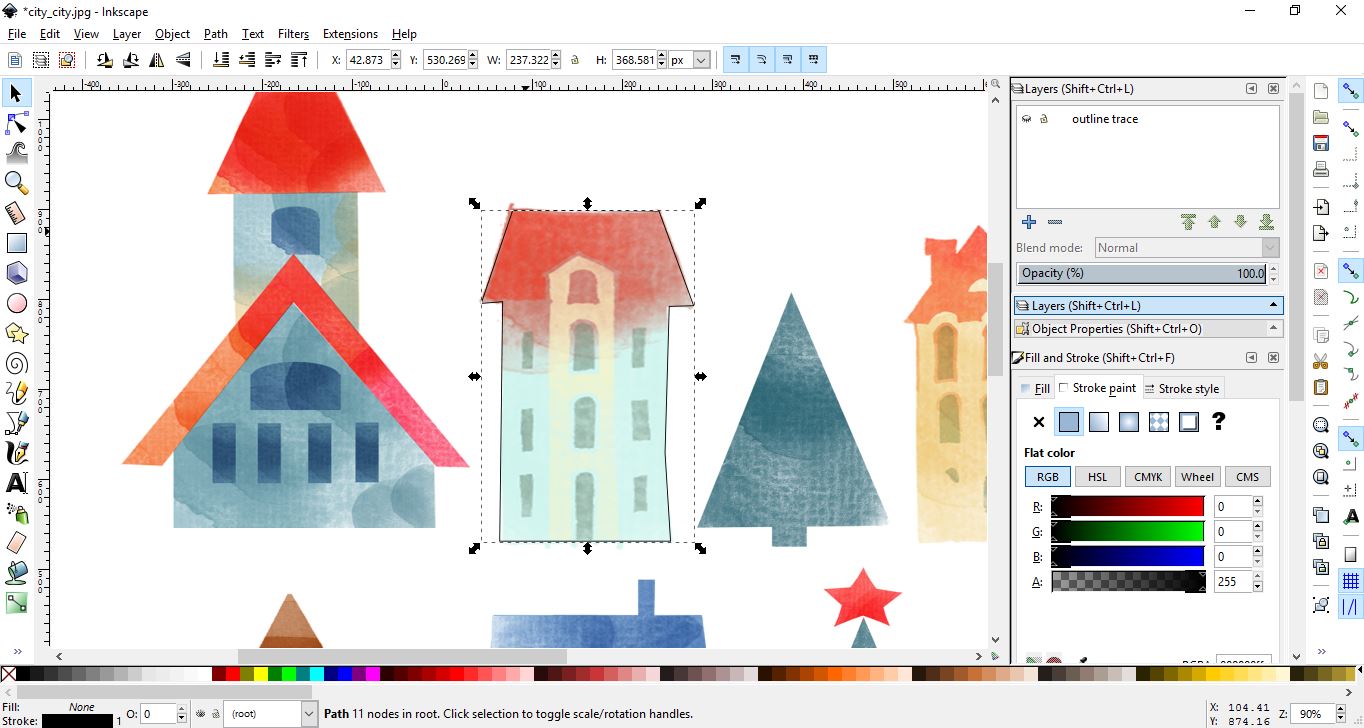
To see the difference between the two traces you need to change the Stroke color of the top one. Go to Object > Fill and Stroke and in the Stroke Paint panel on the right, choose a color. Click on the eye icon for the duplicate trace layer to hide it for now.
Step 3 - Separate Image from Background
We are now going to separate the image from the background. Select both the image and the original trace.
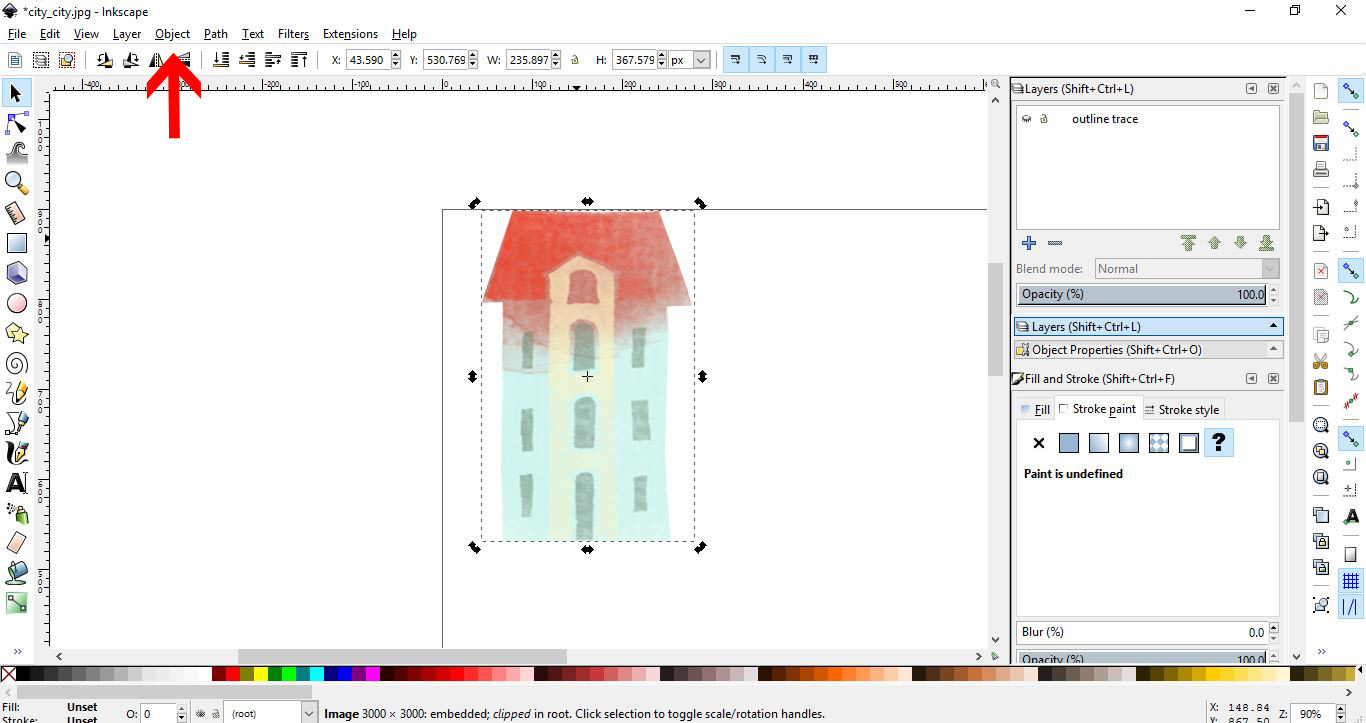
Go to Object > Clip > Set. This will cut out the selected image and remove the rest of the background.
Go back to the Layers panel and once again click on the eye icon to make the duplicate trace layer visible.
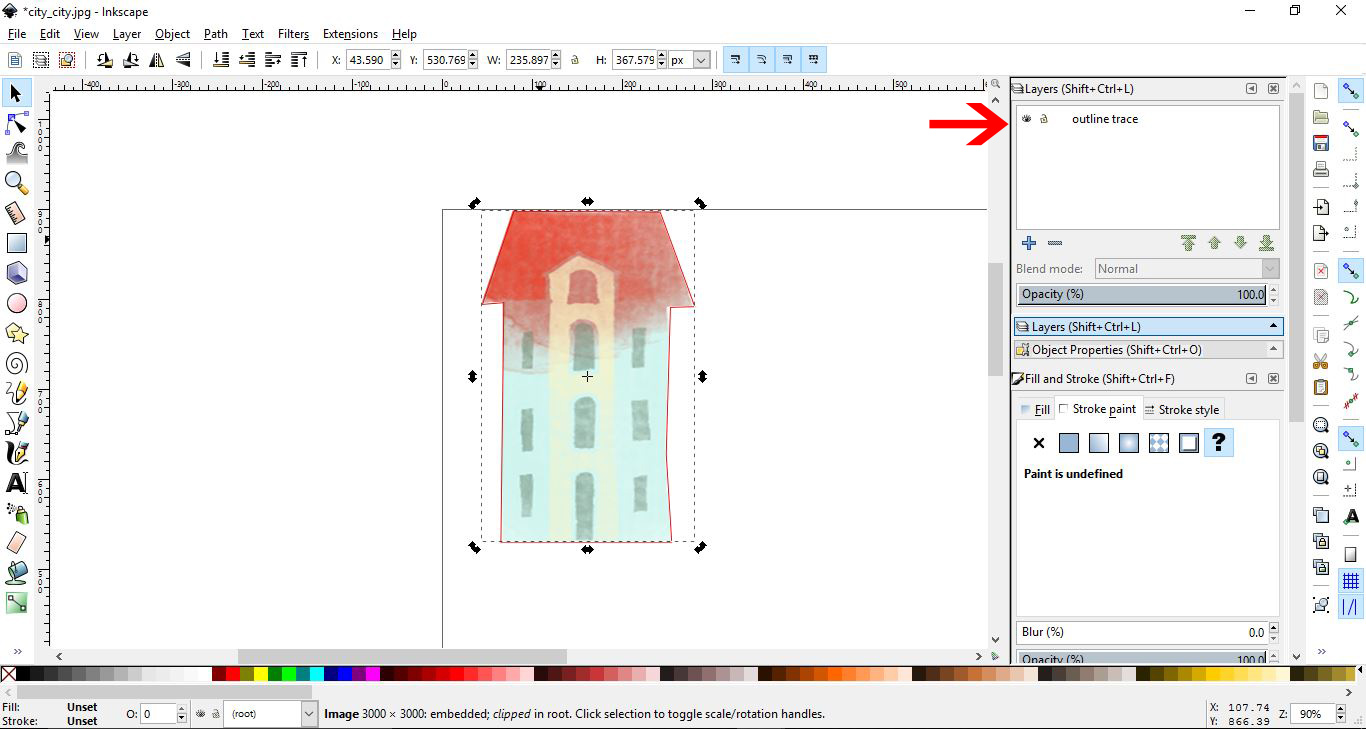
Select both the duplicate trace and the cut out image, then go to Object > Group. You now have cut lines for your image.
Finally, save your image by going to File > Save as then choosing Plain SVG next to Save as type. You can now use this file to make a print and cut in Silhouette Studio or Cricut.
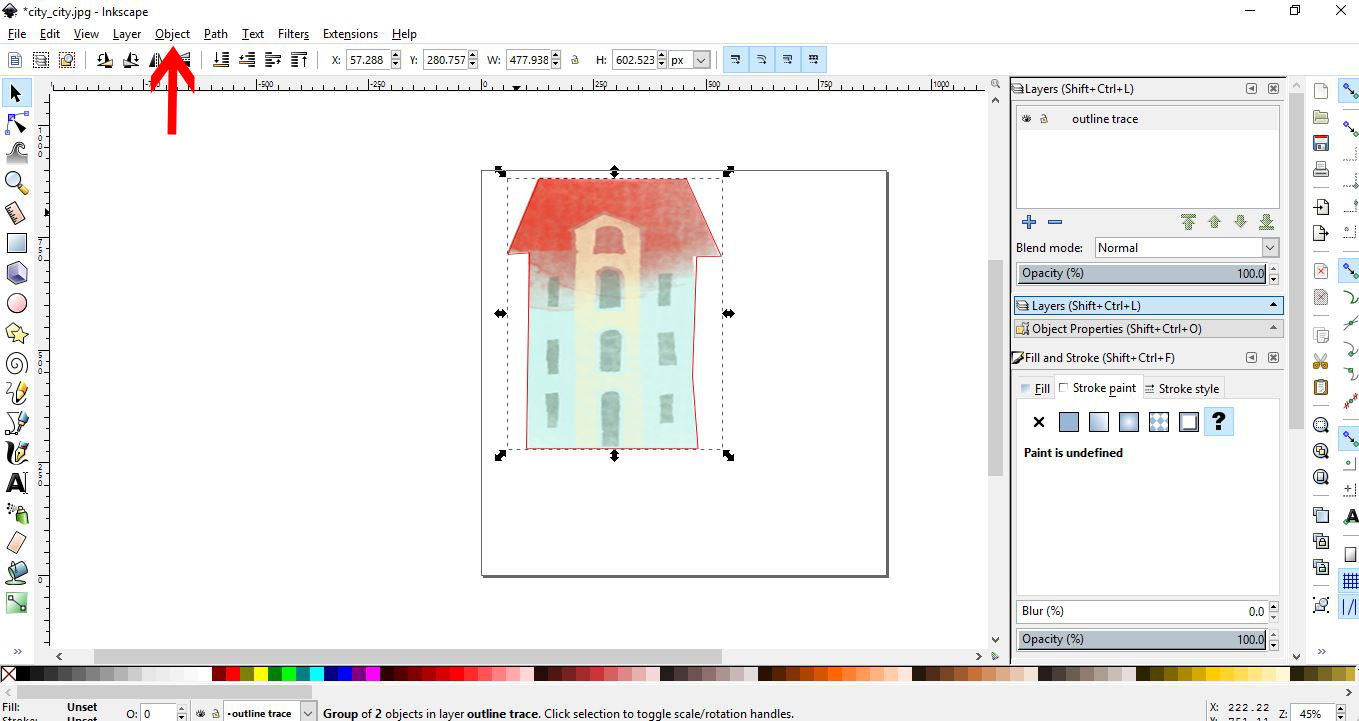
As quick as that you learned how to remove an image from a background with Inkscape. You can use this method across many of your projects where specific items are required. If you found this tutorial helpful then be sure to check out our other tutorials available.
Design elements are fromDesign Bundlesand the file is calledWatercolor Winter Landscapes.