By Design Bundles
Photoshop Tutorials7 min
How to Make 3D Text in Photoshop
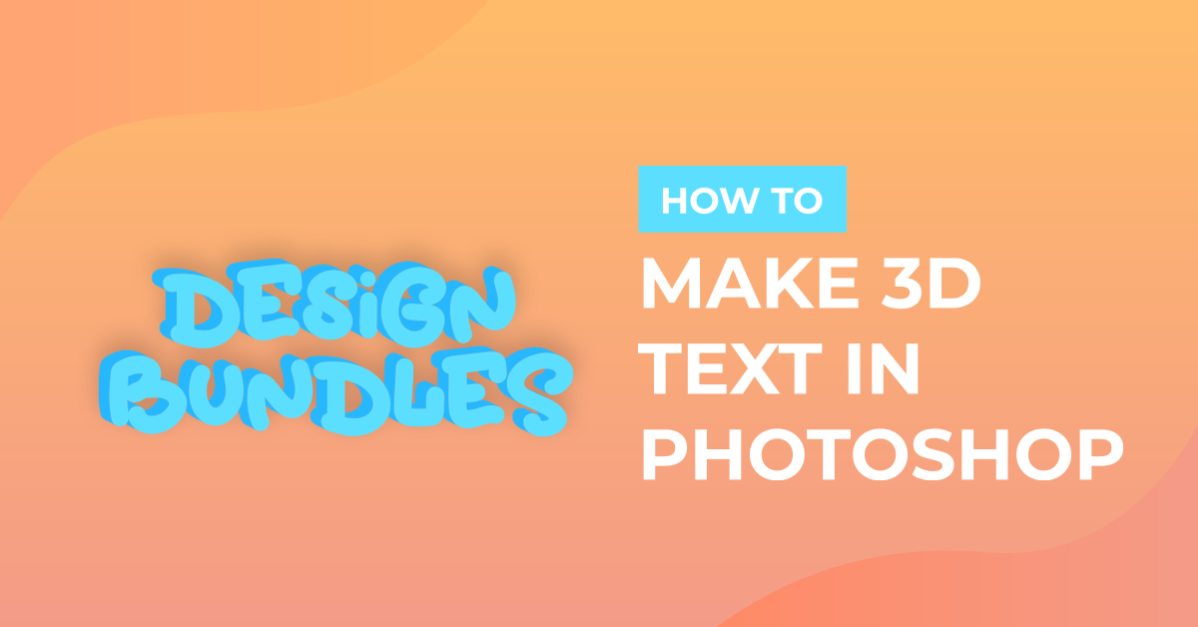
In this tutorial, we will learn how to make tridimensional text in Photoshop using the 3D text feature.
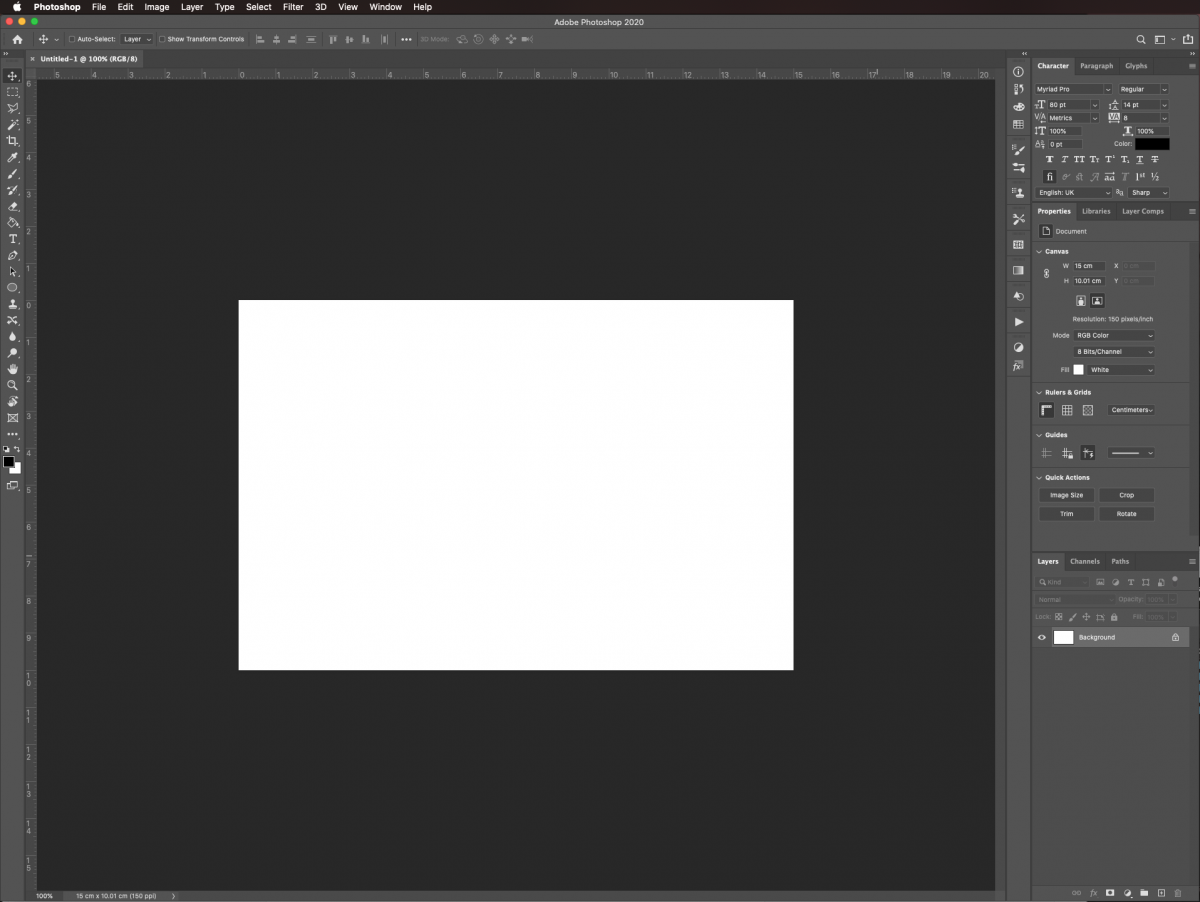
In Photoshop, create a New Document and use white as your background color. Ours was 15 x 10 cm @150 dpi, RGB, but you should choose yours depending on what you want to use your artwork in.
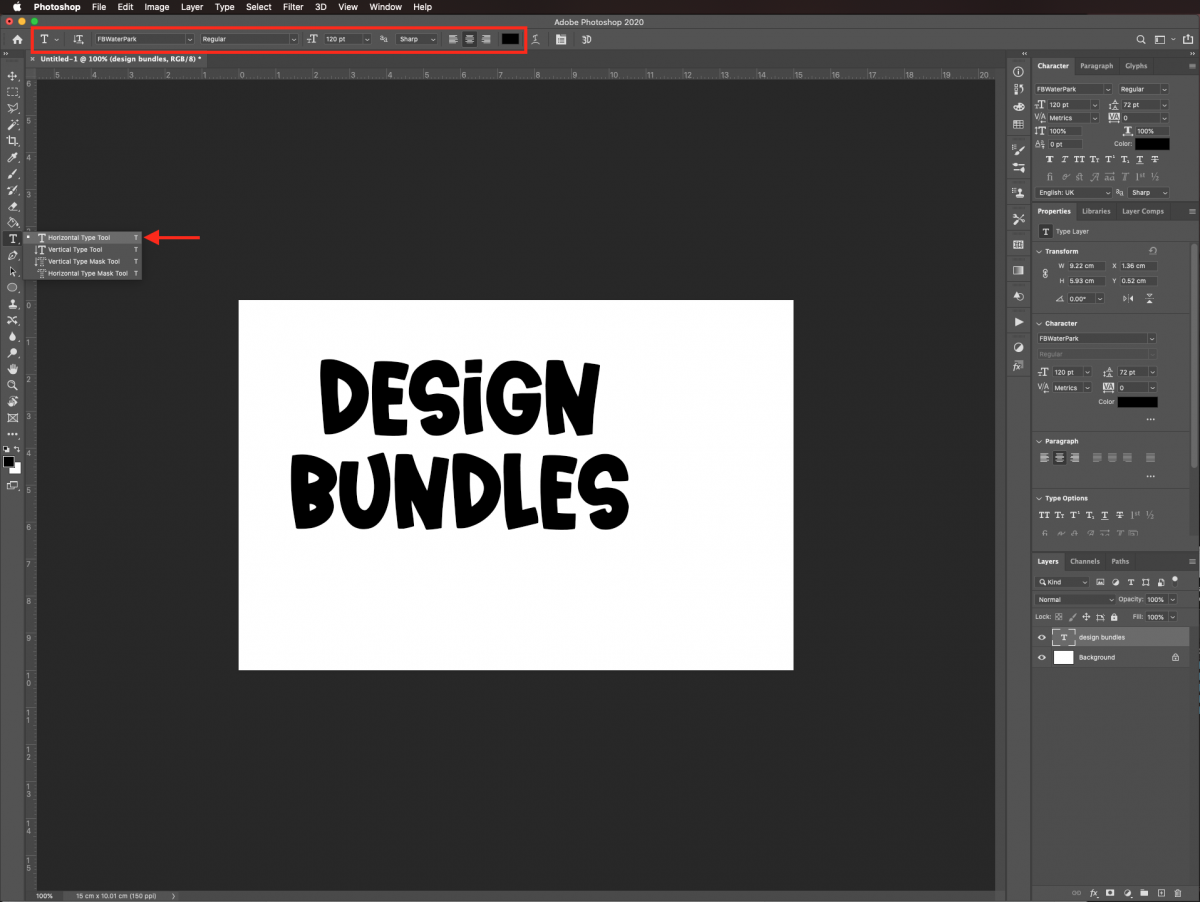
The font we’ve chosen today is the Water Park font. There are tons of great modern sans serif fonts available on Font Bundles. Select the Type Tool (T), choose your font, and type your text. Use black as the Foreground color.
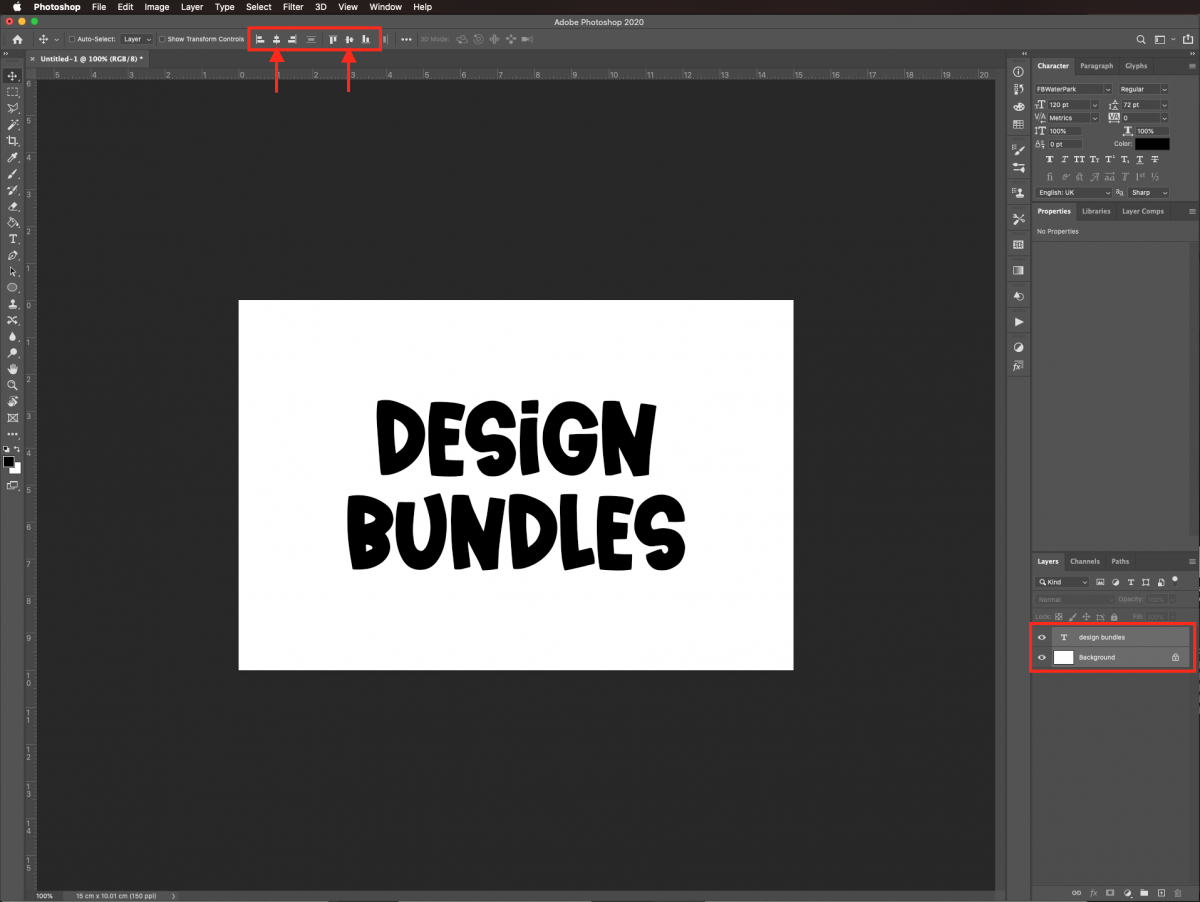
Select both layers (shift key) and head to the top menu to center your text by clicking the Horizontal and Vertical Align Centers buttons.
Change the size of your text and re-center it if needed.
With your Text Tool and text layer selected, click on the 3D button on the top menu.
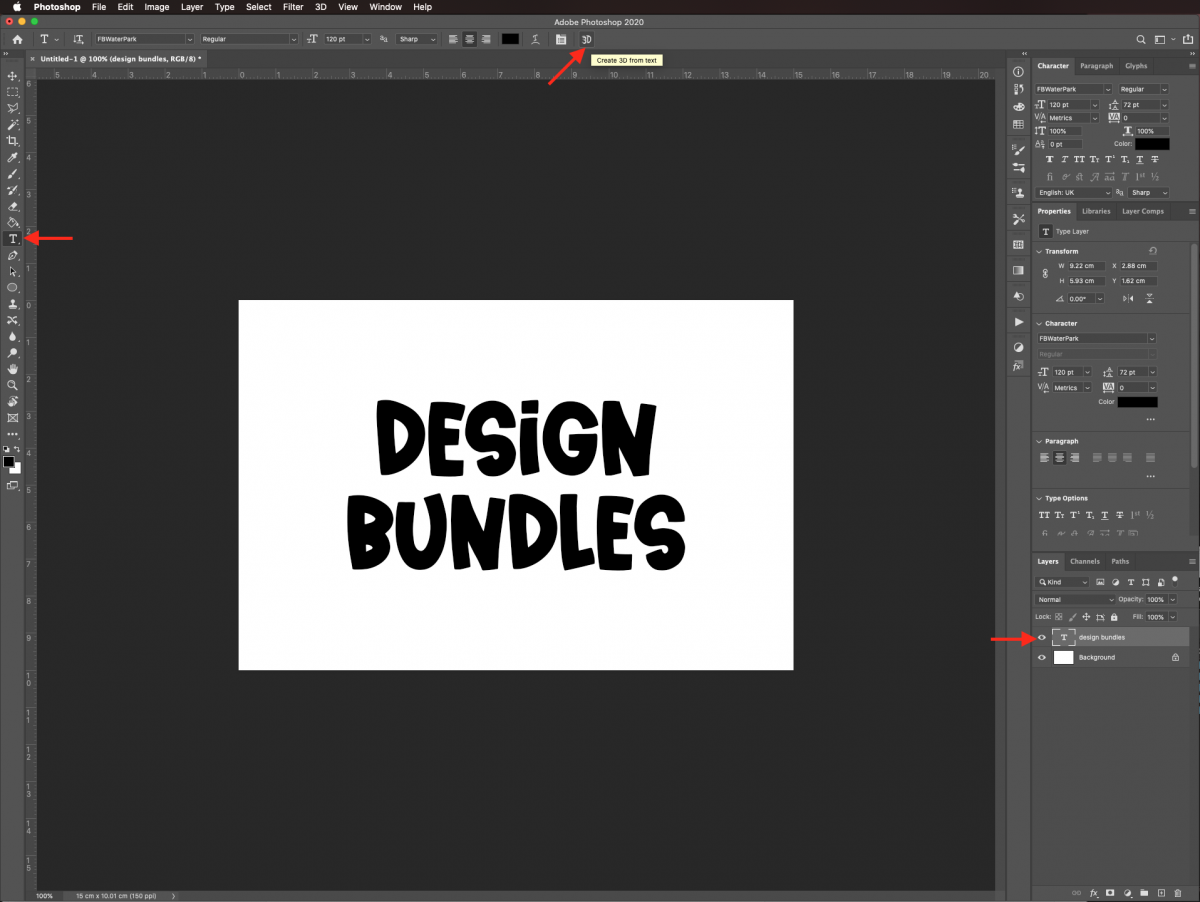
Or right-click on top of the text’s layer thumbnail and choose new 3D extrusion from selected layer.
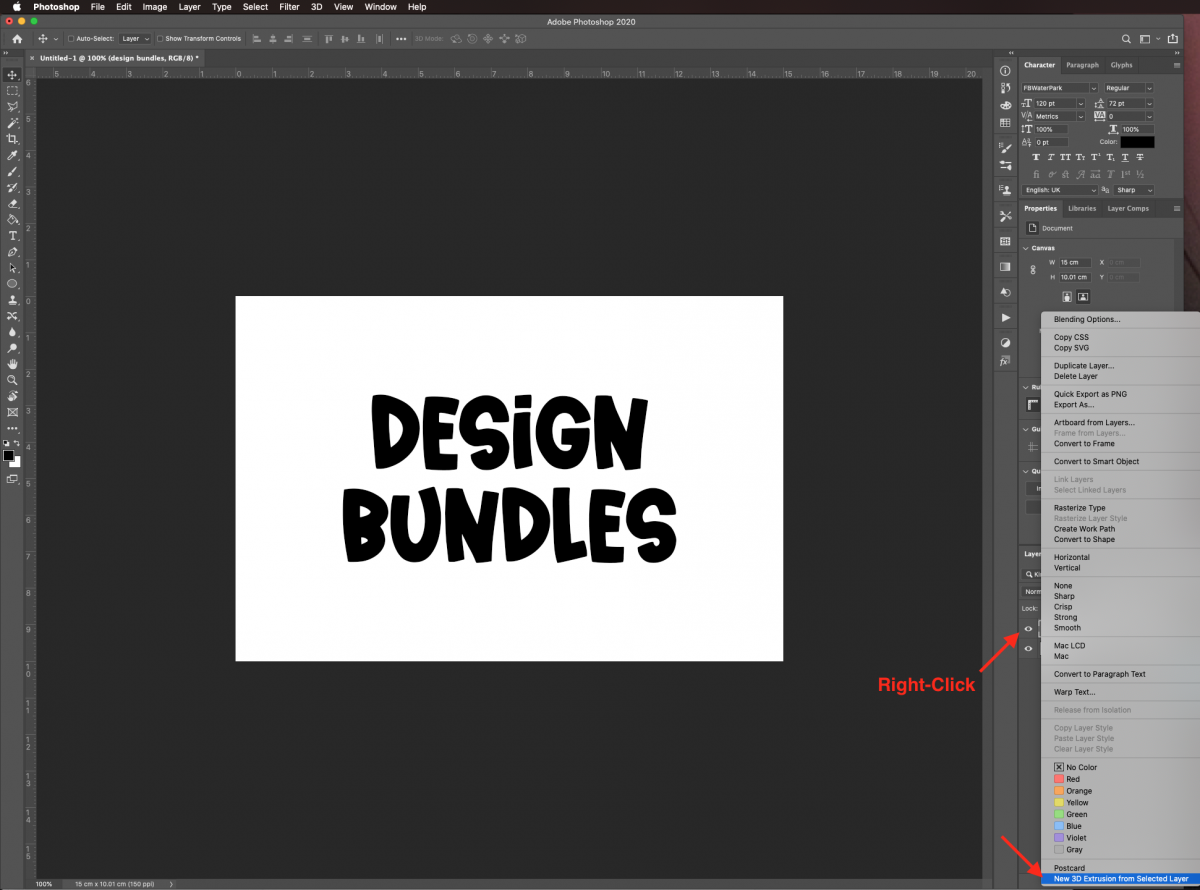
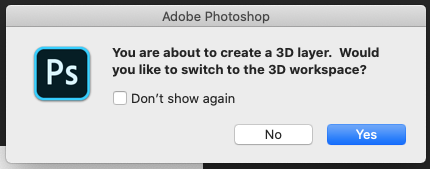
Click yes on the pop-up window.
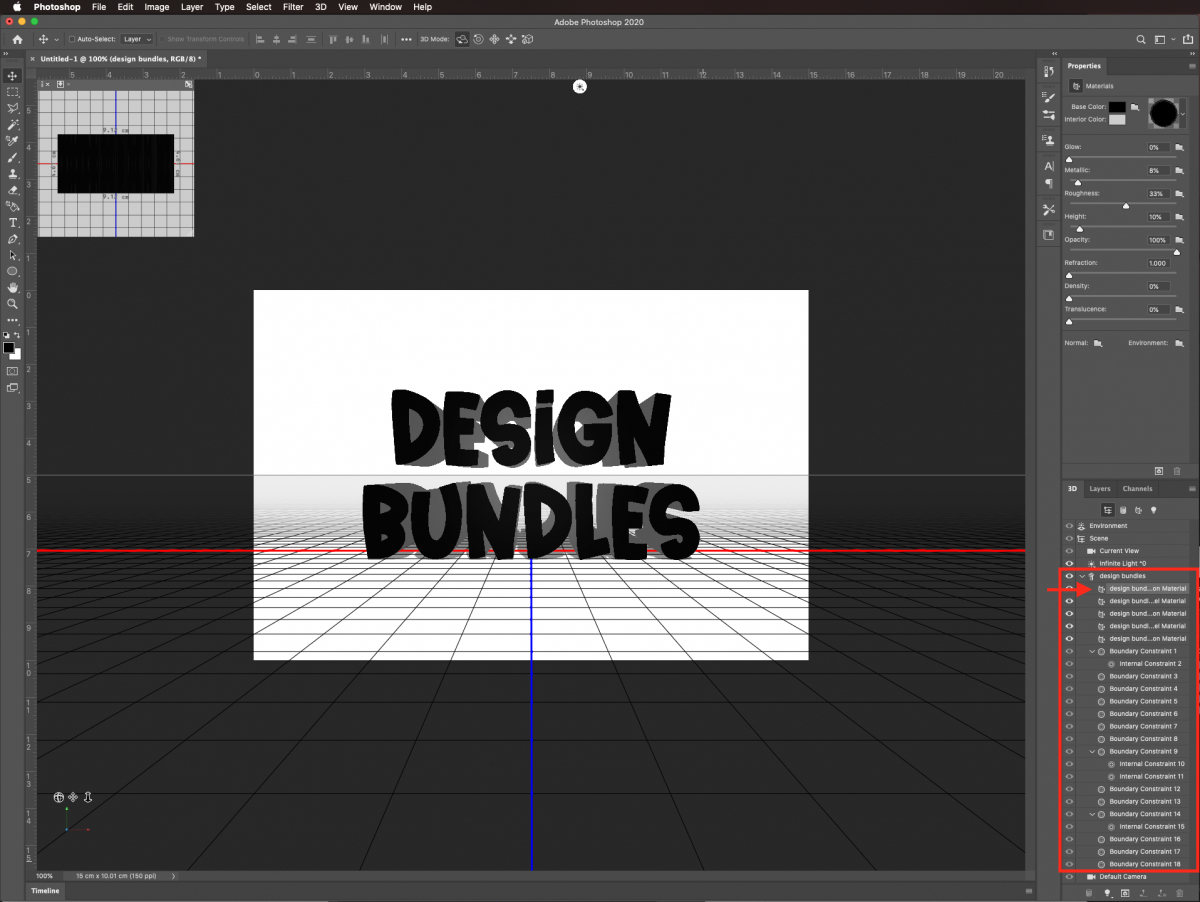
In the 3D panel select Design Bundles (or the word you used) to show its contents and then select the front inflation material.
Head to the Properties Panel, click on base color and select a color in the color picker.
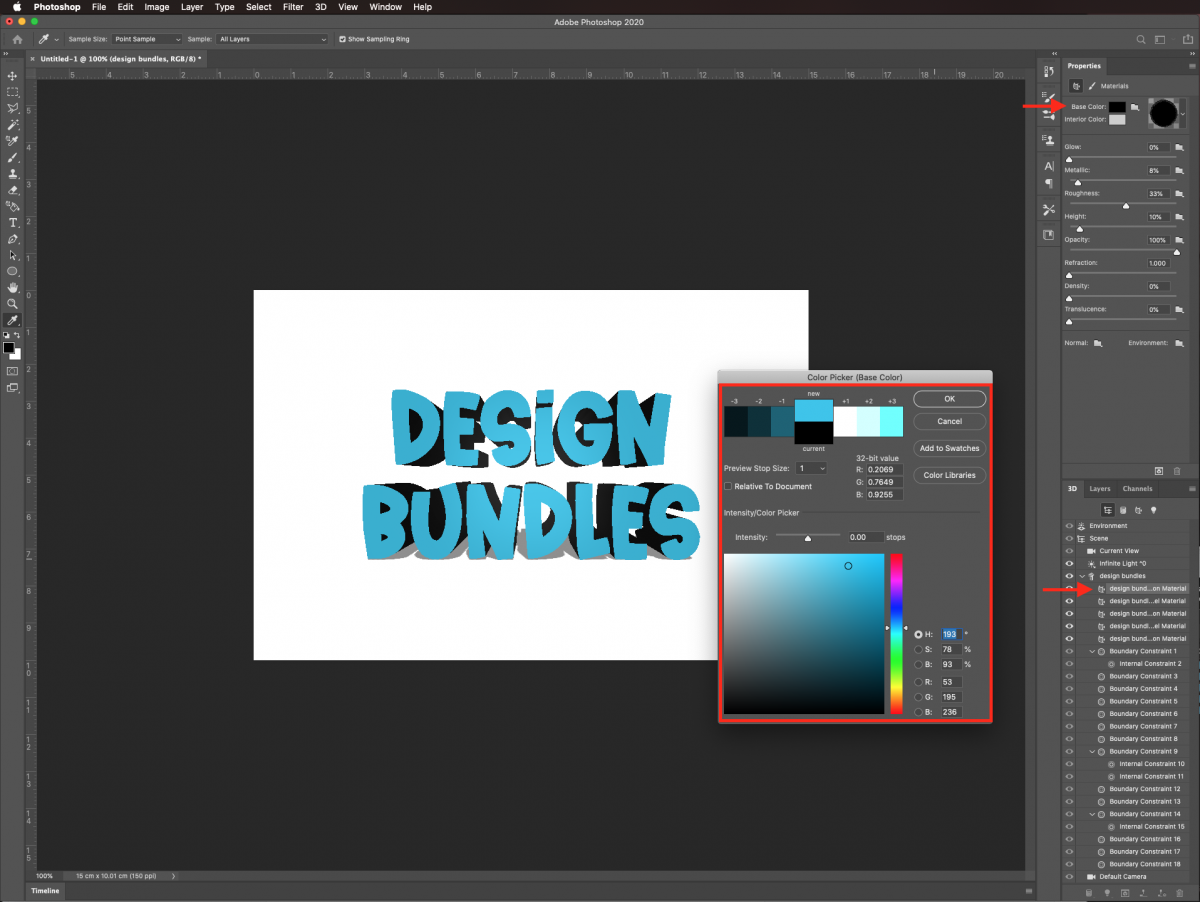
Now, select the extrusion material. Head to the Properties Panel, click on base color and select another color in the color picker (we used a darker shade of the same color used before).
\
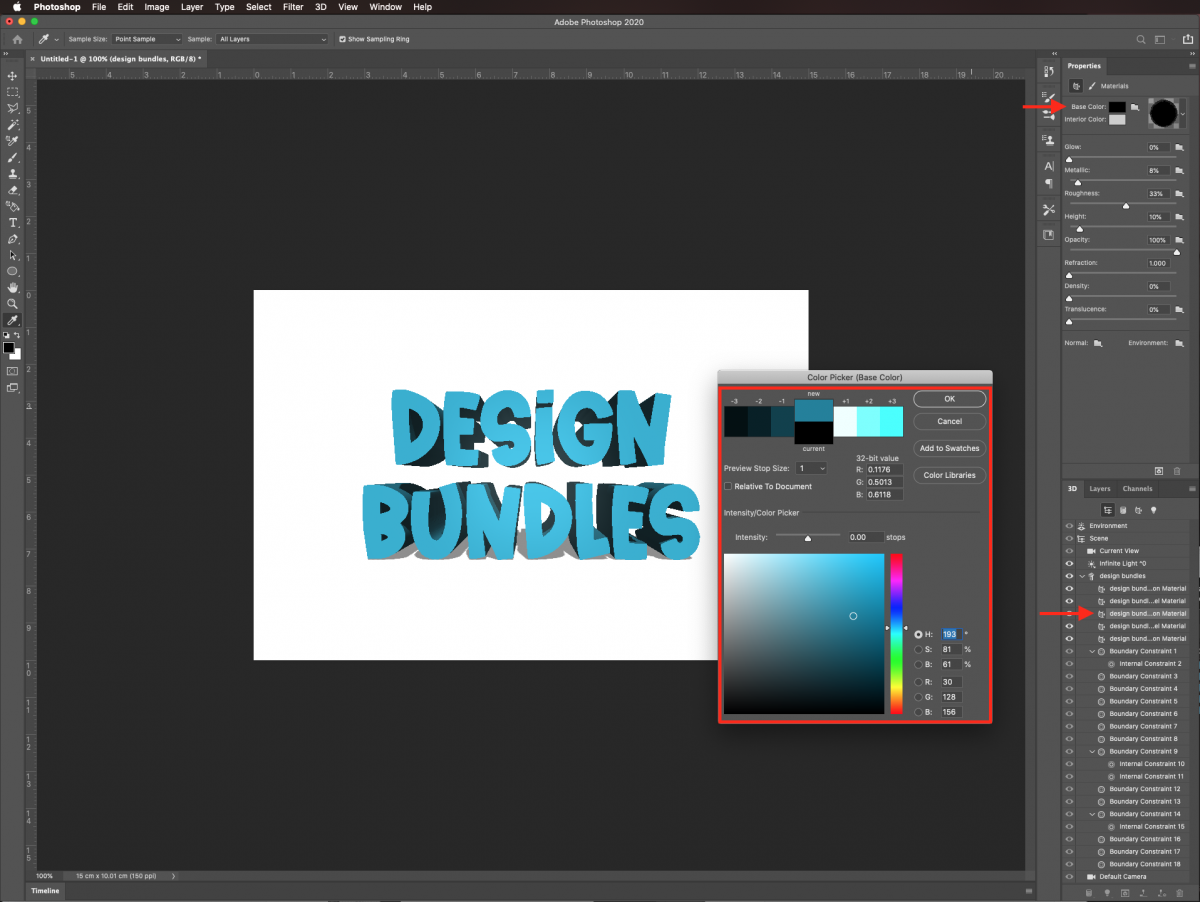
The resulting text should look similar to this.
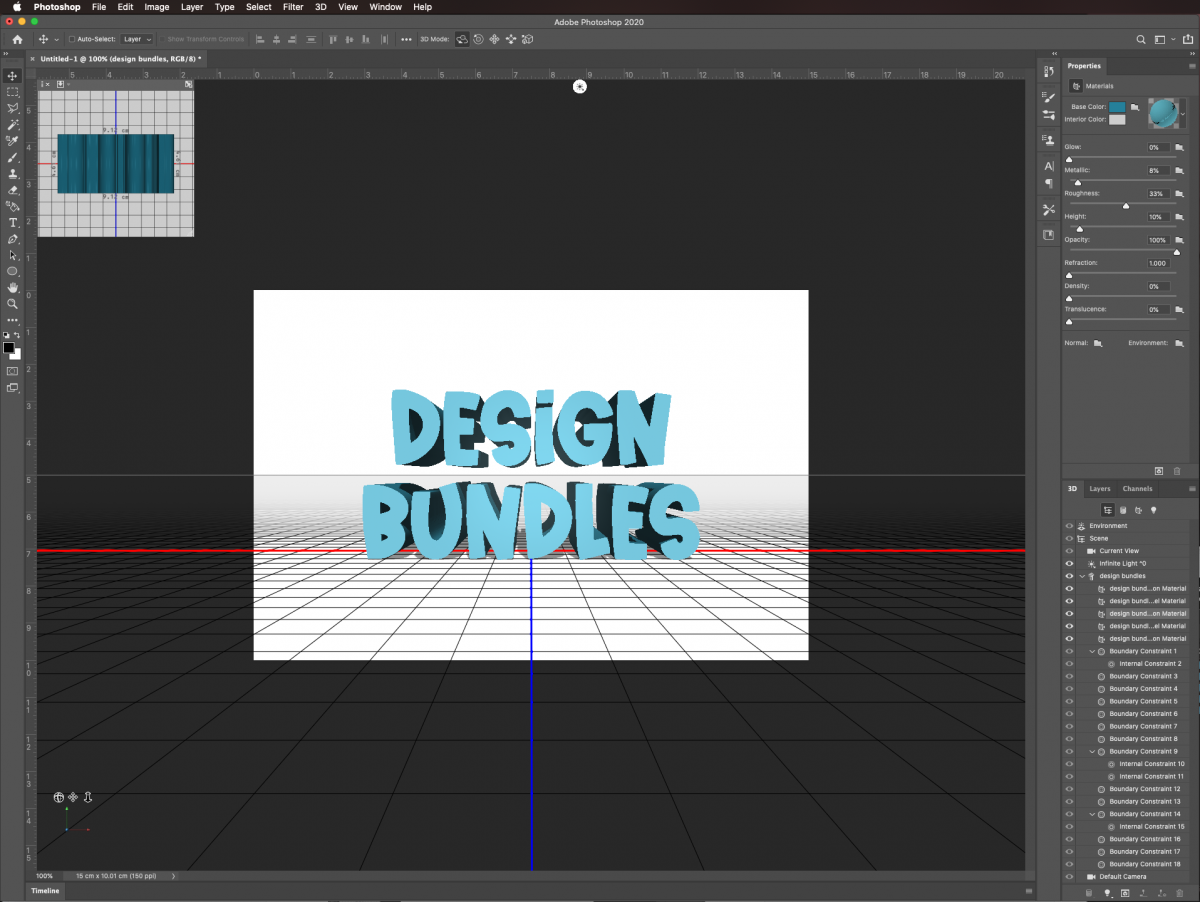
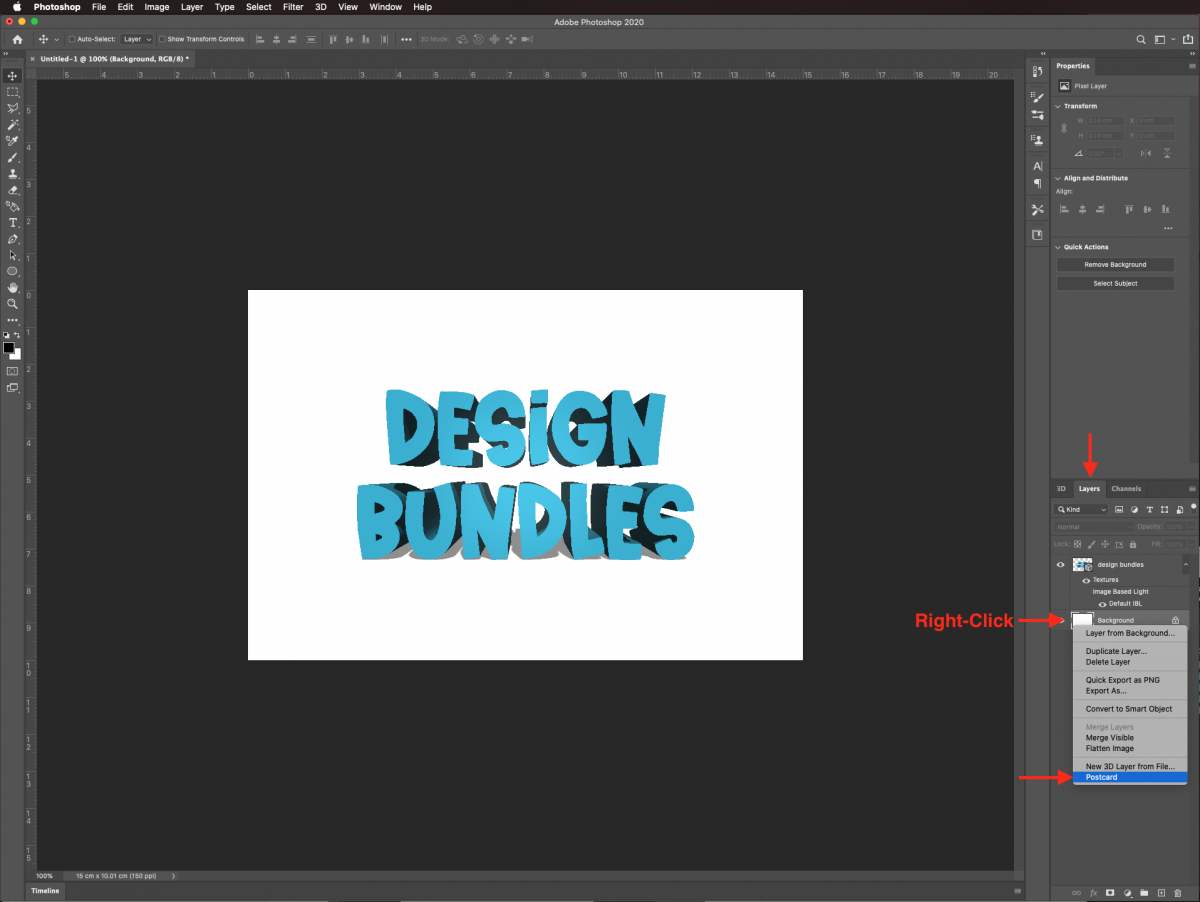
Click on the Layers Tab and select the background layer, right-click on top of its thumbnail and choose Postcard.
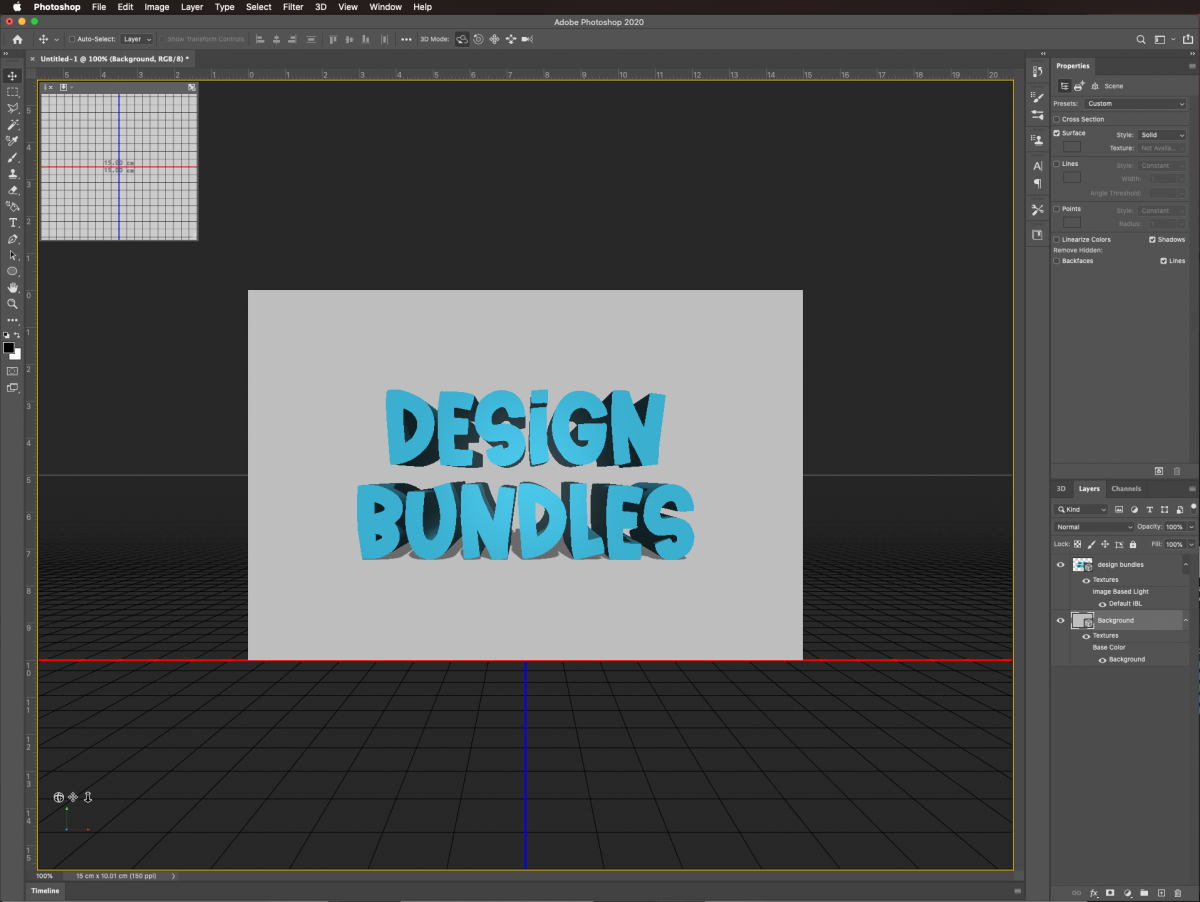
Select both layers and click command/control + alt/option + E to create a merged 3D image.
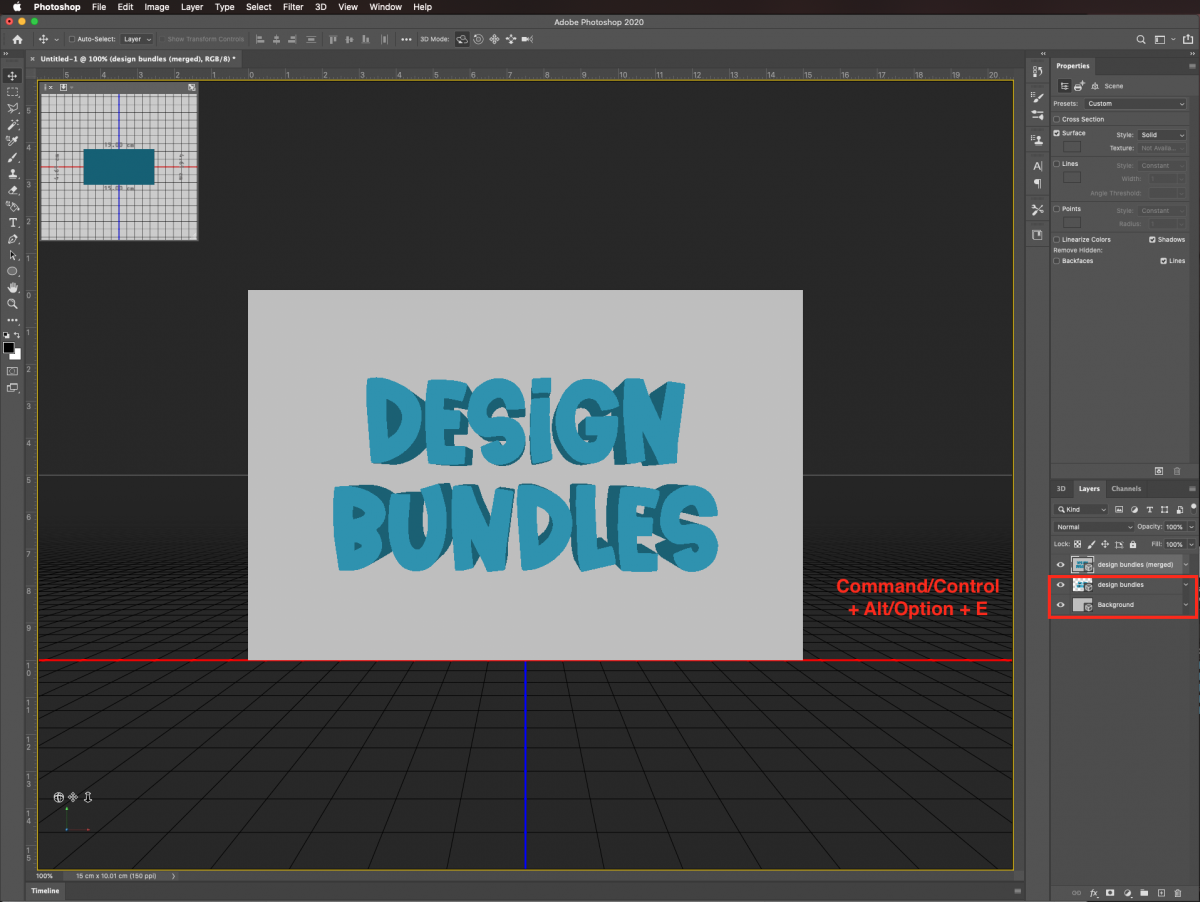
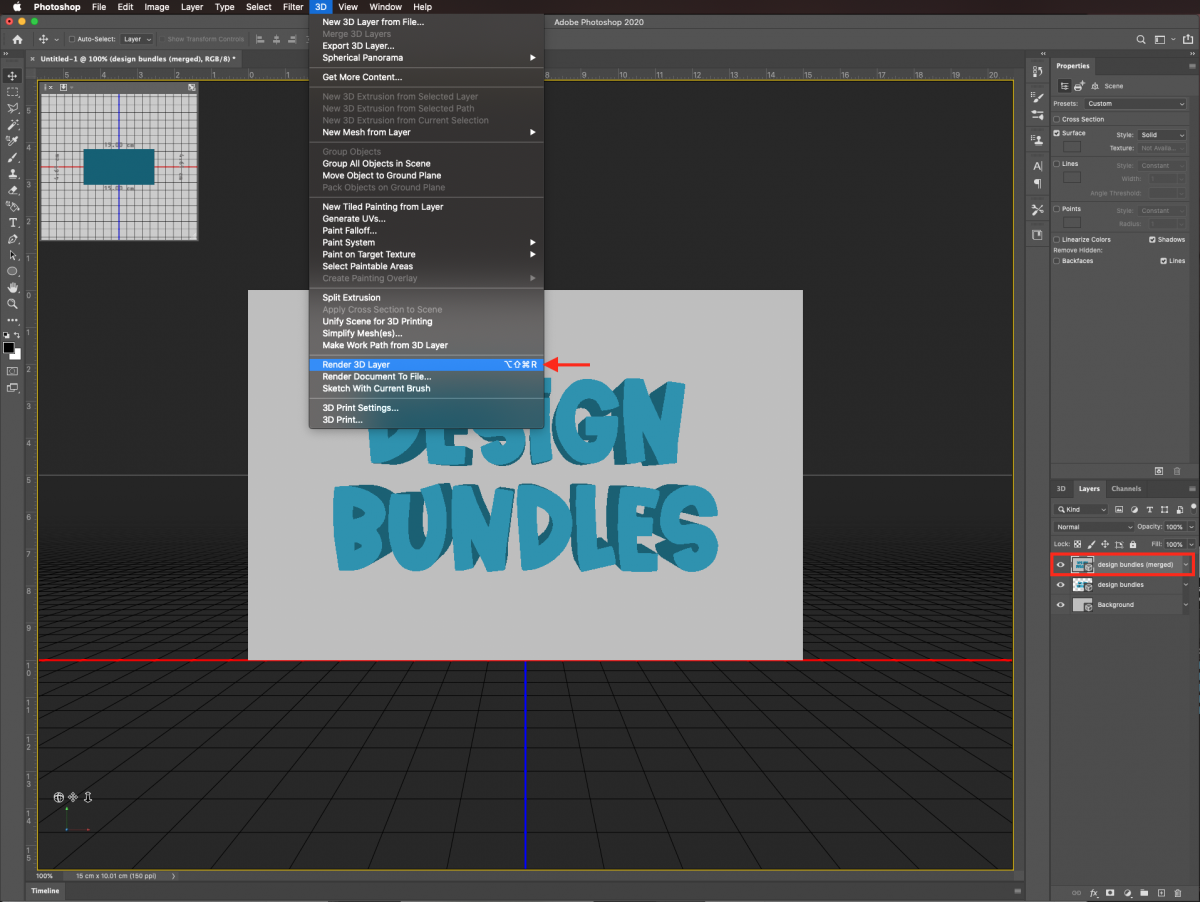
With the merged image selected, go to 3D > render 3D layer.
And wait for the render process to finish (it may take some time depending on your document’s size and/or resolution).

Your text should be similar to this.

Now you’ve successfully created 3D text in Photoshop!
If you liked this tutorial make sure to check out our other tutorials such as creating folded 3D text and making a 3D comic text effect in Photoshop.
Step 1- Create a New Document
In Photoshop, create a New Document and use white as your background color. Ours was 15 x 10 cm @150 dpi, RGB, but you should choose yours depending on what you want to use your artwork in.
Step 2- Add Your Text
The font we’ve chosen today is the Water Park font. There are tons of great modern sans serif fonts available on Font Bundles. Select the Type Tool (T), choose your font, and type your text. Use black as the Foreground color.
Step 3- Align Your Text
Select both layers (shift key) and head to the top menu to center your text by clicking the Horizontal and Vertical Align Centers buttons.
Change the size of your text and re-center it if needed.
Step 4- Create a 3D Extrusion from Your Text
With your Text Tool and text layer selected, click on the 3D button on the top menu.
Or right-click on top of the text’s layer thumbnail and choose new 3D extrusion from selected layer.
Click yes on the pop-up window.
Step 5- Add Color to the 3D Text
In the 3D panel select Design Bundles (or the word you used) to show its contents and then select the front inflation material.
Head to the Properties Panel, click on base color and select a color in the color picker.
Now, select the extrusion material. Head to the Properties Panel, click on base color and select another color in the color picker (we used a darker shade of the same color used before).
\
The resulting text should look similar to this.
Step 6- Select Background Format
Click on the Layers Tab and select the background layer, right-click on top of its thumbnail and choose Postcard.
Step 7- Merge 3D Text and Background
Select both layers and click command/control + alt/option + E to create a merged 3D image.
Step 8- Render the 3D Text
With the merged image selected, go to 3D > render 3D layer.
And wait for the render process to finish (it may take some time depending on your document’s size and/or resolution).
Your text should be similar to this.
Now you’ve successfully created 3D text in Photoshop!
If you liked this tutorial make sure to check out our other tutorials such as creating folded 3D text and making a 3D comic text effect in Photoshop.
Related Tutorials
Photoshop Tutorials
How to Make a Graffiti Text Effect in Photoshop
Learn how to create a realistic grafitti text effect in Photoshop.
Photoshop Tutorials
3D Comic Text in Photoshop
Photoshop Tutorials
Hollow 3D Text Effect in Photoshop
Learn how to create a hollow 3D text effect in Photoshop.
DesignScape Tutorials
How to Make 3D Text in DesignScape
Learn how to create 3D text in DesignScape with this tutorial.
Photoshop Tutorials
Rainbow Cake Text Effect in Photoshop 3D Text
Photoshop Tutorials