By Design Bundles
Photoshop Tutorials14 min
Folded 3D Text in Photoshop
For this tutorial, you will need a couple of images to add to the text and the font “Penzance” from Font Bundles.
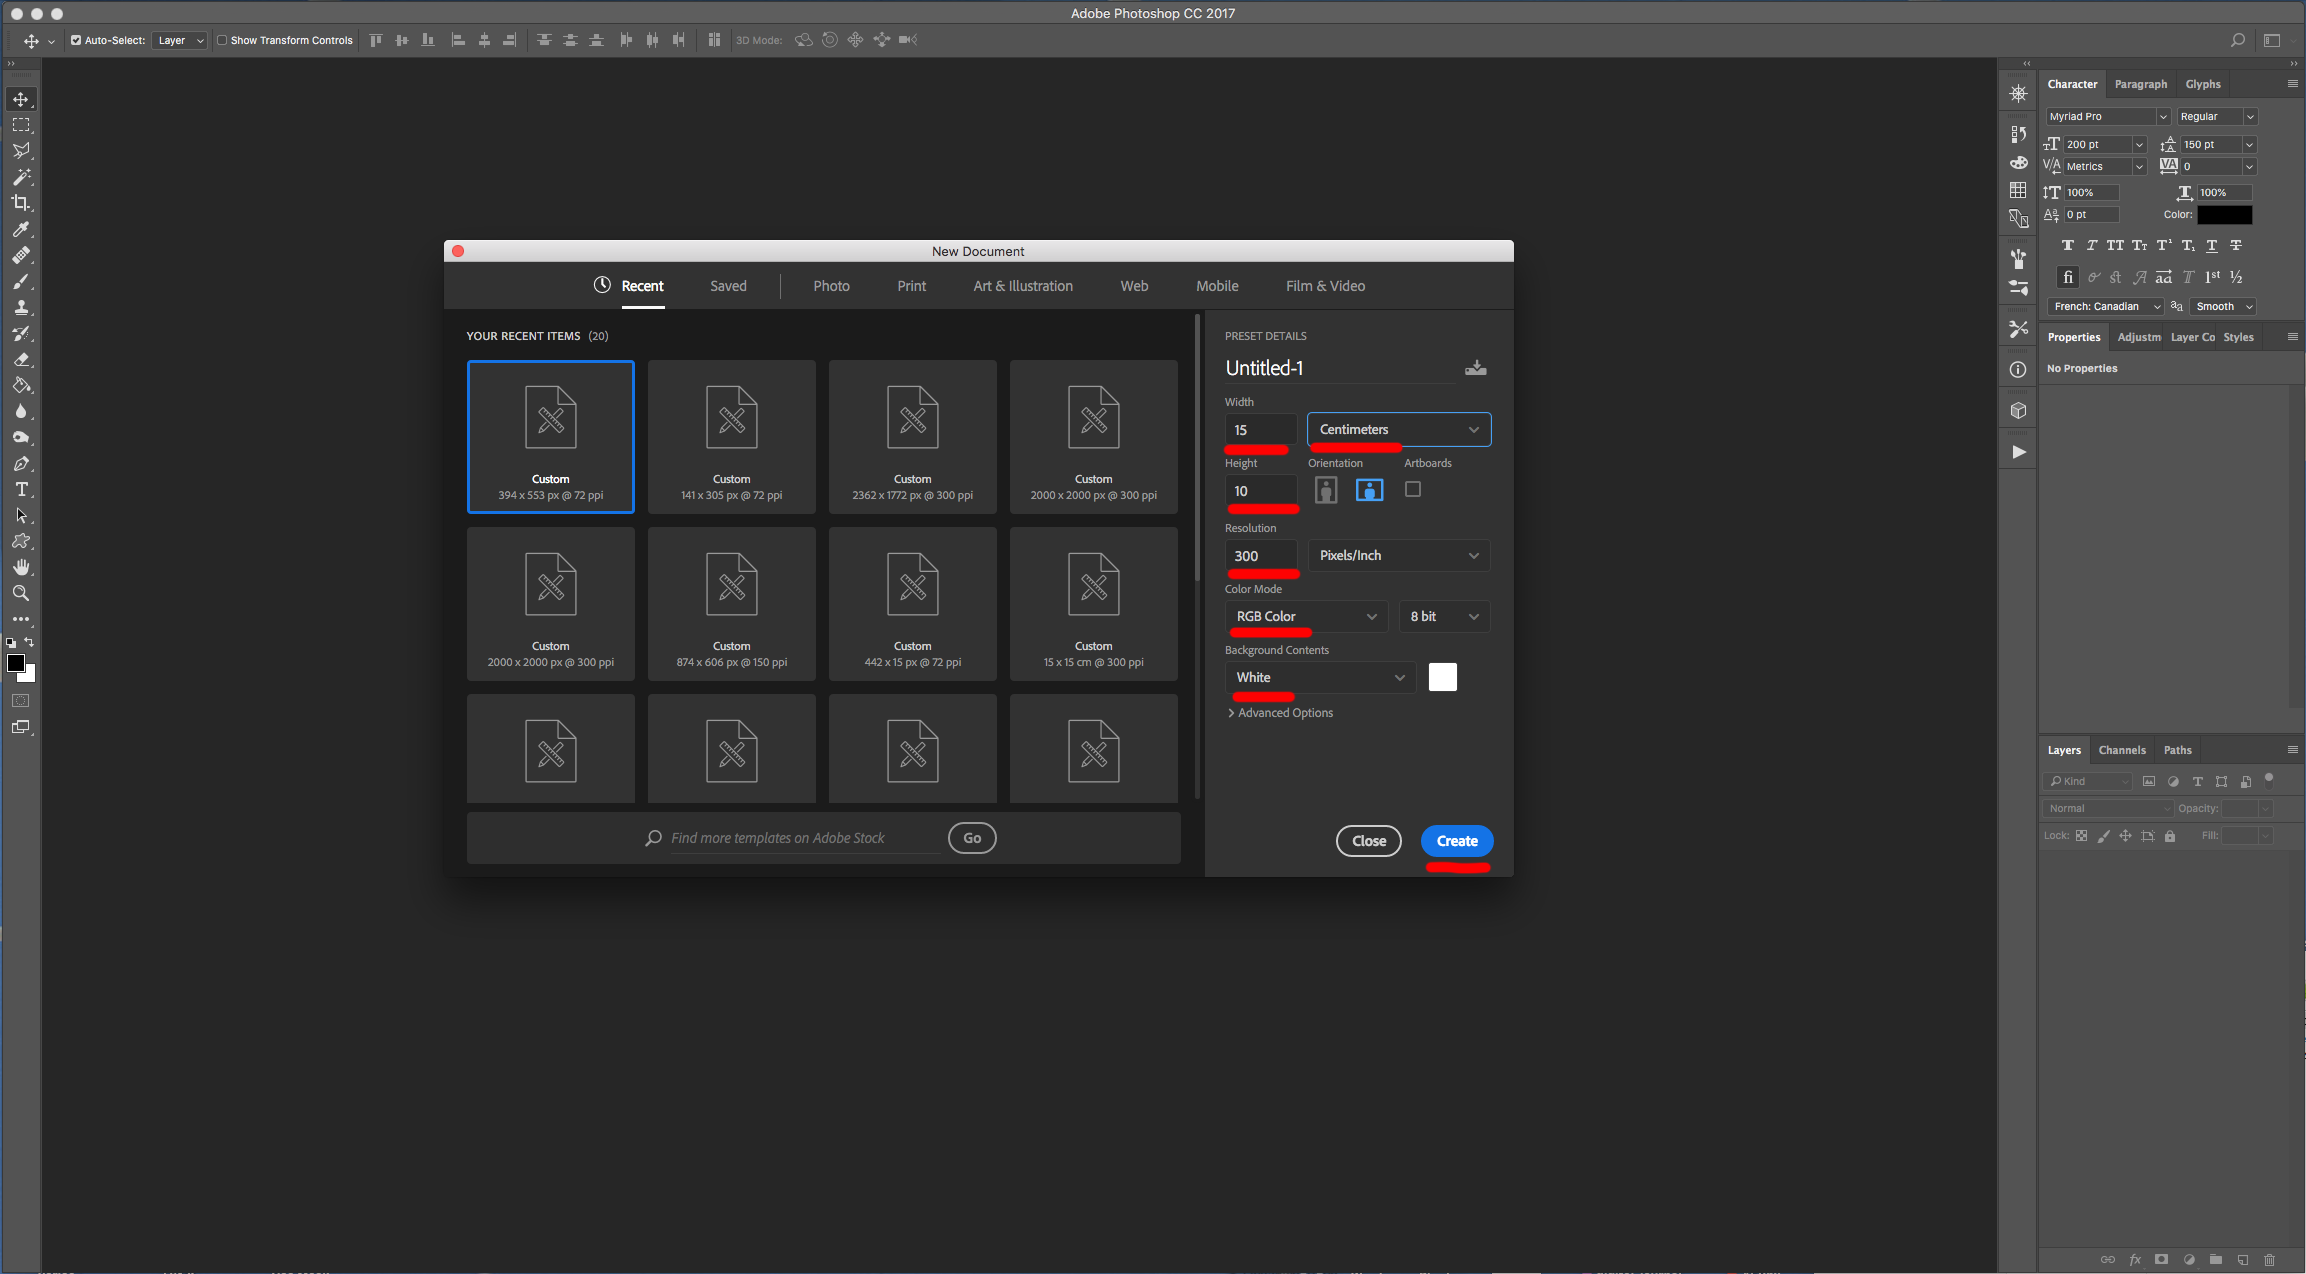
1 - In Photoshop, create a “New Document”. Make it 15 cm in “Width” and 10 cm in “Height” @ 300 dpi, RGB Color and use White as “Background” color.
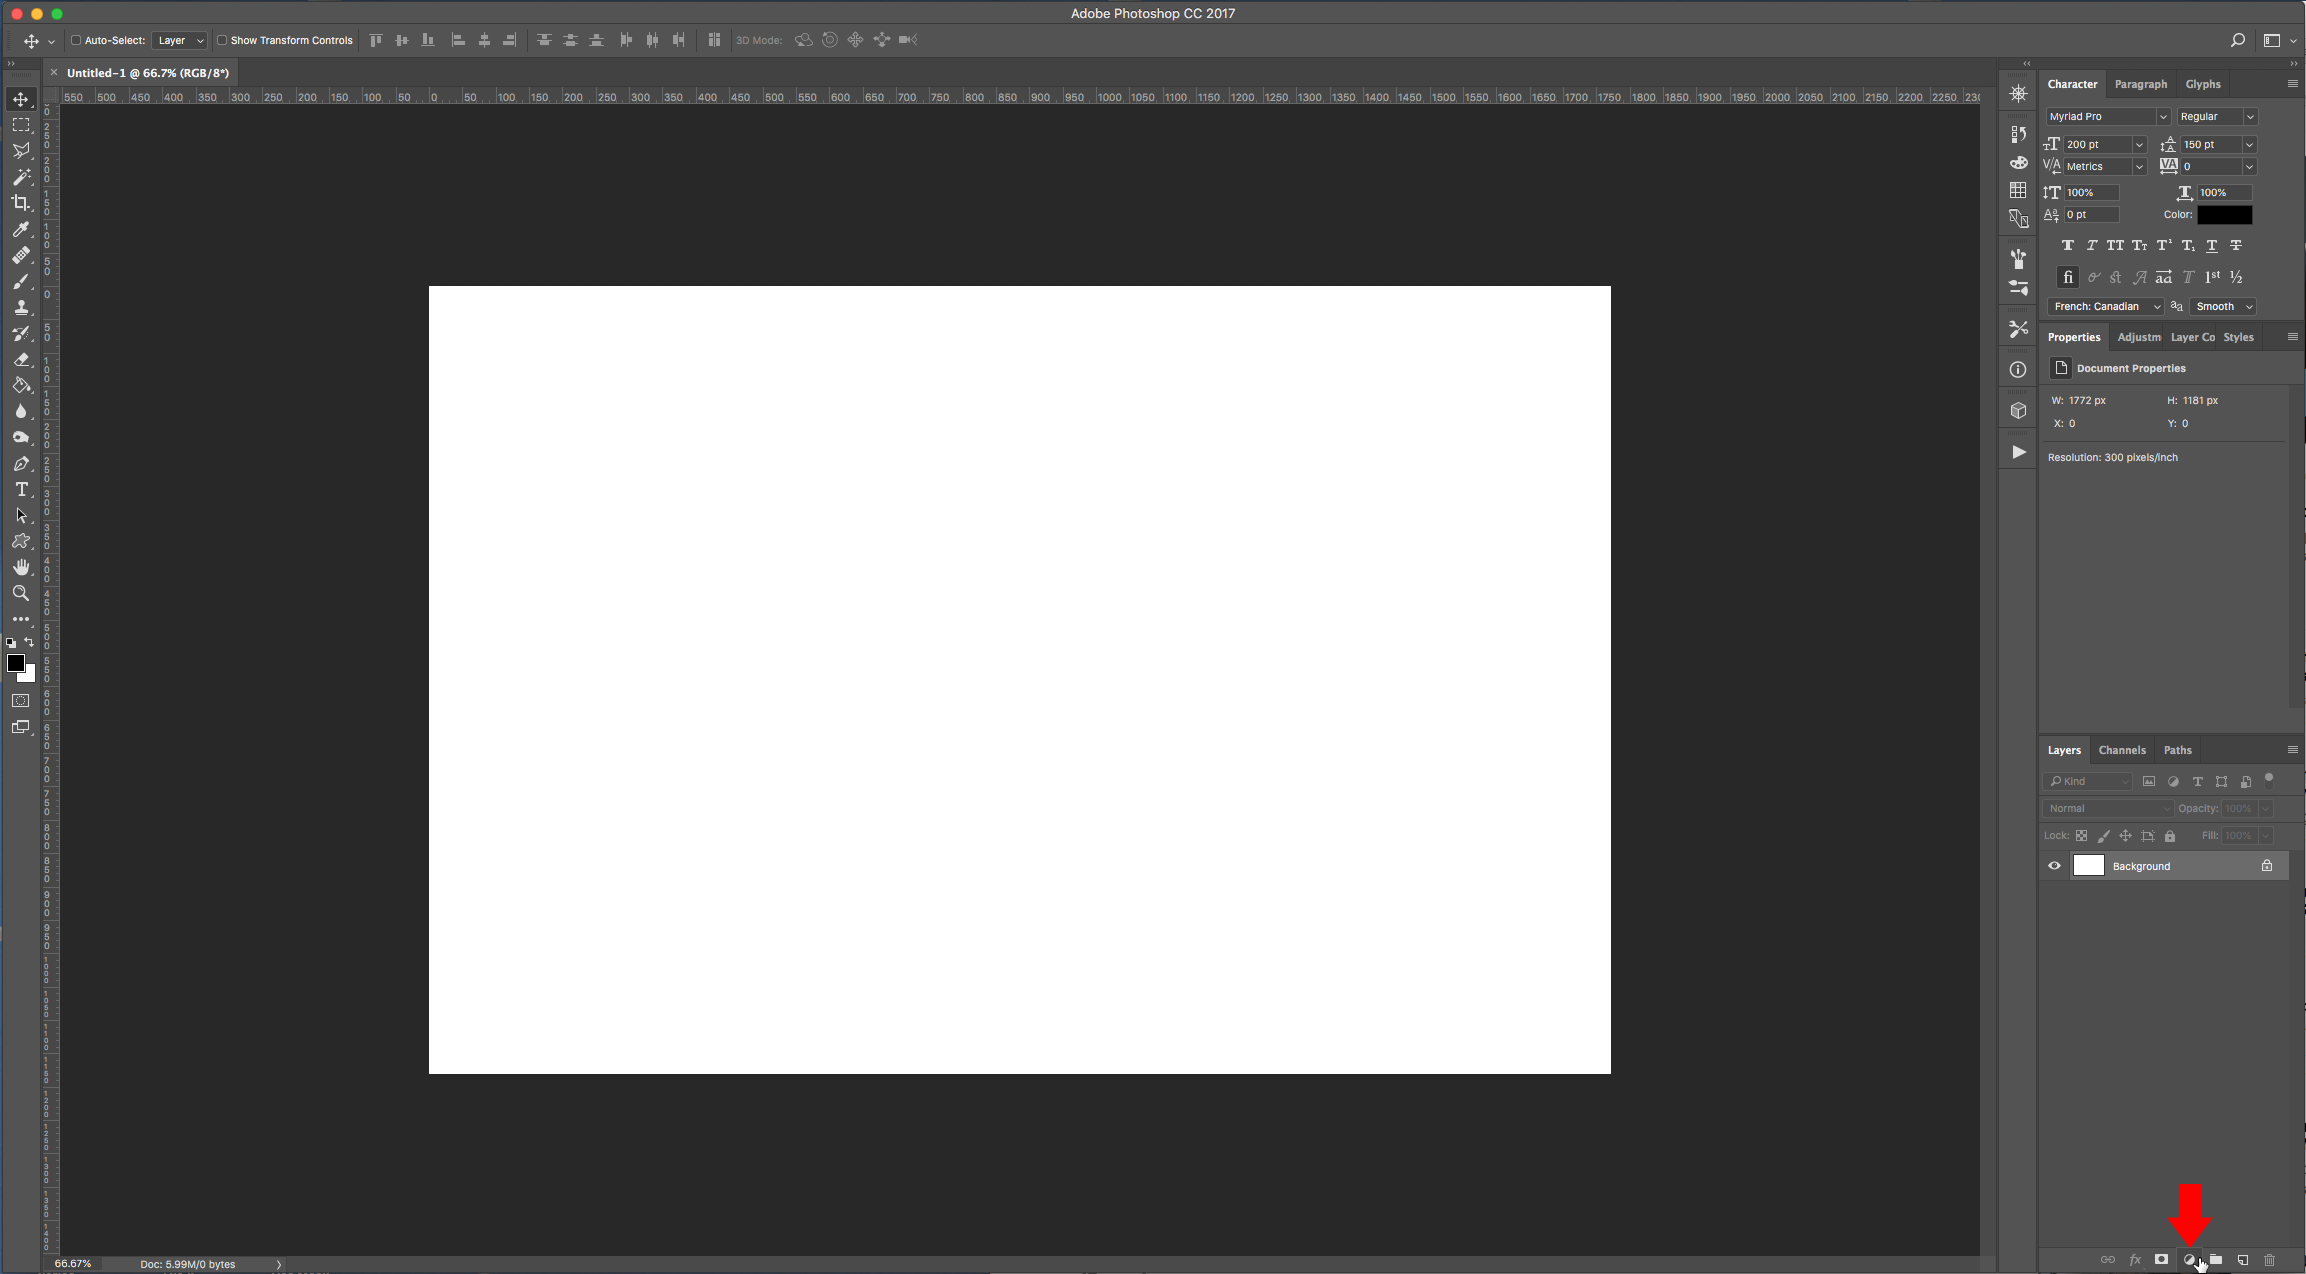
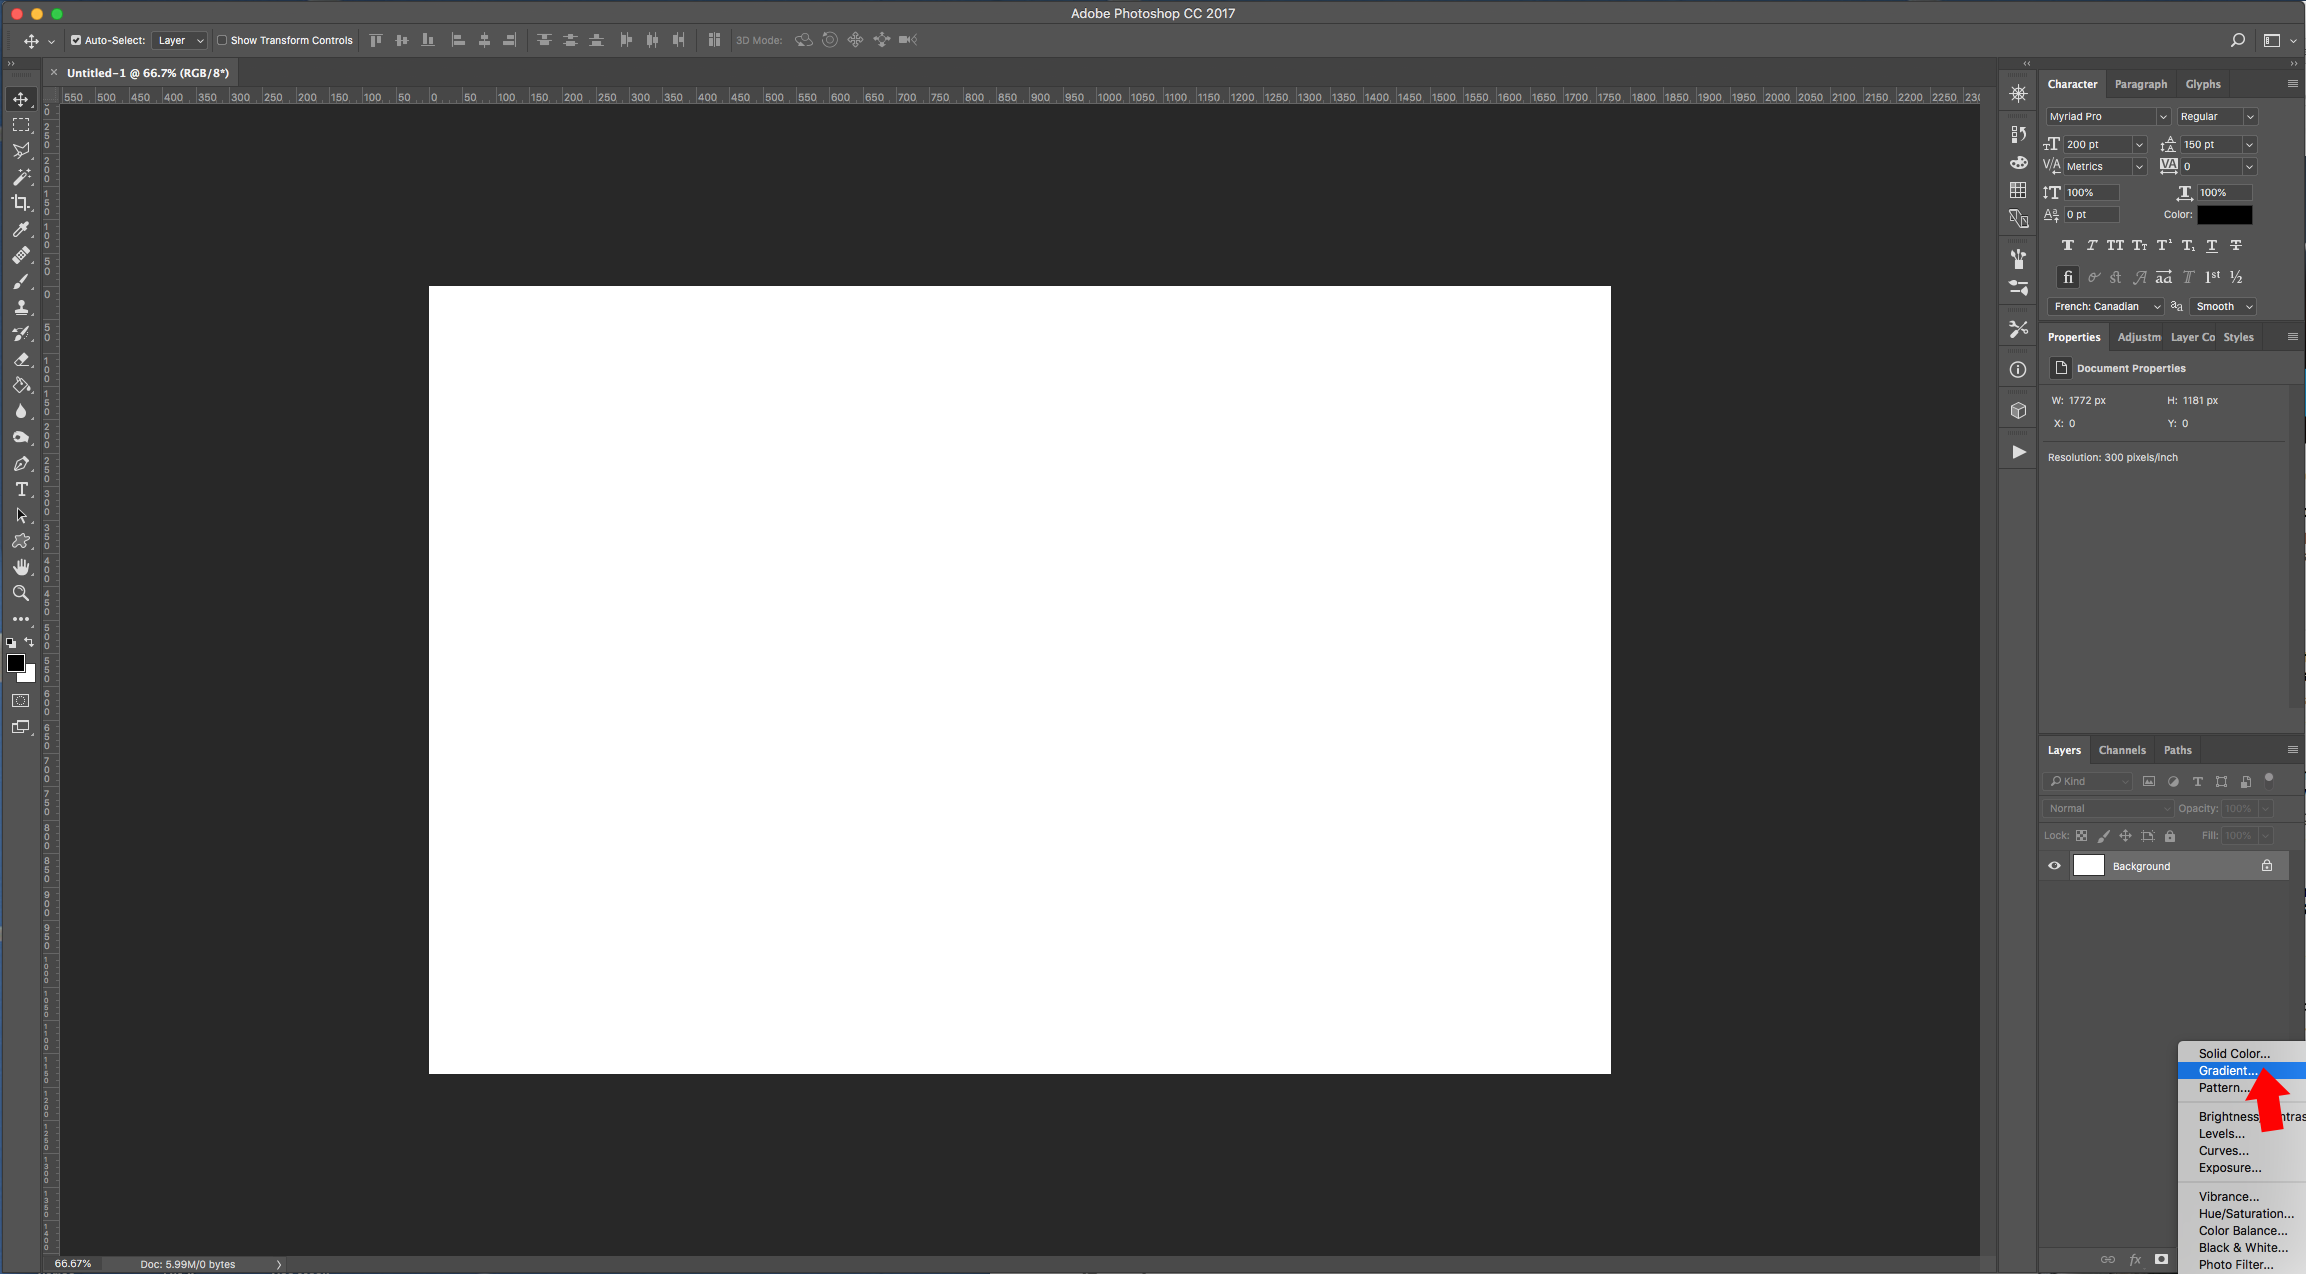
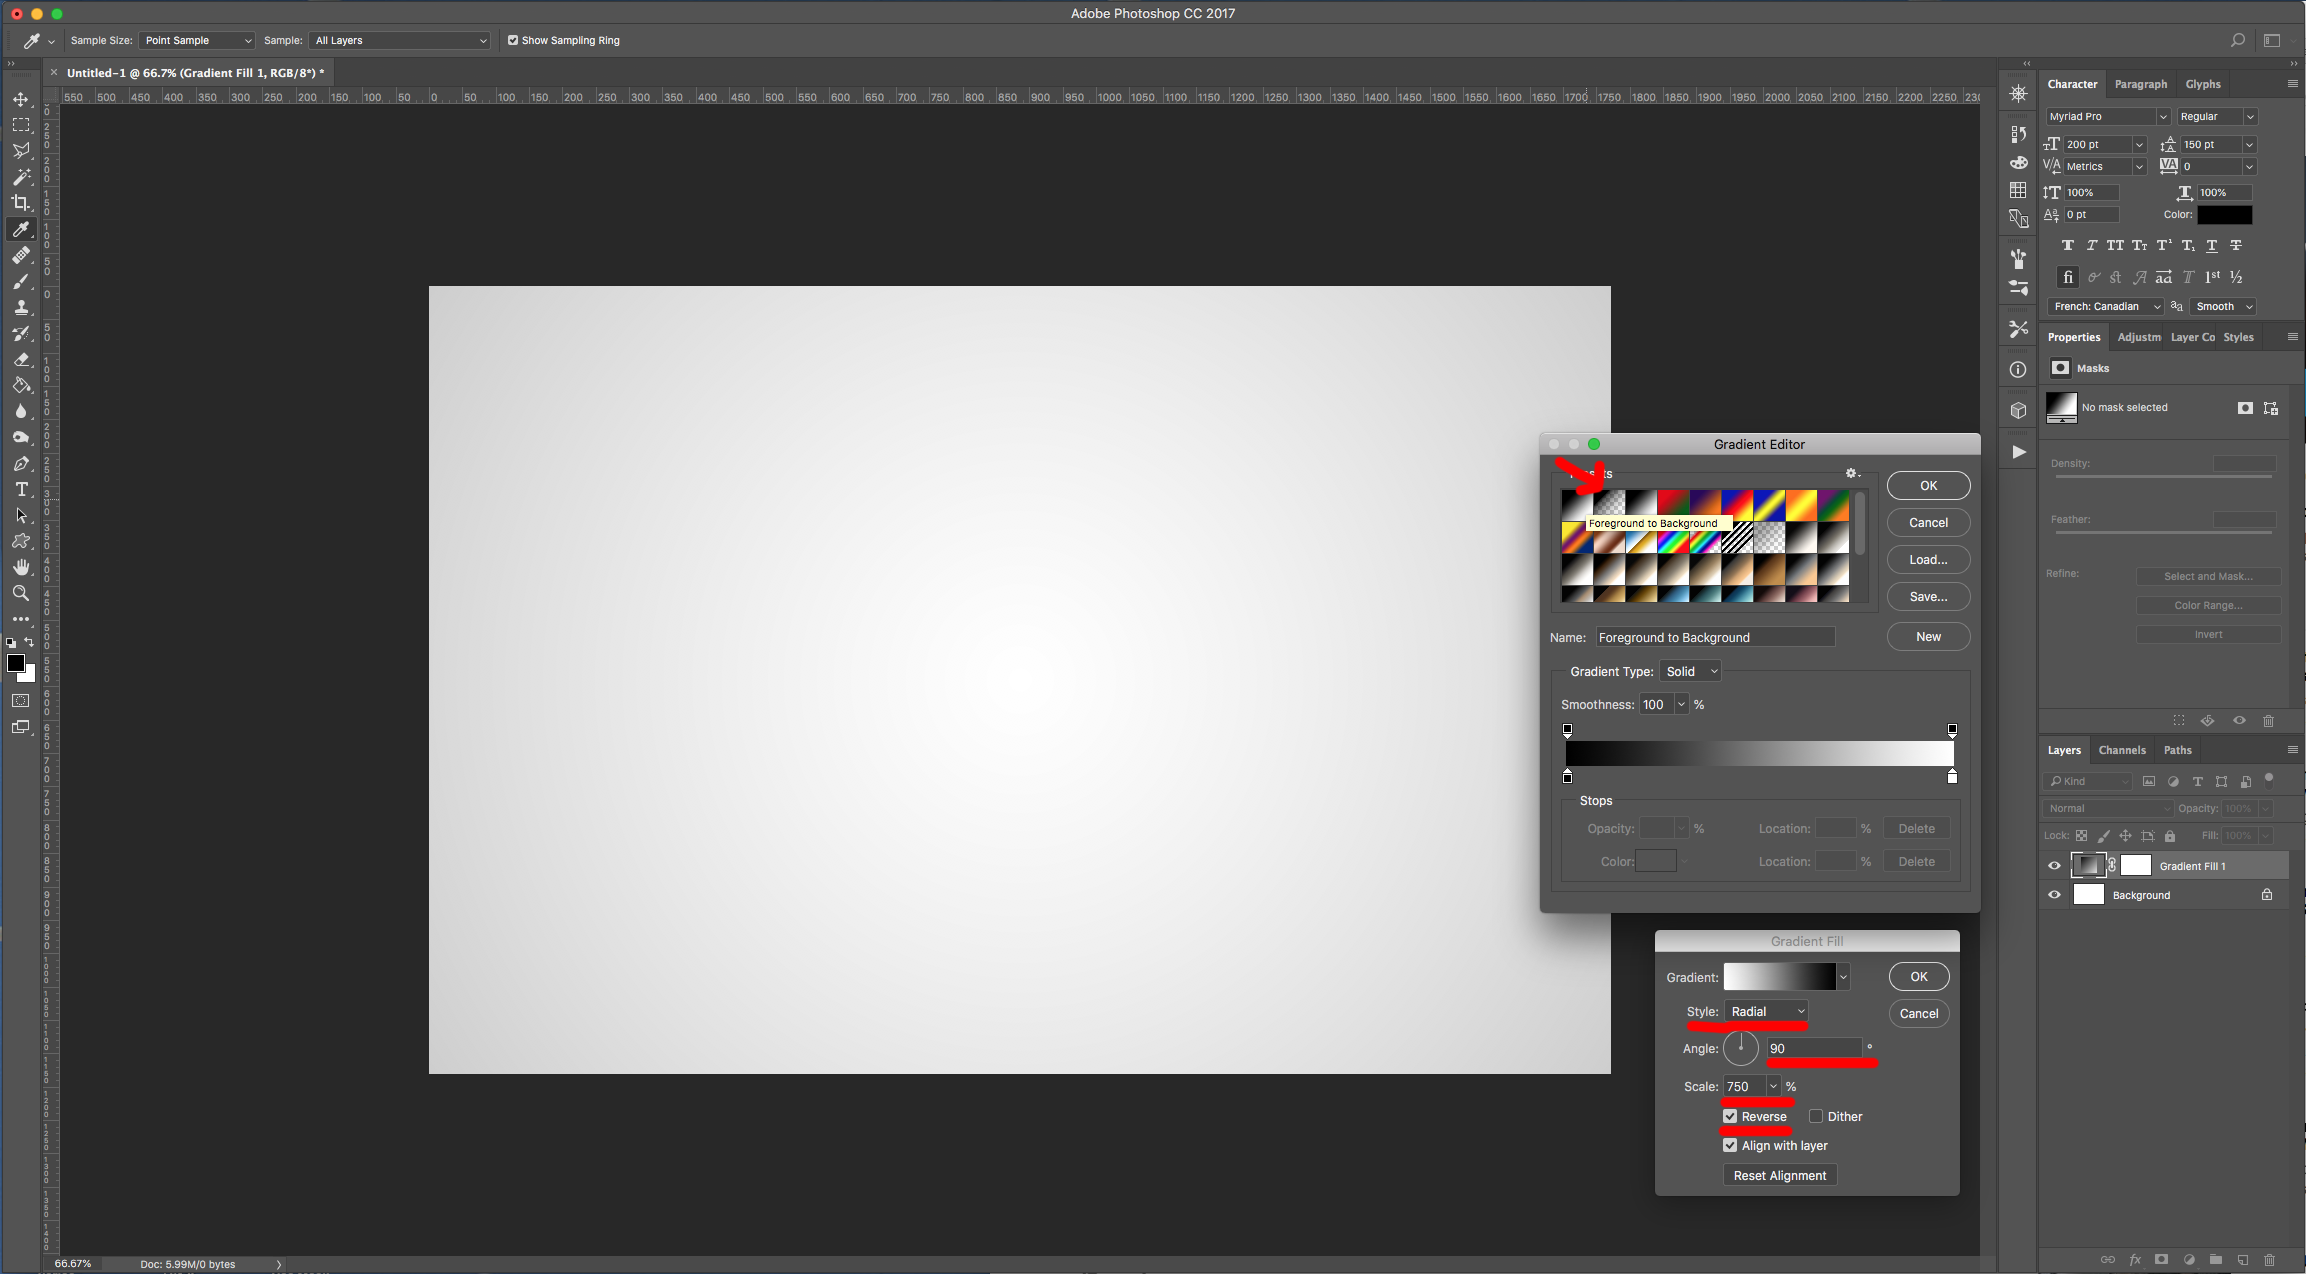
2 - Create a “New Gradient Fill Layer” by clicking on the small Black & White circular icon at the bottom of the “Layers Panel”. Use a “Foreground to Background Radial” Gradient (Black to White) with a 90° Angle, as “Scale” of 750 % and check the “Reverse” button.
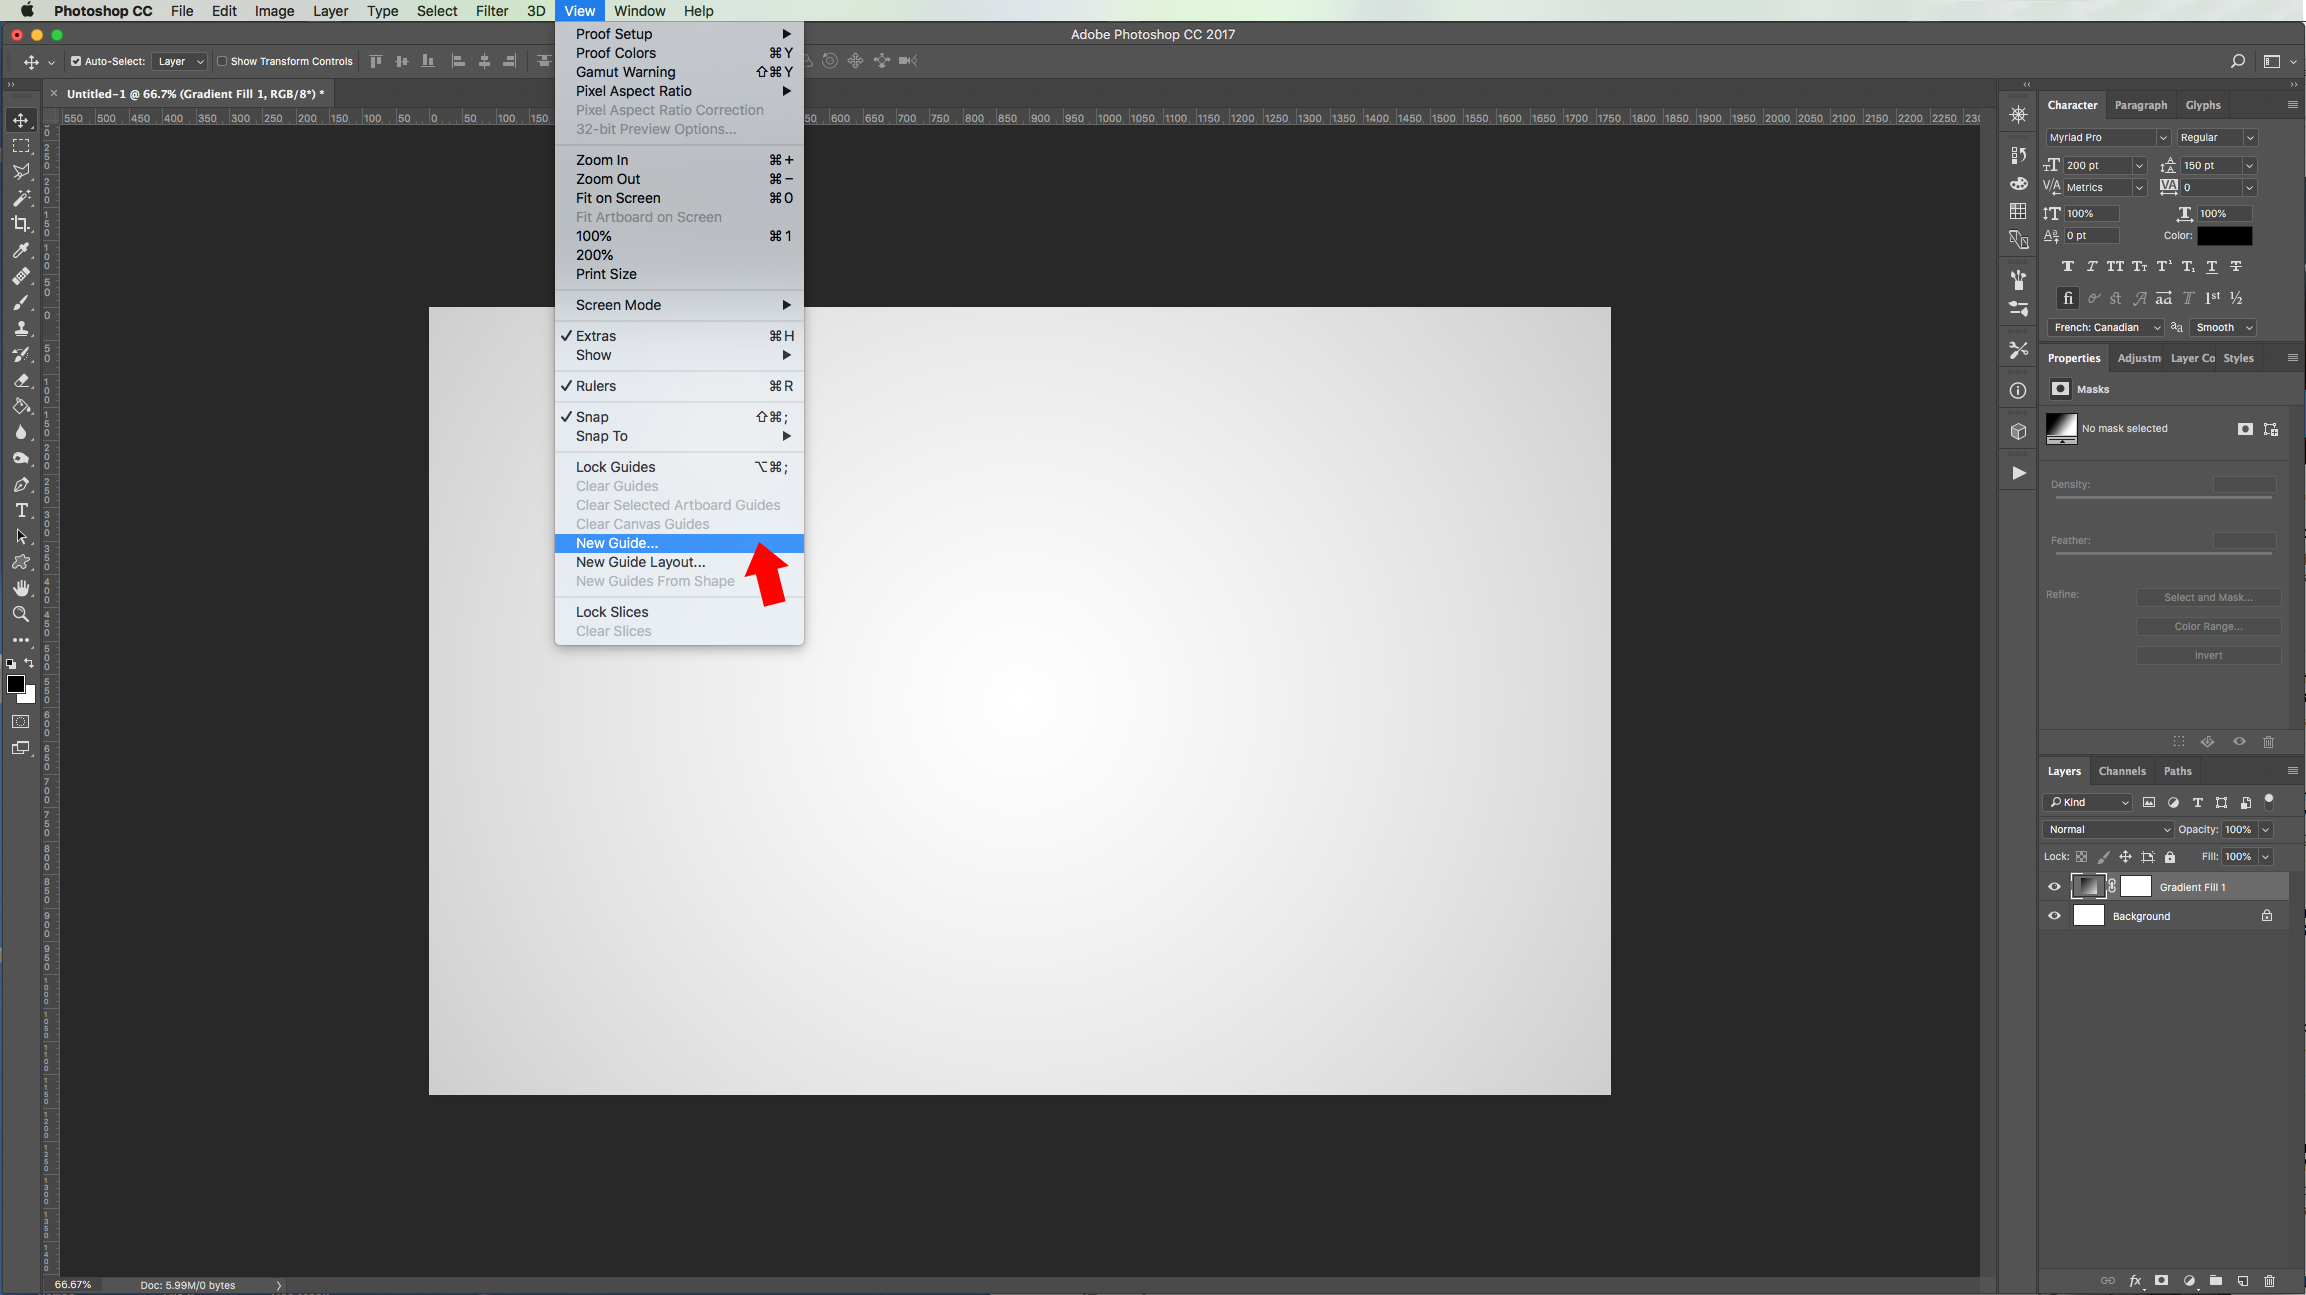
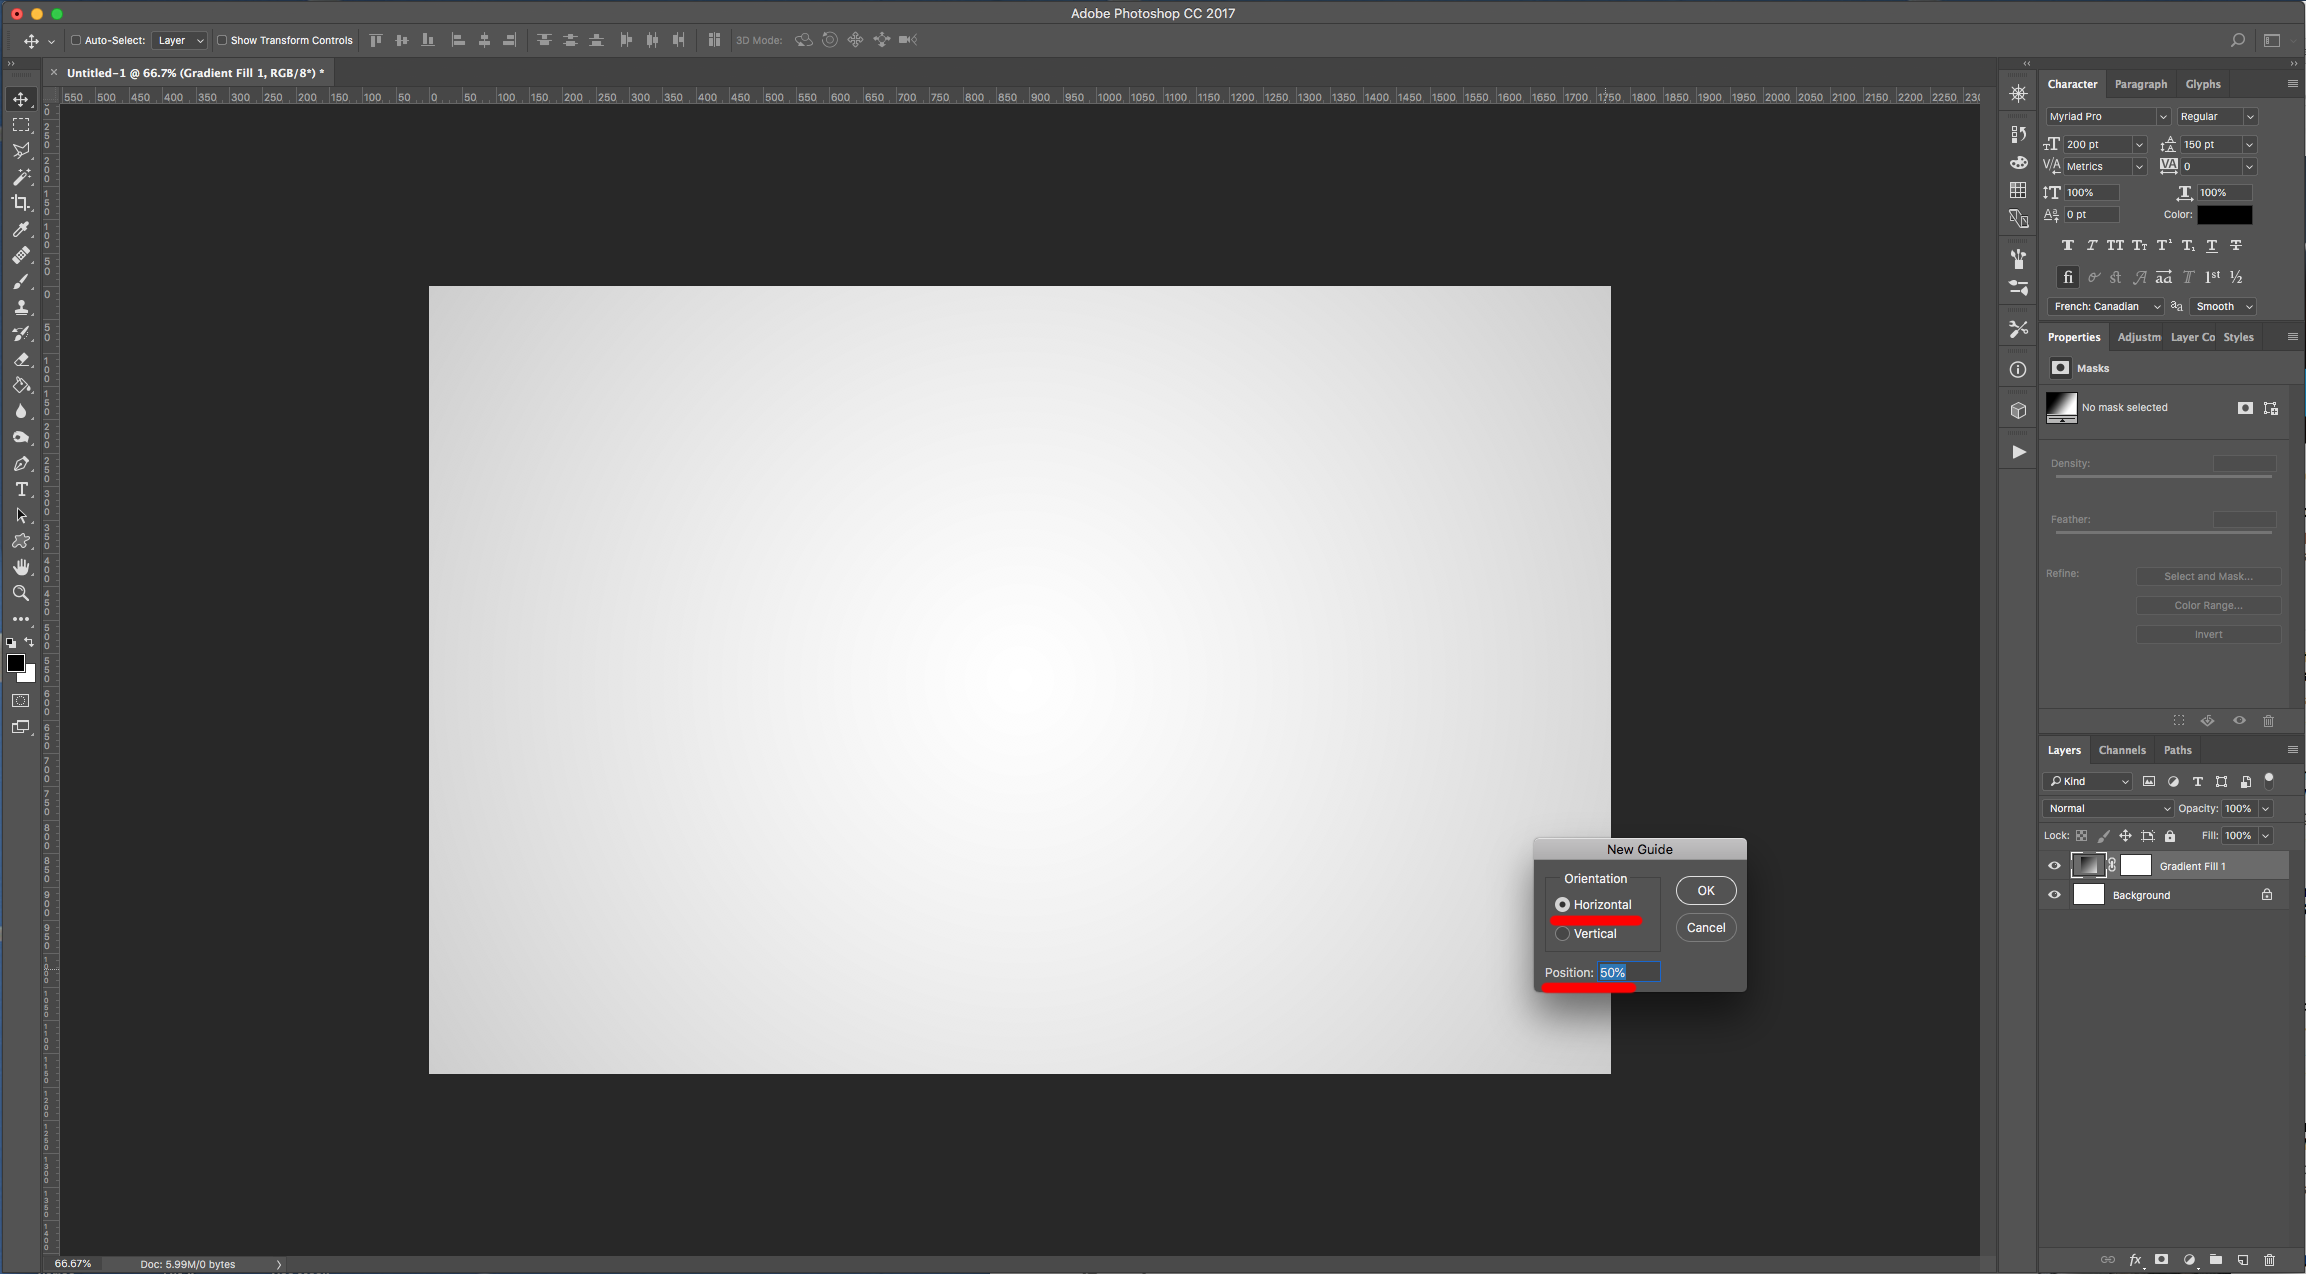
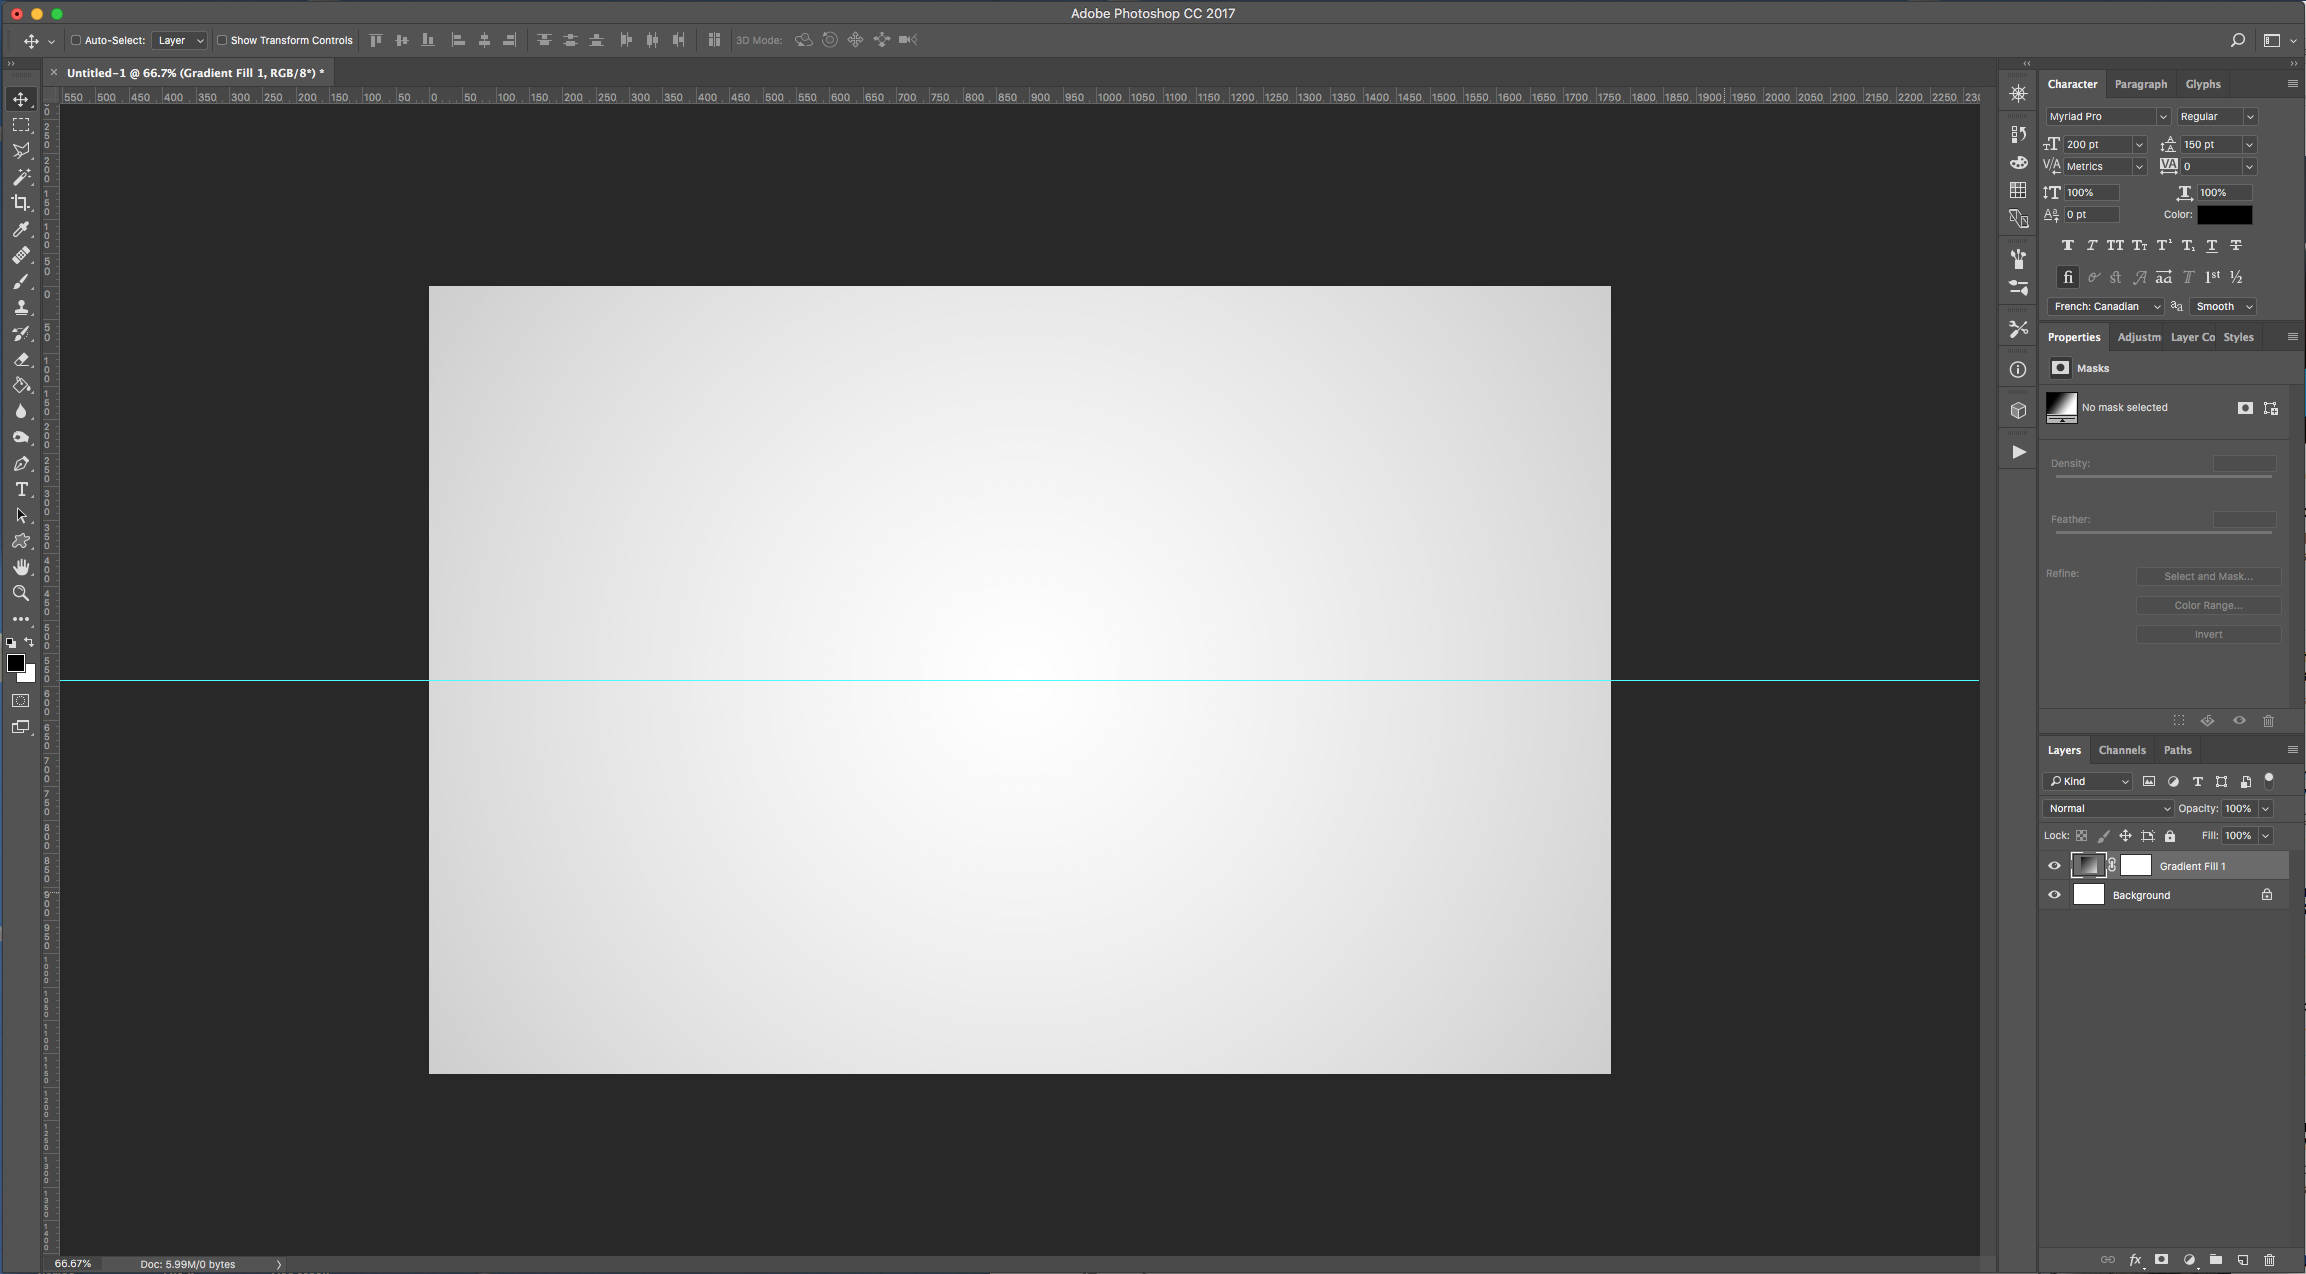
3 - Go to View > New Guide… and choose “Horizontal” and 50% “Position”. Click “OK”.
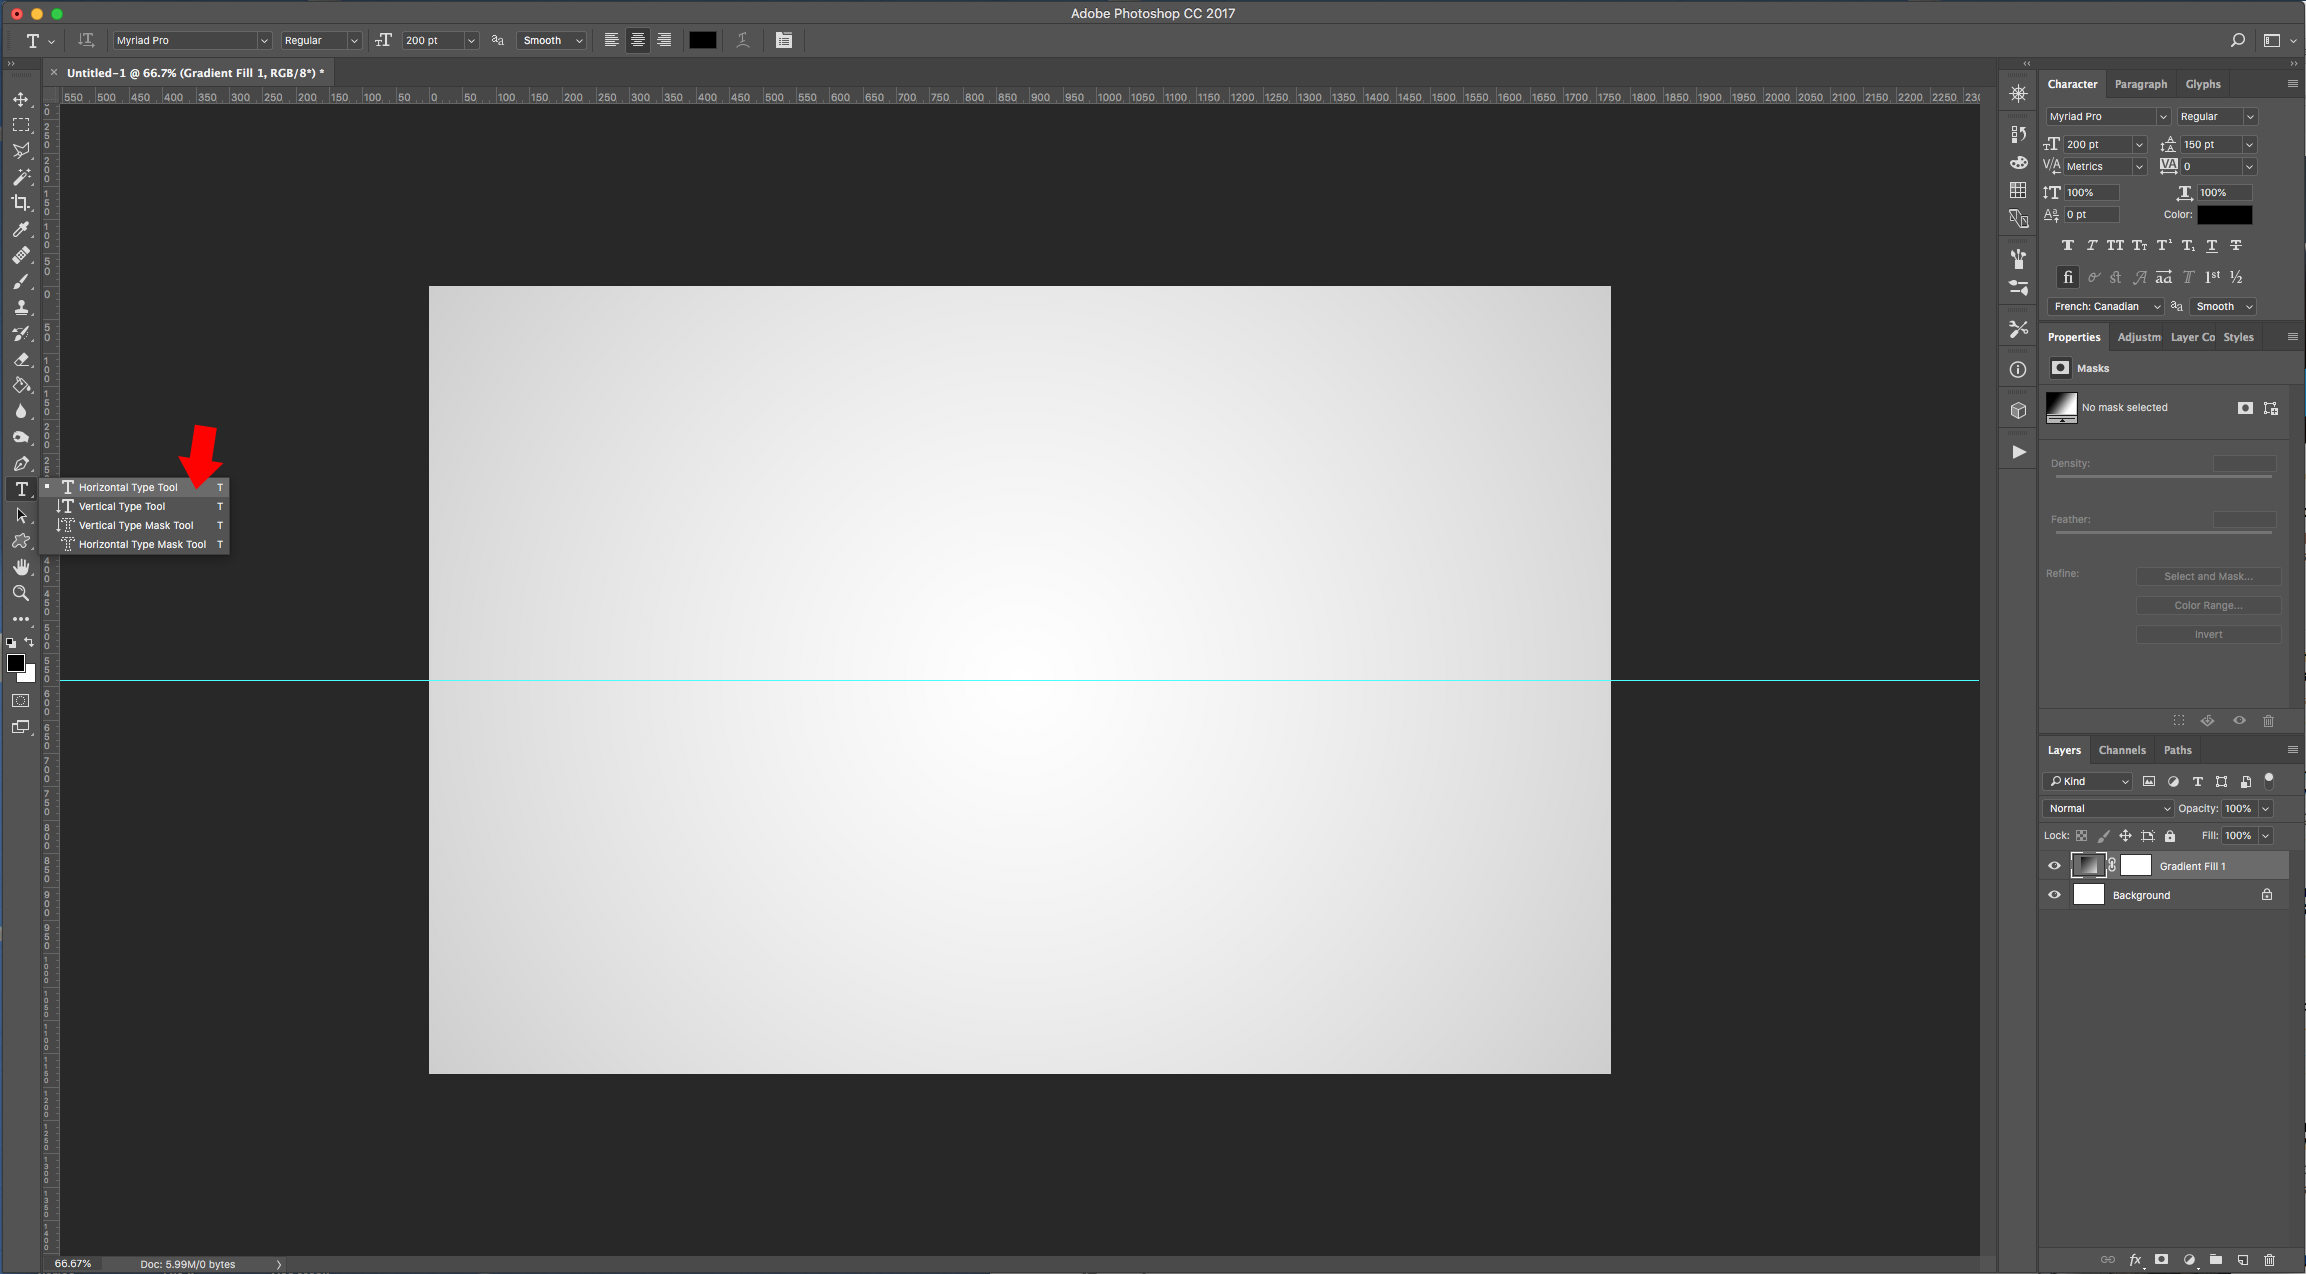
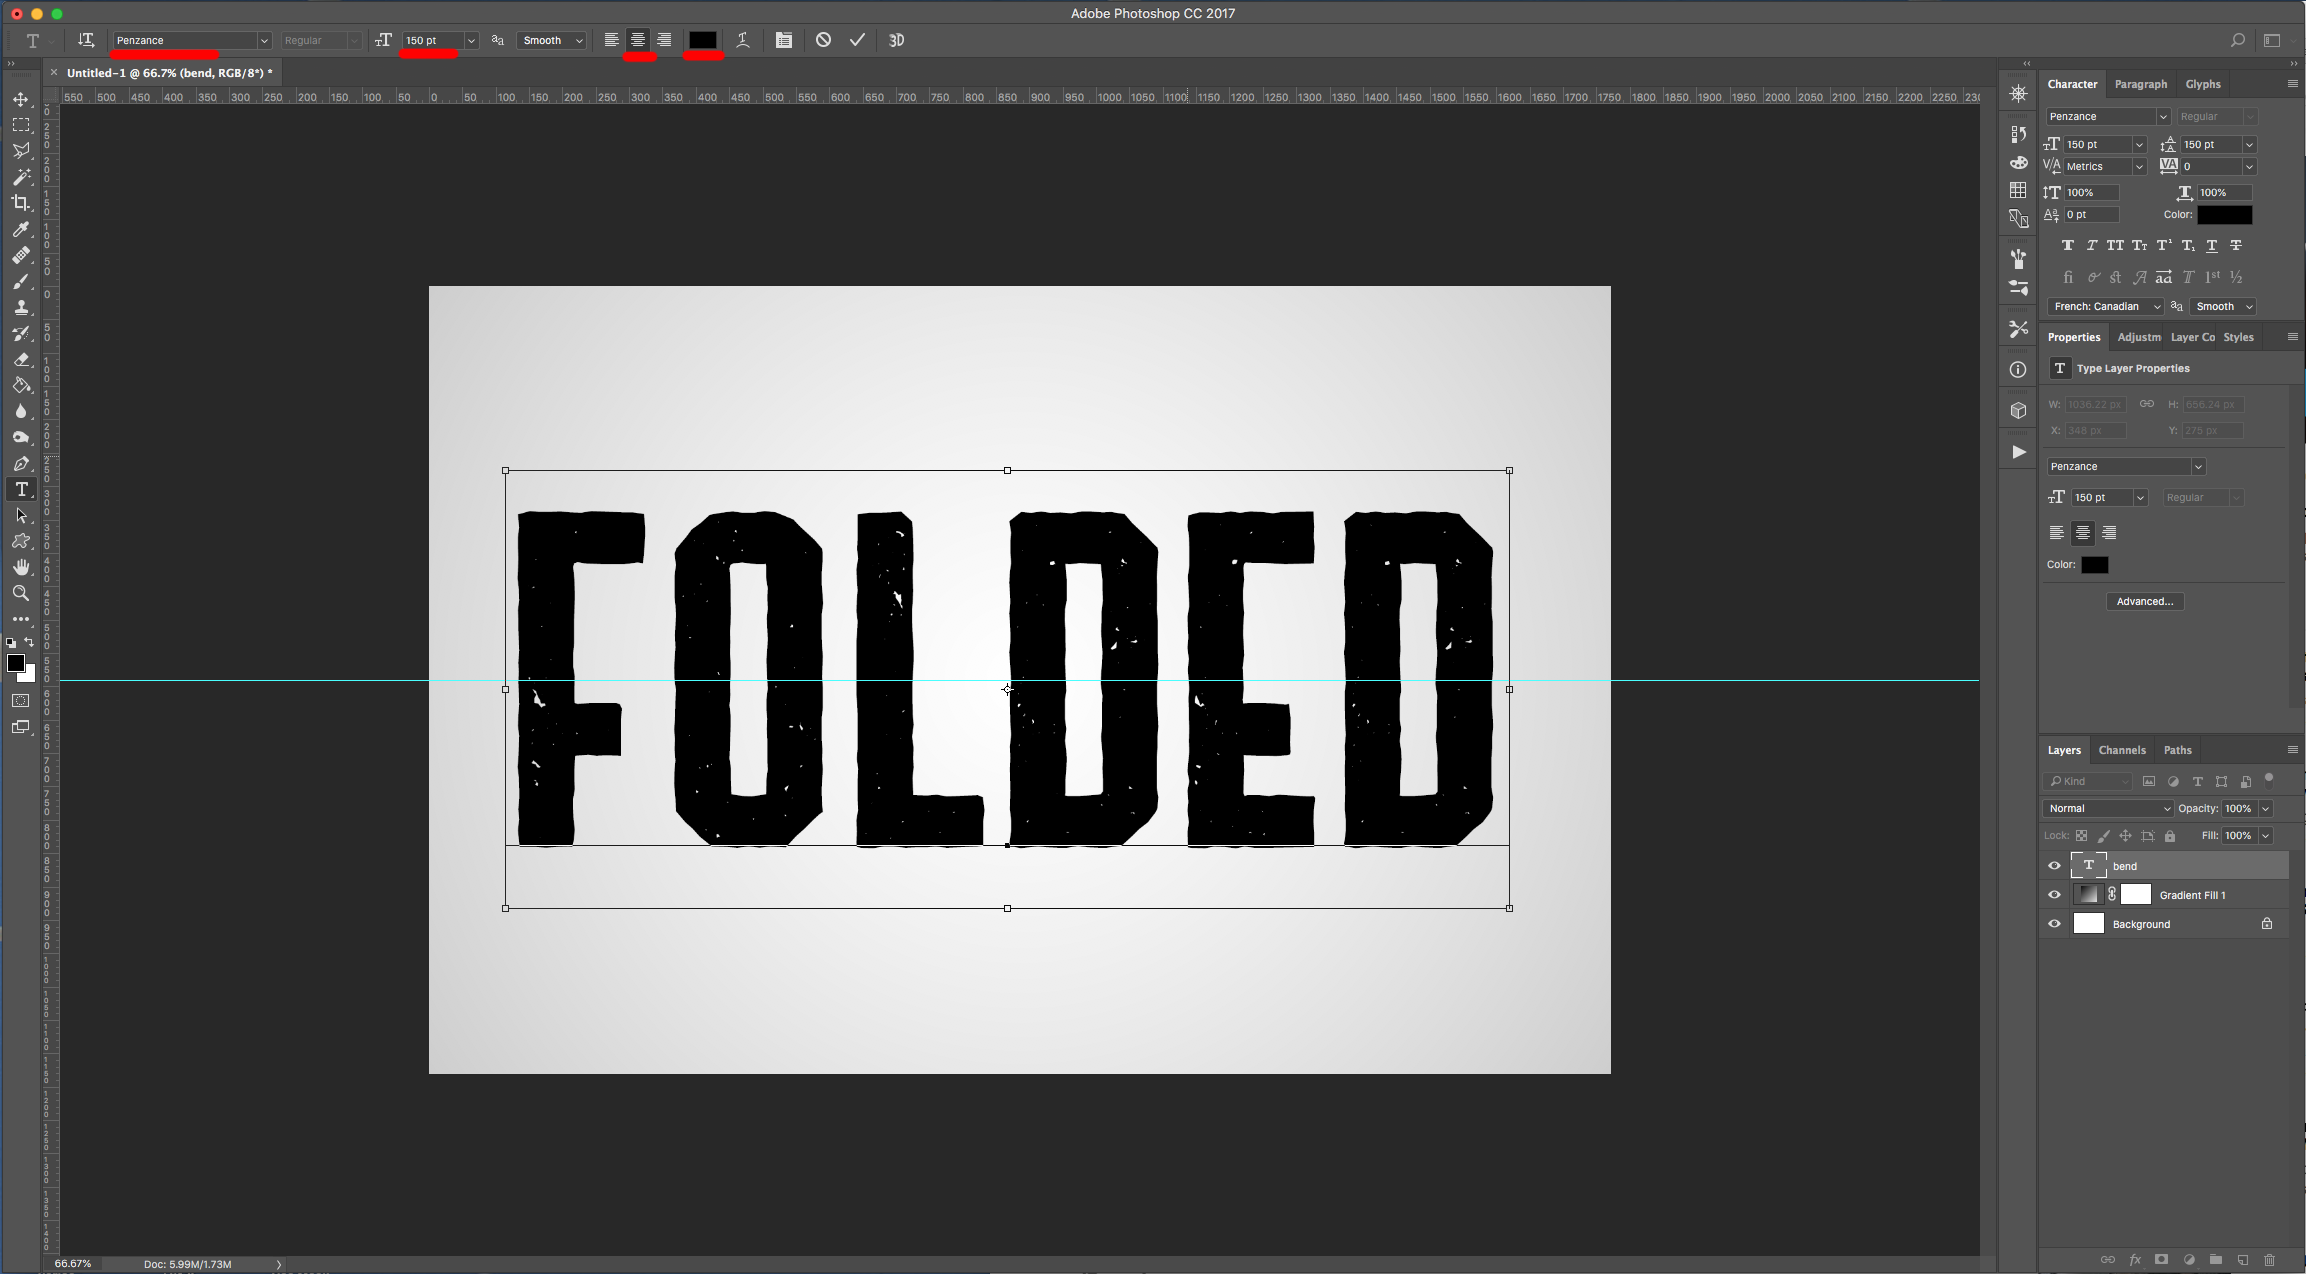
4 - Select the “Type Tool” (T), choose your font (we used “Penzance”) and type your text. Use Black as fill color and make it as big as needed to fit inside your Canvas (150 pt).
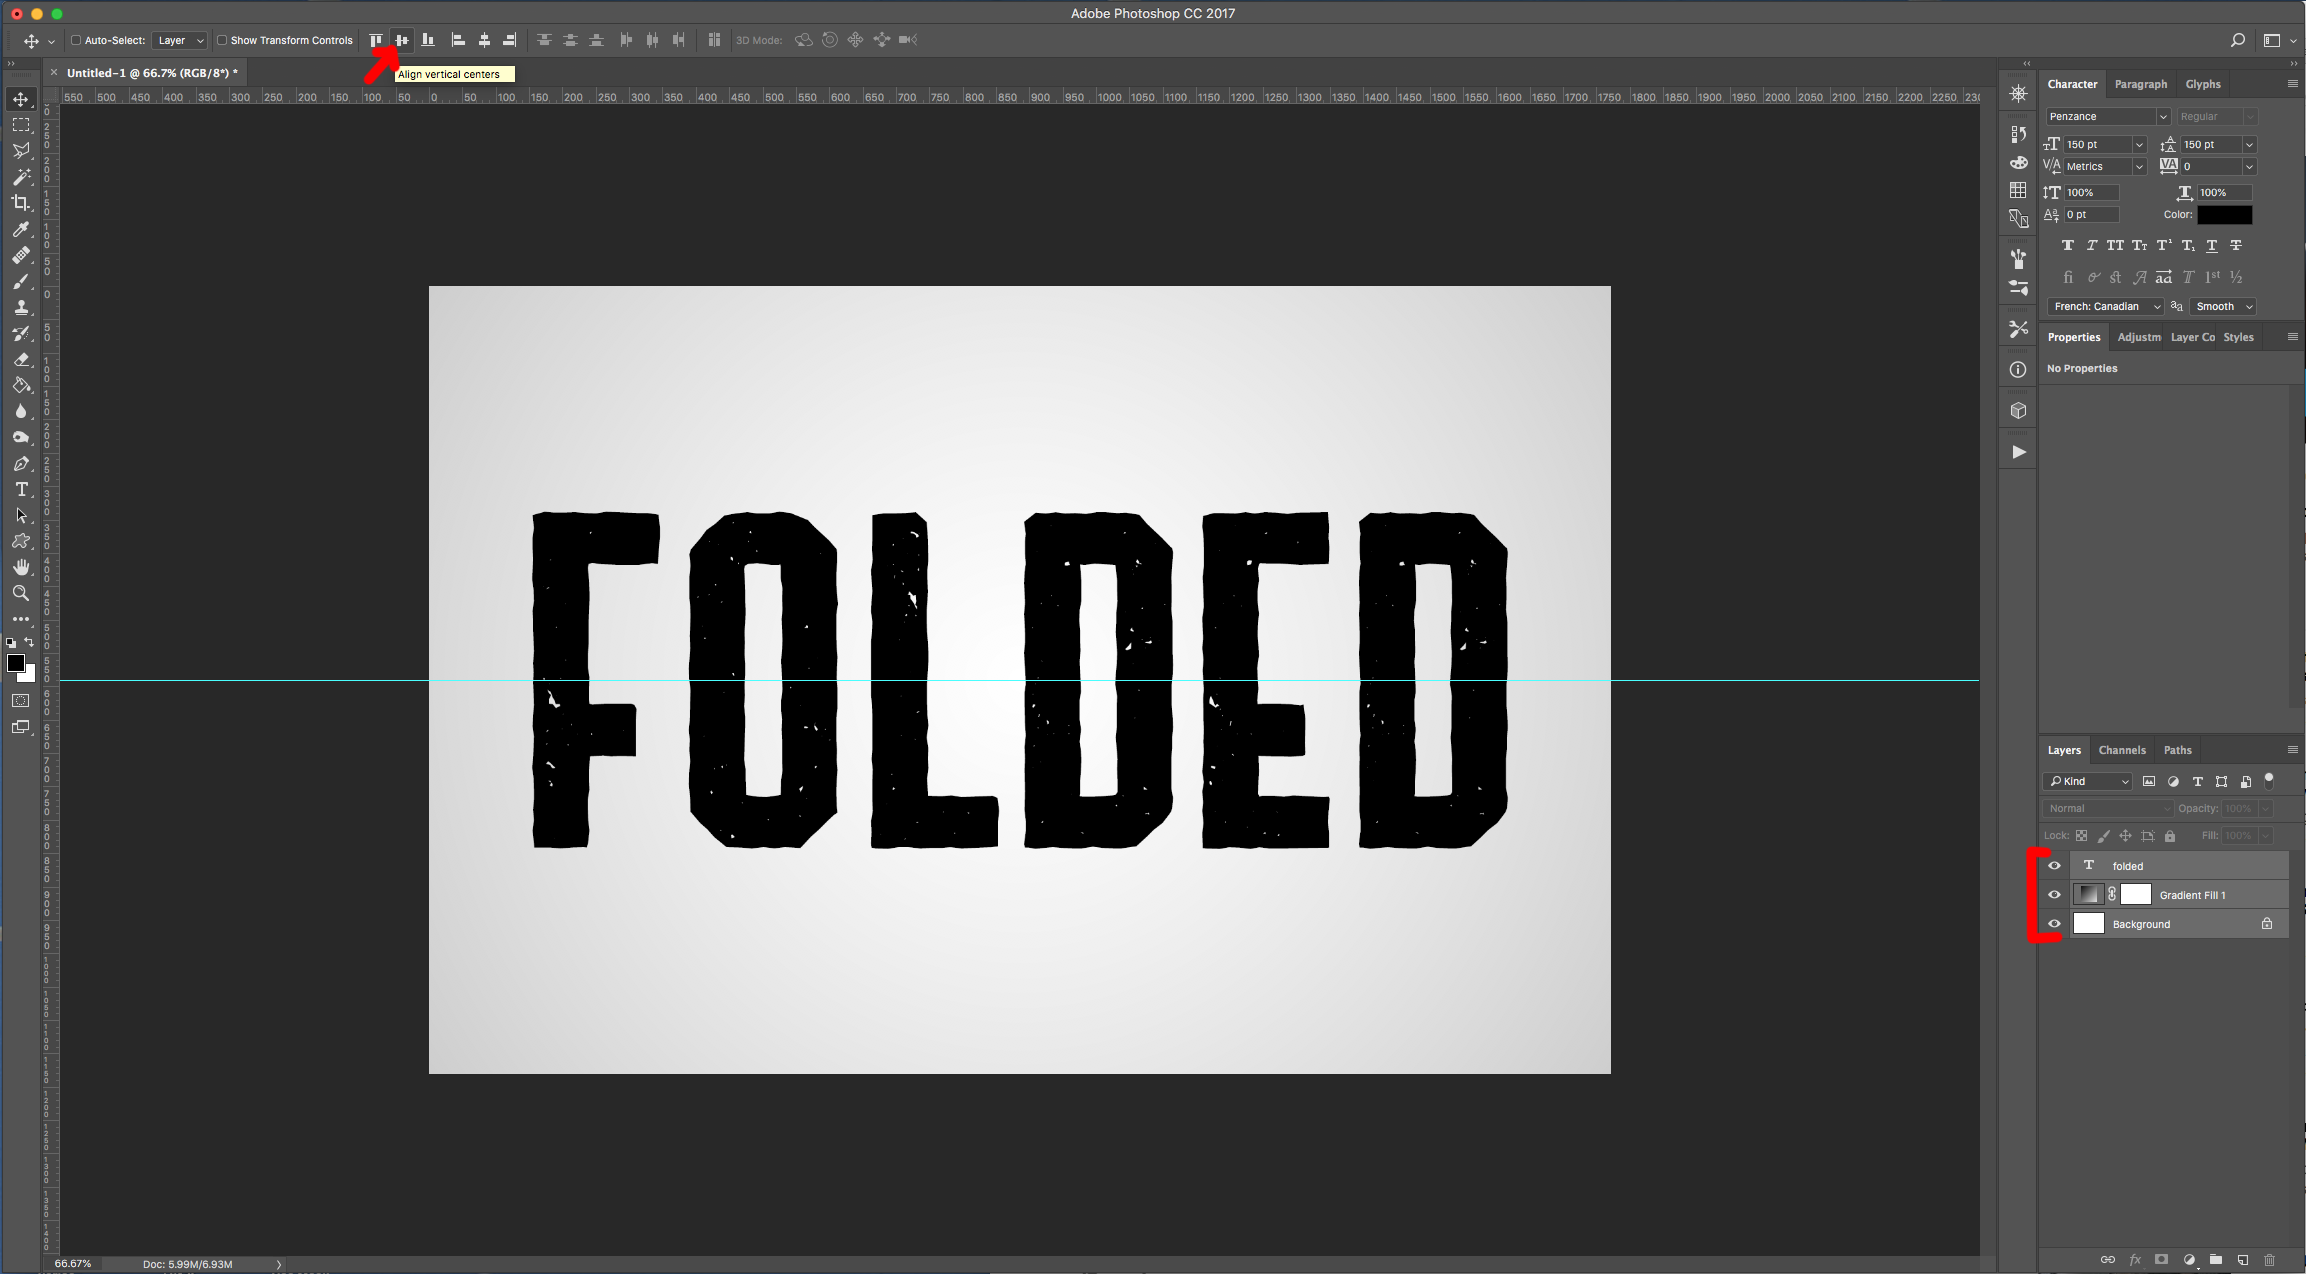
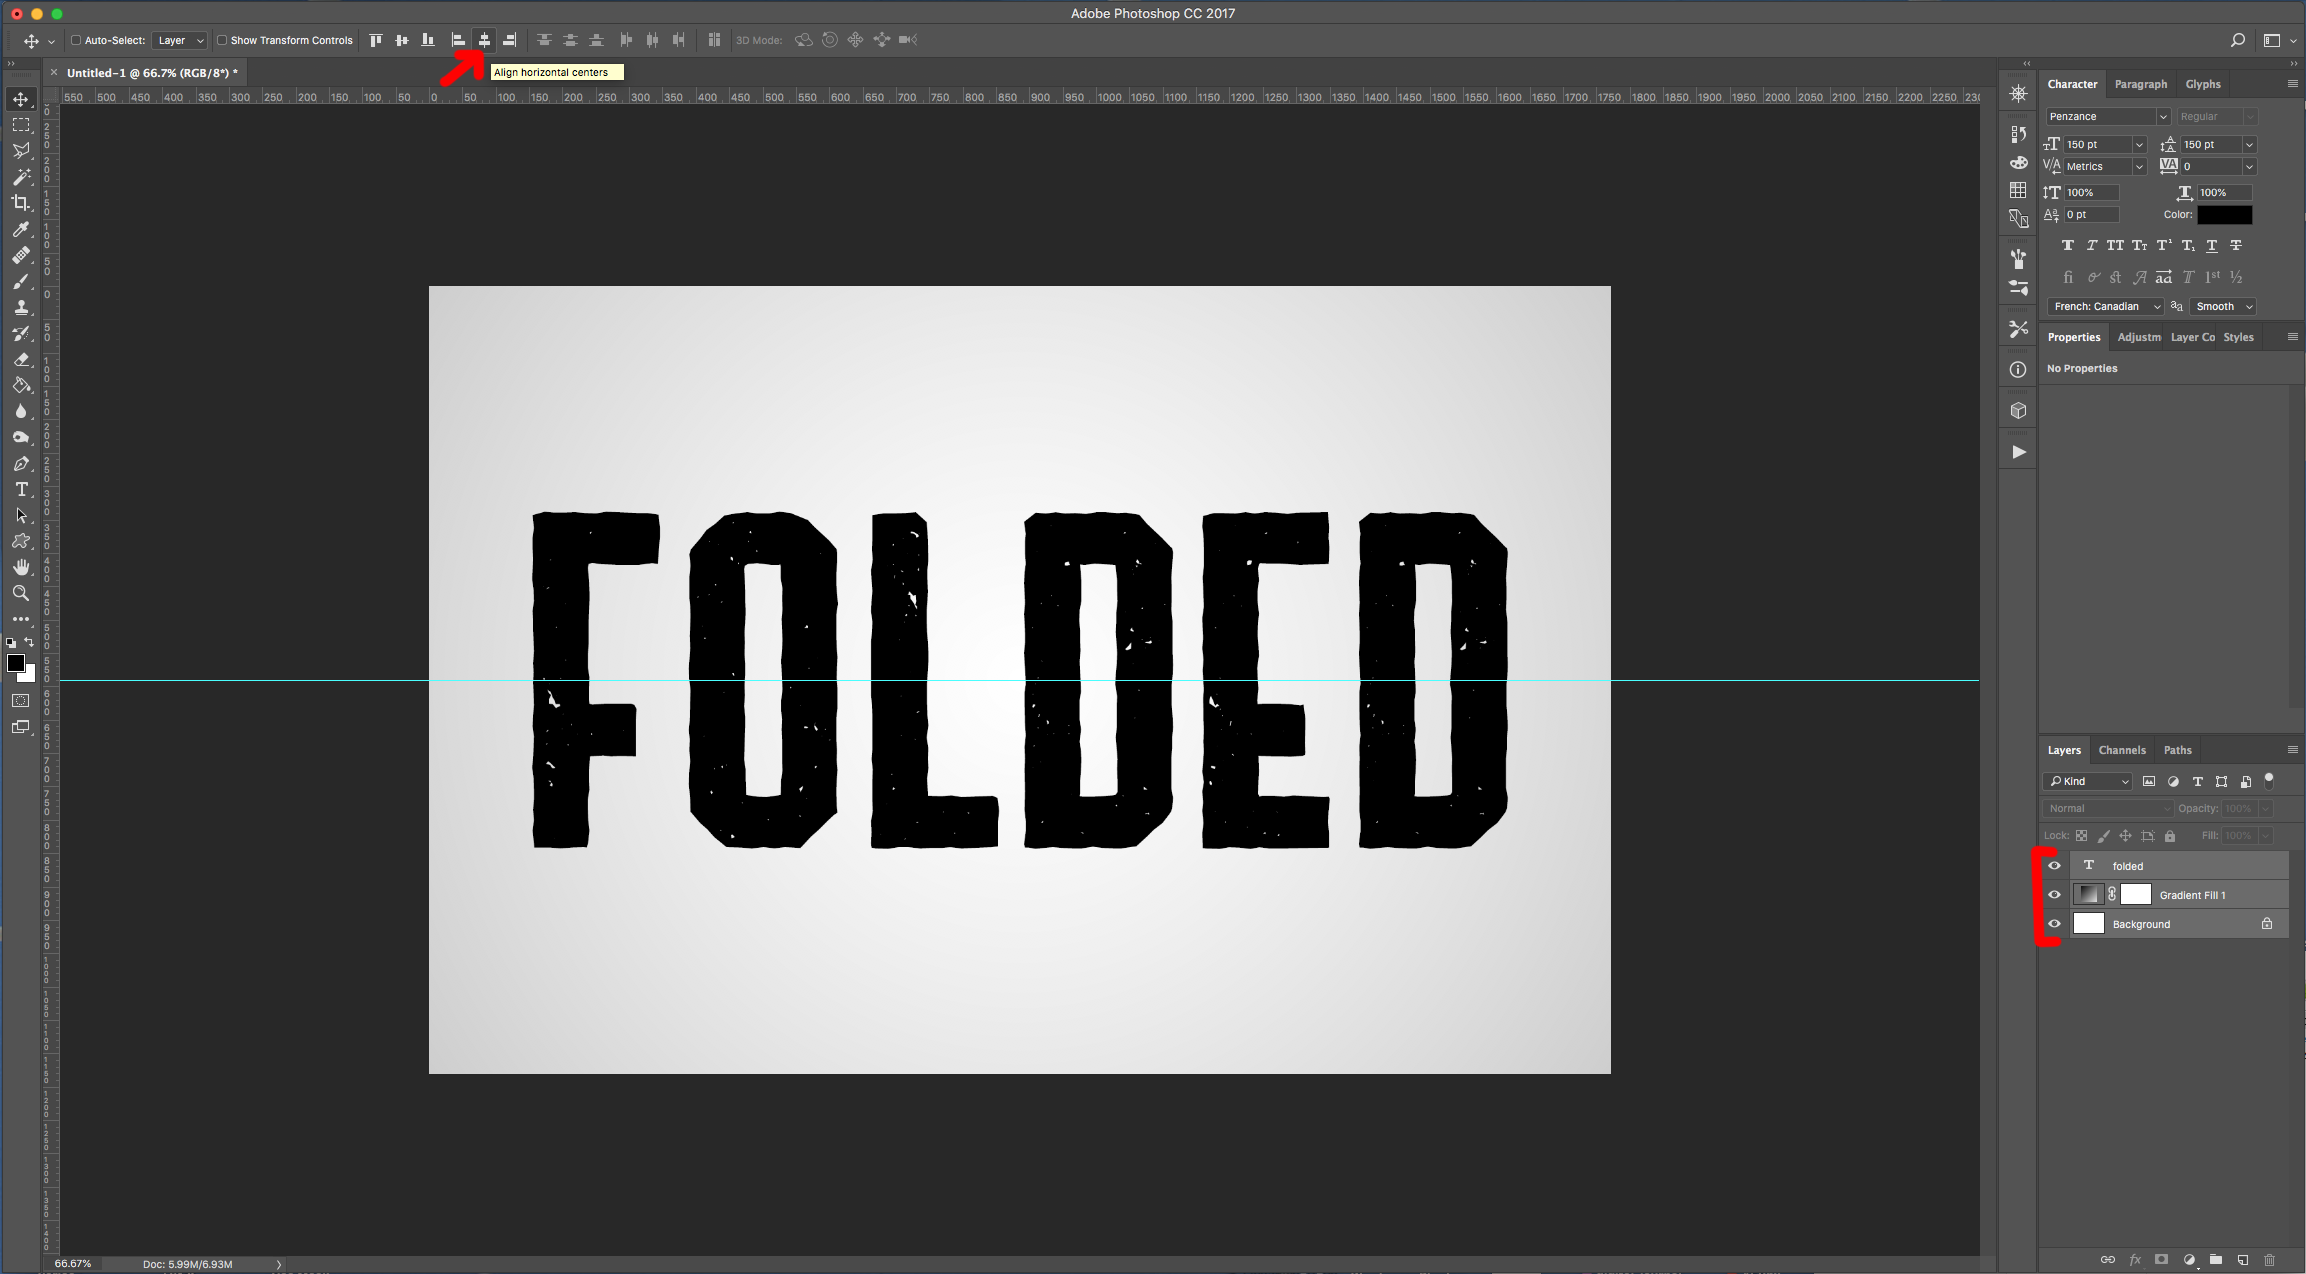
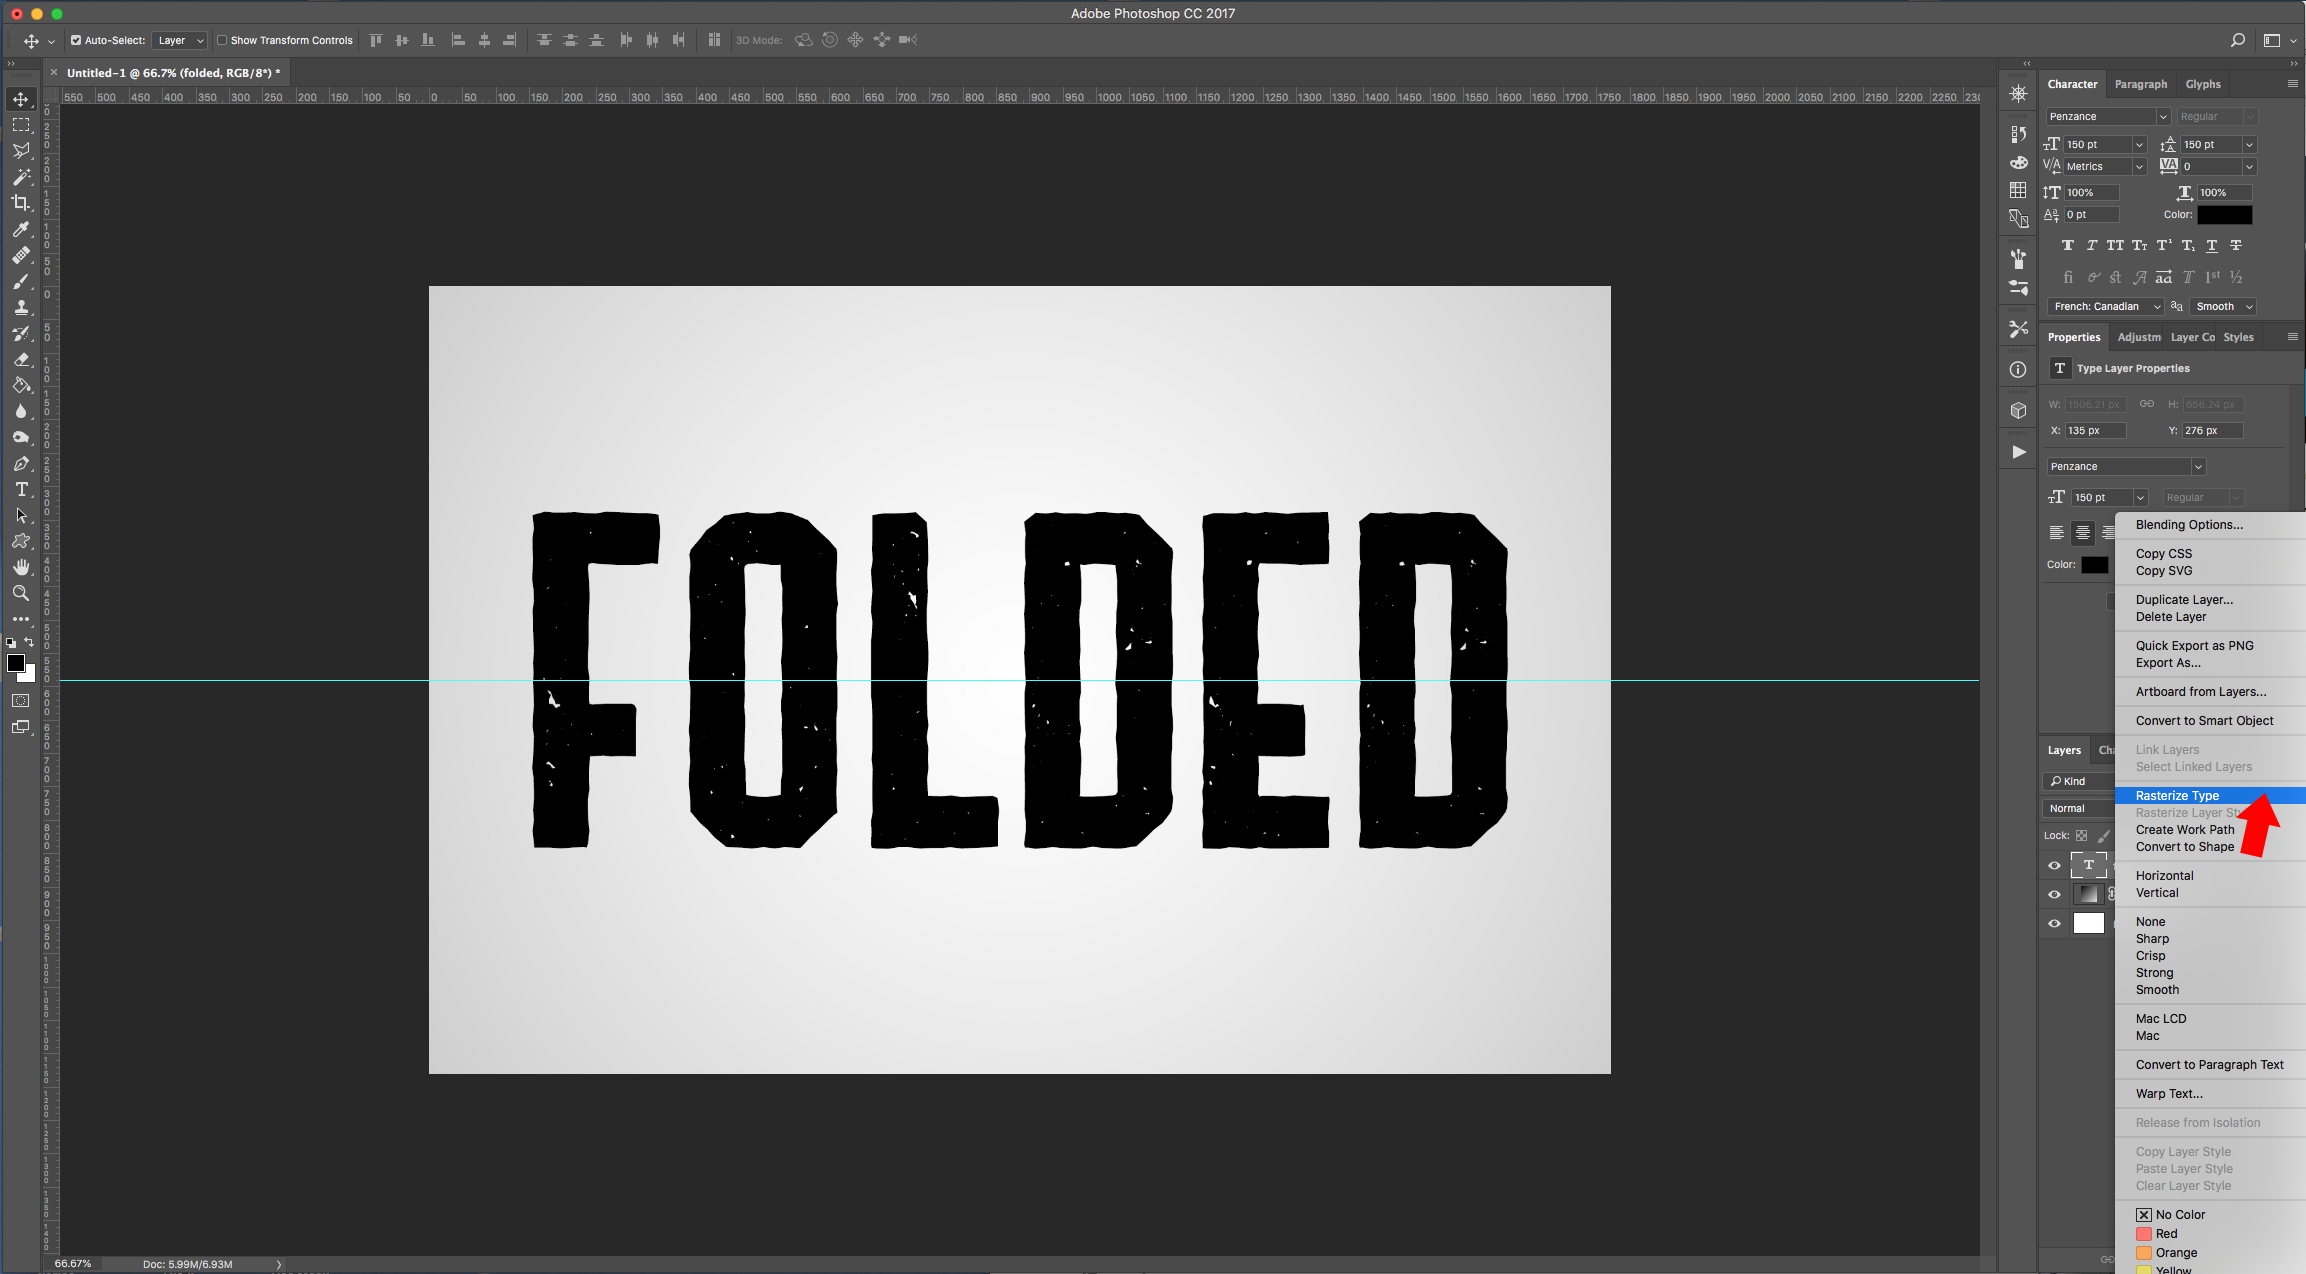
5 - Select all your Layers (Shift key) and center your text using “Align Vertical and Horizontal Centers” in the Top Menu. Right-click on top of the Text Layer Thumbnail and choose “Rasterize Type”.
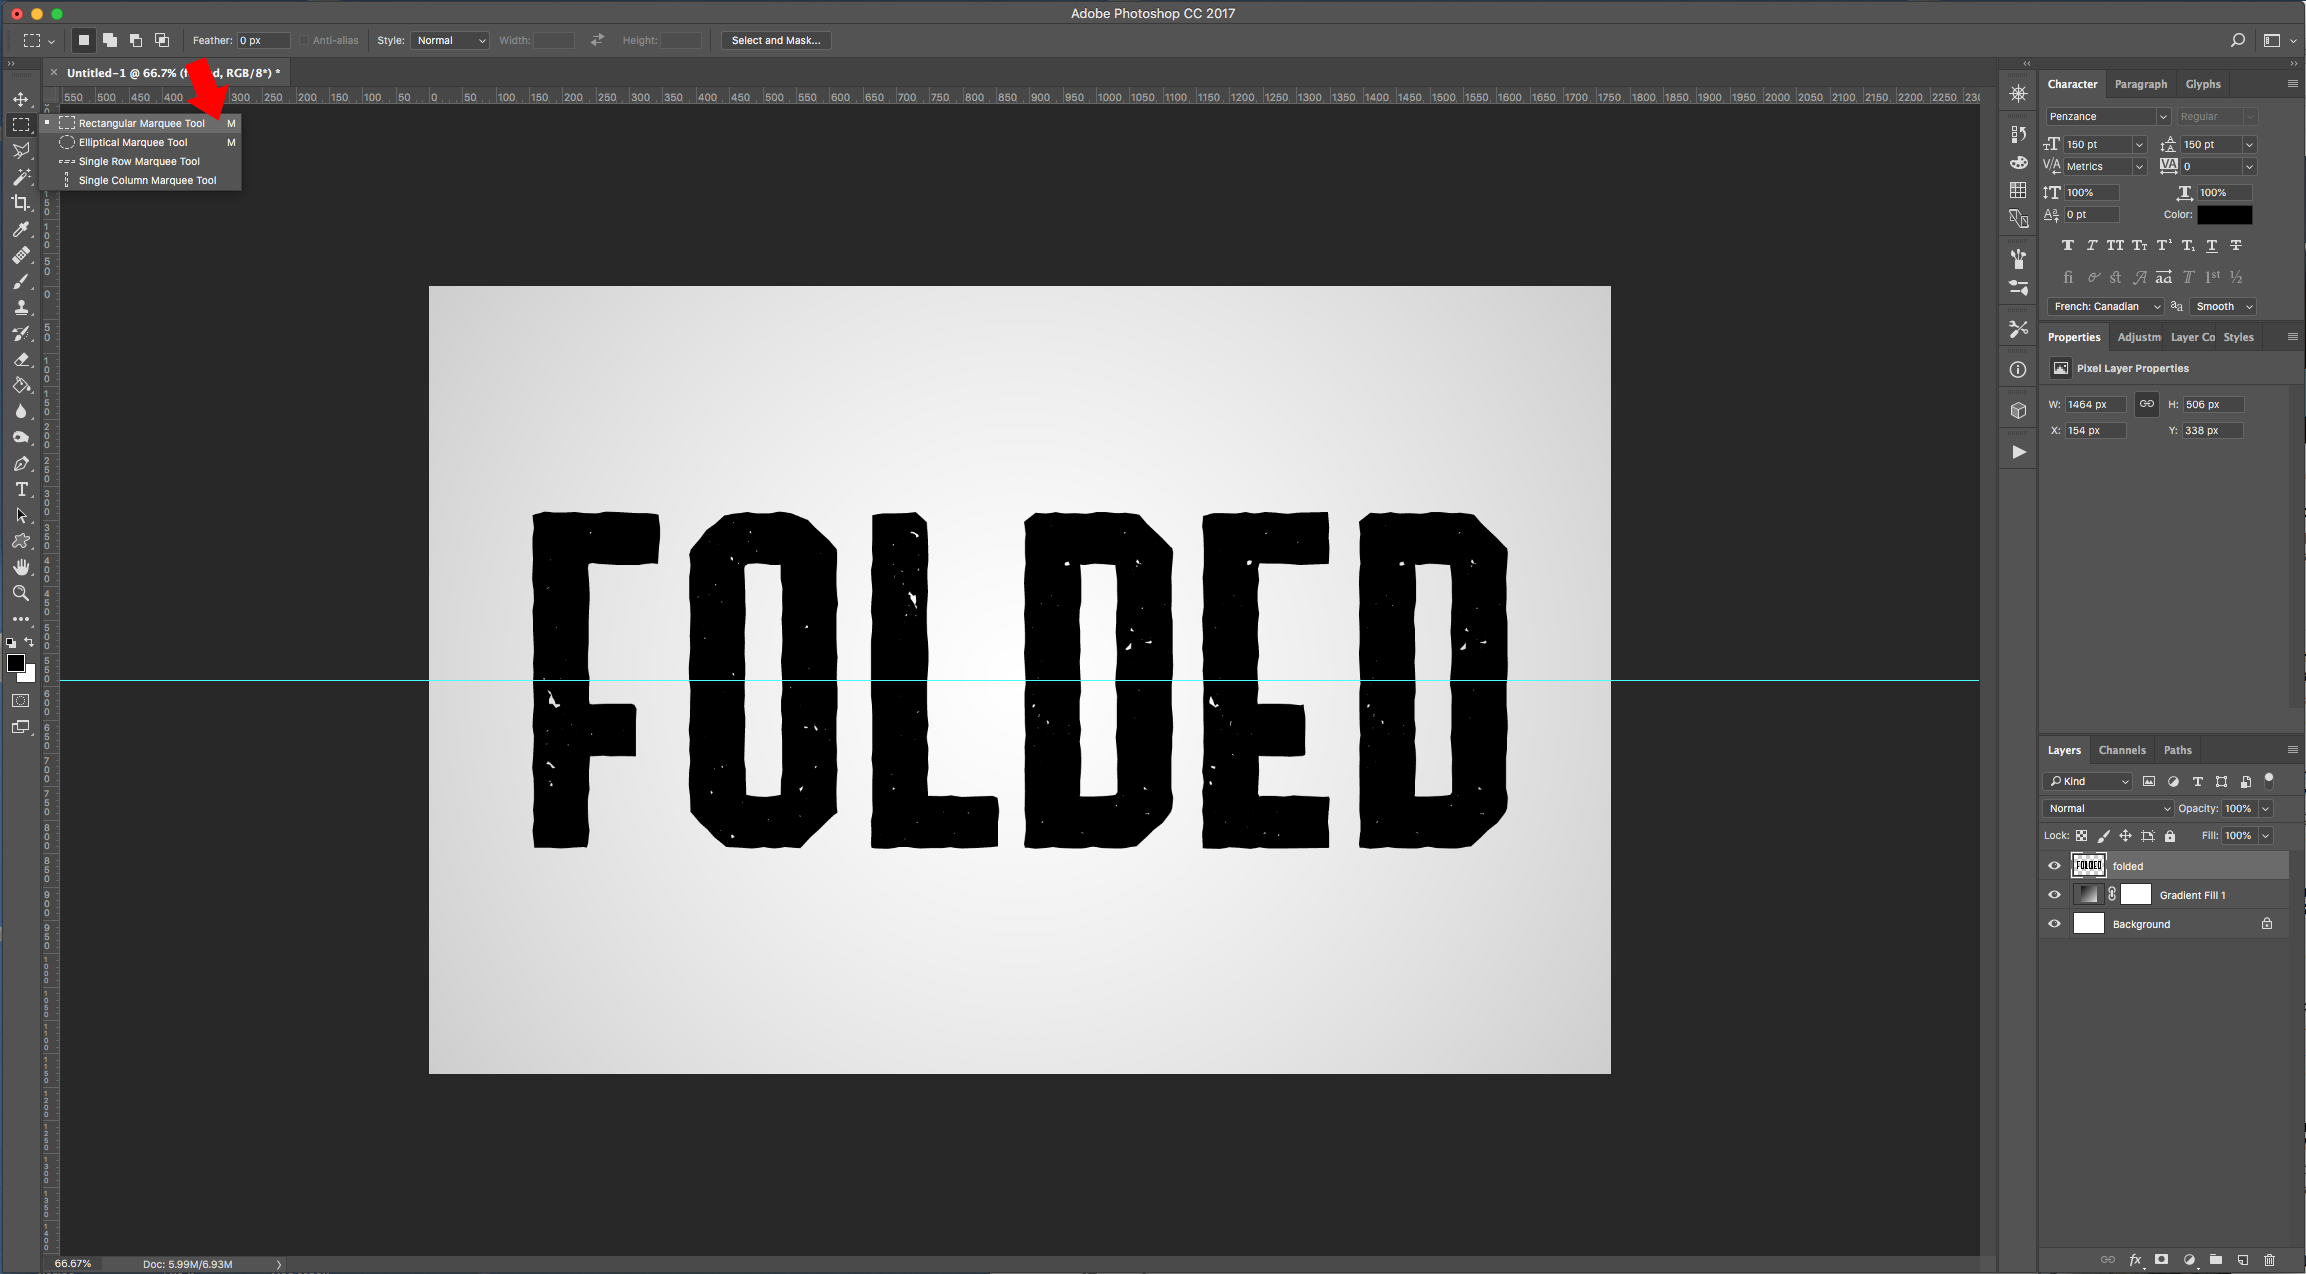
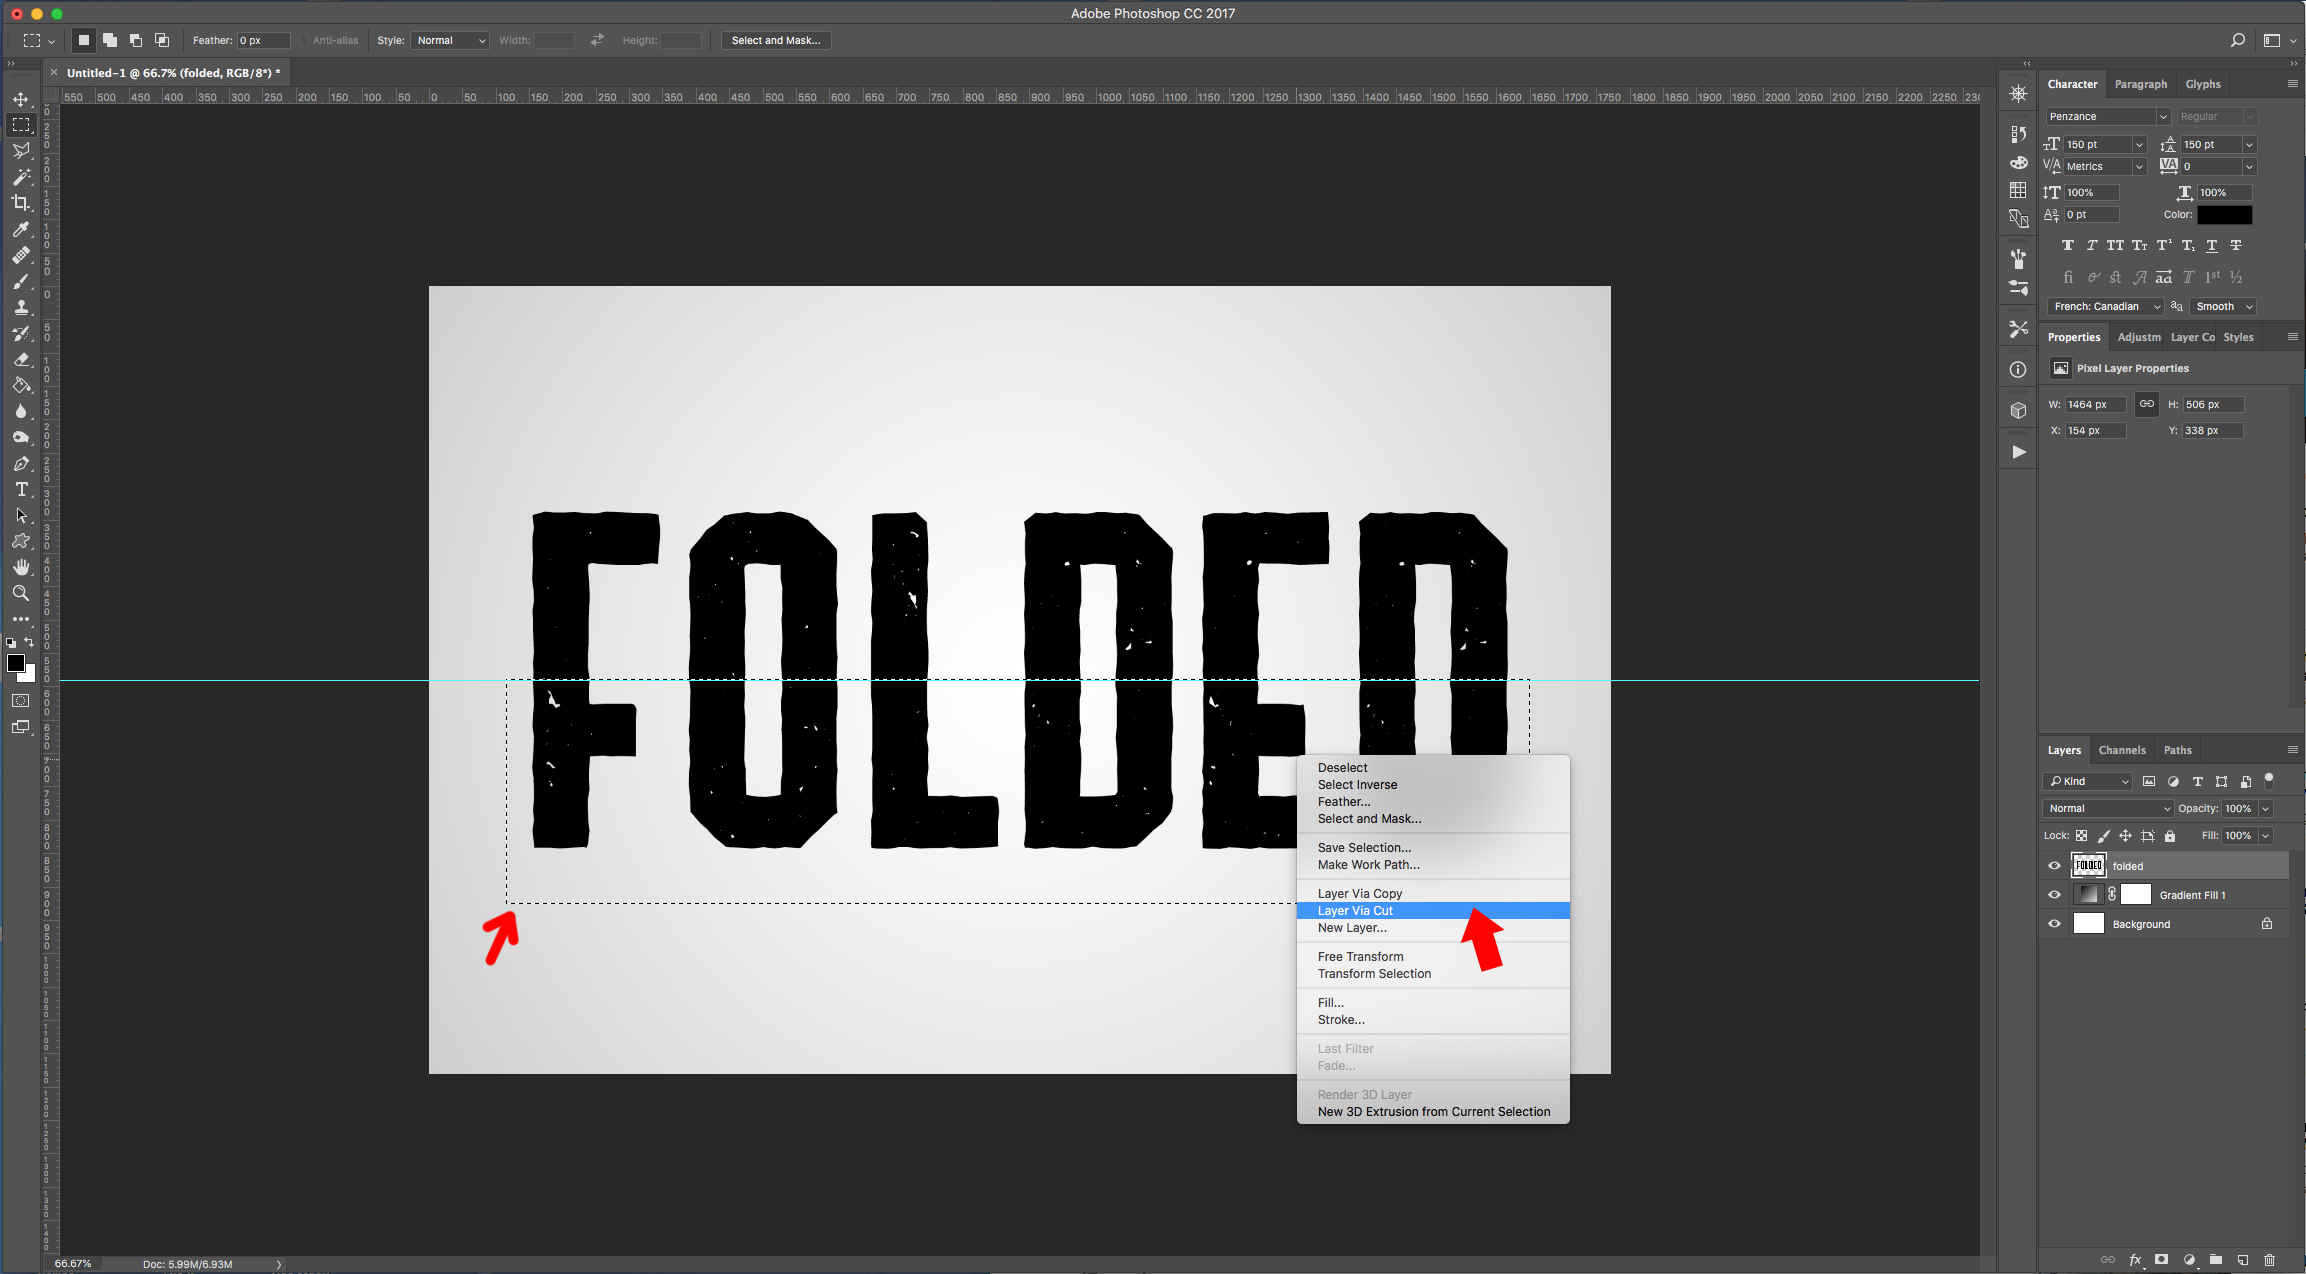
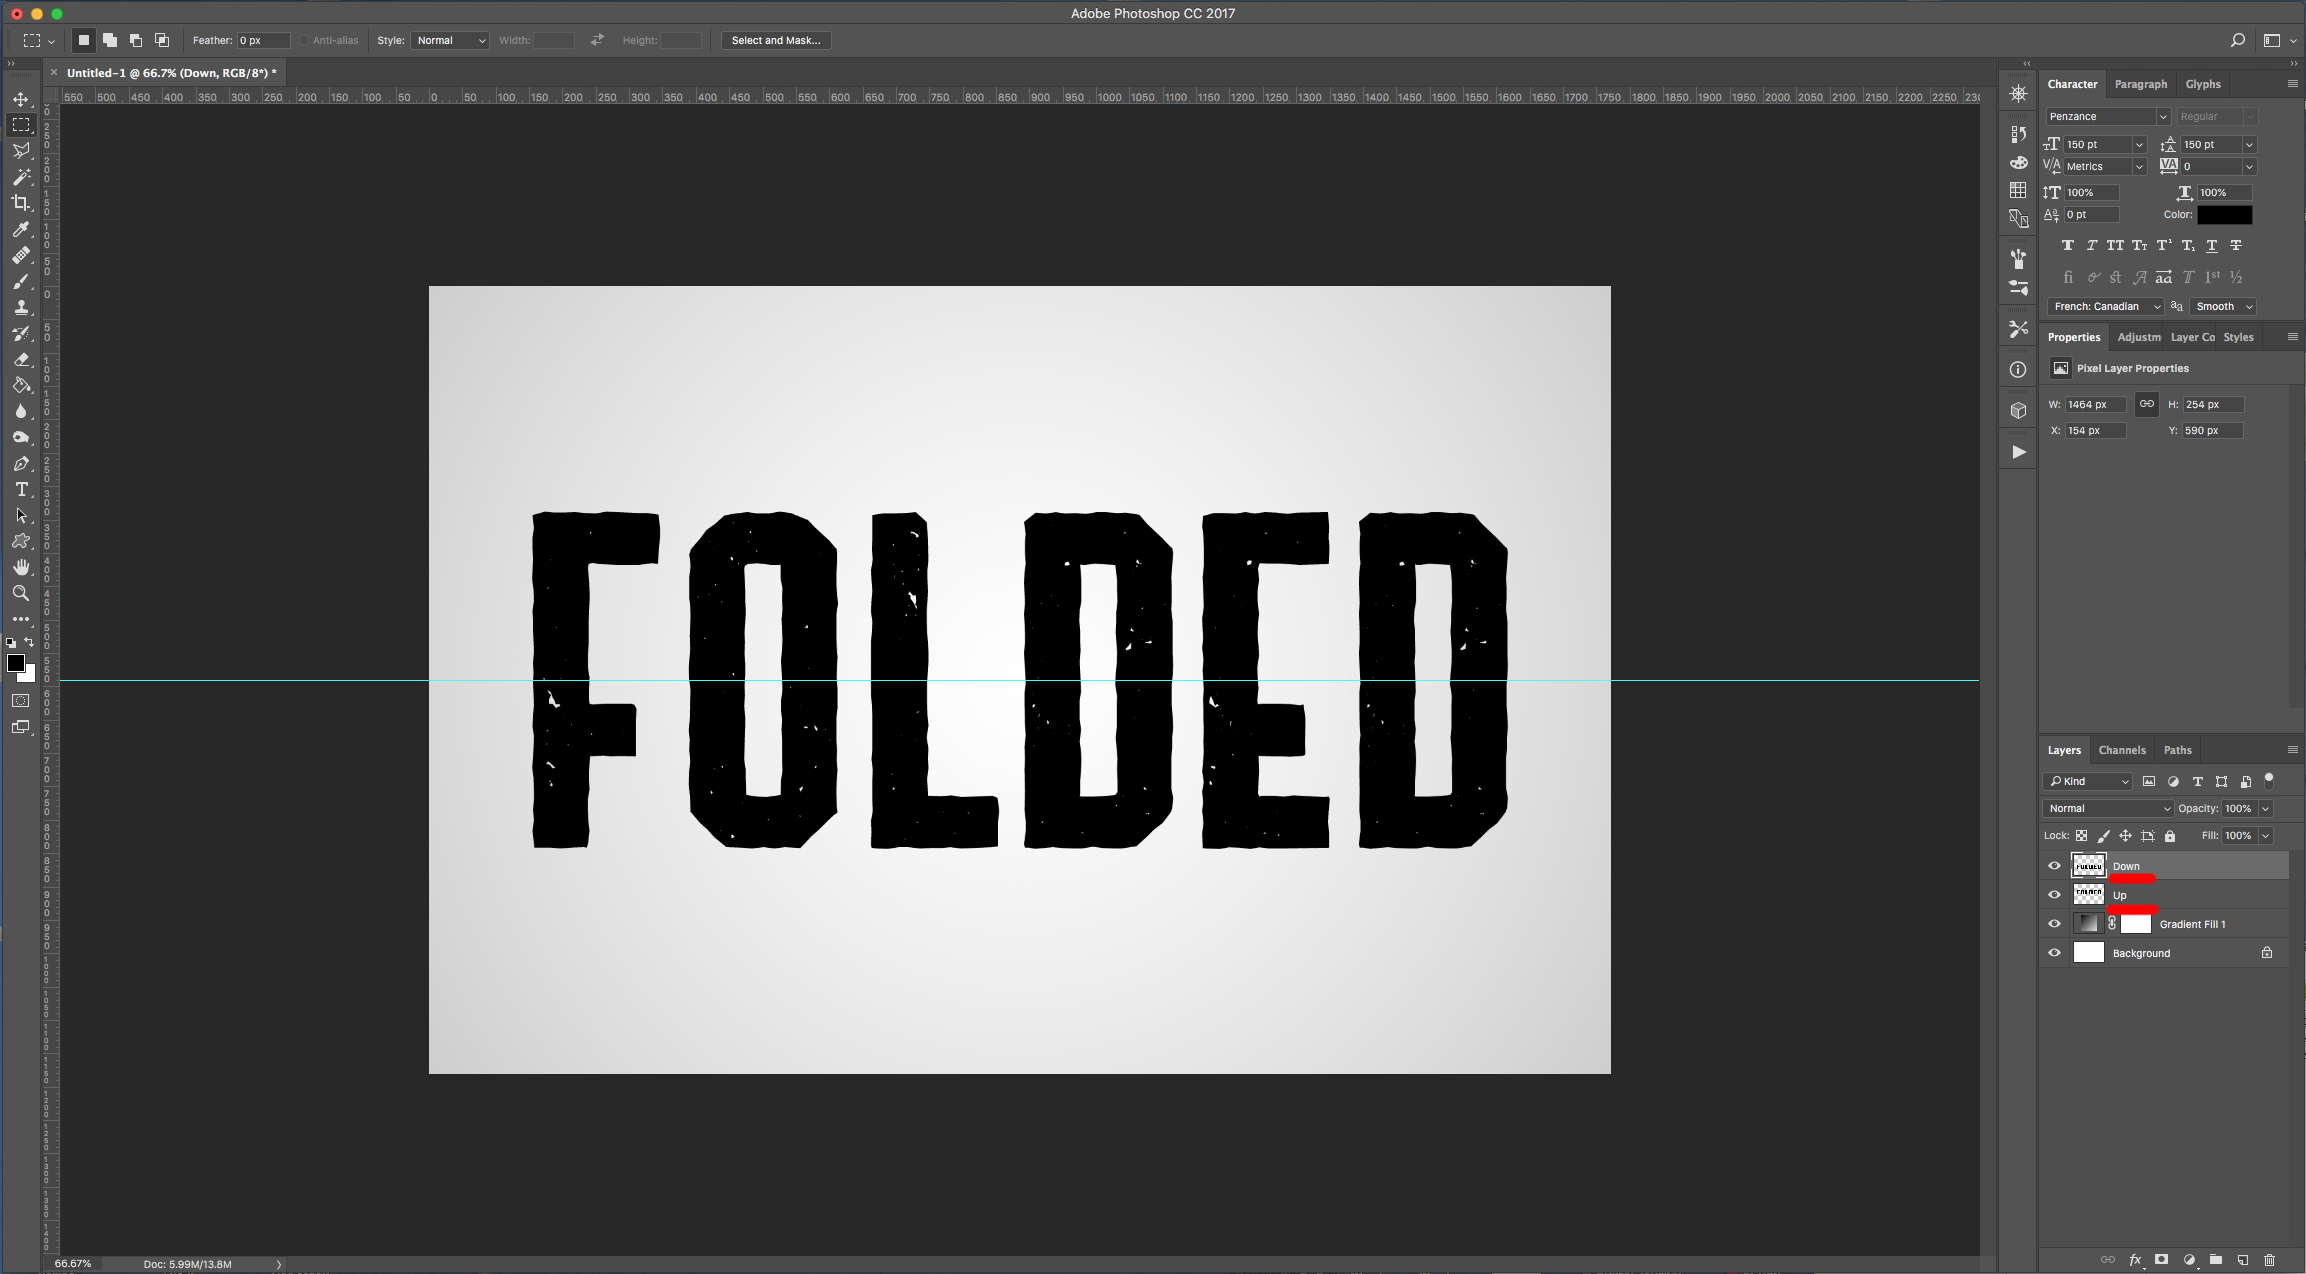
6 - Select the “Rectangular Marquee Tool” and create a rectangle than covers the bottom portion of your document starting from the Guide. Right-click on top of your selection and choose “Layer Via Cut” to create a new layer by cutting your selection. Name the two resulting Layers “Up” and “Down”.
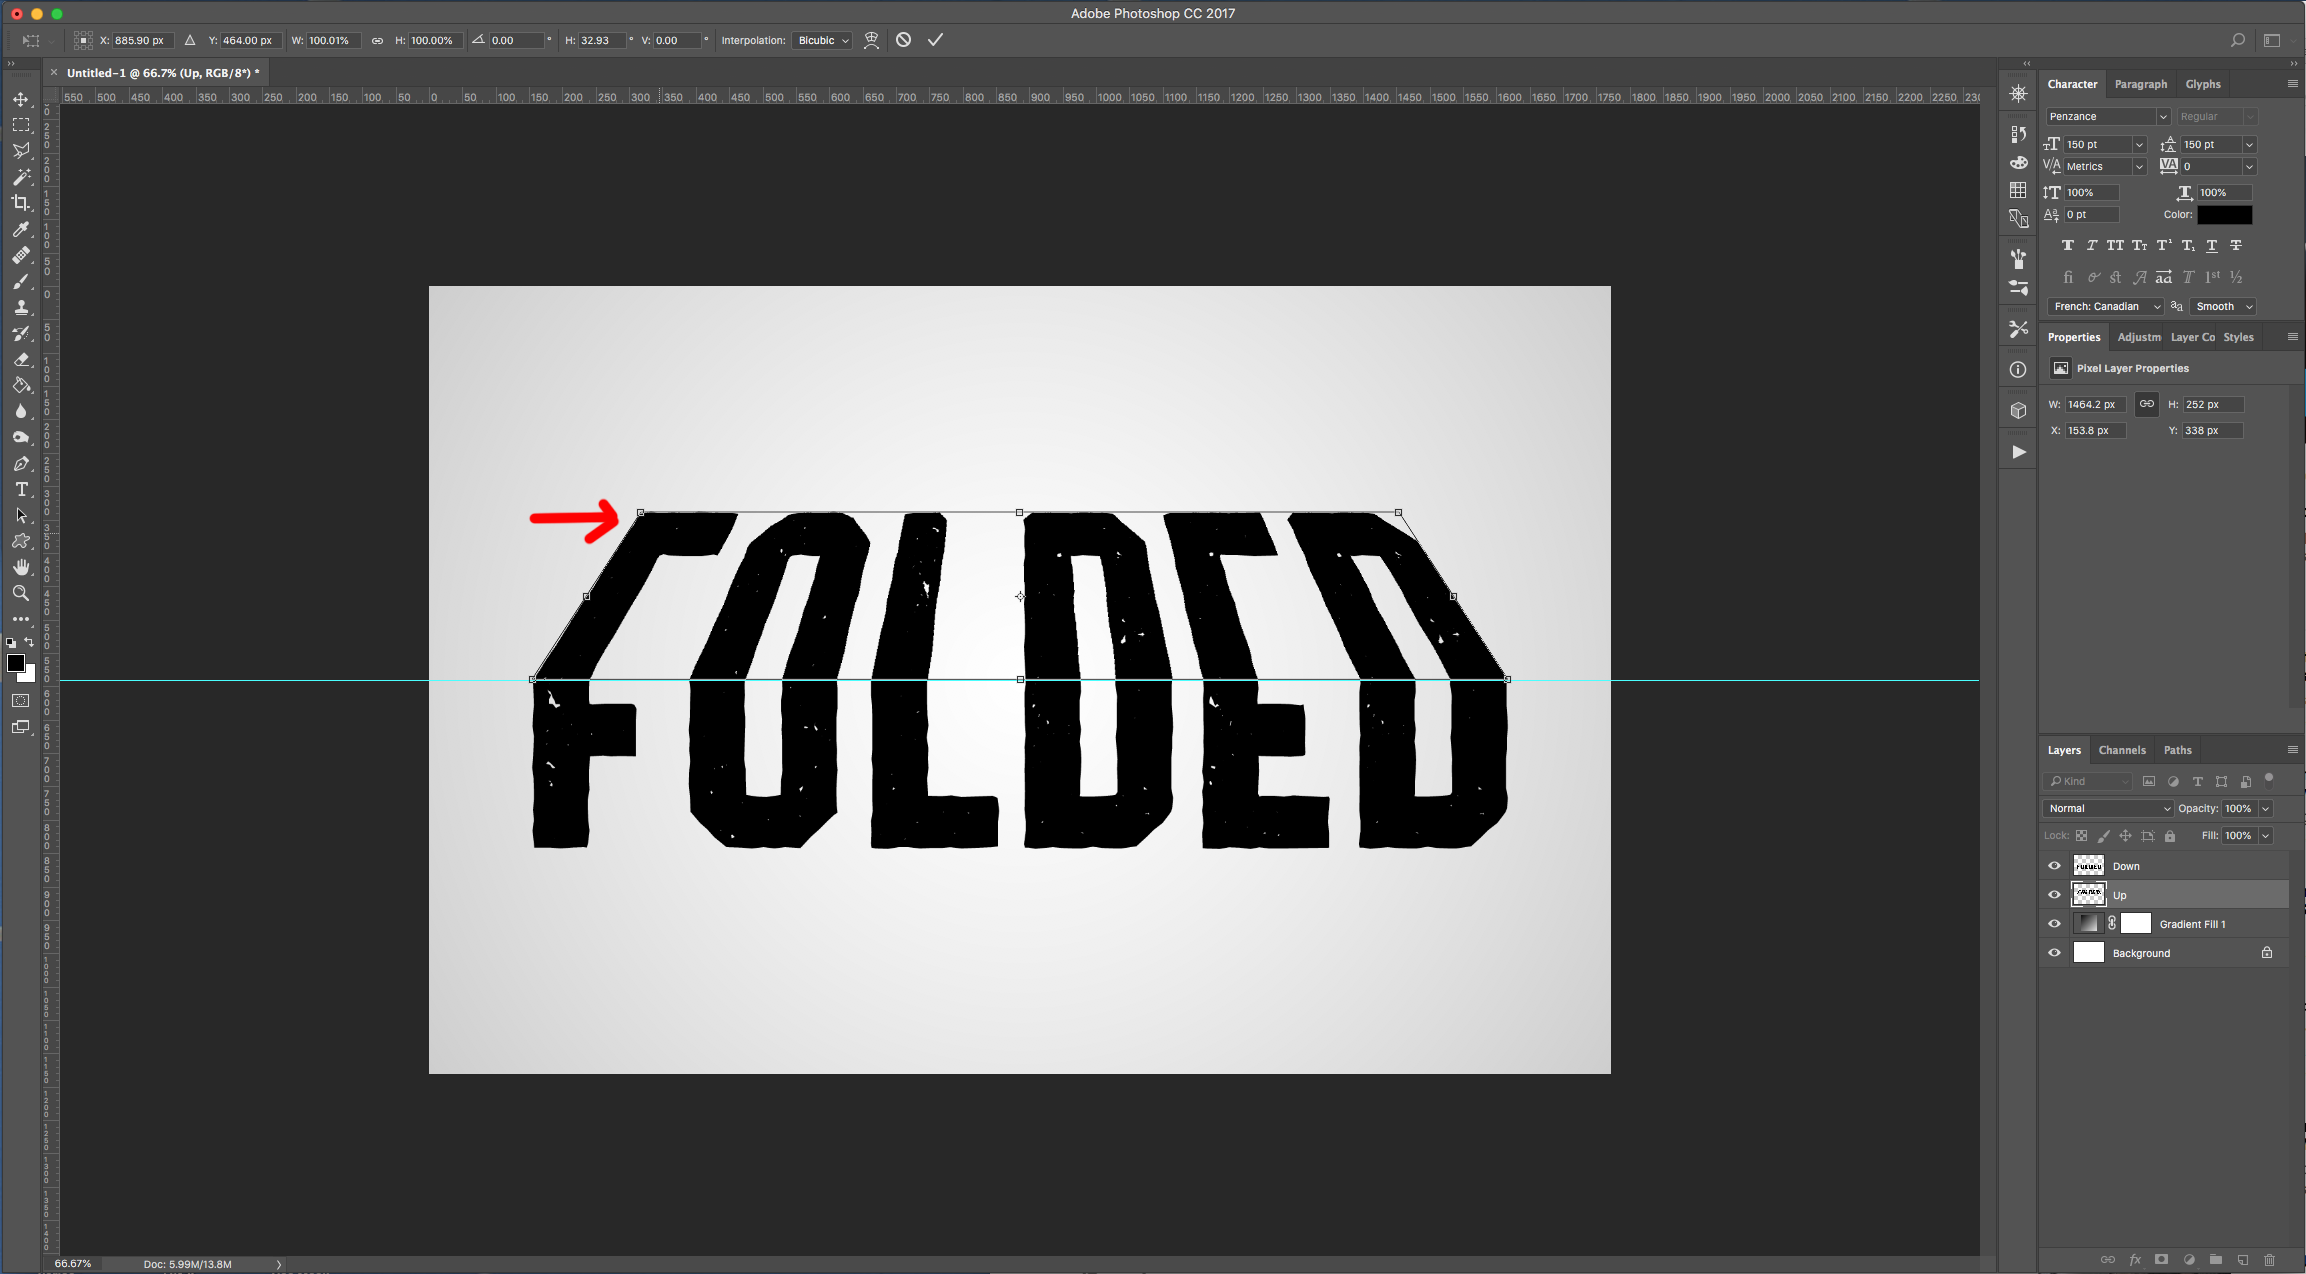
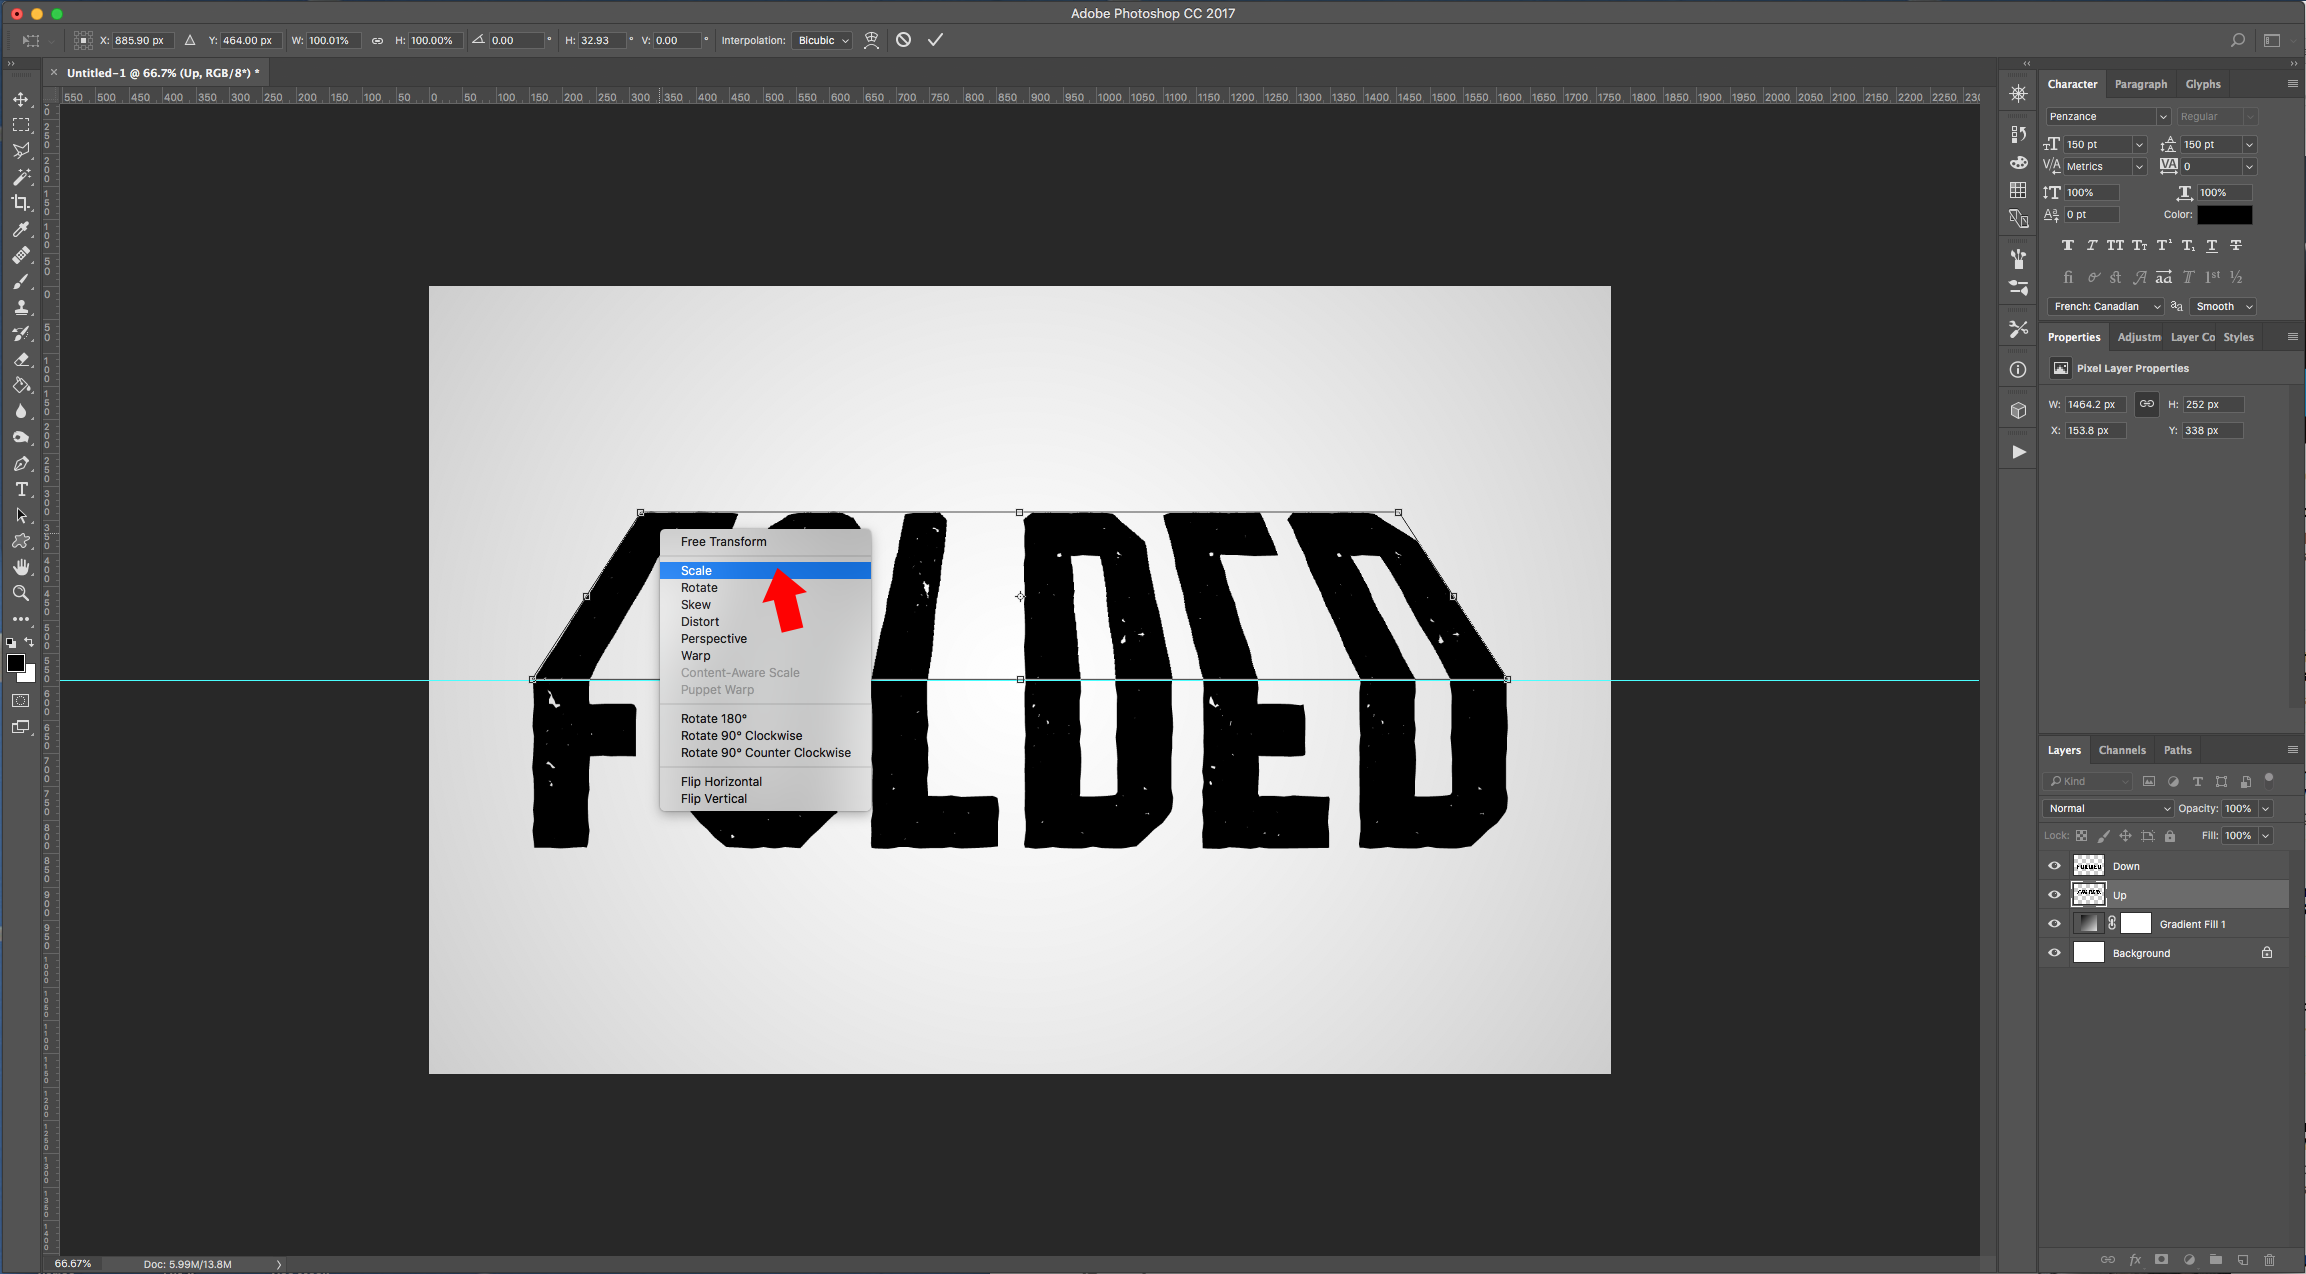
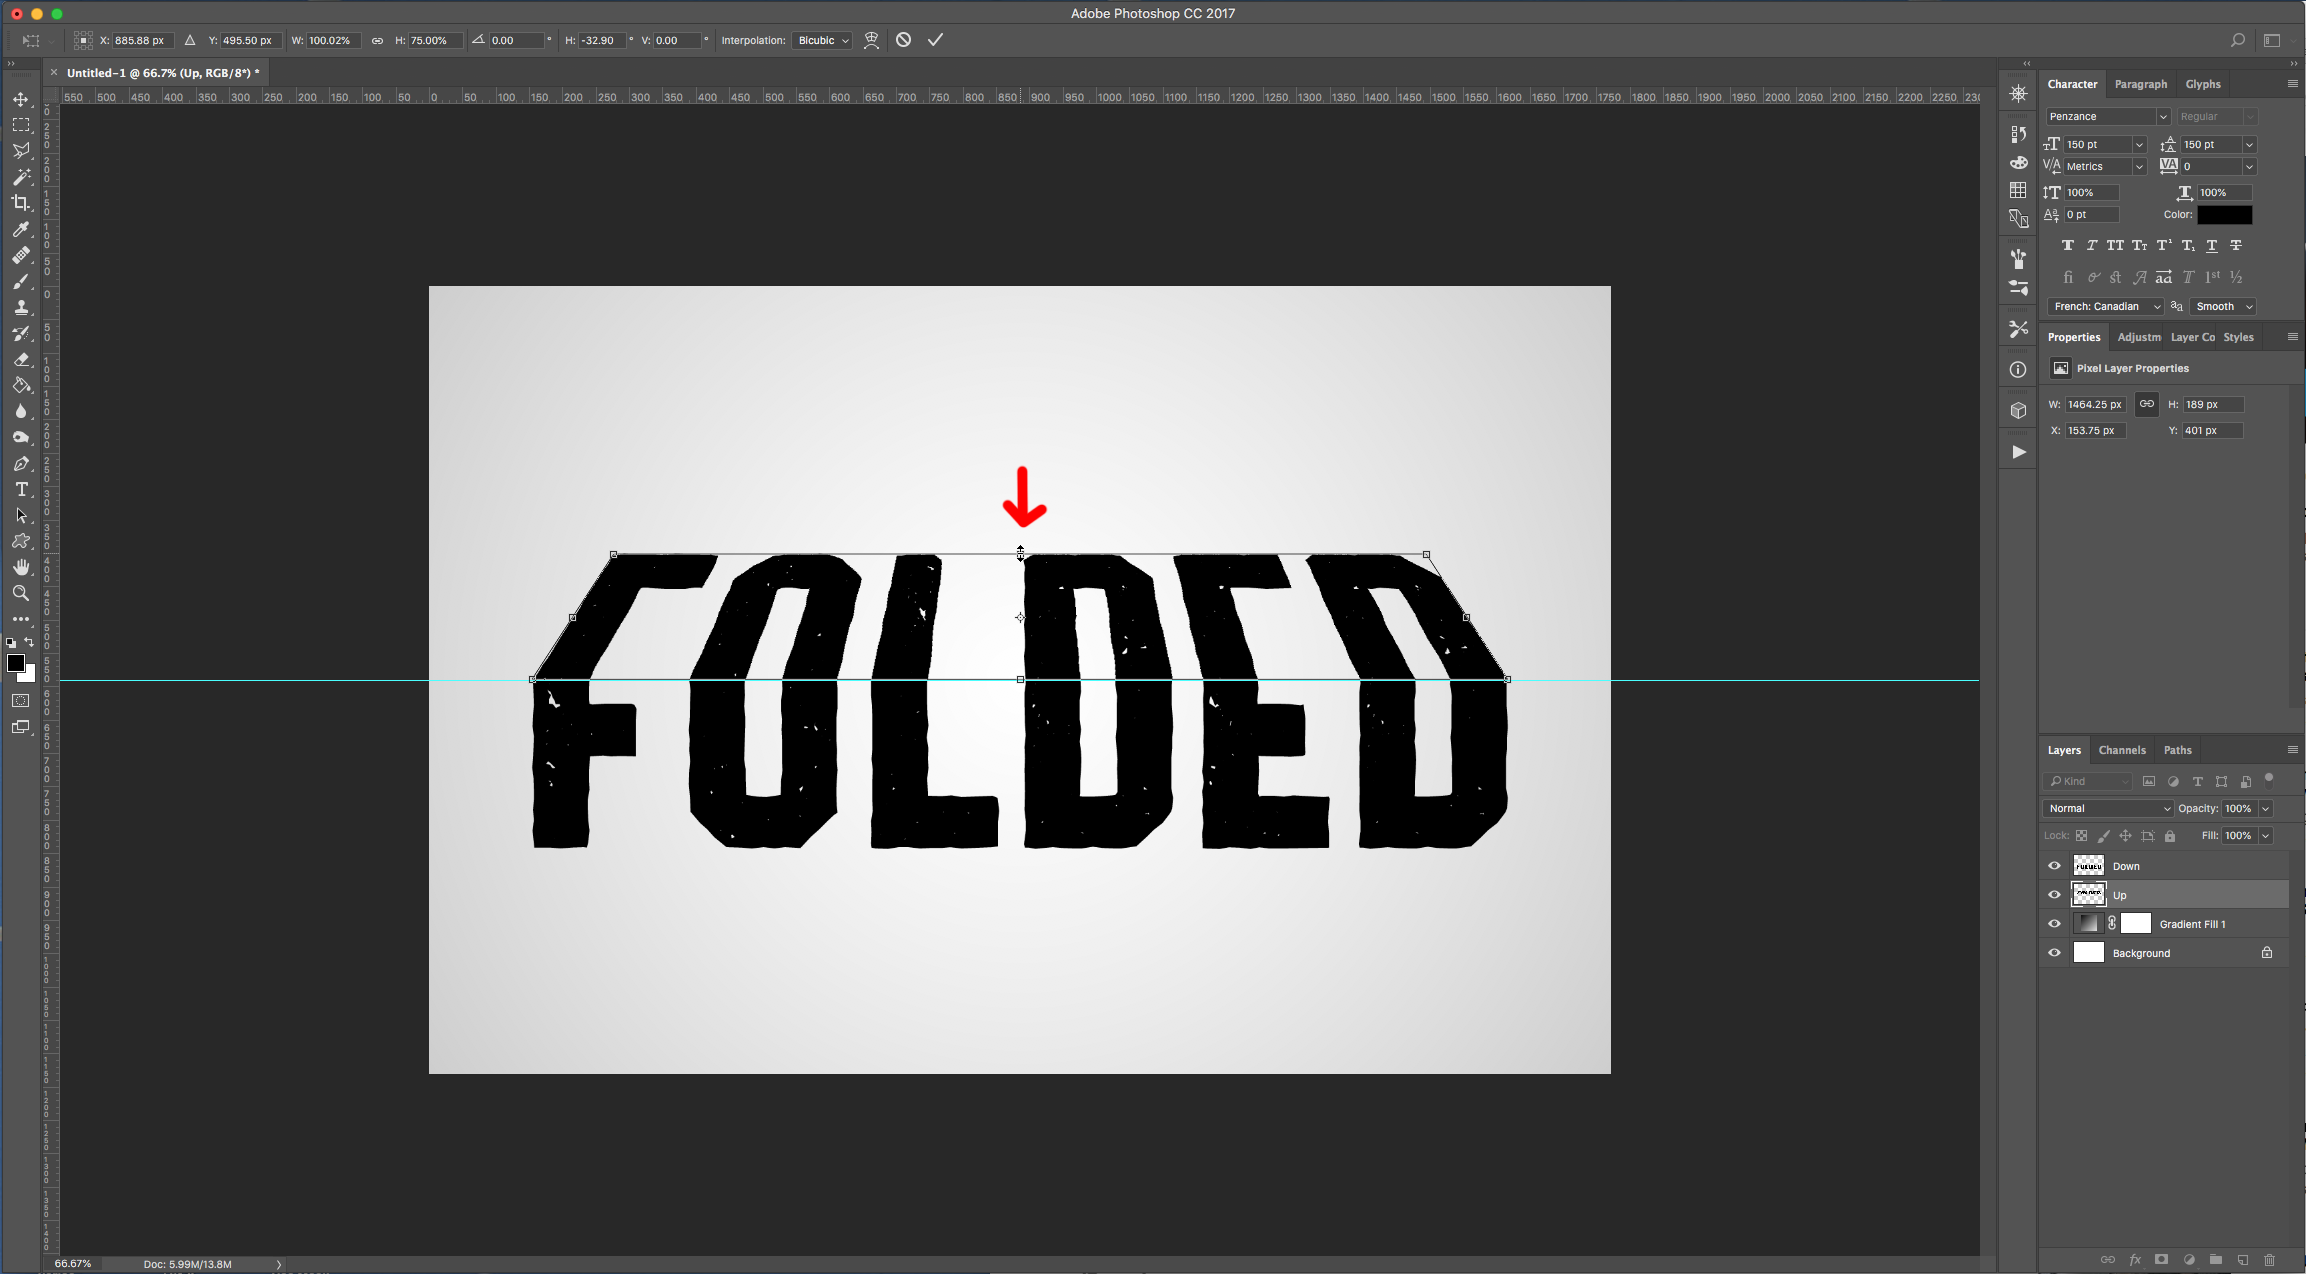
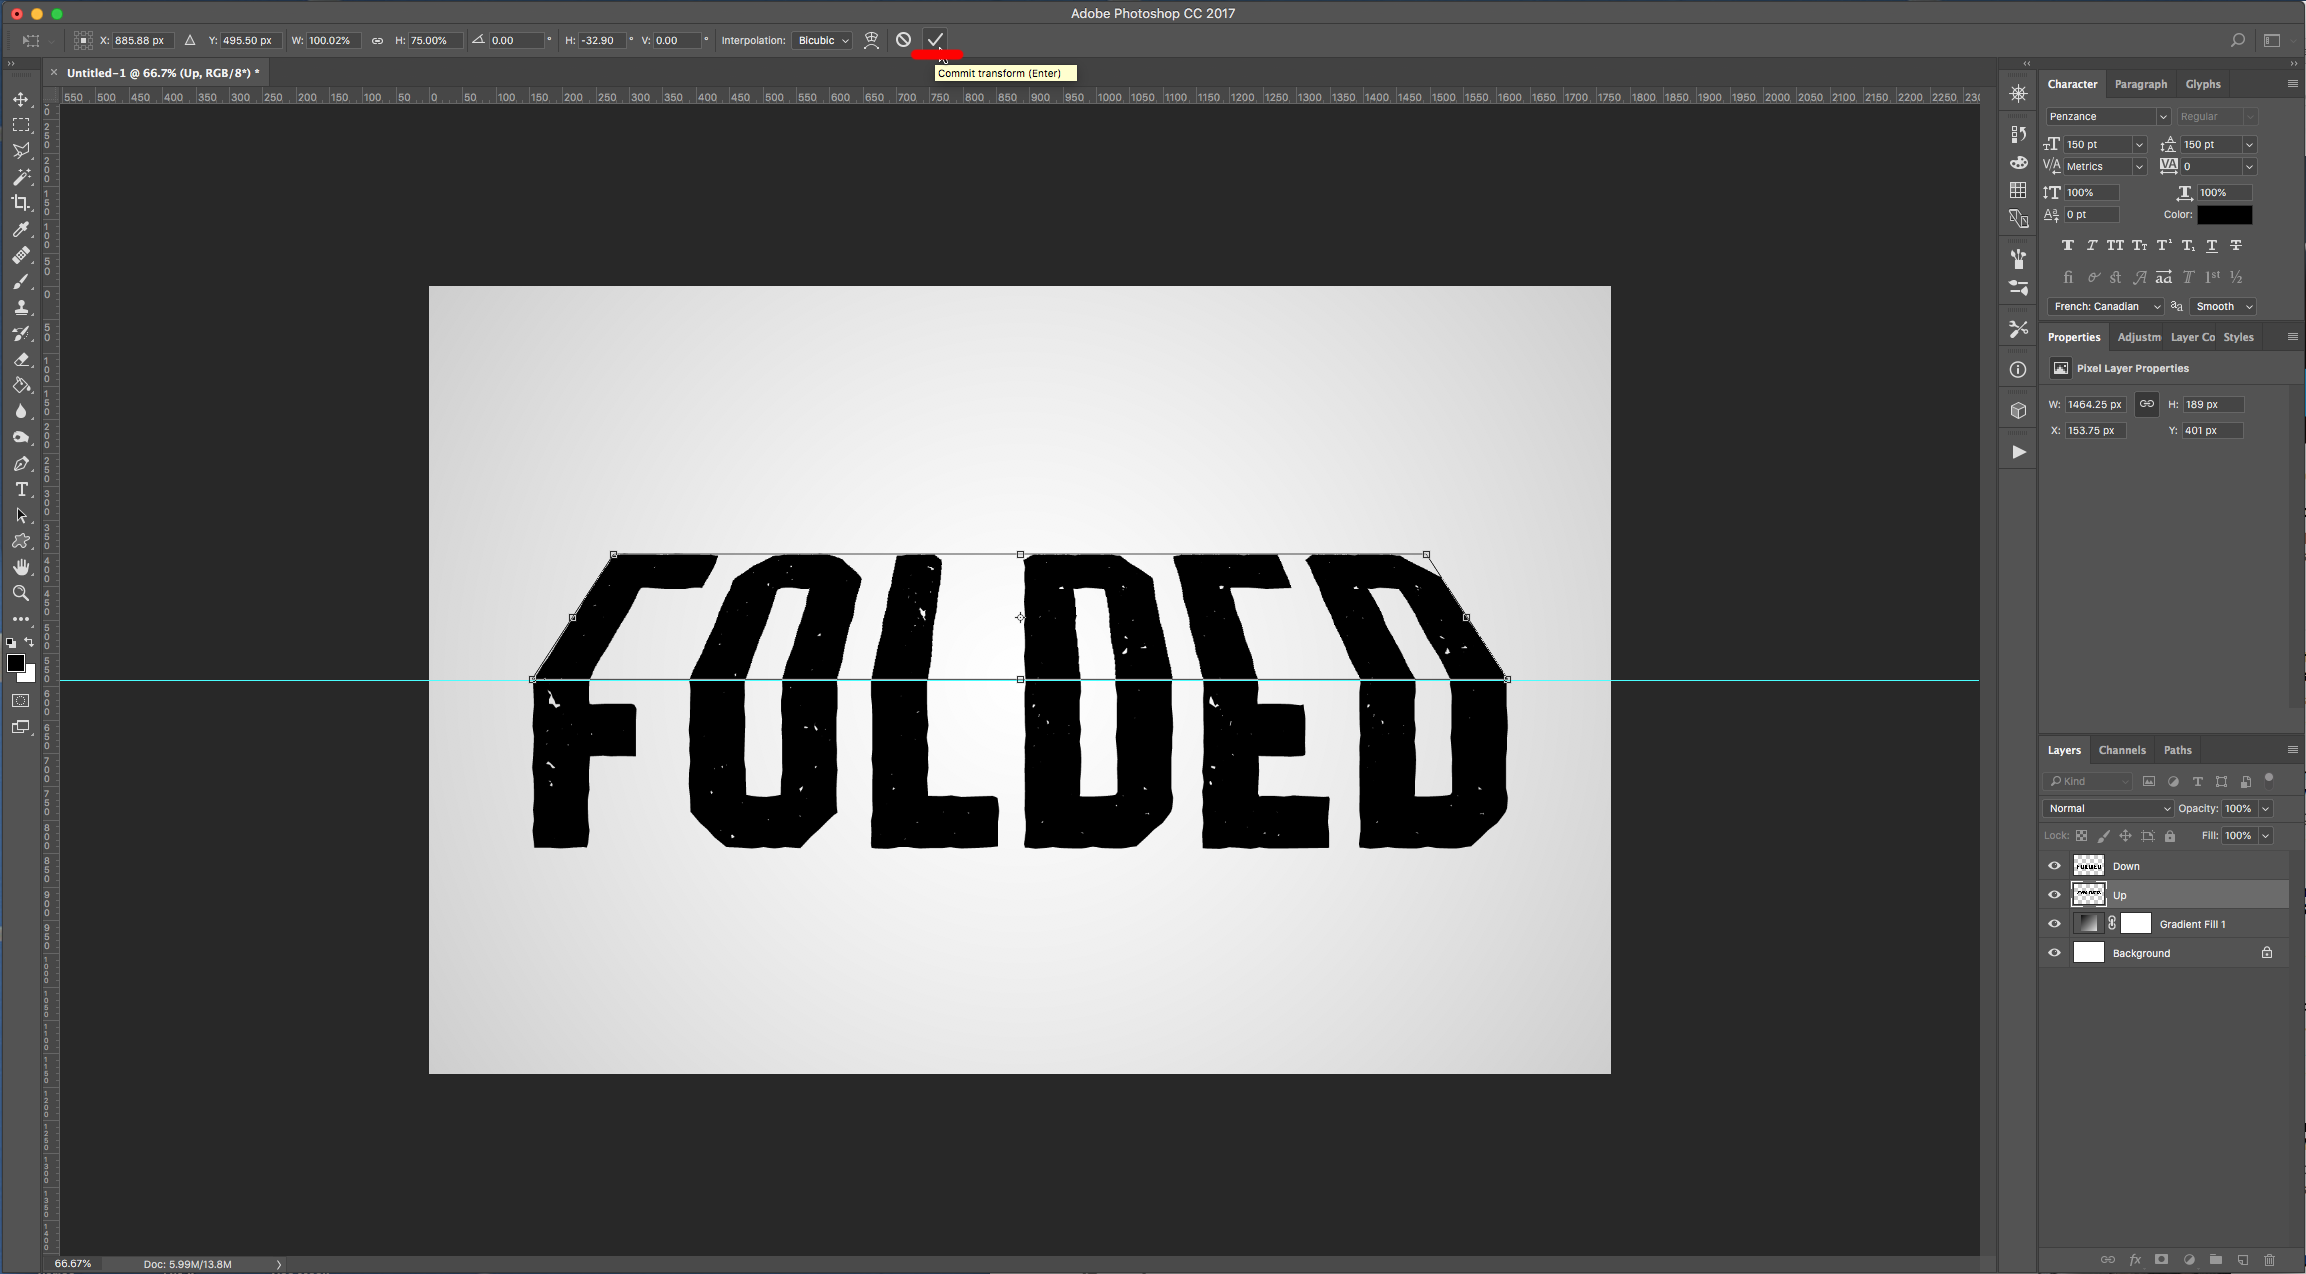
7 - Select the “Up” Layer, go to Edit > Transform > Perspective… and push in the Top-Left or Top-Right “Anchor Point” at the Top of the letters to make them look like they are bent. Right-click on top and choose “Scale”, then push down from the Top-Center “Anchor Point” to make the letters a bit shorter. Once you are happy, hit “Enter” or click the small “Checkmark” on the Top Menu.
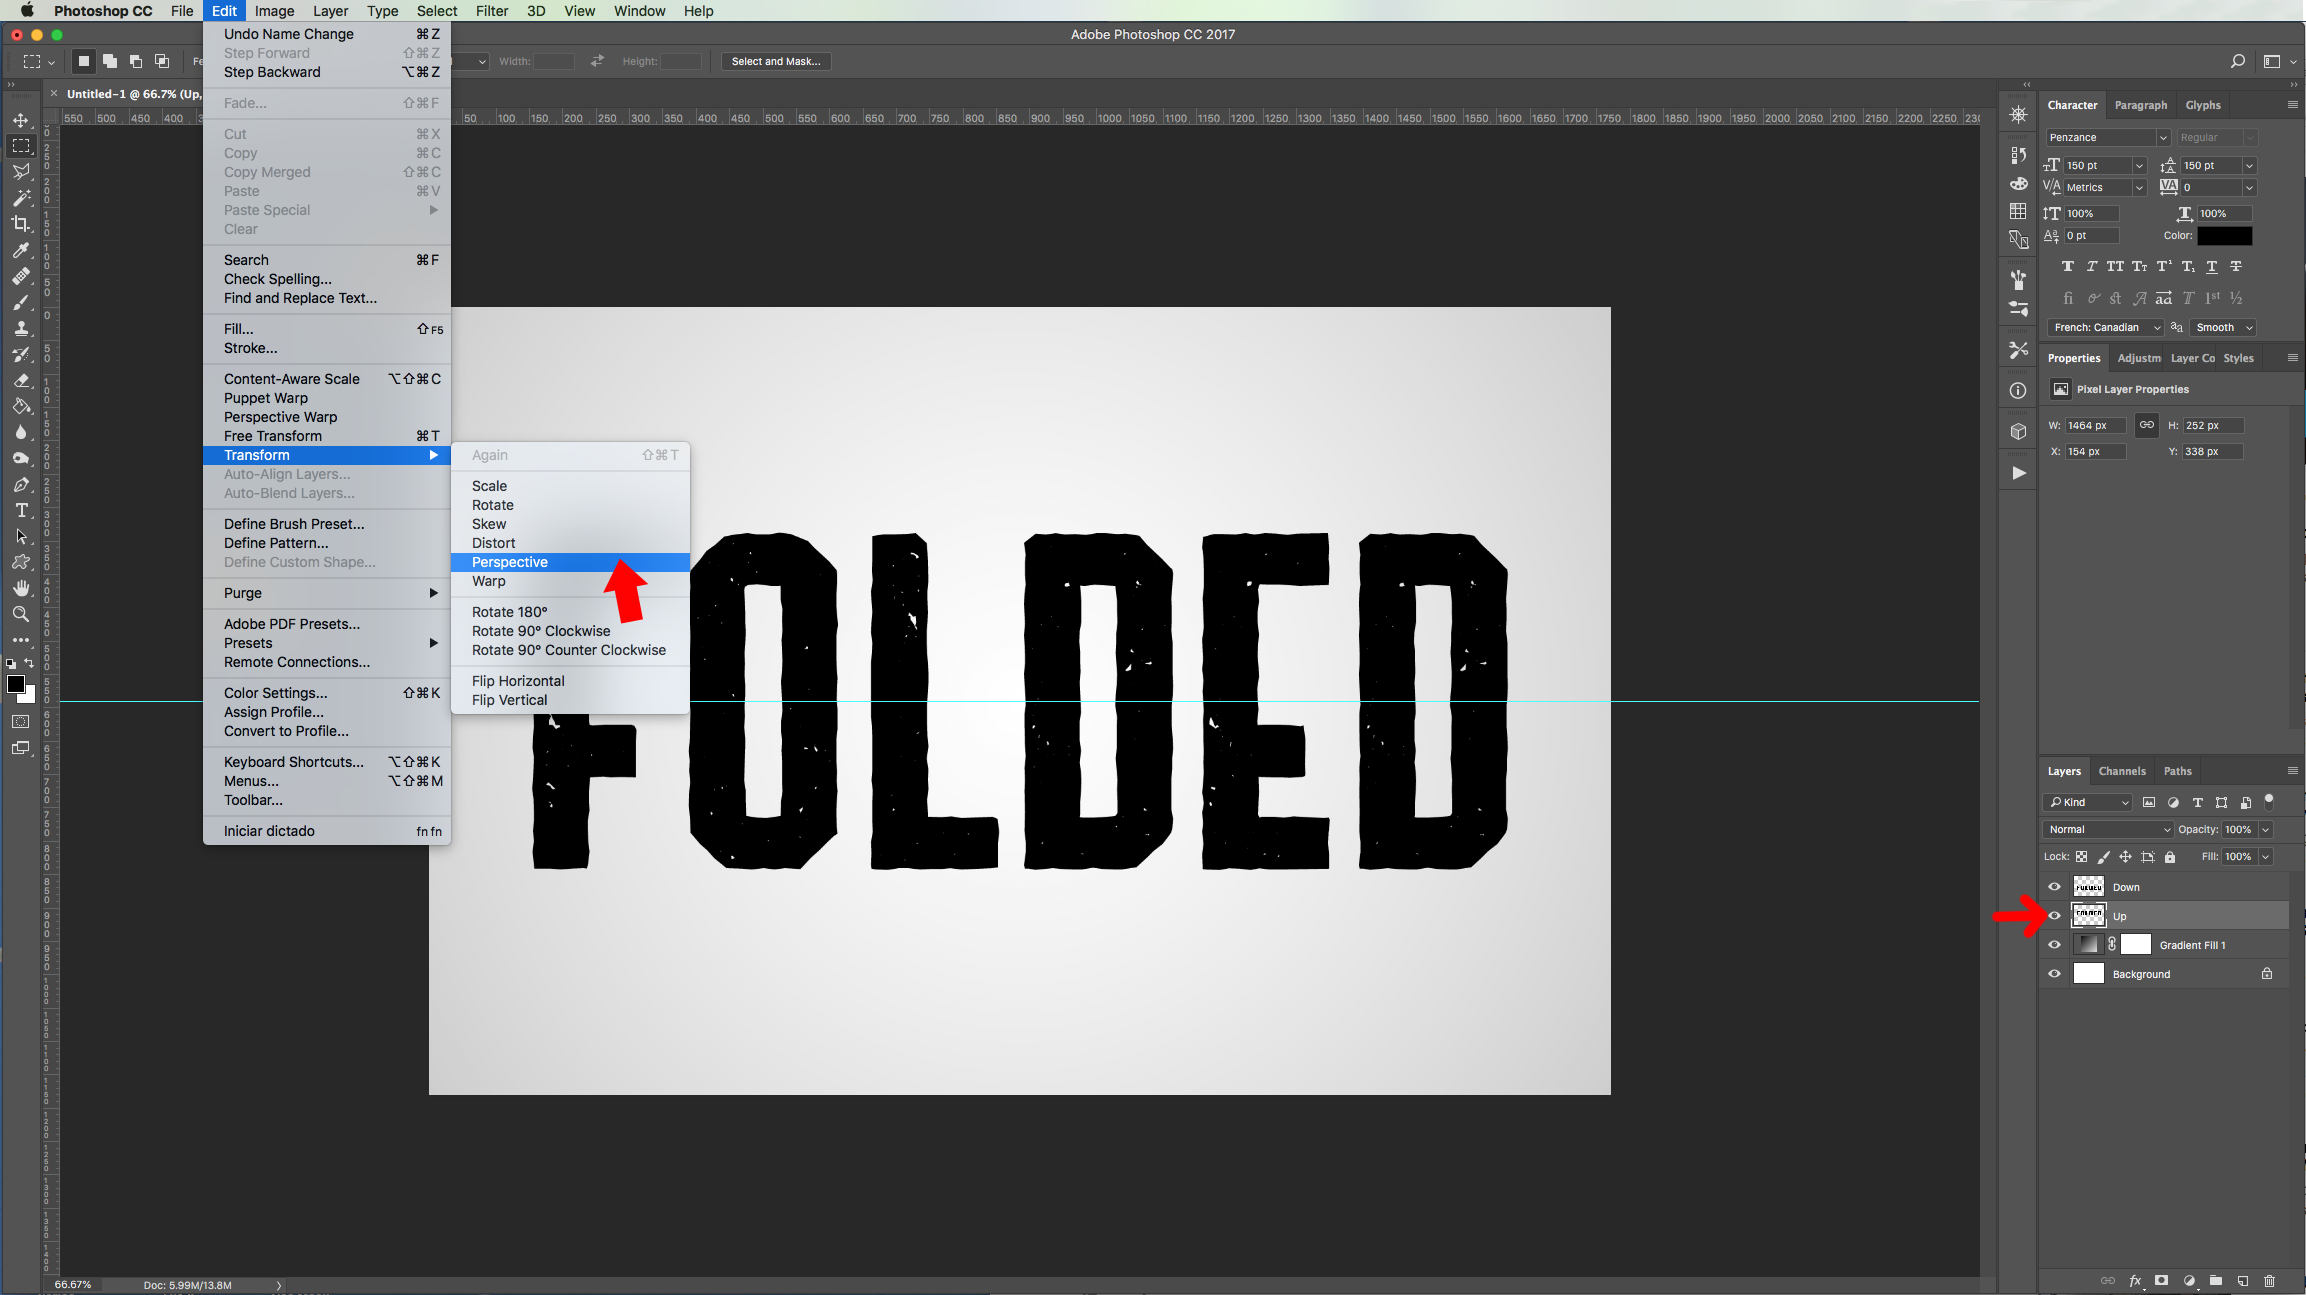
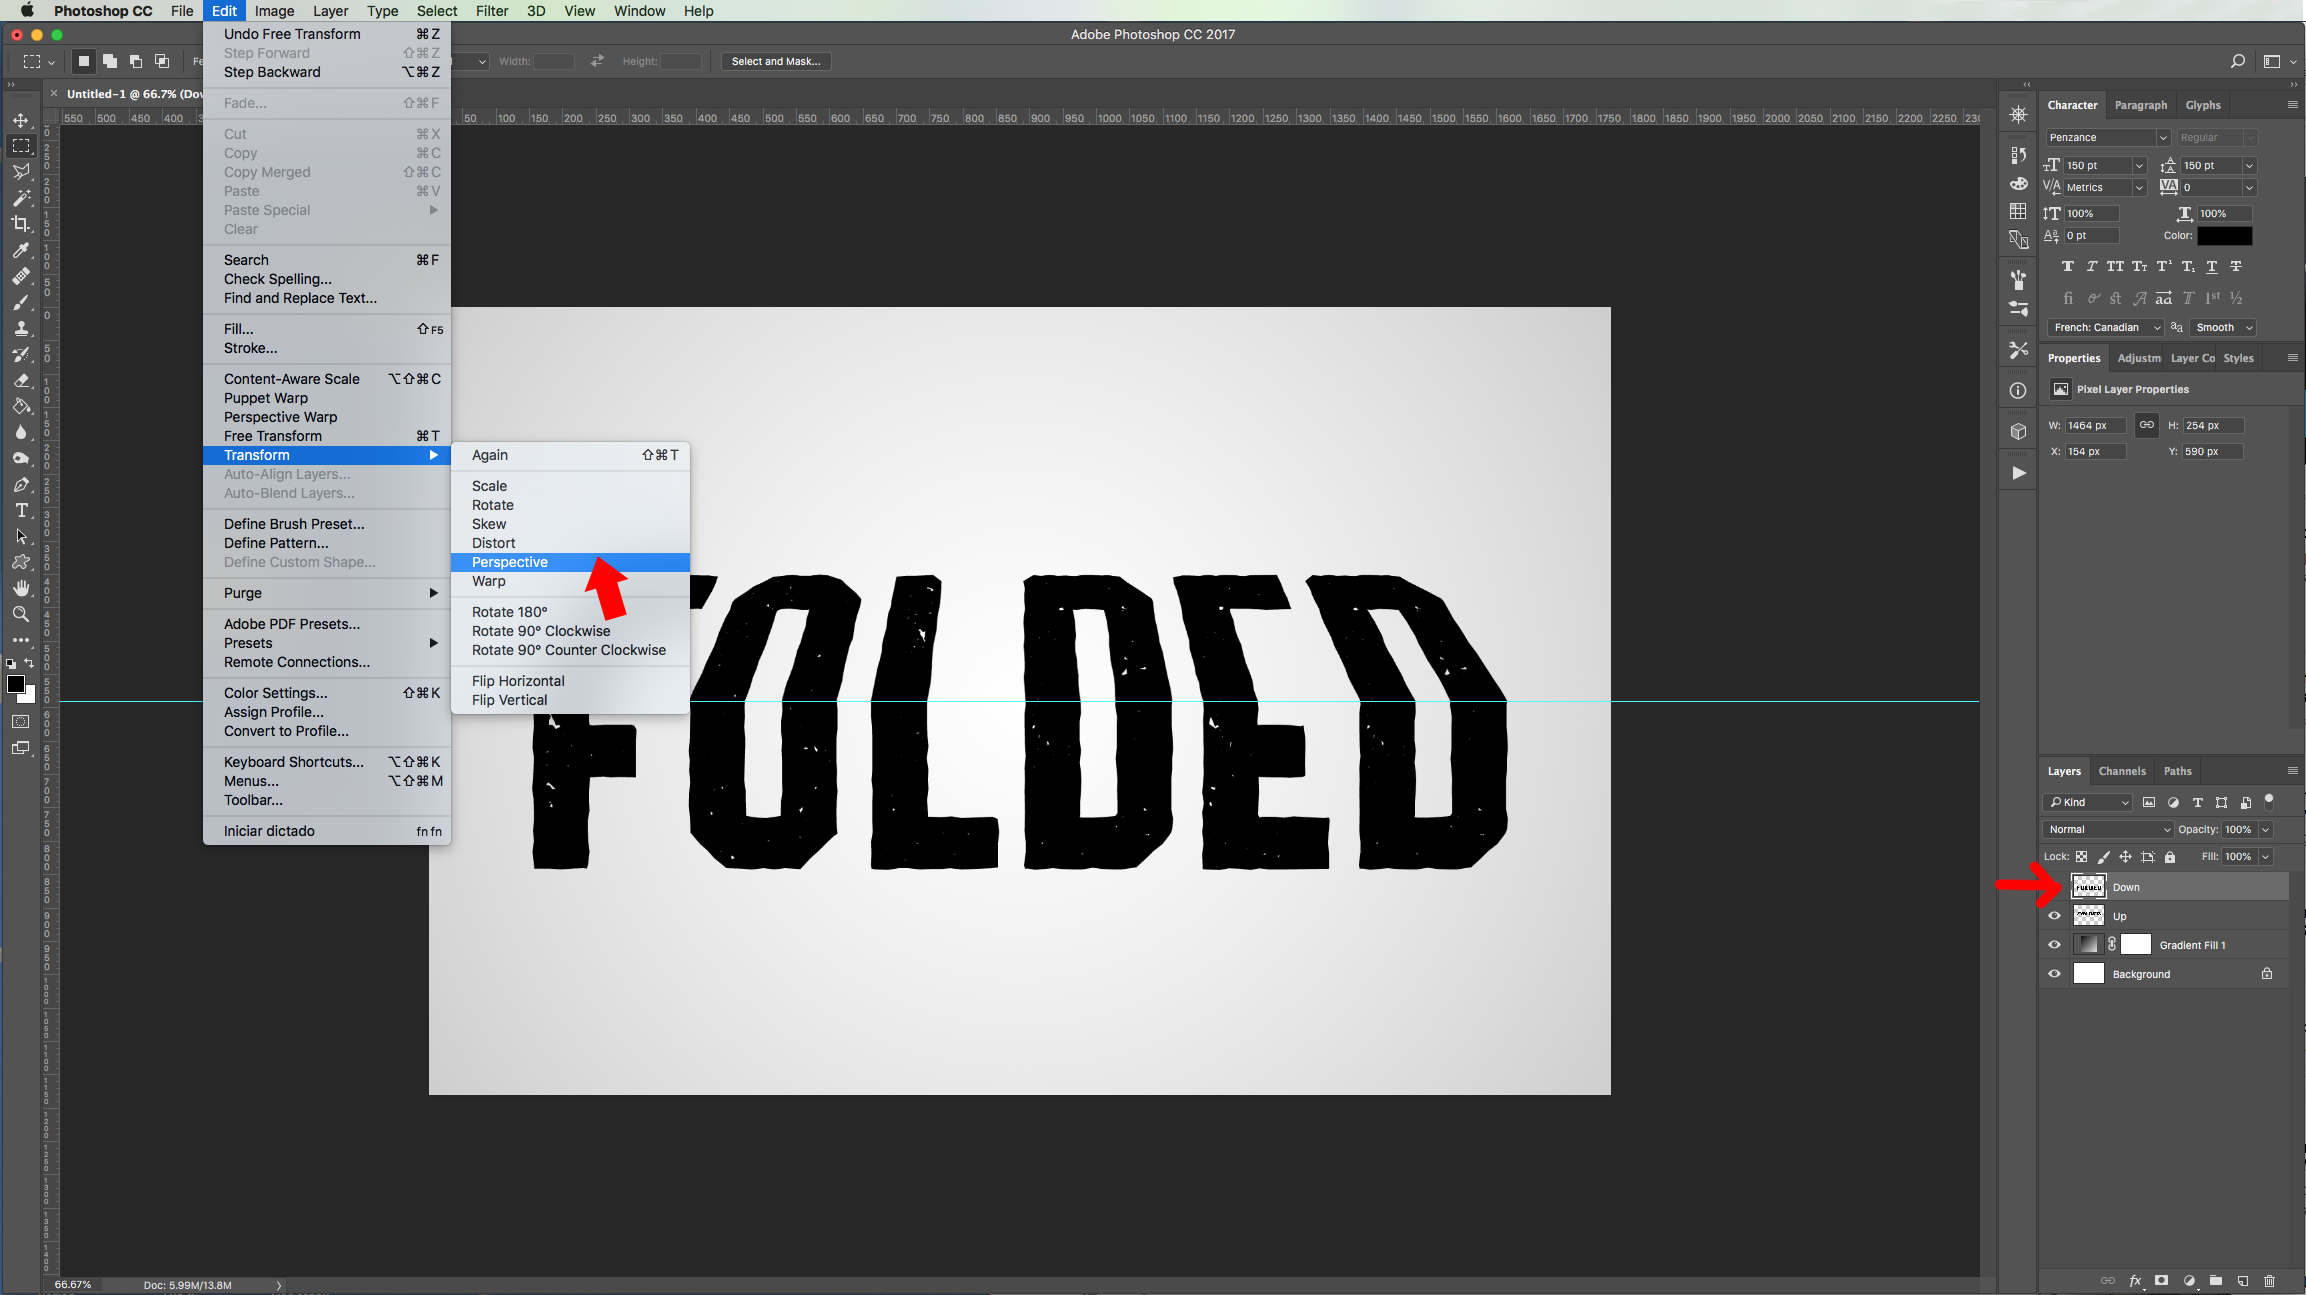
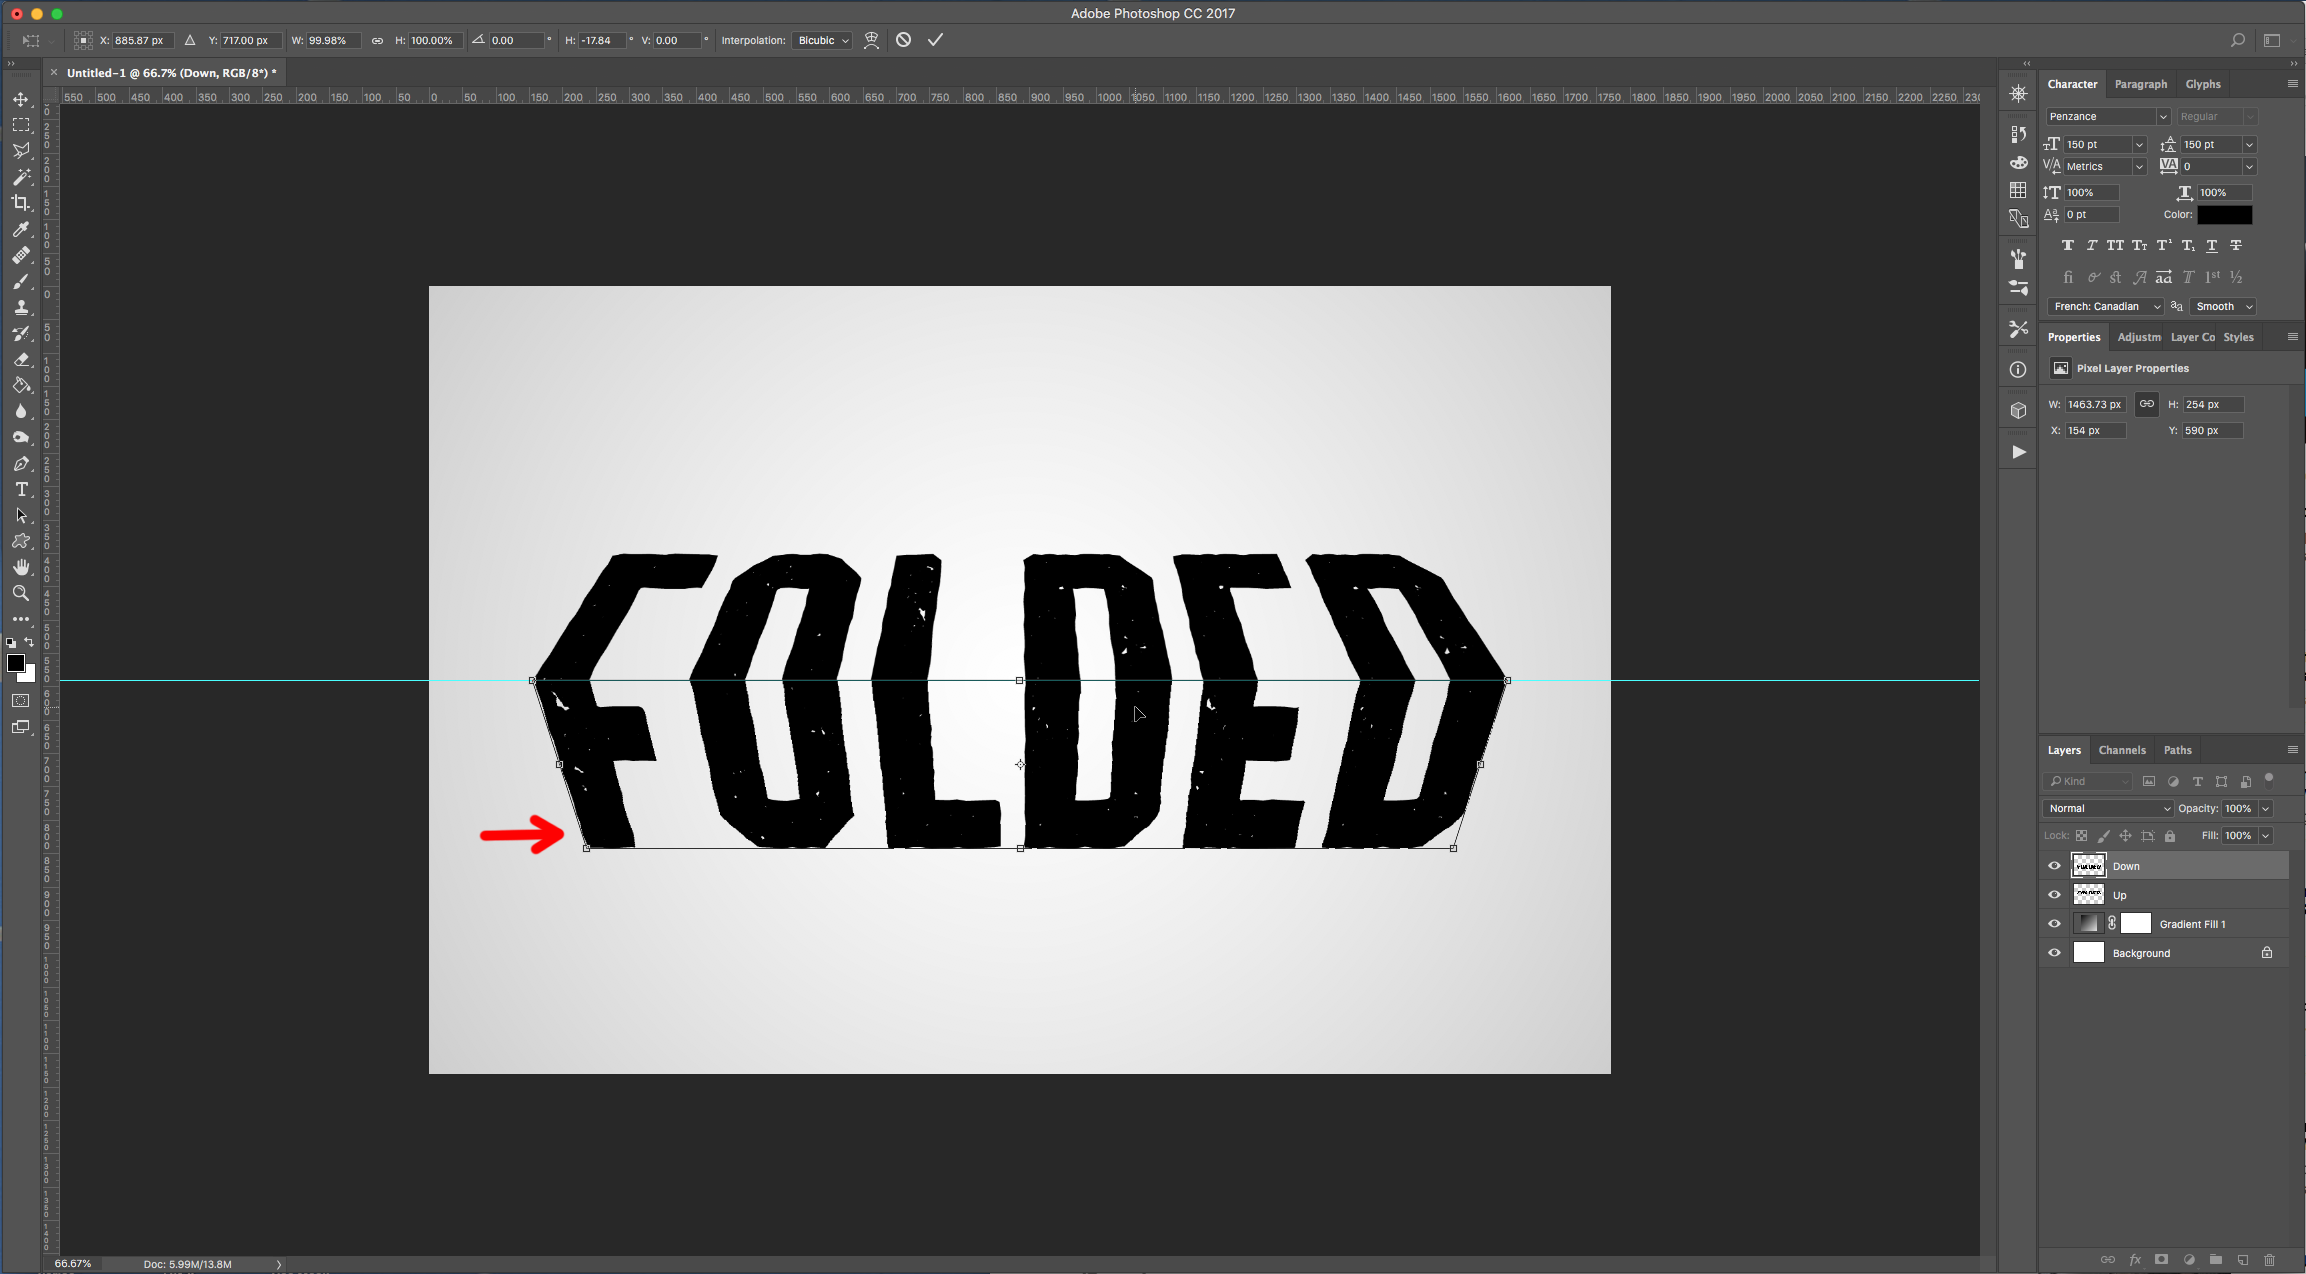
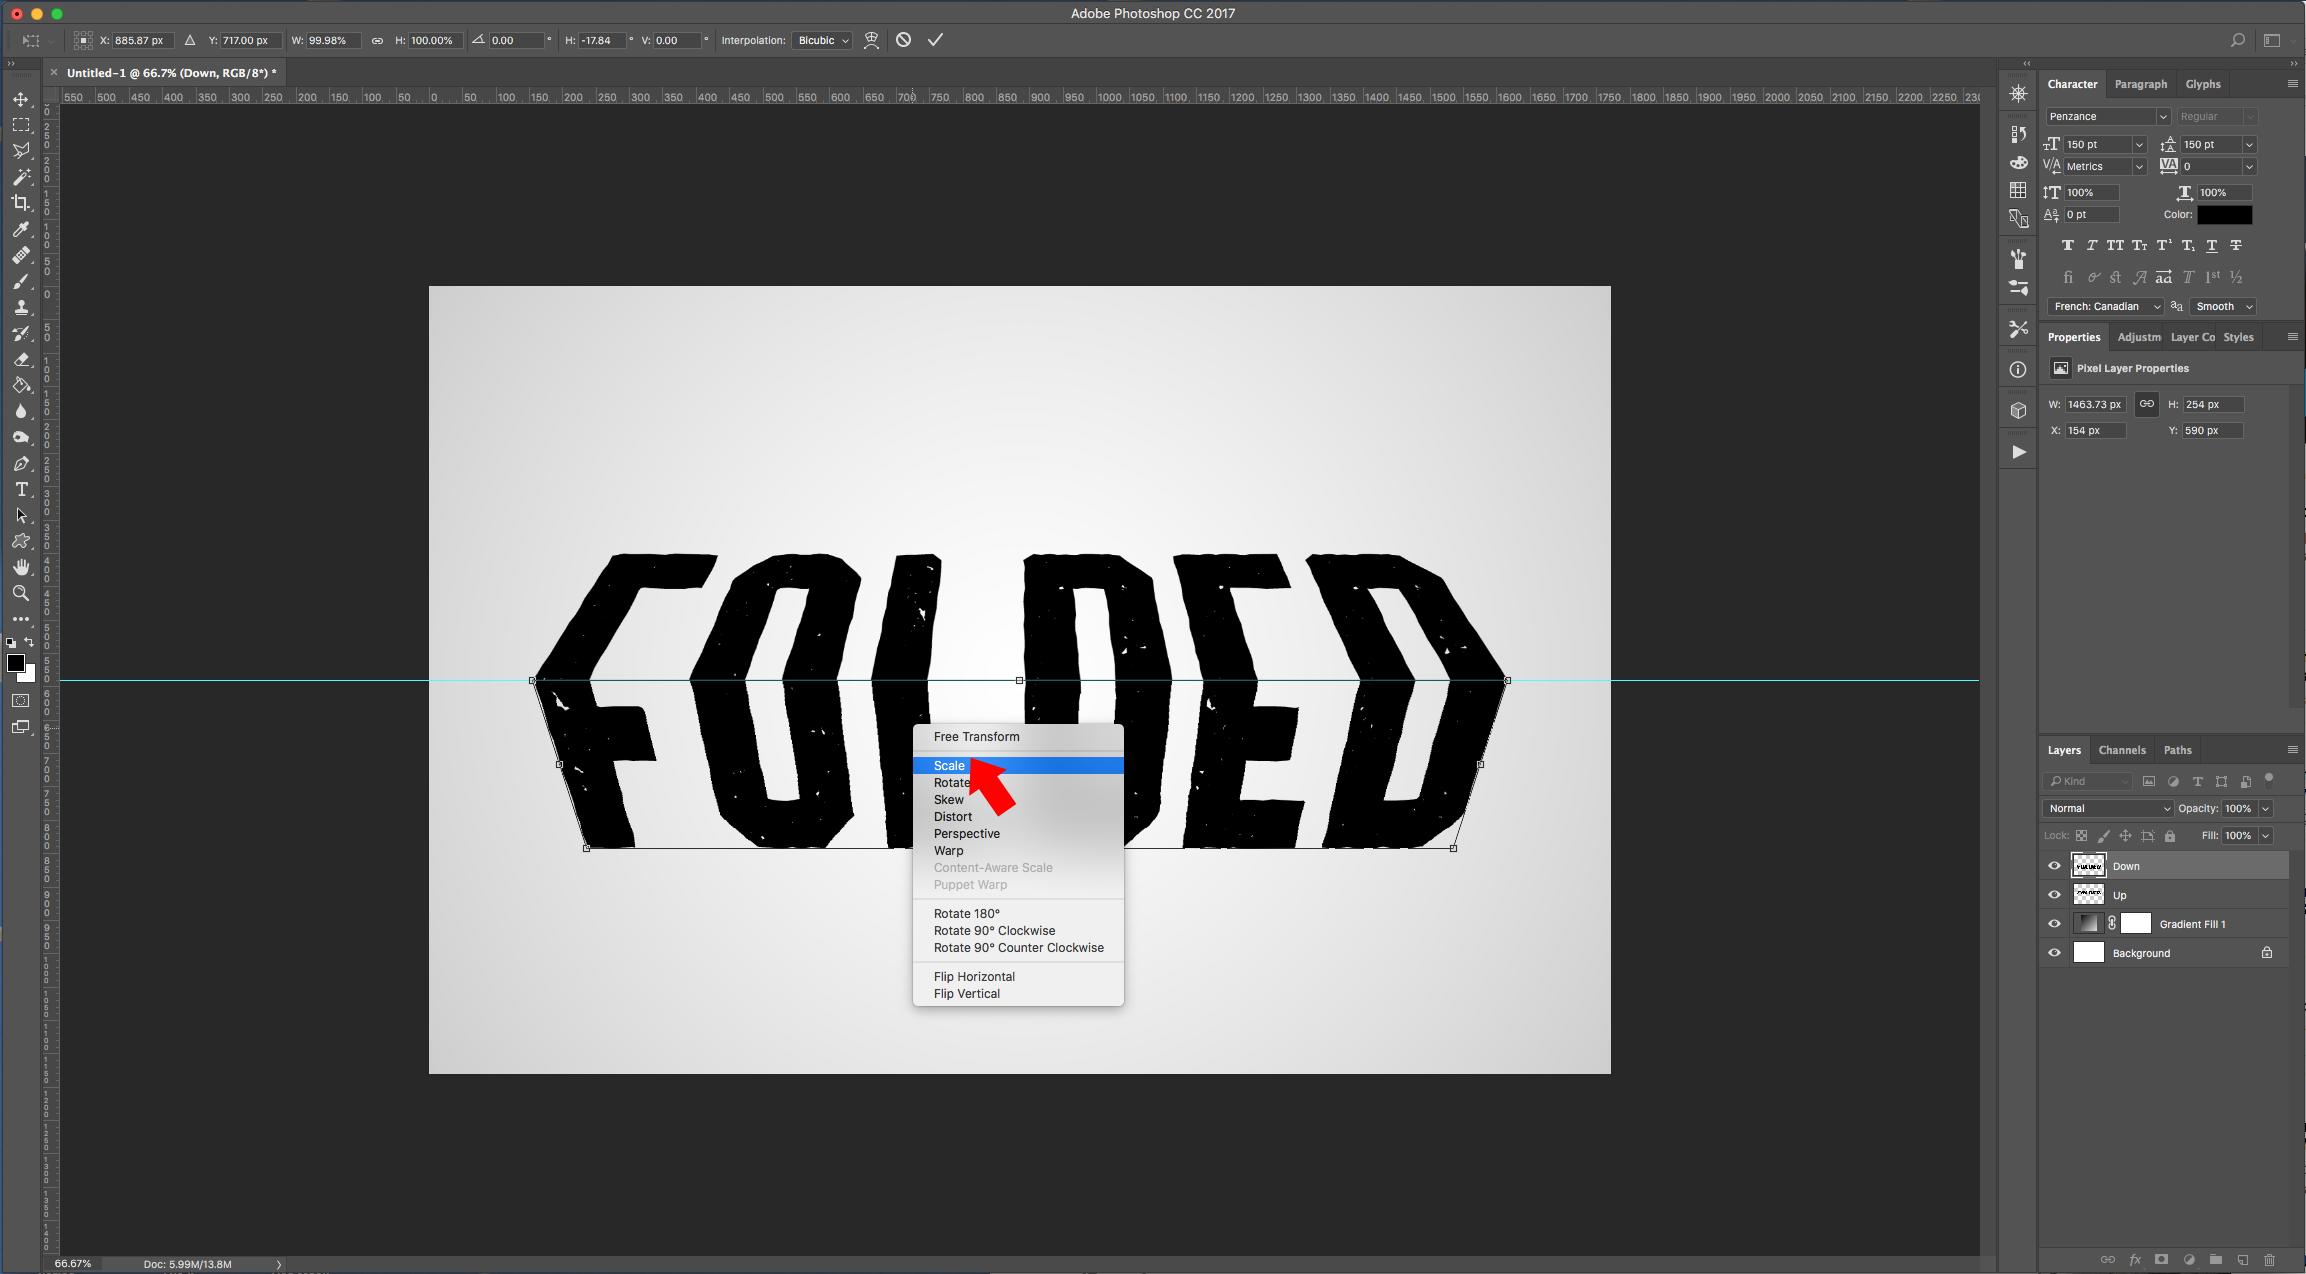
8 - Now, select the “Down” Layer, go to Edit > Transform > Perspective… and reduce the Bottom of the letters to make them look like they are bent. Right-click on top and choose “Scale”, then drag down from the Bottom-Center “Anchor Point” to make the letters a bit longer. Once you are happy, hit “Enter” or click the small “Checkmark” on the Top Menu.
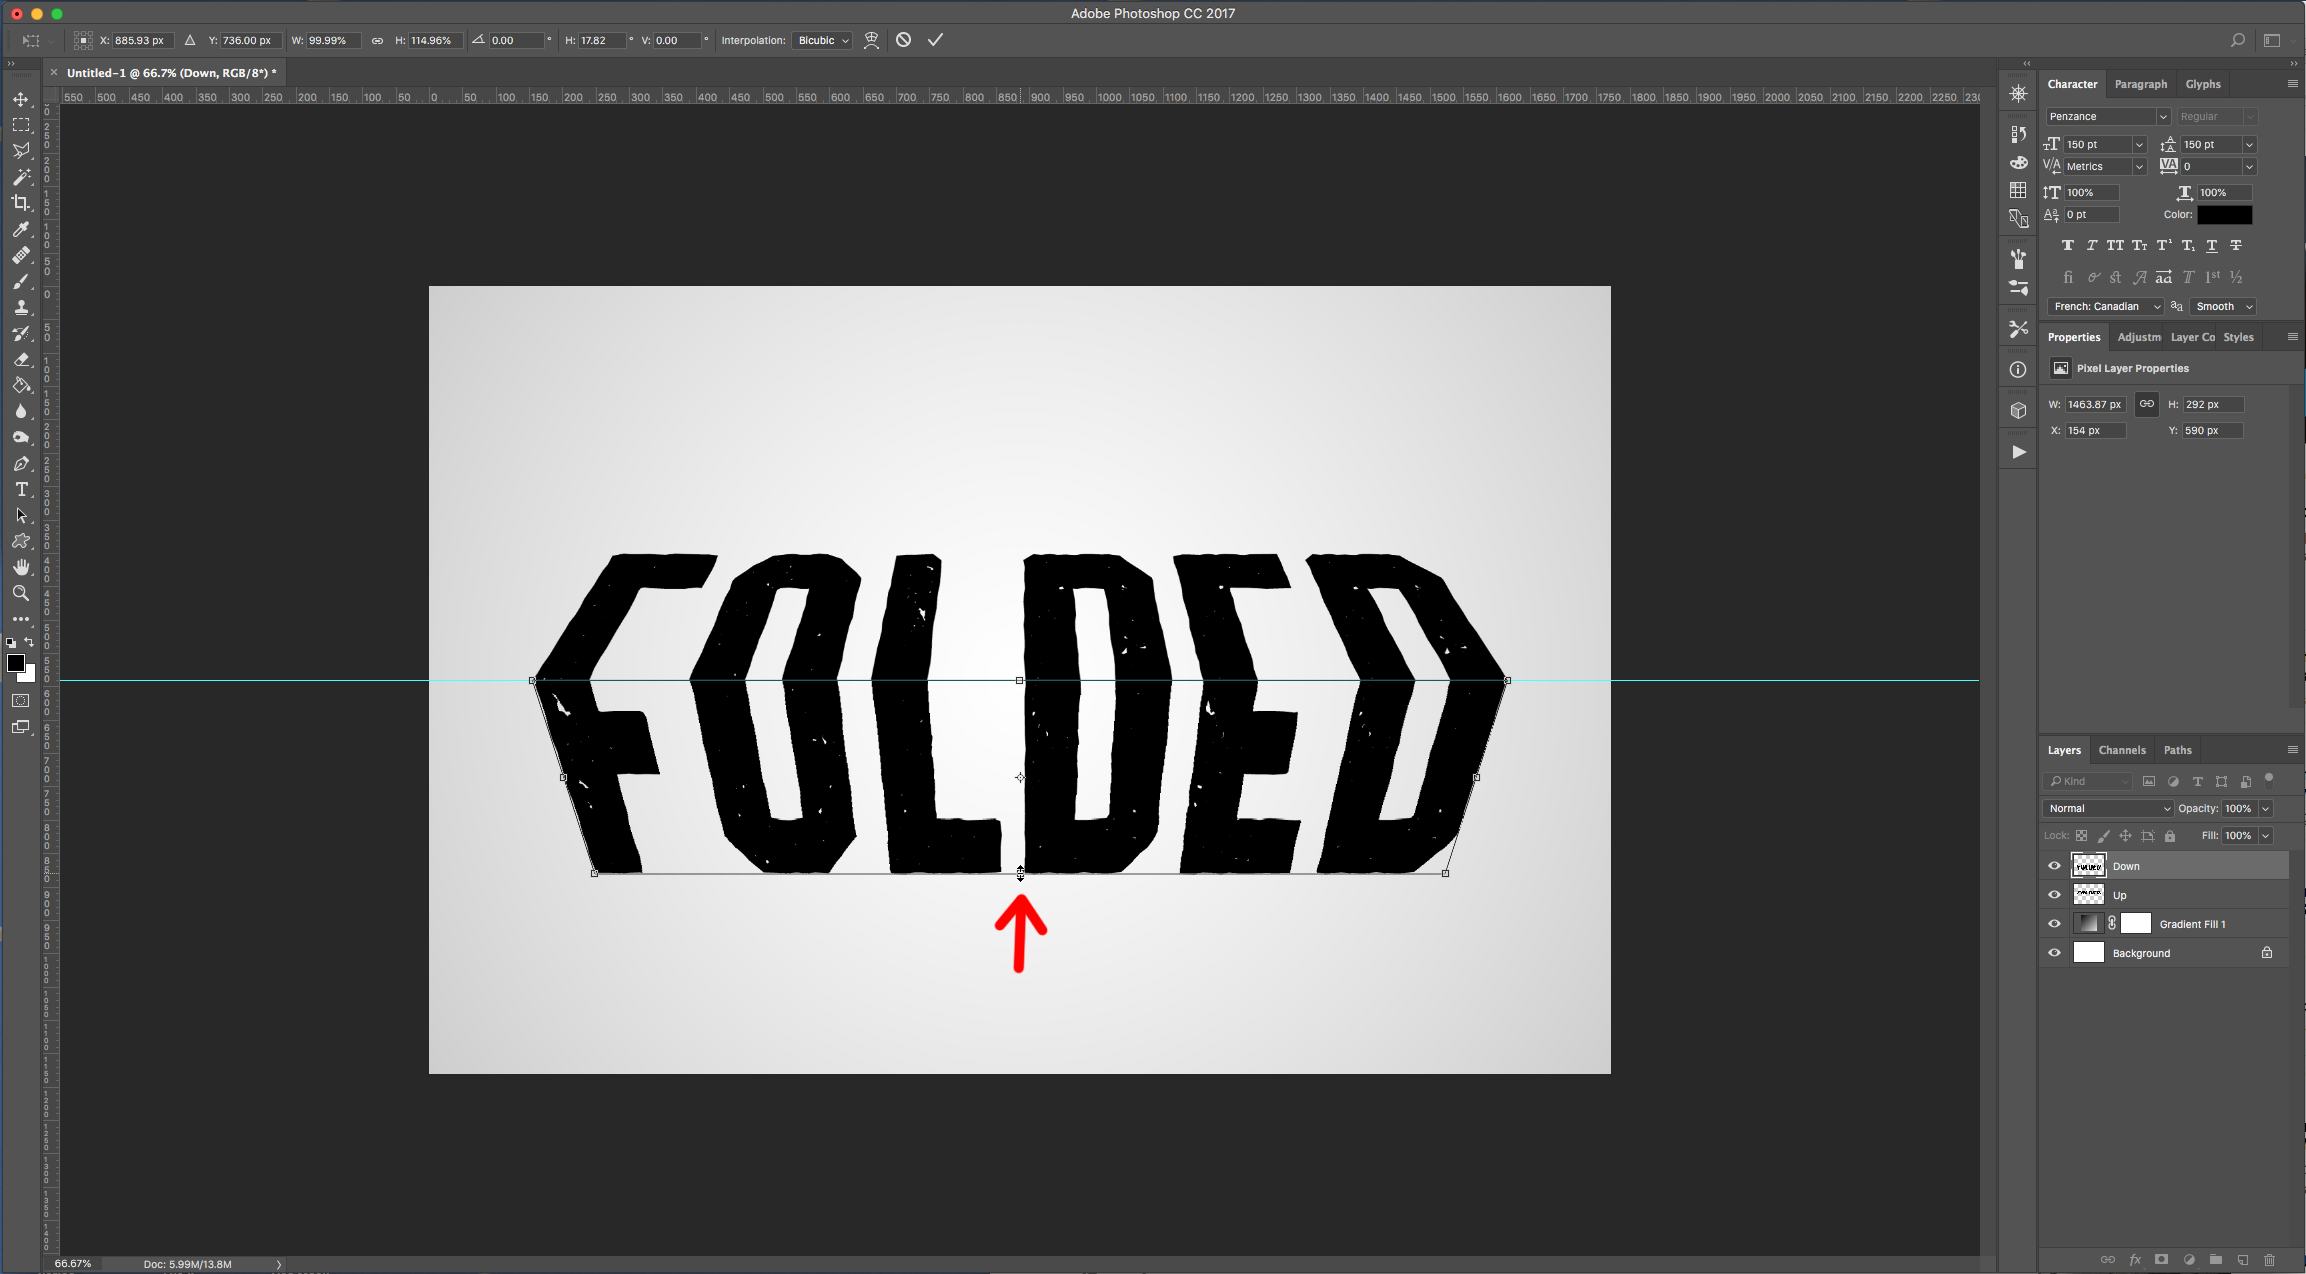
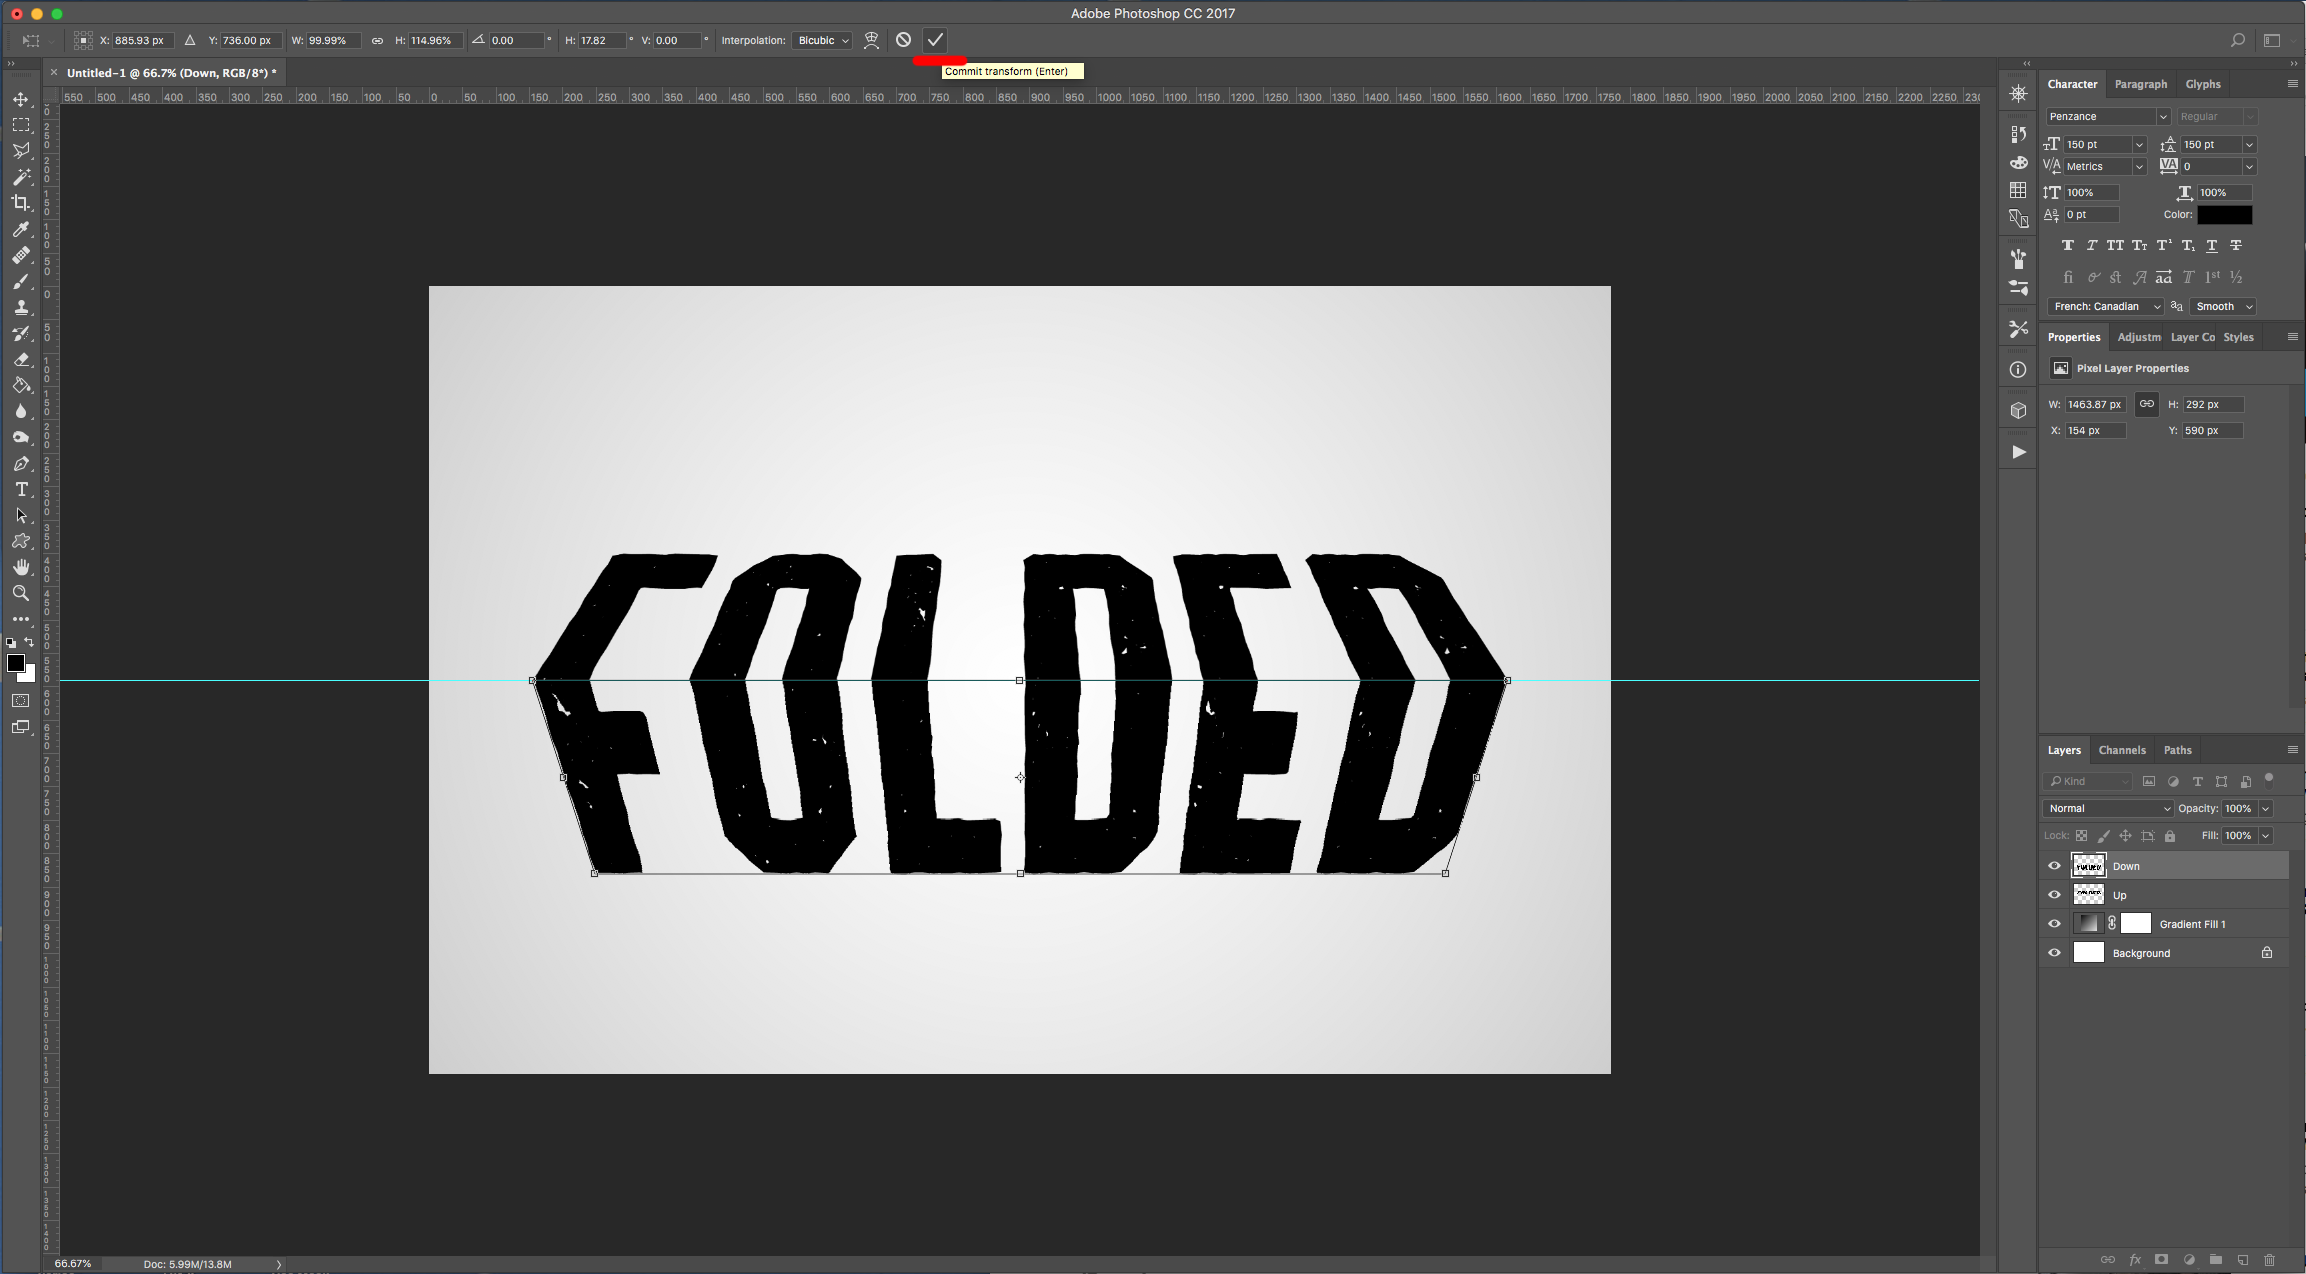
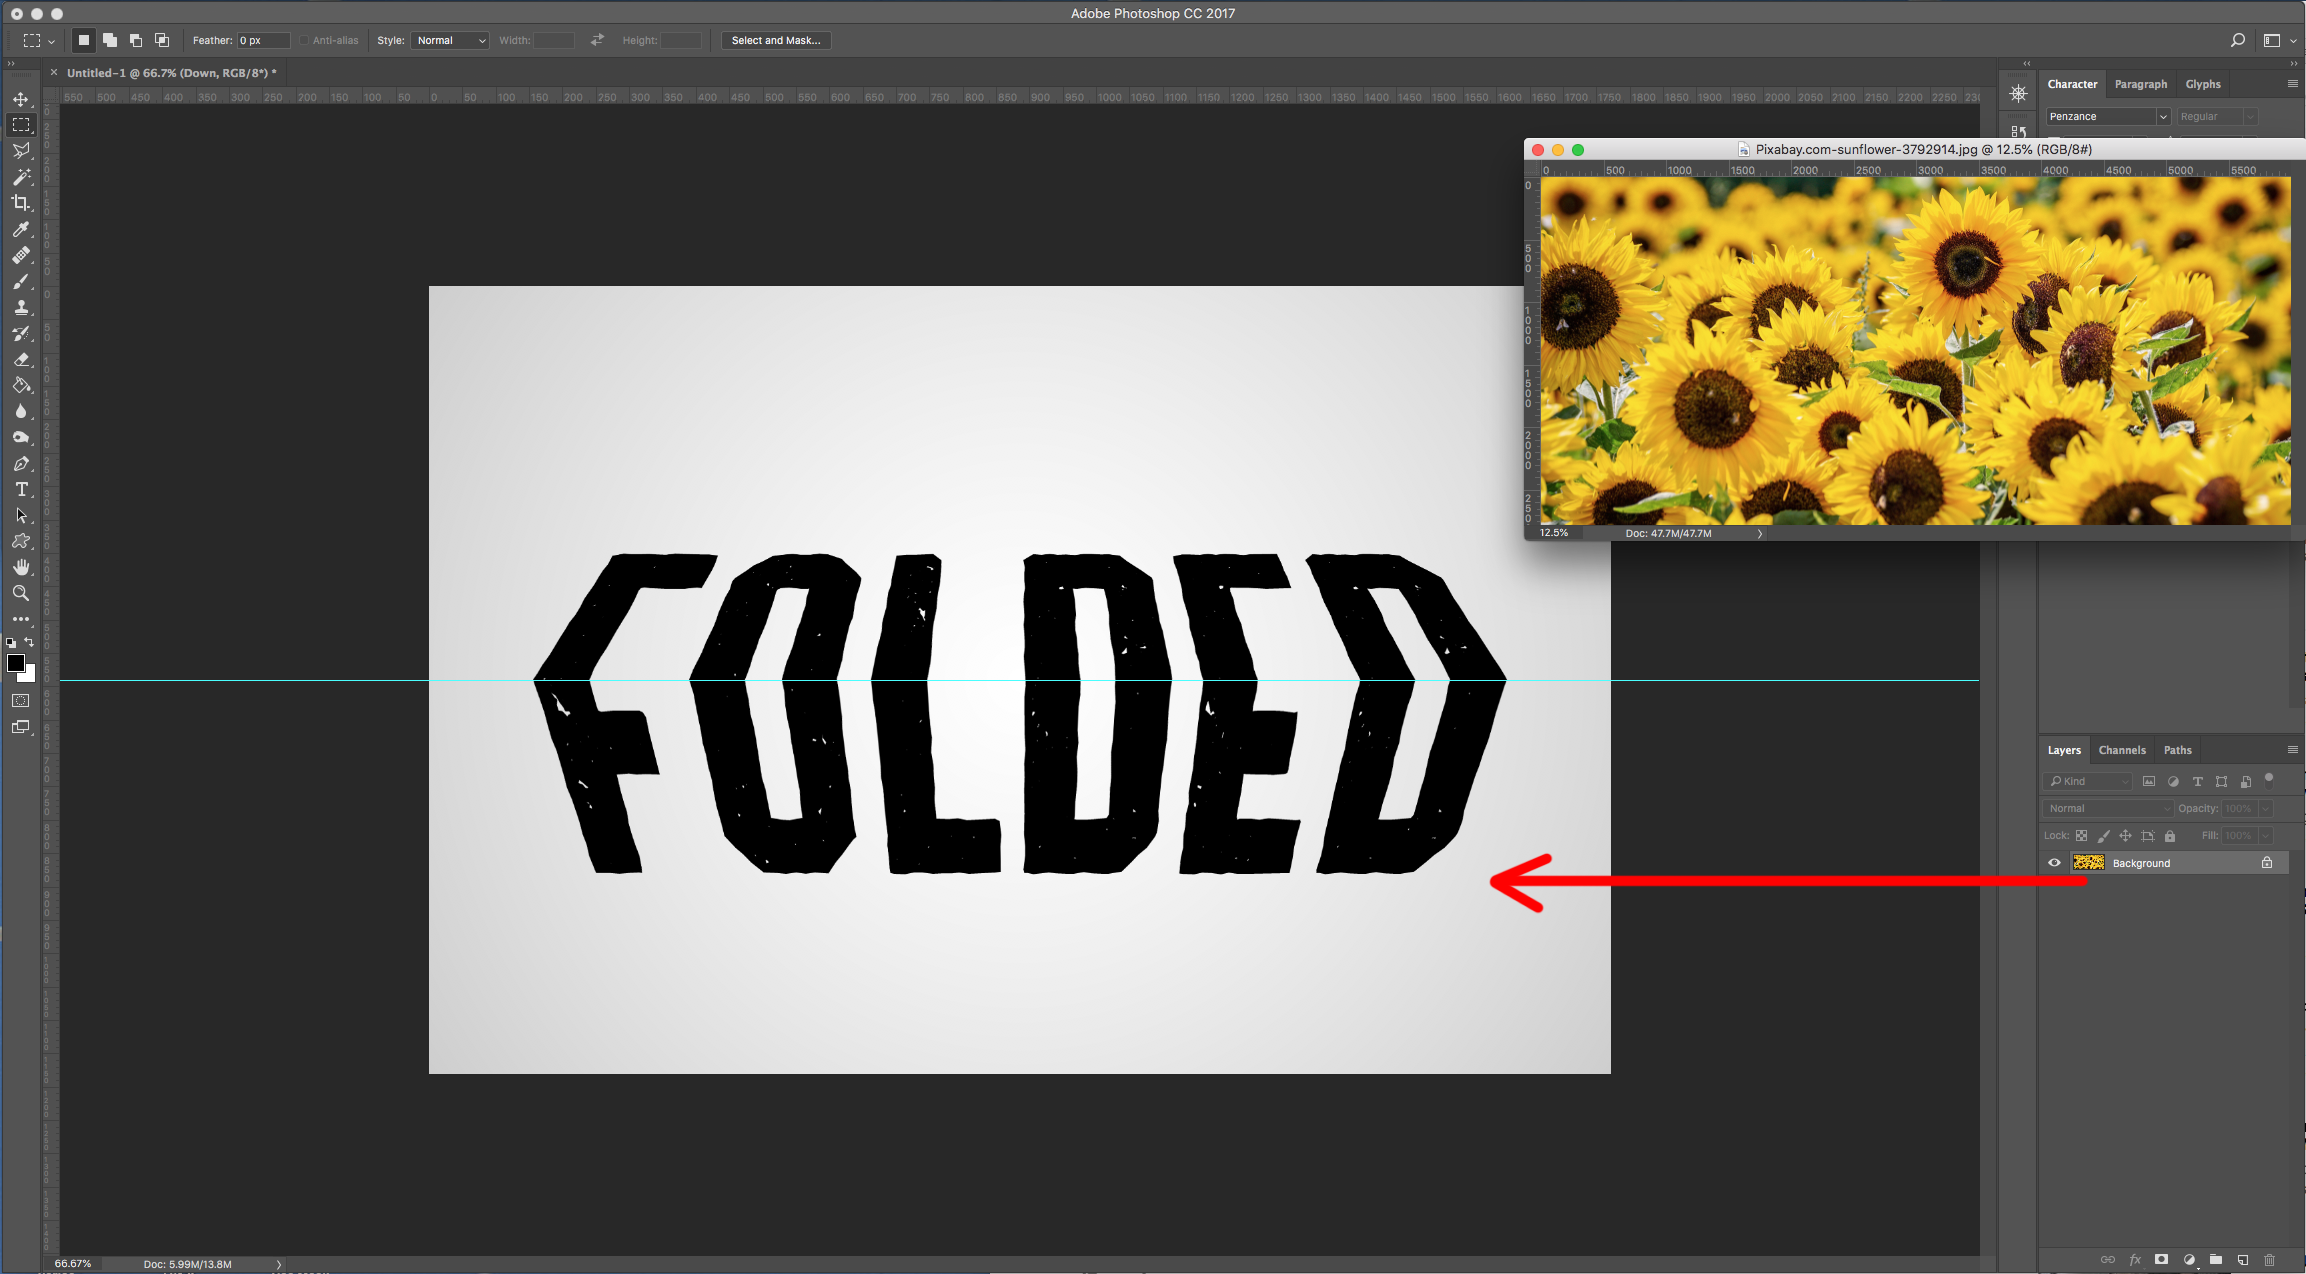
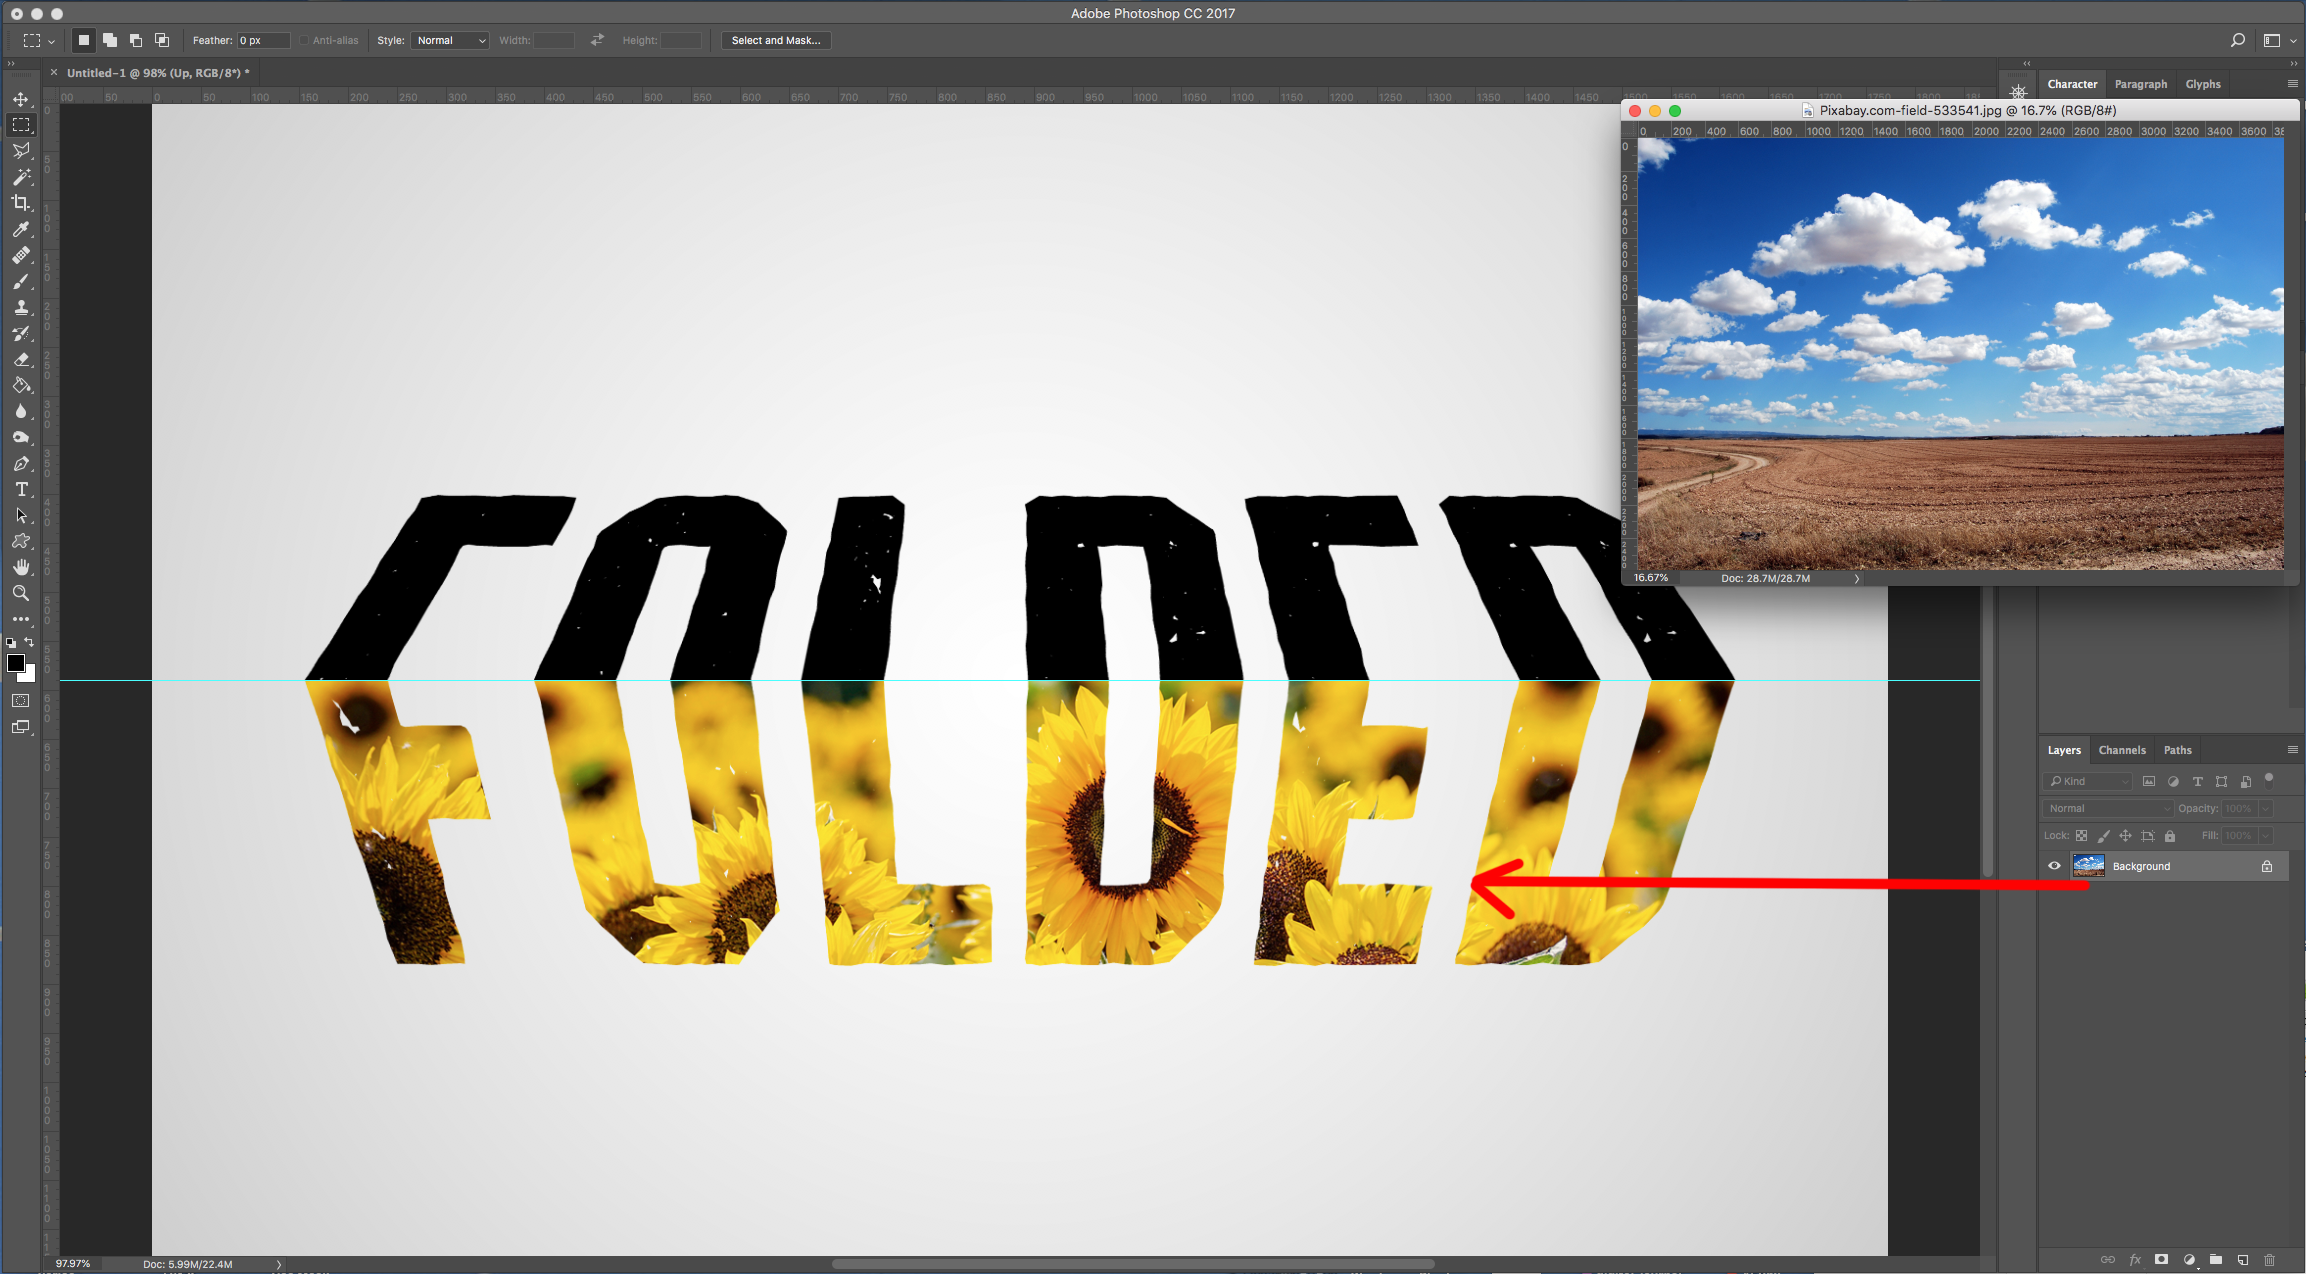
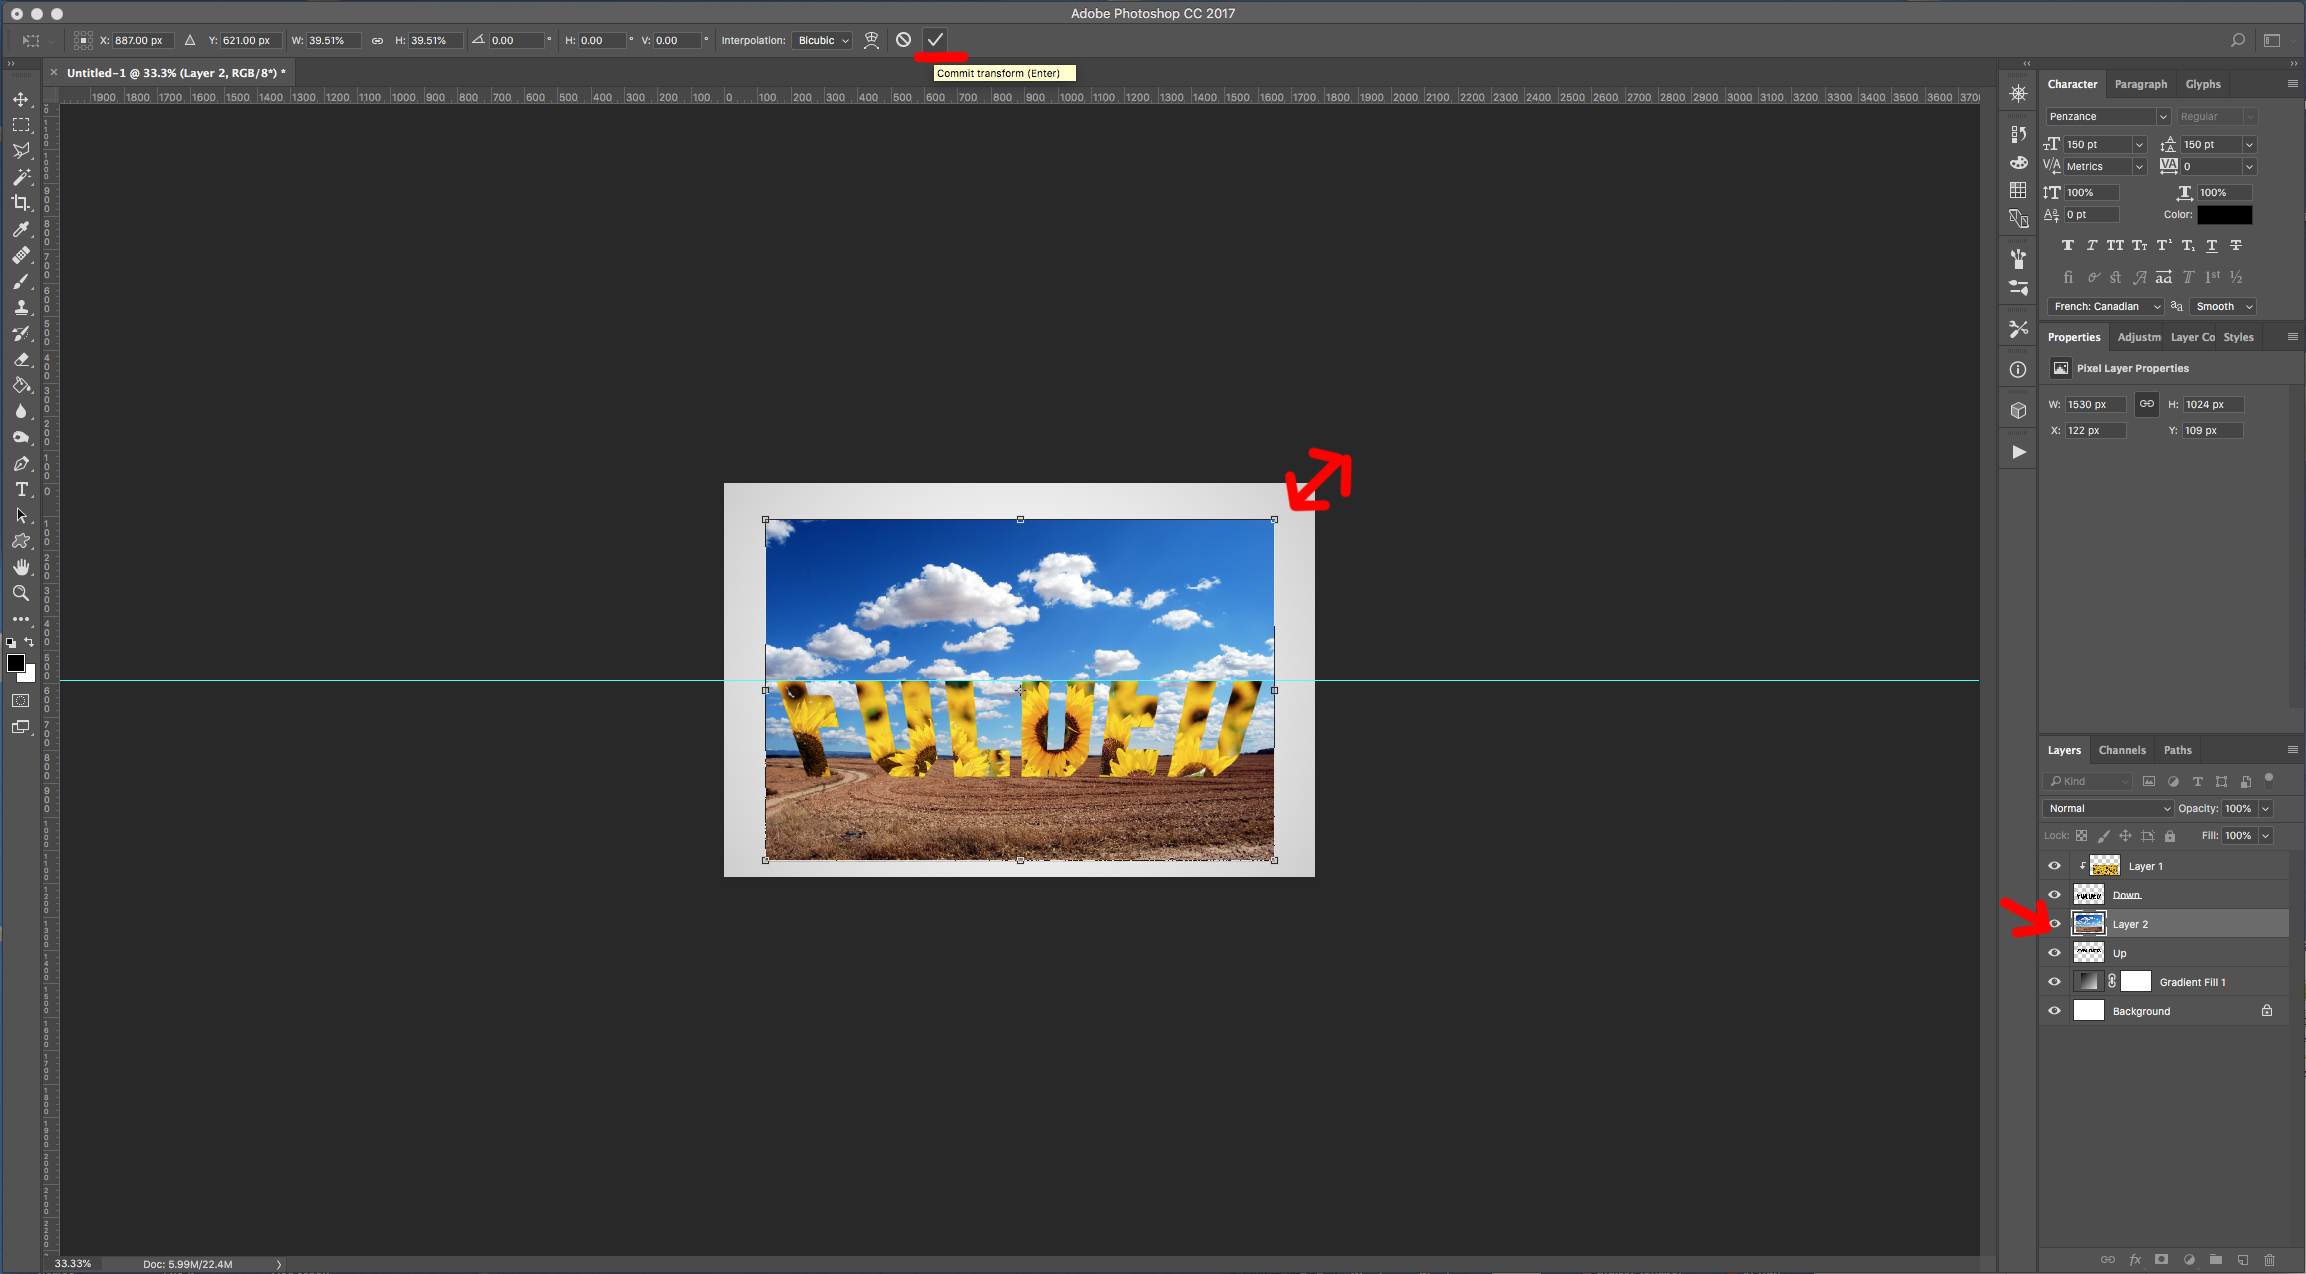
9 - Open one of the images you chose to add to your text and drag it into your original document. It should be on top of everything. Use “Free Transform” (Command/Control + T) to Resize it and place where you want it.
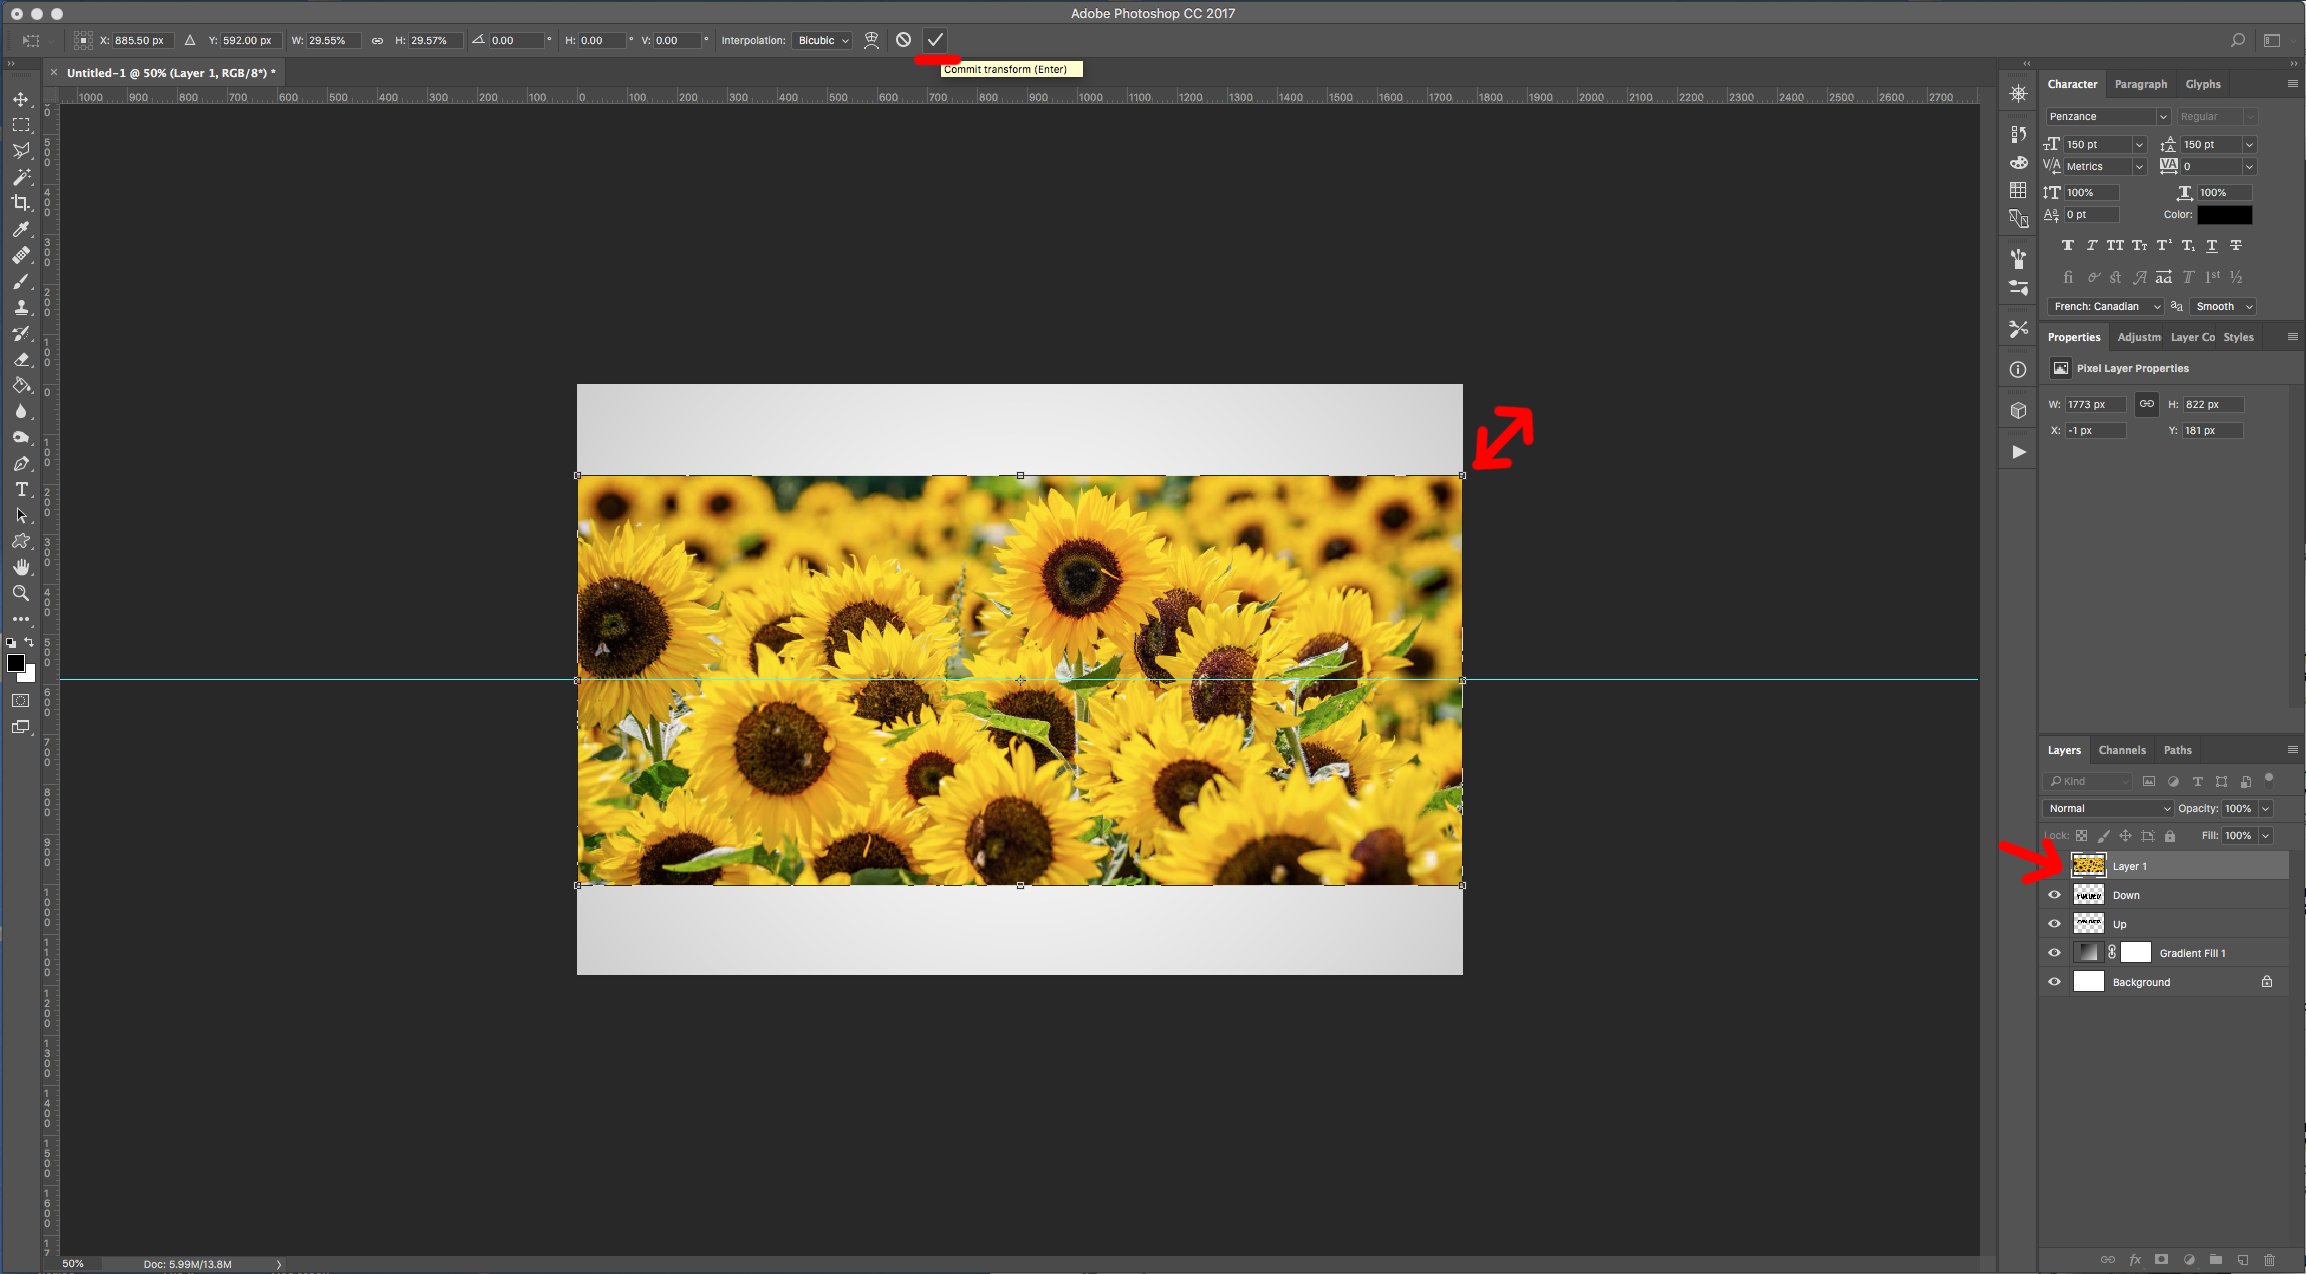
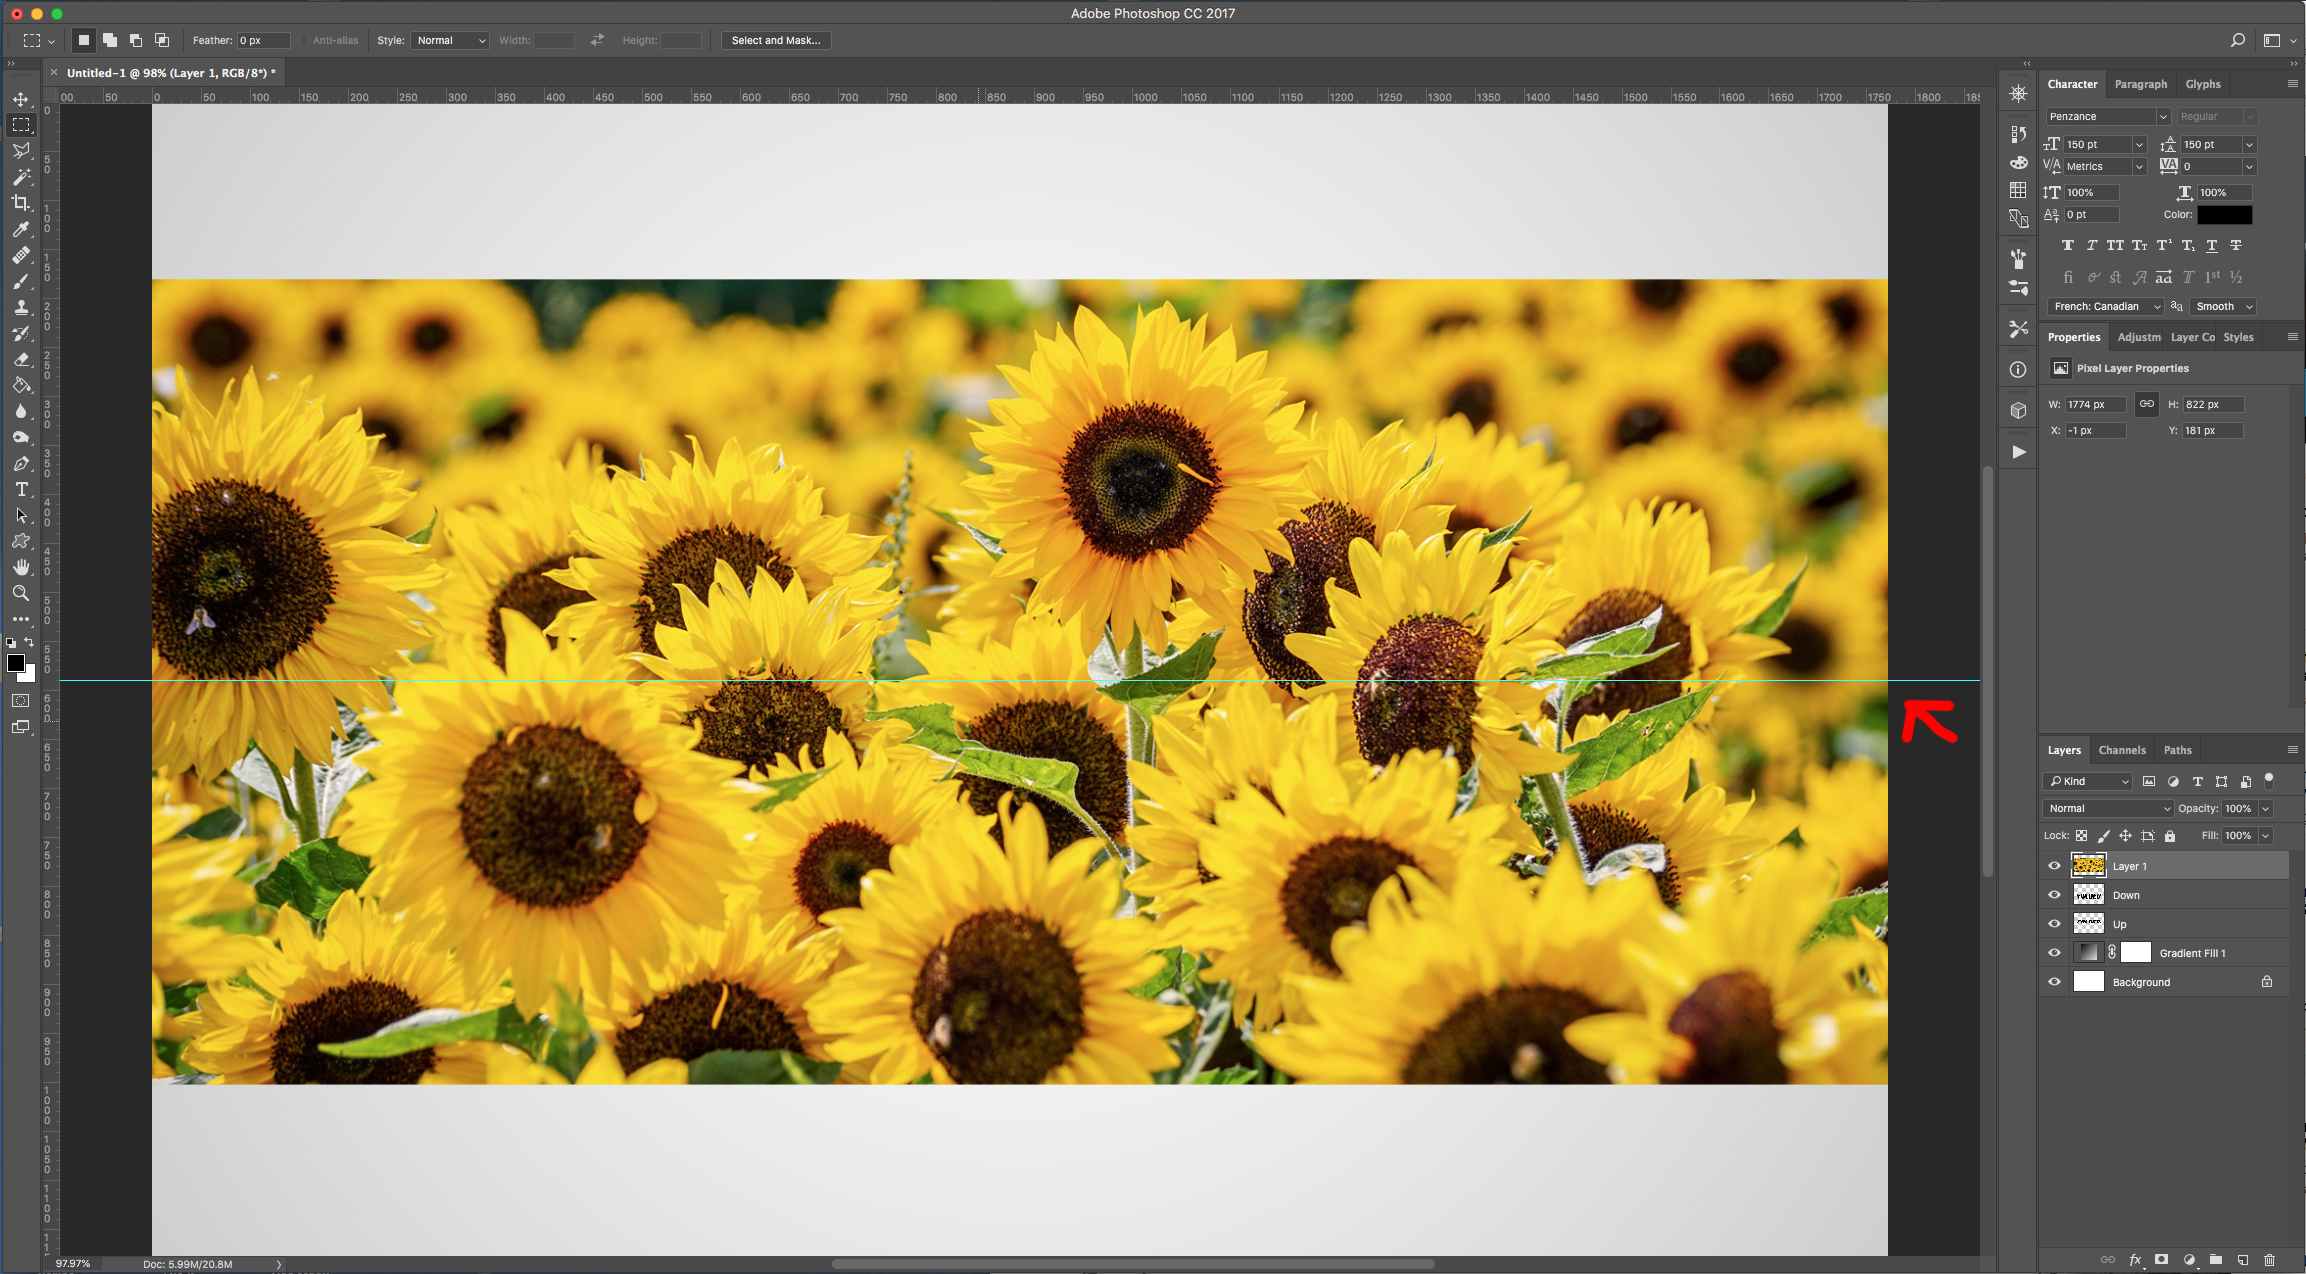
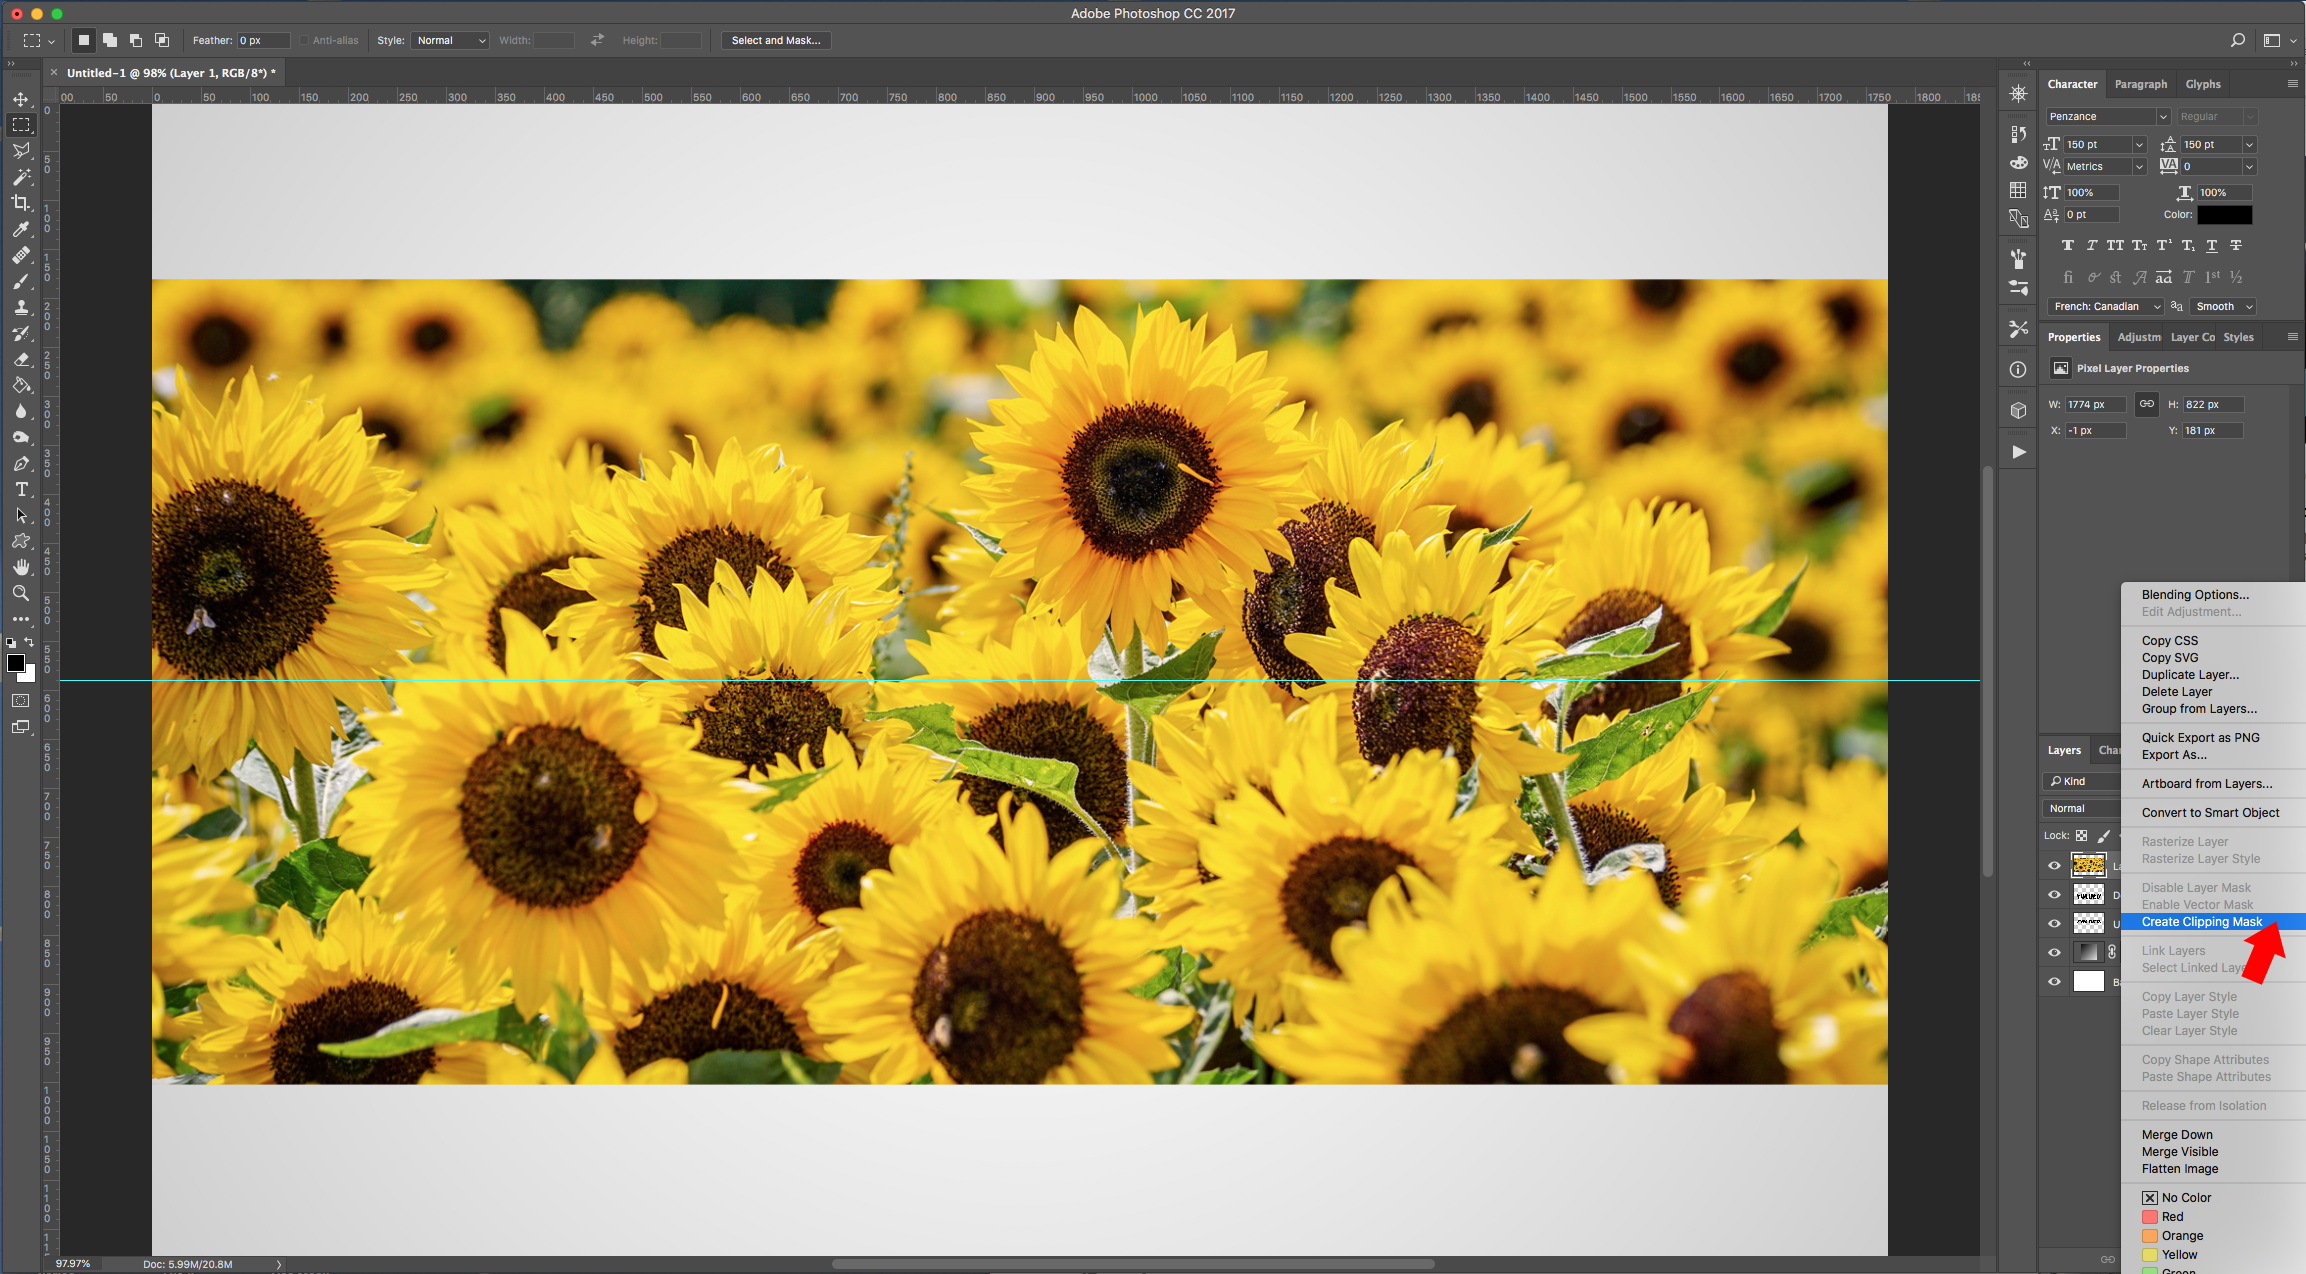
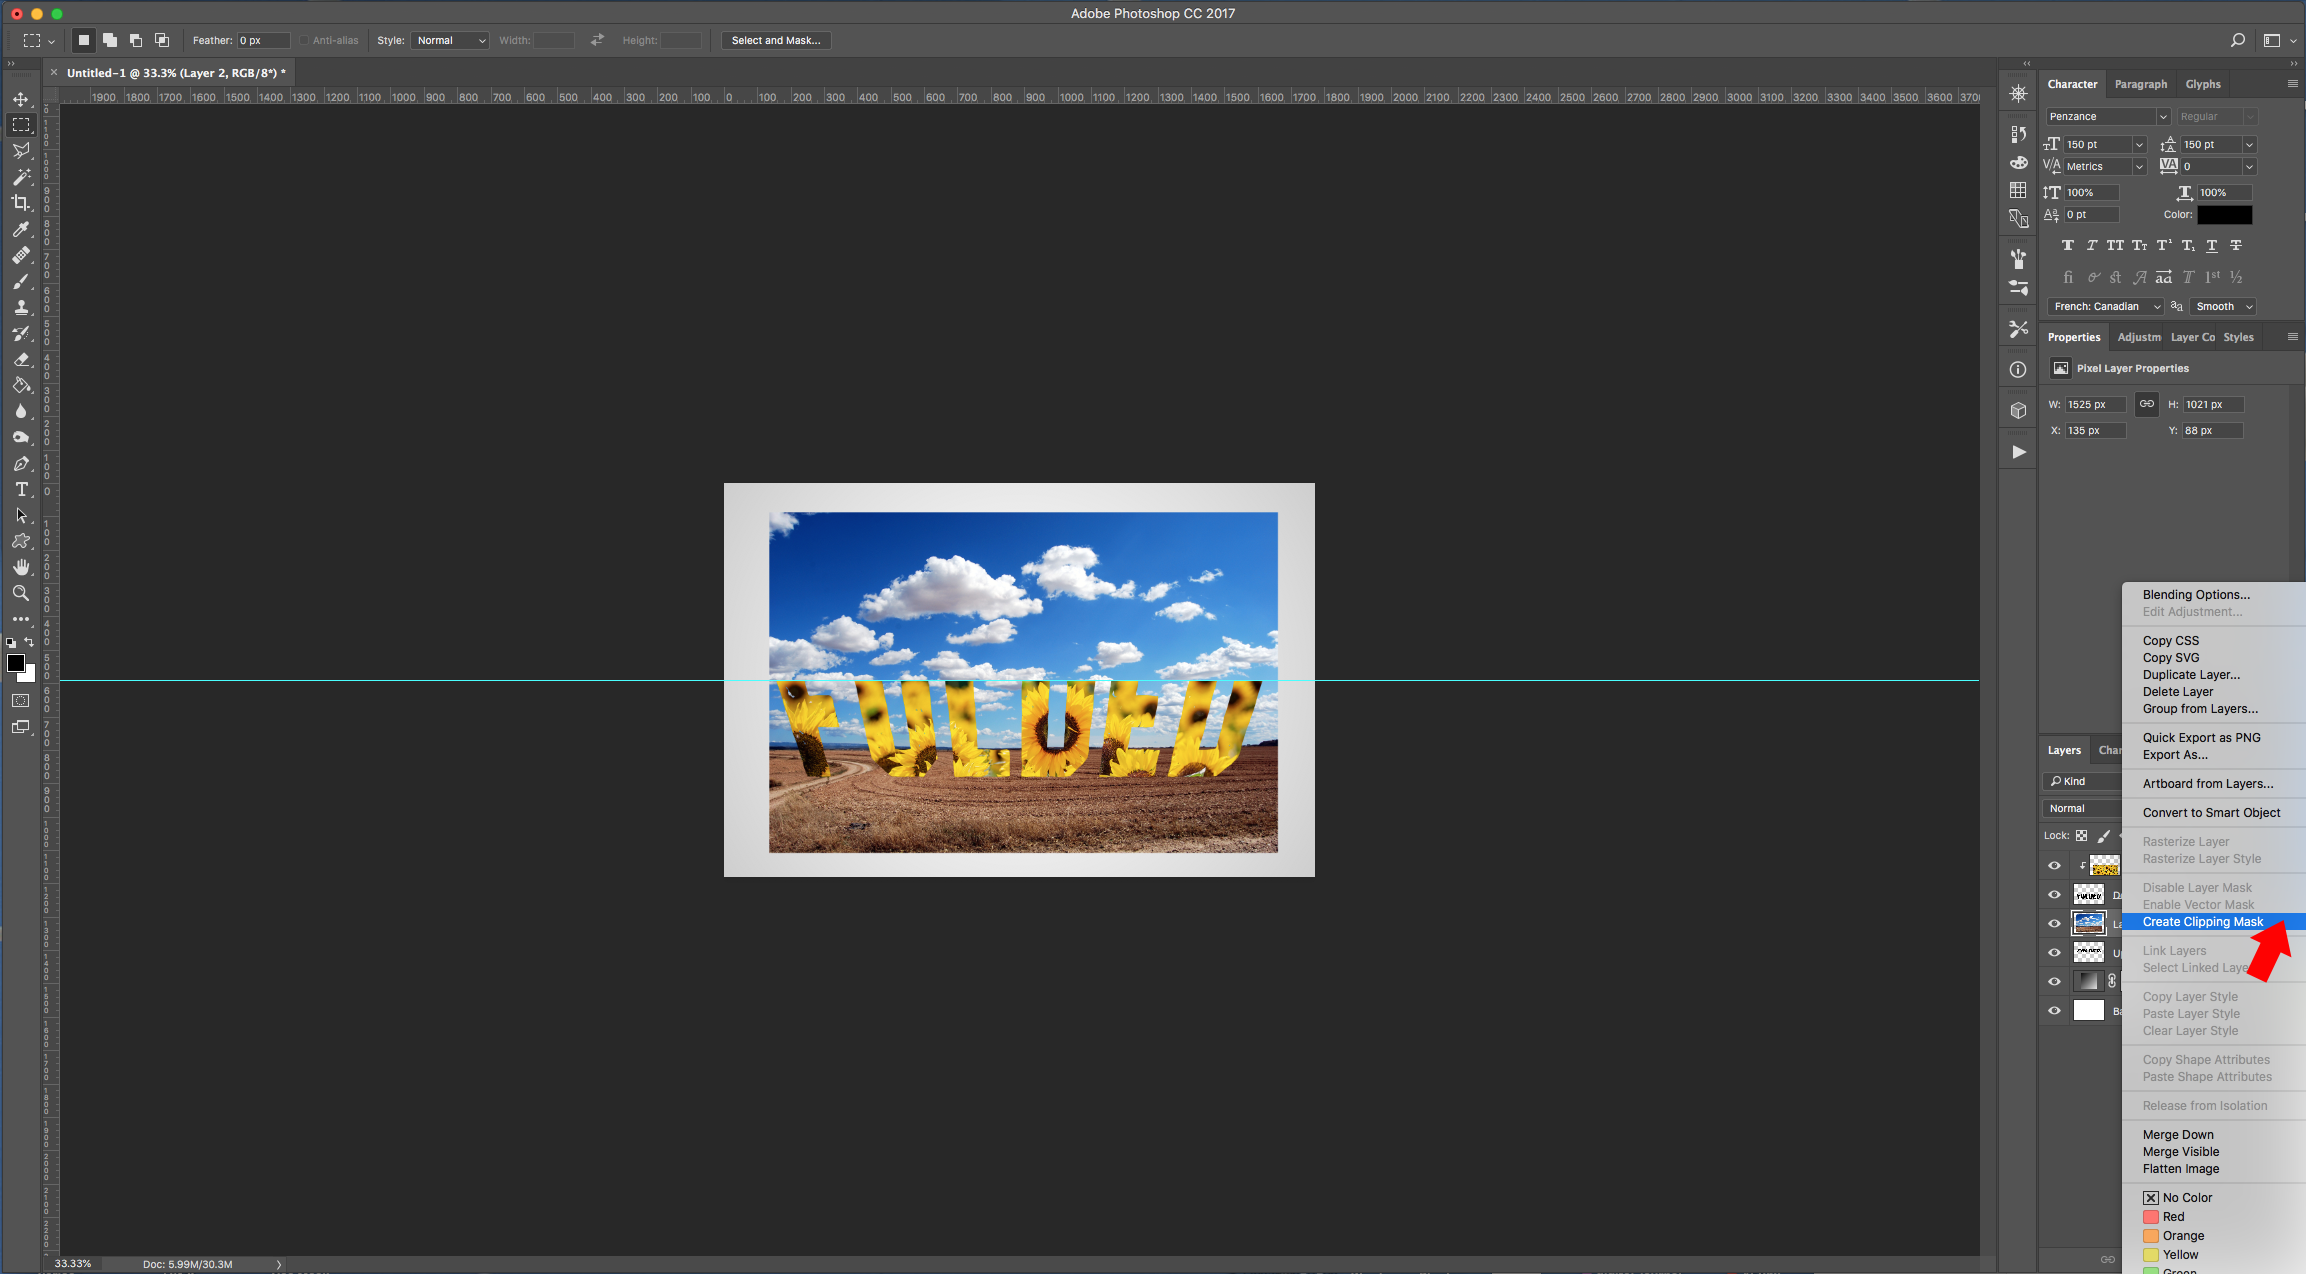
10 - Right-click on top of its Thumbnail and choose “Create Clipping Mask”. Use “Free Transform” (Command/Control + T) to further Resize it and move it around. Once you are done hit “Enter” or click the small “Checkmark” on the Top Menu.
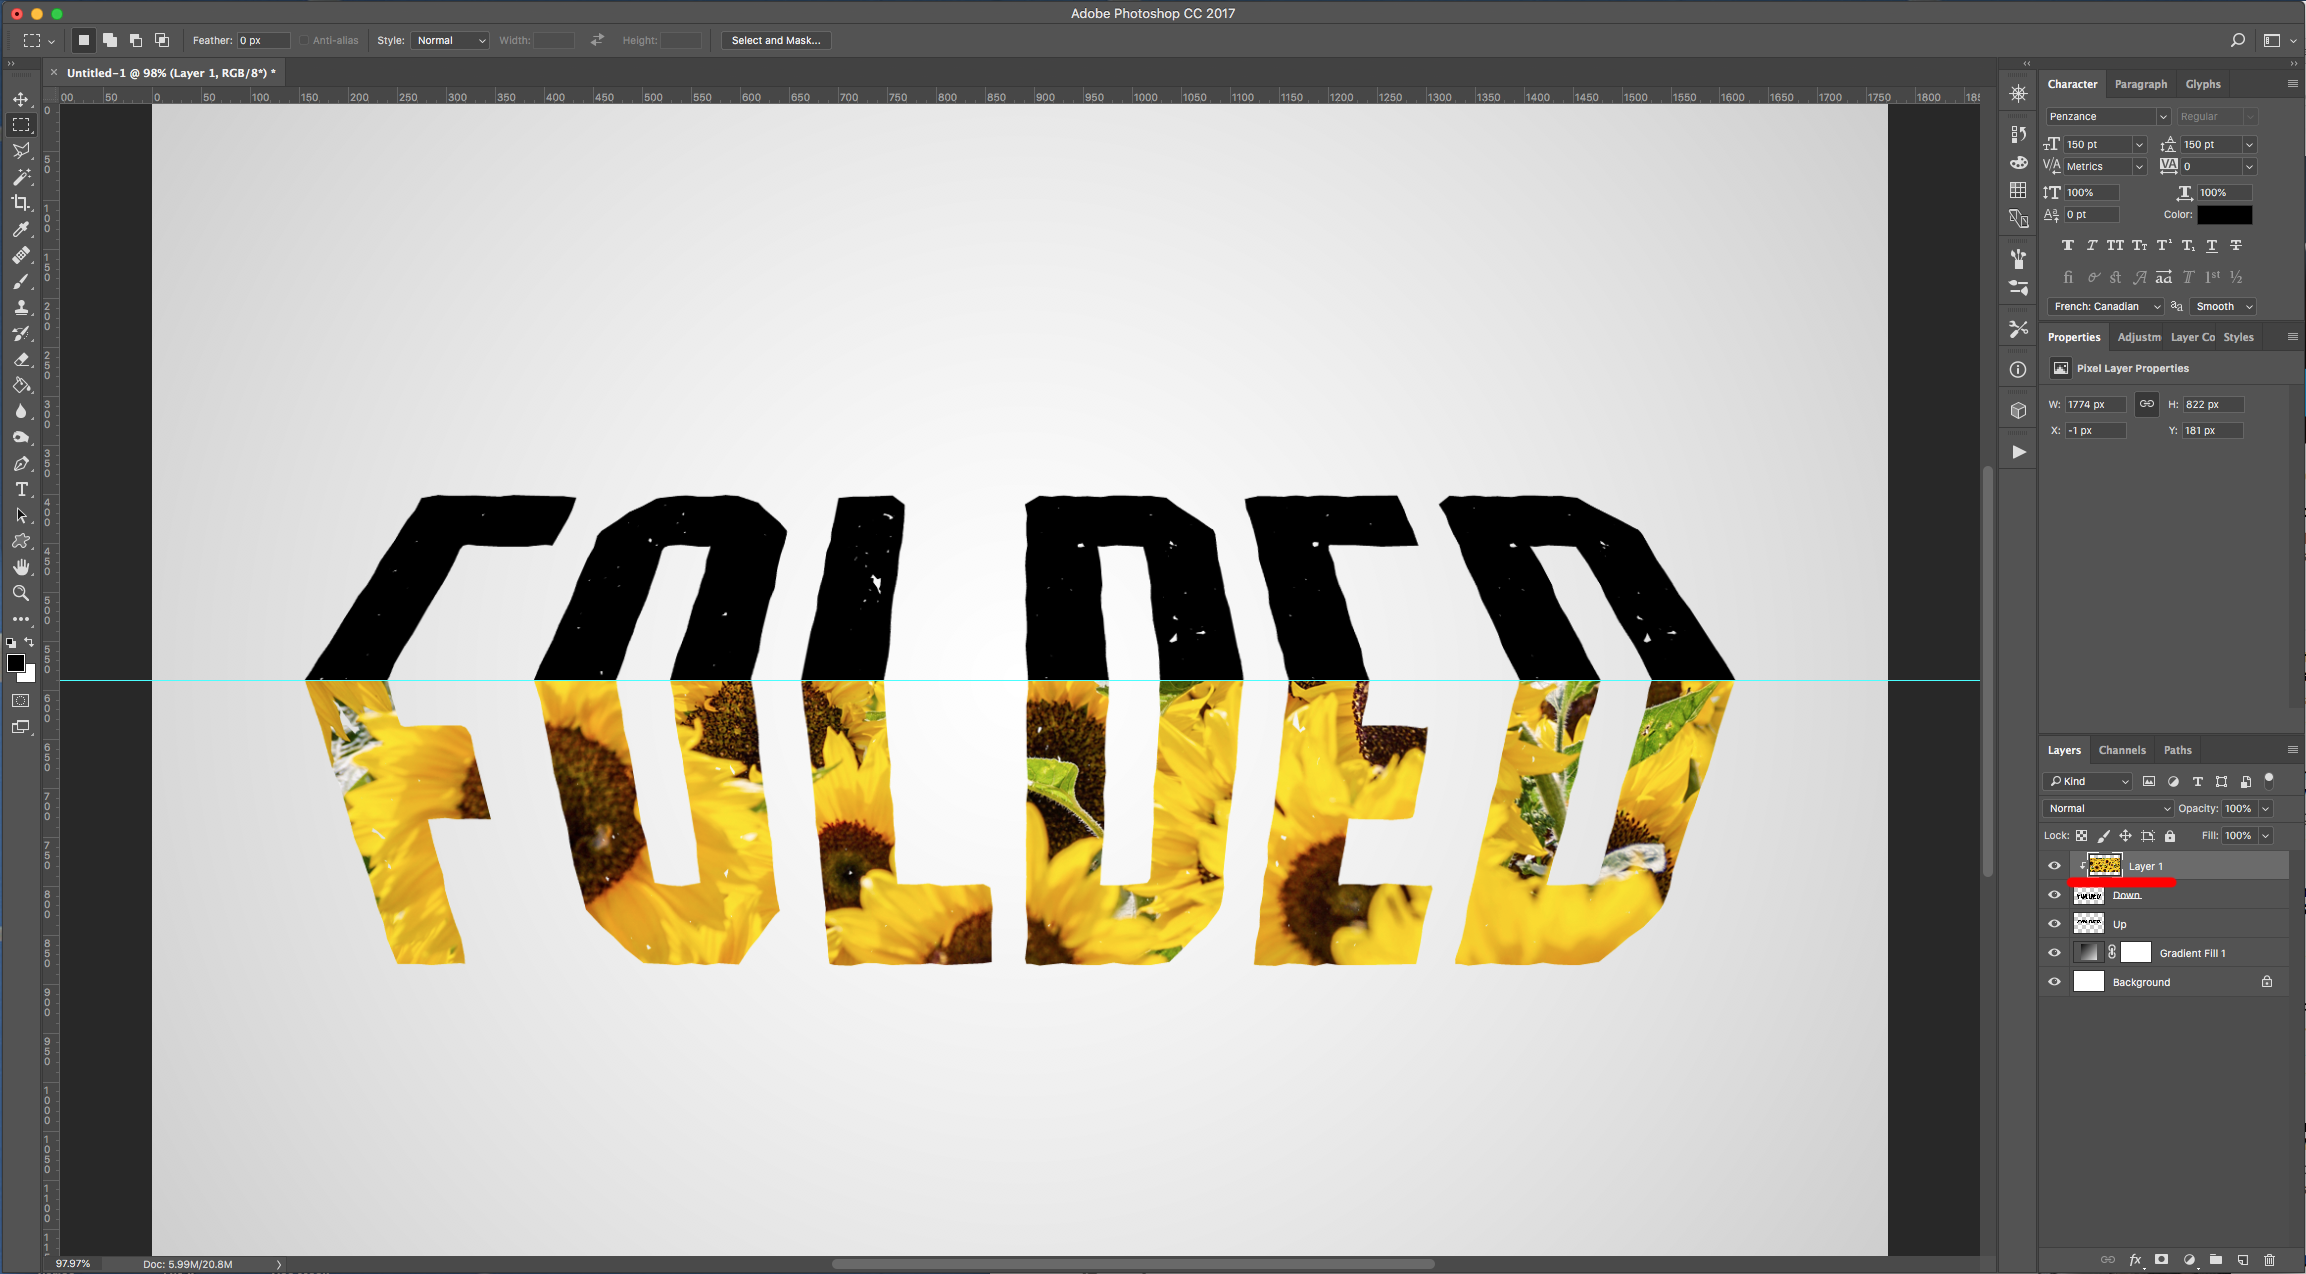
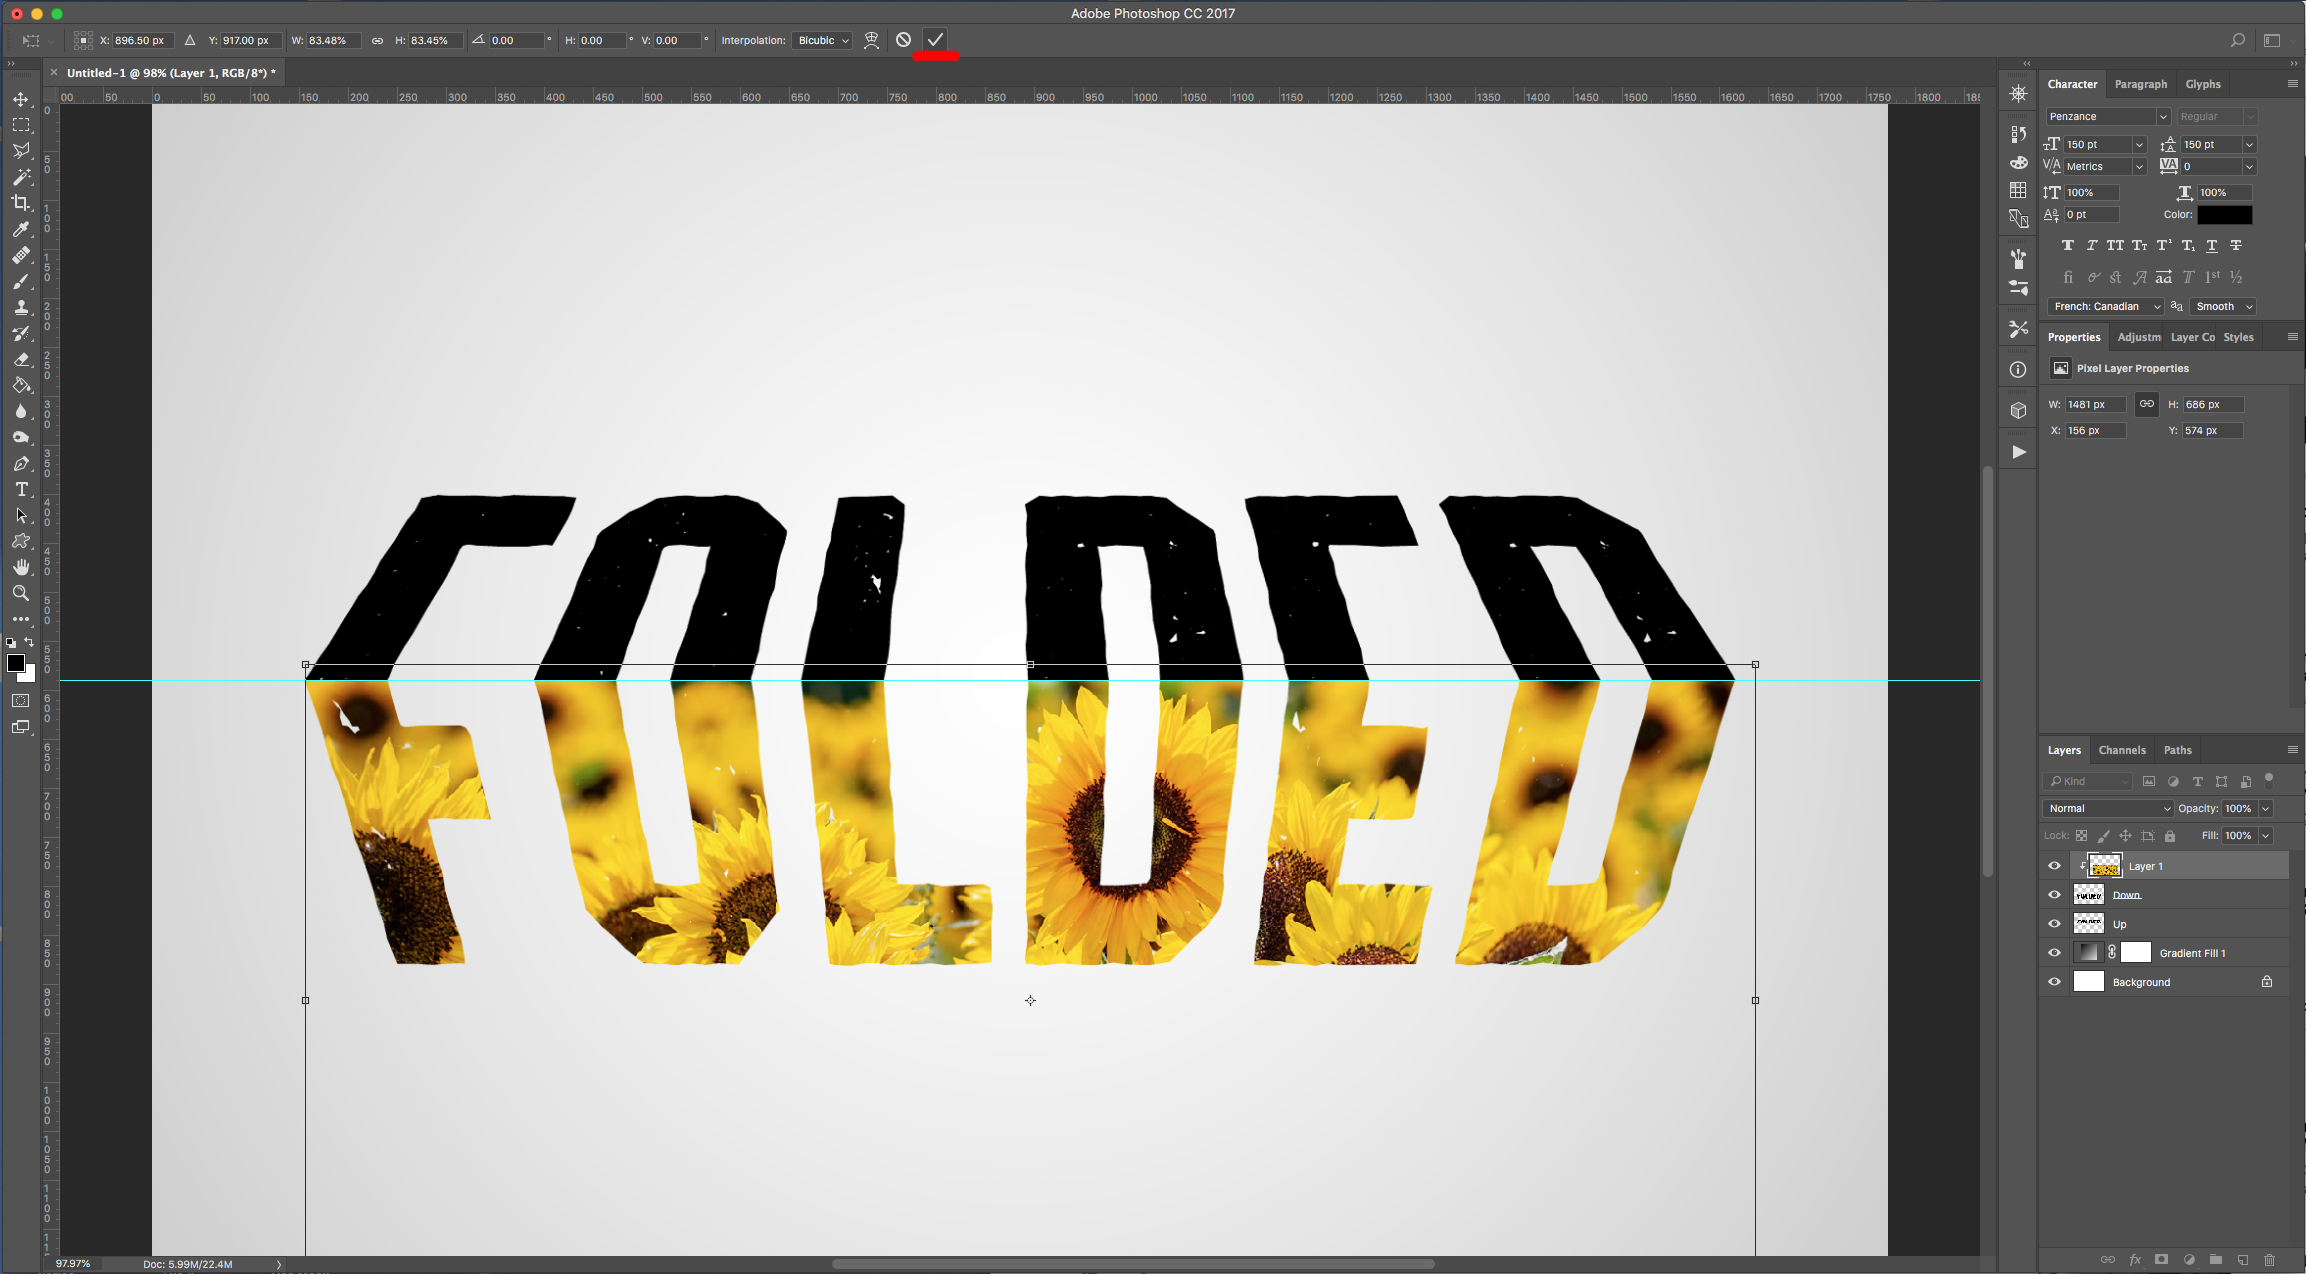
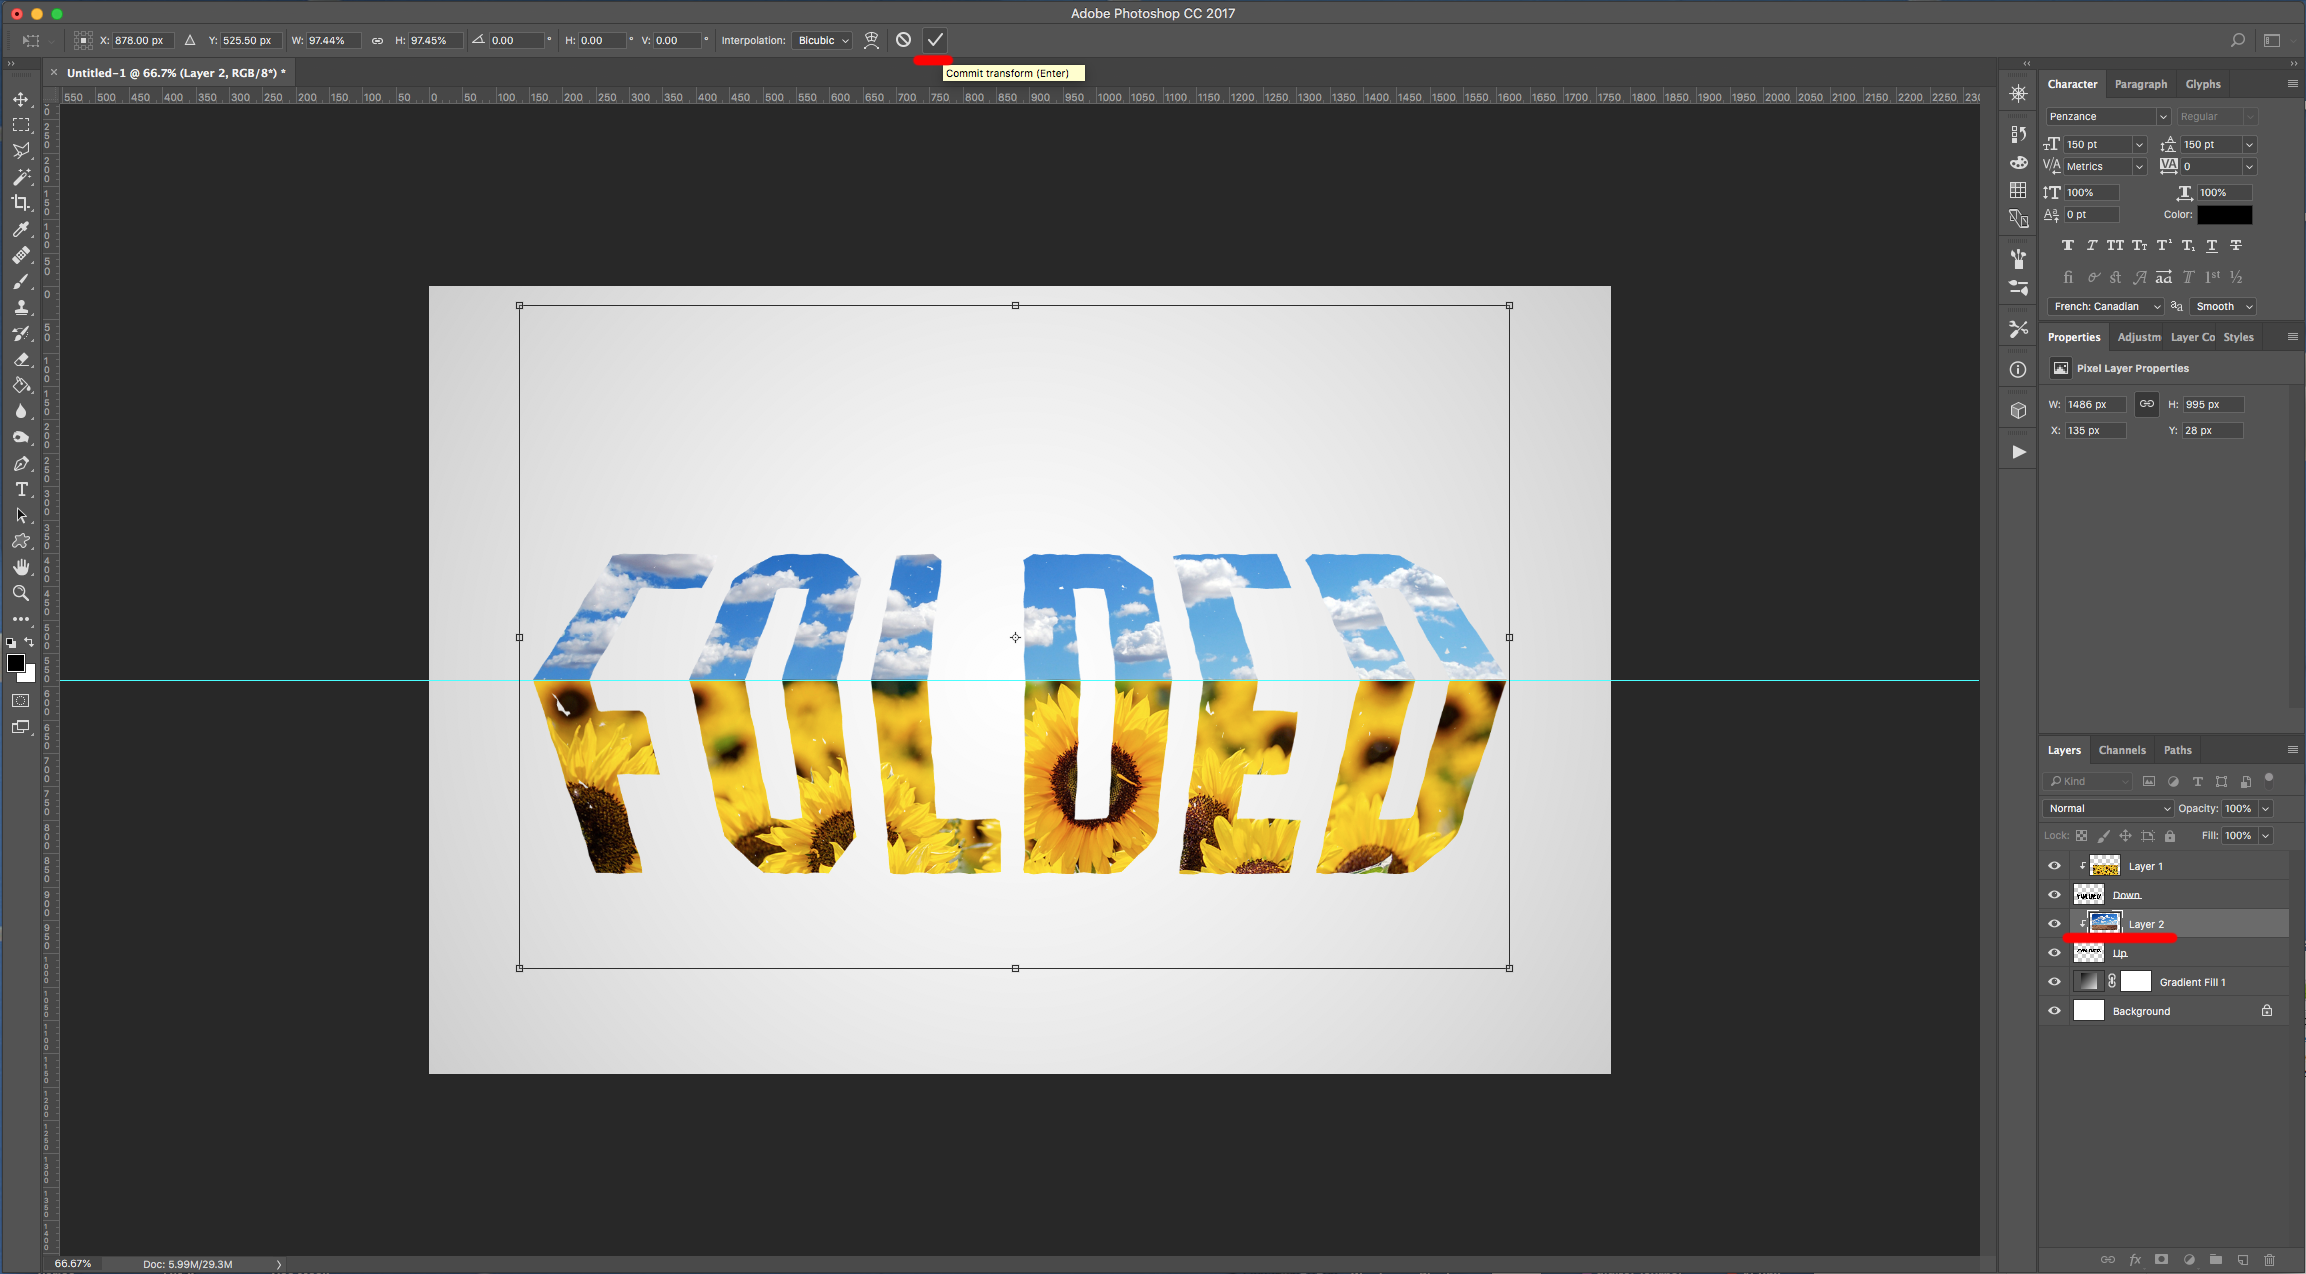
11 - Bring your second image to your document, resize it if needed and make sure it is place on top of the “Up” layer. Right-click on top of its Thumbnail and choose “Create Clipping Mask”. Use “Free Transform” (Command/Control + T) to further Resize it and move it around. Once you are done hit “Enter” or click the small “Checkmark” on the Top Menu.
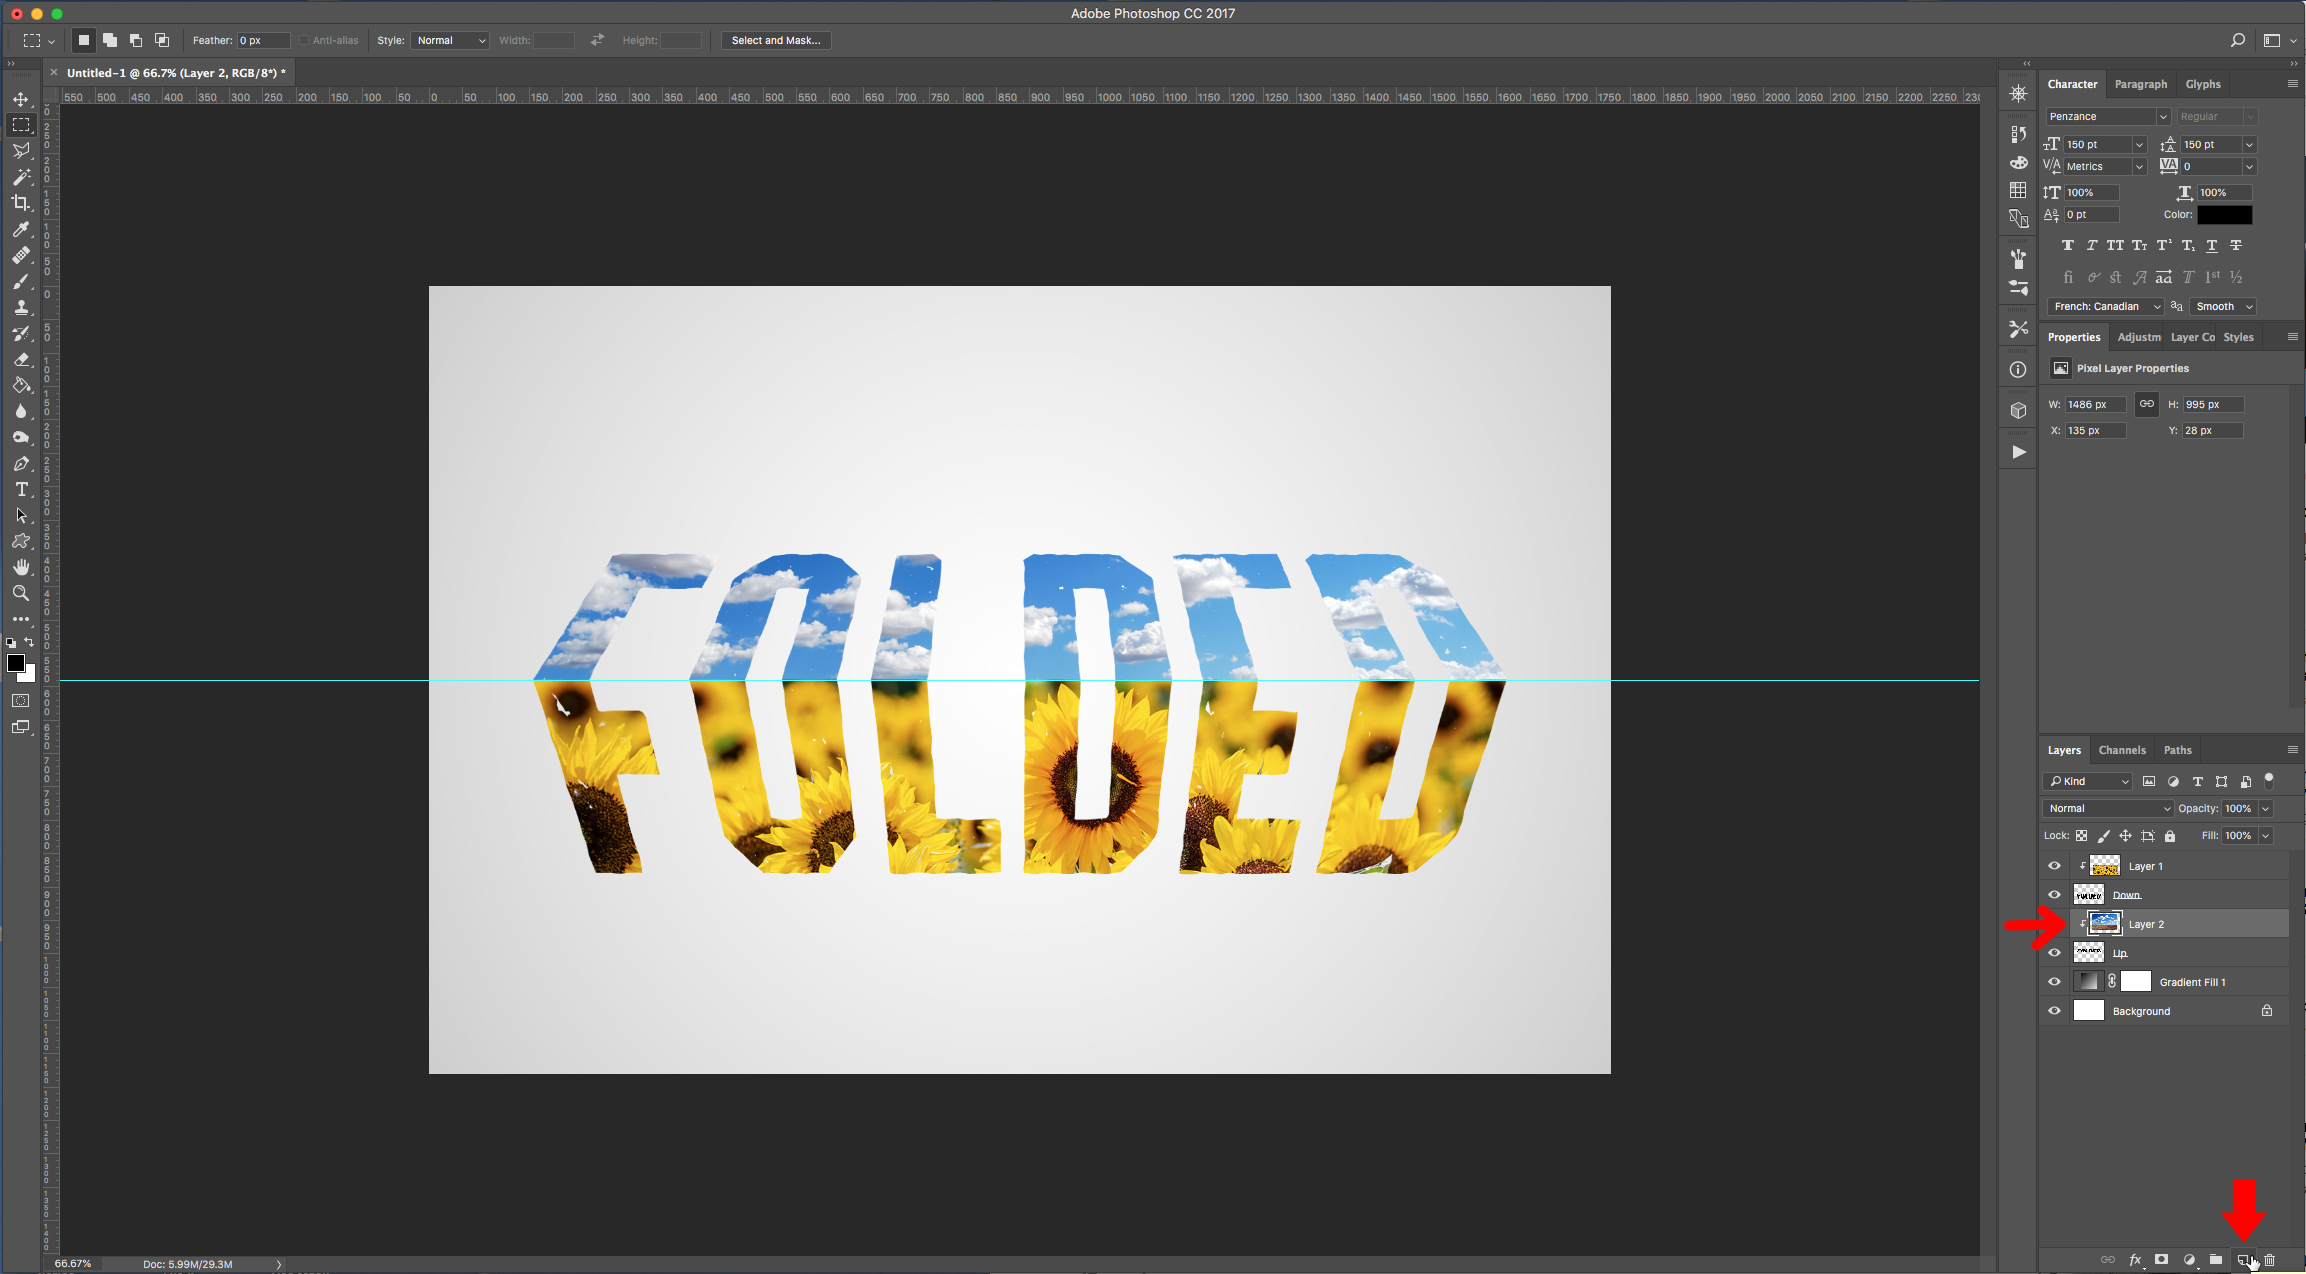
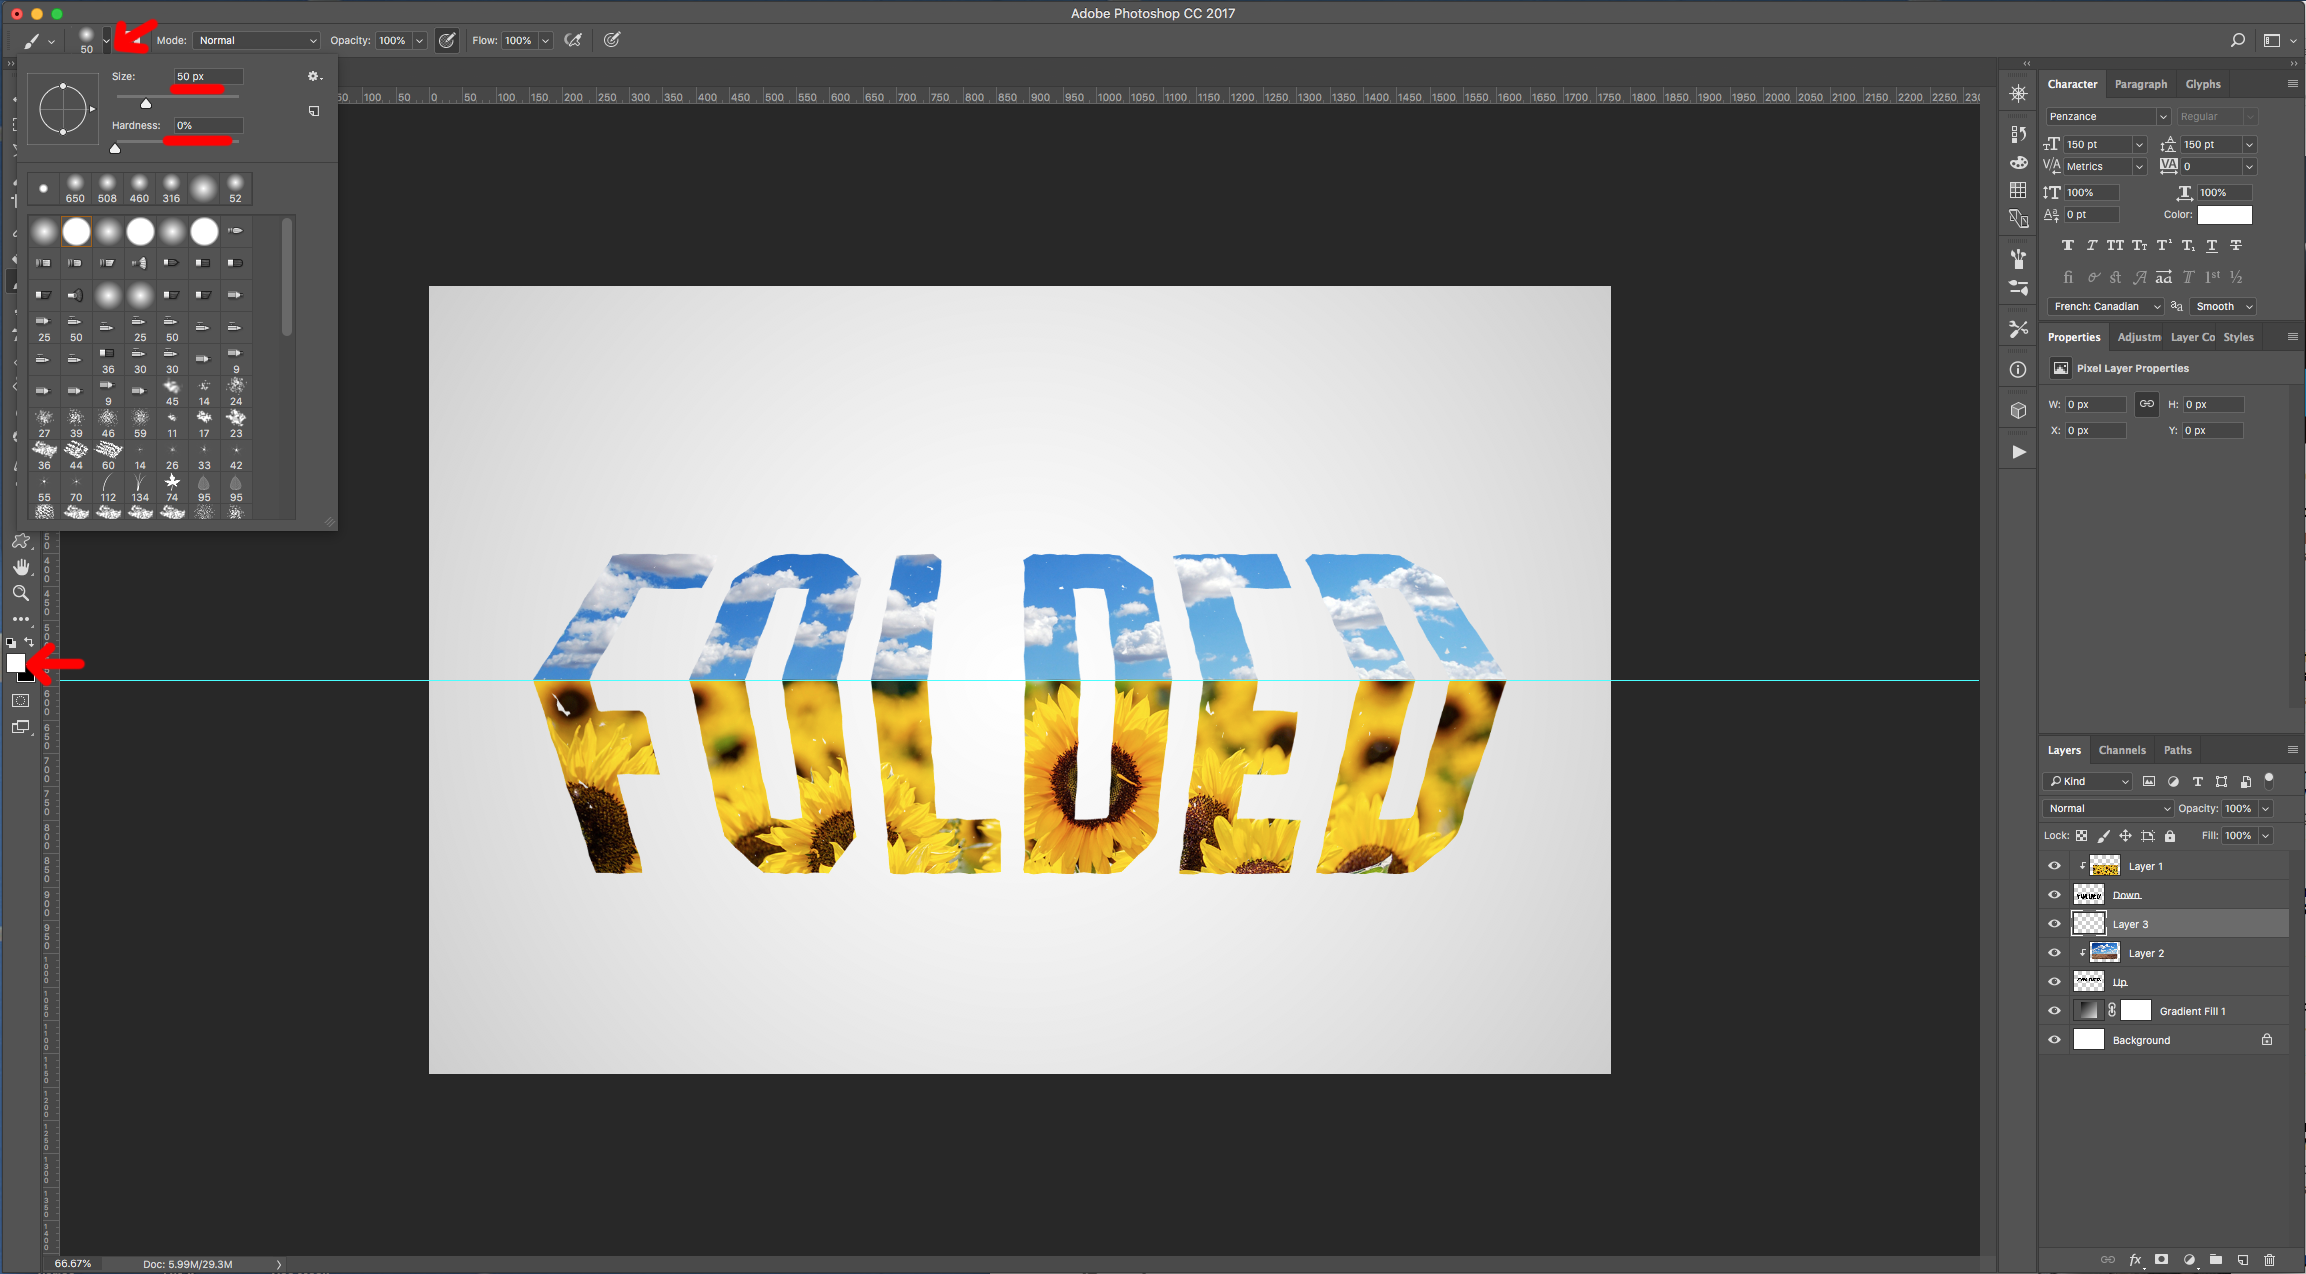
12 - With this Layer still selected, create a “New Layer” by clicking the small button at the bottom of the “Layers Panel” and make sure it sits on top of the second Clipped Image Layer. Select the “Brush Tool” (B) and use a 50 px Brush with 0% “Hardness” with White as “Foreground” color to draw a straight line on top of the Guide (hold the “Shift” key” and drag from side to side).
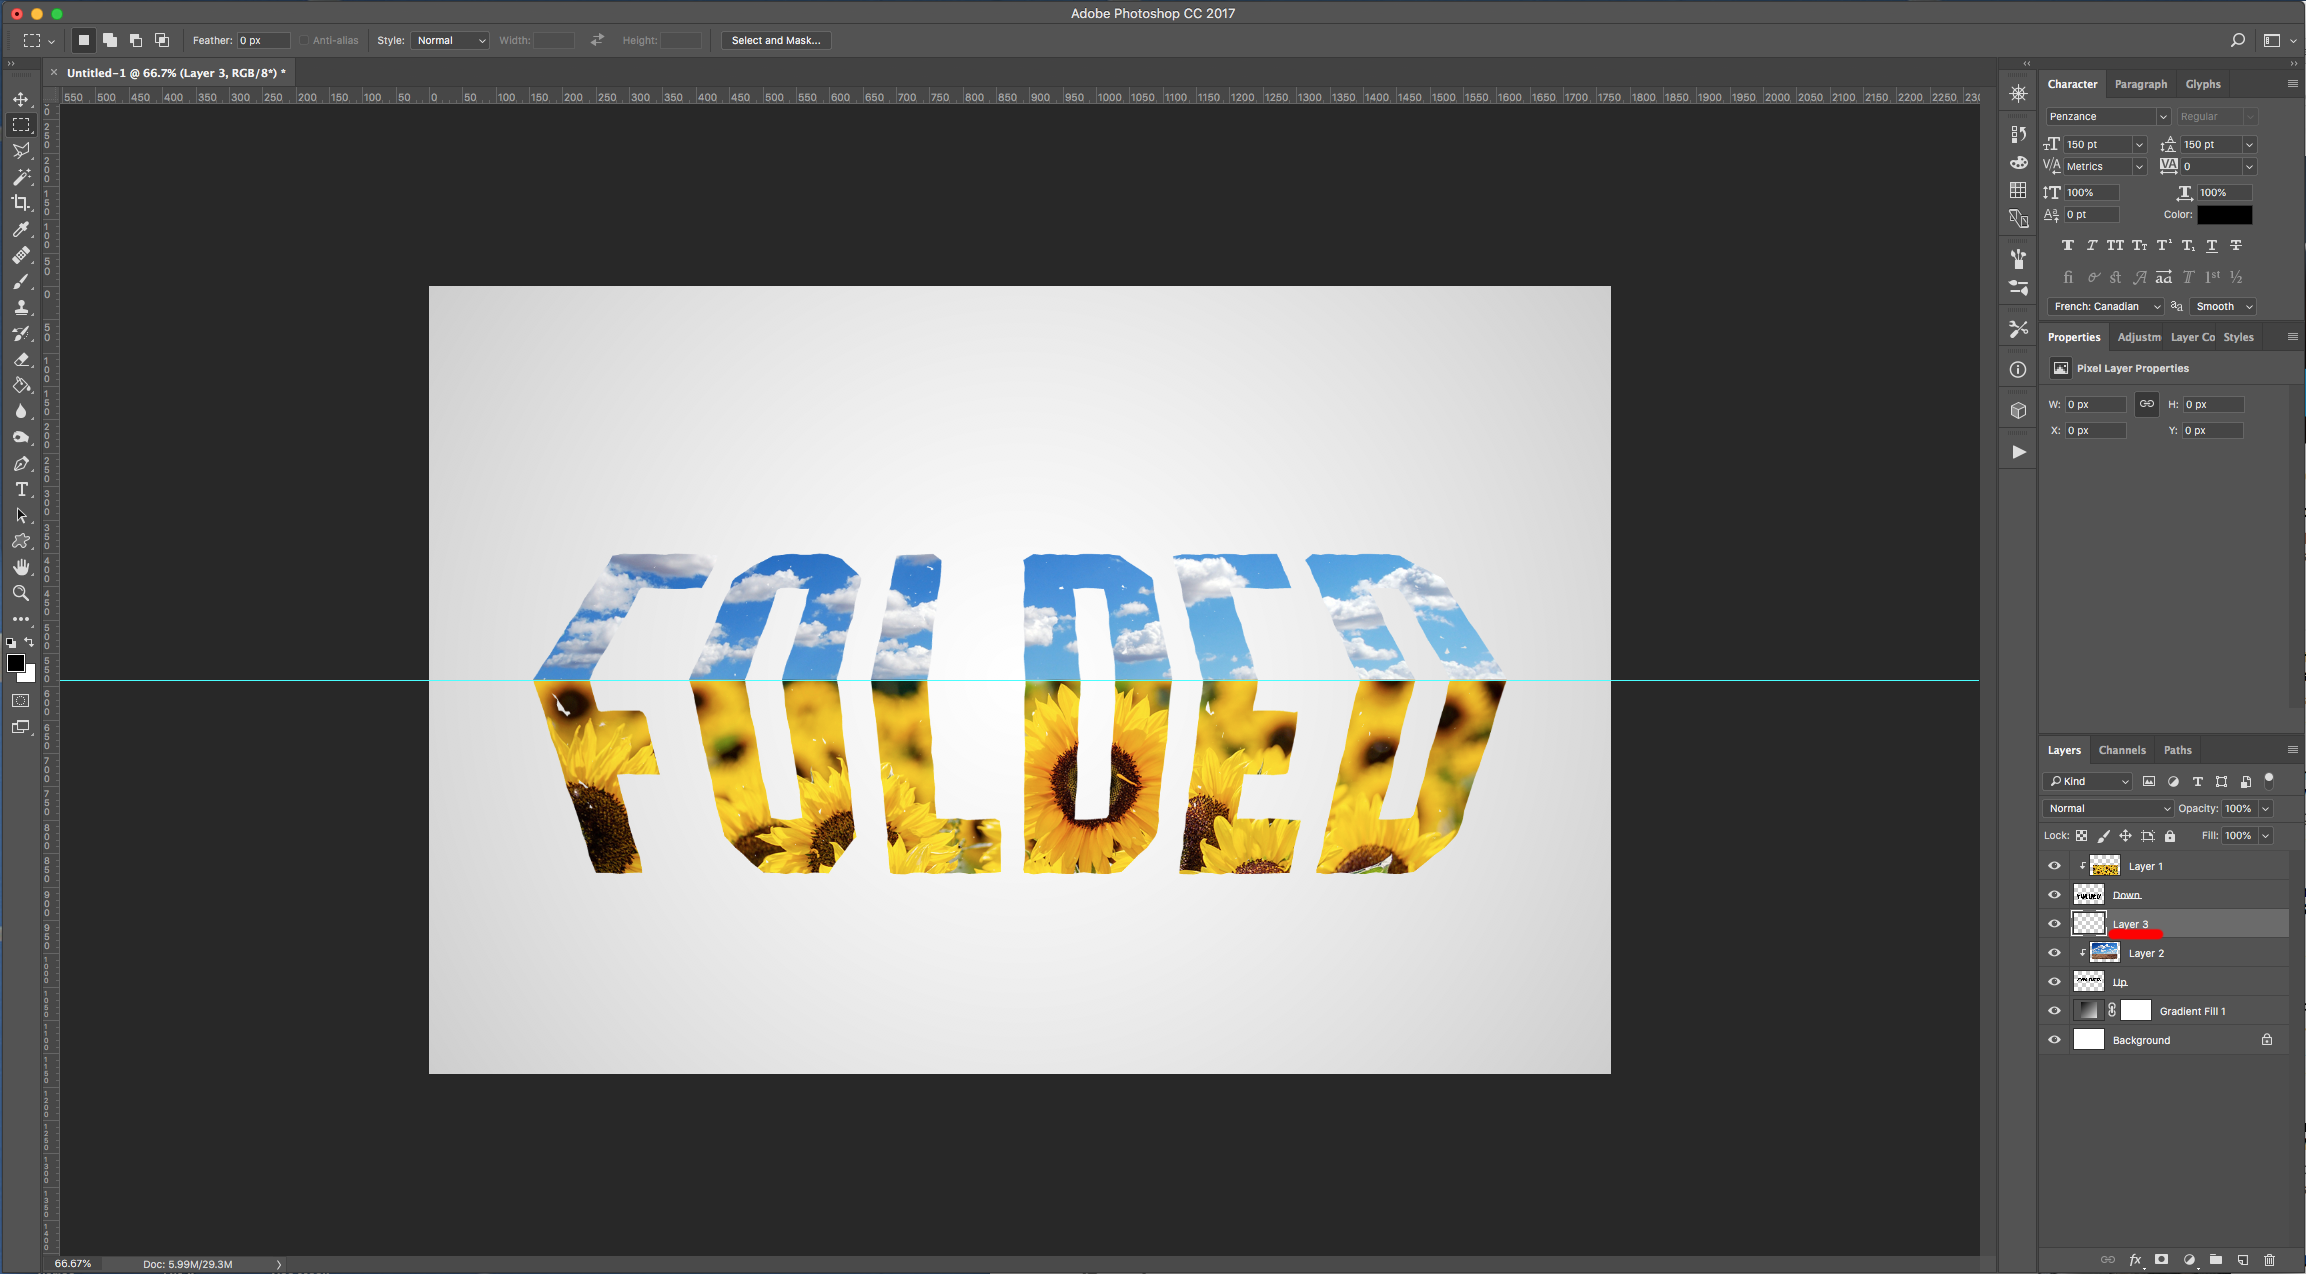
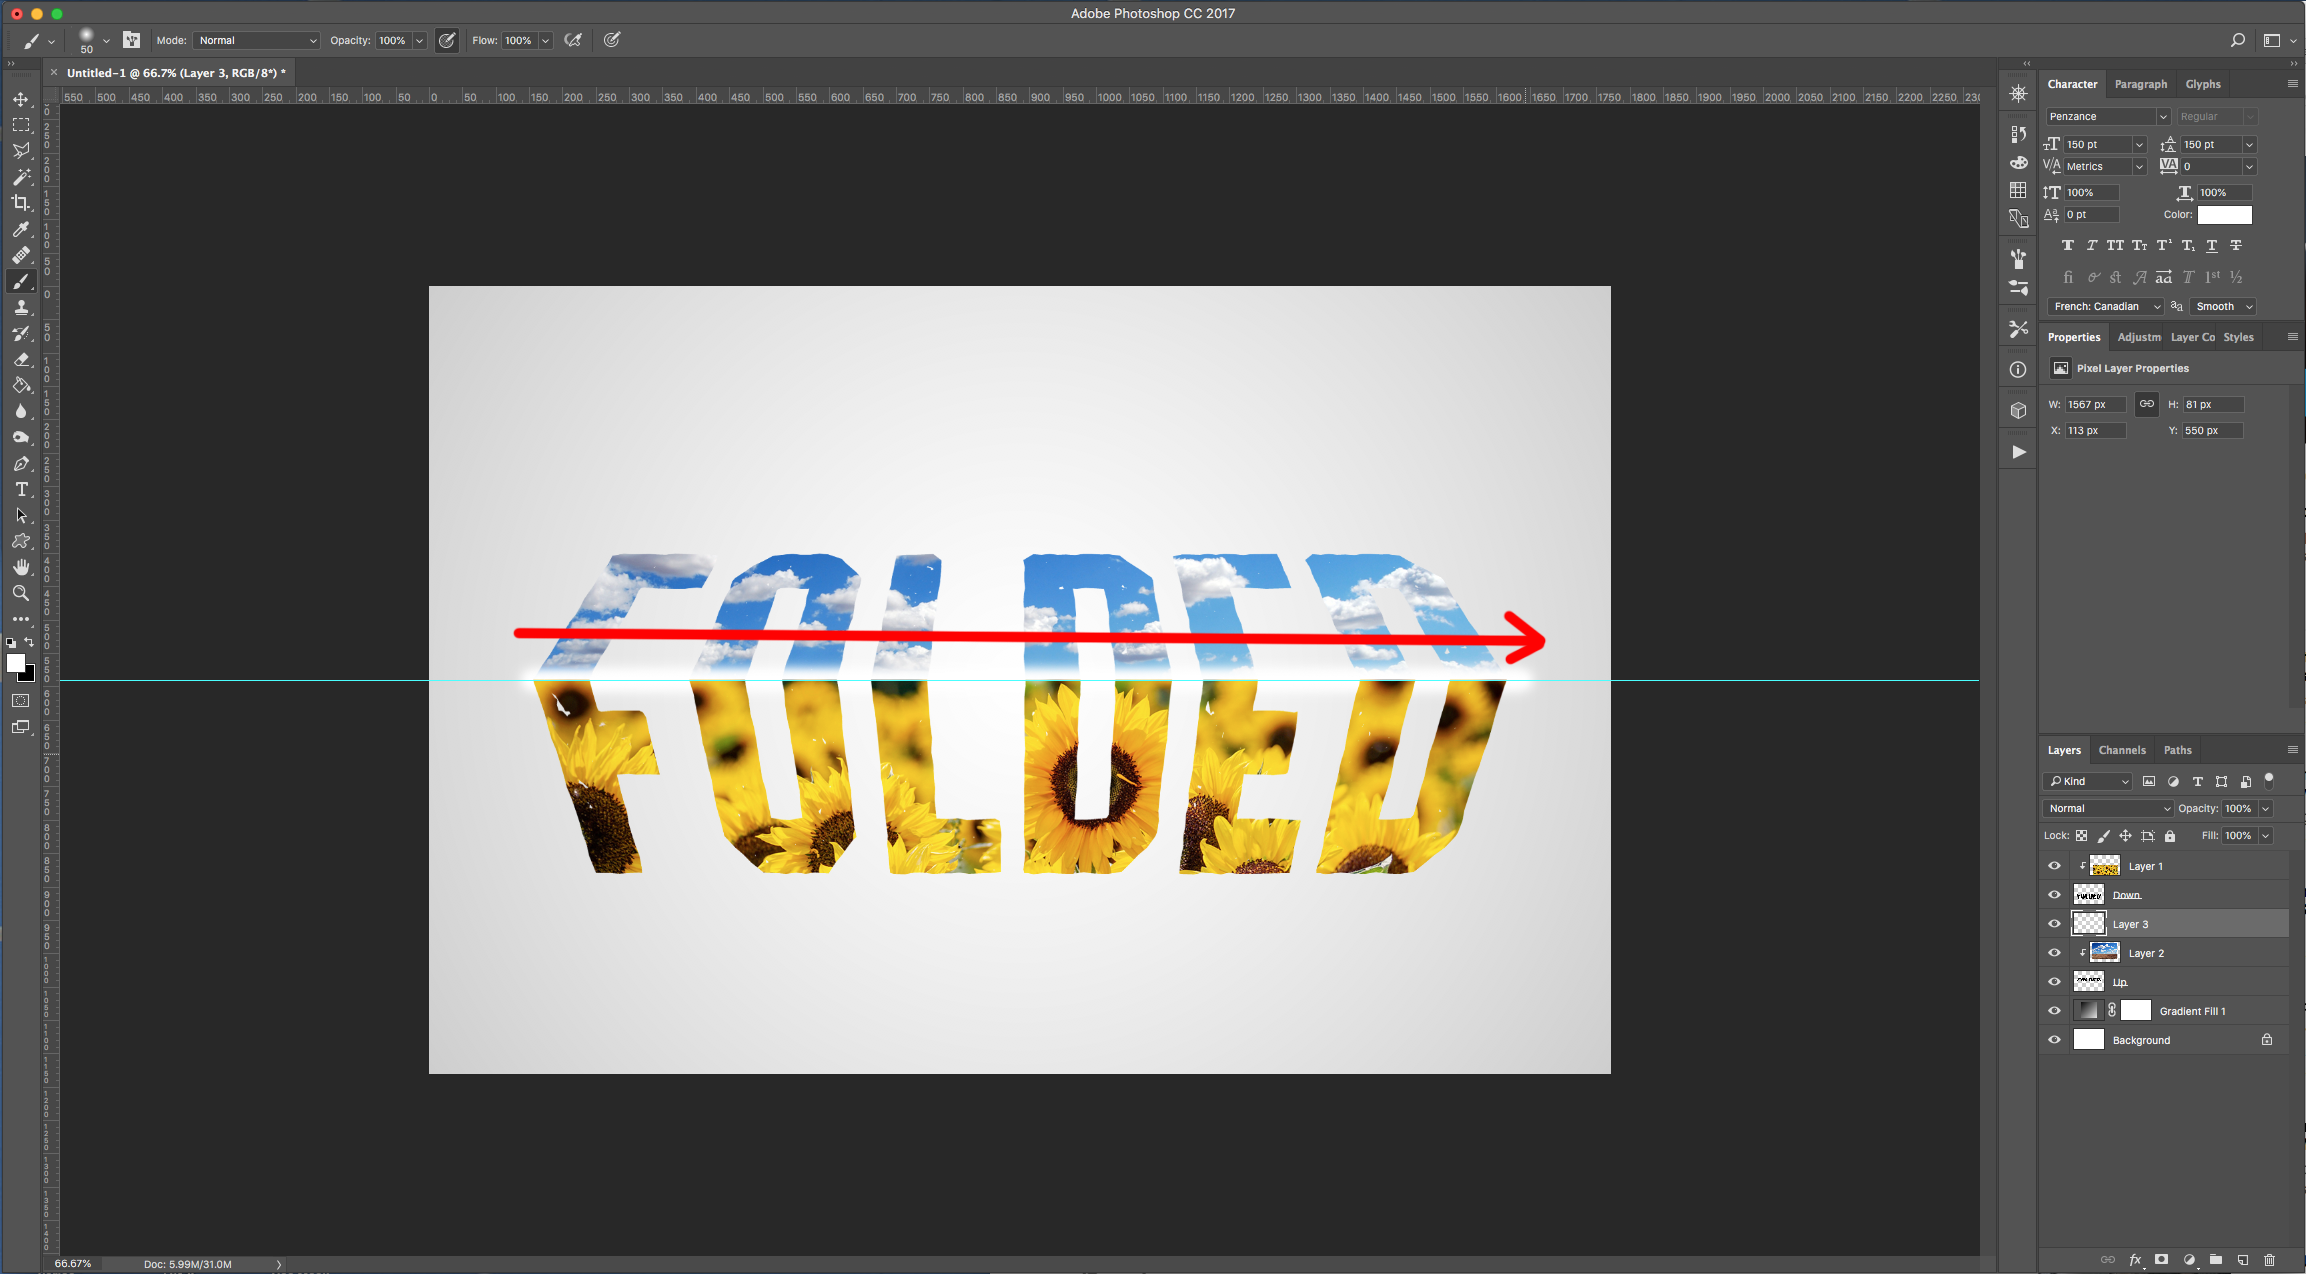
13 - Right-click on top of its Thumbnail and choose “Create Clipping Mask”. Lower the “Opacity” to 55 %.
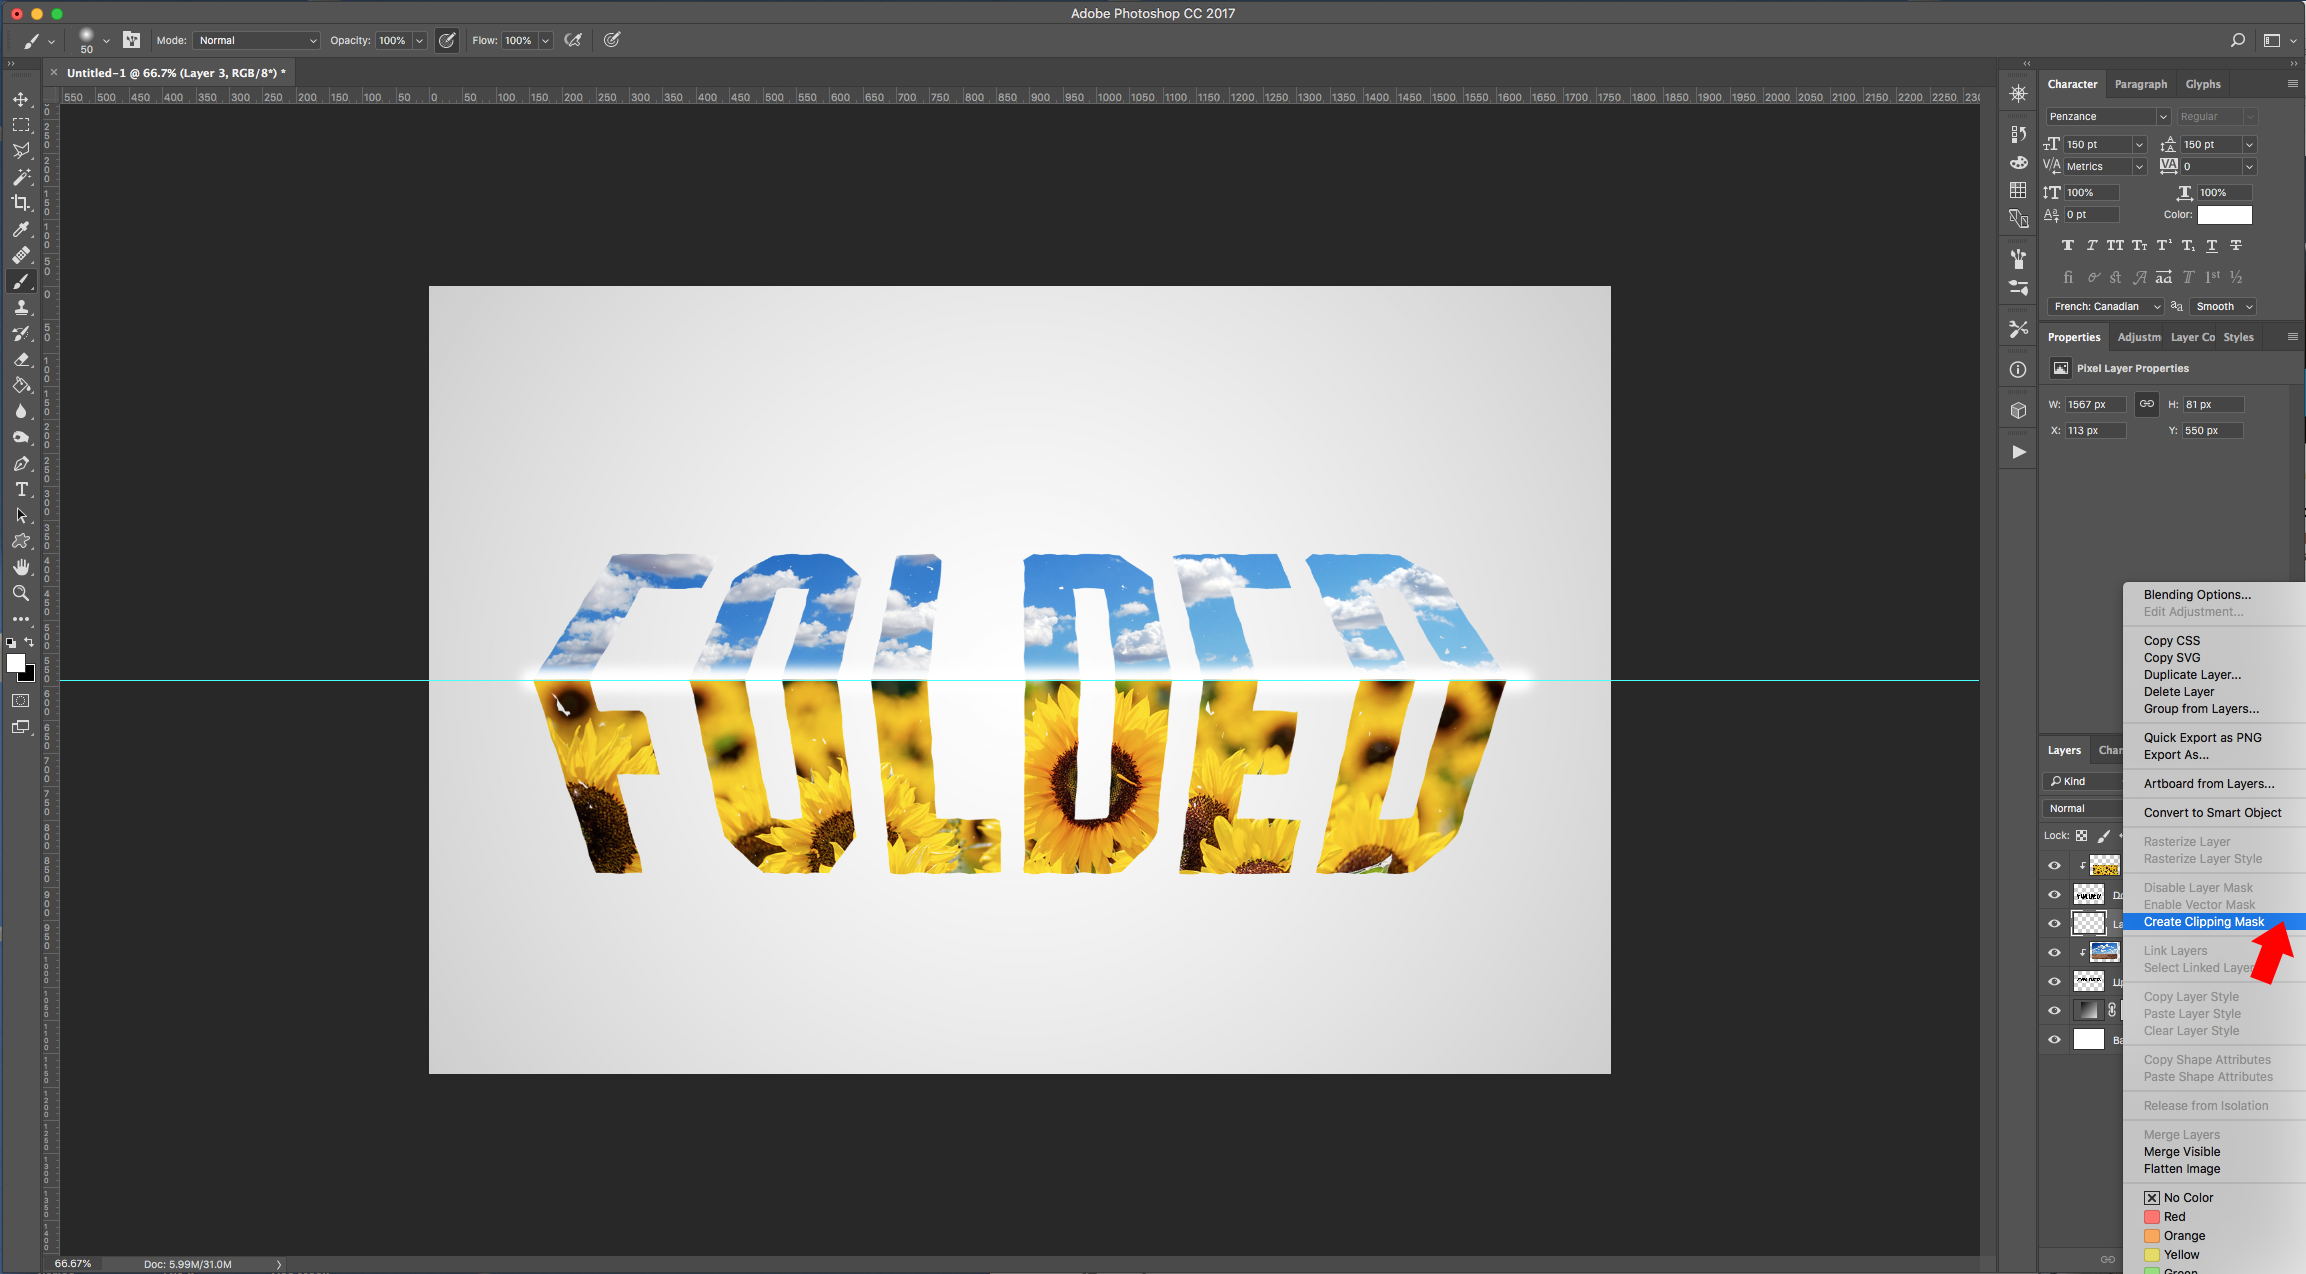
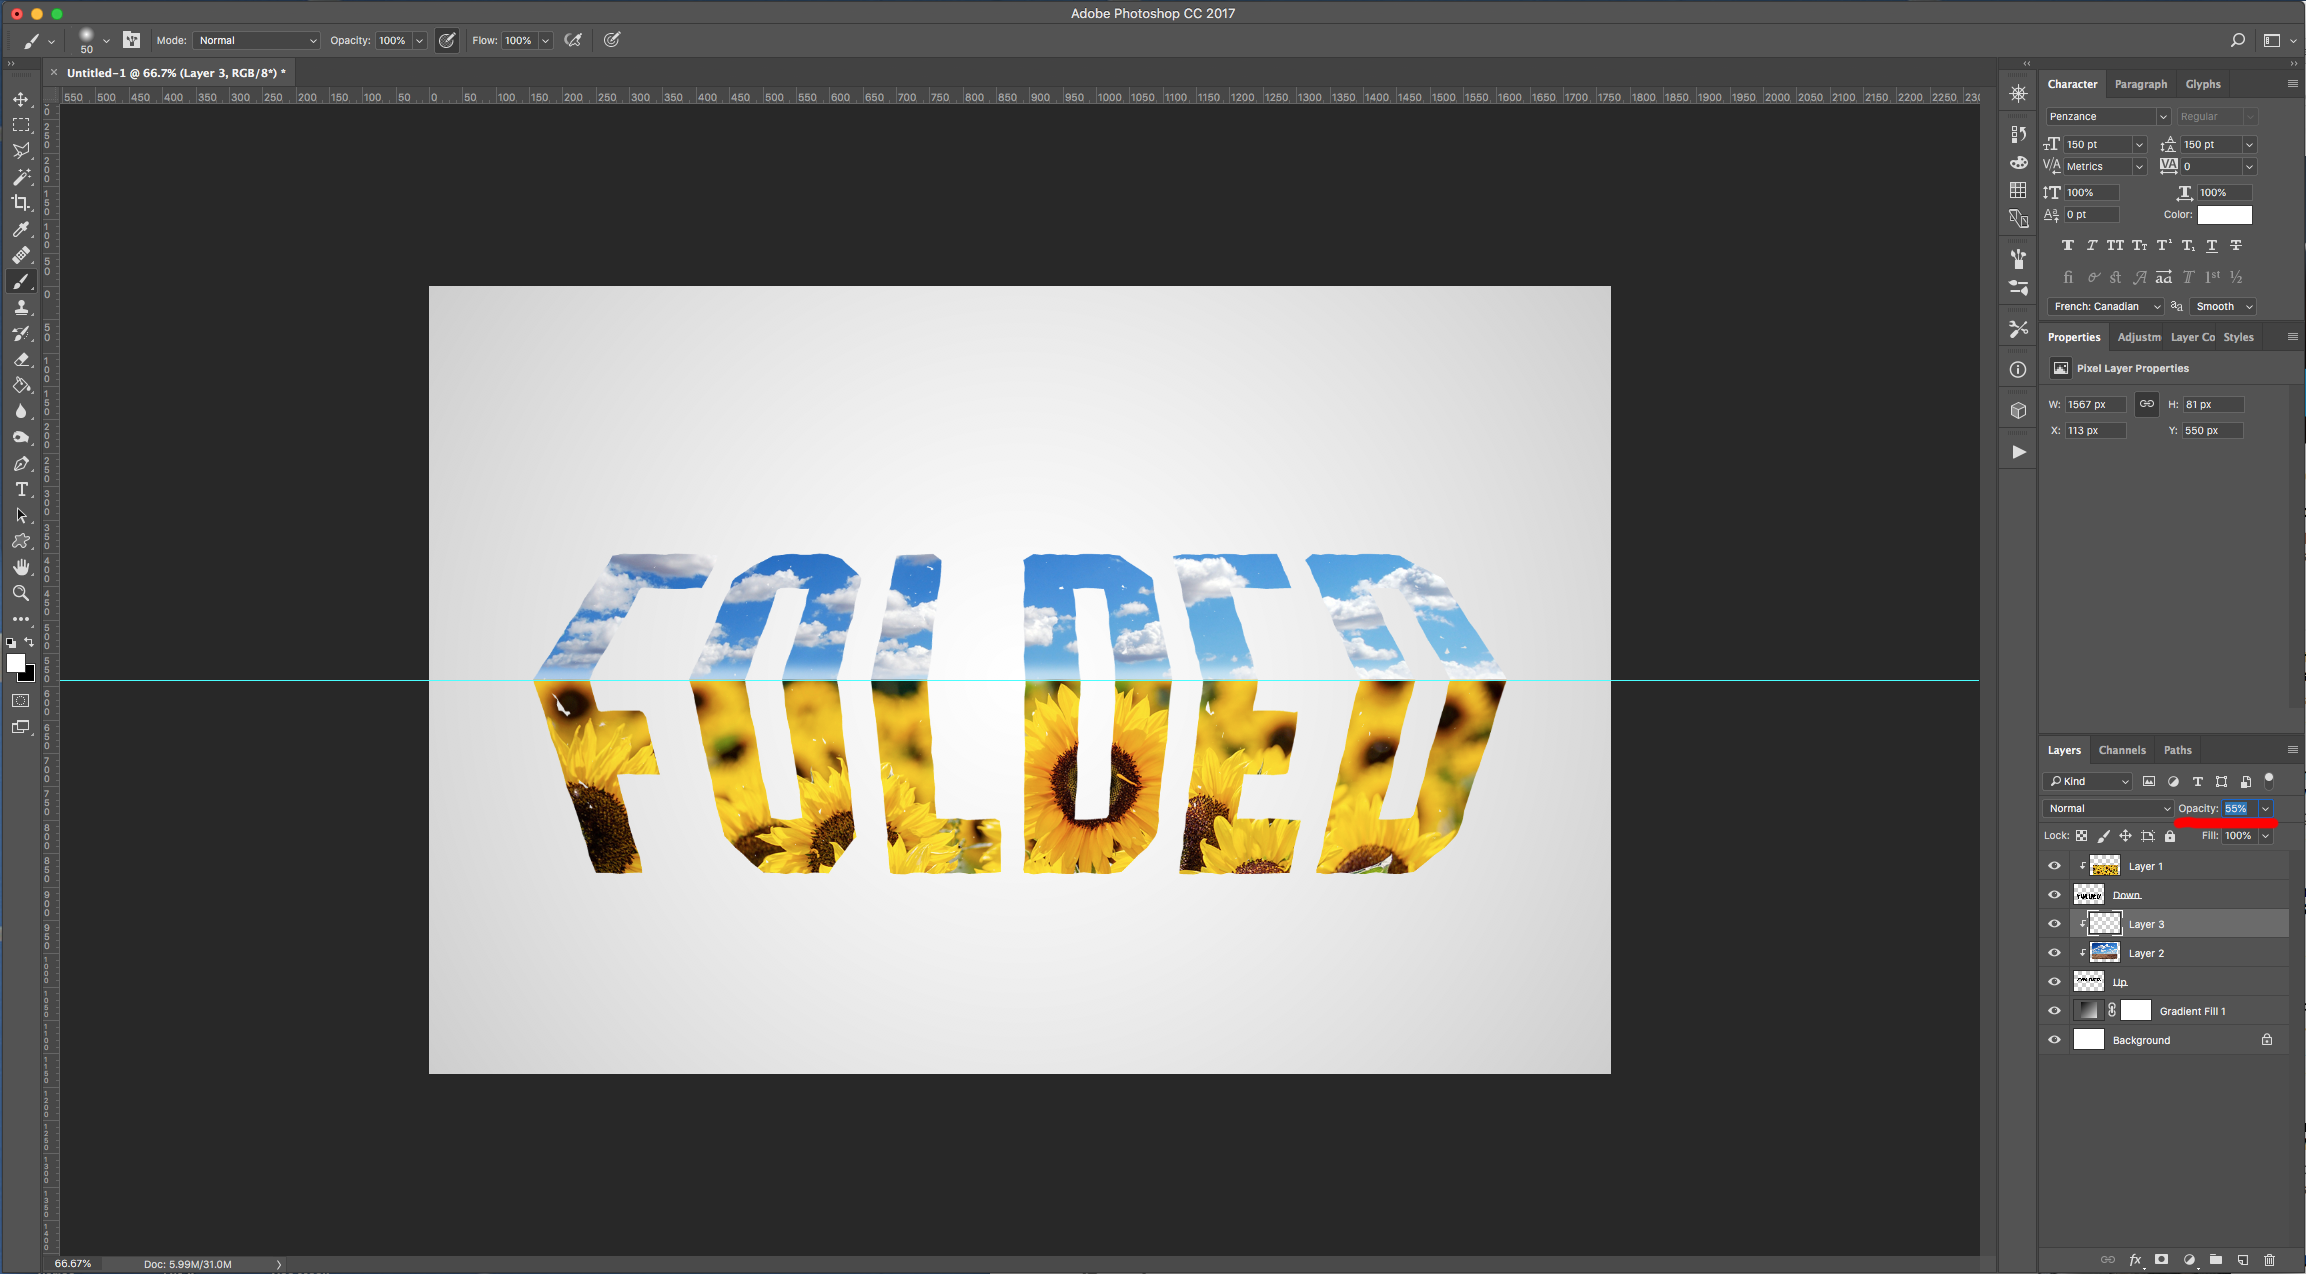
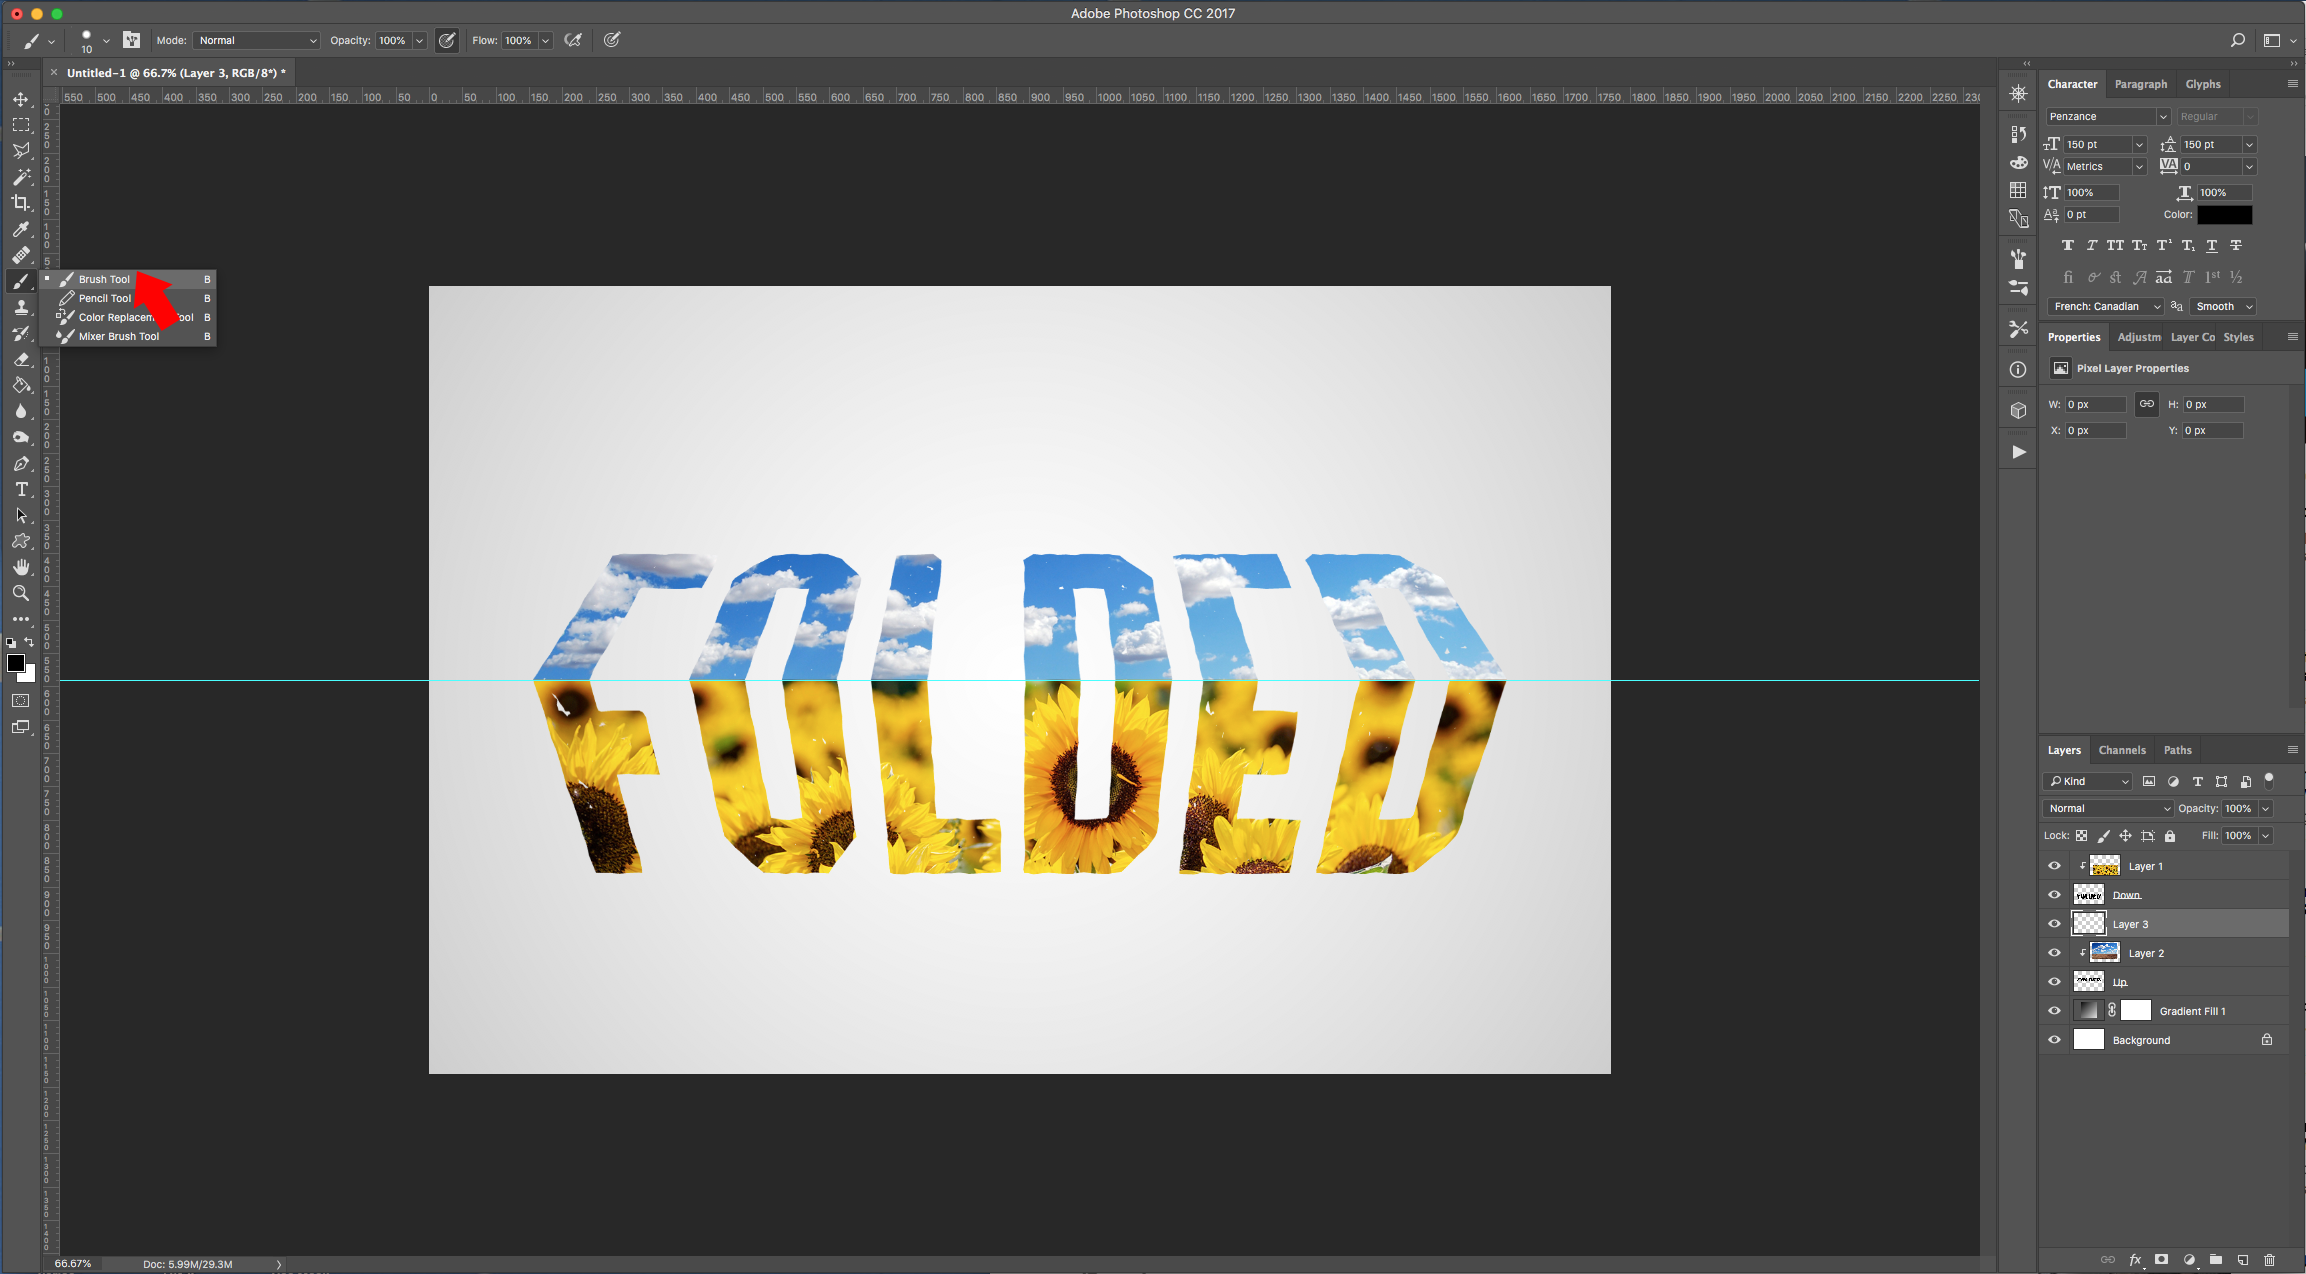
14 - Select the Top Clipped Image Layer and create a “New Layer” by clicking the small button at the bottom of the “Layers Panel” and make sure it sits on top of everything. Select the “Brush Tool” (B) and use a 50 px Brush with 0% “Hardness” with Black as “Foreground” color to draw a straight line on top of the Guide (hold the “Shift” key” and drag from side to side).
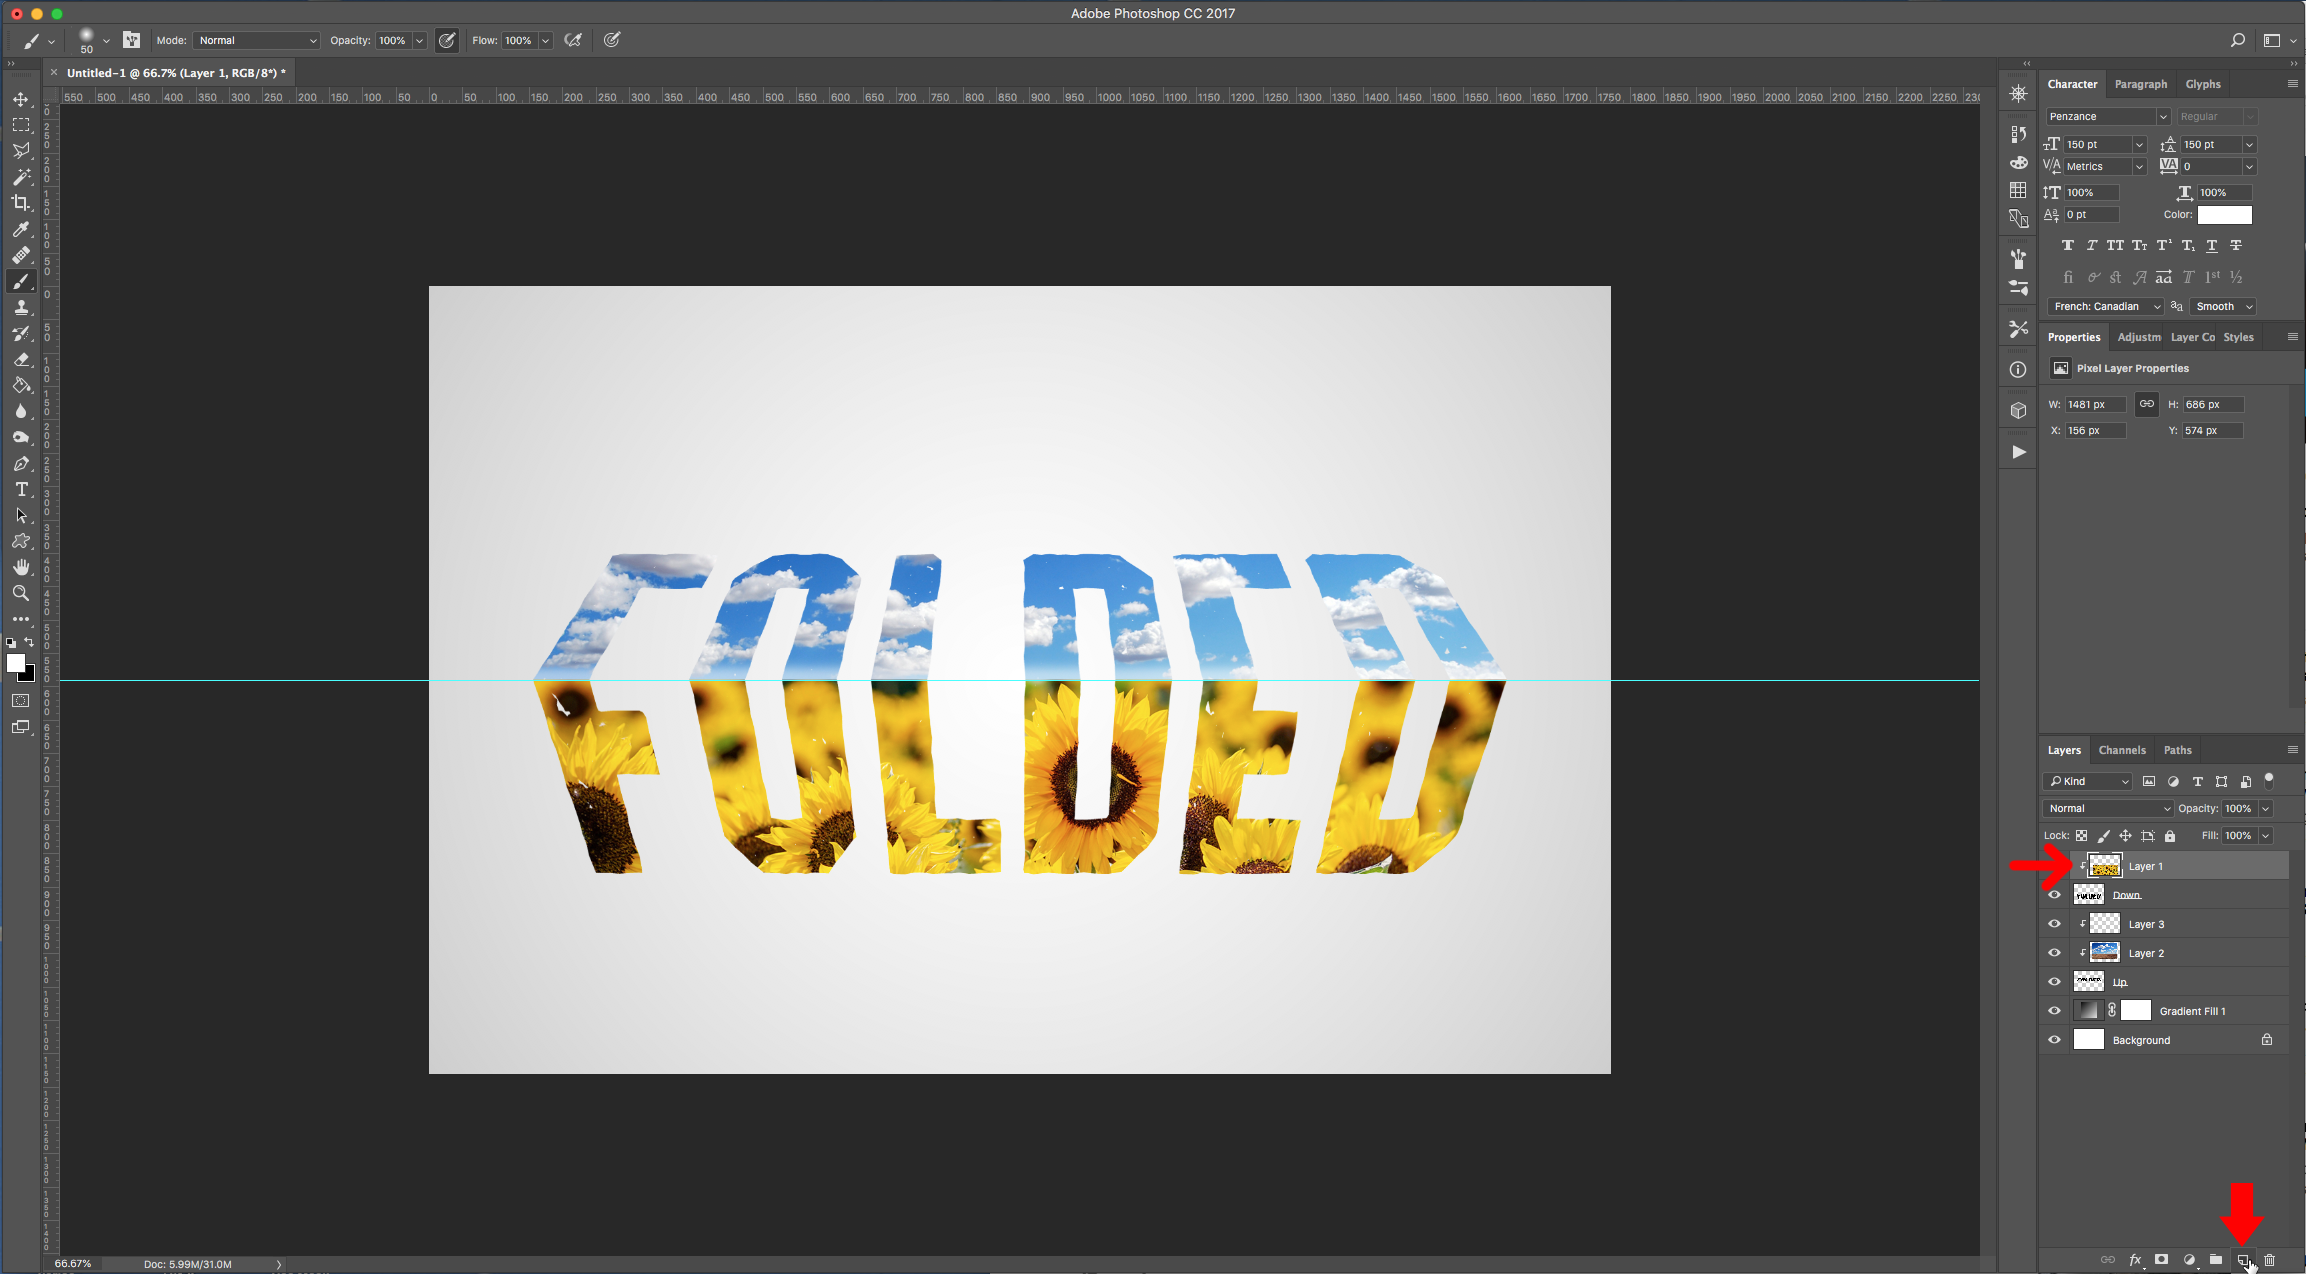
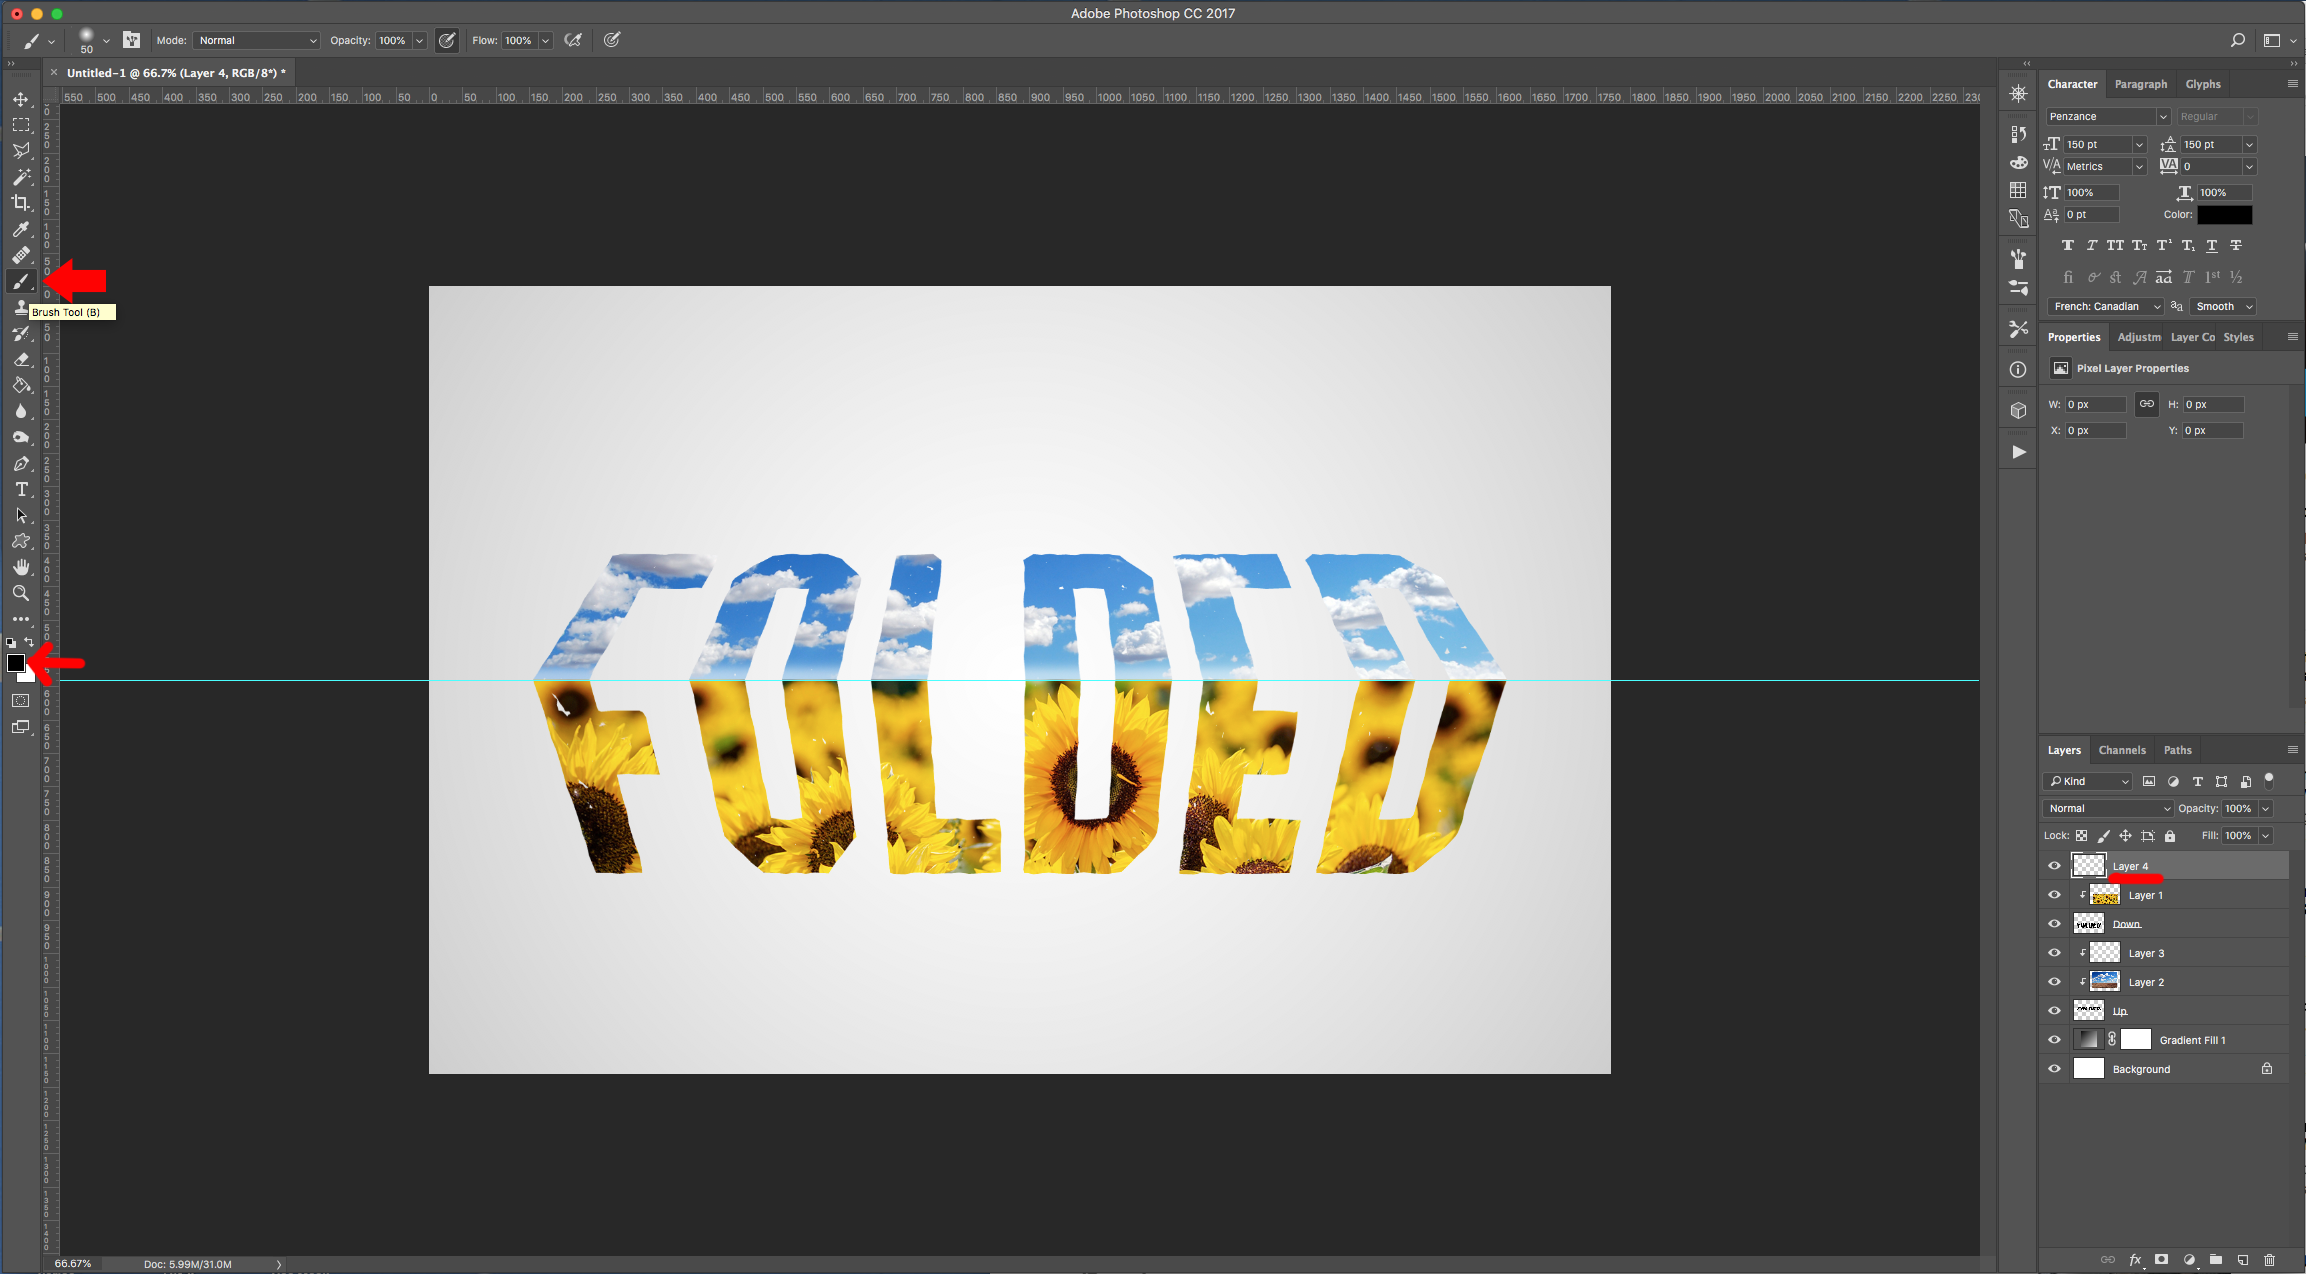
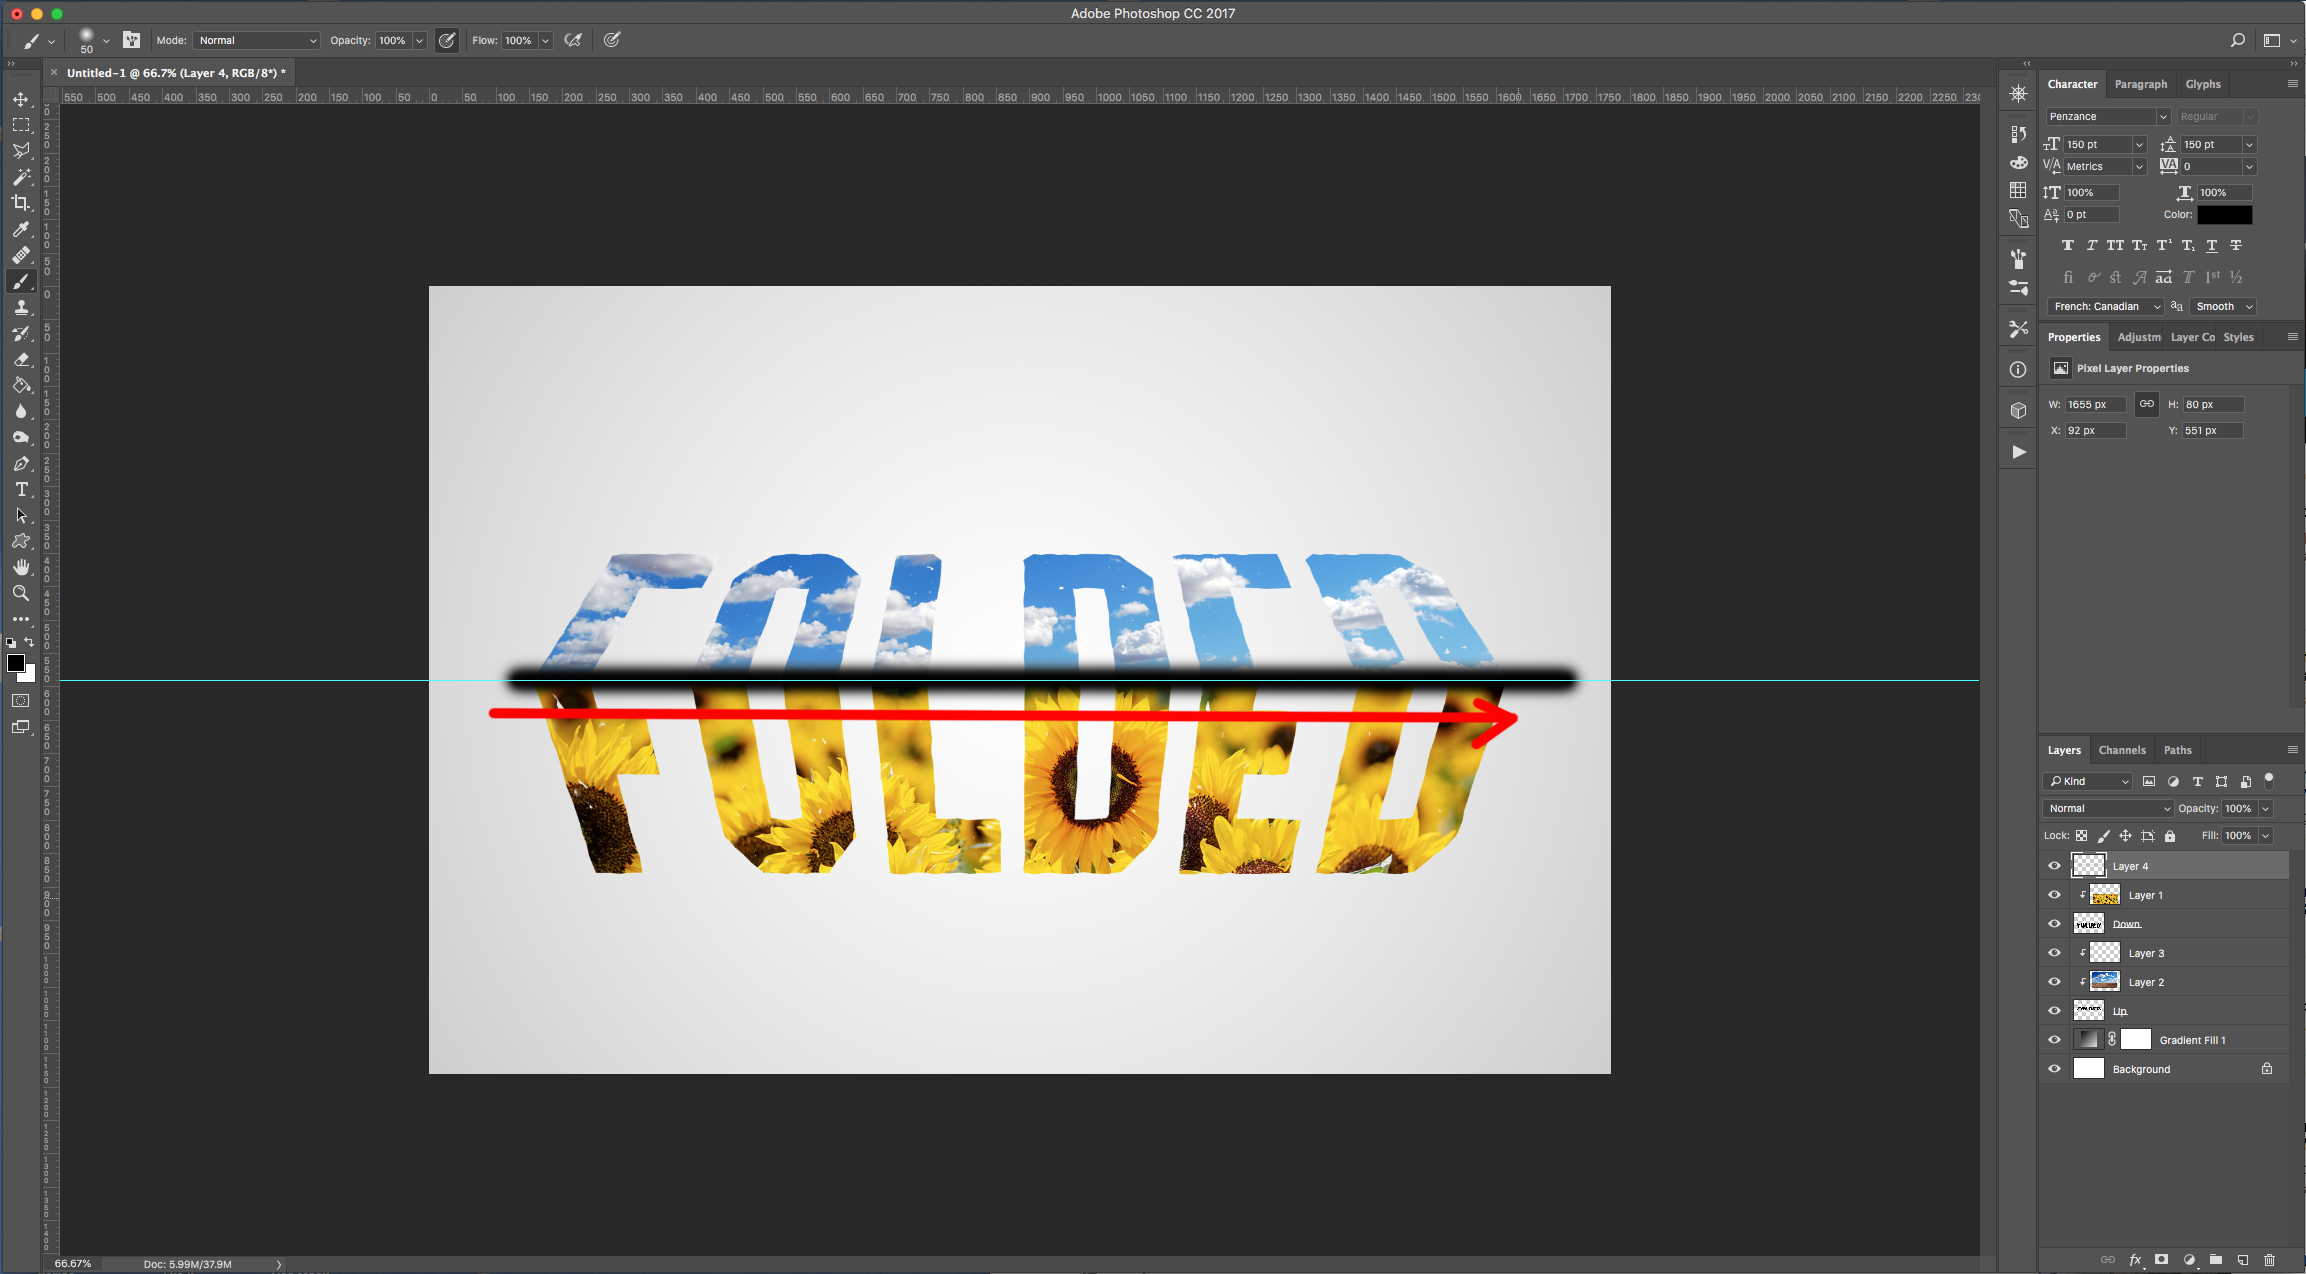
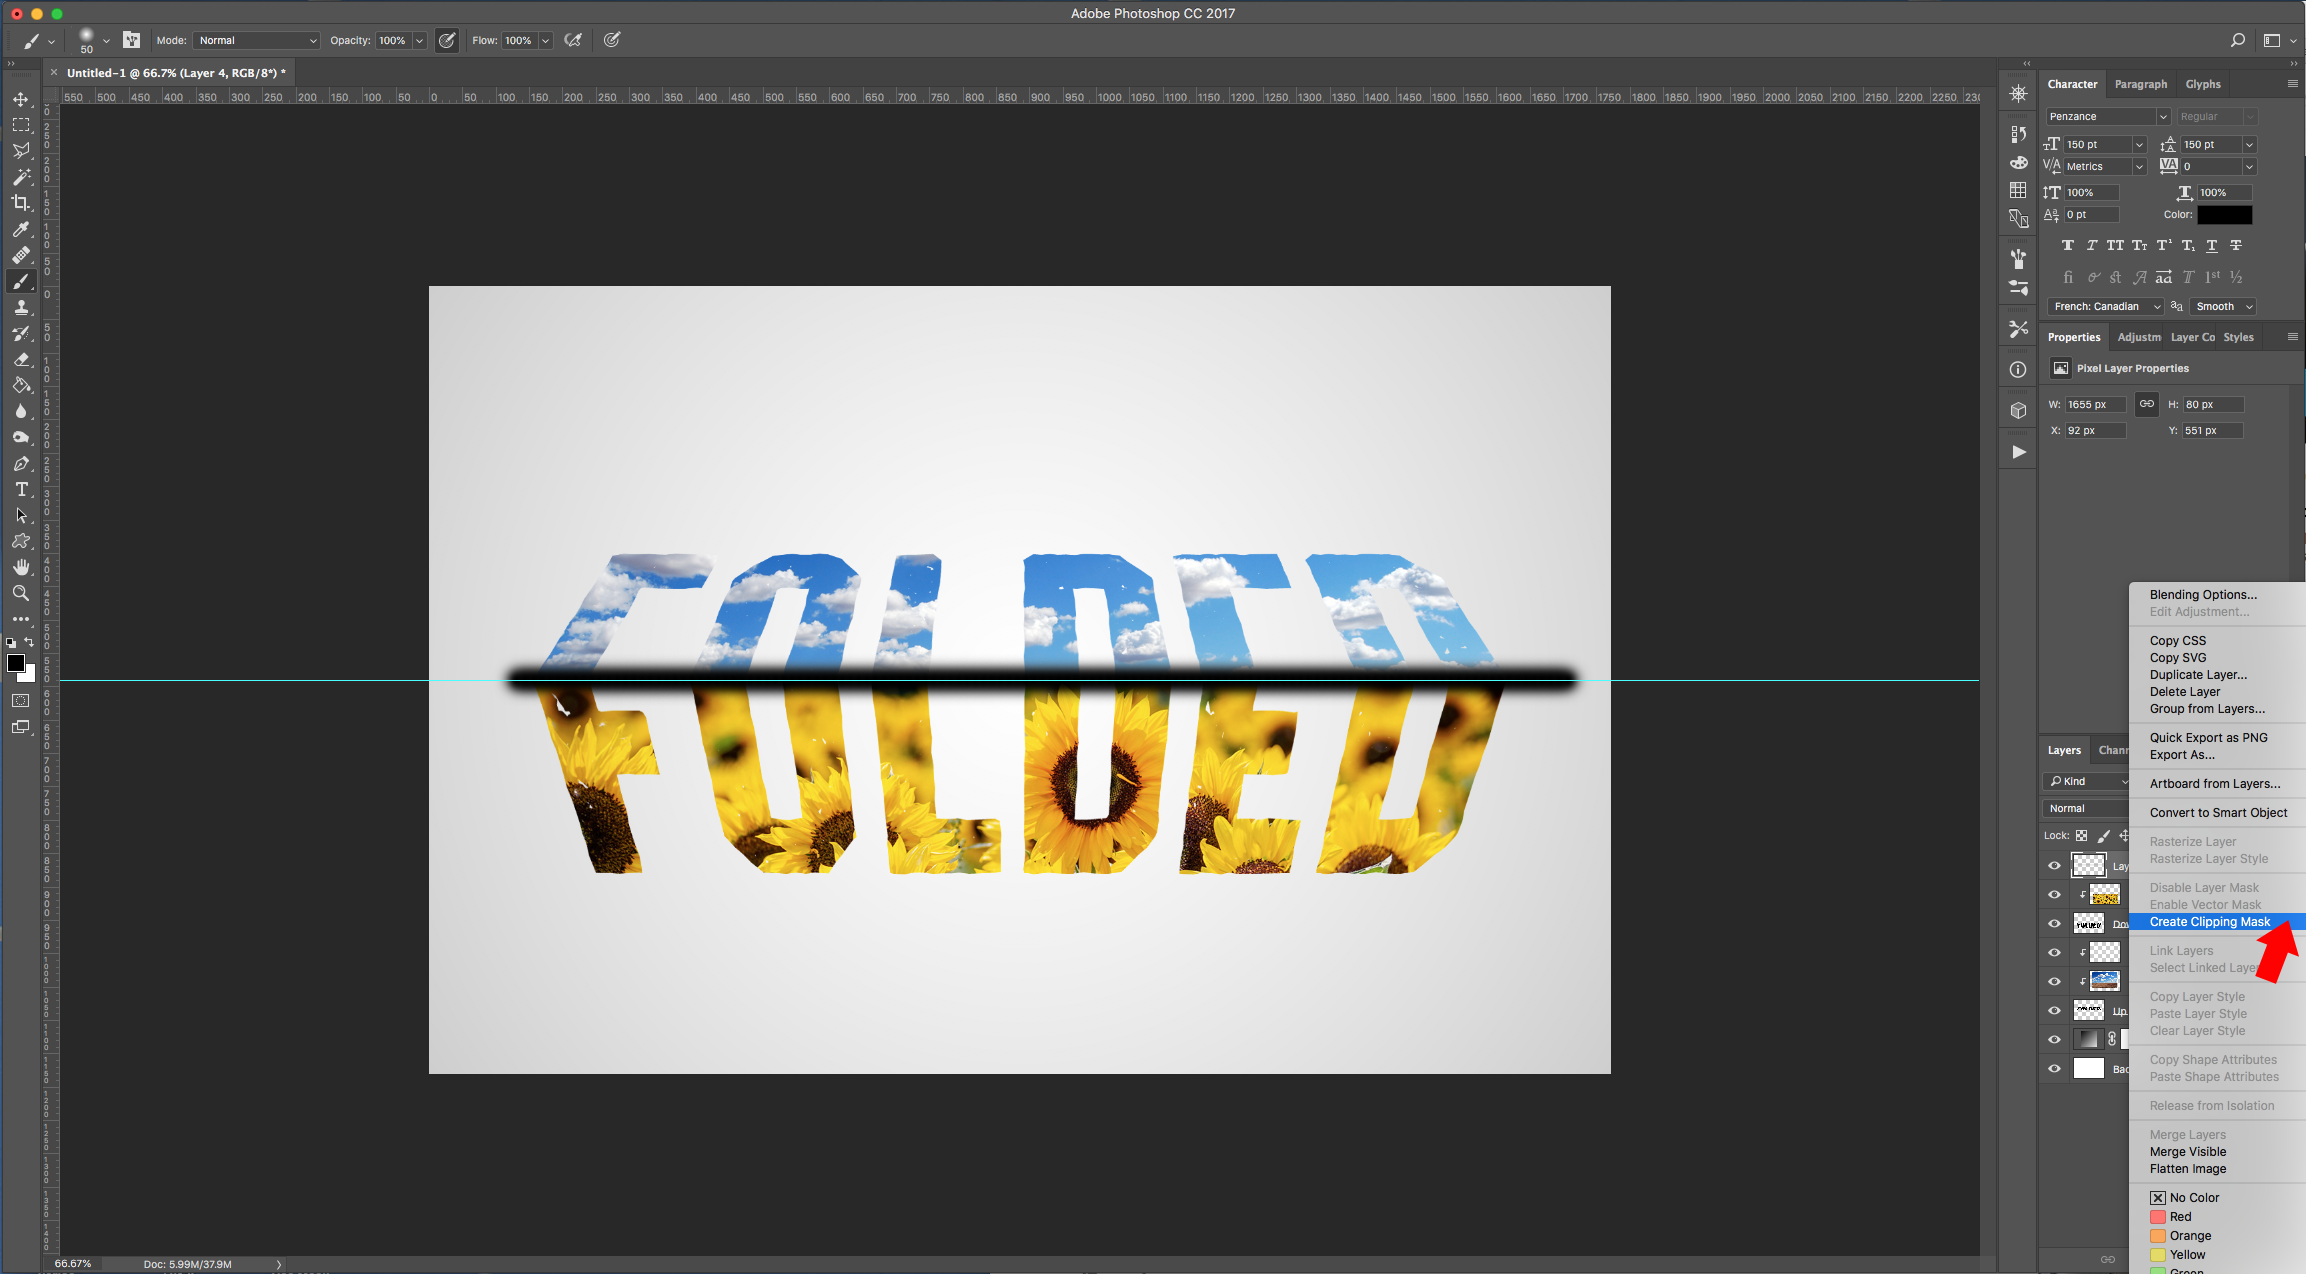
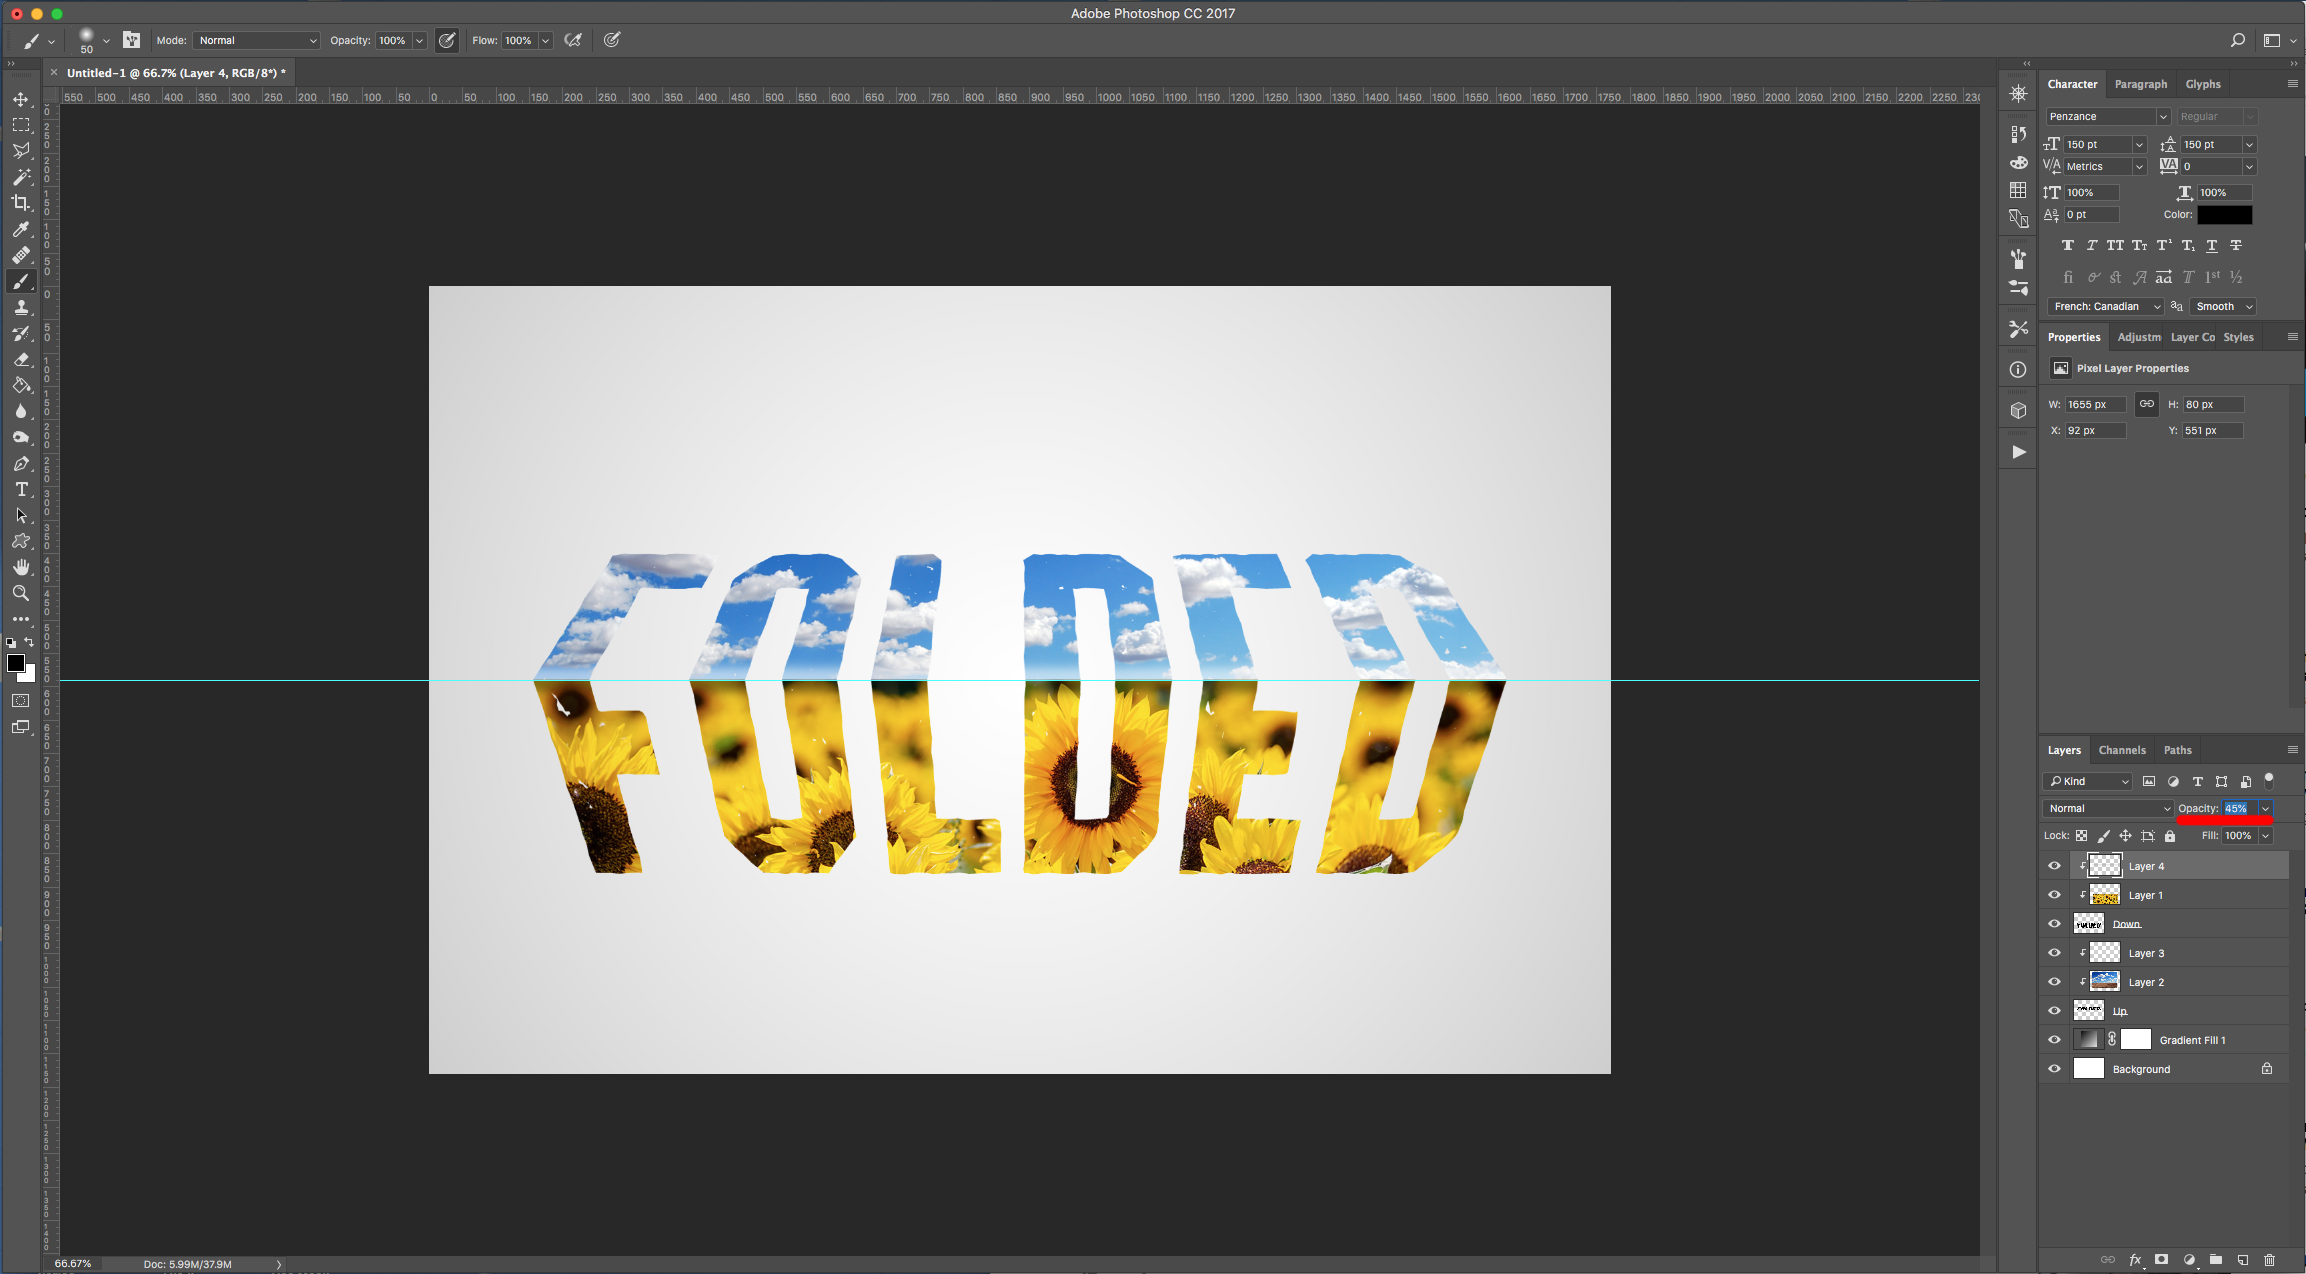
15 - Right-click on top of its Thumbnail and choose “Create Clipping Mask”. Lower the “Opacity” to 45 %.
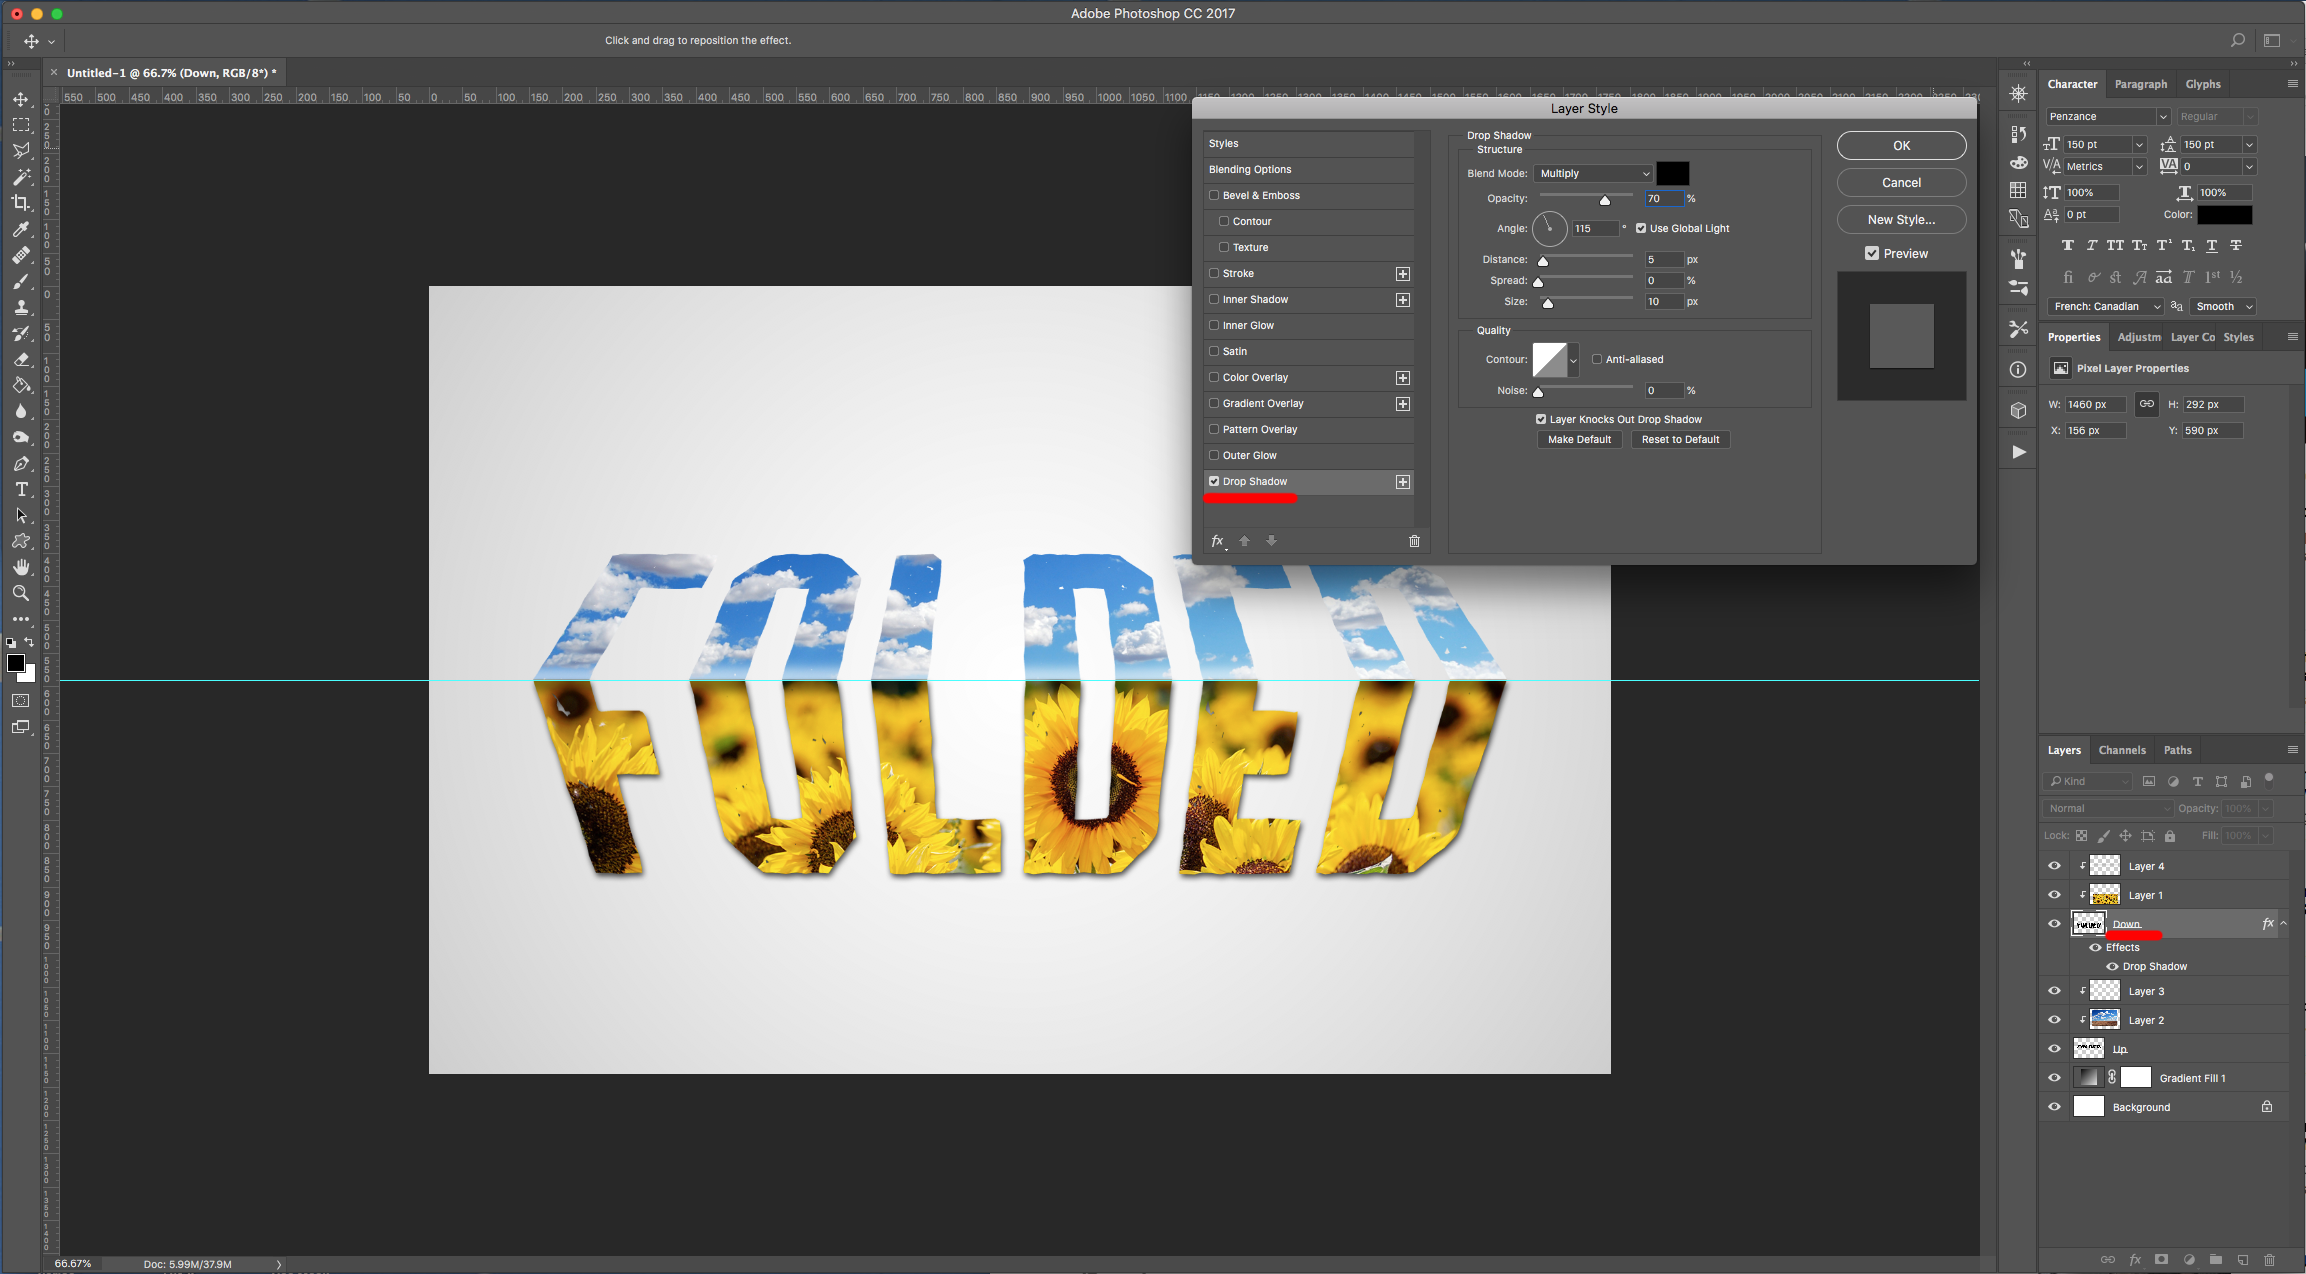
16 - Double-click on top of the “Down” Layer and apply the following “Blending Options”:
Drop Shadow:
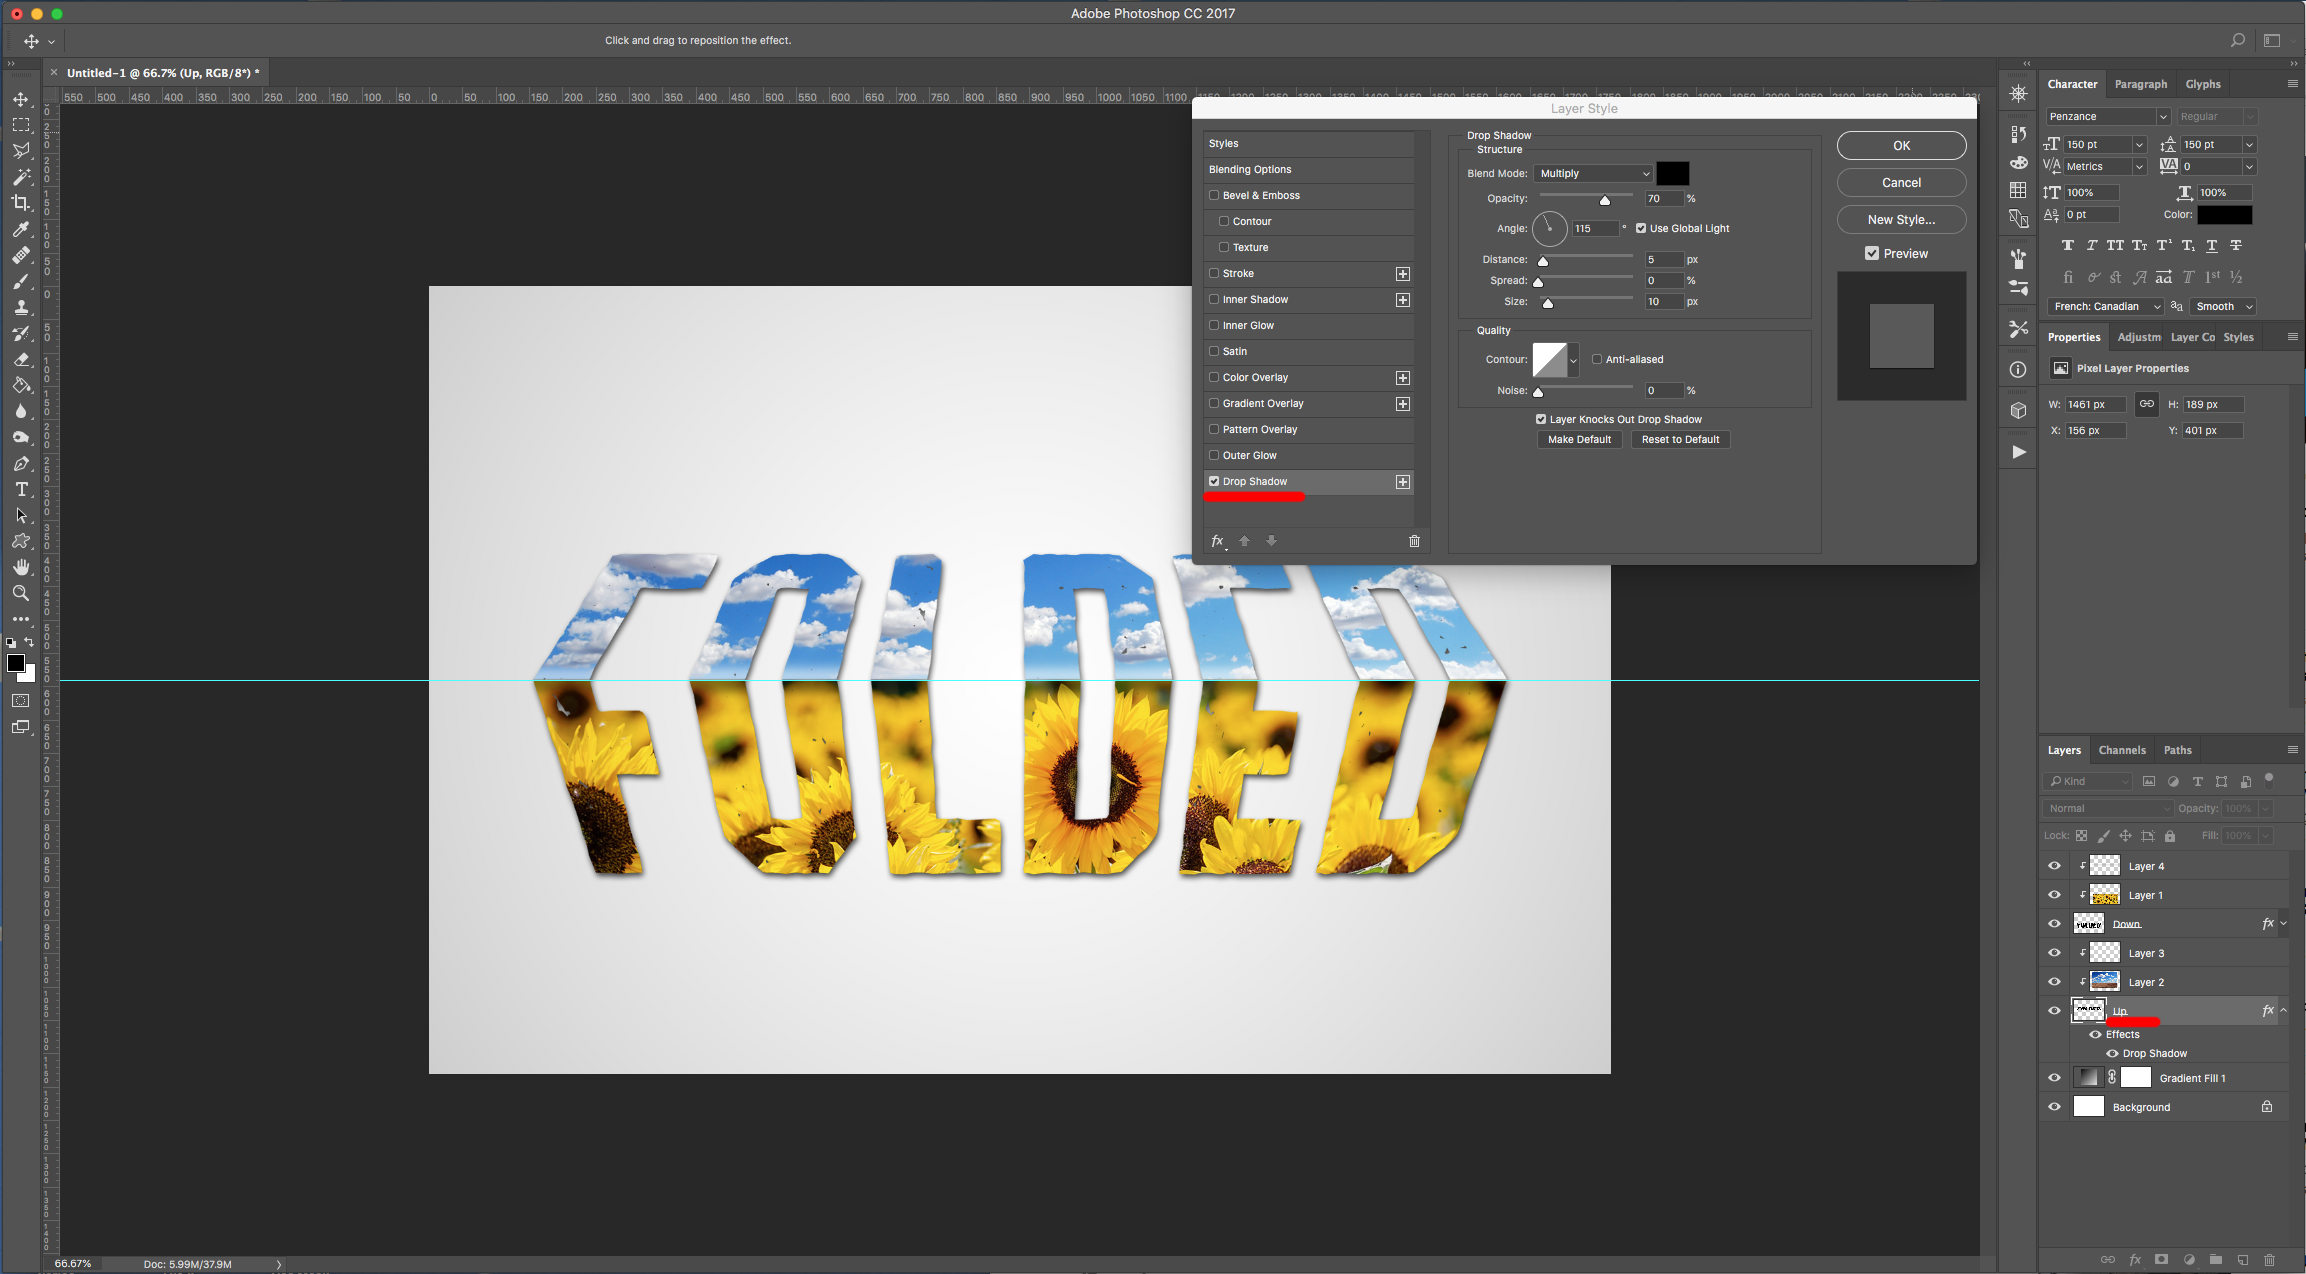
17 - Double-click on top of the “Up” Layer and apply the following “Blending Options”:
Drop Shadow:
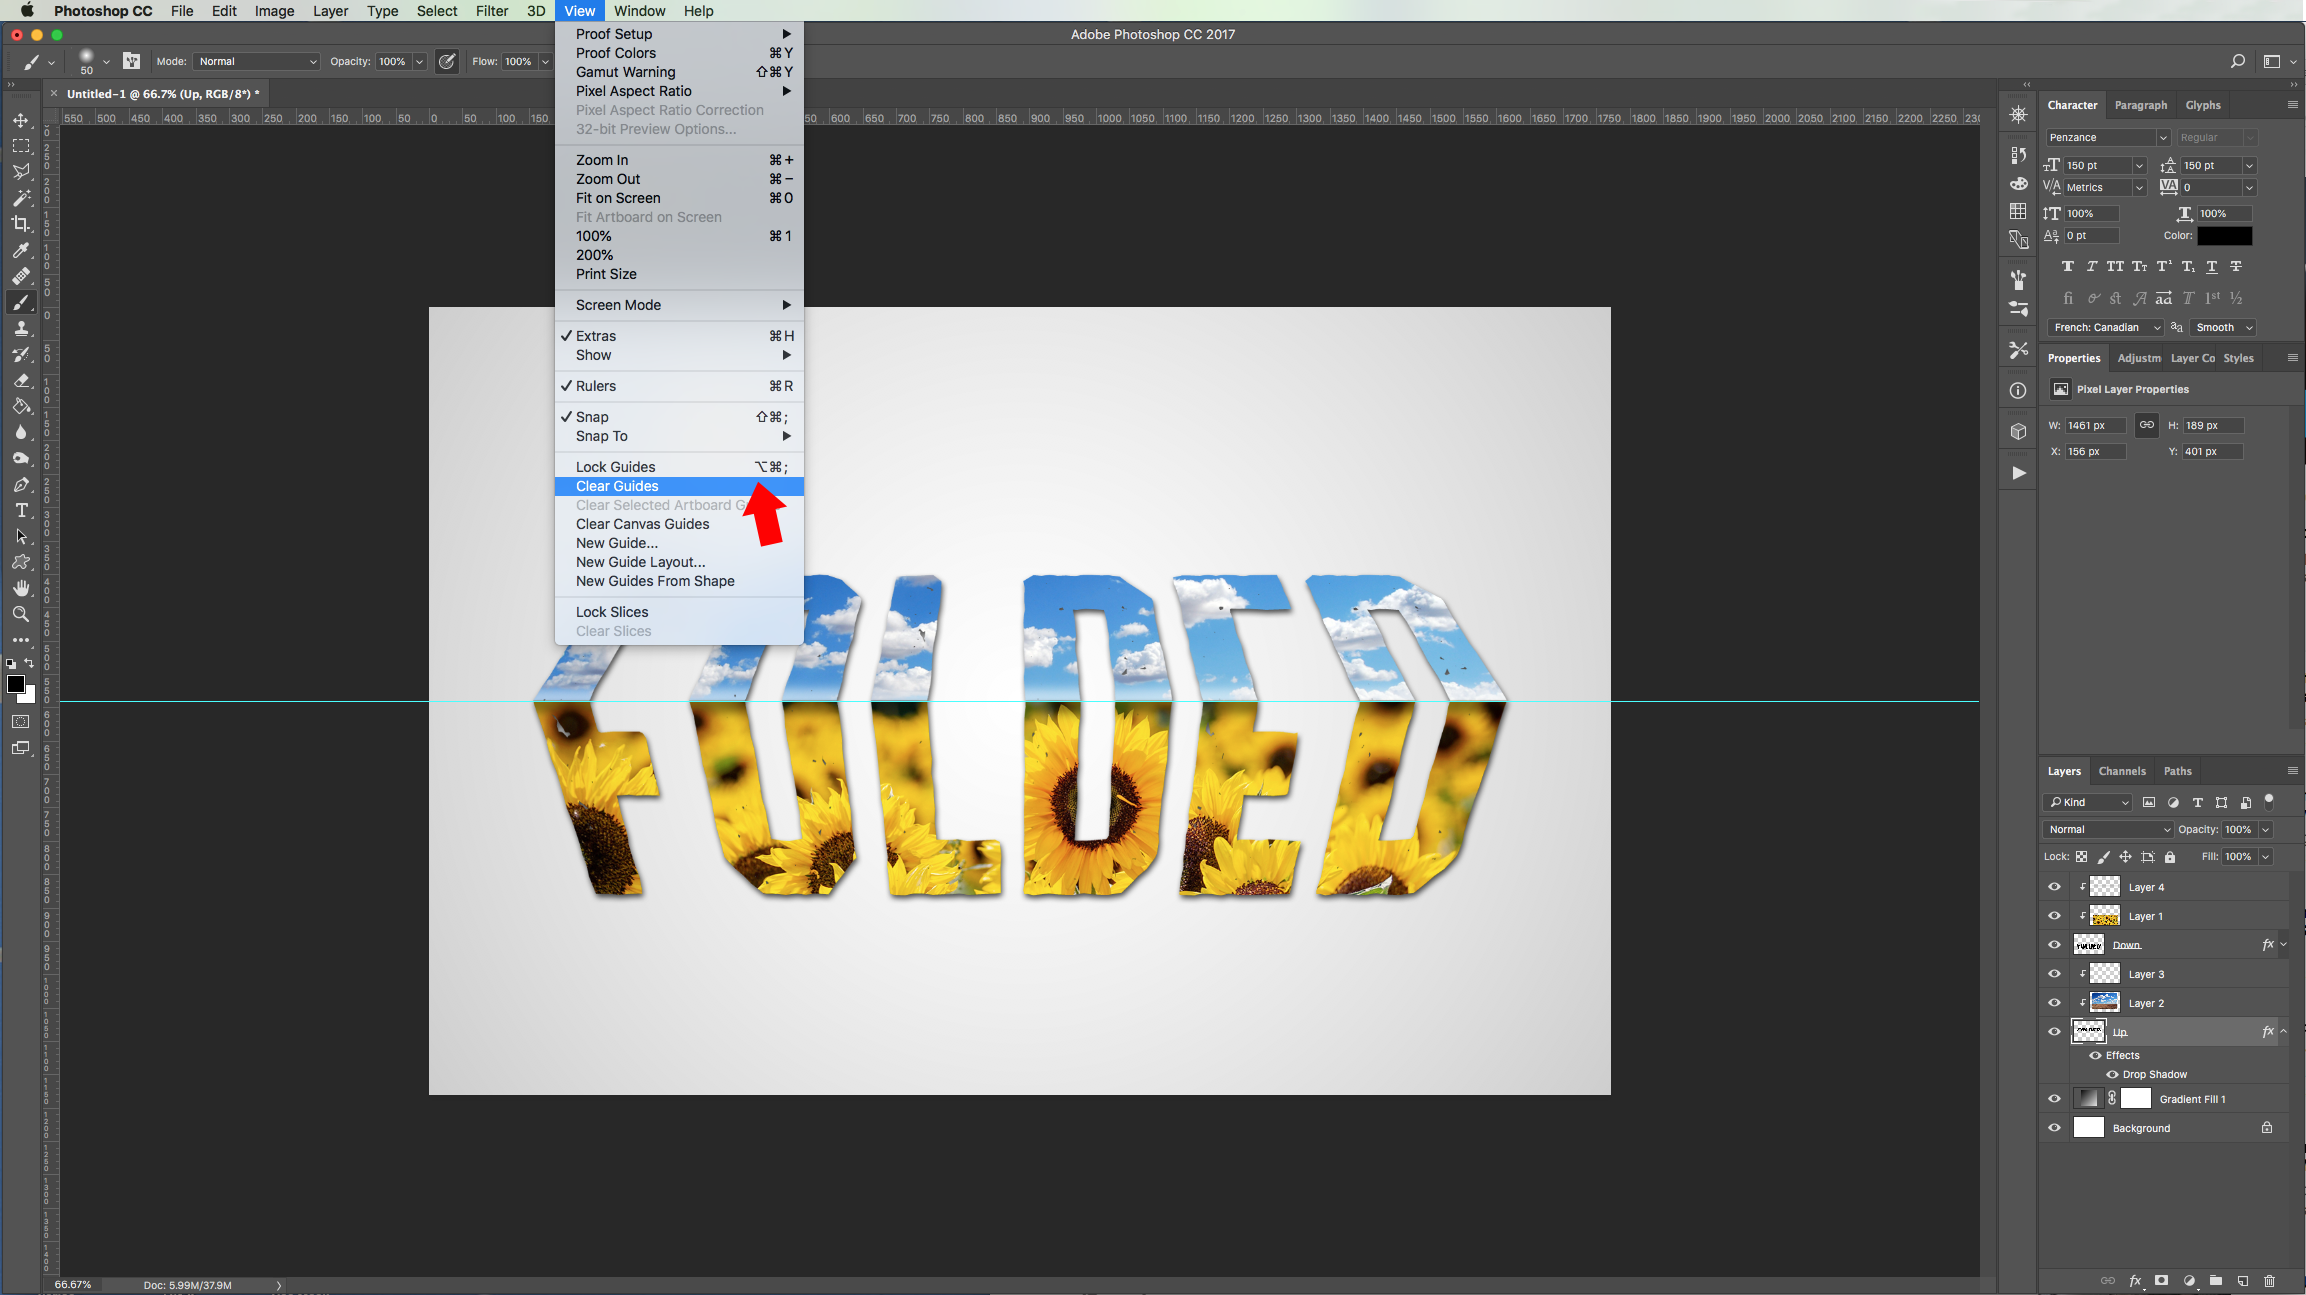
18 - Go to View > Clear Guides to get rid of the Guide.
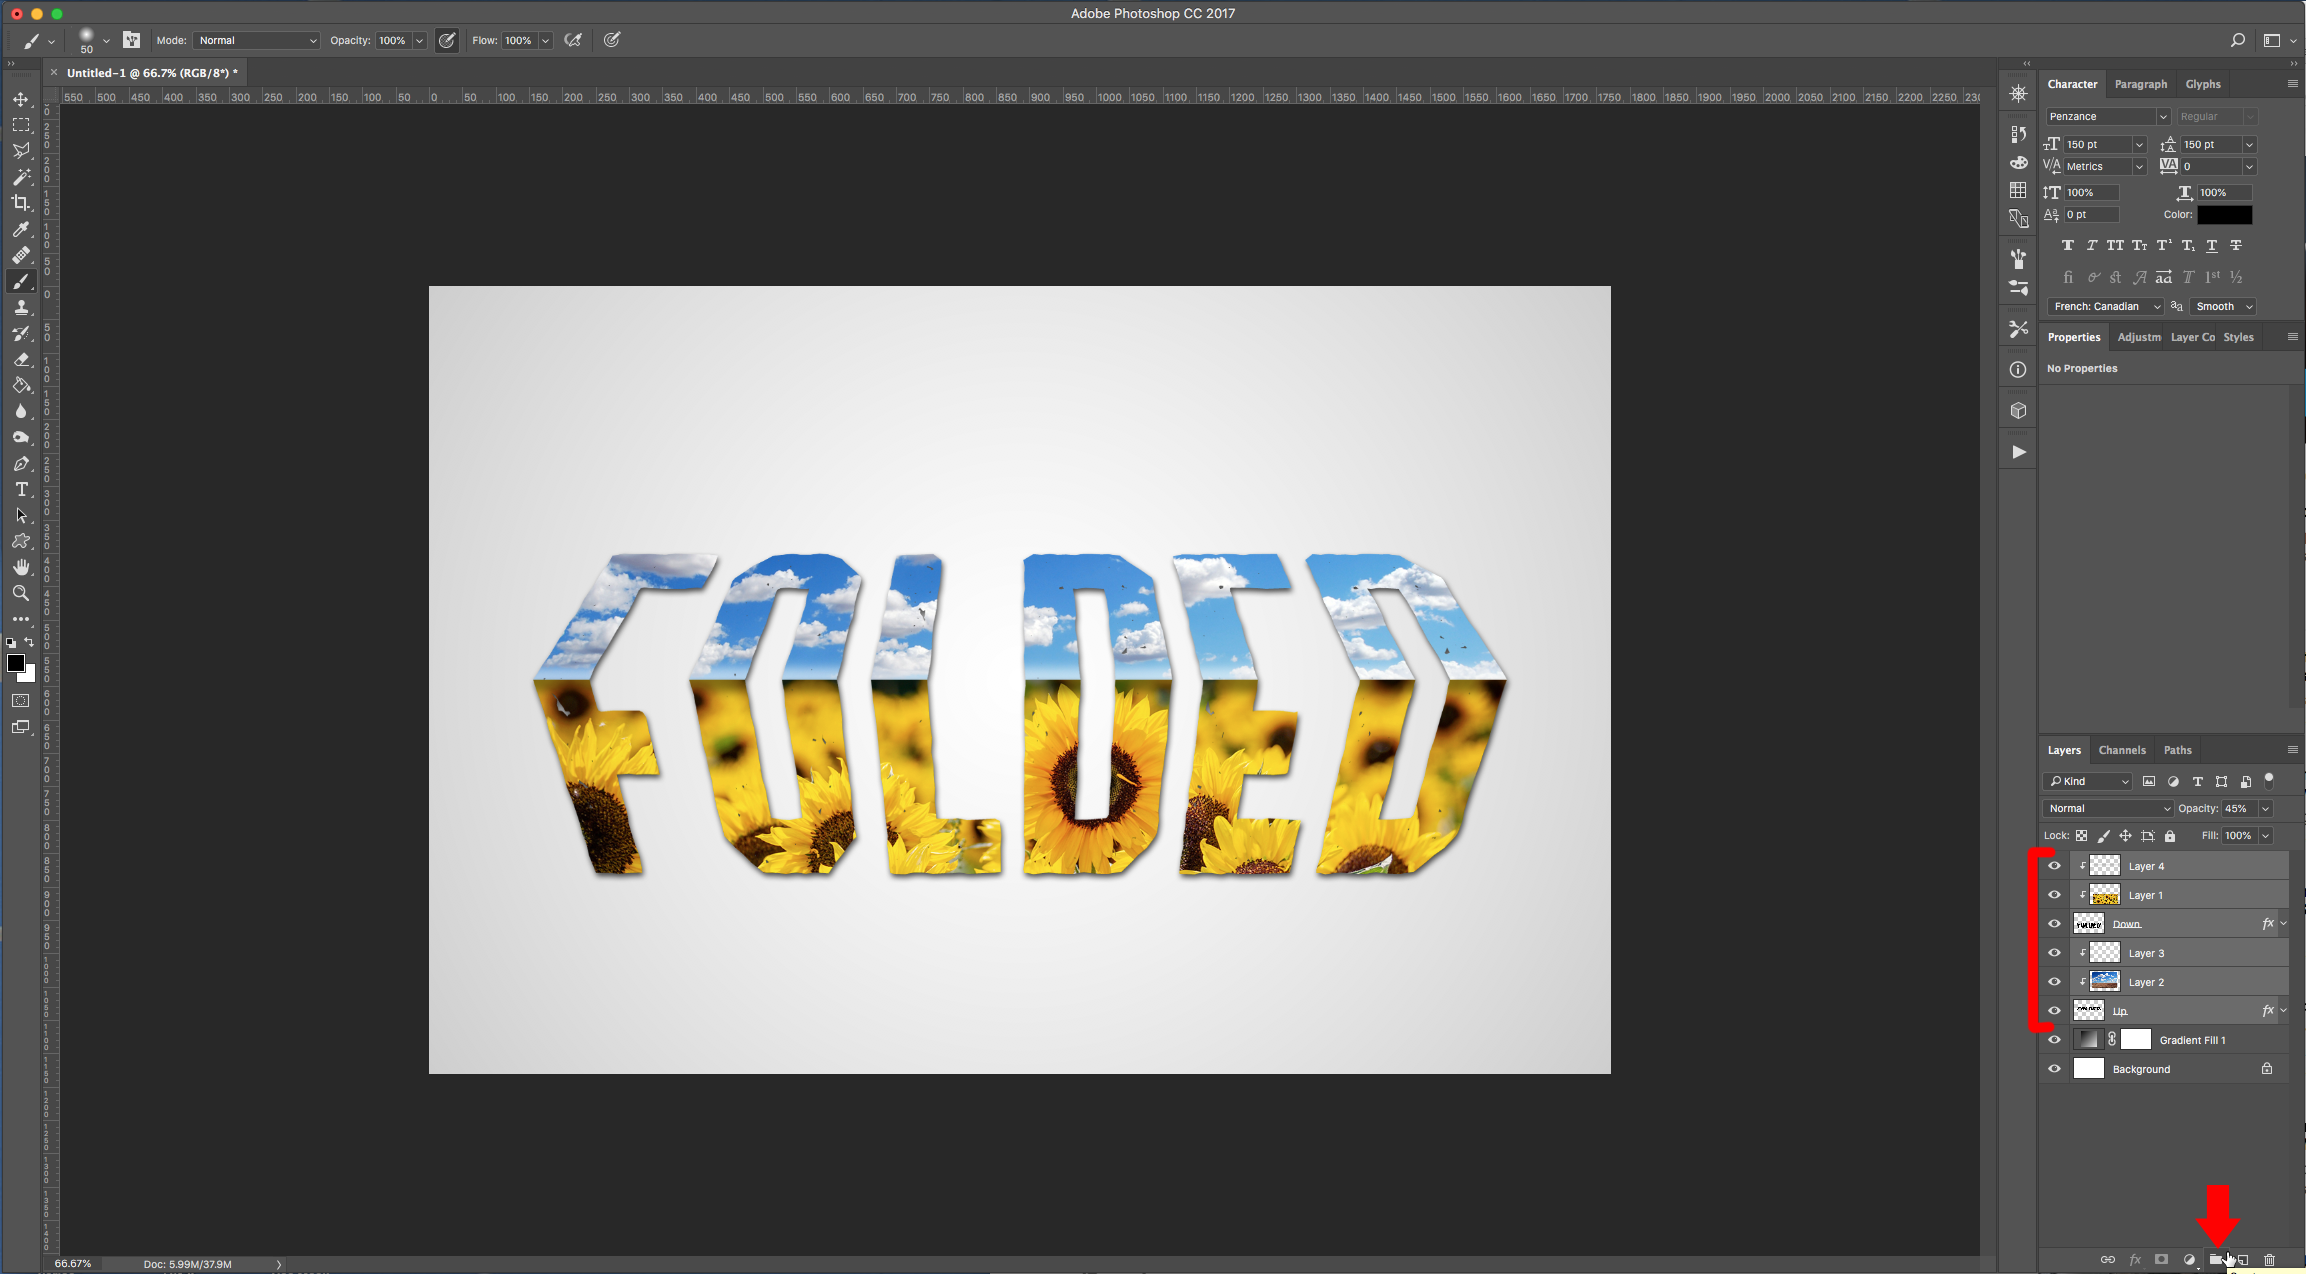
19 - Select all your “Text” and “Clipped” Layers (use the “Shift” key)and “Group” them together by clicking on the small Folder icon at the bottom of the “Layers Panel”. Name the folder “Text”.
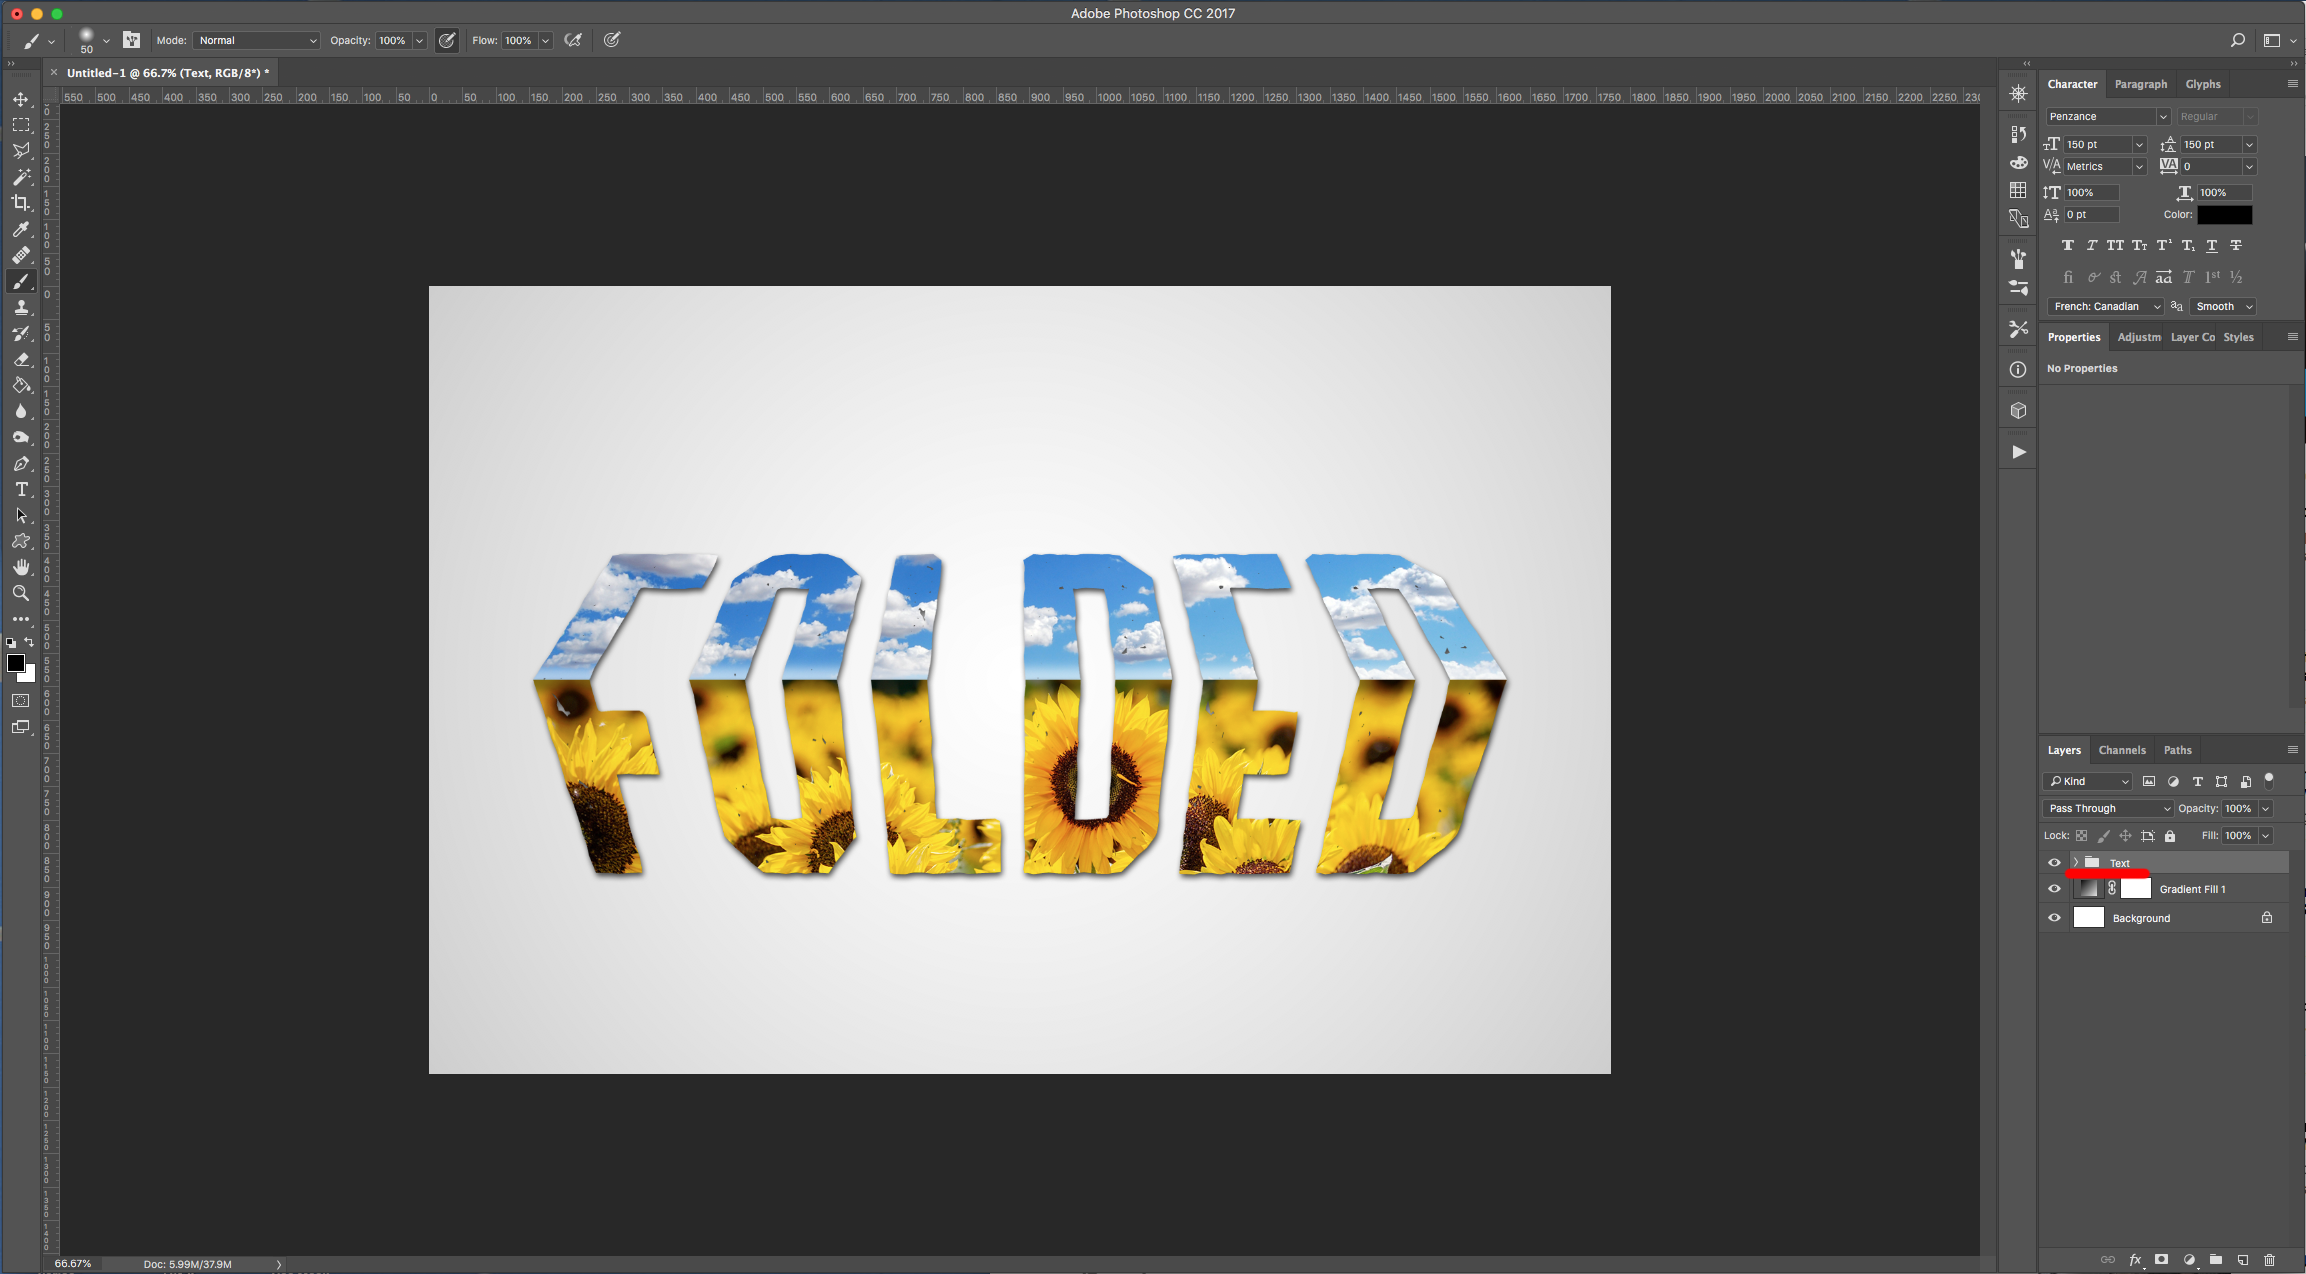
20 - Select all your Layers (Shift key) and center your text using “Align Vertical and Horizontal Centers” in the Top Menu to center it again.
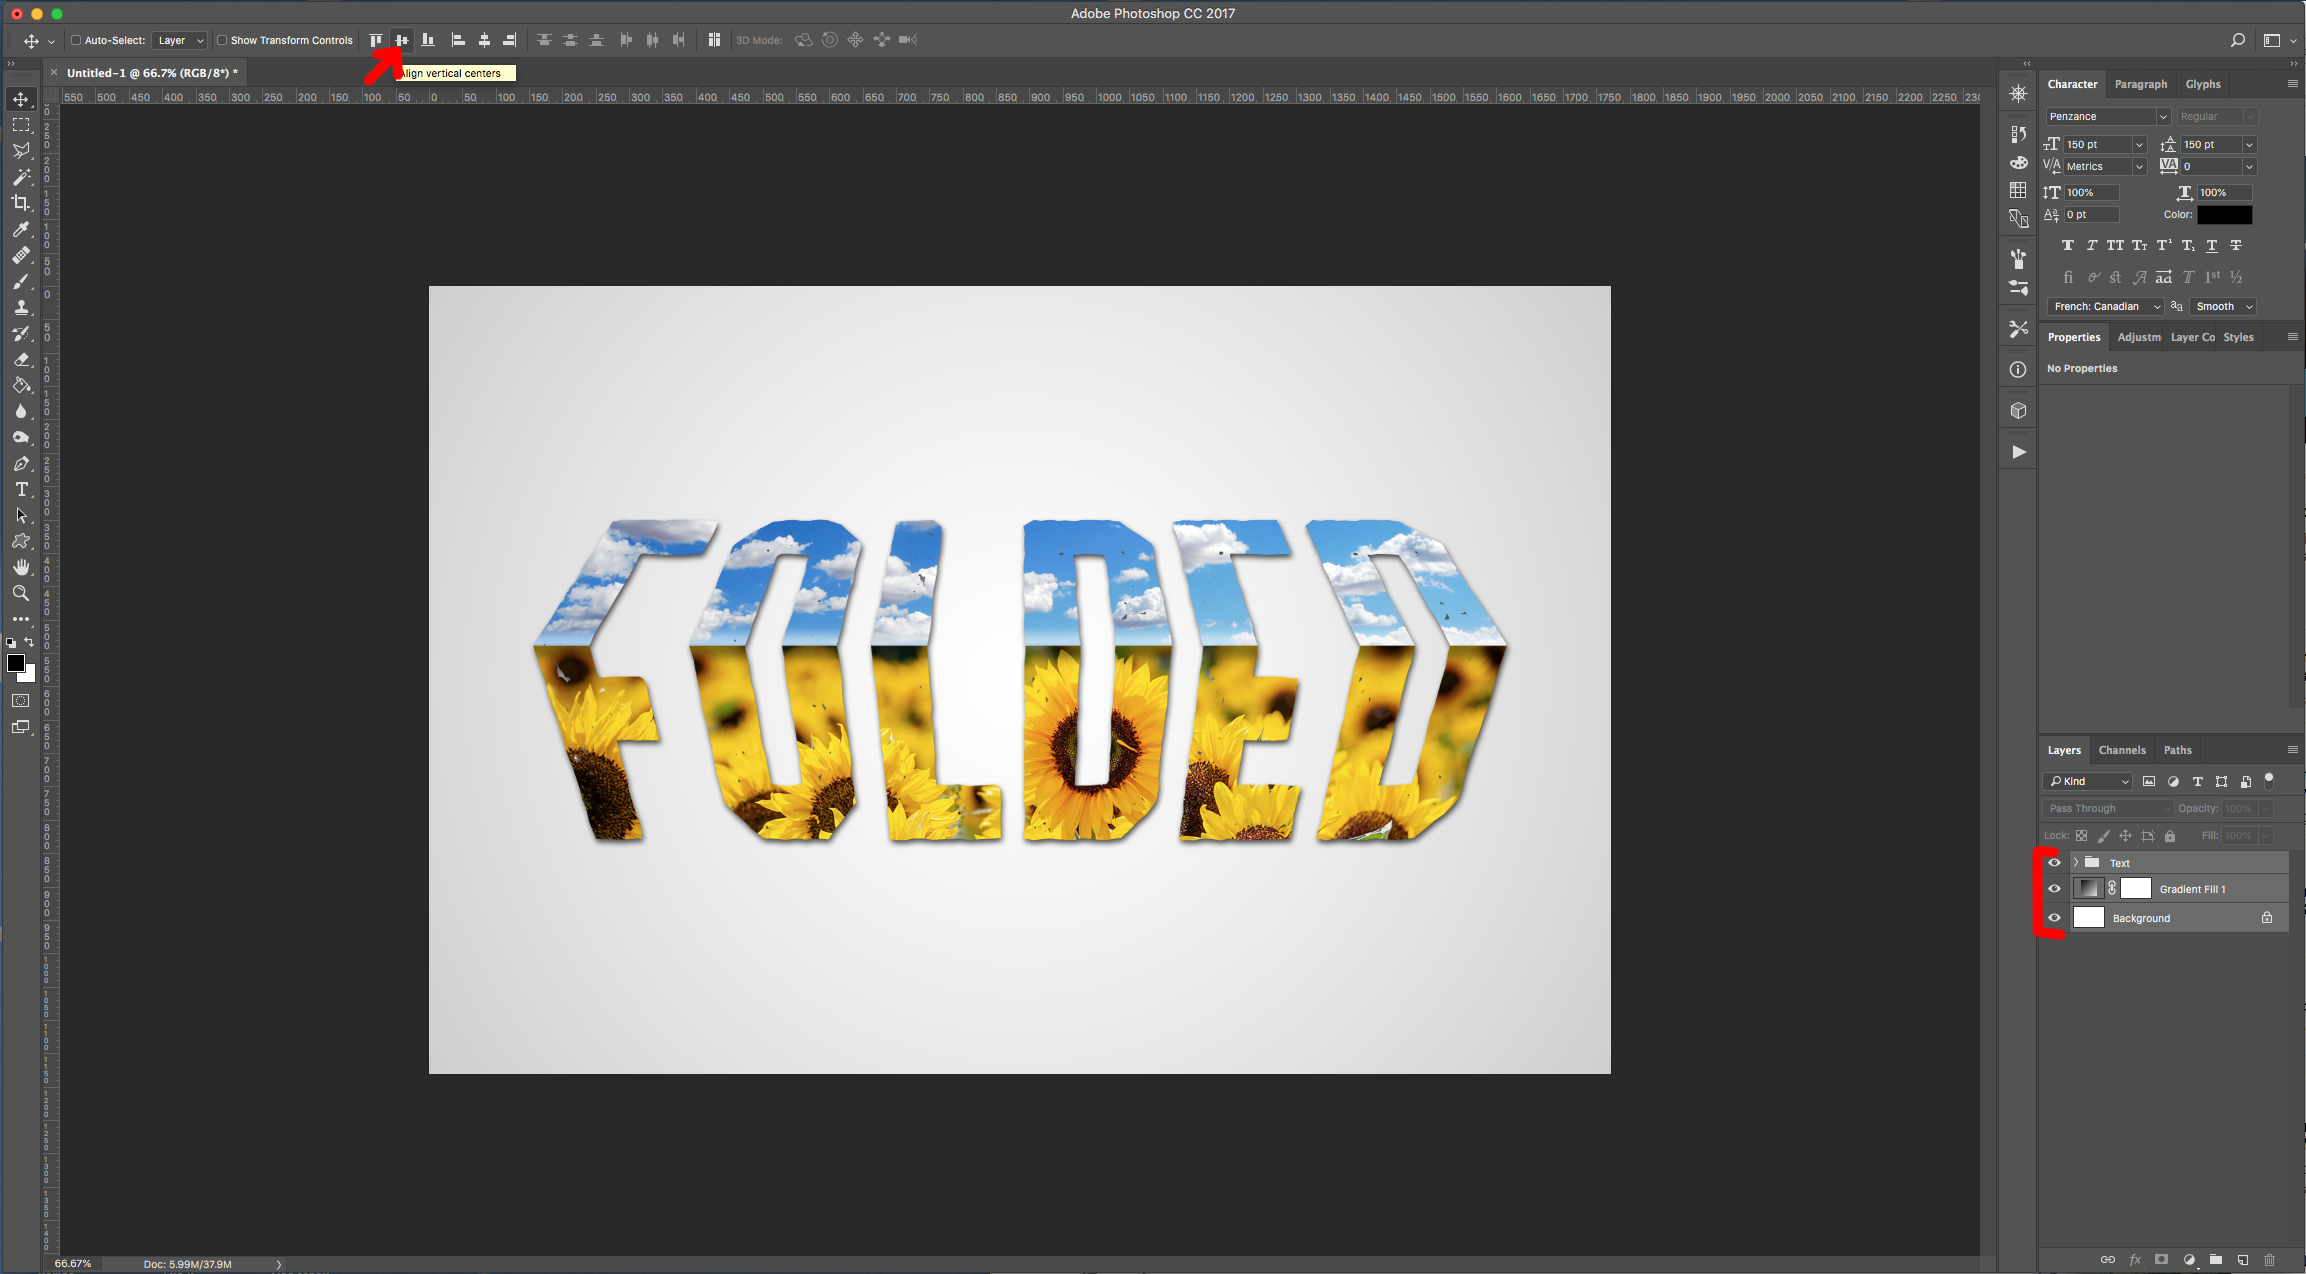
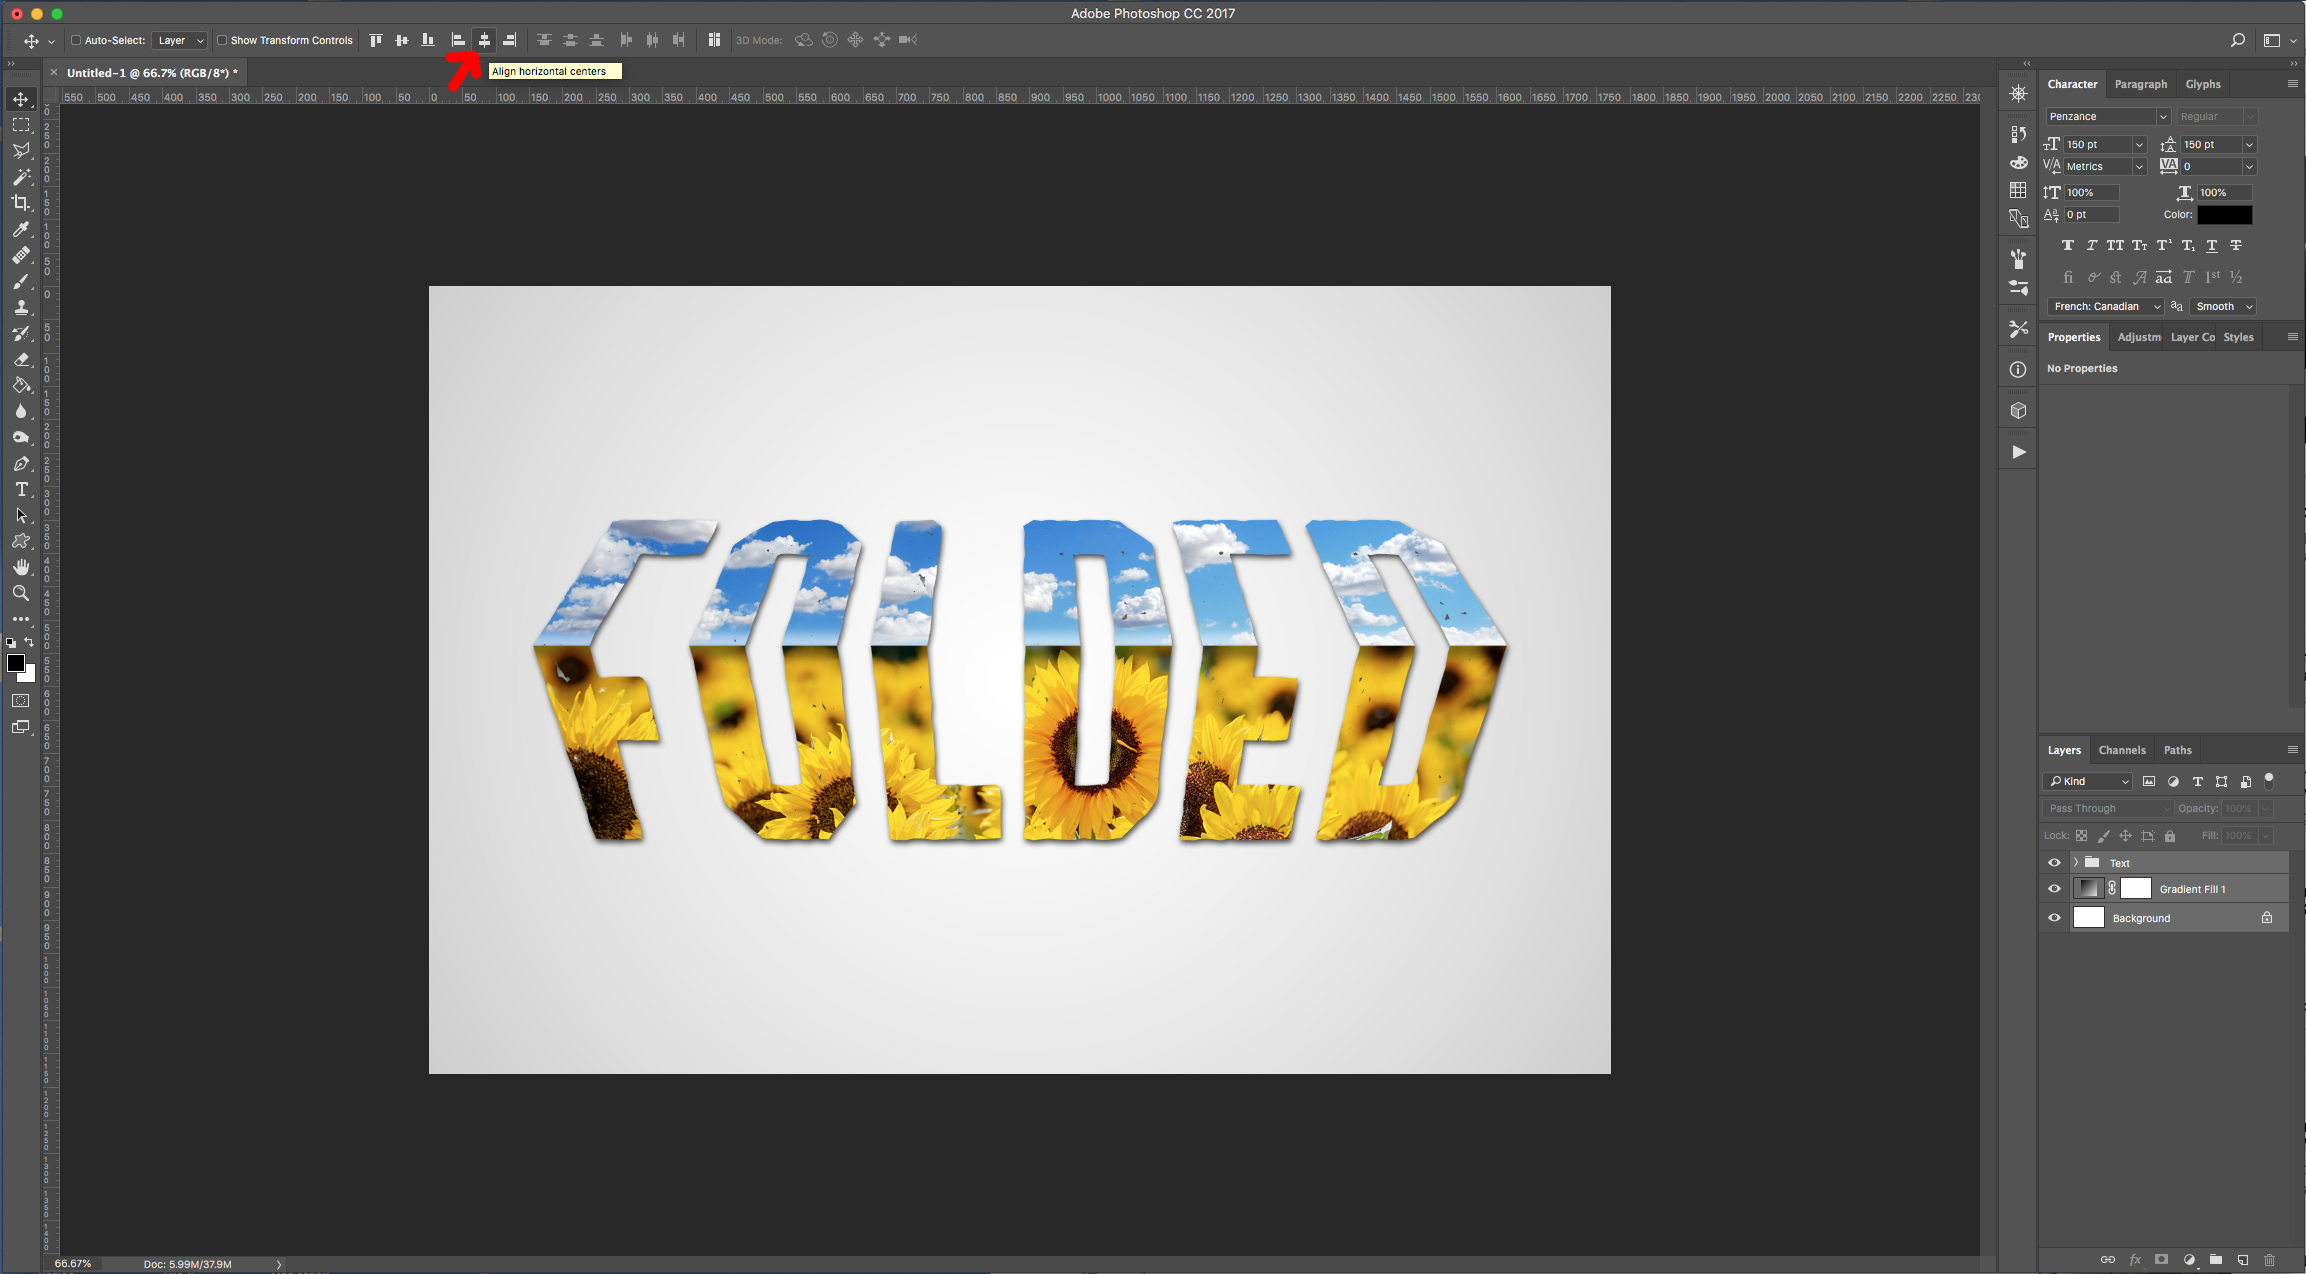
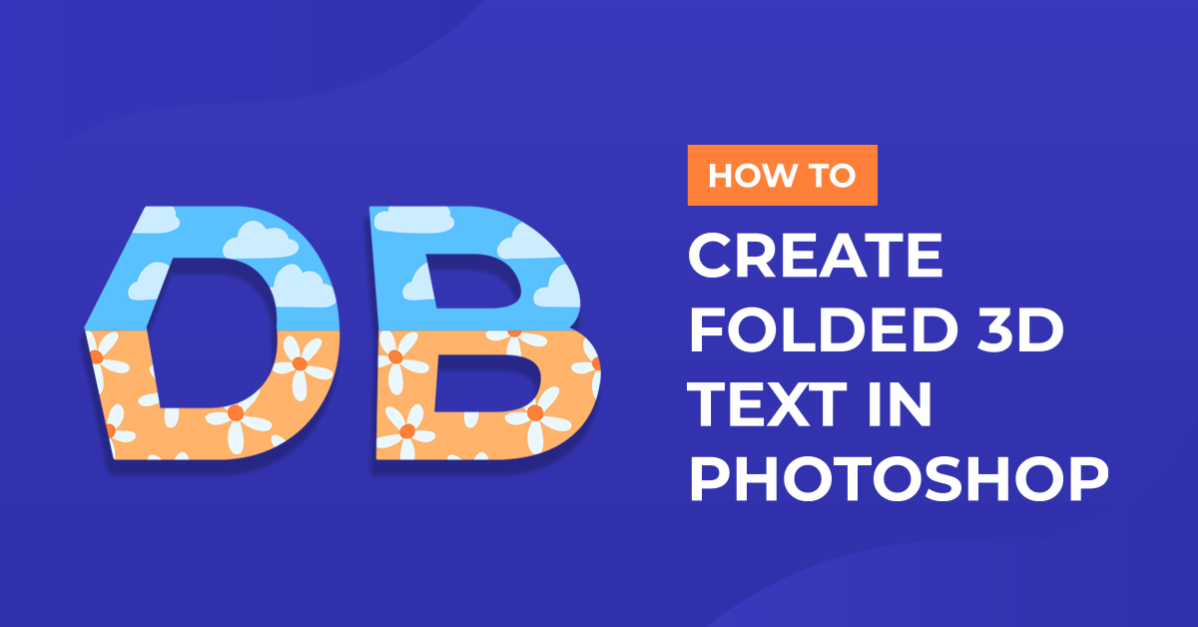
21 - Your text should be similar to this.
1 - In Photoshop, create a “New Document”. Make it 15 cm in “Width” and 10 cm in “Height” @ 300 dpi, RGB Color and use White as “Background” color.
2 - Create a “New Gradient Fill Layer” by clicking on the small Black & White circular icon at the bottom of the “Layers Panel”. Use a “Foreground to Background Radial” Gradient (Black to White) with a 90° Angle, as “Scale” of 750 % and check the “Reverse” button.
3 - Go to View > New Guide… and choose “Horizontal” and 50% “Position”. Click “OK”.
4 - Select the “Type Tool” (T), choose your font (we used “Penzance”) and type your text. Use Black as fill color and make it as big as needed to fit inside your Canvas (150 pt).
5 - Select all your Layers (Shift key) and center your text using “Align Vertical and Horizontal Centers” in the Top Menu. Right-click on top of the Text Layer Thumbnail and choose “Rasterize Type”.
6 - Select the “Rectangular Marquee Tool” and create a rectangle than covers the bottom portion of your document starting from the Guide. Right-click on top of your selection and choose “Layer Via Cut” to create a new layer by cutting your selection. Name the two resulting Layers “Up” and “Down”.
7 - Select the “Up” Layer, go to Edit > Transform > Perspective… and push in the Top-Left or Top-Right “Anchor Point” at the Top of the letters to make them look like they are bent. Right-click on top and choose “Scale”, then push down from the Top-Center “Anchor Point” to make the letters a bit shorter. Once you are happy, hit “Enter” or click the small “Checkmark” on the Top Menu.
8 - Now, select the “Down” Layer, go to Edit > Transform > Perspective… and reduce the Bottom of the letters to make them look like they are bent. Right-click on top and choose “Scale”, then drag down from the Bottom-Center “Anchor Point” to make the letters a bit longer. Once you are happy, hit “Enter” or click the small “Checkmark” on the Top Menu.
9 - Open one of the images you chose to add to your text and drag it into your original document. It should be on top of everything. Use “Free Transform” (Command/Control + T) to Resize it and place where you want it.
10 - Right-click on top of its Thumbnail and choose “Create Clipping Mask”. Use “Free Transform” (Command/Control + T) to further Resize it and move it around. Once you are done hit “Enter” or click the small “Checkmark” on the Top Menu.
11 - Bring your second image to your document, resize it if needed and make sure it is place on top of the “Up” layer. Right-click on top of its Thumbnail and choose “Create Clipping Mask”. Use “Free Transform” (Command/Control + T) to further Resize it and move it around. Once you are done hit “Enter” or click the small “Checkmark” on the Top Menu.
12 - With this Layer still selected, create a “New Layer” by clicking the small button at the bottom of the “Layers Panel” and make sure it sits on top of the second Clipped Image Layer. Select the “Brush Tool” (B) and use a 50 px Brush with 0% “Hardness” with White as “Foreground” color to draw a straight line on top of the Guide (hold the “Shift” key” and drag from side to side).
13 - Right-click on top of its Thumbnail and choose “Create Clipping Mask”. Lower the “Opacity” to 55 %.
14 - Select the Top Clipped Image Layer and create a “New Layer” by clicking the small button at the bottom of the “Layers Panel” and make sure it sits on top of everything. Select the “Brush Tool” (B) and use a 50 px Brush with 0% “Hardness” with Black as “Foreground” color to draw a straight line on top of the Guide (hold the “Shift” key” and drag from side to side).
15 - Right-click on top of its Thumbnail and choose “Create Clipping Mask”. Lower the “Opacity” to 45 %.
16 - Double-click on top of the “Down” Layer and apply the following “Blending Options”:
Drop Shadow:
17 - Double-click on top of the “Up” Layer and apply the following “Blending Options”:
Drop Shadow:
18 - Go to View > Clear Guides to get rid of the Guide.
19 - Select all your “Text” and “Clipped” Layers (use the “Shift” key)and “Group” them together by clicking on the small Folder icon at the bottom of the “Layers Panel”. Name the folder “Text”.
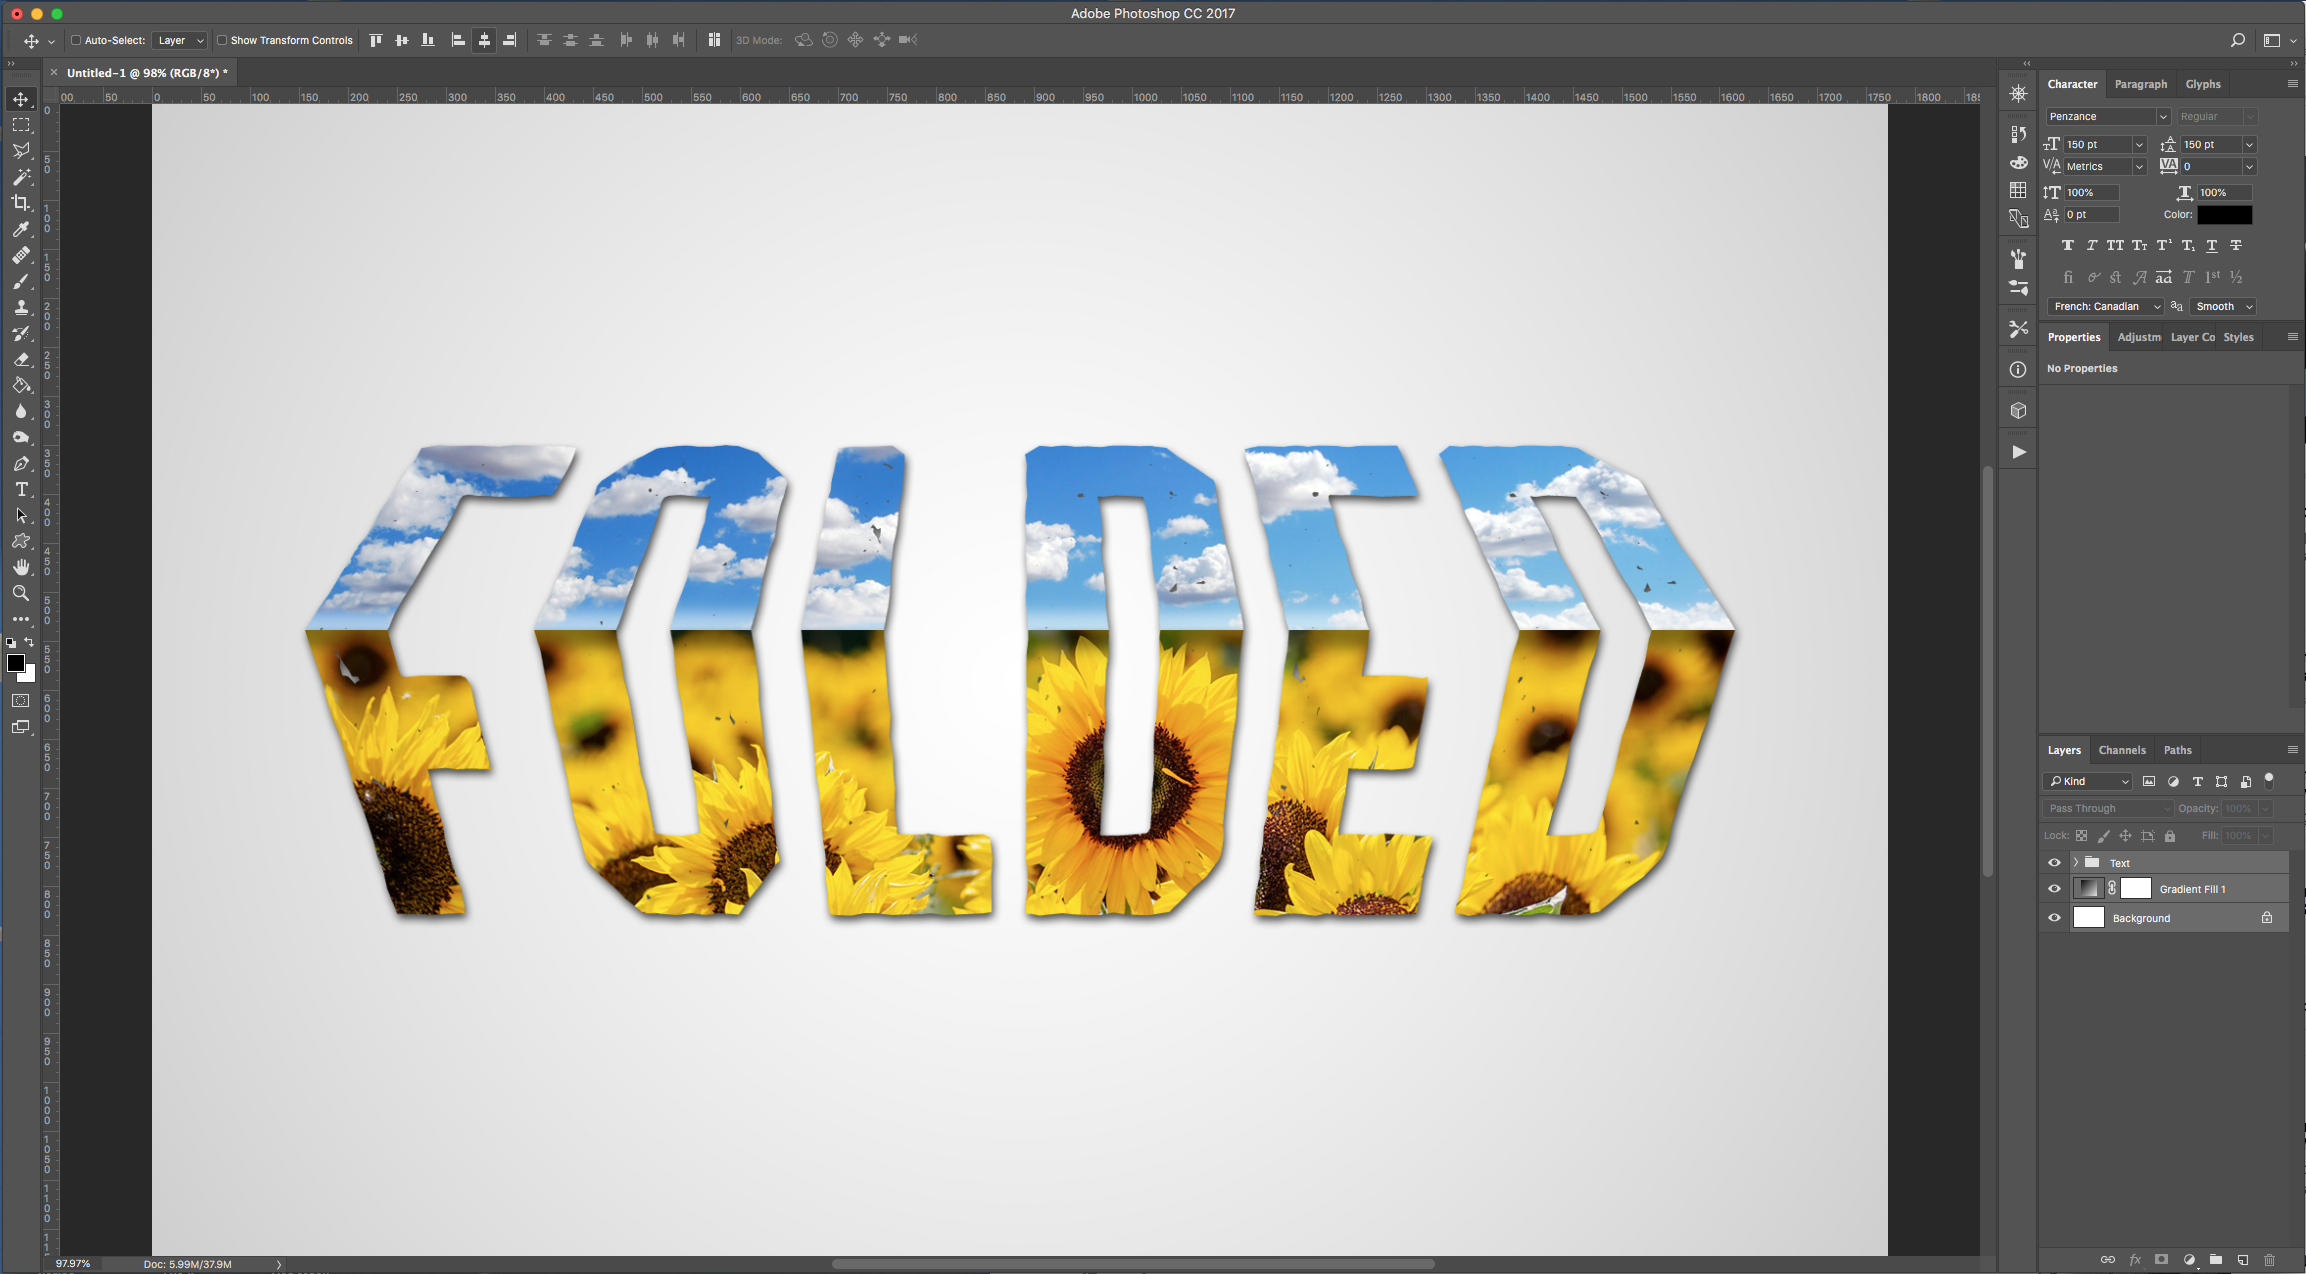
20 - Select all your Layers (Shift key) and center your text using “Align Vertical and Horizontal Centers” in the Top Menu to center it again.
21 - Your text should be similar to this.
by @lornacane
Related Tutorials
Photoshop Tutorials
3D Comic Text in Photoshop
Photoshop Tutorials
Hollow 3D Text Effect in Photoshop
Learn how to create a hollow 3D text effect in Photoshop.
Photoshop Tutorials
How to Make 3D Text in Photoshop
Photoshop Tutorials
Rainbow Cake Text Effect in Photoshop 3D Text
Photoshop Tutorials
3D Grassy Text in Photoshop
Photoshop Tutorials