By Design Bundles
Photoshop Tutorials12 min
Chocolate Text in Photoshop
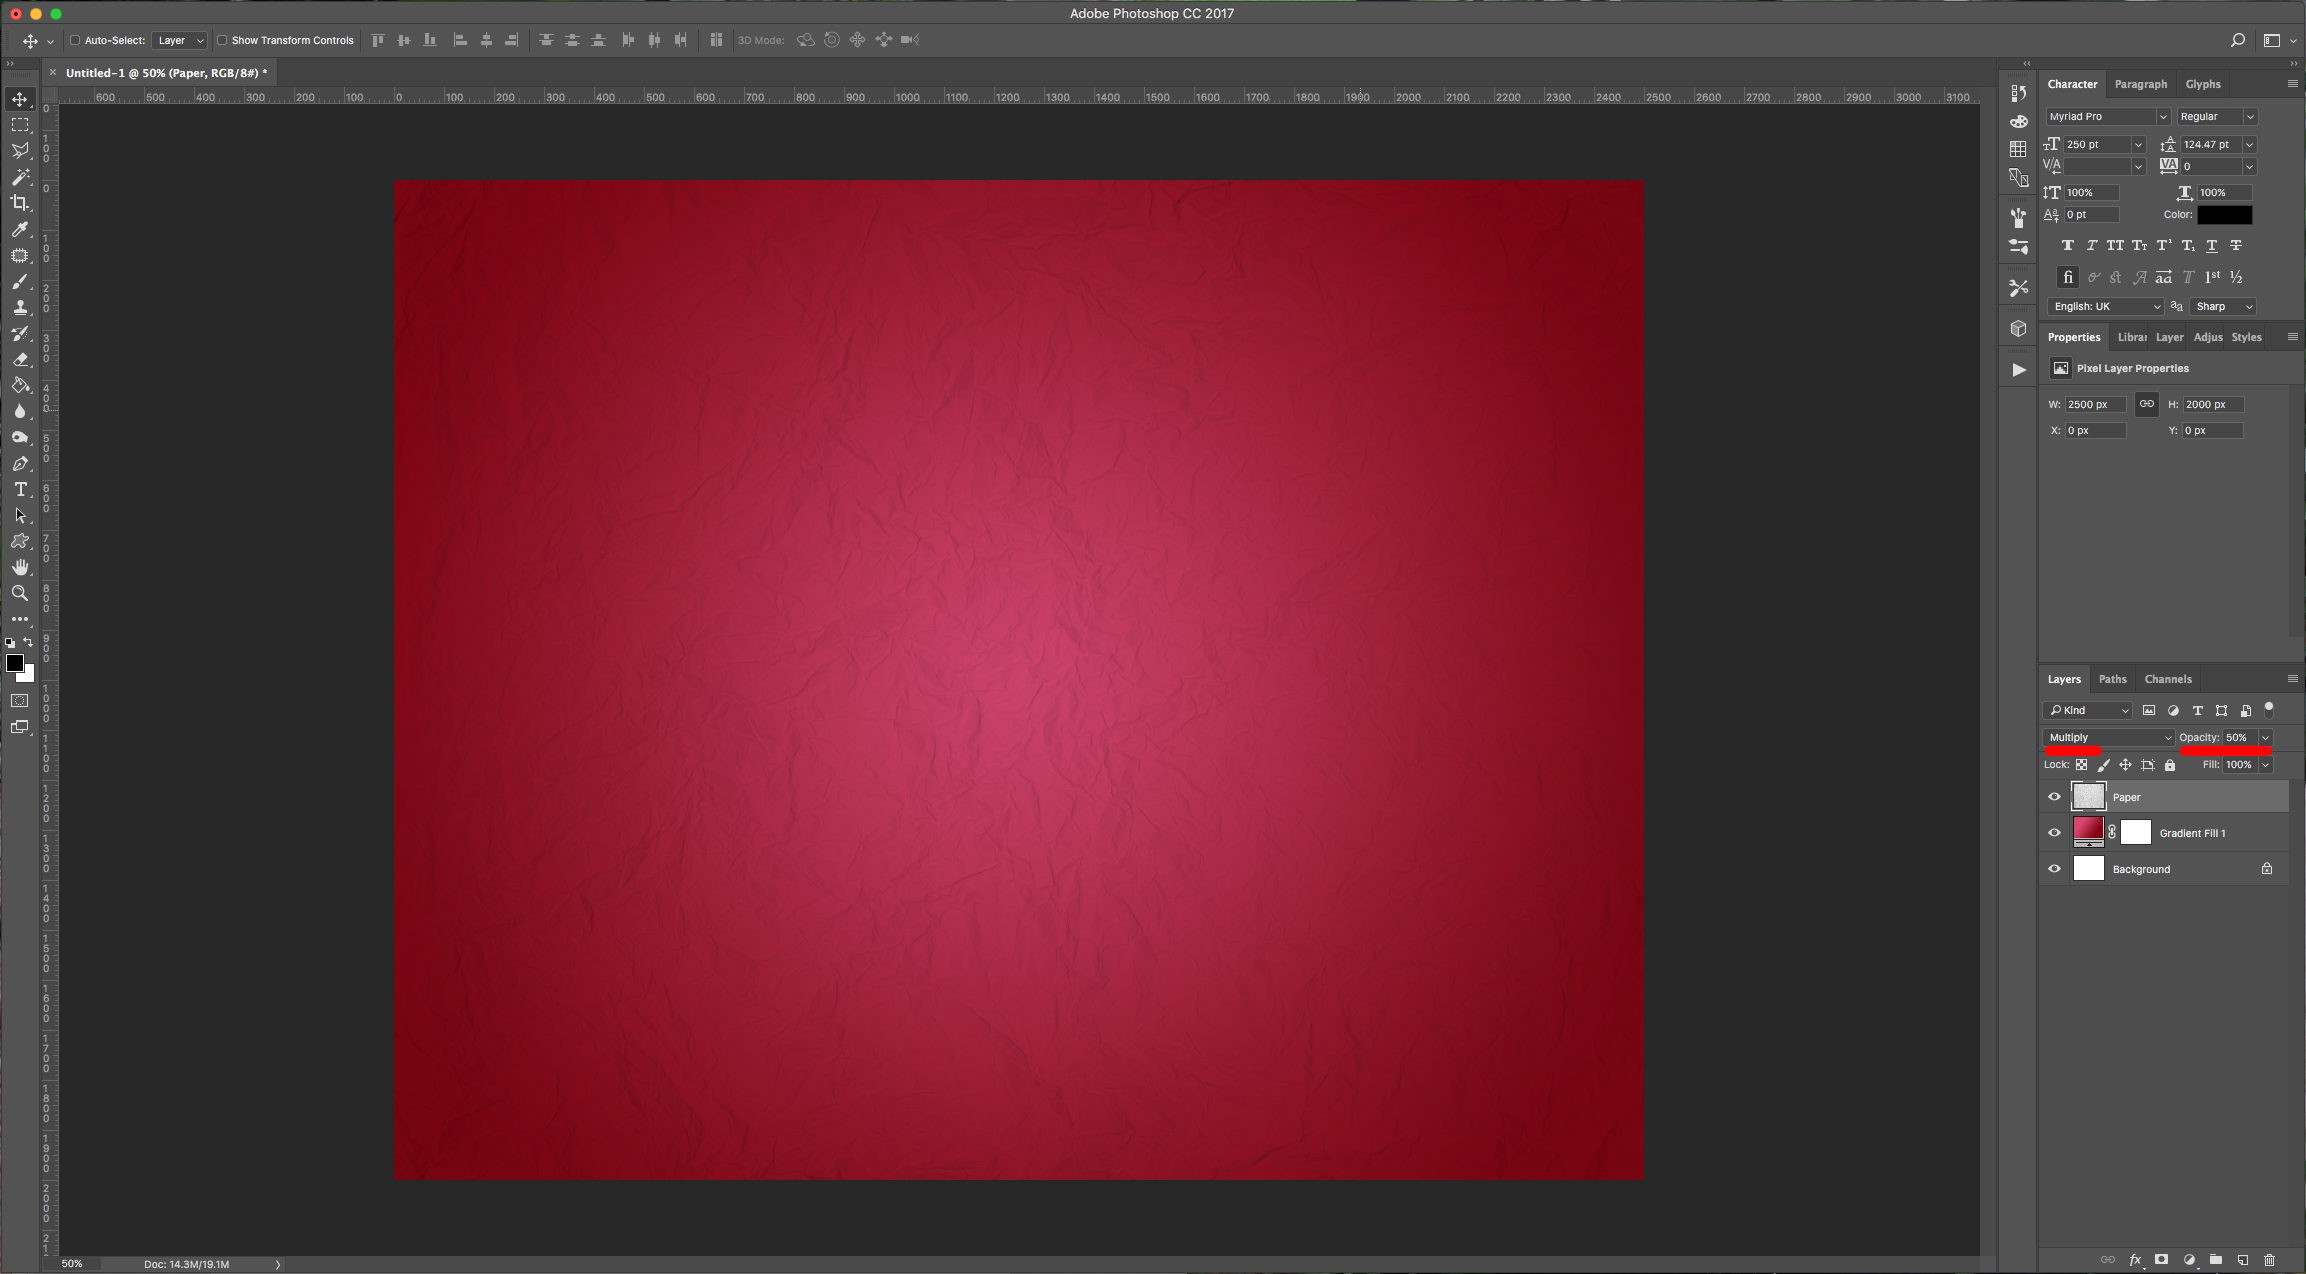
For this Tutorial, we will use an image of crumpled paper as a texture for our background. We will also use the Free Font Cupcakia by Tabita's shop.
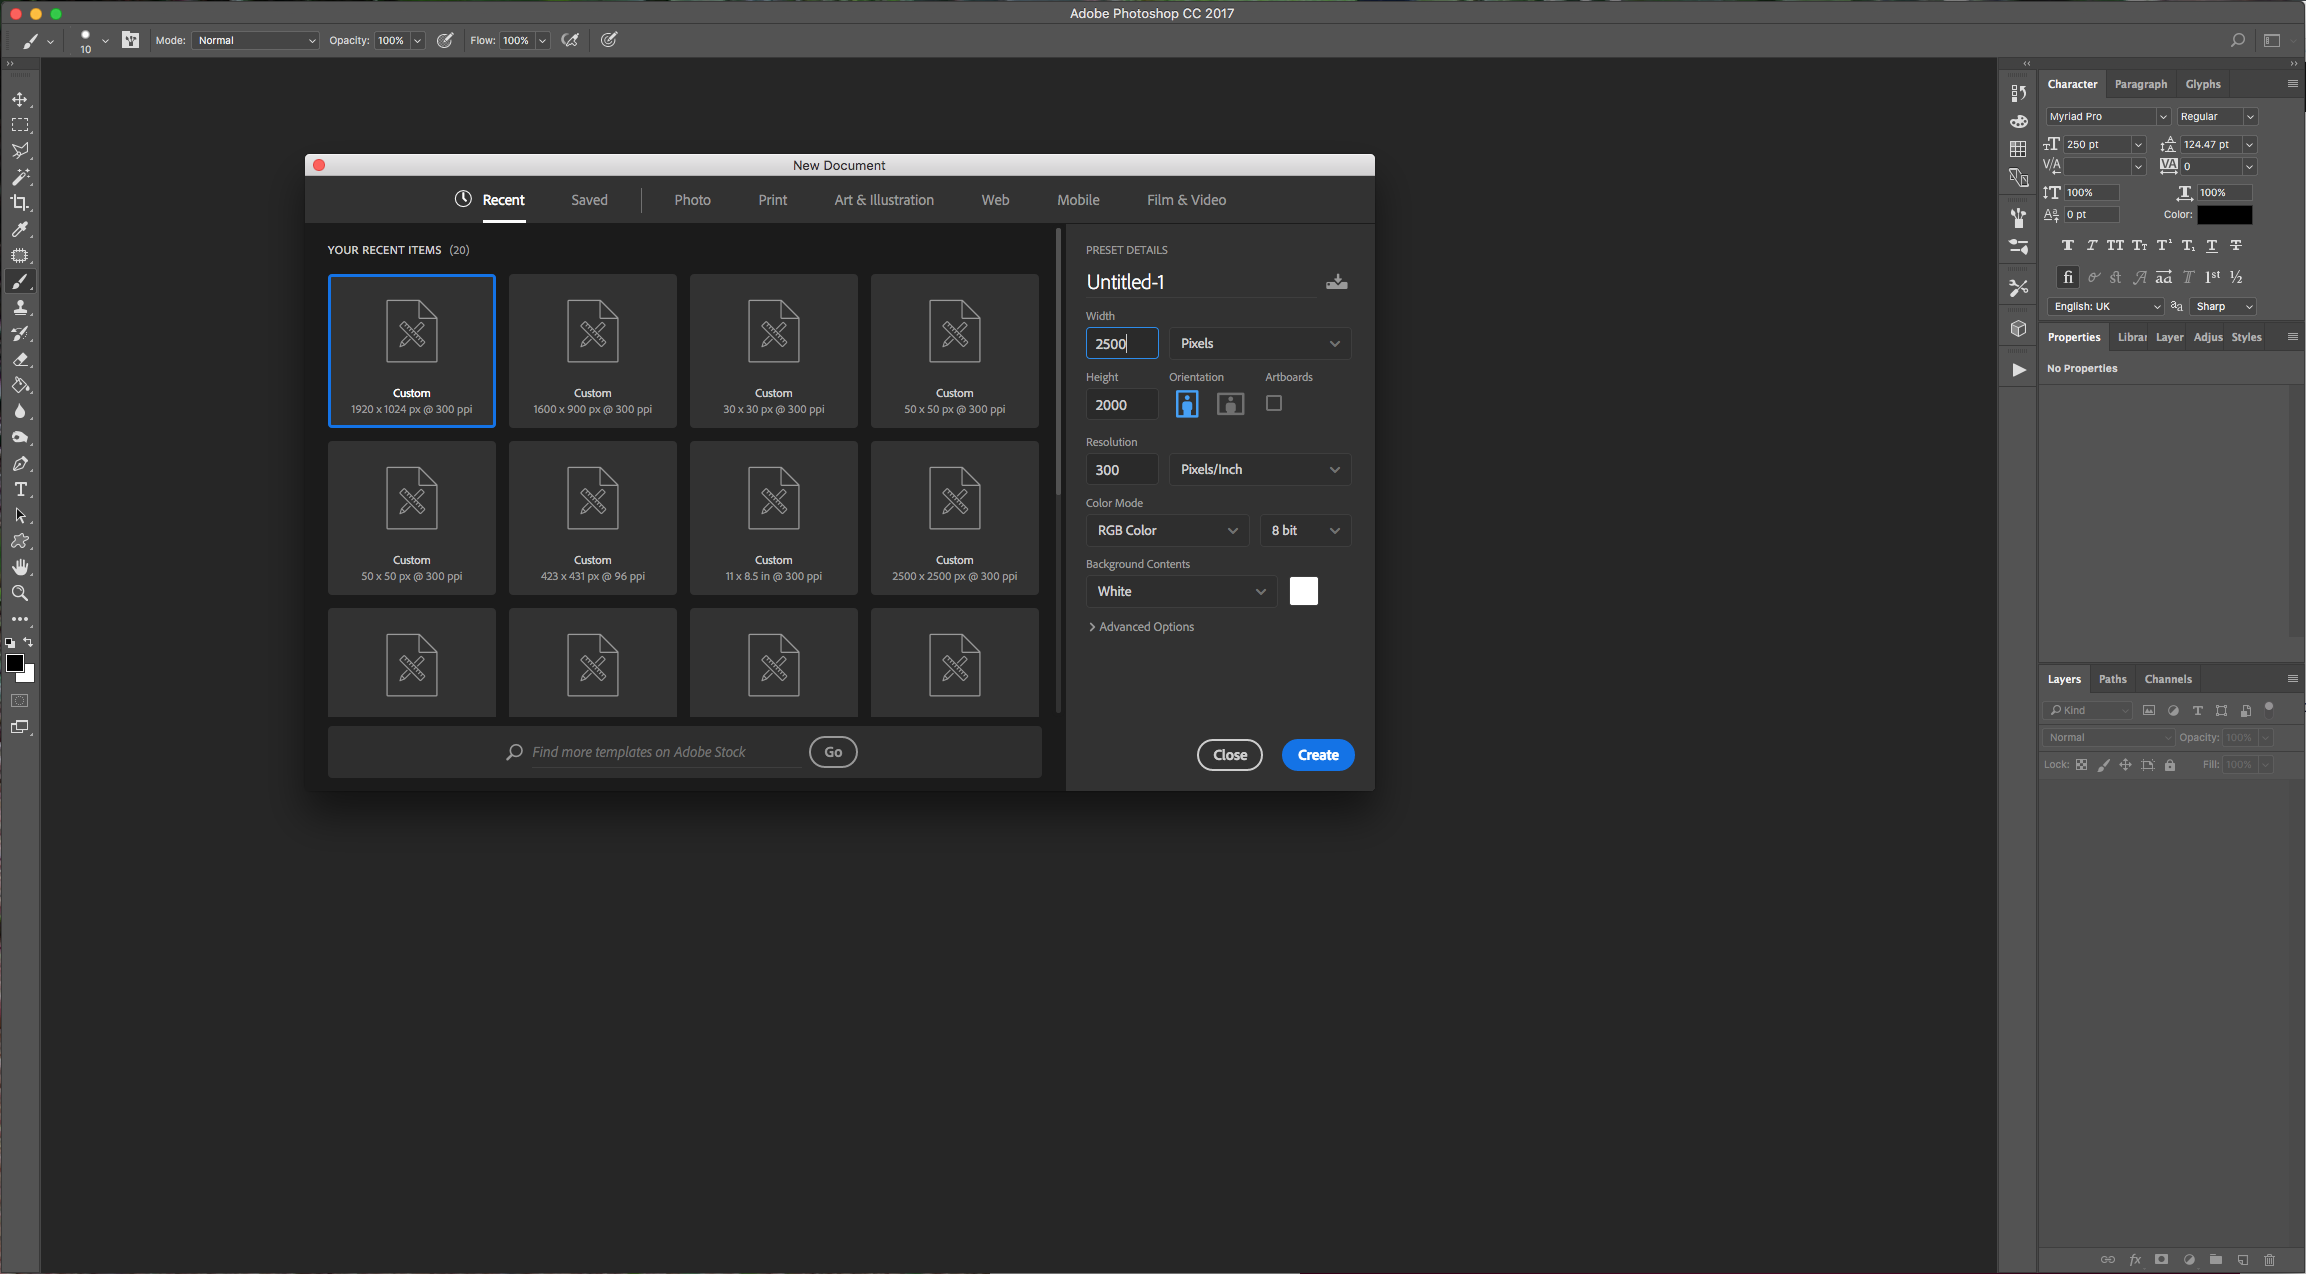
1 - Create a “New Document” in Photoshop. We made ours 2500 x 2000 Pixels, 300 Dpi.
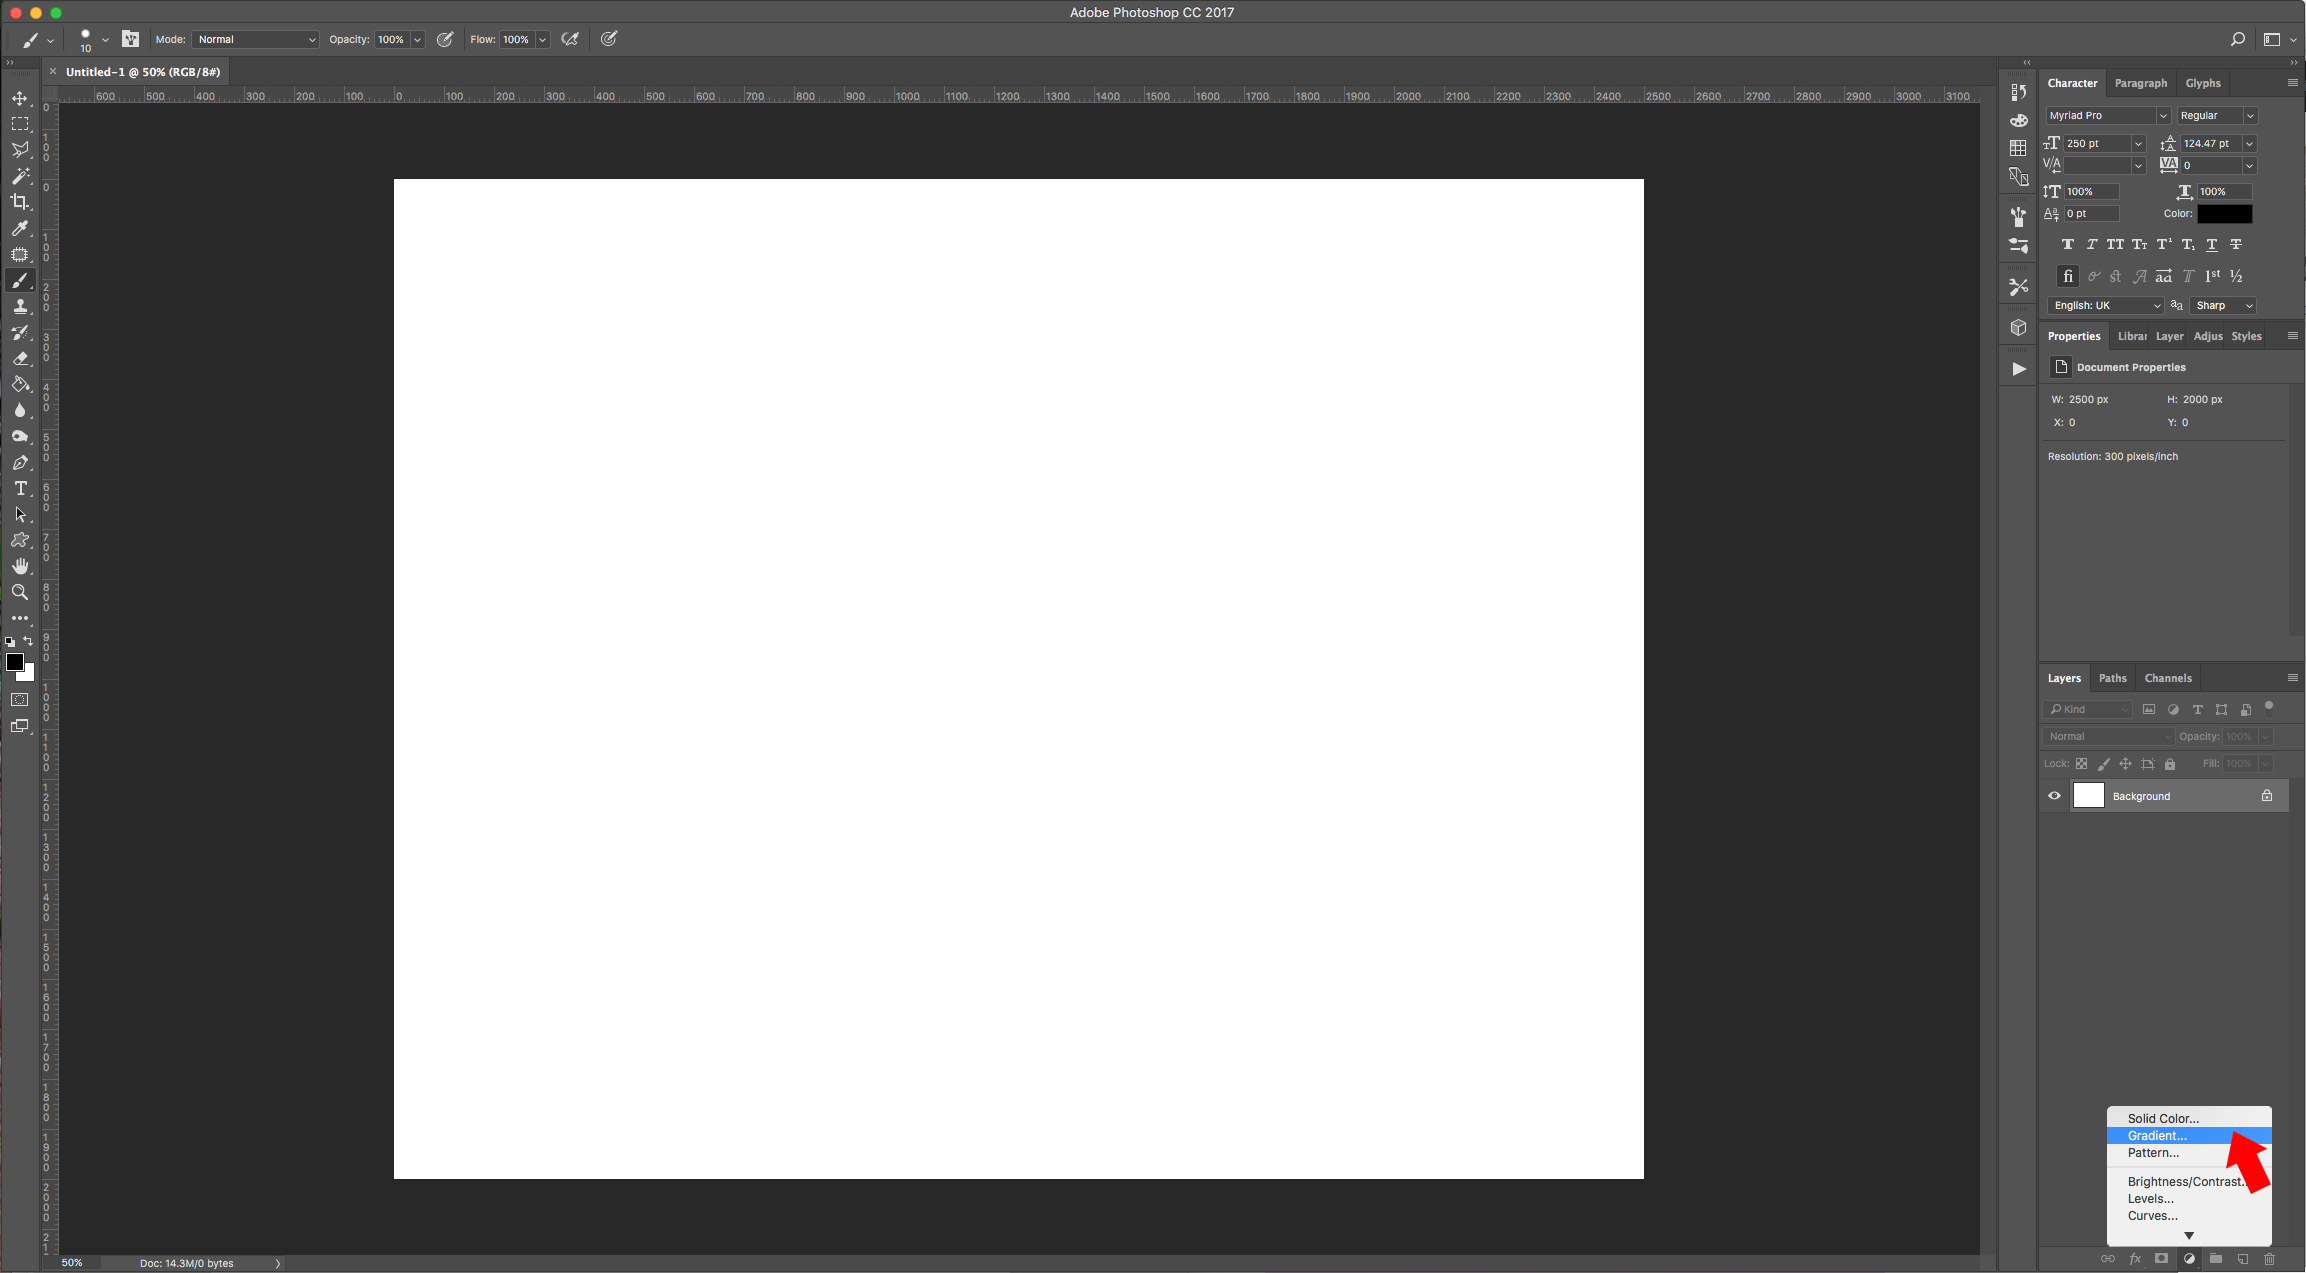
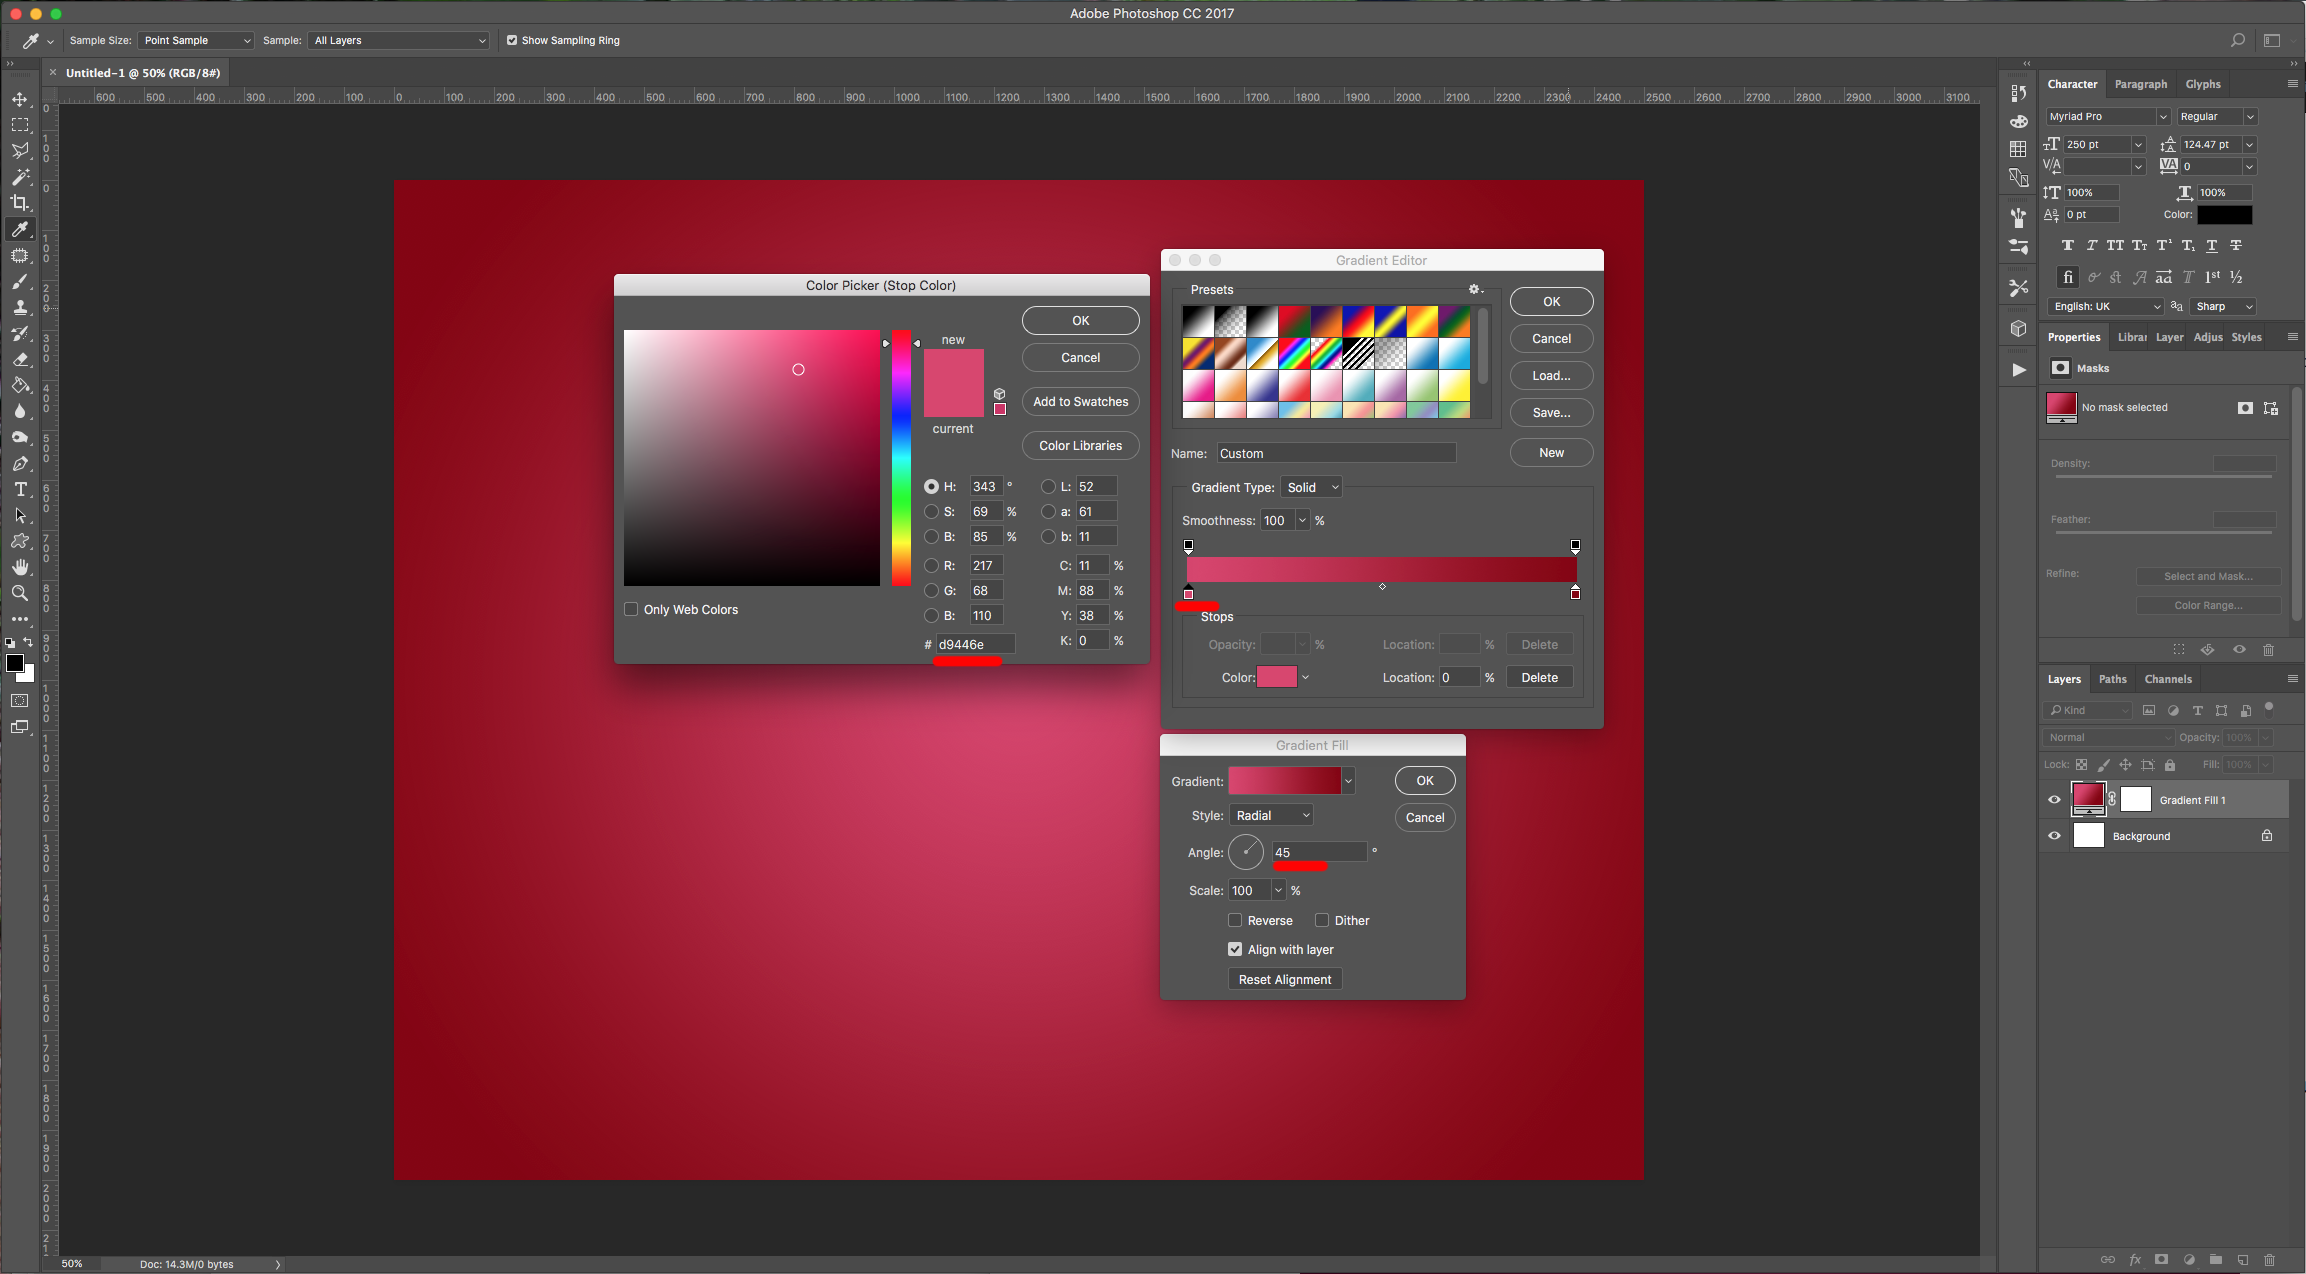
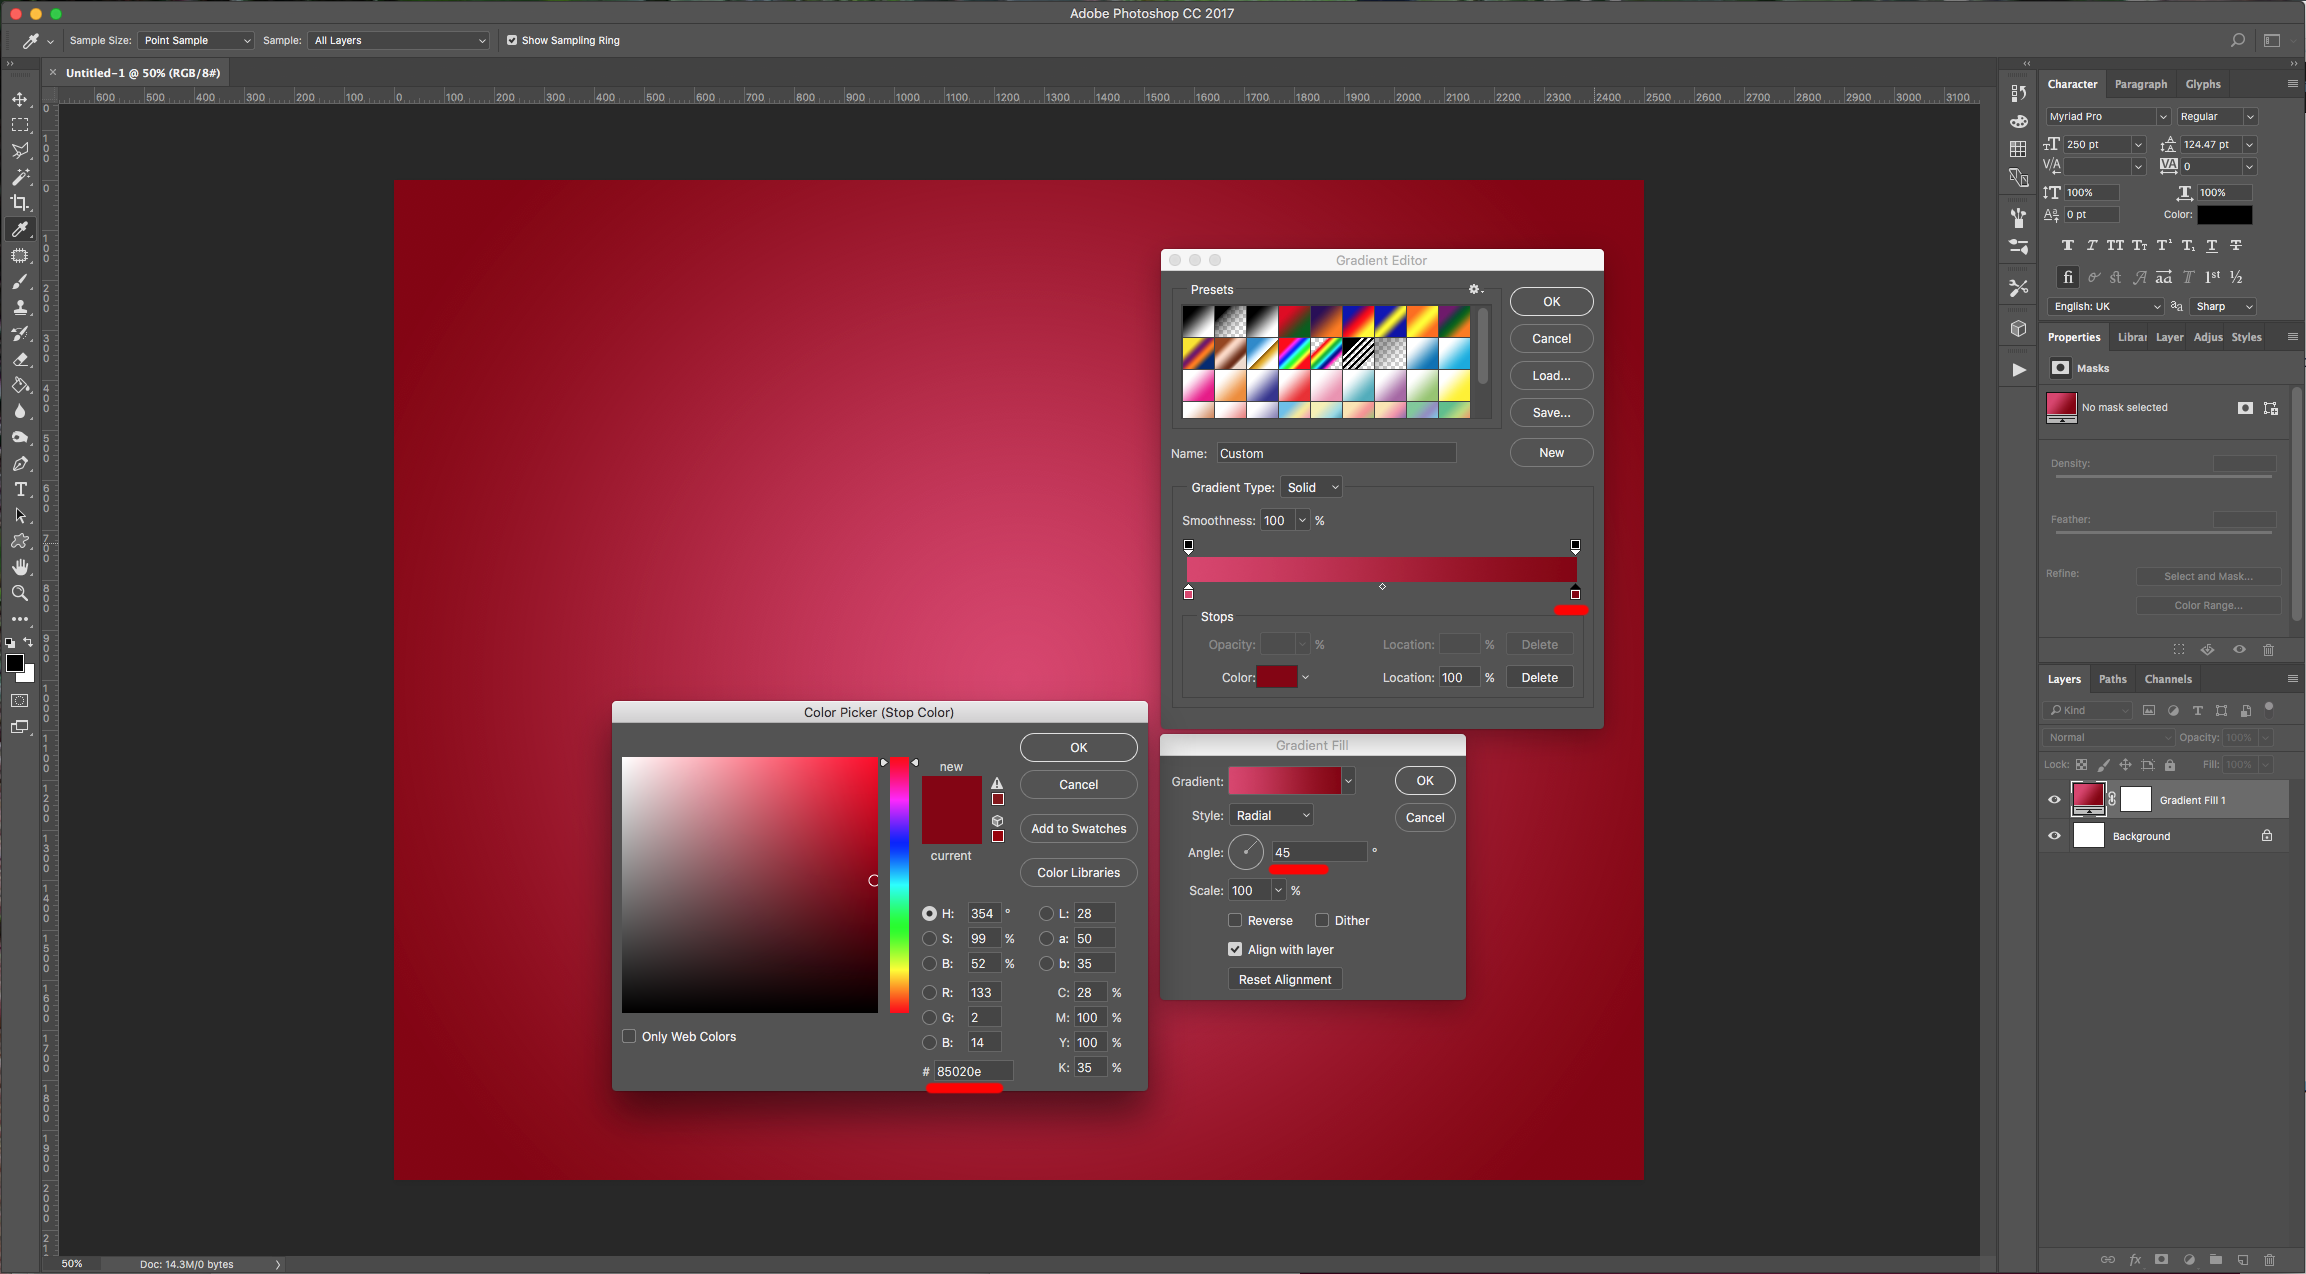
2 - Click on the “Create New Fill or Adjustment Layer” button at the bottom of the “Layers” Panel and create a new “Gradient Fill” Layer. Make it “Radial” with a 45° Angle. We used the colors #d9446e and #85020e.
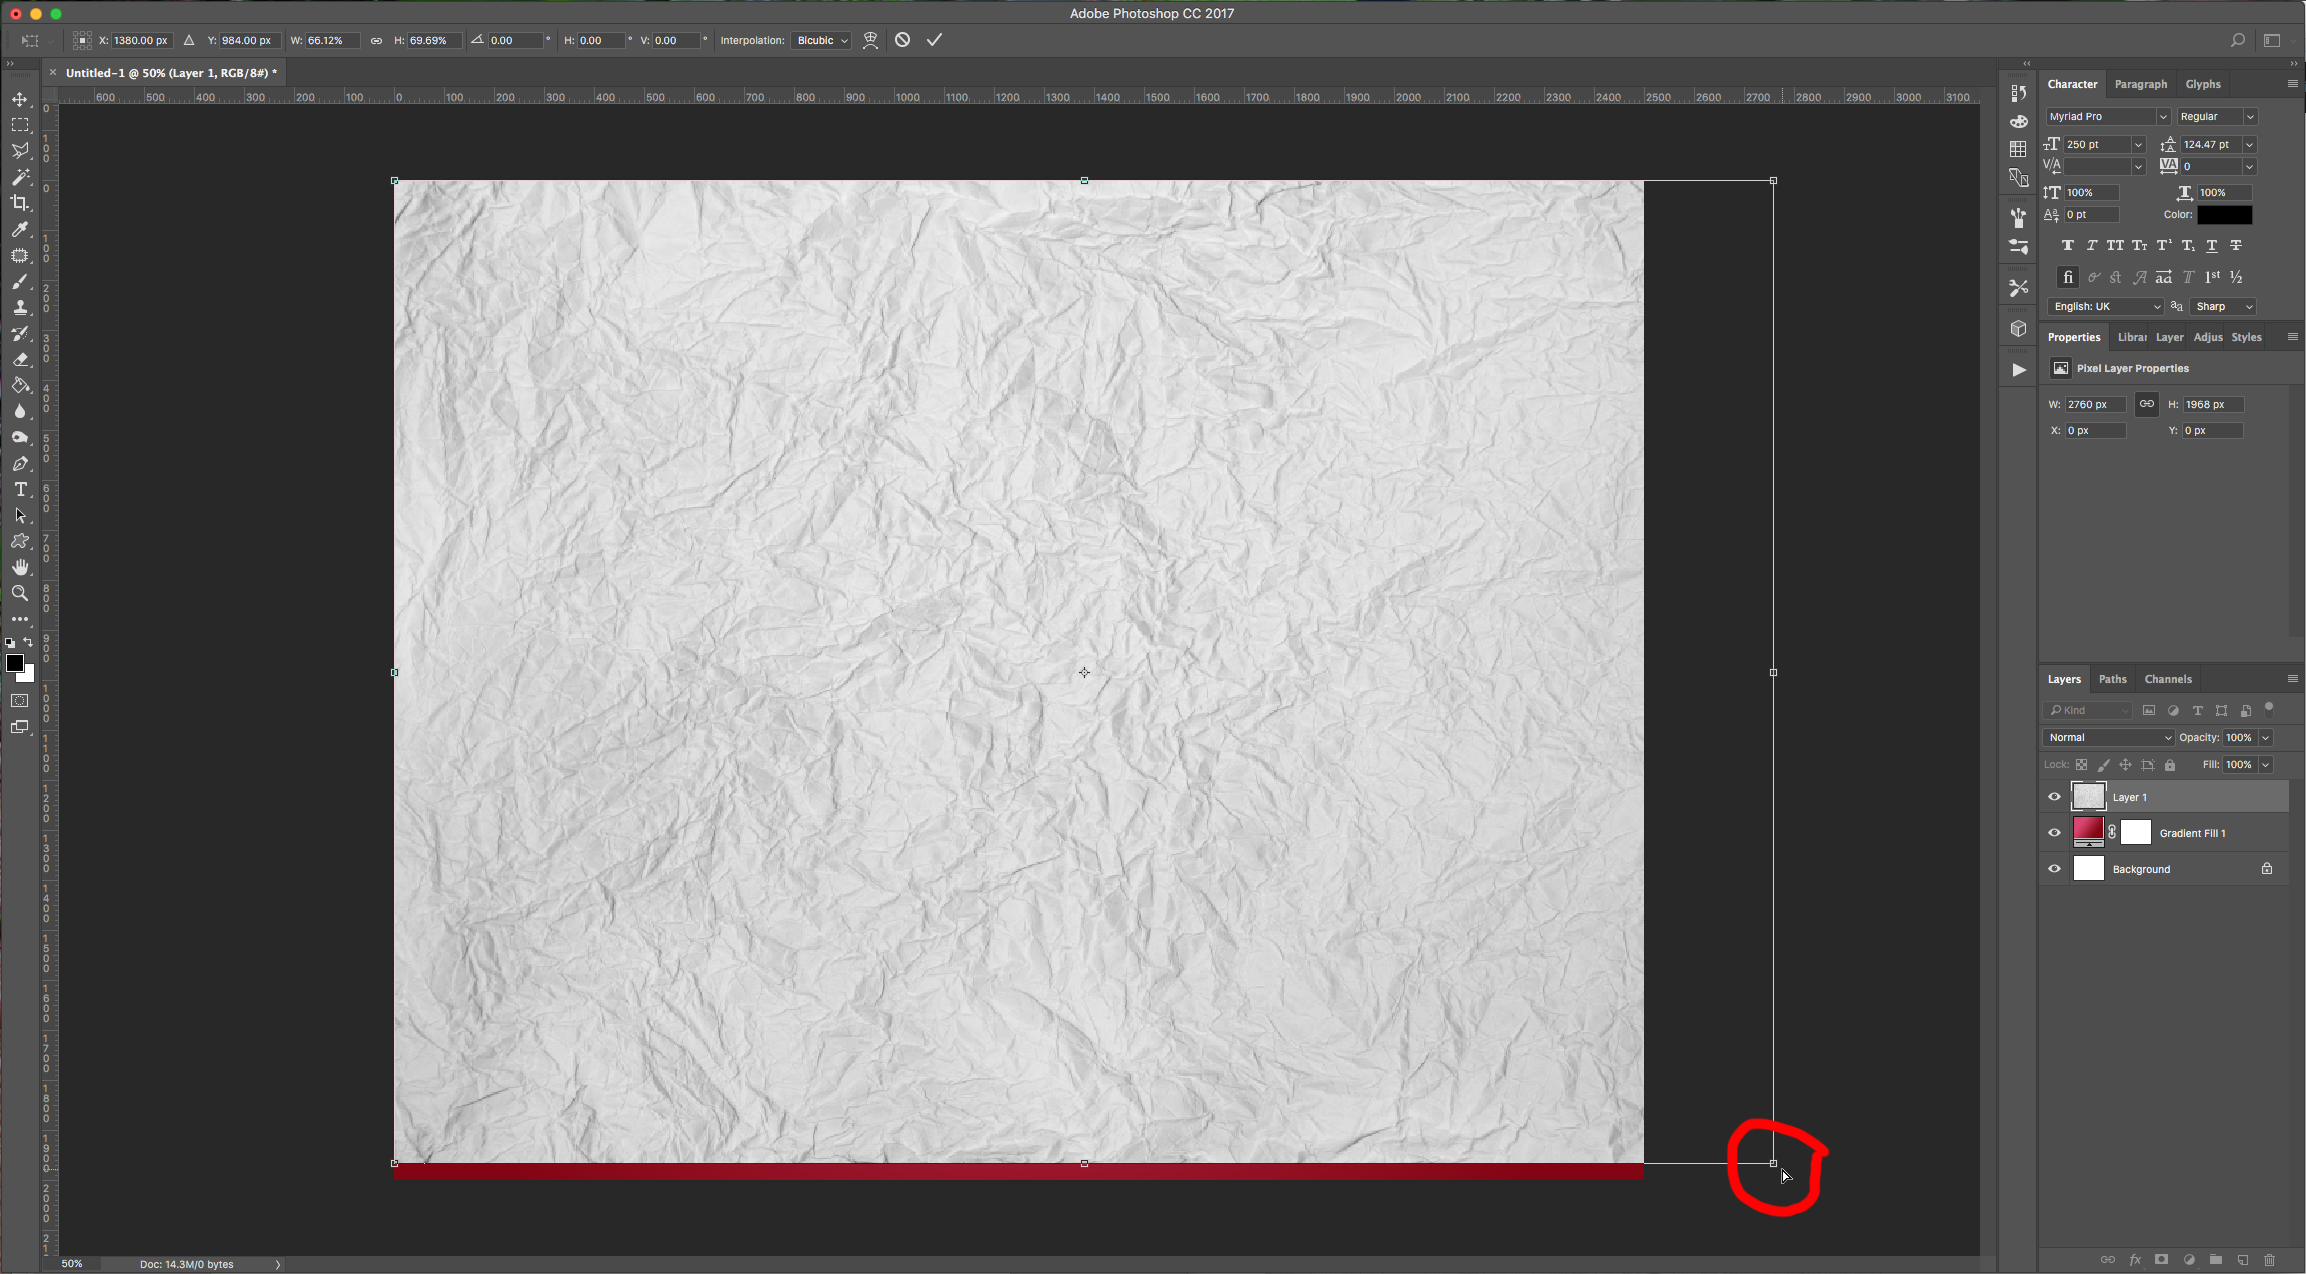
3 - Open the image you chose to use as Background Texture, drag it (or Paste it) into your document and resize it if needed using the “Free Transform” Tool” (Command/Control + T). Once you are happy, click “Enter”, then change the “Blending Mode” to “Multiply” and the “Opacity” to 50%.
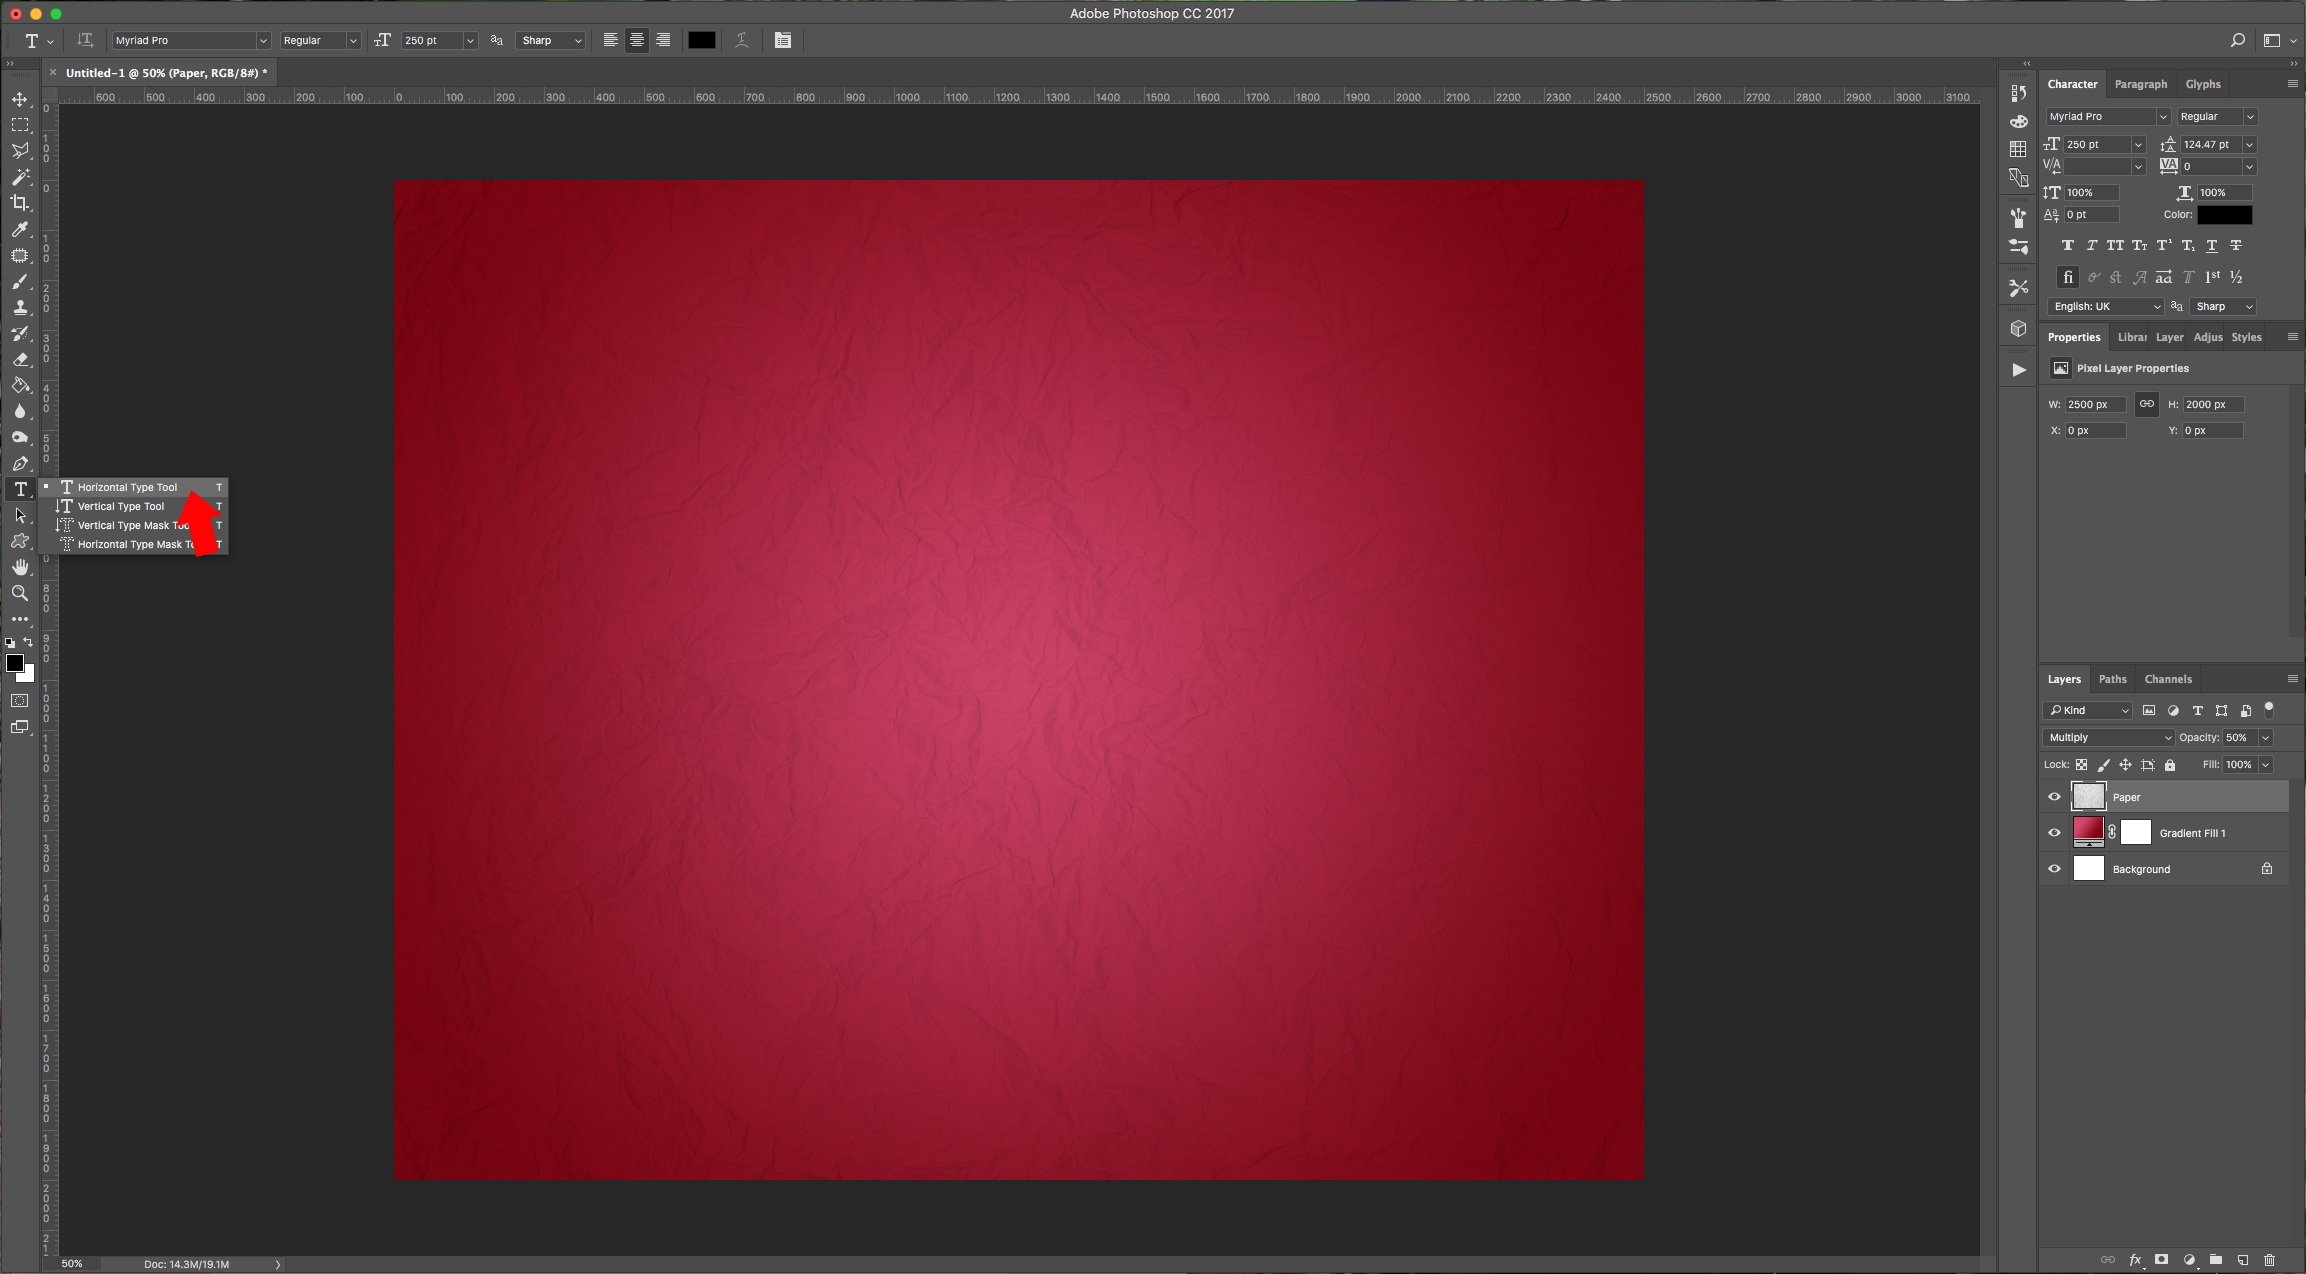
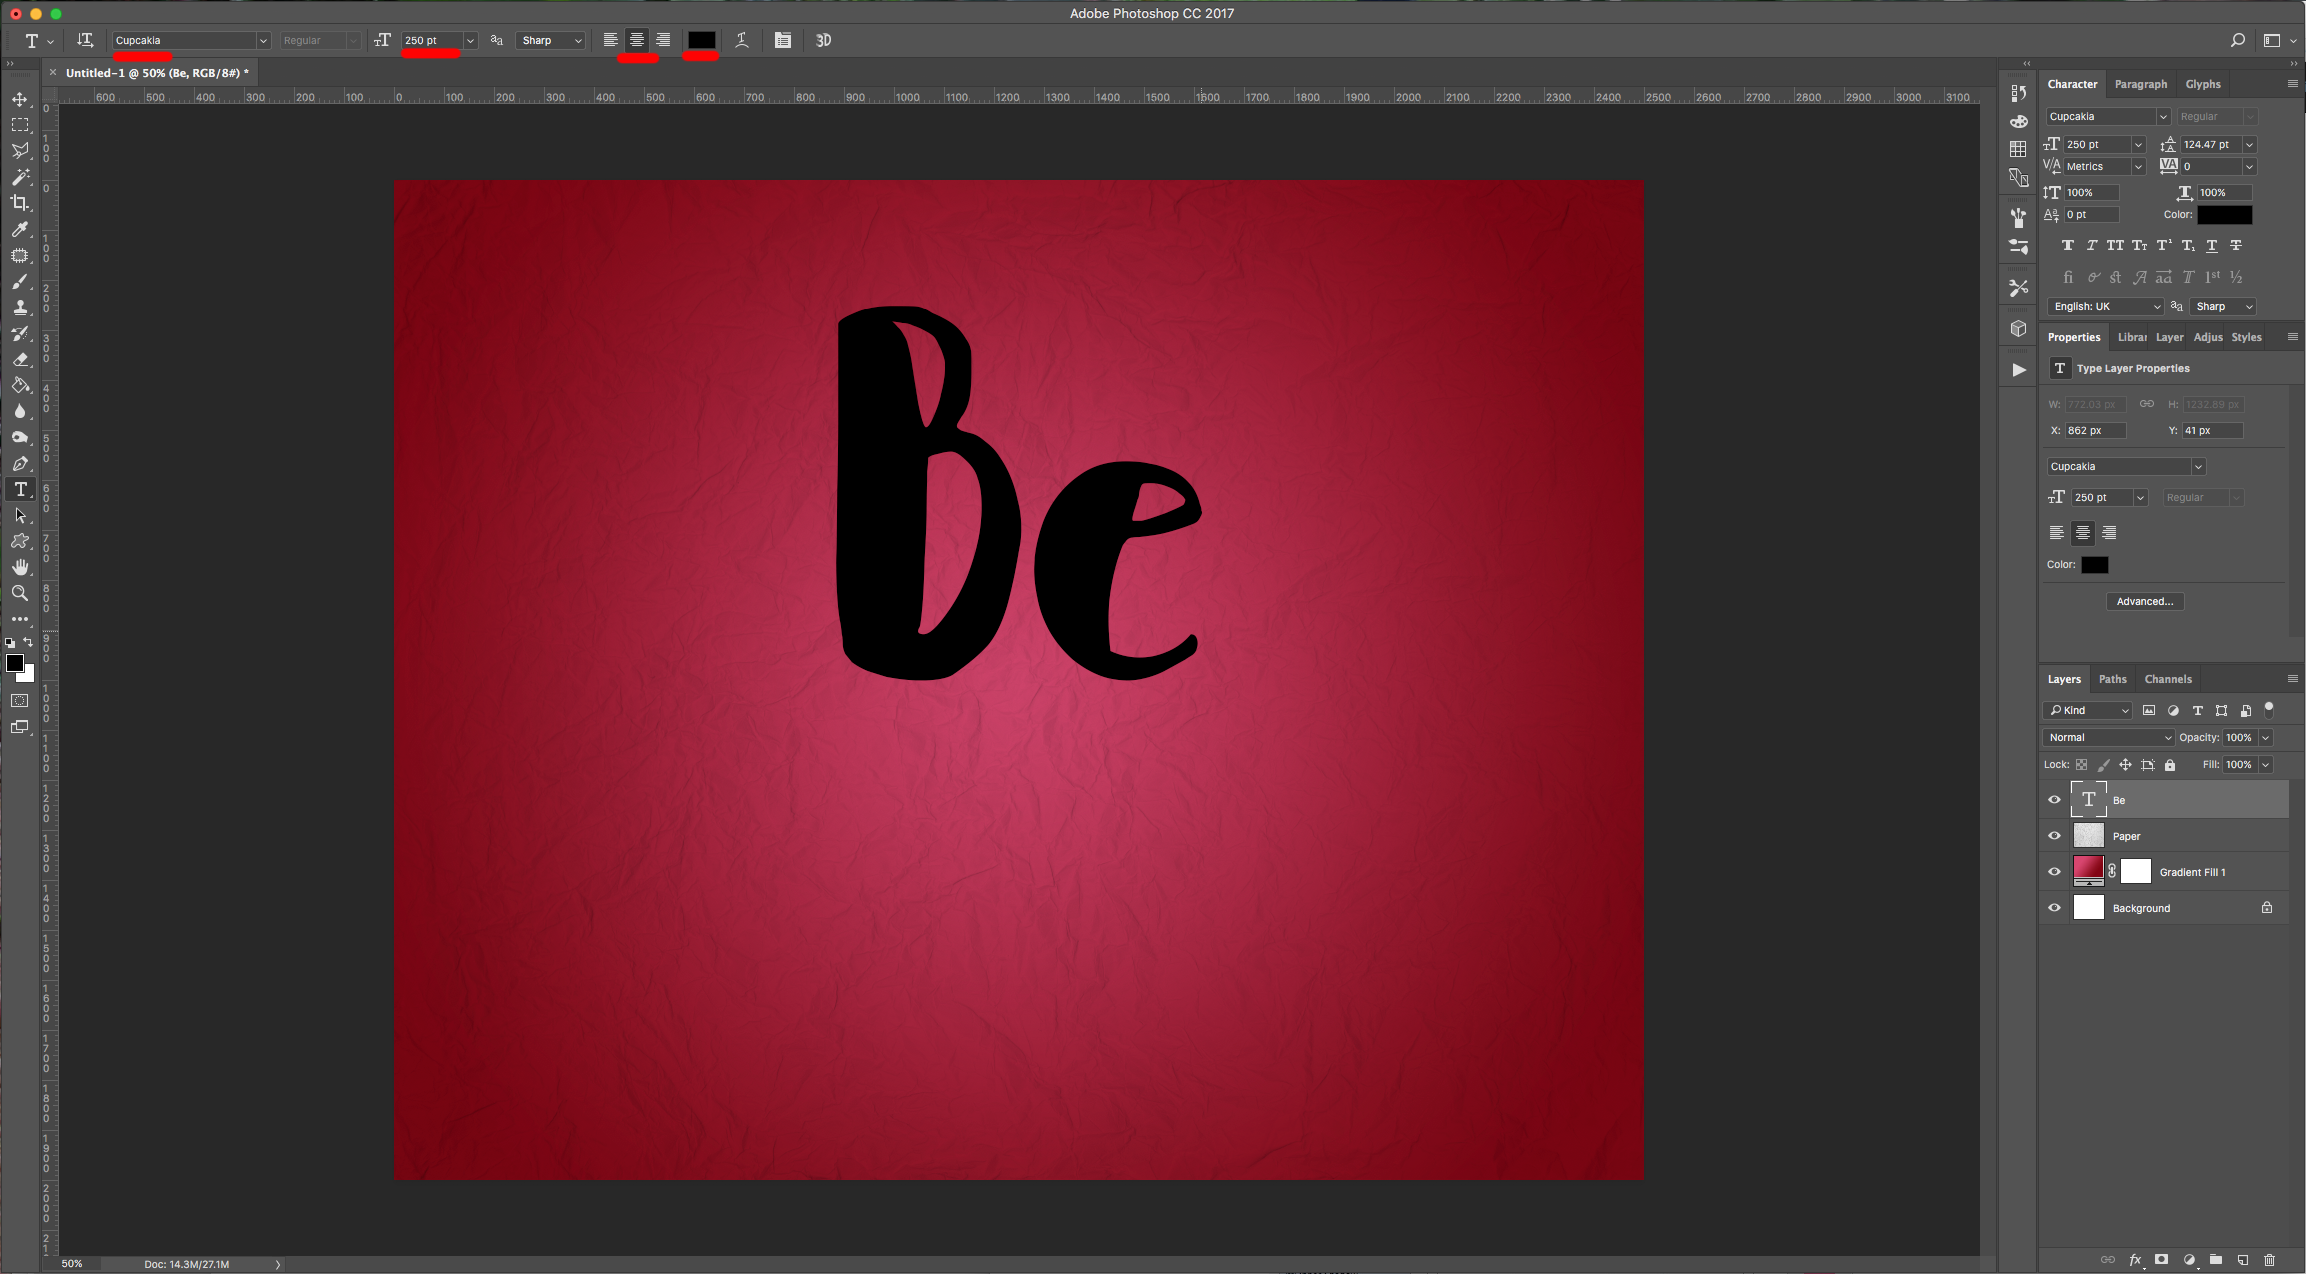
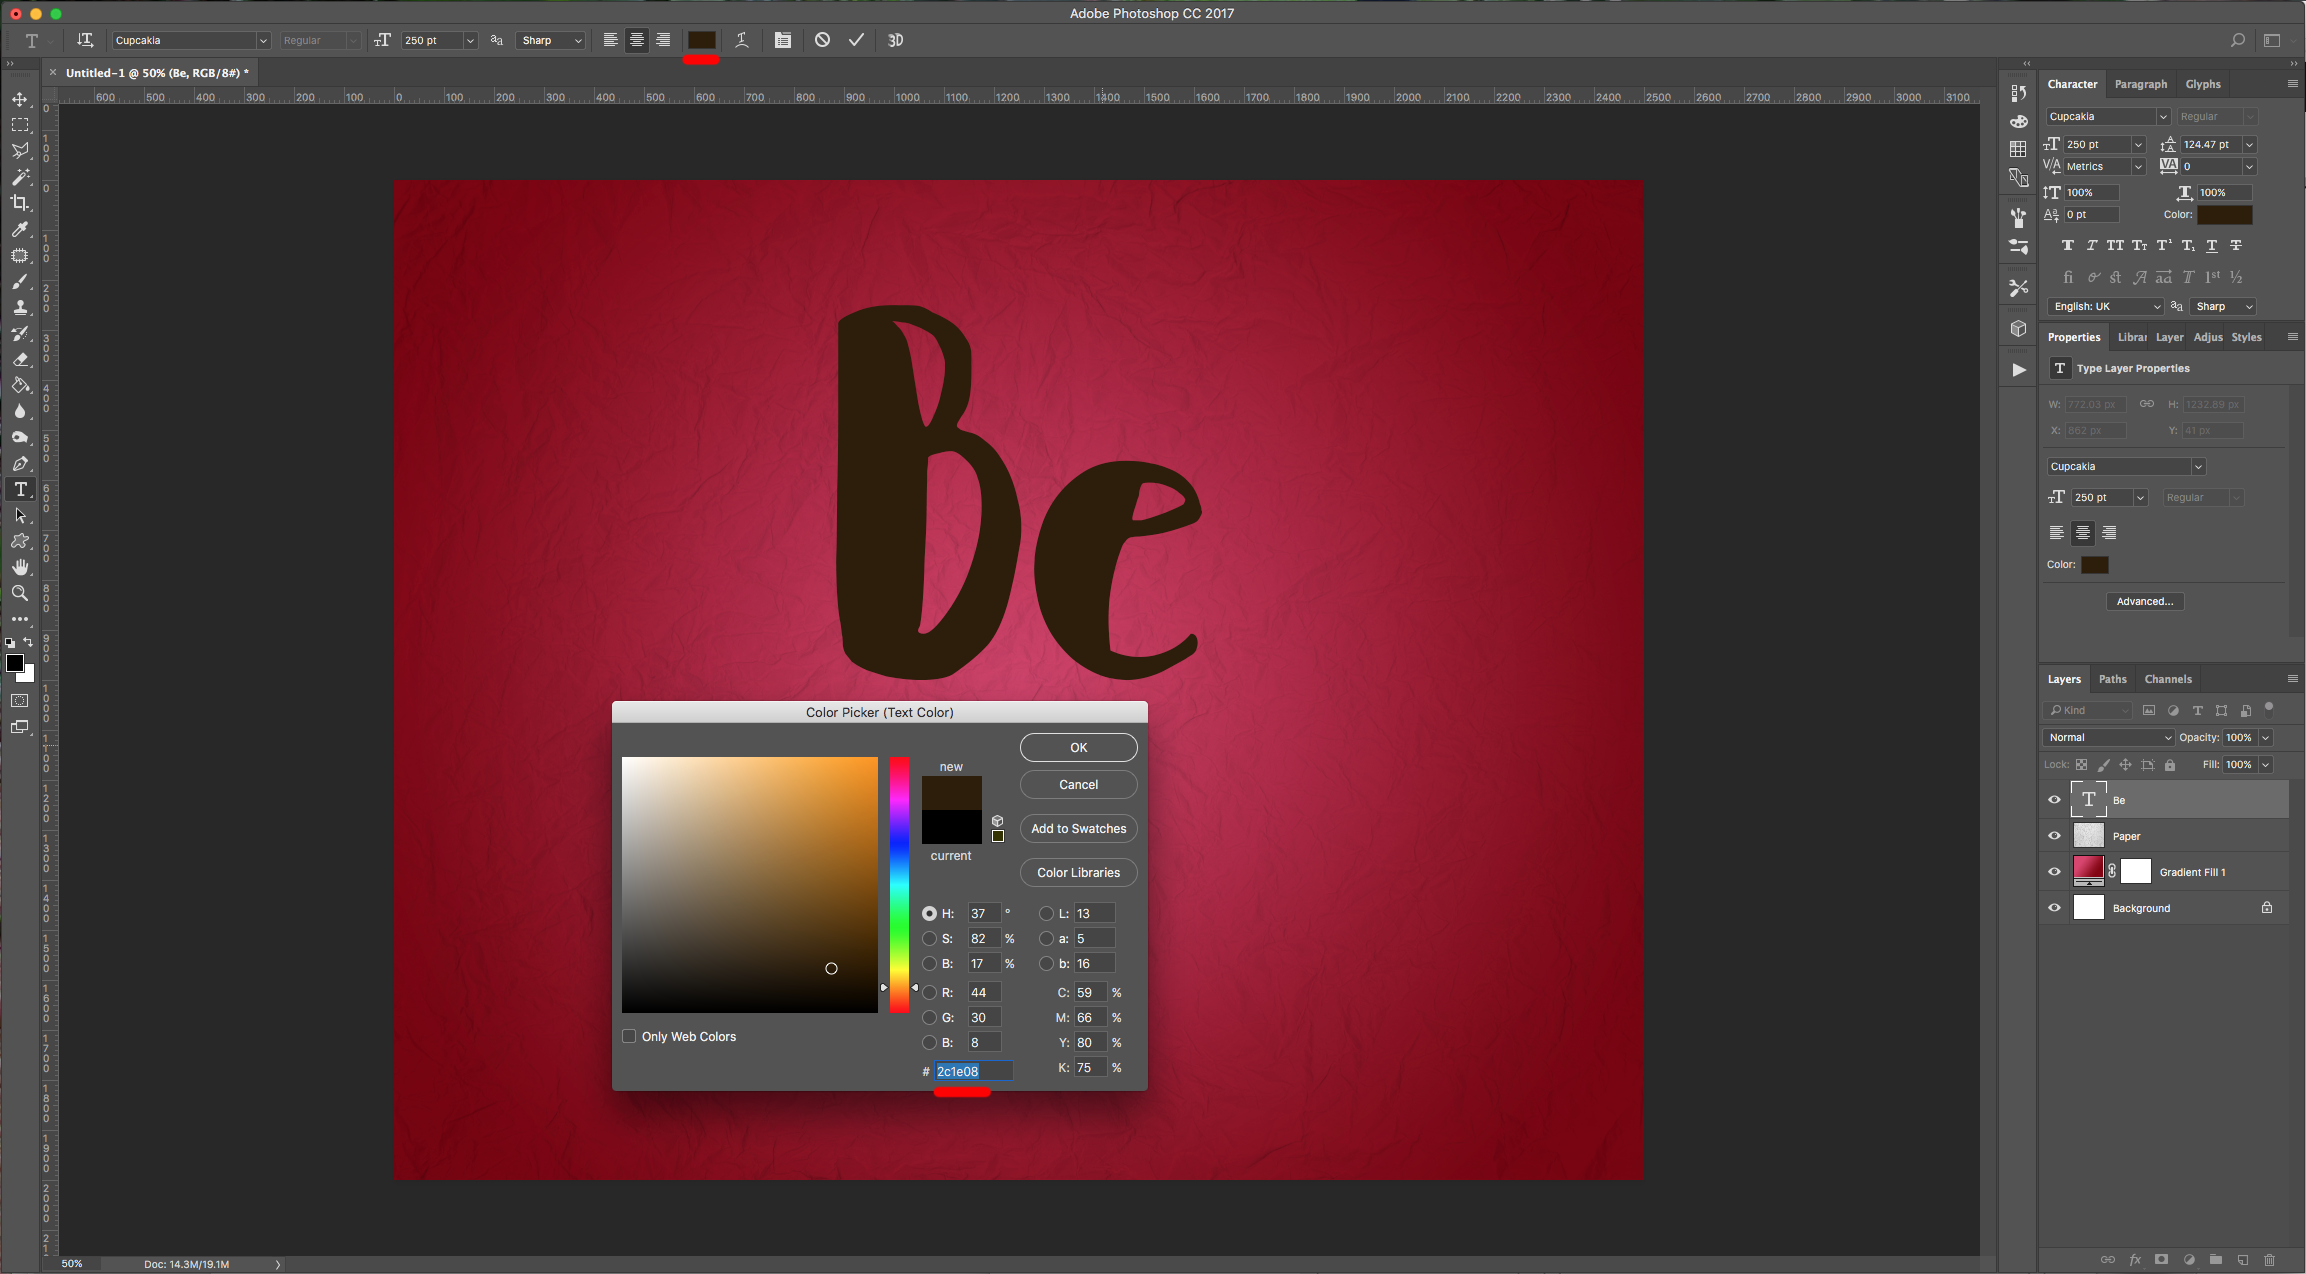
4 - Select the “Type Tool” (T), choose your font (we used Cupcakia) and type your text use #2c1e08 as “Fill” color.
5 - Double-click on your text layer and apply the following “Layer Styles”:
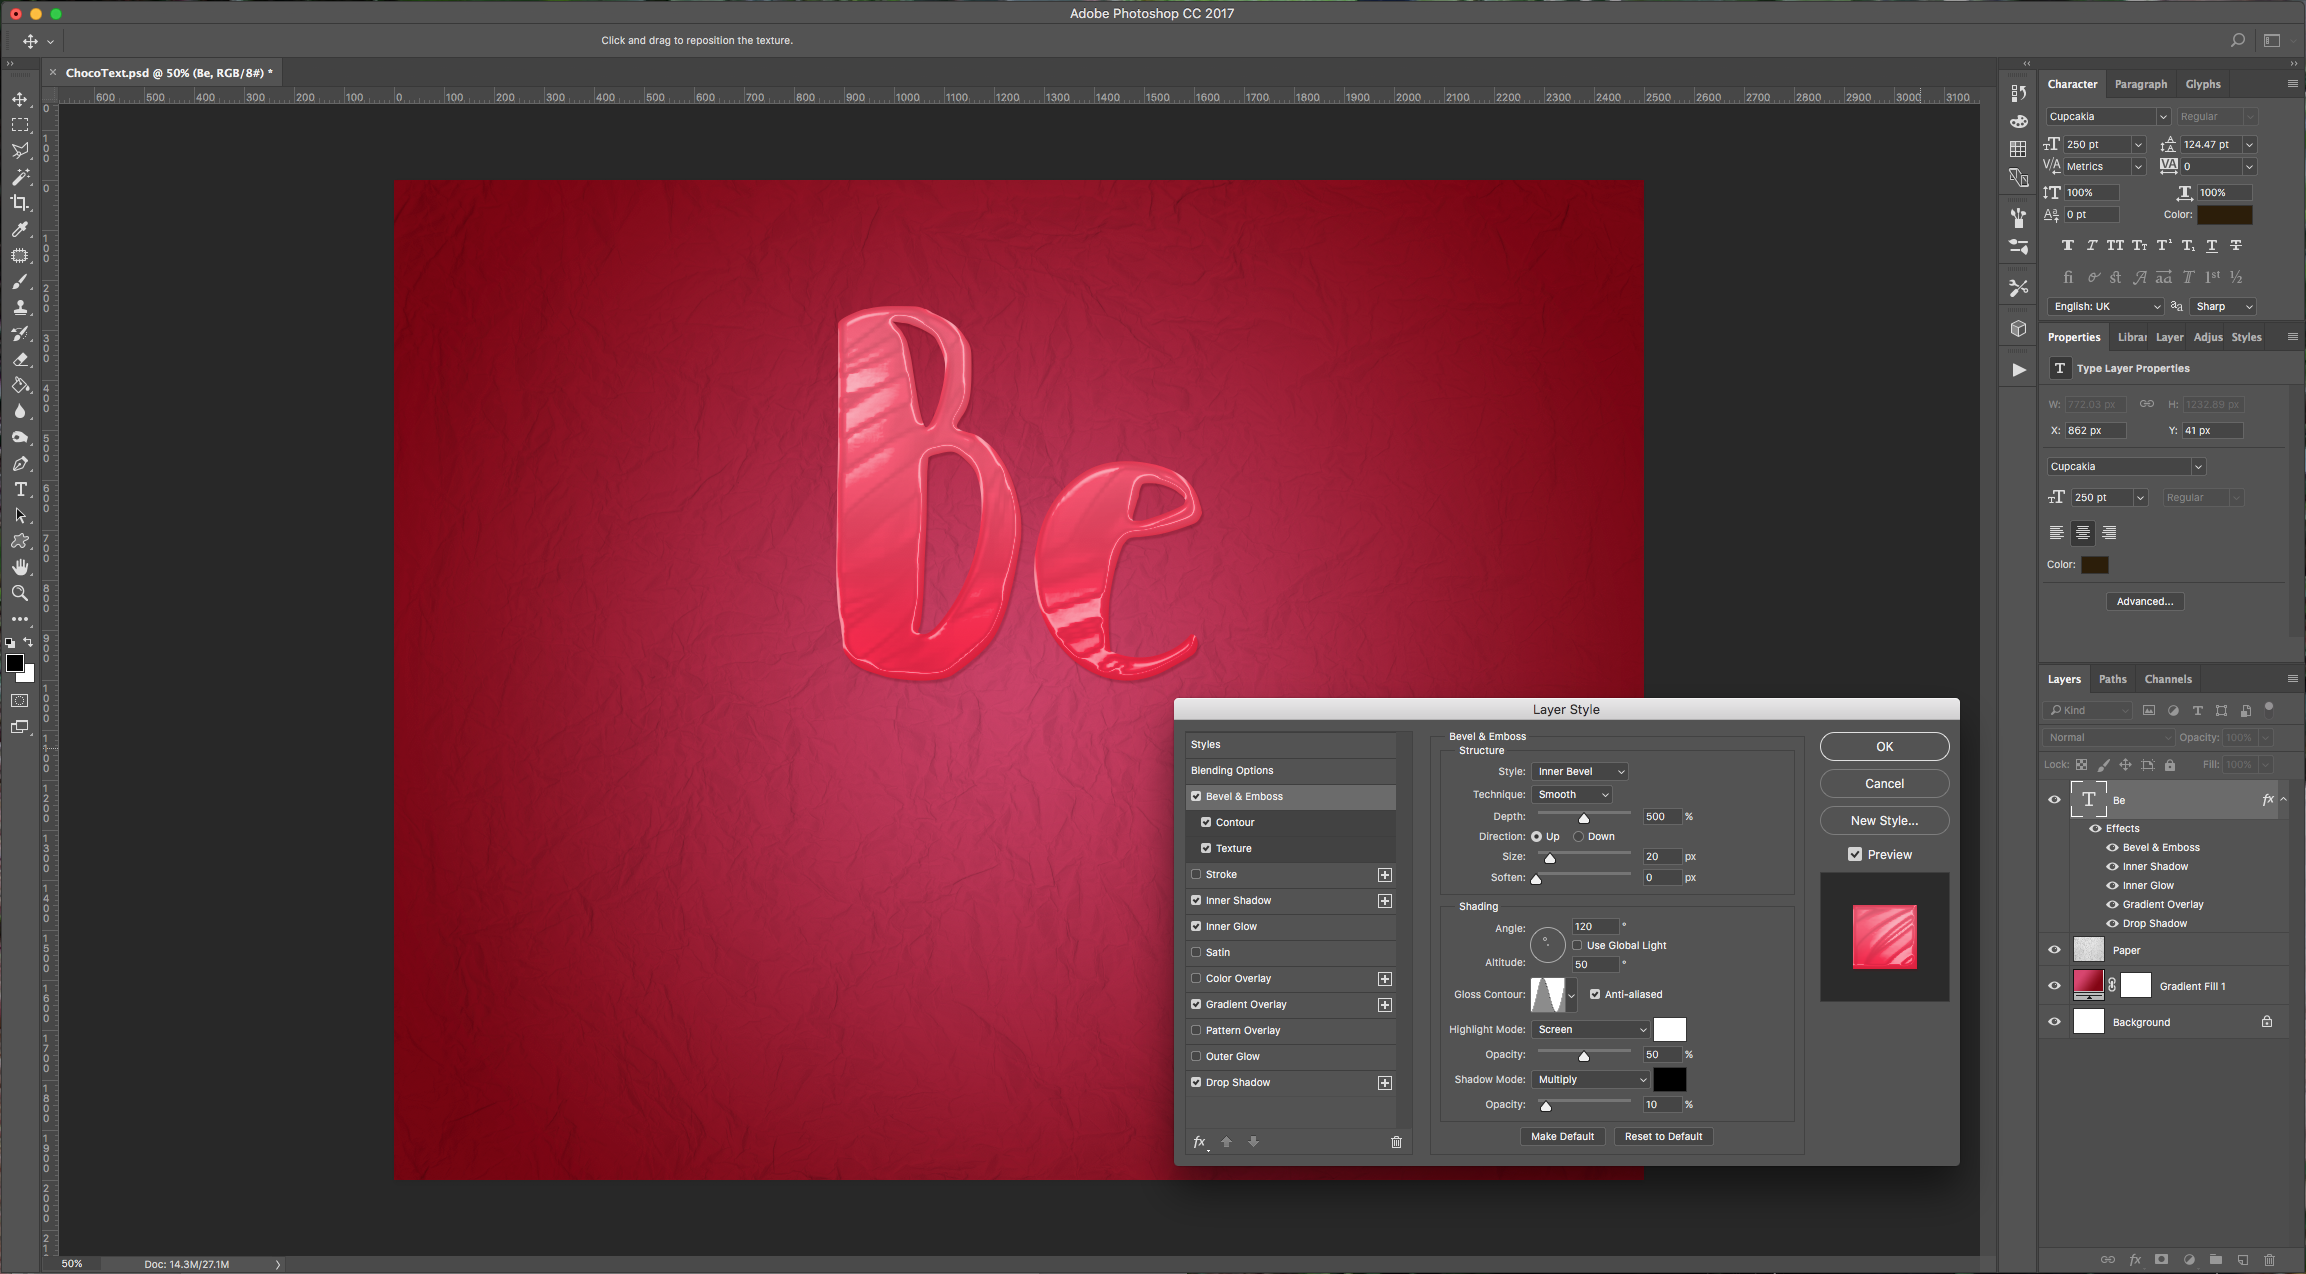
Bevel & Emboss: (Gloss Contour: Ring)
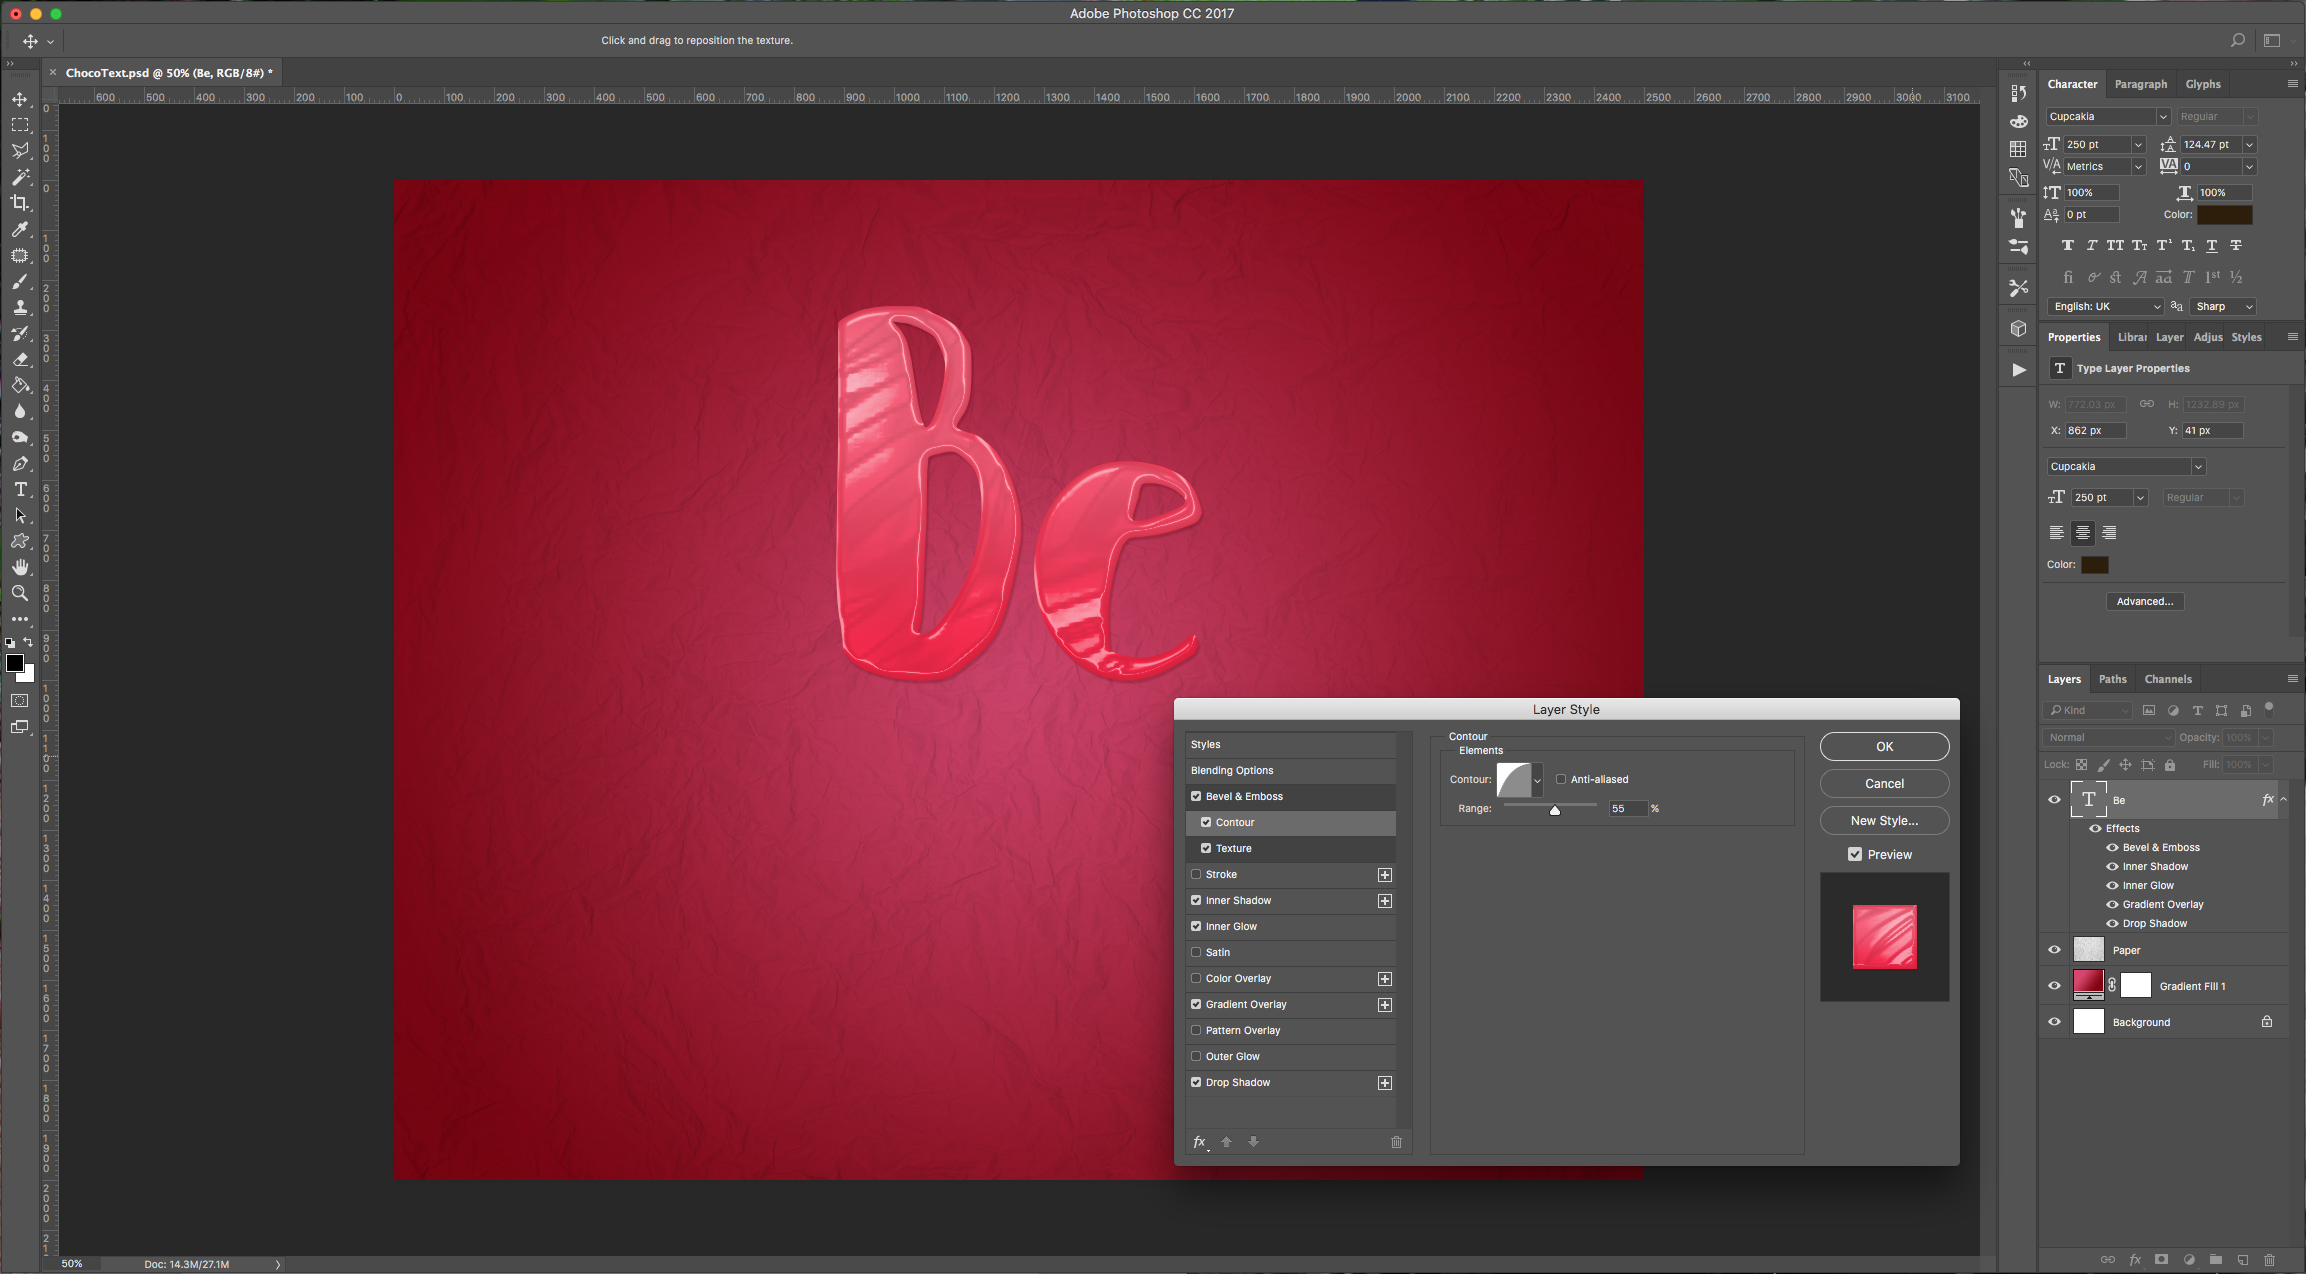
Contour: (Contour: Half Round)
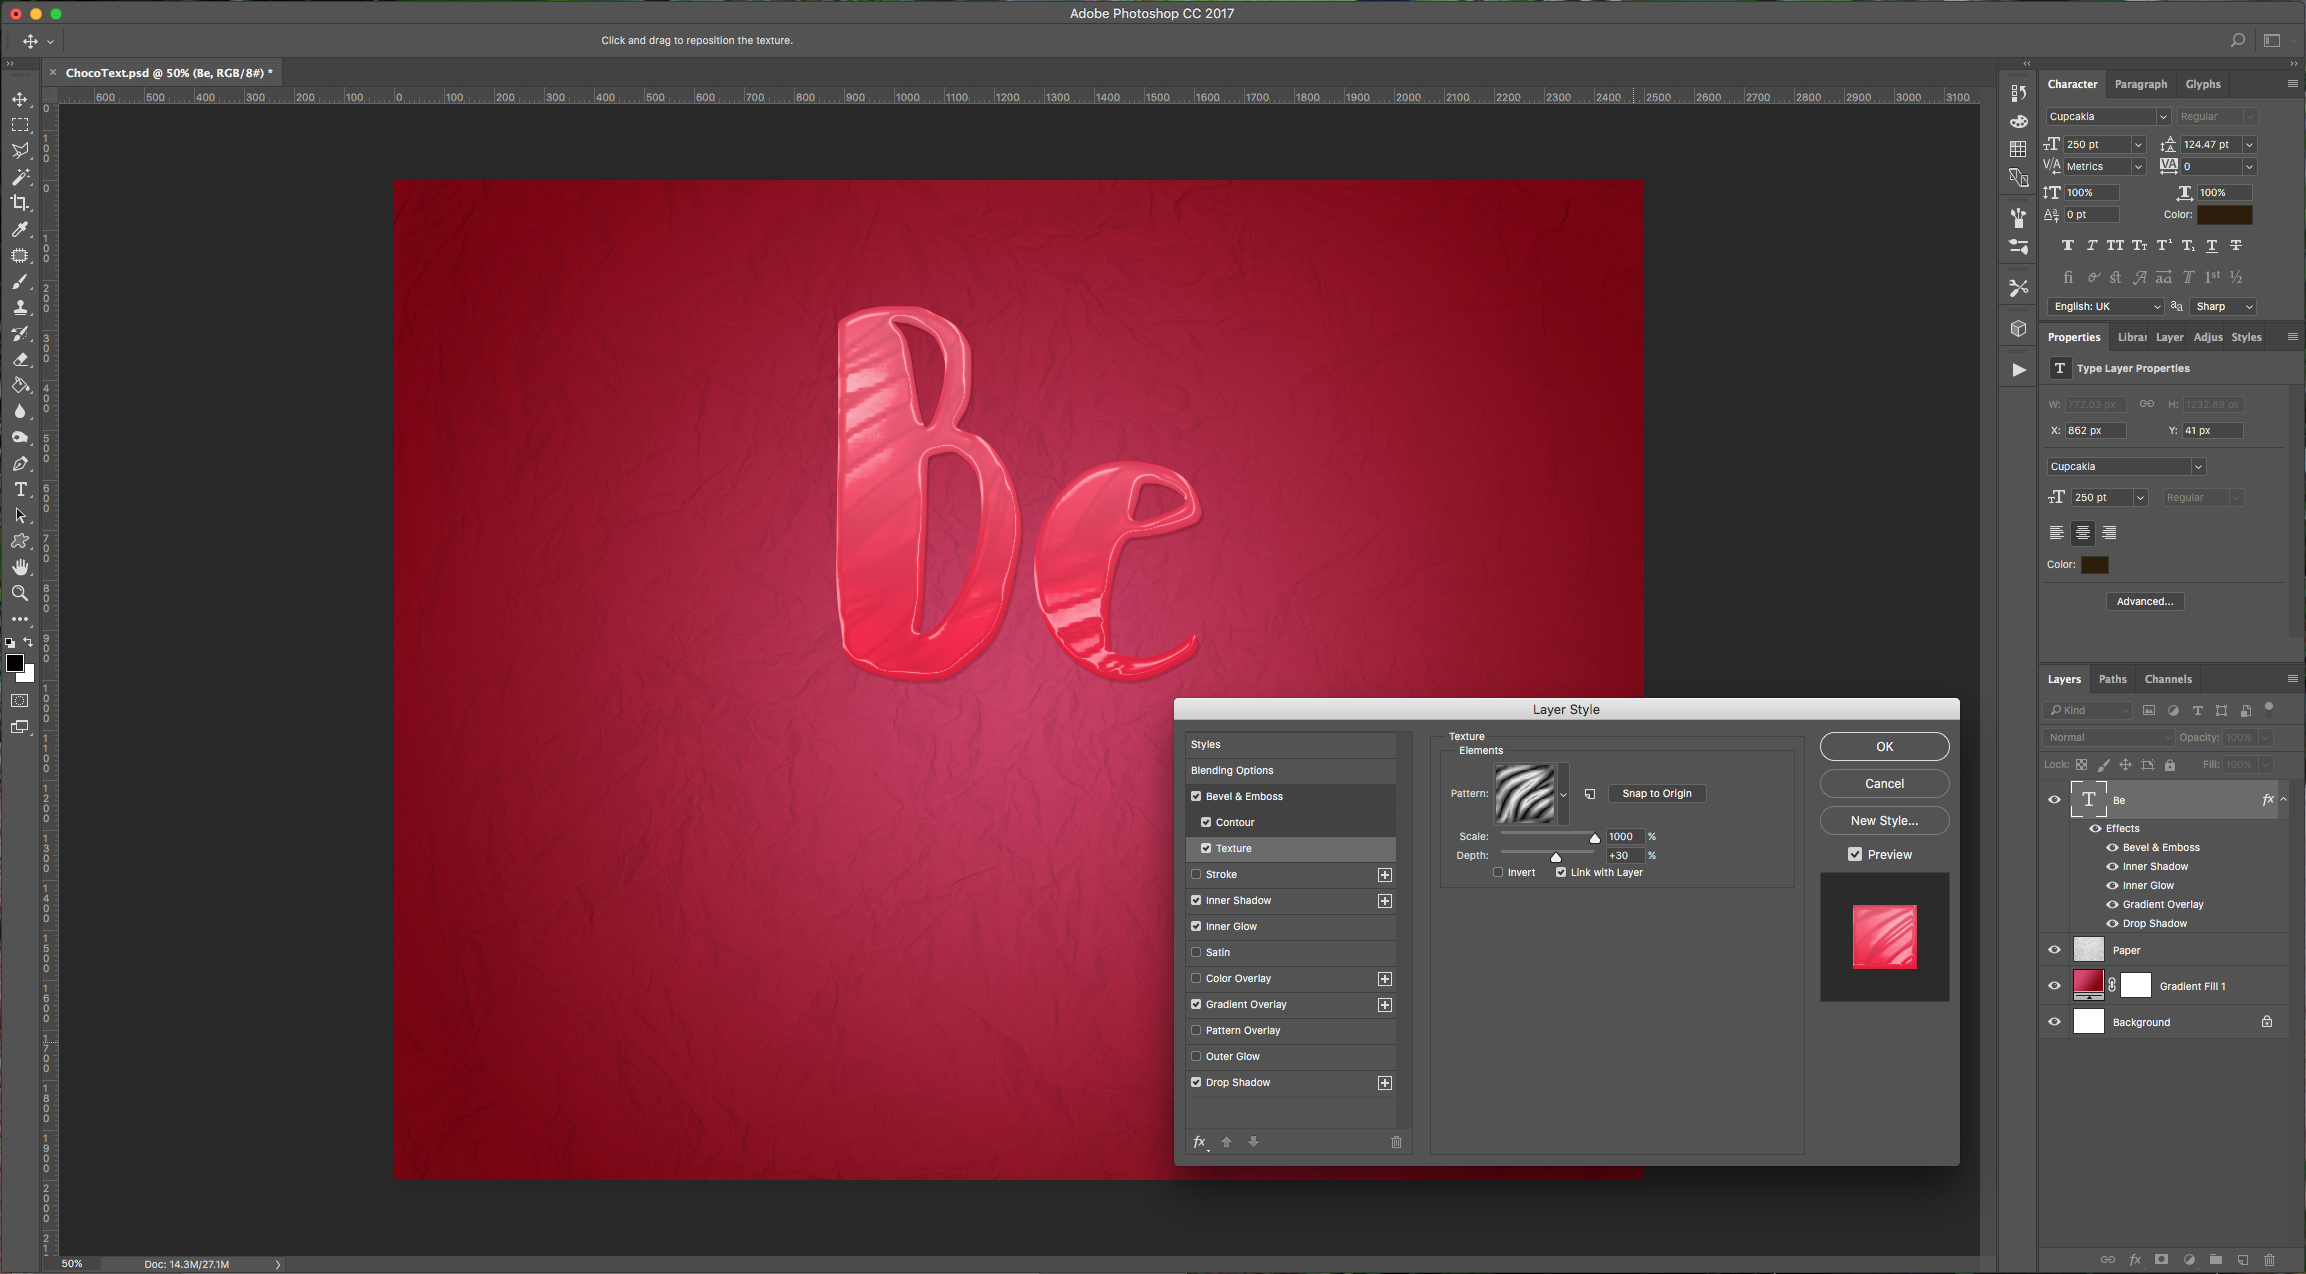
Texture: (Pattern: Zebra 64 x 64 Pixels, Grayscale Mode)
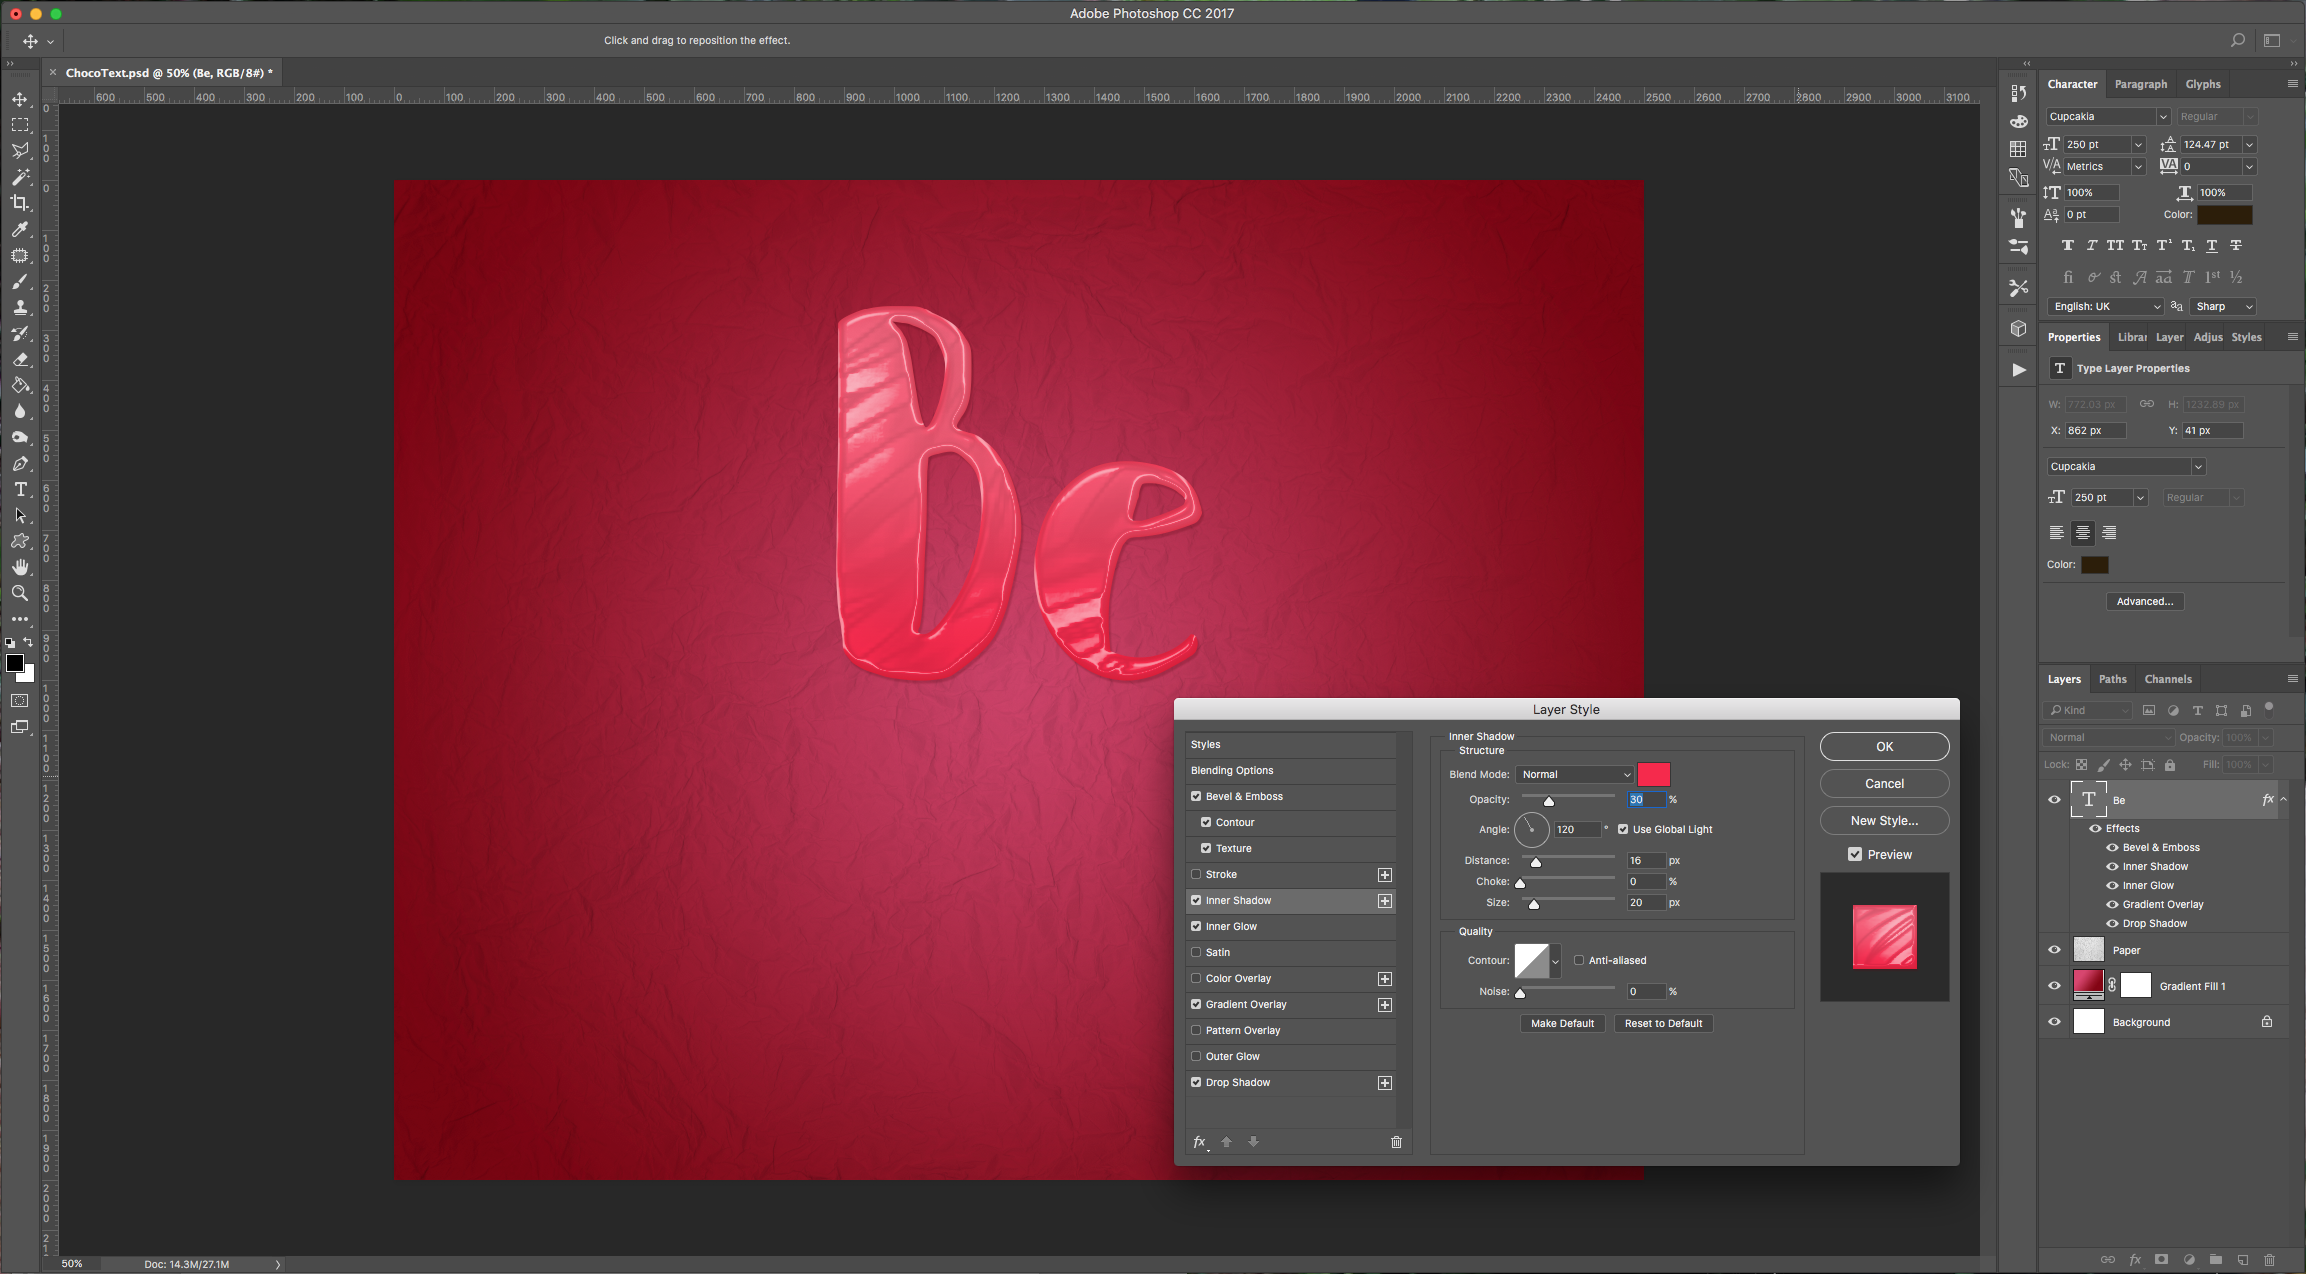
Inner Shadow: (#f82548)
Inner Glow: (#f82548)
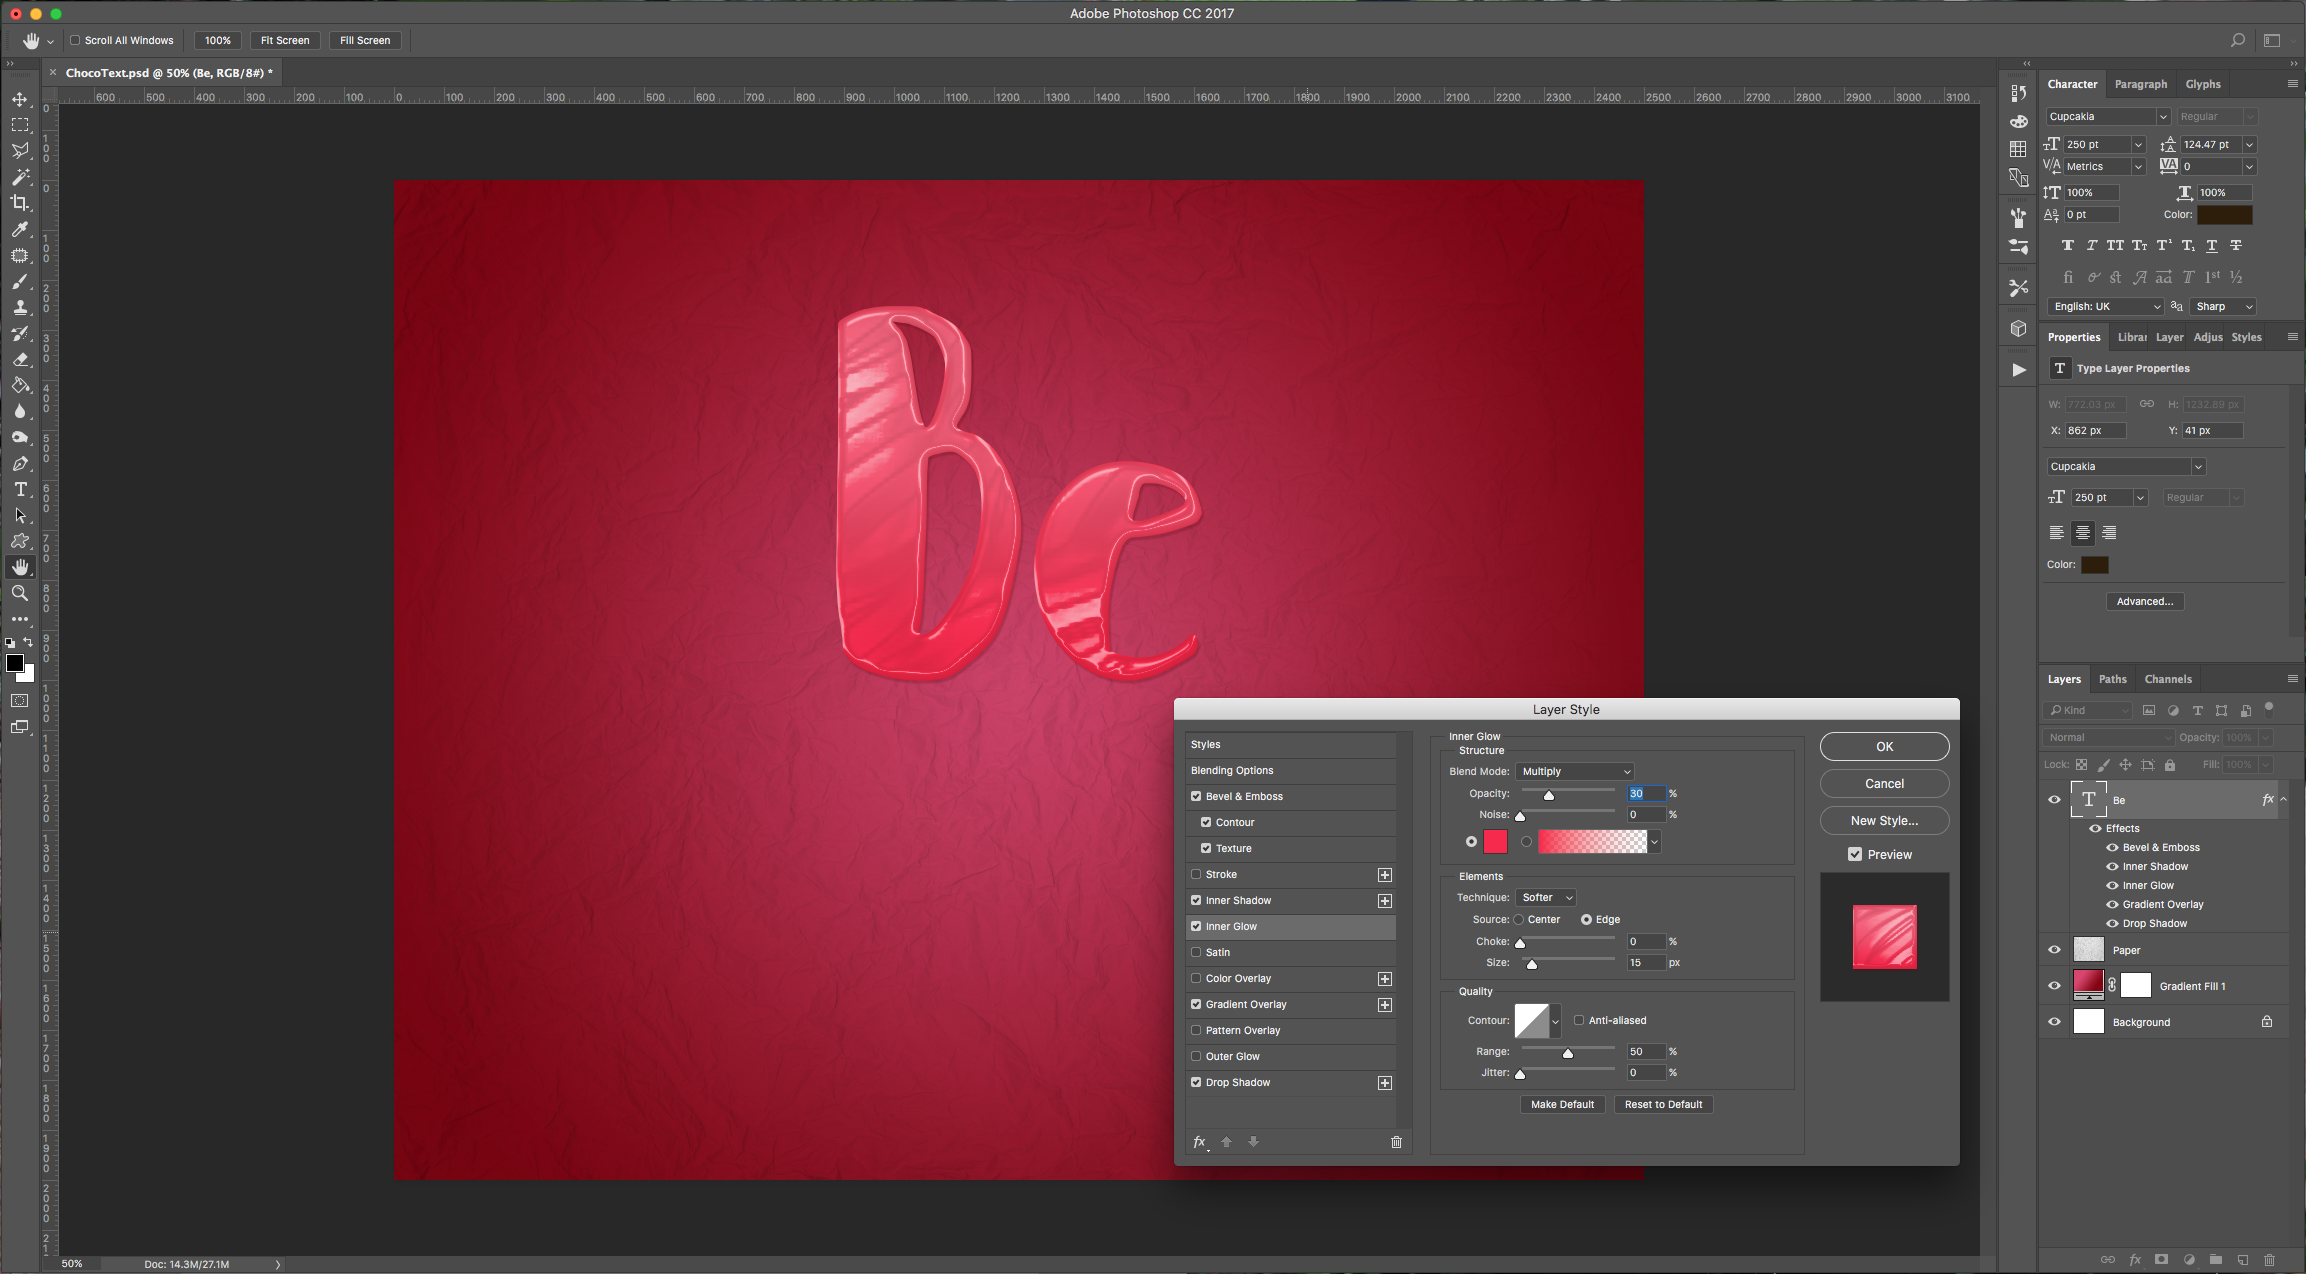
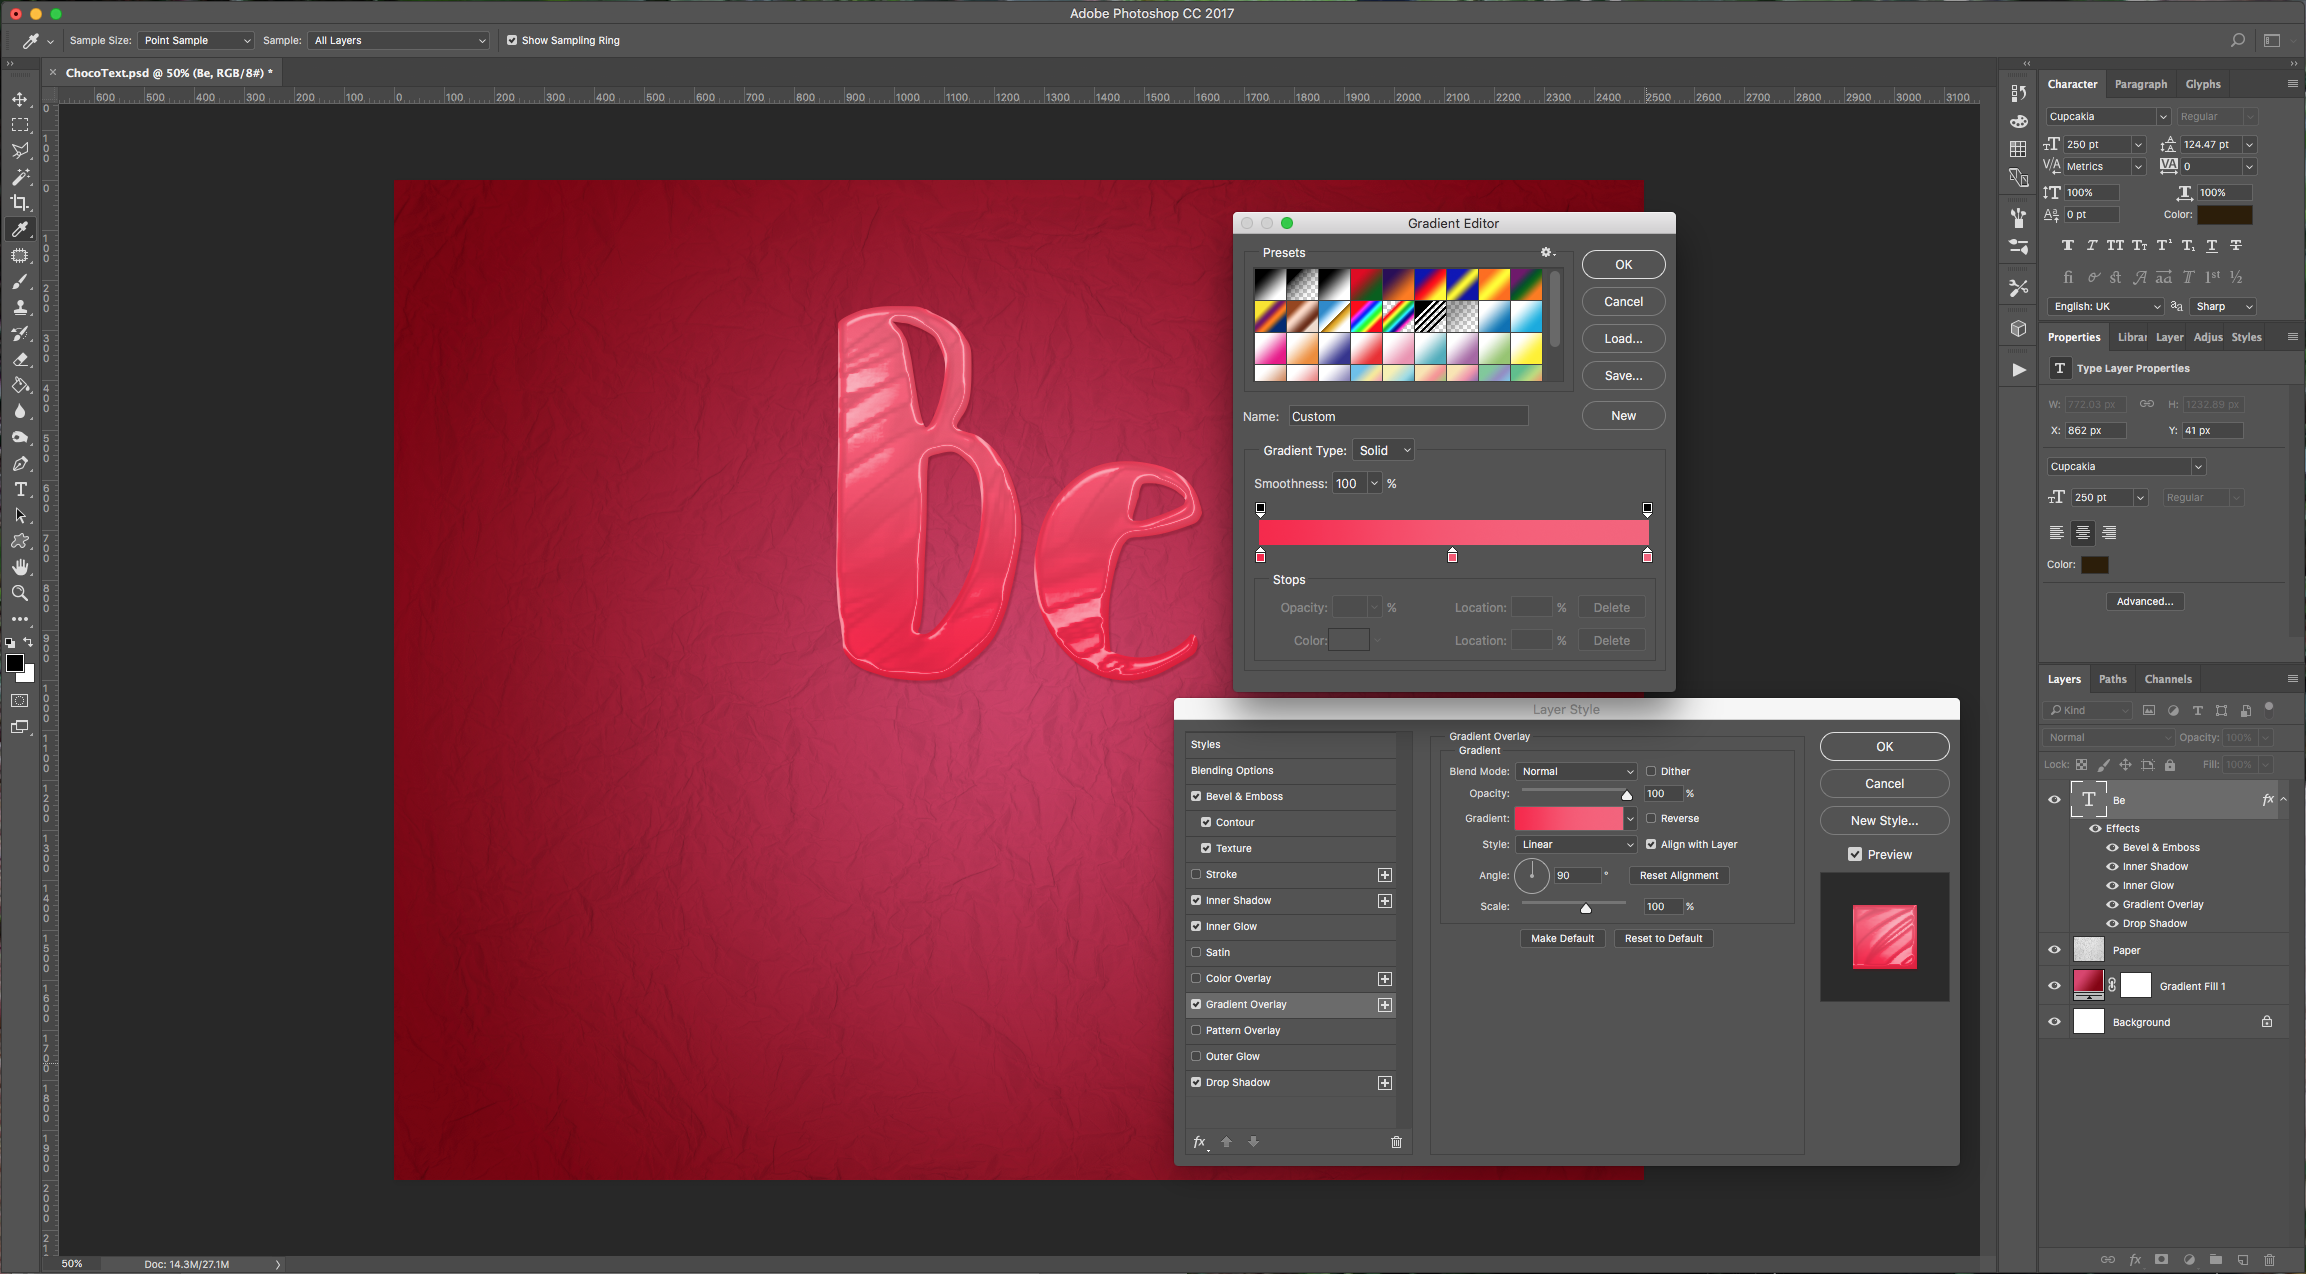
Gradient Overlay: (#f82548, #f85772 and #f4637b)
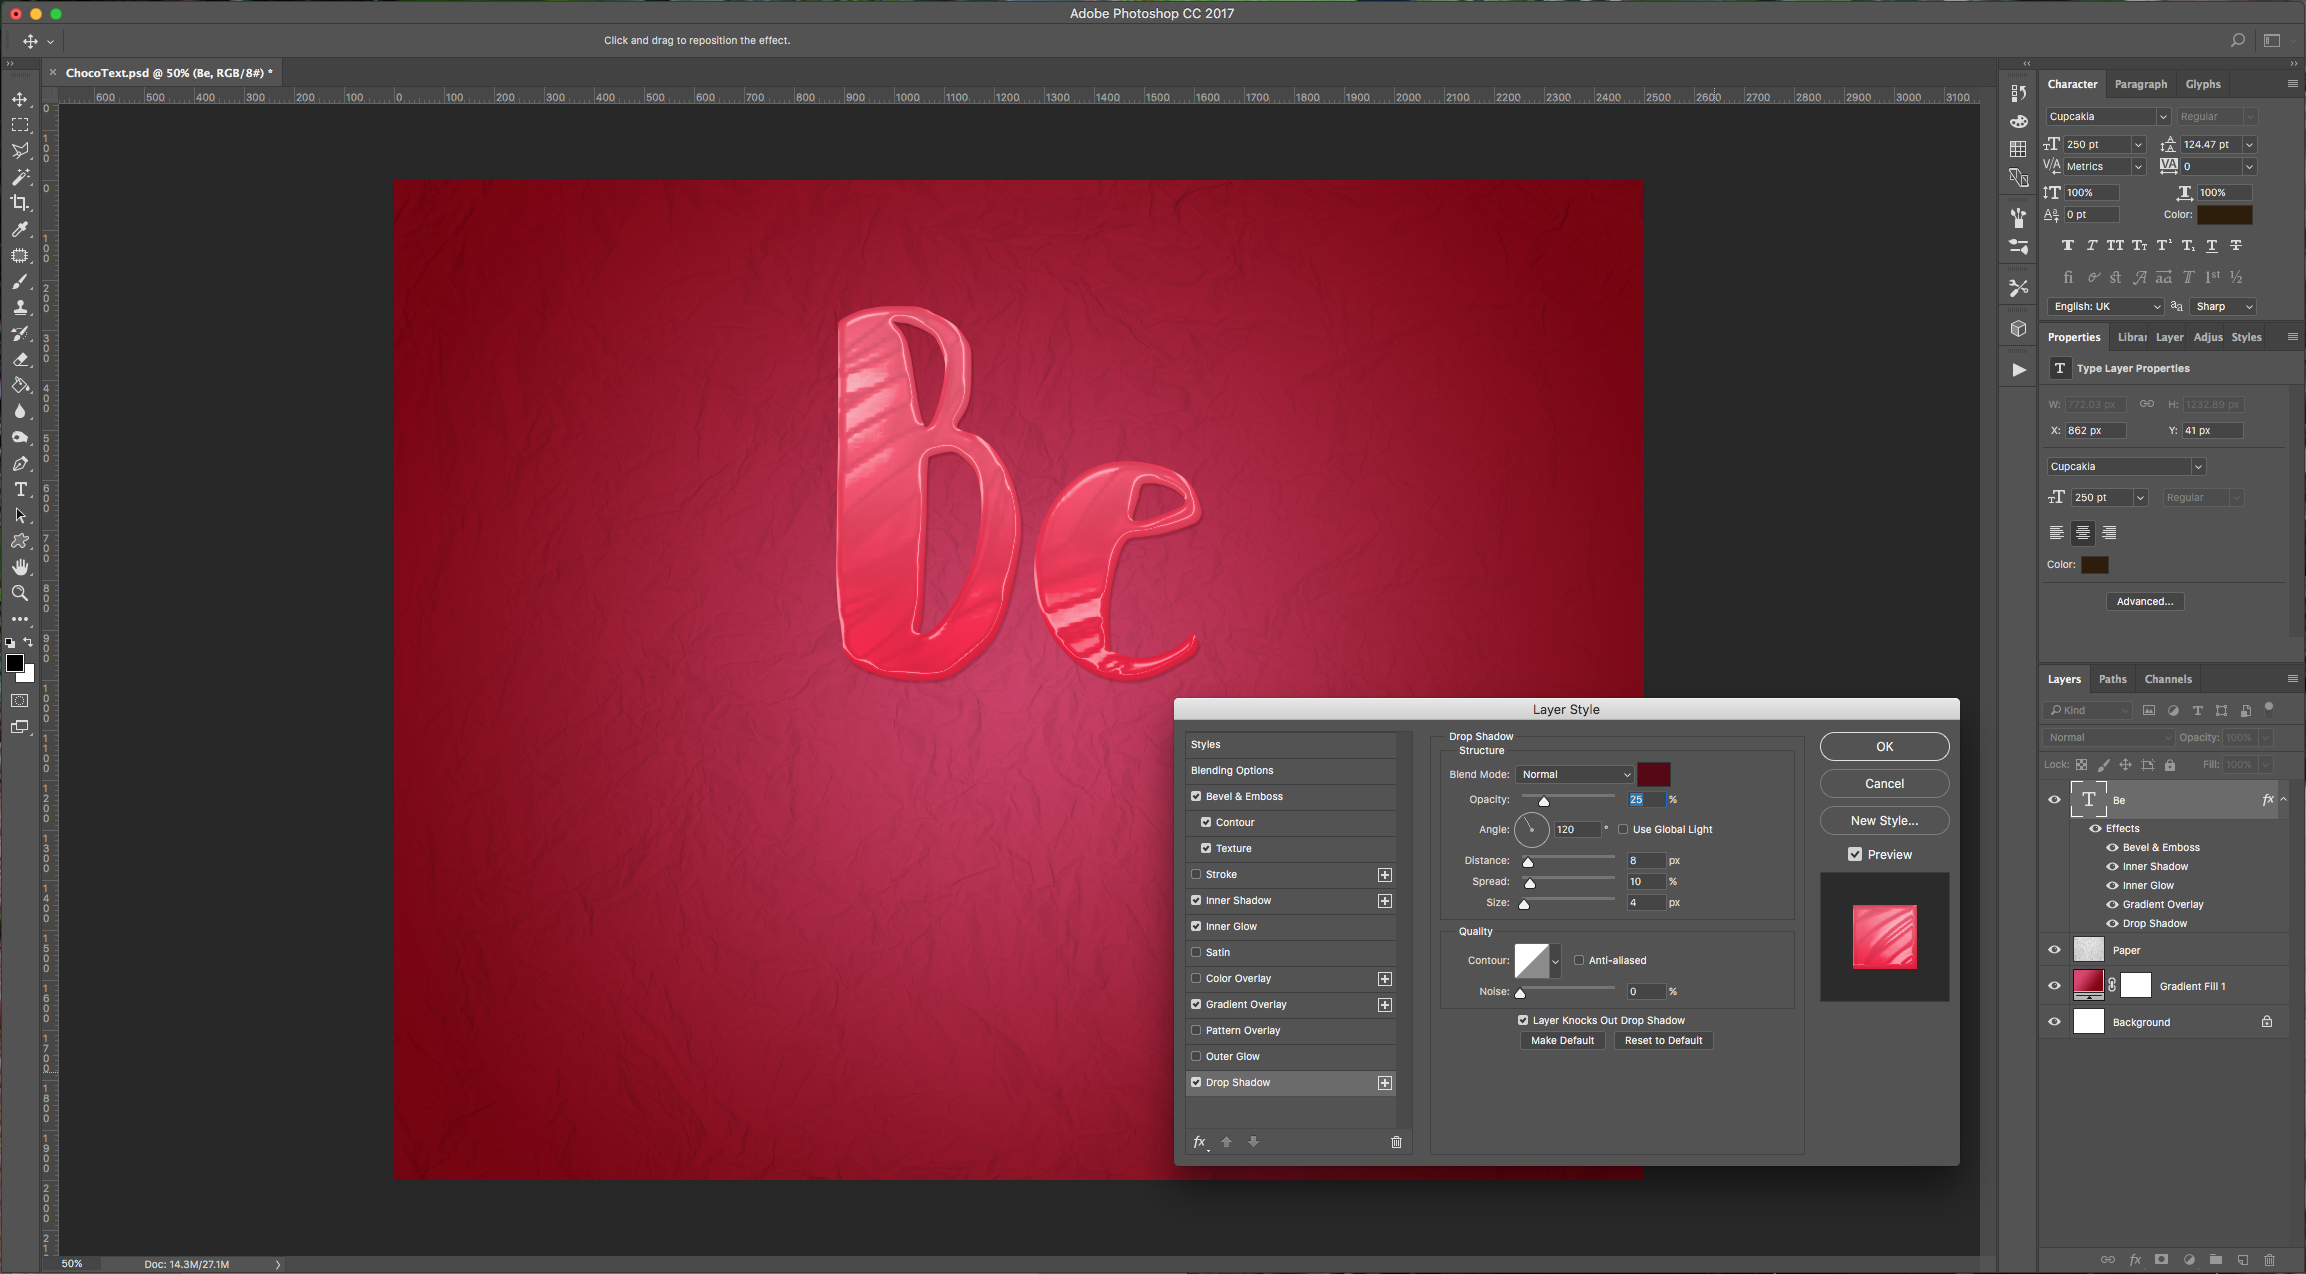
Drop Shadow: (#560613)
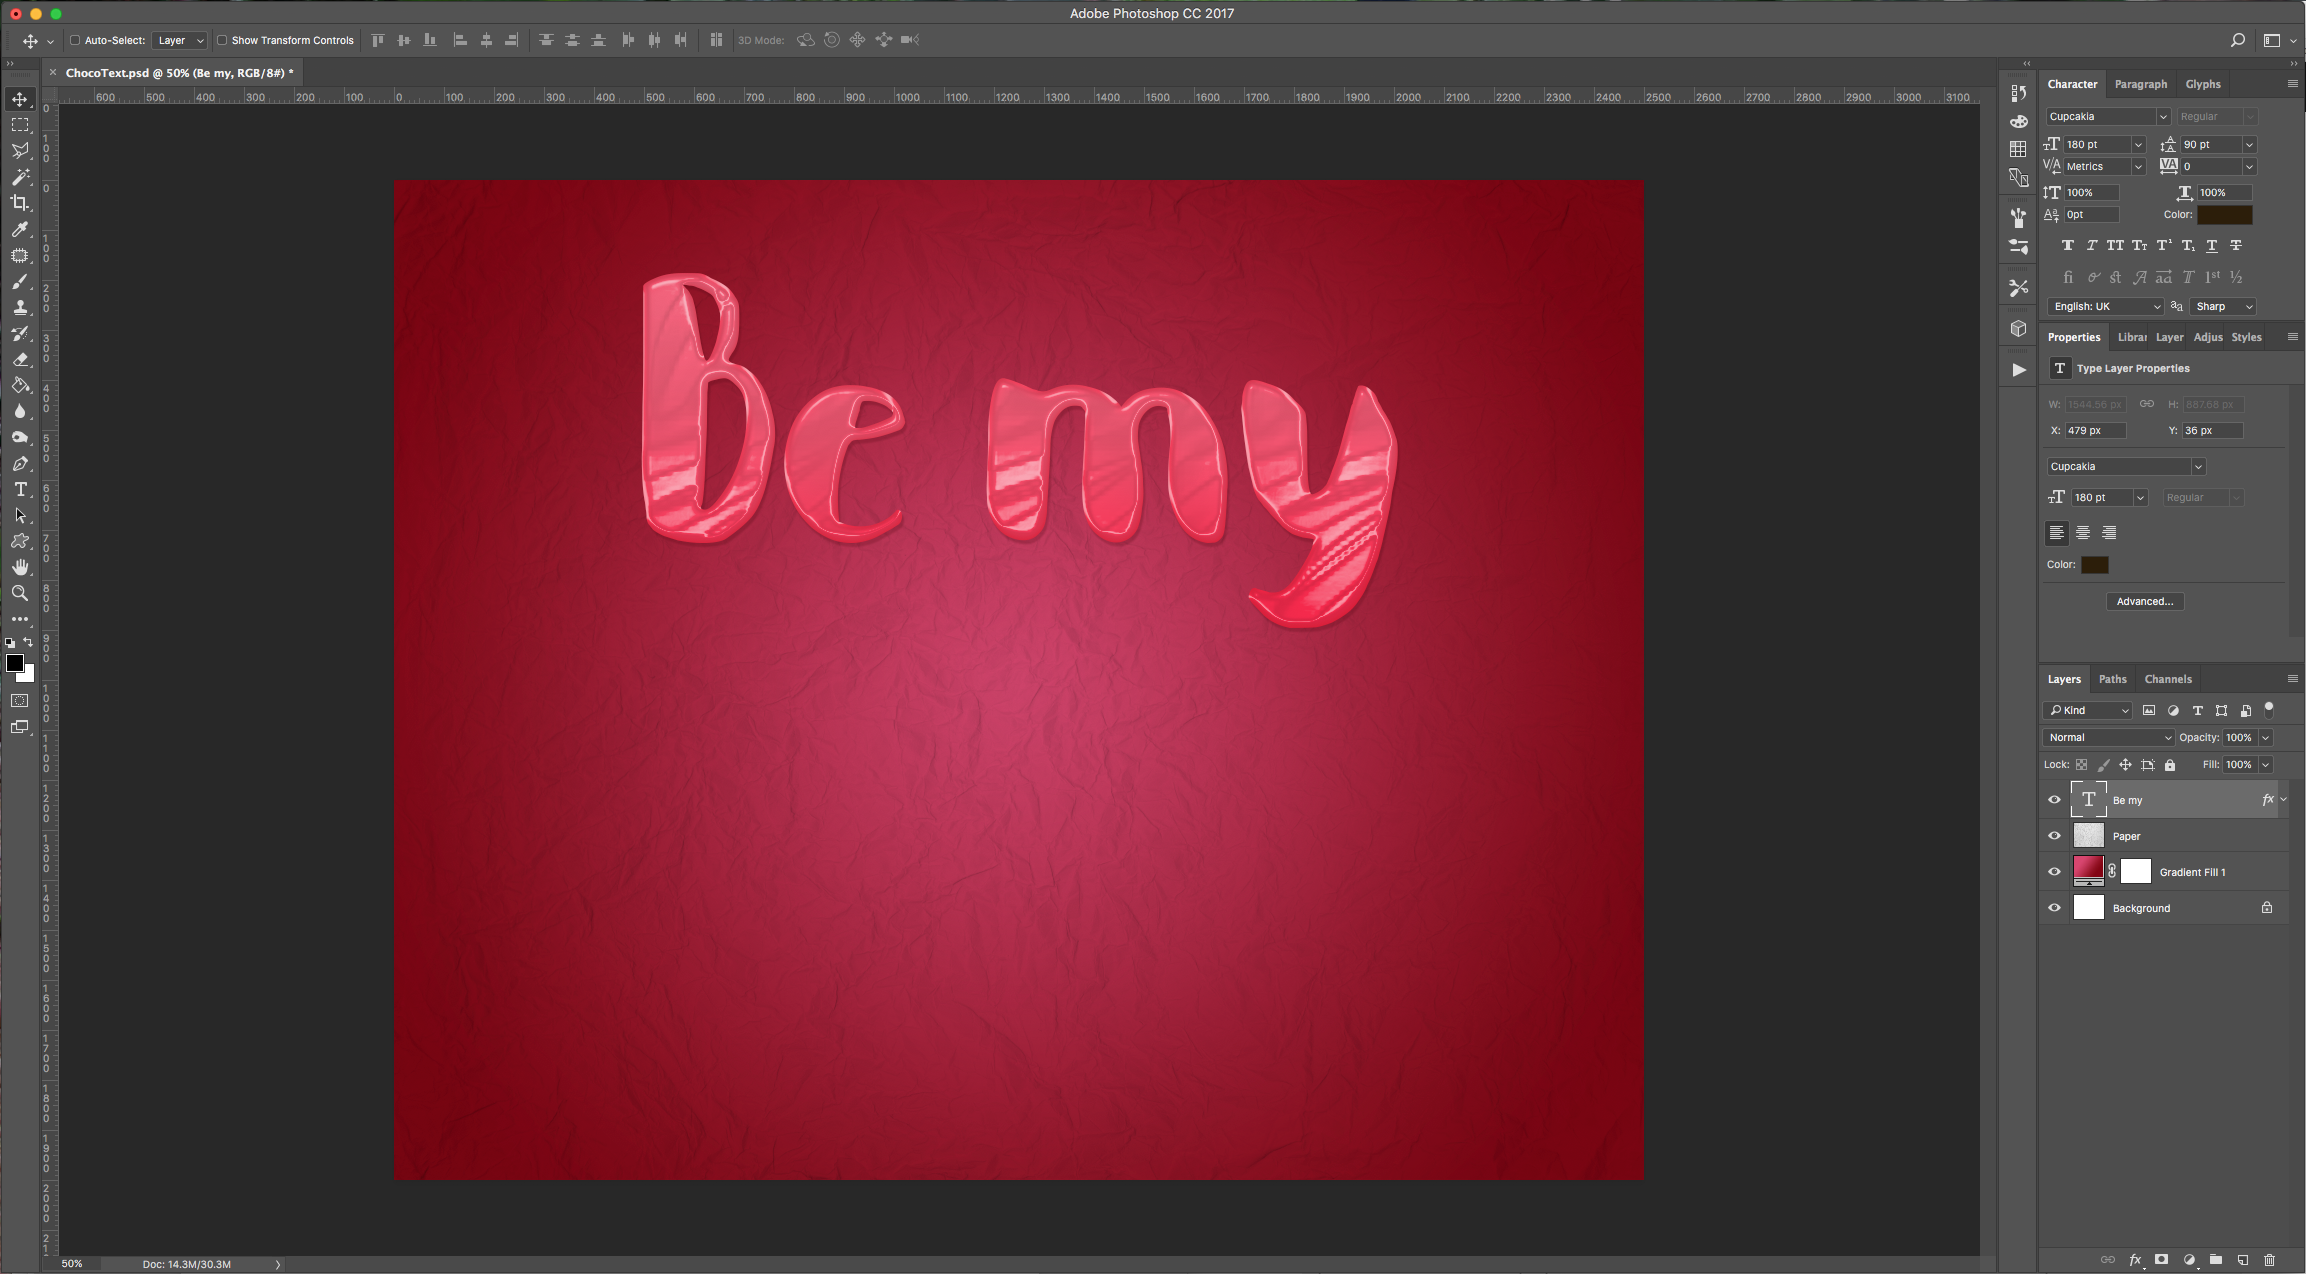
We added more text to this layer and reduced the size to 180 Pixels.
6 - Type a second line of text creating another layer (keep the Font, Fill Color and Size from the previous one) and apply the following “Layer Styles” to this one:
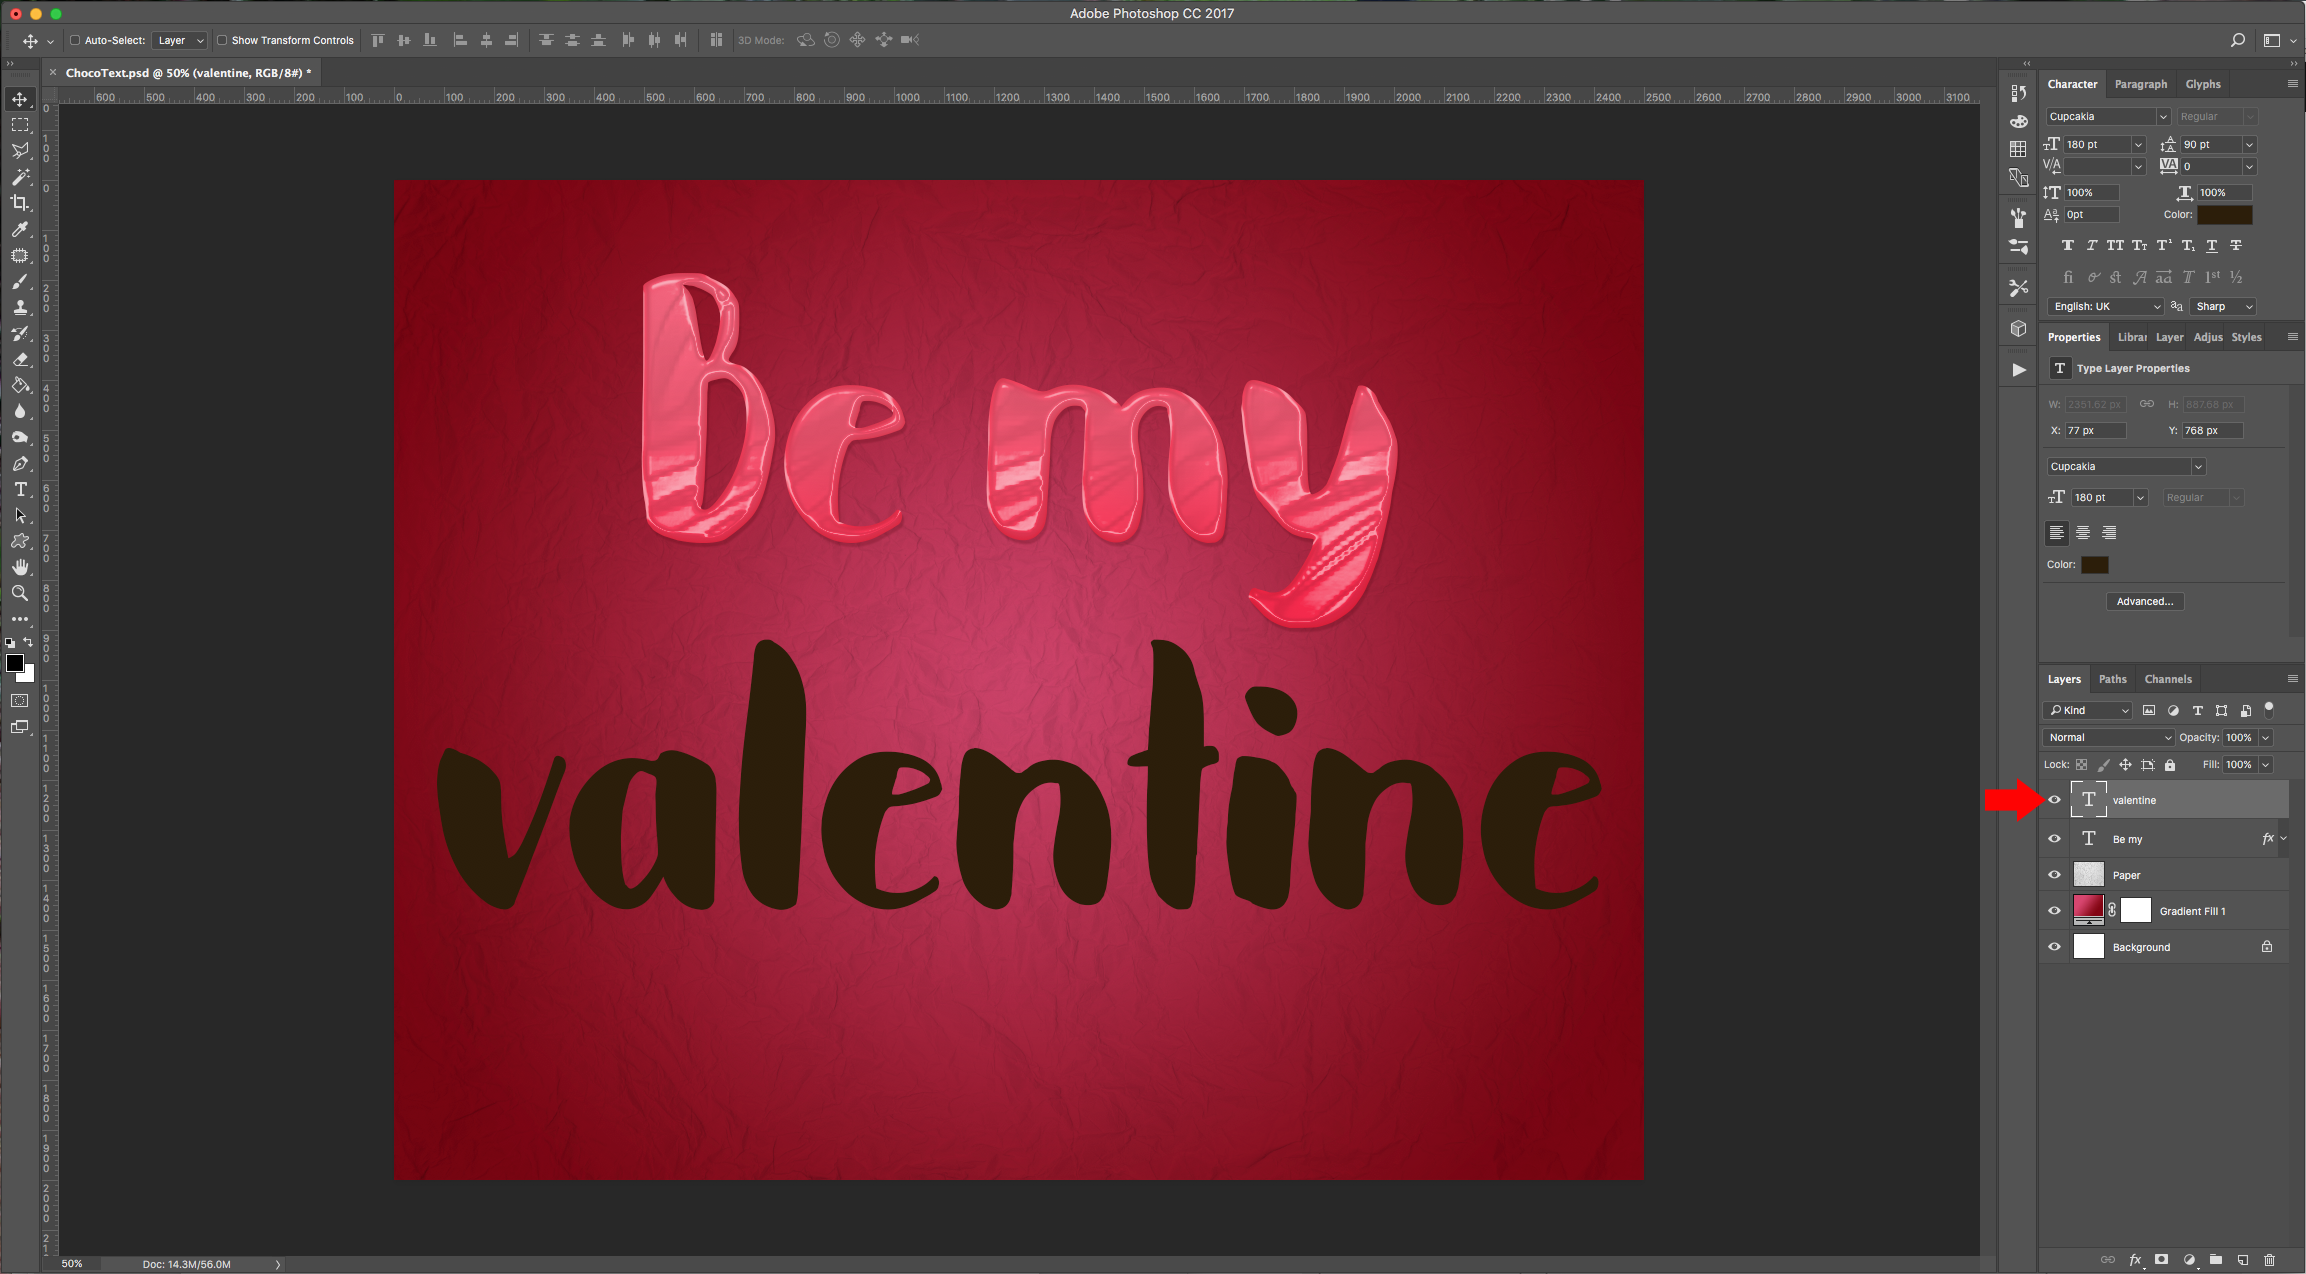
Bevel & Emboss: (Gloss Contour: Rounded Steps)
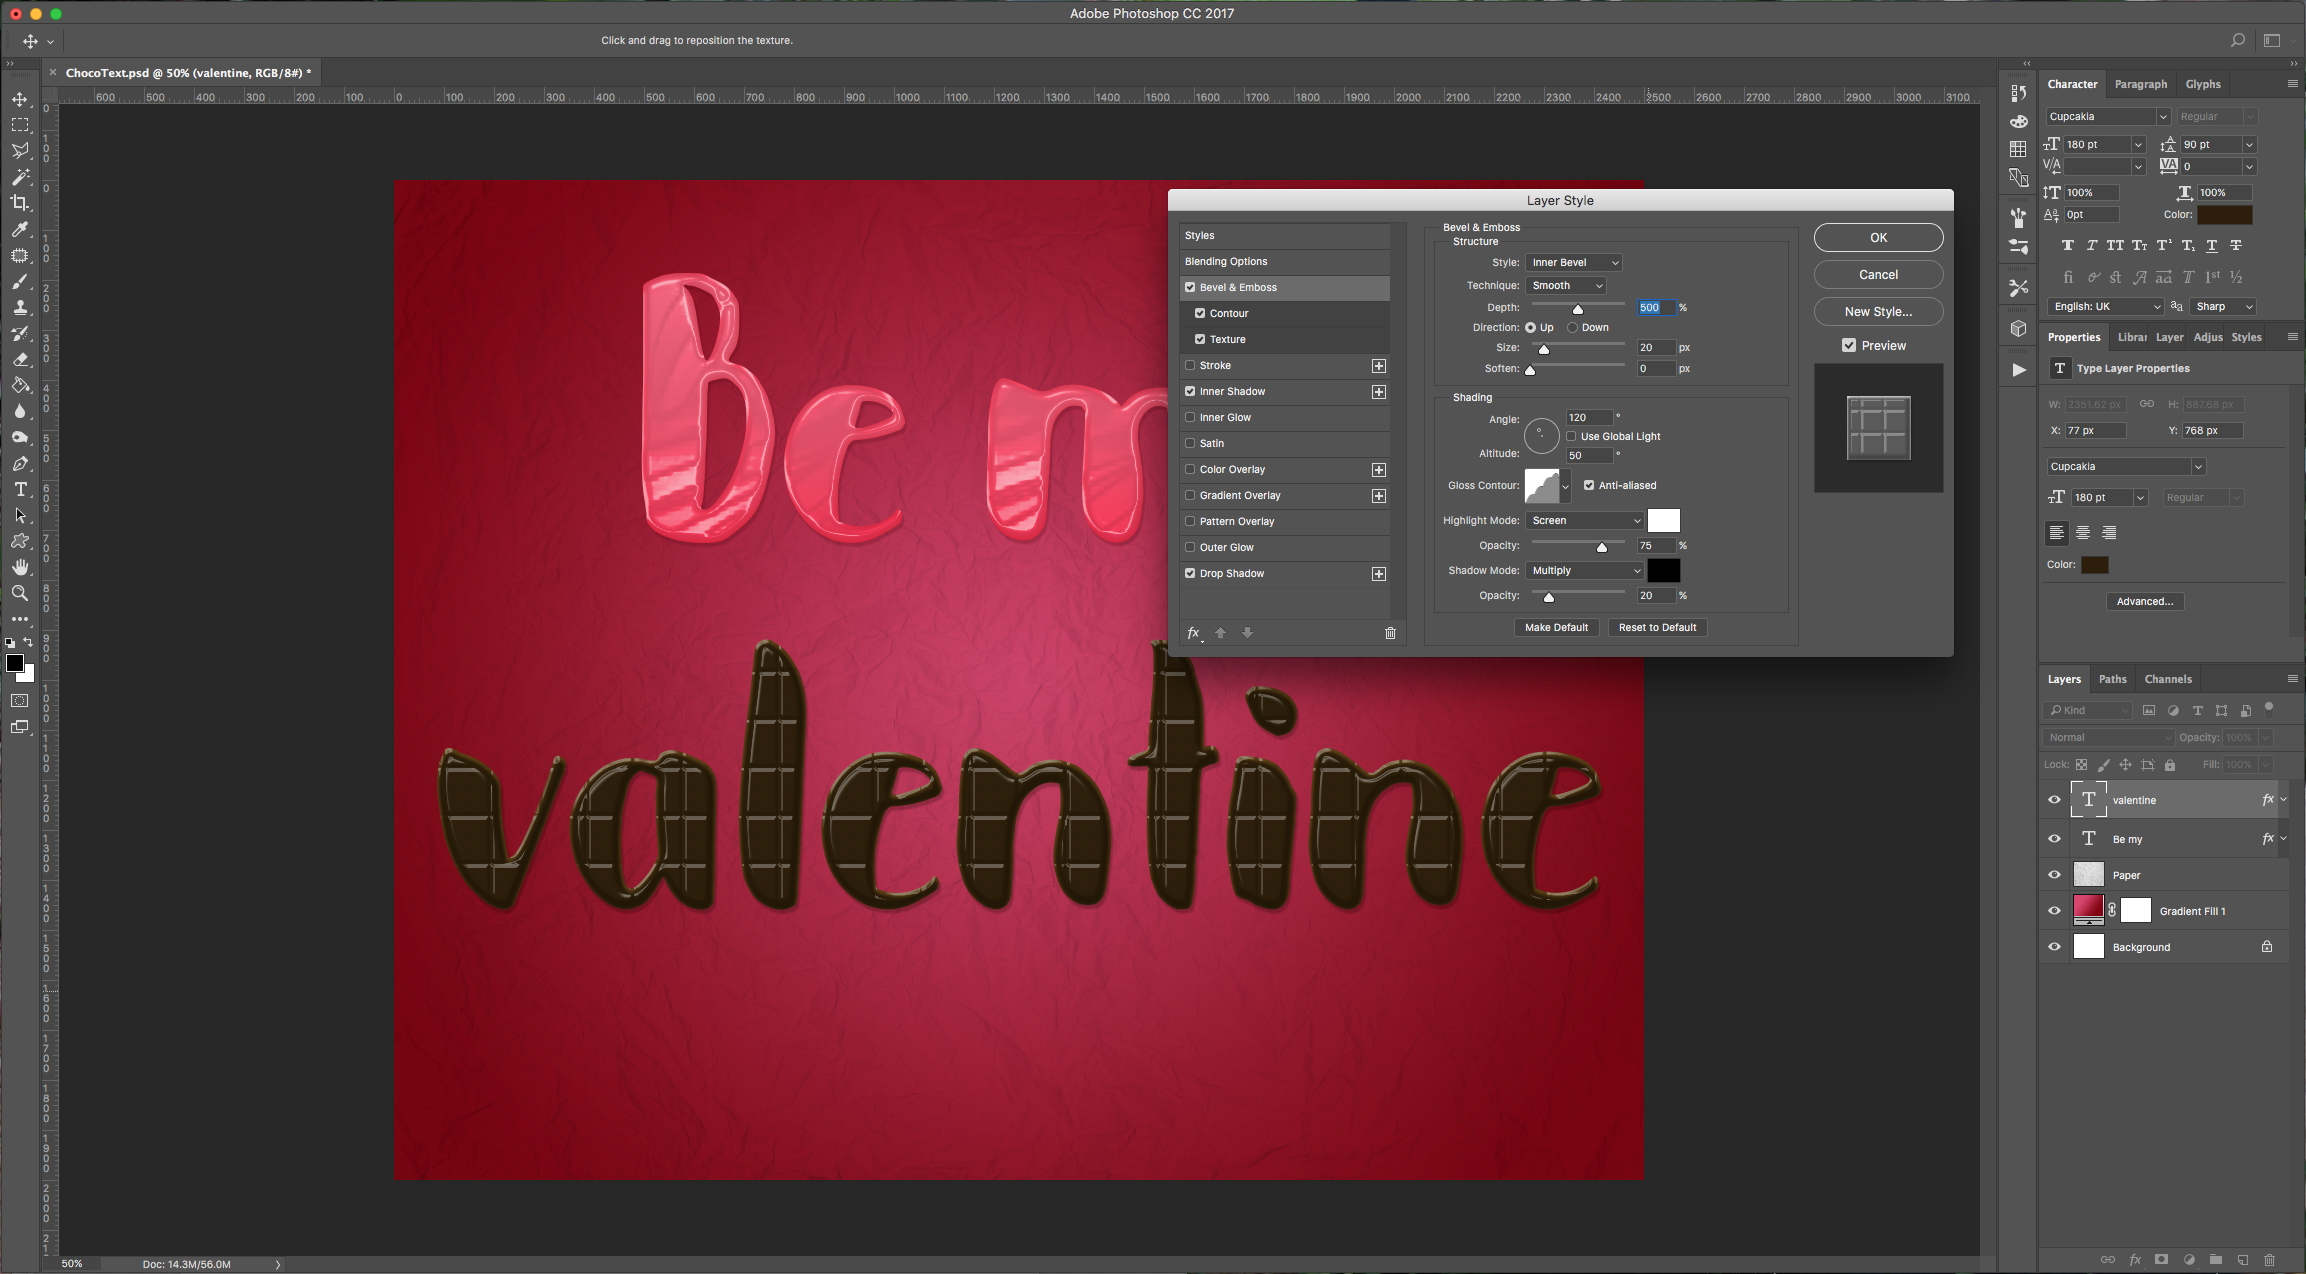
Contour: (Contour: Gaussian)
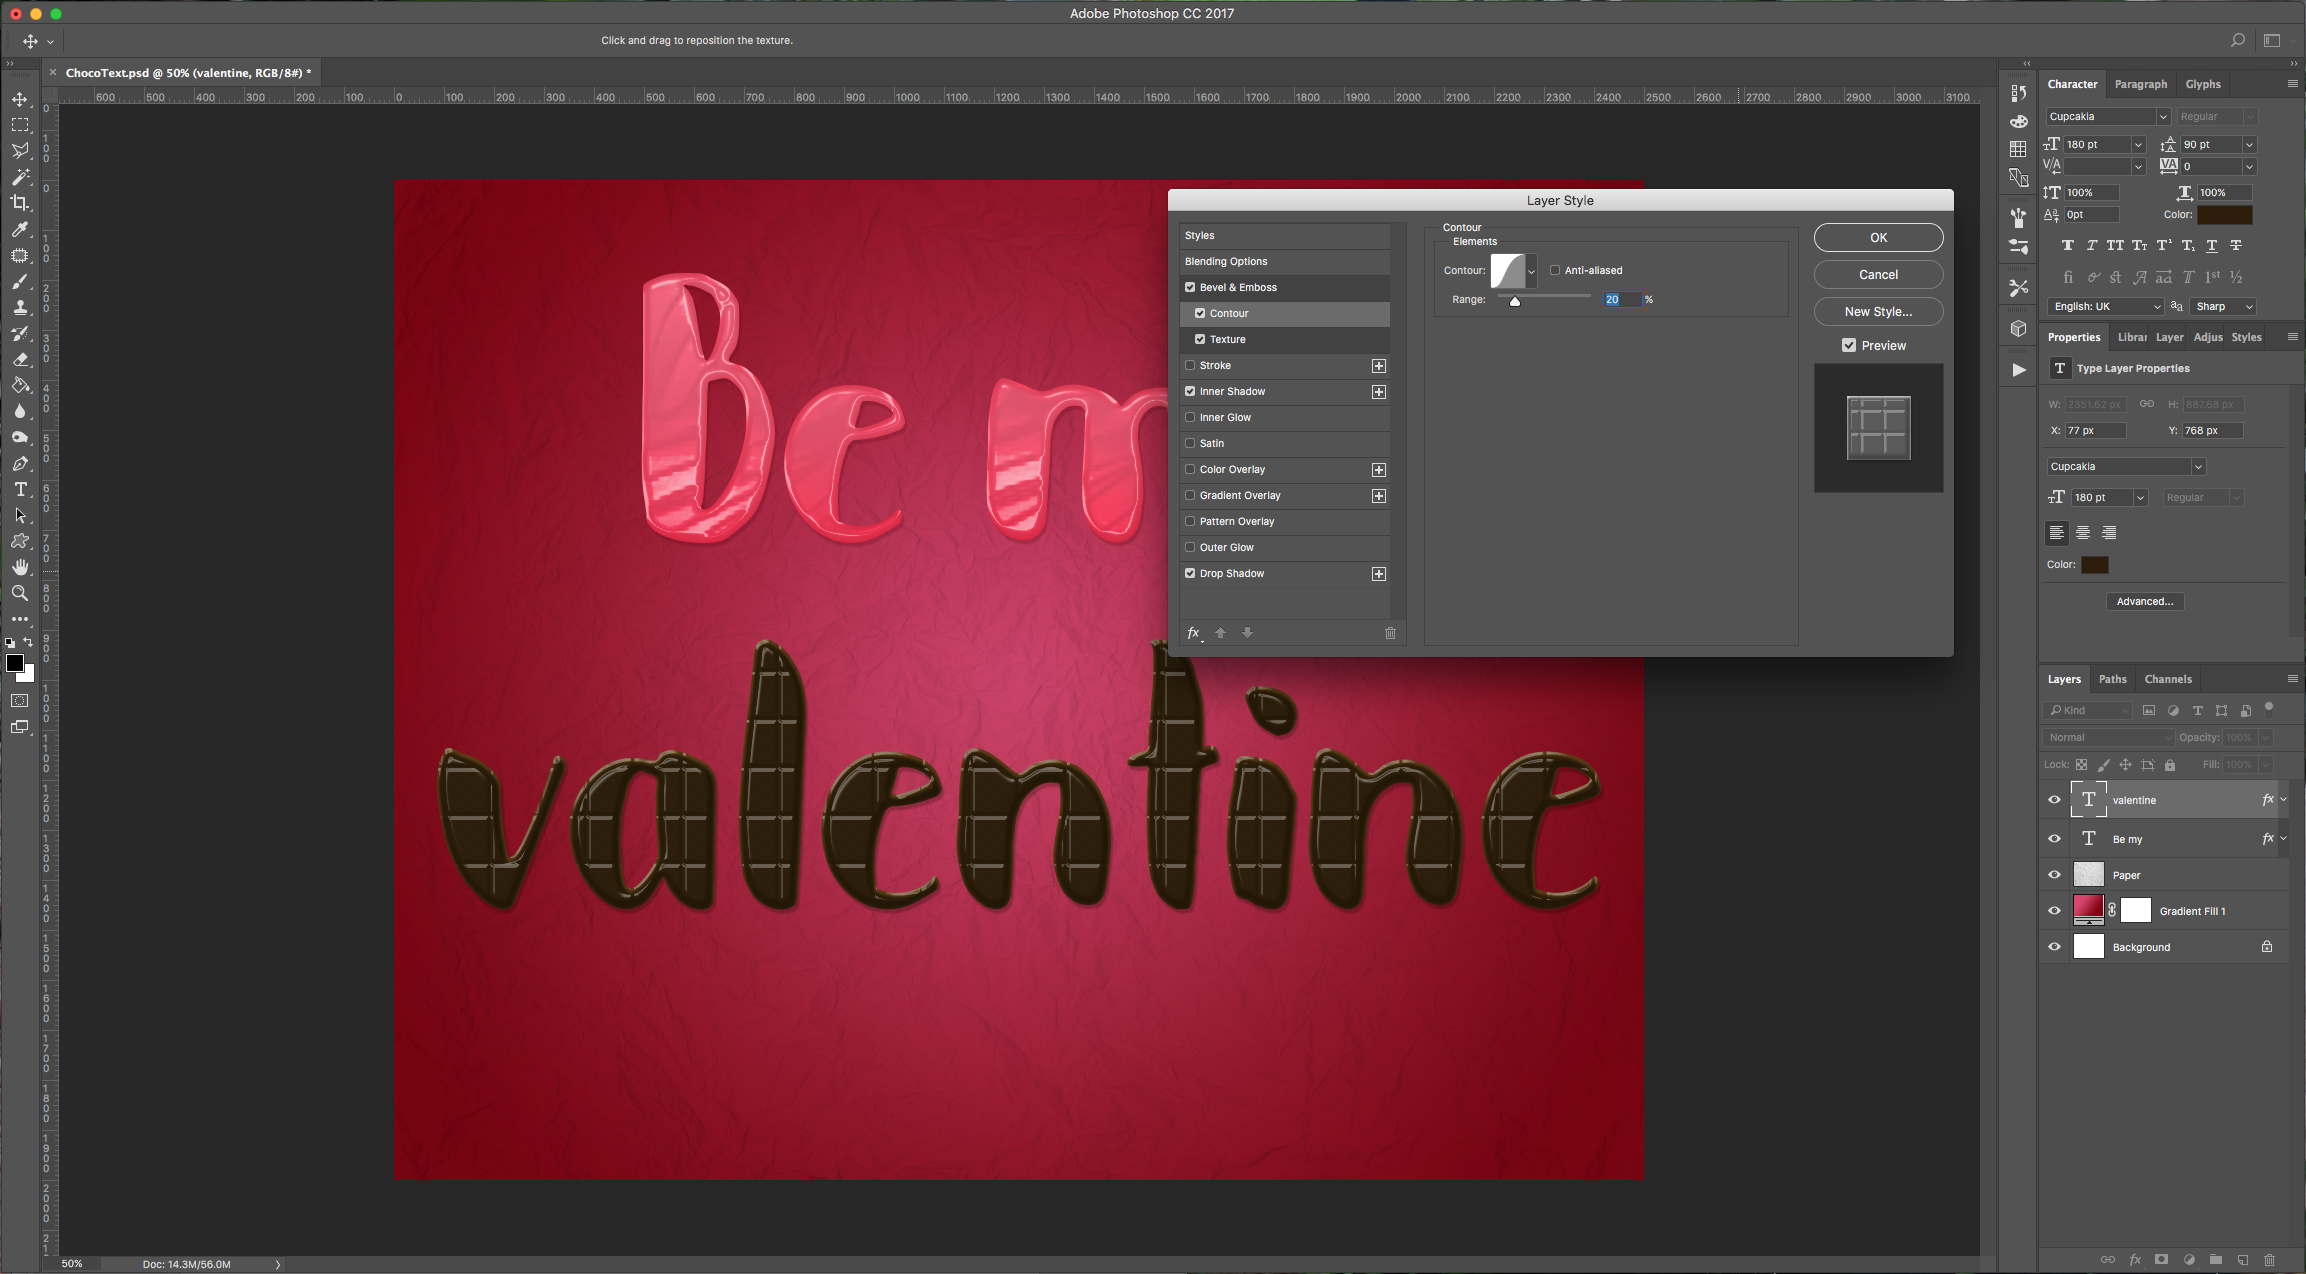
Texture: (Tiles-Smooth: Zebra 128 x 128 Pixels, Grayscale Mode)
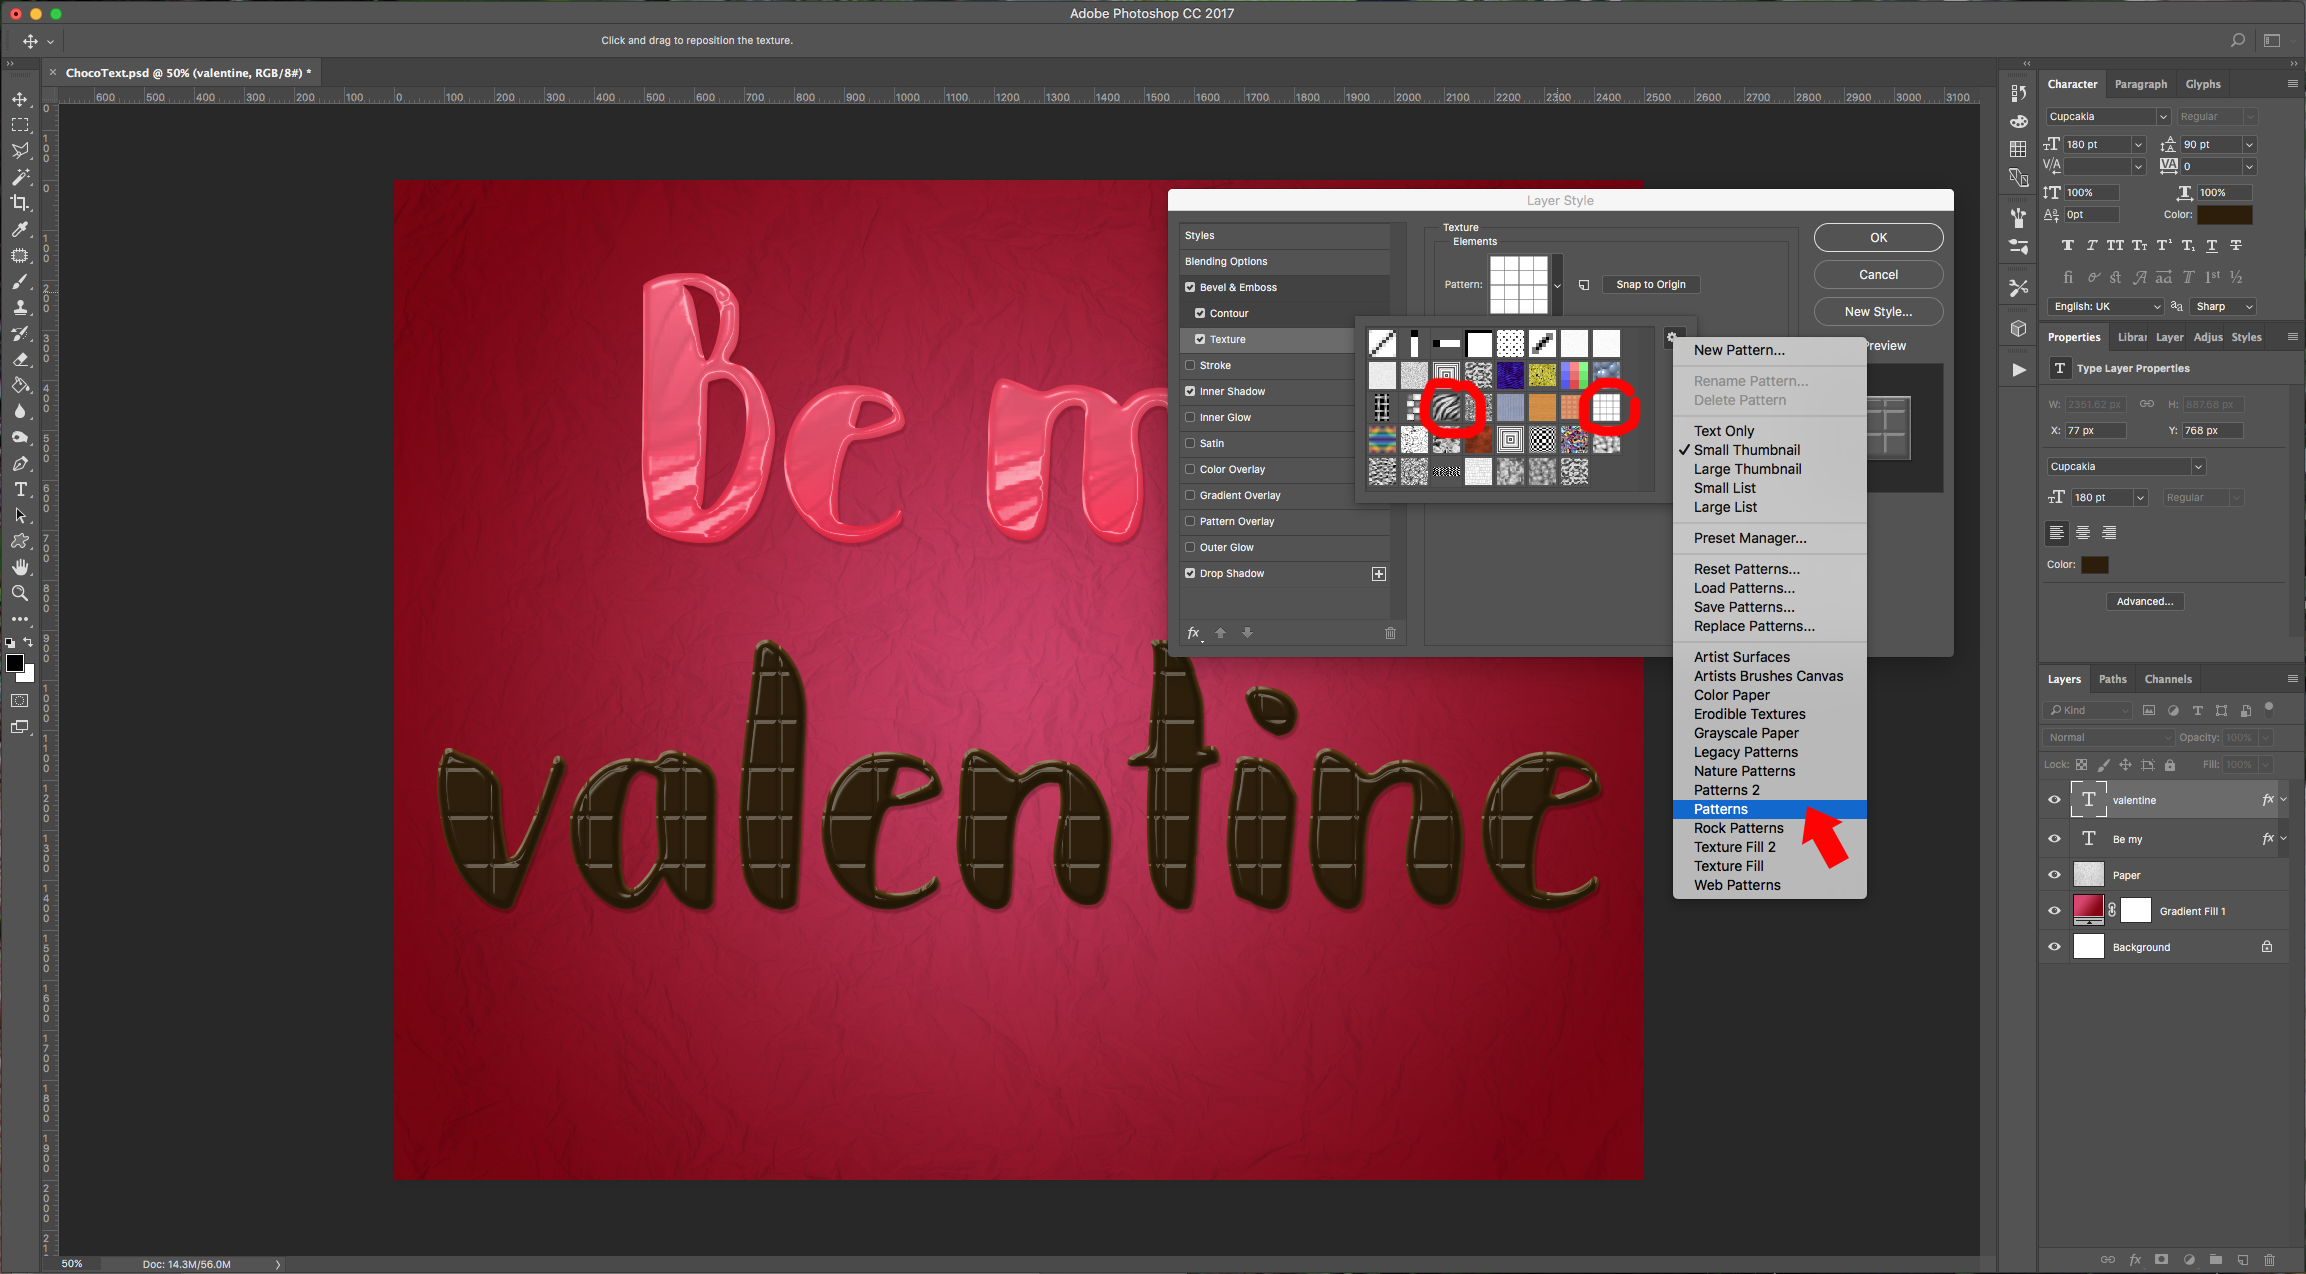
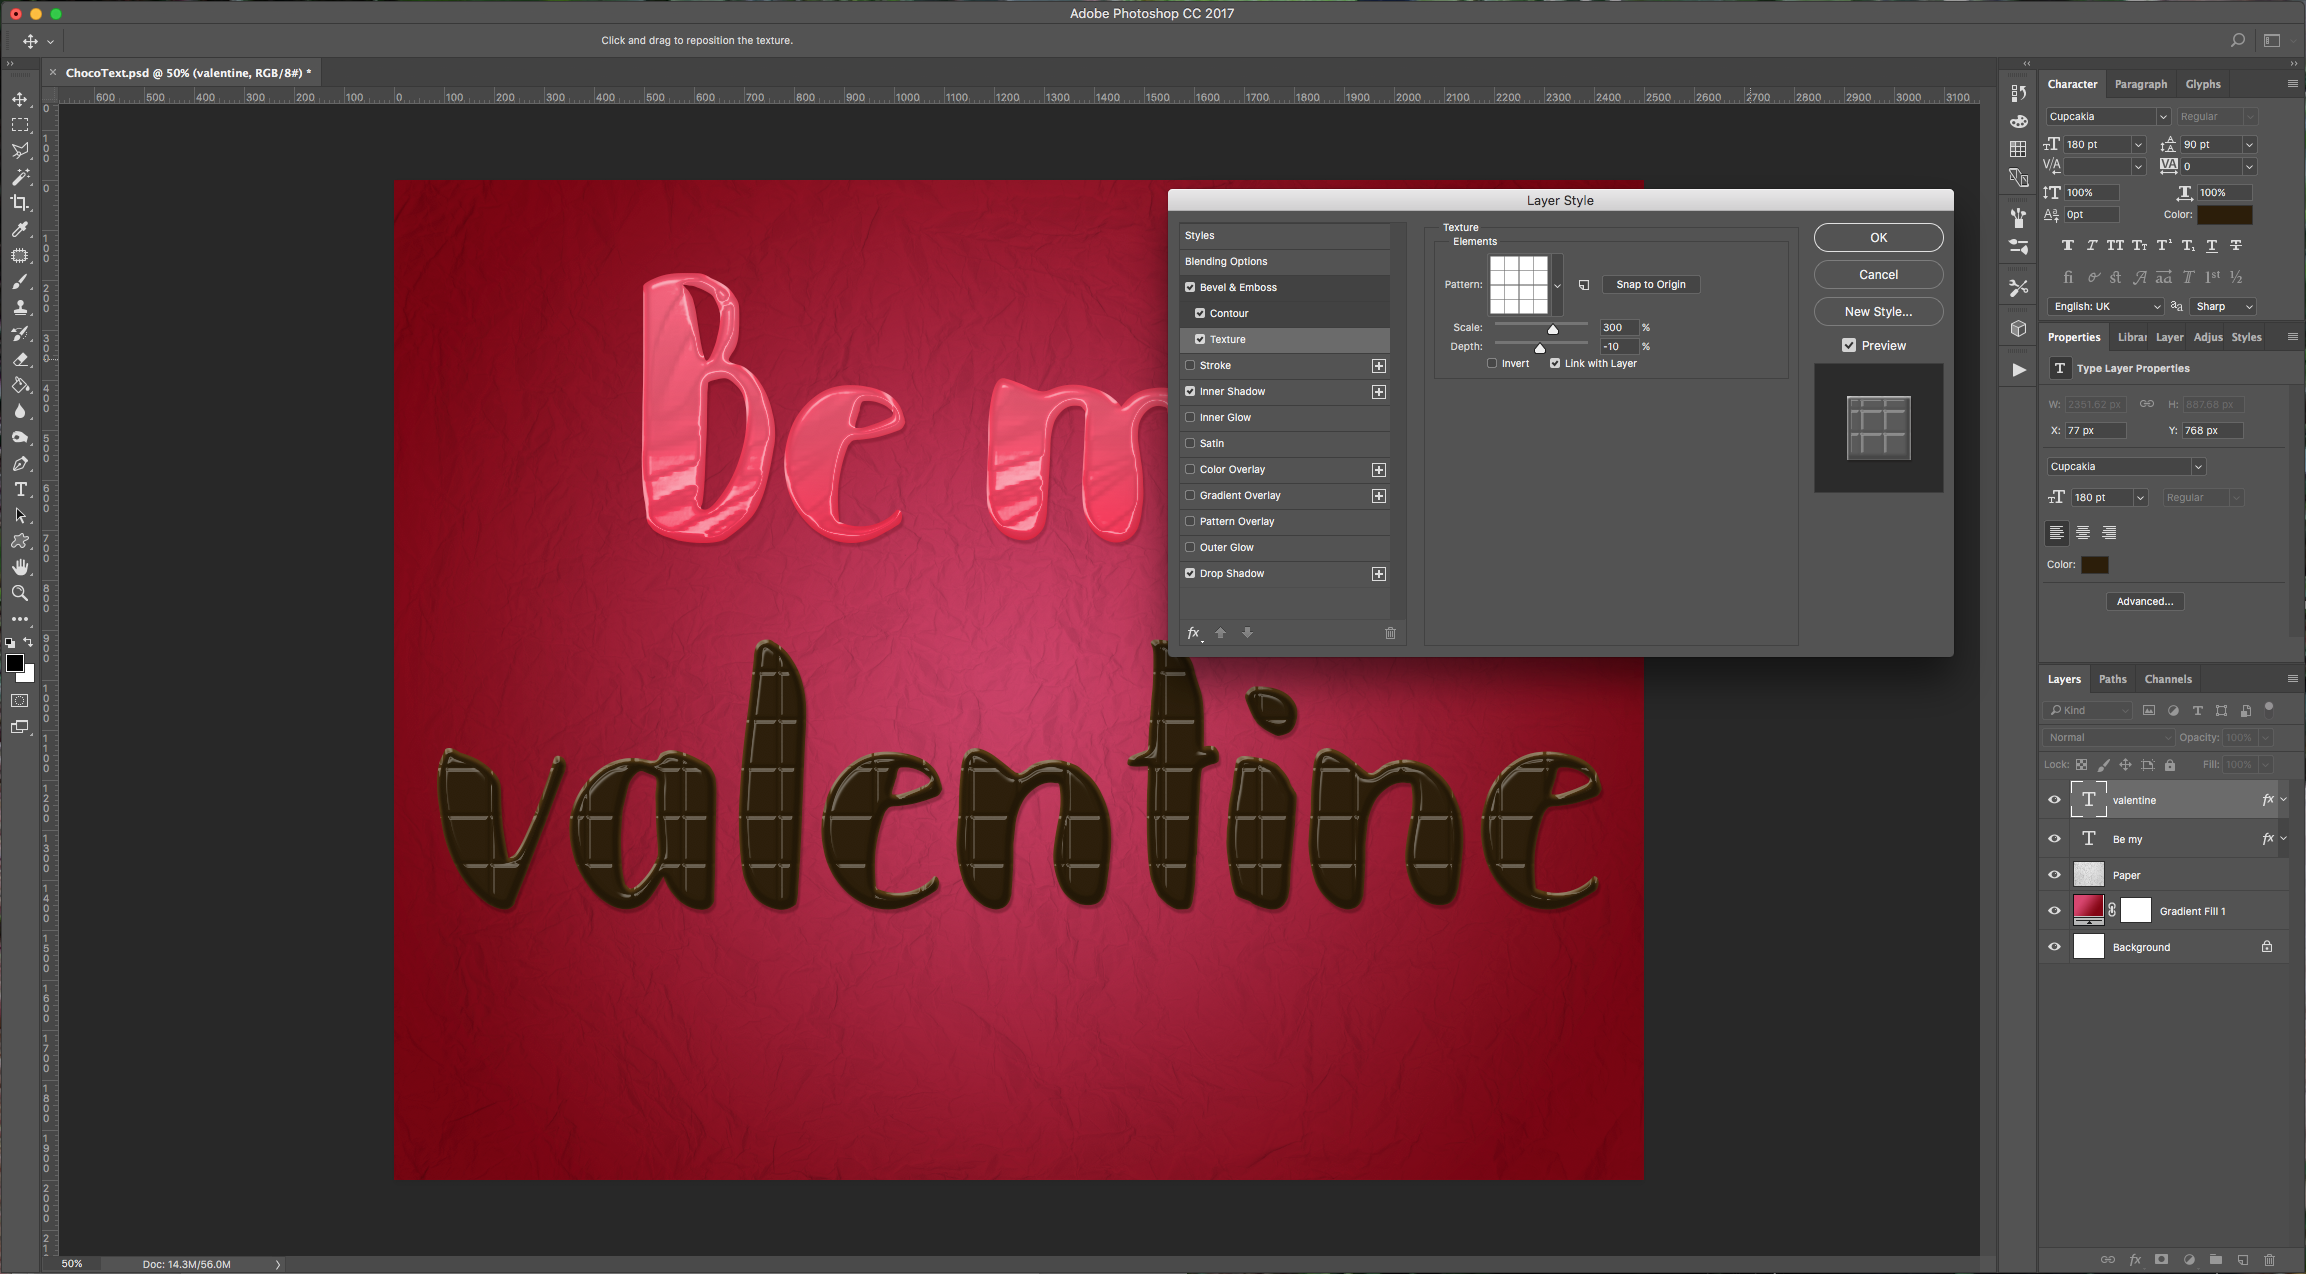
Inner Shadow: (#ffffff)
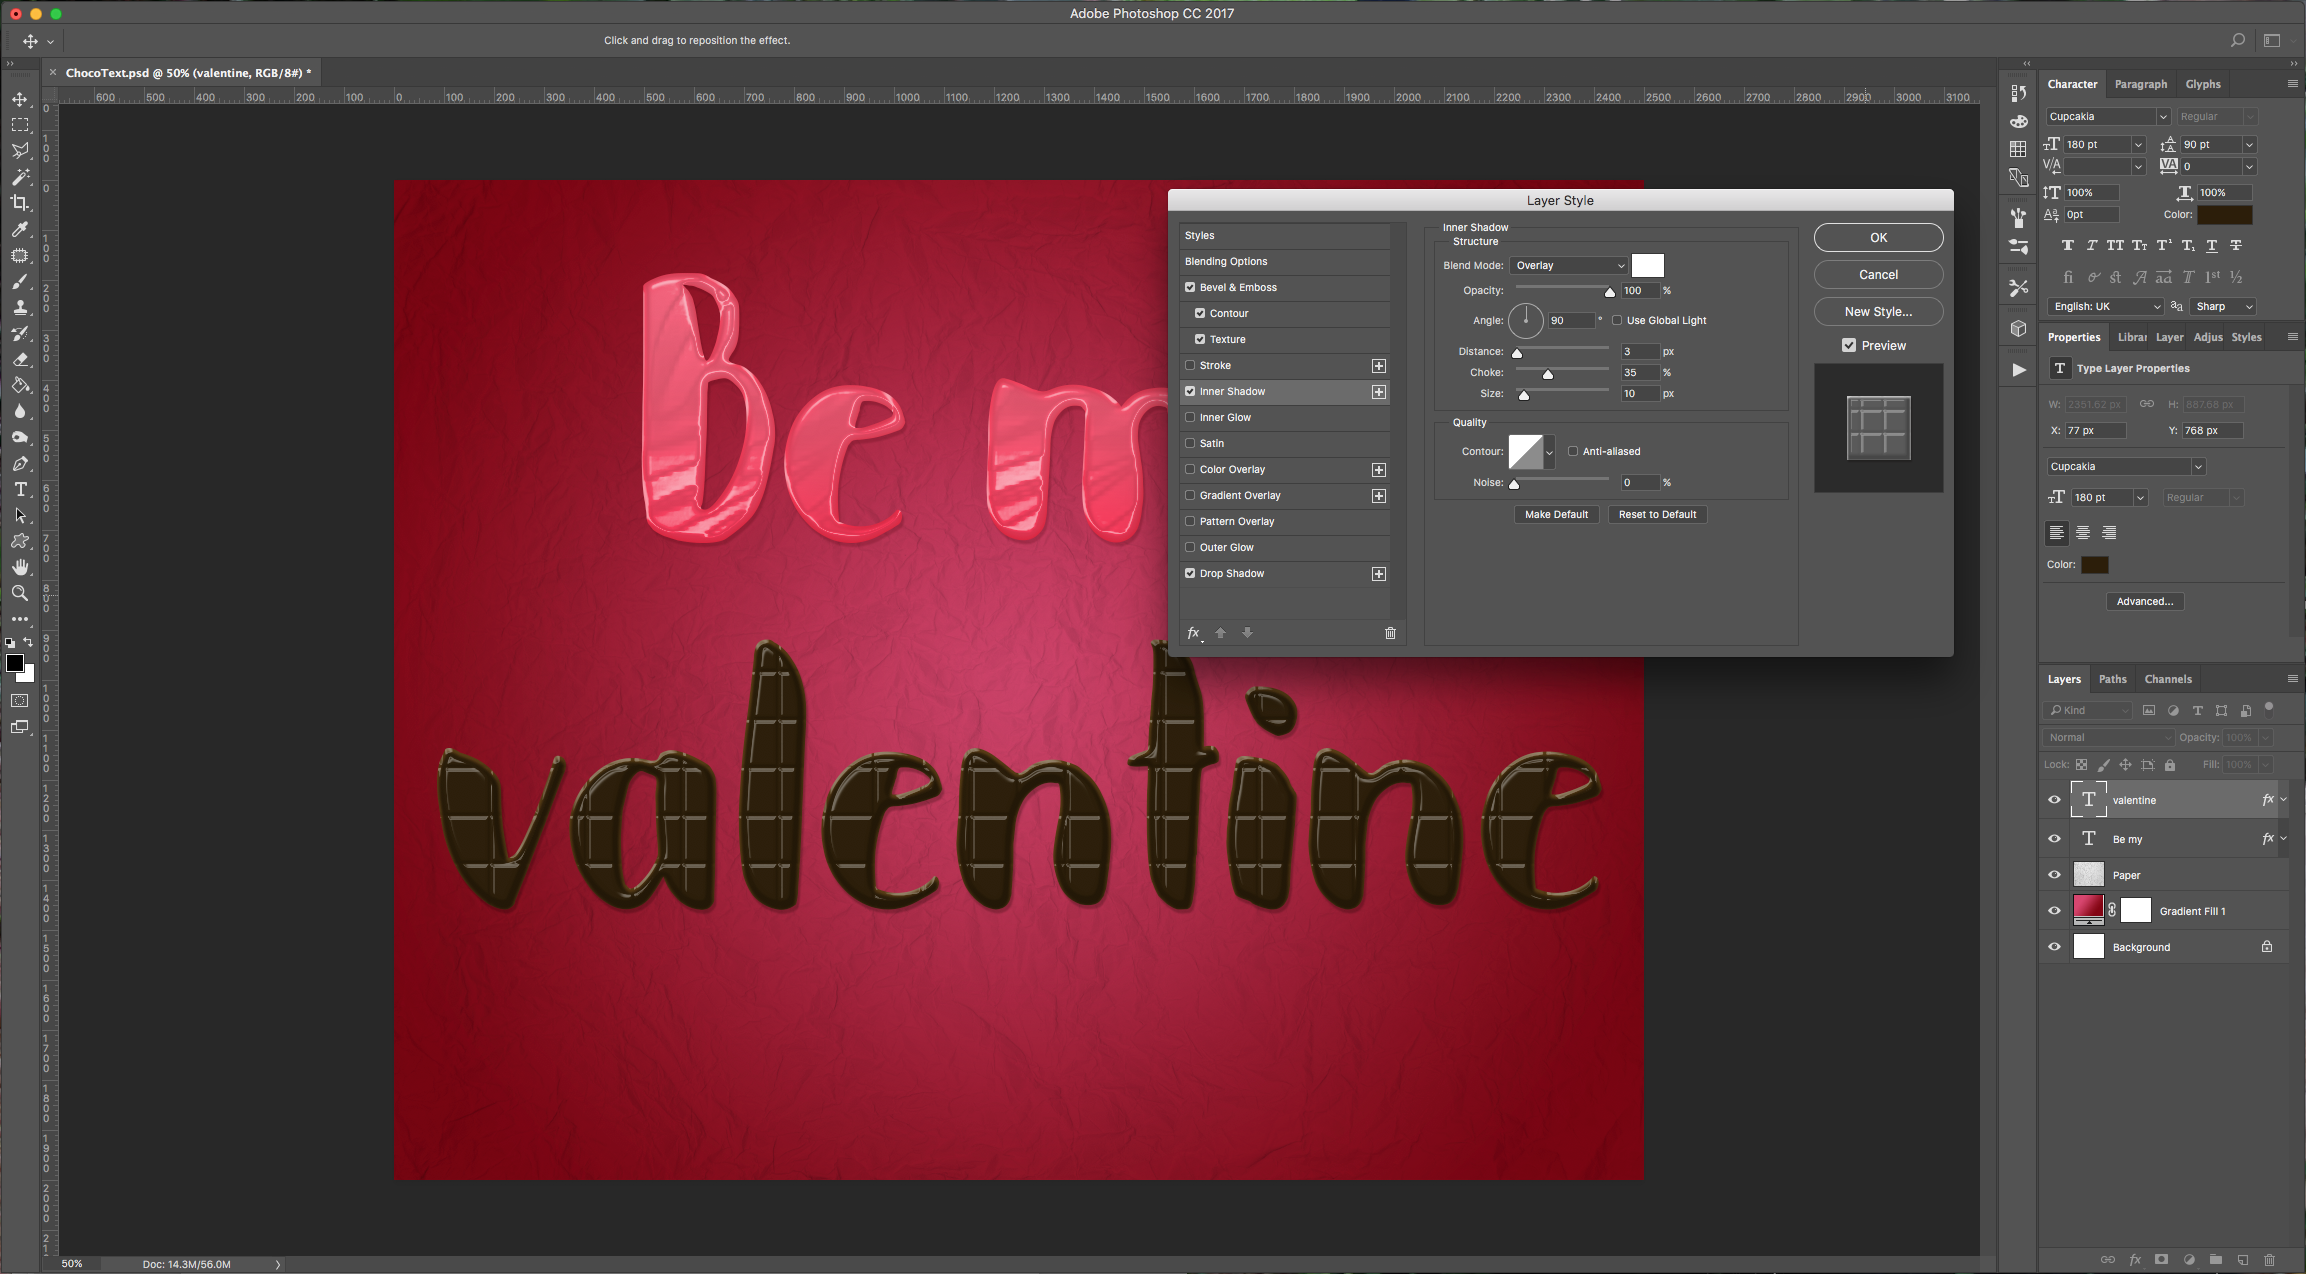
Drop Shadow: (#231103)
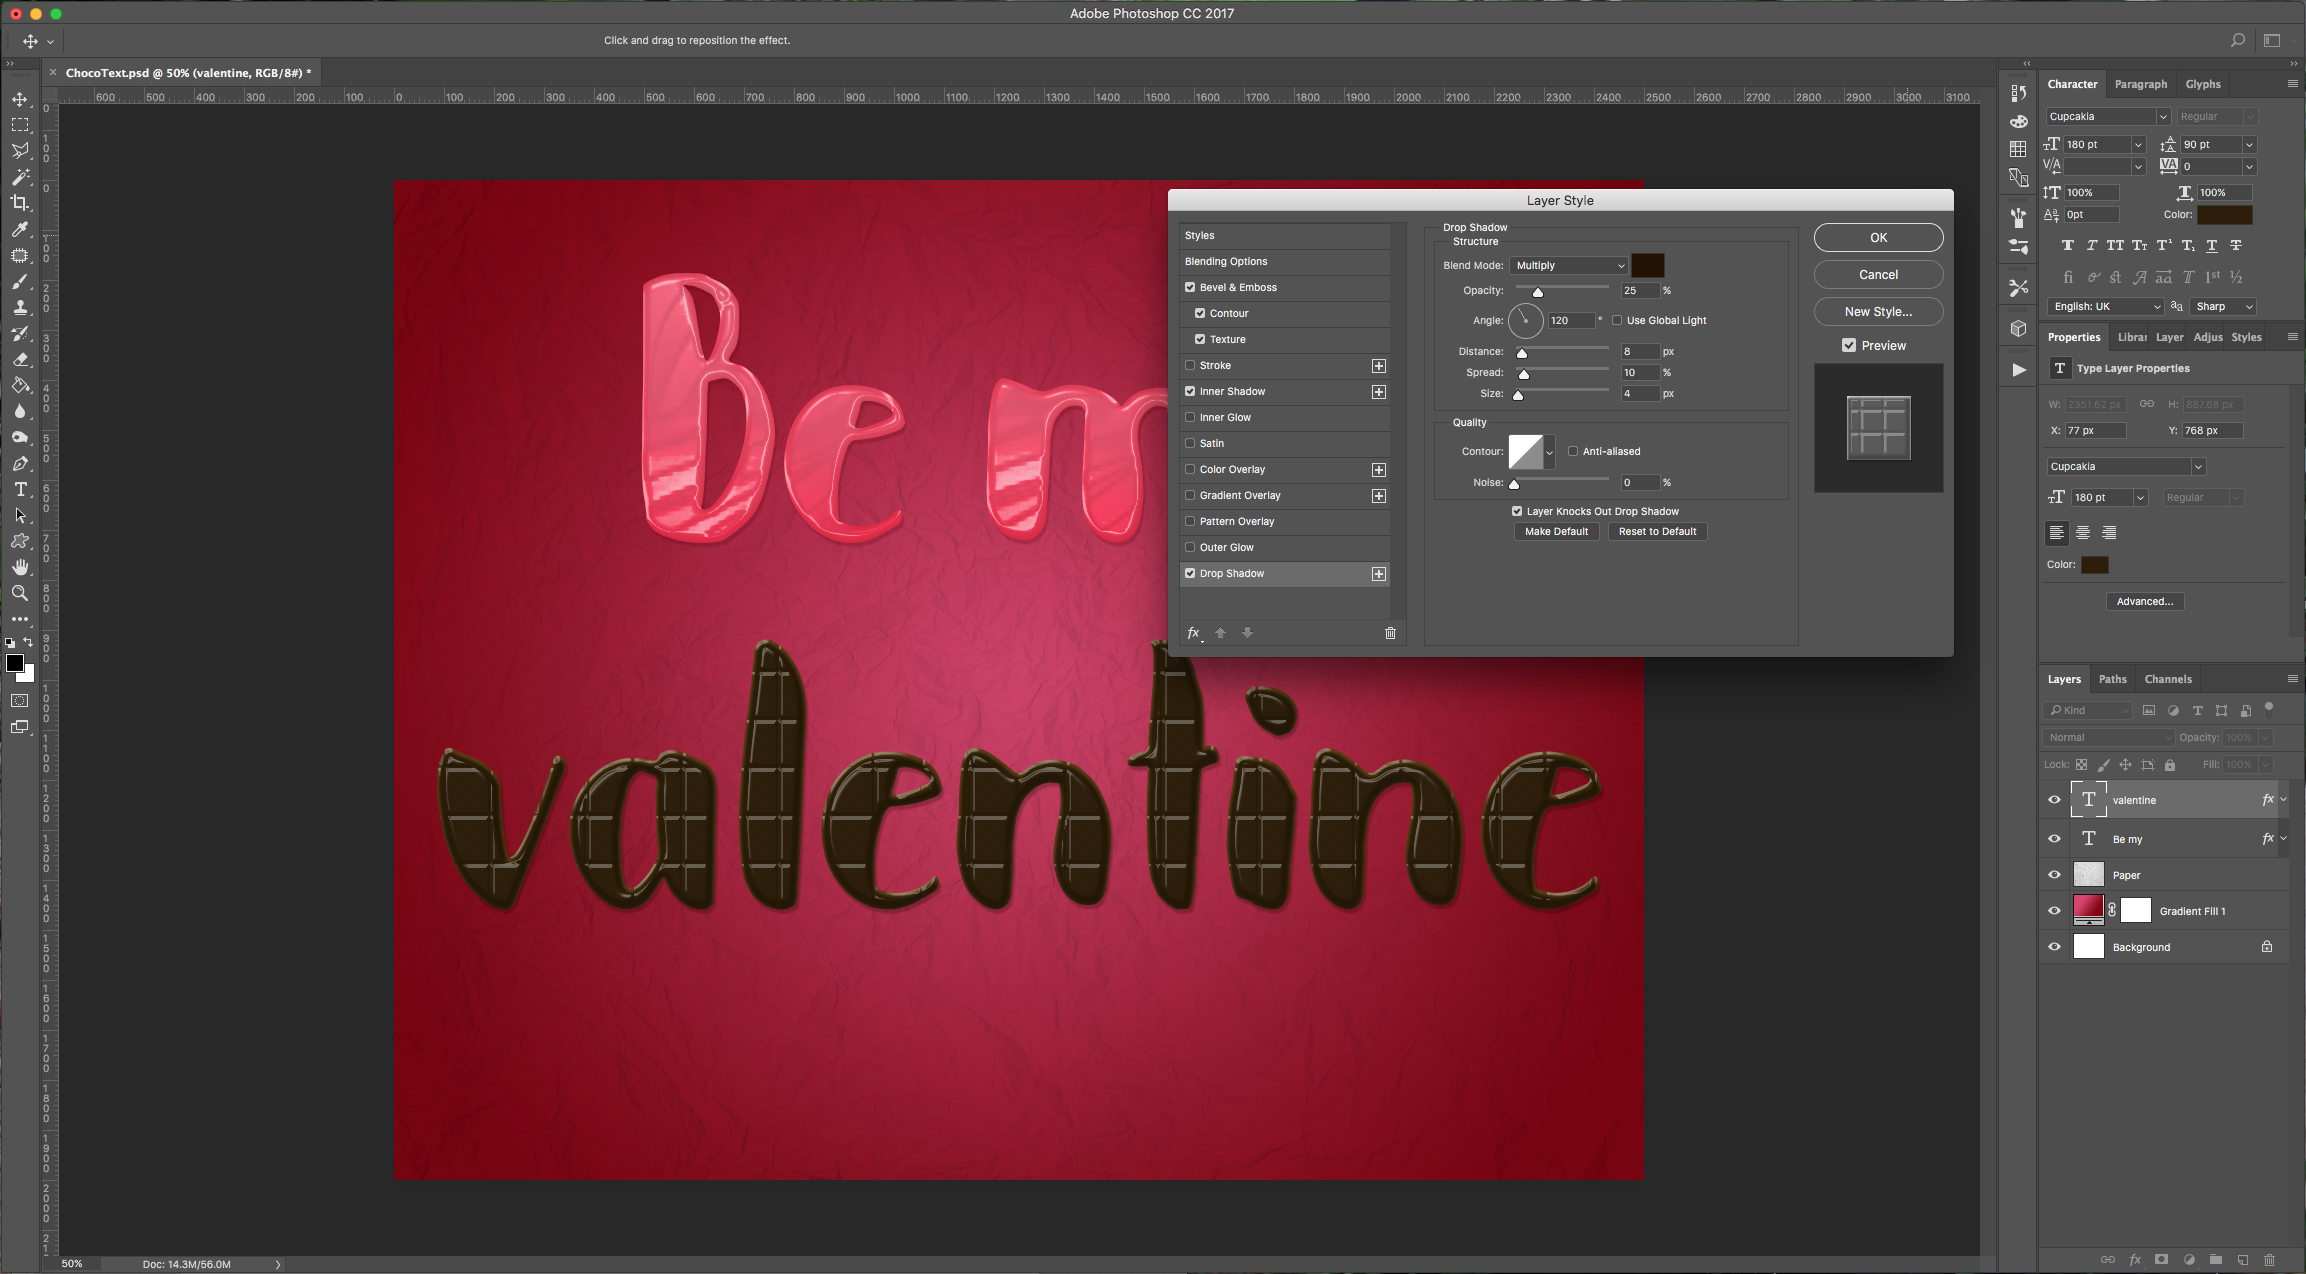
7 - Duplicate your text layer (Command/Control + J) and delete all the “Layer Styles” (just drag them to the little “Trash Can” icon at the bottom of the “Layers” Panel.
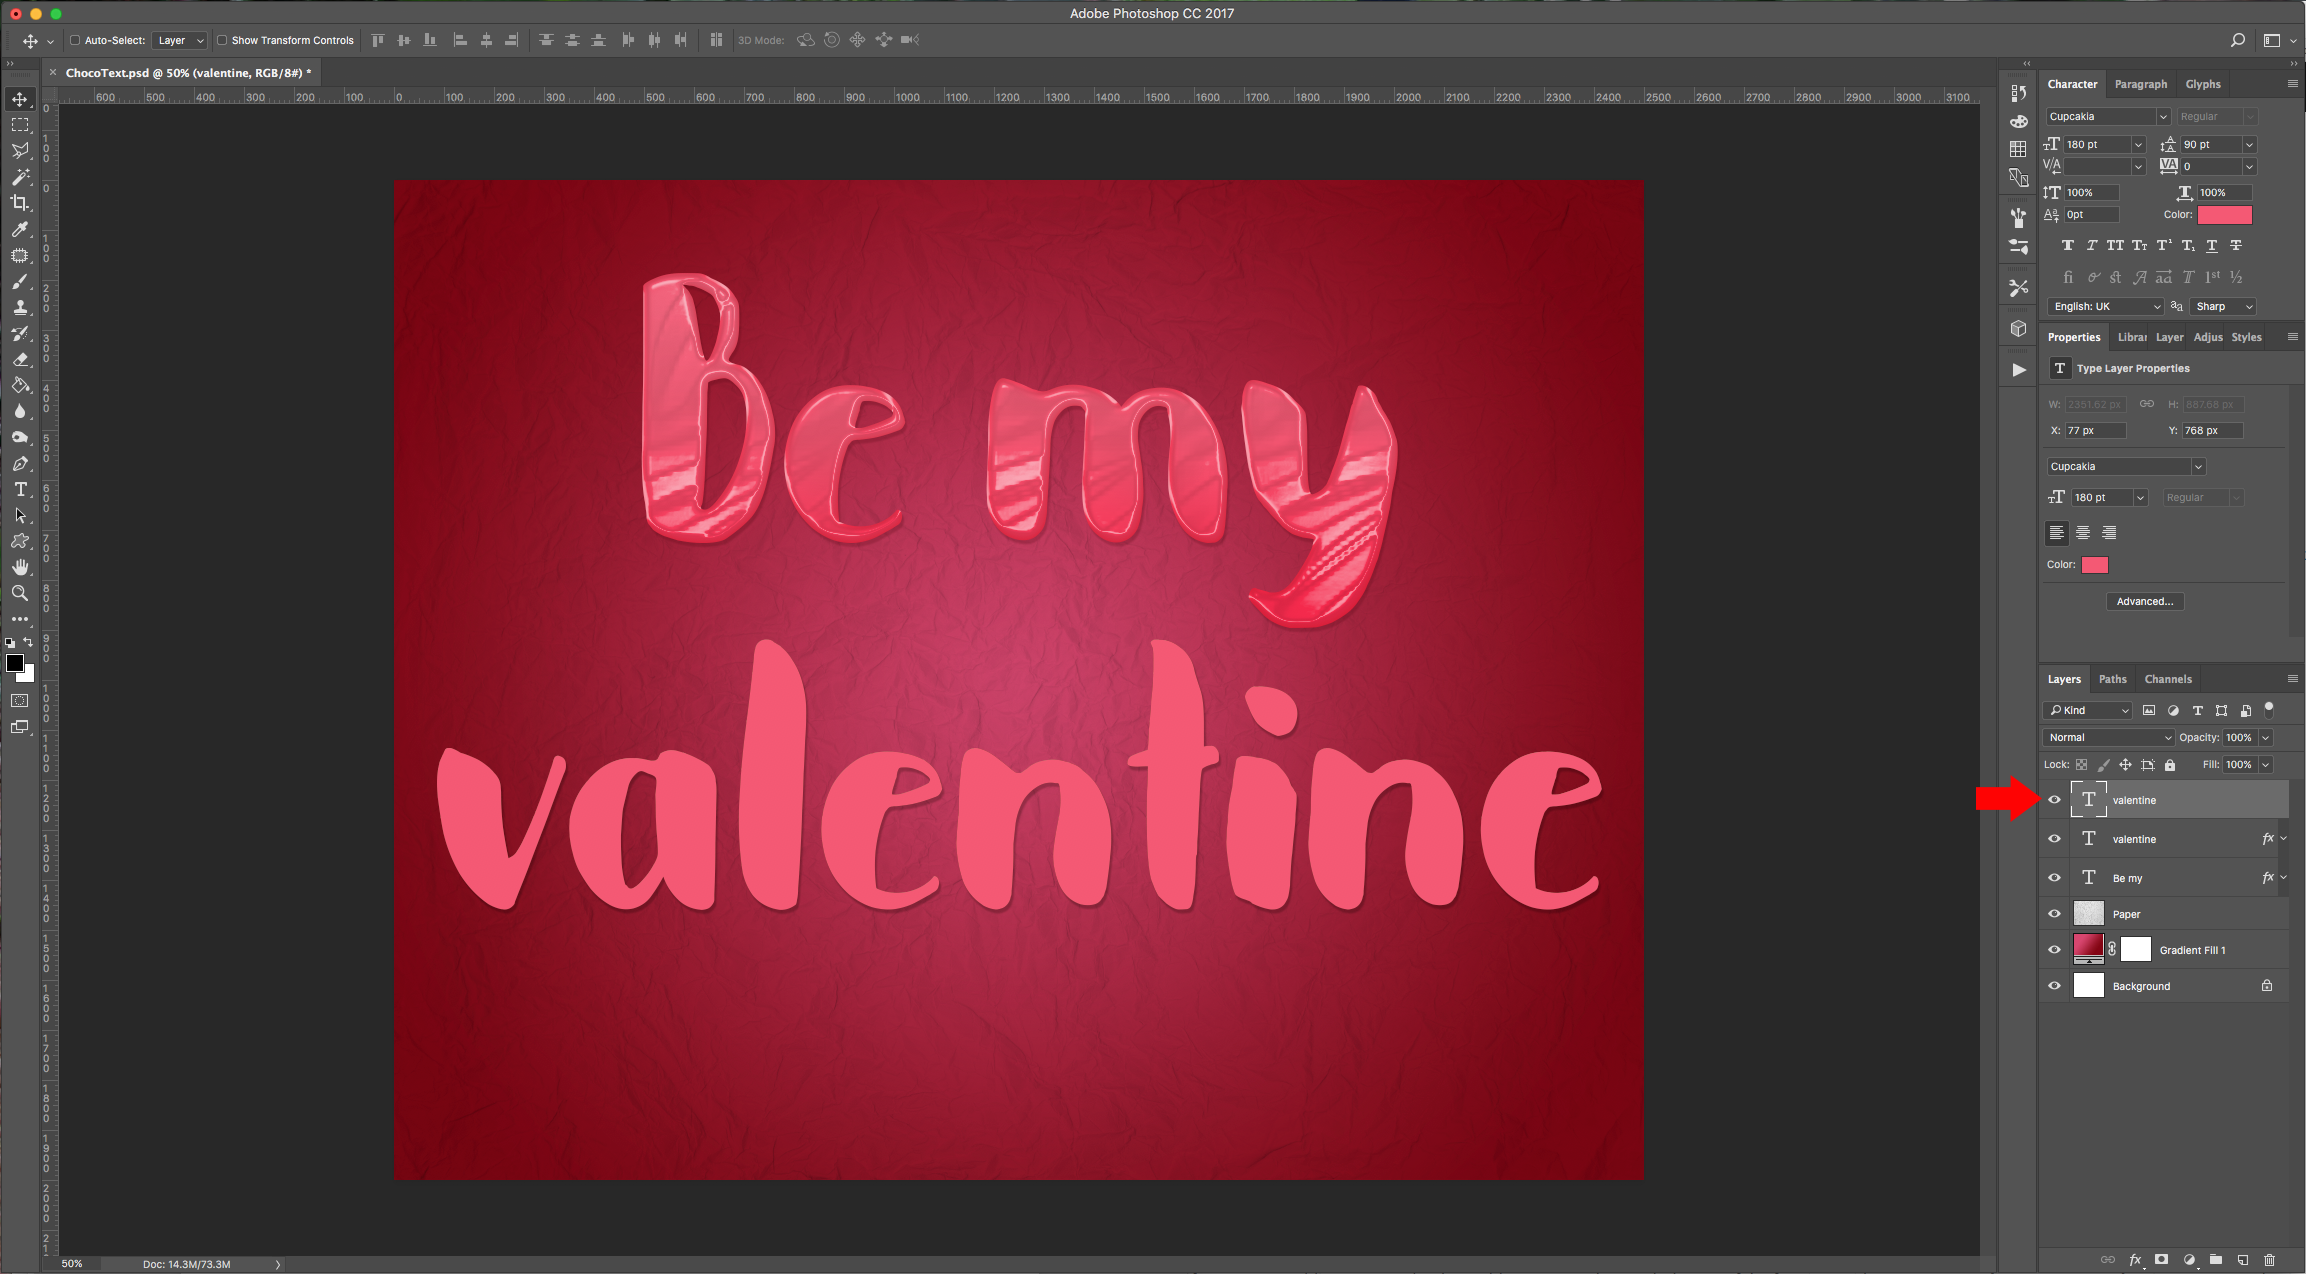
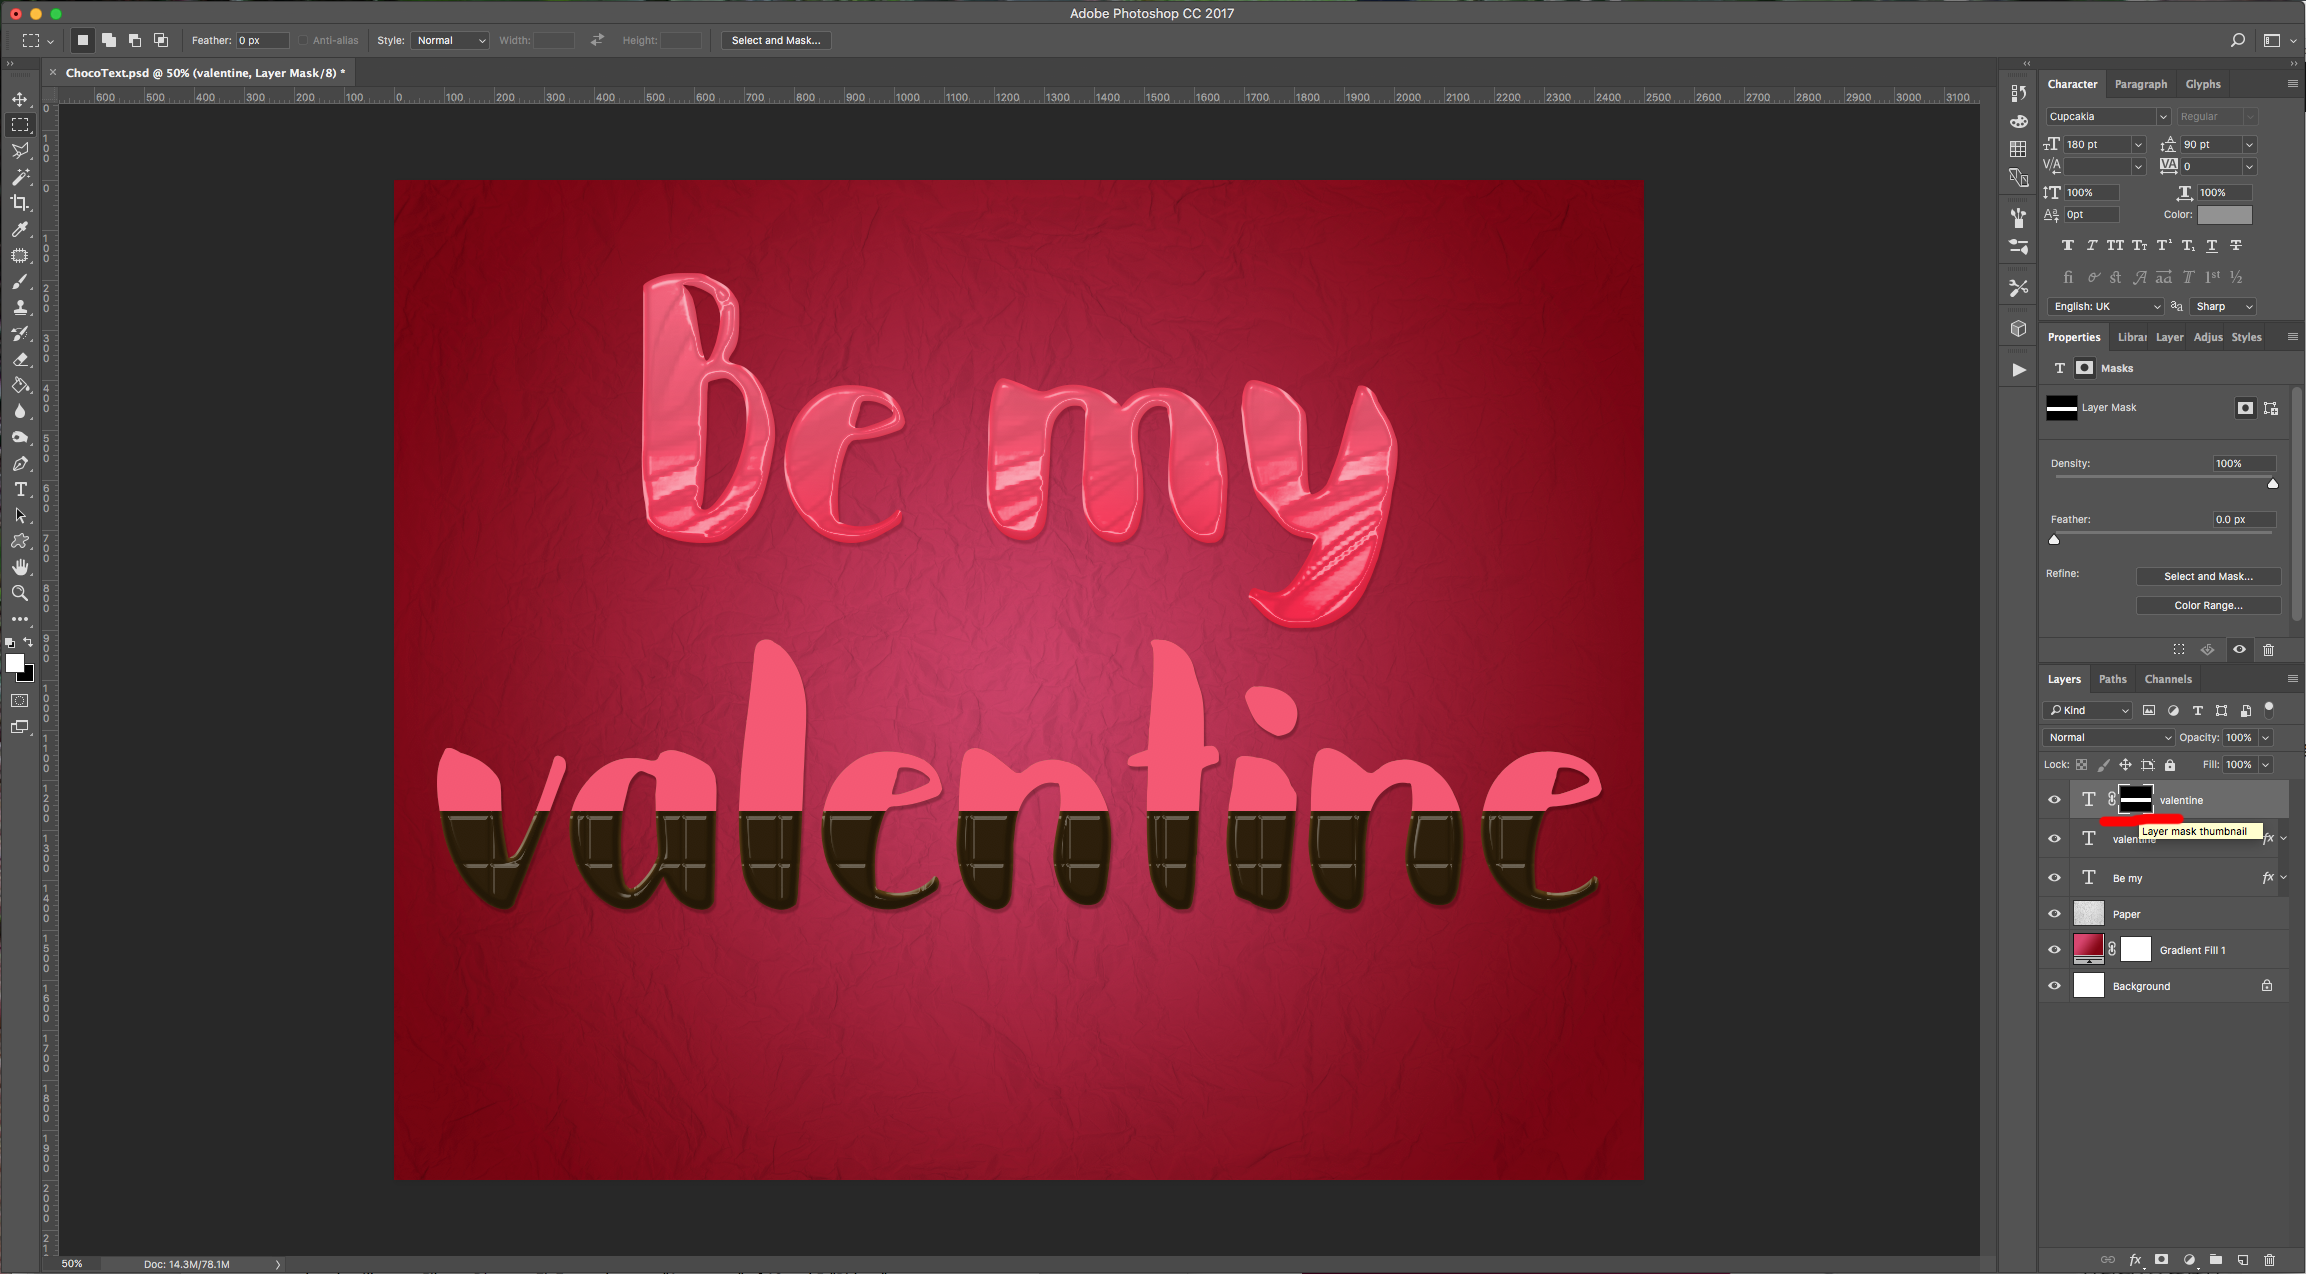
8 - Change the “Fill” color to #f85772. Select the “Rectangular Marquee Tool” (M) and draw a rectangle covering the top part of your text, then click on the “Add Layer Mask” button at the bottom of the “Layers” Panel to mask your text.
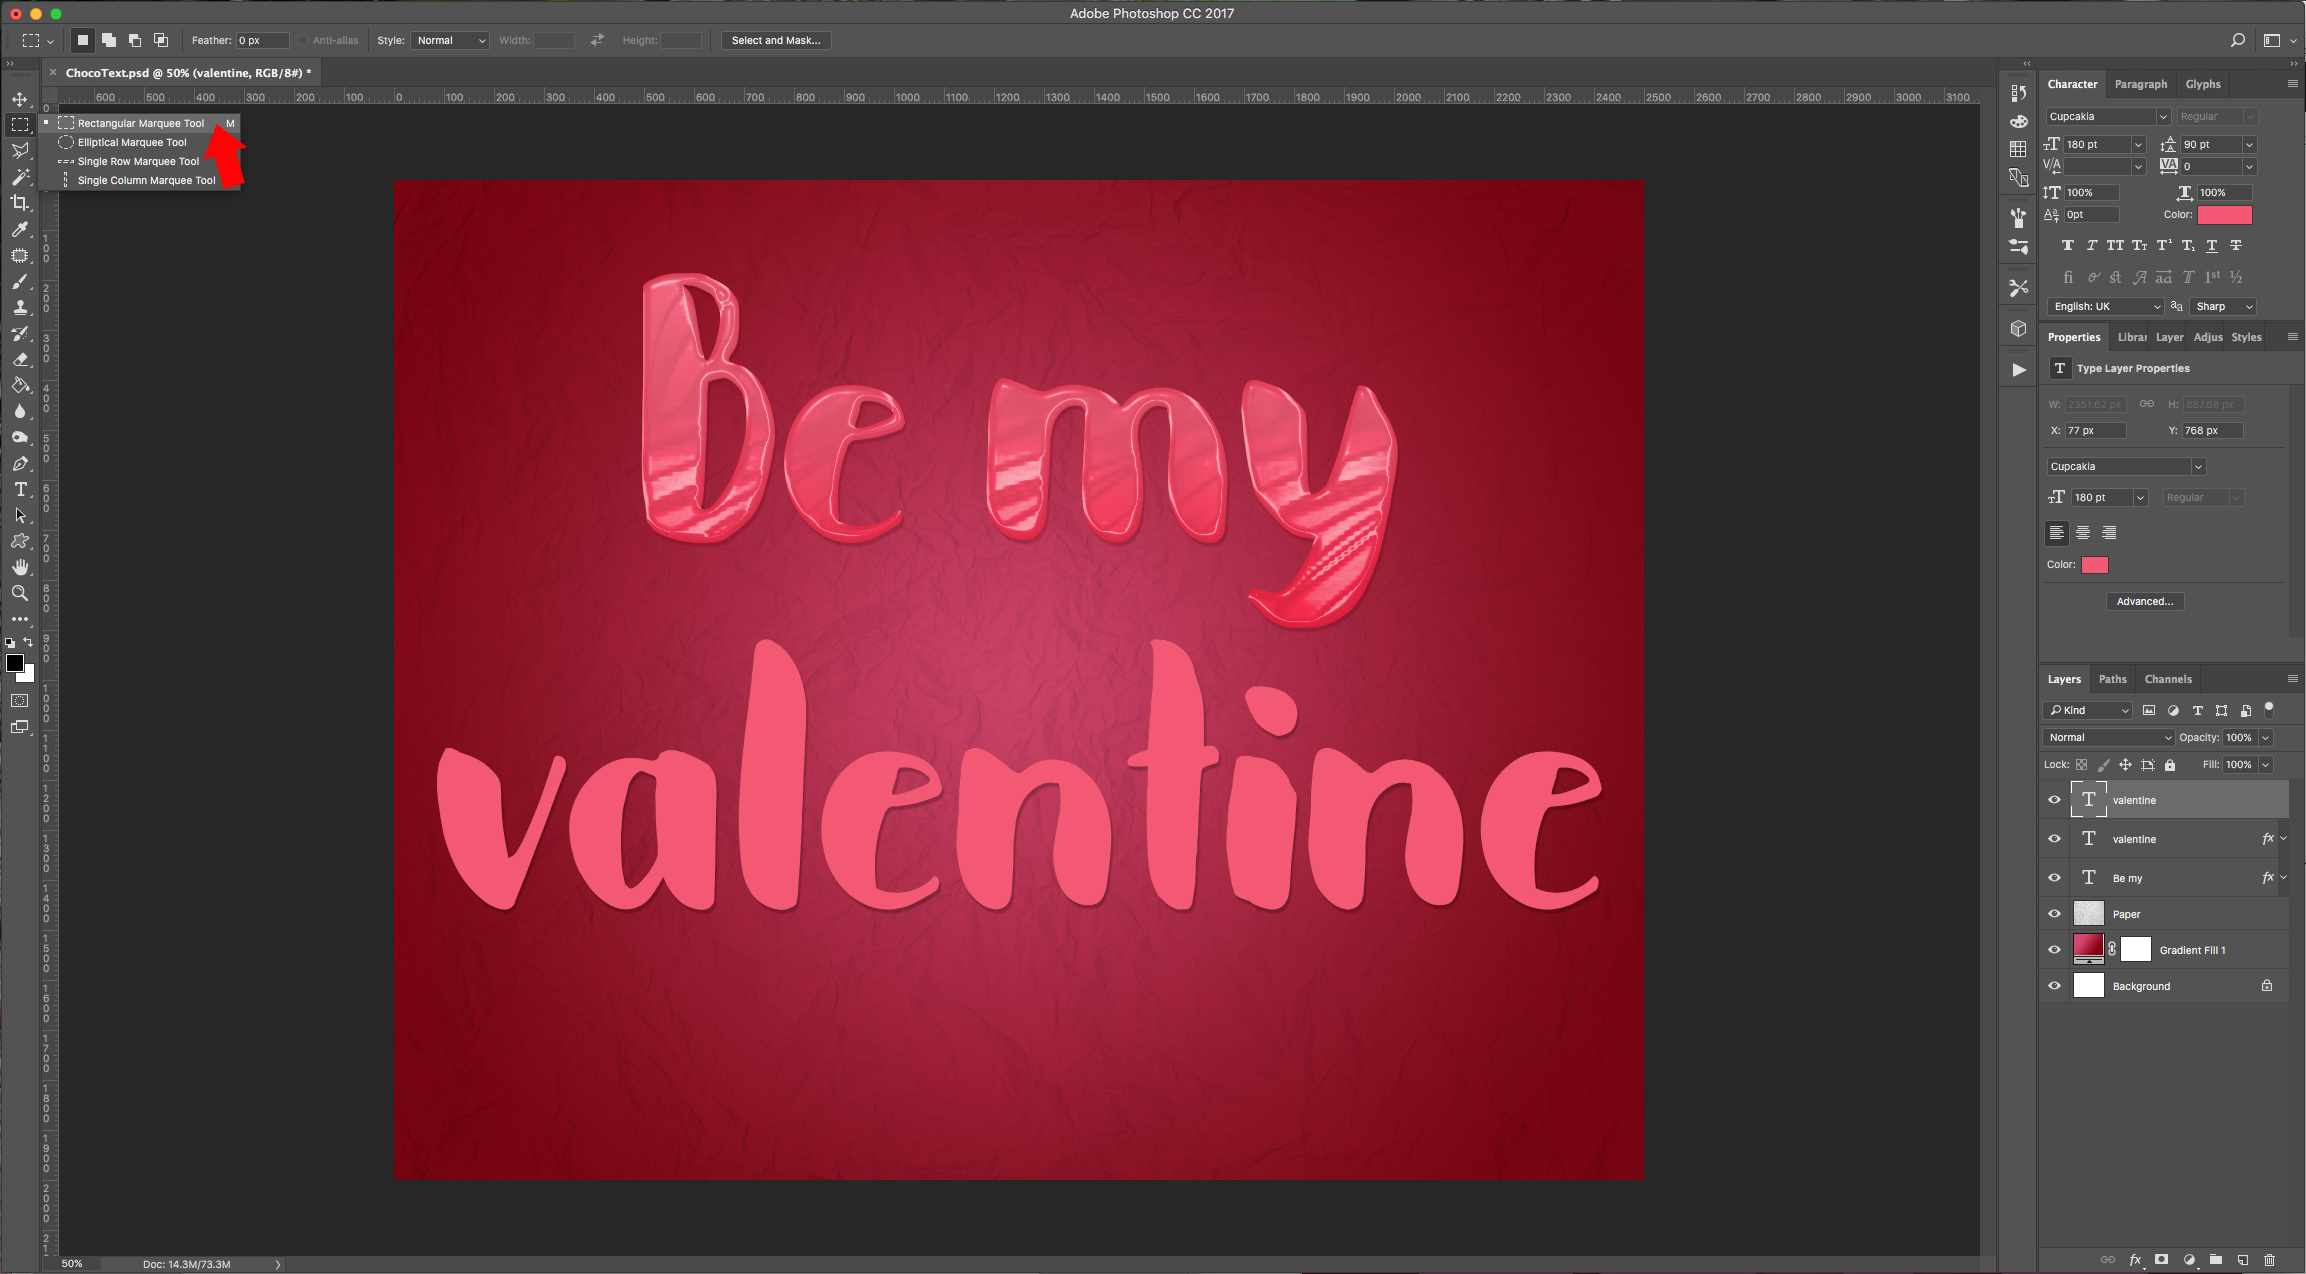
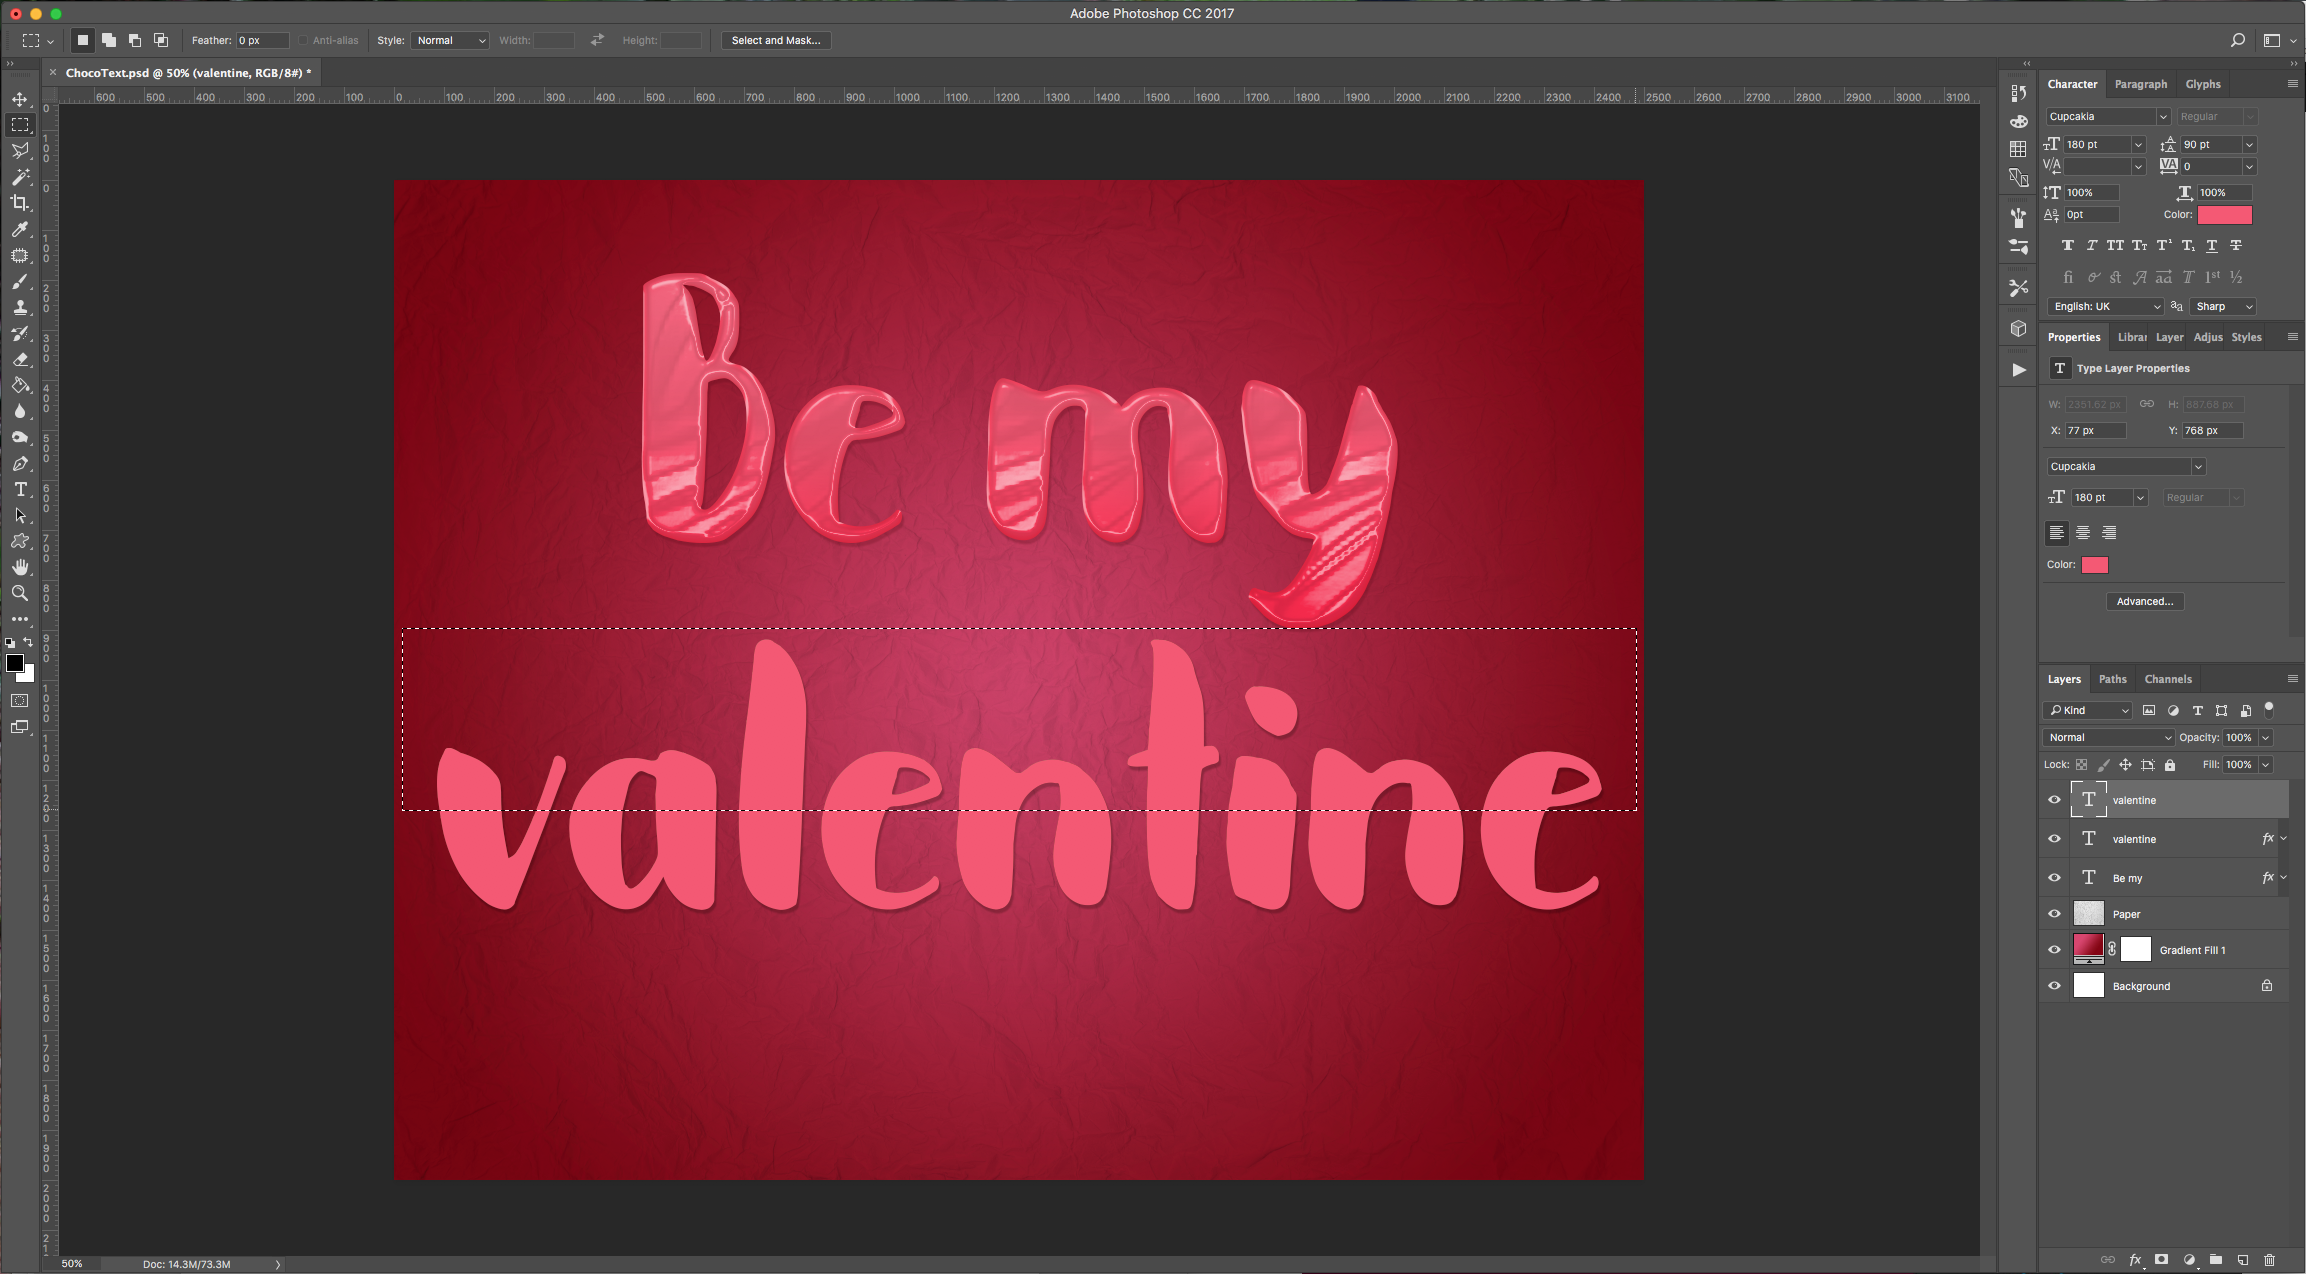
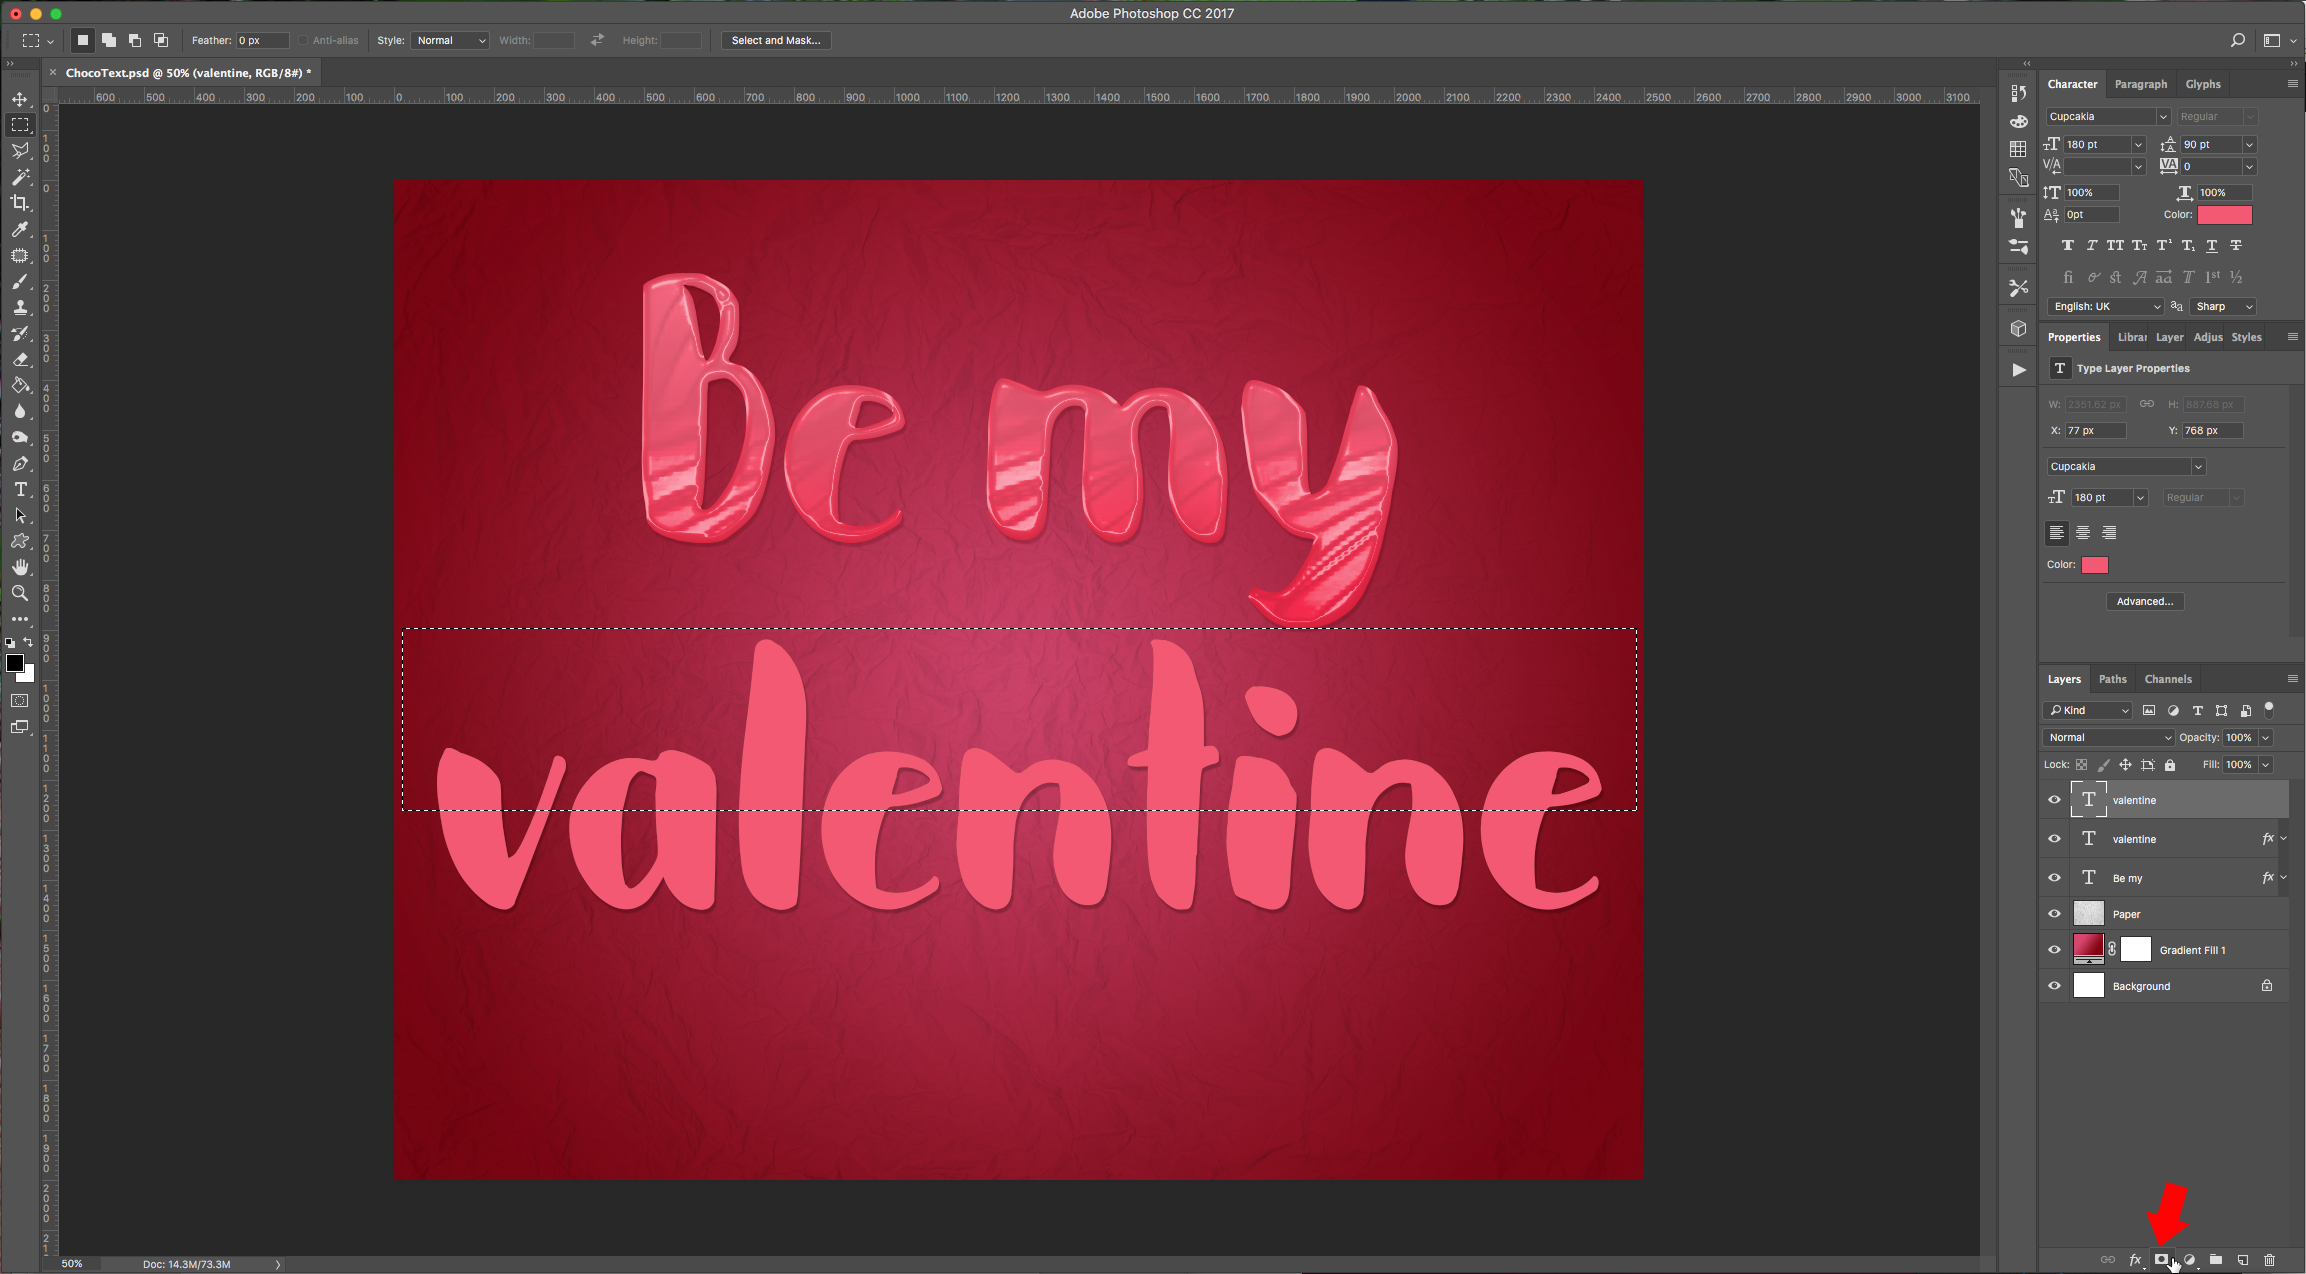
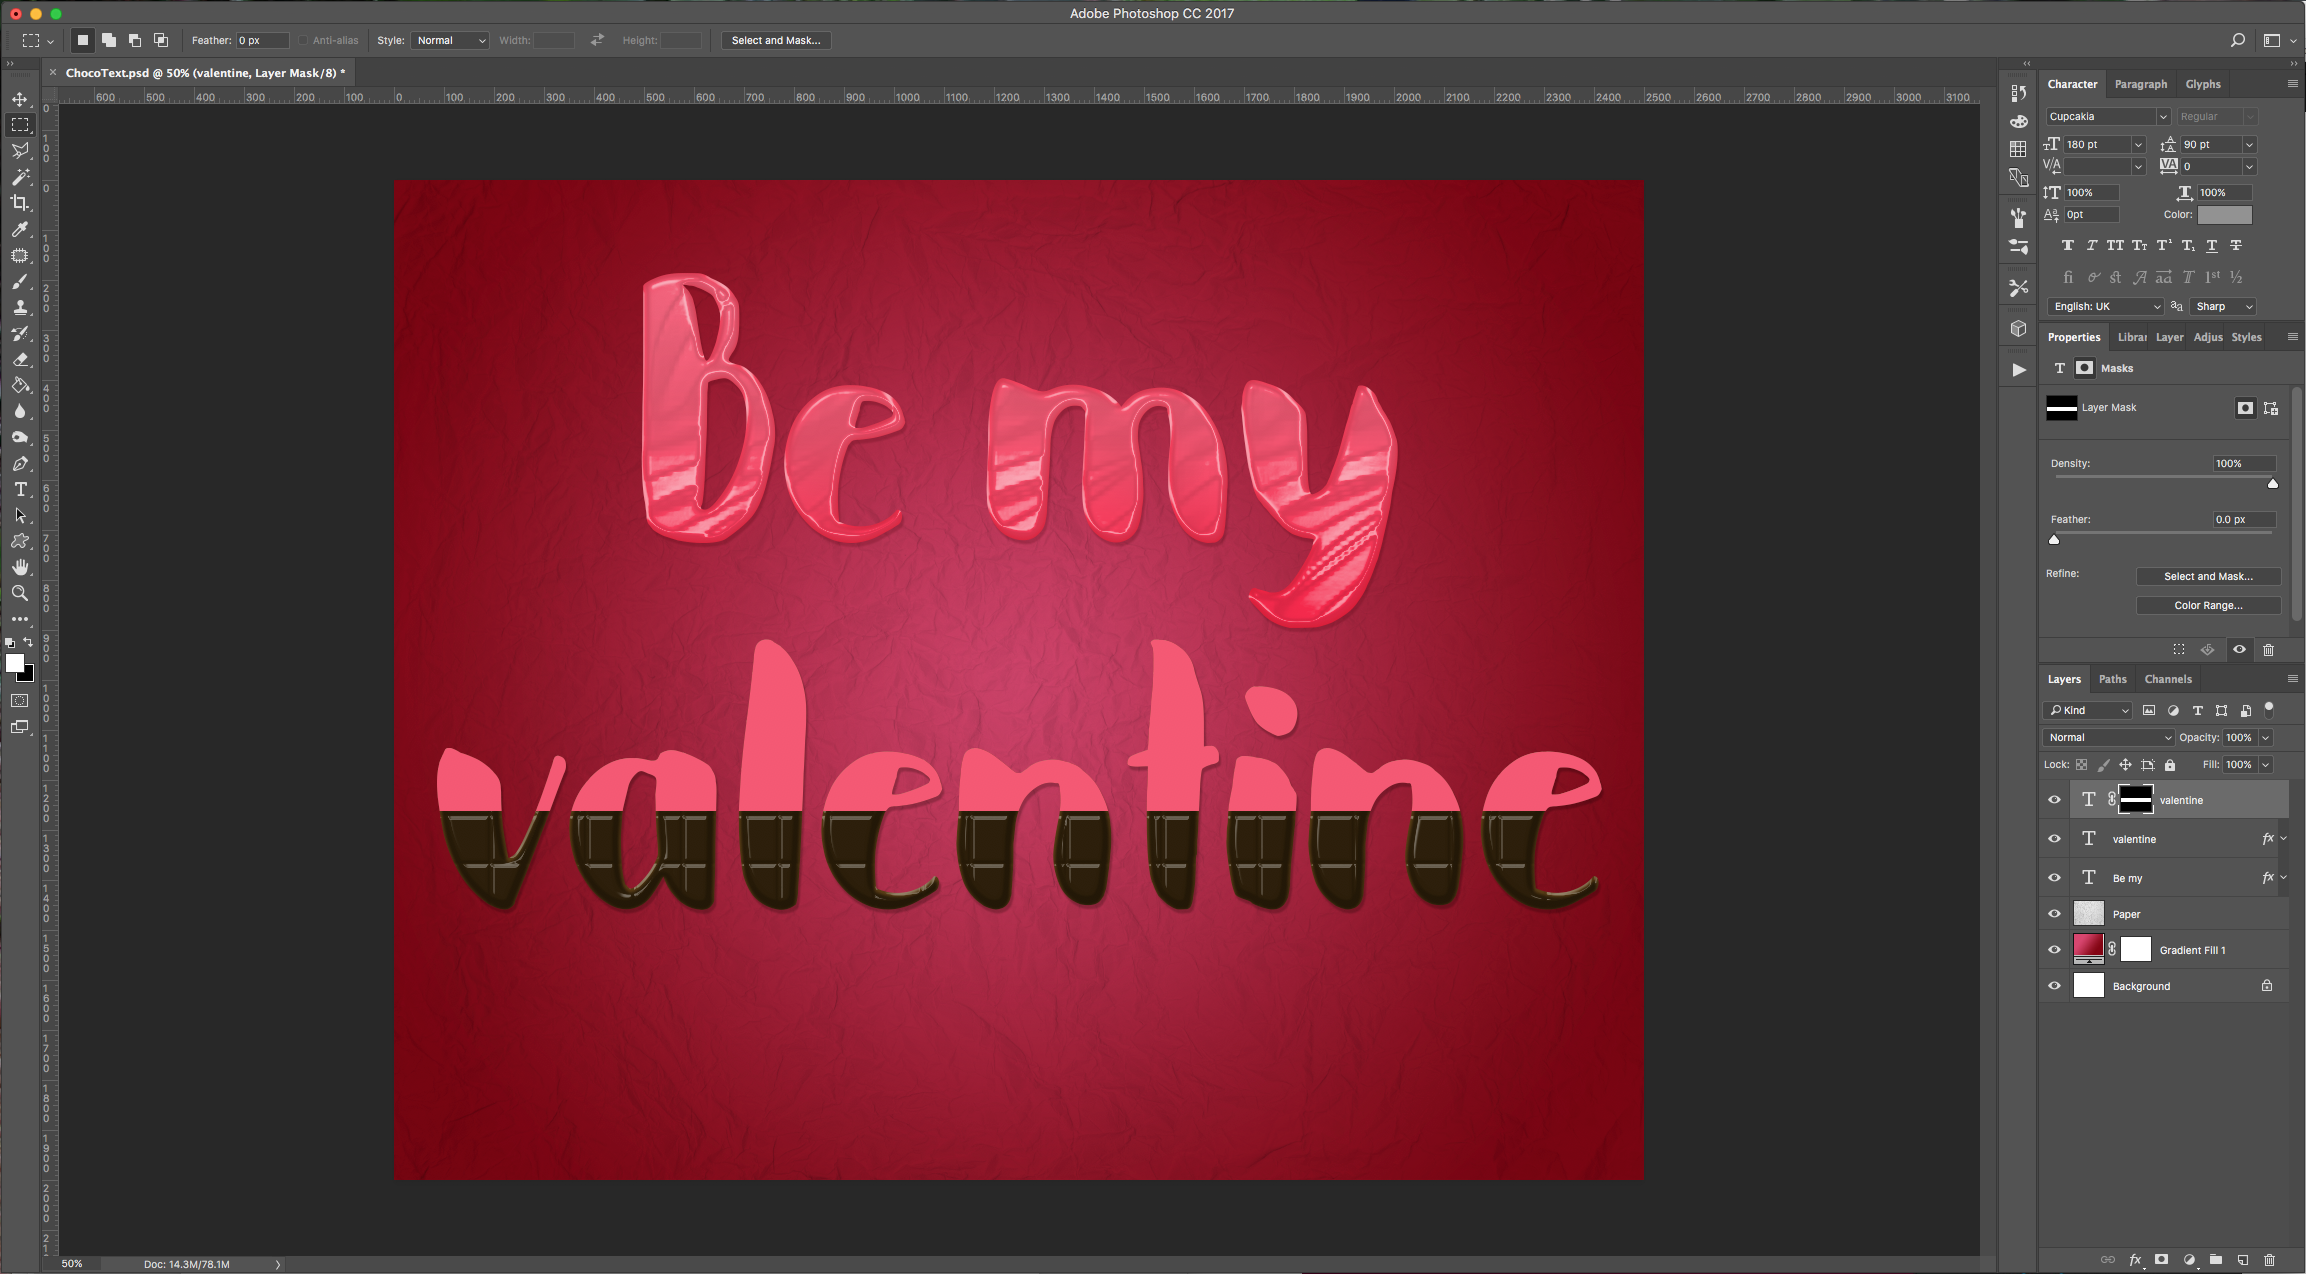
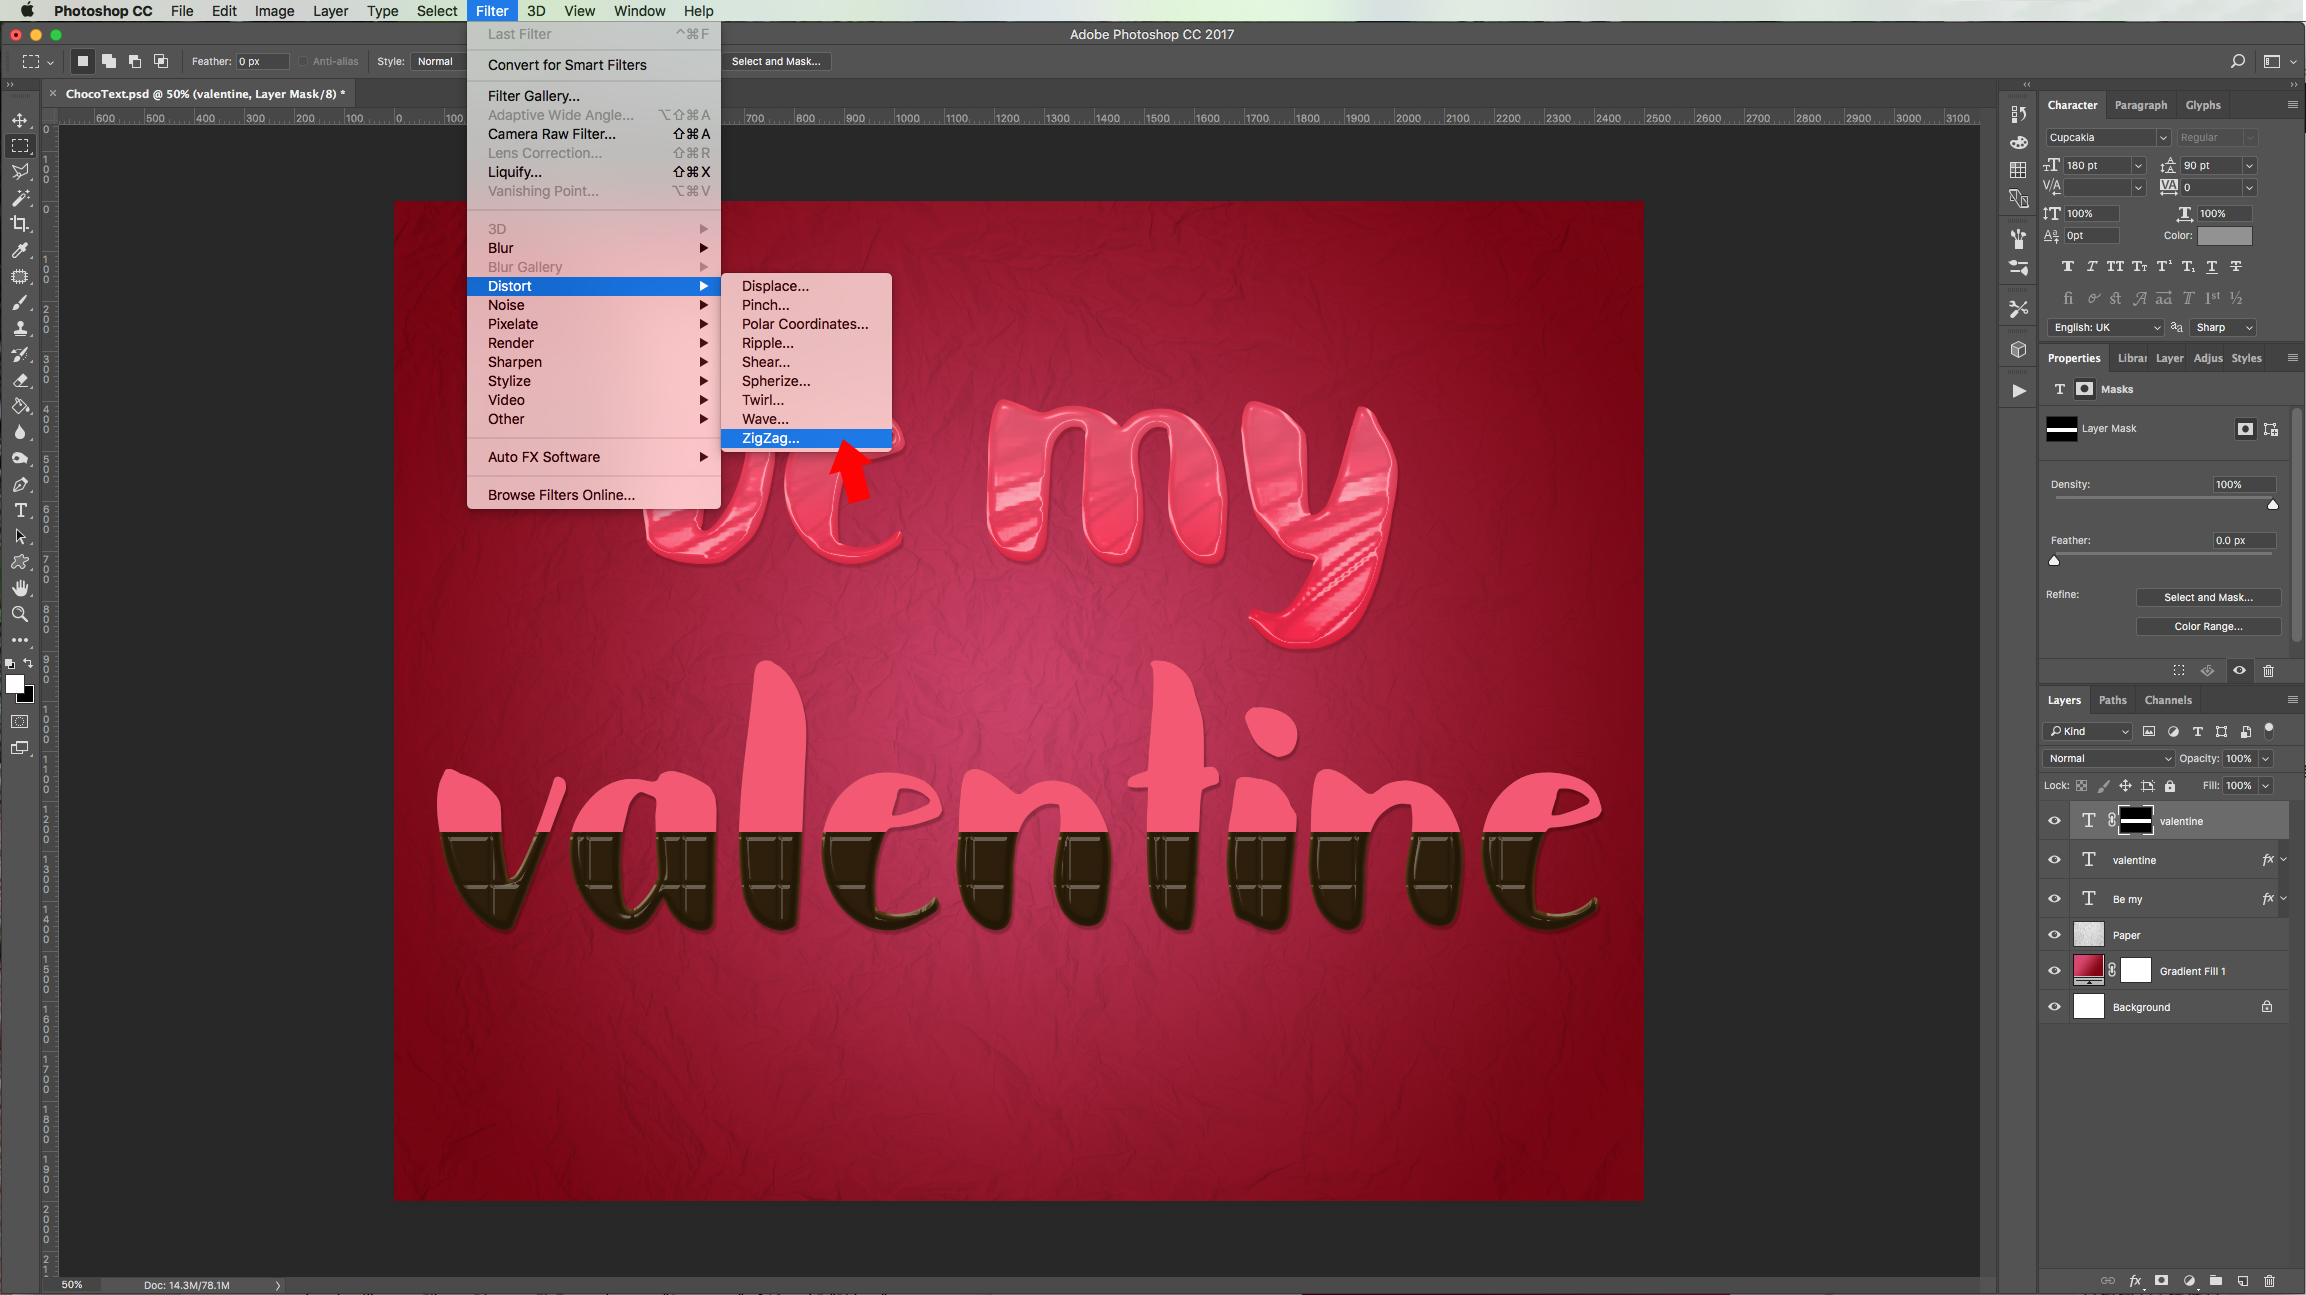
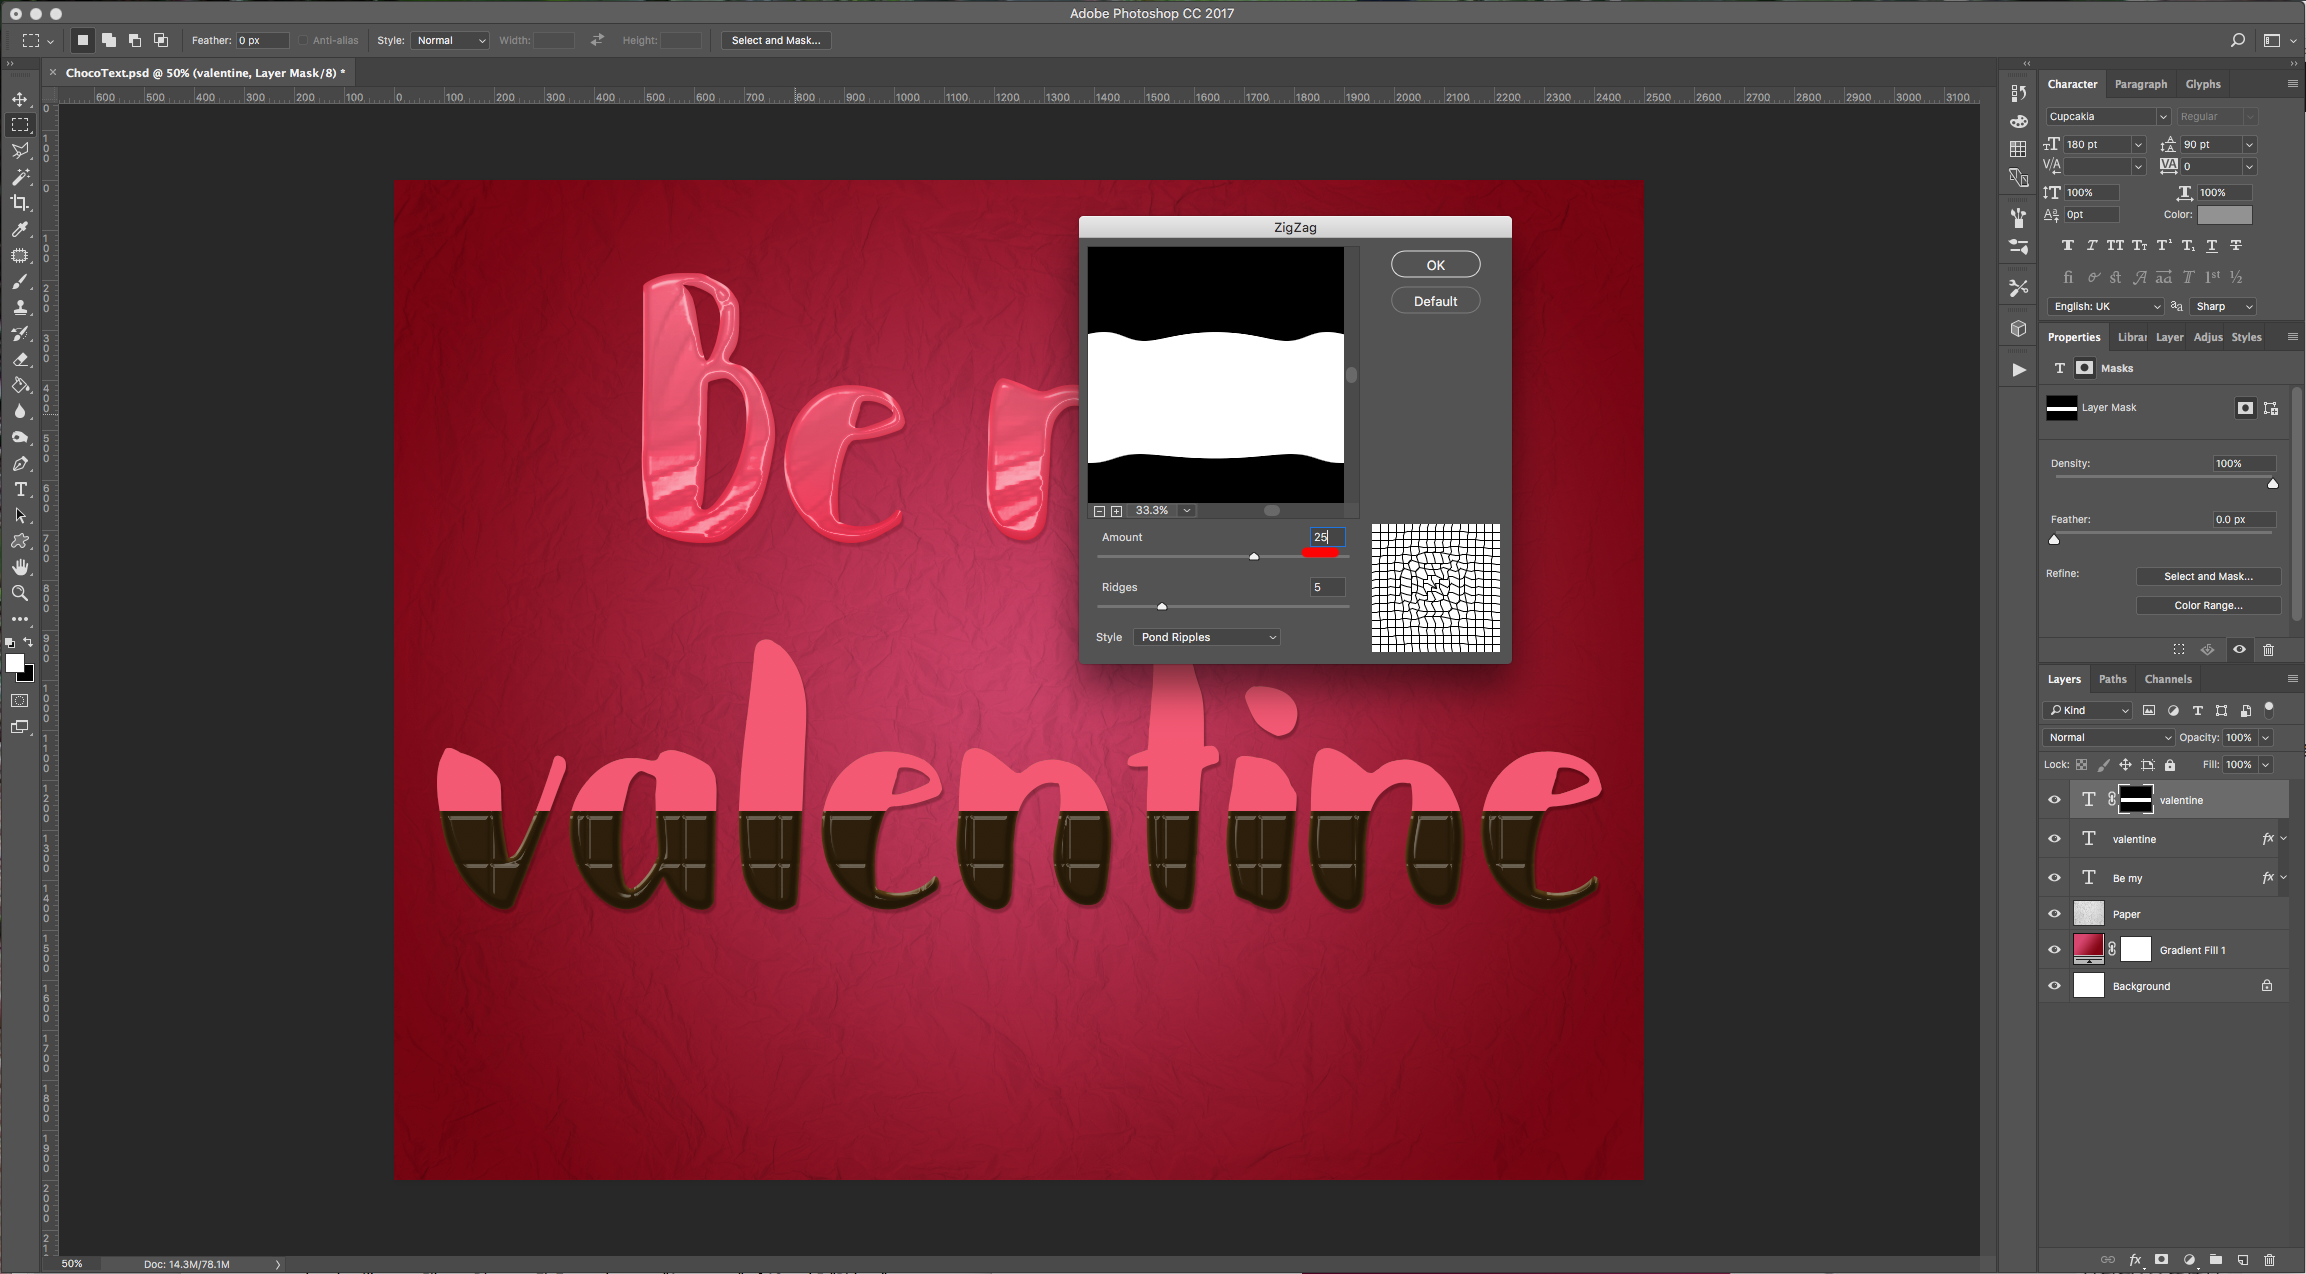
9 - Making sure the “Mask” is selected (there should be a white box around the mask thumbnail), go to Filter > Distort > ZigZag and use an “Amount” of 25 and 5 “Ridges”. Use “Pond Ripples” as “Style”.
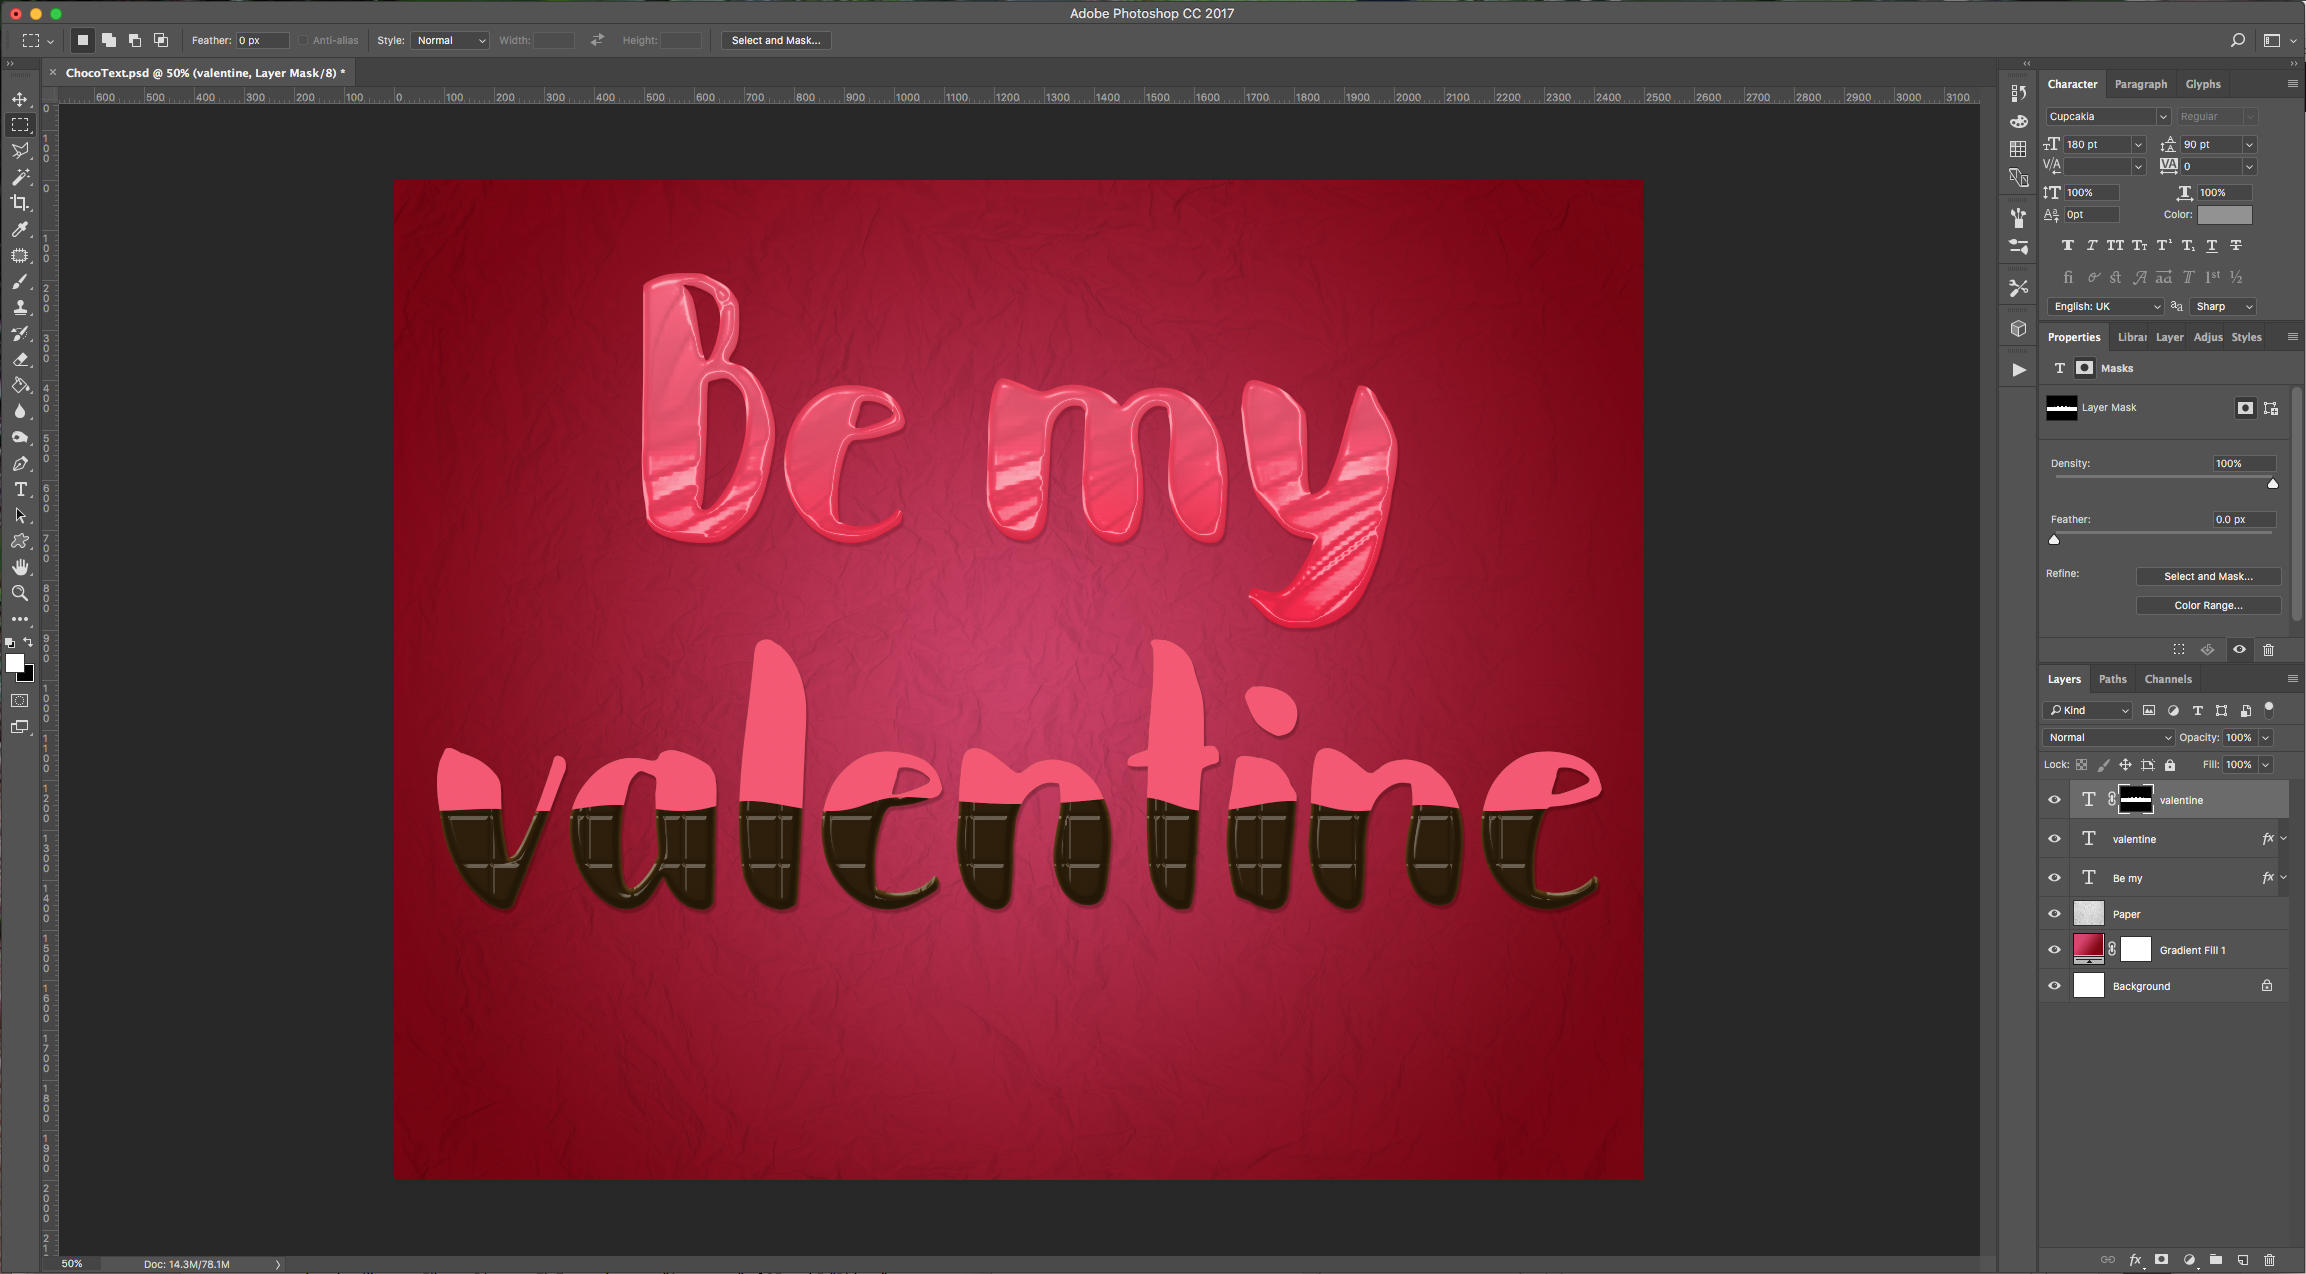
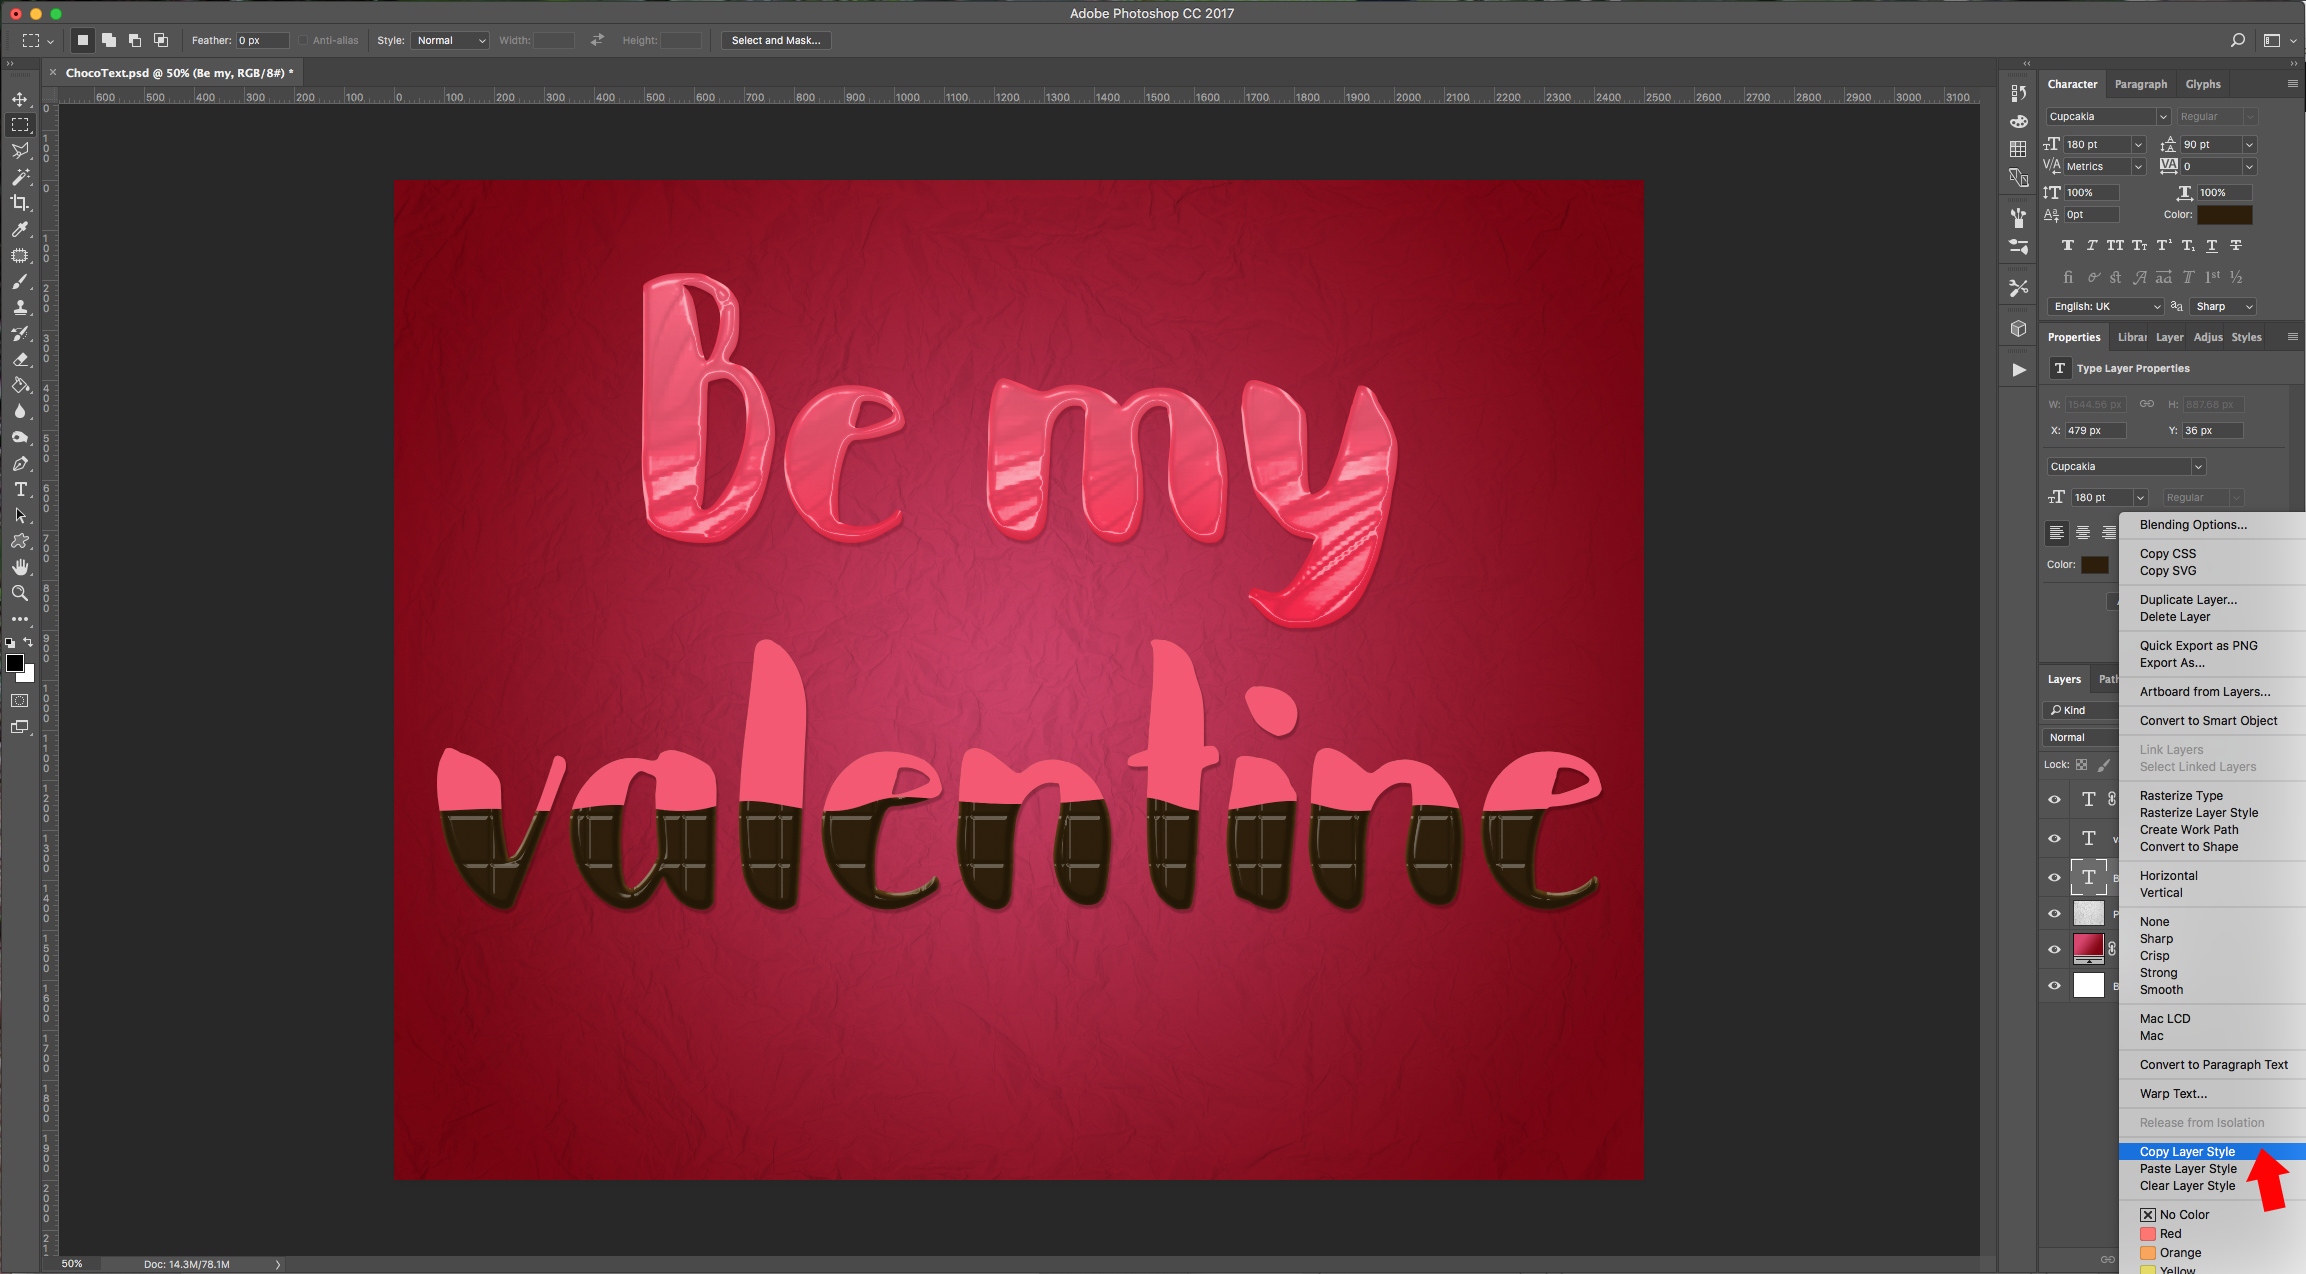
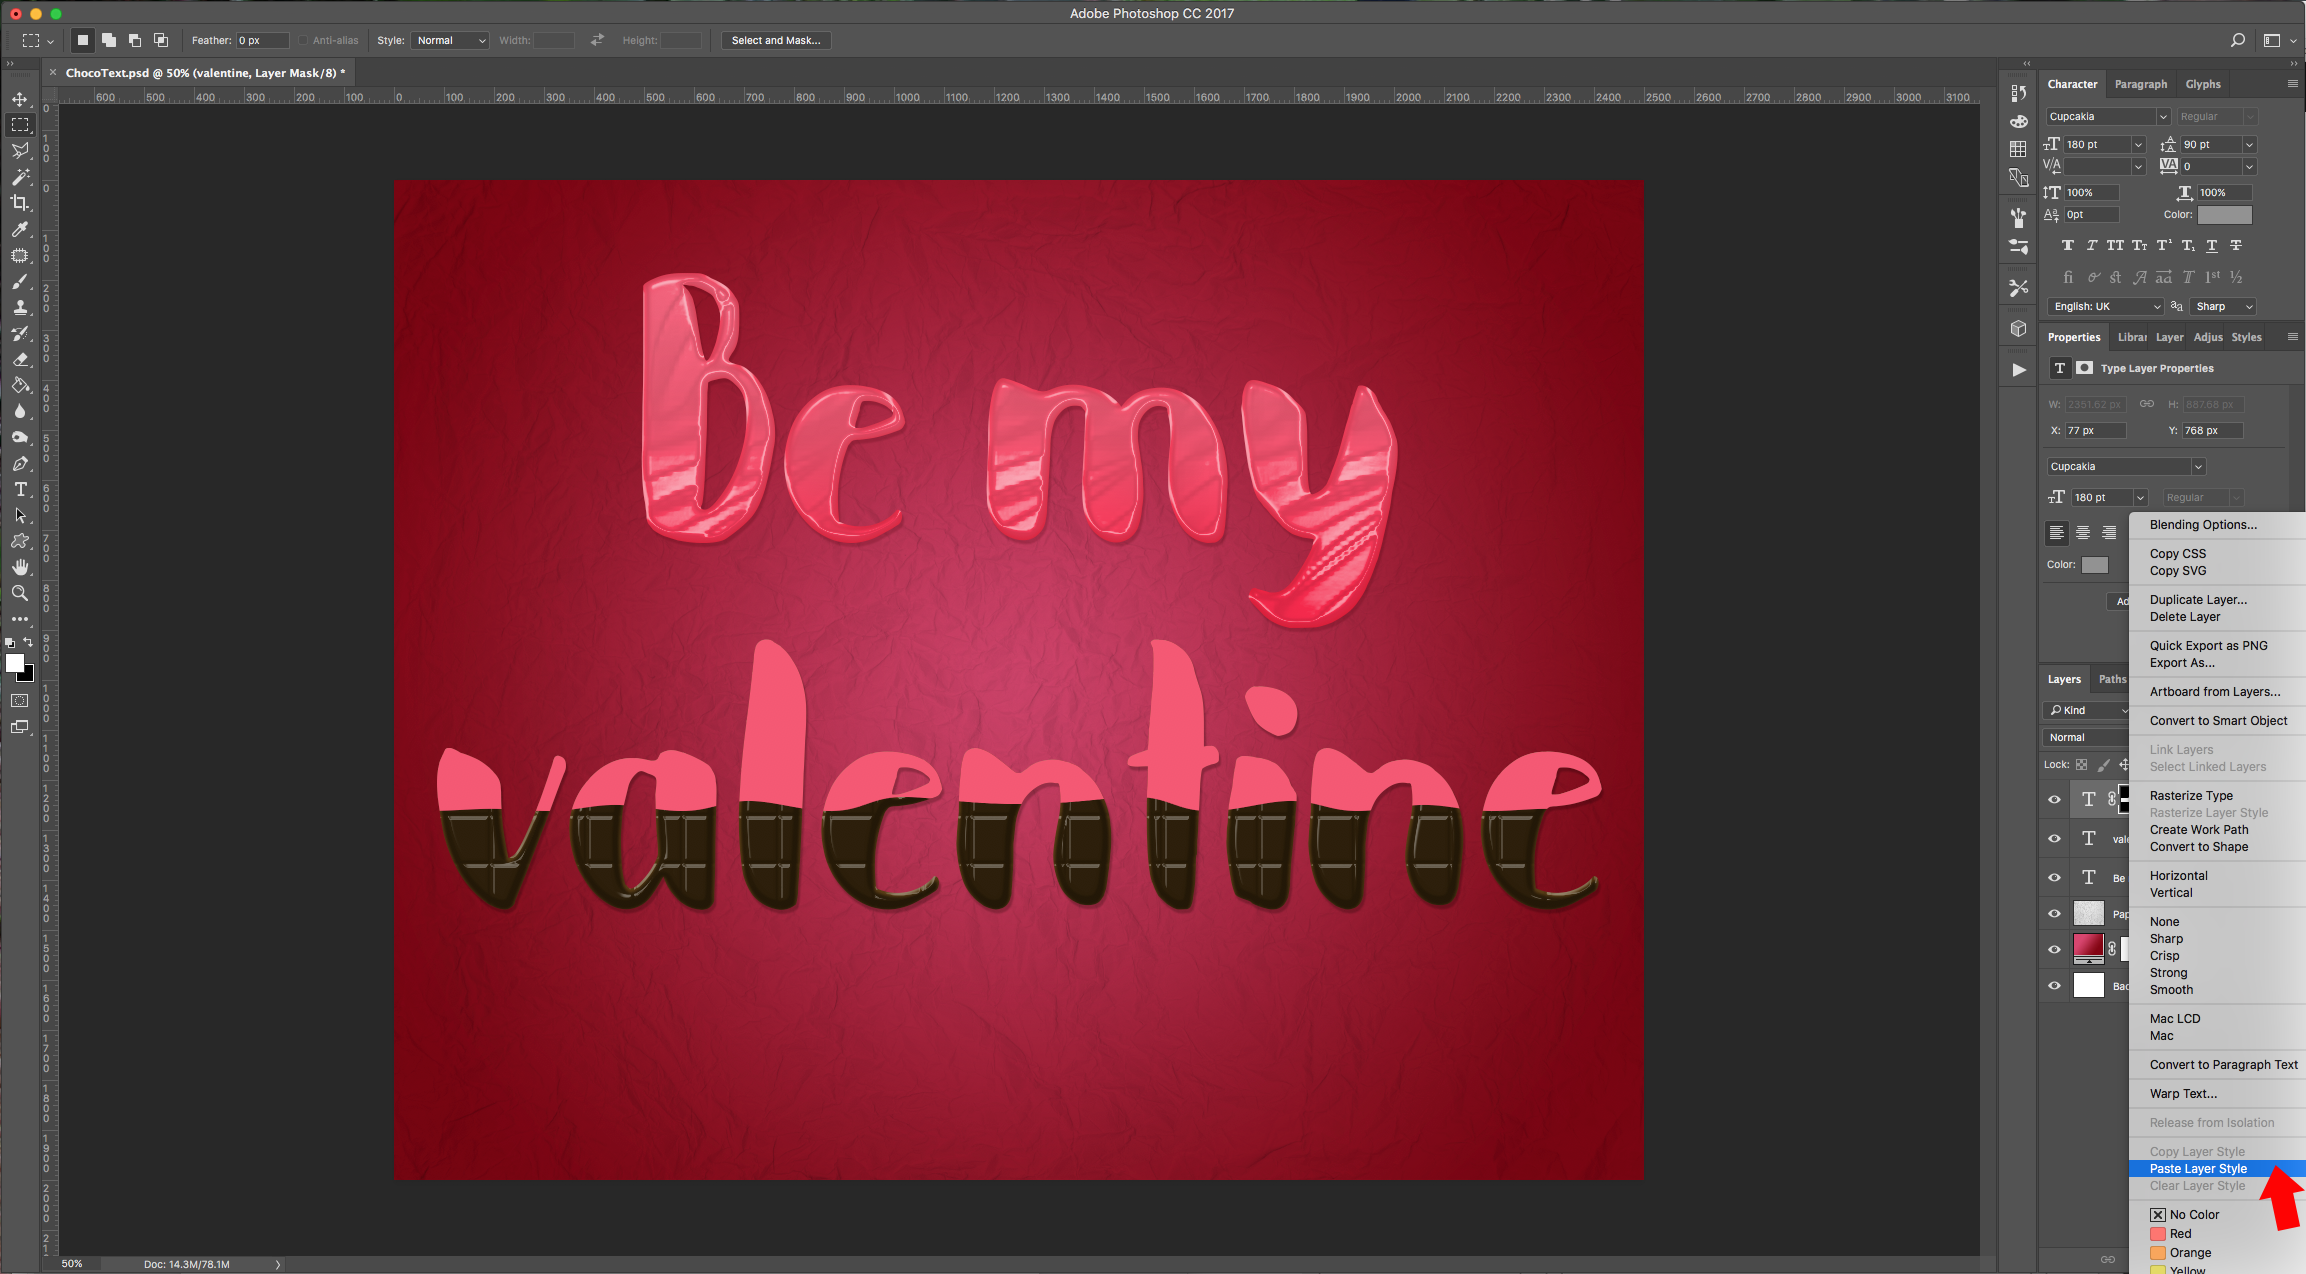
10 - Right-click on your first text layer (Be my) and “Copy Layer Style”, the right-click on your masked text layer and “Paste Layer Style”.
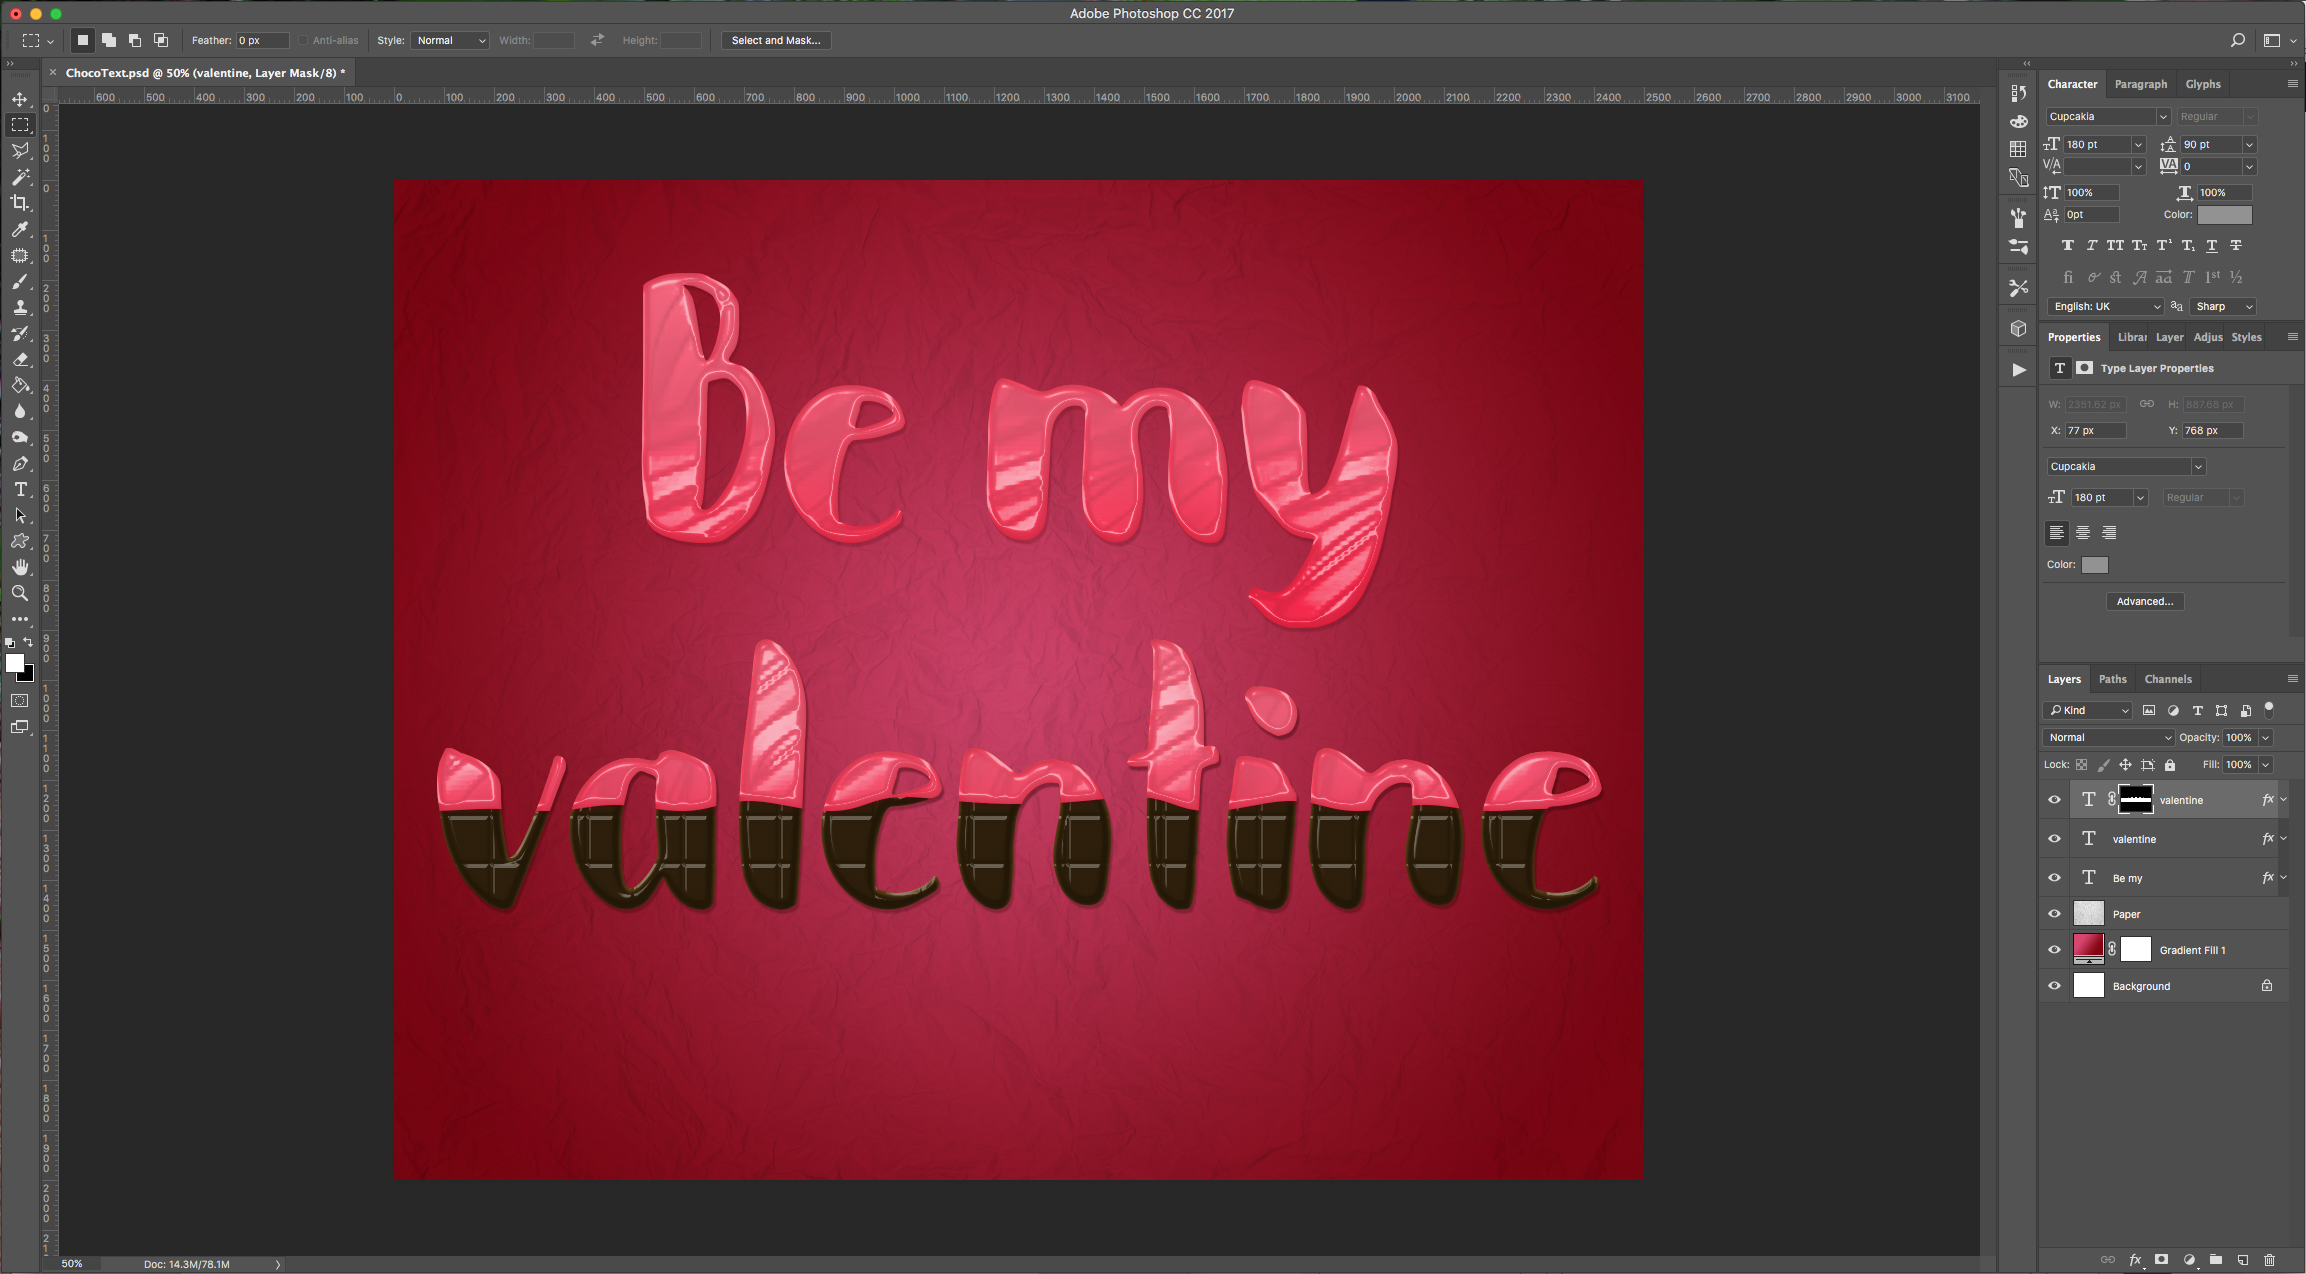
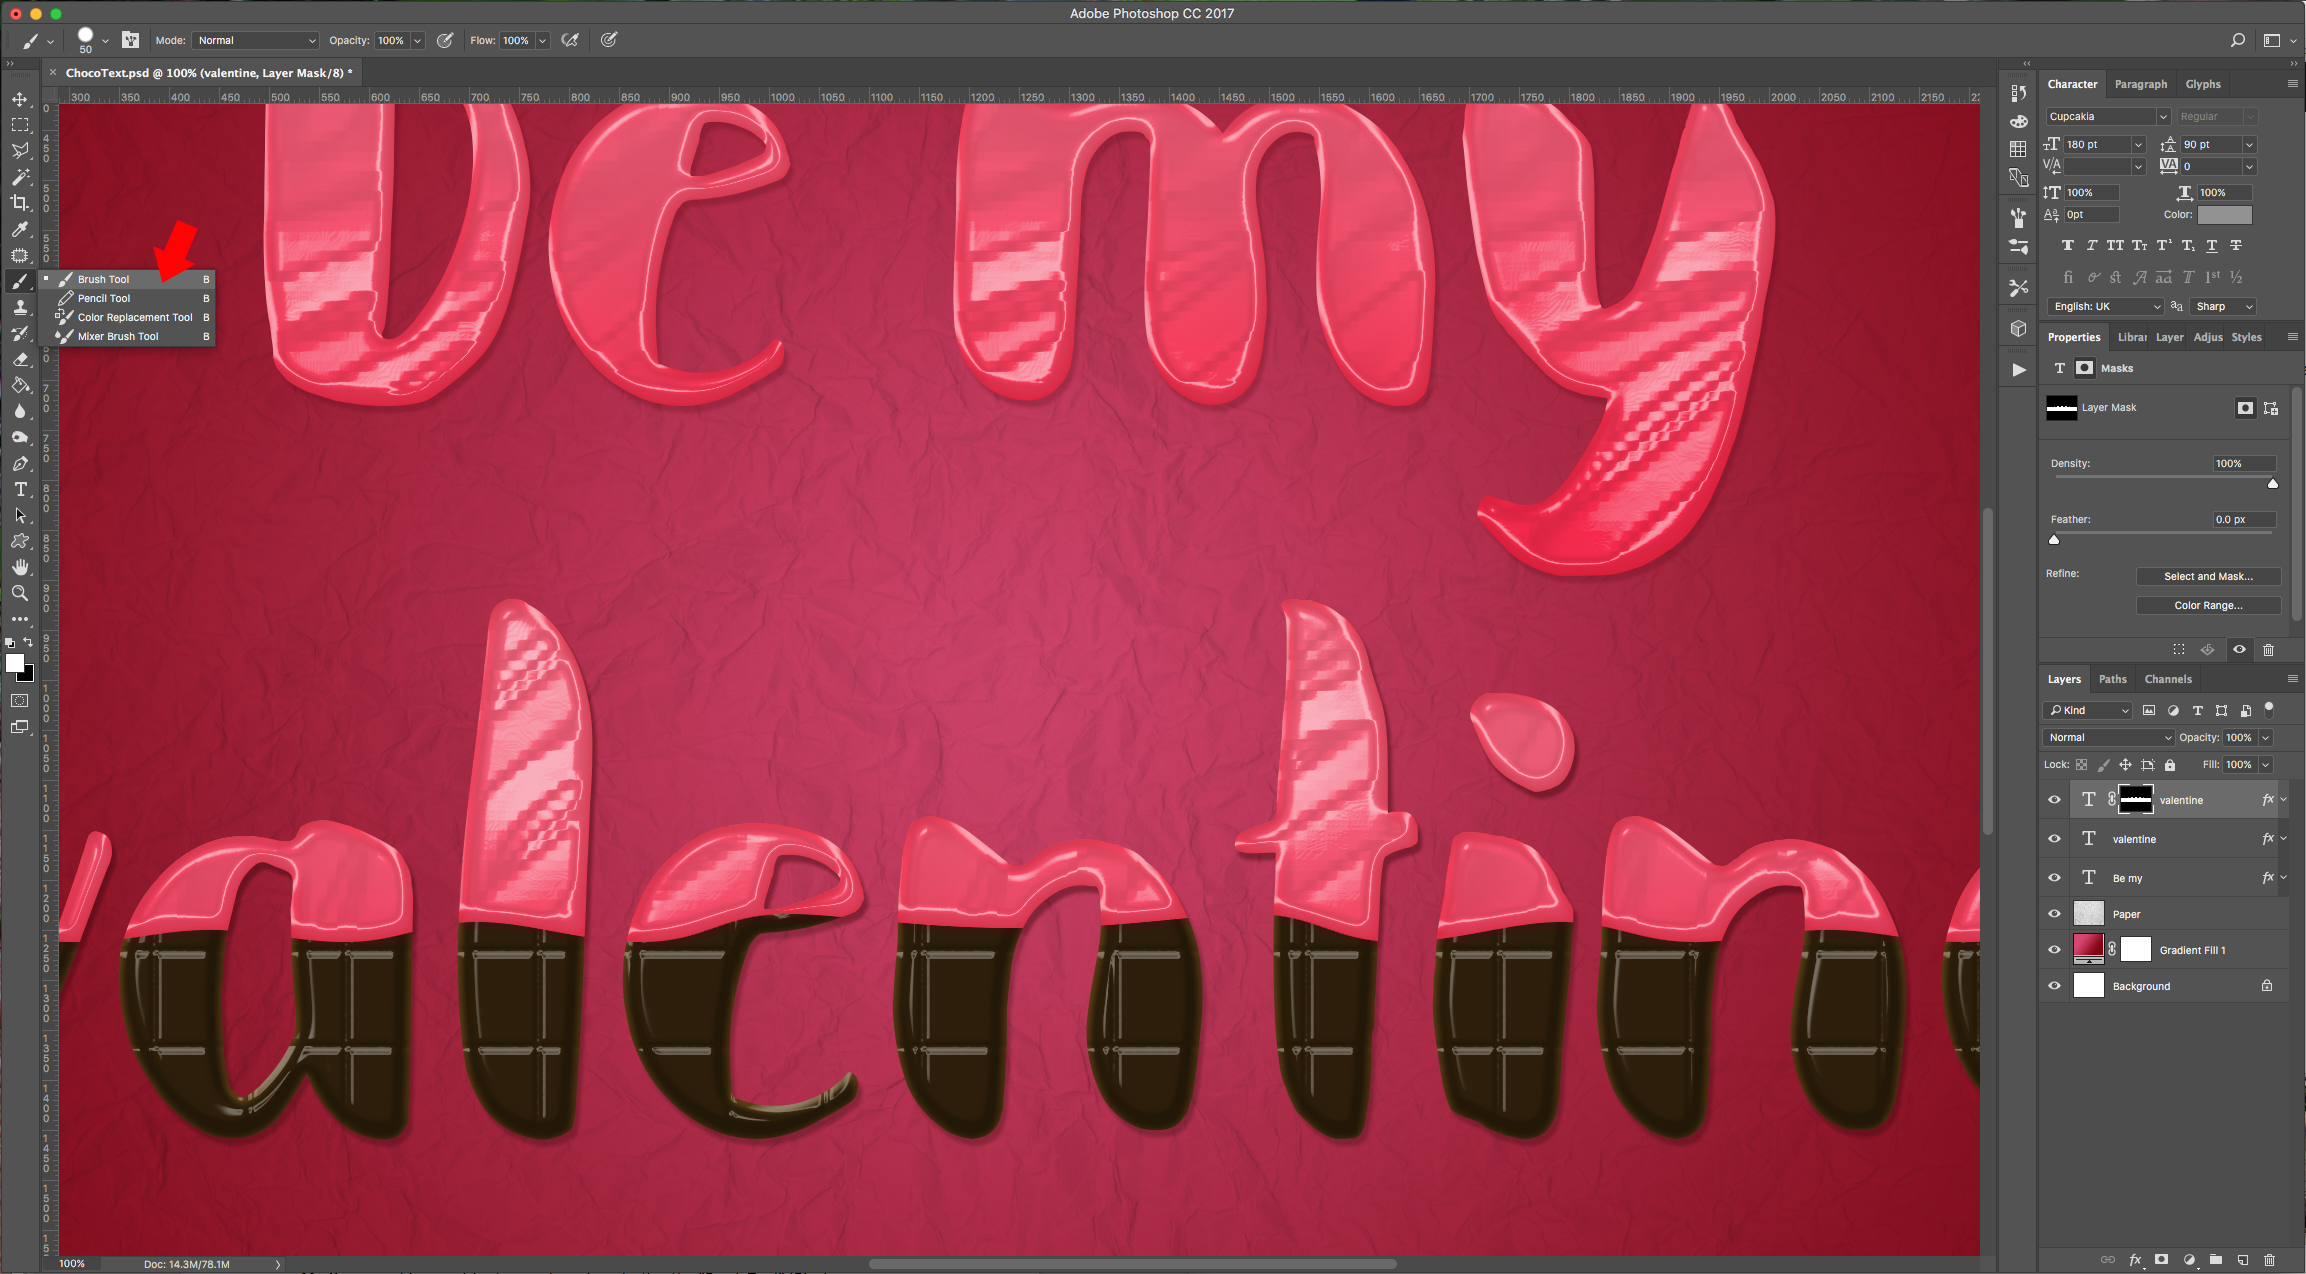
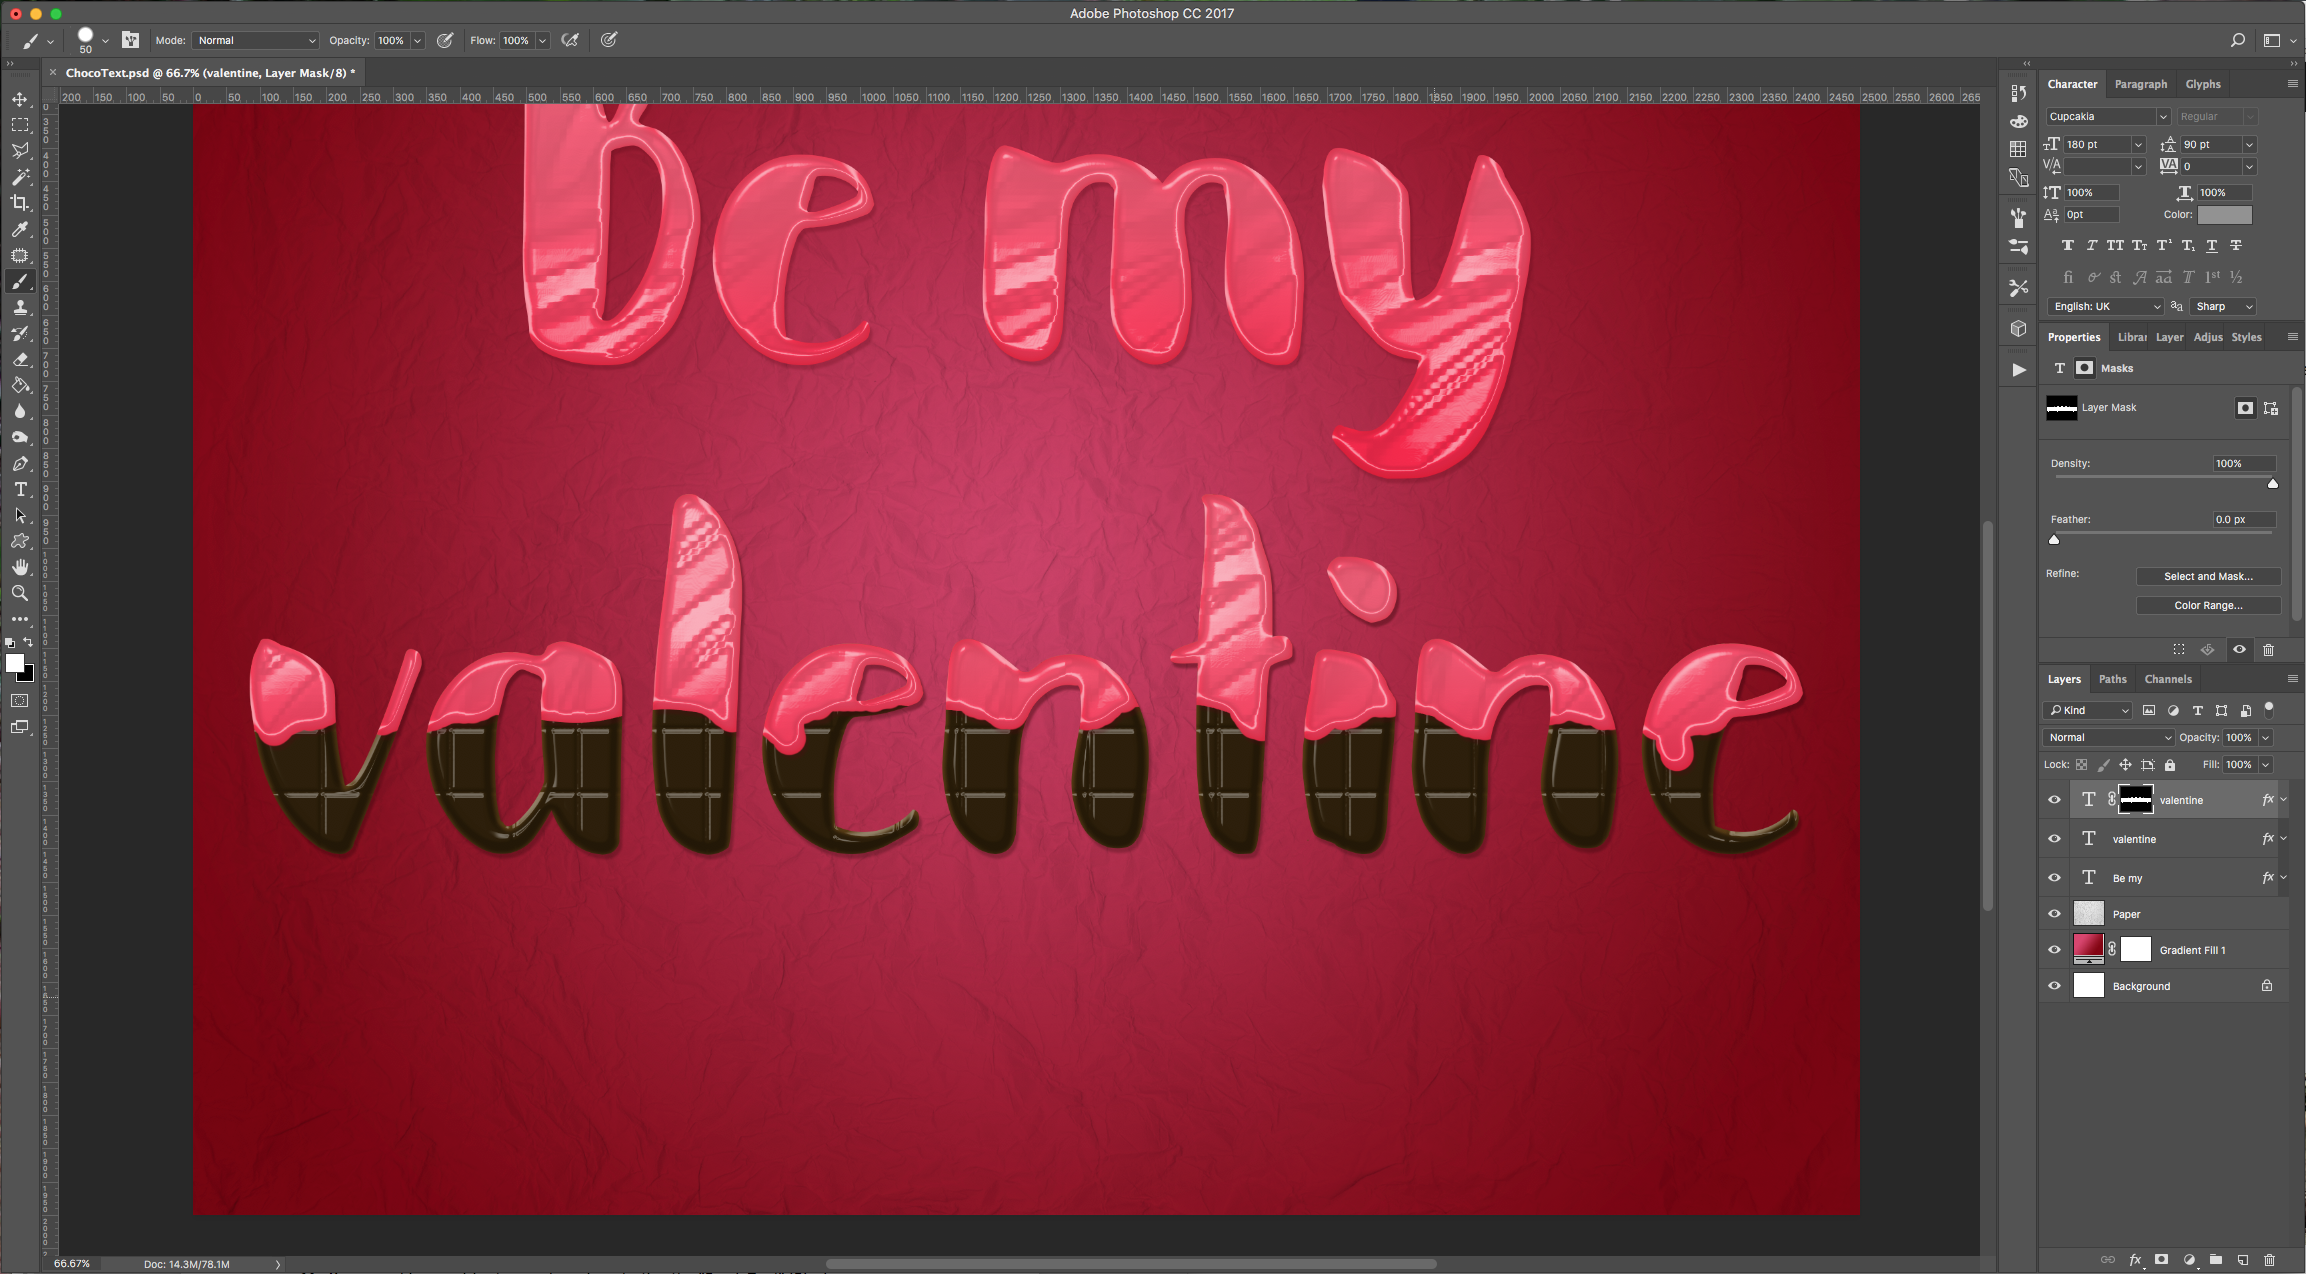
11 - You can add some drips to your layer by selecting the “Brush Tool” (B), choose a medium sized brush (about 50 Pixels), make sure the “Hardness” is set to 100%, that you “Foreground” color is black and that your “Mask” is selected and paint some drops.
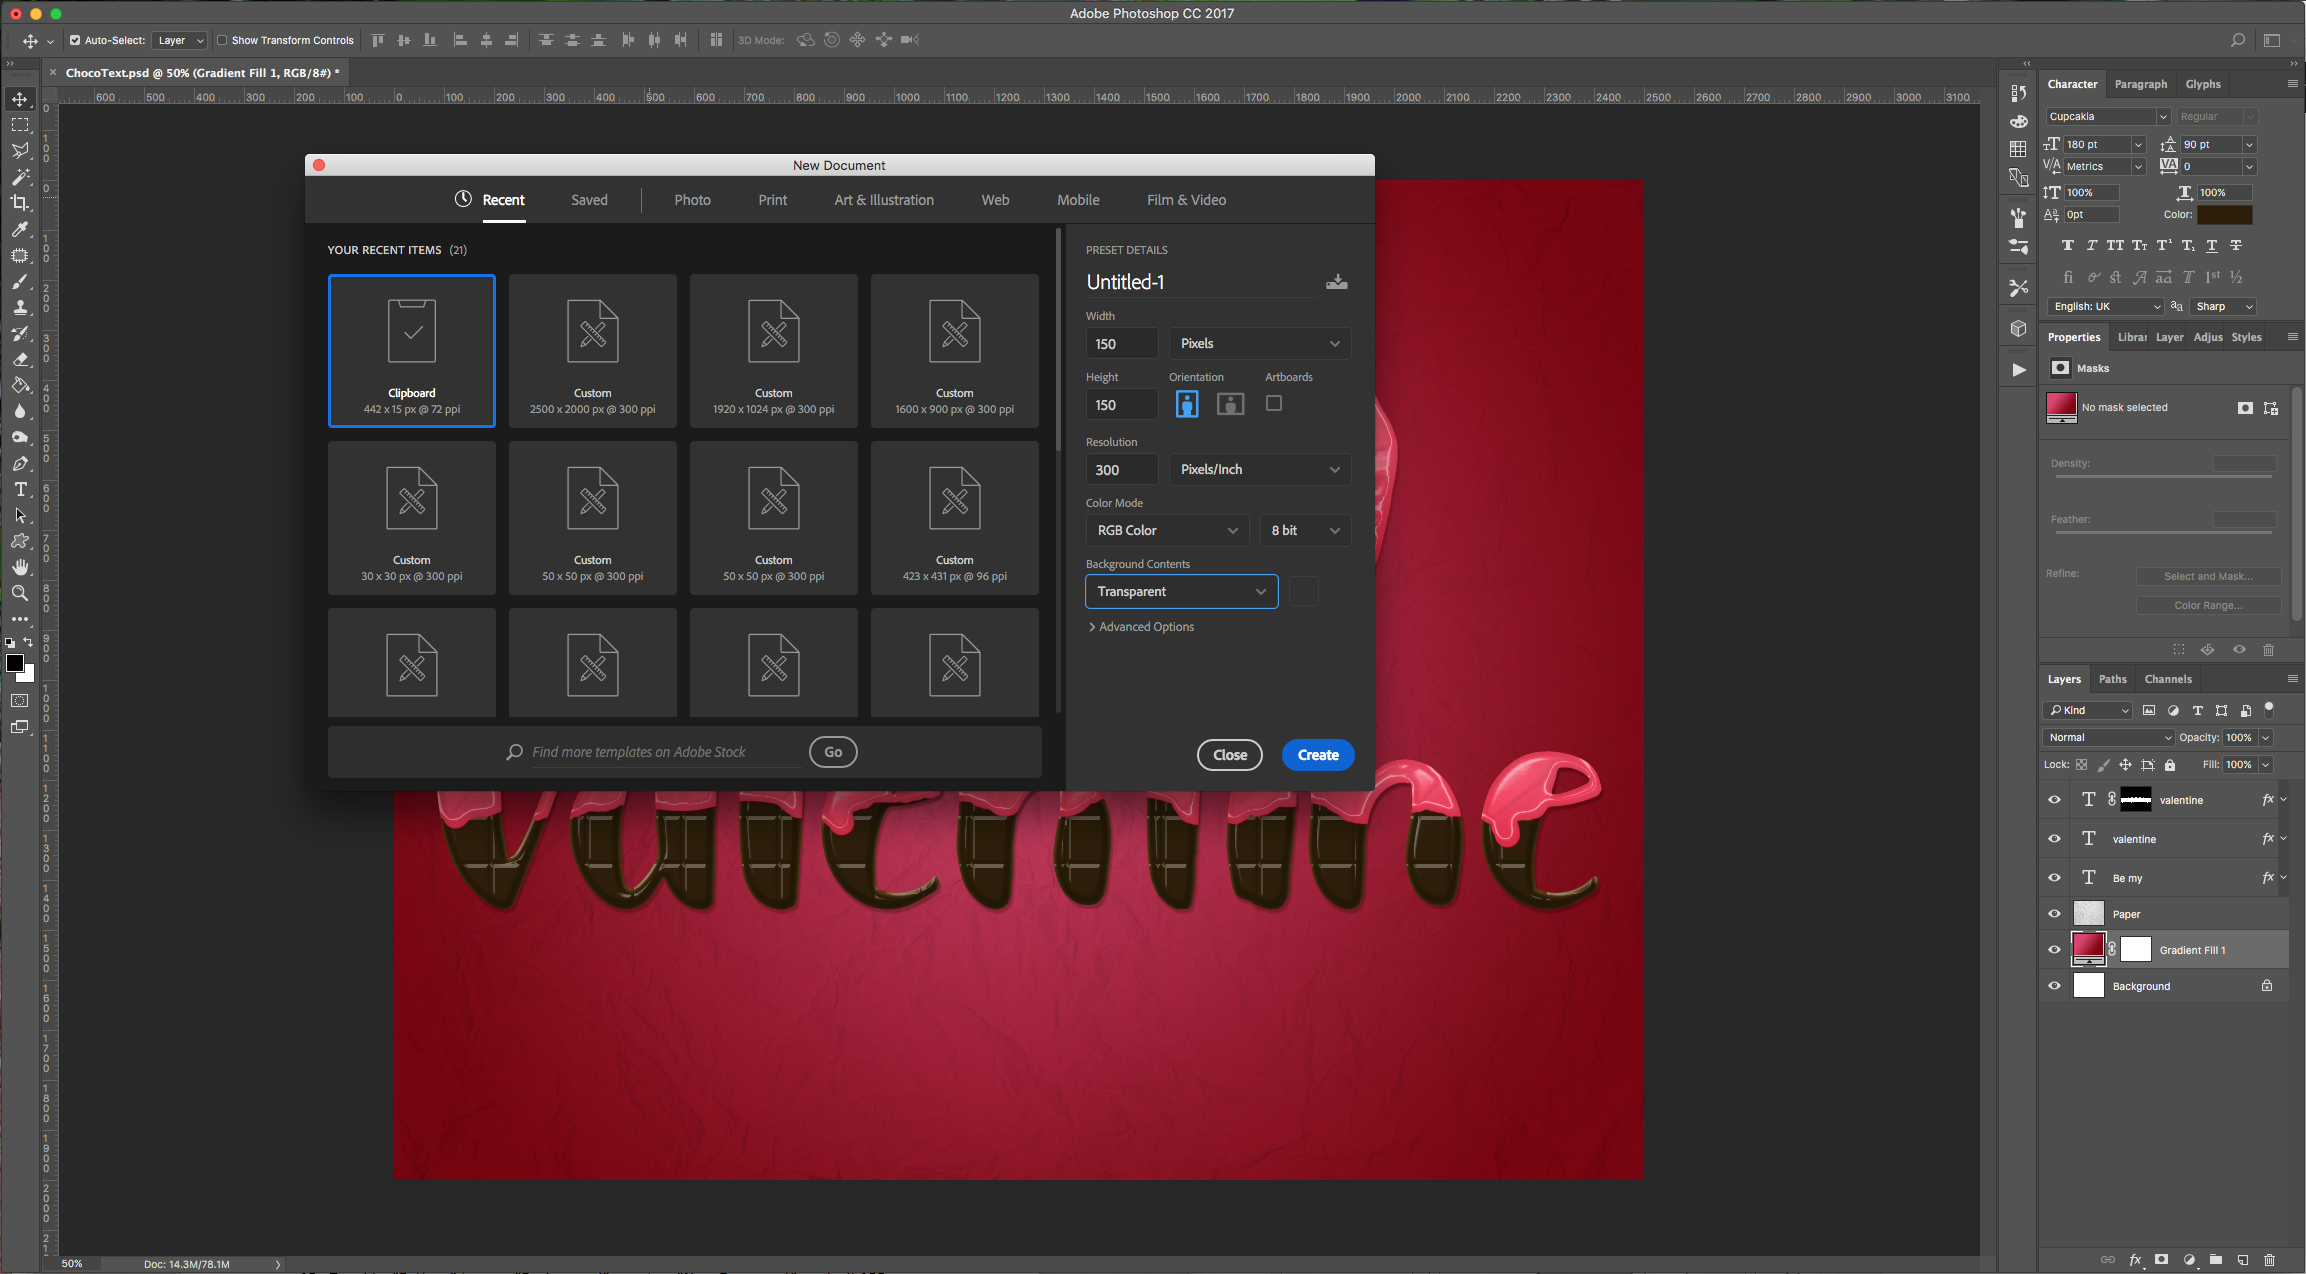
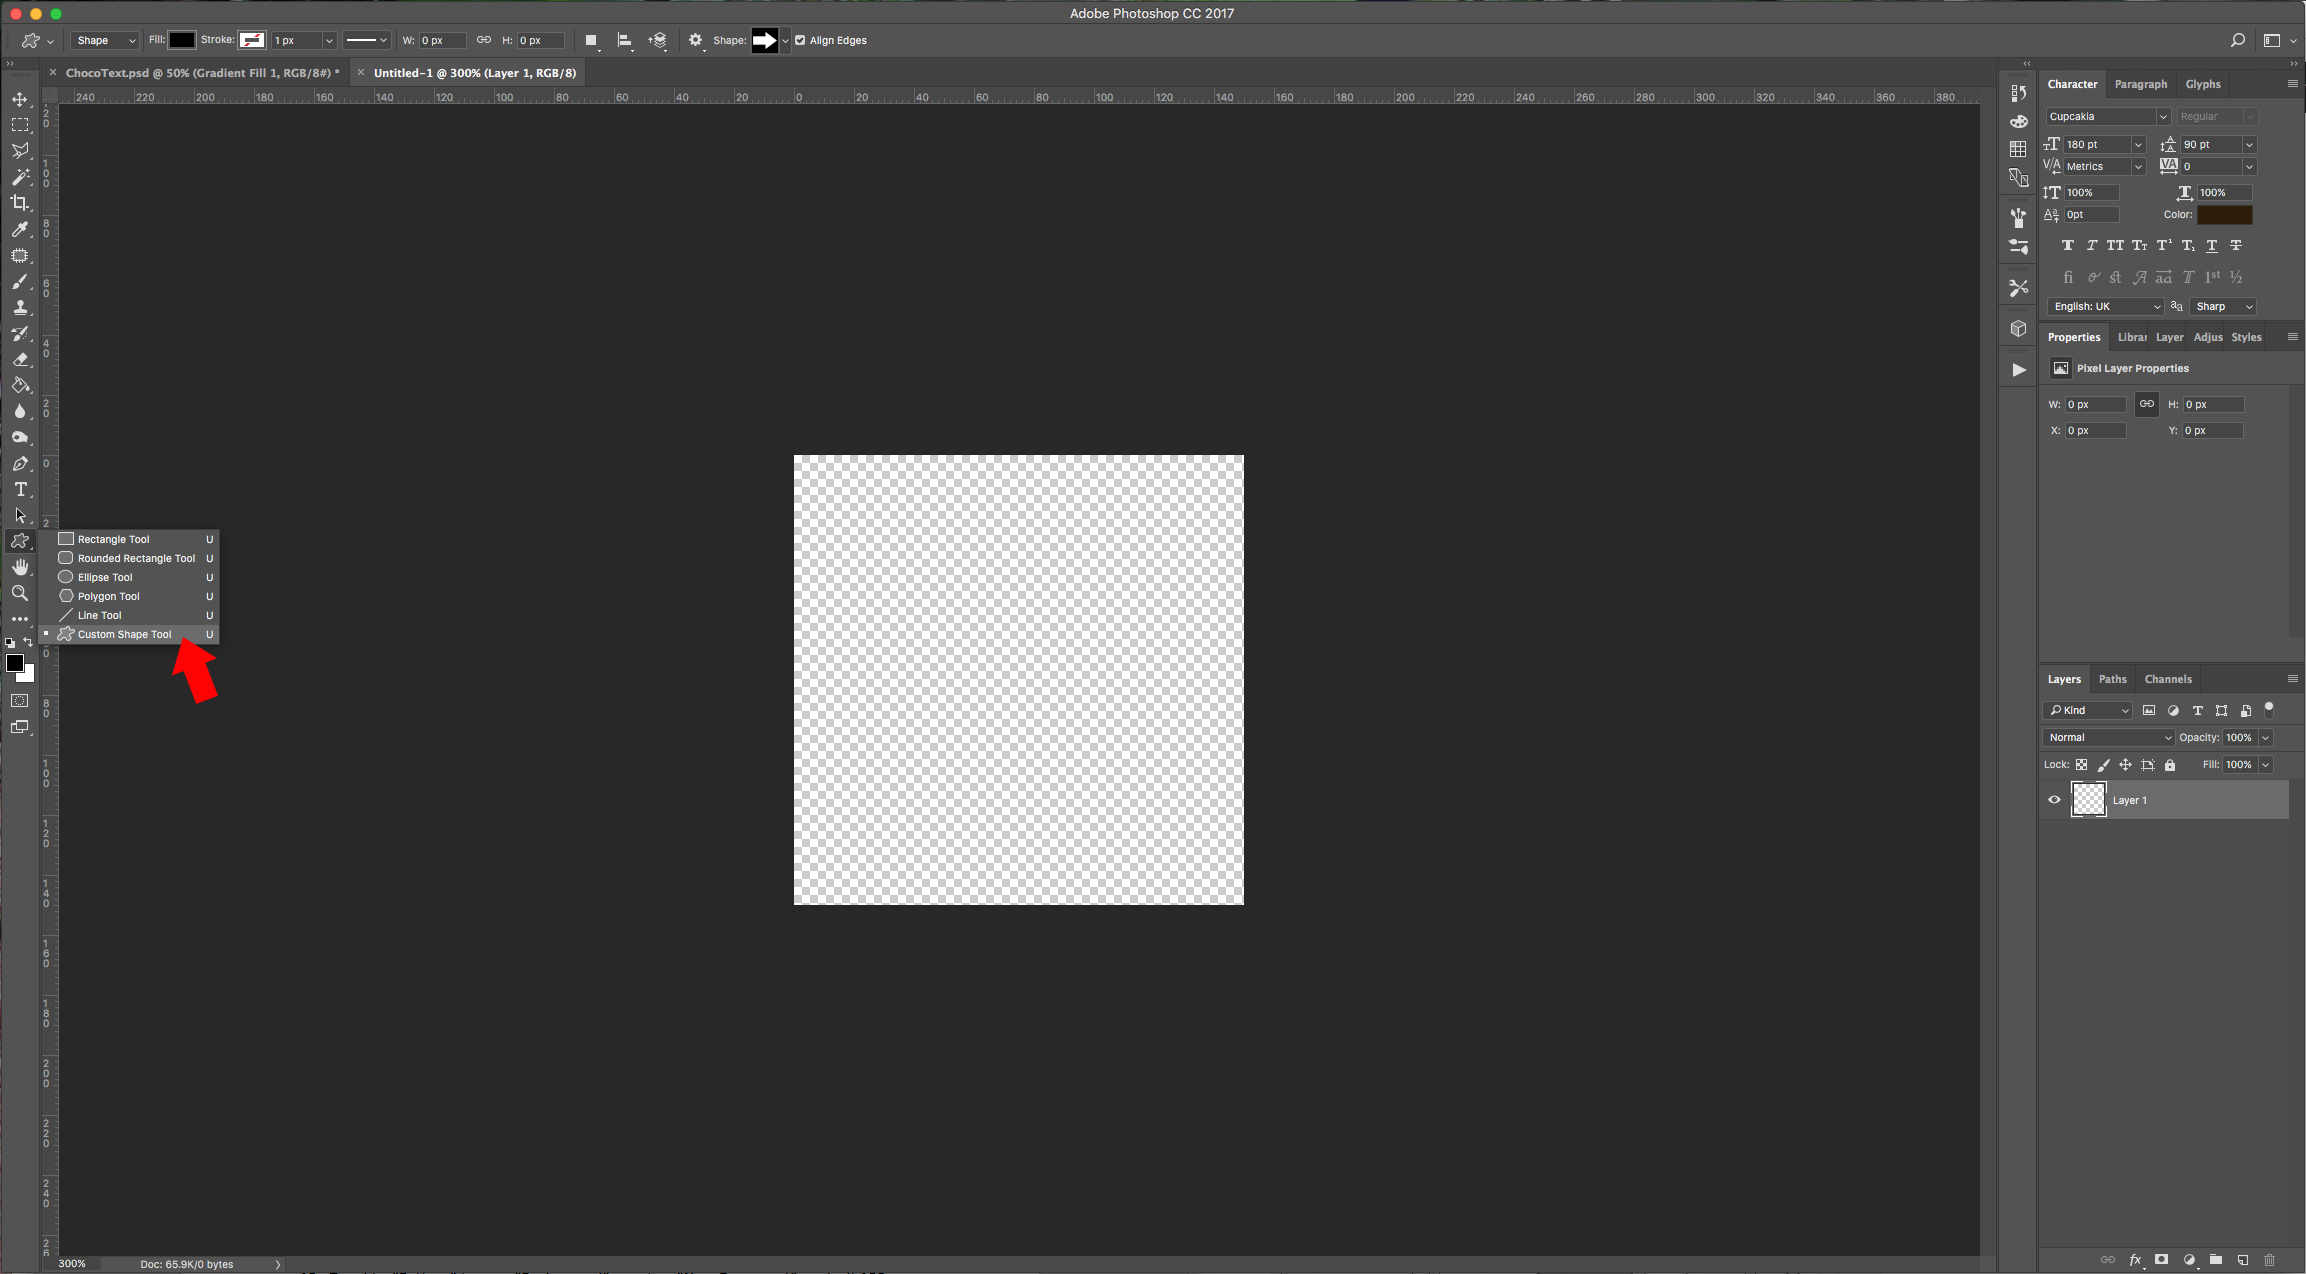
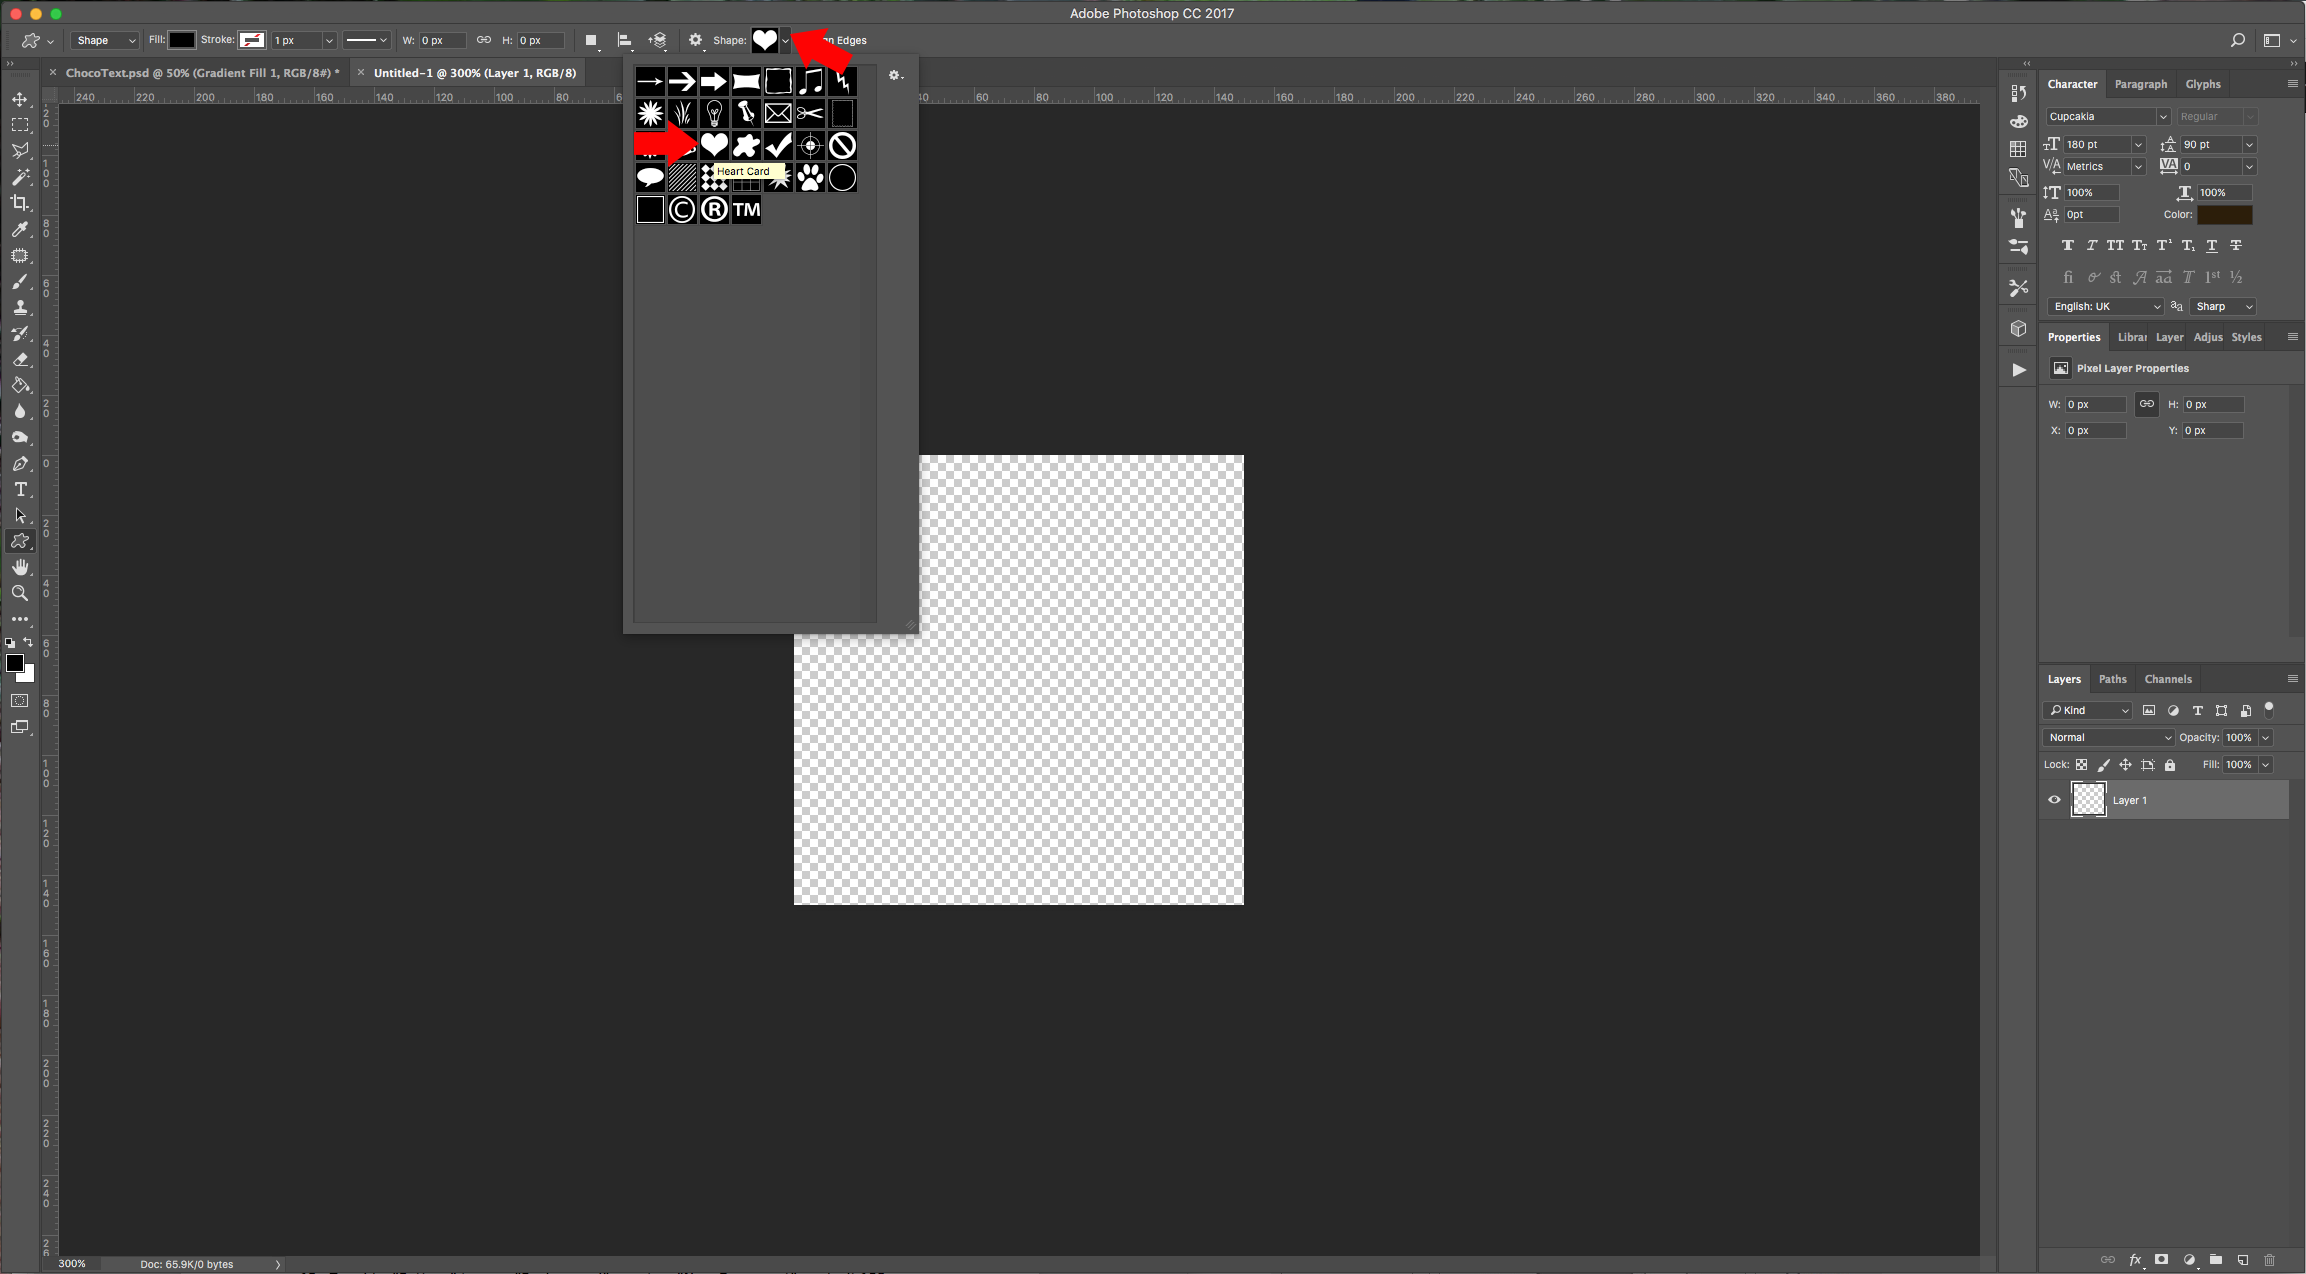
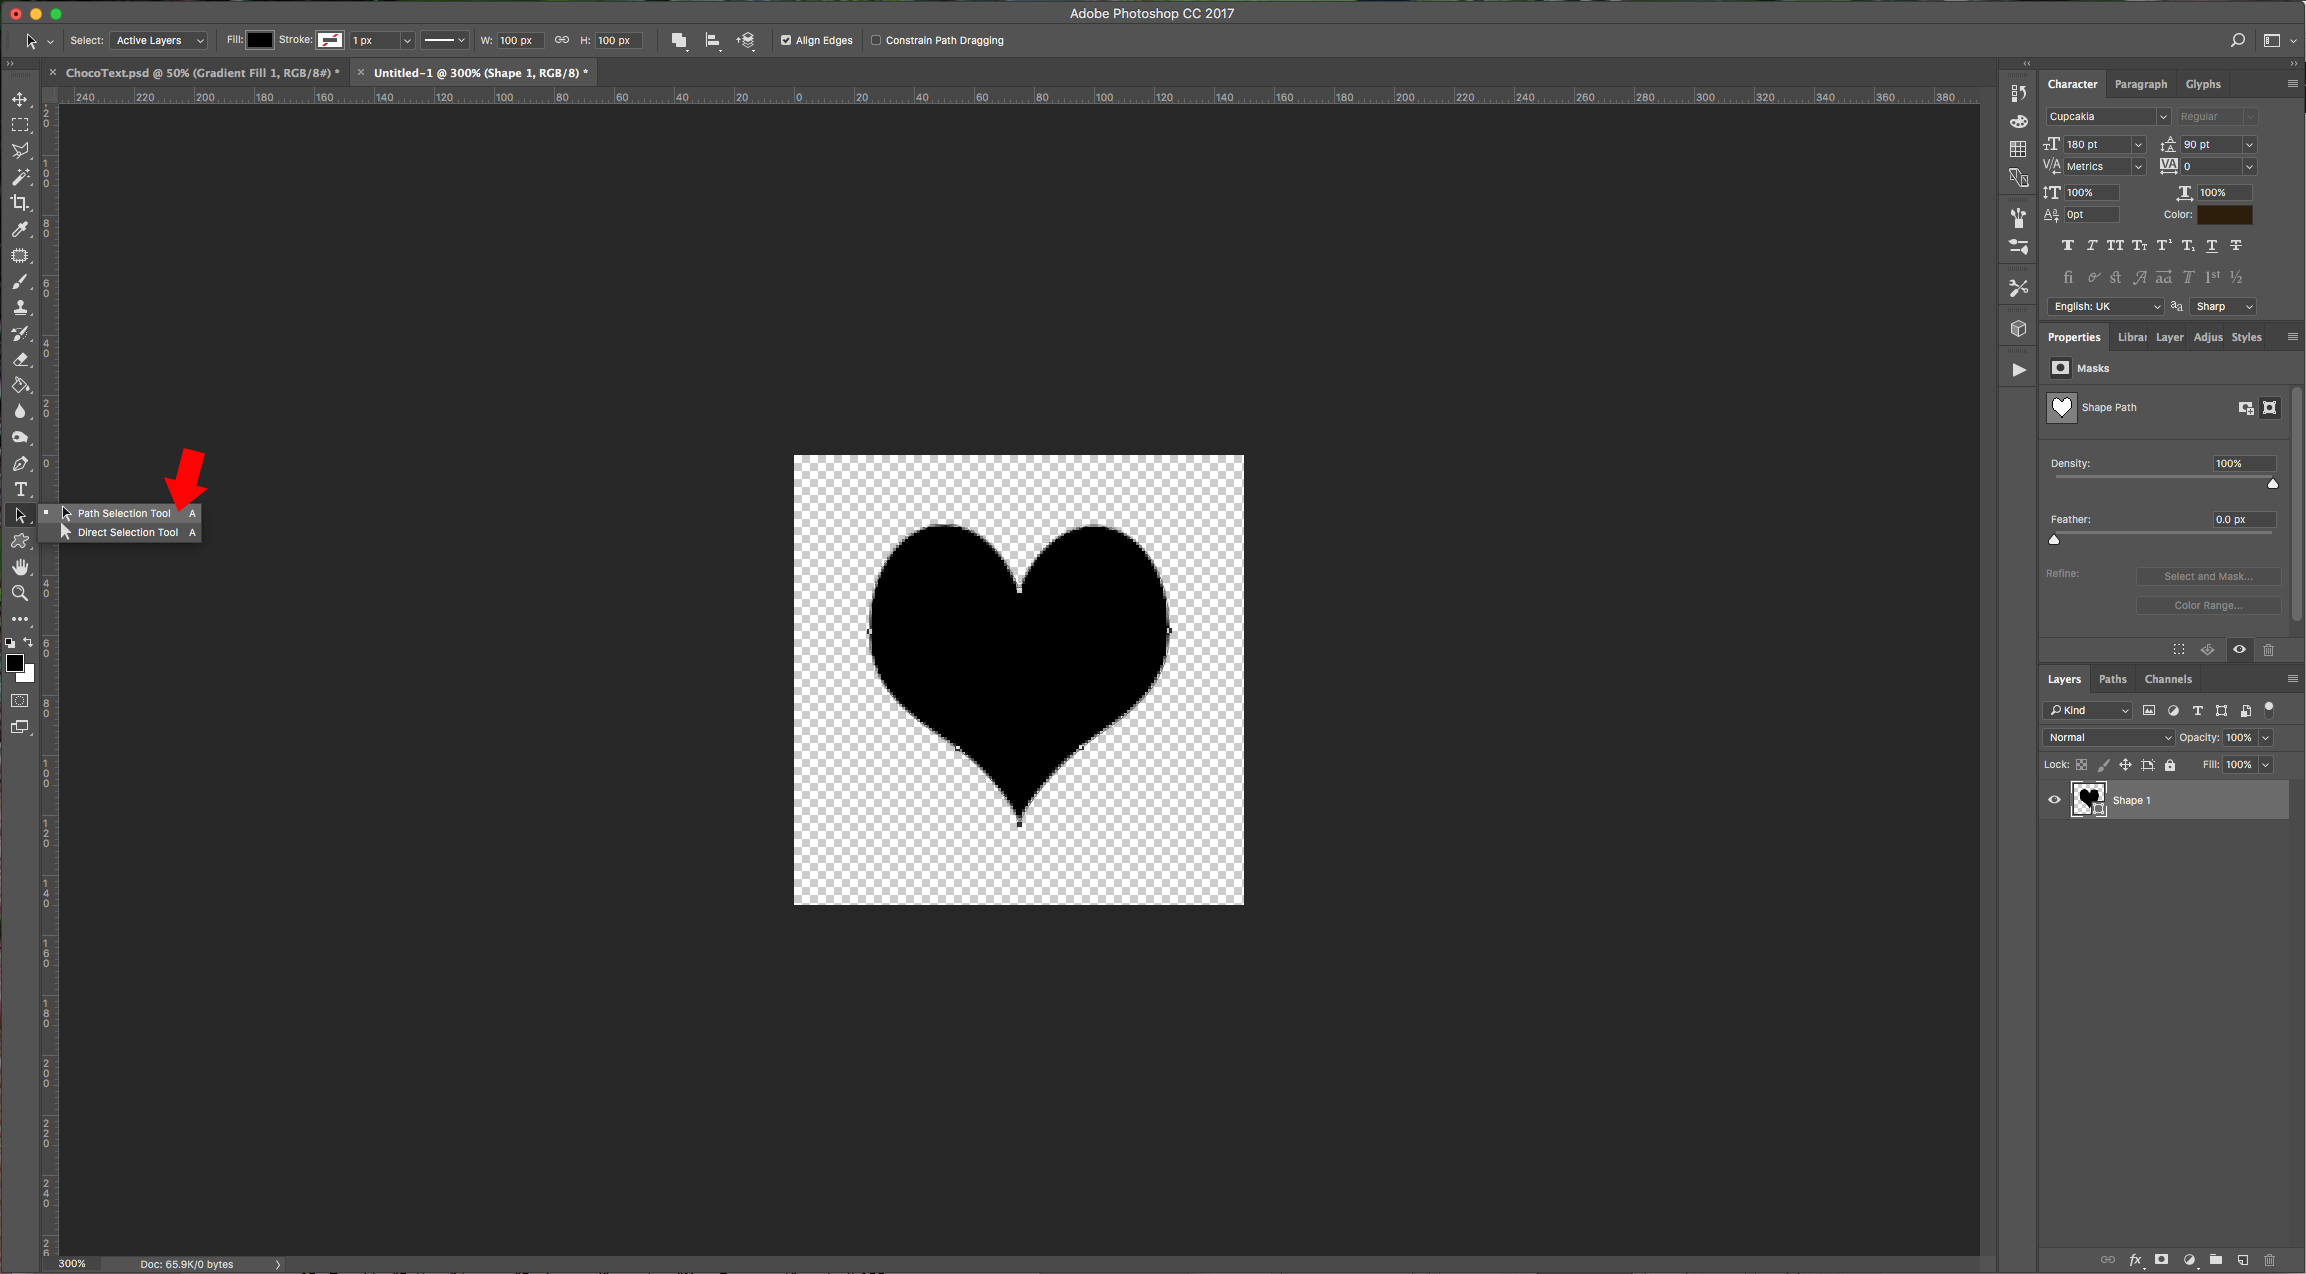
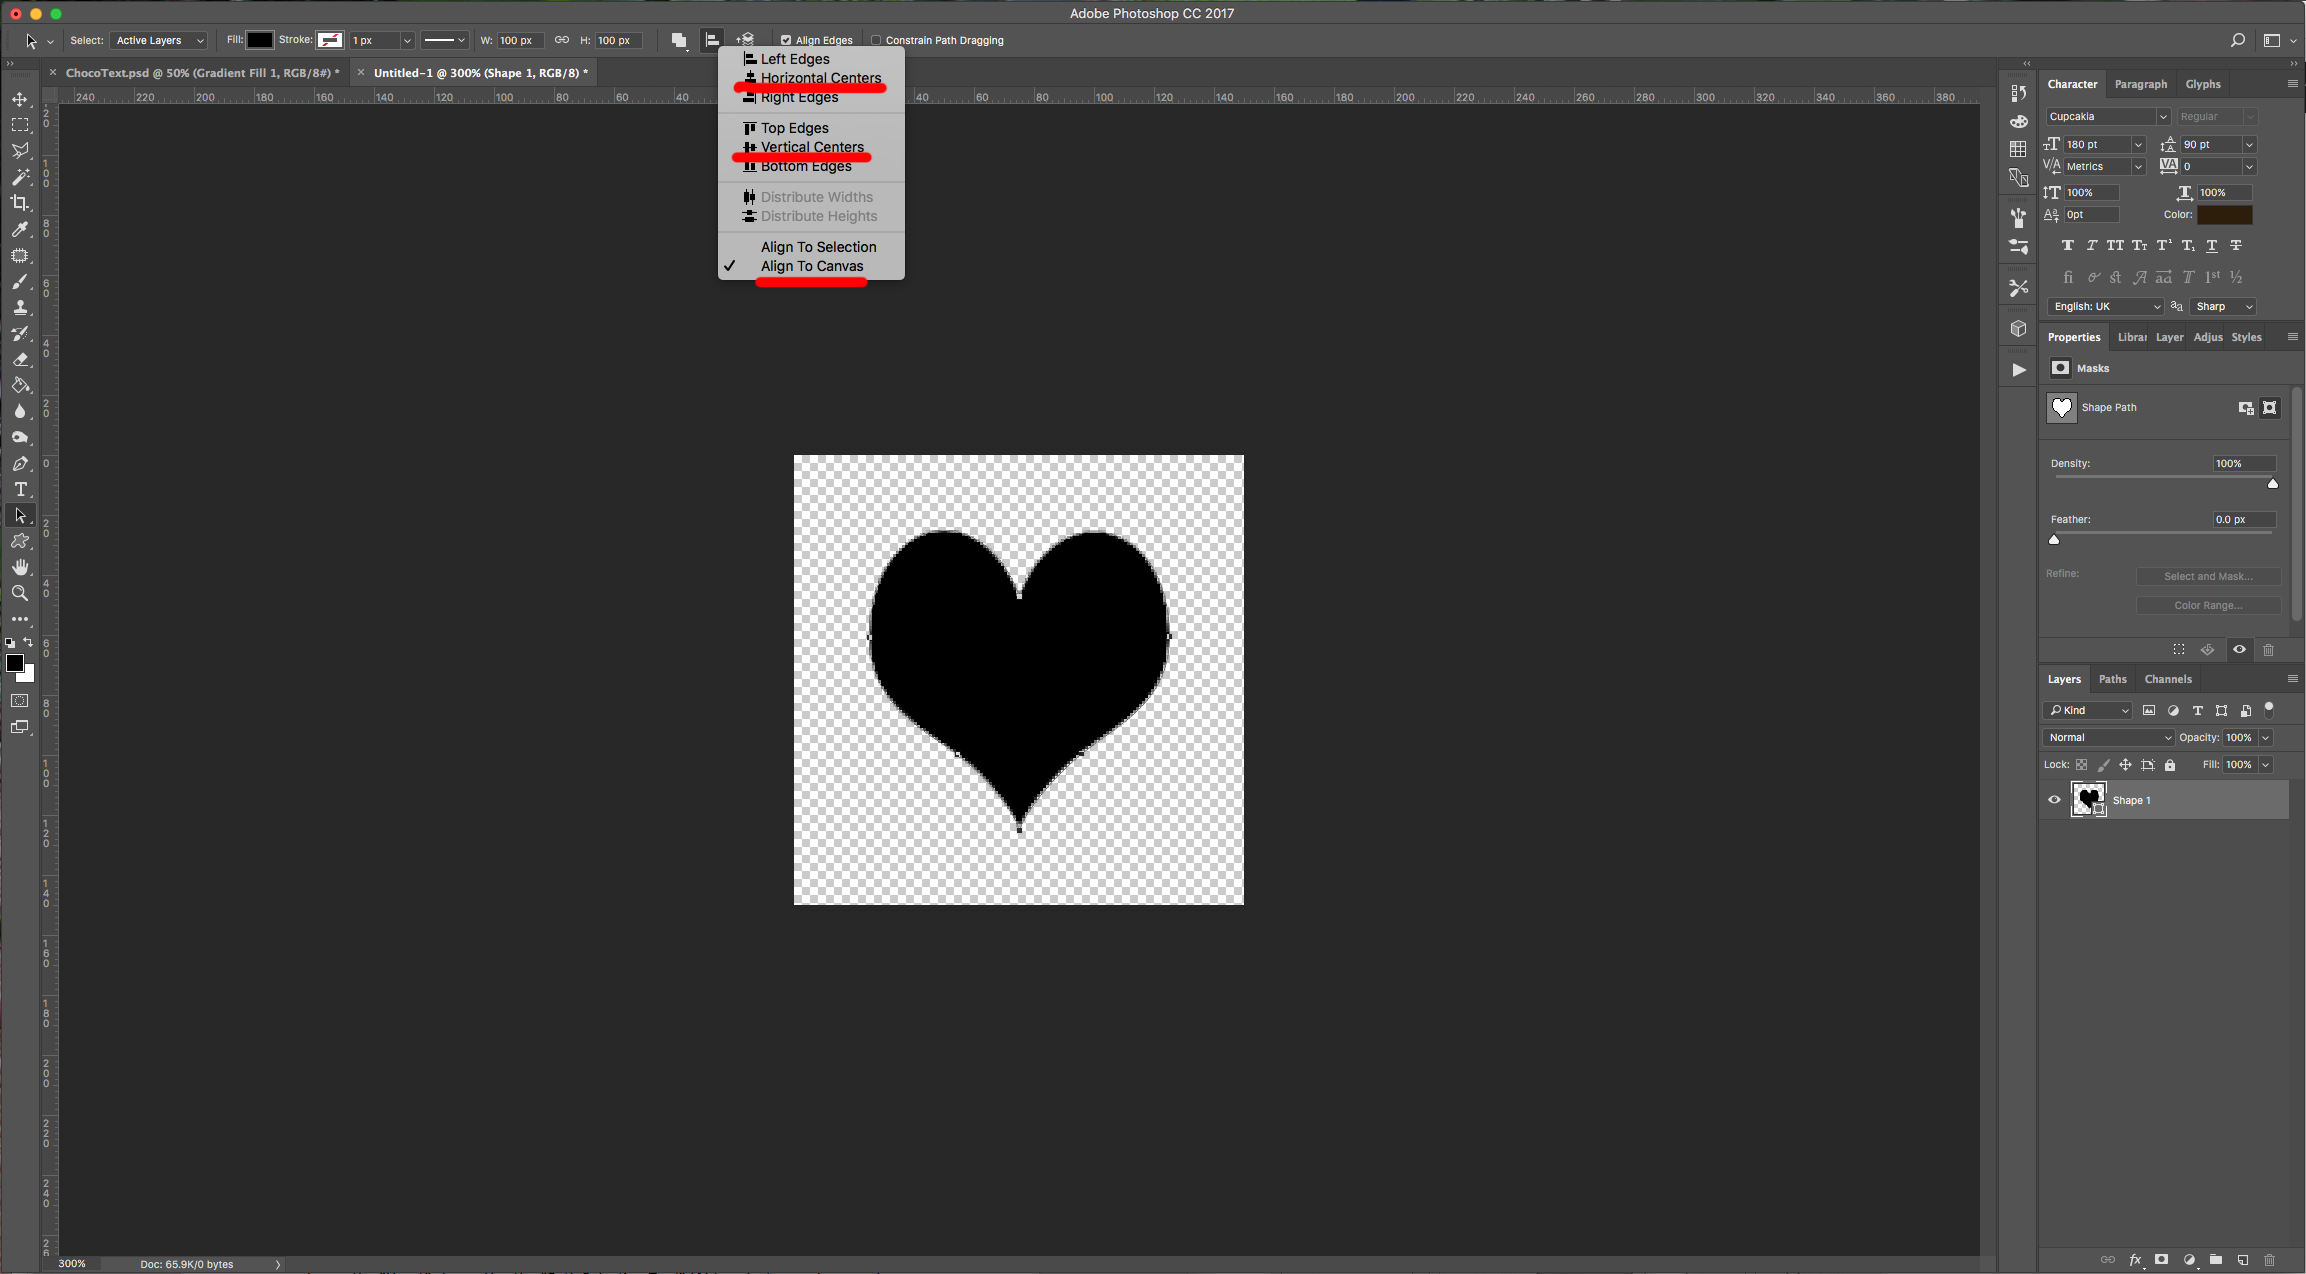
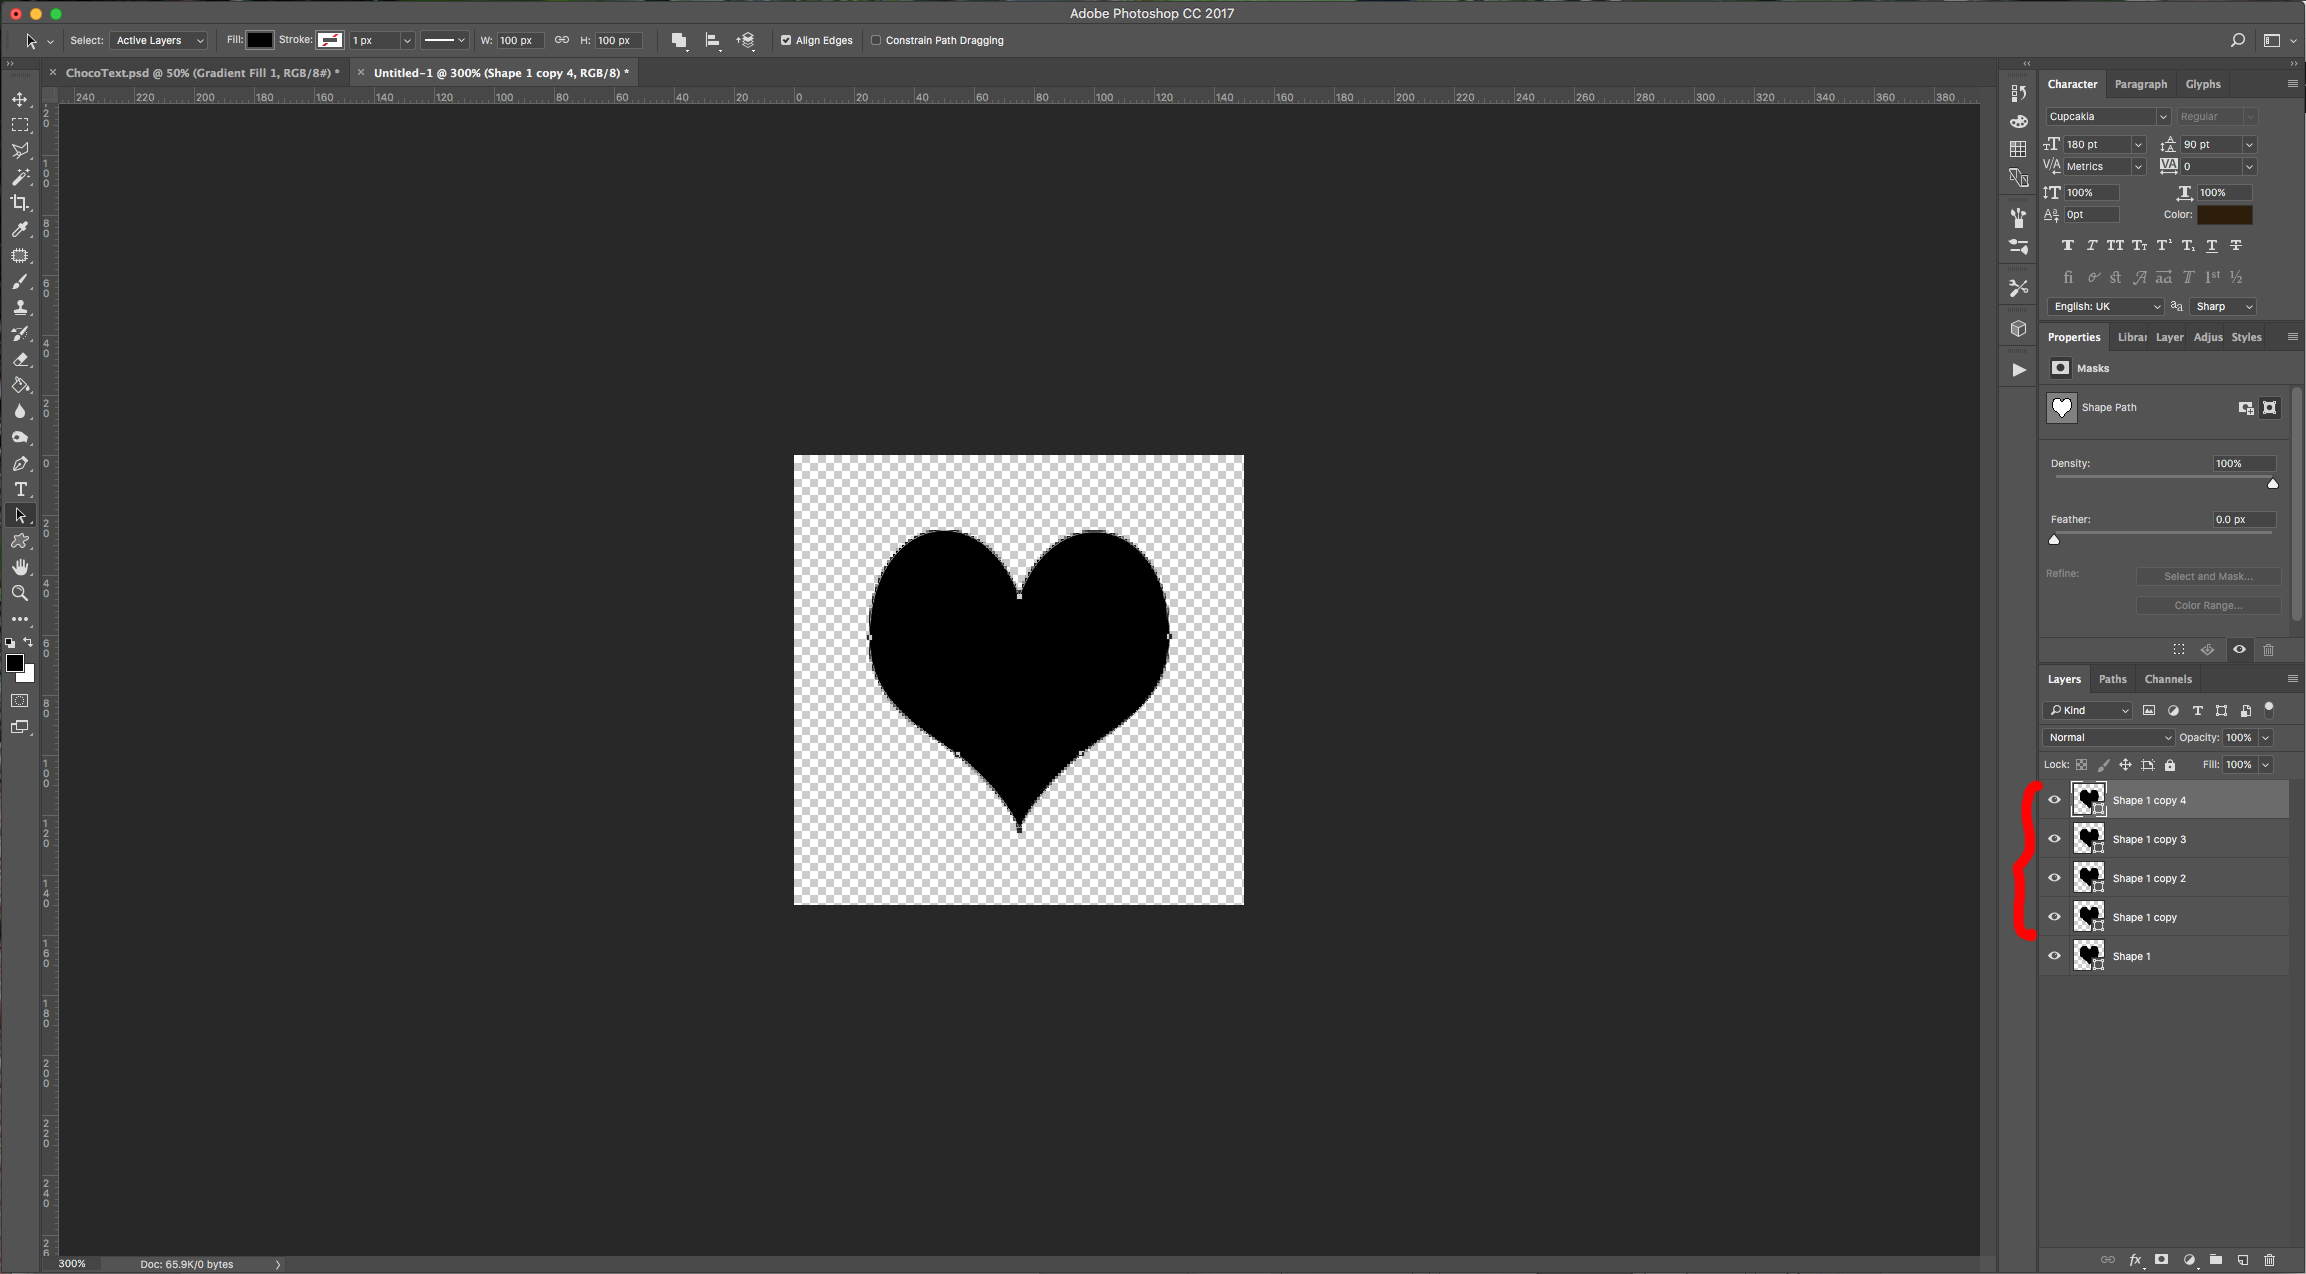
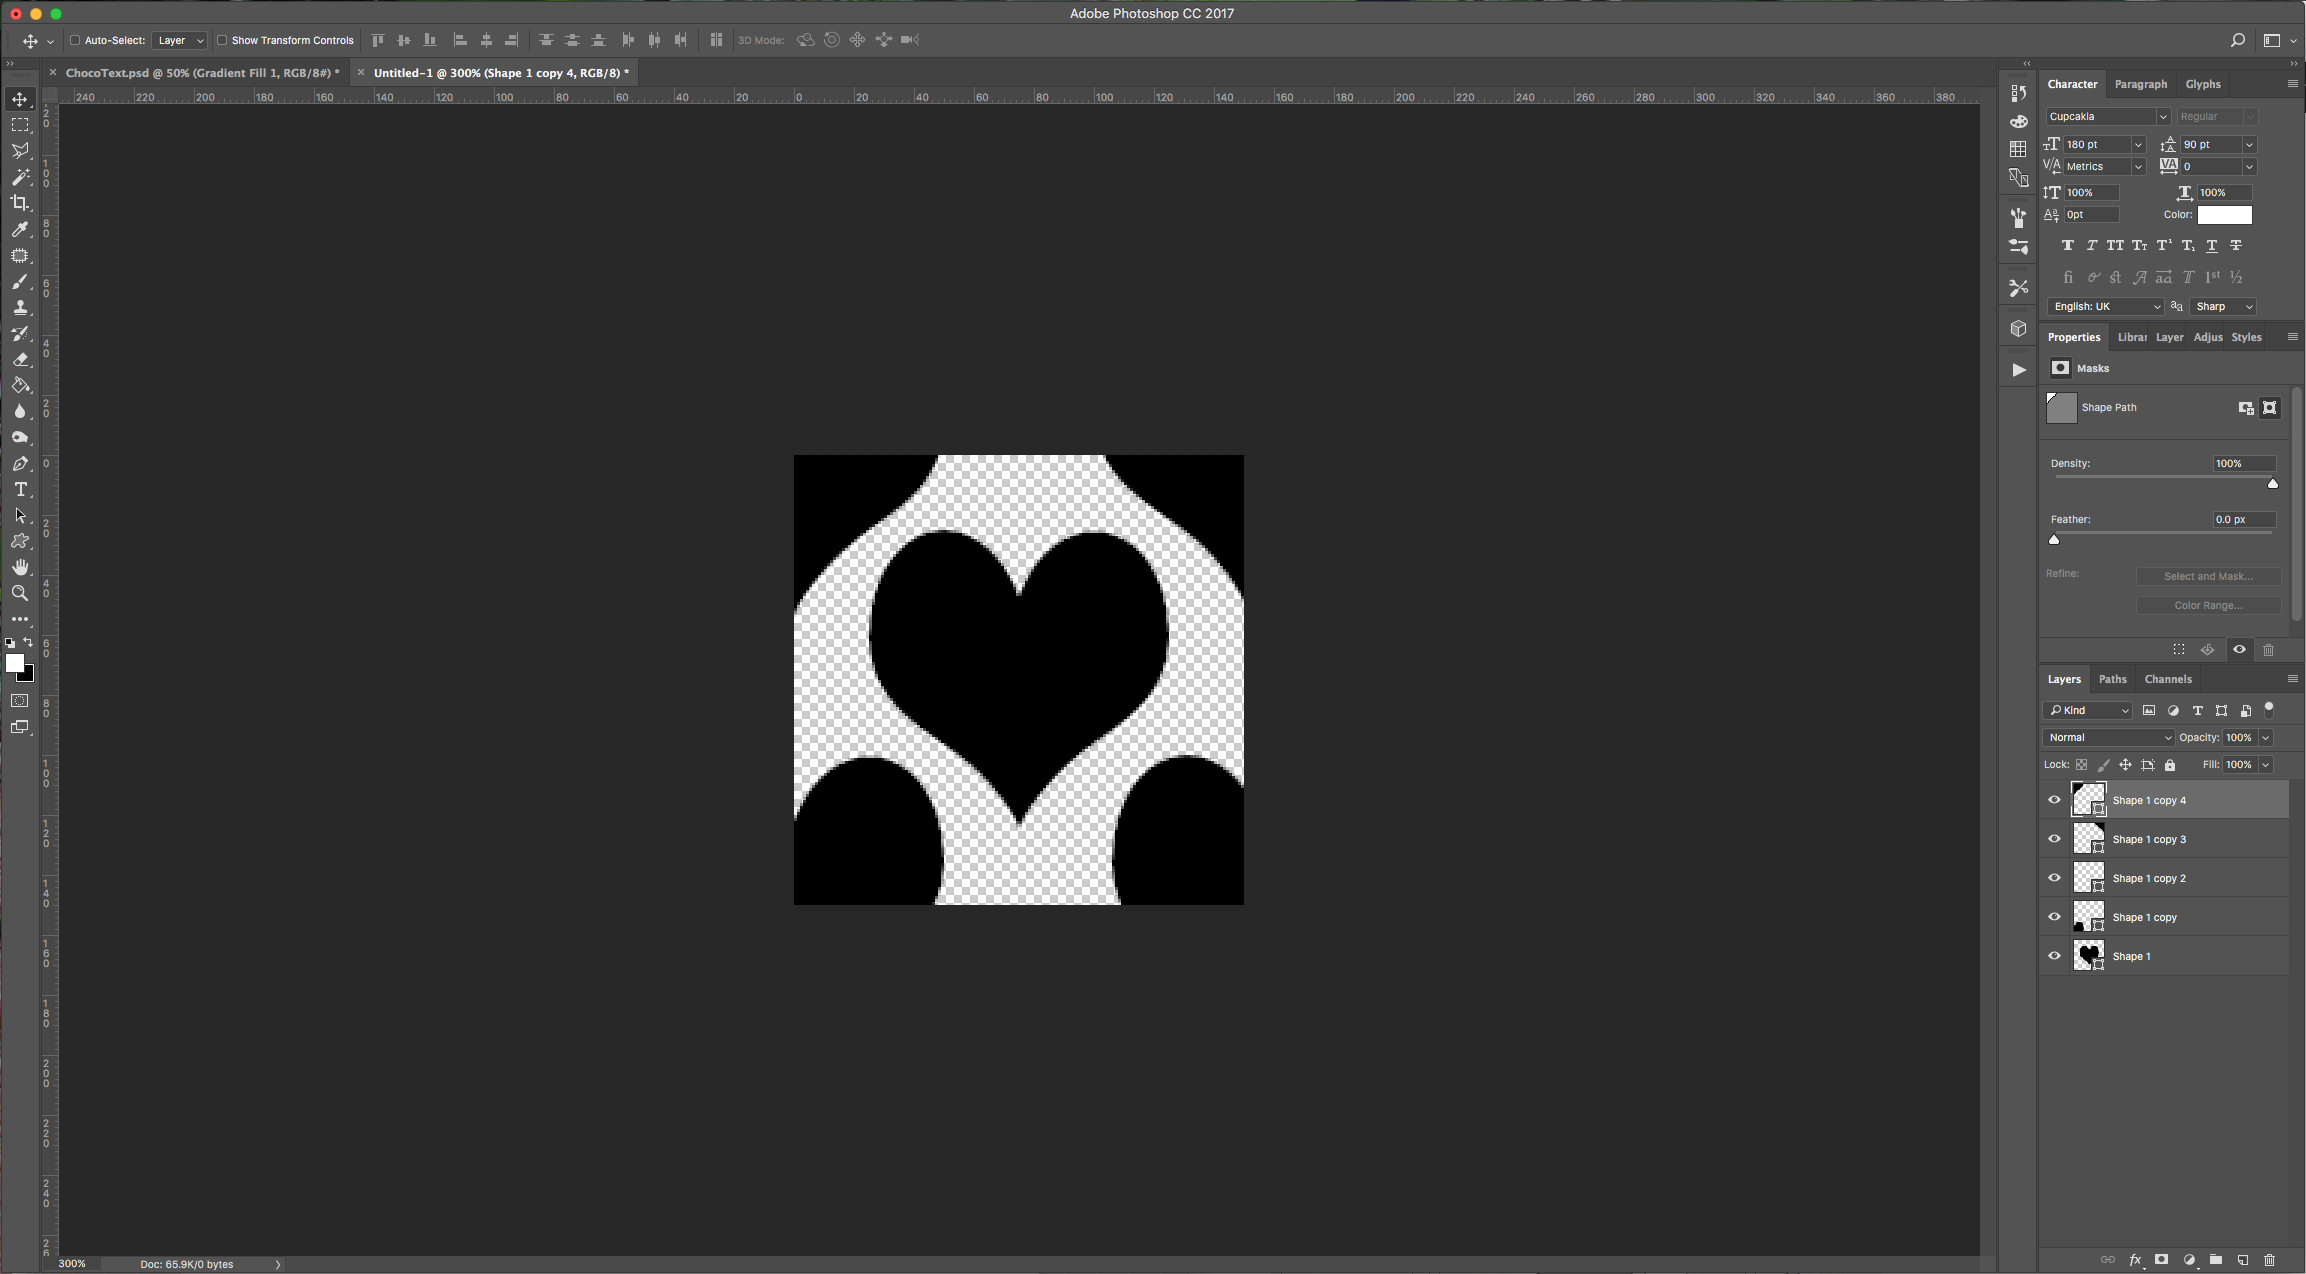
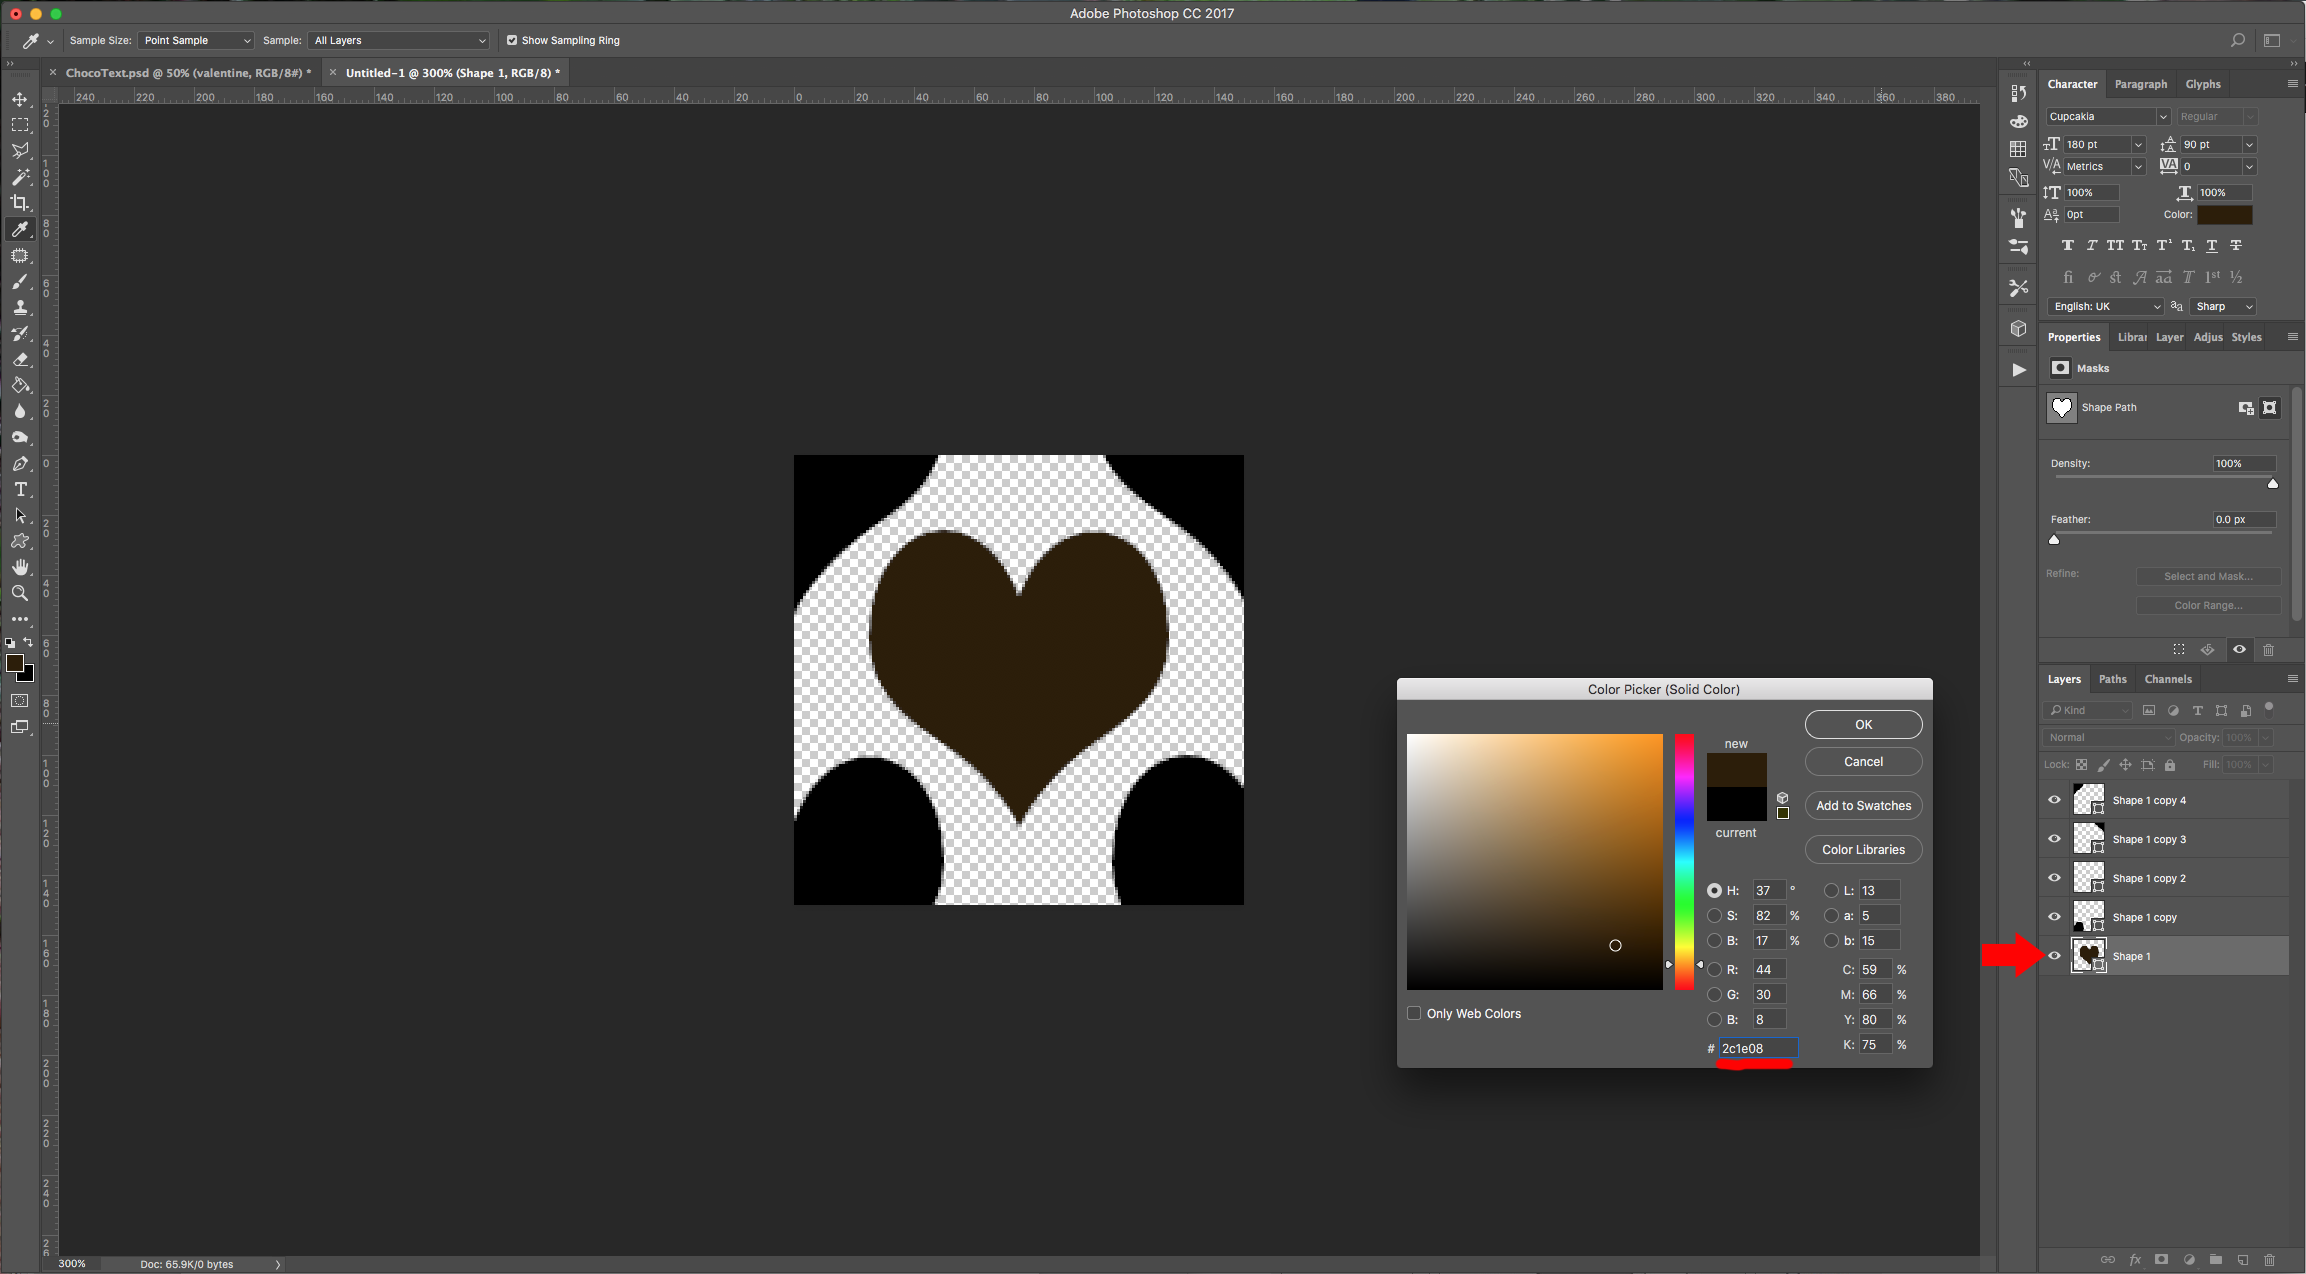
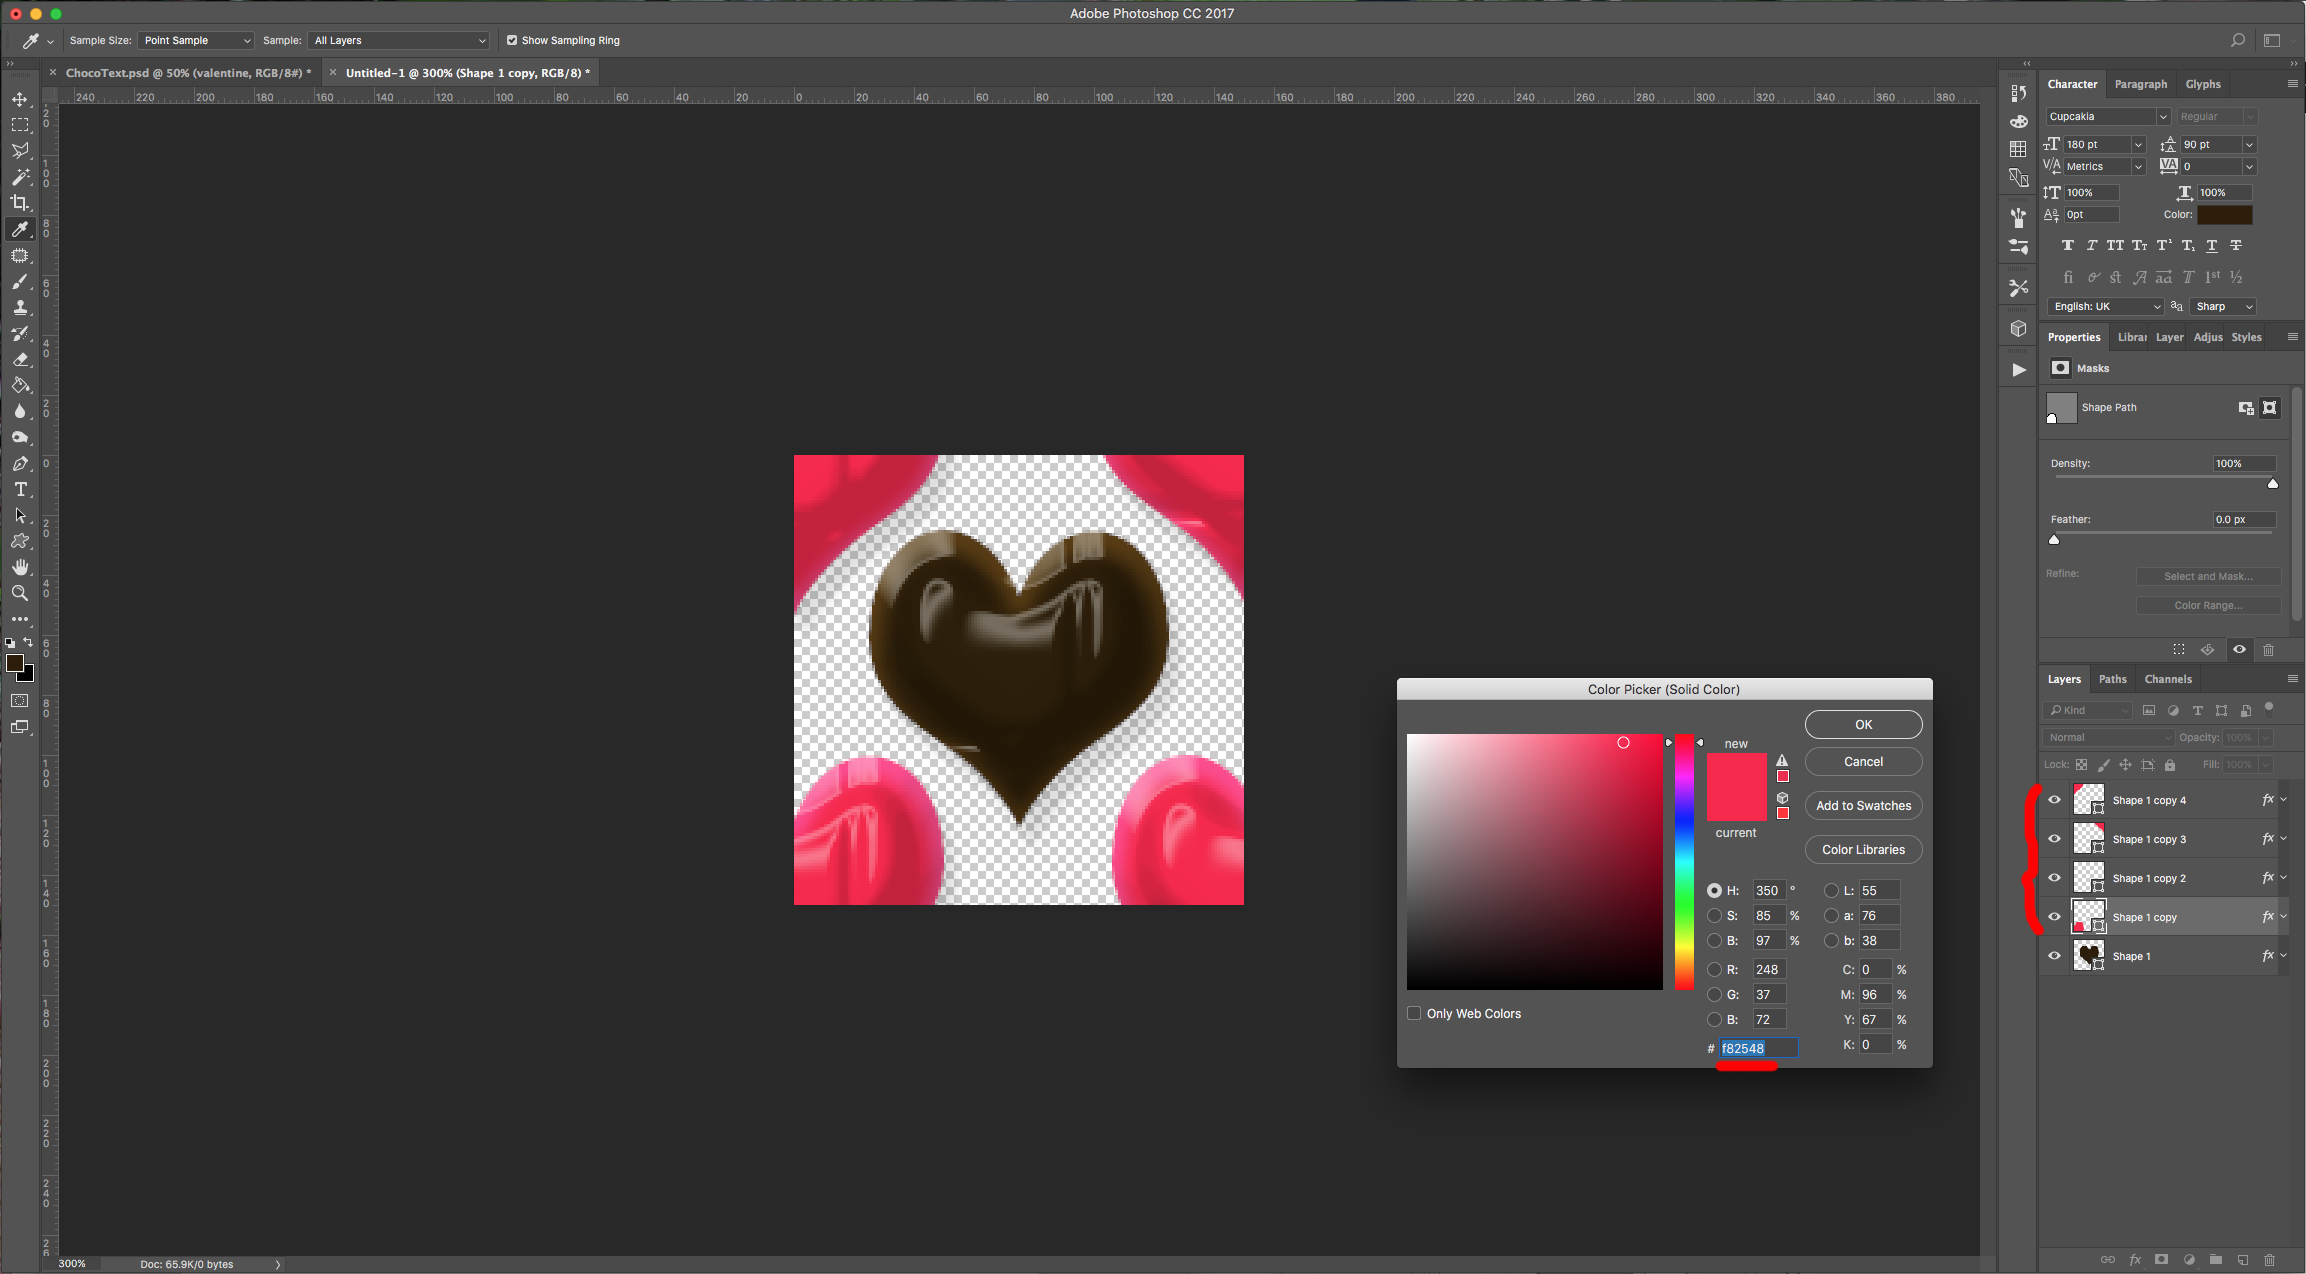
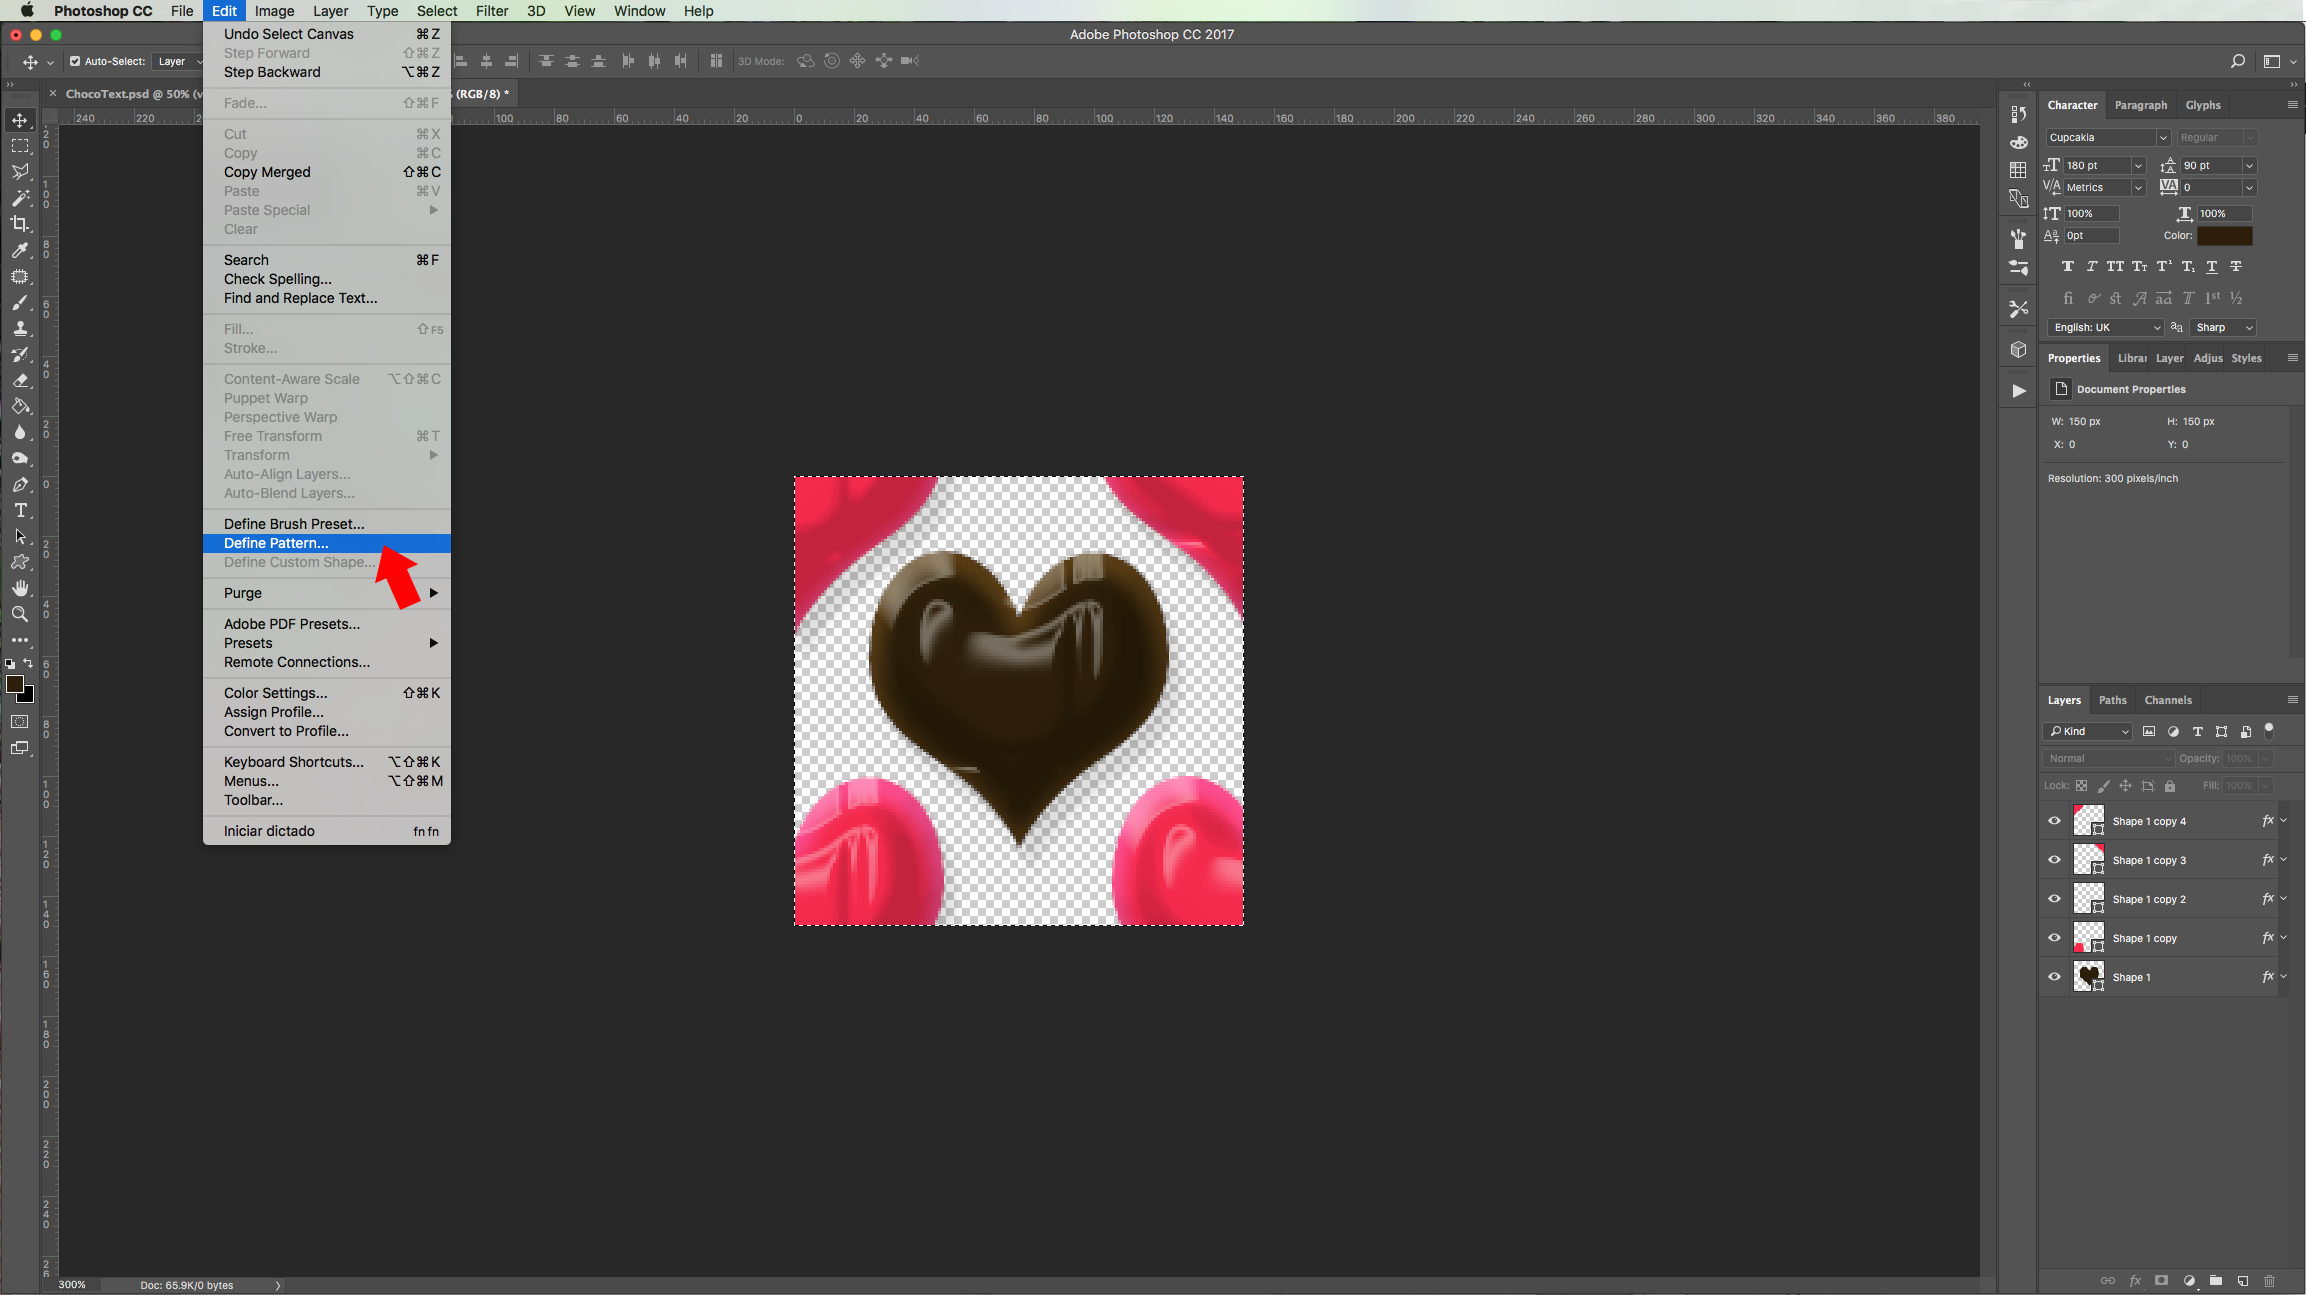
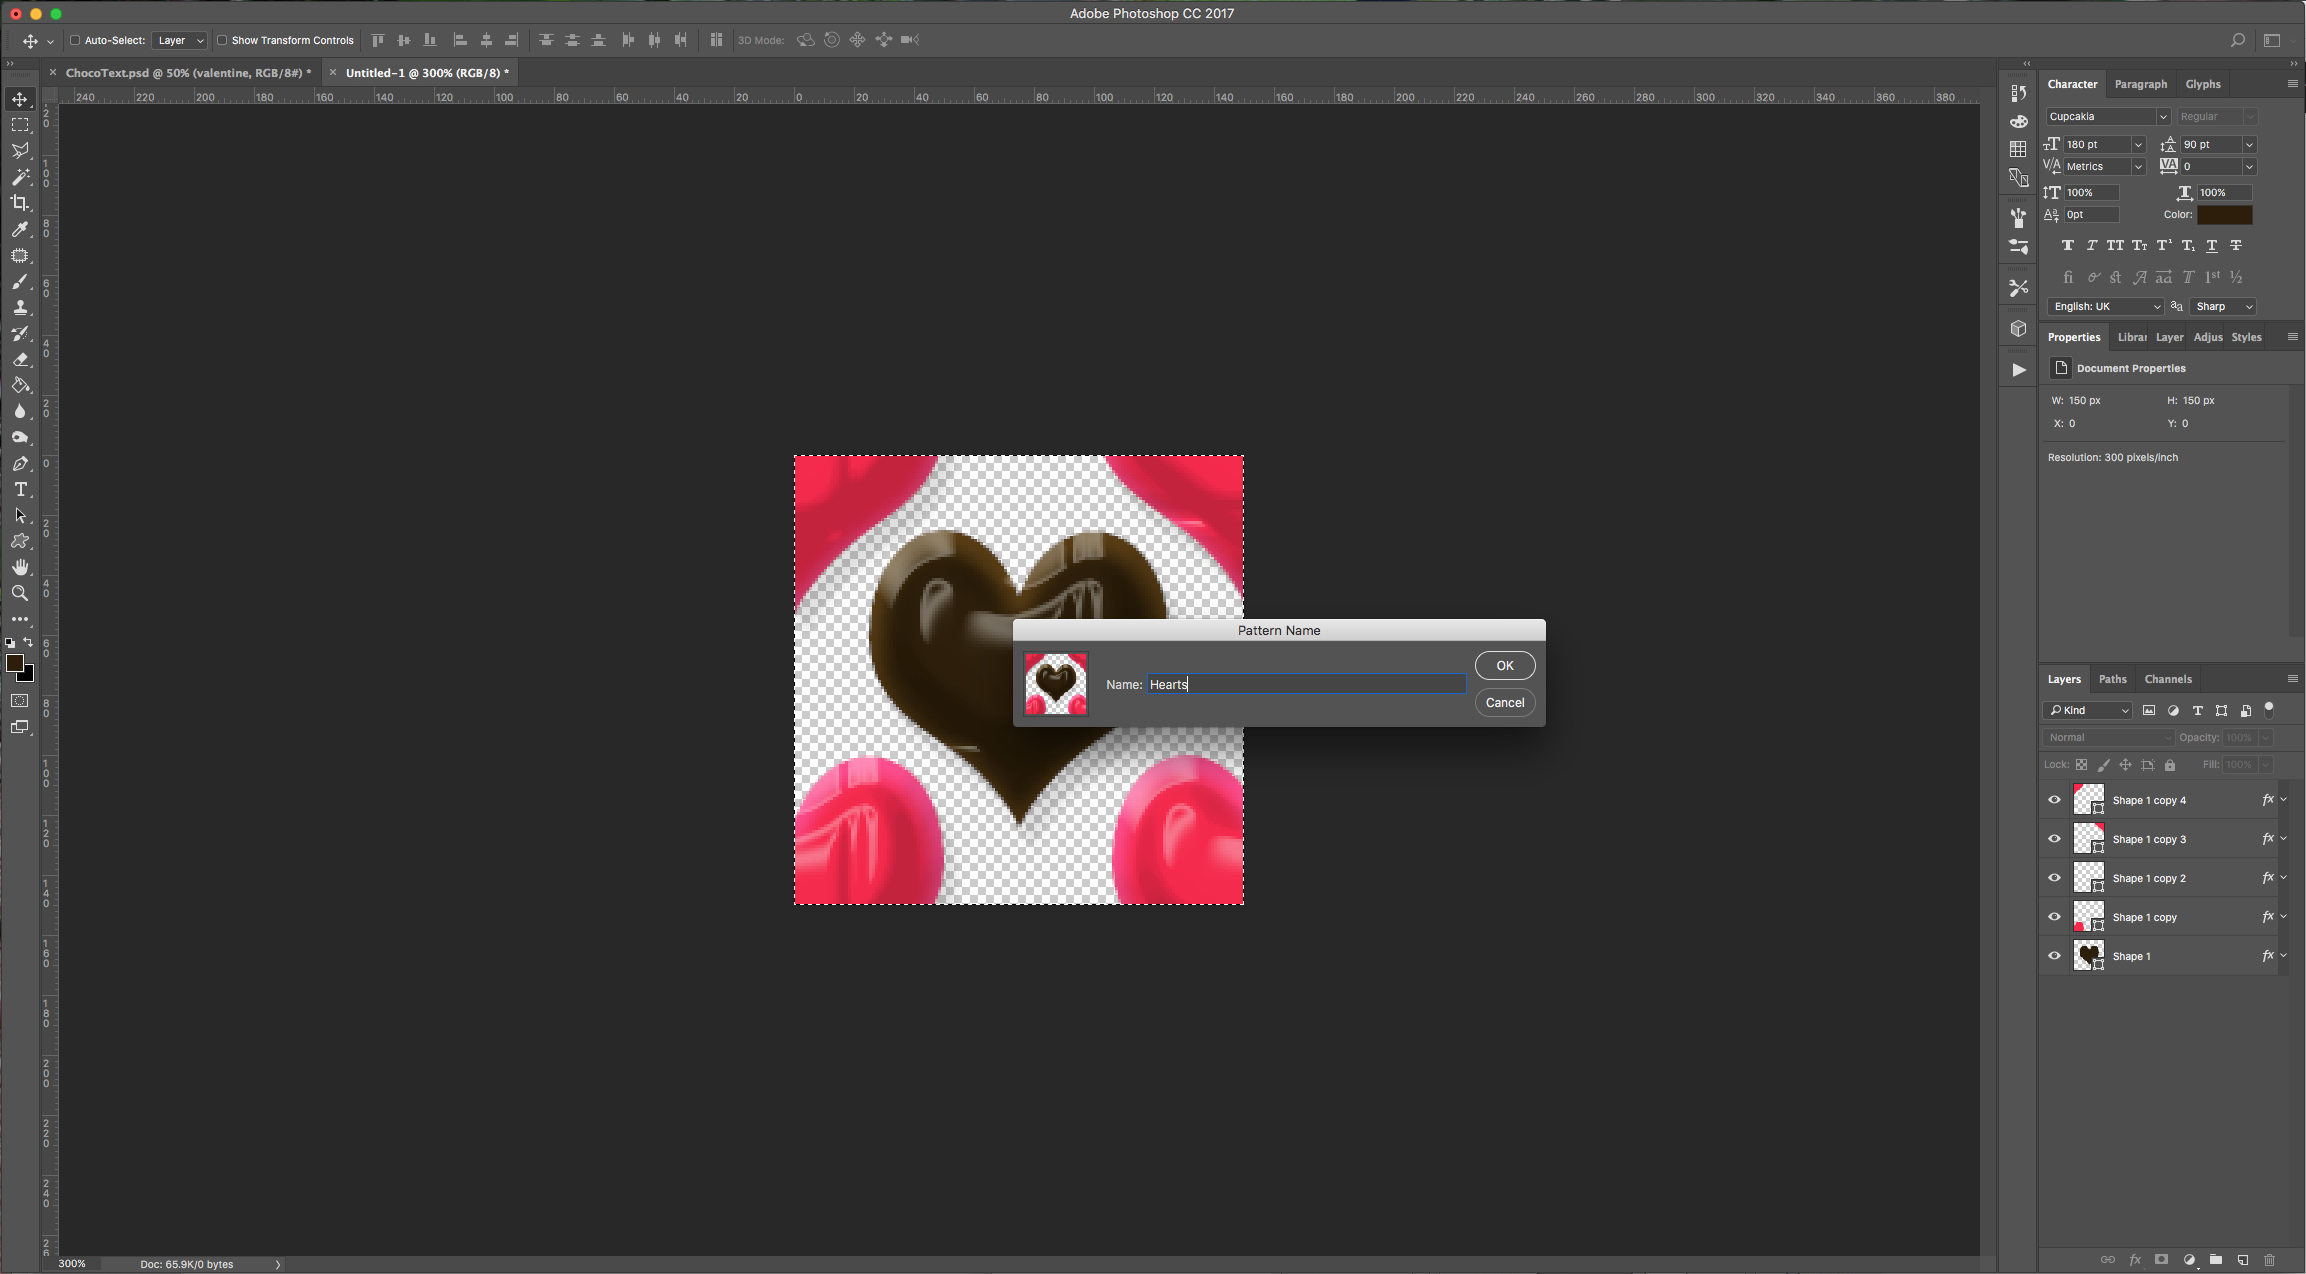
12 - To add a “Pattern” to your “Background”, create a “New Document”, make it 150 x 150 Pixels with a “Transparent” Background. Select the “Custom Shape Tool” (U) and choose the “Heart” shape. Use the “Path Selection Tool” (A) to select your shape and make it 100 x 100 Pixels in size and place it in the center of your document. Duplicate your shape 4 times and place one duplicate in each corner making sure the center of the shape is positioned on the corner (you will see just a quarter of your shape and the rest should be outside of the canvas). Double-click on the “Shape” thumbnail to change the “Fill” color to #2c1e08, then “Copy” your second Text (the one that looks like chocolate) “Layer Style” and “Paste” it in your “Heart” Shape. Do the same with the corner shapes but use #f82548 as “Fill” color. Select everything (Command/Control + A) and go to Edit > Define Pattern, mane your Pattern ad click “OK”.
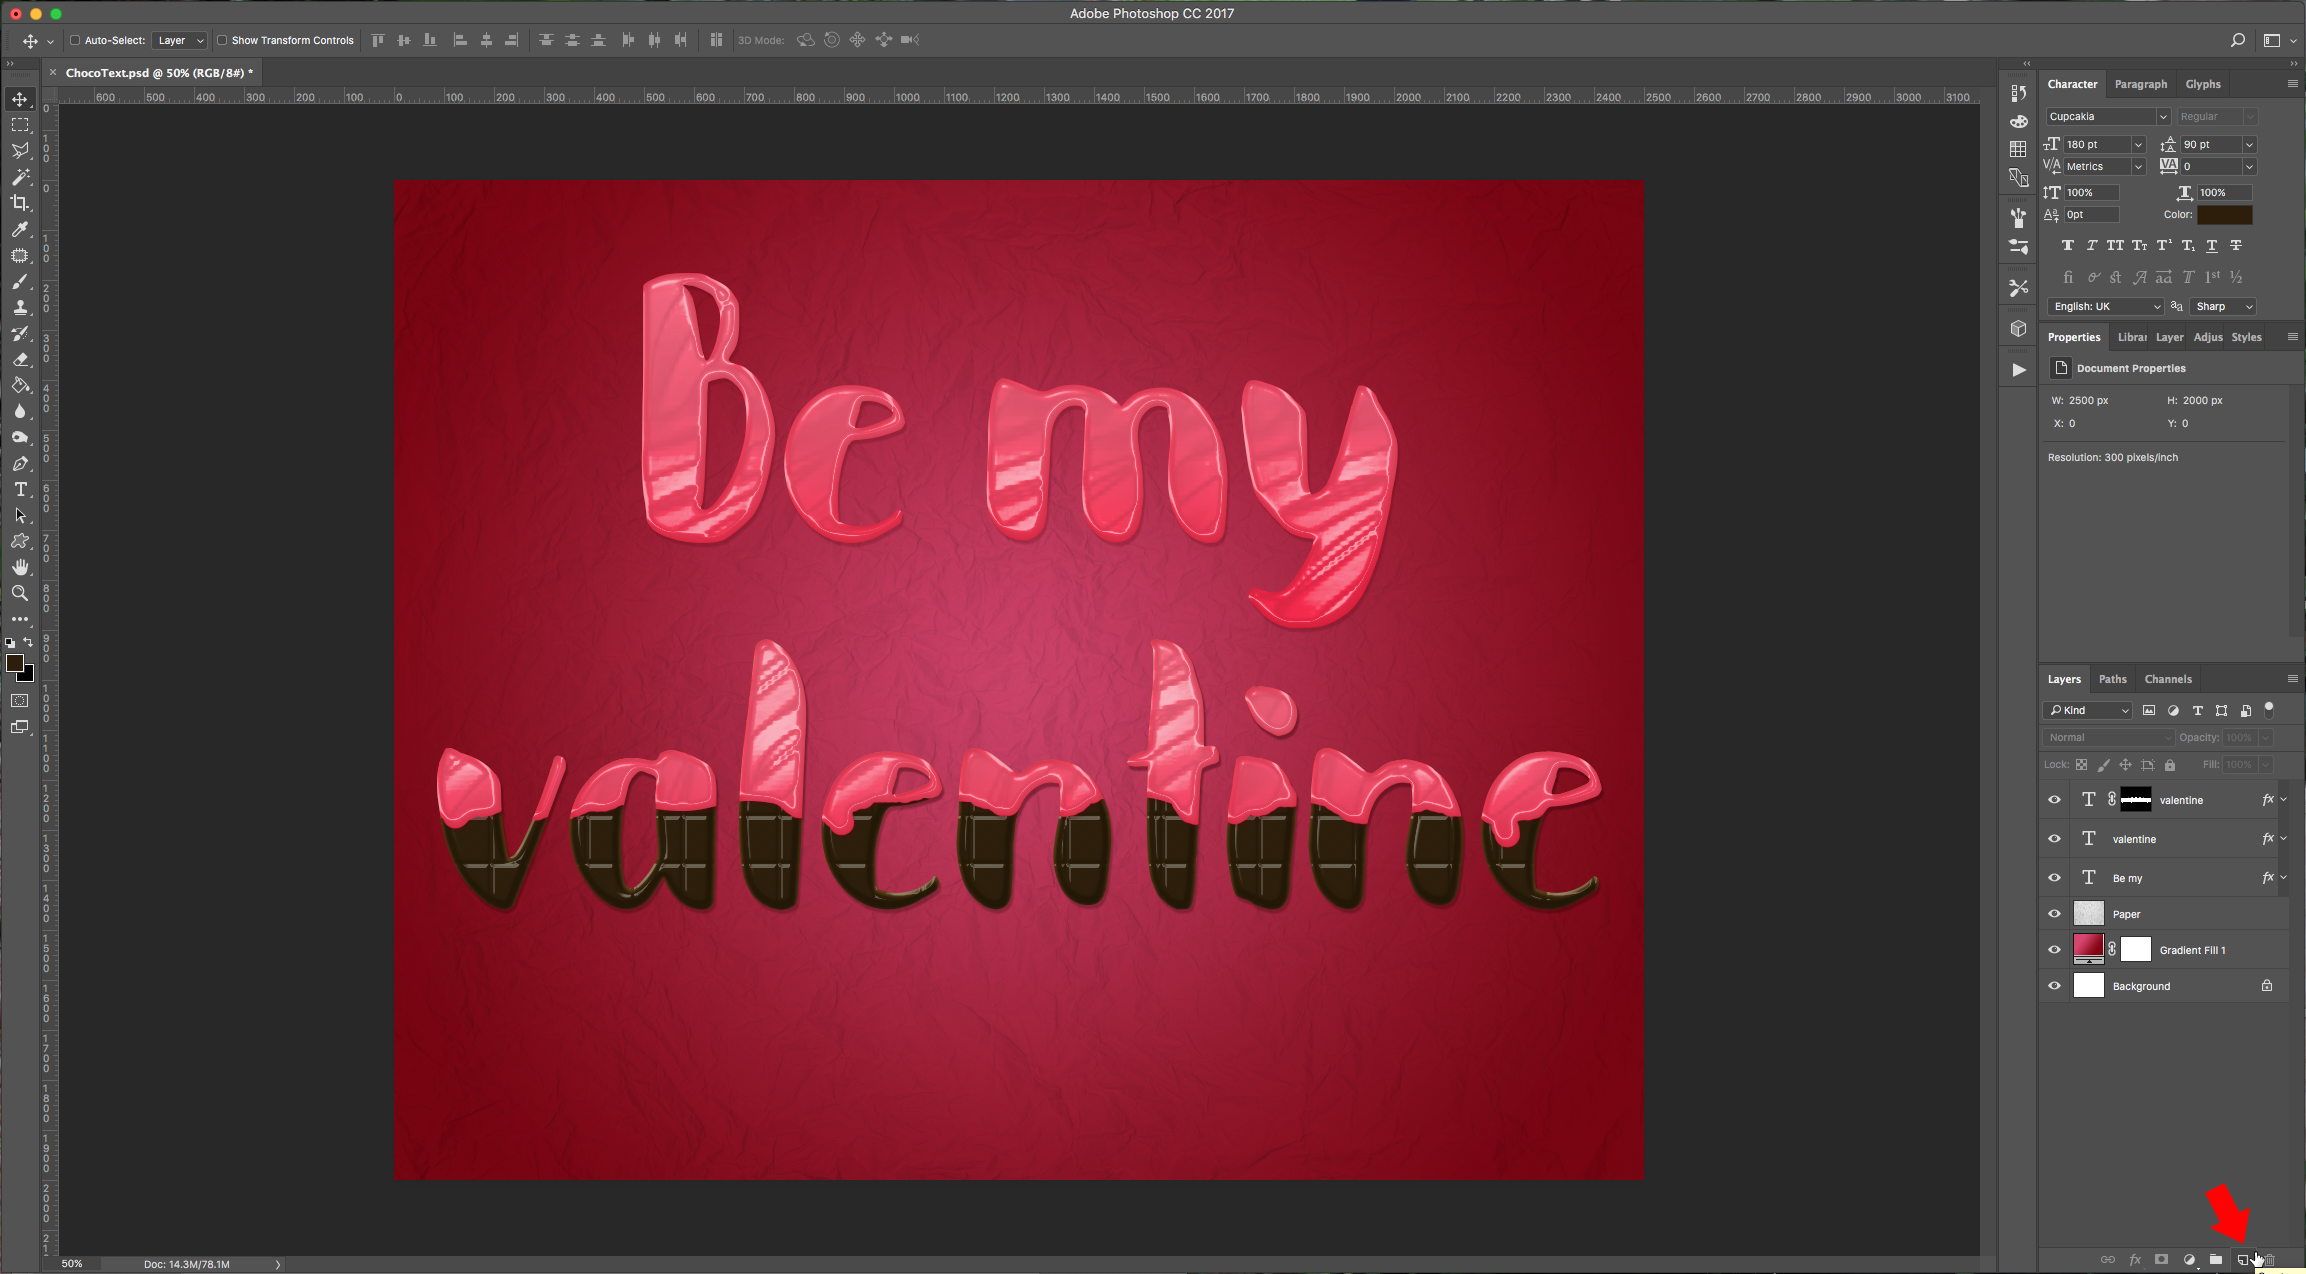
13 - Back in your Artwork, create a “New Layer” by clicking on the small button at the bottom of the “Layers” Panel, place it on top of the “Paper” Layer. Fill it with 100% White and double-click on its thumbnail to apply the following “Layer Styles”:
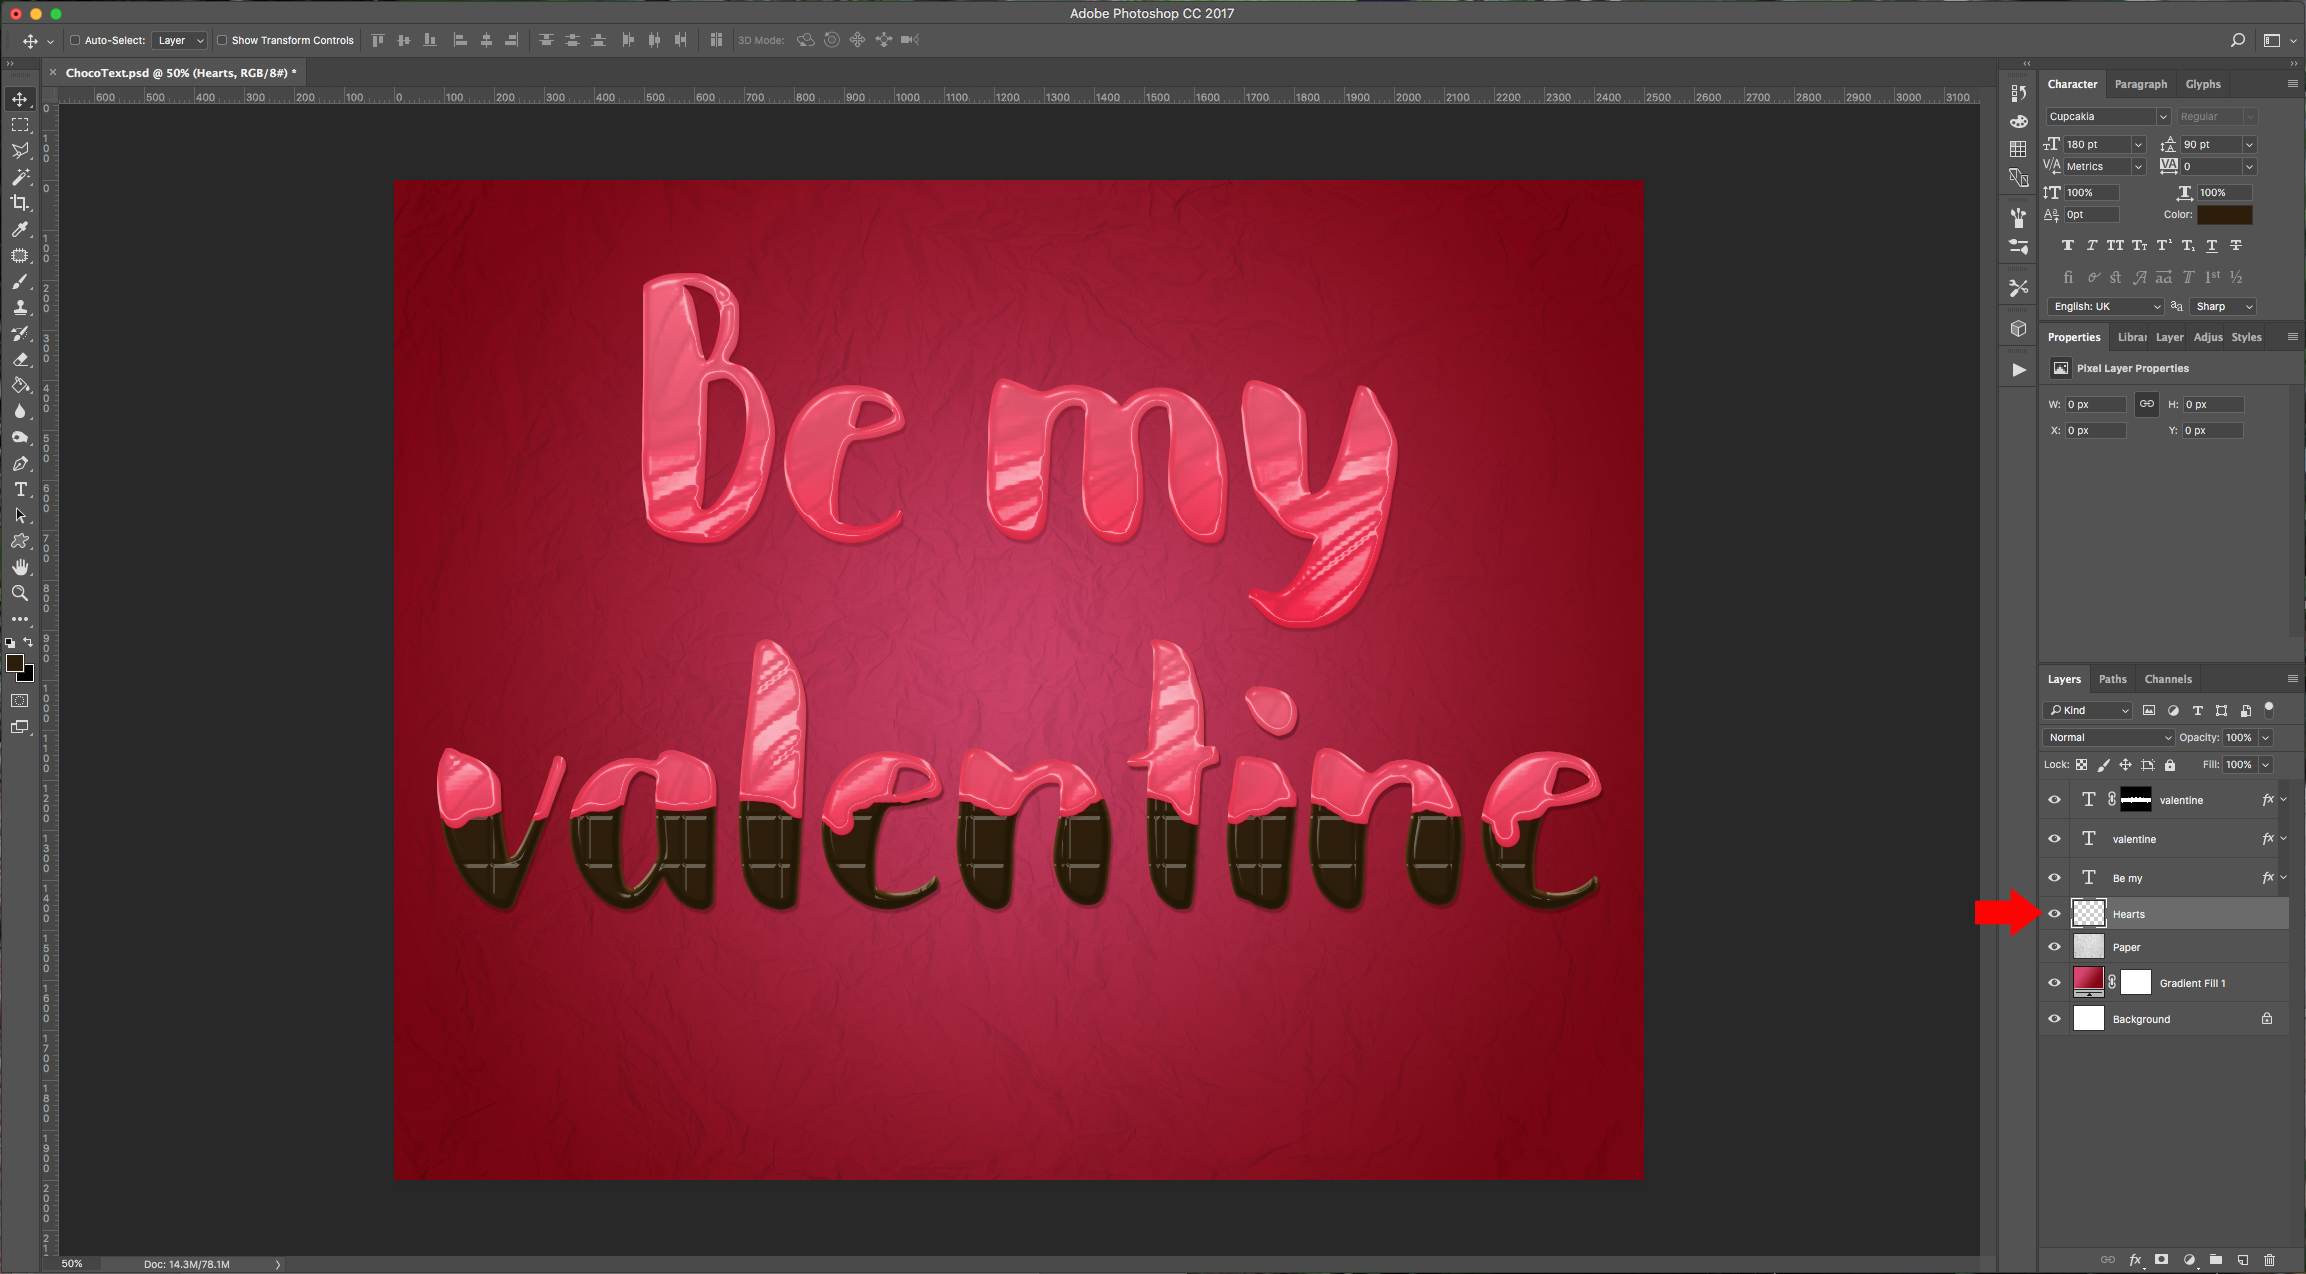
Blending Options:
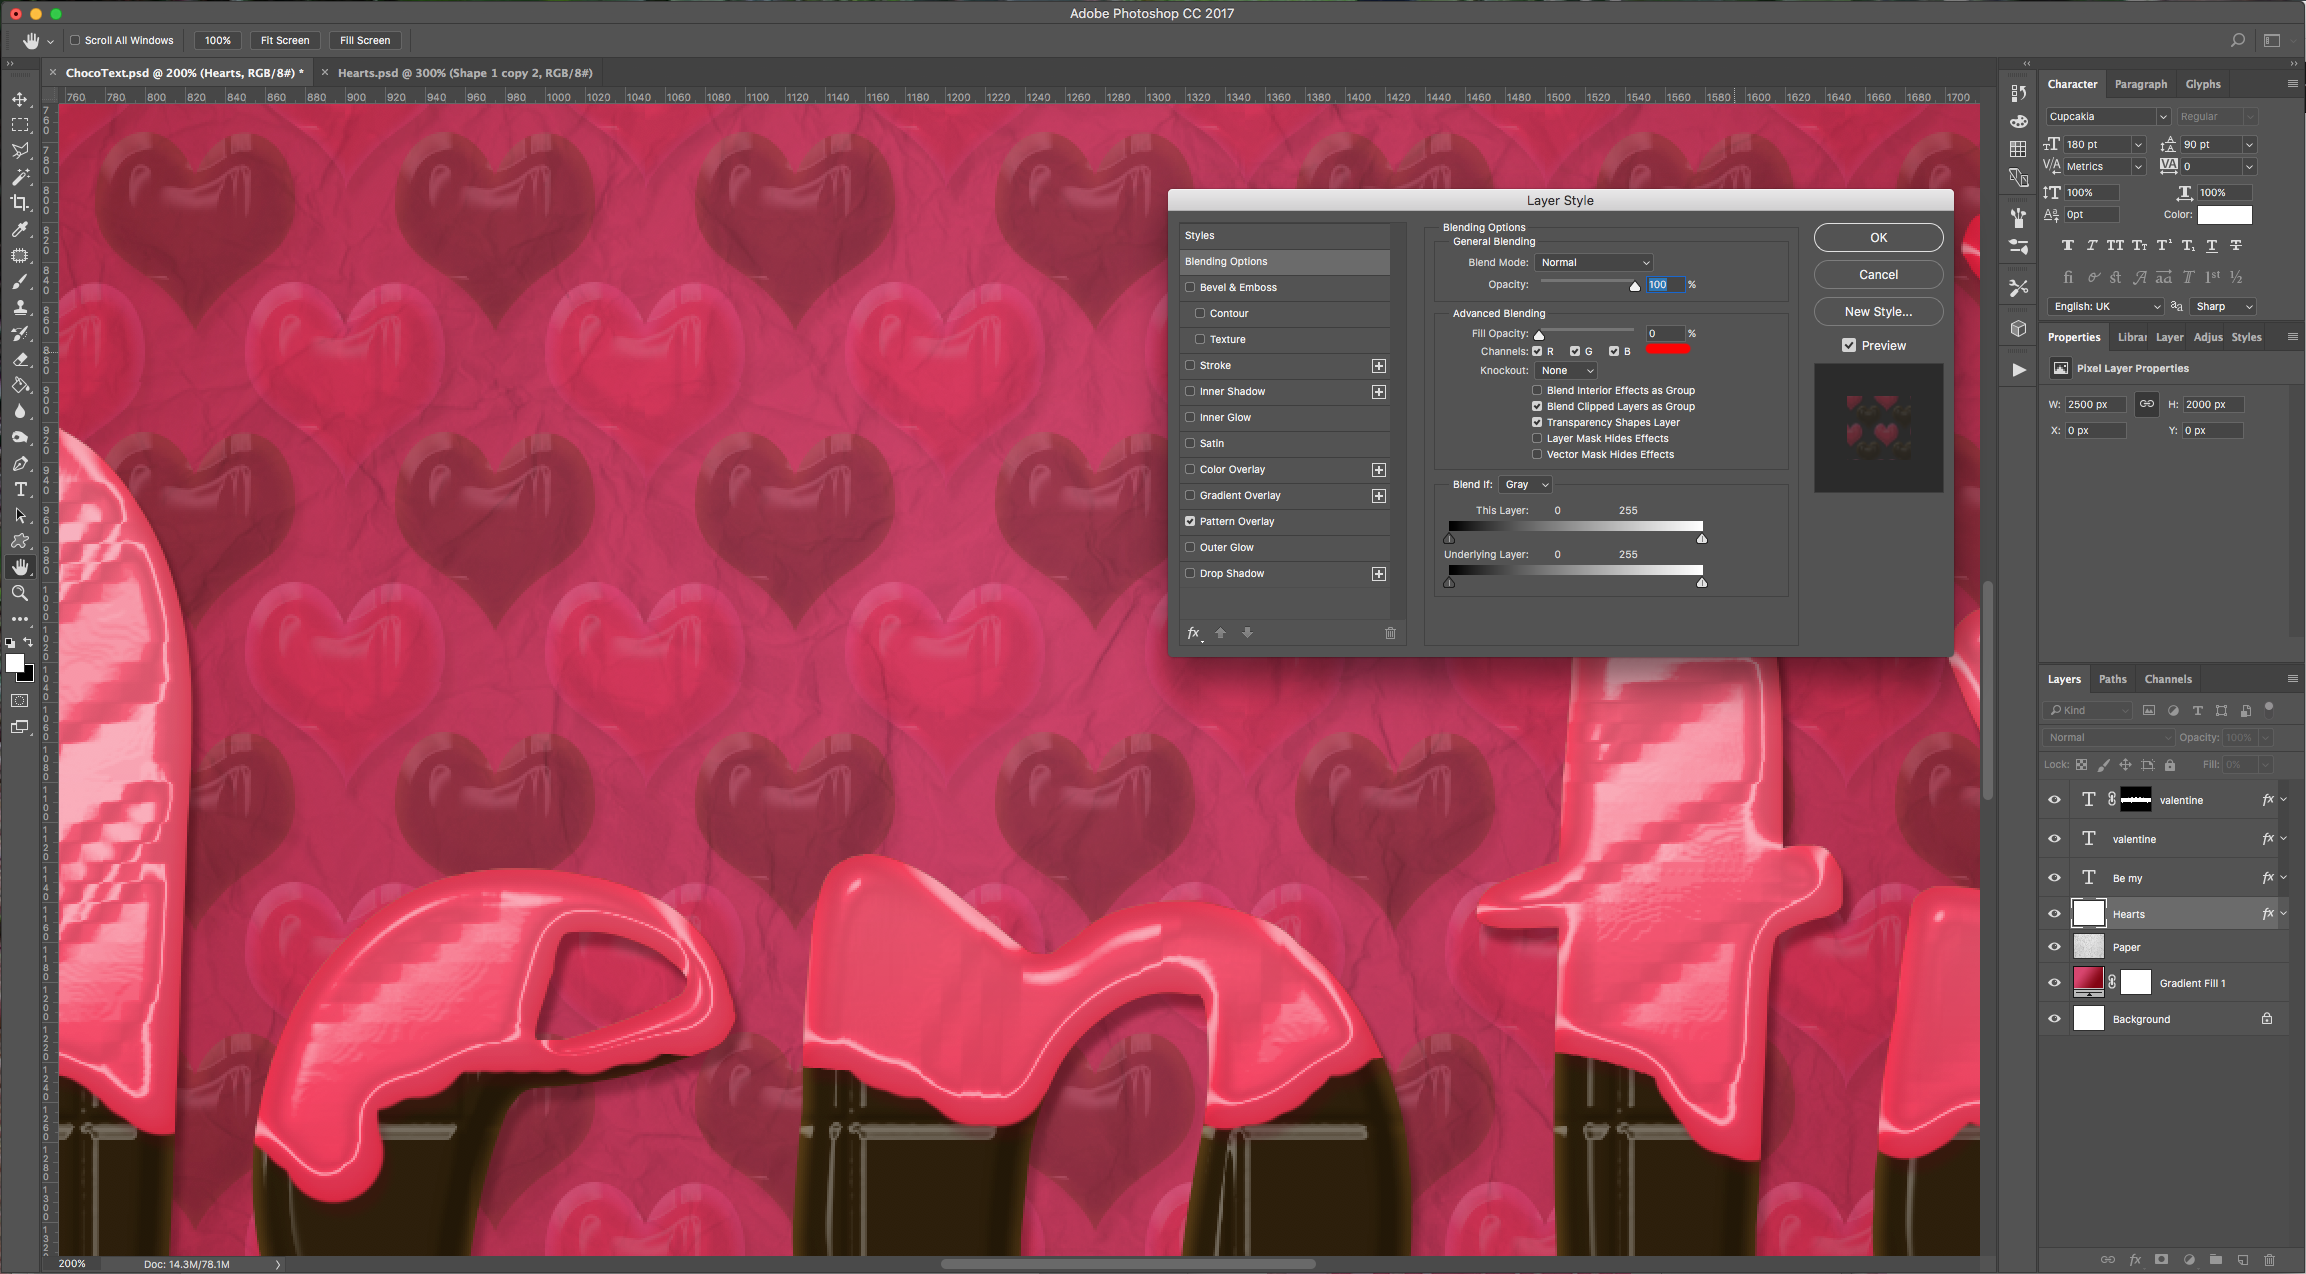
Pattern Overlay:
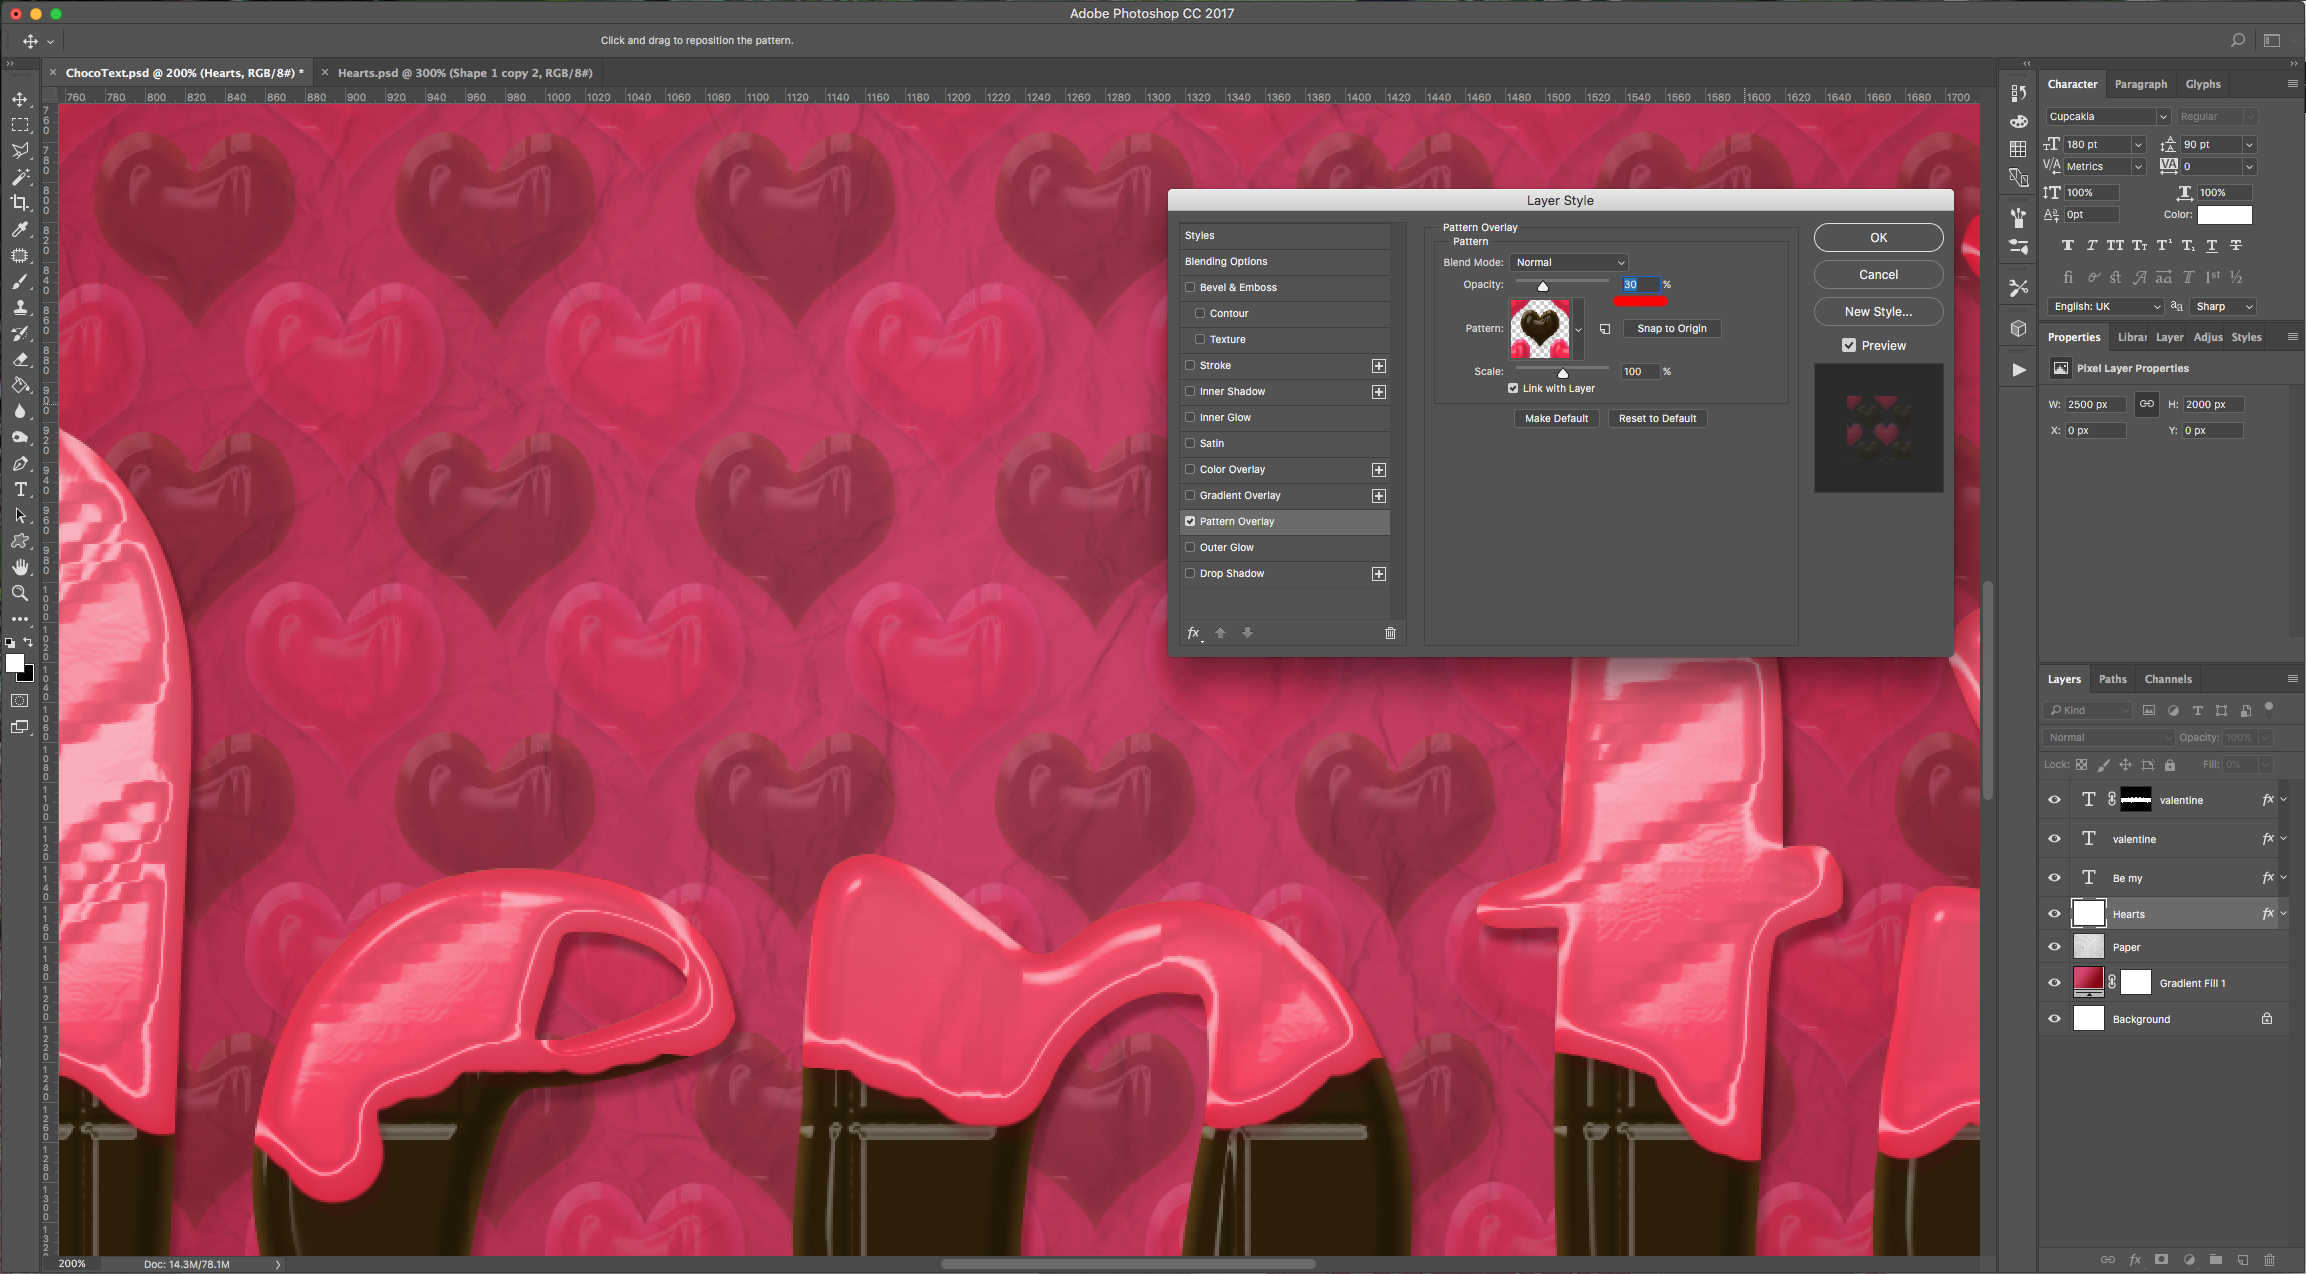
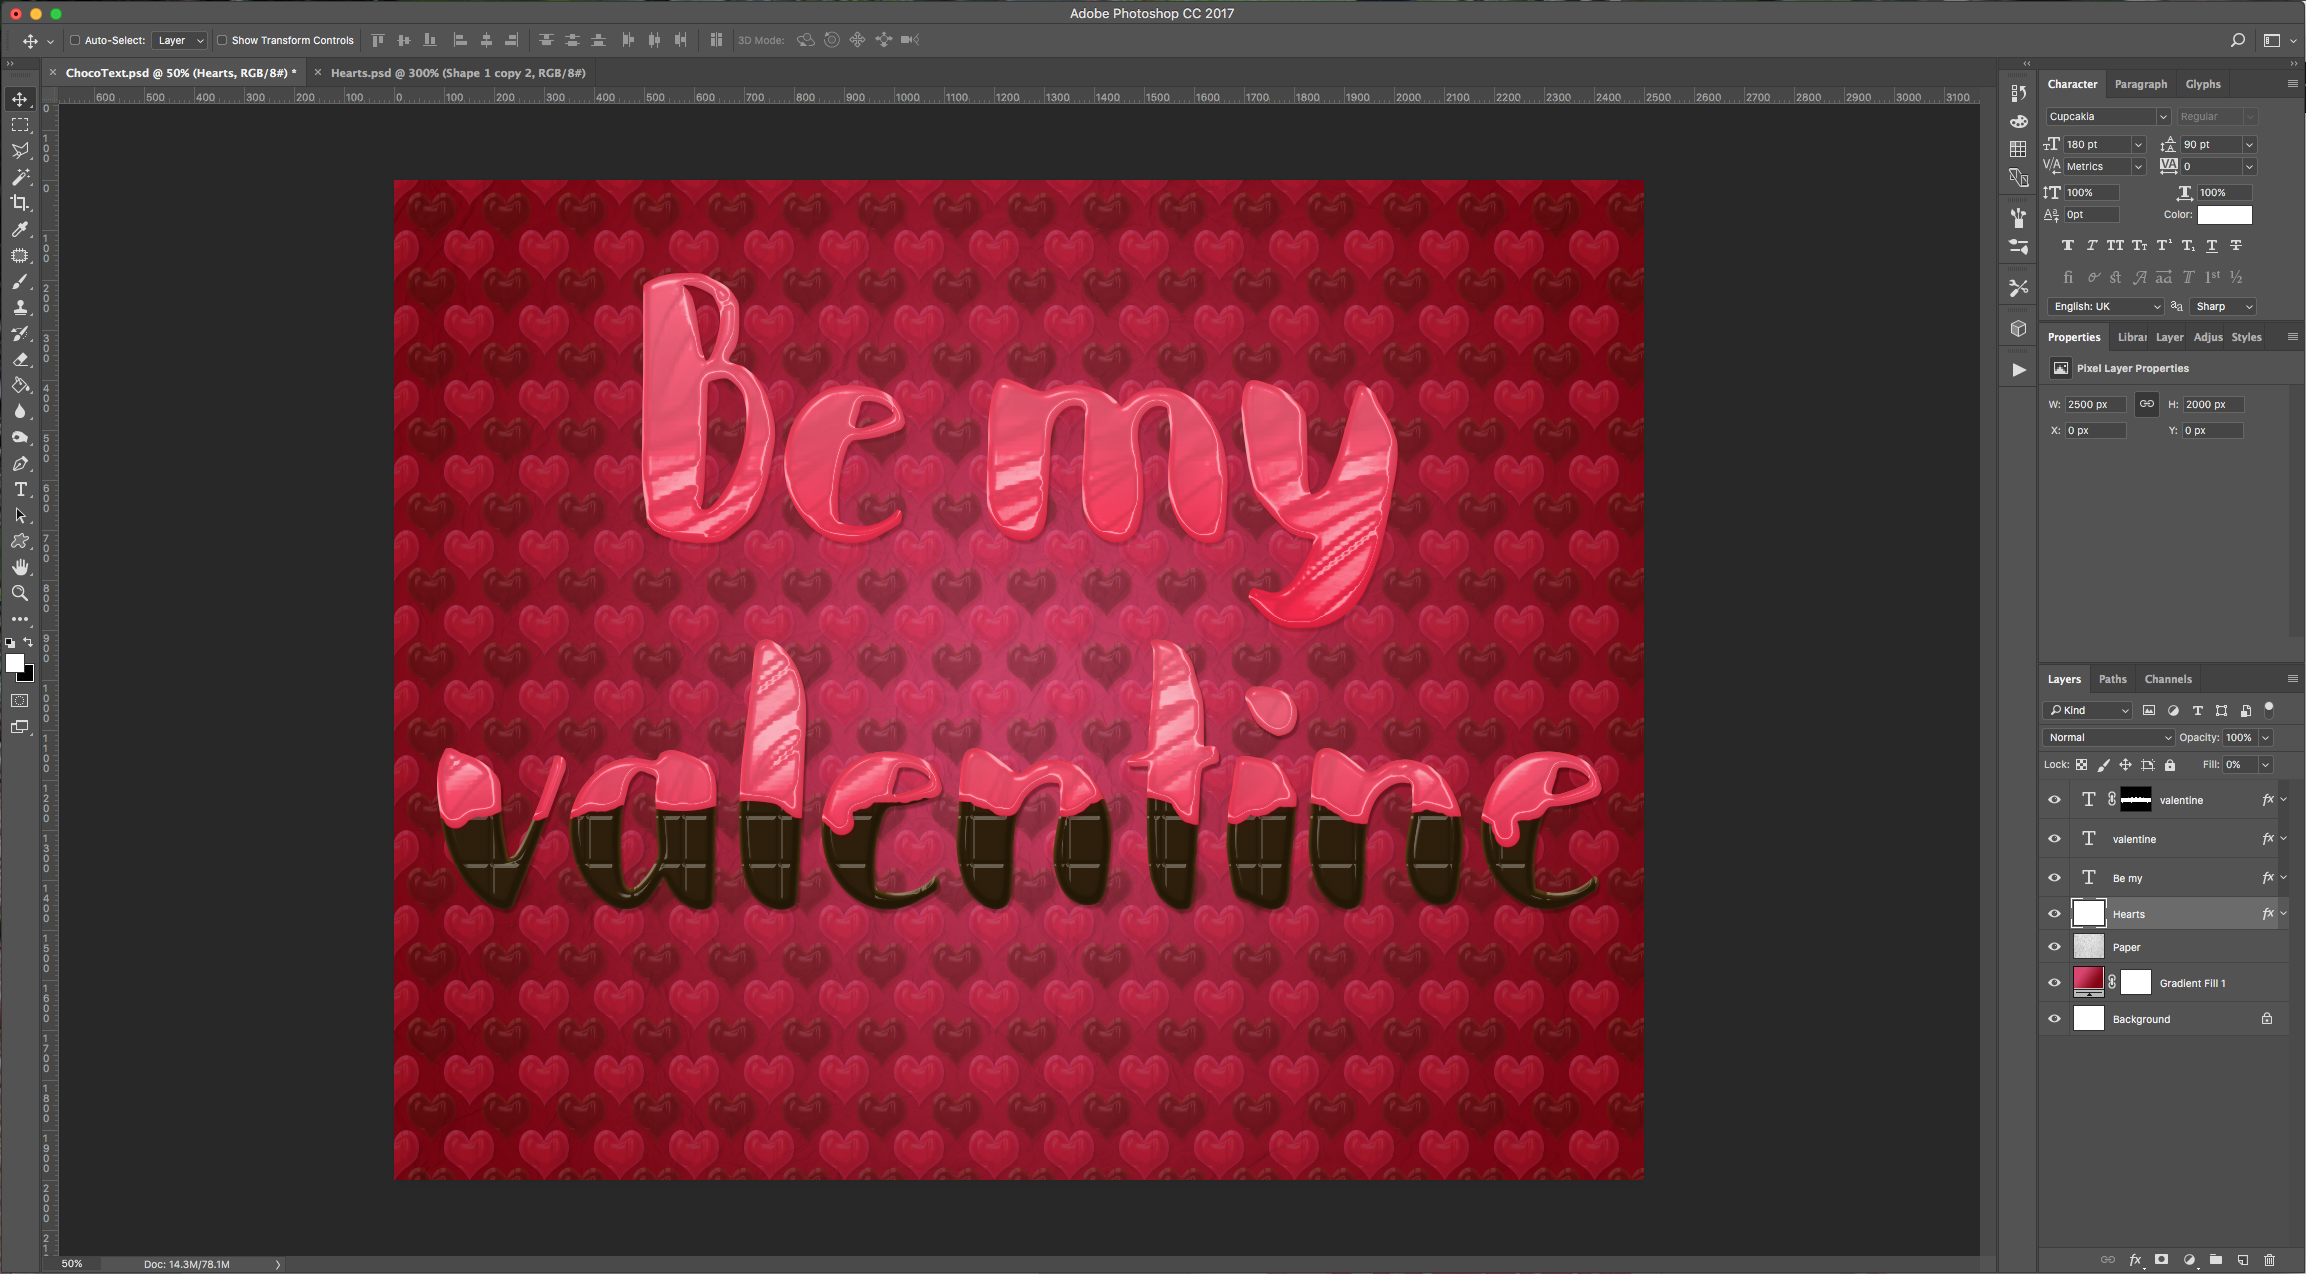
14 - Your Artwork should look like this:
1 - Create a “New Document” in Photoshop. We made ours 2500 x 2000 Pixels, 300 Dpi.
2 - Click on the “Create New Fill or Adjustment Layer” button at the bottom of the “Layers” Panel and create a new “Gradient Fill” Layer. Make it “Radial” with a 45° Angle. We used the colors #d9446e and #85020e.
3 - Open the image you chose to use as Background Texture, drag it (or Paste it) into your document and resize it if needed using the “Free Transform” Tool” (Command/Control + T). Once you are happy, click “Enter”, then change the “Blending Mode” to “Multiply” and the “Opacity” to 50%.
4 - Select the “Type Tool” (T), choose your font (we used Cupcakia) and type your text use #2c1e08 as “Fill” color.
5 - Double-click on your text layer and apply the following “Layer Styles”:
Bevel & Emboss: (Gloss Contour: Ring)
Contour: (Contour: Half Round)
Texture: (Pattern: Zebra 64 x 64 Pixels, Grayscale Mode)
Inner Shadow: (#f82548)
Inner Glow: (#f82548)
Gradient Overlay: (#f82548, #f85772 and #f4637b)
Drop Shadow: (#560613)
We added more text to this layer and reduced the size to 180 Pixels.
6 - Type a second line of text creating another layer (keep the Font, Fill Color and Size from the previous one) and apply the following “Layer Styles” to this one:
Bevel & Emboss: (Gloss Contour: Rounded Steps)
Contour: (Contour: Gaussian)
Texture: (Tiles-Smooth: Zebra 128 x 128 Pixels, Grayscale Mode)
Inner Shadow: (#ffffff)
Drop Shadow: (#231103)
7 - Duplicate your text layer (Command/Control + J) and delete all the “Layer Styles” (just drag them to the little “Trash Can” icon at the bottom of the “Layers” Panel.
8 - Change the “Fill” color to #f85772. Select the “Rectangular Marquee Tool” (M) and draw a rectangle covering the top part of your text, then click on the “Add Layer Mask” button at the bottom of the “Layers” Panel to mask your text.
9 - Making sure the “Mask” is selected (there should be a white box around the mask thumbnail), go to Filter > Distort > ZigZag and use an “Amount” of 25 and 5 “Ridges”. Use “Pond Ripples” as “Style”.
10 - Right-click on your first text layer (Be my) and “Copy Layer Style”, the right-click on your masked text layer and “Paste Layer Style”.
11 - You can add some drips to your layer by selecting the “Brush Tool” (B), choose a medium sized brush (about 50 Pixels), make sure the “Hardness” is set to 100%, that you “Foreground” color is black and that your “Mask” is selected and paint some drops.
12 - To add a “Pattern” to your “Background”, create a “New Document”, make it 150 x 150 Pixels with a “Transparent” Background. Select the “Custom Shape Tool” (U) and choose the “Heart” shape. Use the “Path Selection Tool” (A) to select your shape and make it 100 x 100 Pixels in size and place it in the center of your document. Duplicate your shape 4 times and place one duplicate in each corner making sure the center of the shape is positioned on the corner (you will see just a quarter of your shape and the rest should be outside of the canvas). Double-click on the “Shape” thumbnail to change the “Fill” color to #2c1e08, then “Copy” your second Text (the one that looks like chocolate) “Layer Style” and “Paste” it in your “Heart” Shape. Do the same with the corner shapes but use #f82548 as “Fill” color. Select everything (Command/Control + A) and go to Edit > Define Pattern, mane your Pattern ad click “OK”.
13 - Back in your Artwork, create a “New Layer” by clicking on the small button at the bottom of the “Layers” Panel, place it on top of the “Paper” Layer. Fill it with 100% White and double-click on its thumbnail to apply the following “Layer Styles”:
Blending Options:
Pattern Overlay:
14 - Your Artwork should look like this:
by @lornacane
Related Tutorials
Photoshop Tutorials
How to Use Text Effects in Photoshop
With Photoshop Text Effects, you can create text with impact in just a few steps.
Photoshop Tutorials
Easy See through Cut Out Text in Photoshop
Create a see-through cut out text design in Photoshop with these easy to follow steps.
Photoshop Tutorials
How to Fill a Shape with Text in Photoshop
Learn how to fill a shape with text in Photoshop in seven quick steps.
Photoshop Tutorials
How to Make a Graffiti Text Effect in Photoshop
Learn how to create a realistic grafitti text effect in Photoshop.
Photoshop Tutorials
How to Create a Holographic Text Effect in Photoshop
Discover how to create a holographic text effect in Photoshop with this step by step tutorial.
Photoshop Tutorials
Chalk Text Effect in Photoshop
In this tutorial, learn how to turn any font into chalk text in Photoshop with the Brush tool.