By Design Bundles
Photoshop Tutorials7 min
Grass Text Effect in Photoshop
For this Tutorial, we are going to use the image/images or pattern of grass and one you wish to use as “Background” and the Free Font “Cactus Cuties”.
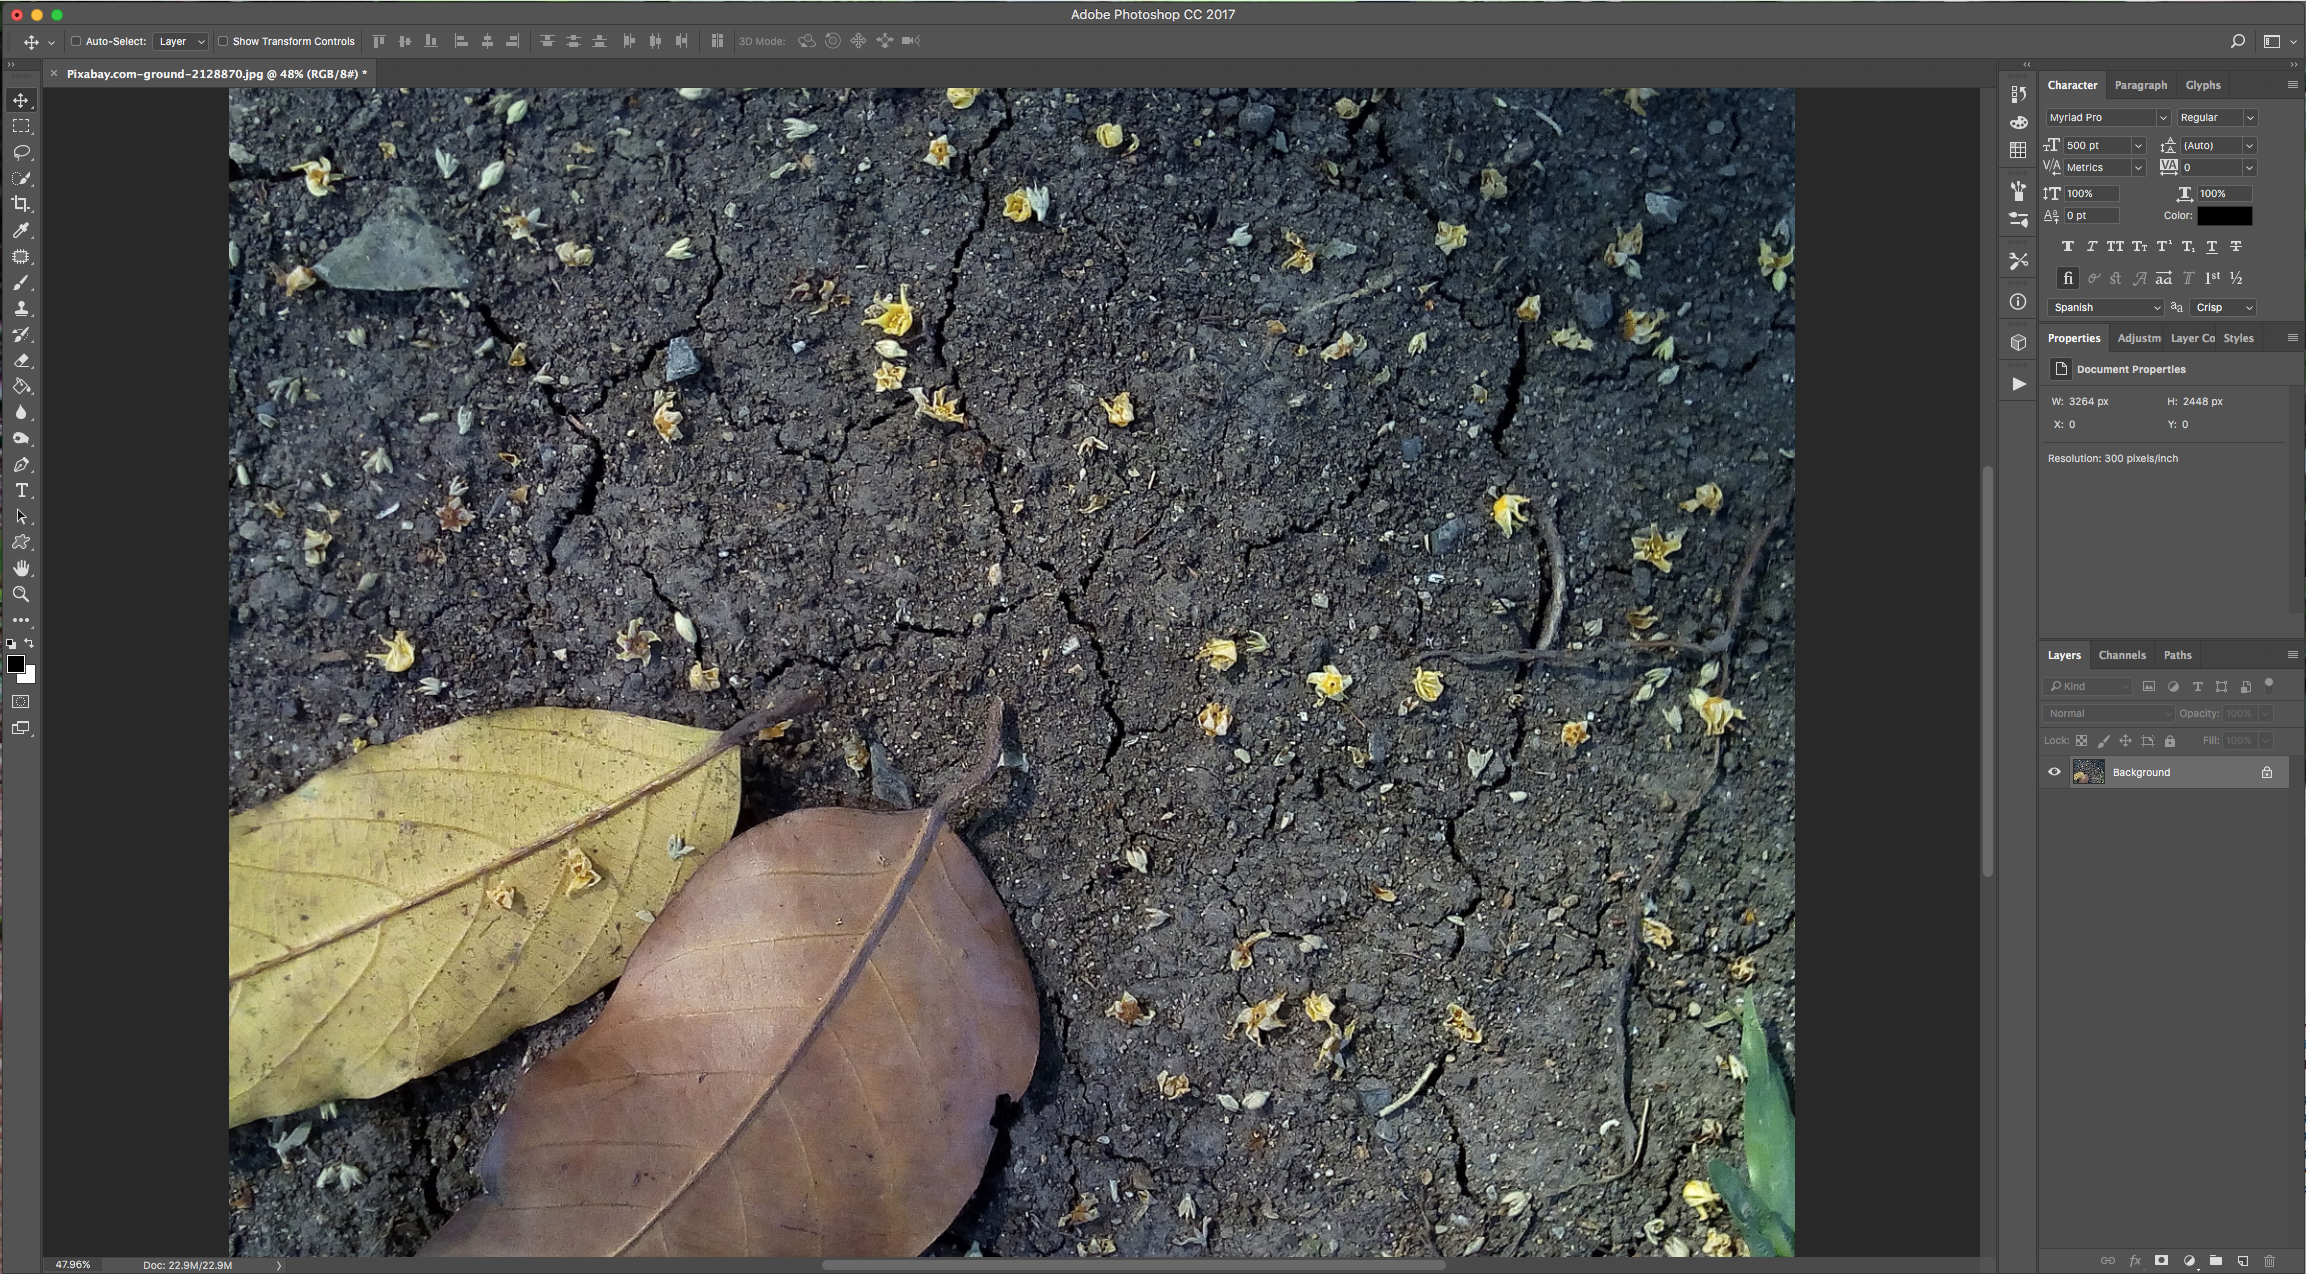
1 - In Photoshop, open the file you chose as “Background”.
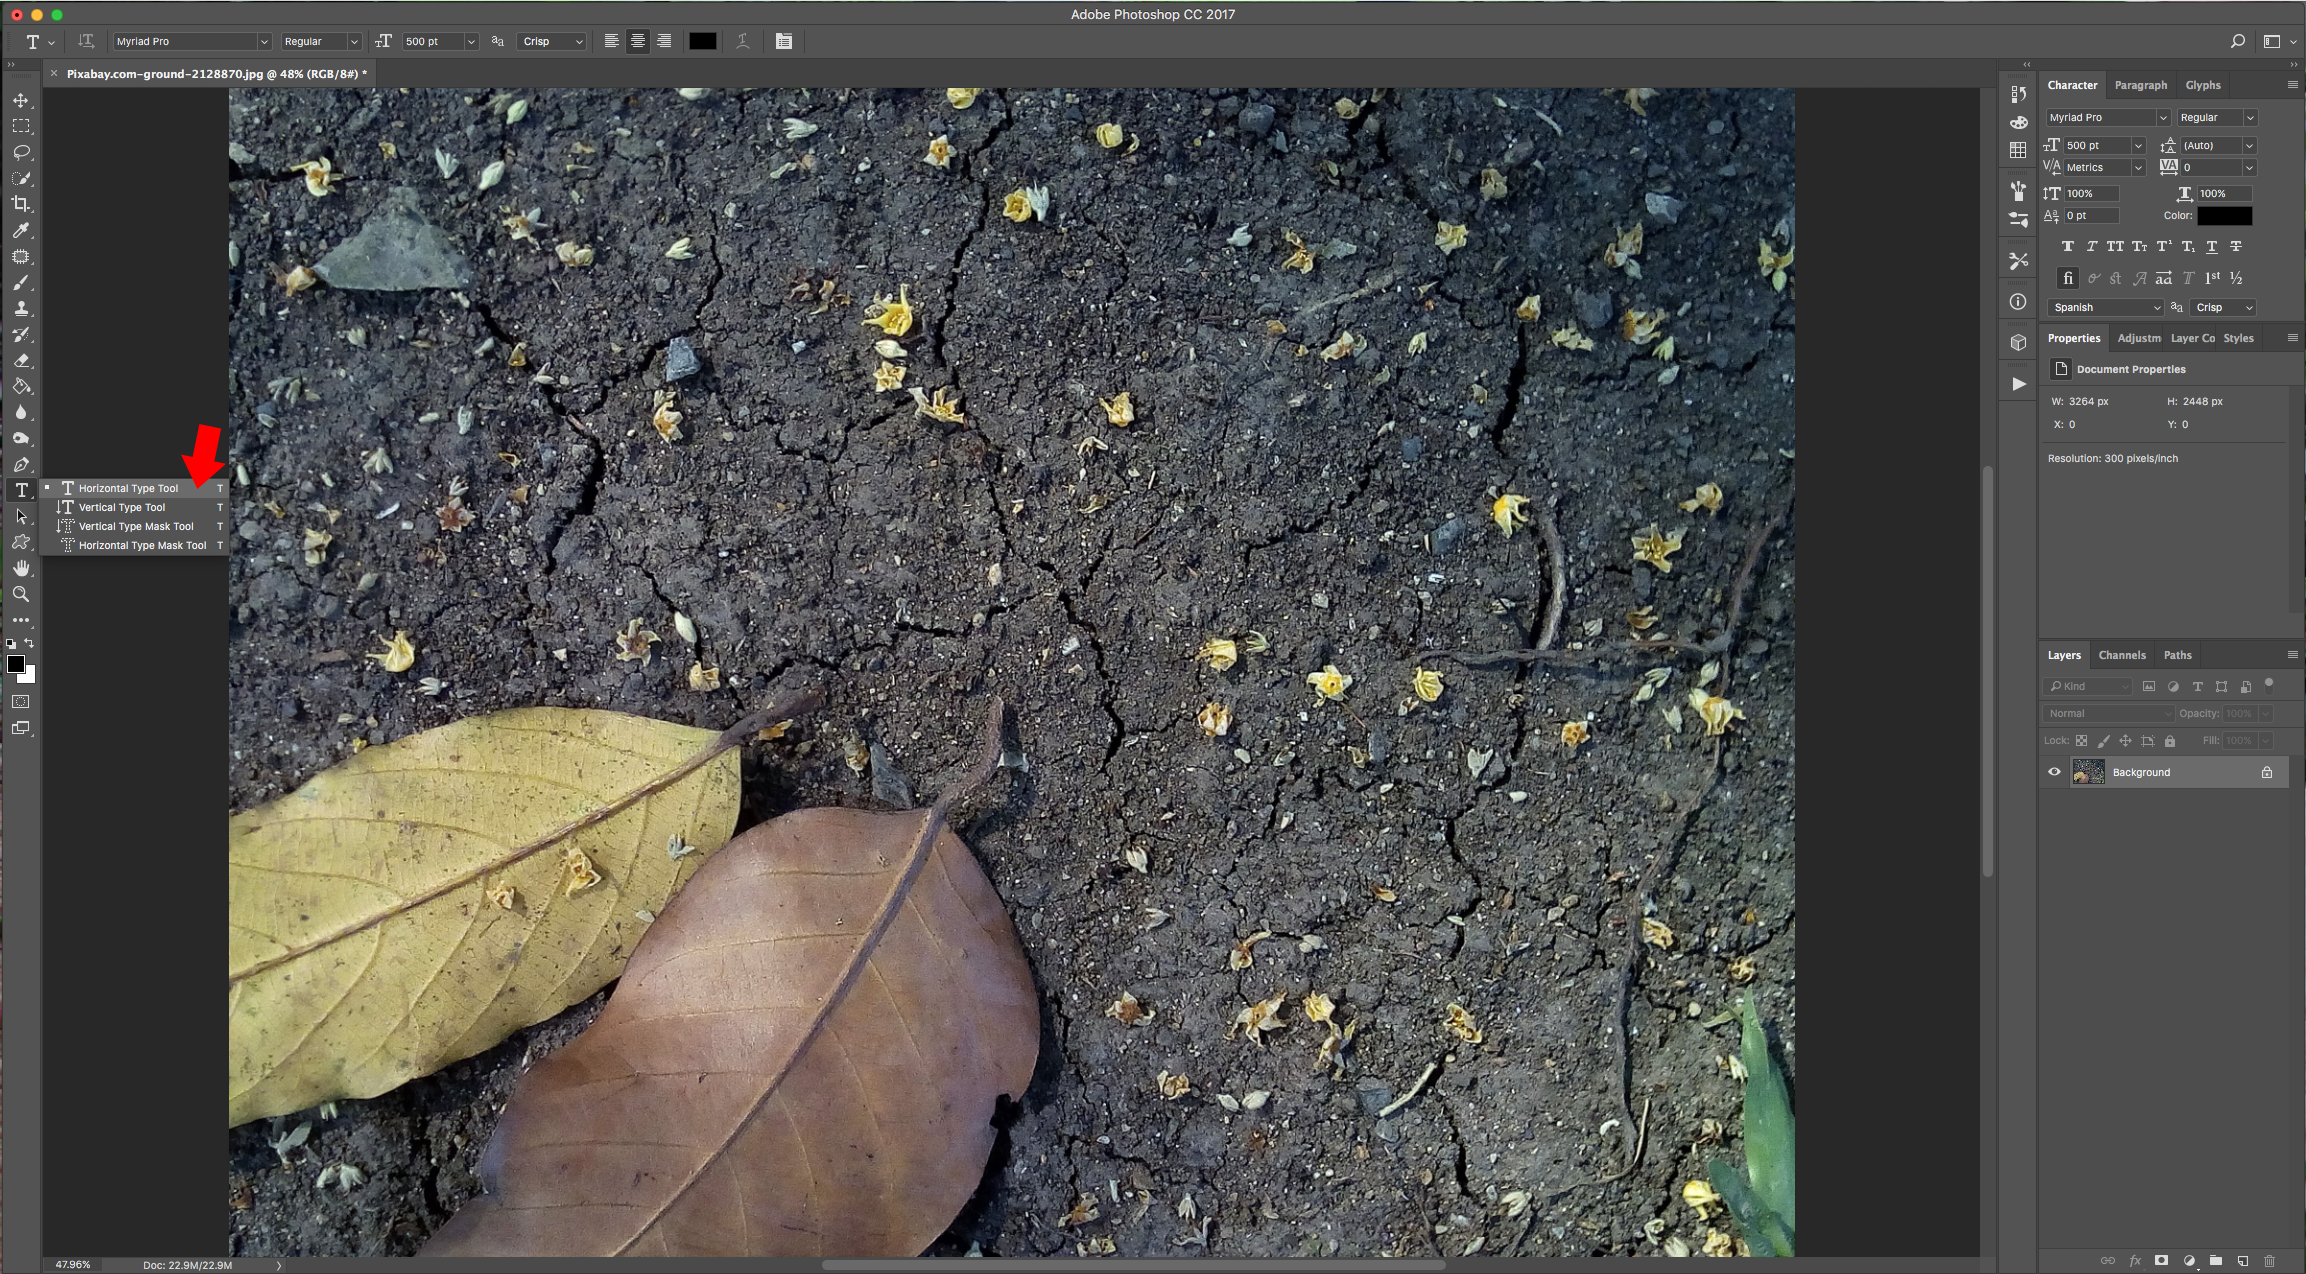
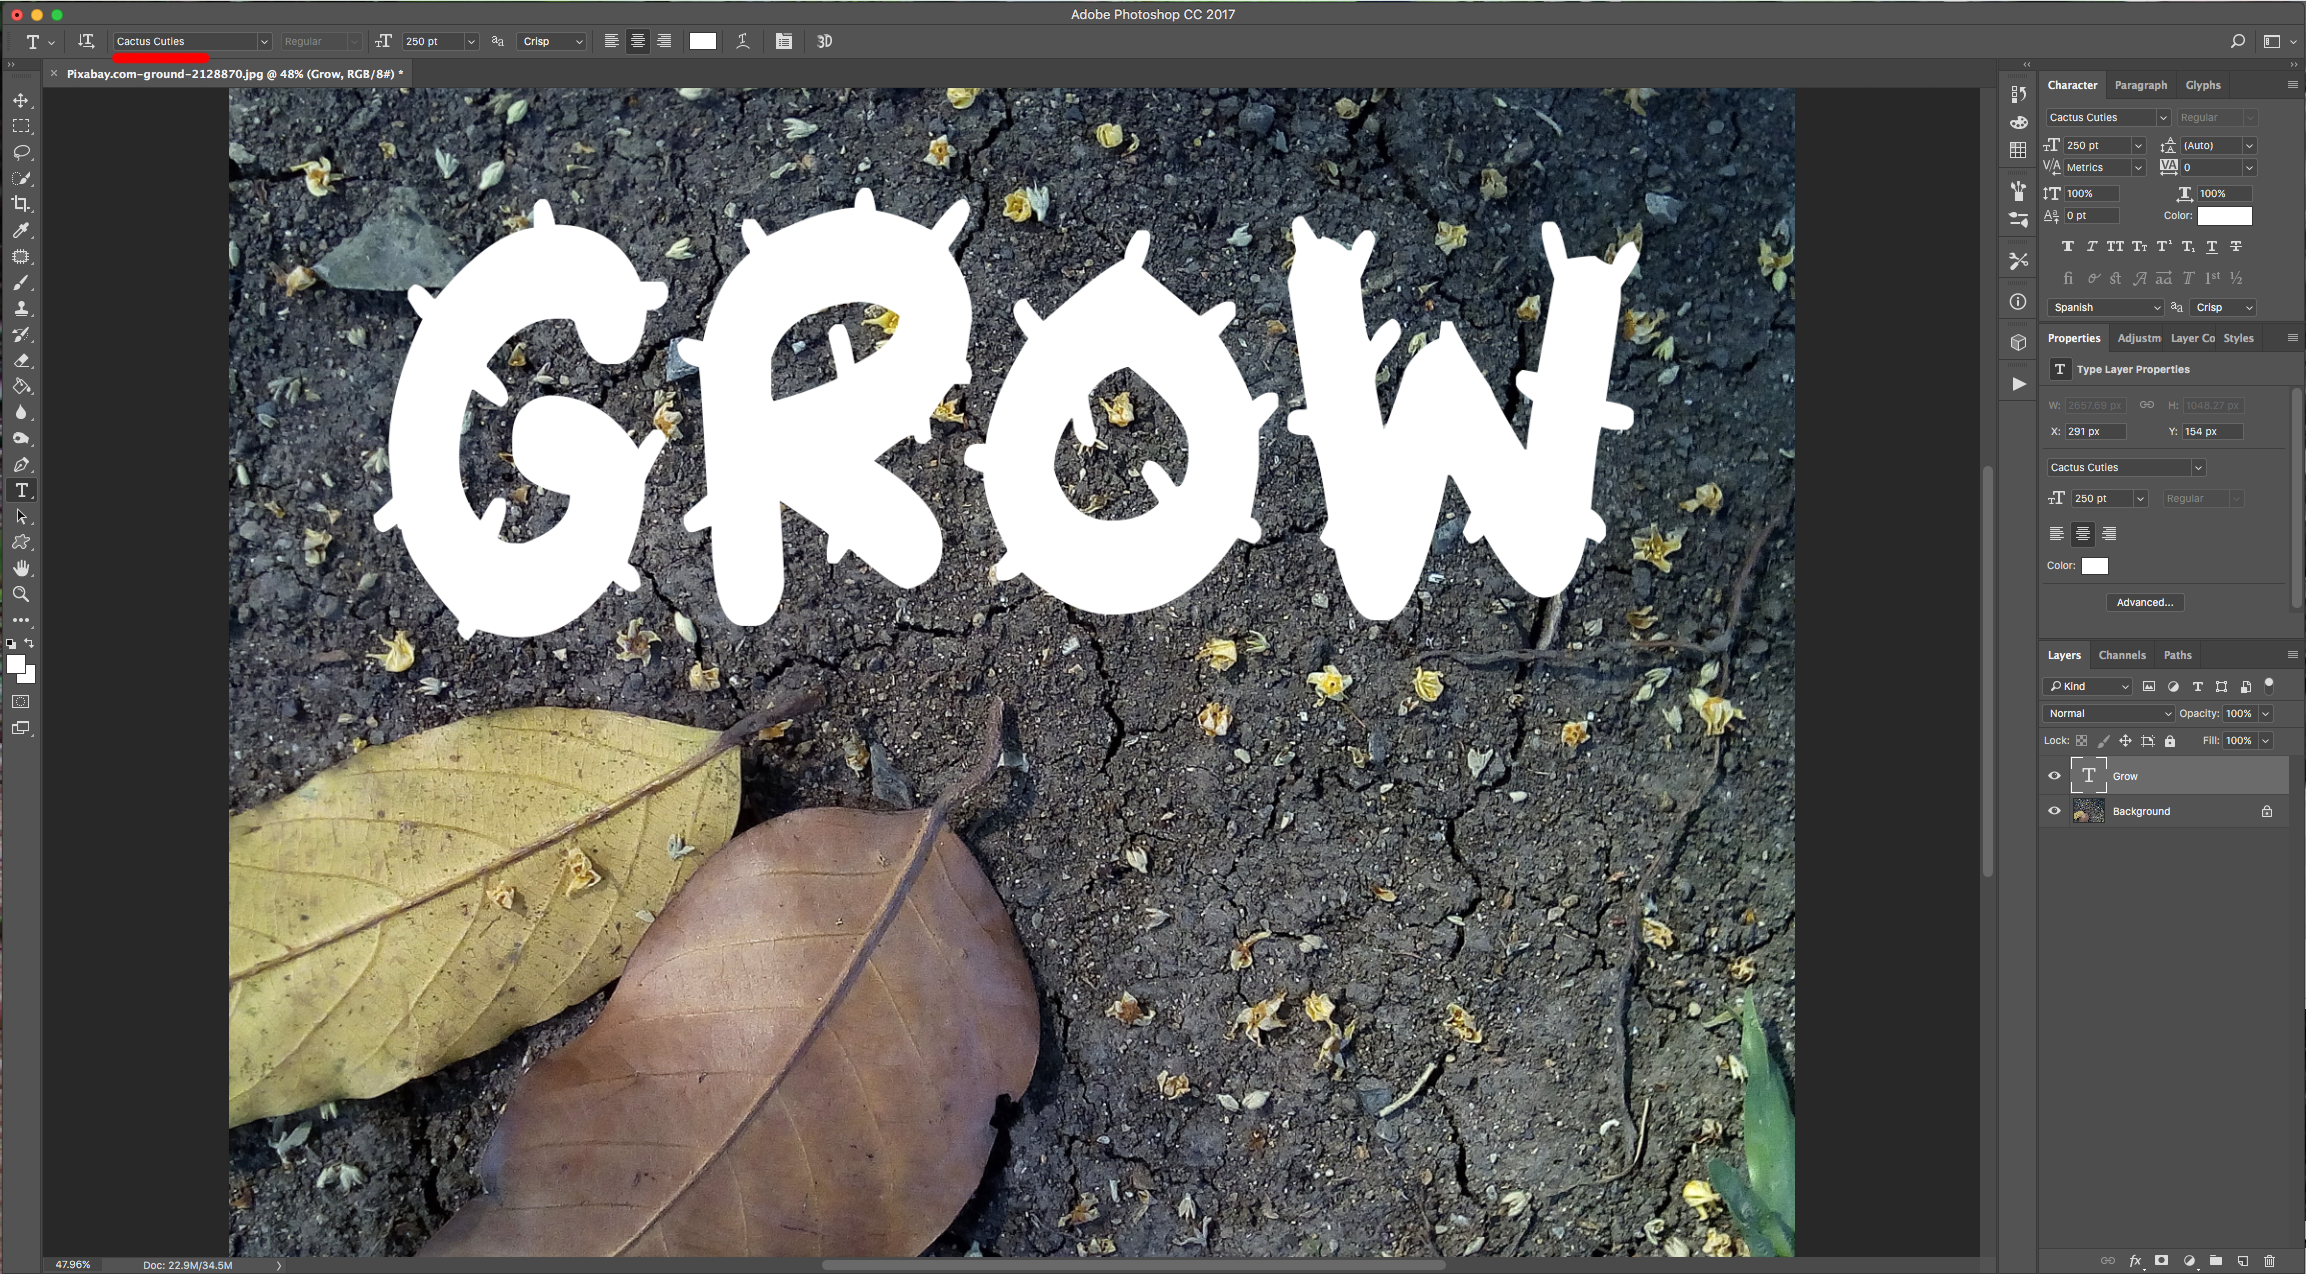
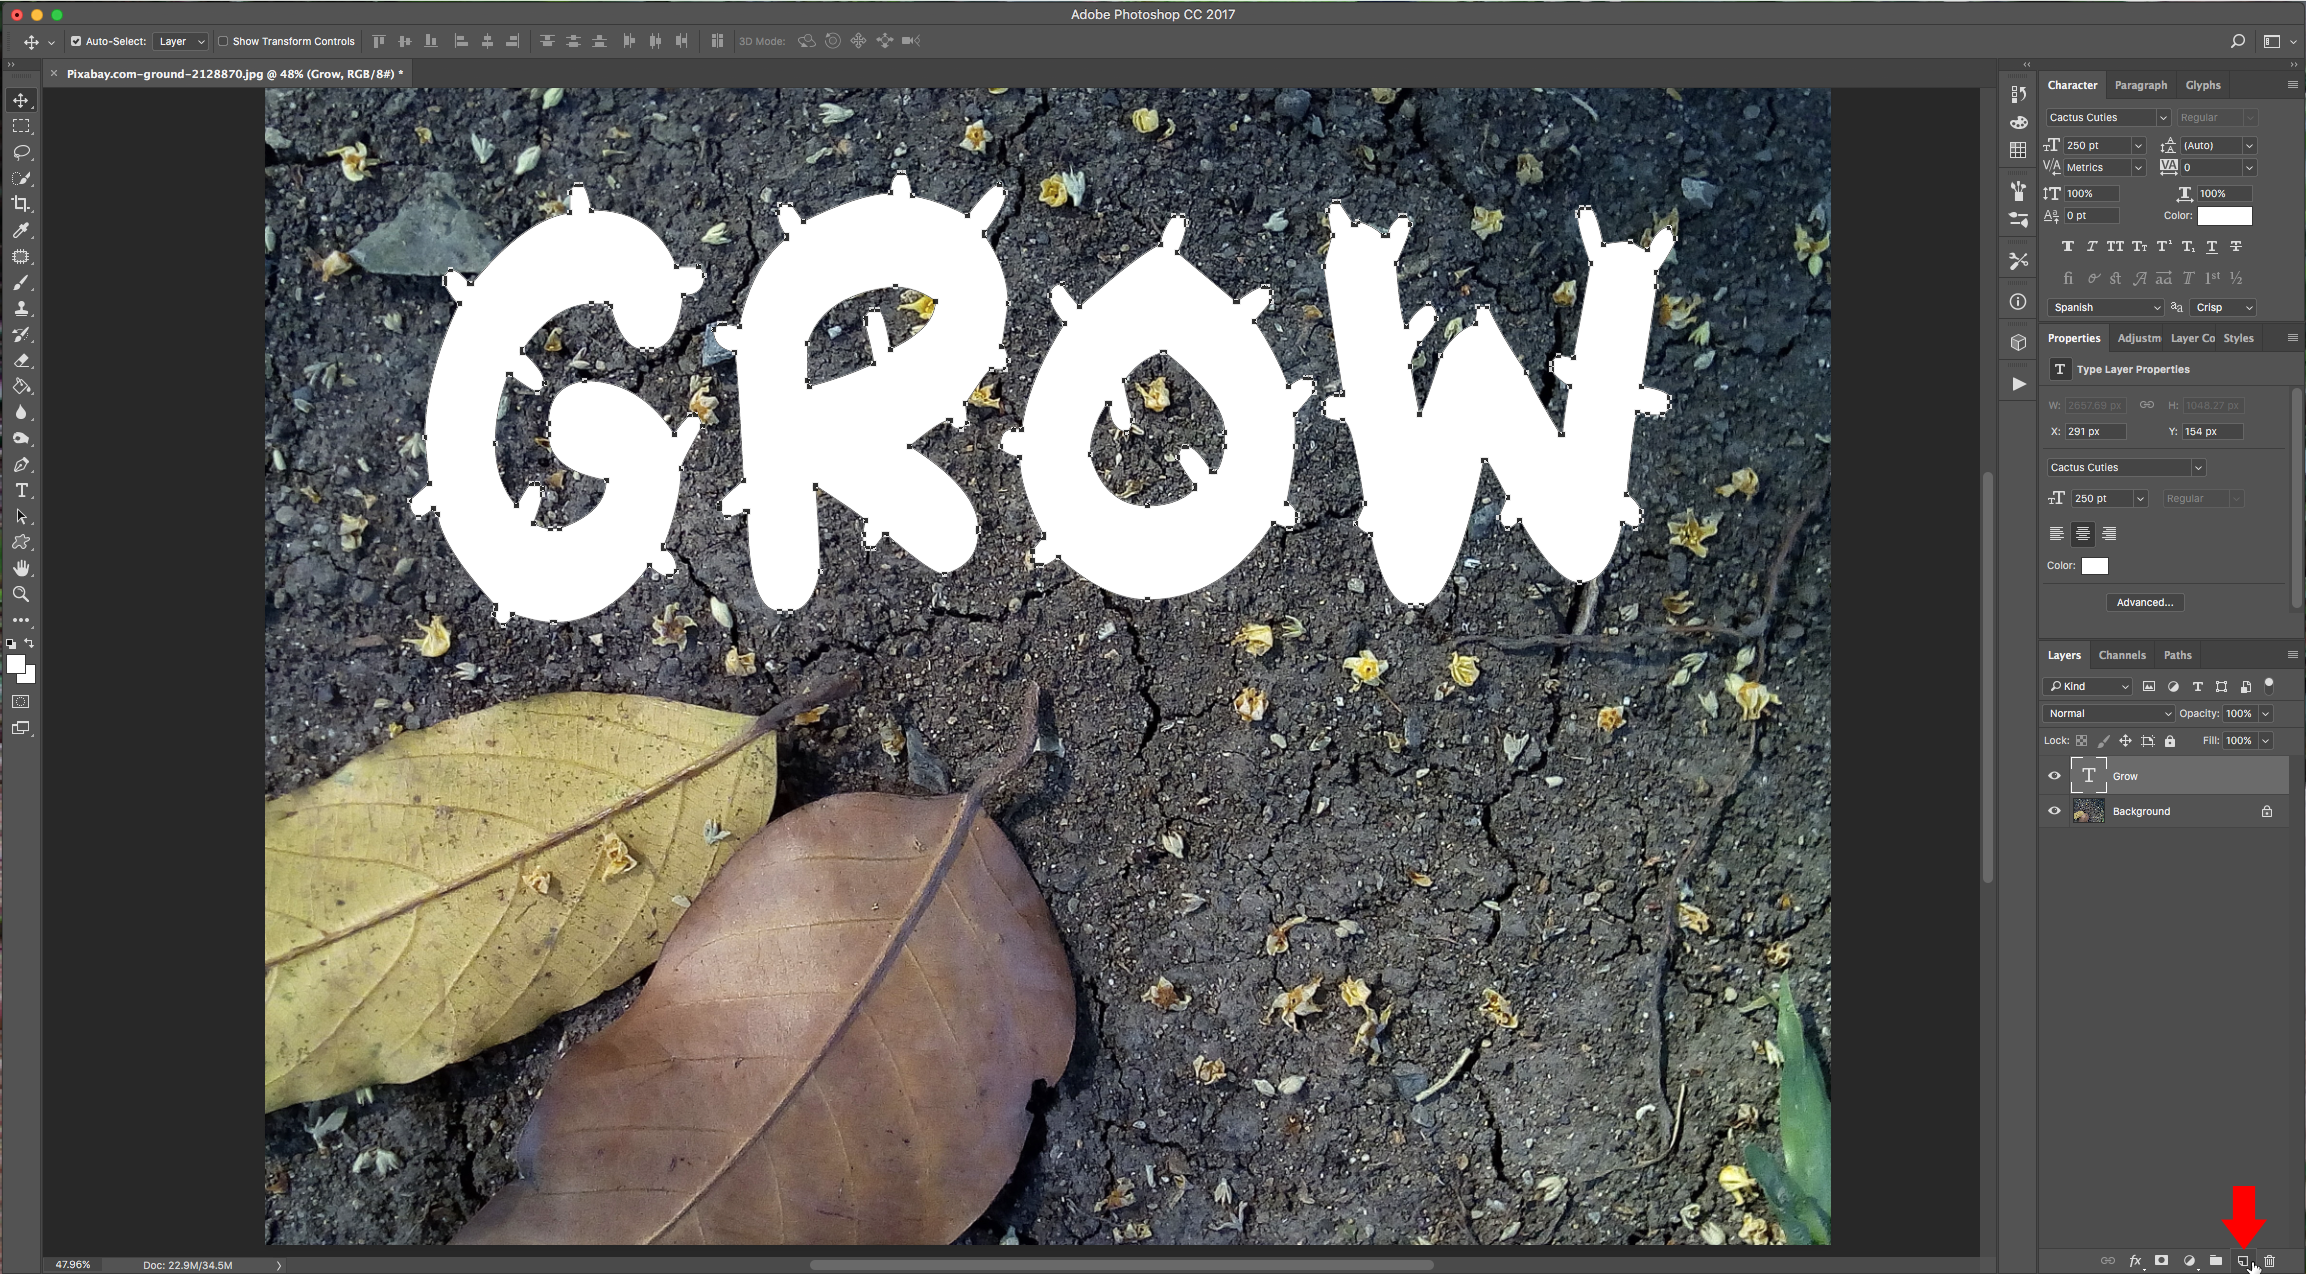
2 - Select the “Type Tool” (T), select your font (we used “Cactus Cuties”), and type your text.
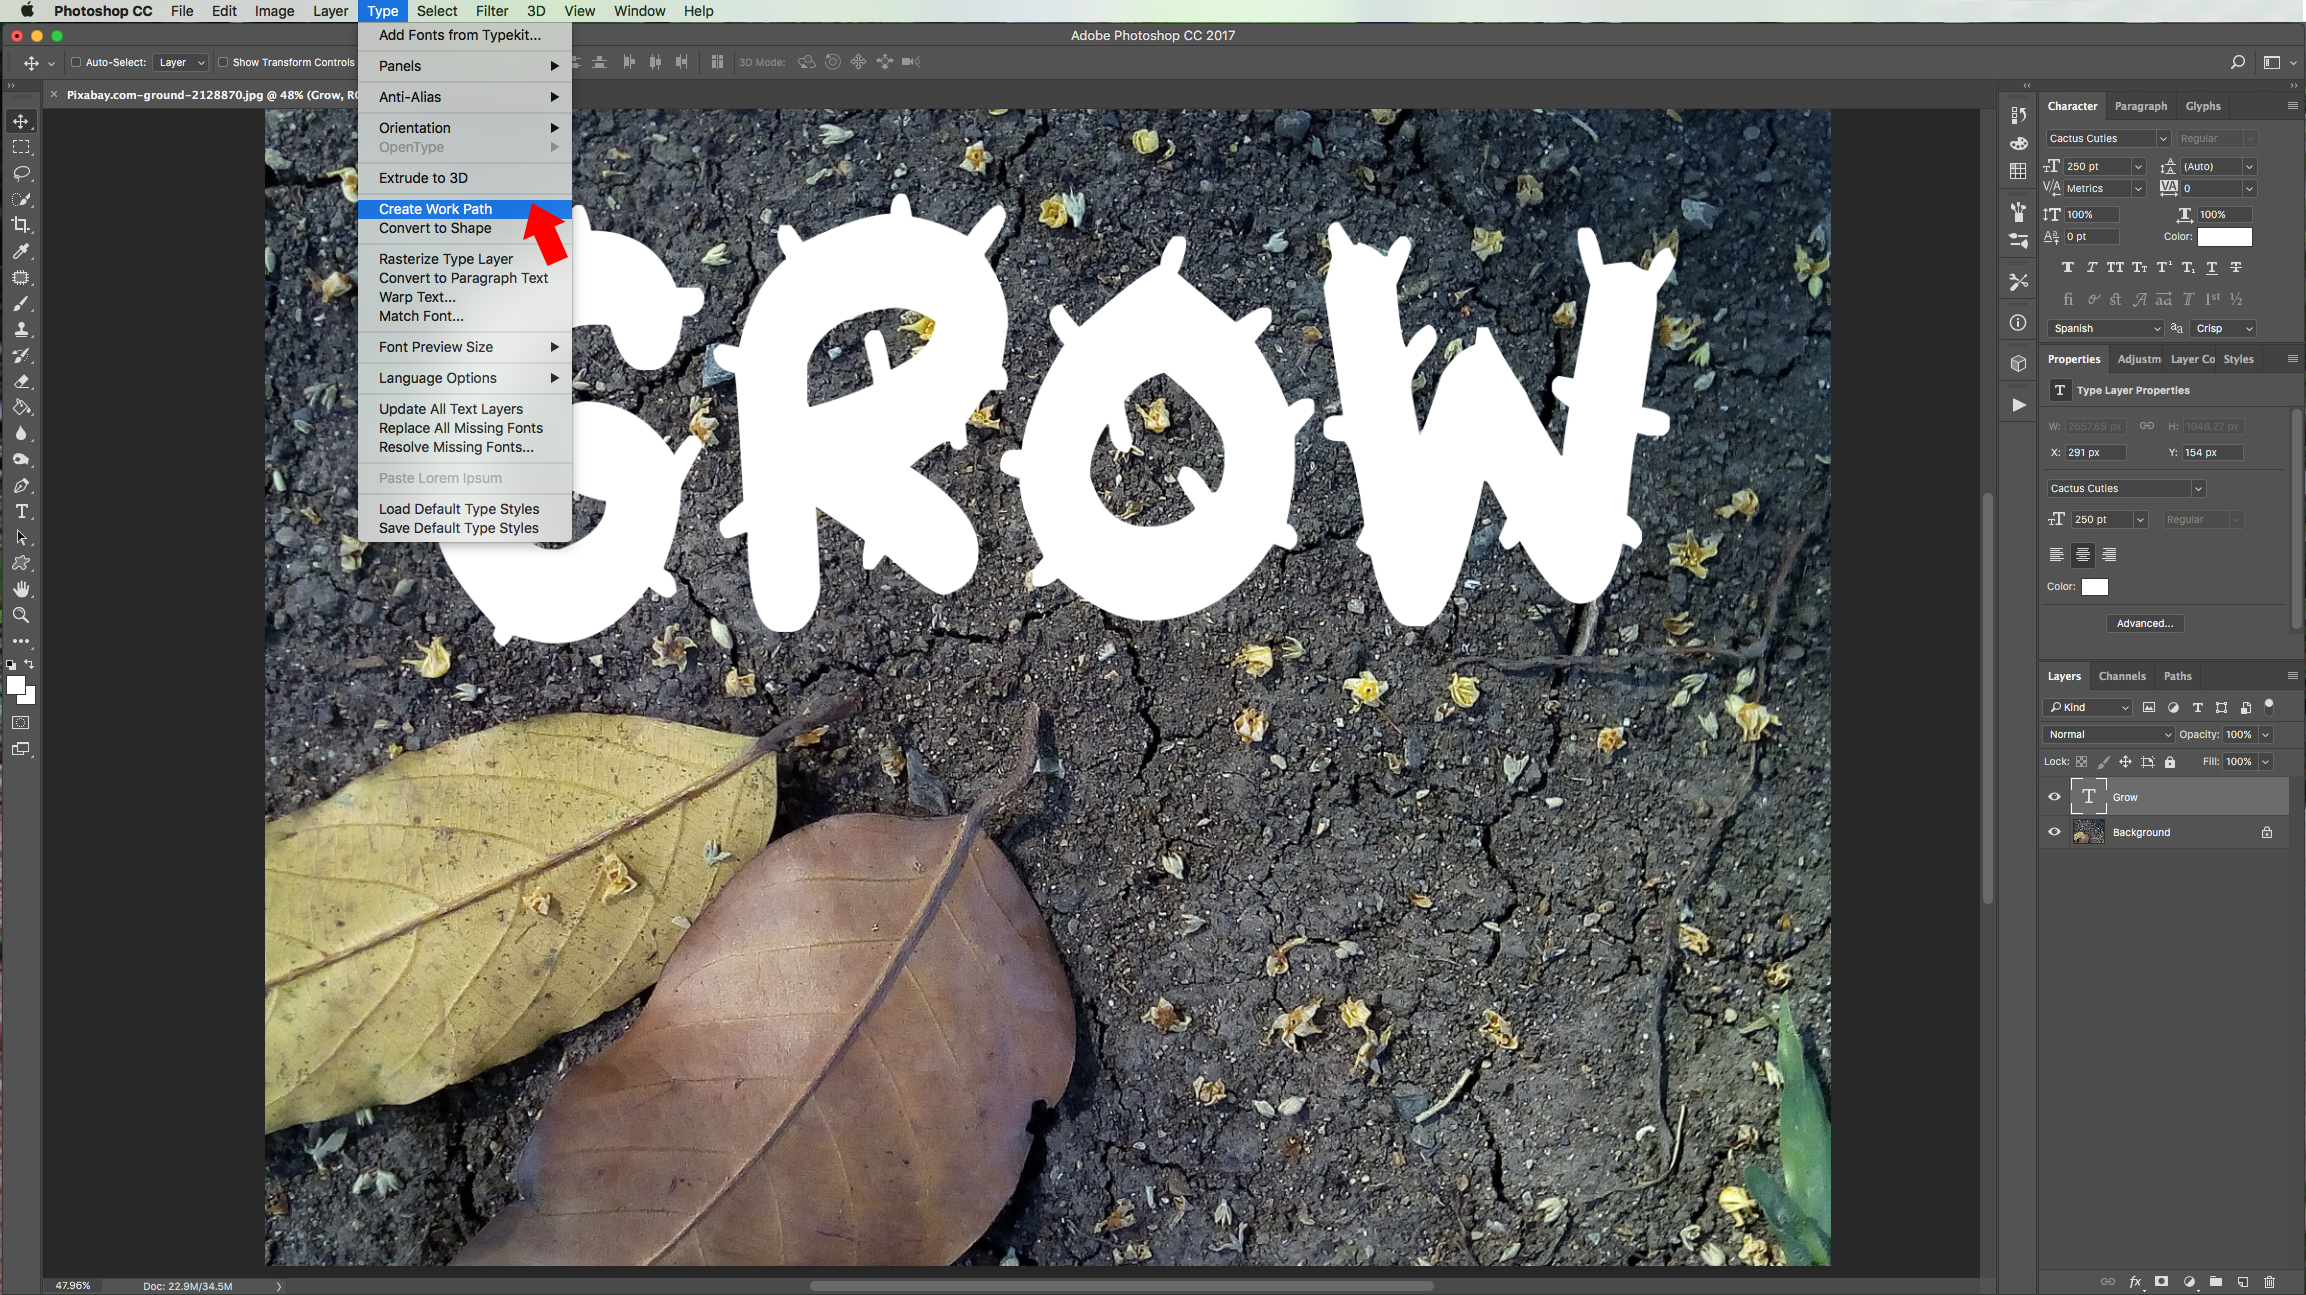
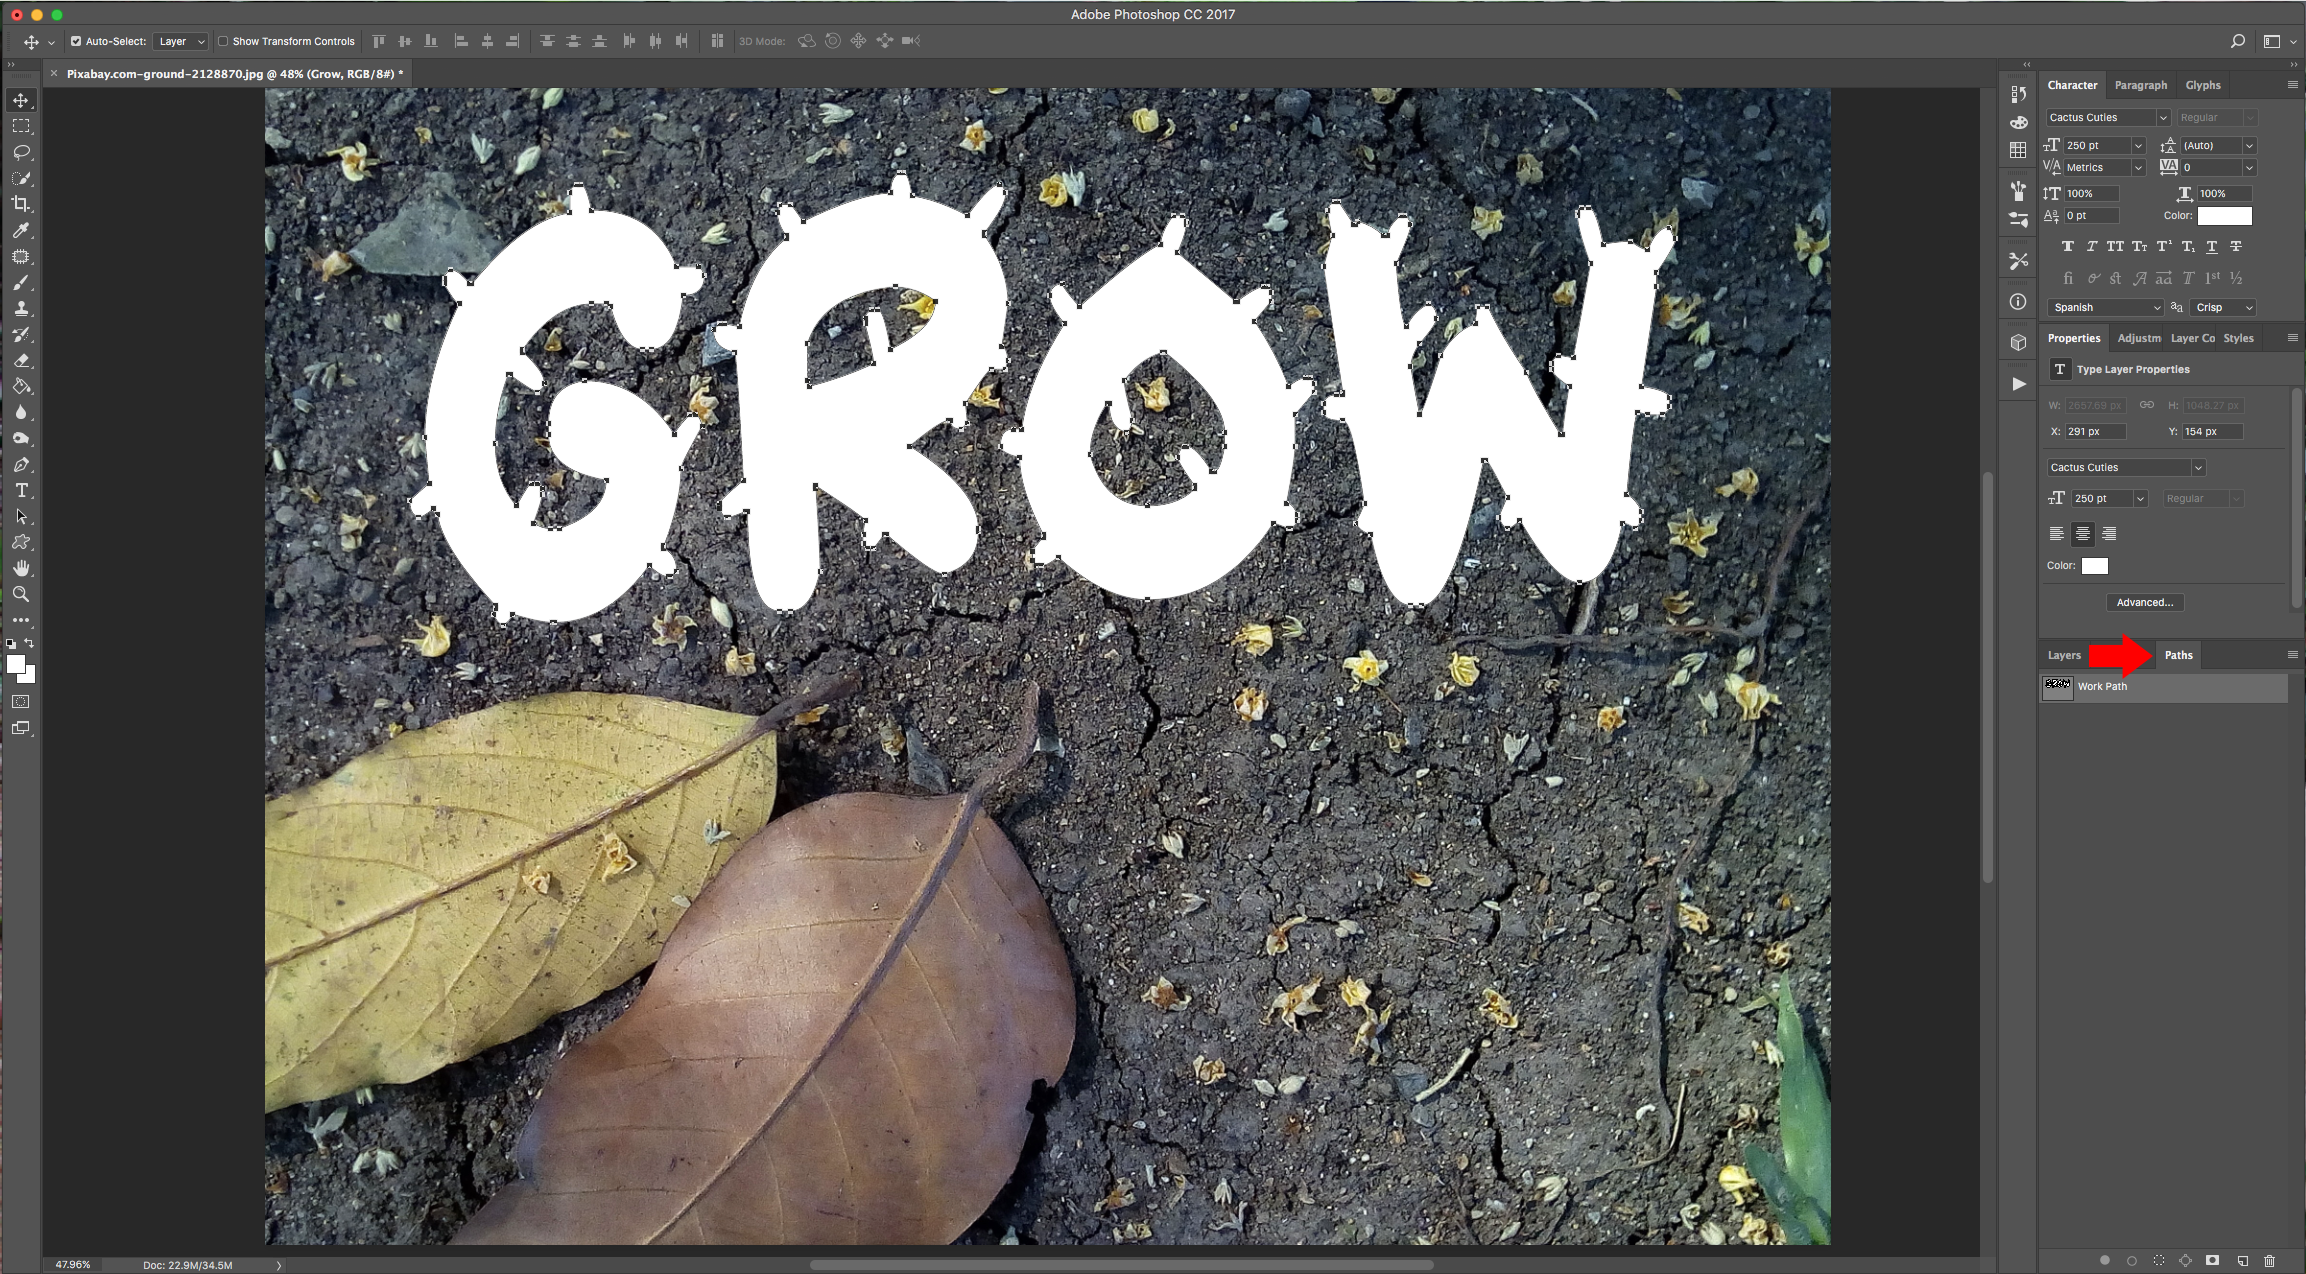
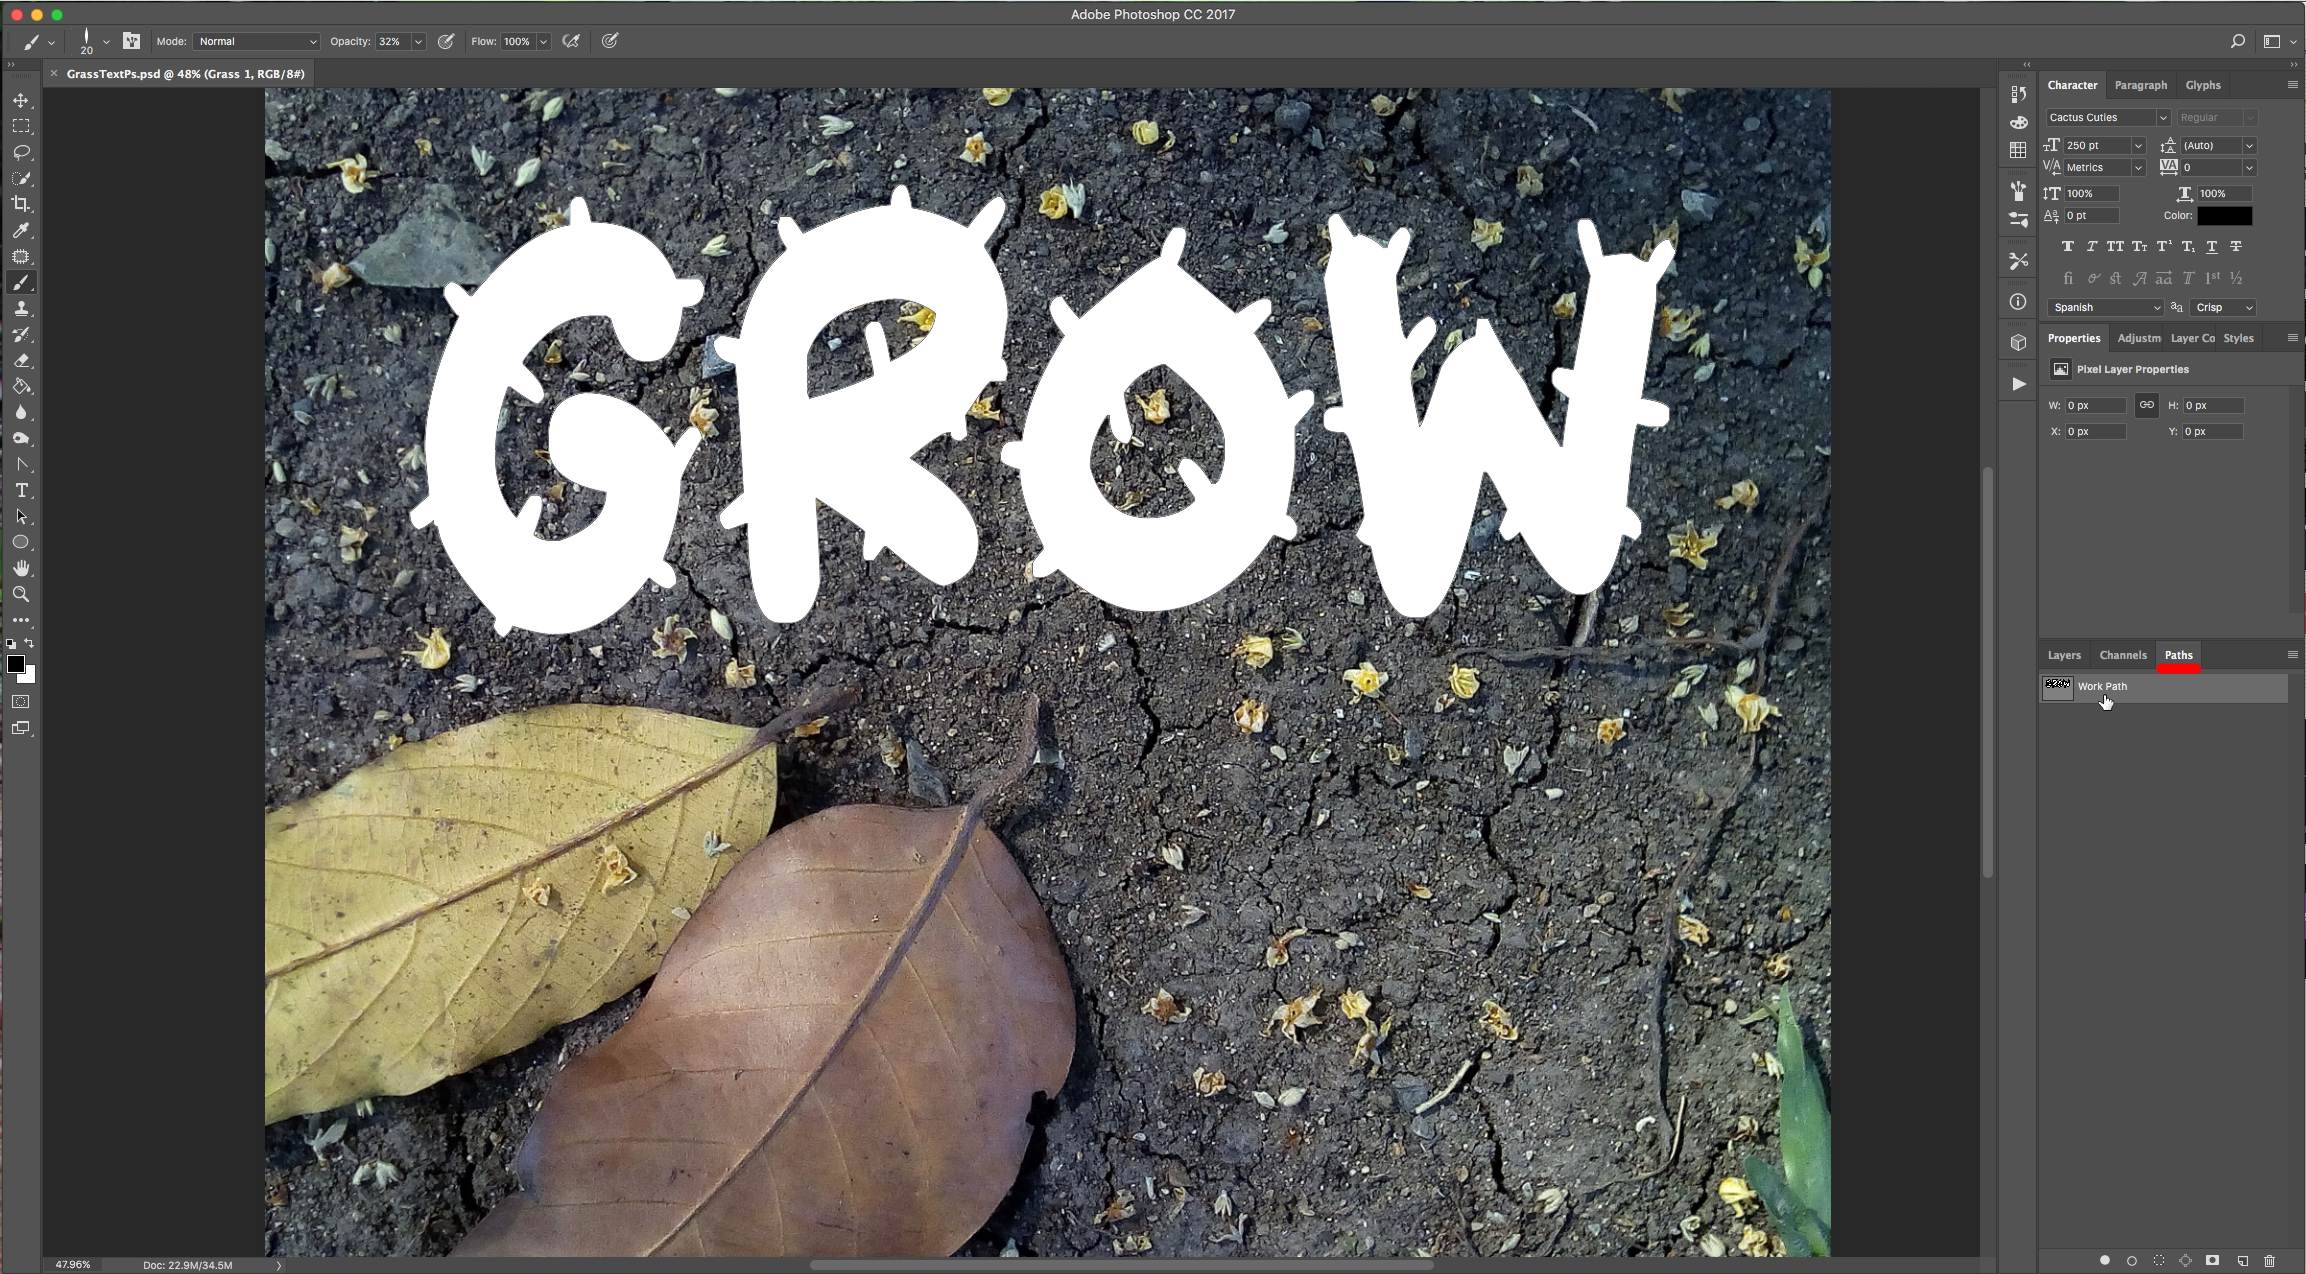
3 - Go to Type > Create Work Path. It should be saved in the “Paths Panel”.
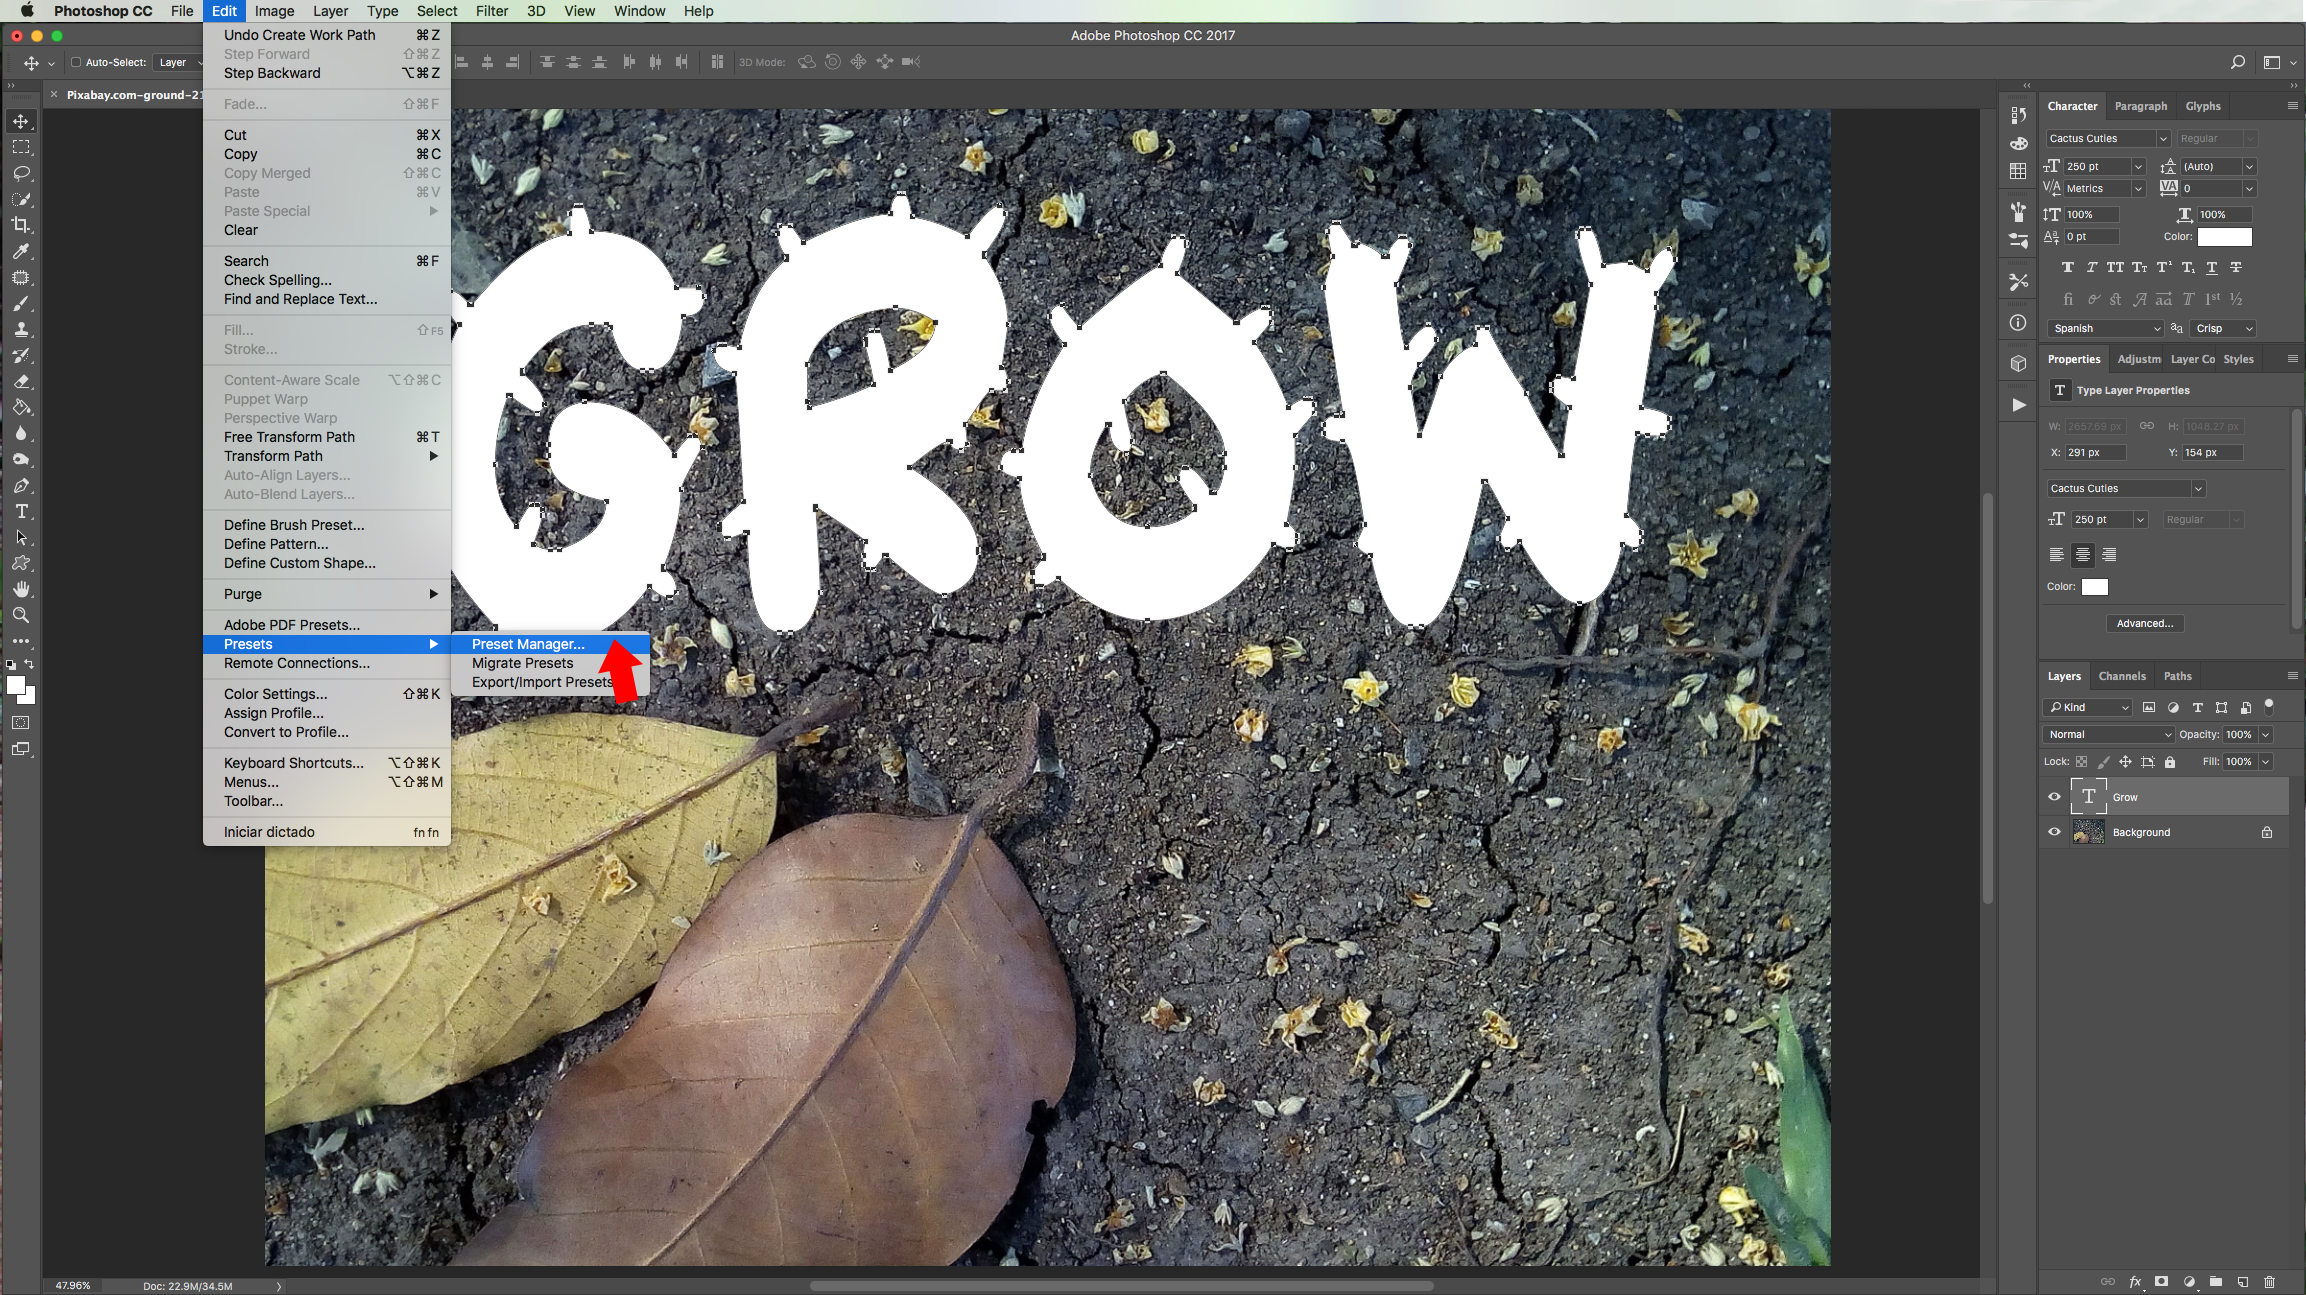
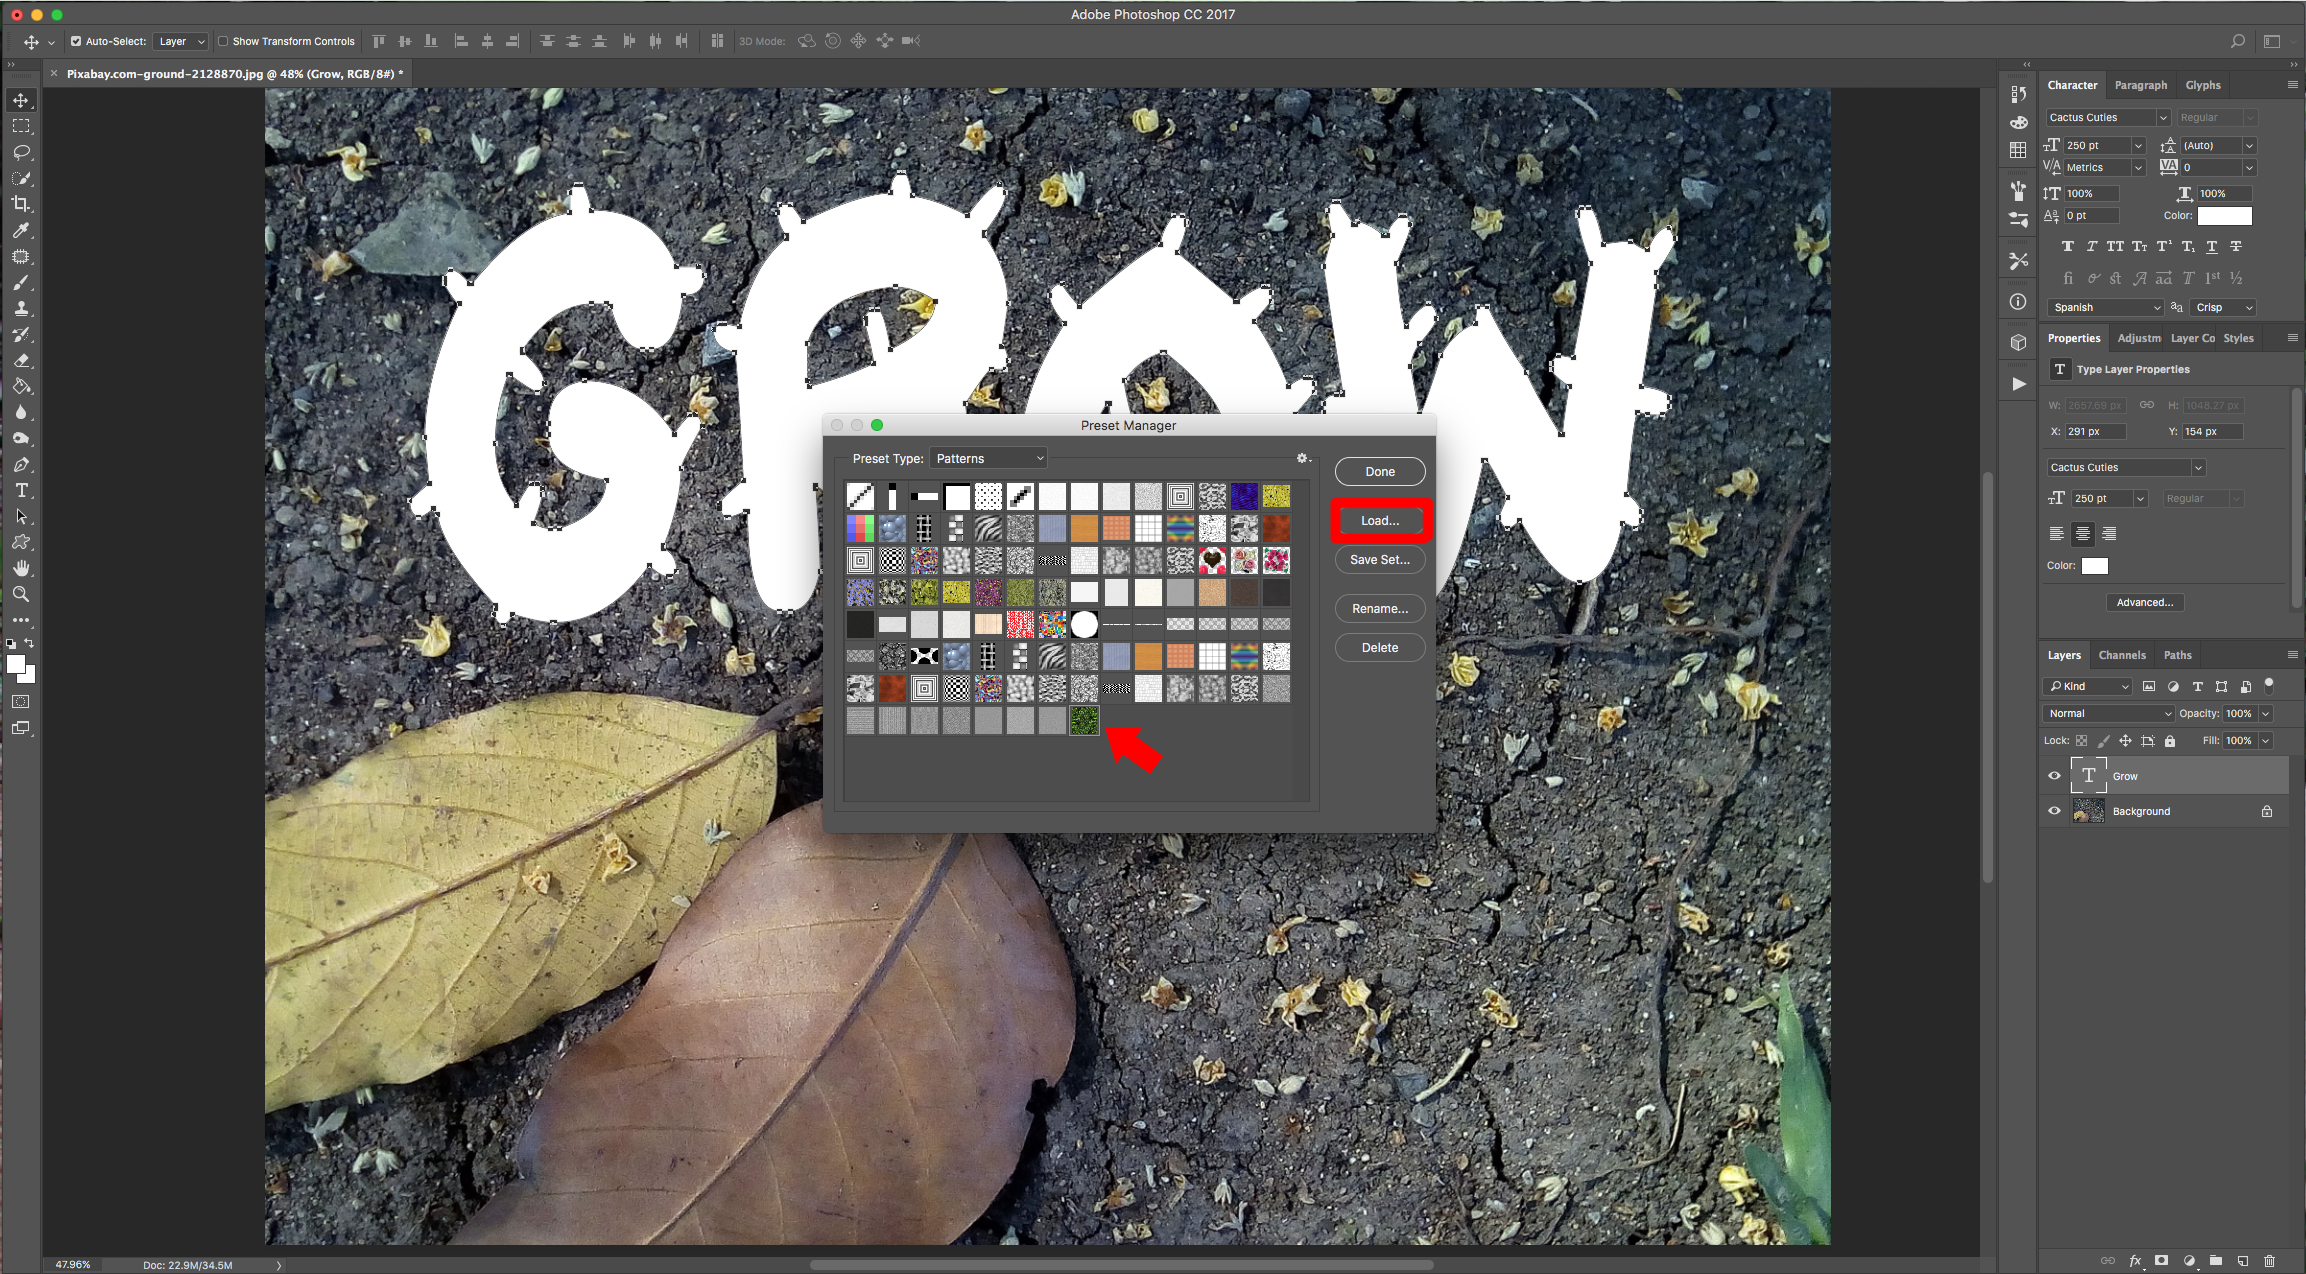
4 - To load the Grass Pattern, go to Edit > Presets > Preset Manager, choose “Patterns” and load yours. Click on the small button at the bottom of the “Layers Panel” to create a “New Layer” and name it “Grass1”.
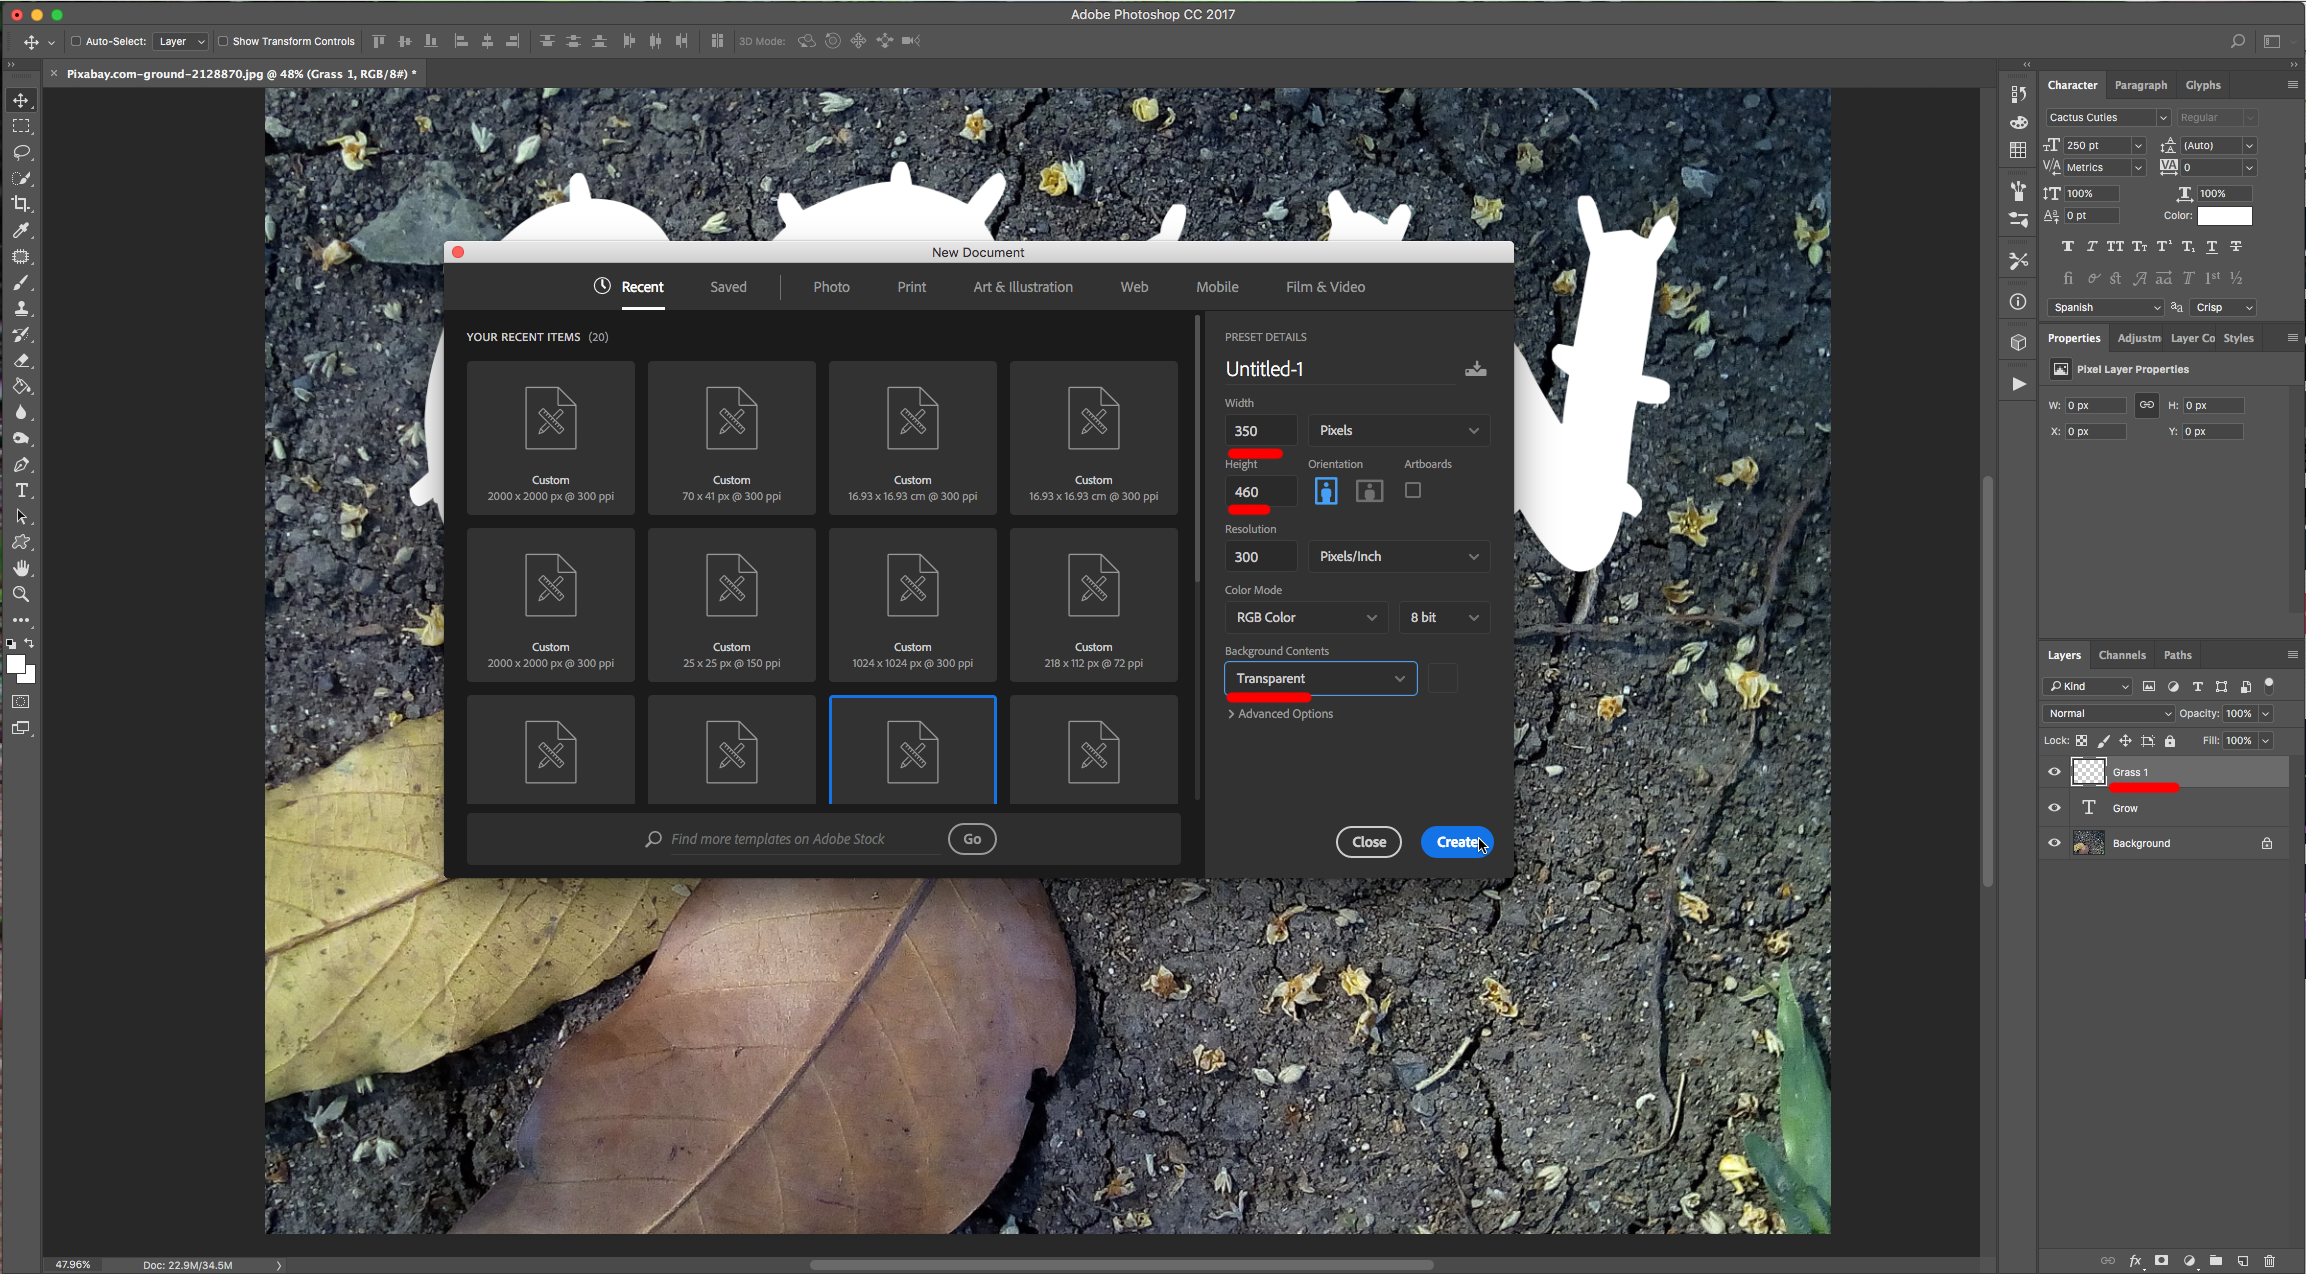
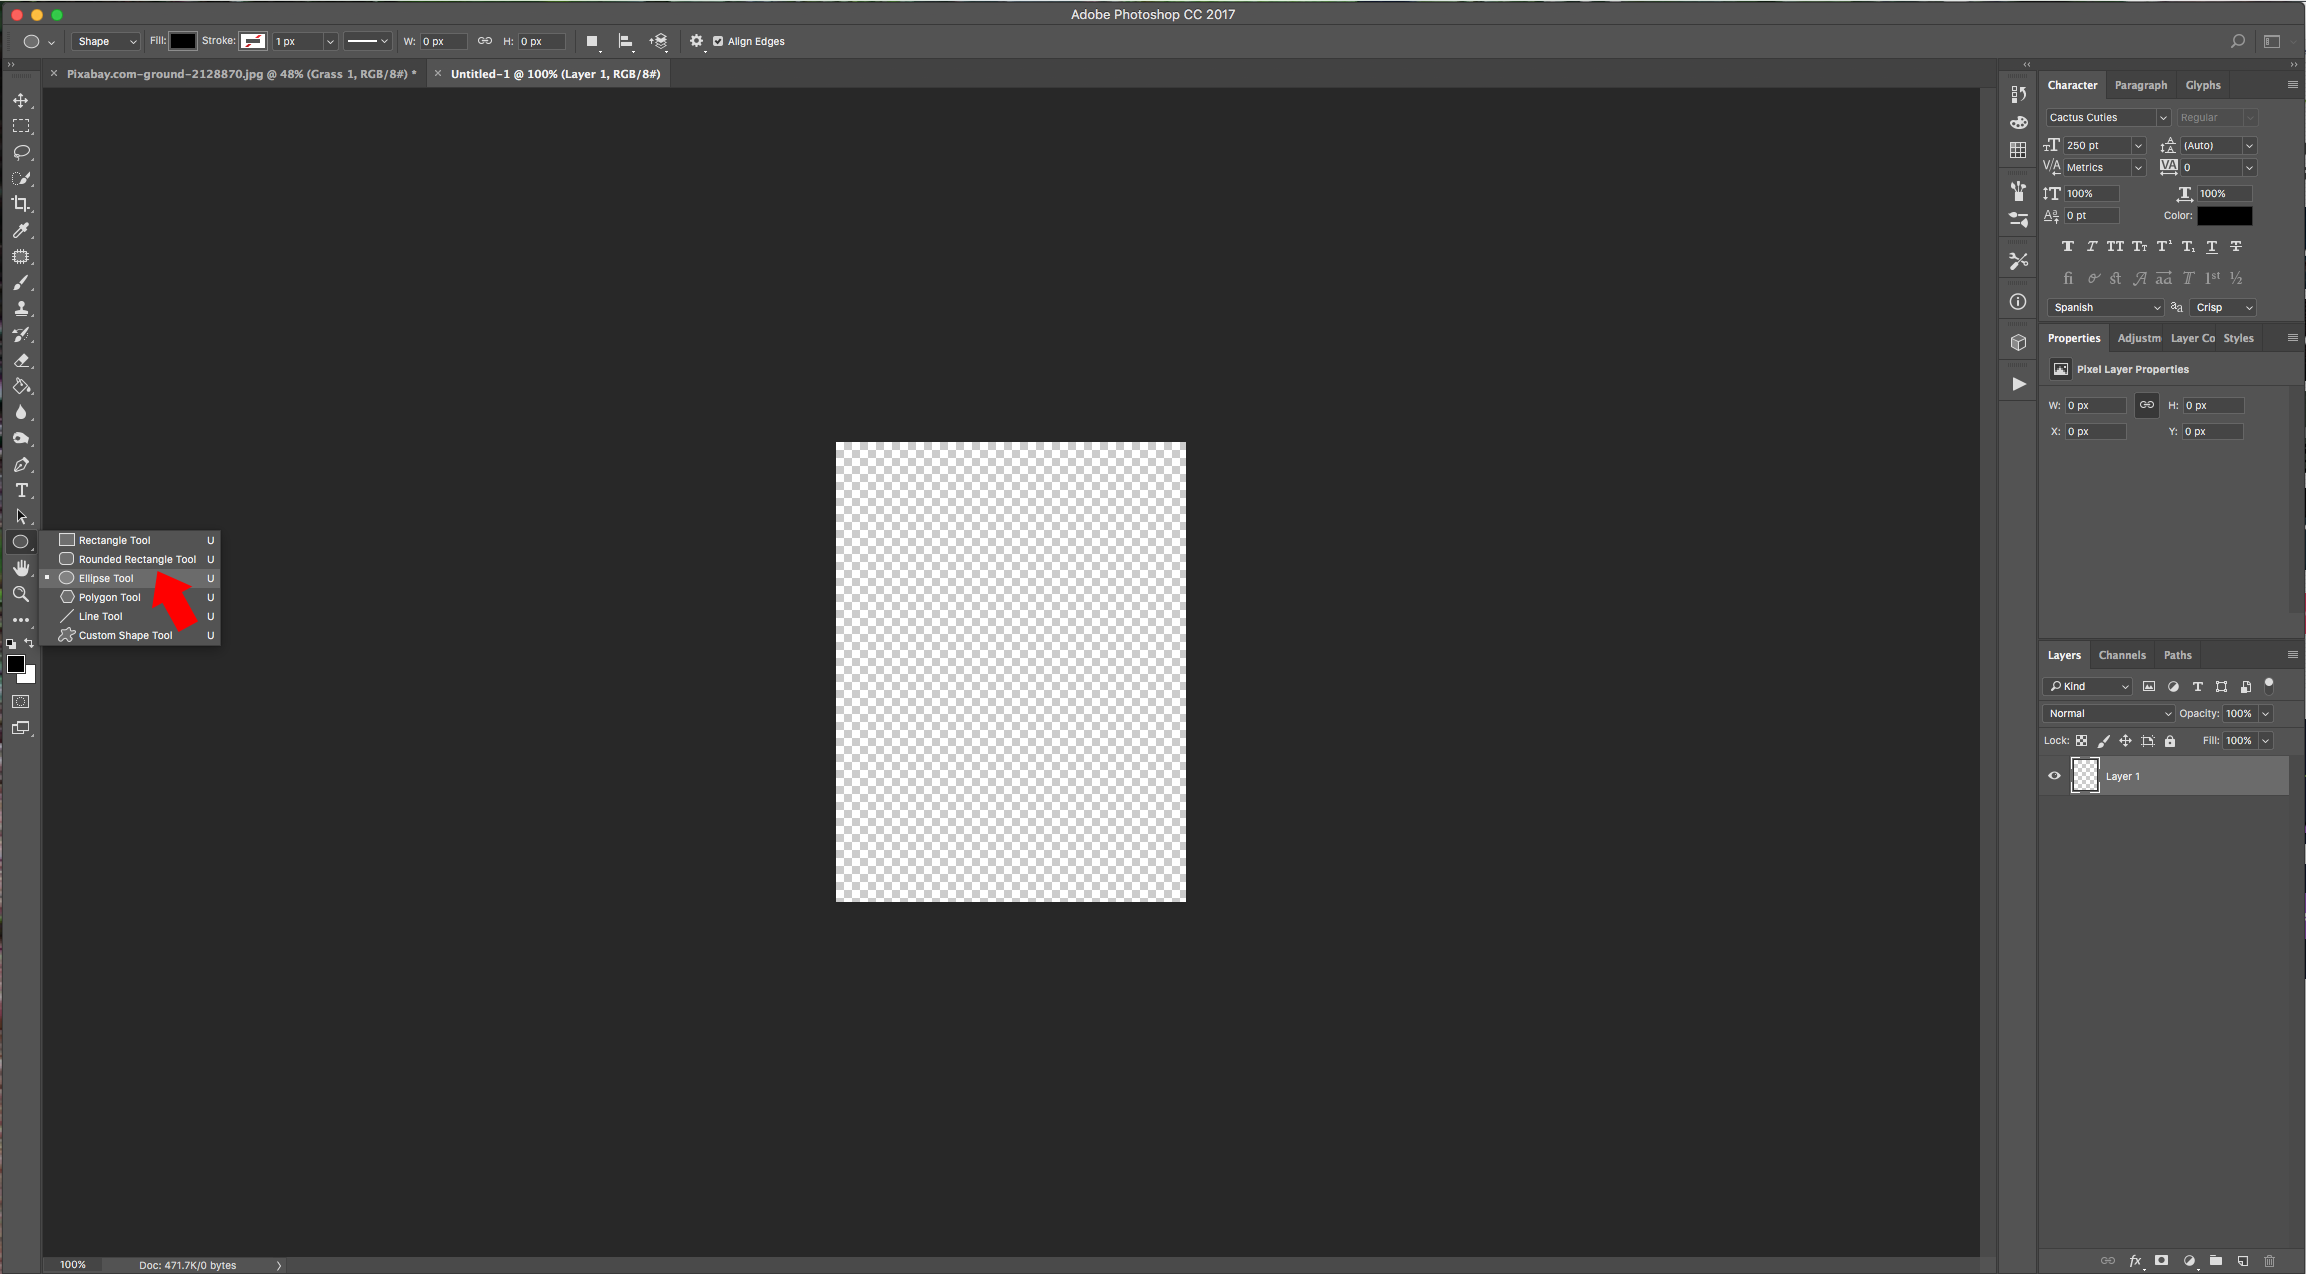
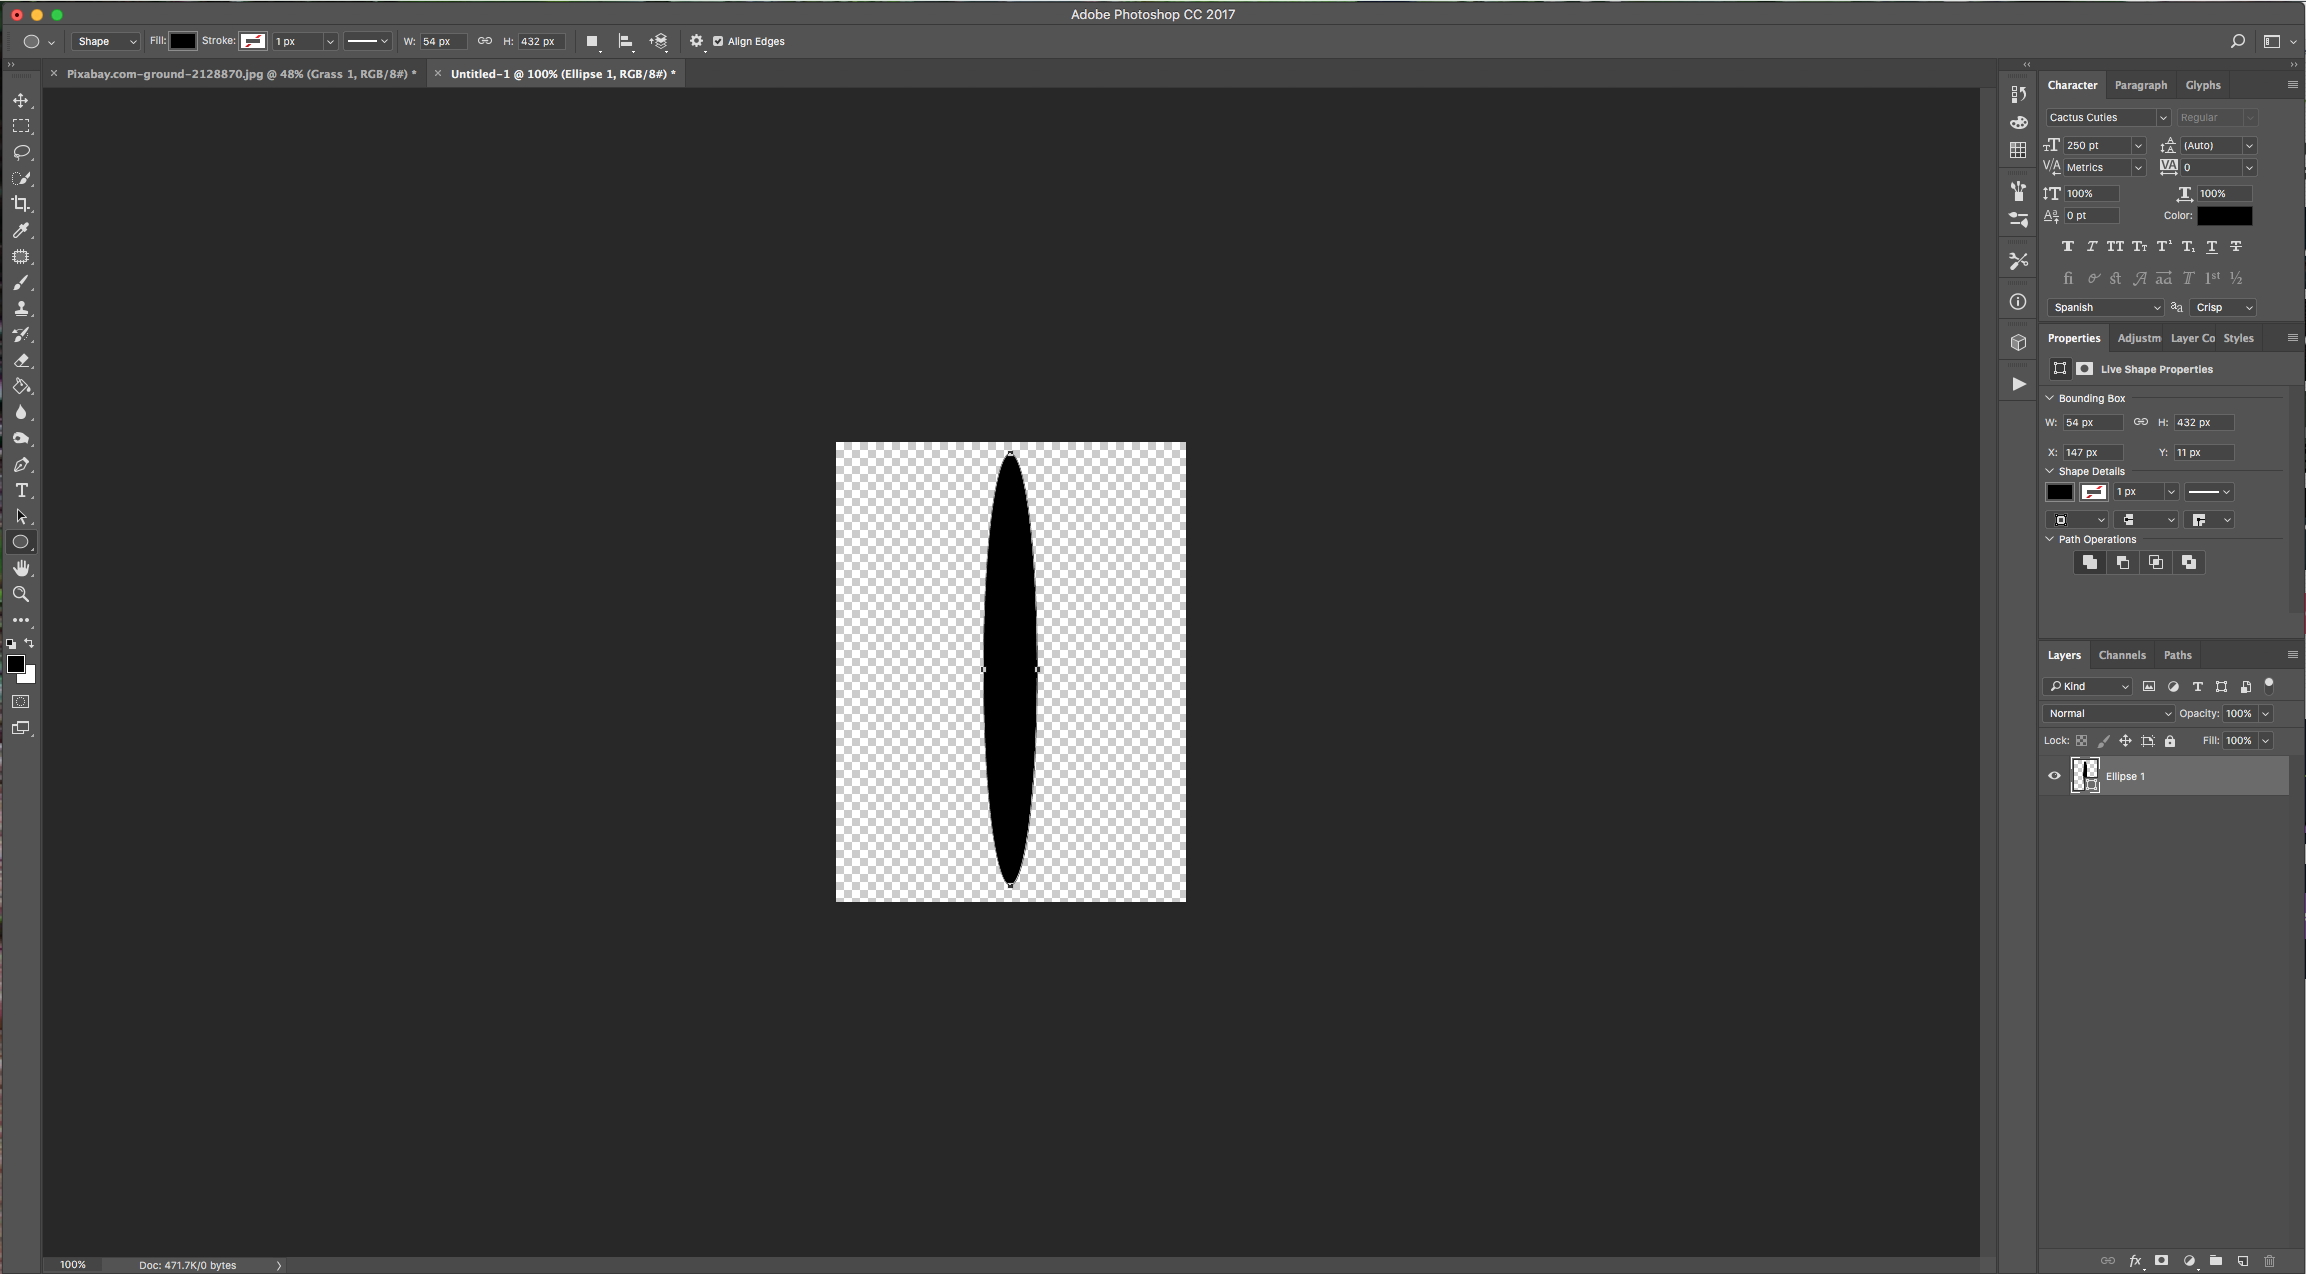
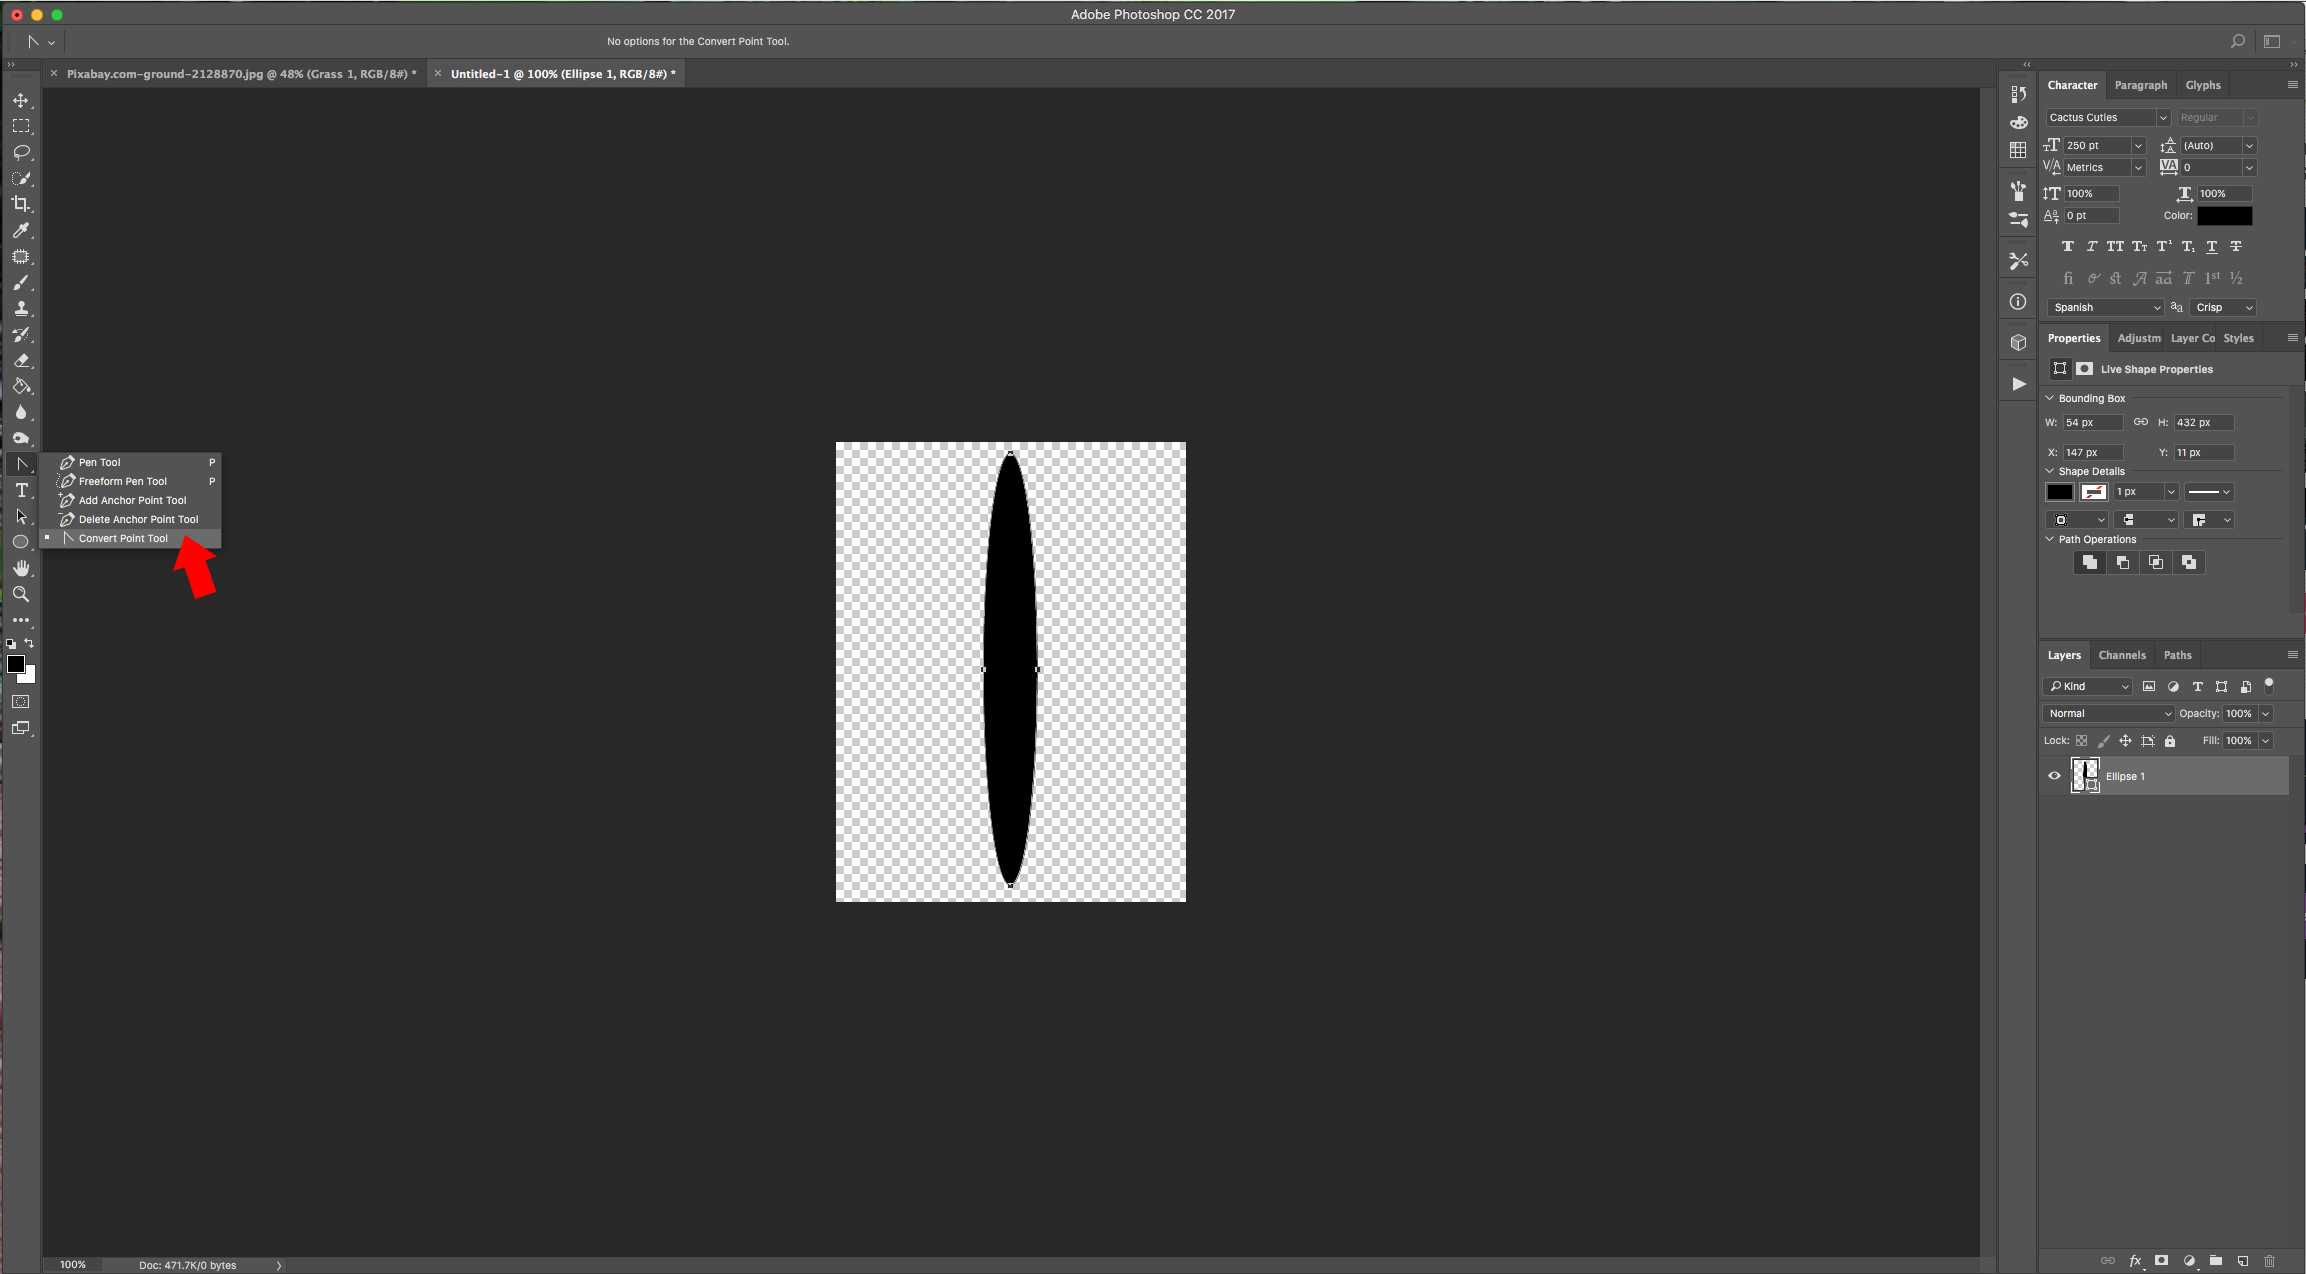
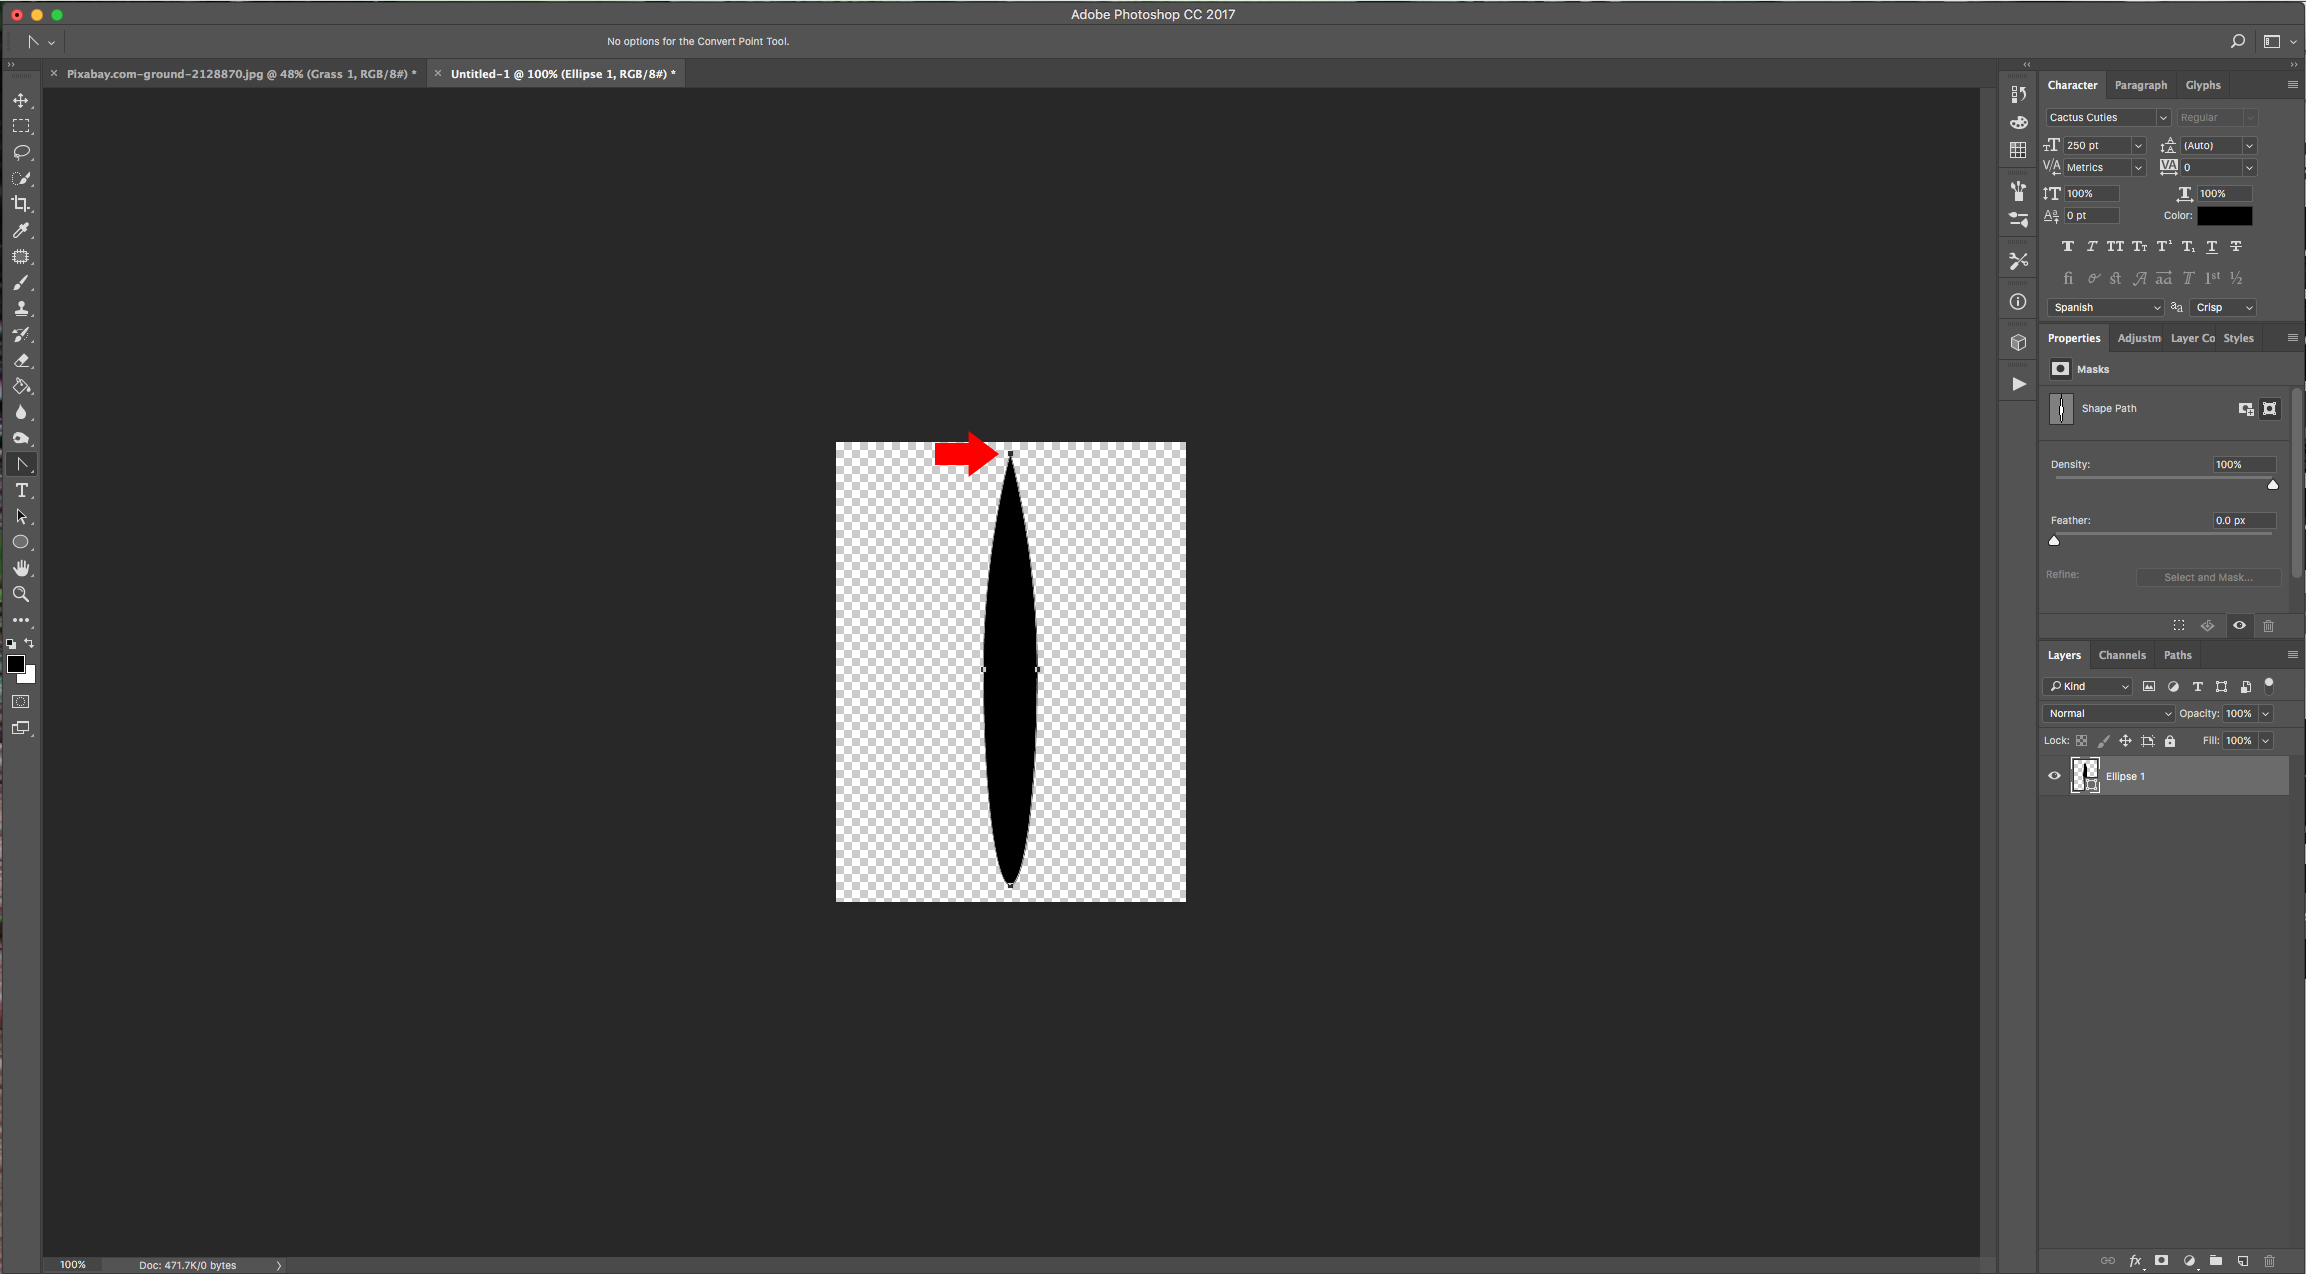
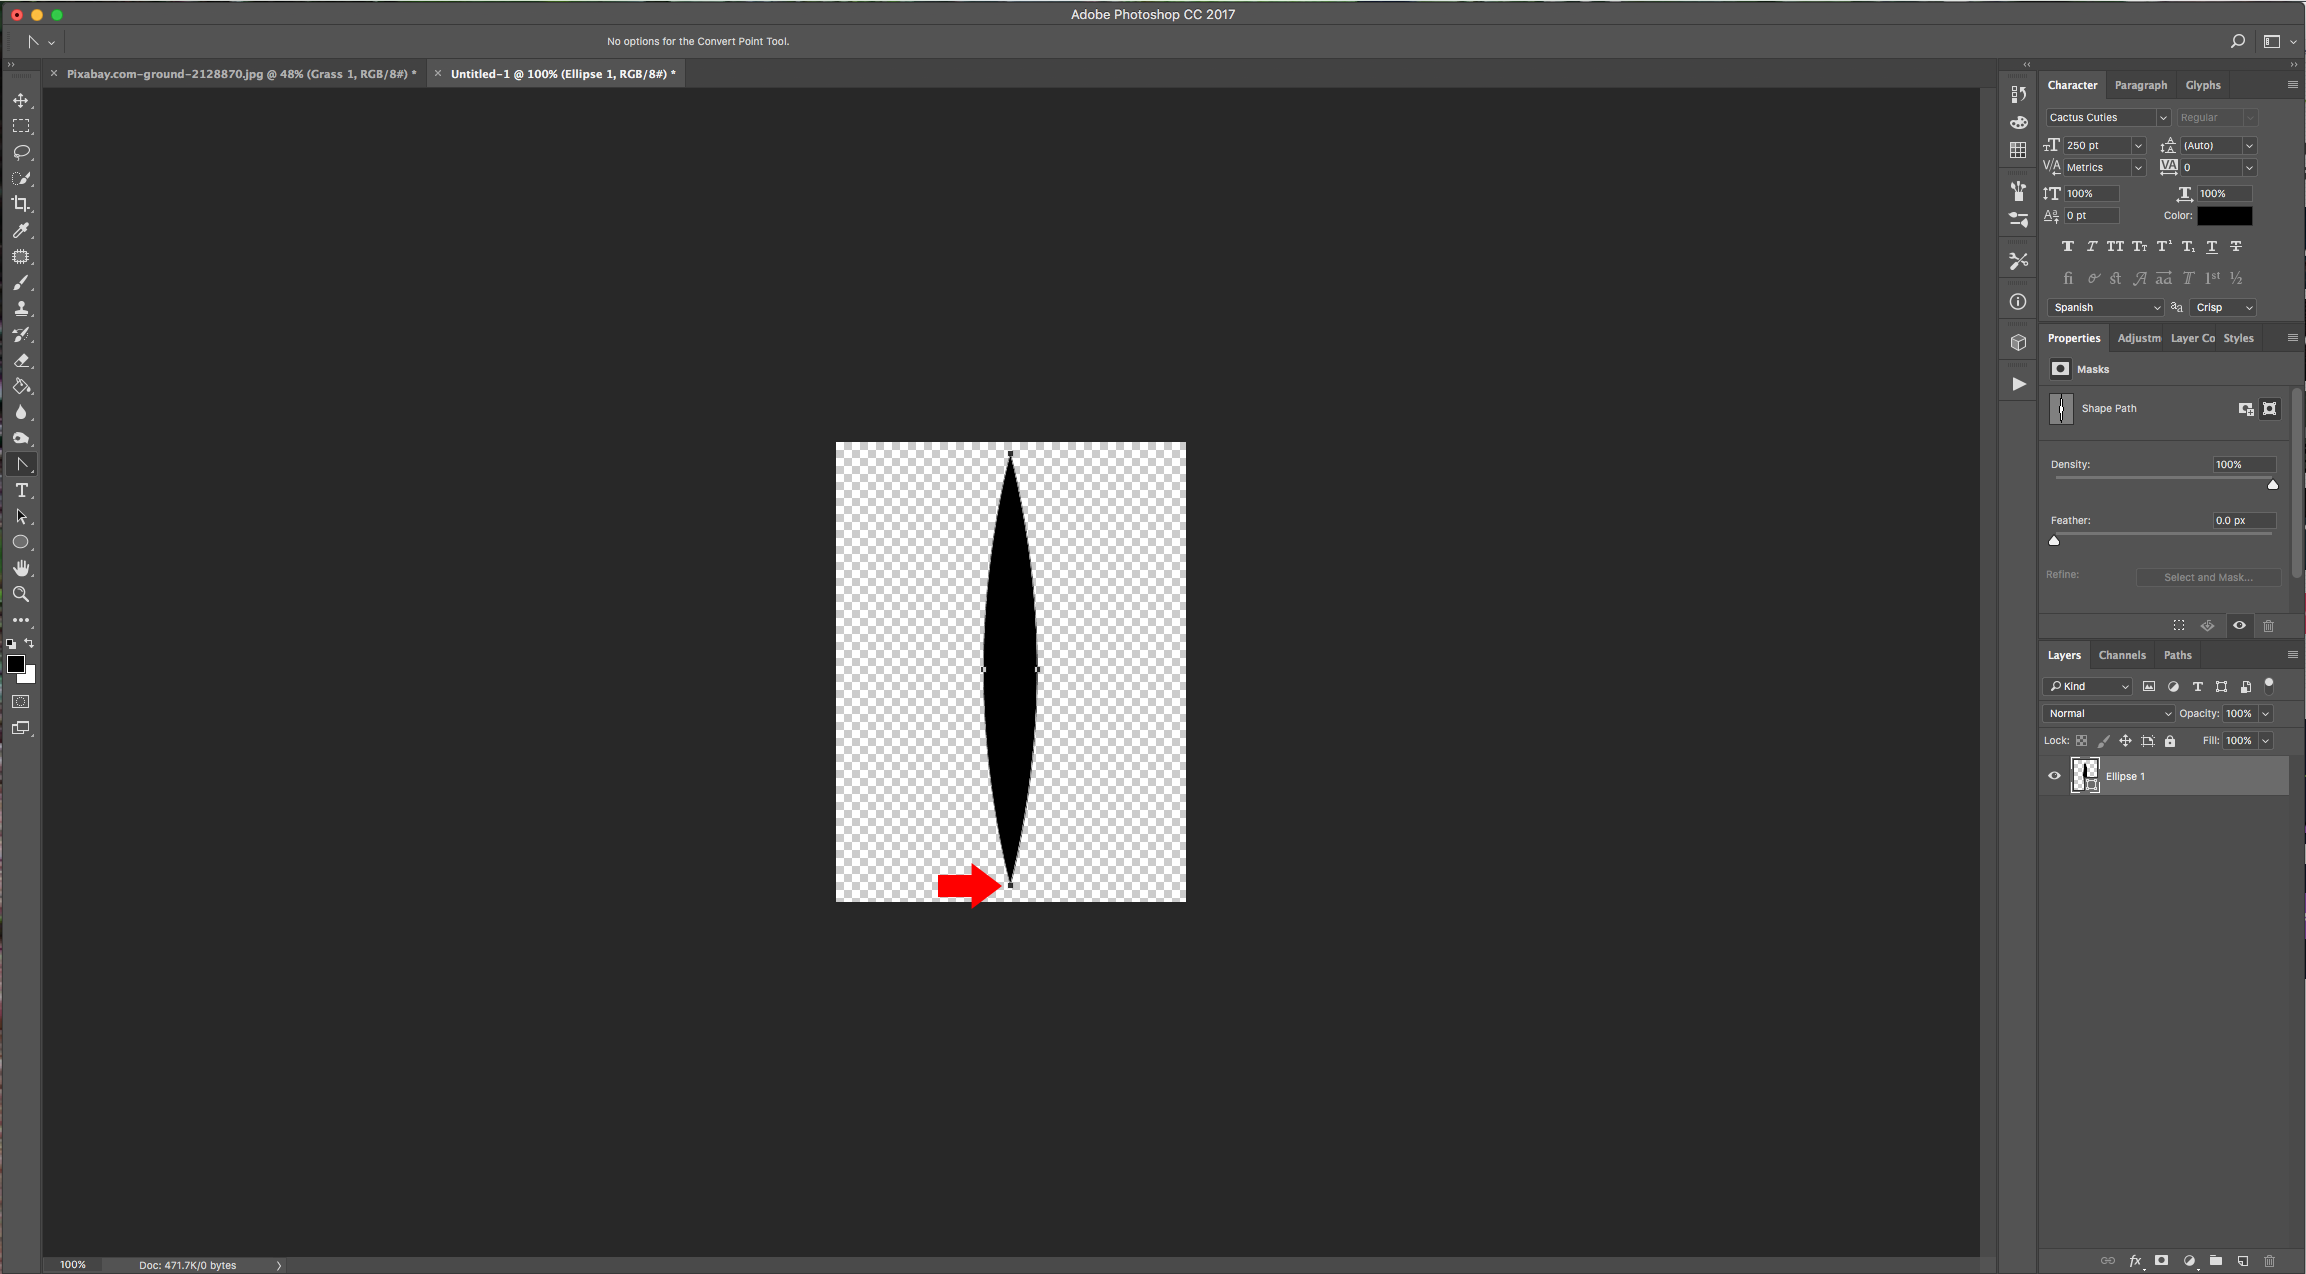
5 - Create a “New Document”, make it 350 x 450 Pixels @ 300 dpi with a “Transparent” background. Select the “Ellipse Tool” (L), use Black as “Foreground” color, and draw one that covers almost the whole “Height” and it’s about 55 px in “With”. Select the “Convert Anchor Point Tool”, click in the Top “Anchor Point” to get rid of the curves and repeat with the Bottom “Anchor Point”.
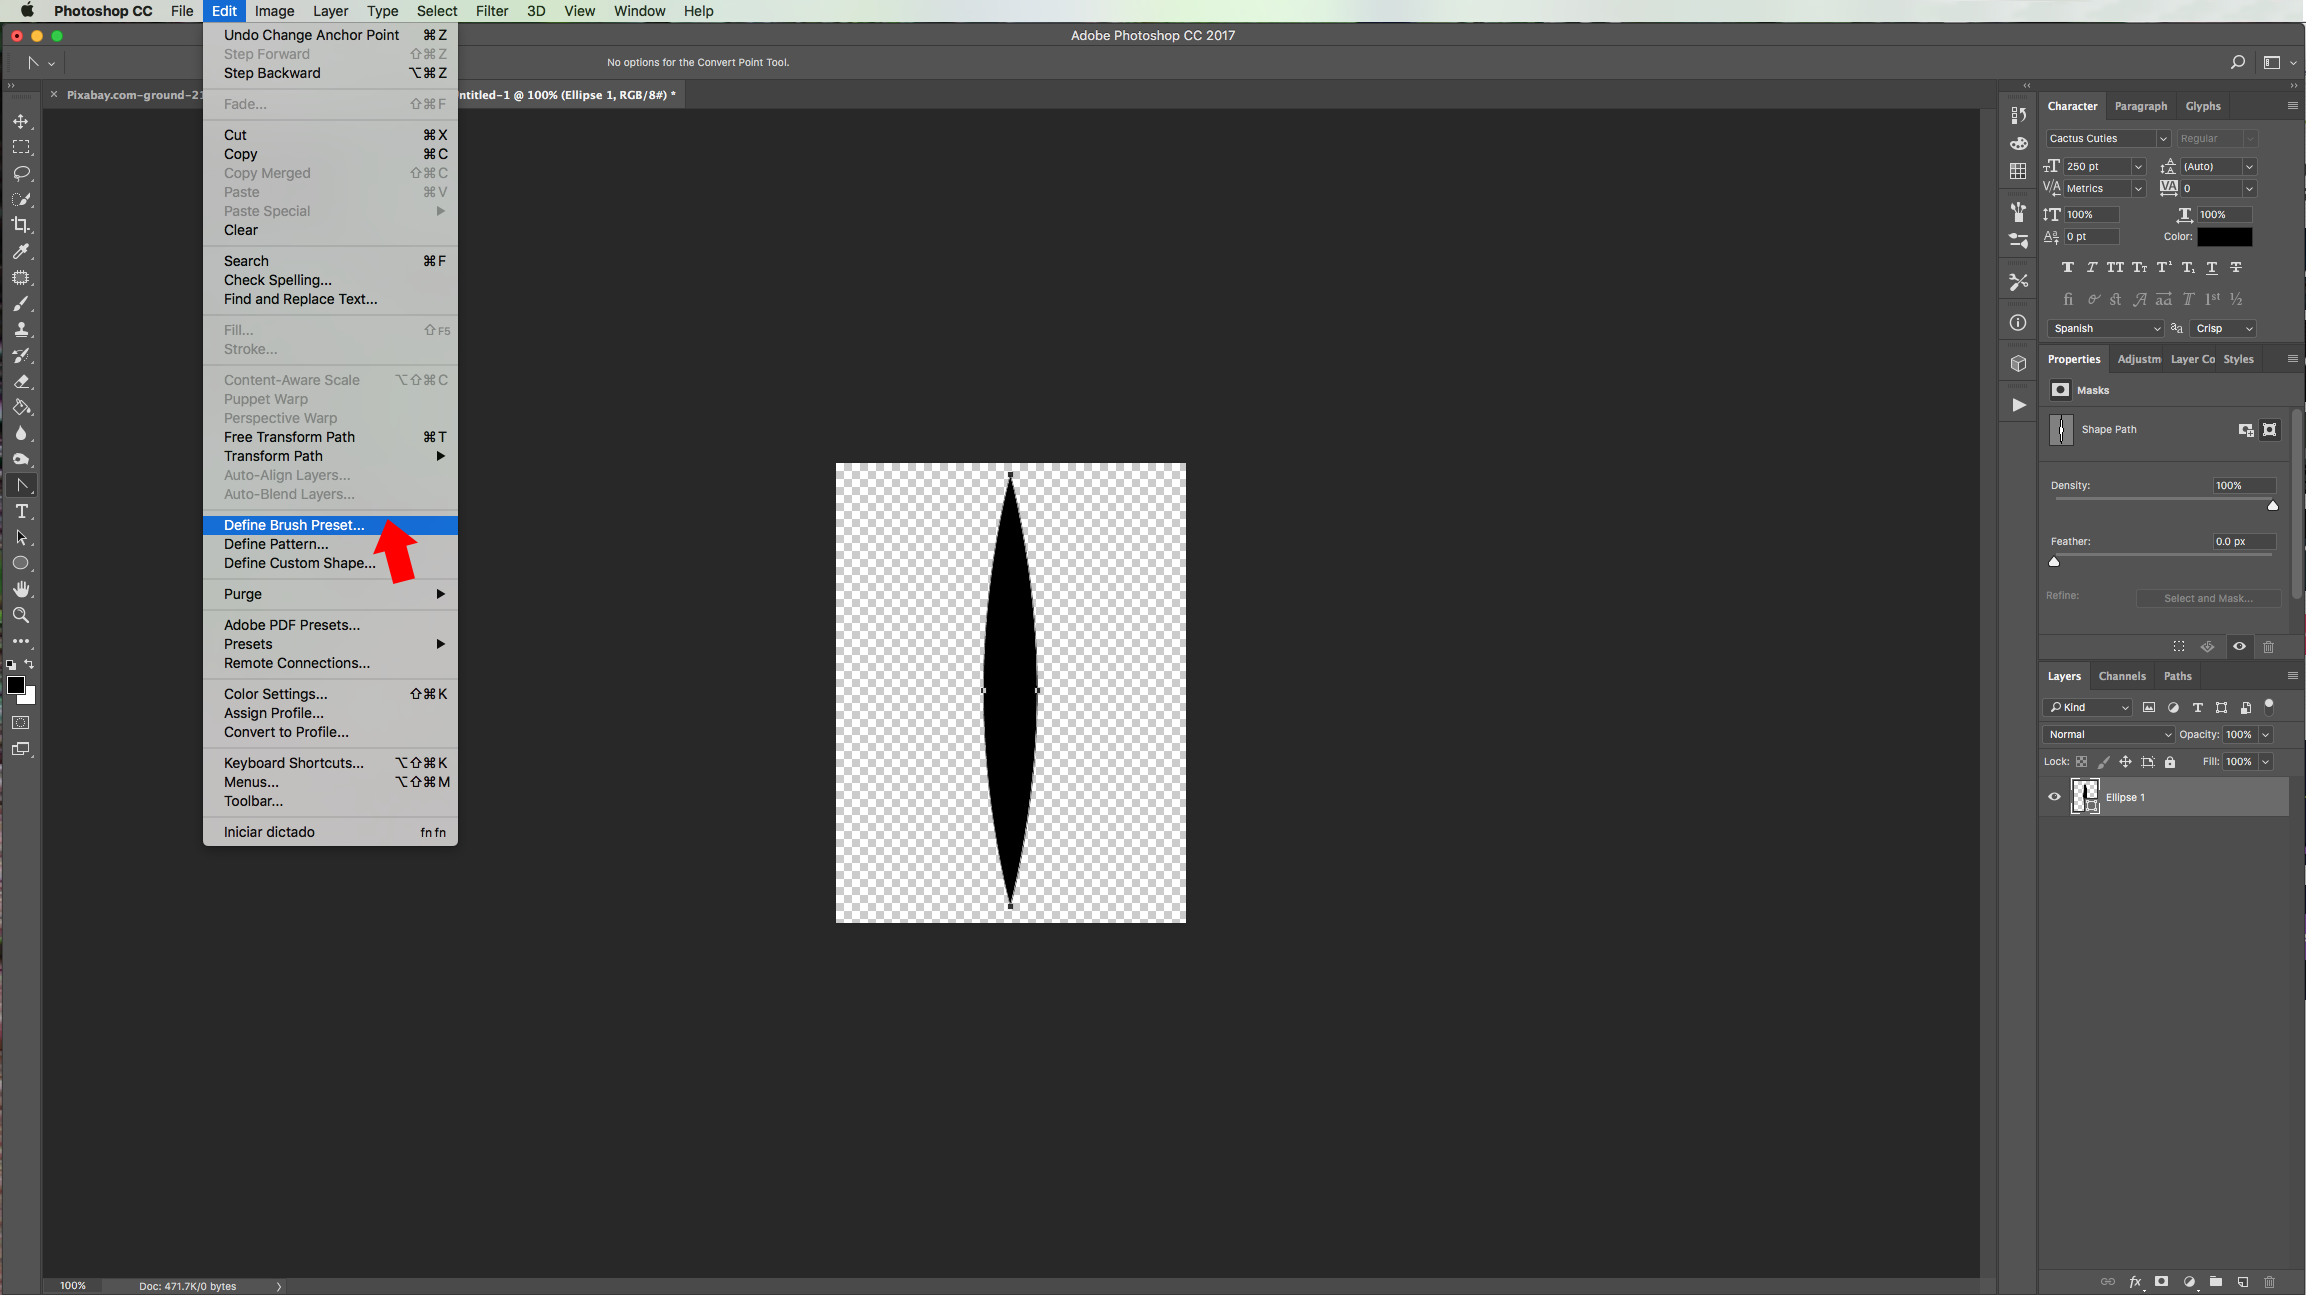
6 - Go to Edit > Define Brush Preset and name it “Grass Base”.
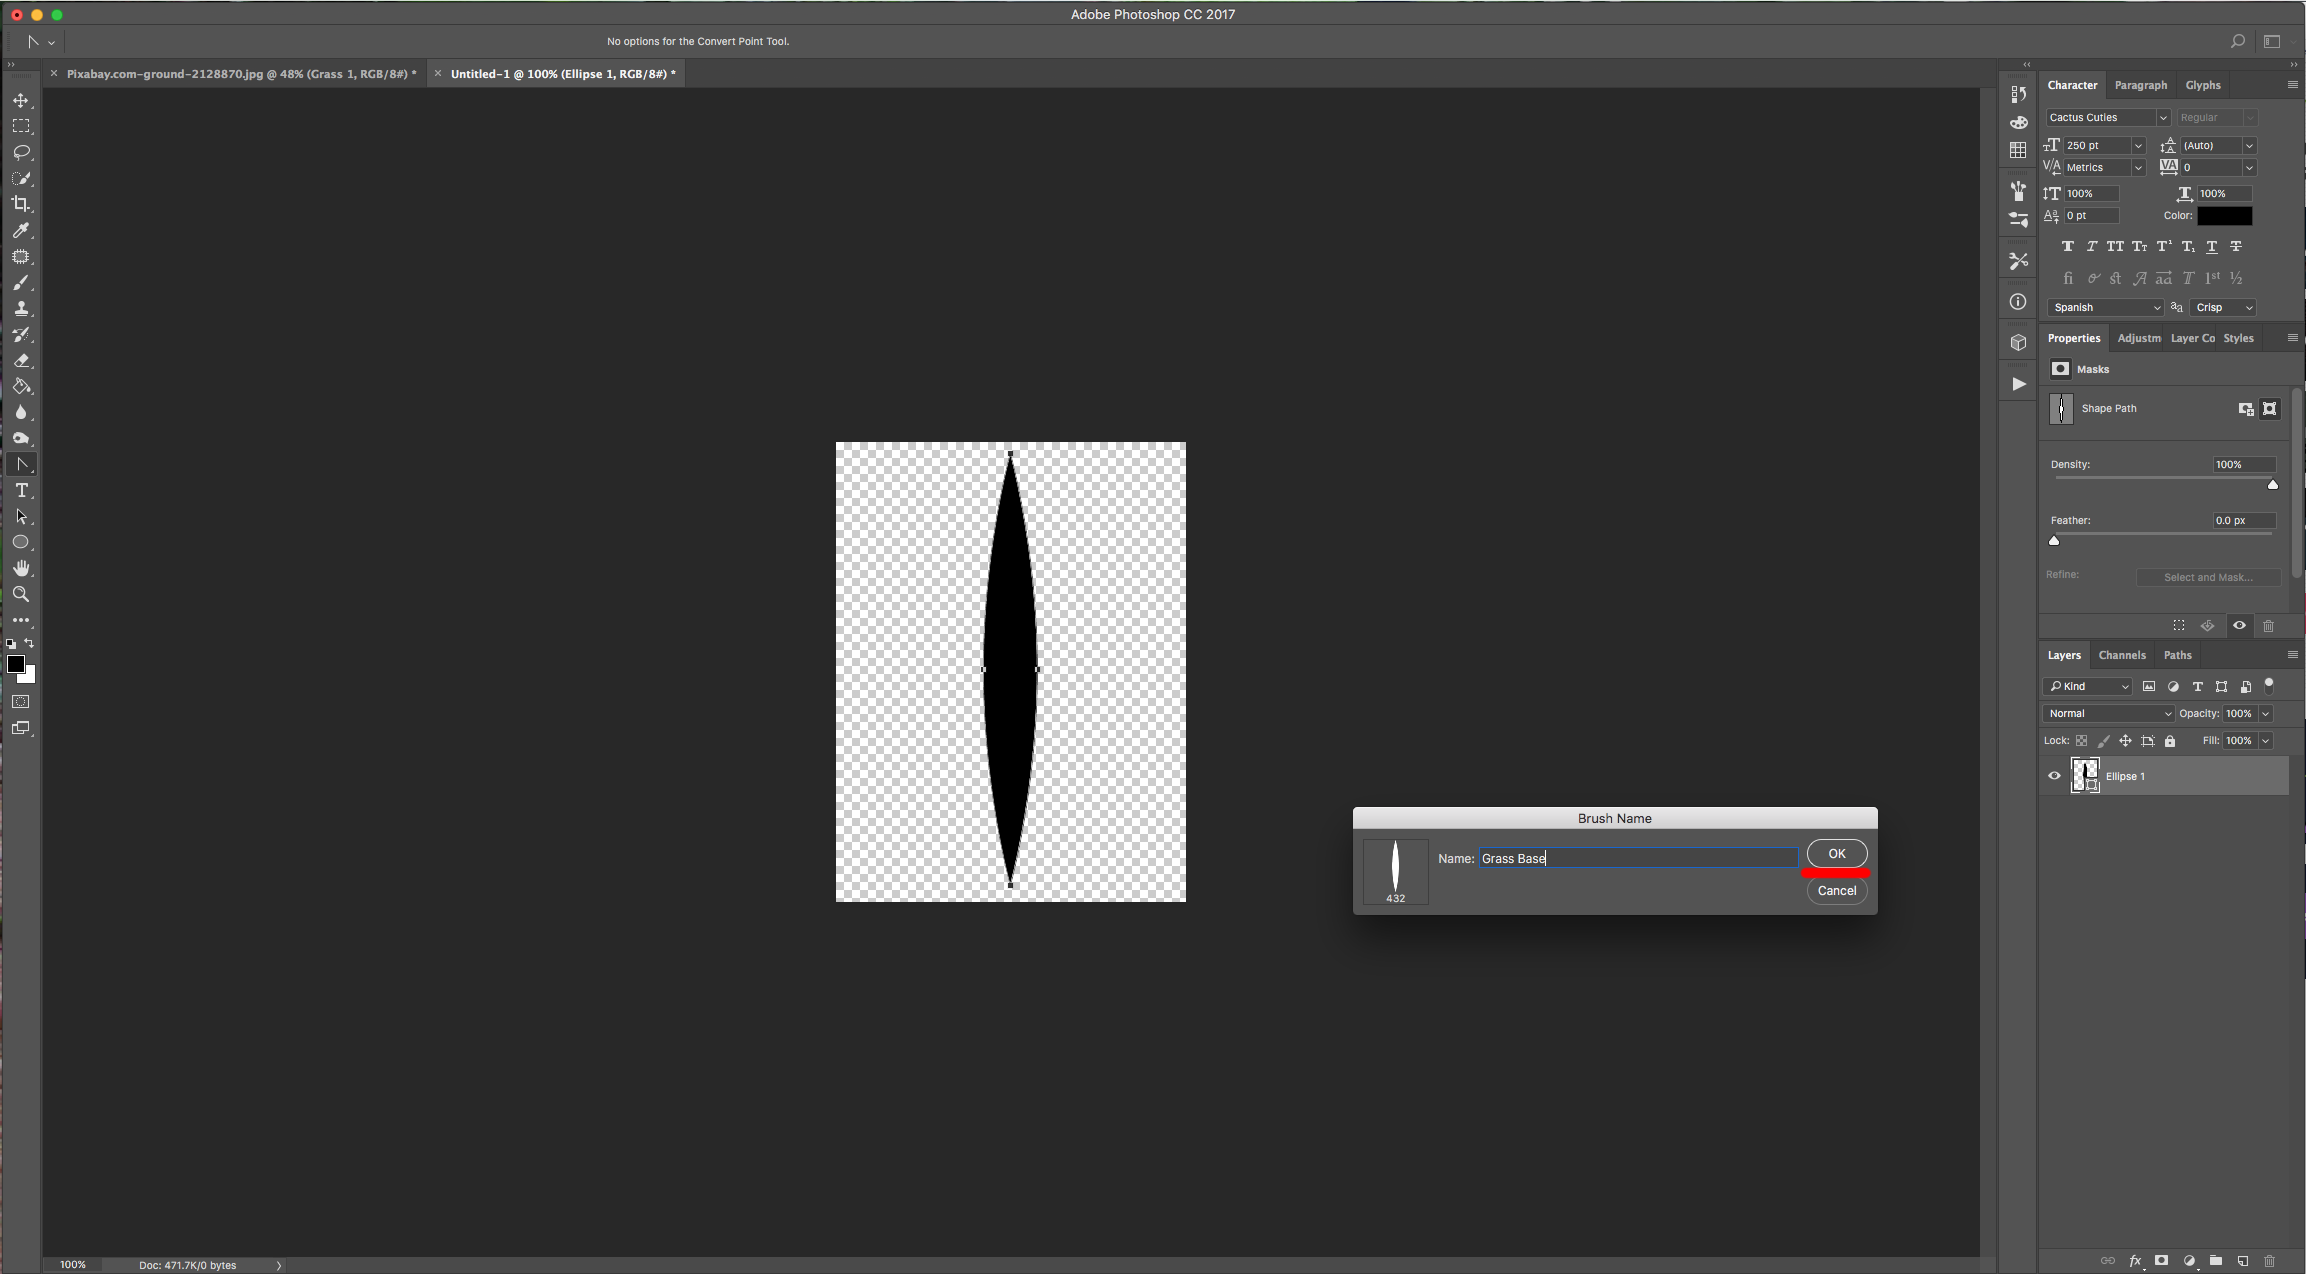
7 - Open the “Brush Panel”, make the “Size” 30 px and the “Spacing” 130.
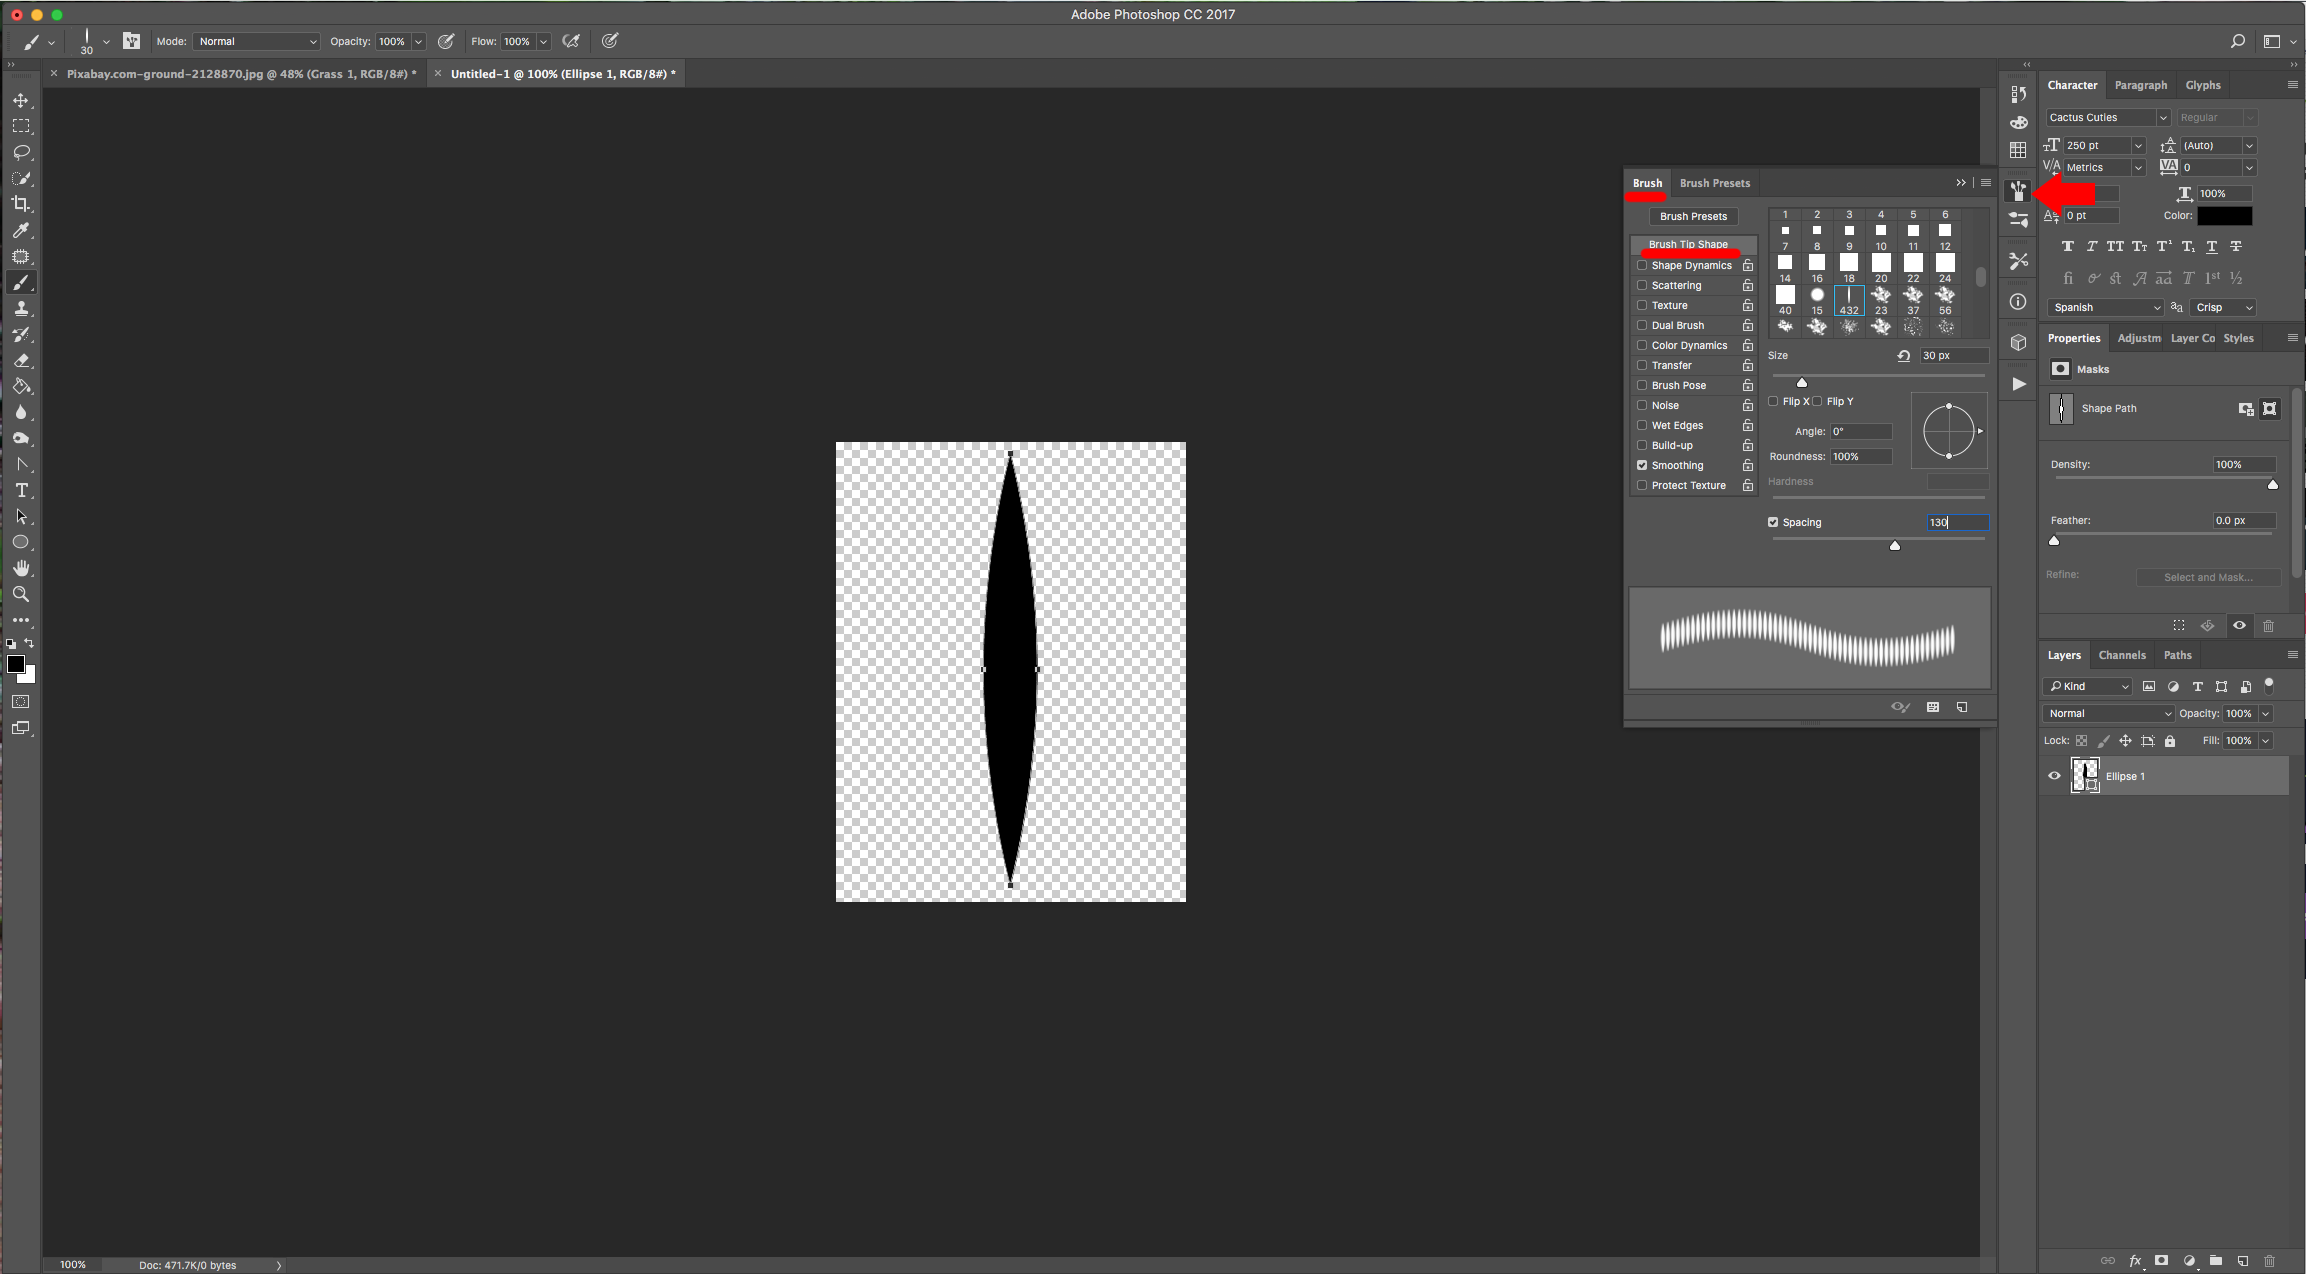
In “Shape Dynamics” use the following values:
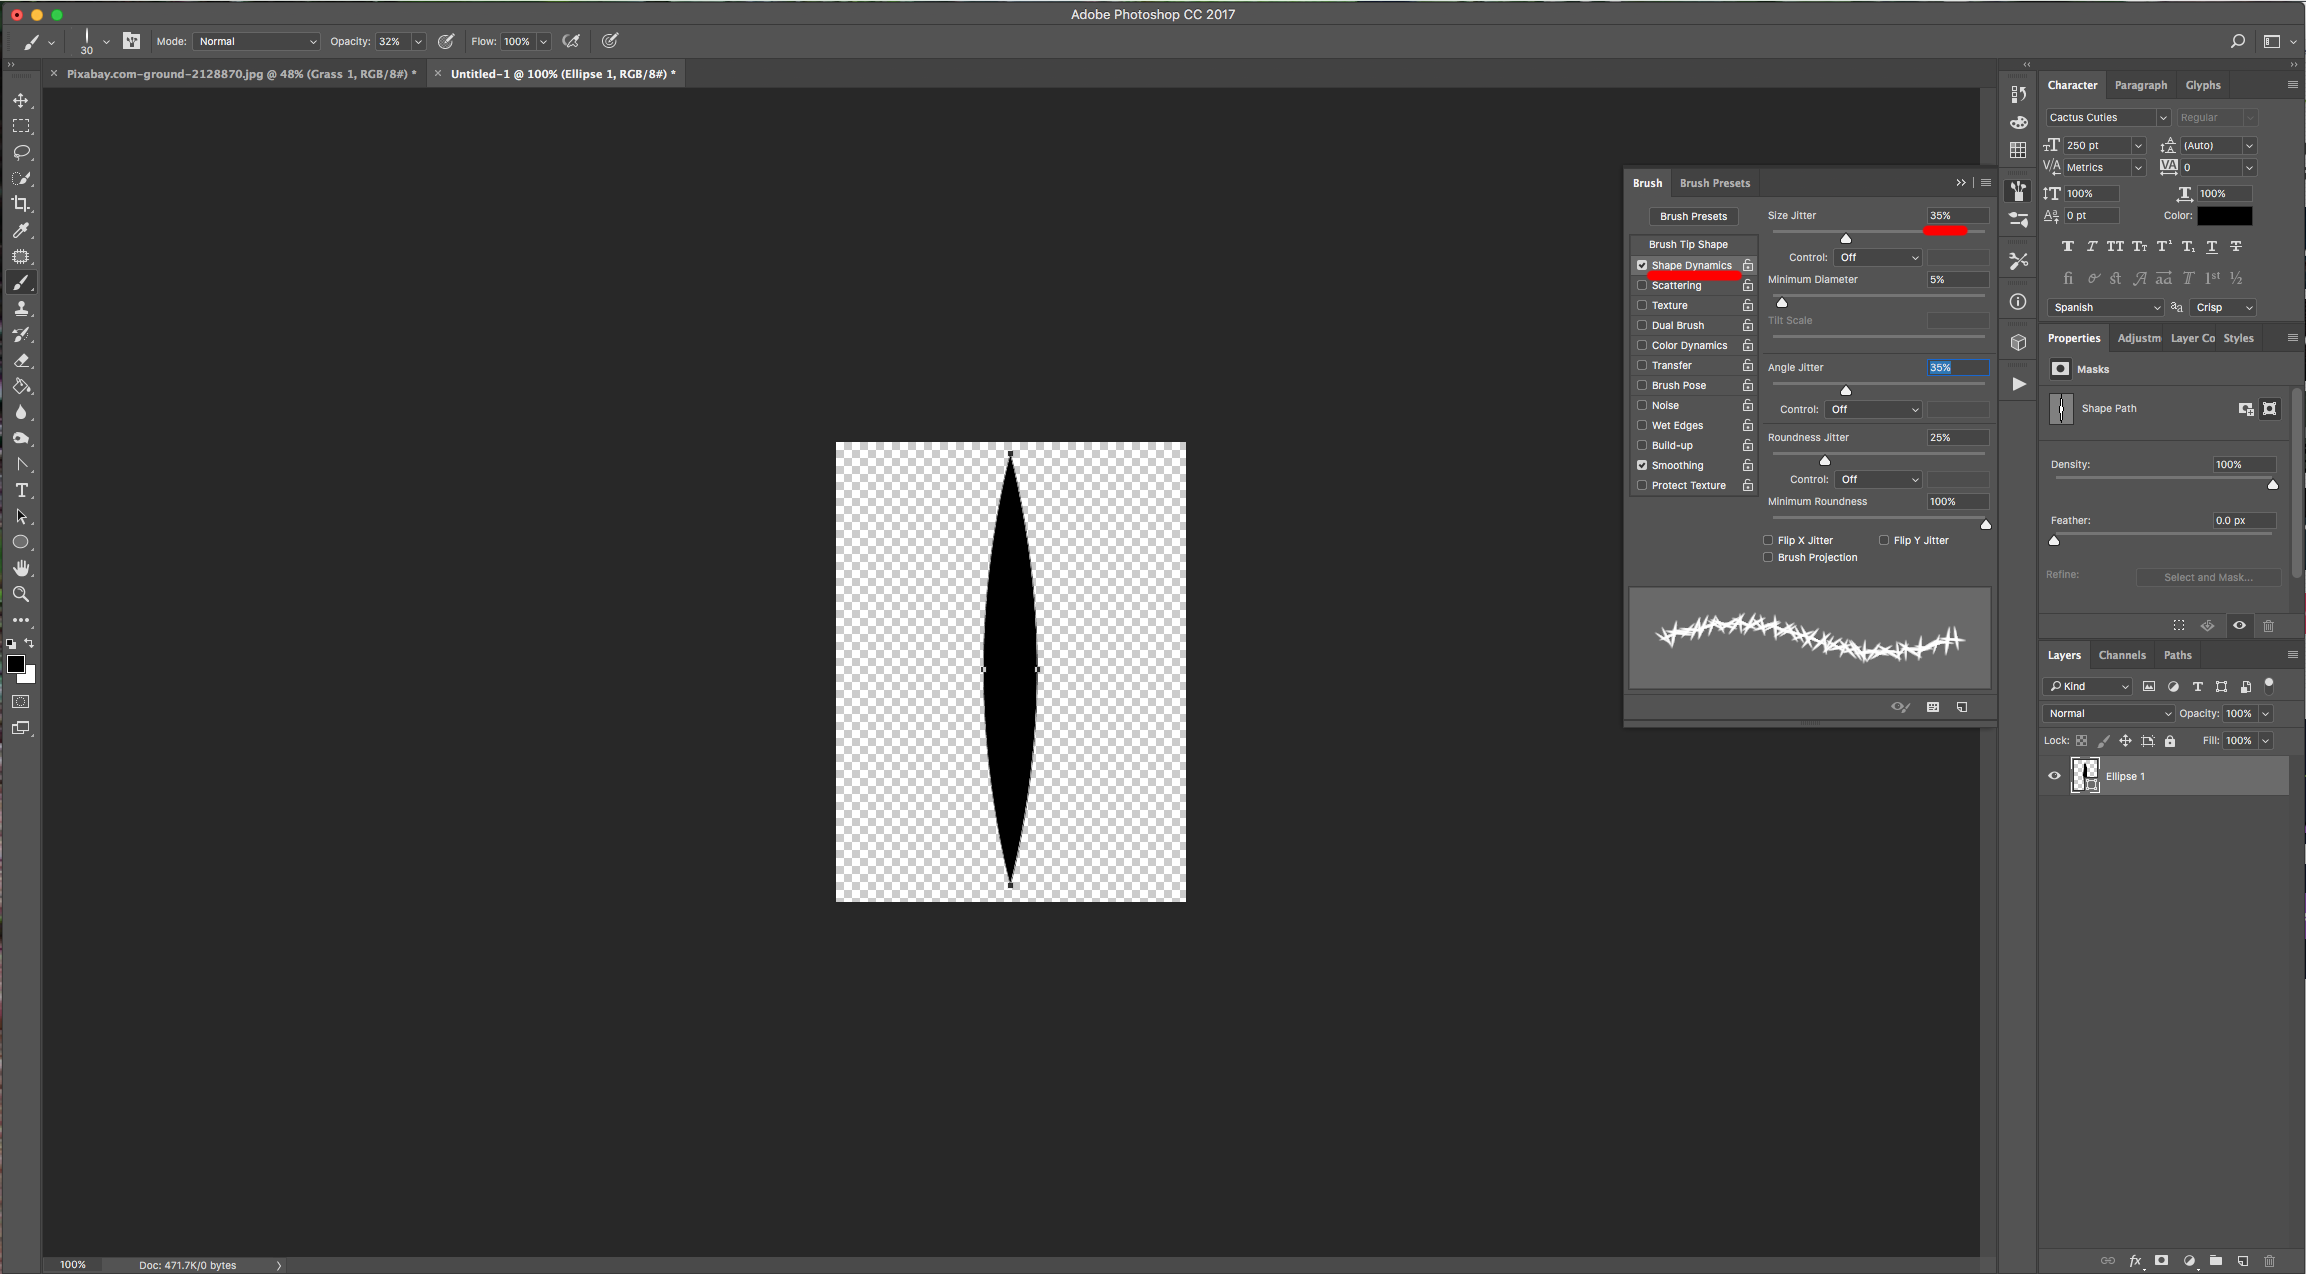
Scattering:
Color Dynamics:
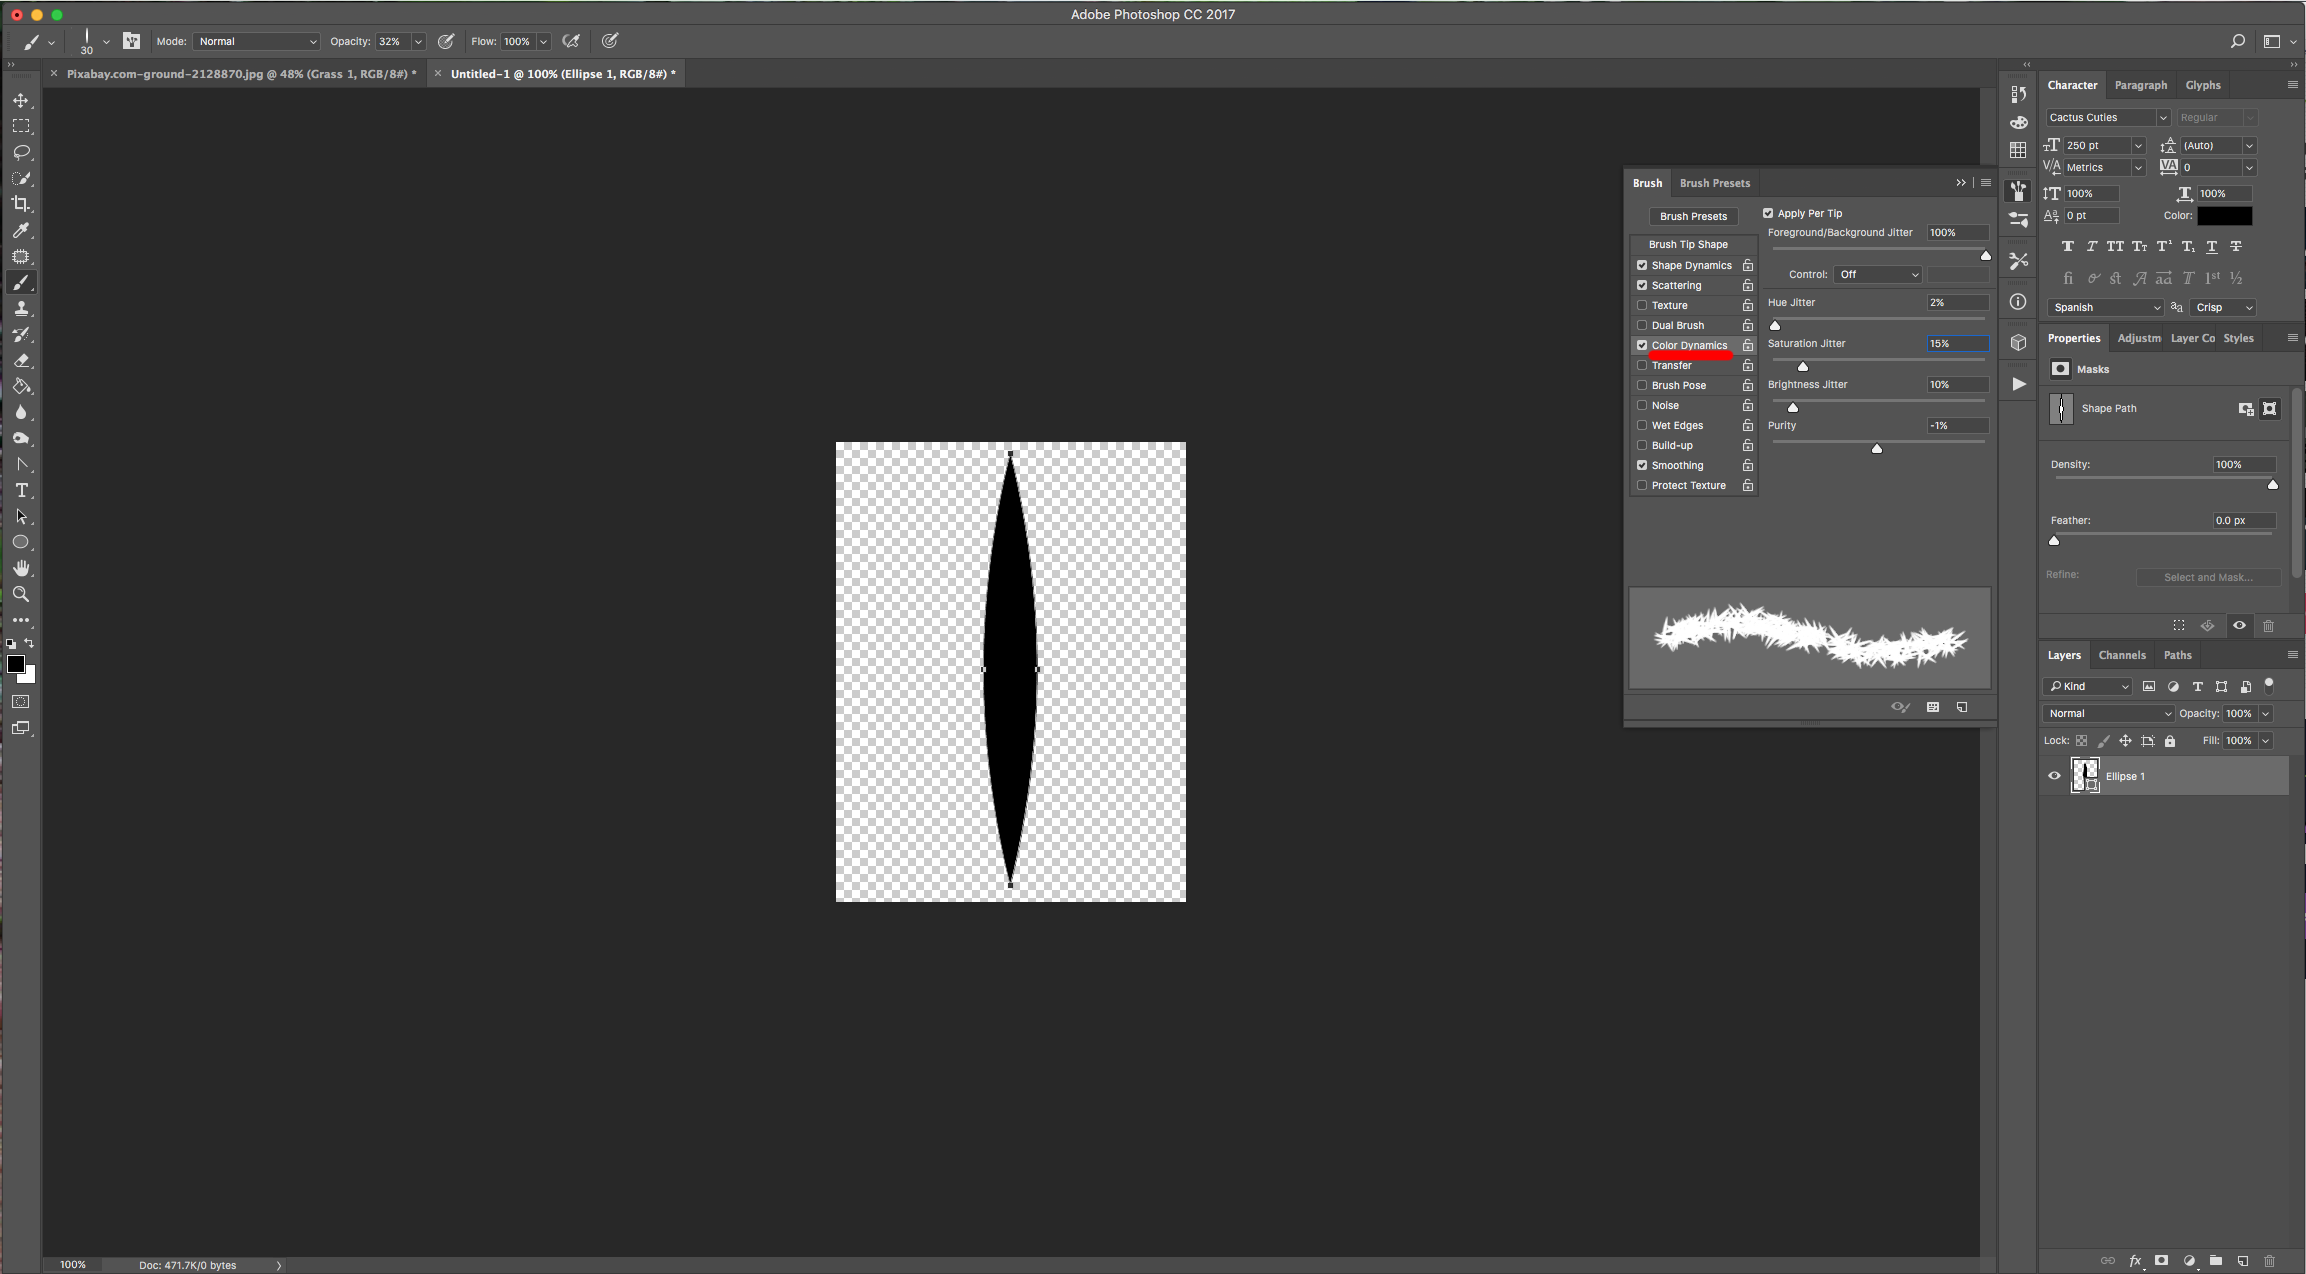
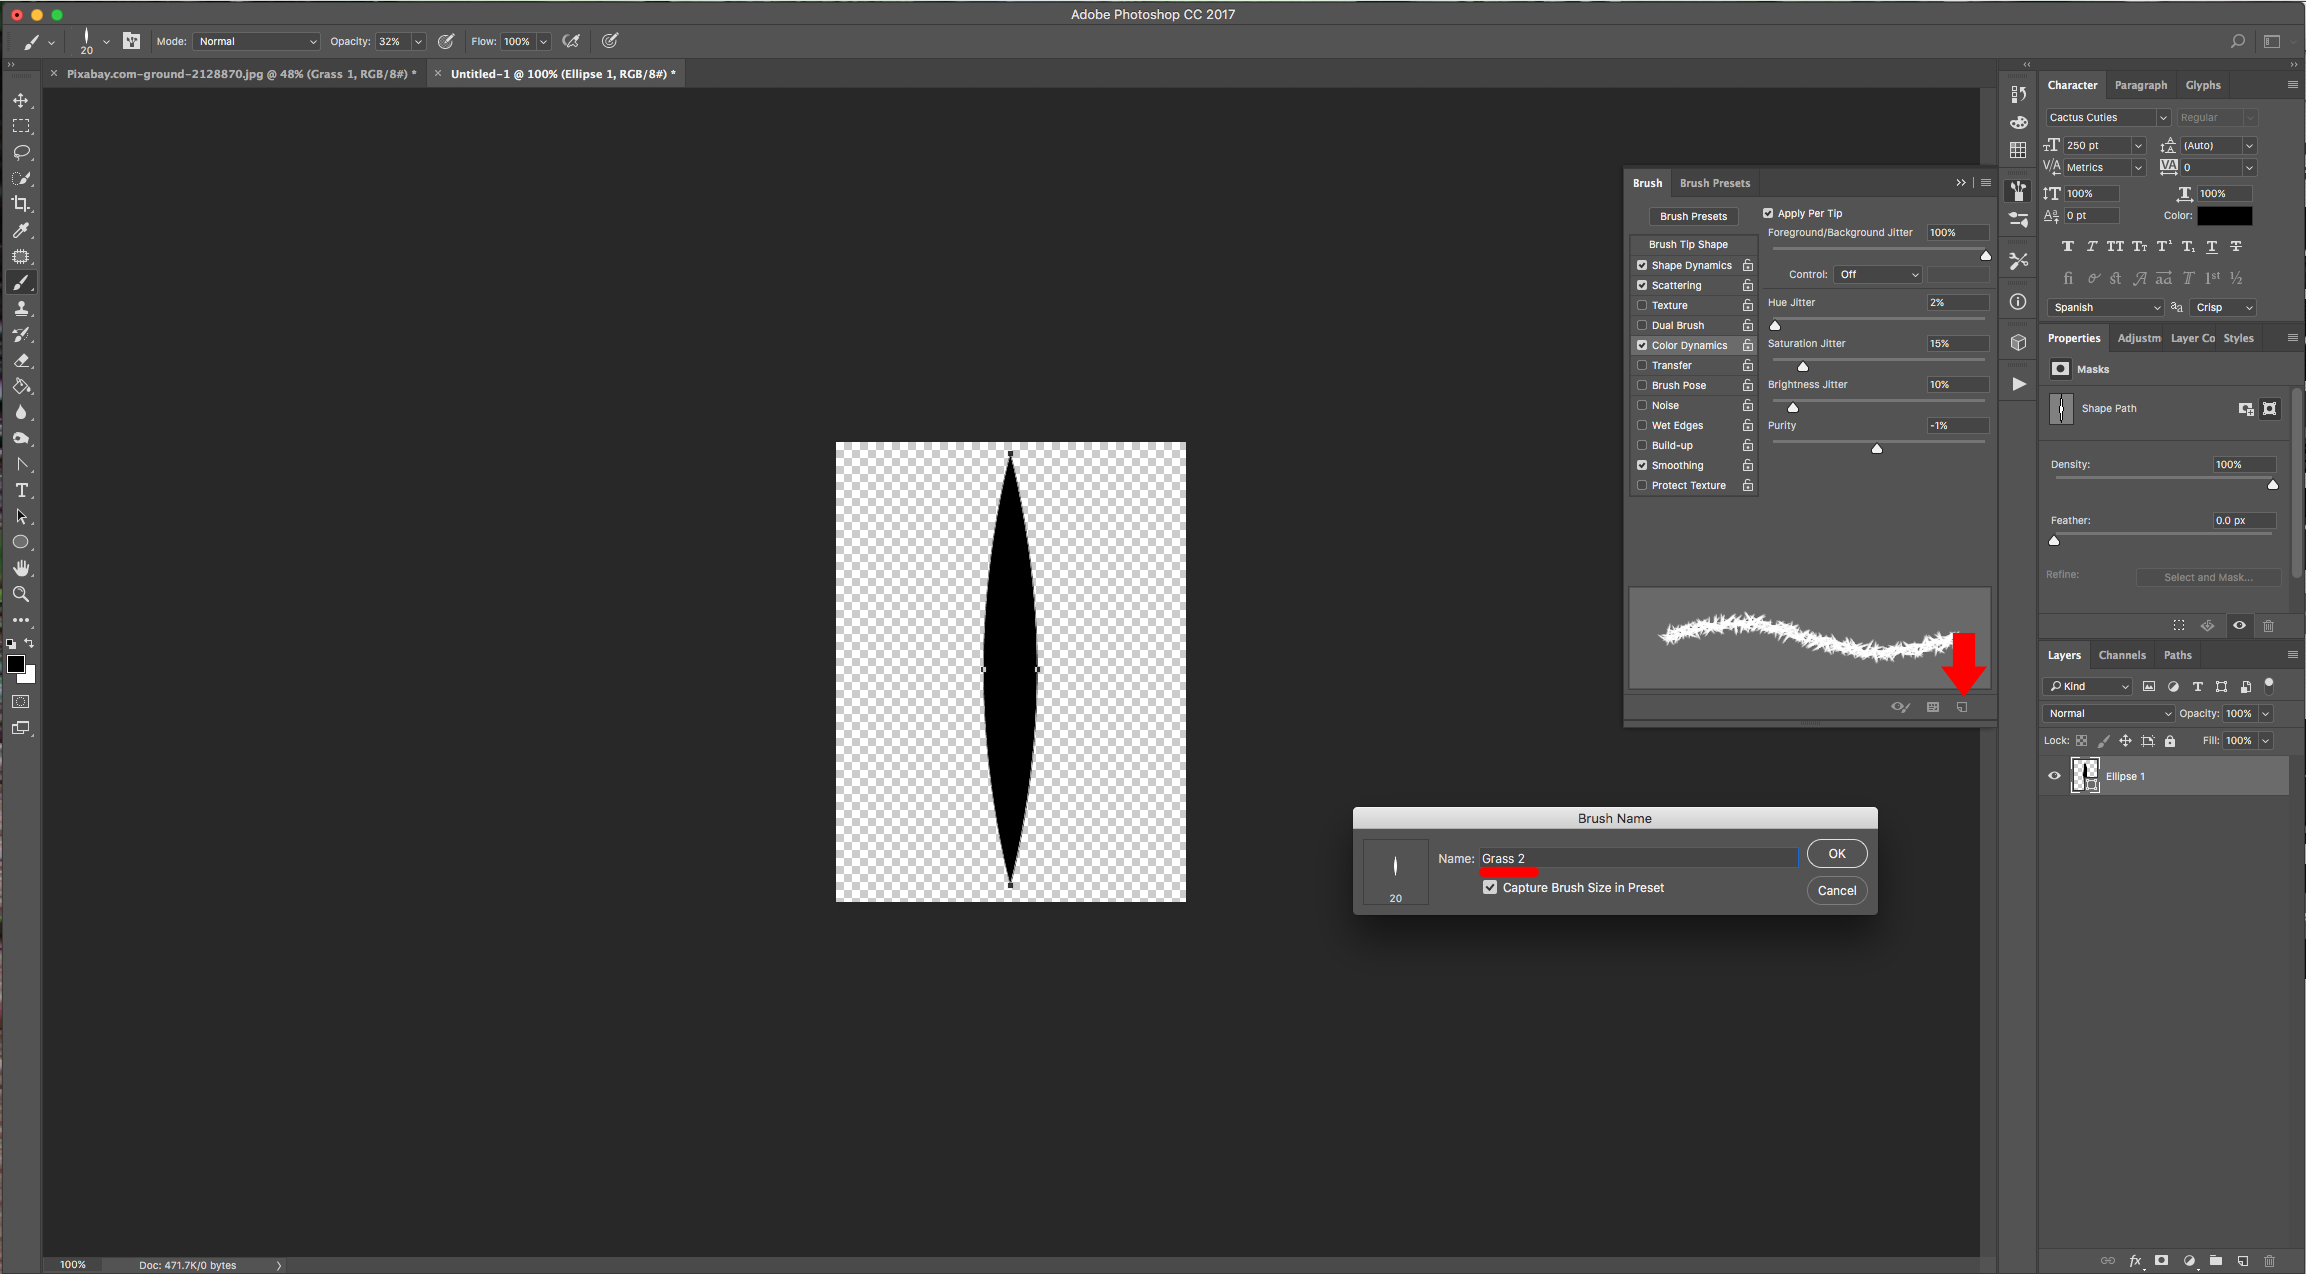
Click in the small icon at the bottom and save your “New Brush” as “Grass 1”.
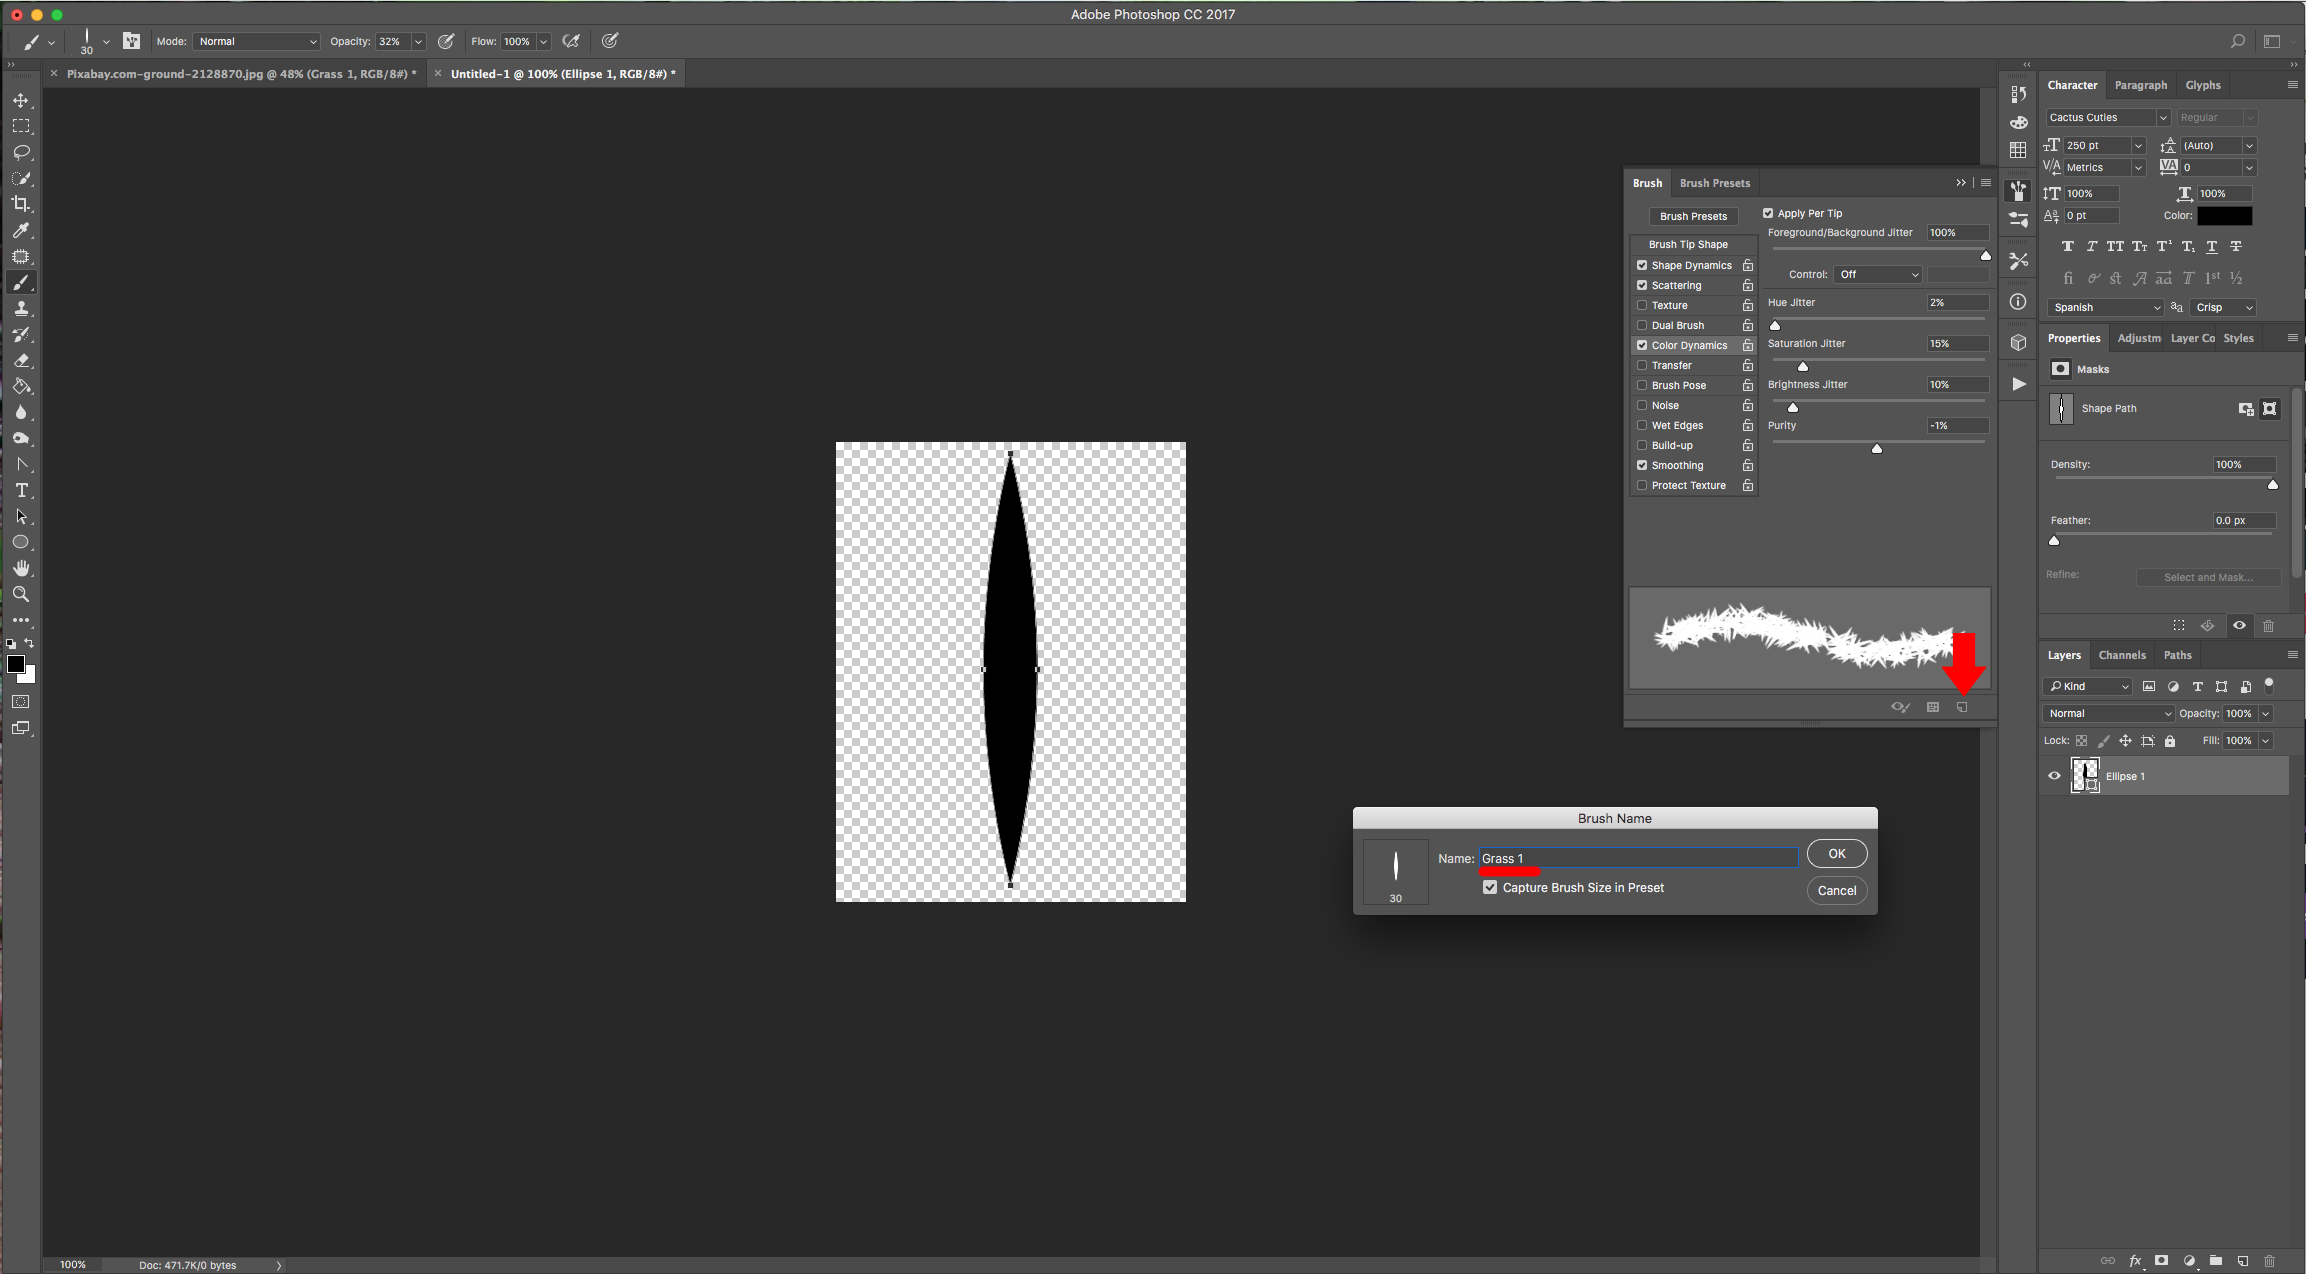
8 - Without exiting the “Brush Panel”, change the “Size” to 20 px and the “Spacing” 340.
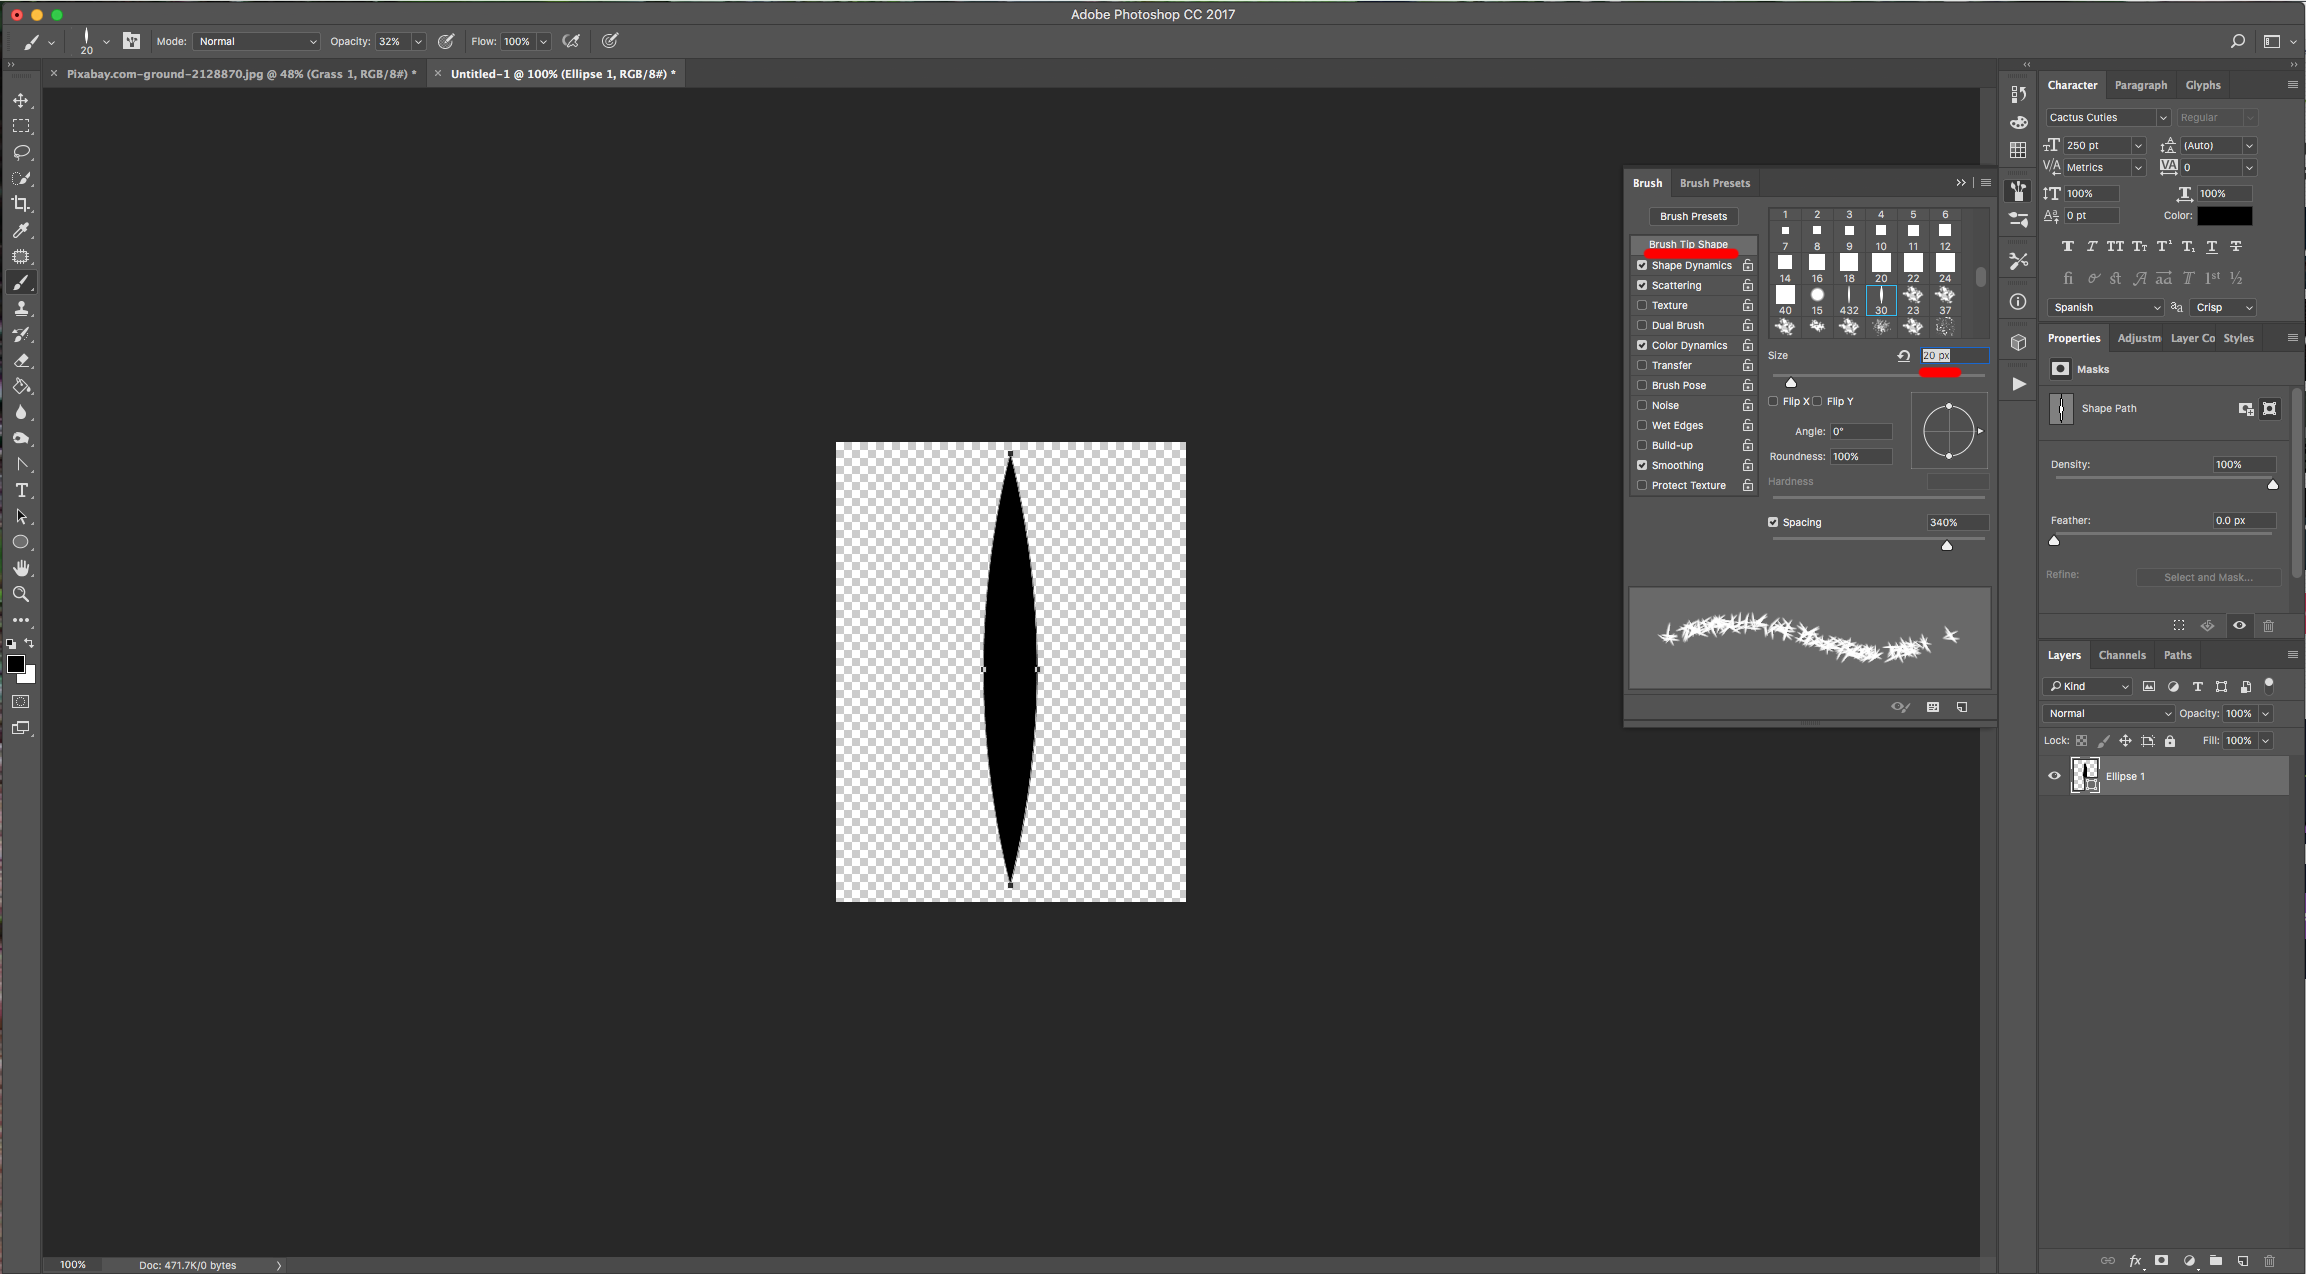
Shape Dynamics: (Stays the same)
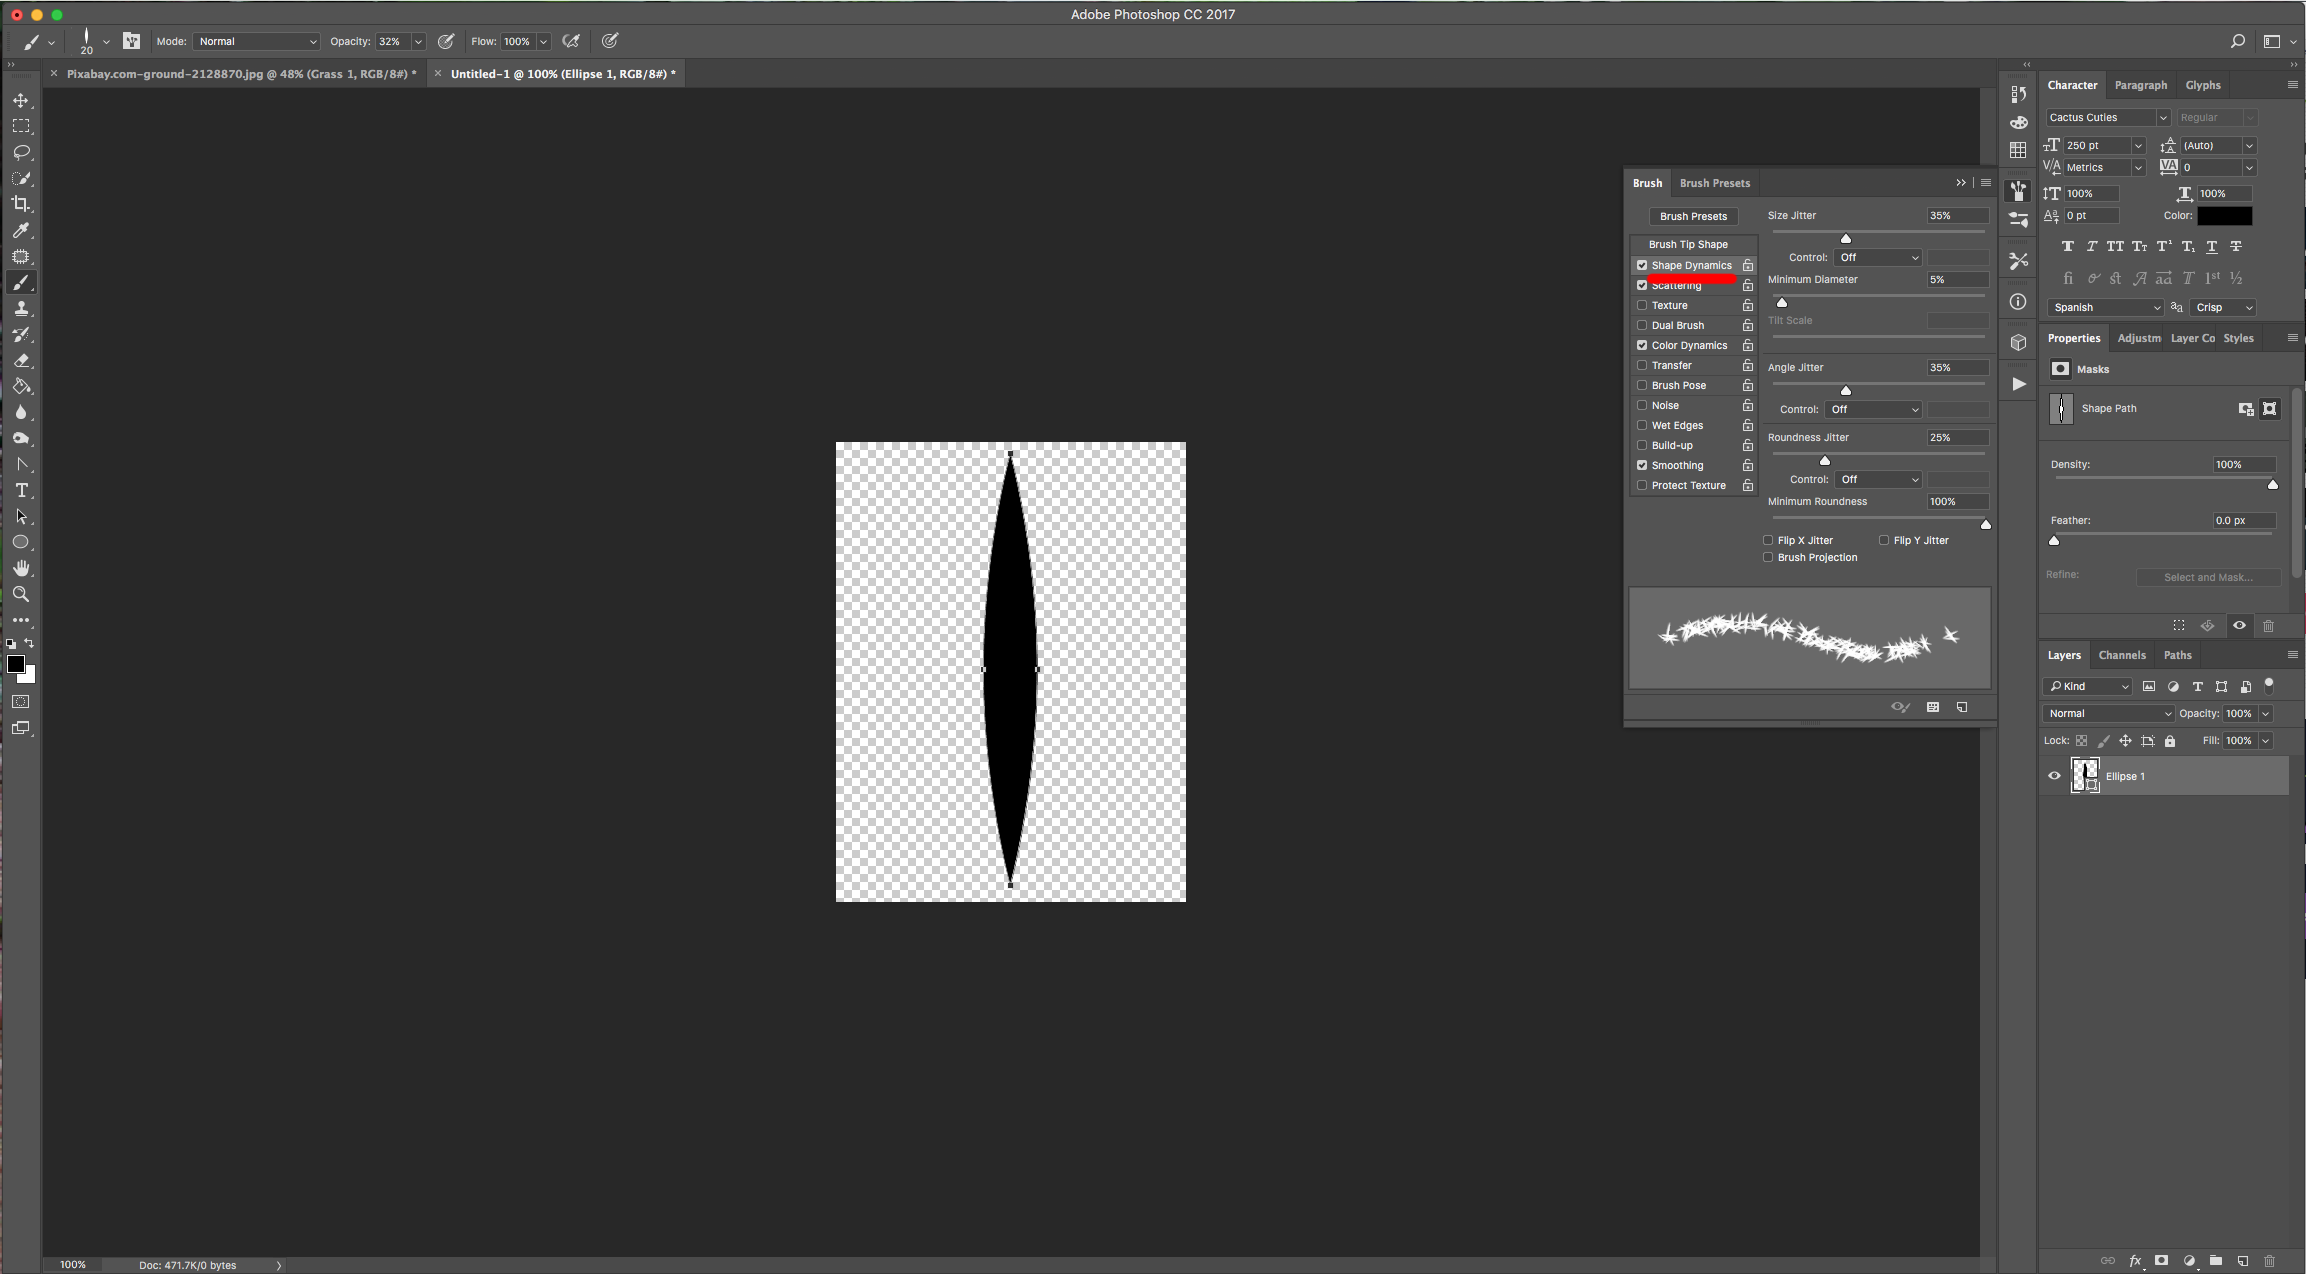
Scattering:
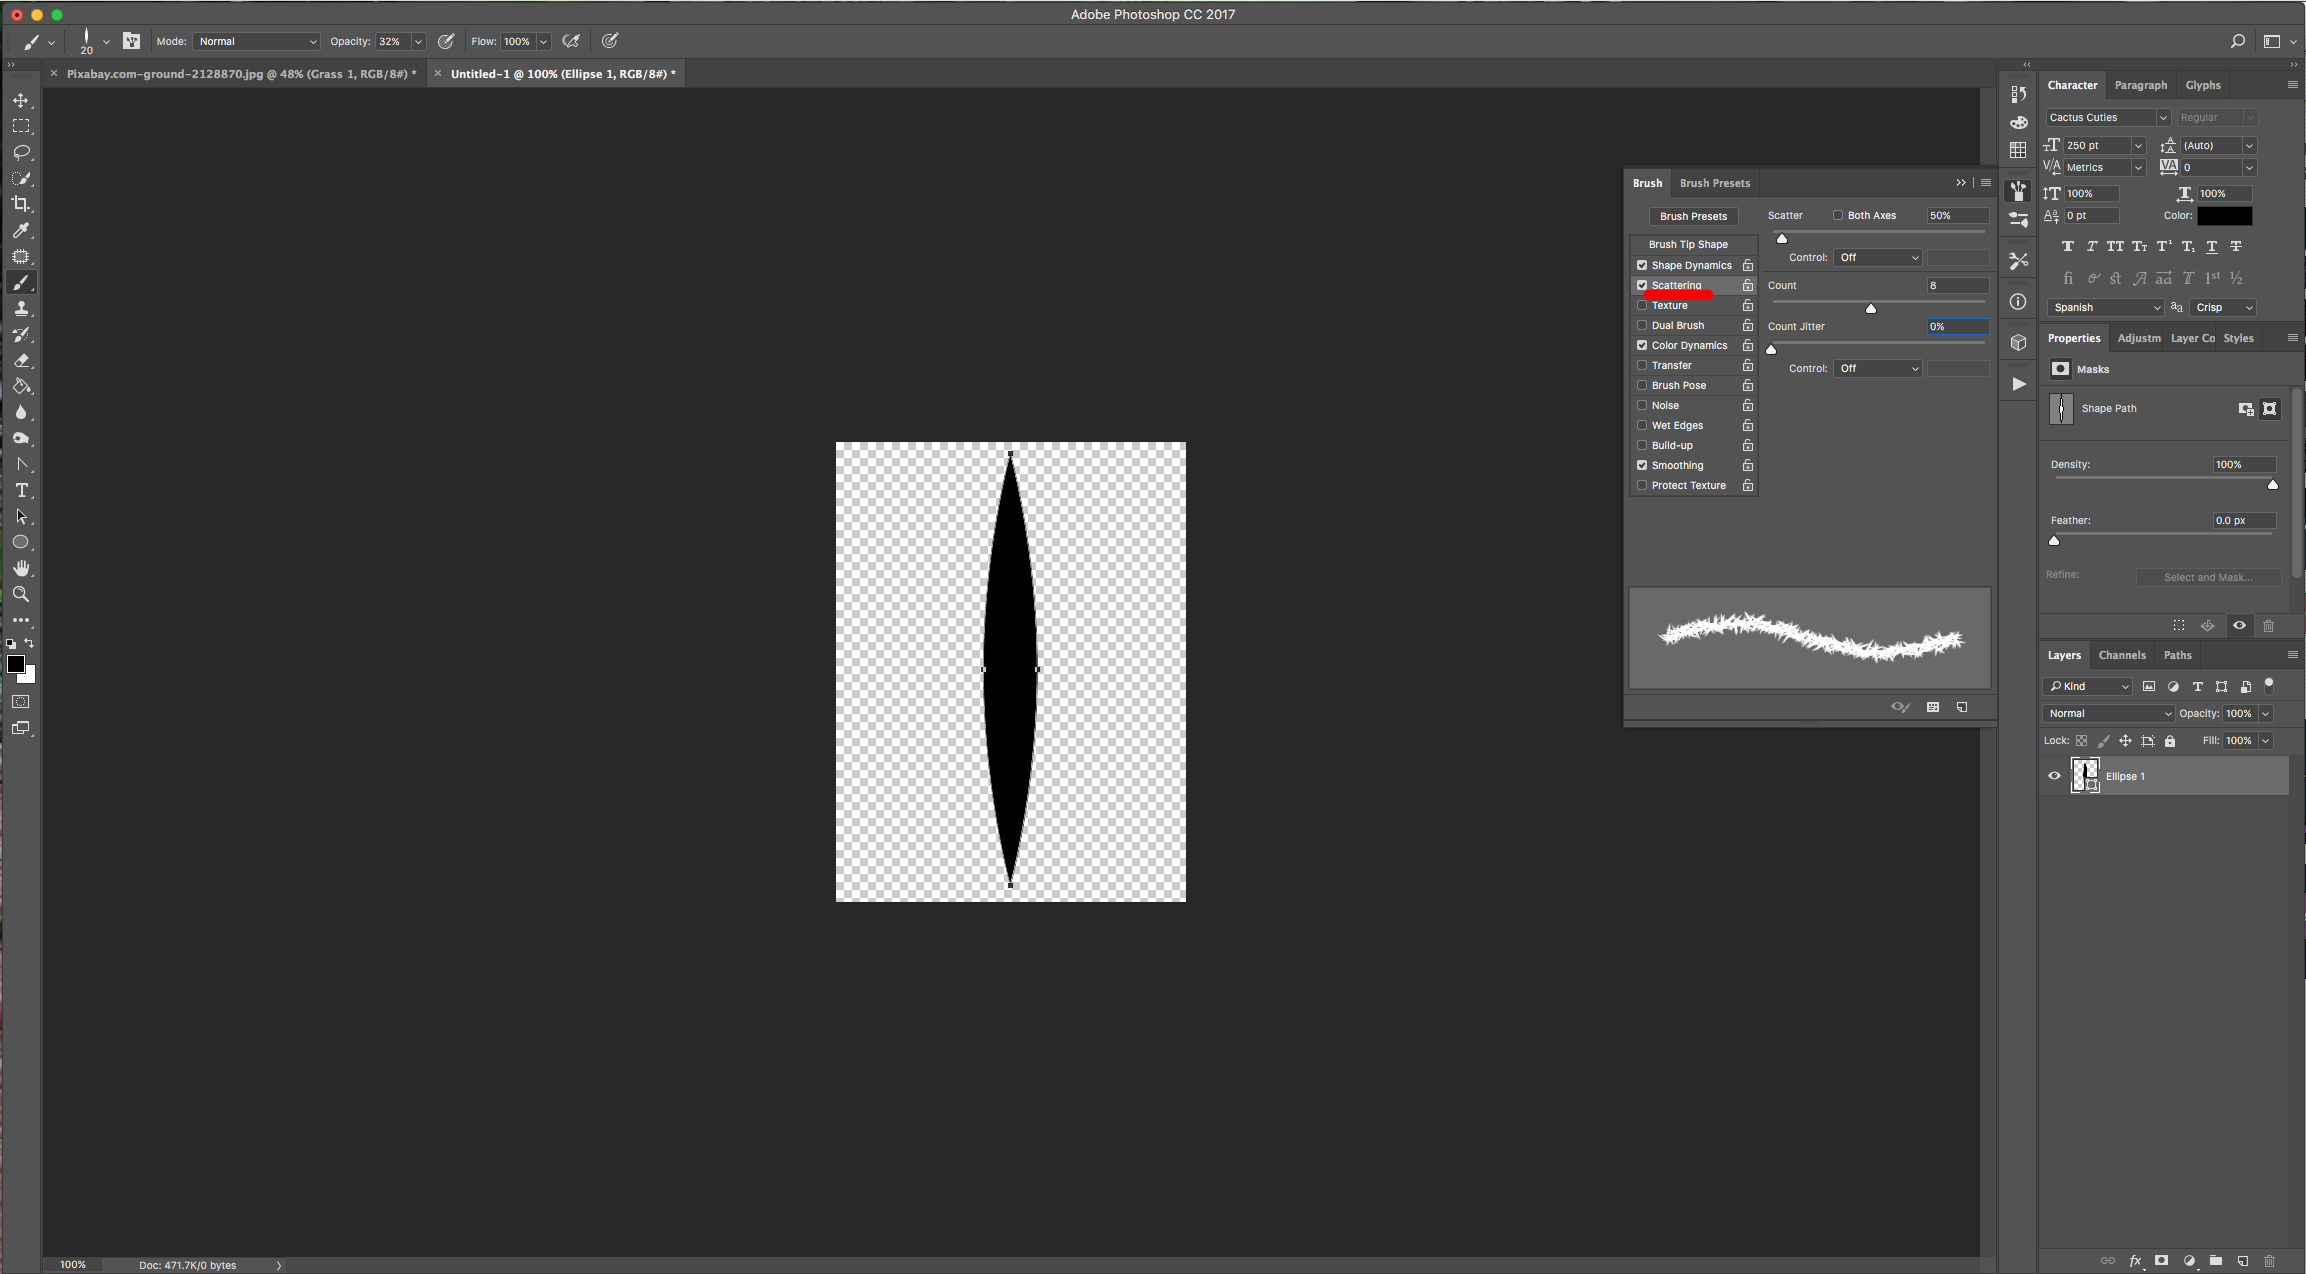
Color Dynamics: (Stays the same)
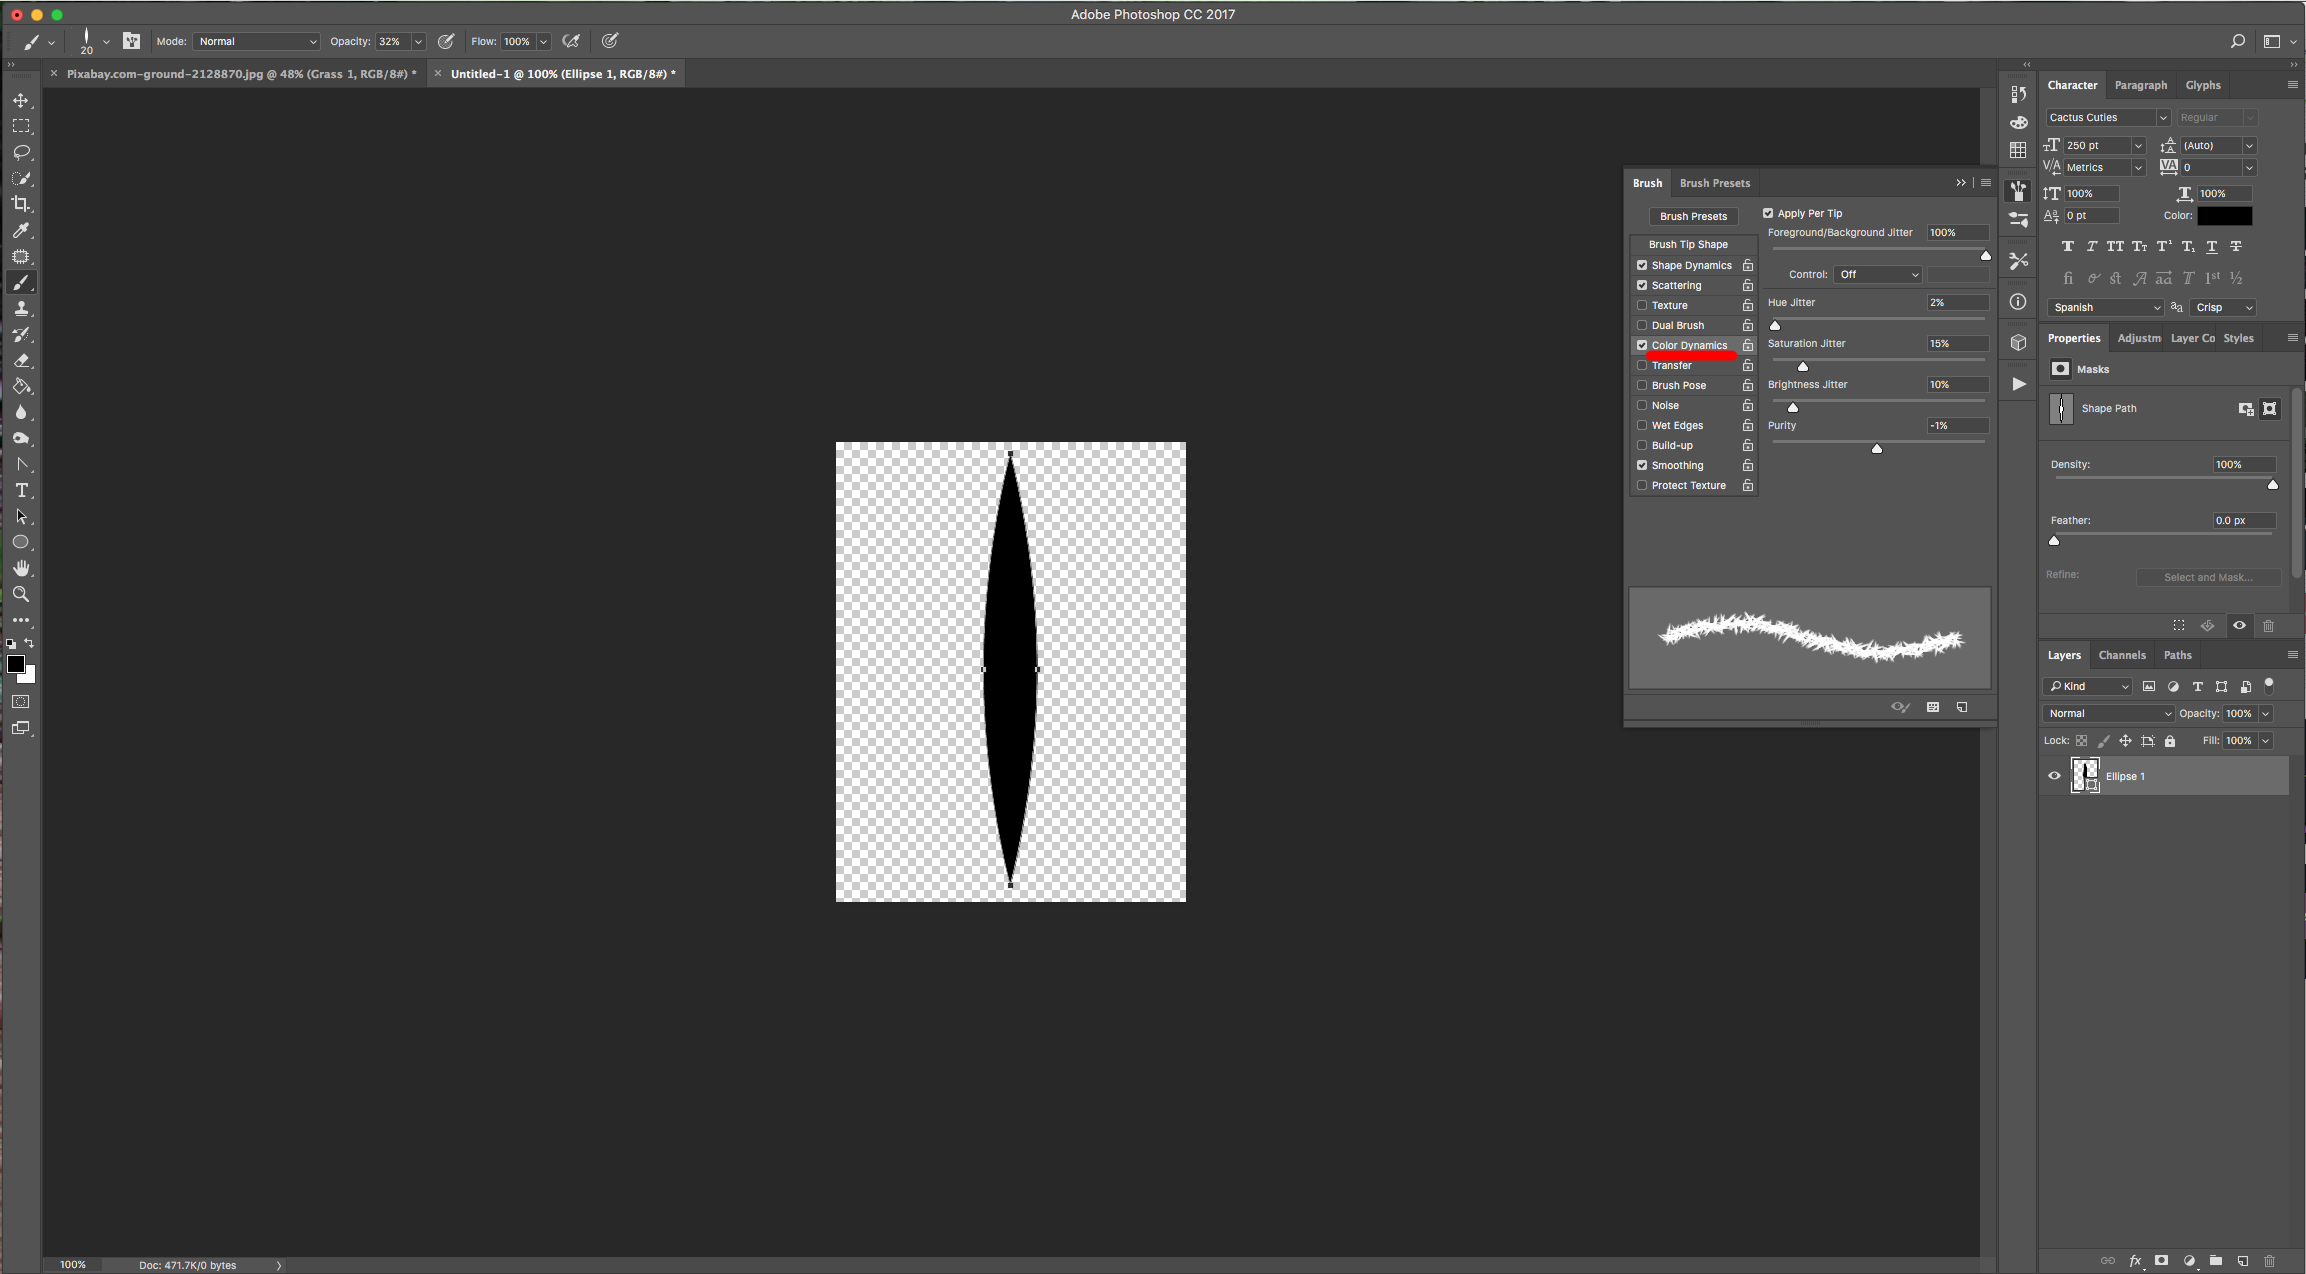
Name this one “Grass 2”.
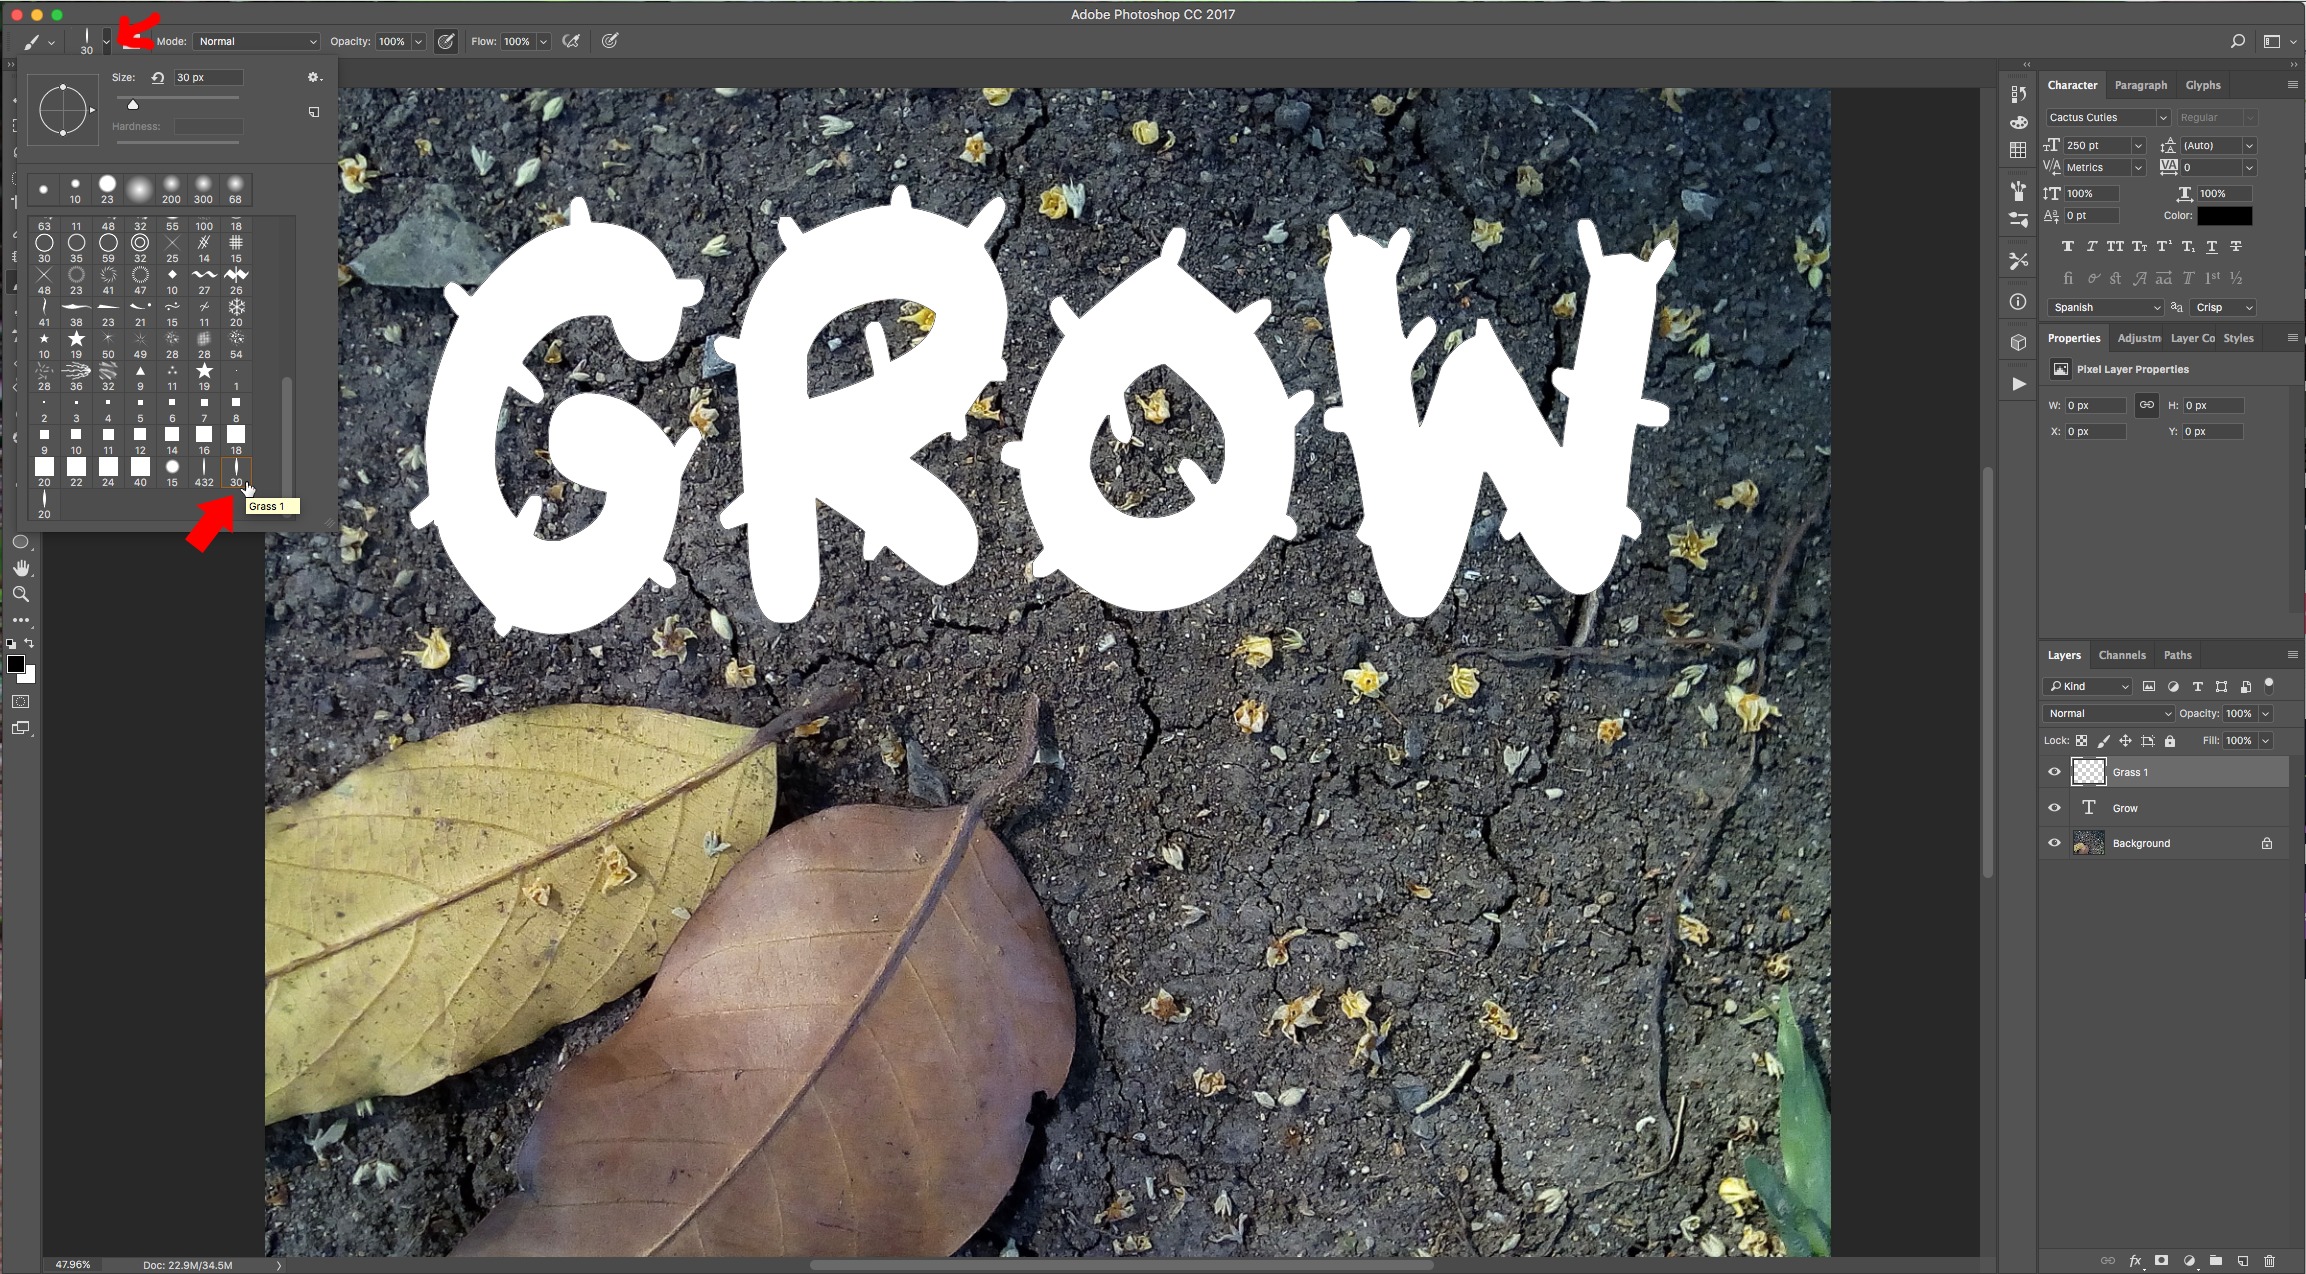
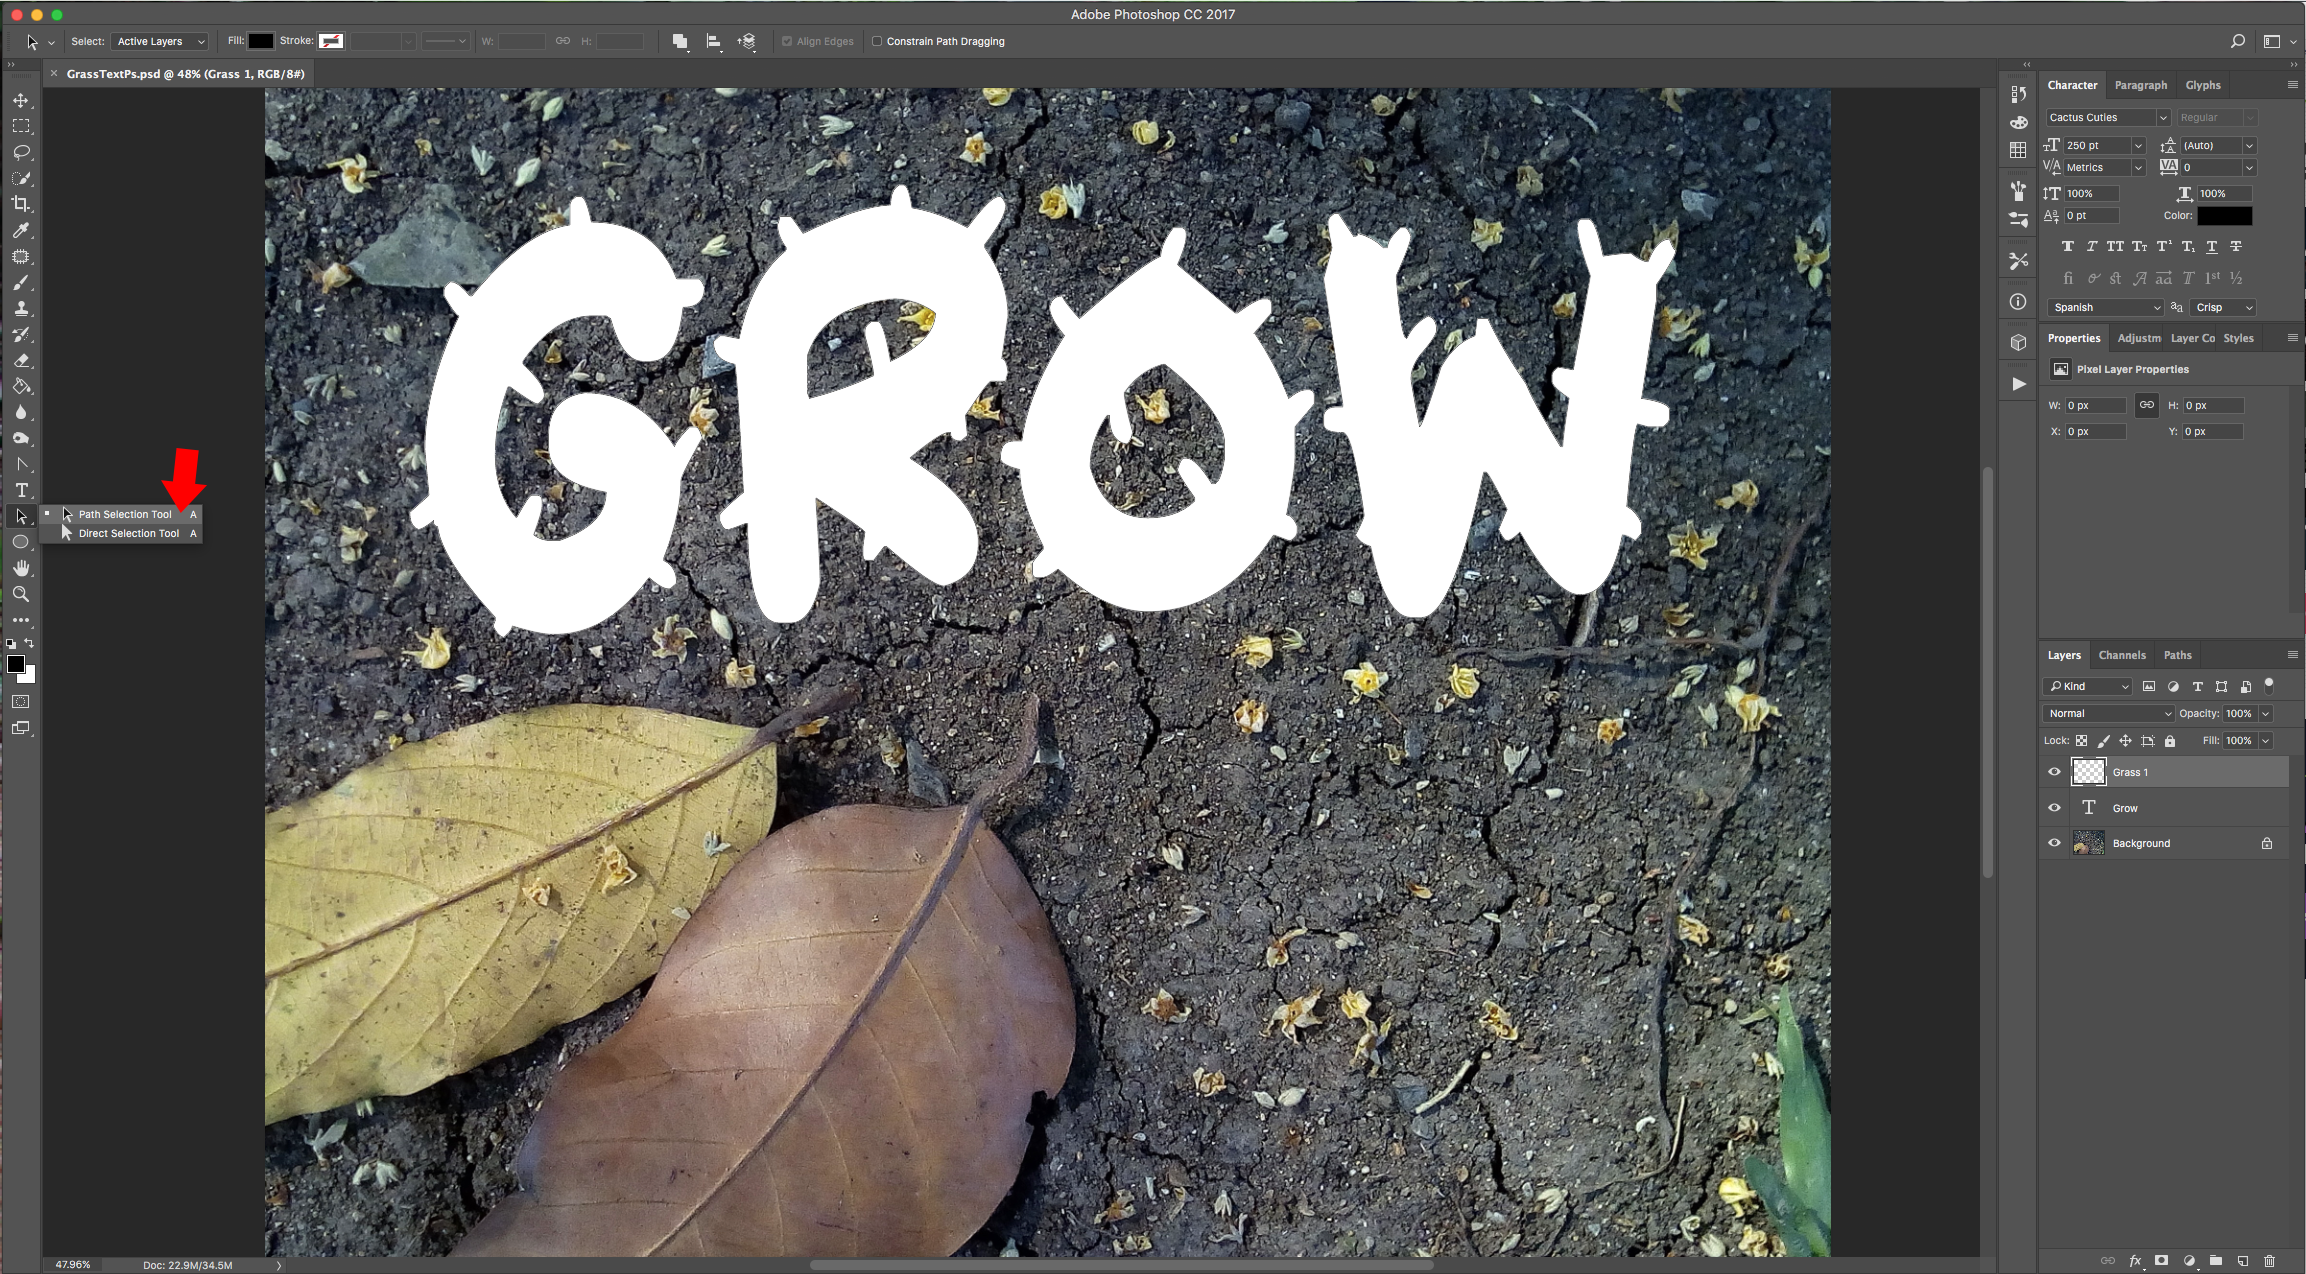
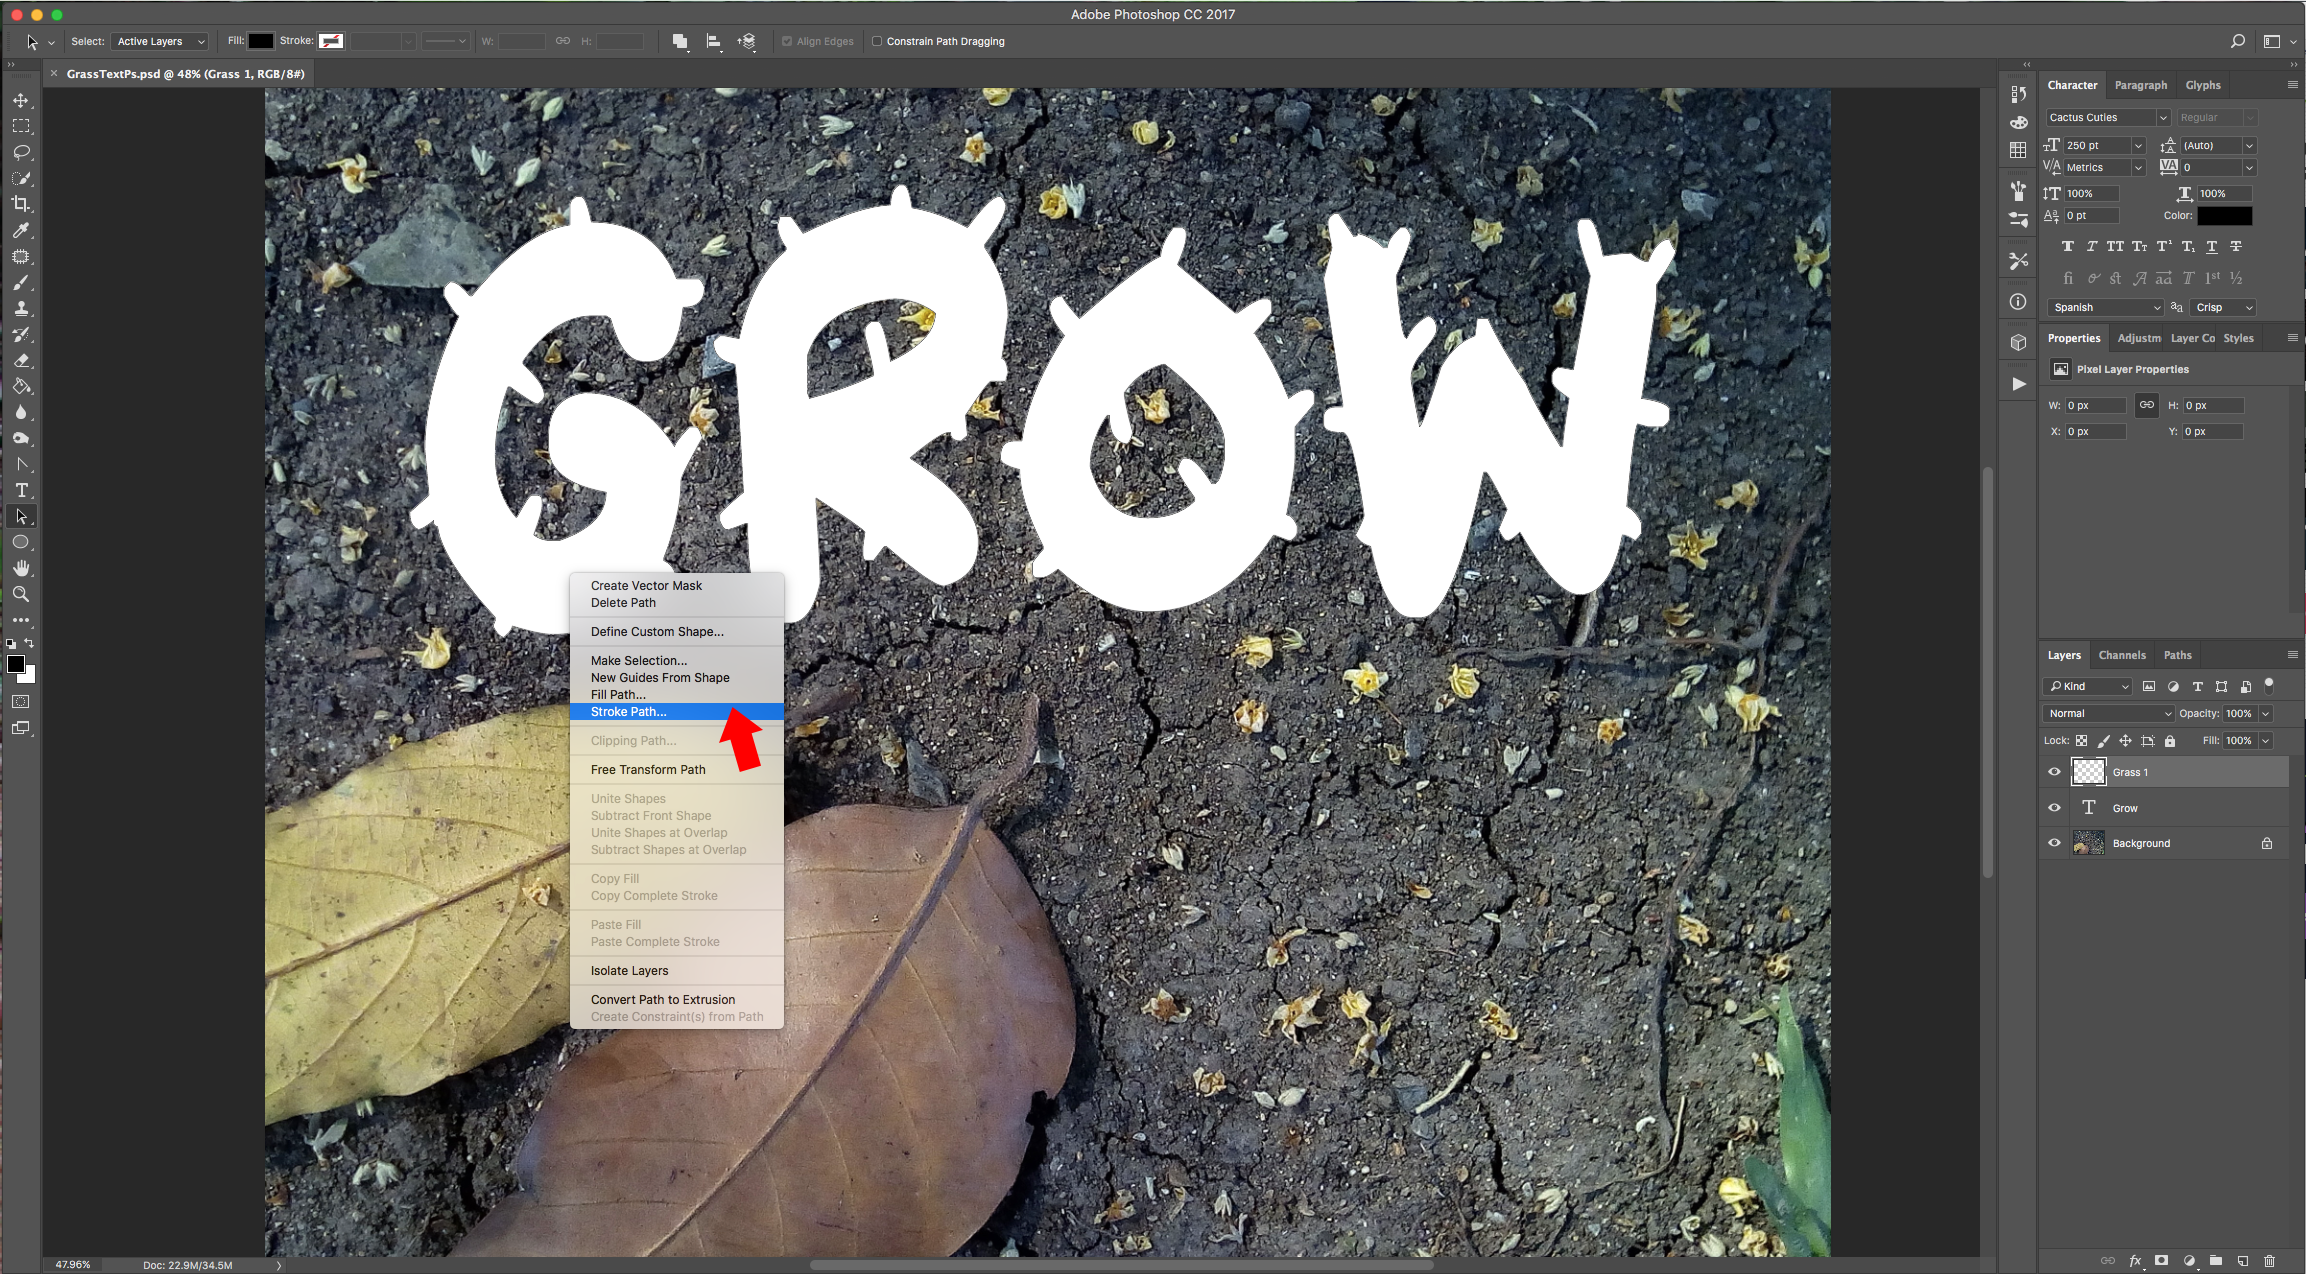
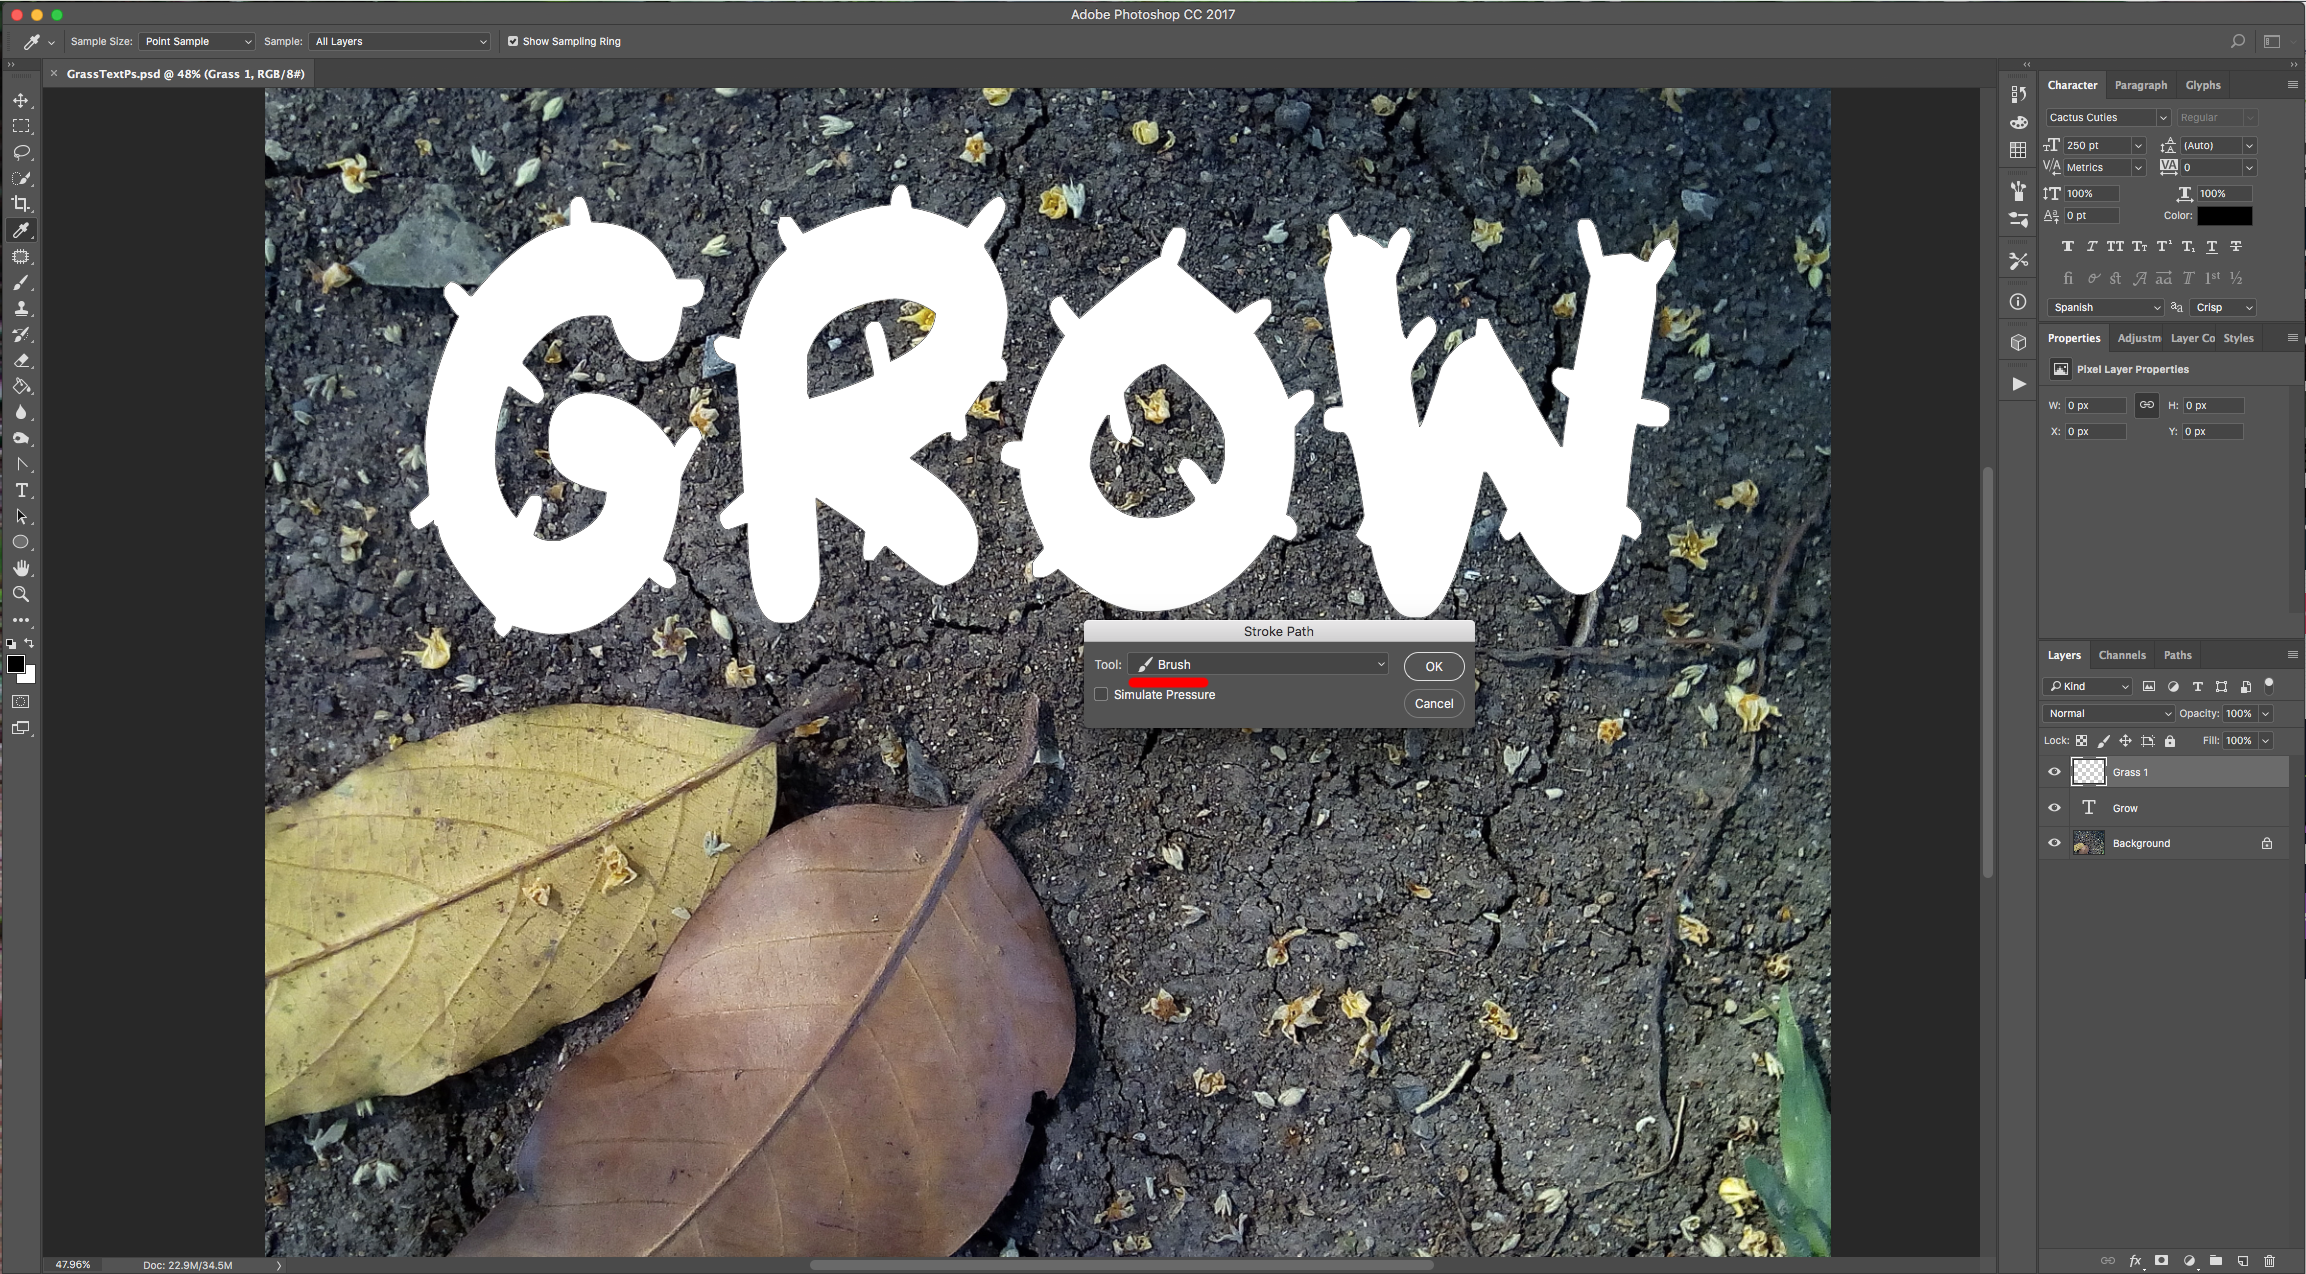
9 - Go to the “Paths Panel” and click on the “Work path” to select it. Back in the “Layers Panel”, select the “Grass 1” layer. Choose the “Grass 1” brush in the “Brushes Panel”, choose the “Path Selection Tool” (A), right-click on top of the text and choose “Stroke Path”. Use “Brush” as “Tool”.
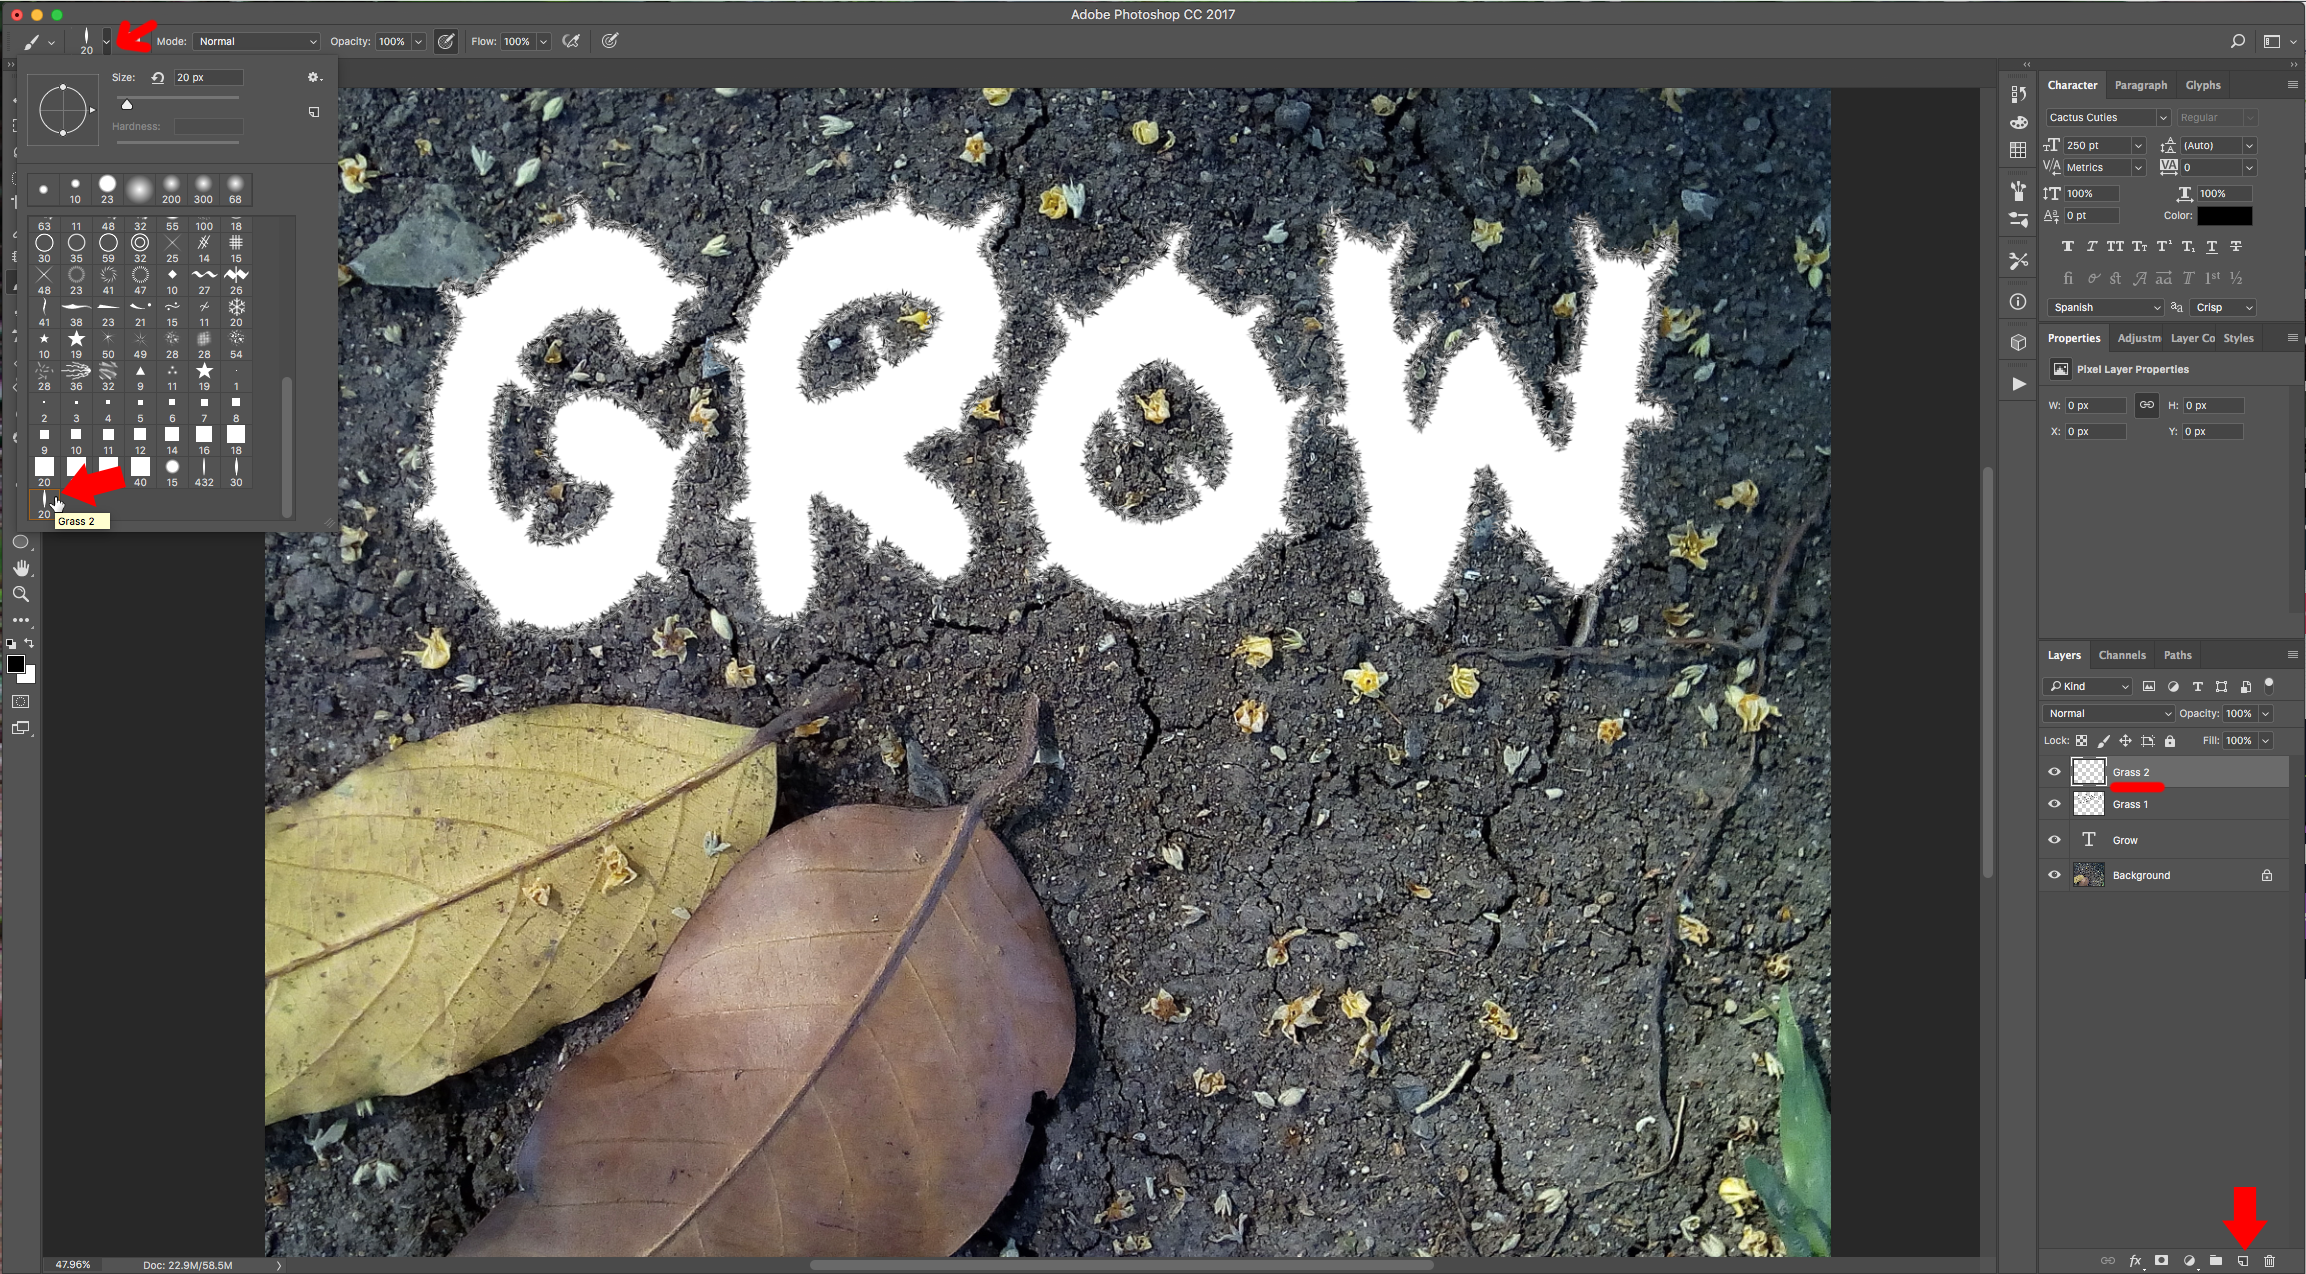
10 - Create another layer, name it “Grass 2”, select the “Grass 2” brush and repeat the “Stroke Path”. Deselect or delete your “Work Path”.
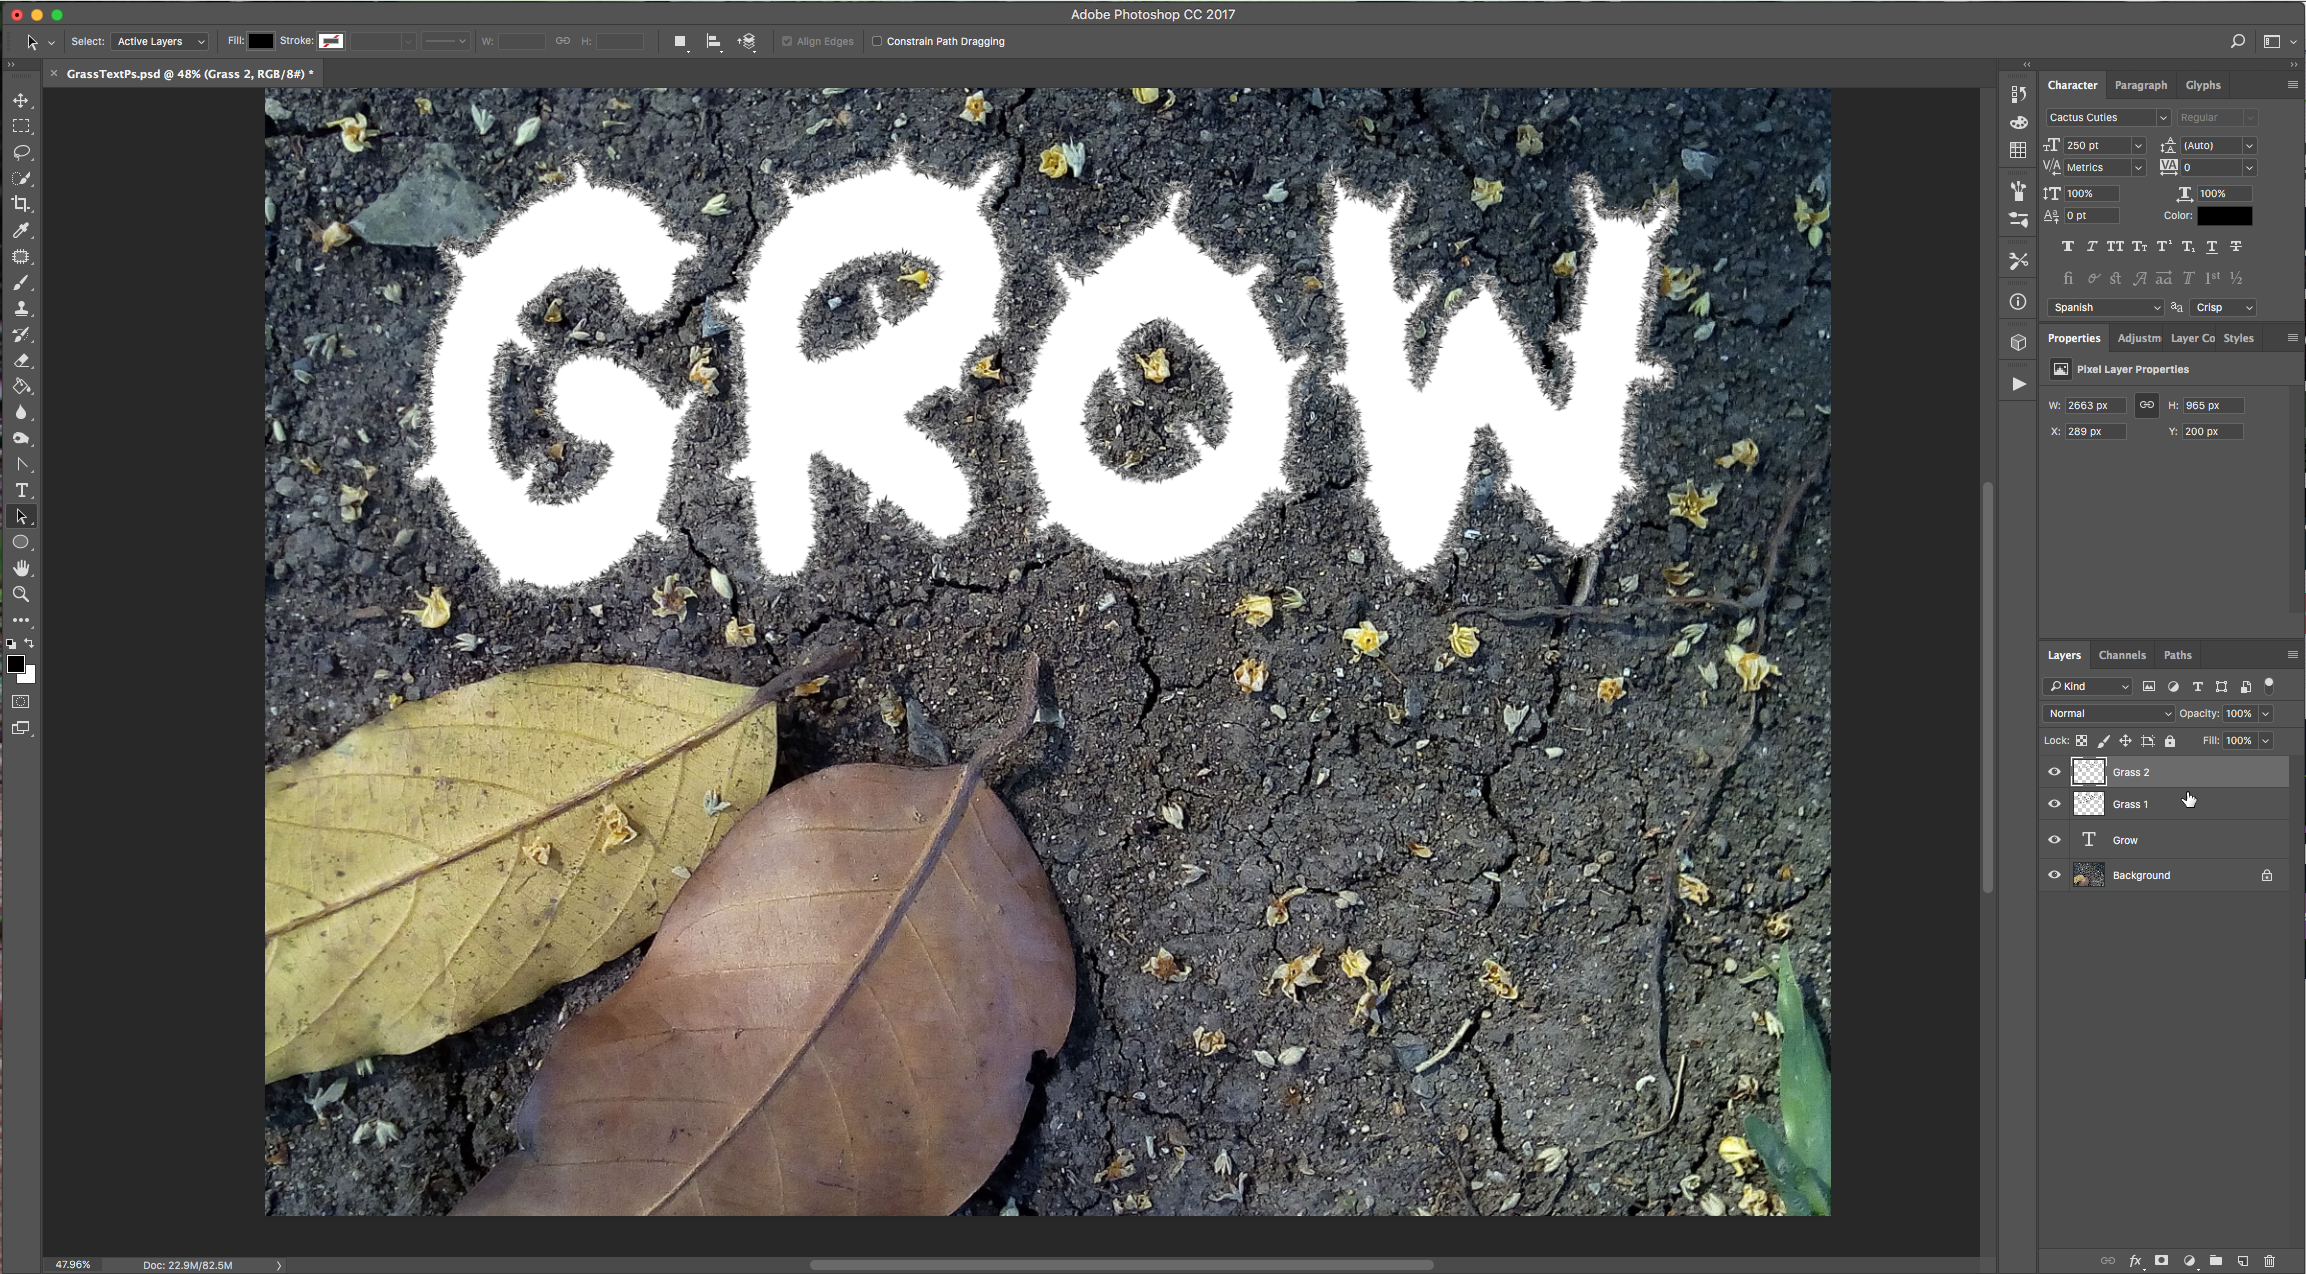
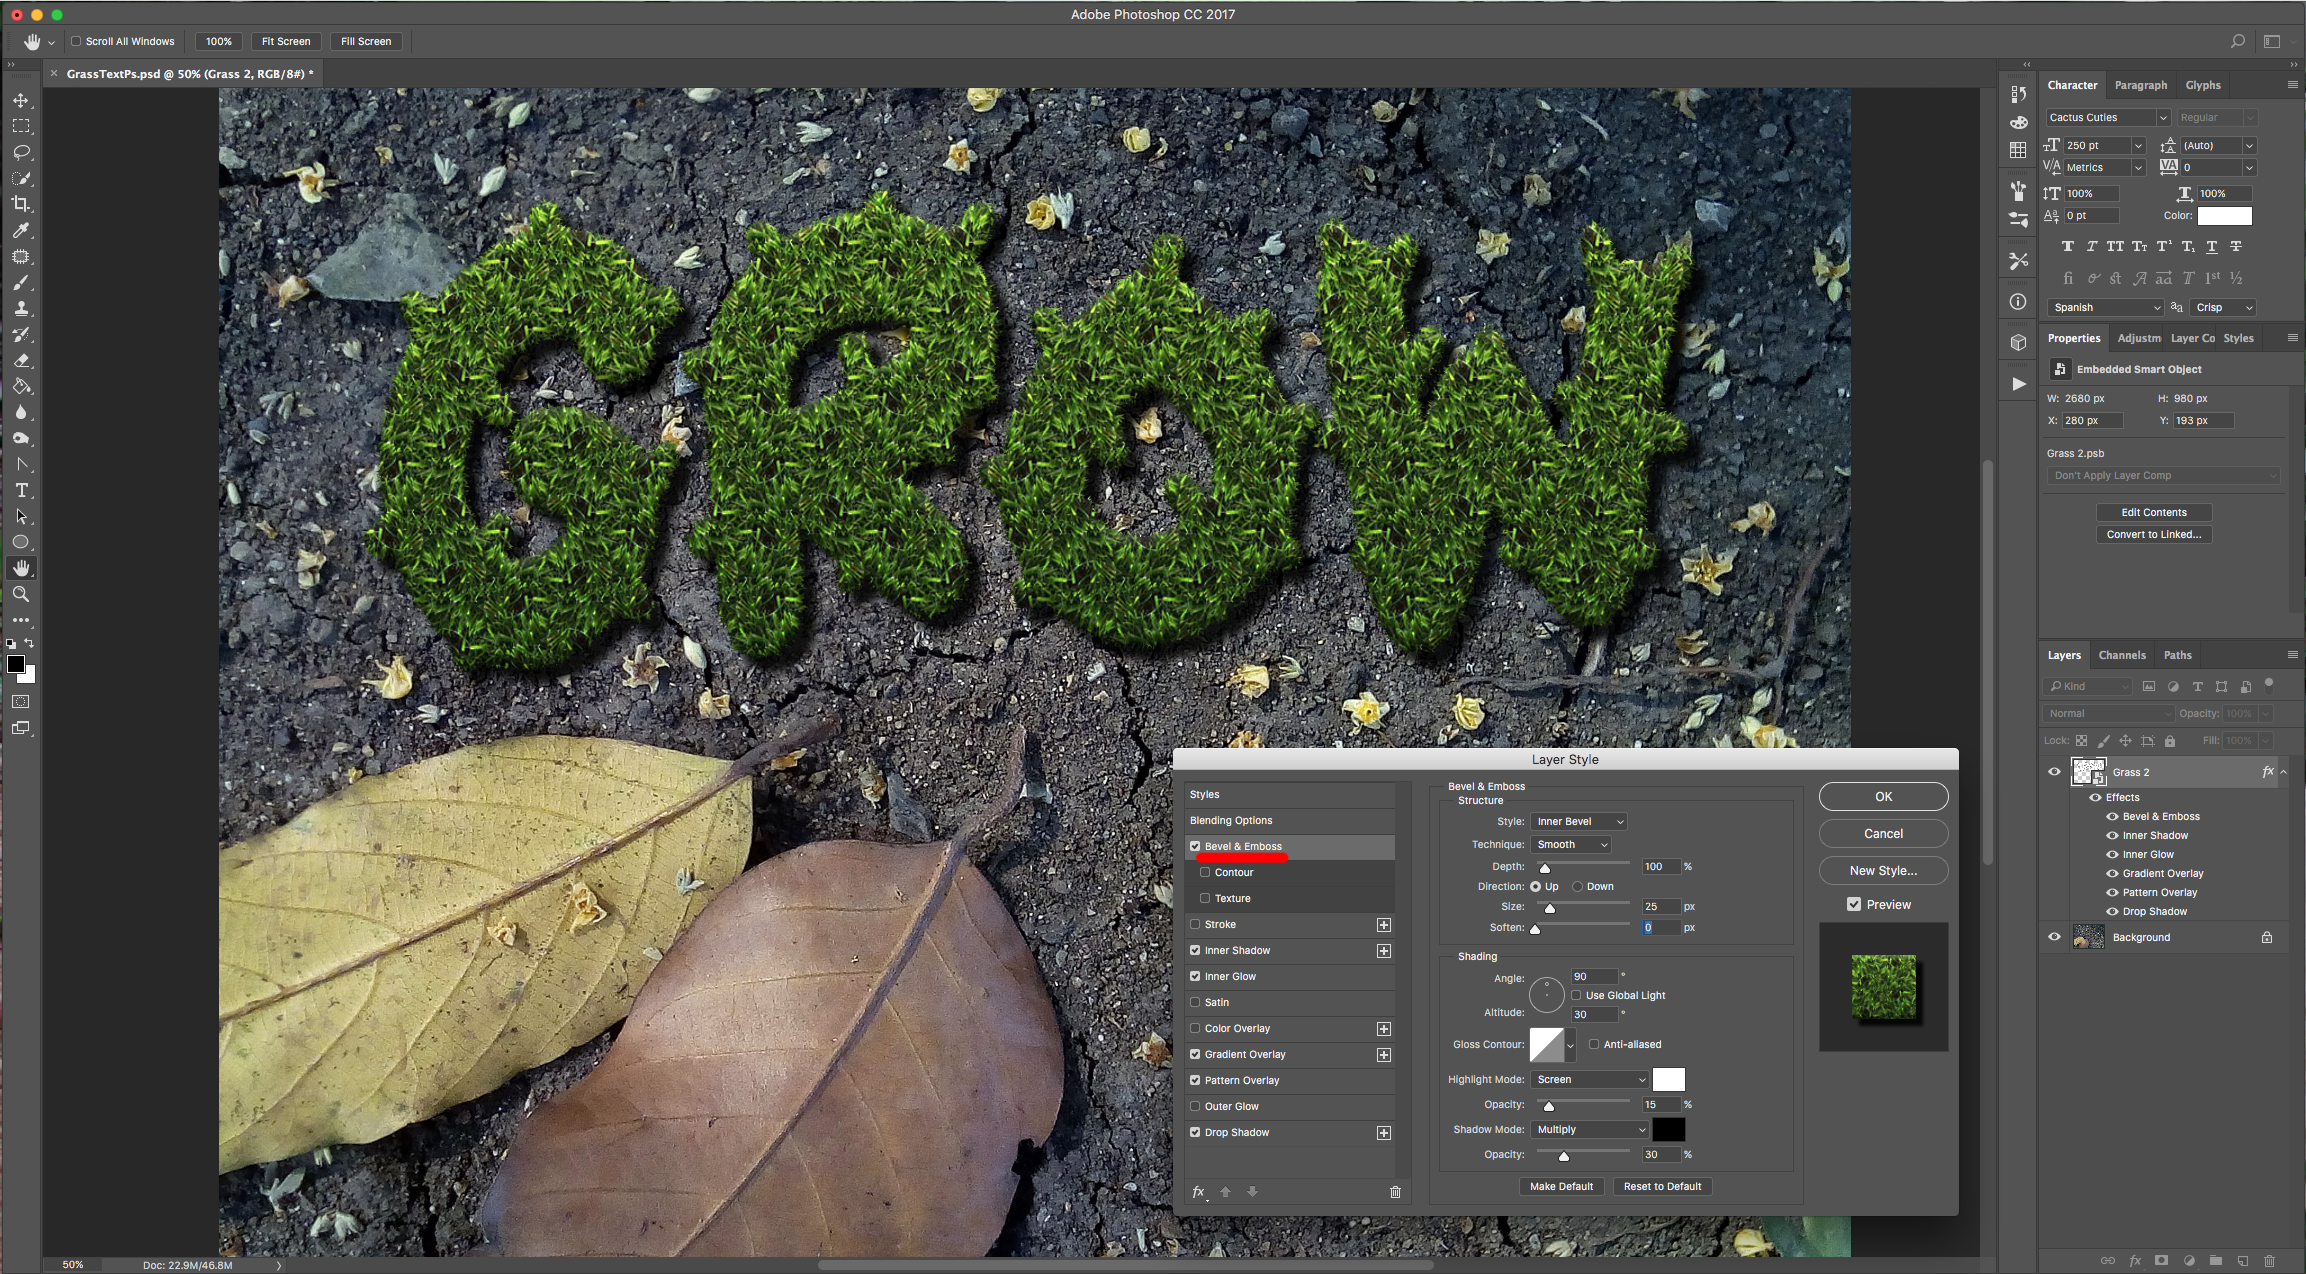
11 - Select the 3 Text-related layers (Hold “Shift” key), right-click on top of their Thumbnails and choose “Convert to Smart Object”. Double-click on top of its Thumbnail and apply the following “Layer Styles”:
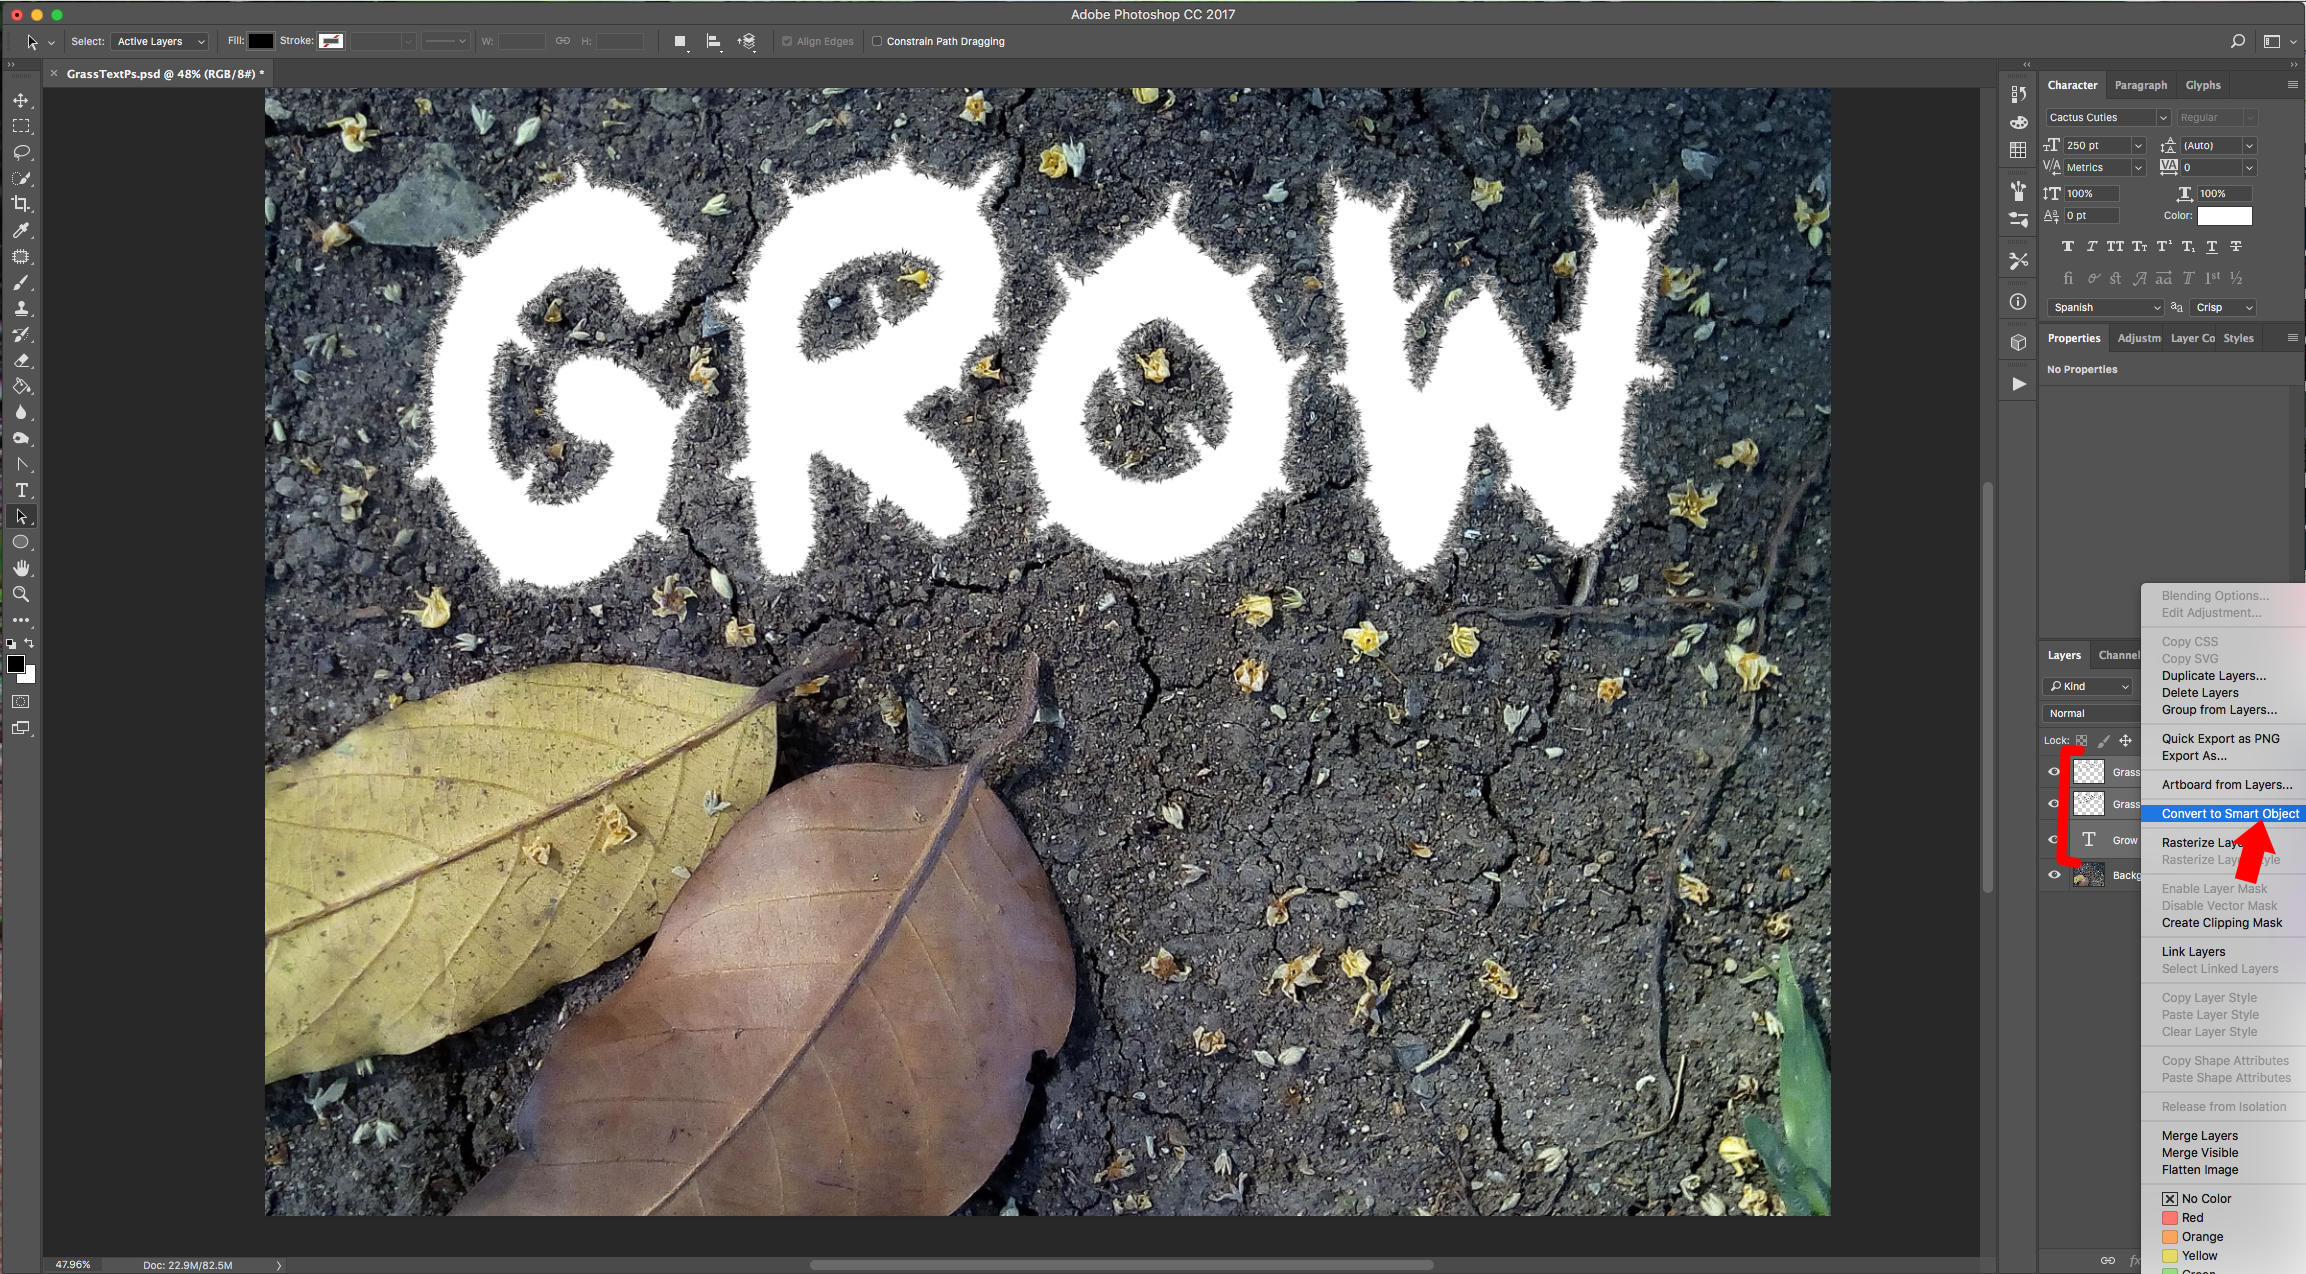
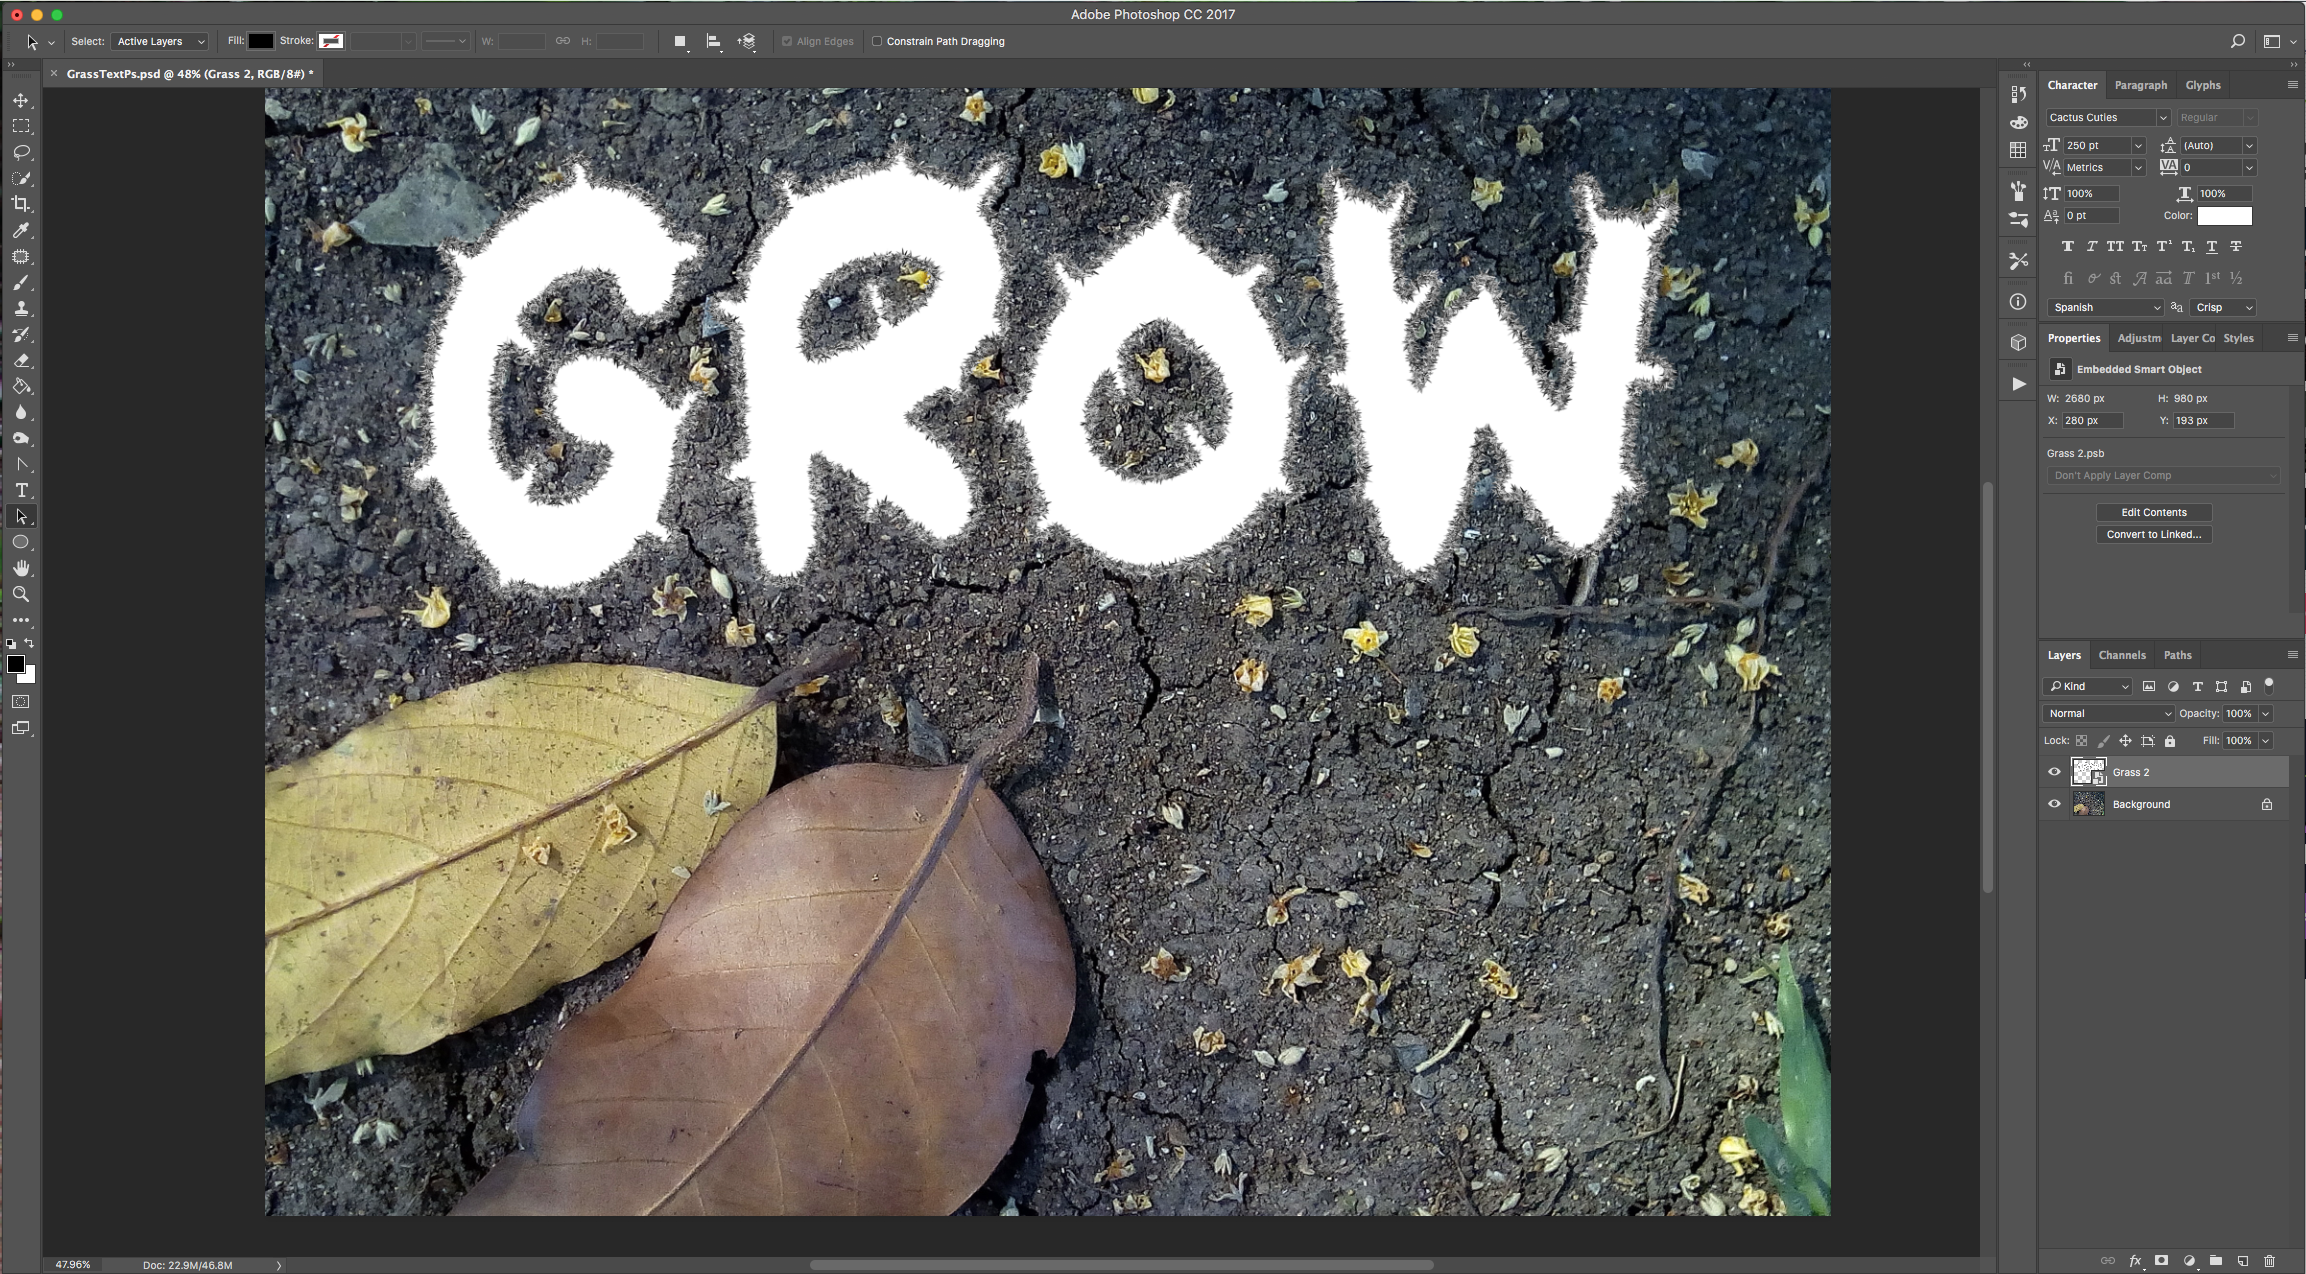
Bevel & Emboss:
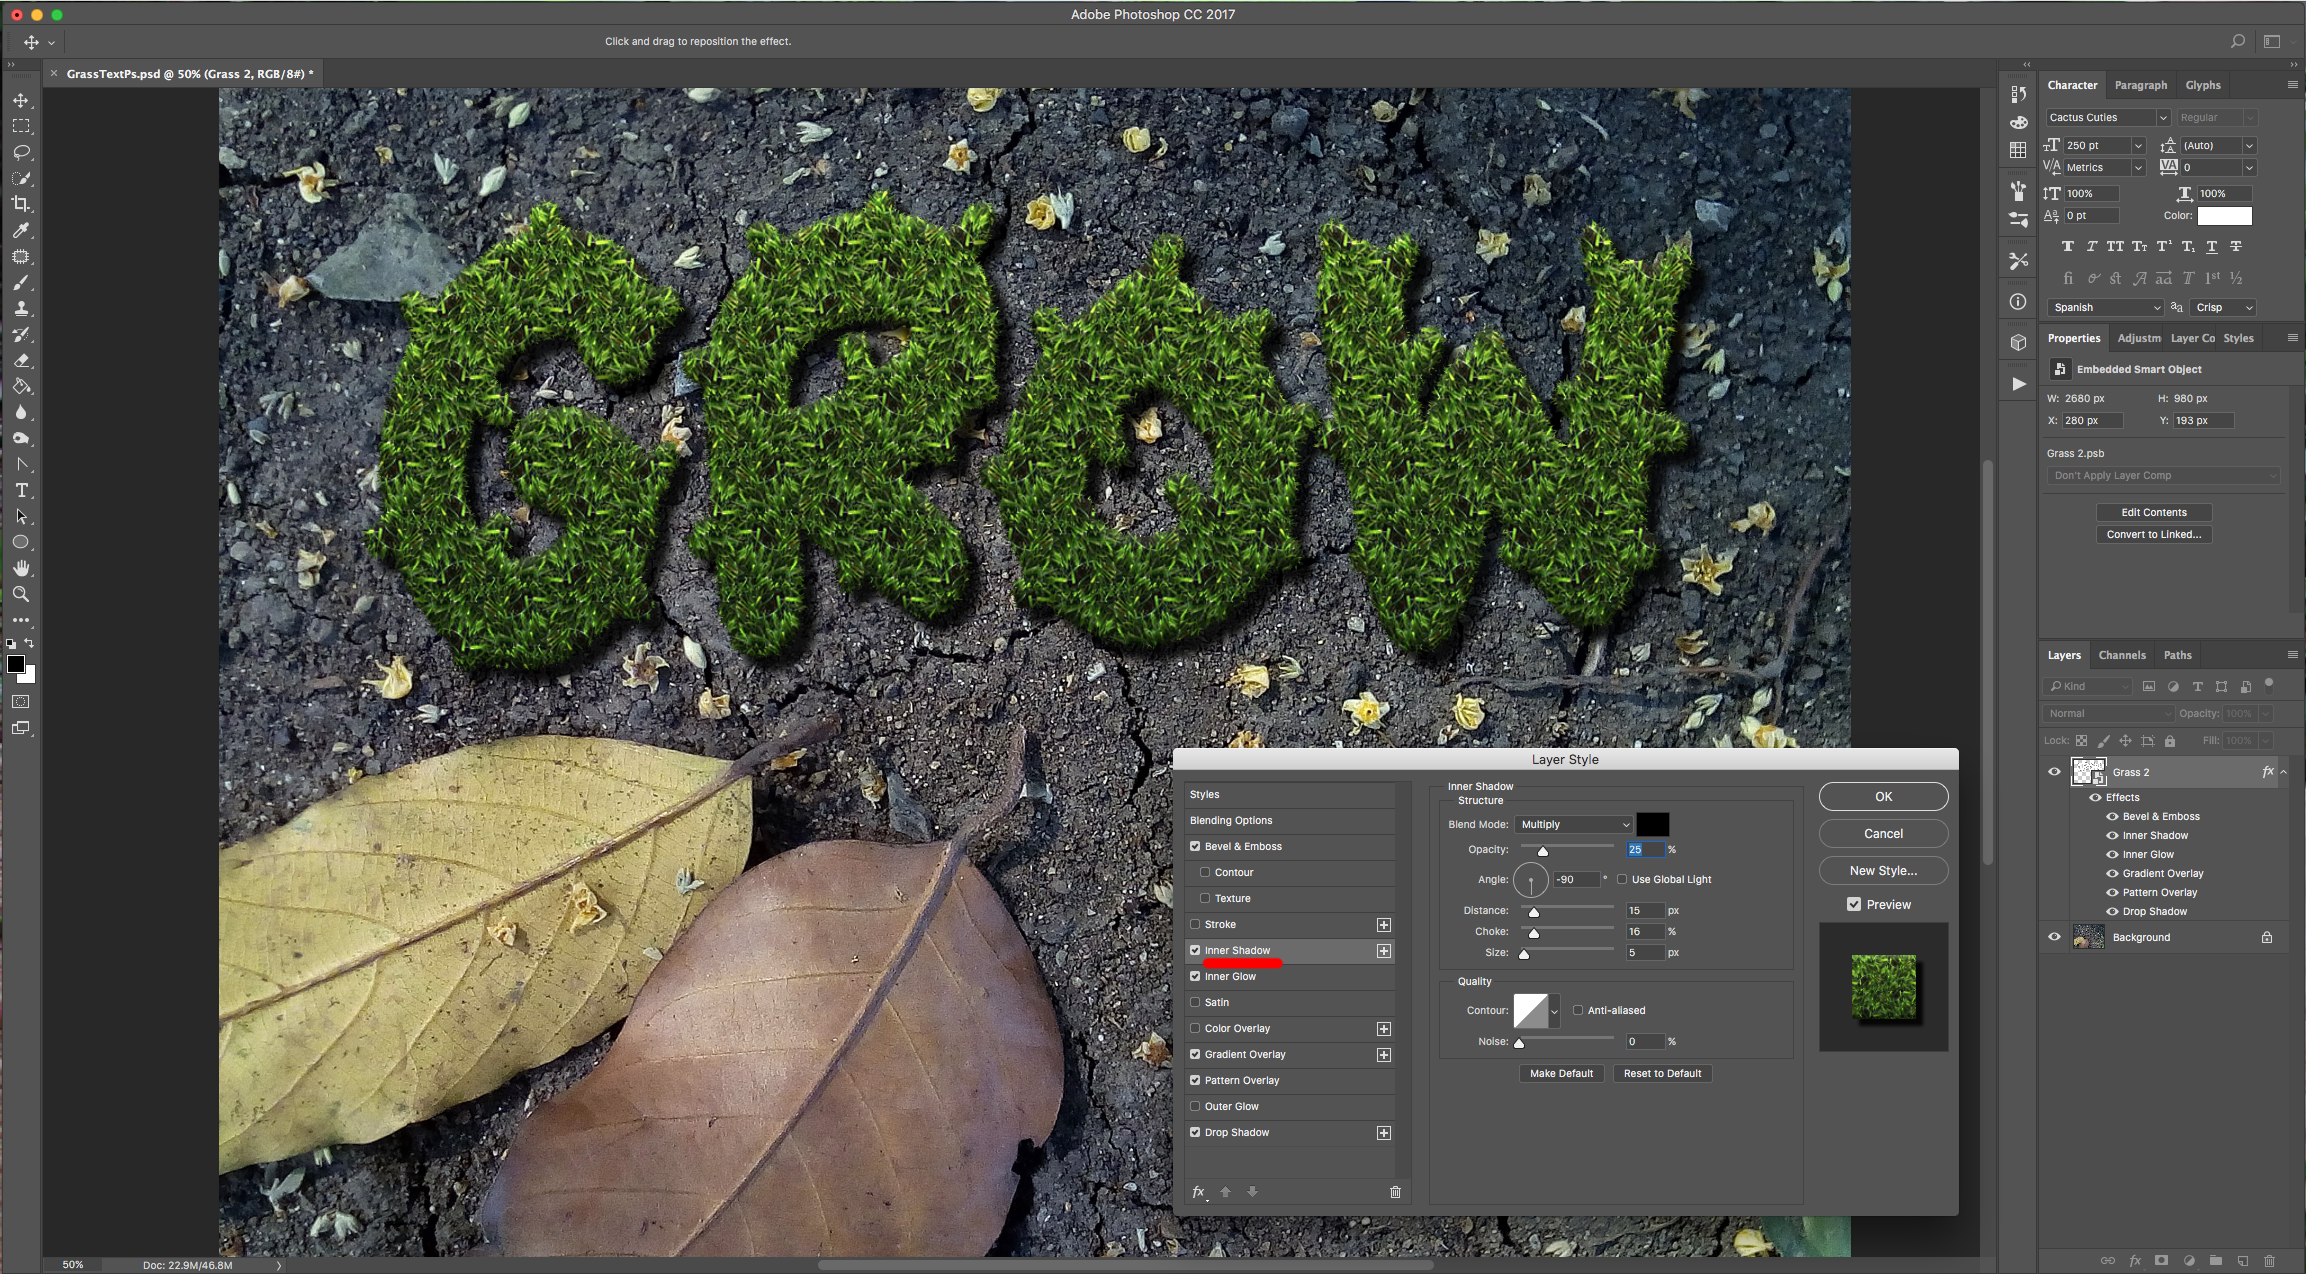
Inner Shadow:
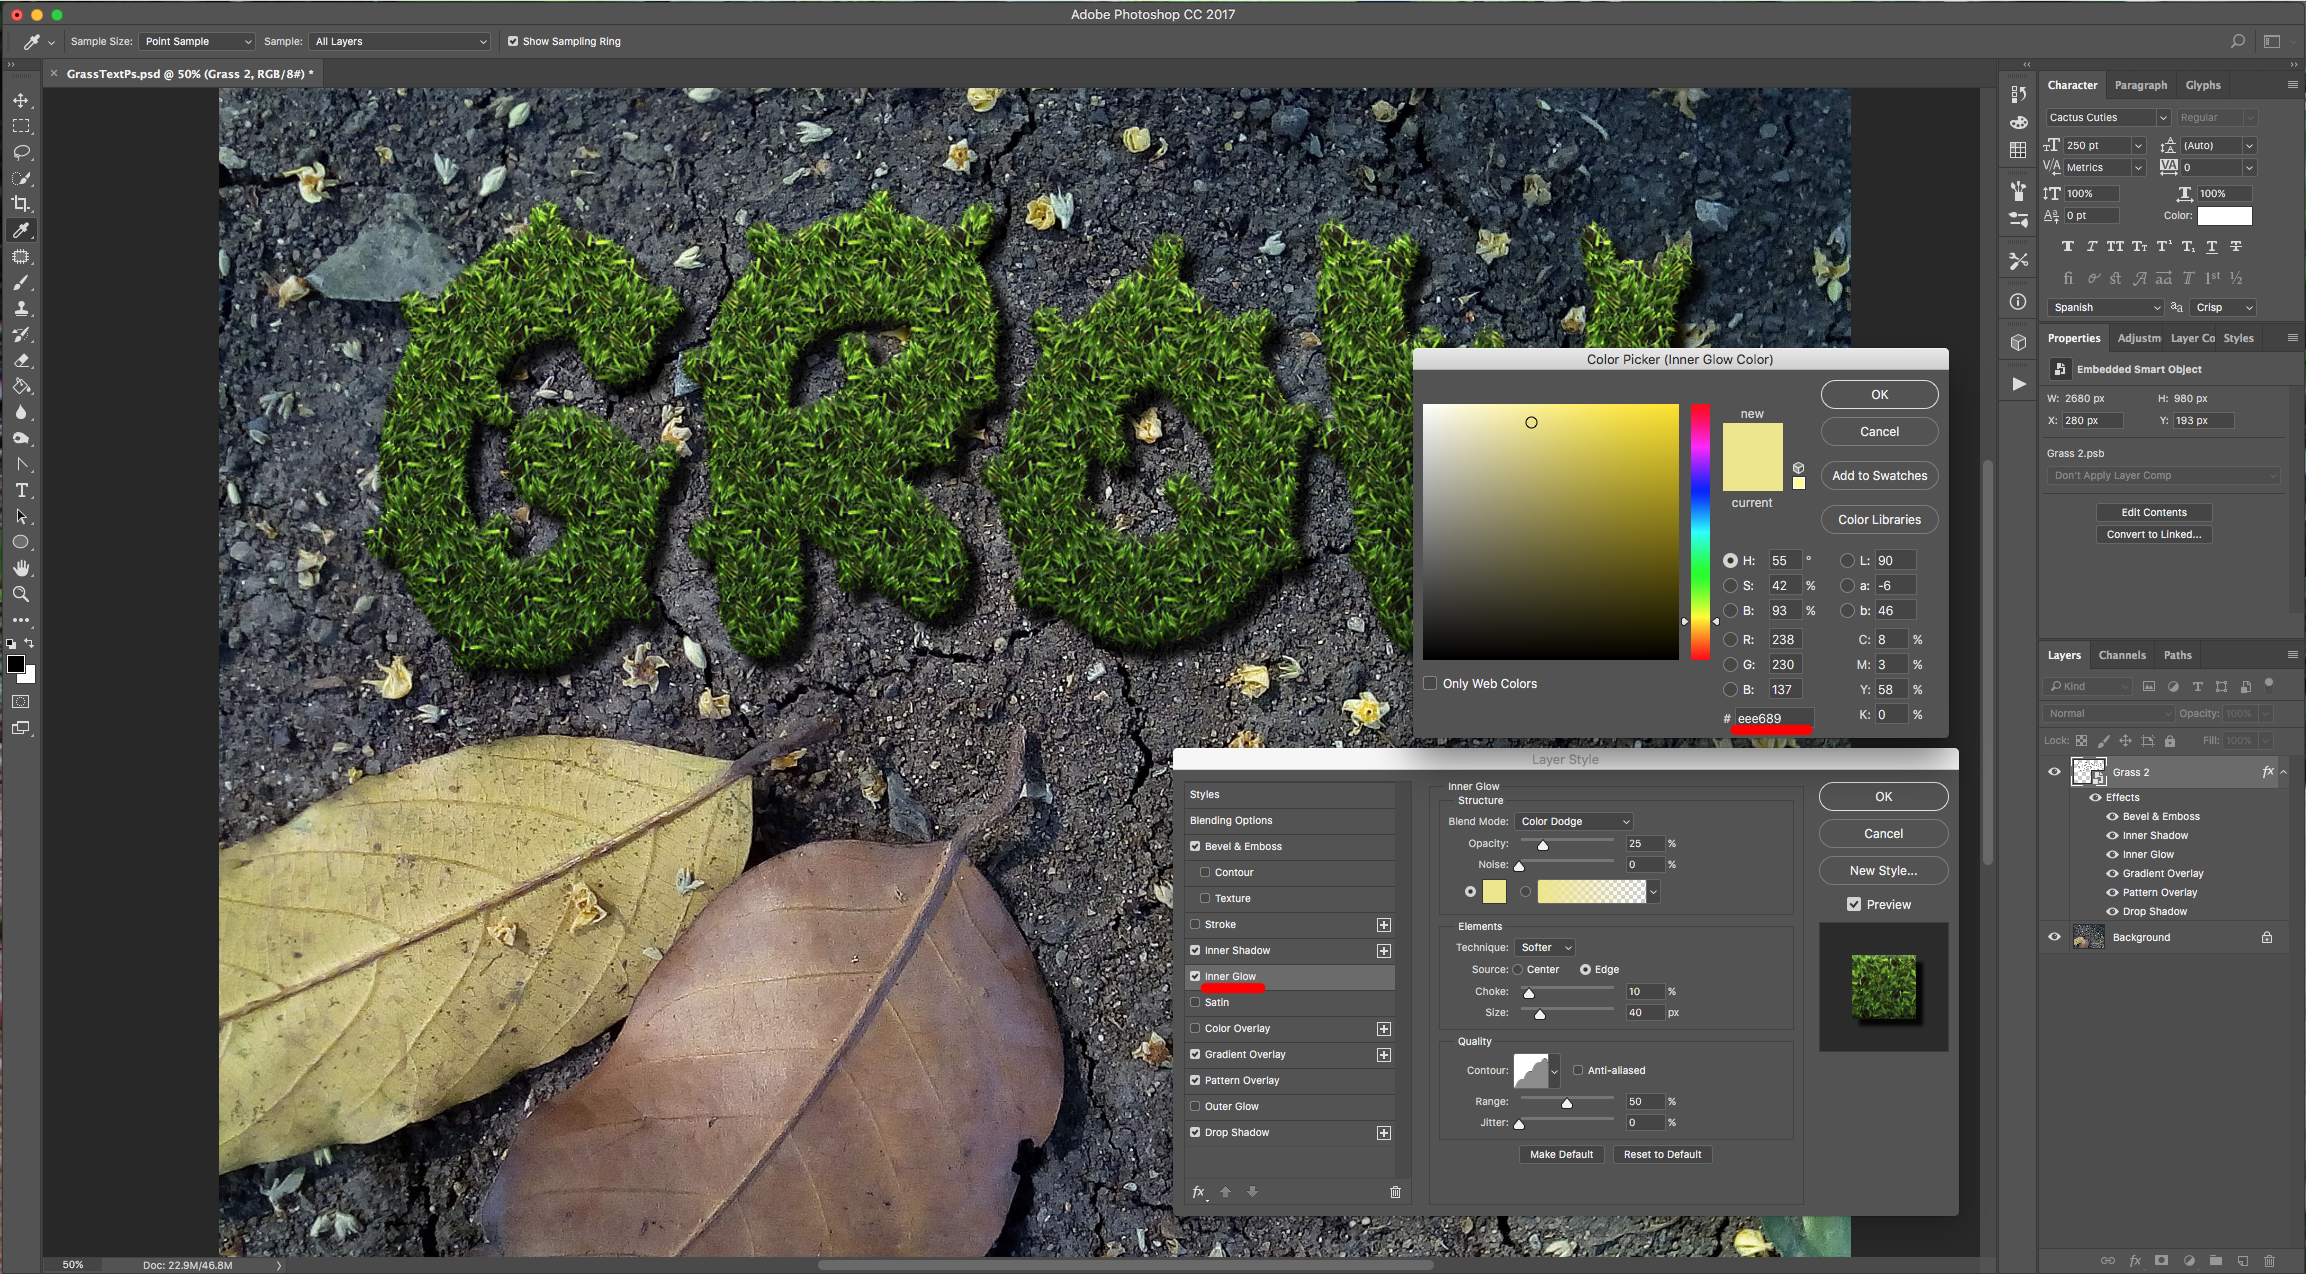
Inner Glow: (#eee689. Contour: “Rounded Steps”)
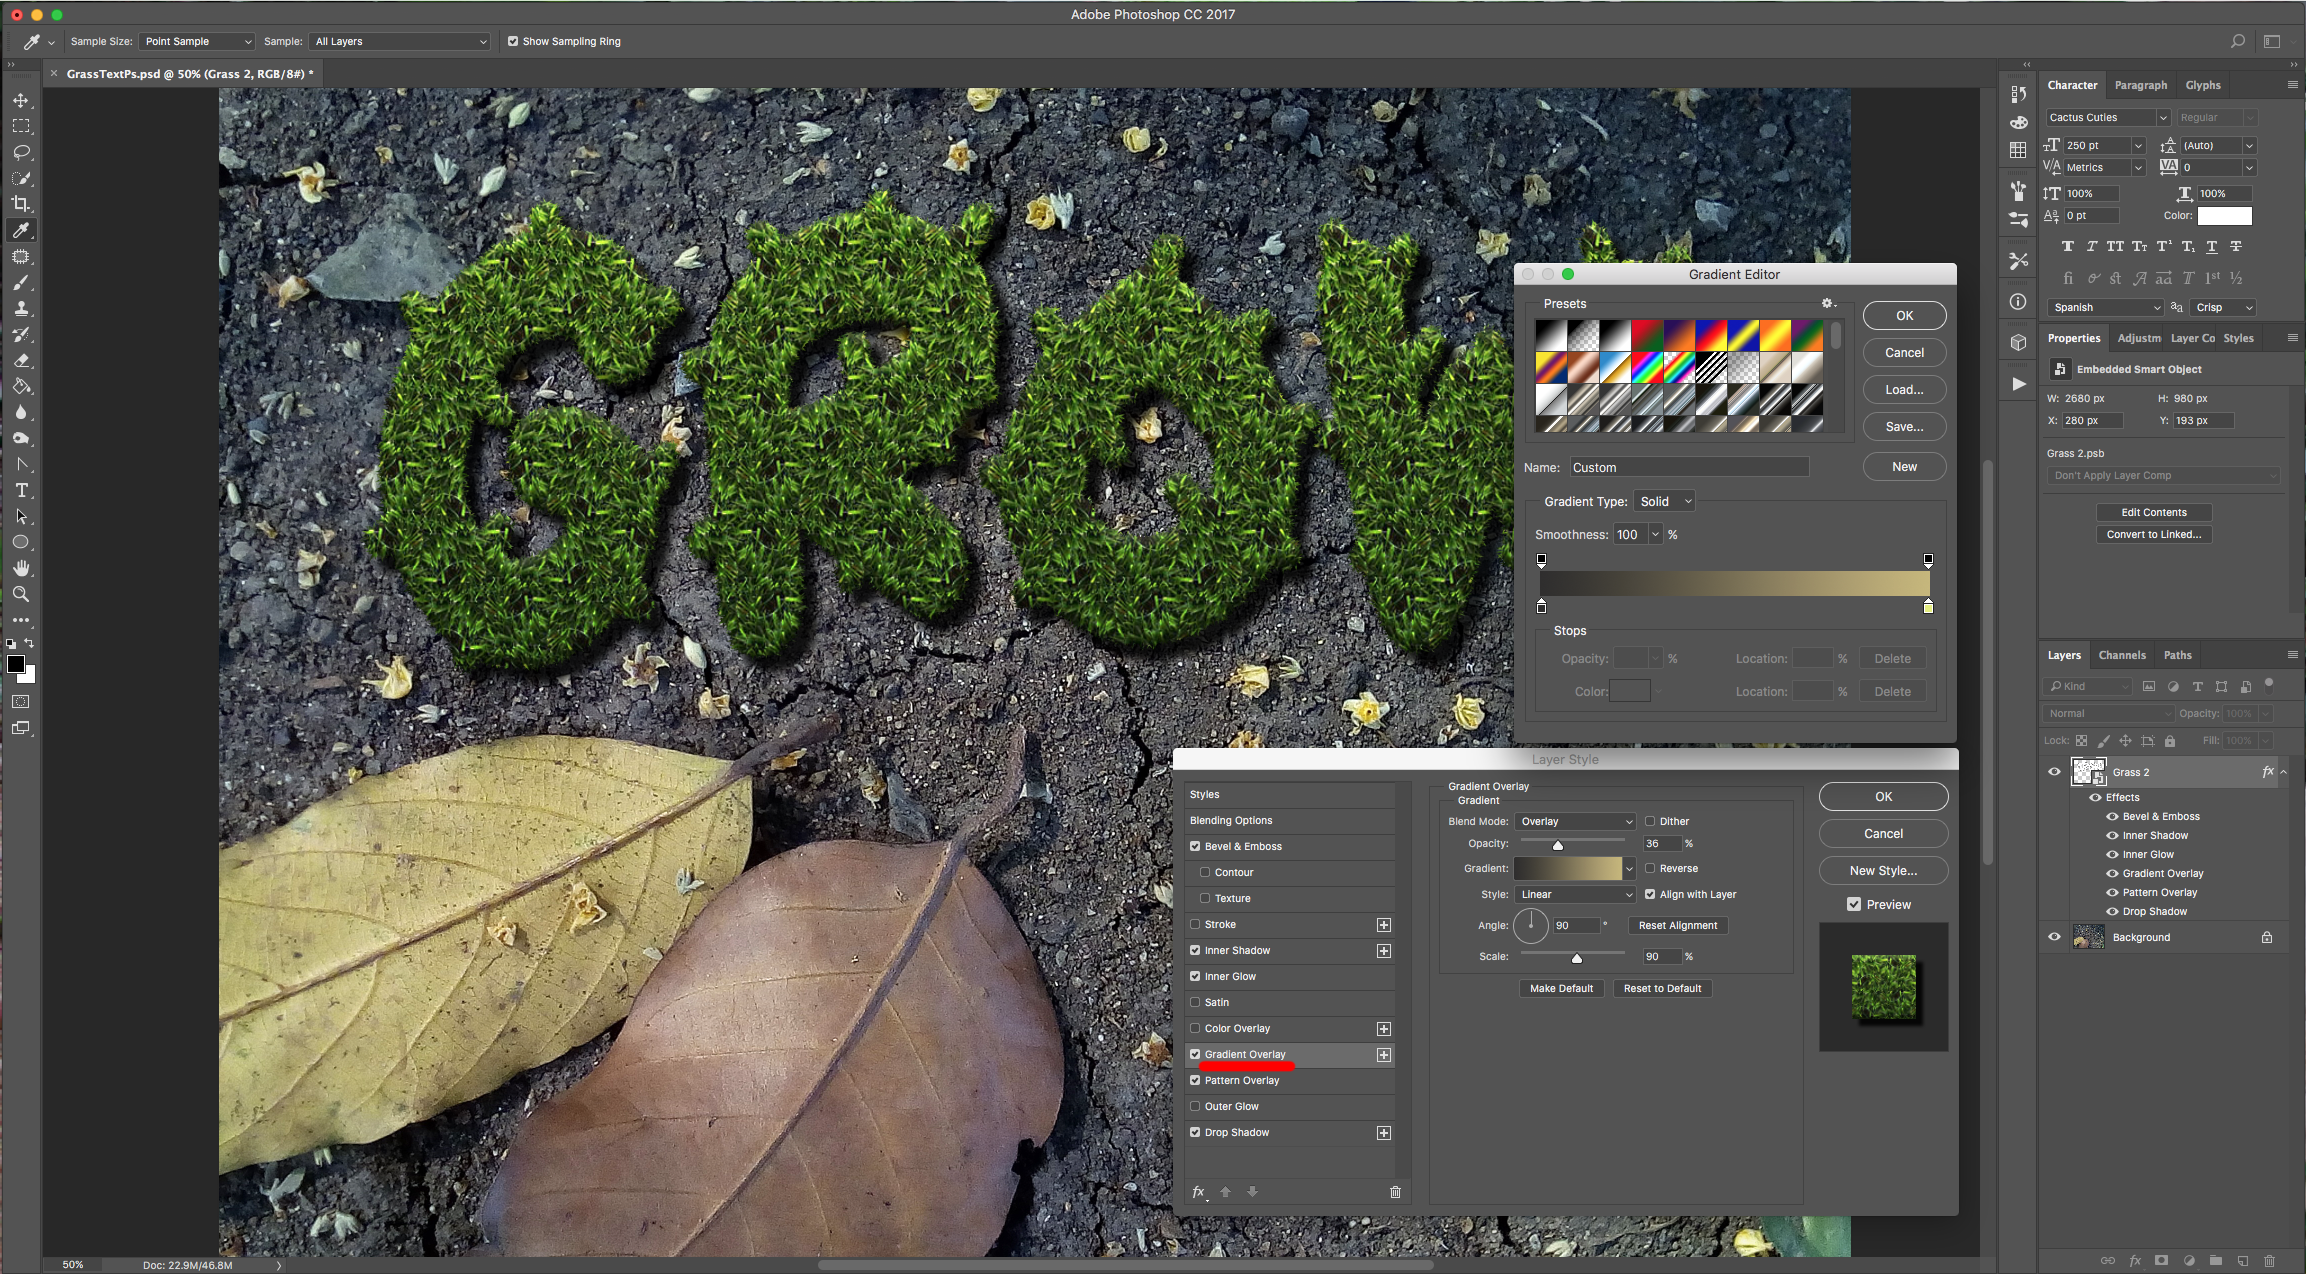
Gradient Overlay: (#2f2e2e and #c6b879)
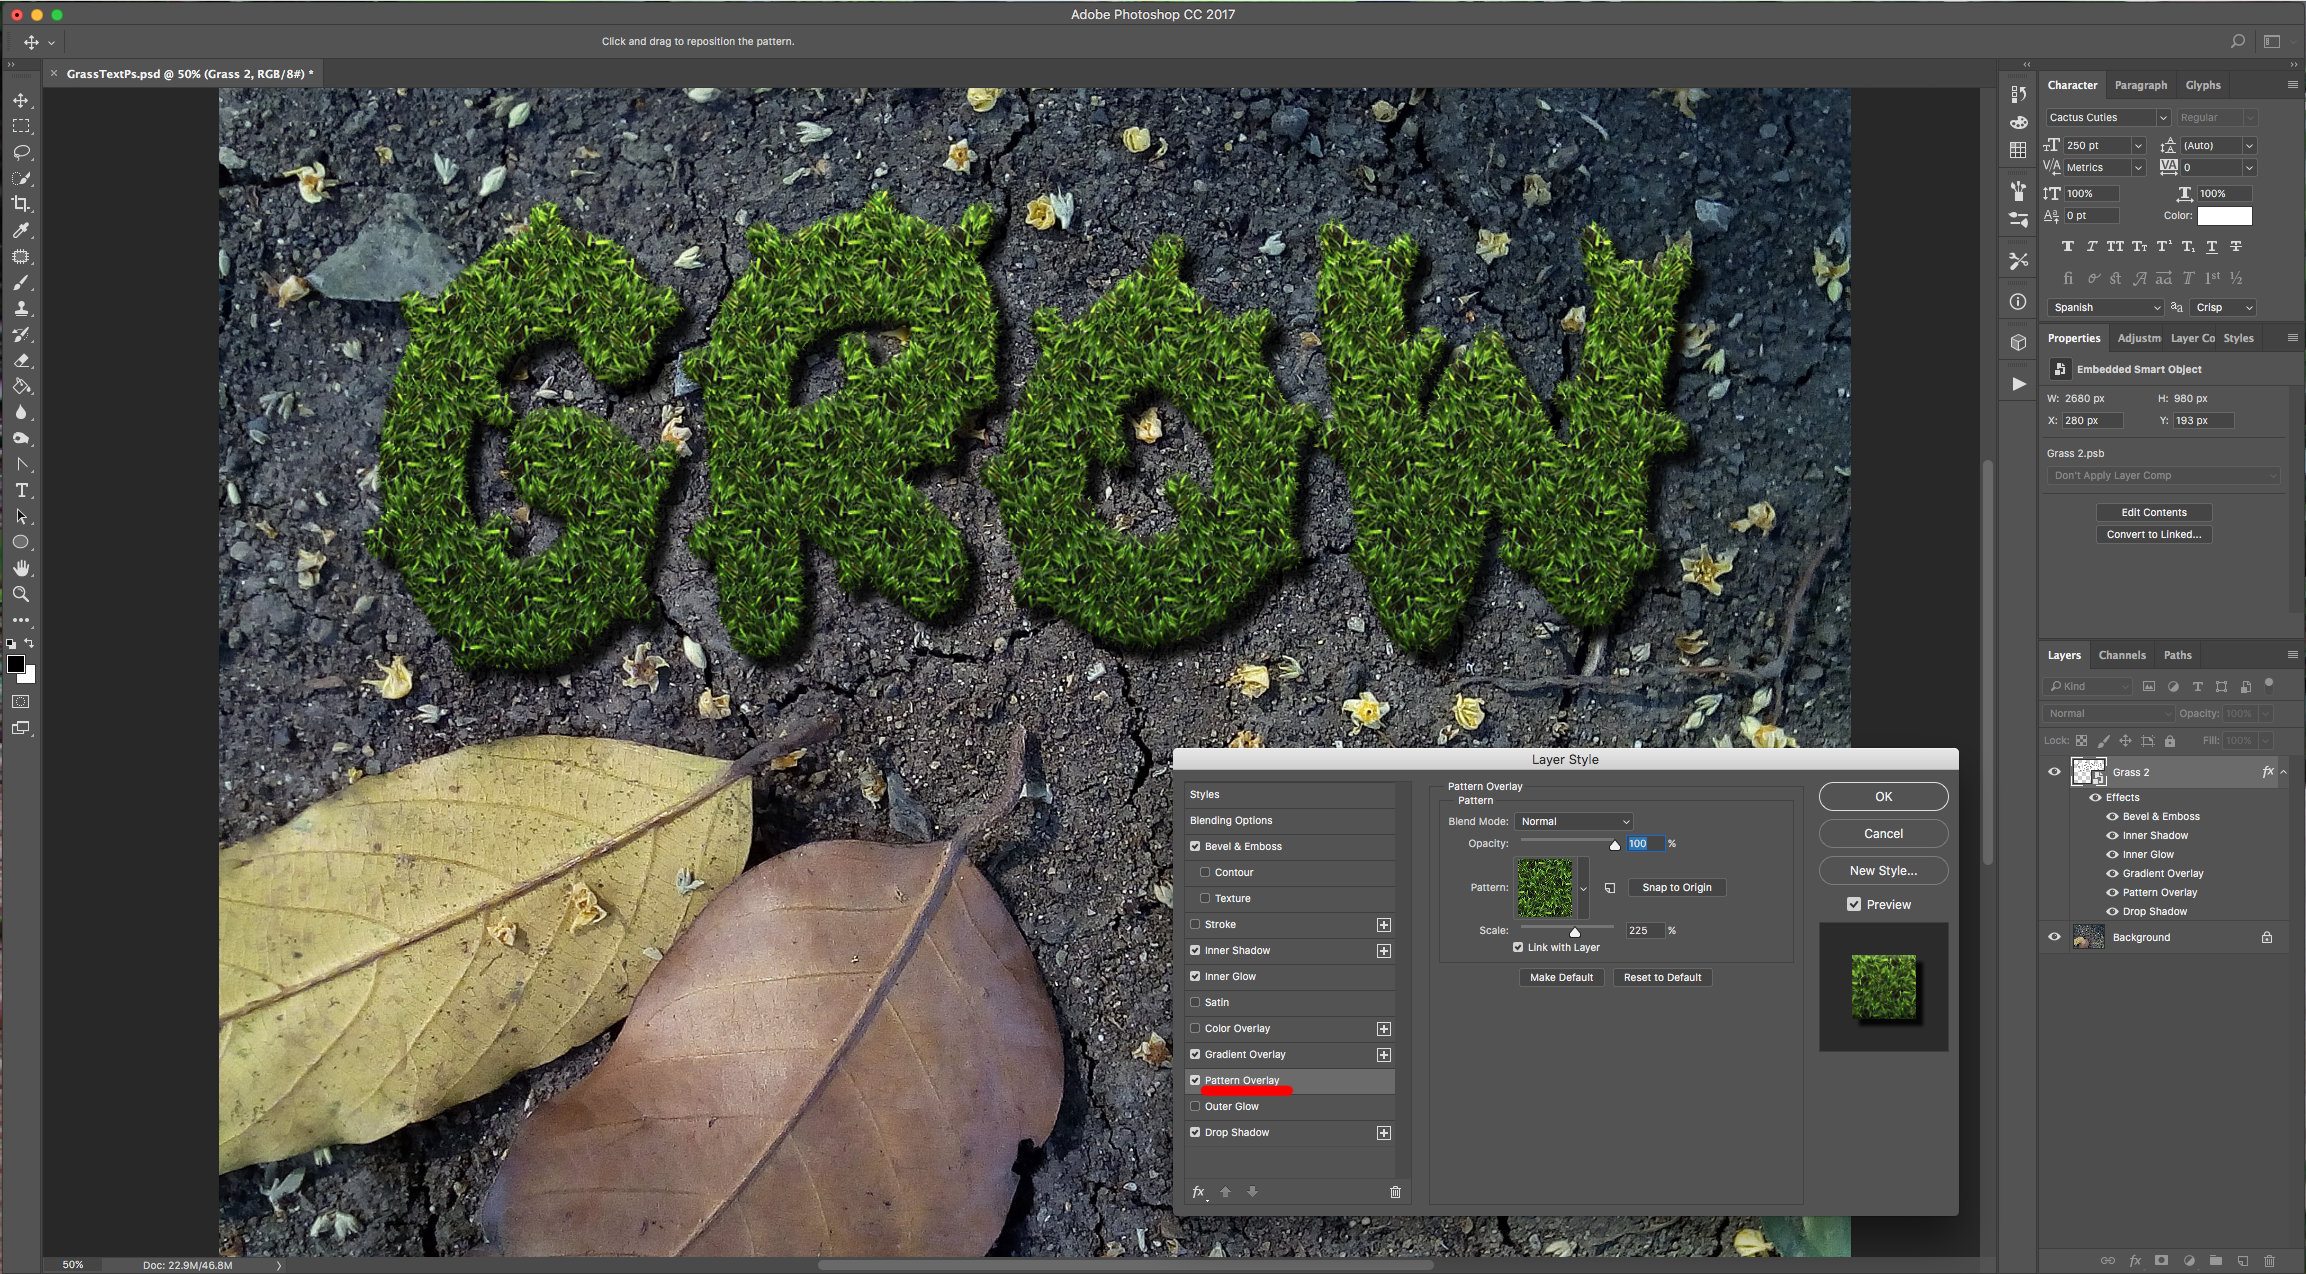
Patter Overlay: (use the one you loaded earlier)
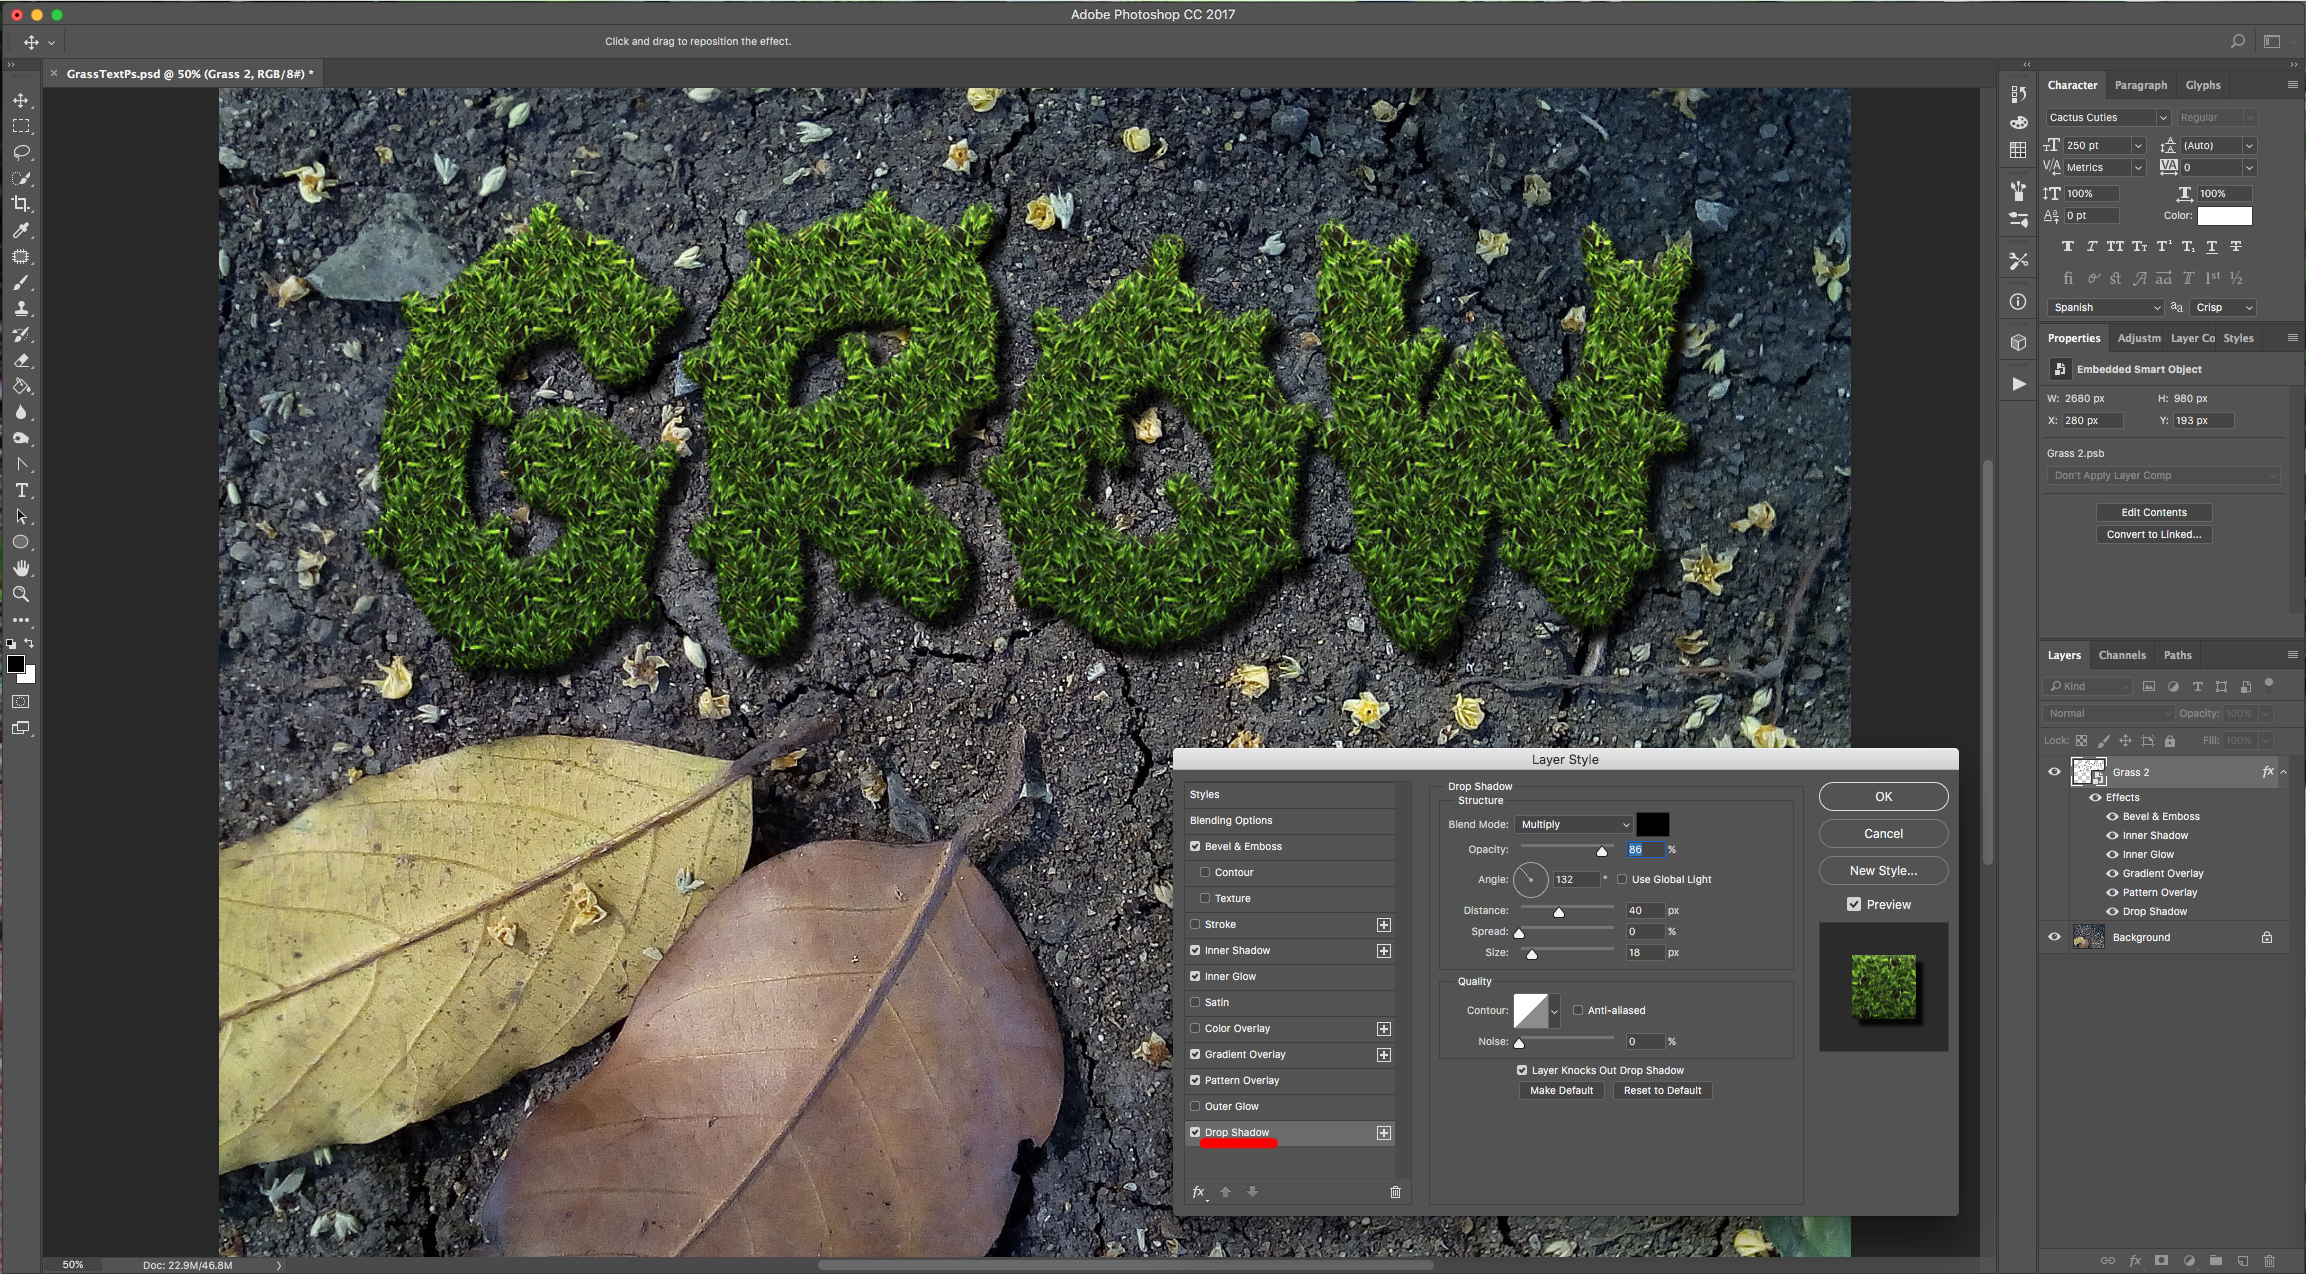
Drop Shadow:
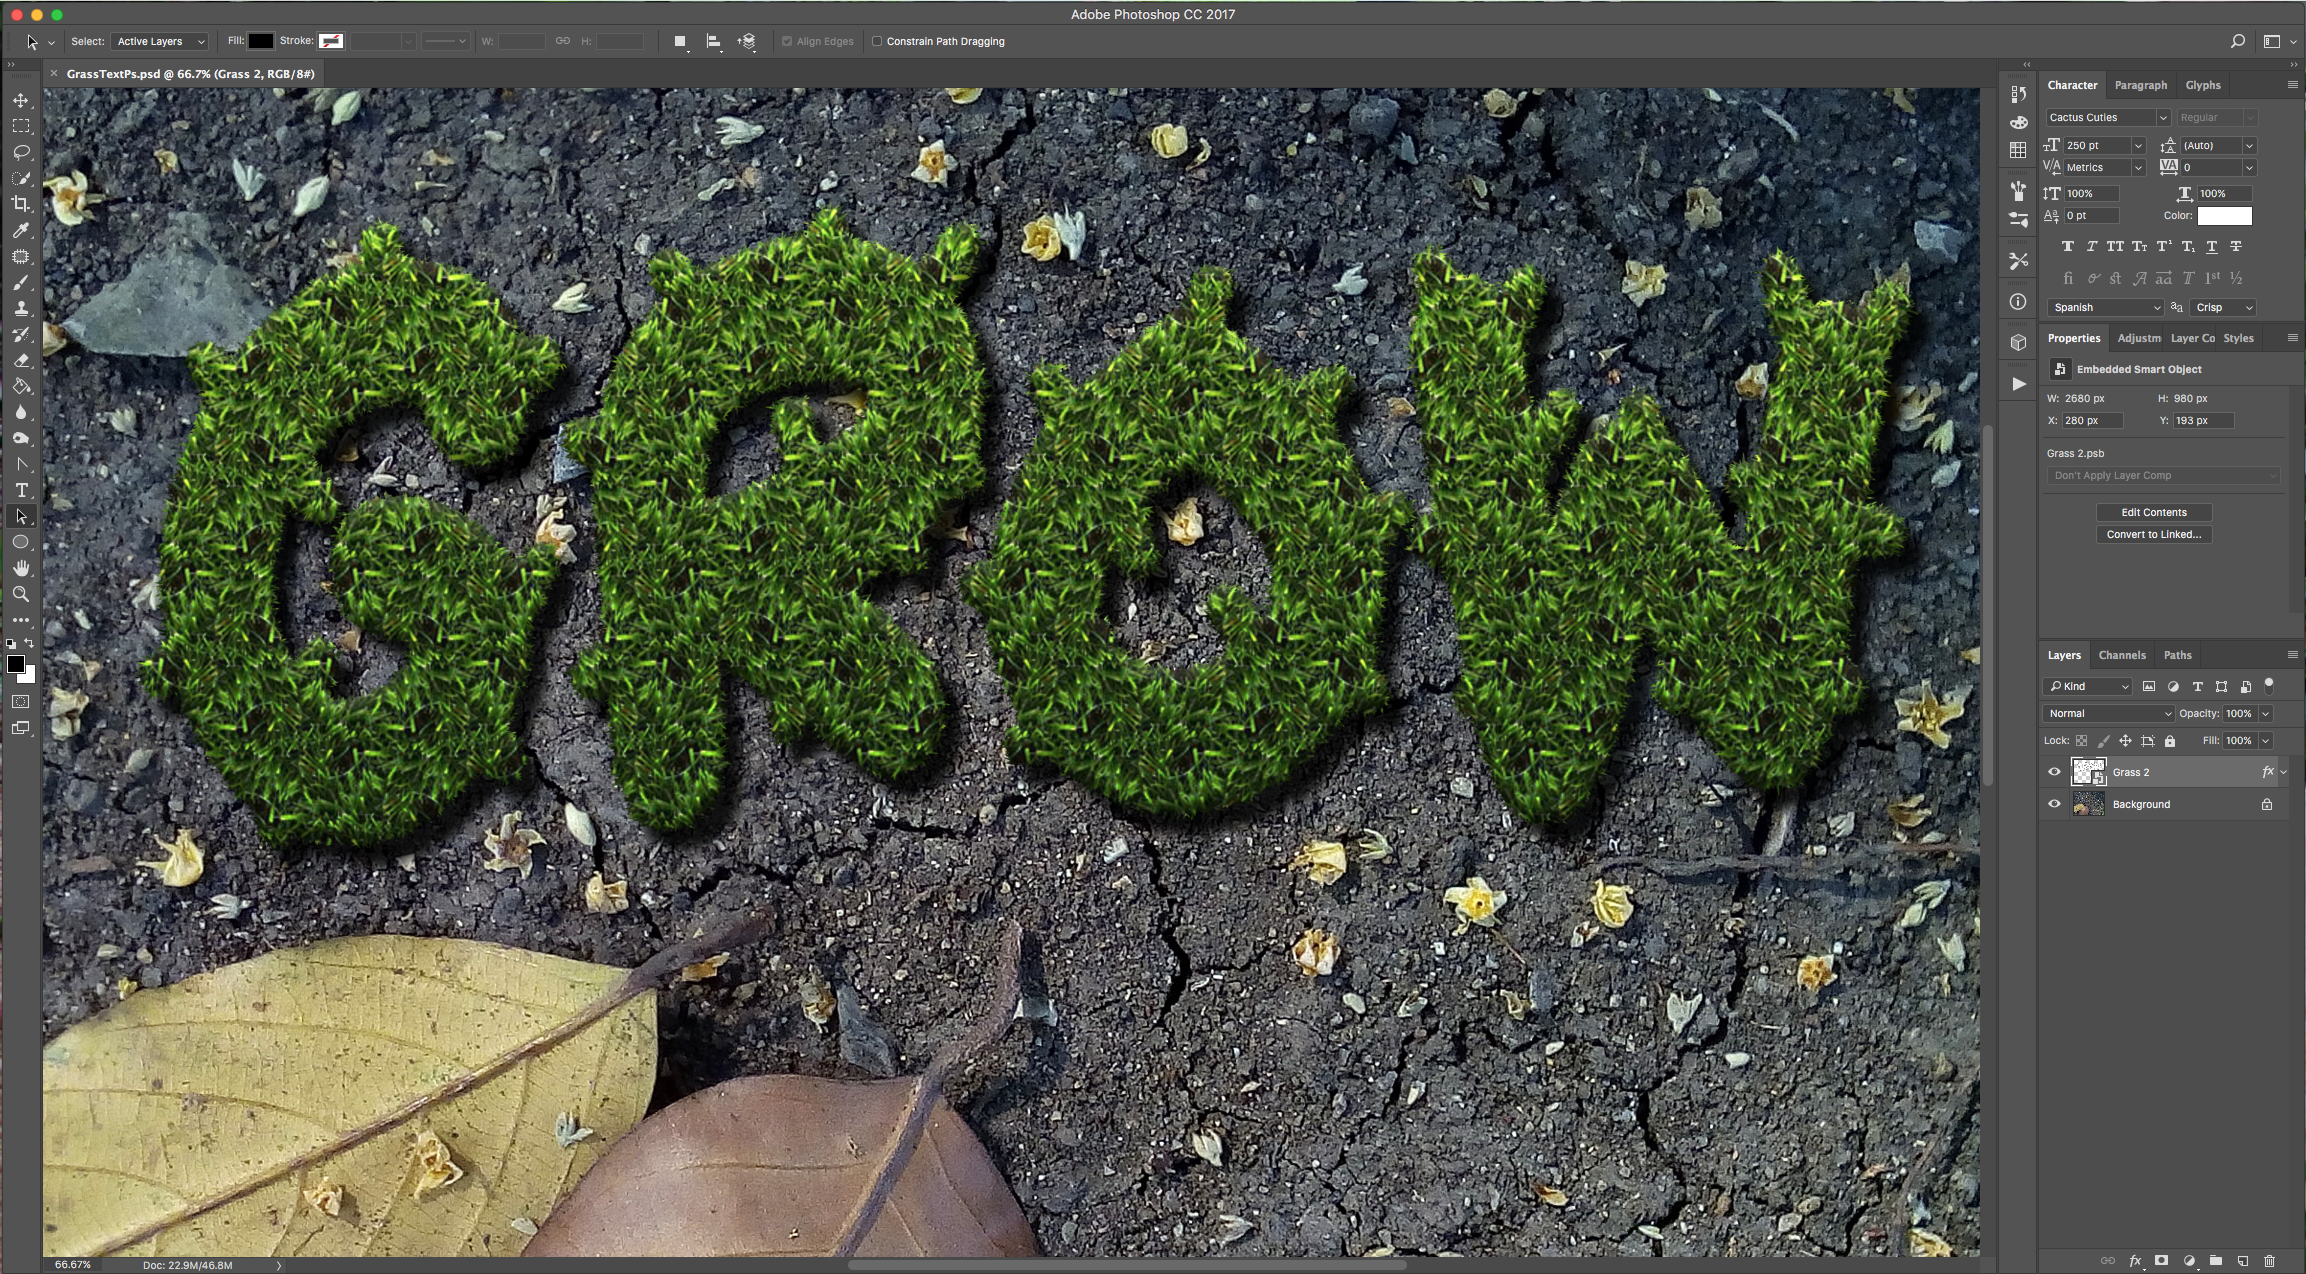
12 - Your text should be similar to this.
1 - In Photoshop, open the file you chose as “Background”.
2 - Select the “Type Tool” (T), select your font (we used “Cactus Cuties”), and type your text.
3 - Go to Type > Create Work Path. It should be saved in the “Paths Panel”.
4 - To load the Grass Pattern, go to Edit > Presets > Preset Manager, choose “Patterns” and load yours. Click on the small button at the bottom of the “Layers Panel” to create a “New Layer” and name it “Grass1”.
5 - Create a “New Document”, make it 350 x 450 Pixels @ 300 dpi with a “Transparent” background. Select the “Ellipse Tool” (L), use Black as “Foreground” color, and draw one that covers almost the whole “Height” and it’s about 55 px in “With”. Select the “Convert Anchor Point Tool”, click in the Top “Anchor Point” to get rid of the curves and repeat with the Bottom “Anchor Point”.
6 - Go to Edit > Define Brush Preset and name it “Grass Base”.
7 - Open the “Brush Panel”, make the “Size” 30 px and the “Spacing” 130.
In “Shape Dynamics” use the following values:
Scattering:
Color Dynamics:
Click in the small icon at the bottom and save your “New Brush” as “Grass 1”.
8 - Without exiting the “Brush Panel”, change the “Size” to 20 px and the “Spacing” 340.
Shape Dynamics: (Stays the same)
Scattering:
Color Dynamics: (Stays the same)
Name this one “Grass 2”.
9 - Go to the “Paths Panel” and click on the “Work path” to select it. Back in the “Layers Panel”, select the “Grass 1” layer. Choose the “Grass 1” brush in the “Brushes Panel”, choose the “Path Selection Tool” (A), right-click on top of the text and choose “Stroke Path”. Use “Brush” as “Tool”.
10 - Create another layer, name it “Grass 2”, select the “Grass 2” brush and repeat the “Stroke Path”. Deselect or delete your “Work Path”.
11 - Select the 3 Text-related layers (Hold “Shift” key), right-click on top of their Thumbnails and choose “Convert to Smart Object”. Double-click on top of its Thumbnail and apply the following “Layer Styles”:
Bevel & Emboss:
Inner Shadow:
Inner Glow: (#eee689. Contour: “Rounded Steps”)
Gradient Overlay: (#2f2e2e and #c6b879)
Patter Overlay: (use the one you loaded earlier)
Drop Shadow:
12 - Your text should be similar to this.
by @lornacane
Related Tutorials
Photoshop Tutorials
How to Make a Graffiti Text Effect in Photoshop
Learn how to create a realistic grafitti text effect in Photoshop.
Photoshop Tutorials
How to Create a Holographic Text Effect in Photoshop
Discover how to create a holographic text effect in Photoshop with this step by step tutorial.
Photoshop Tutorials
Chalk Text Effect in Photoshop
In this tutorial, learn how to turn any font into chalk text in Photoshop with the Brush tool.
Photoshop Tutorials
Puffy Sticker Text Effect in Photoshop
Photoshop Tutorials
How to Create an Embossed Text Effect in Photoshop
In this tutorial, discover how to create an Embossed Text Effect in Photoshop!
Photoshop Tutorials
Tinsel Text Effect in Photoshop
Discover how to create a tinsel text effect in Photoshop layer by layer.