By Design Bundles
Photoshop Tutorials13 min
How to Use the Healing Brush in Photoshop
The Healing Brush tool is mainly used to correct imperfections in your images by making them disappear into the surrounding portions of the image. The Healing Brush samples pixels from an image or pattern and paints with them. It can also match the characteristics (texture, lighting, transparency, and shading) of the sampled pixels to the pixels being healed. This means the repaired pixels blend seamlessly into the rest of the image. It can also be applied to video or animation frames.
In this tutorial, we will show you how you can use the Healing Brush tool and we will be using a Stock Photo from Design Bundles.
Open the image you want to work with and select the Healing Brush tool from the left toolbar menu.
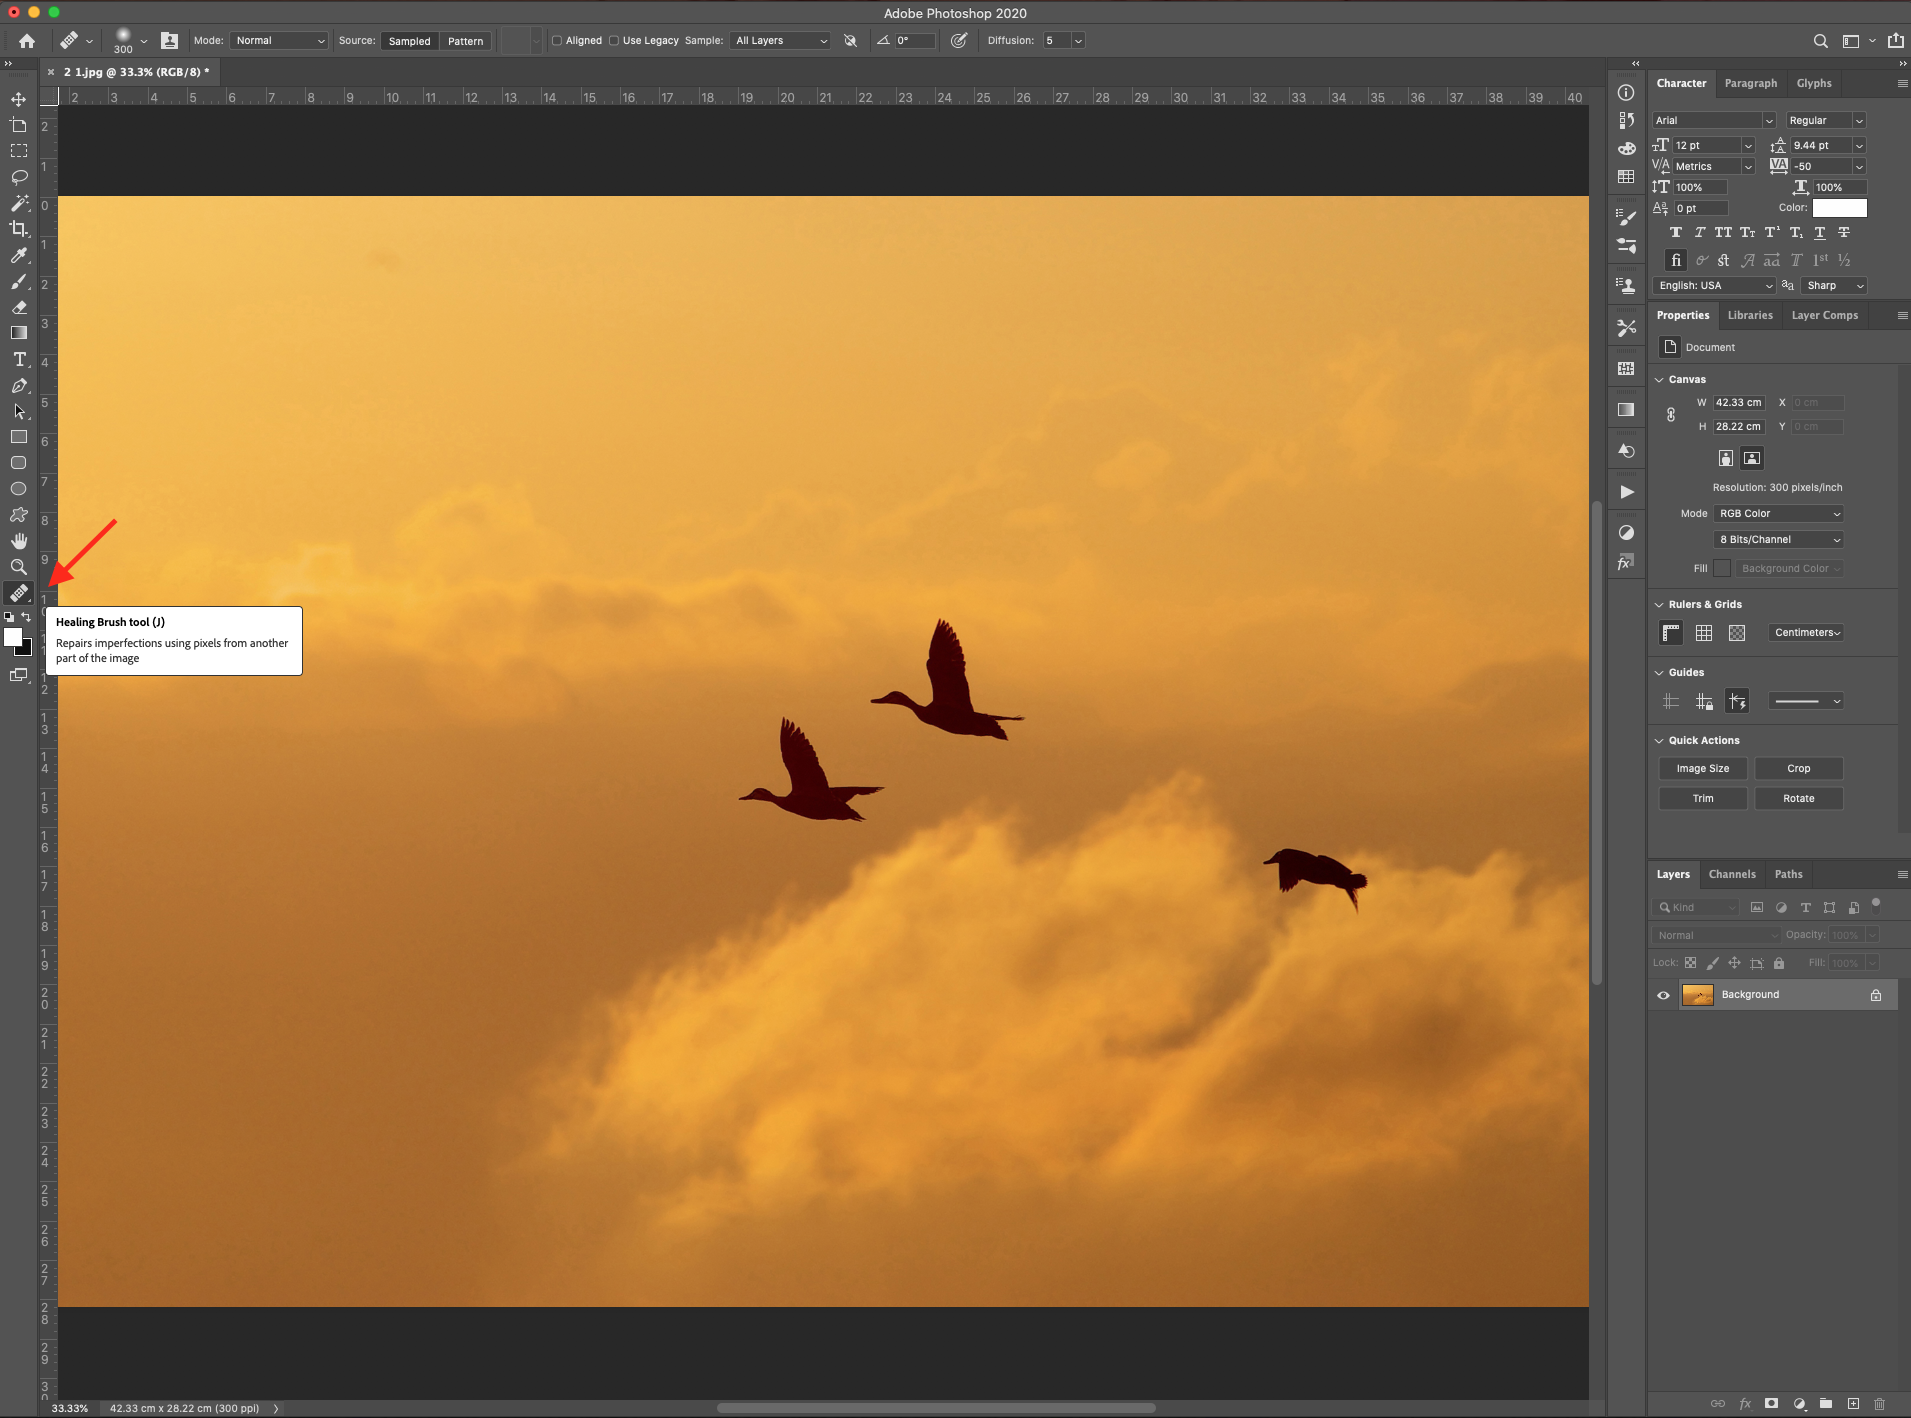
Click the brush sample in the options bar and set its options in the pop-up panel.
Defines the Blending or Painting mode. If you choose to Replace you will preserve noise, film grain, and texture at the edges of the stroke when using a soft-edged brush.

It specifies the source used to repair the pixels. Choose Sampled to use pixels from the current image, or Pattern to use pixels from a pattern. When choosing Pattern, select a pattern from the Pattern pop-up panel.


Samples pixels continuously, without losing the sampling point, even after releasing the mouse button. If you deselect it then you will continue to use the sampled pixels from the initial sampling point each time you stop and resume painting.

Samples pixels from specified layers. To sample from the active layer and visible layers below it you have to choose Current And Below. If you want only to sample from the active layer, choose the Current Layer. Finally, to sample from all visible layers, choose All Layers. (And to sample from all layers (visible) except adjustment layers, then choose All Layers and click the Ignore Adjustment Layers icon to the right of the Sample pop-up menu).

Controls how quickly the pasted pixels adapt to the surrounding. A lower value works better for images with grain or fine details, and a higher value for smooth images.

Also, if using a pressure-sensitive tablet, you can choose an option from the Size menu to vary the size of the Healing Brush for the stroke. Choose Pen Pressure for the variation on the pen pressure. Choose Stylus Wheel for the variation on the position of the pen thumbwheel. Or choose Off if you don’t want to vary the size.

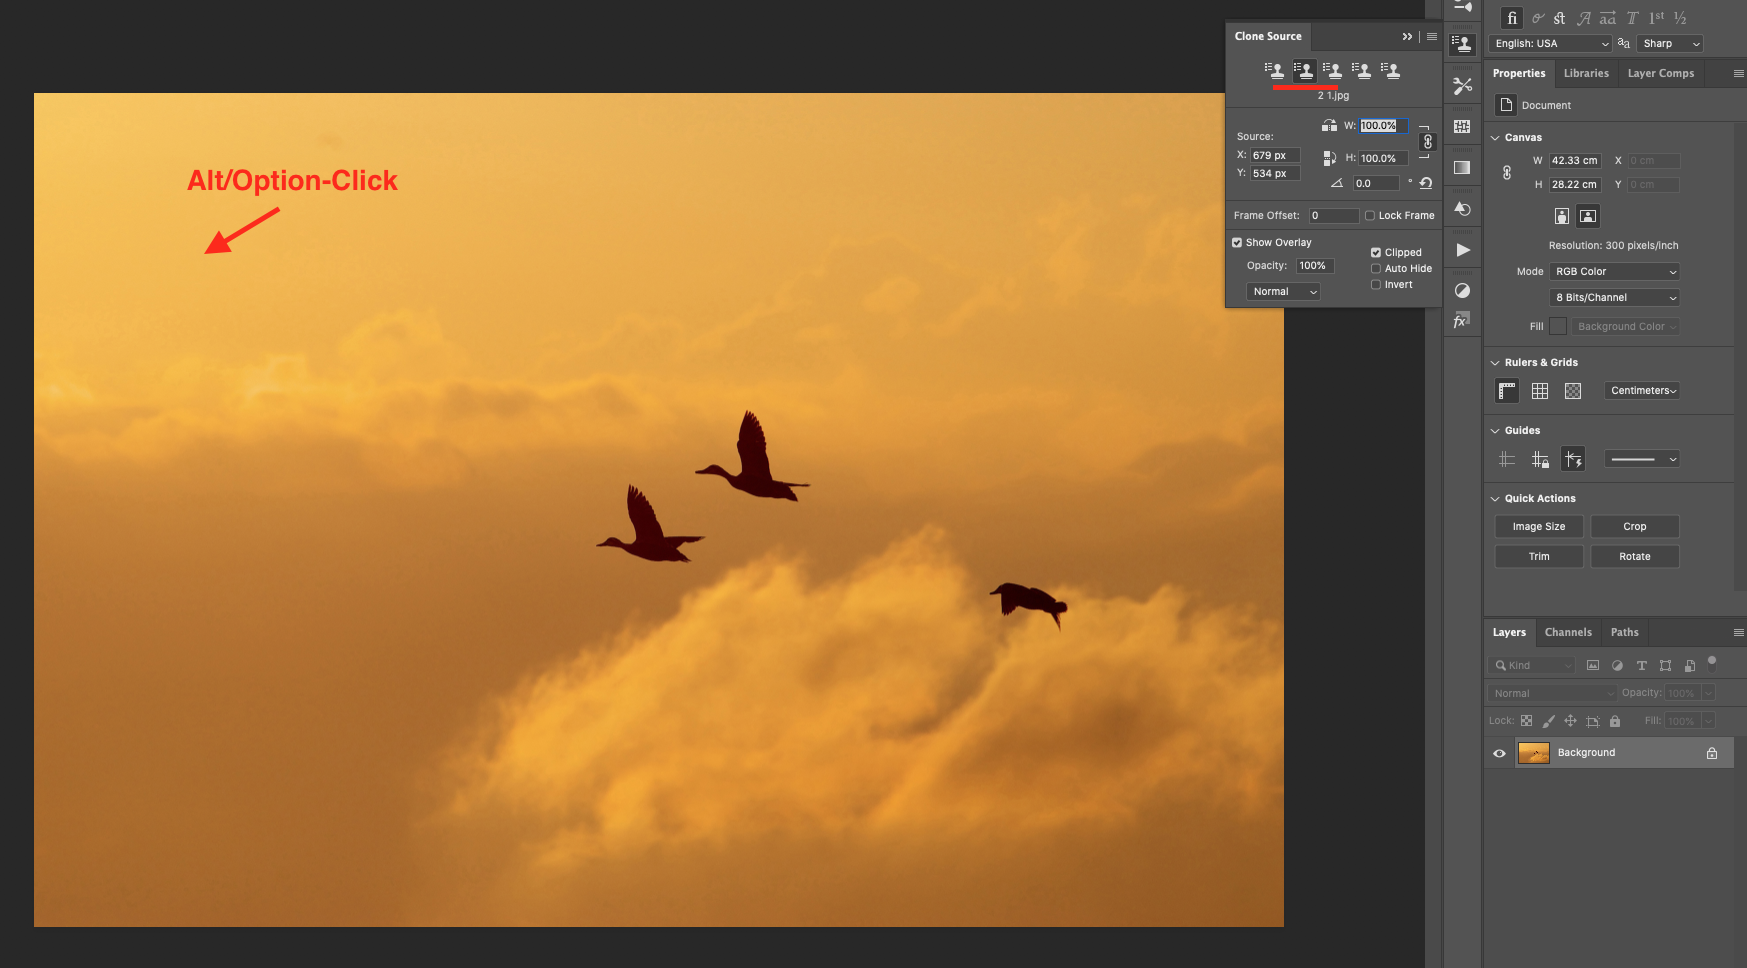
Position the pointer over the portion of the image you want to use and Alt-Click (Windows) or Option-Click (Mac OS) to set the sampling point. (If you are using different images for the sampling and healing, make sure that they have the same Color Mode or that one of them is in Grayscale mode).

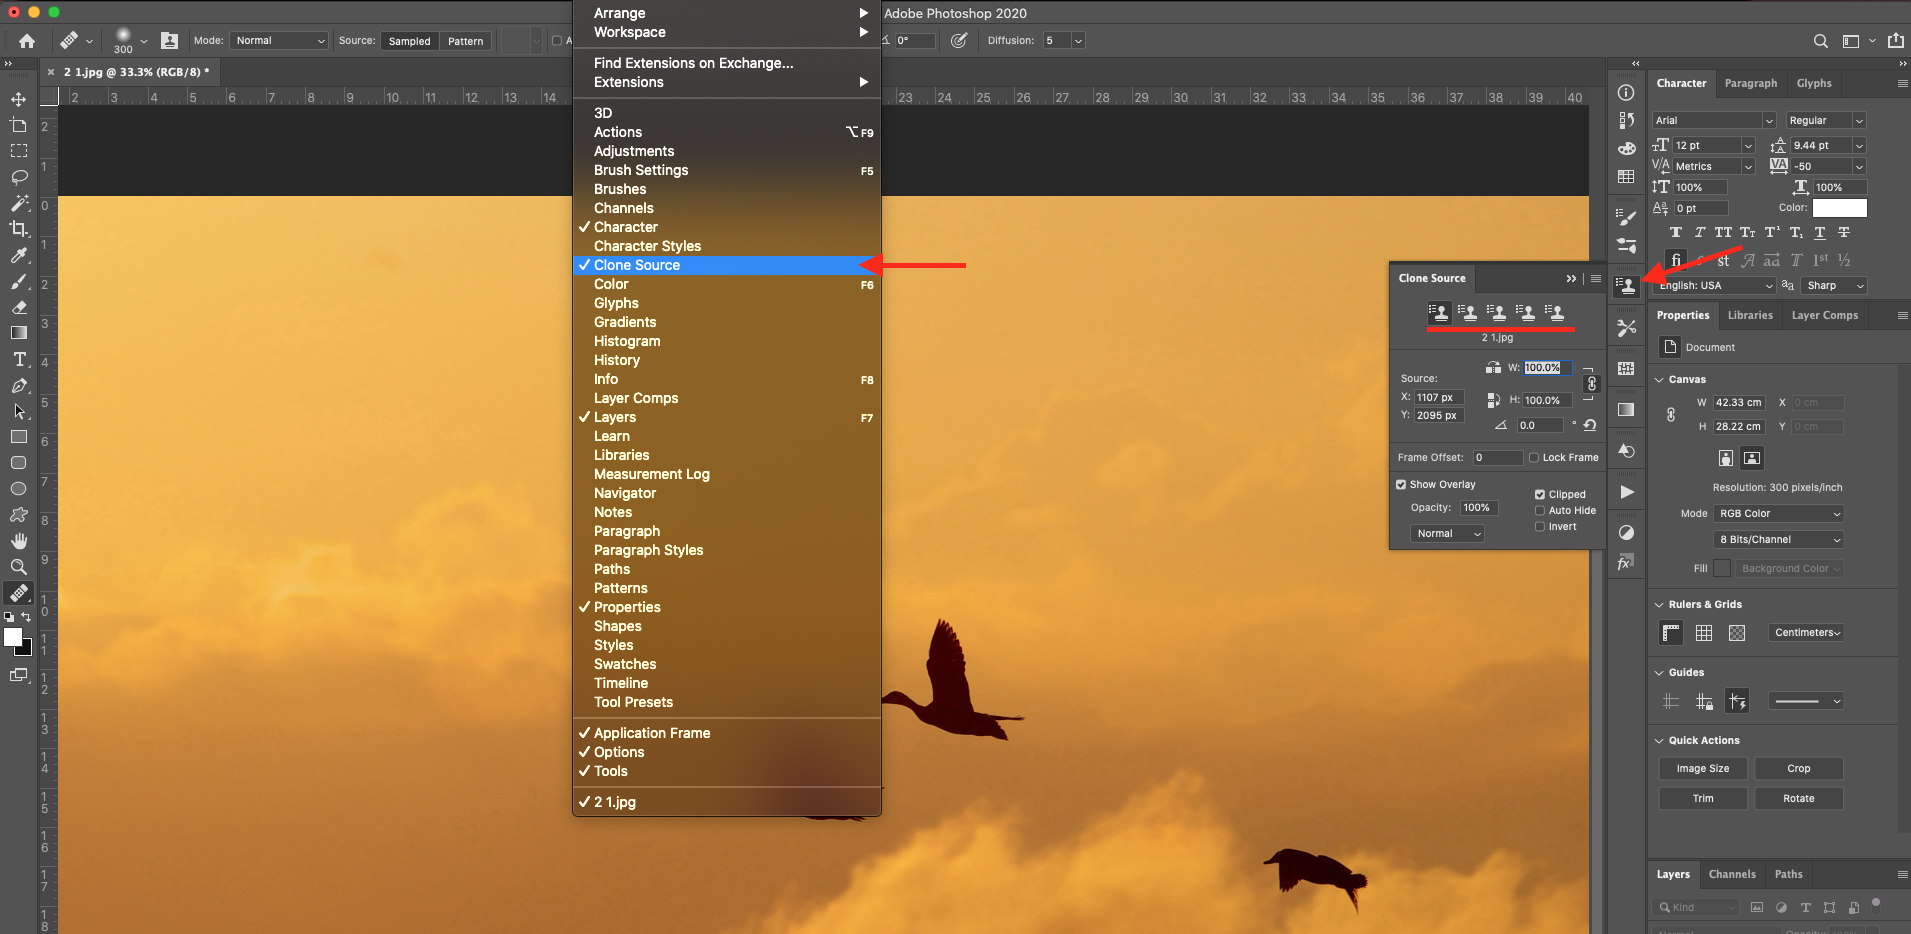
If you need to add additional sampling points by clicking a clone source button and set an additional point. You can set up to five different sampling sources in the Clone Source Panel. It will remember the selected sources until you close the document you are working with.
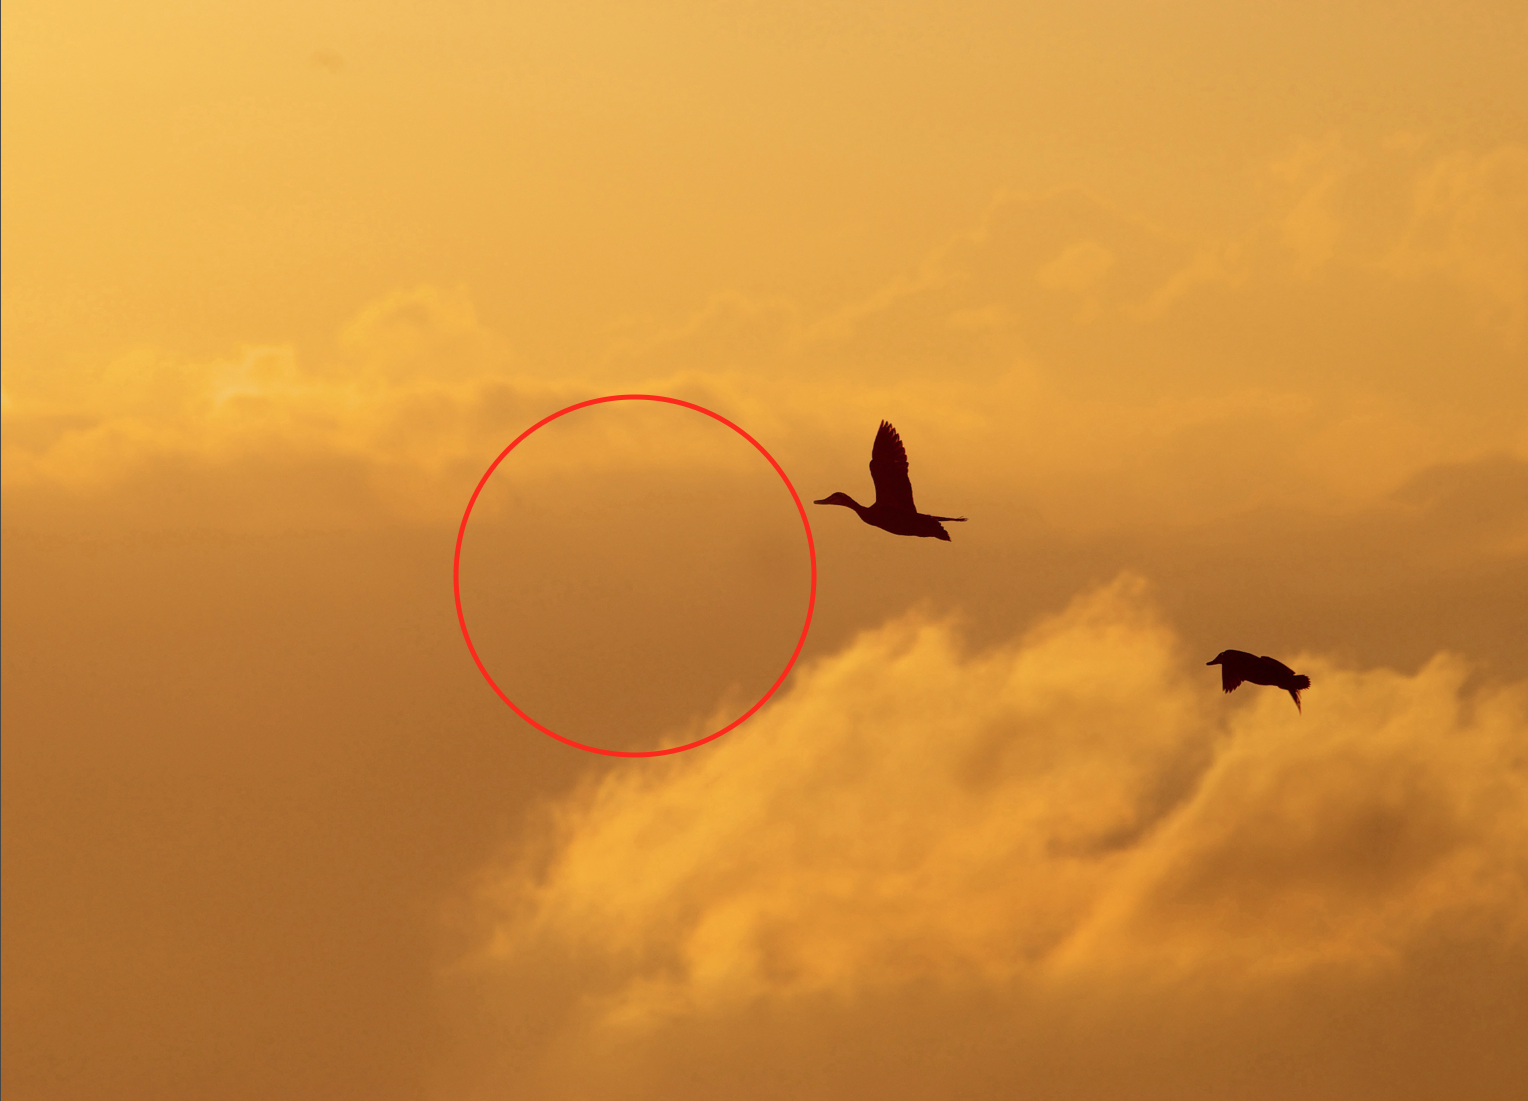
To use the Healing Brush, just start “painting” on top of the area you want to fix. You can change the sampling point (or use what is explained in Step 6). The size, hardness, and other details of the brush to achieve the desired results.
To select the other sampling points, head to the Clone Source panel and click a clone source button to select the sampled source you want to use.
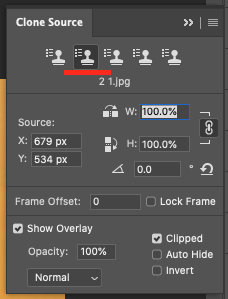
You can also do any of the following in the Clone Source panel:
To scale or rotate the source, enter a value for W (width), H (height), or the rotation in degrees. And to show an overlay of the source, select Show Overlay and specify the overlay options.
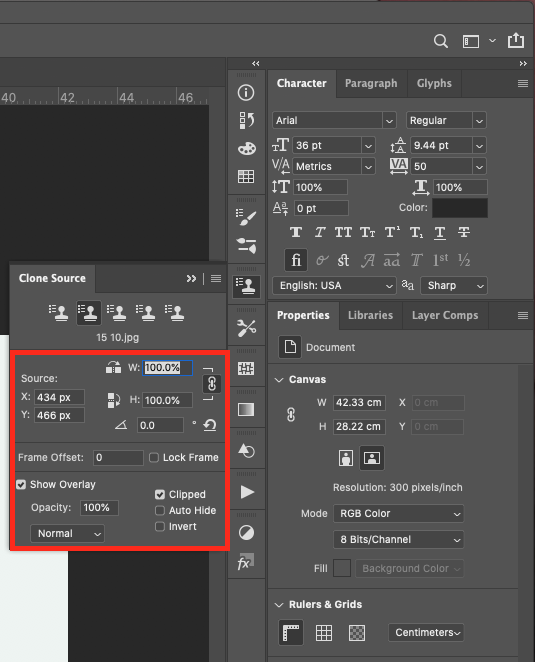
This tool comes in very handy when you need to quickly retouch your photos in Photoshop. Some other tools you may want to use when retouching photos are the Spot Healing Brush, and the Patch tool.

If you enjoyed this tutorial, feel free to leave a comment. You can also let us know if there is any topic you would want us to cover in future tutorials.
We hop you enjoyed this tutorial. You can browse our other entire collection of Photoshop Tutorials for Beginners.
In this tutorial, we will show you how you can use the Healing Brush tool and we will be using a Stock Photo from Design Bundles.
1. Select the Healing Brush
Open the image you want to work with and select the Healing Brush tool from the left toolbar menu.
2. Set Brush Options
Click the brush sample in the options bar and set its options in the pop-up panel.
Mode:
Defines the Blending or Painting mode. If you choose to Replace you will preserve noise, film grain, and texture at the edges of the stroke when using a soft-edged brush.
Source:
It specifies the source used to repair the pixels. Choose Sampled to use pixels from the current image, or Pattern to use pixels from a pattern. When choosing Pattern, select a pattern from the Pattern pop-up panel.
Aligned:
Samples pixels continuously, without losing the sampling point, even after releasing the mouse button. If you deselect it then you will continue to use the sampled pixels from the initial sampling point each time you stop and resume painting.
Sample:
Samples pixels from specified layers. To sample from the active layer and visible layers below it you have to choose Current And Below. If you want only to sample from the active layer, choose the Current Layer. Finally, to sample from all visible layers, choose All Layers. (And to sample from all layers (visible) except adjustment layers, then choose All Layers and click the Ignore Adjustment Layers icon to the right of the Sample pop-up menu).
Diffusion:
Controls how quickly the pasted pixels adapt to the surrounding. A lower value works better for images with grain or fine details, and a higher value for smooth images.
Also, if using a pressure-sensitive tablet, you can choose an option from the Size menu to vary the size of the Healing Brush for the stroke. Choose Pen Pressure for the variation on the pen pressure. Choose Stylus Wheel for the variation on the position of the pen thumbwheel. Or choose Off if you don’t want to vary the size.
3. Set Sampling Point
Position the pointer over the portion of the image you want to use and Alt-Click (Windows) or Option-Click (Mac OS) to set the sampling point. (If you are using different images for the sampling and healing, make sure that they have the same Color Mode or that one of them is in Grayscale mode).
4. Set Additional Sampling Points
If you need to add additional sampling points by clicking a clone source button and set an additional point. You can set up to five different sampling sources in the Clone Source Panel. It will remember the selected sources until you close the document you are working with.
5. Use the Healing Brush
To use the Healing Brush, just start “painting” on top of the area you want to fix. You can change the sampling point (or use what is explained in Step 6). The size, hardness, and other details of the brush to achieve the desired results.
6. Select Additional Sampling Points
To select the other sampling points, head to the Clone Source panel and click a clone source button to select the sampled source you want to use.
7. Other Options
You can also do any of the following in the Clone Source panel:
To scale or rotate the source, enter a value for W (width), H (height), or the rotation in degrees. And to show an overlay of the source, select Show Overlay and specify the overlay options.
8. End Results
This tool comes in very handy when you need to quickly retouch your photos in Photoshop. Some other tools you may want to use when retouching photos are the Spot Healing Brush, and the Patch tool.
If you enjoyed this tutorial, feel free to leave a comment. You can also let us know if there is any topic you would want us to cover in future tutorials.
We hop you enjoyed this tutorial. You can browse our other entire collection of Photoshop Tutorials for Beginners.
Related Tutorials
Photoshop Tutorials
How to Use the Spot Healing Brush in Photoshop
Learn how to use the Spot Healing Brush in Photoshop with this beginner tutorial.
Procreate Tutorials
How to Use Photoshop Brushes in Procreate
In this step by step tutorial we will show you how to use your Photoshop brushes in Procreate.
DesignScape Tutorials
How to Use Photoshop Brushes in DesignScape
In this quick tutorial we'll show you how easy it is to use Photoshop brushes in DesignScape.
Photoshop Tutorials
Use Stipple Brushes in Photoshop
Photoshop Tutorials
How to Use Text Effects in Photoshop
With Photoshop Text Effects, you can create text with impact in just a few steps.
Photoshop Tutorials
How to Use EPS Files in Photoshop
In this tutorial, learn how to use EPS files in Photoshop as Smart Objects to maintain image quality