By Design Bundles
Photoshop Tutorials8 min
Jell-O Text in Photoshop
For this Tutorial, we are using a background image, and Pelemeshka Free Font from Cyril Mikhailov.
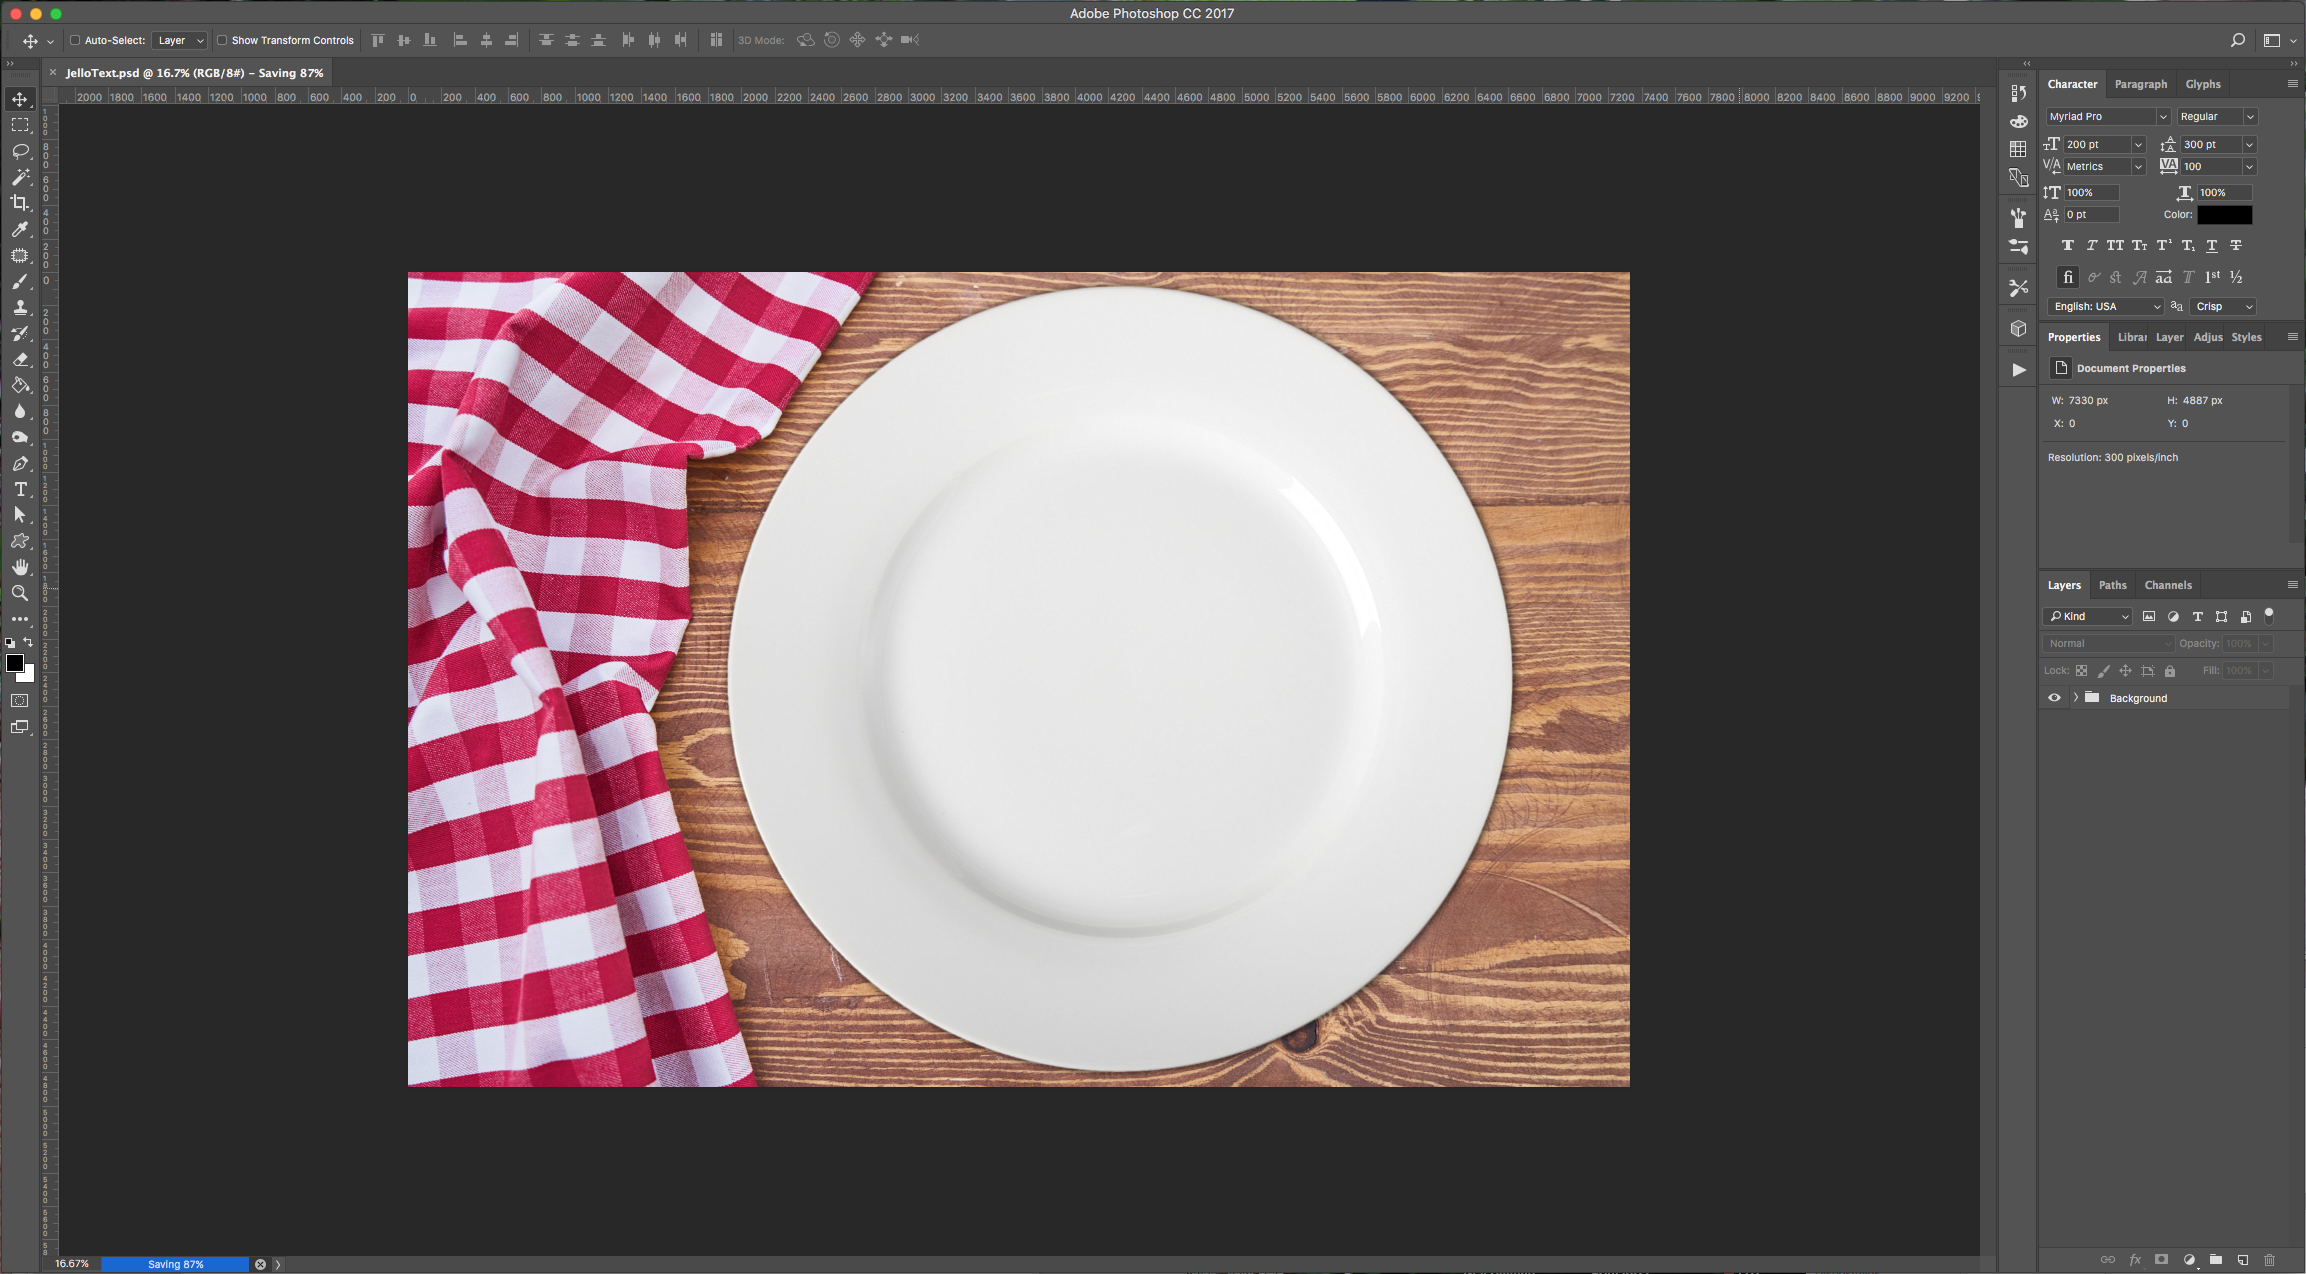
1 - Open your background image (in this case we combined two images, one of a table and the second one of a plate).
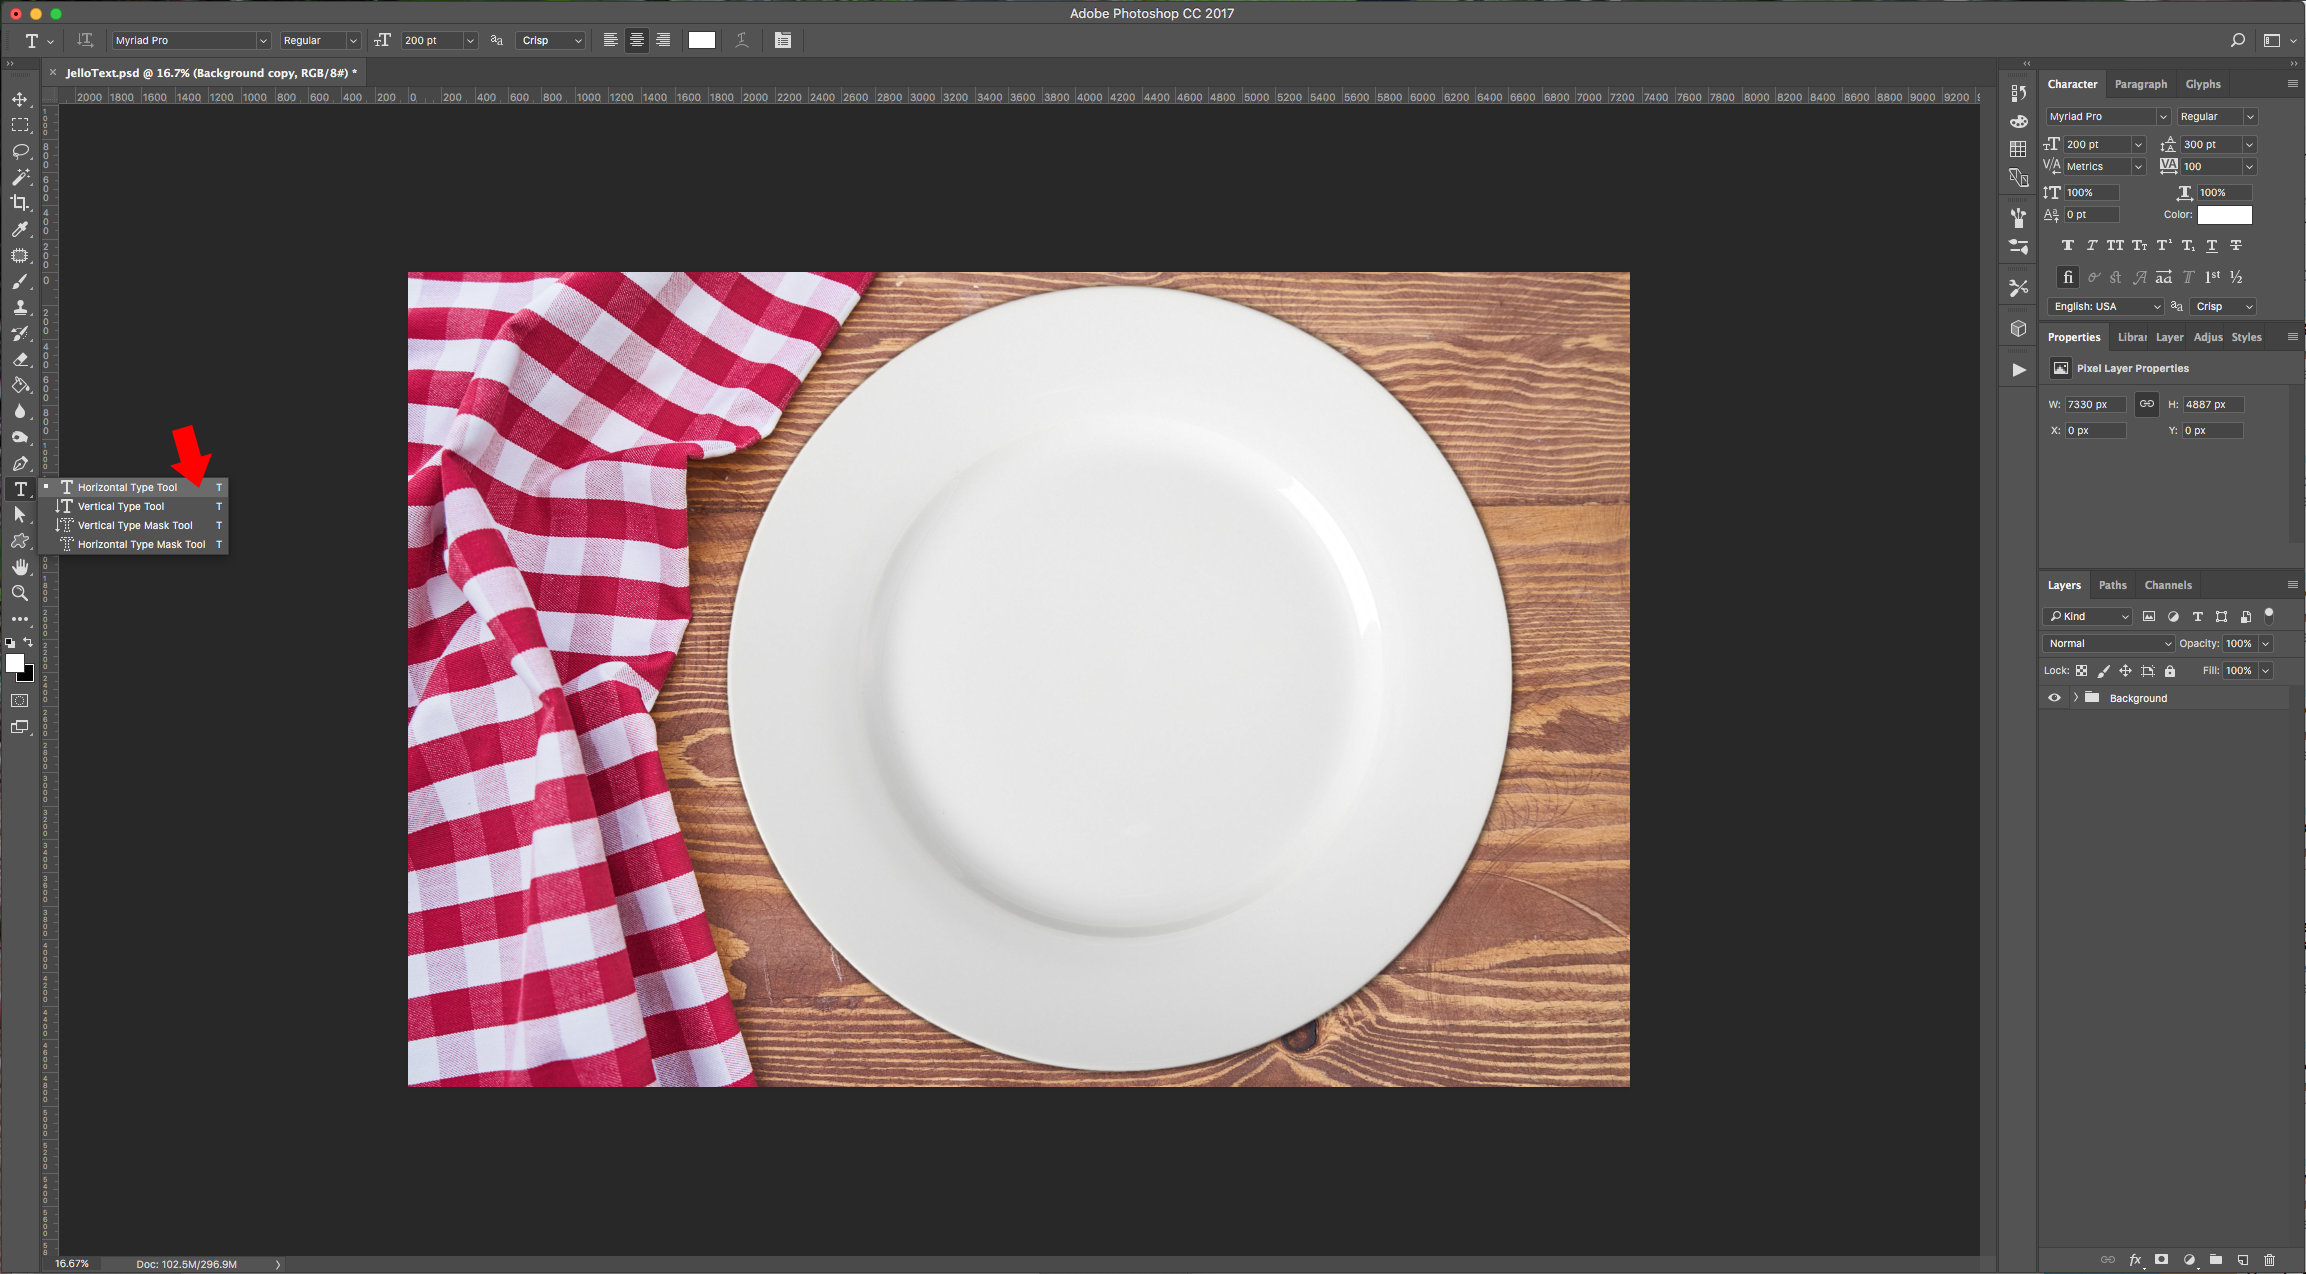
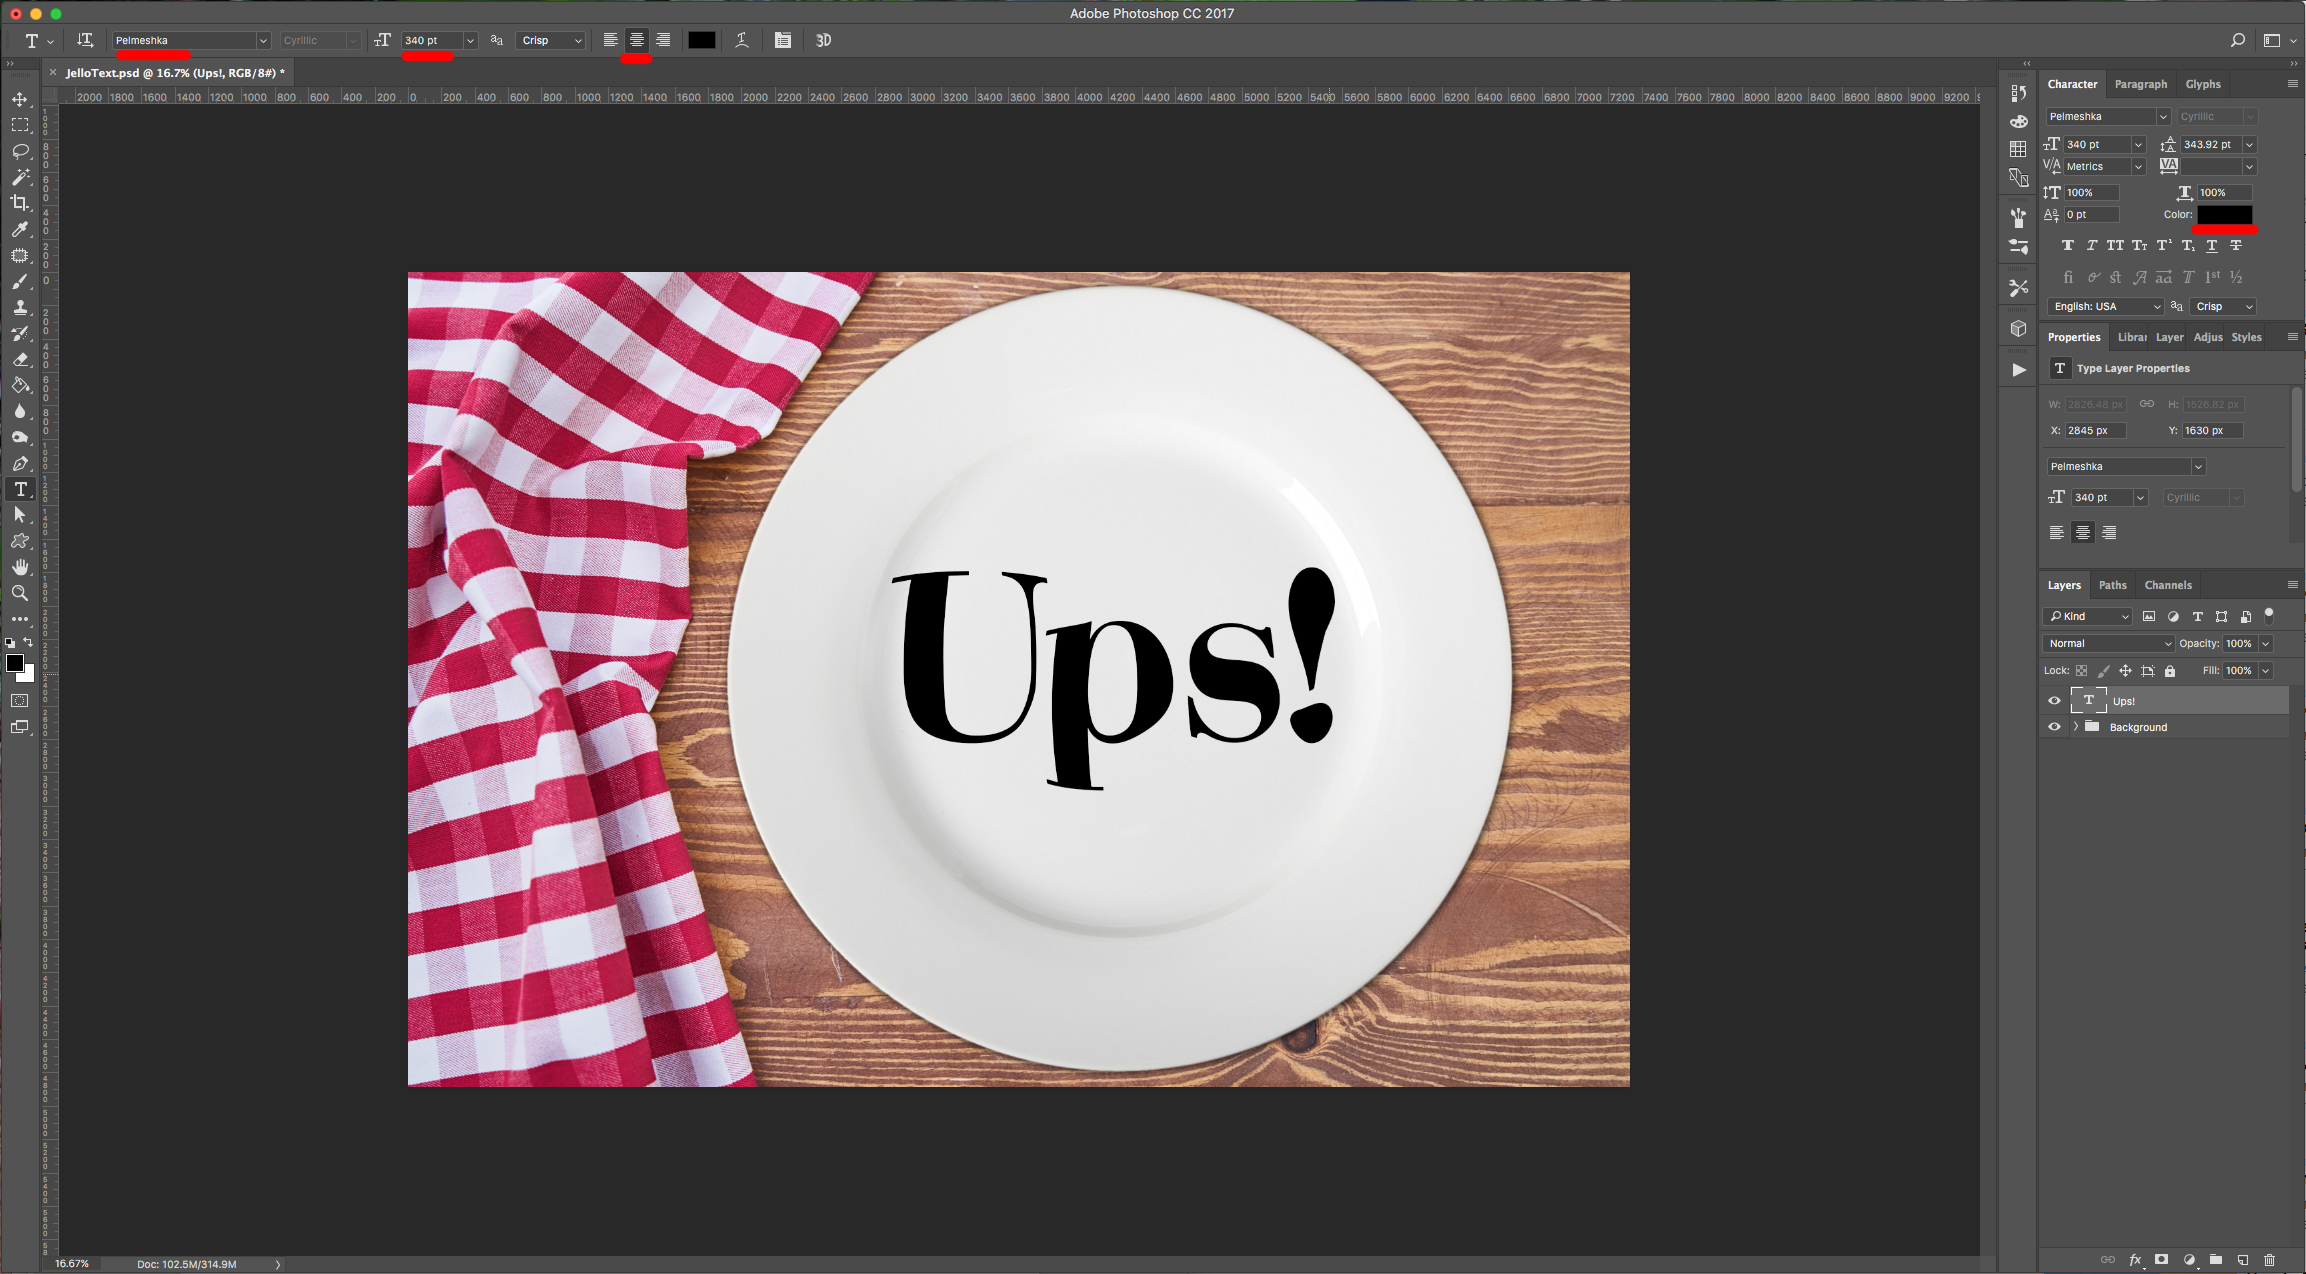
2 - Open your “Type Tool” (T), make sure “Center Text” is selected. Choose your font, use a size that makes your text fit in the plate and use black as “Fill” color.
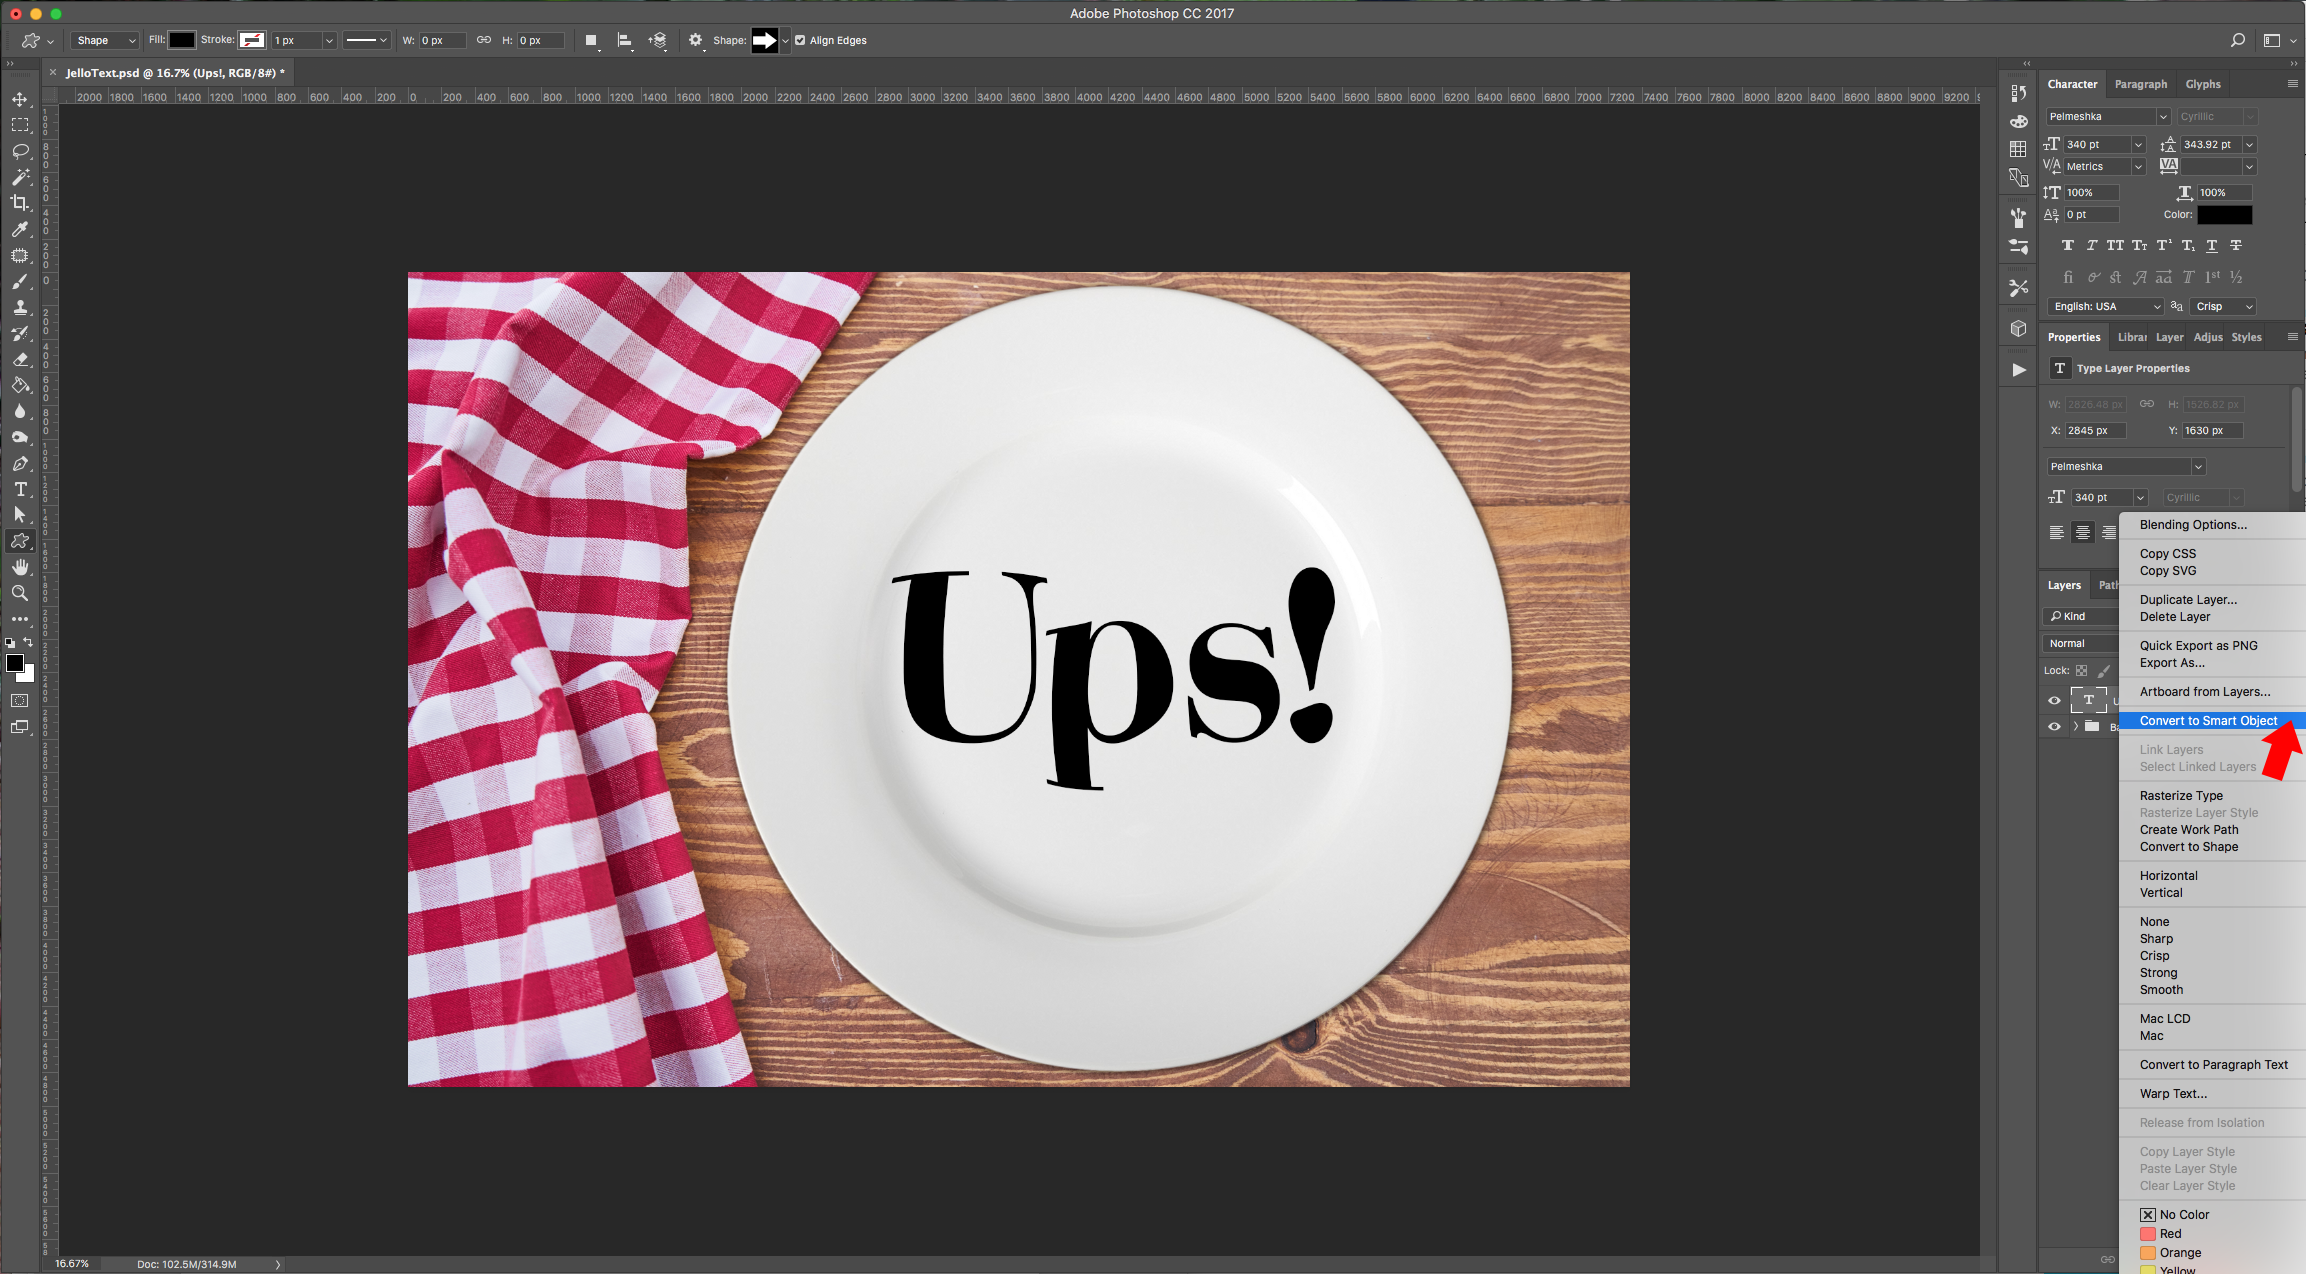
3 - Convert your text into a “Smart Object” by right-clicking on the layer thumbnail and choosing “Convert to Smart Object” from the menu.
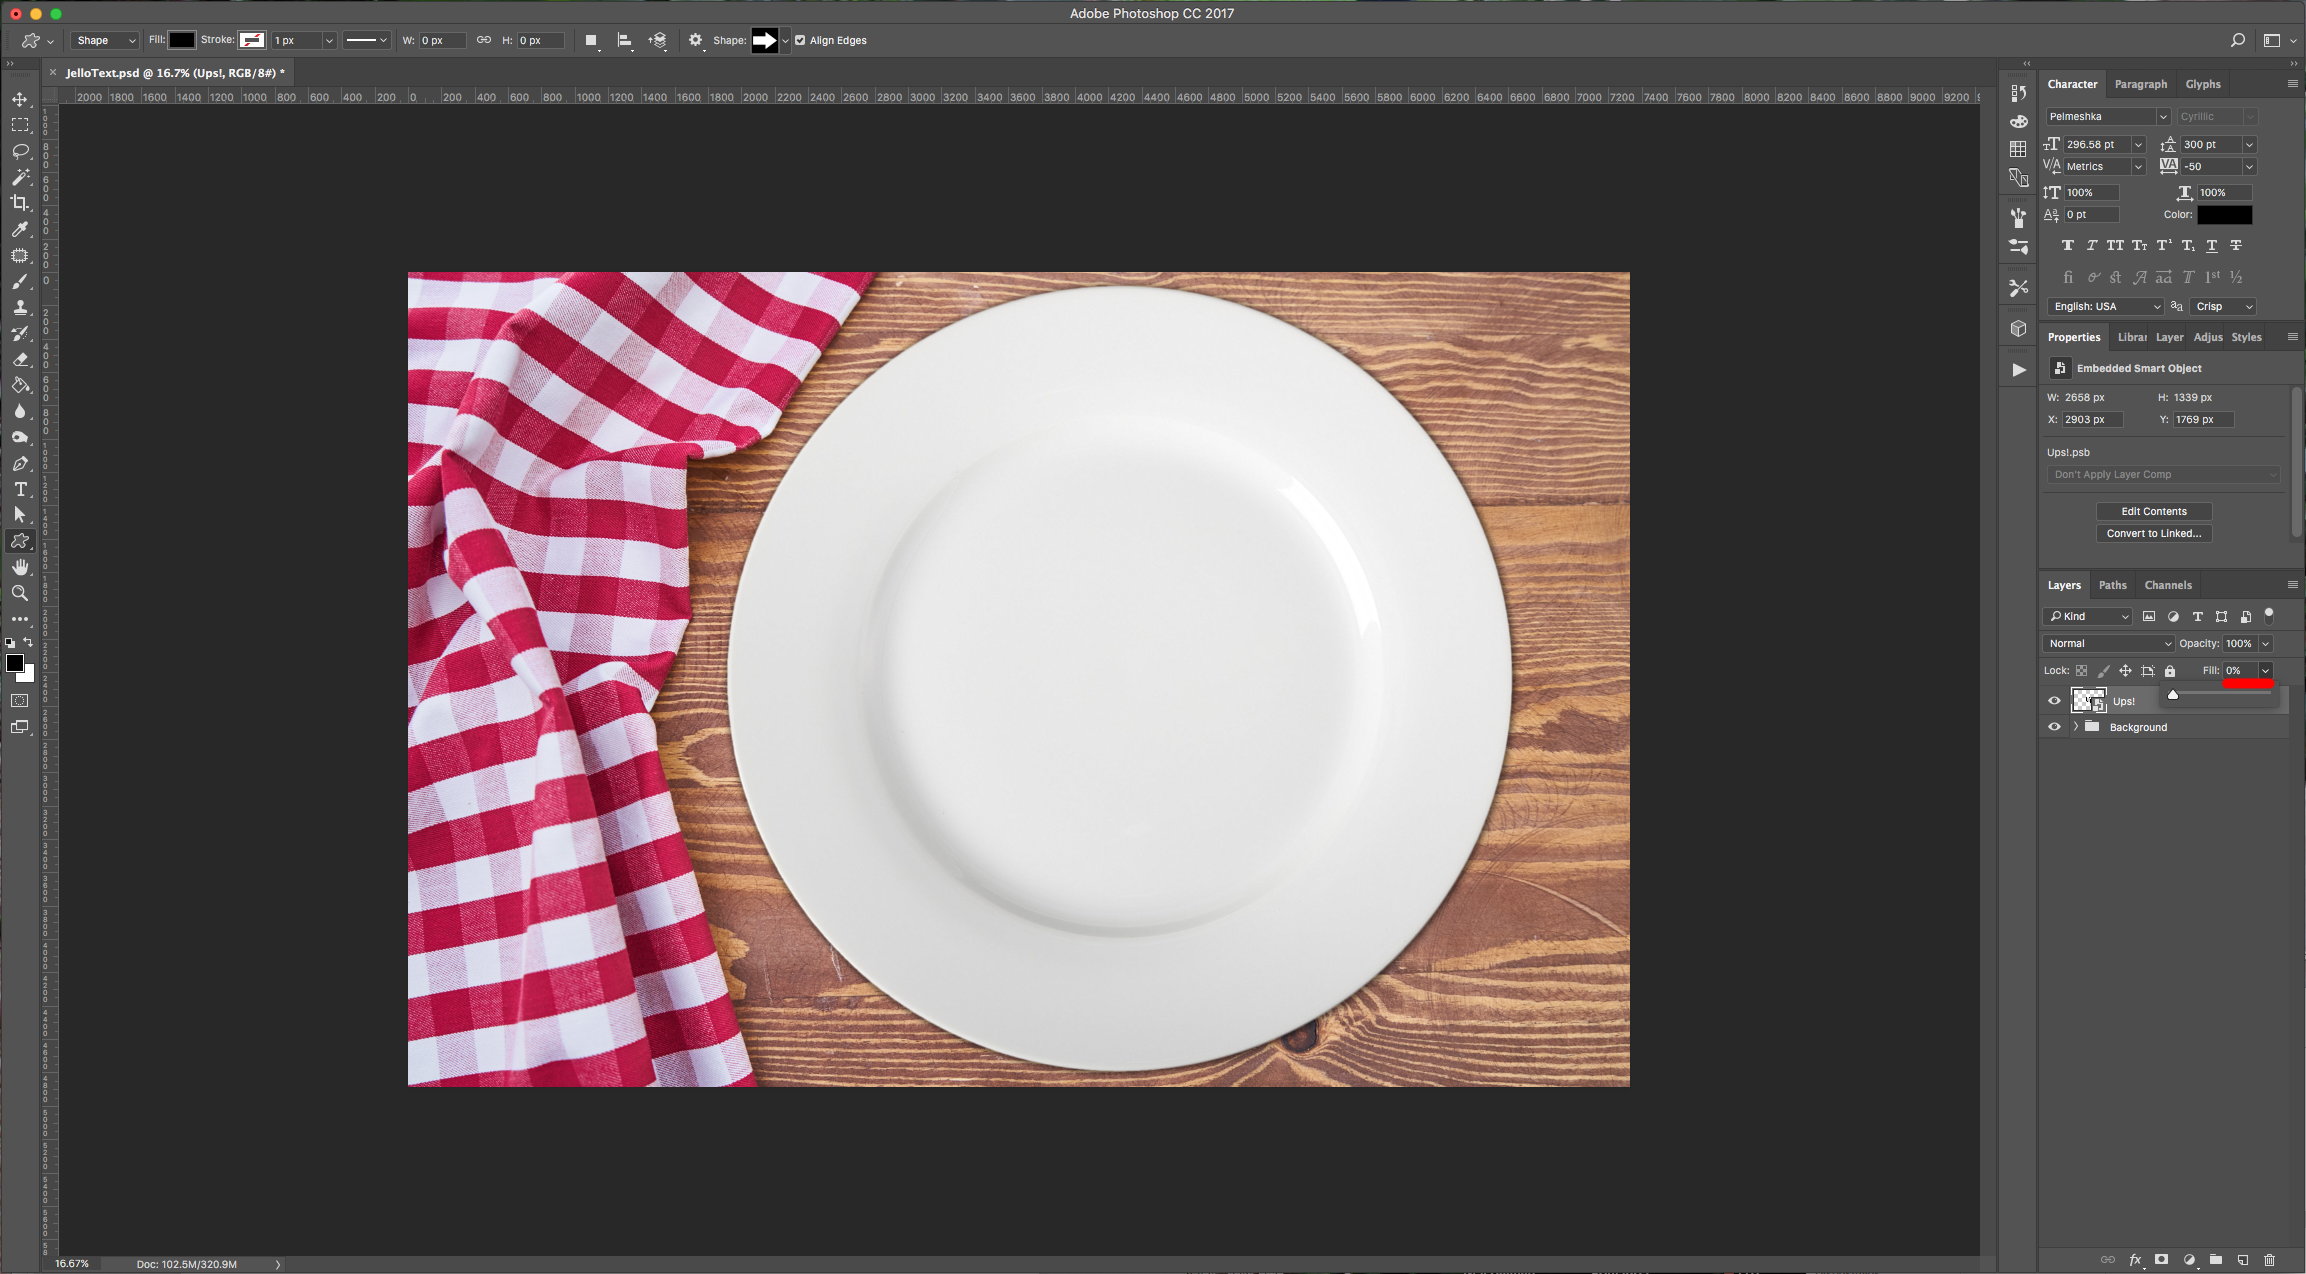
4 - Turn the “Fill” of the text layer to 0%, duplicate it three times and rename the layers.
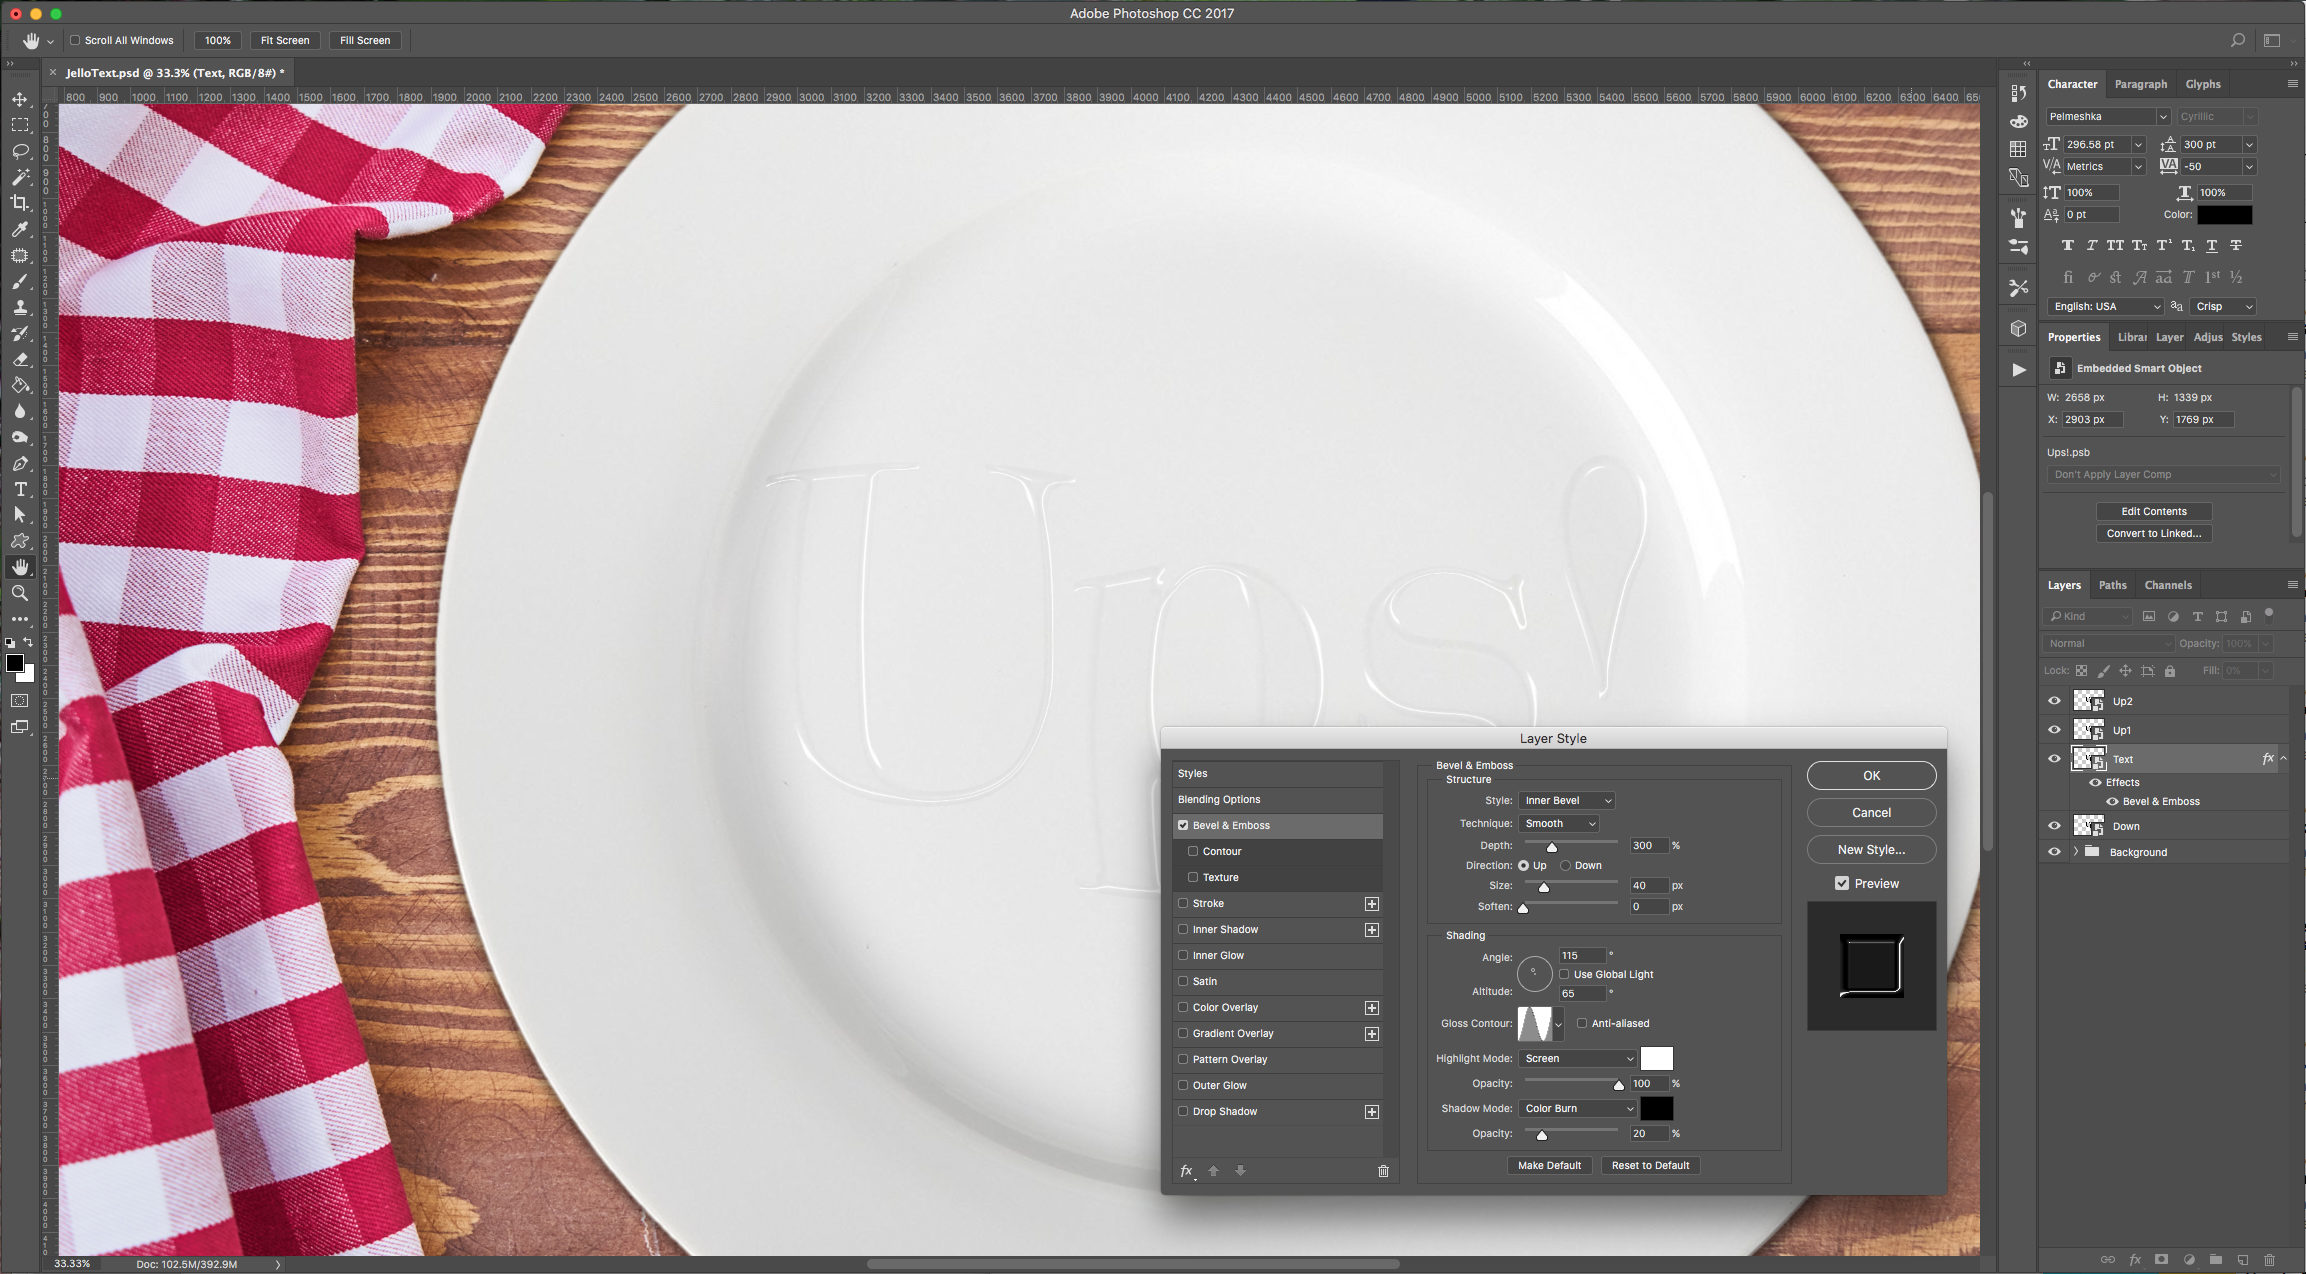
5 - Select the “Text” layer and double-click on it to apply the following “Layer Styles”:
Bevel & Emboss:
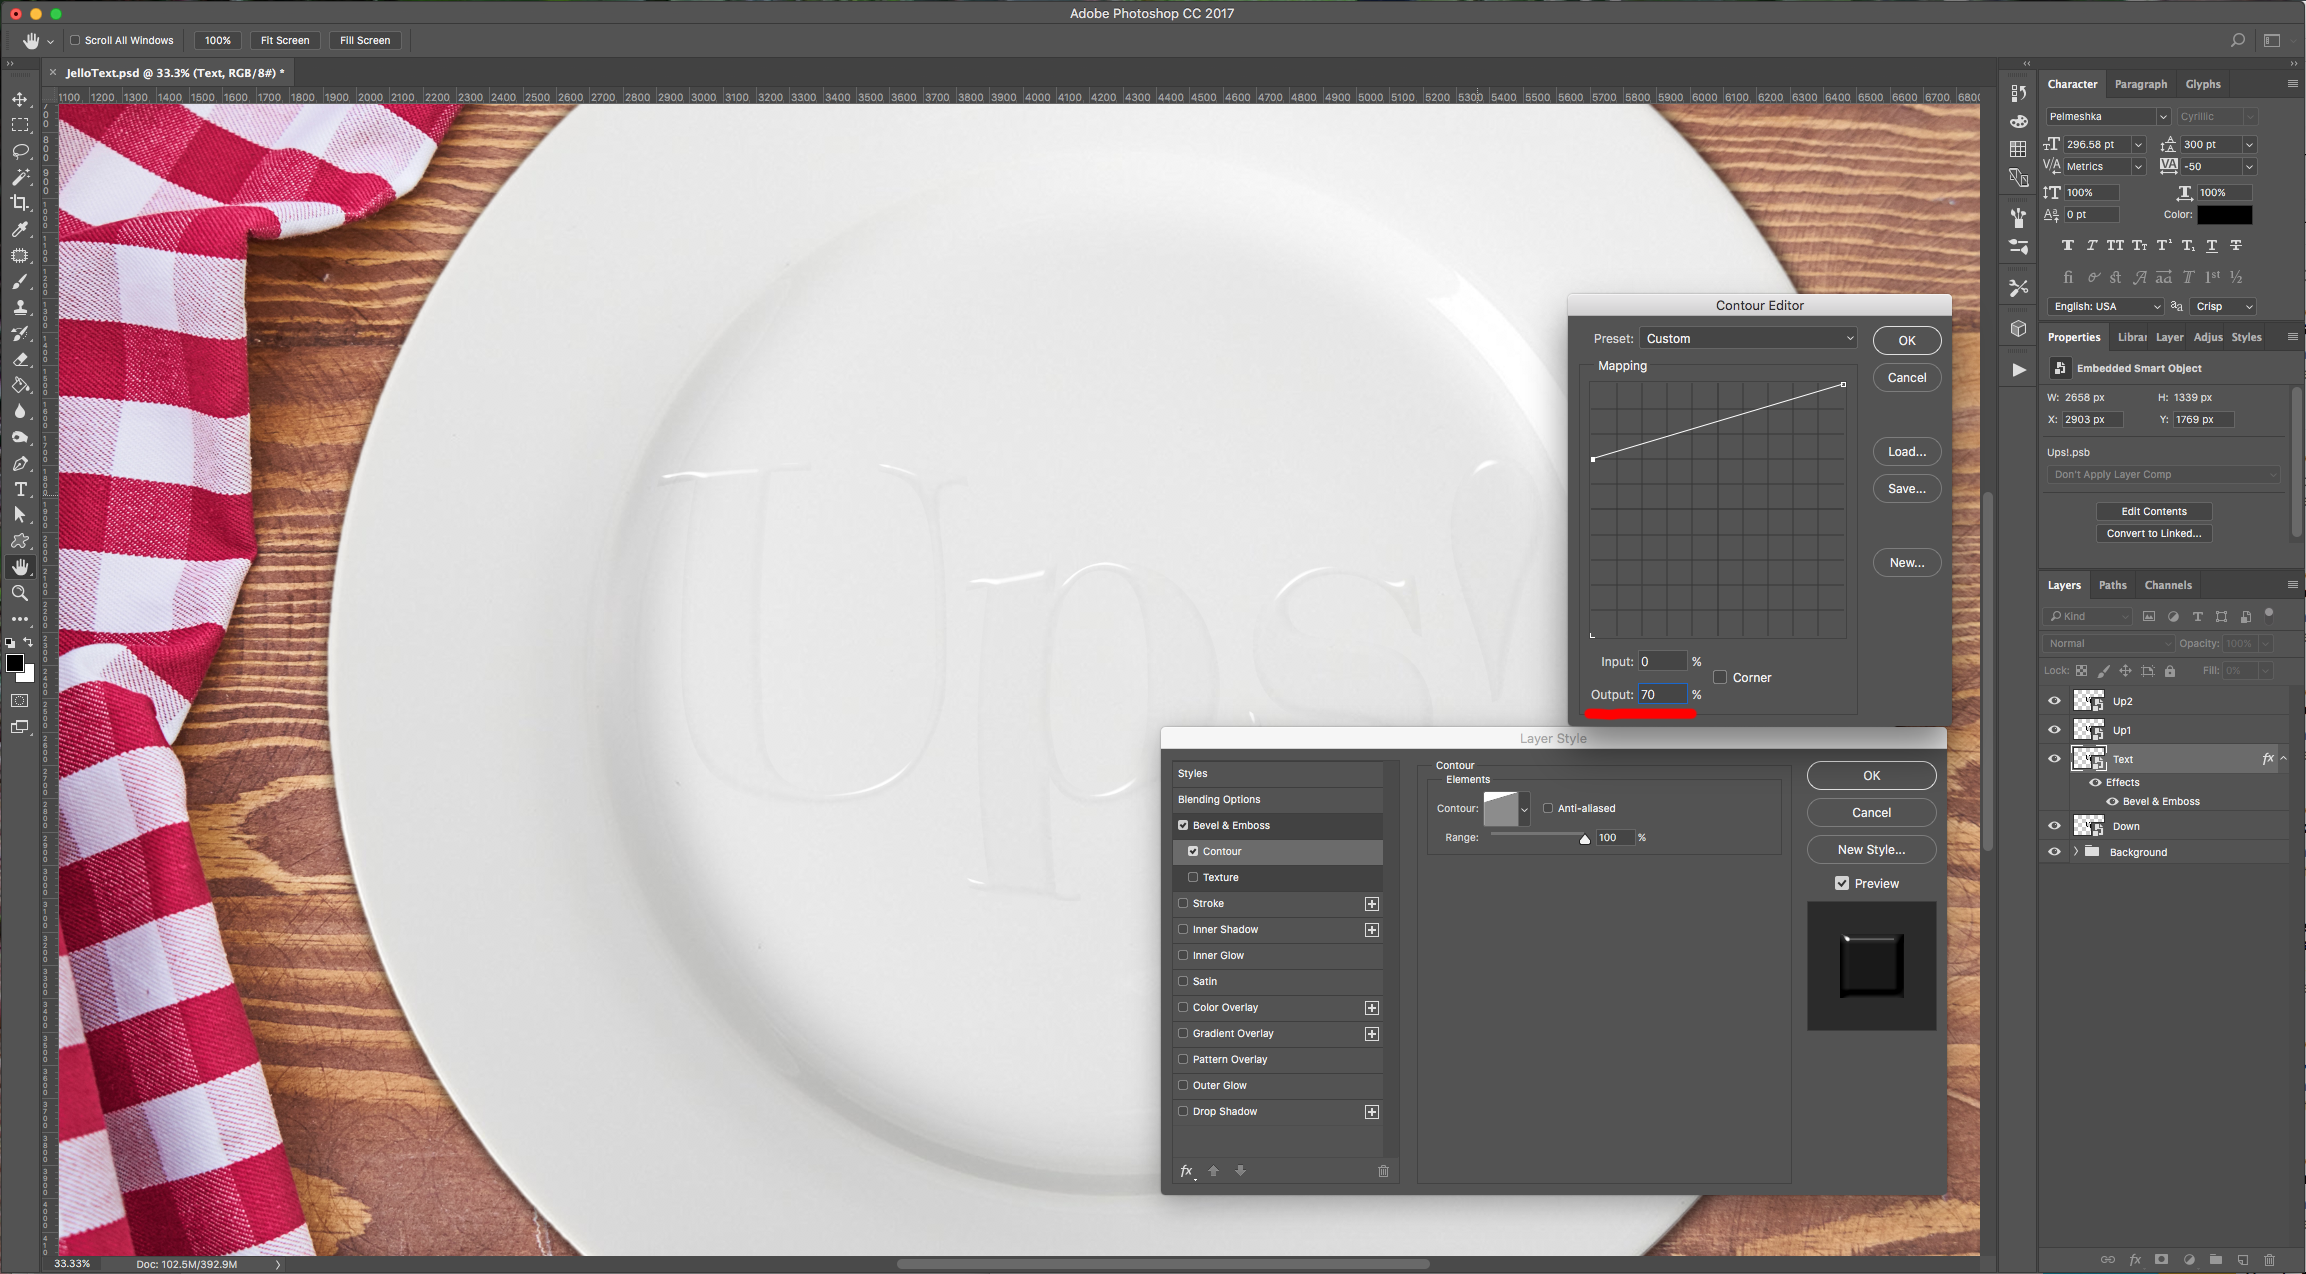
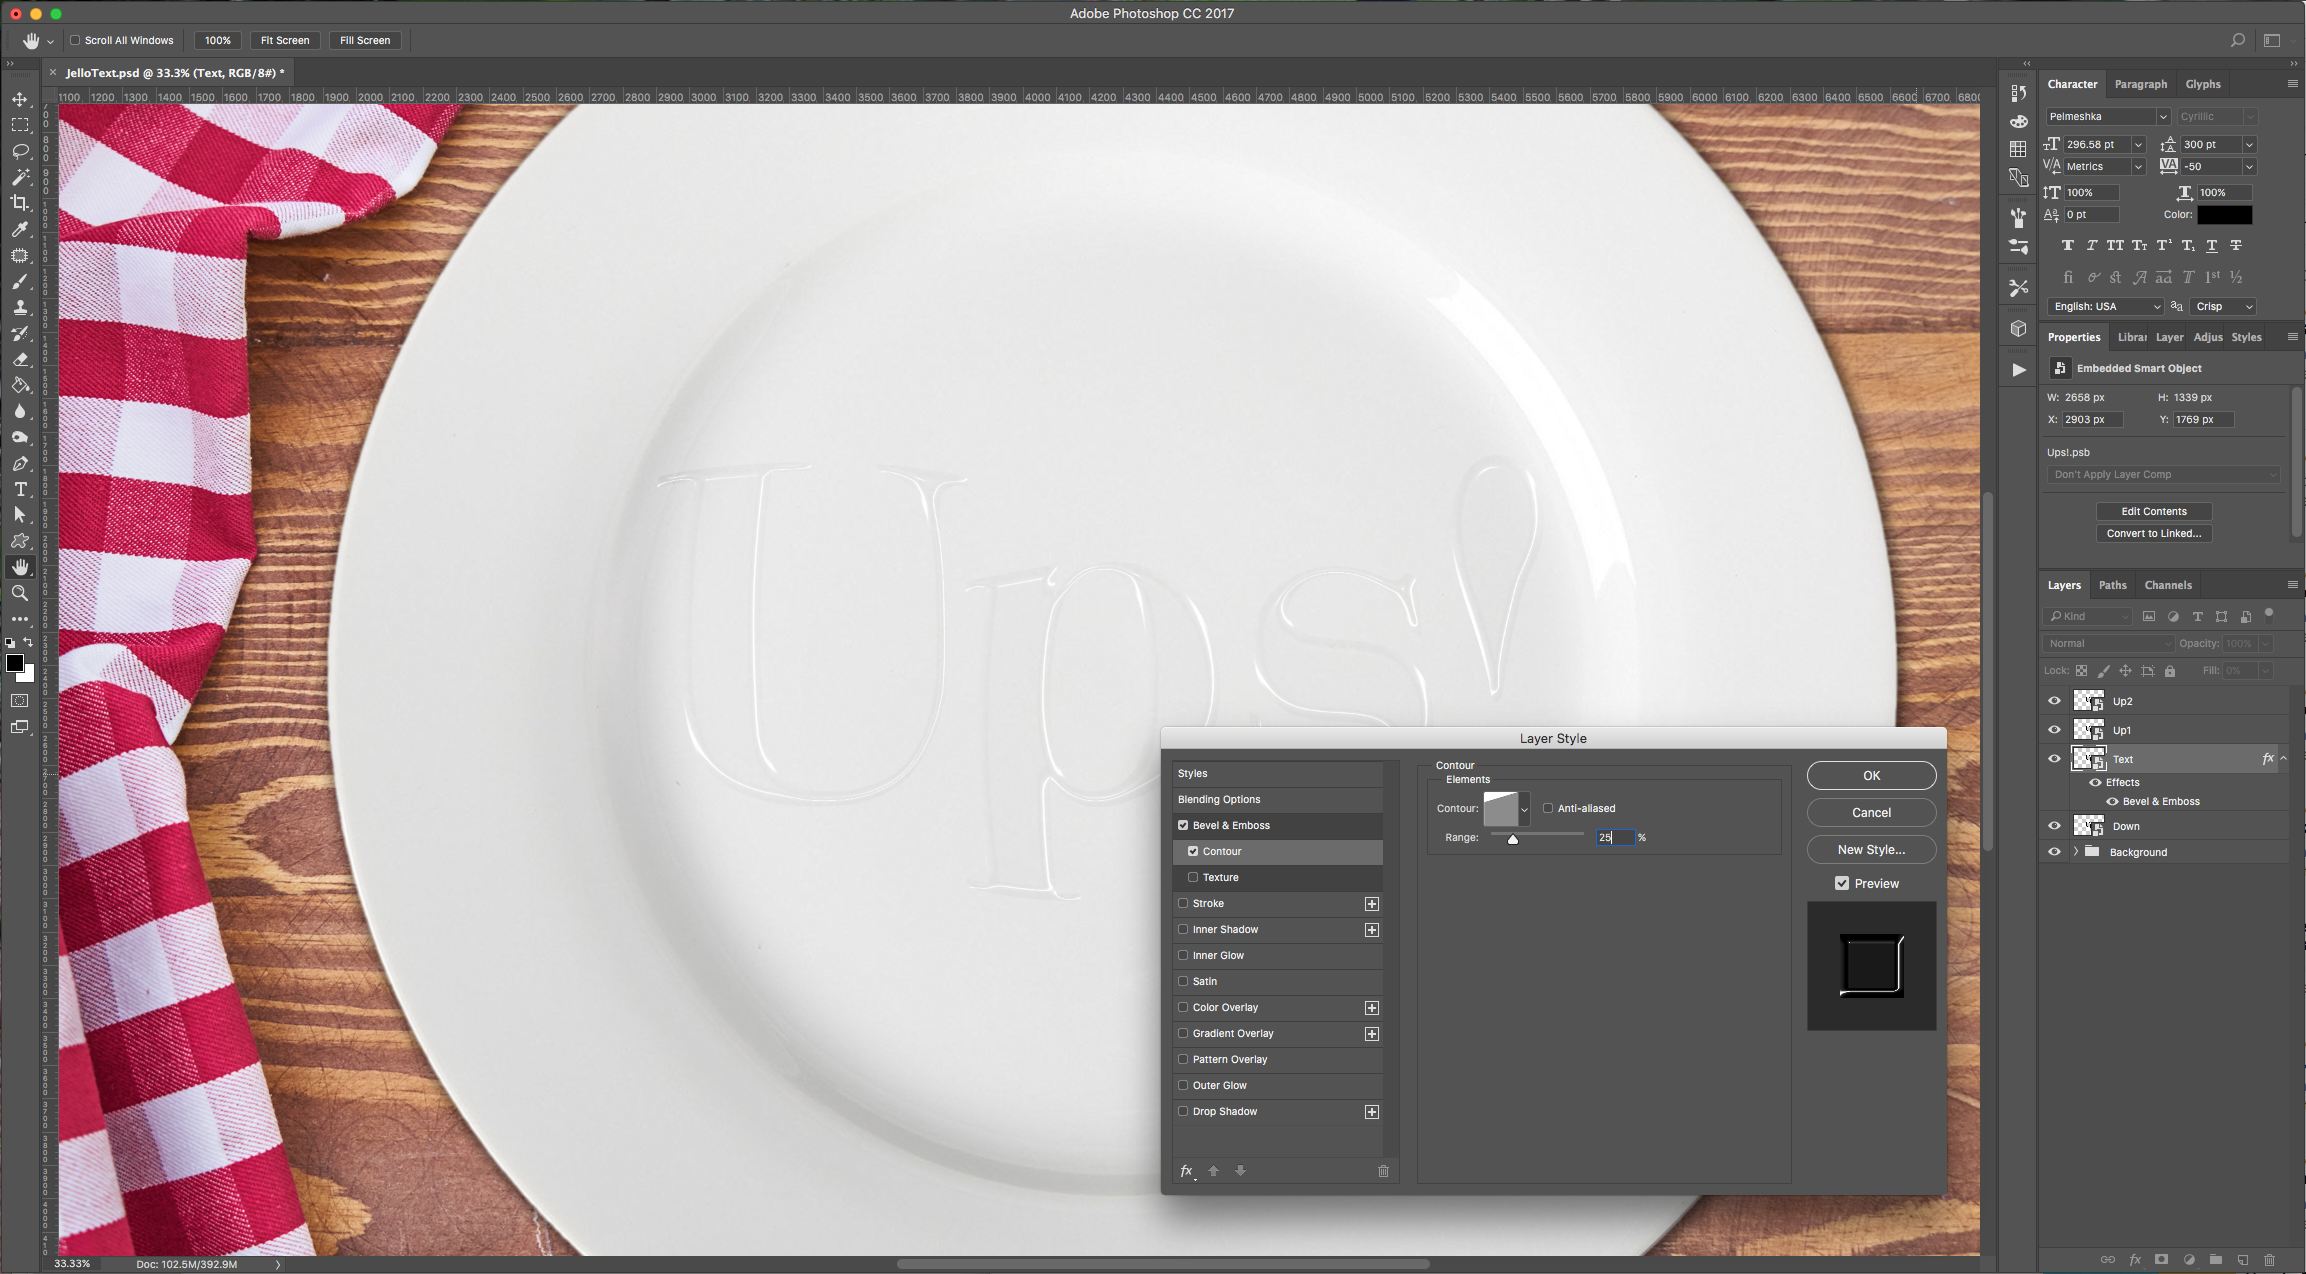
Contour: (Click on the “Contour” thumbnail).
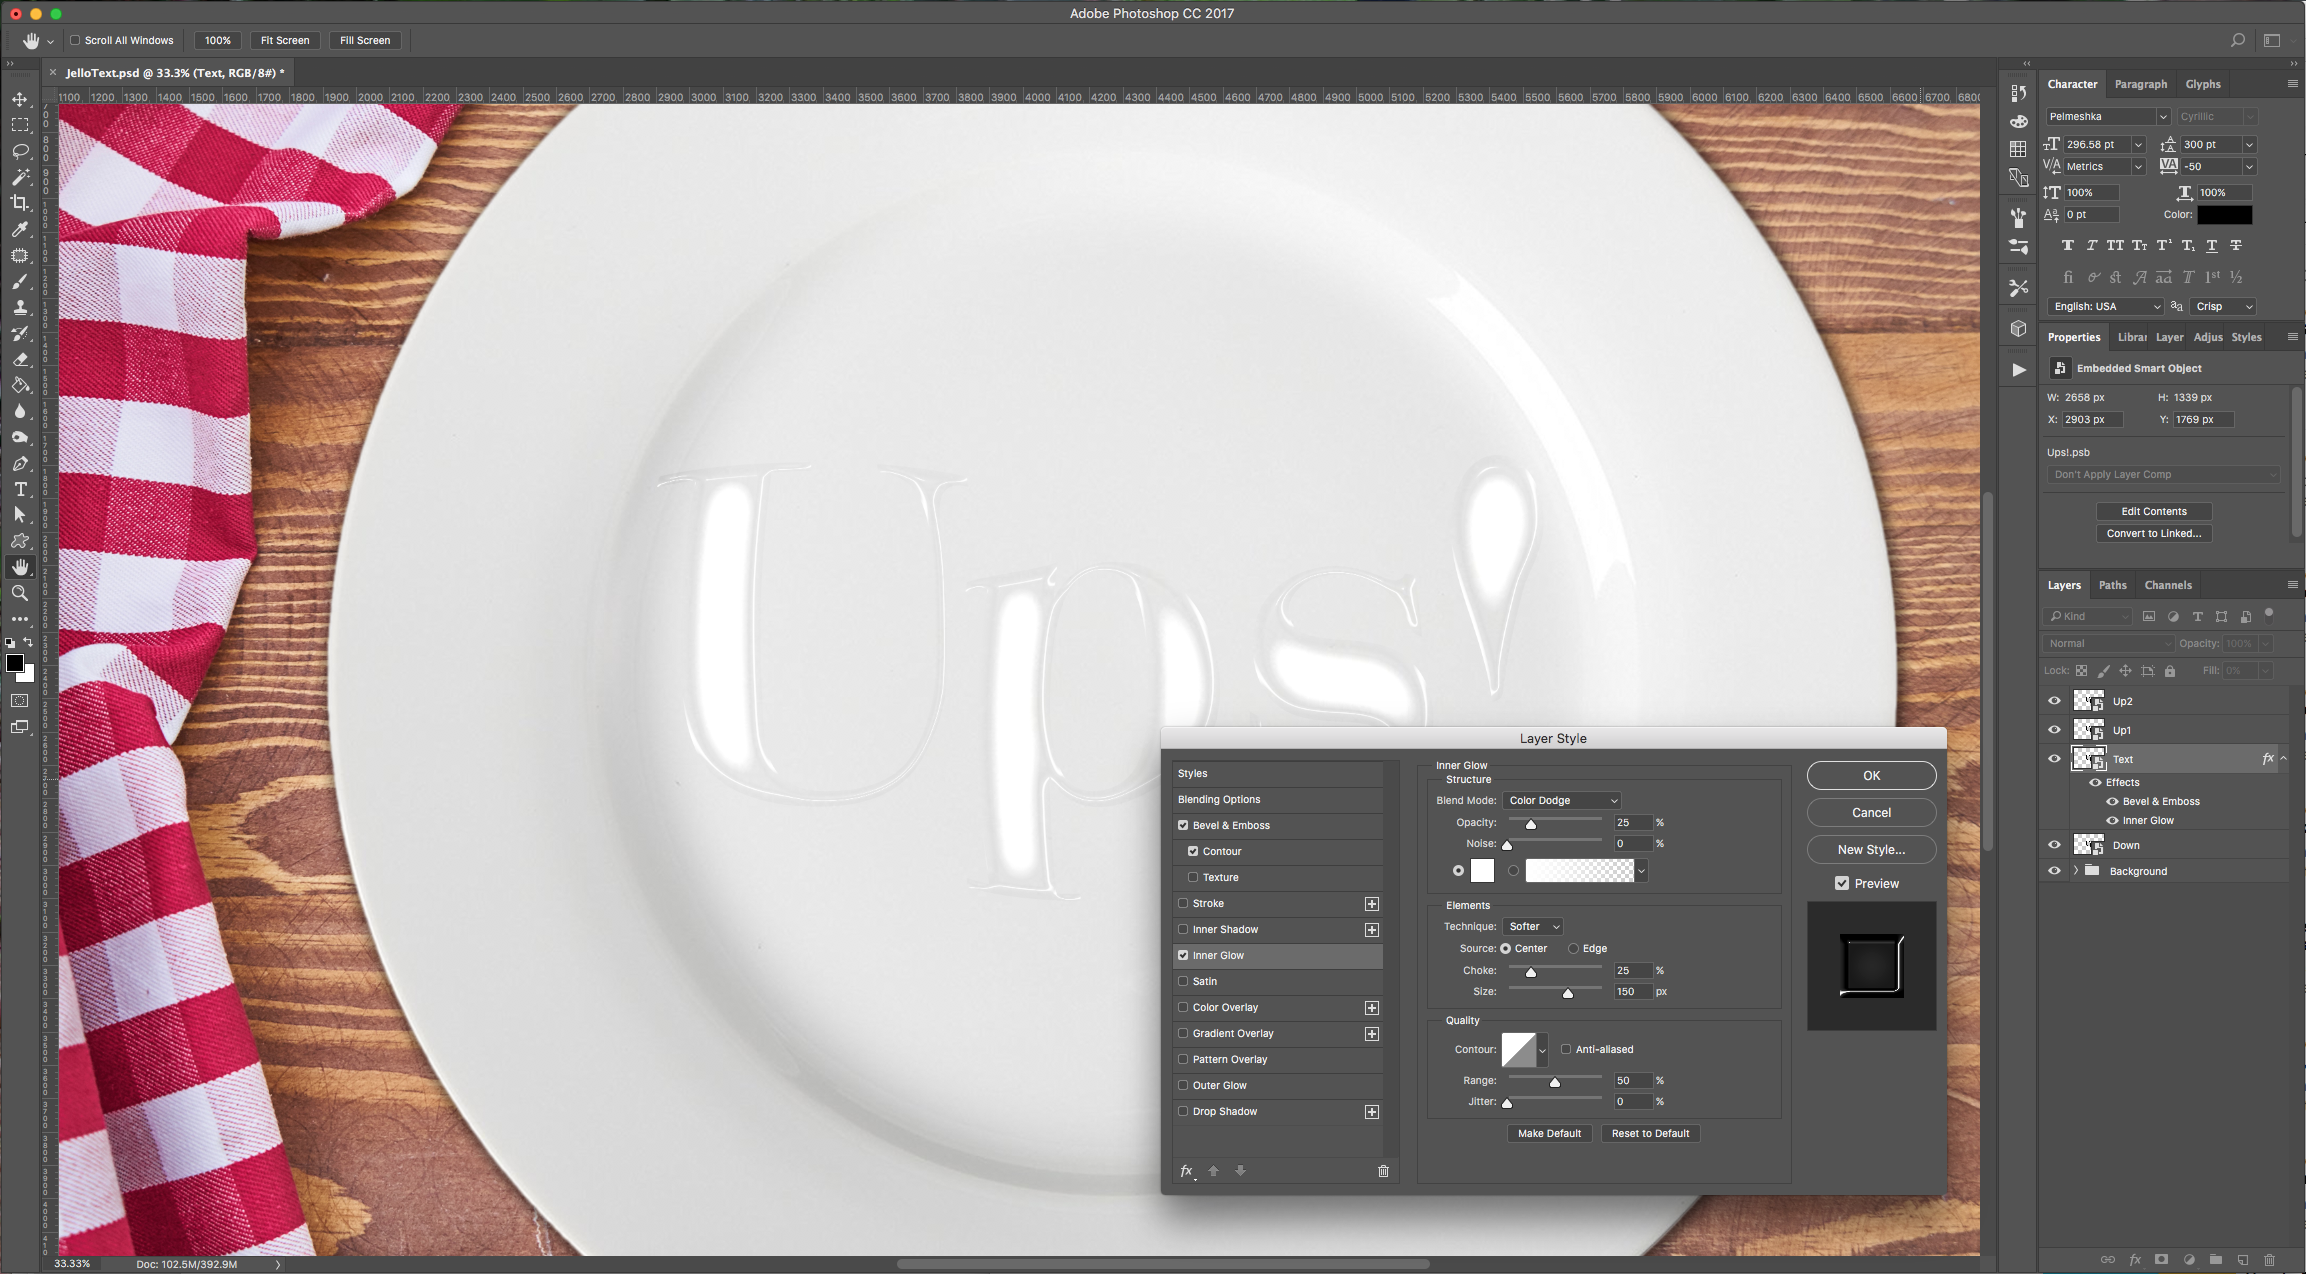
Inner Glow: (color #ffffff).
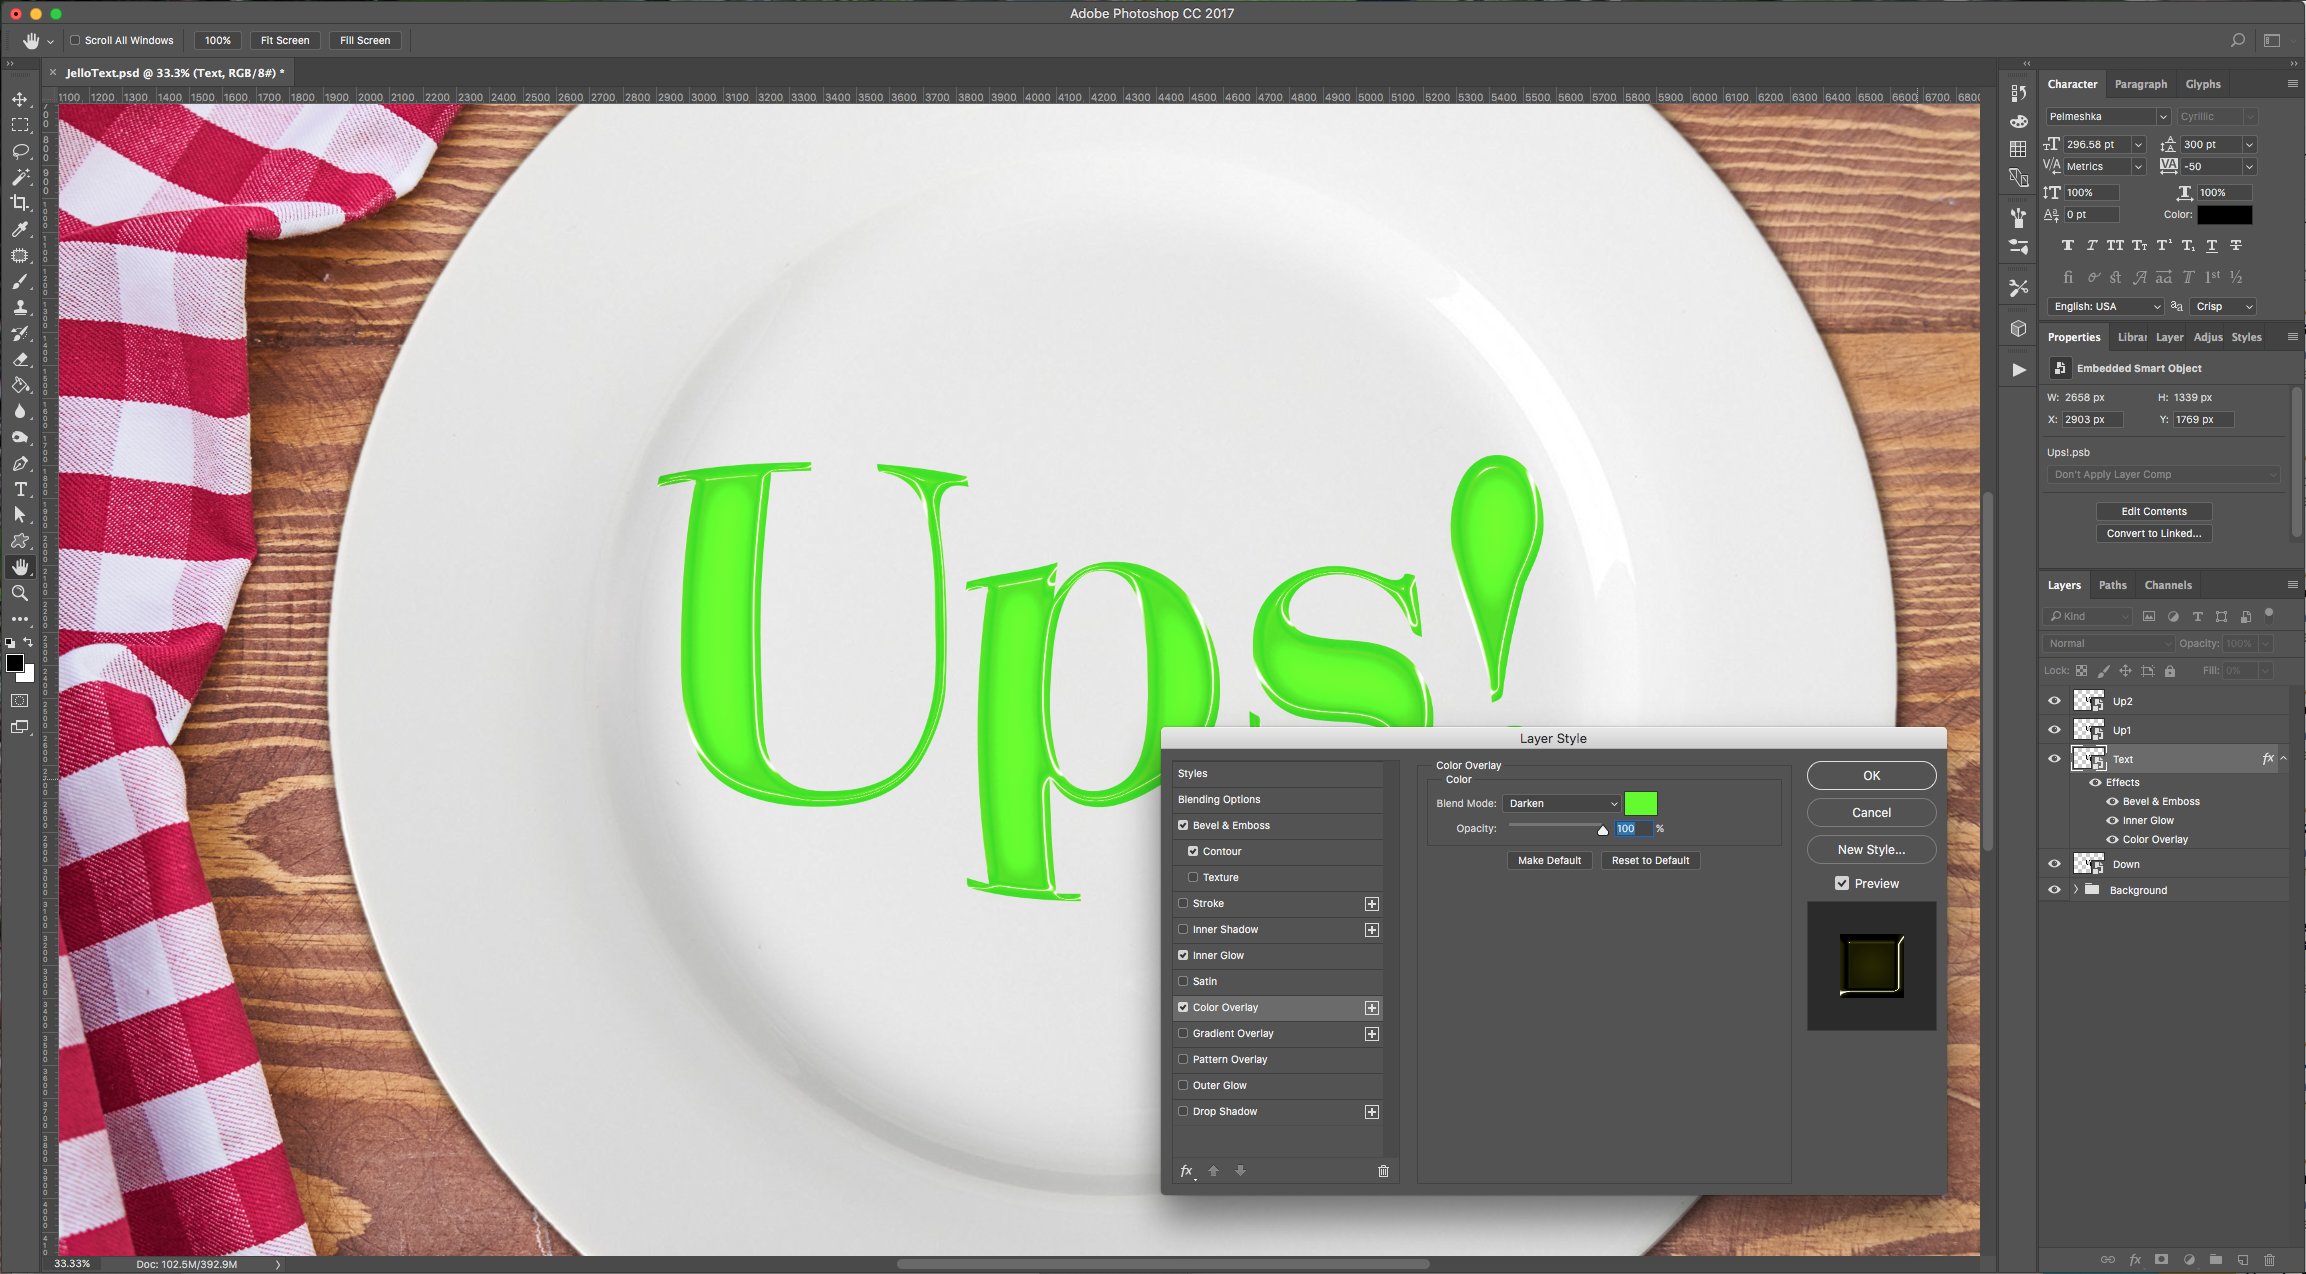
Color Overlay: (color #5bfc03).
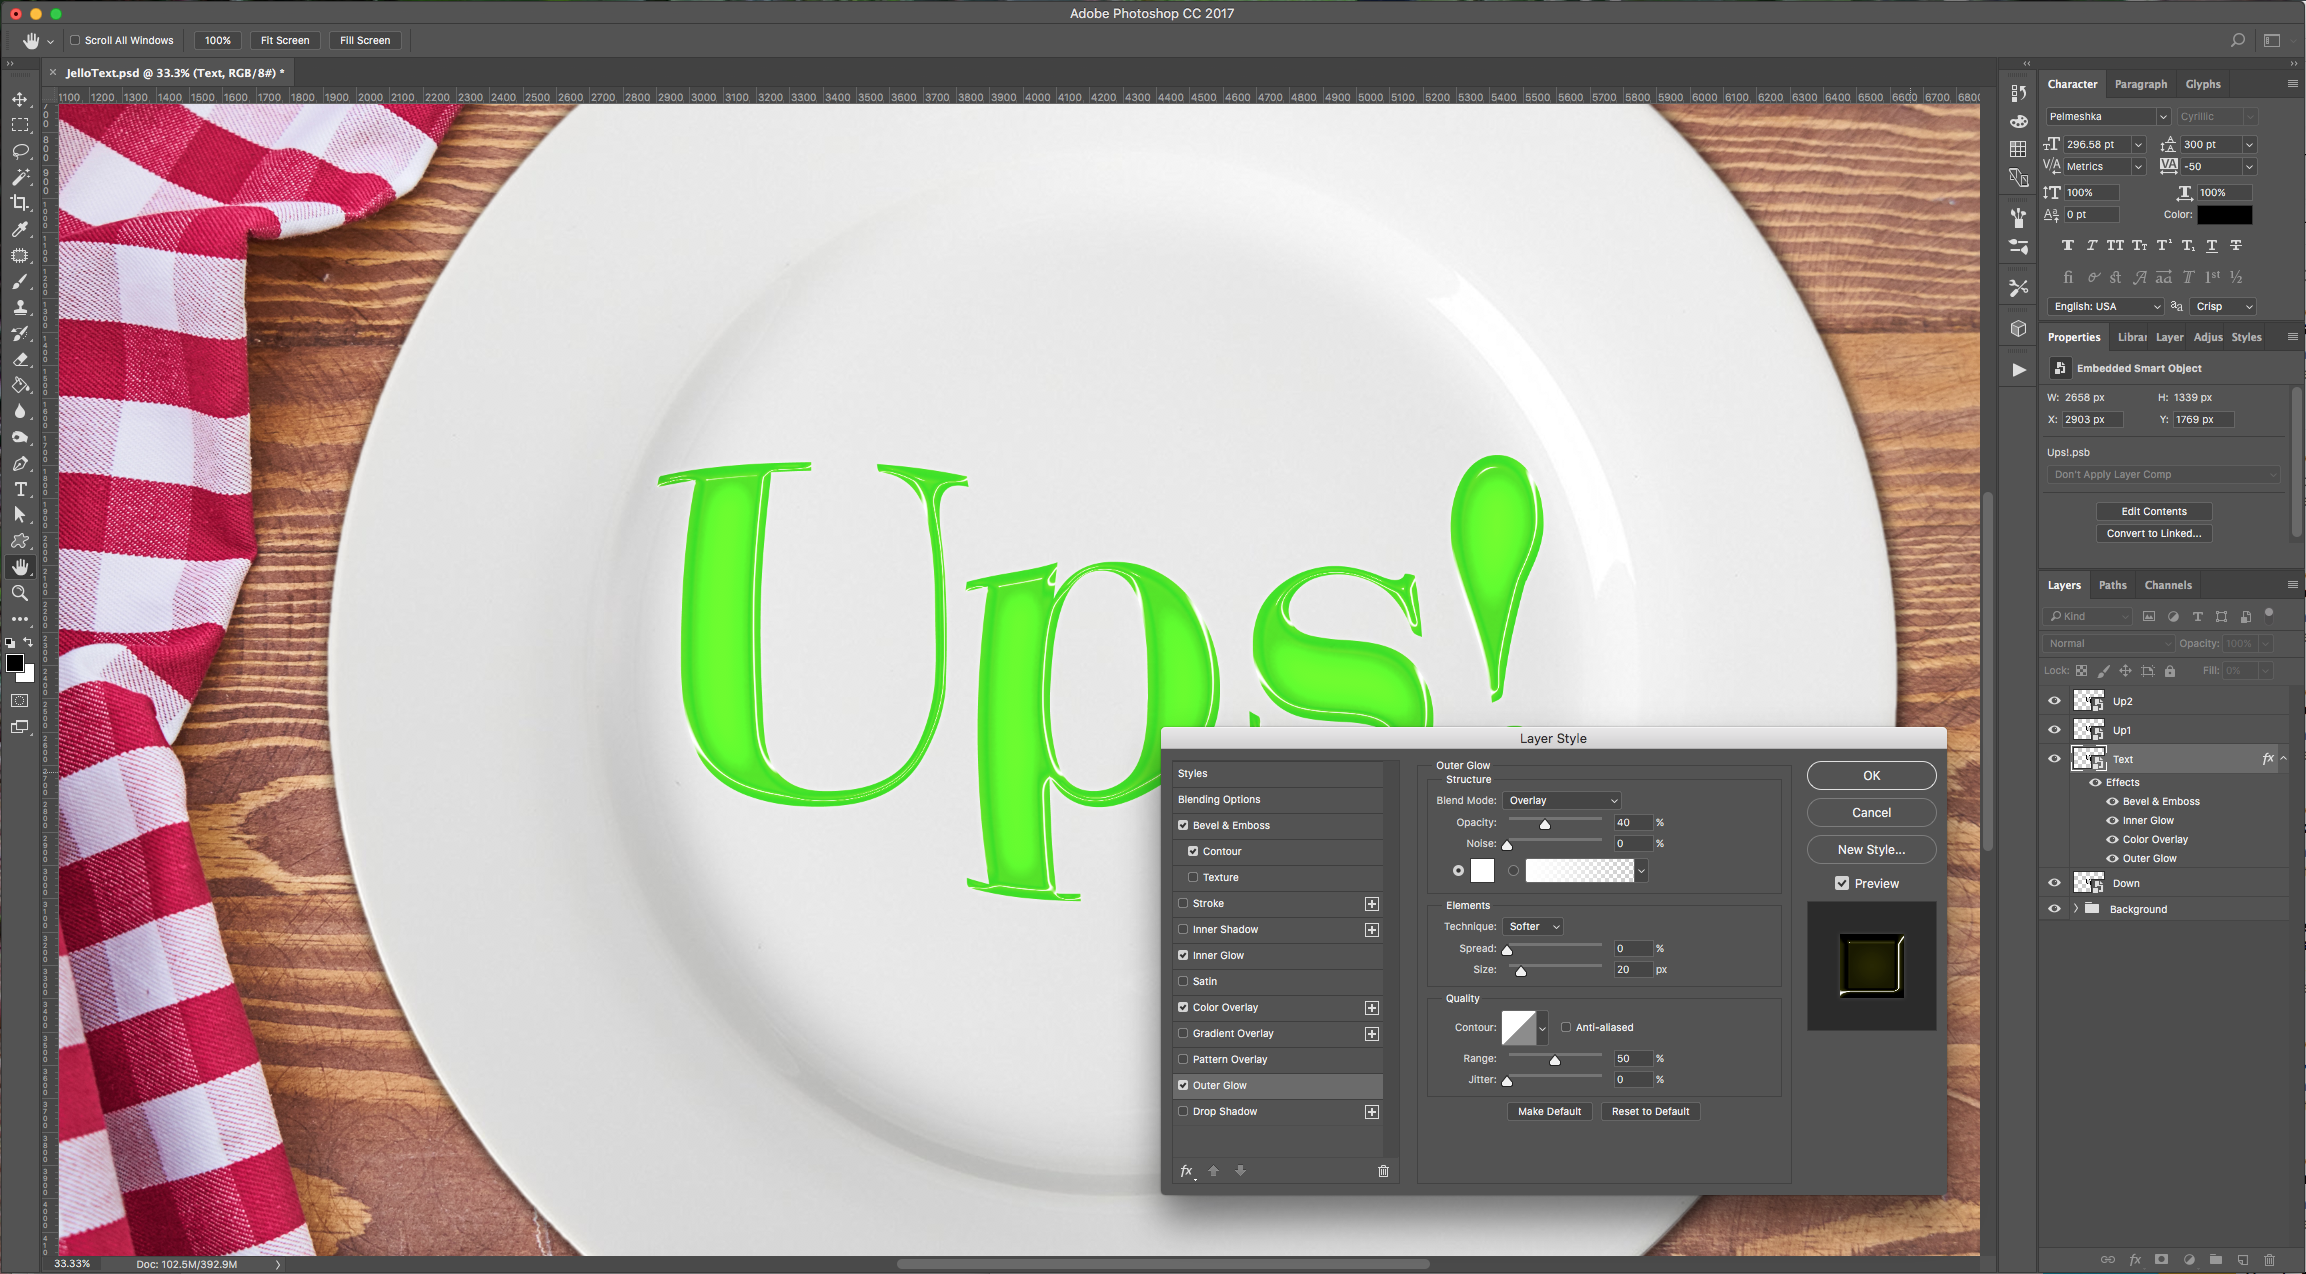
Outer Glow: (color #ffffff).
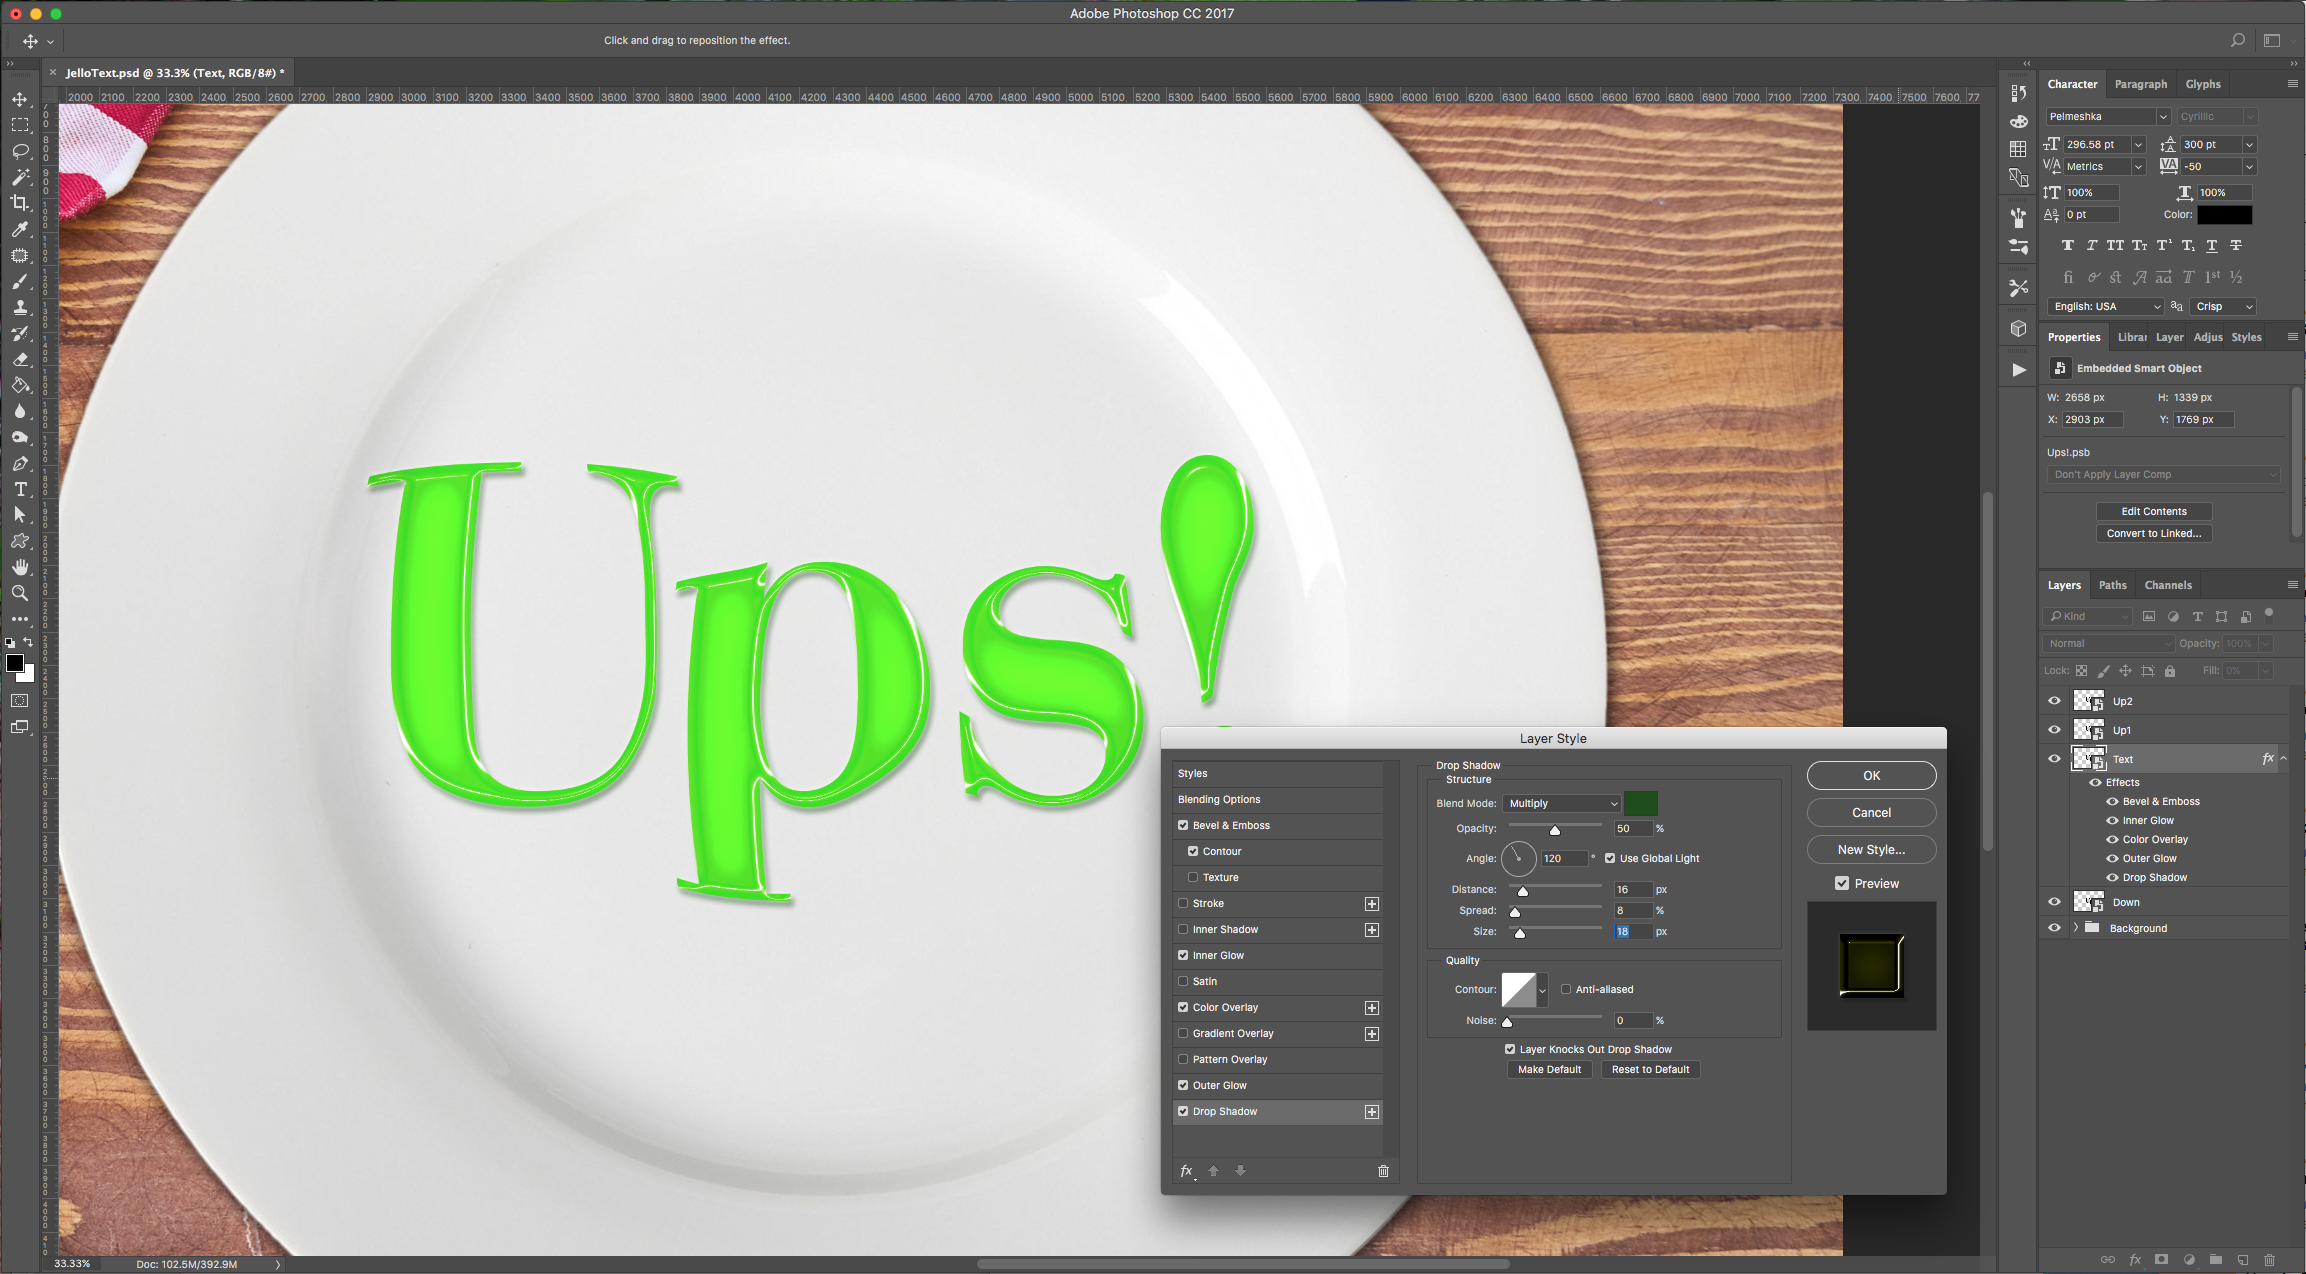
Drop Shadow: (color #1e4e18).
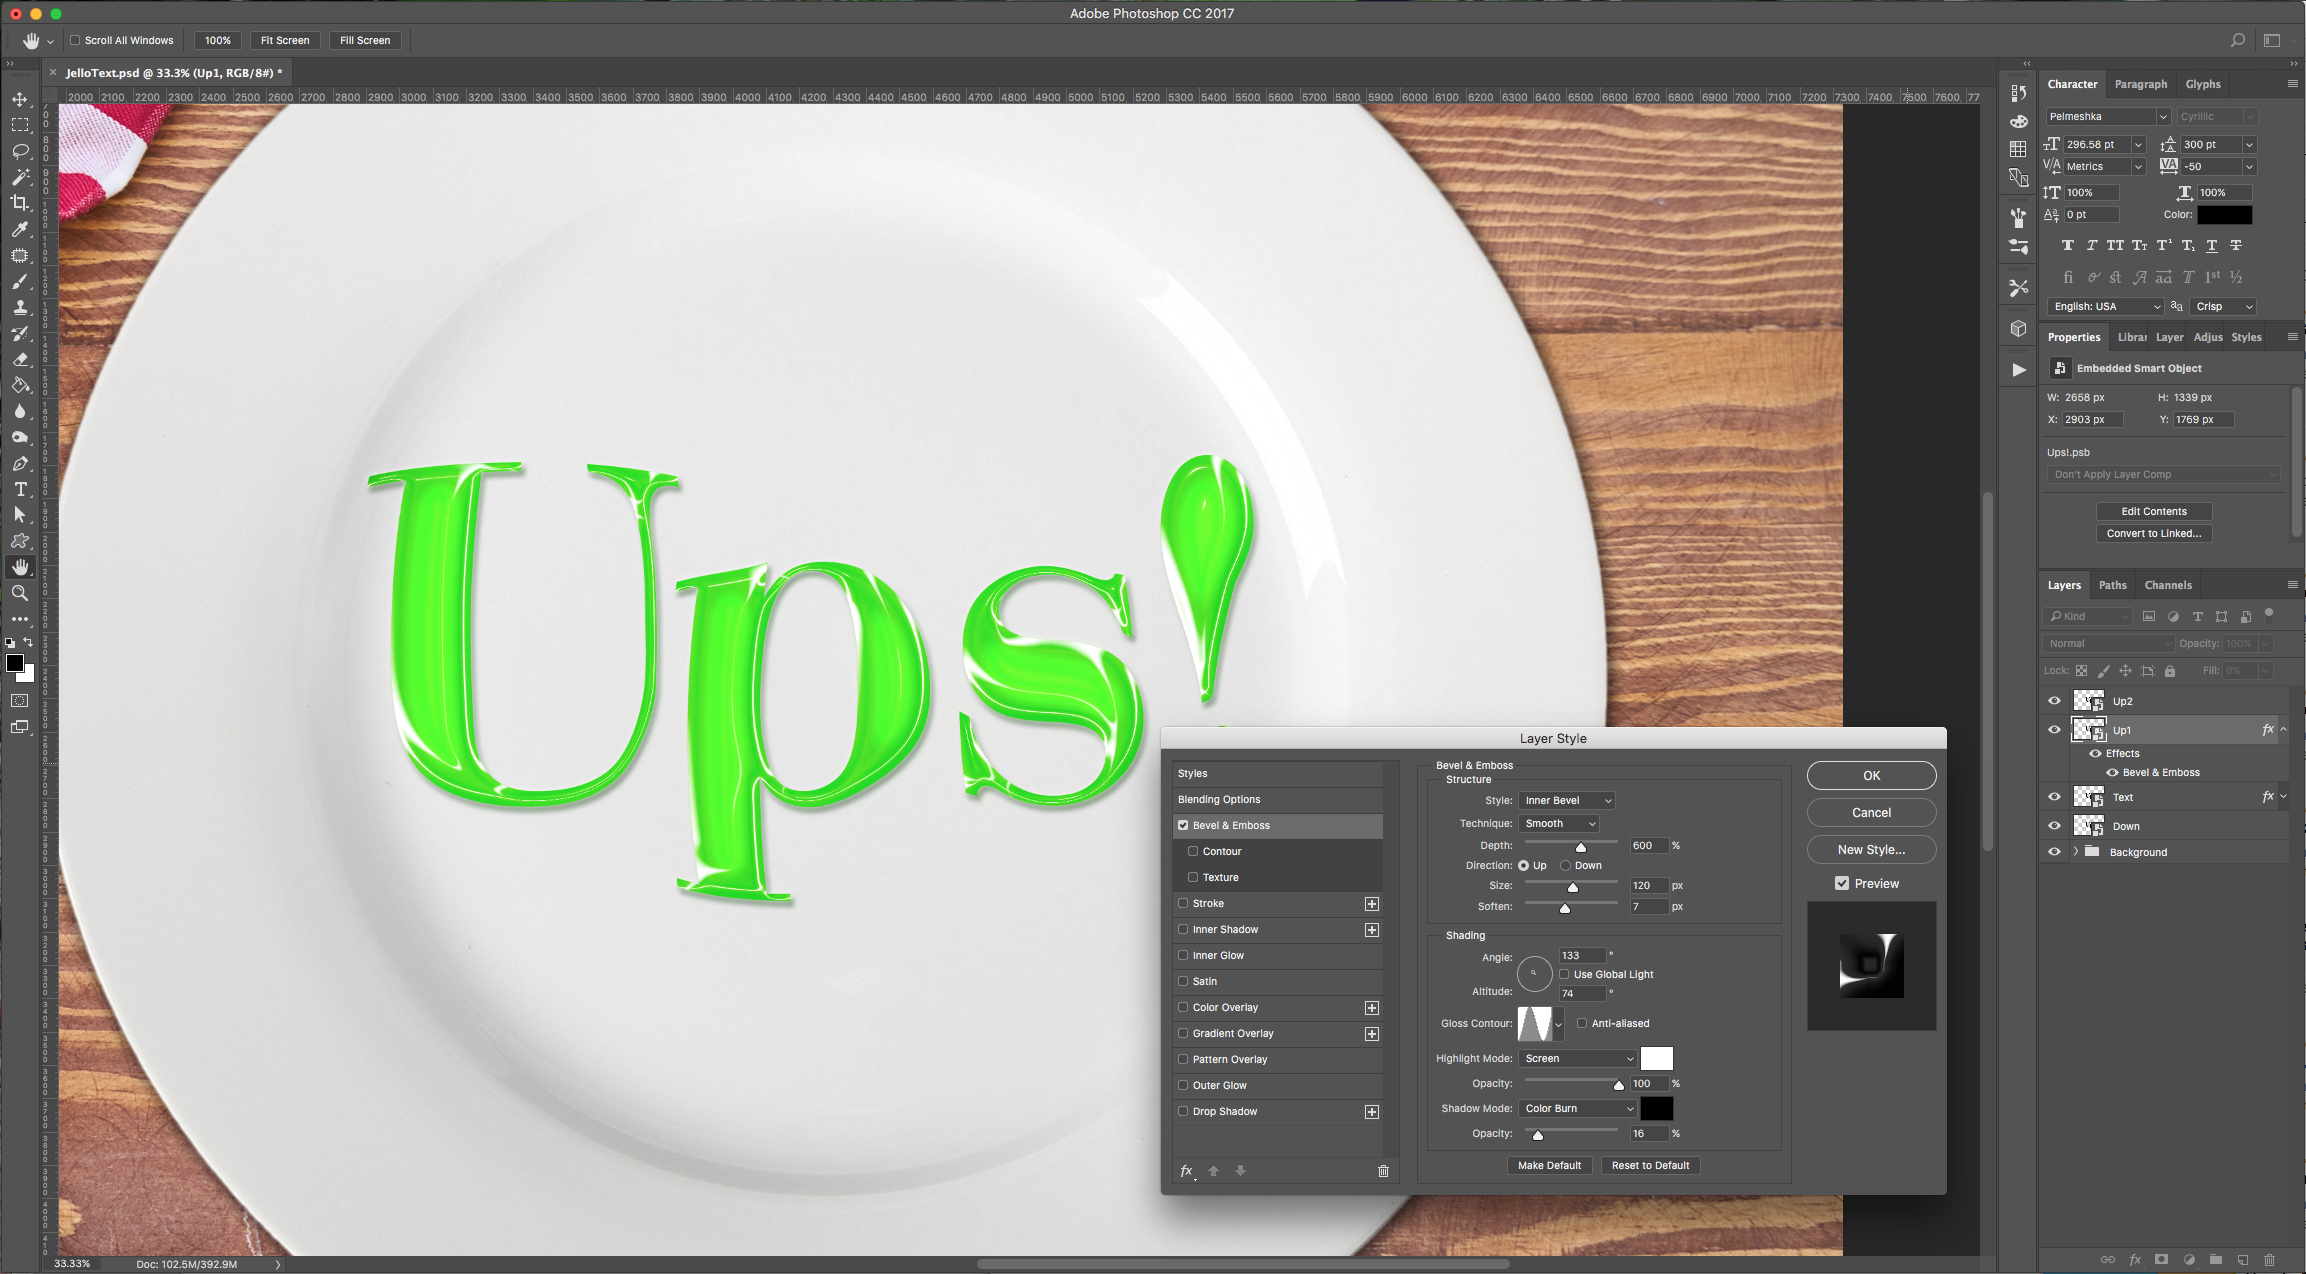
6 - Select “Up1” and apply the following “Layer Styles”:
Bevel & Emboss:
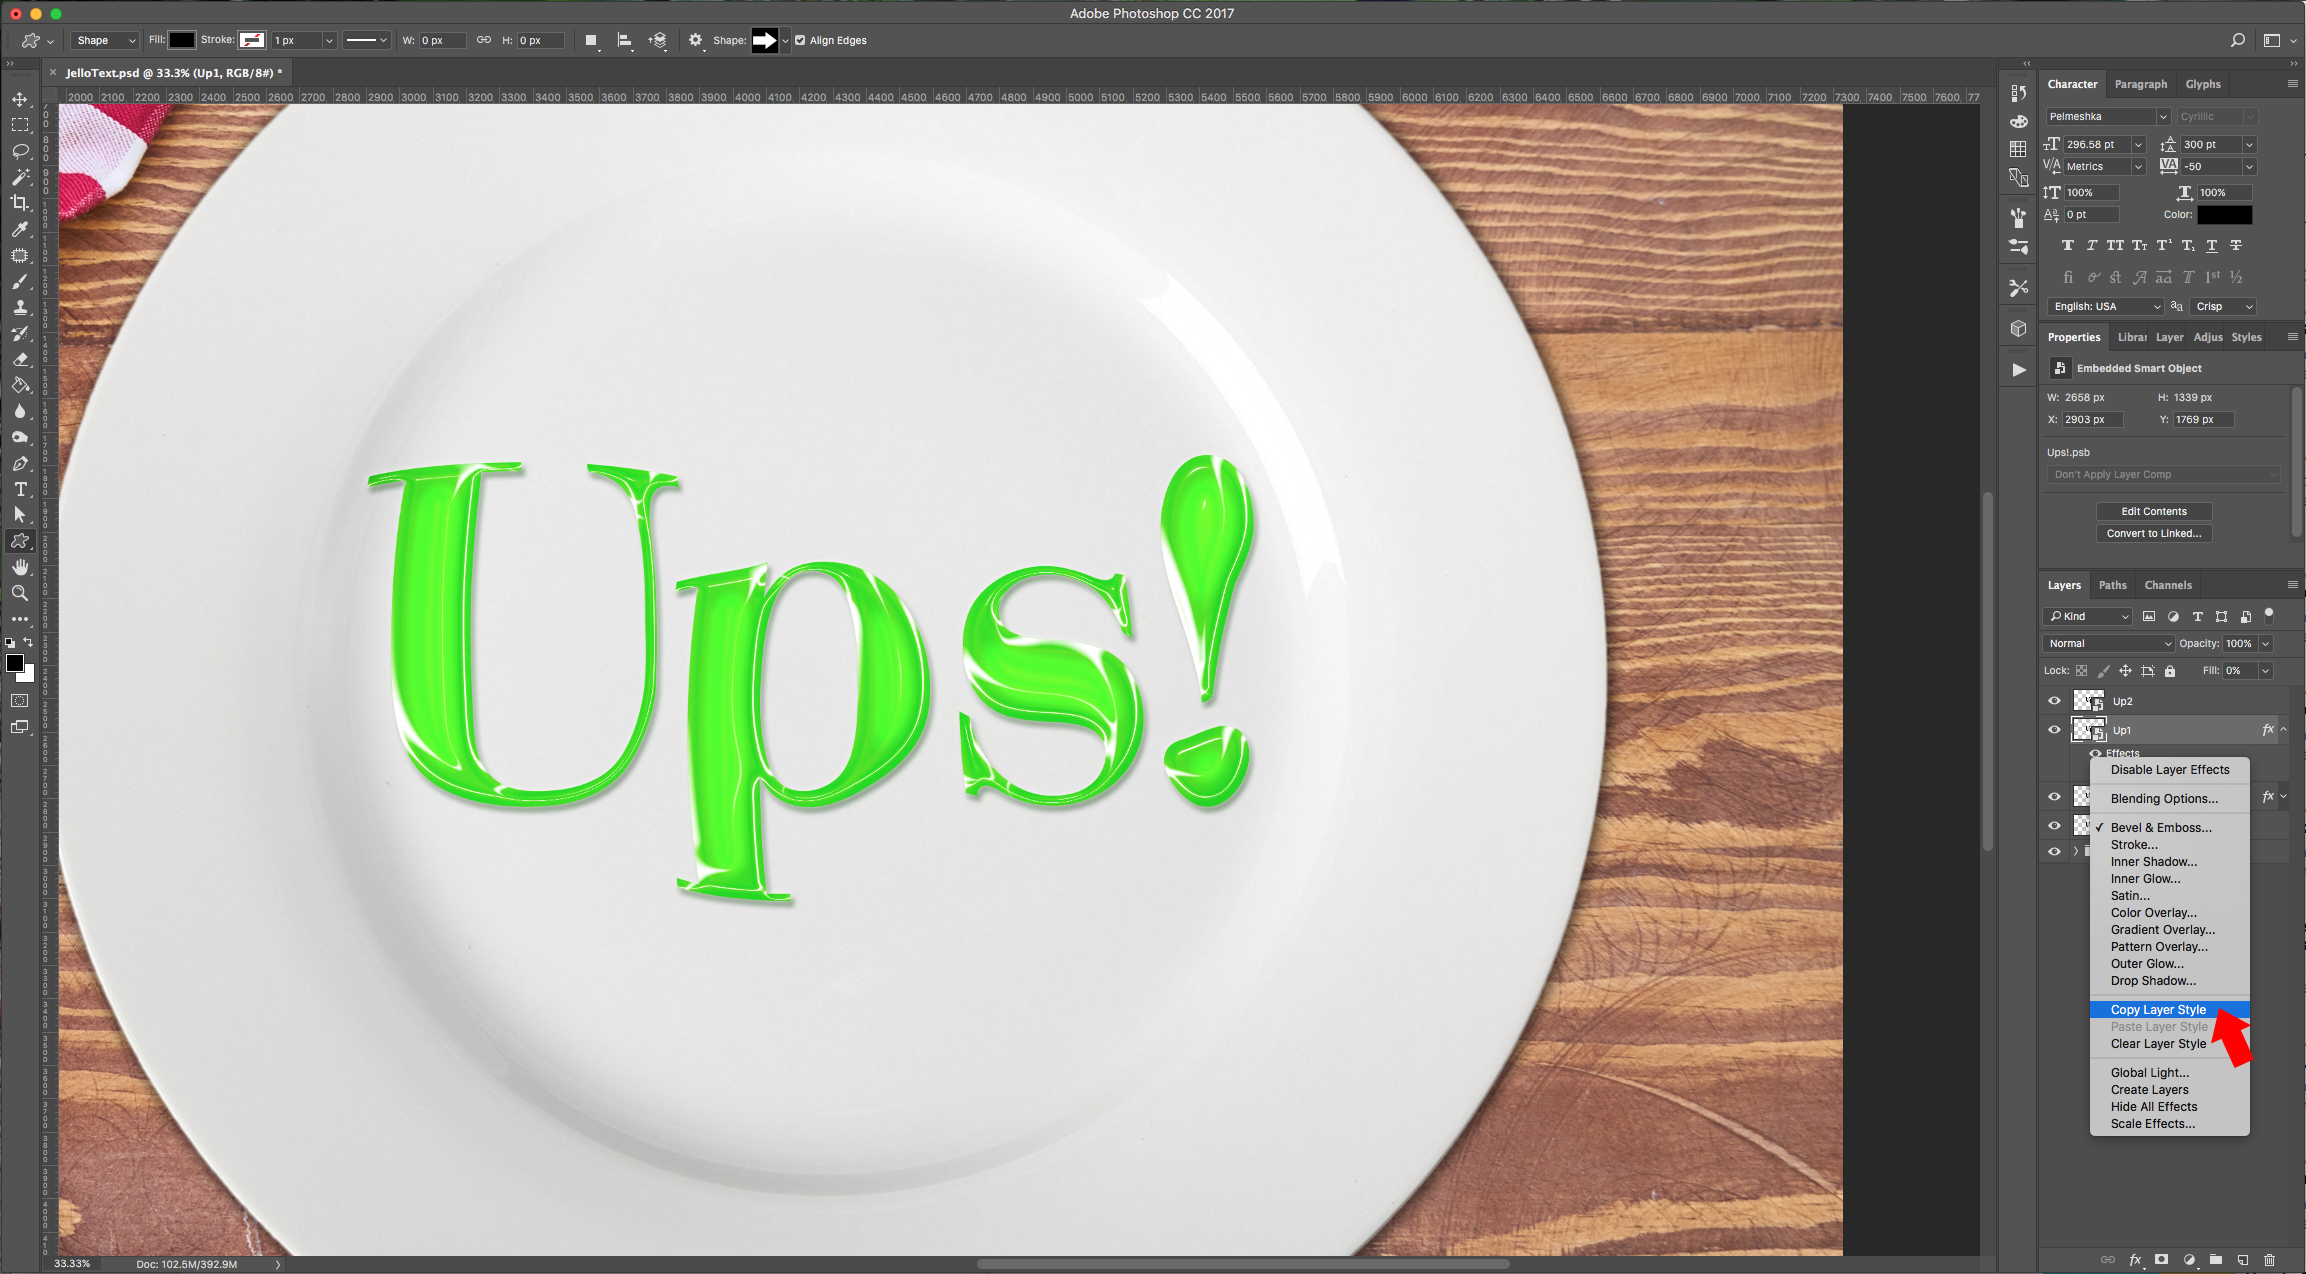
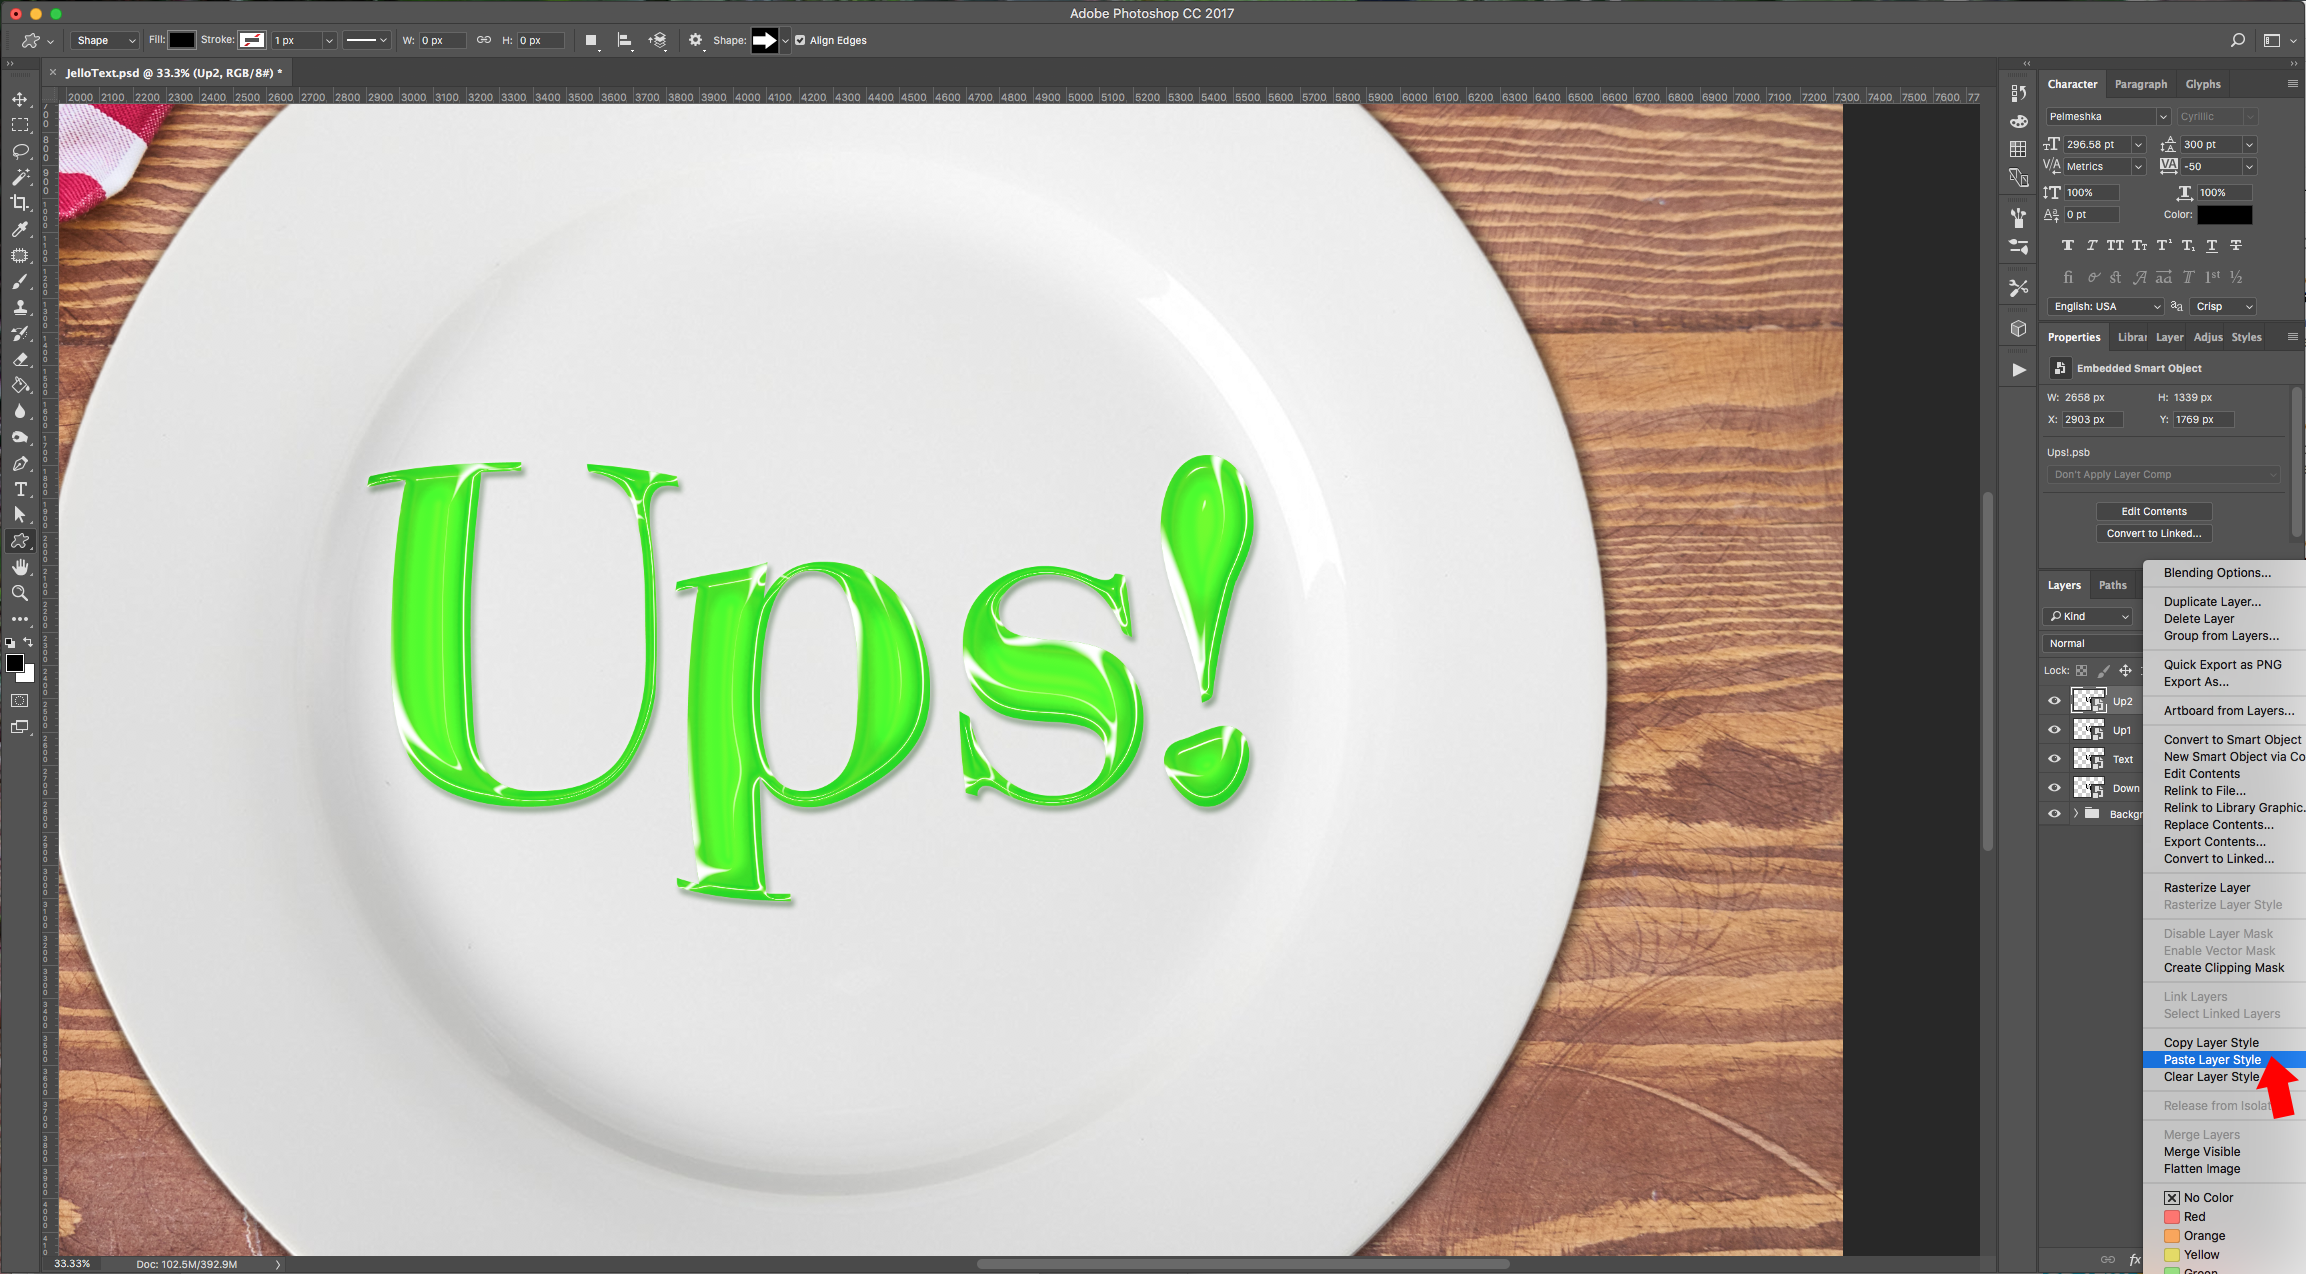
7 - Right-click on your layer “Effects” and choose “Copy Layer Style”, then select “Up2”, right-click on it and “Paste Layer Style”.
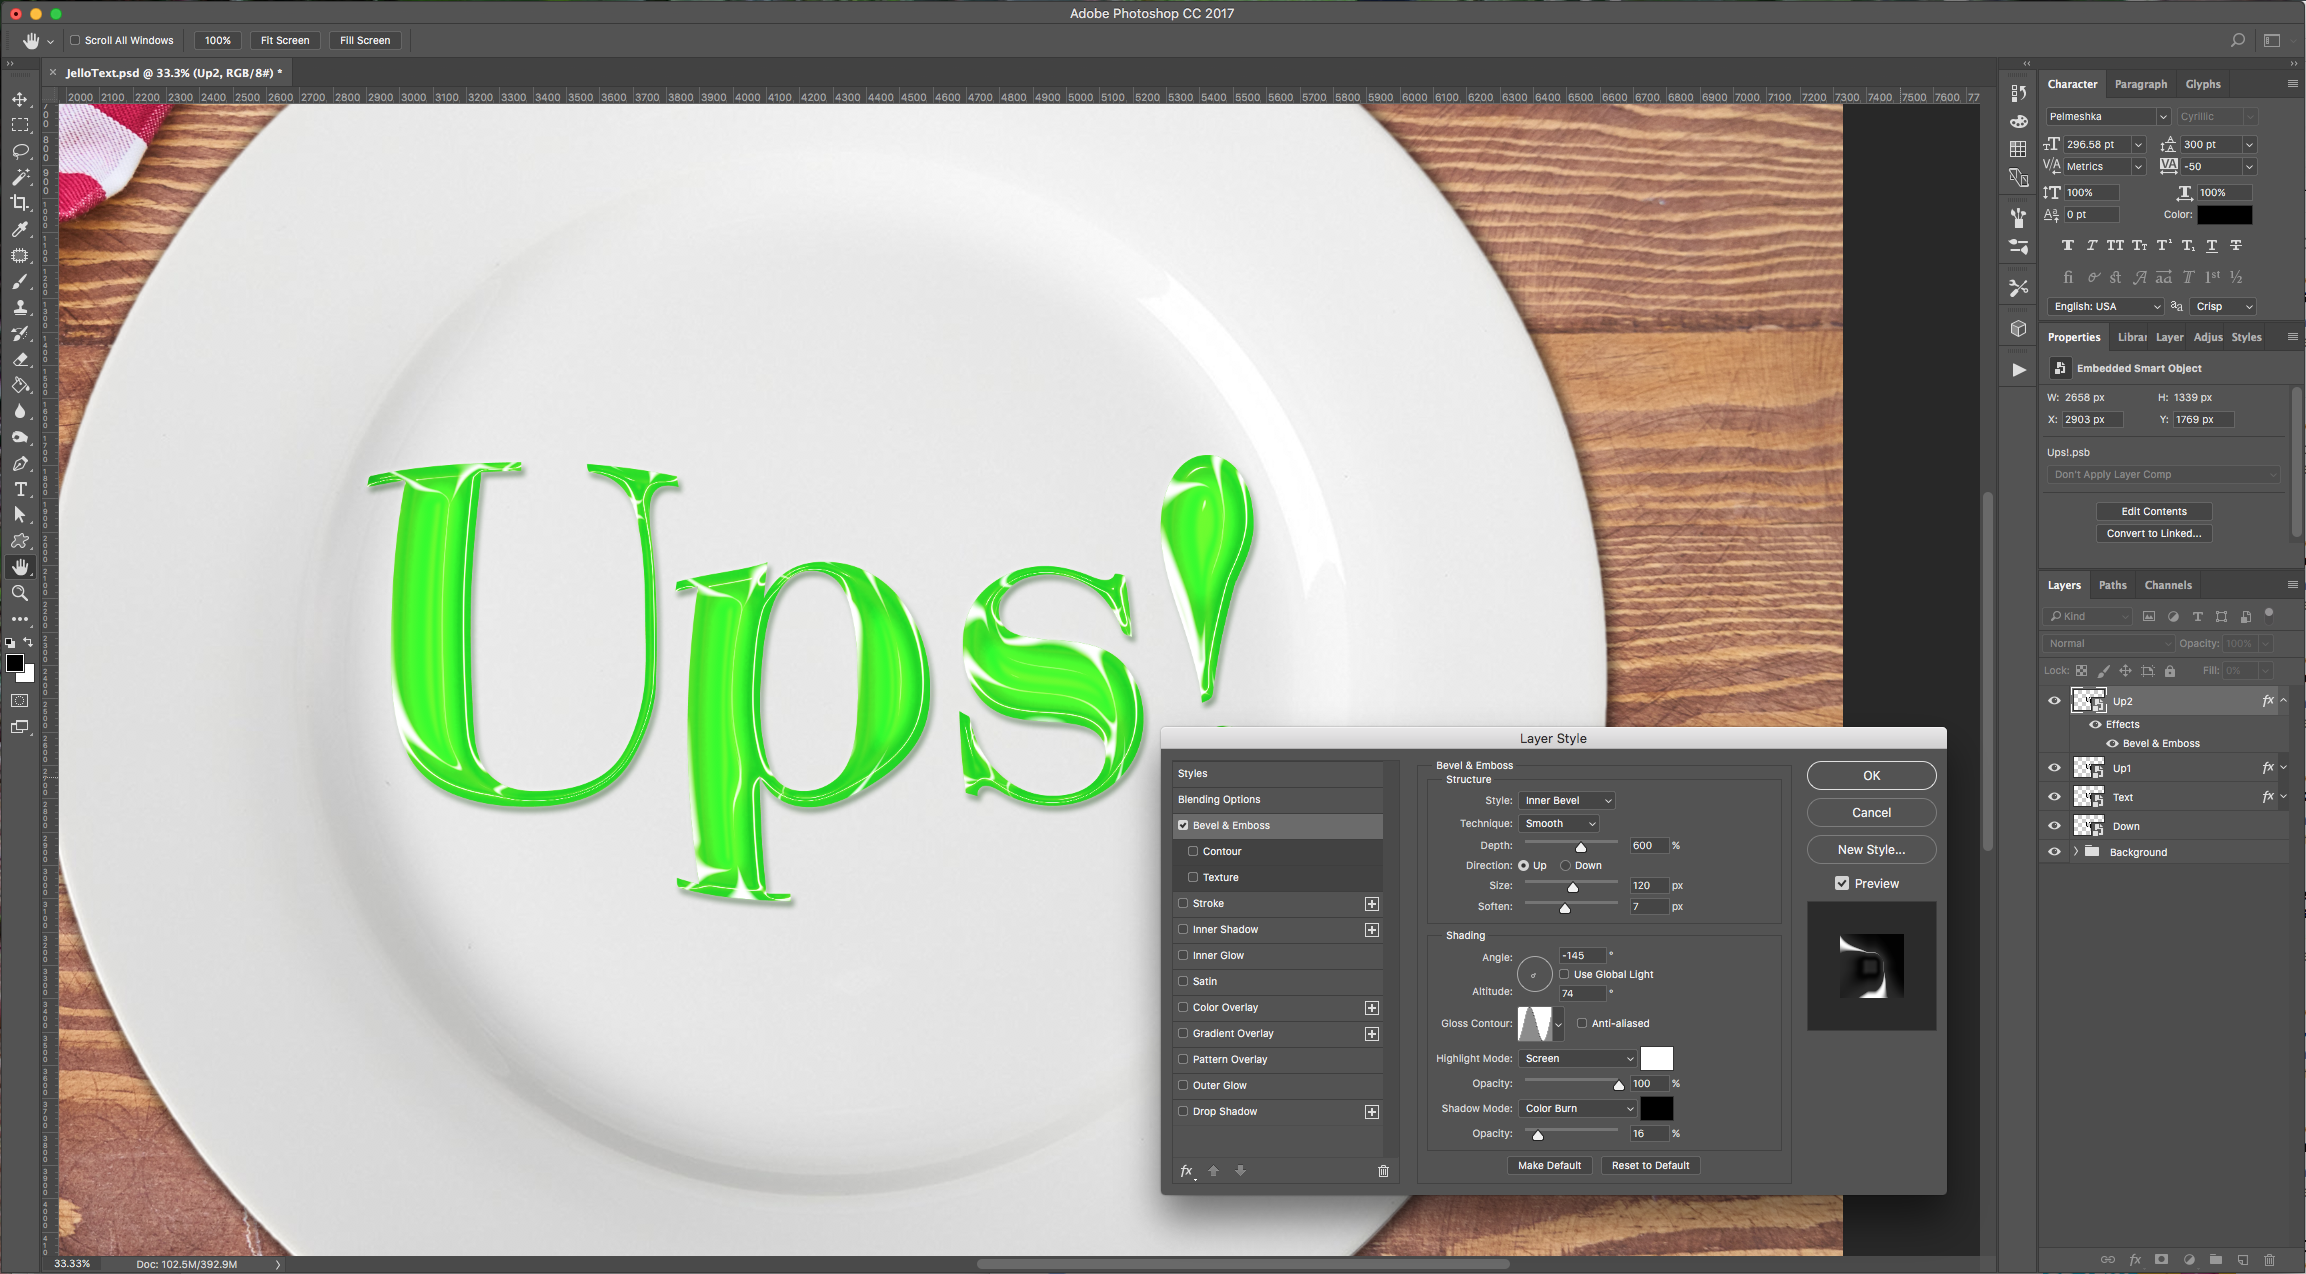
8 - Double-click on the “Up2” layer and make the following changes to the “Bevel & Emboss” style:
9 - To copy some of your styles to another layer select the “Effect” you want to copy and click Shift + Option/Alt while dragging it onto your other layer. Do this with “Bevel & Emboss” and “Color Overlay” from “Text” to “Down”. Double-click on “Down” and add the following “Layer Styles” to the ones you copied:
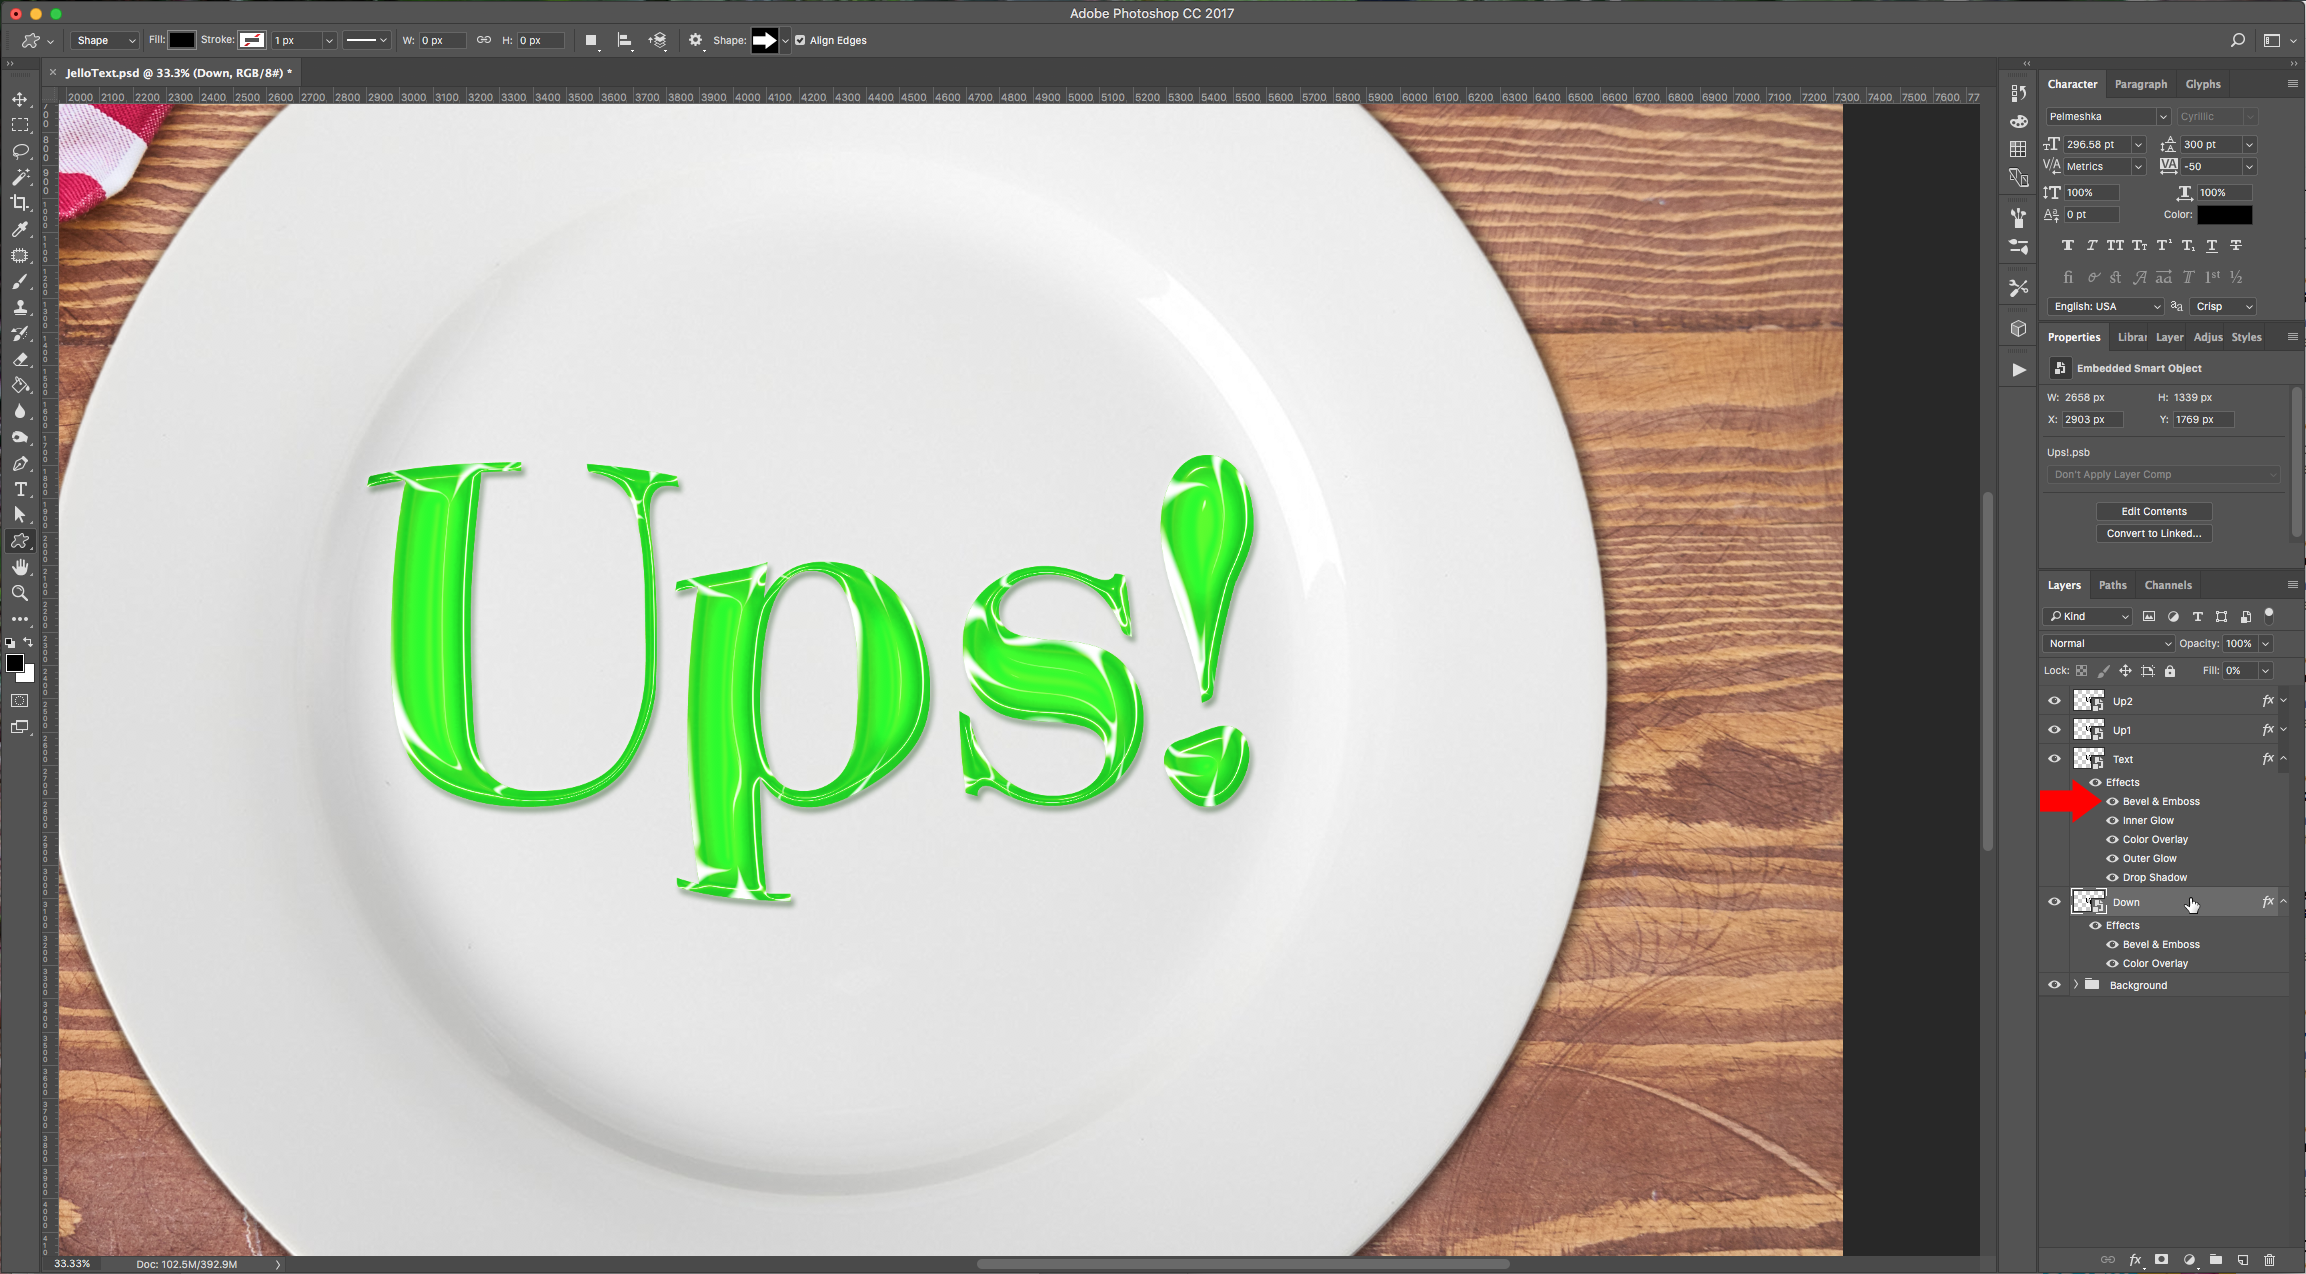
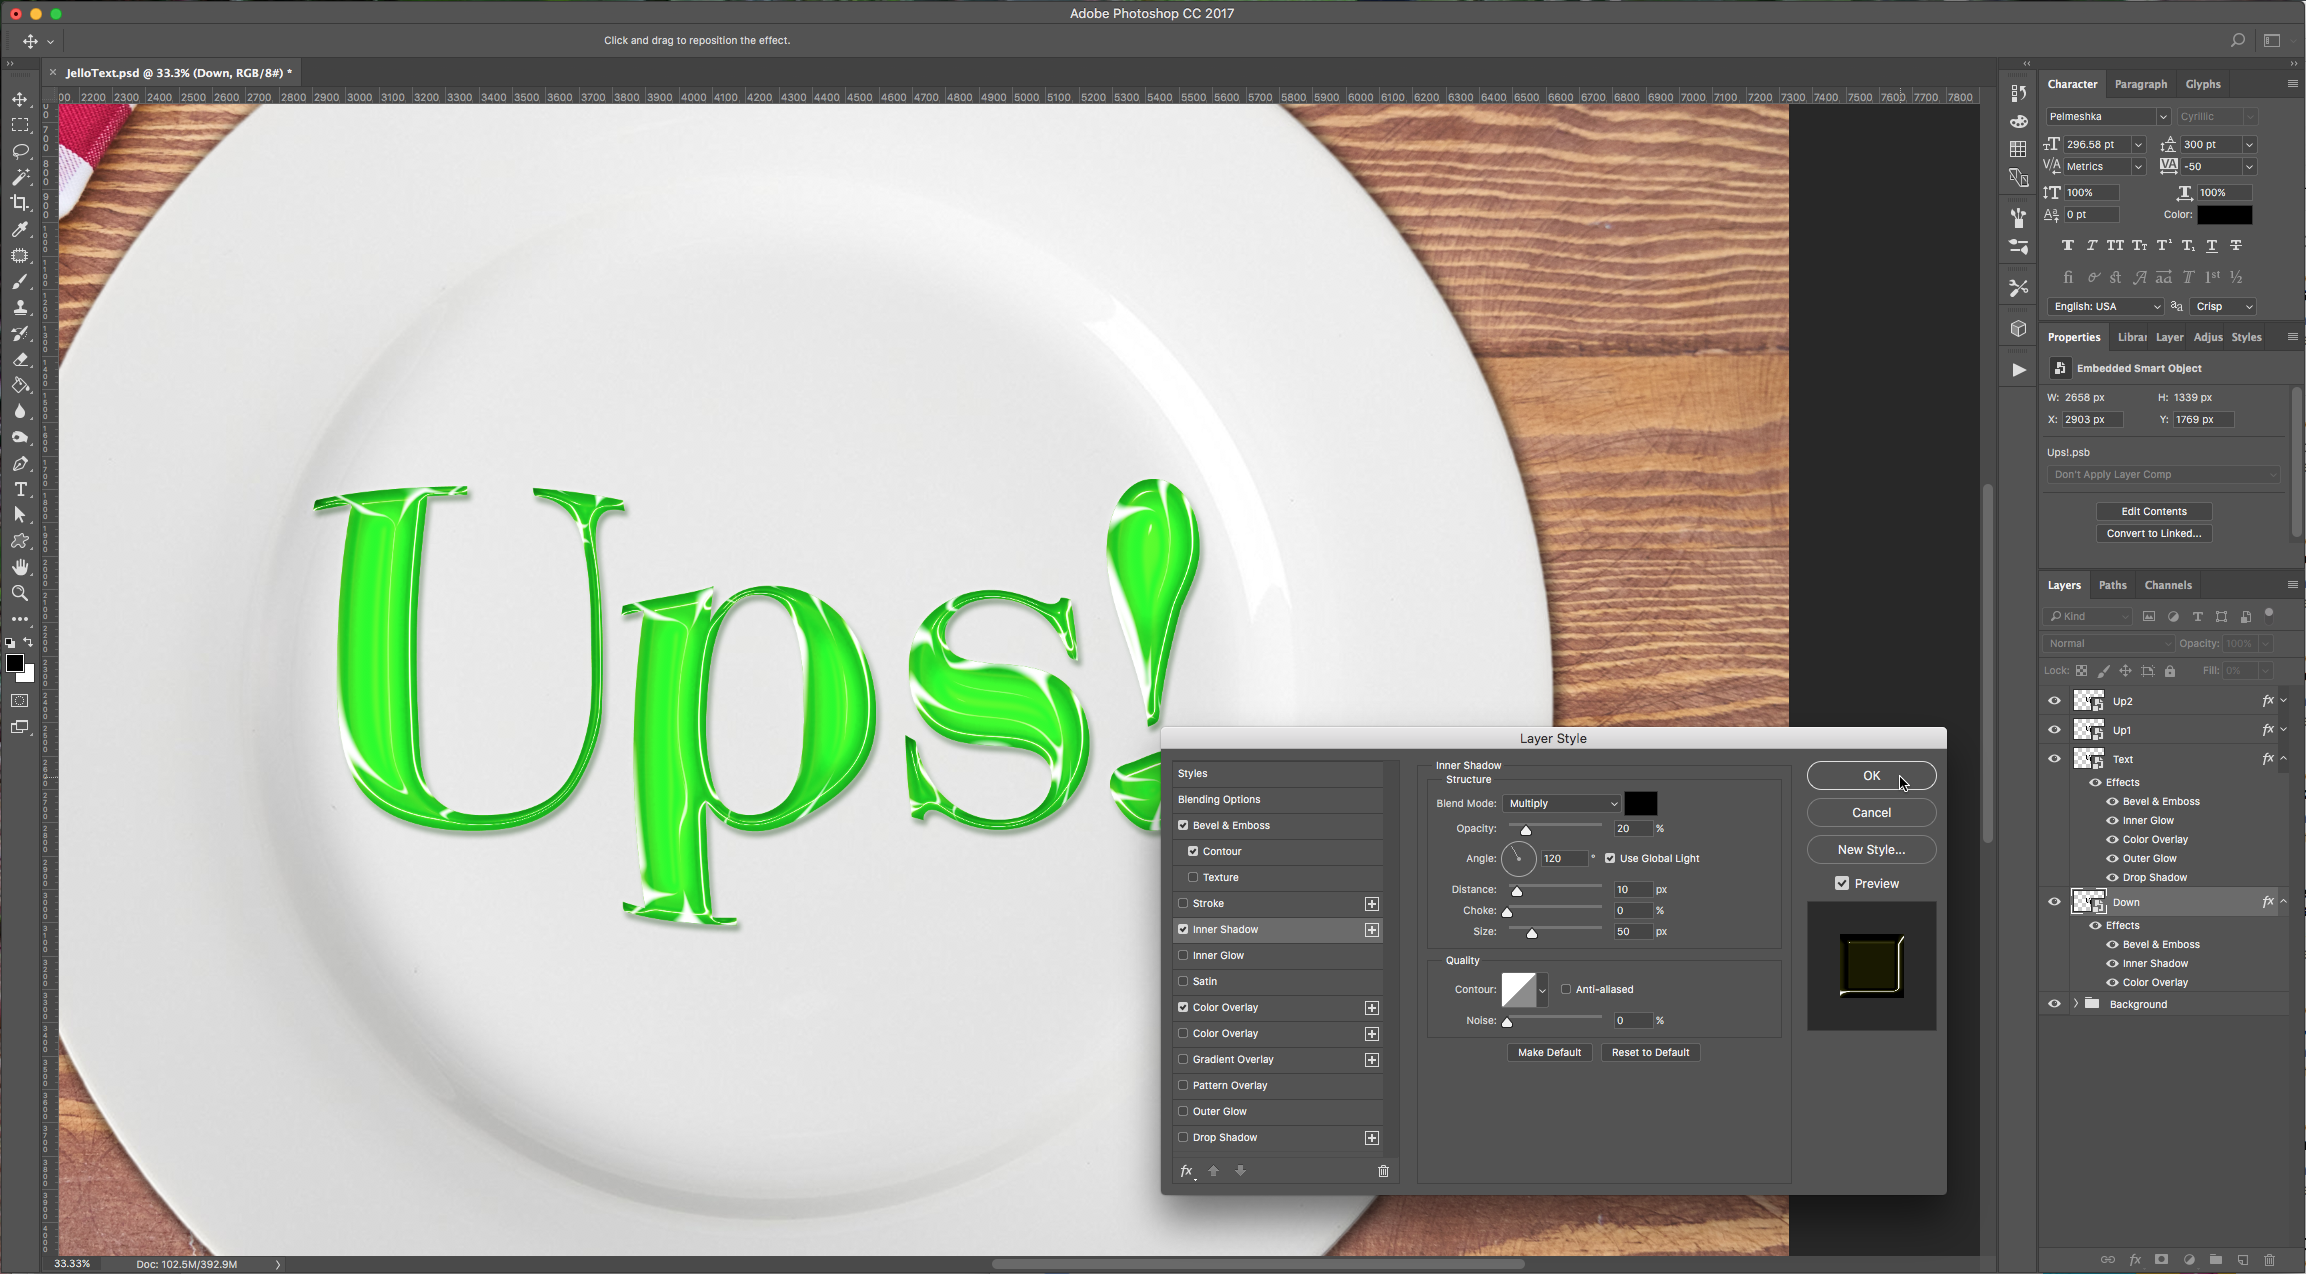
Inner Shadow:
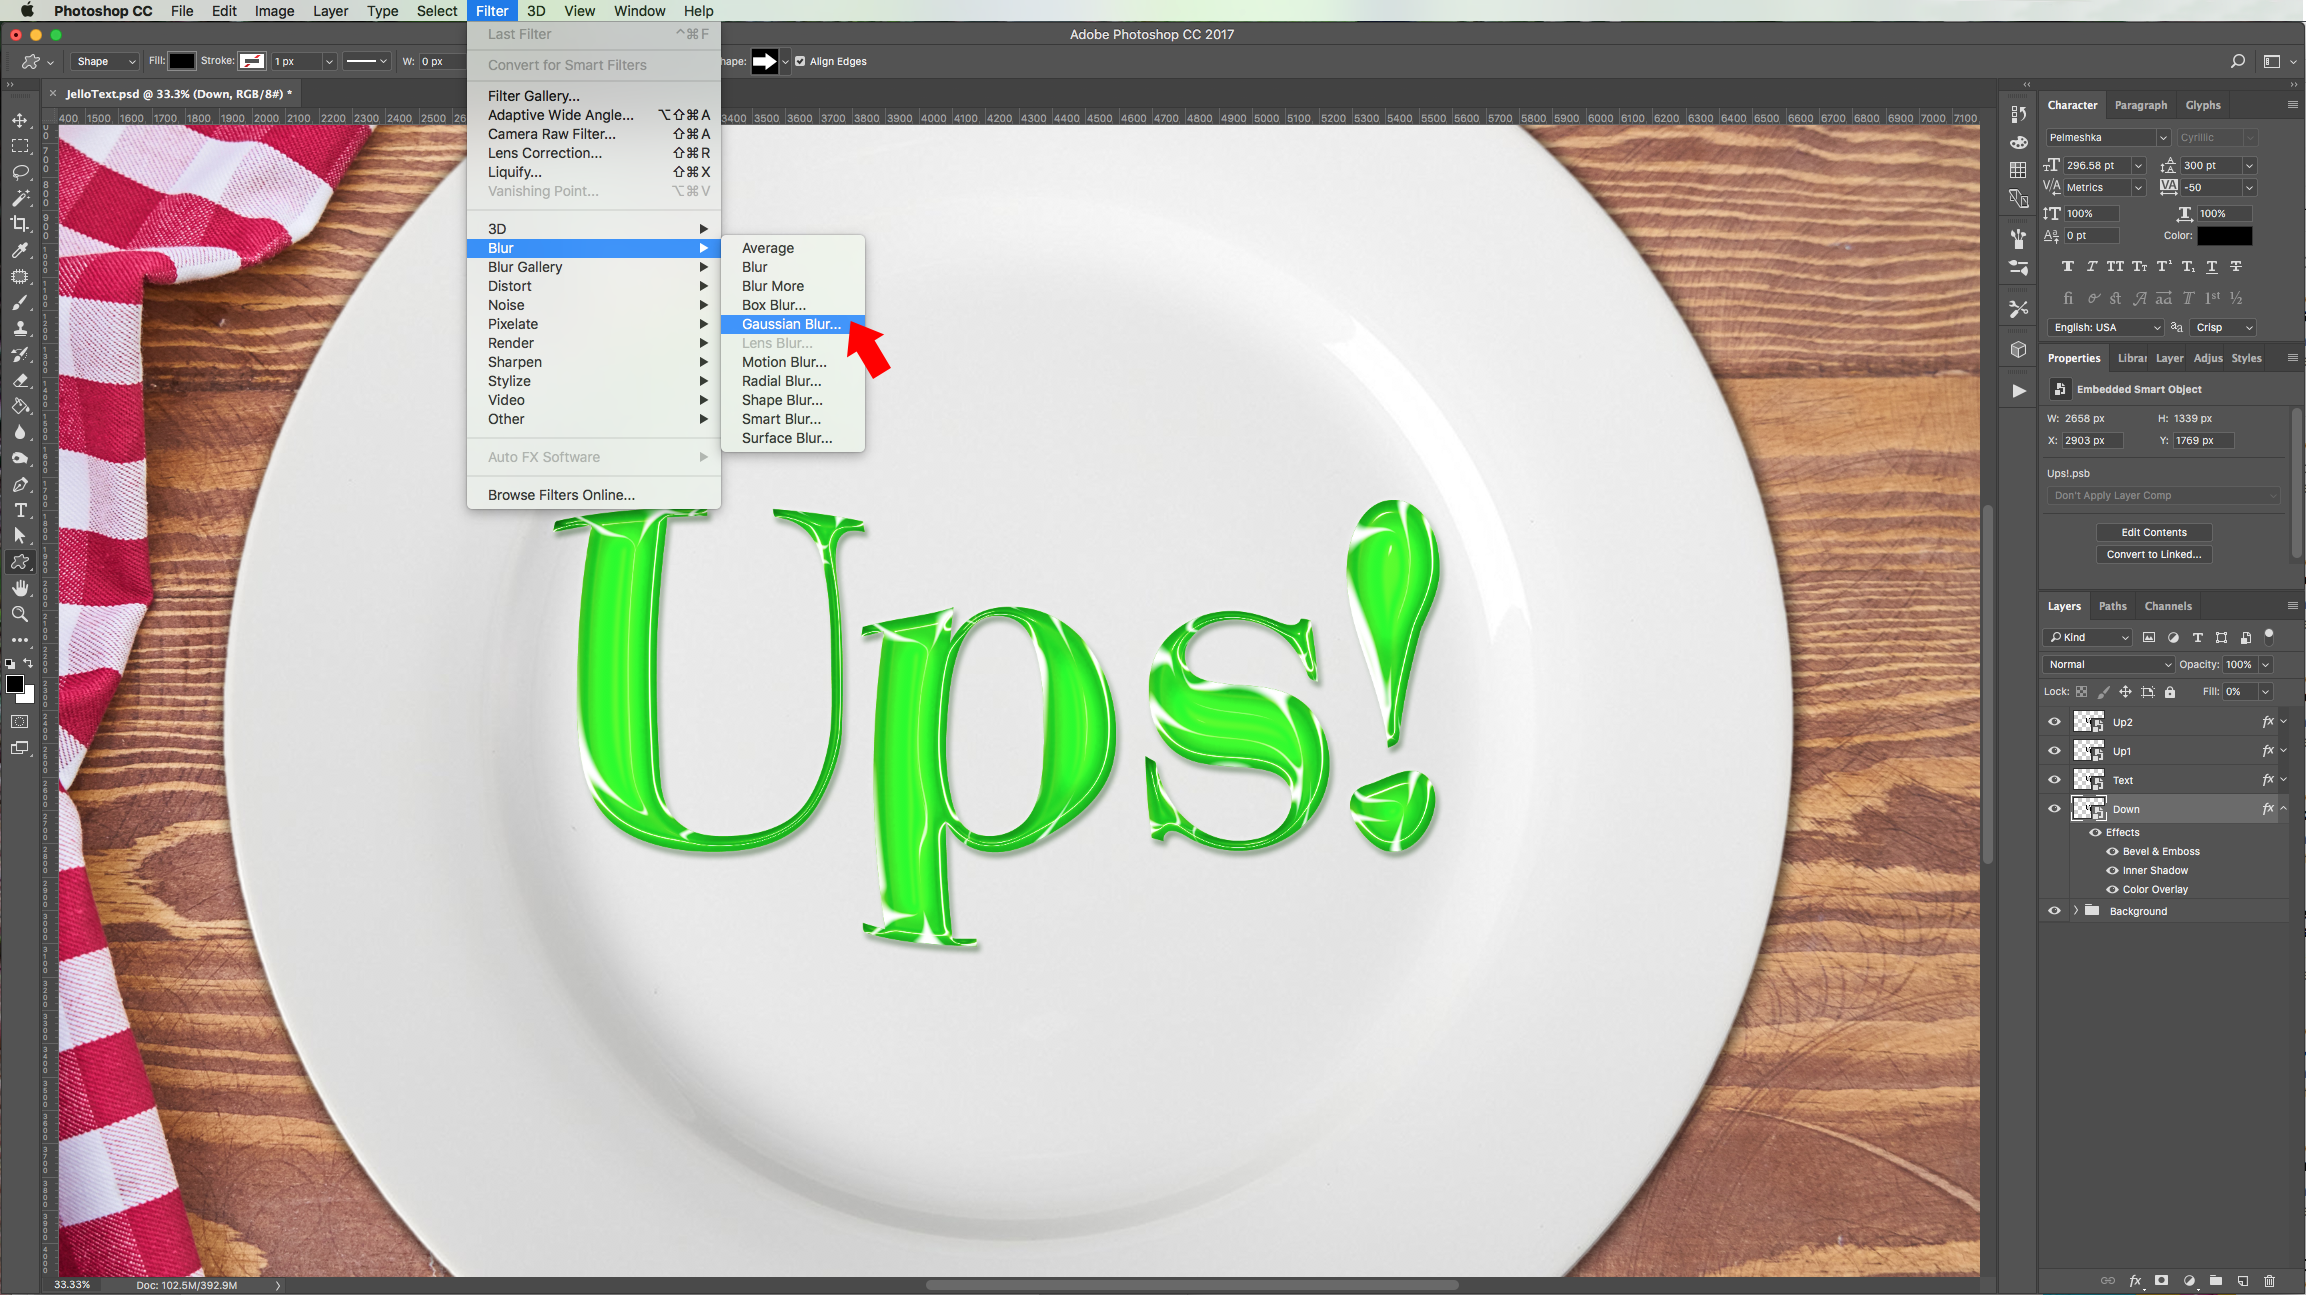
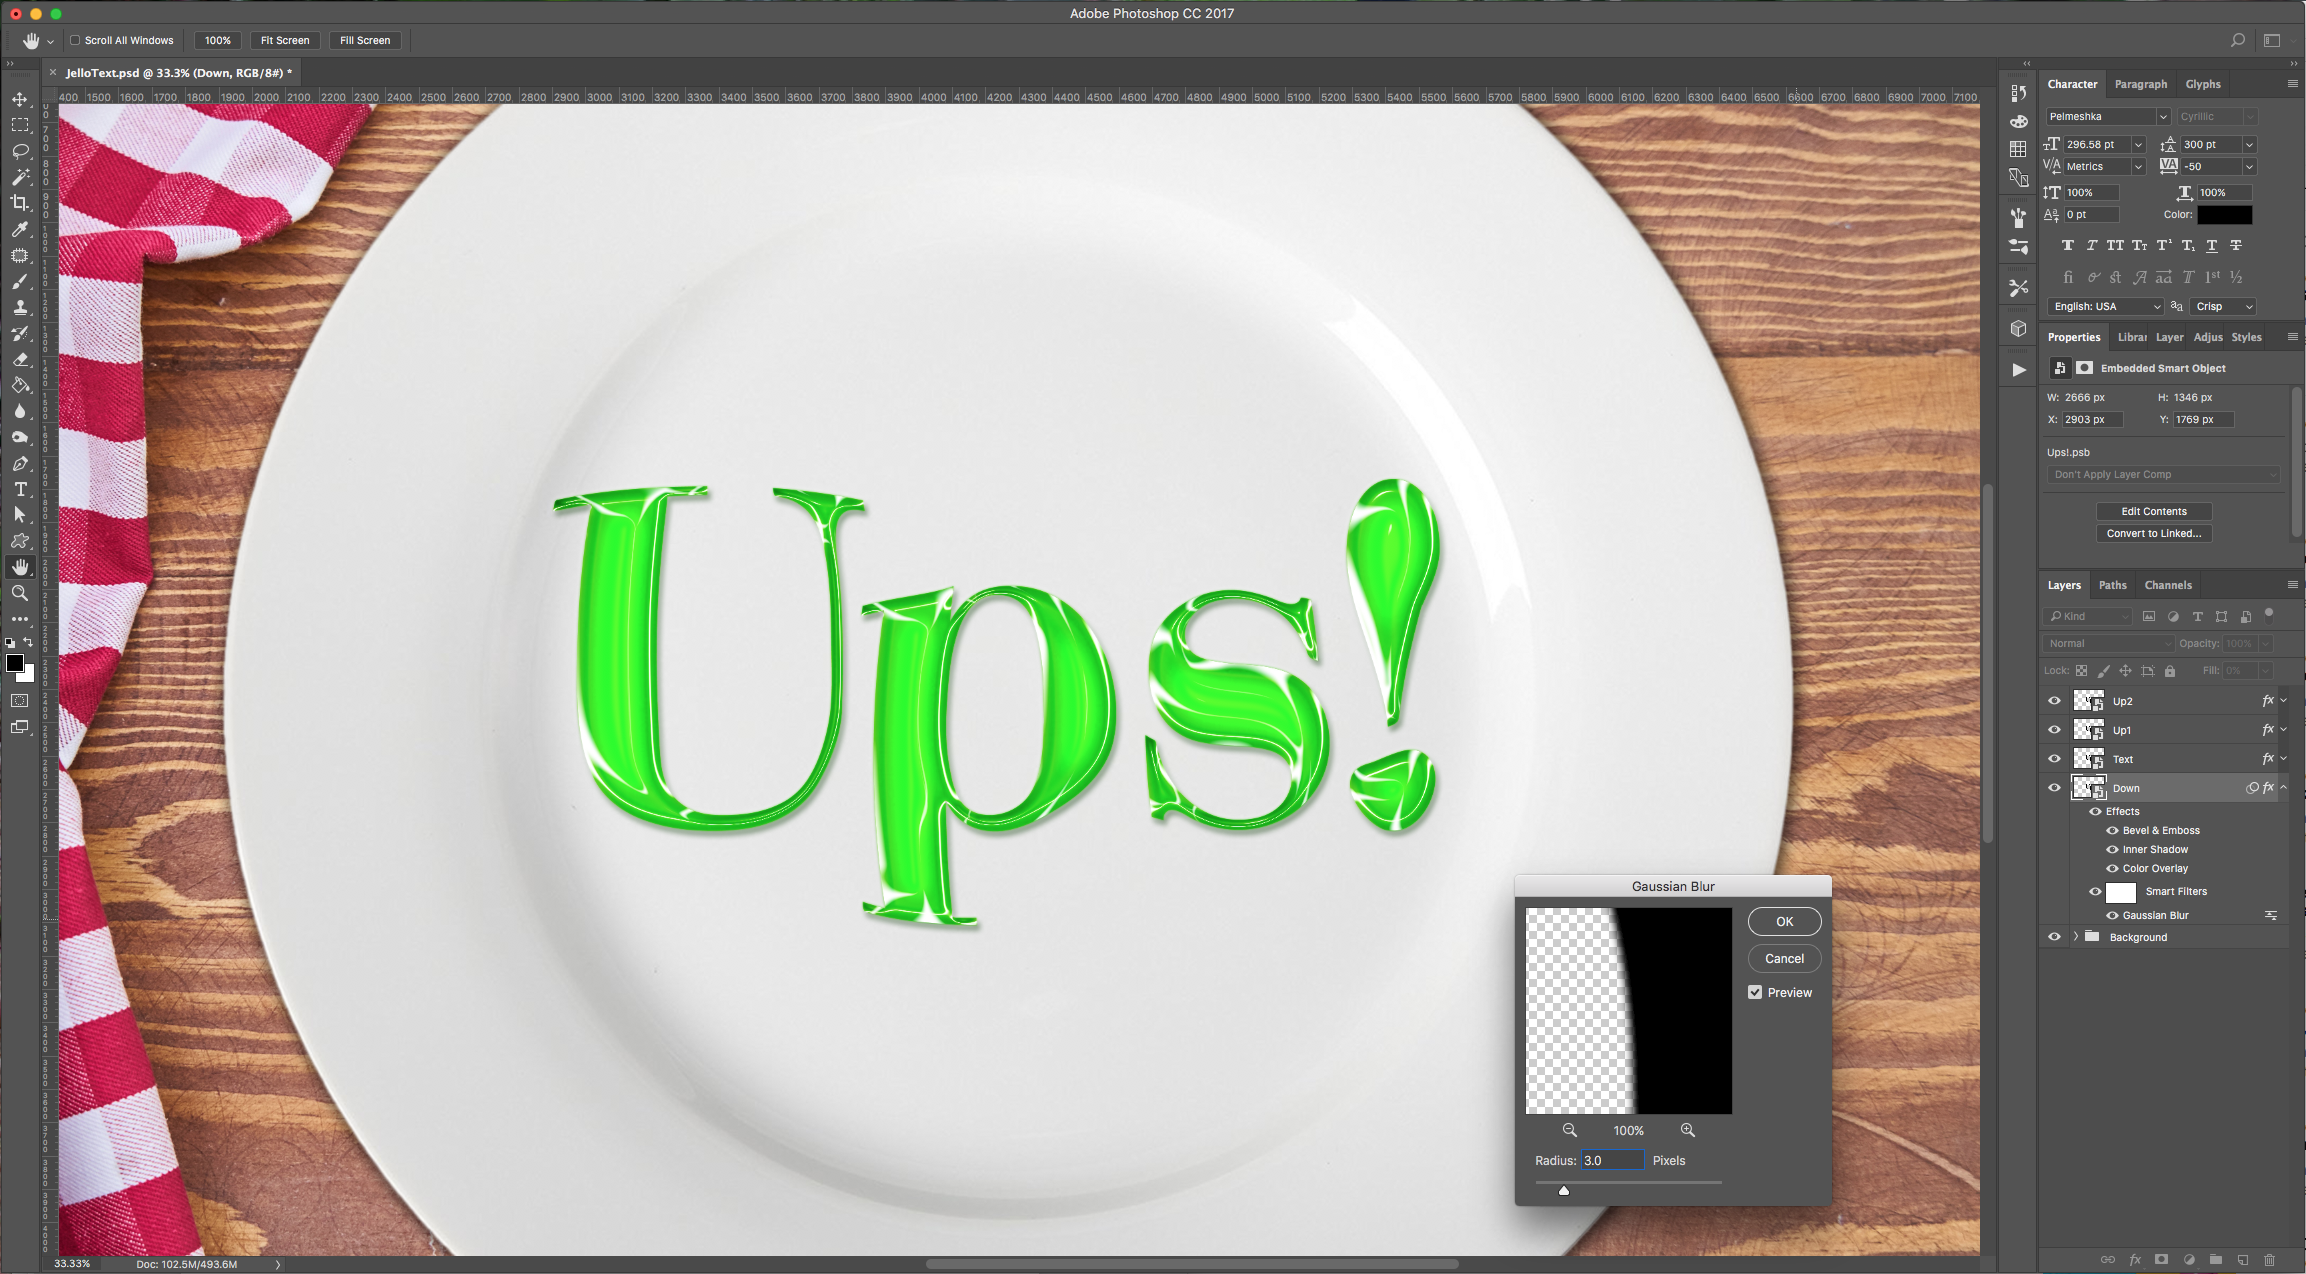
10 - With the “Down” layer still selected go to Filter > Blur > Gaussian Blur and apply a value of 3.0 to the “Radius”. Select the “Move Tool” (V) and move the layer a couple of clicks down and right.
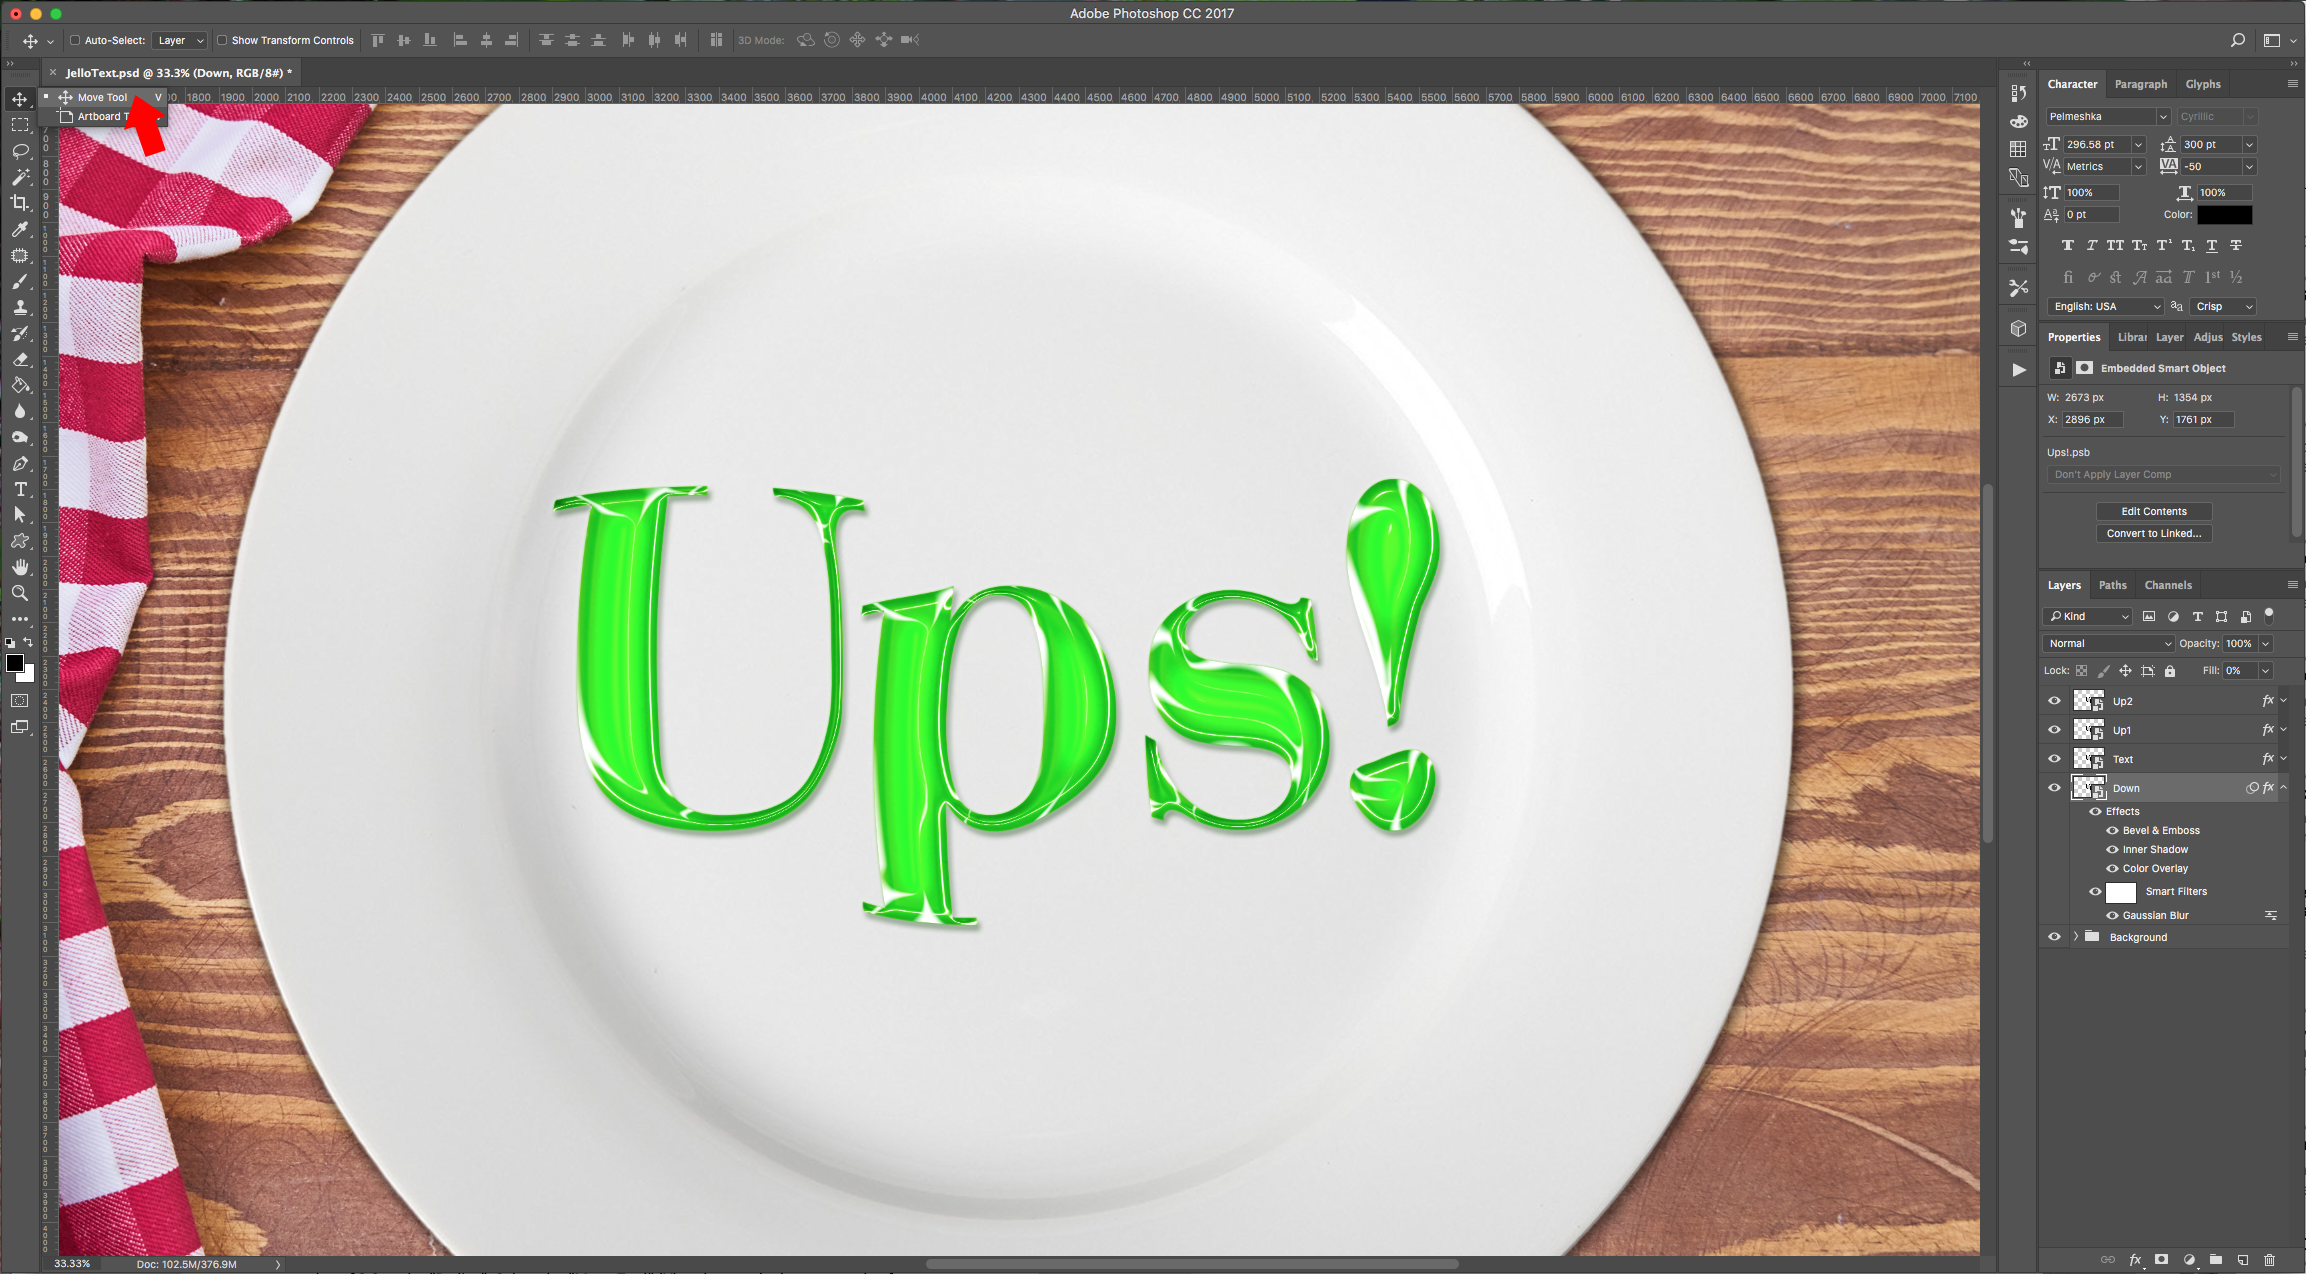
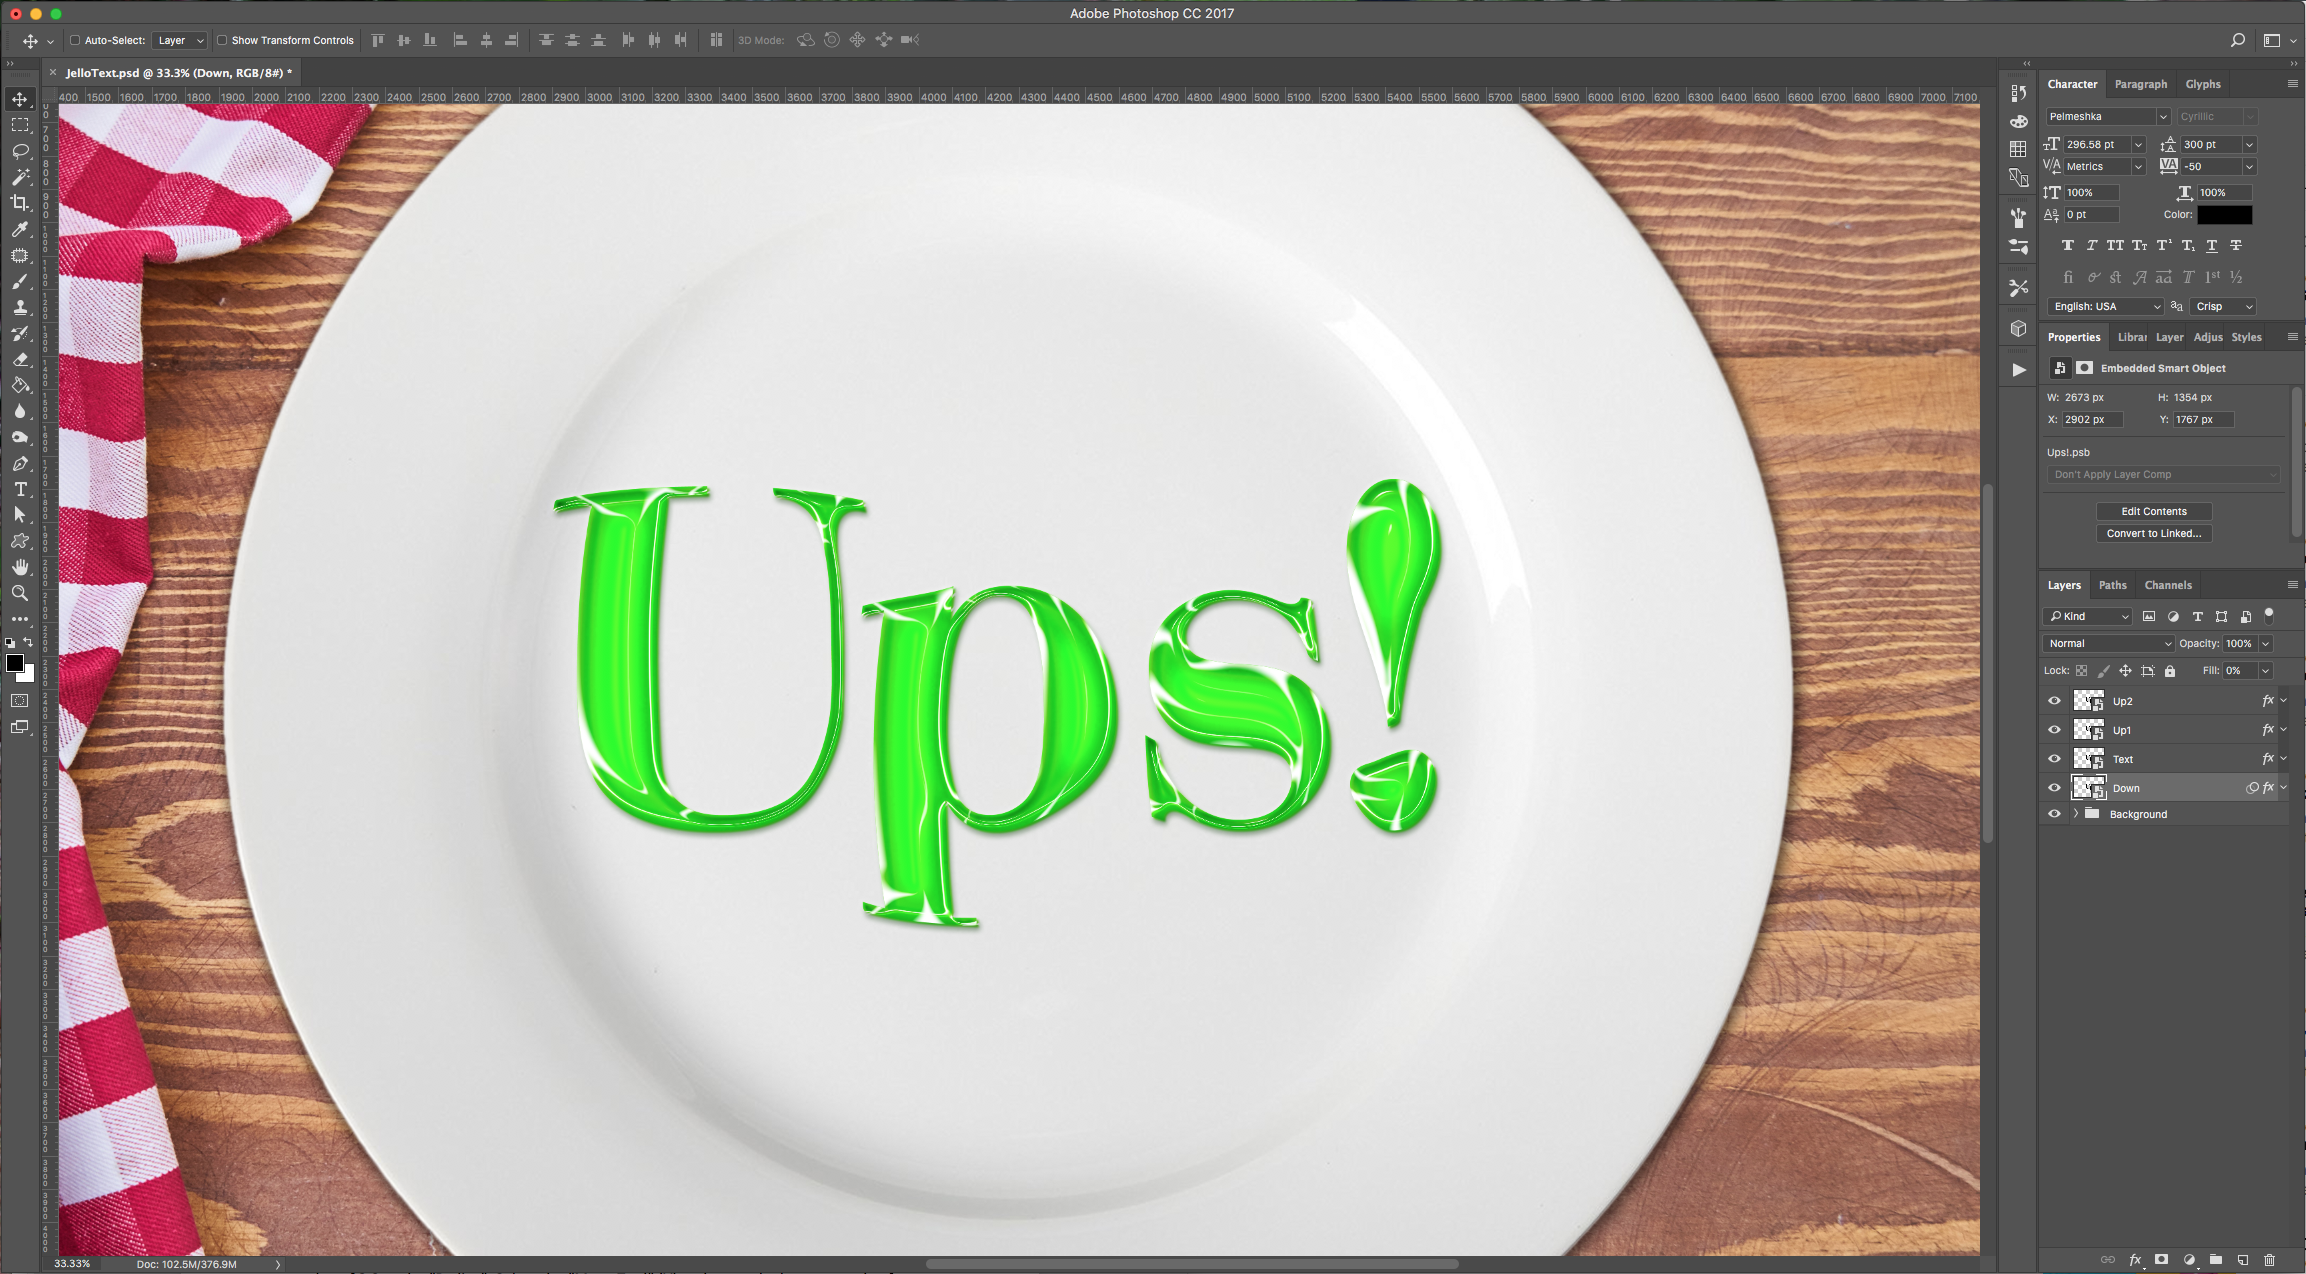
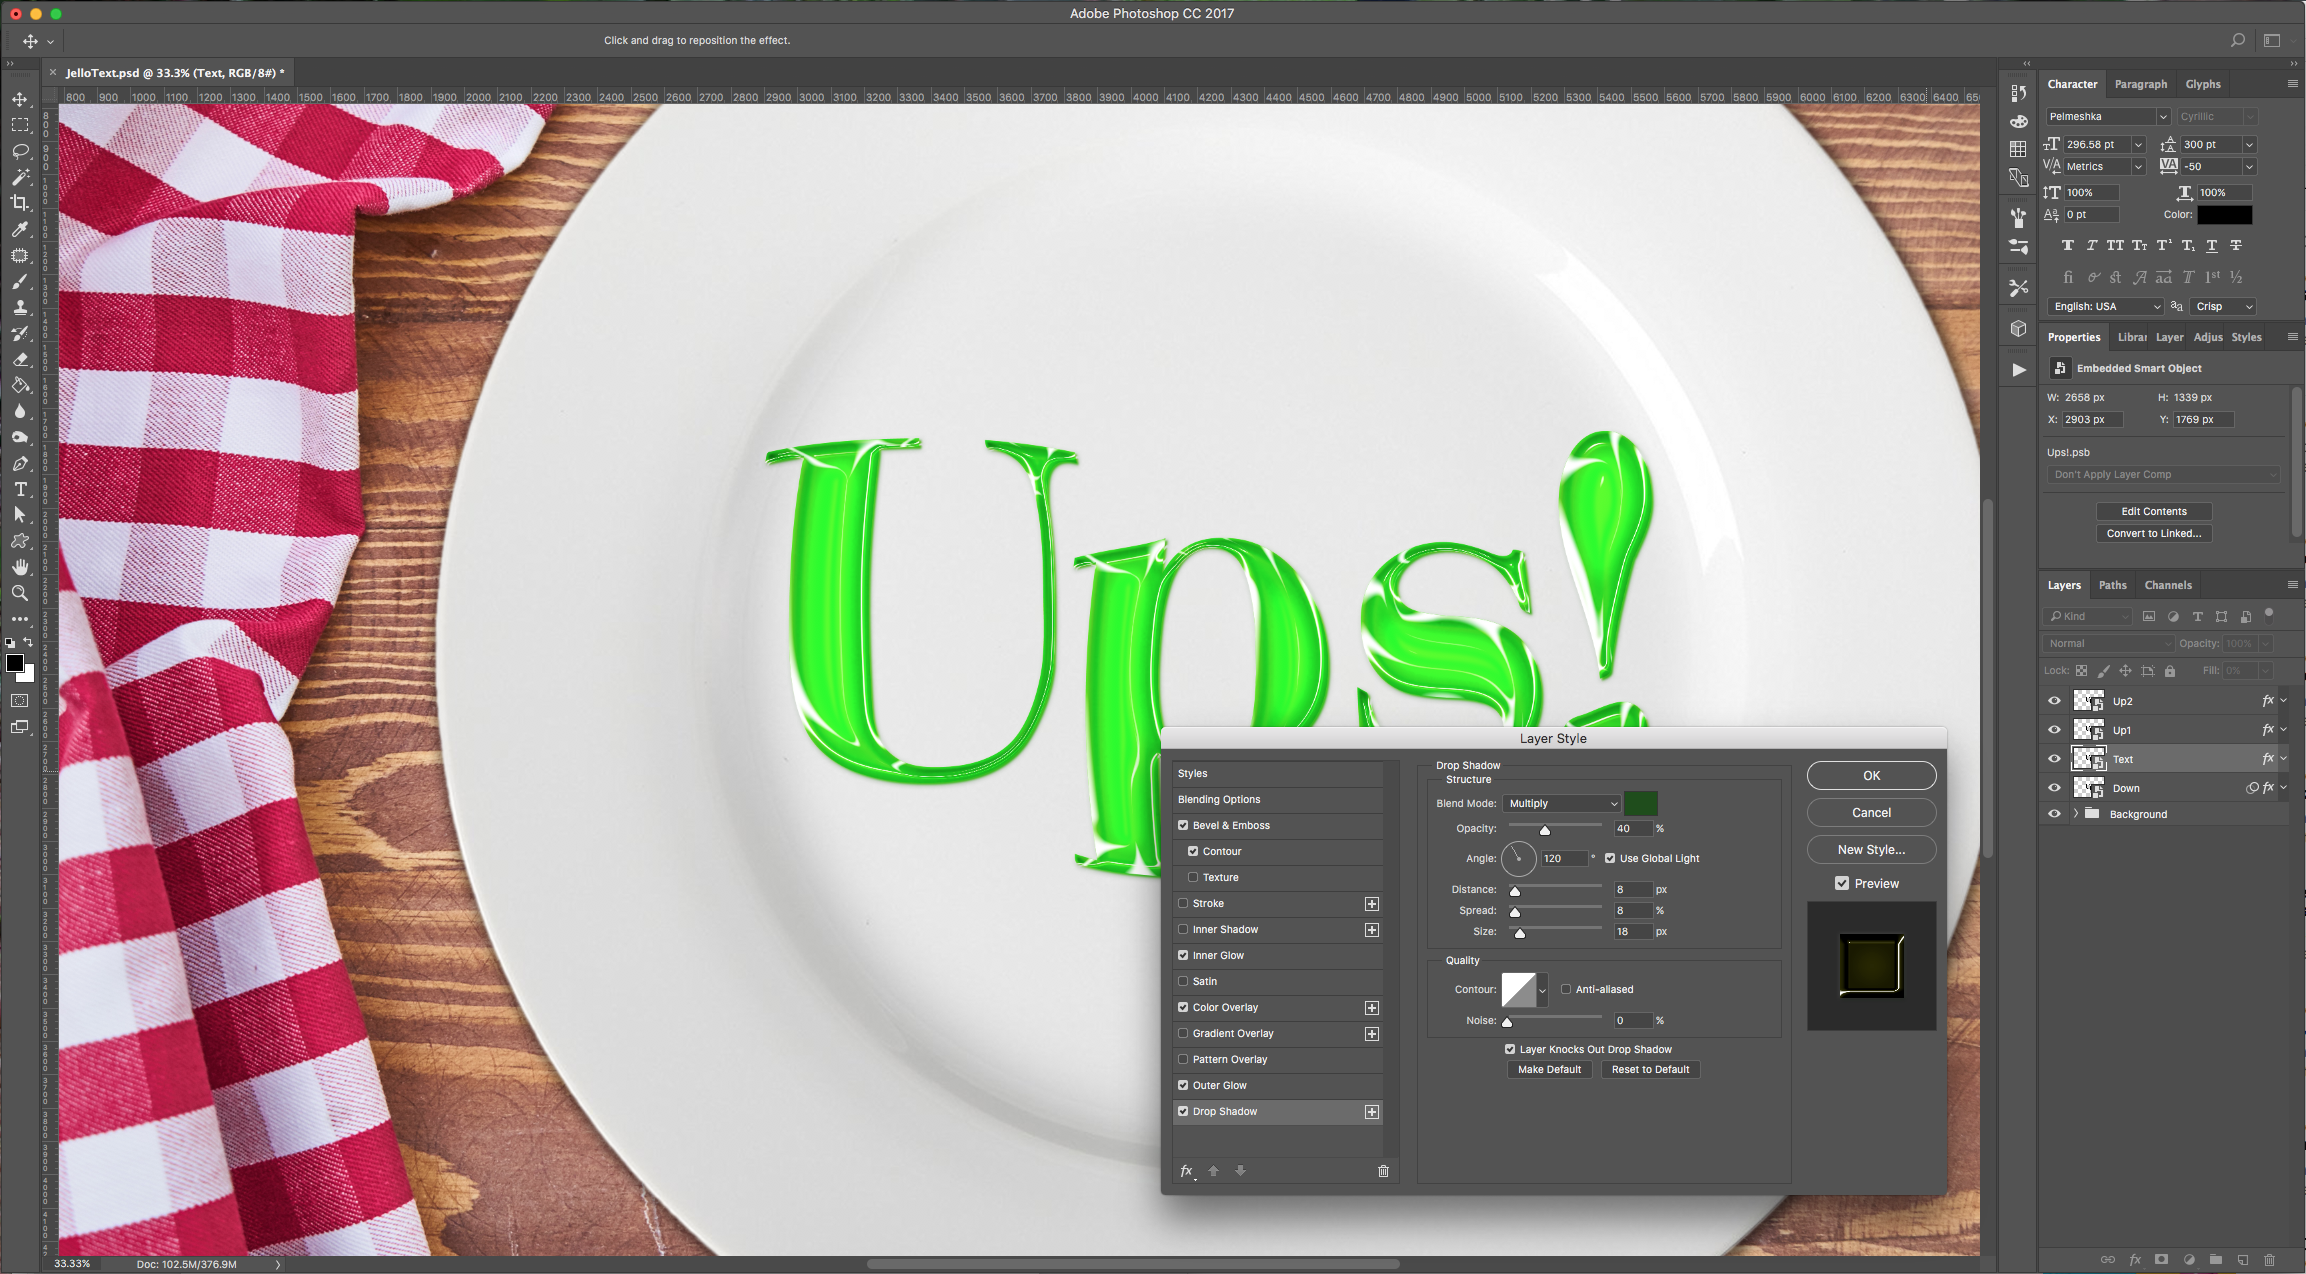
11 - If you think that some something needs to be tweaked, just double-click on the layer you want to correct and change the values. In our case, we decided to adjust the “Drop Shadow” of the “Text” layer to make it less evident:
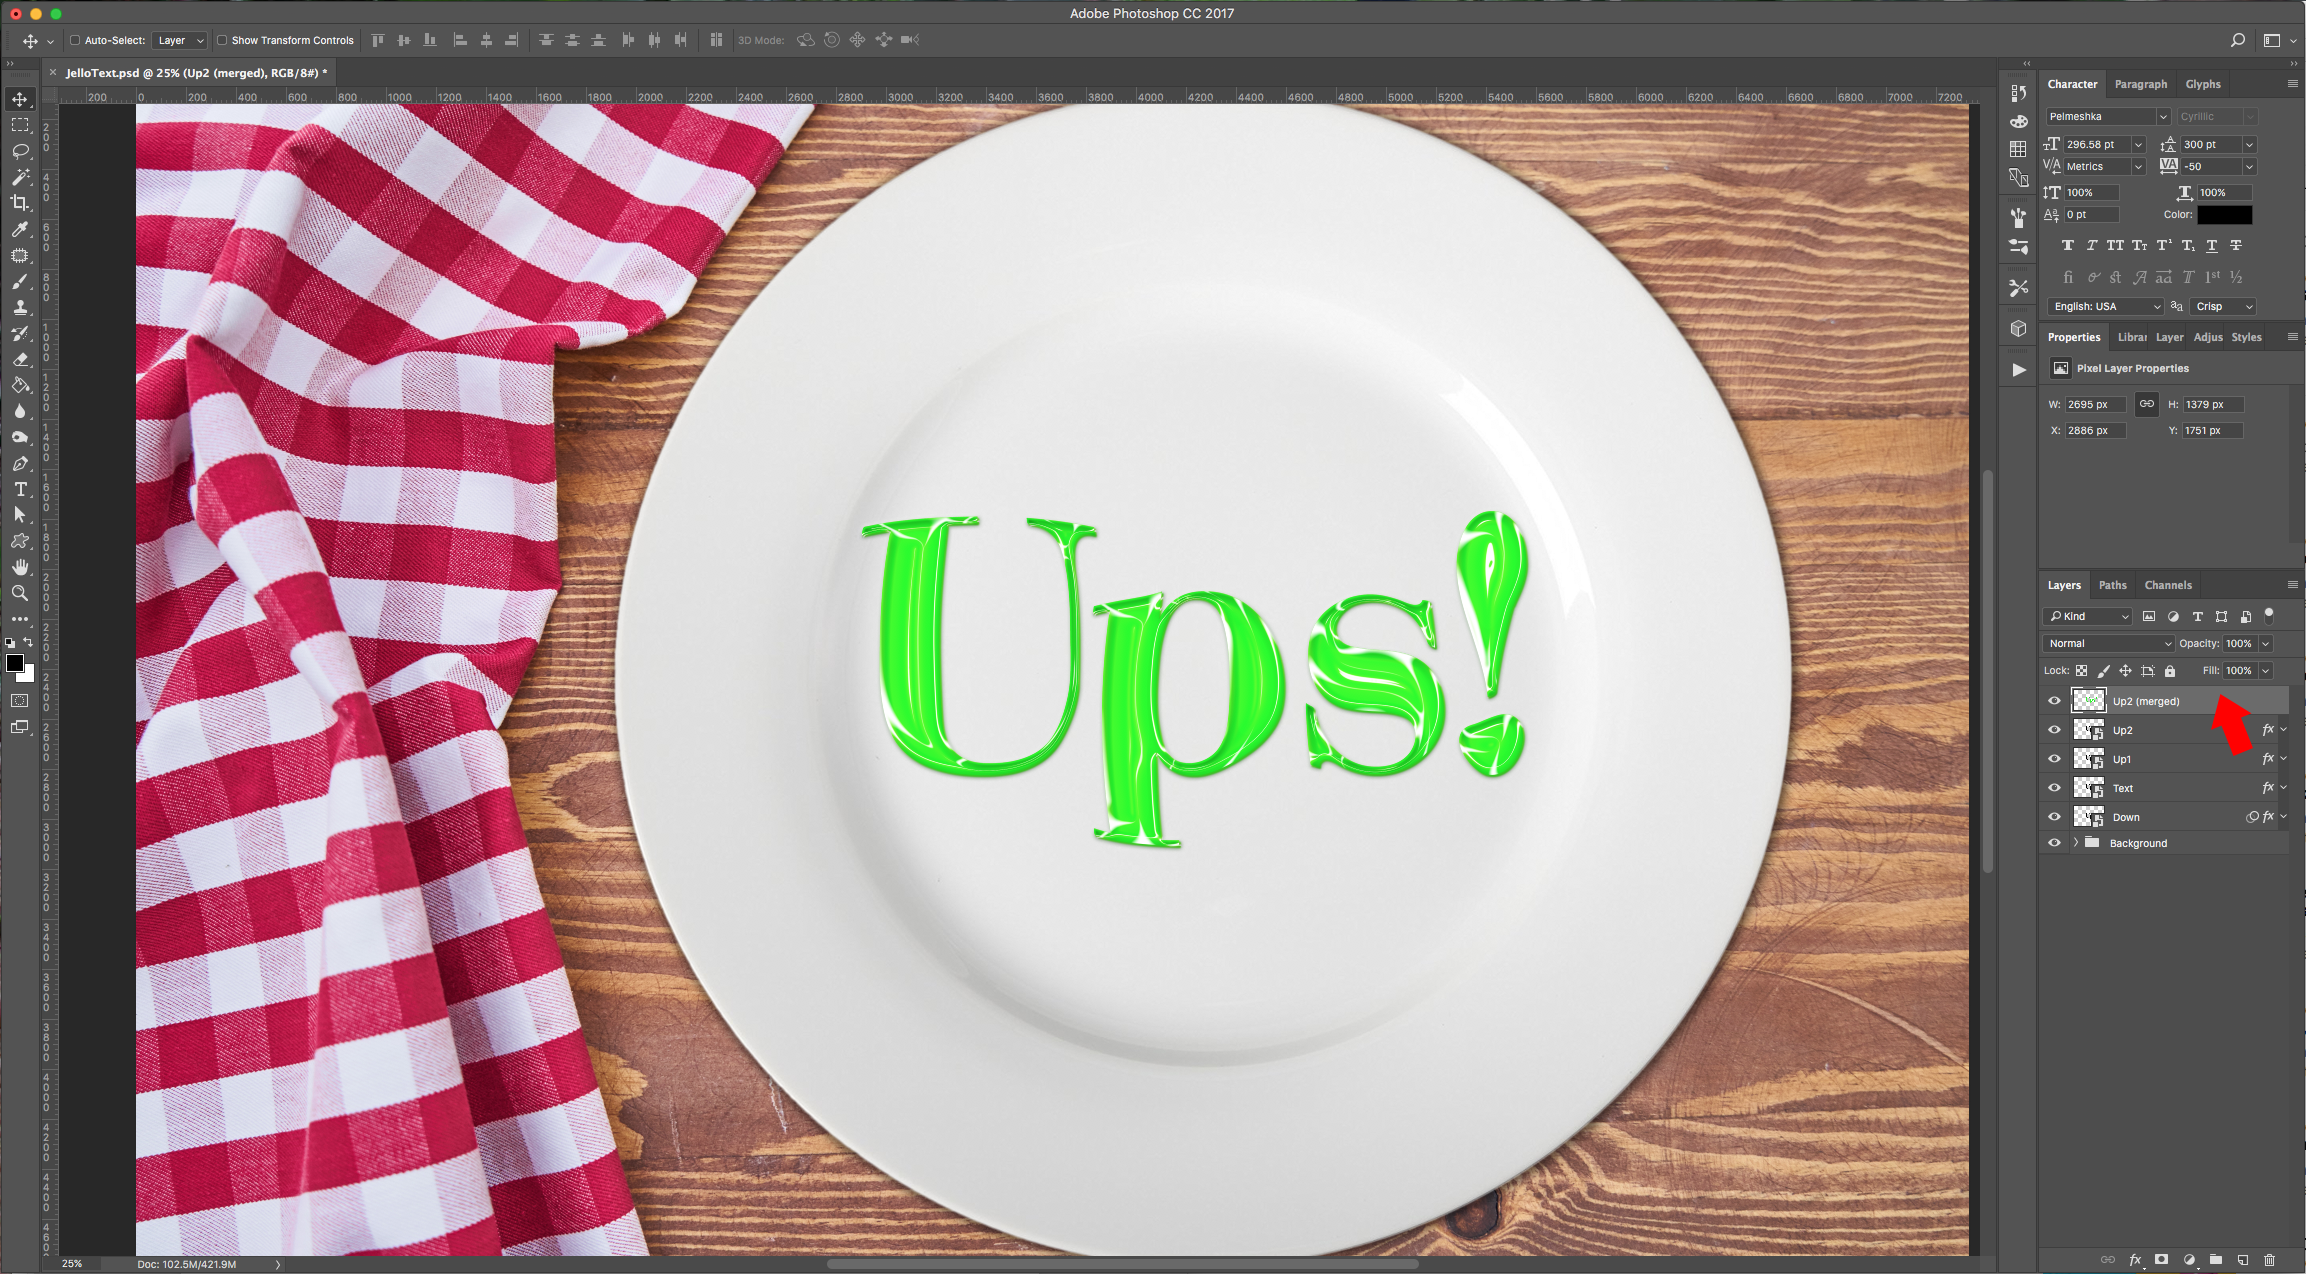
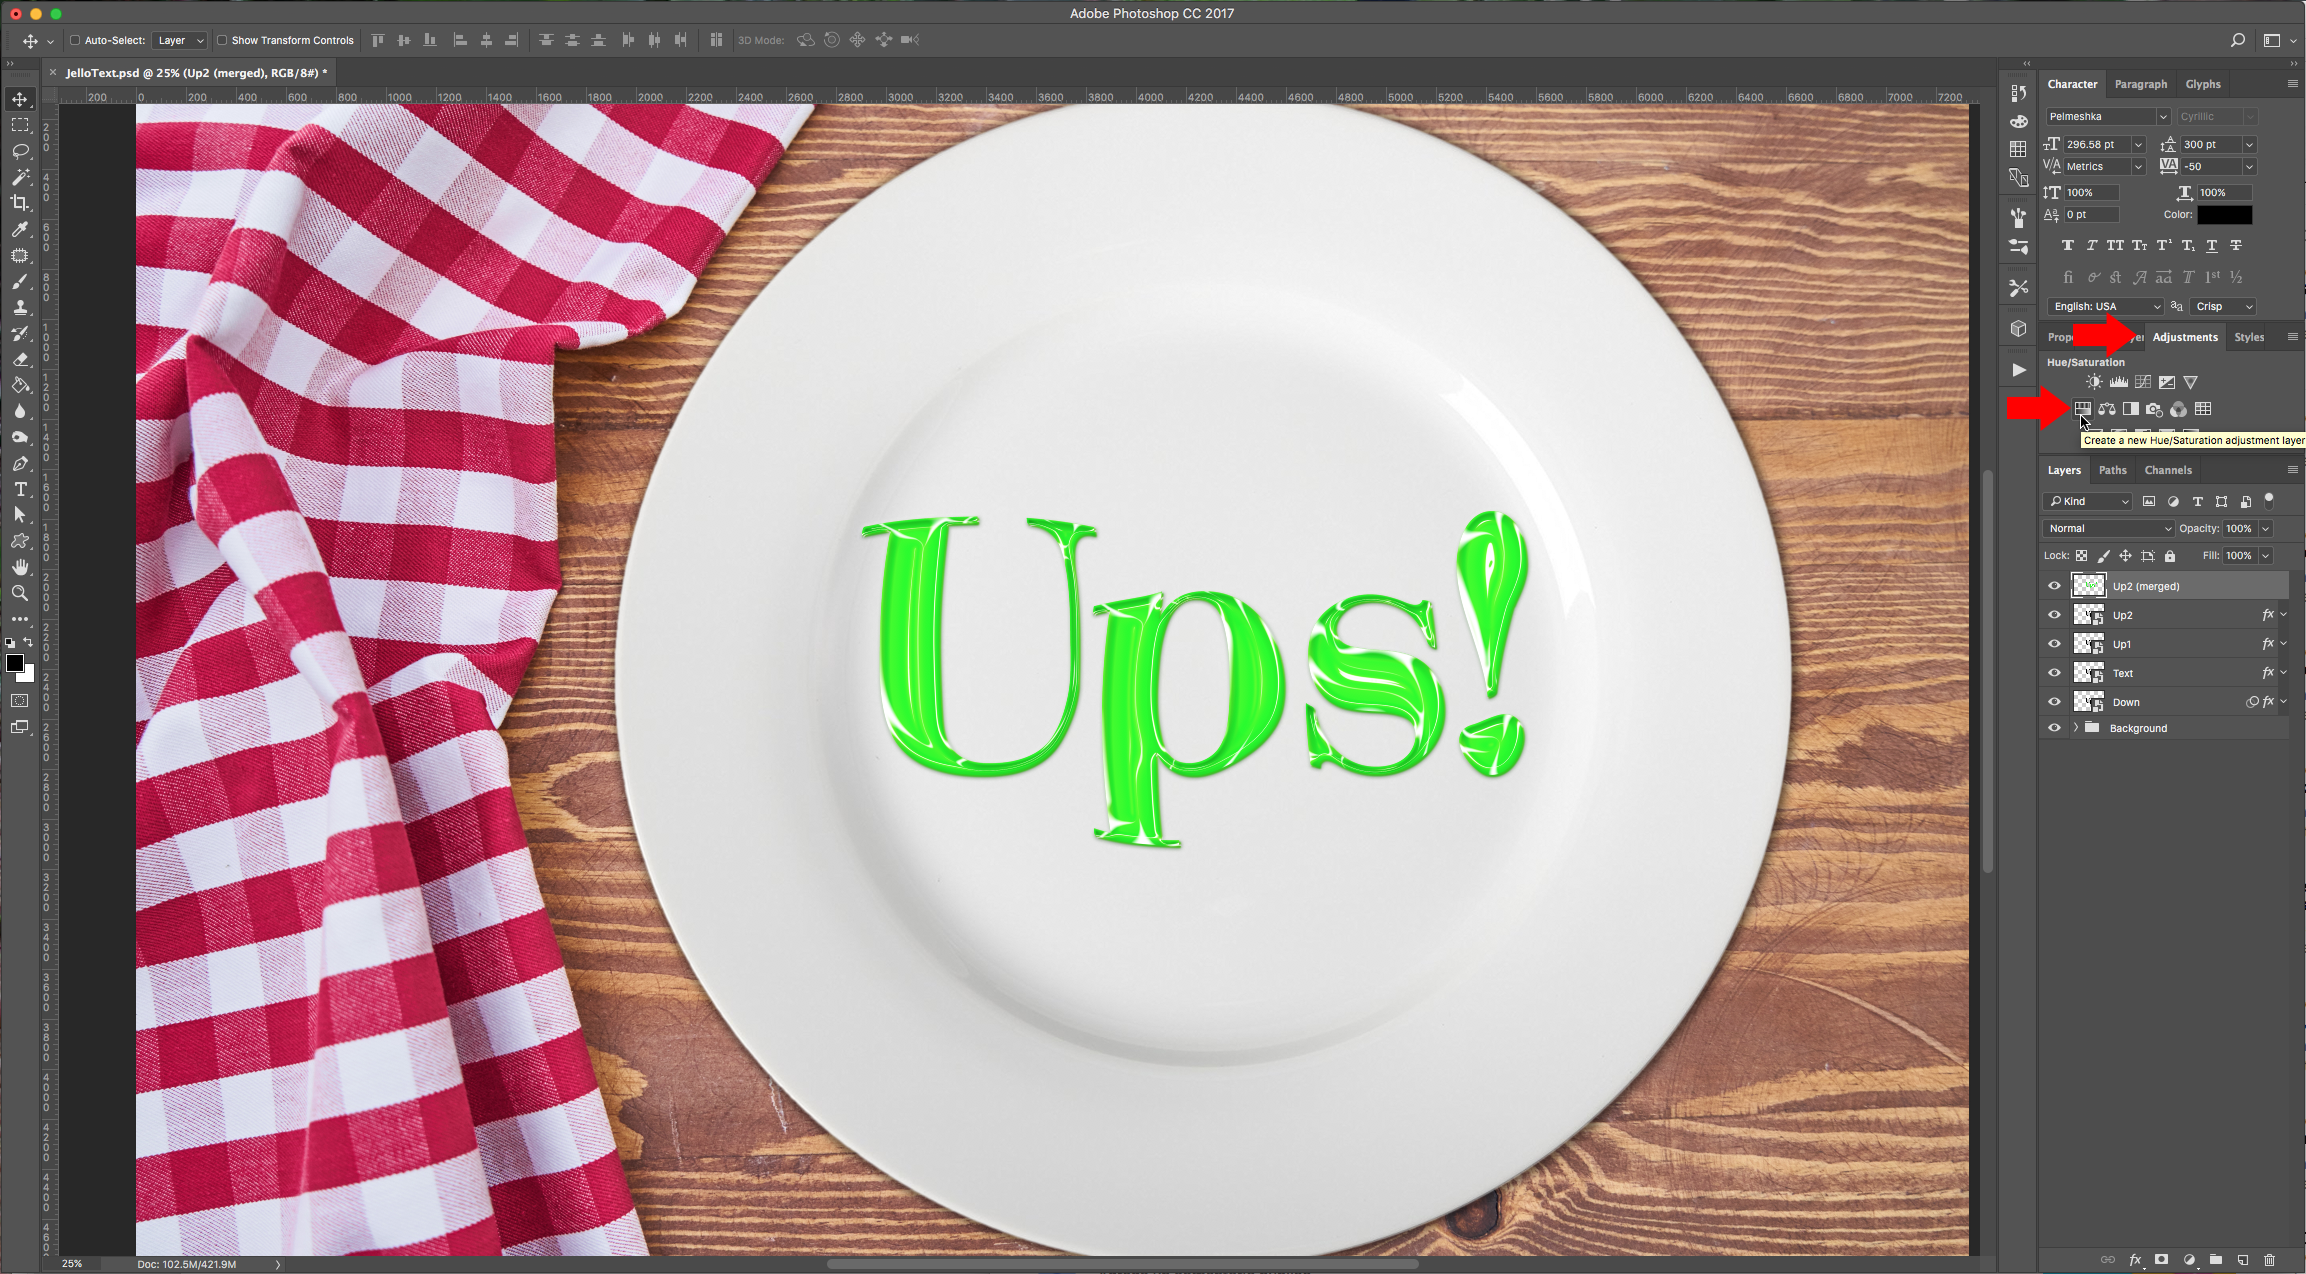
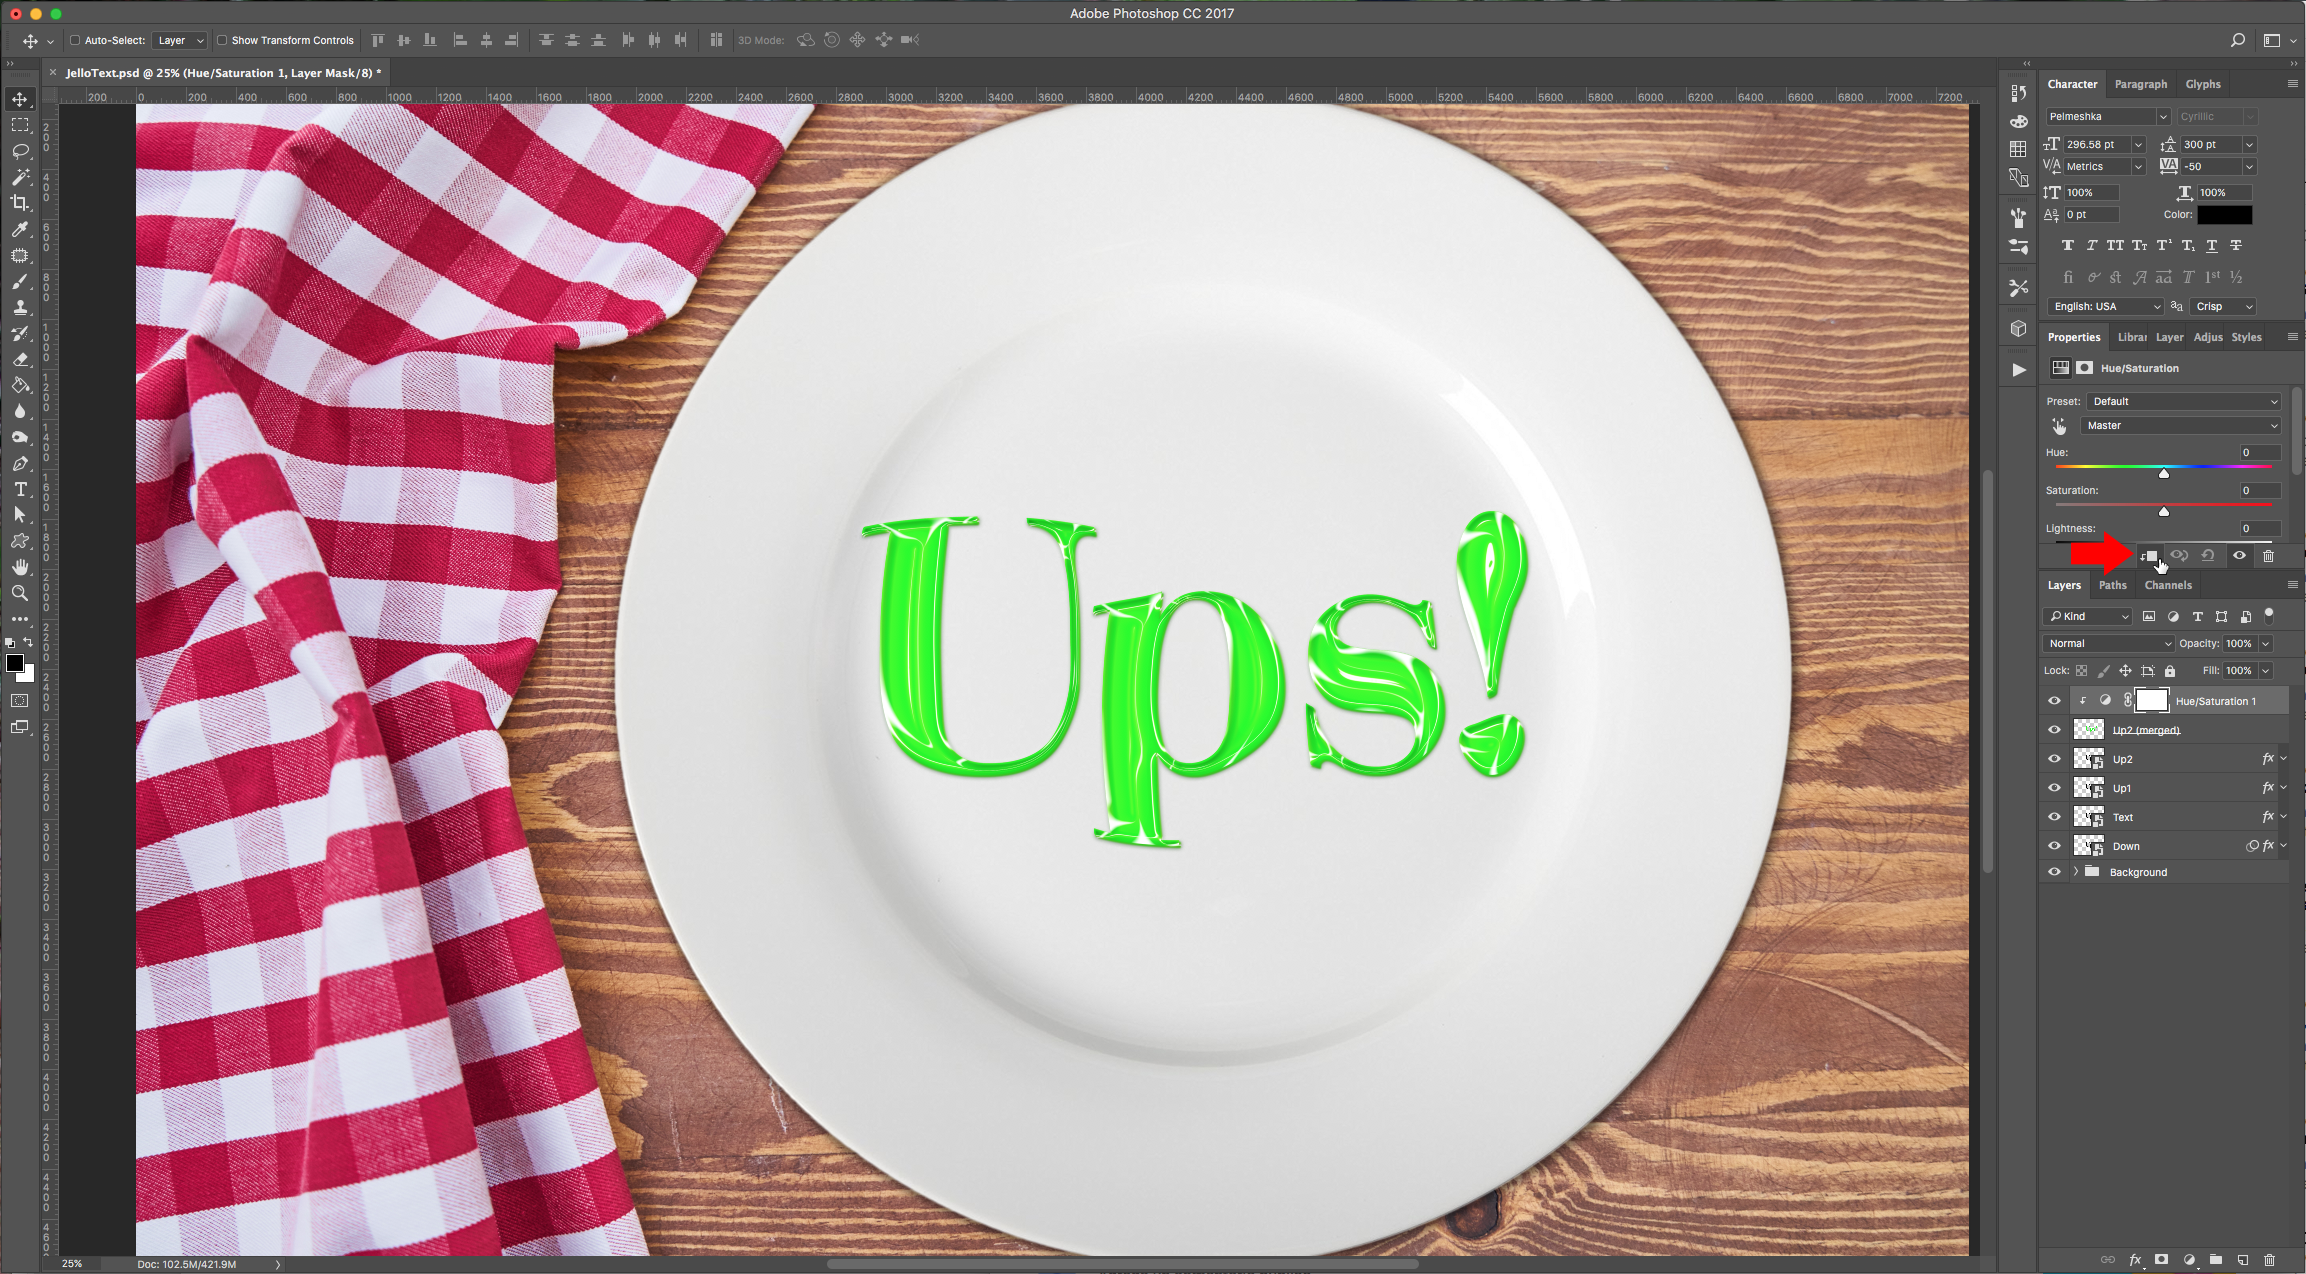
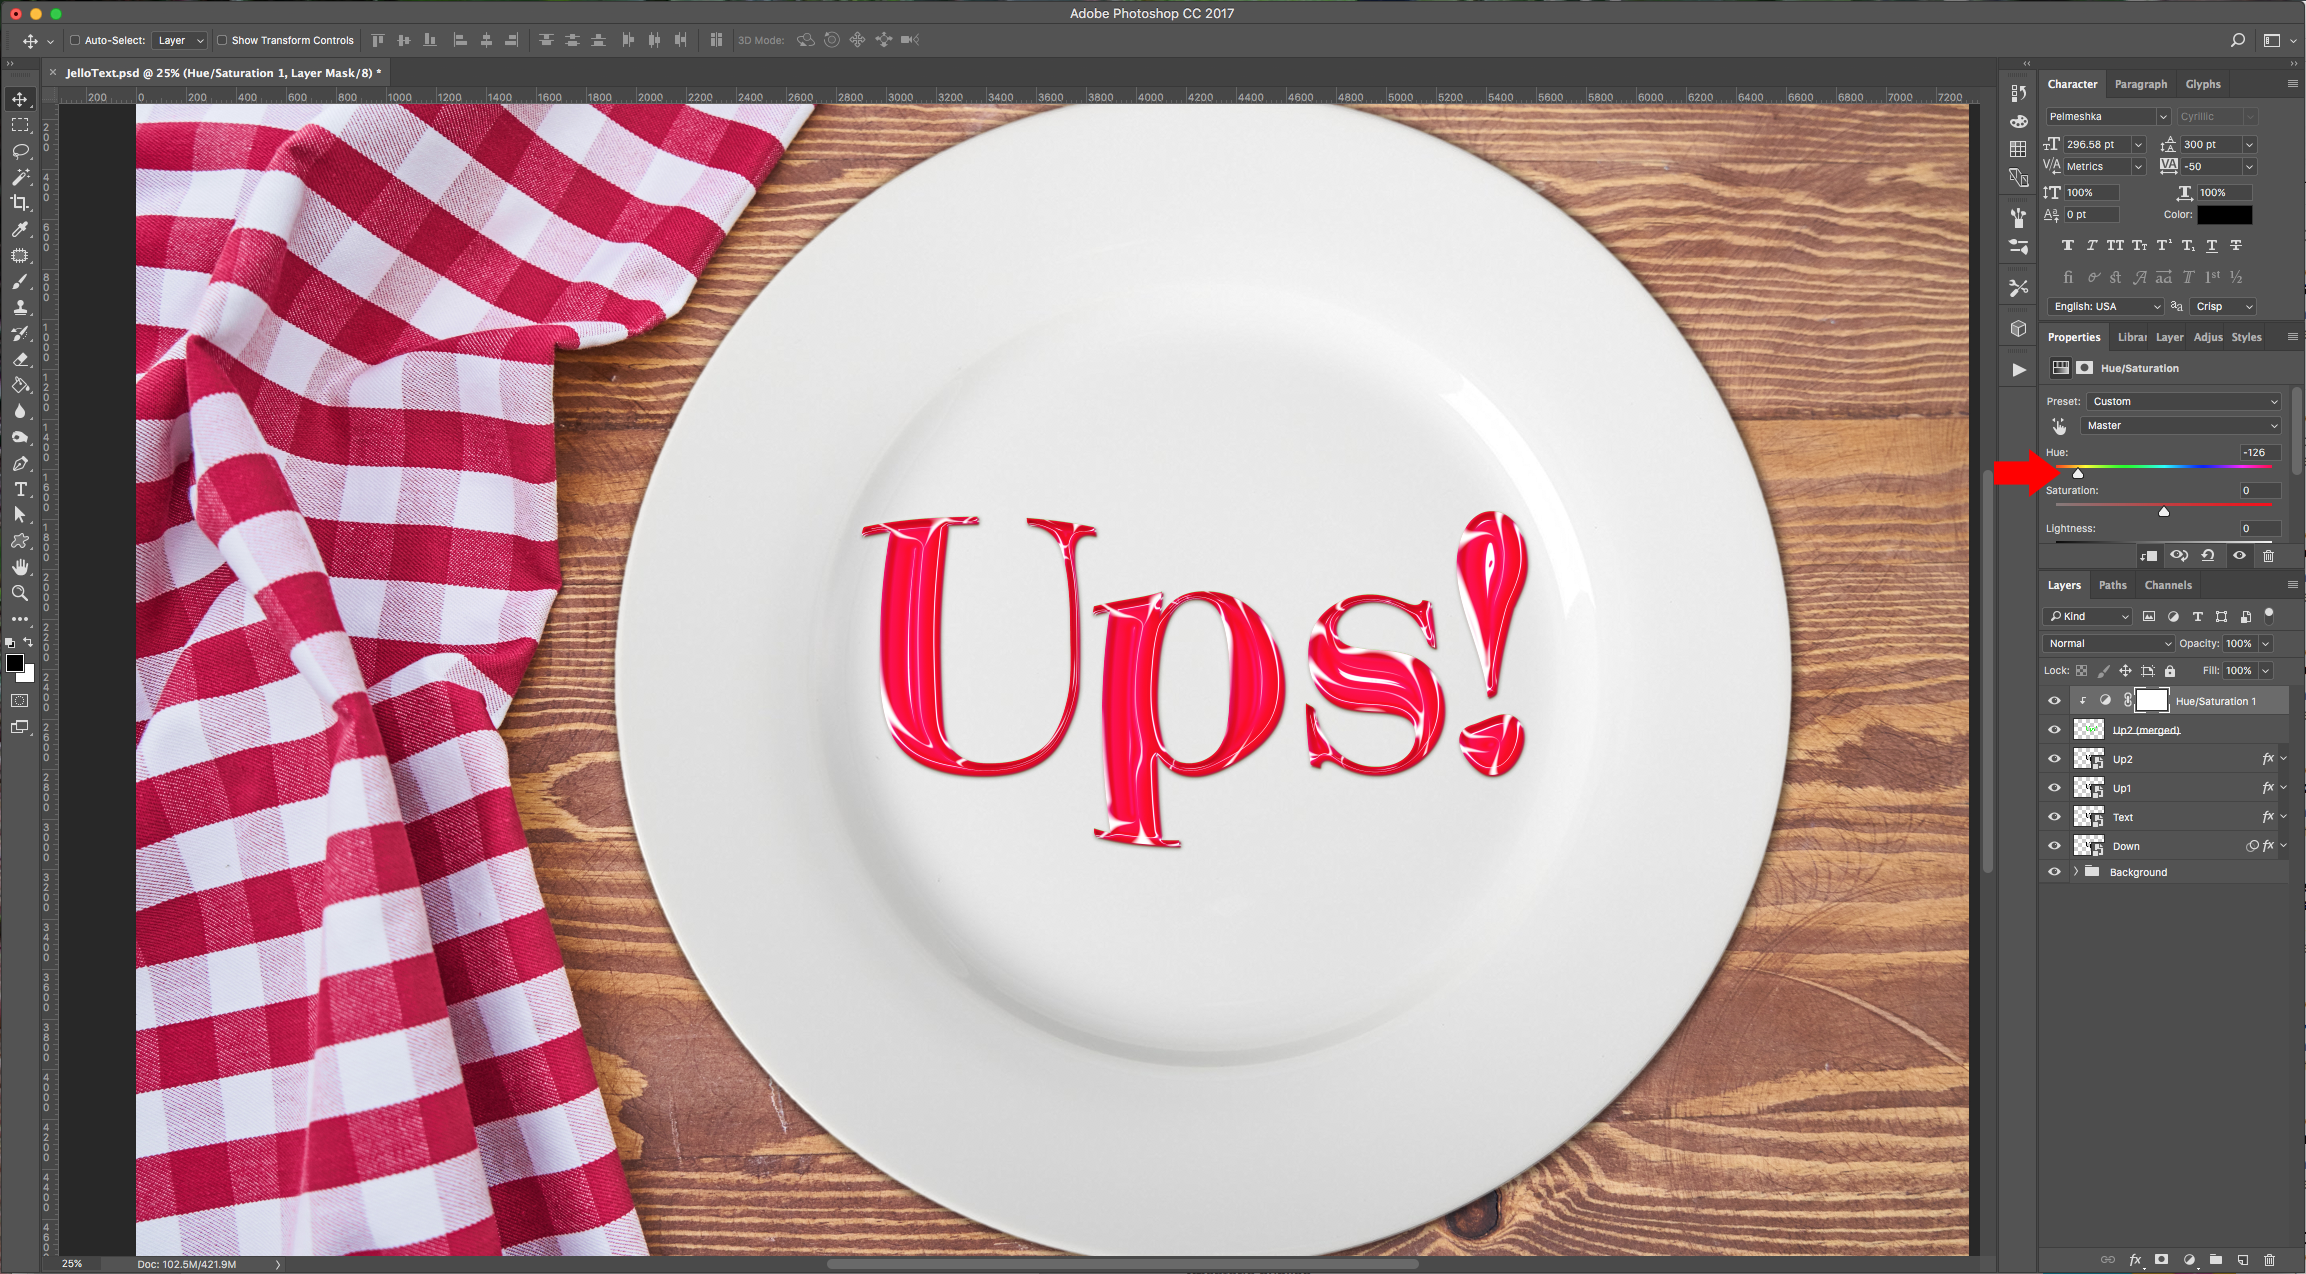
12 - If you want to change the color of your Jell-O, select your text layers, click Shift + Command/Control + Alt + E to make a composite copy of them. Hide the other text layers, go to “Adjustments” panel and click on the “Hue/Saturation” button to create and “Adjustment Layer”. Click on the “Clip” button to apply the adjustment only to the upmost layer. Slide the “Hue” lever to pick the color you want.
13 - Final result:
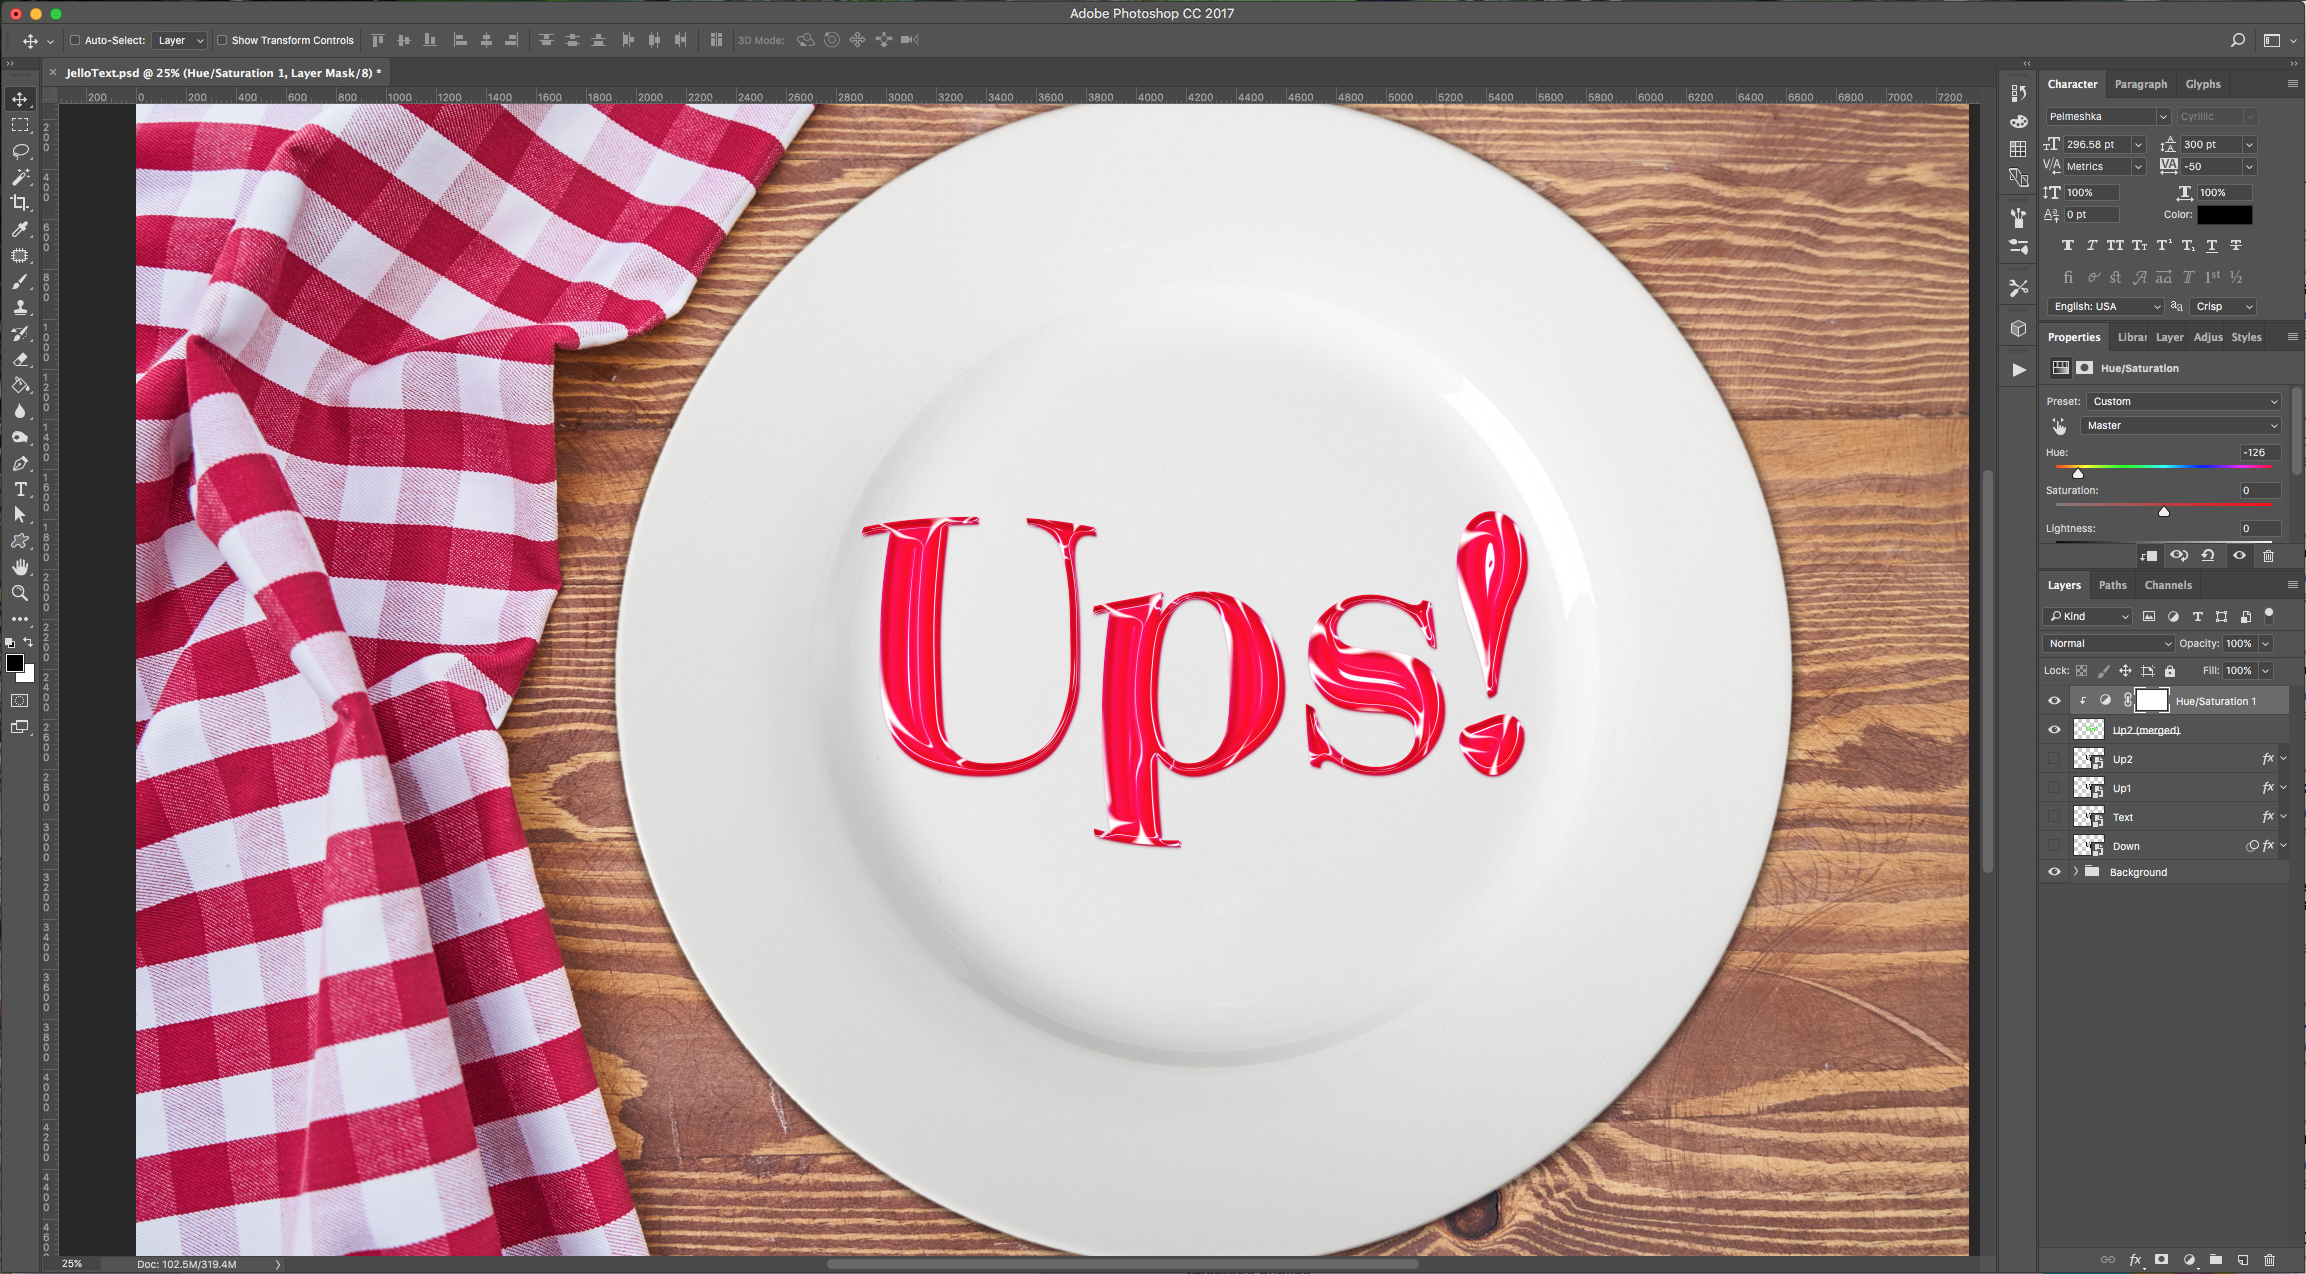
(The values for all “Layer Styles” will depend a lot on the font you are using, so you may need to play around with them to get the desired results).
1 - Open your background image (in this case we combined two images, one of a table and the second one of a plate).
2 - Open your “Type Tool” (T), make sure “Center Text” is selected. Choose your font, use a size that makes your text fit in the plate and use black as “Fill” color.
3 - Convert your text into a “Smart Object” by right-clicking on the layer thumbnail and choosing “Convert to Smart Object” from the menu.
4 - Turn the “Fill” of the text layer to 0%, duplicate it three times and rename the layers.
5 - Select the “Text” layer and double-click on it to apply the following “Layer Styles”:
Bevel & Emboss:
Contour: (Click on the “Contour” thumbnail).
Inner Glow: (color #ffffff).
Color Overlay: (color #5bfc03).
Outer Glow: (color #ffffff).
Drop Shadow: (color #1e4e18).
6 - Select “Up1” and apply the following “Layer Styles”:
Bevel & Emboss:
7 - Right-click on your layer “Effects” and choose “Copy Layer Style”, then select “Up2”, right-click on it and “Paste Layer Style”.
8 - Double-click on the “Up2” layer and make the following changes to the “Bevel & Emboss” style:
9 - To copy some of your styles to another layer select the “Effect” you want to copy and click Shift + Option/Alt while dragging it onto your other layer. Do this with “Bevel & Emboss” and “Color Overlay” from “Text” to “Down”. Double-click on “Down” and add the following “Layer Styles” to the ones you copied:
Inner Shadow:
10 - With the “Down” layer still selected go to Filter > Blur > Gaussian Blur and apply a value of 3.0 to the “Radius”. Select the “Move Tool” (V) and move the layer a couple of clicks down and right.
11 - If you think that some something needs to be tweaked, just double-click on the layer you want to correct and change the values. In our case, we decided to adjust the “Drop Shadow” of the “Text” layer to make it less evident:
12 - If you want to change the color of your Jell-O, select your text layers, click Shift + Command/Control + Alt + E to make a composite copy of them. Hide the other text layers, go to “Adjustments” panel and click on the “Hue/Saturation” button to create and “Adjustment Layer”. Click on the “Clip” button to apply the adjustment only to the upmost layer. Slide the “Hue” lever to pick the color you want.
13 - Final result:
(The values for all “Layer Styles” will depend a lot on the font you are using, so you may need to play around with them to get the desired results).
by @lornacane
Related Tutorials
Photoshop Tutorials
How to Use Text Effects in Photoshop
With Photoshop Text Effects, you can create text with impact in just a few steps.
Photoshop Tutorials
Easy See through Cut Out Text in Photoshop
Create a see-through cut out text design in Photoshop with these easy to follow steps.
Photoshop Tutorials
How to Fill a Shape with Text in Photoshop
Learn how to fill a shape with text in Photoshop in seven quick steps.
Photoshop Tutorials
How to Make a Graffiti Text Effect in Photoshop
Learn how to create a realistic grafitti text effect in Photoshop.
Photoshop Tutorials
How to Create a Holographic Text Effect in Photoshop
Discover how to create a holographic text effect in Photoshop with this step by step tutorial.
Photoshop Tutorials
Chalk Text Effect in Photoshop
In this tutorial, learn how to turn any font into chalk text in Photoshop with the Brush tool.