By Design Bundles
Photoshop Tutorials9 min
Spaghetti Text in Photoshop
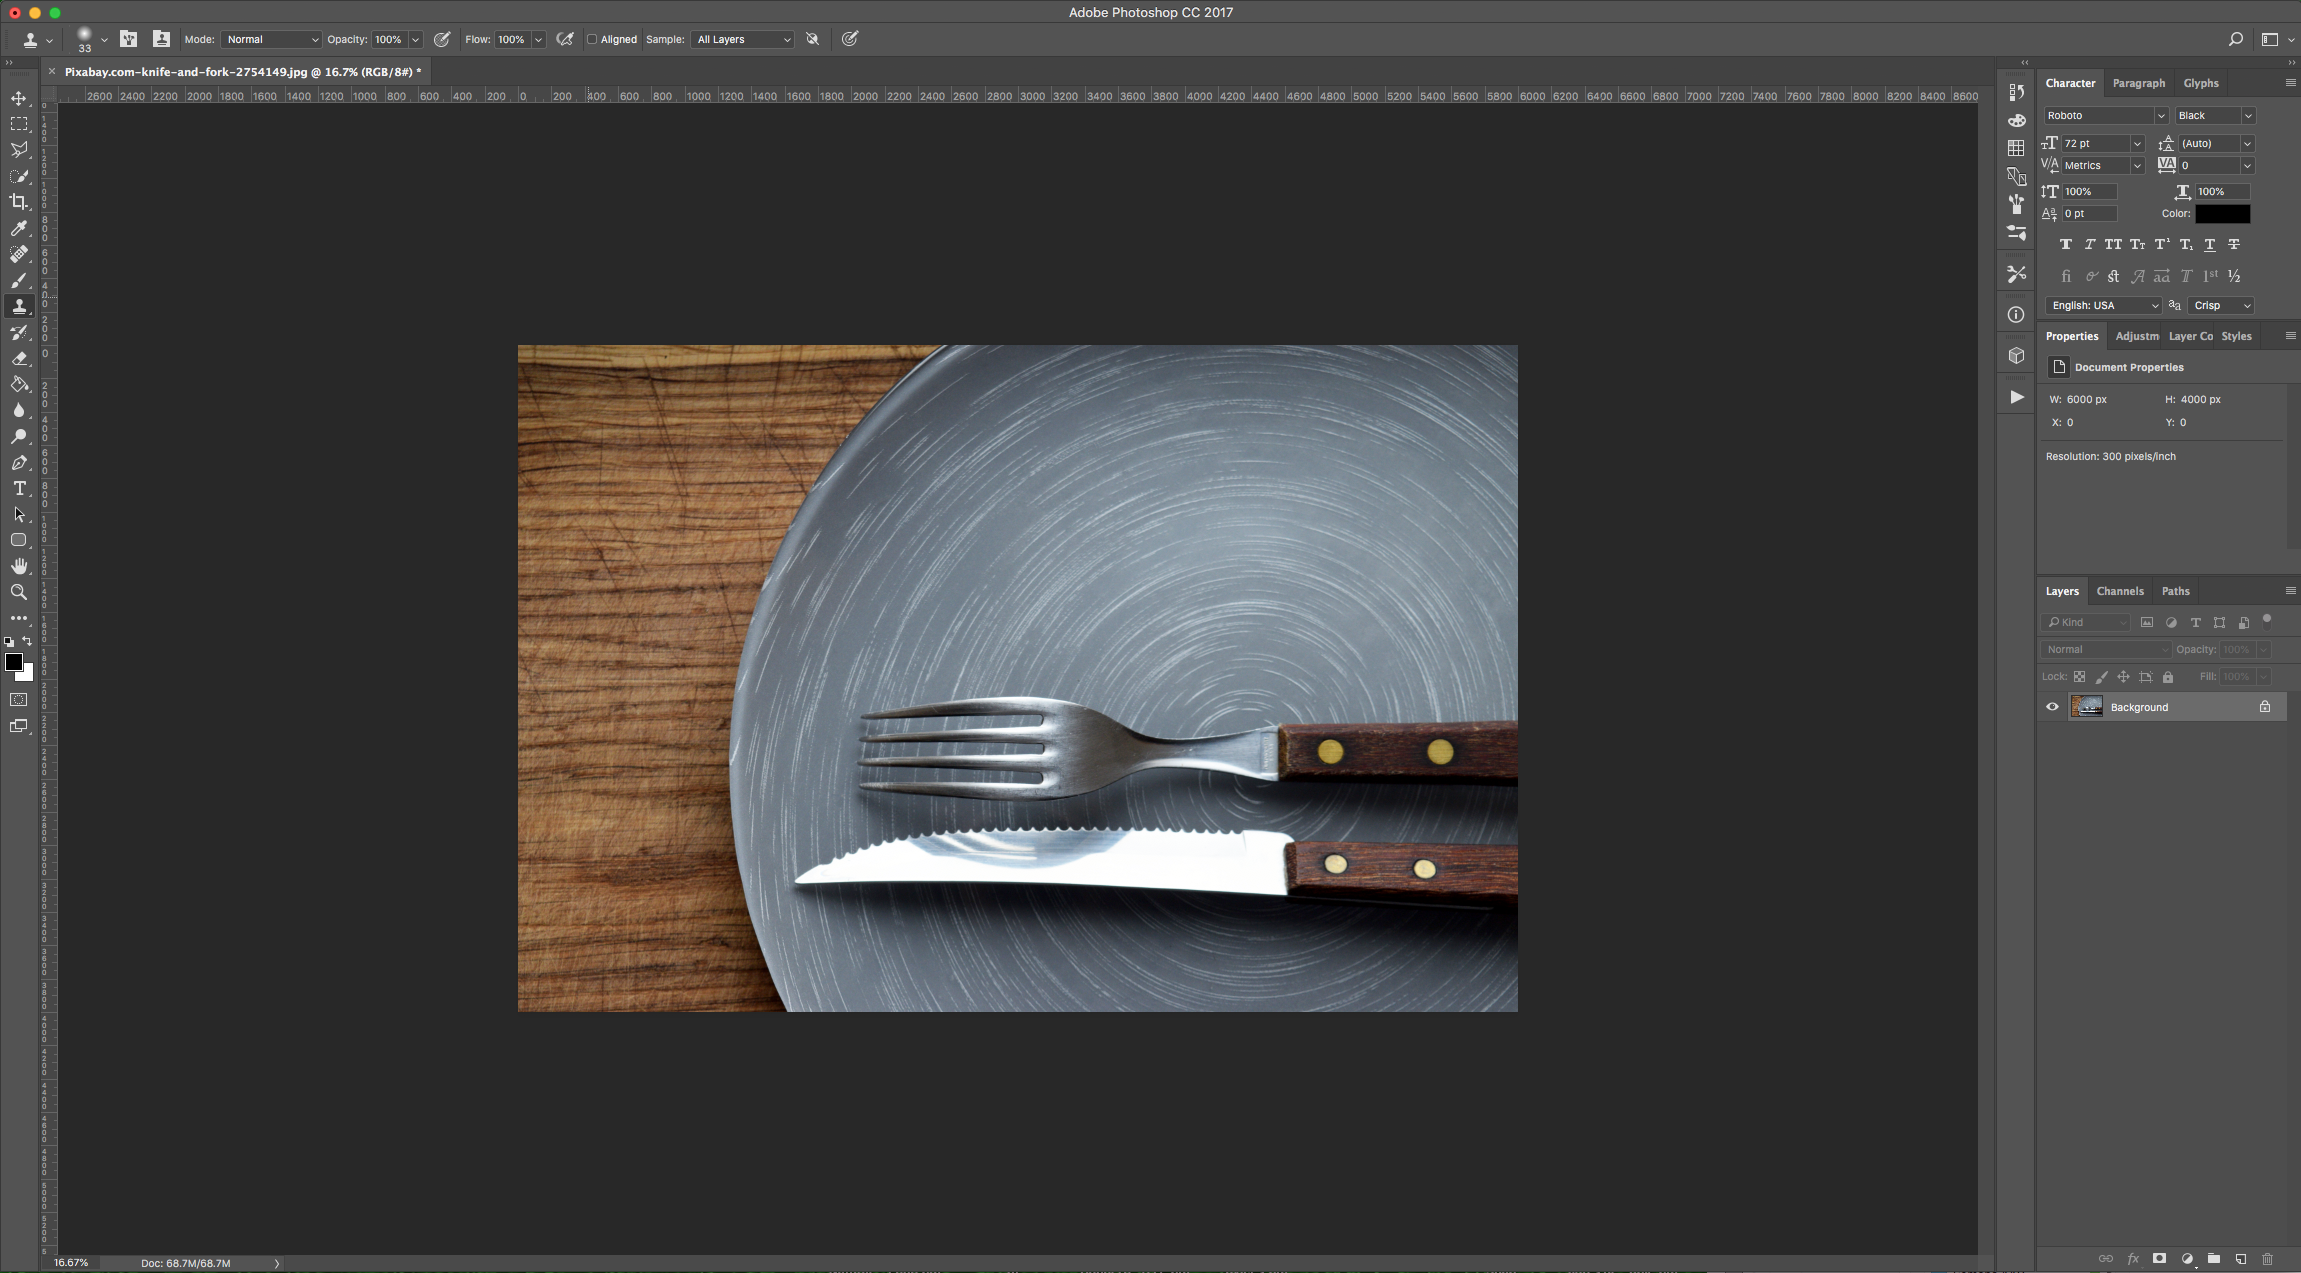
For this tutorial, we will use a “Background” Image with a dish or plate.
1 - In Photoshop, open the image you wish to use as “Background” (we used the image of a plate).
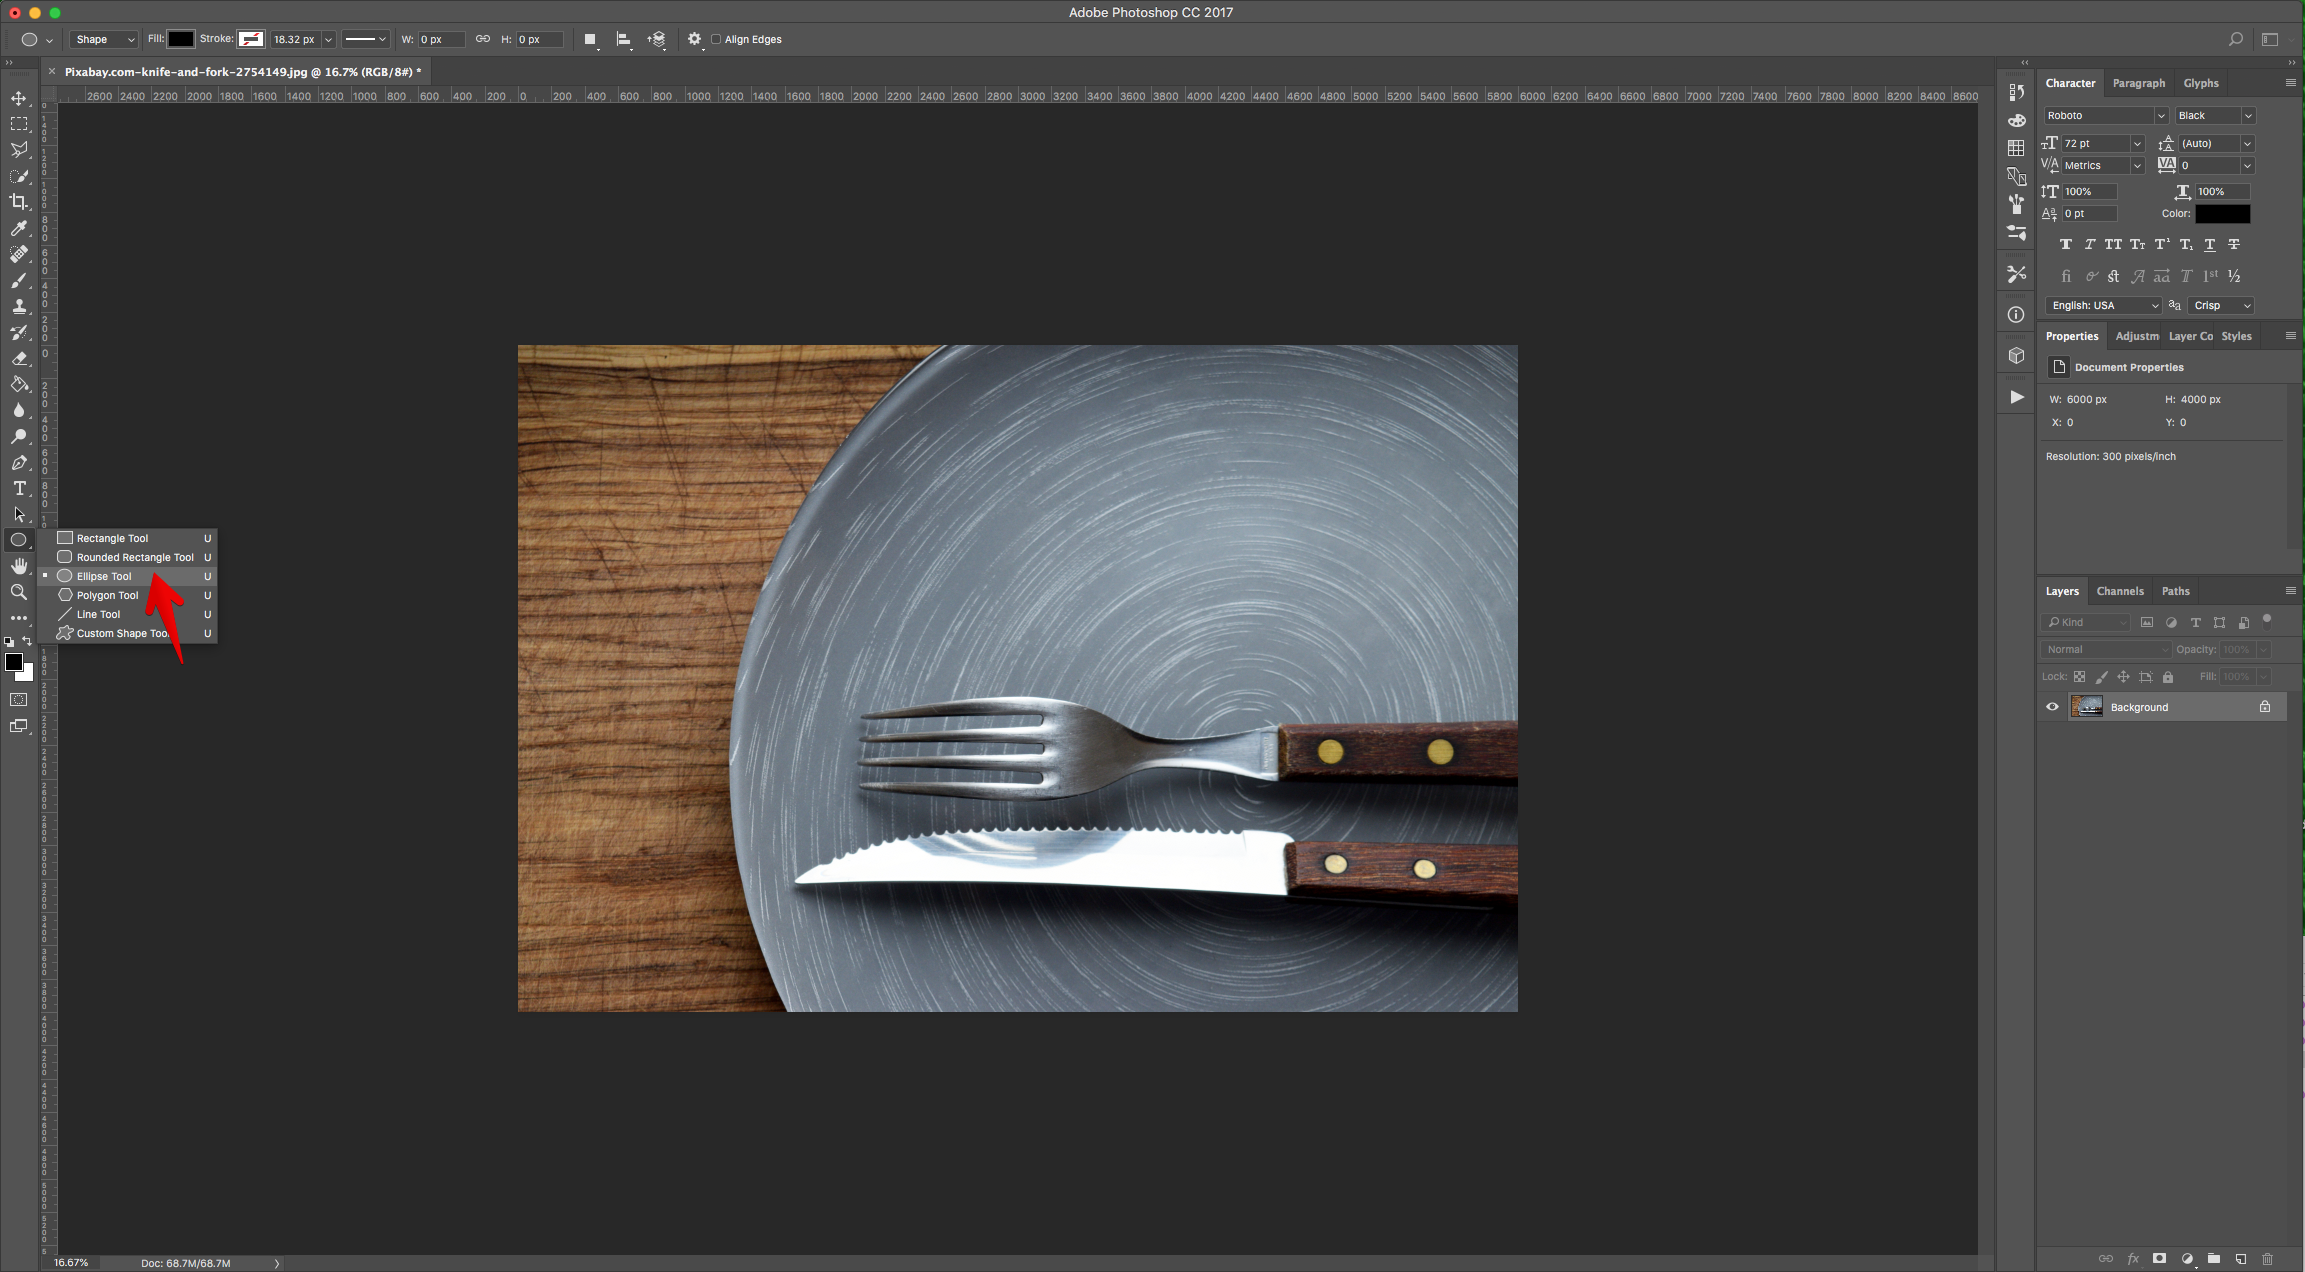
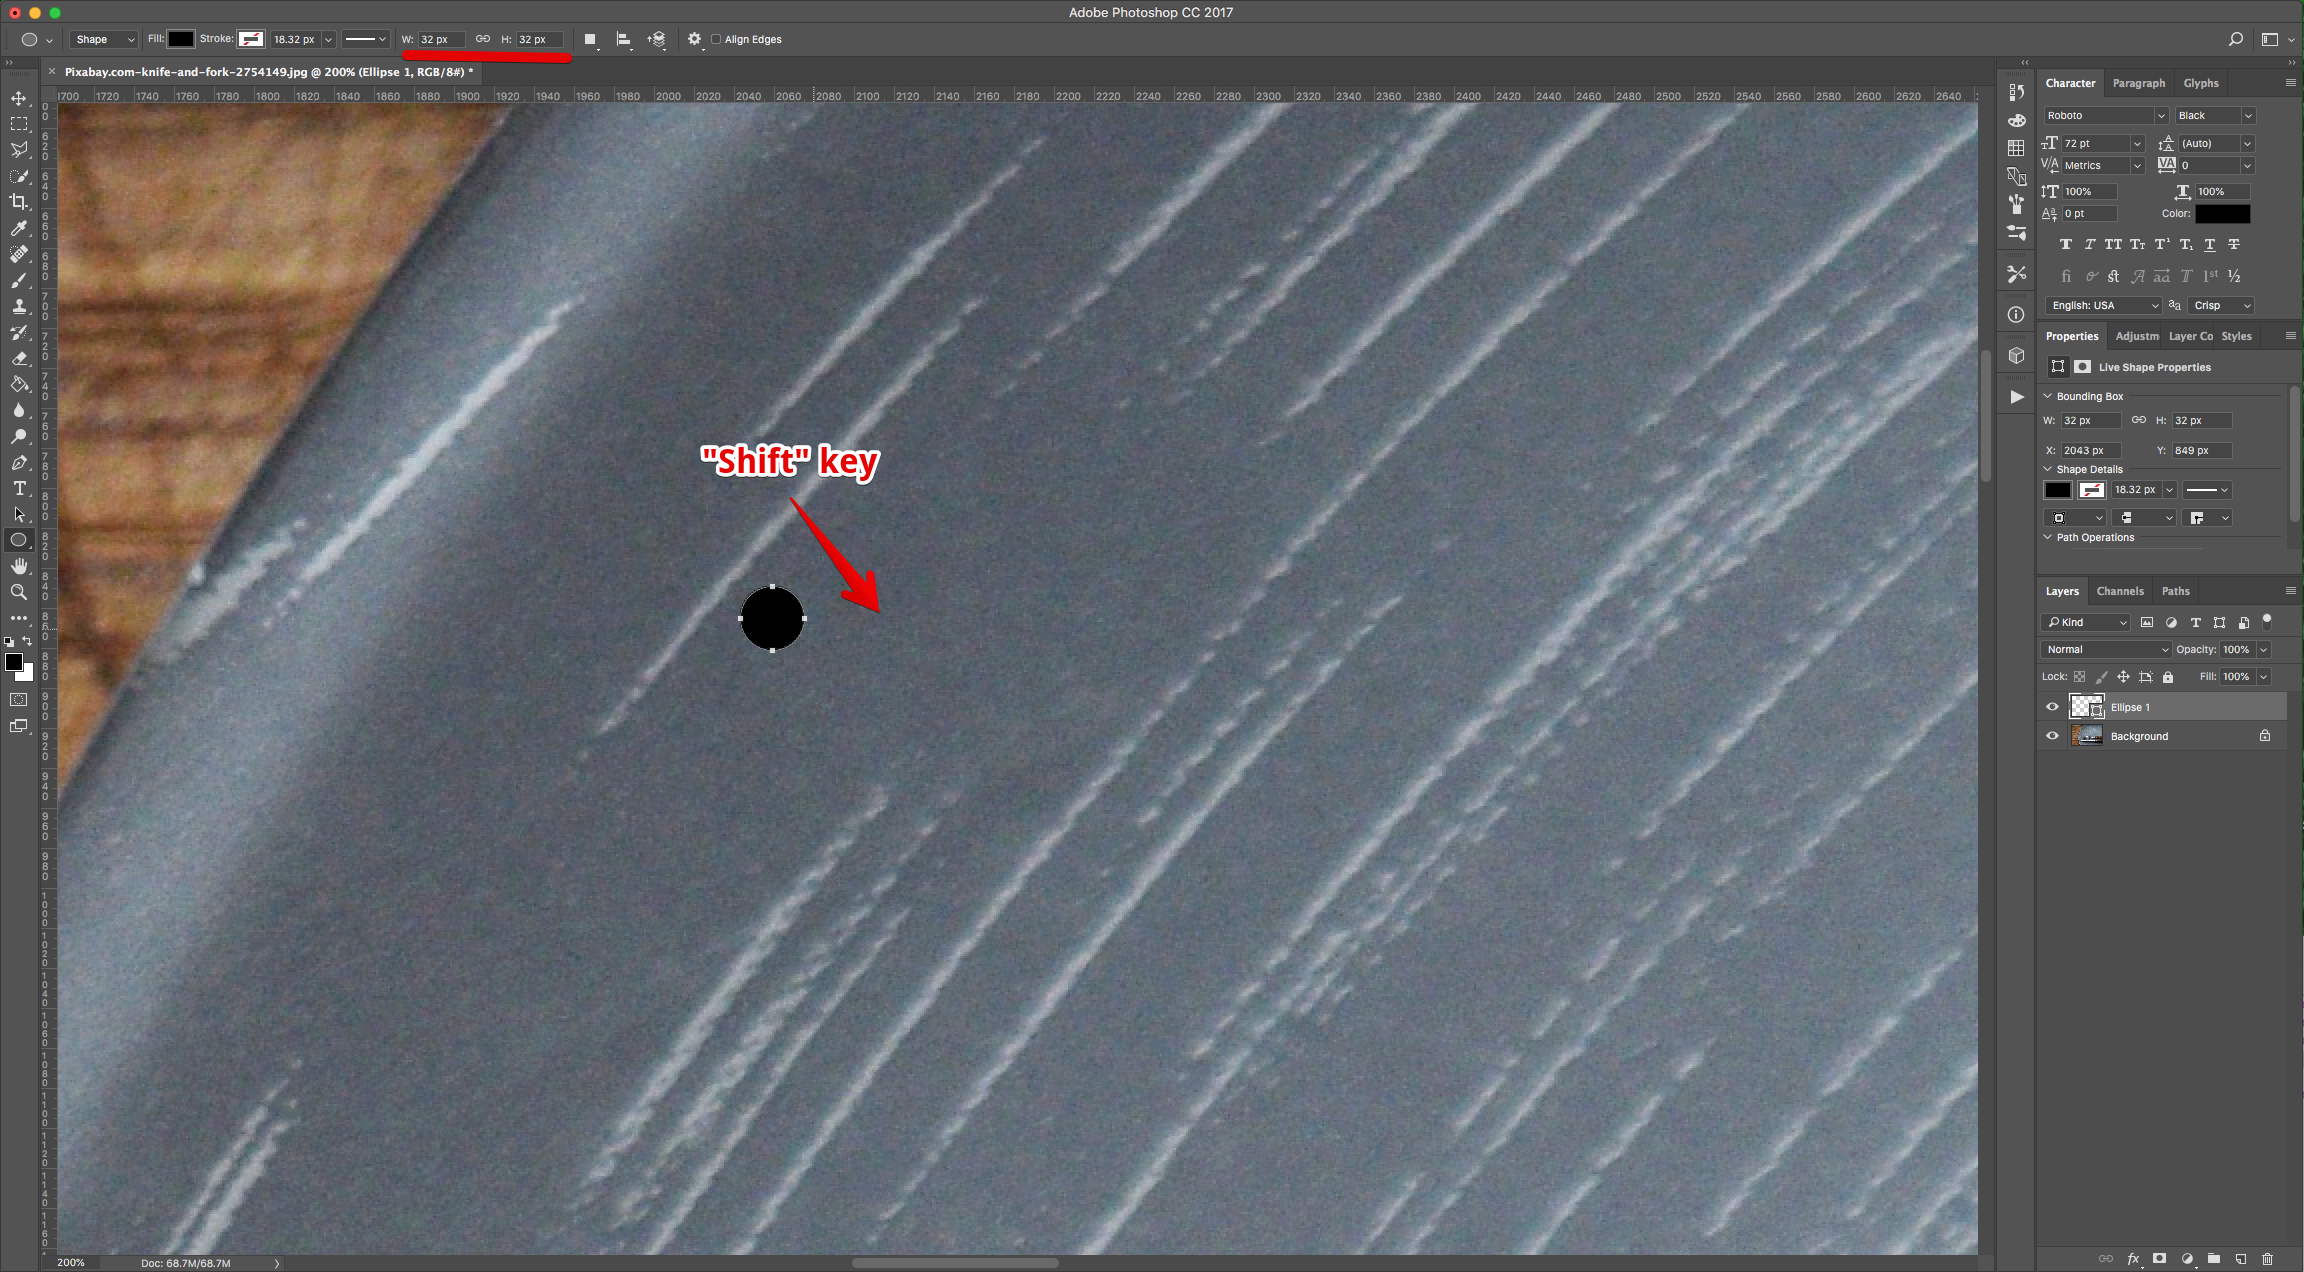
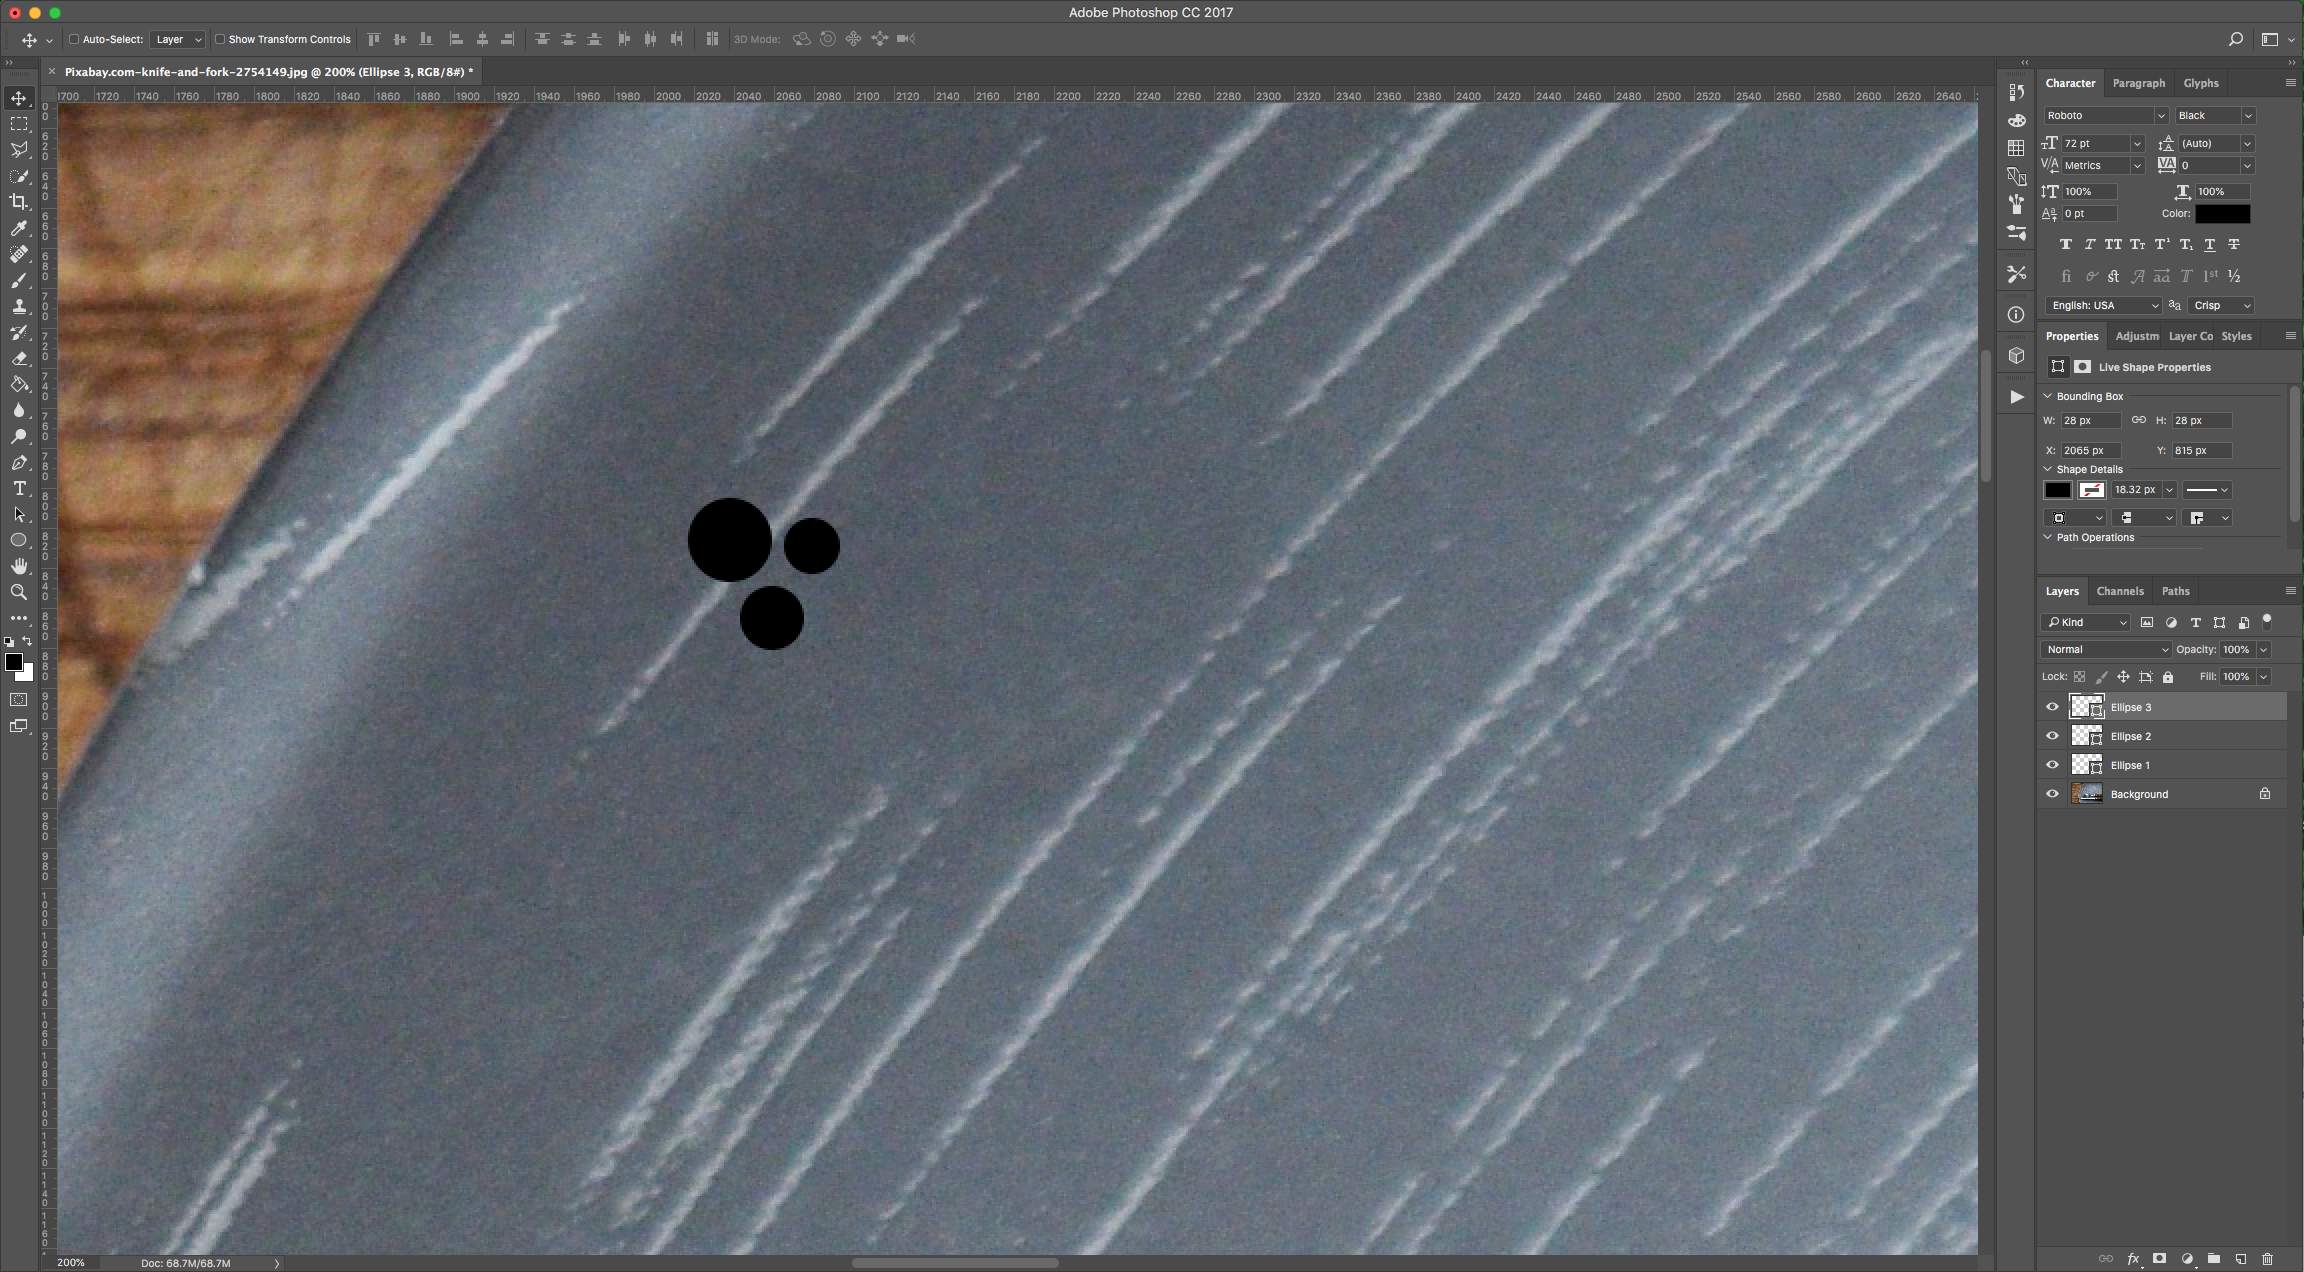
2 - Choose the “Ellipse Tool” (U), use Black (Foreground) as “Fill” color and hold the “Shift” key while dragging diagonally inside your “Canvas” to create a “Circle”. Give it about 30 px in “Width” and “Height”. Create other “Circles” close to each other with a similar “Radius”.
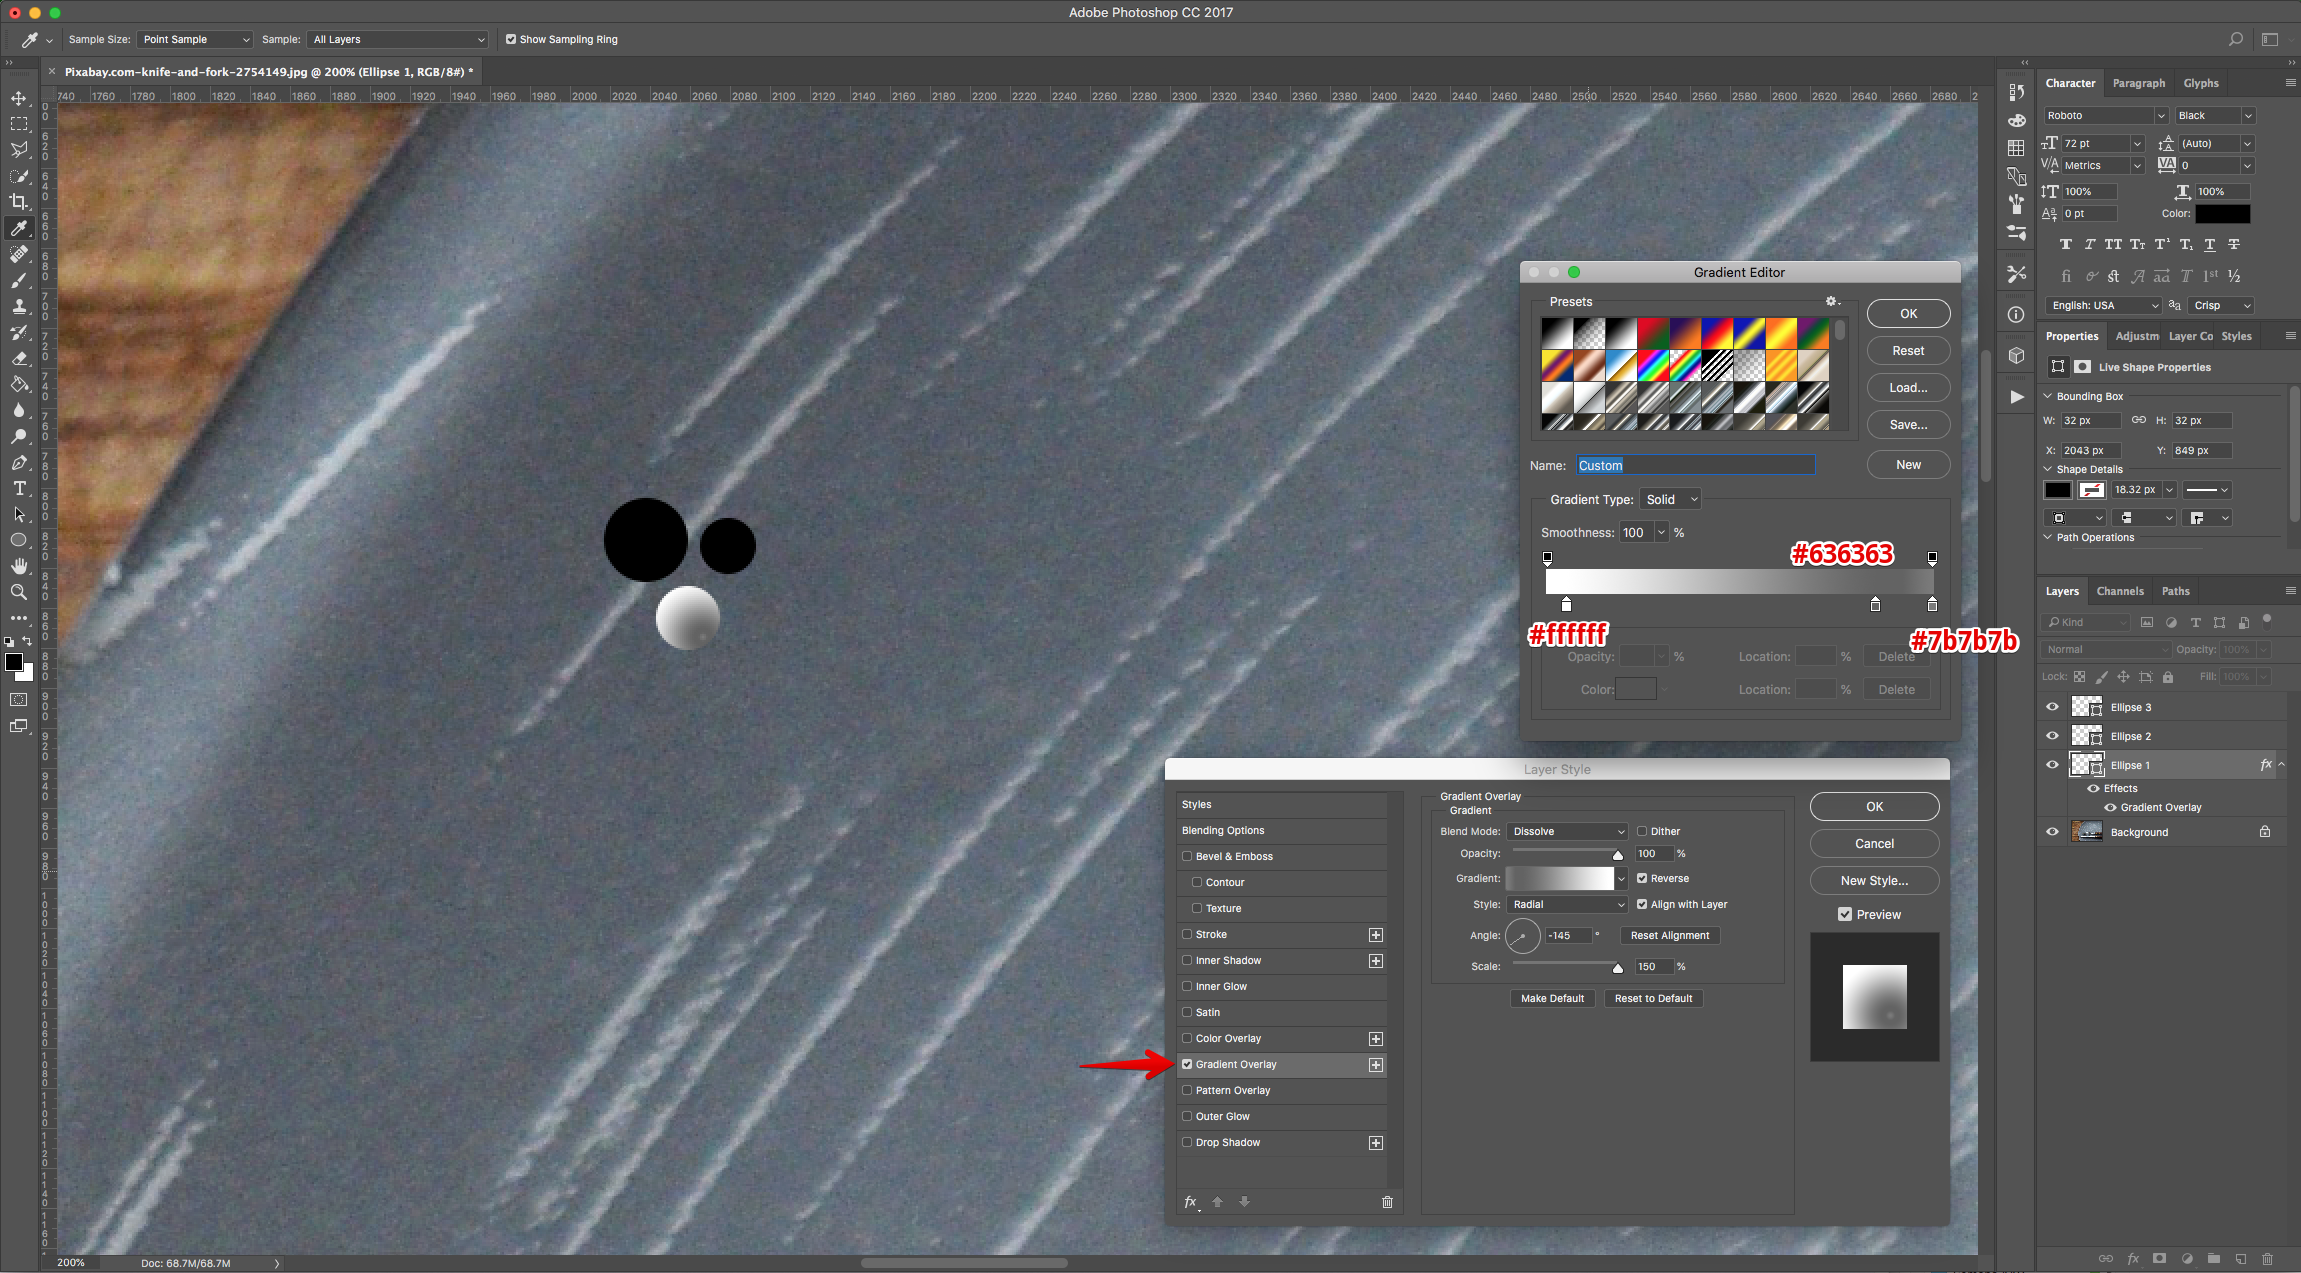
3 - Double-click on one of the “Circles” Thumbnail and apply the following “Layer Styles”:
Gradient Overlay: (1: Location: 5%, #ffffff- 2: Location: 85%, #636363 - 3: Location: 100%, #7b7b7b)
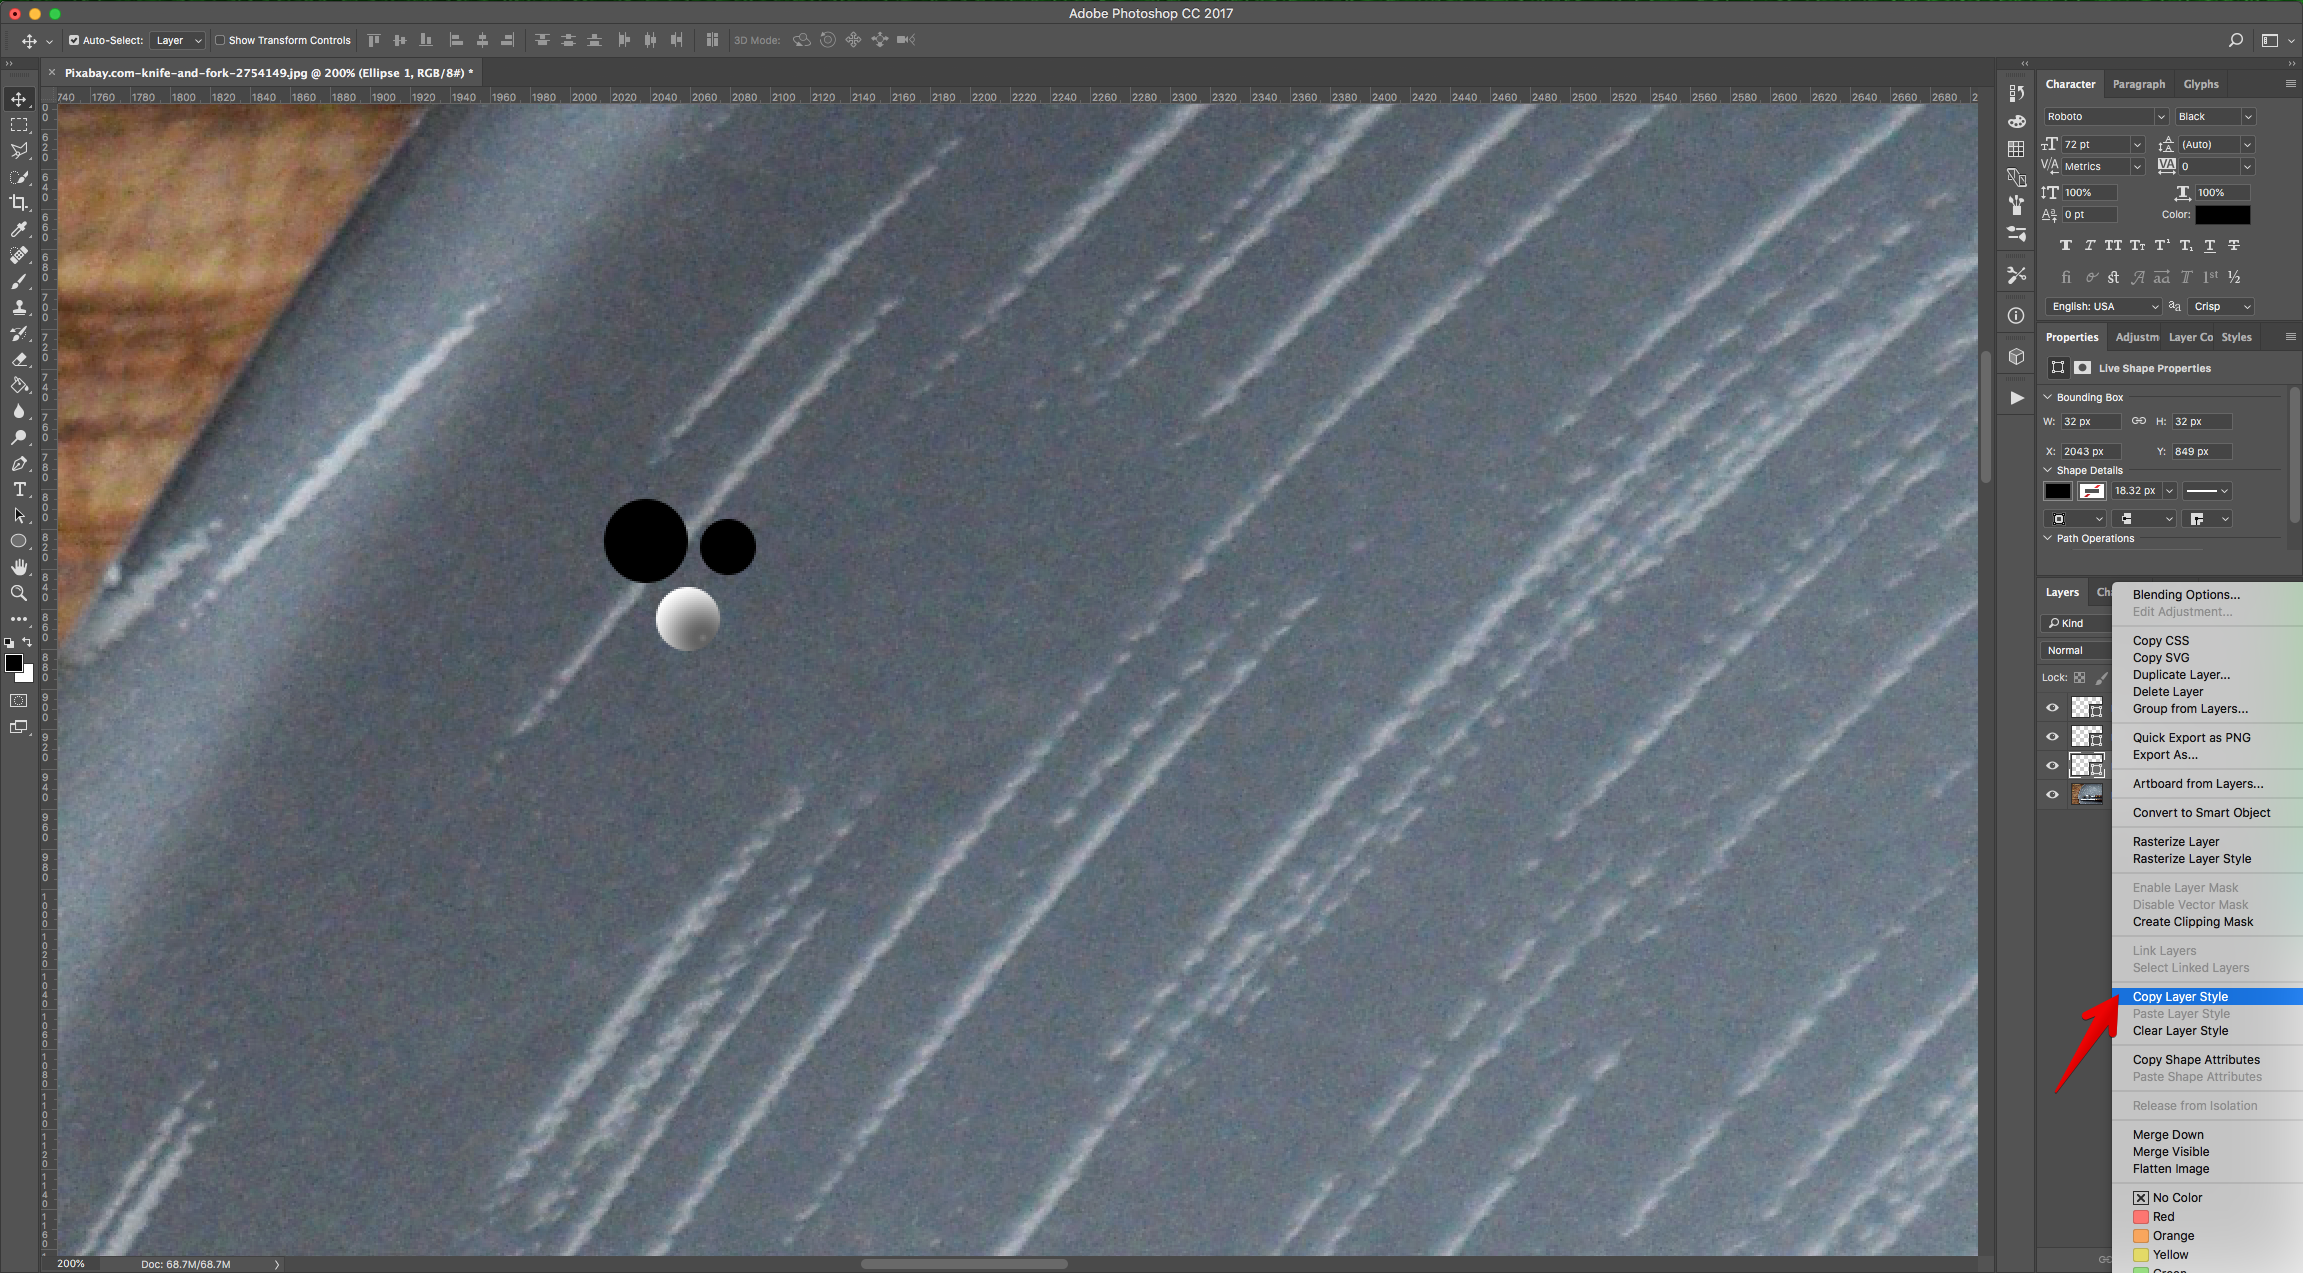
4 - Right-click on top of its Thumbnail and choose “Copy Layer Style”. Then select the other “Circles” (“Shift” key) and choose “Paste Layer Style”.
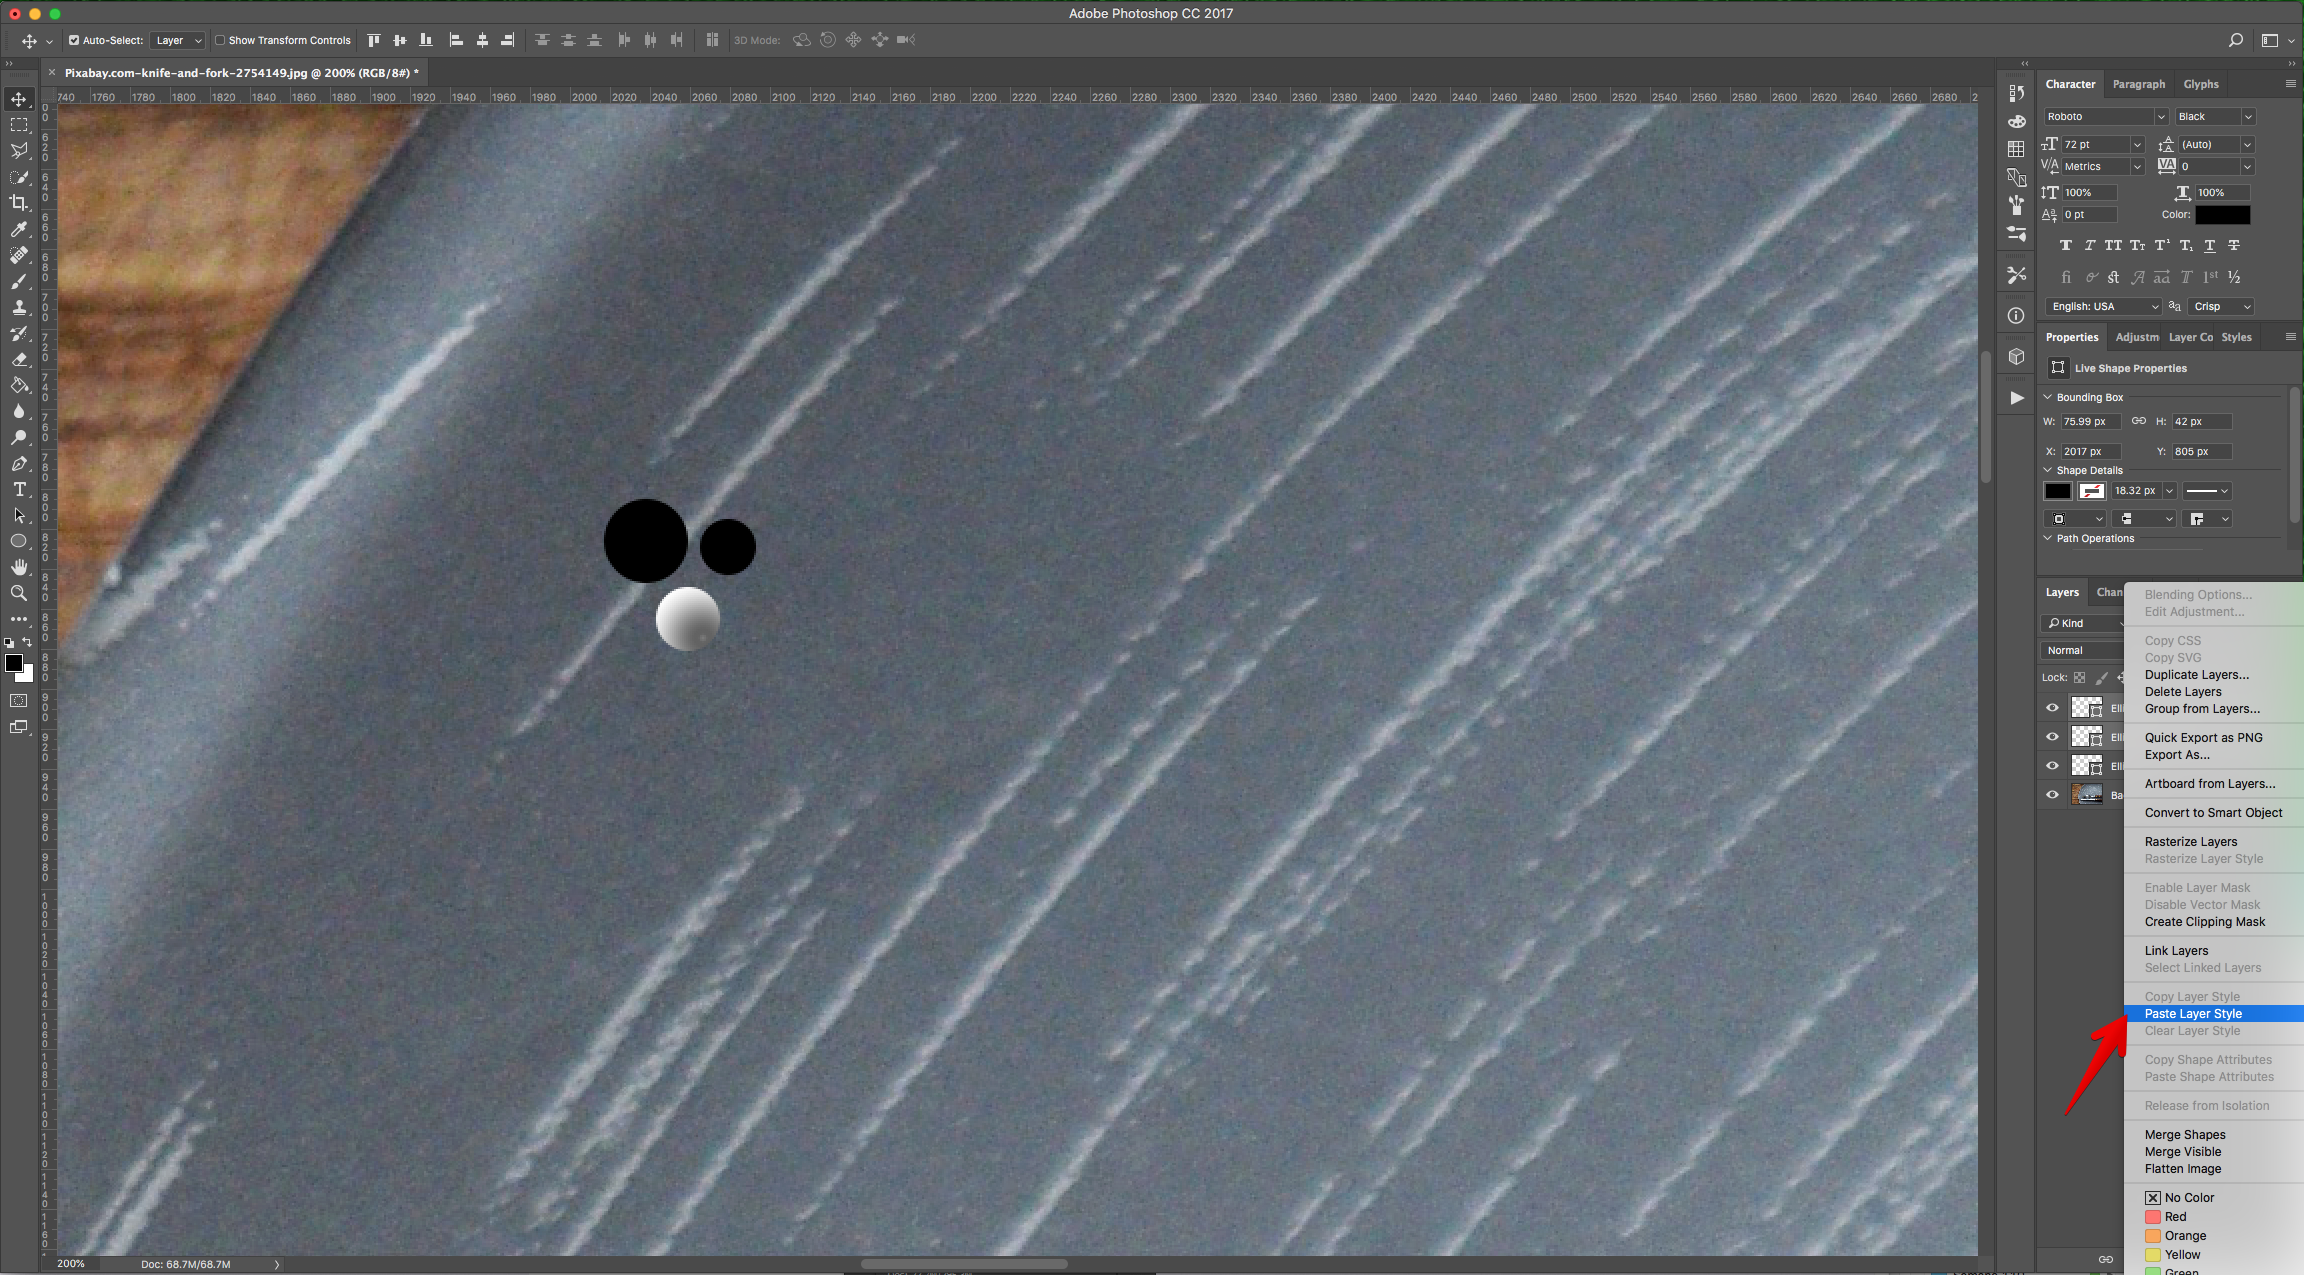
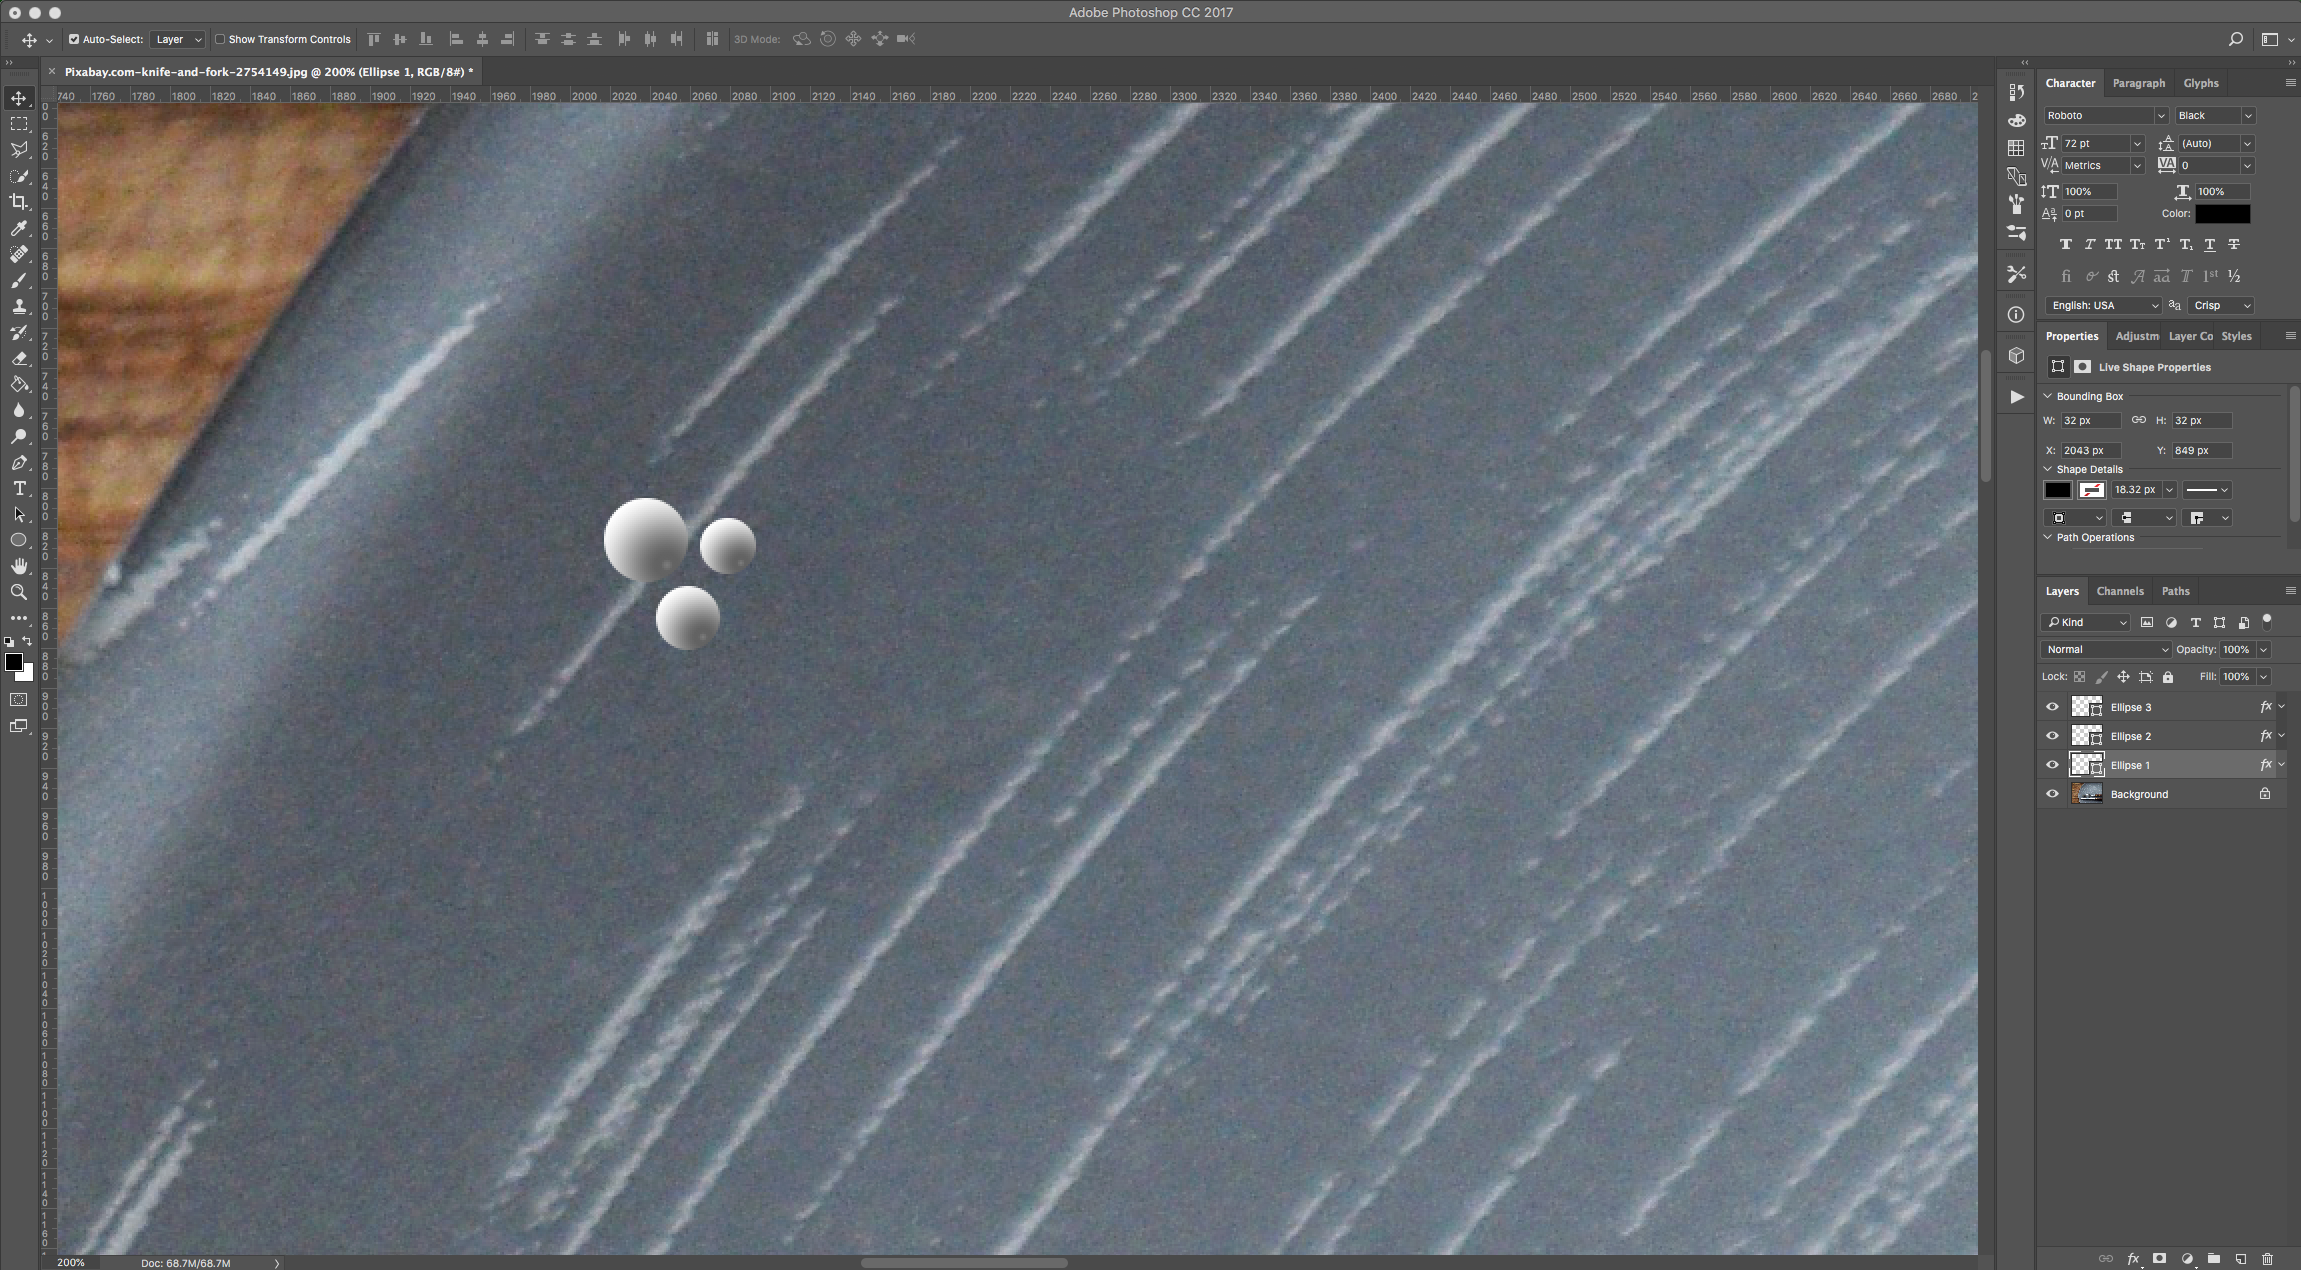
5 - Select all the “Circles”, right-click on top of their Thumbnails and choose “Rasterize Layers”. Then, “Merge Shapes” and name the resulting Layer “Spaghetti Brush”.
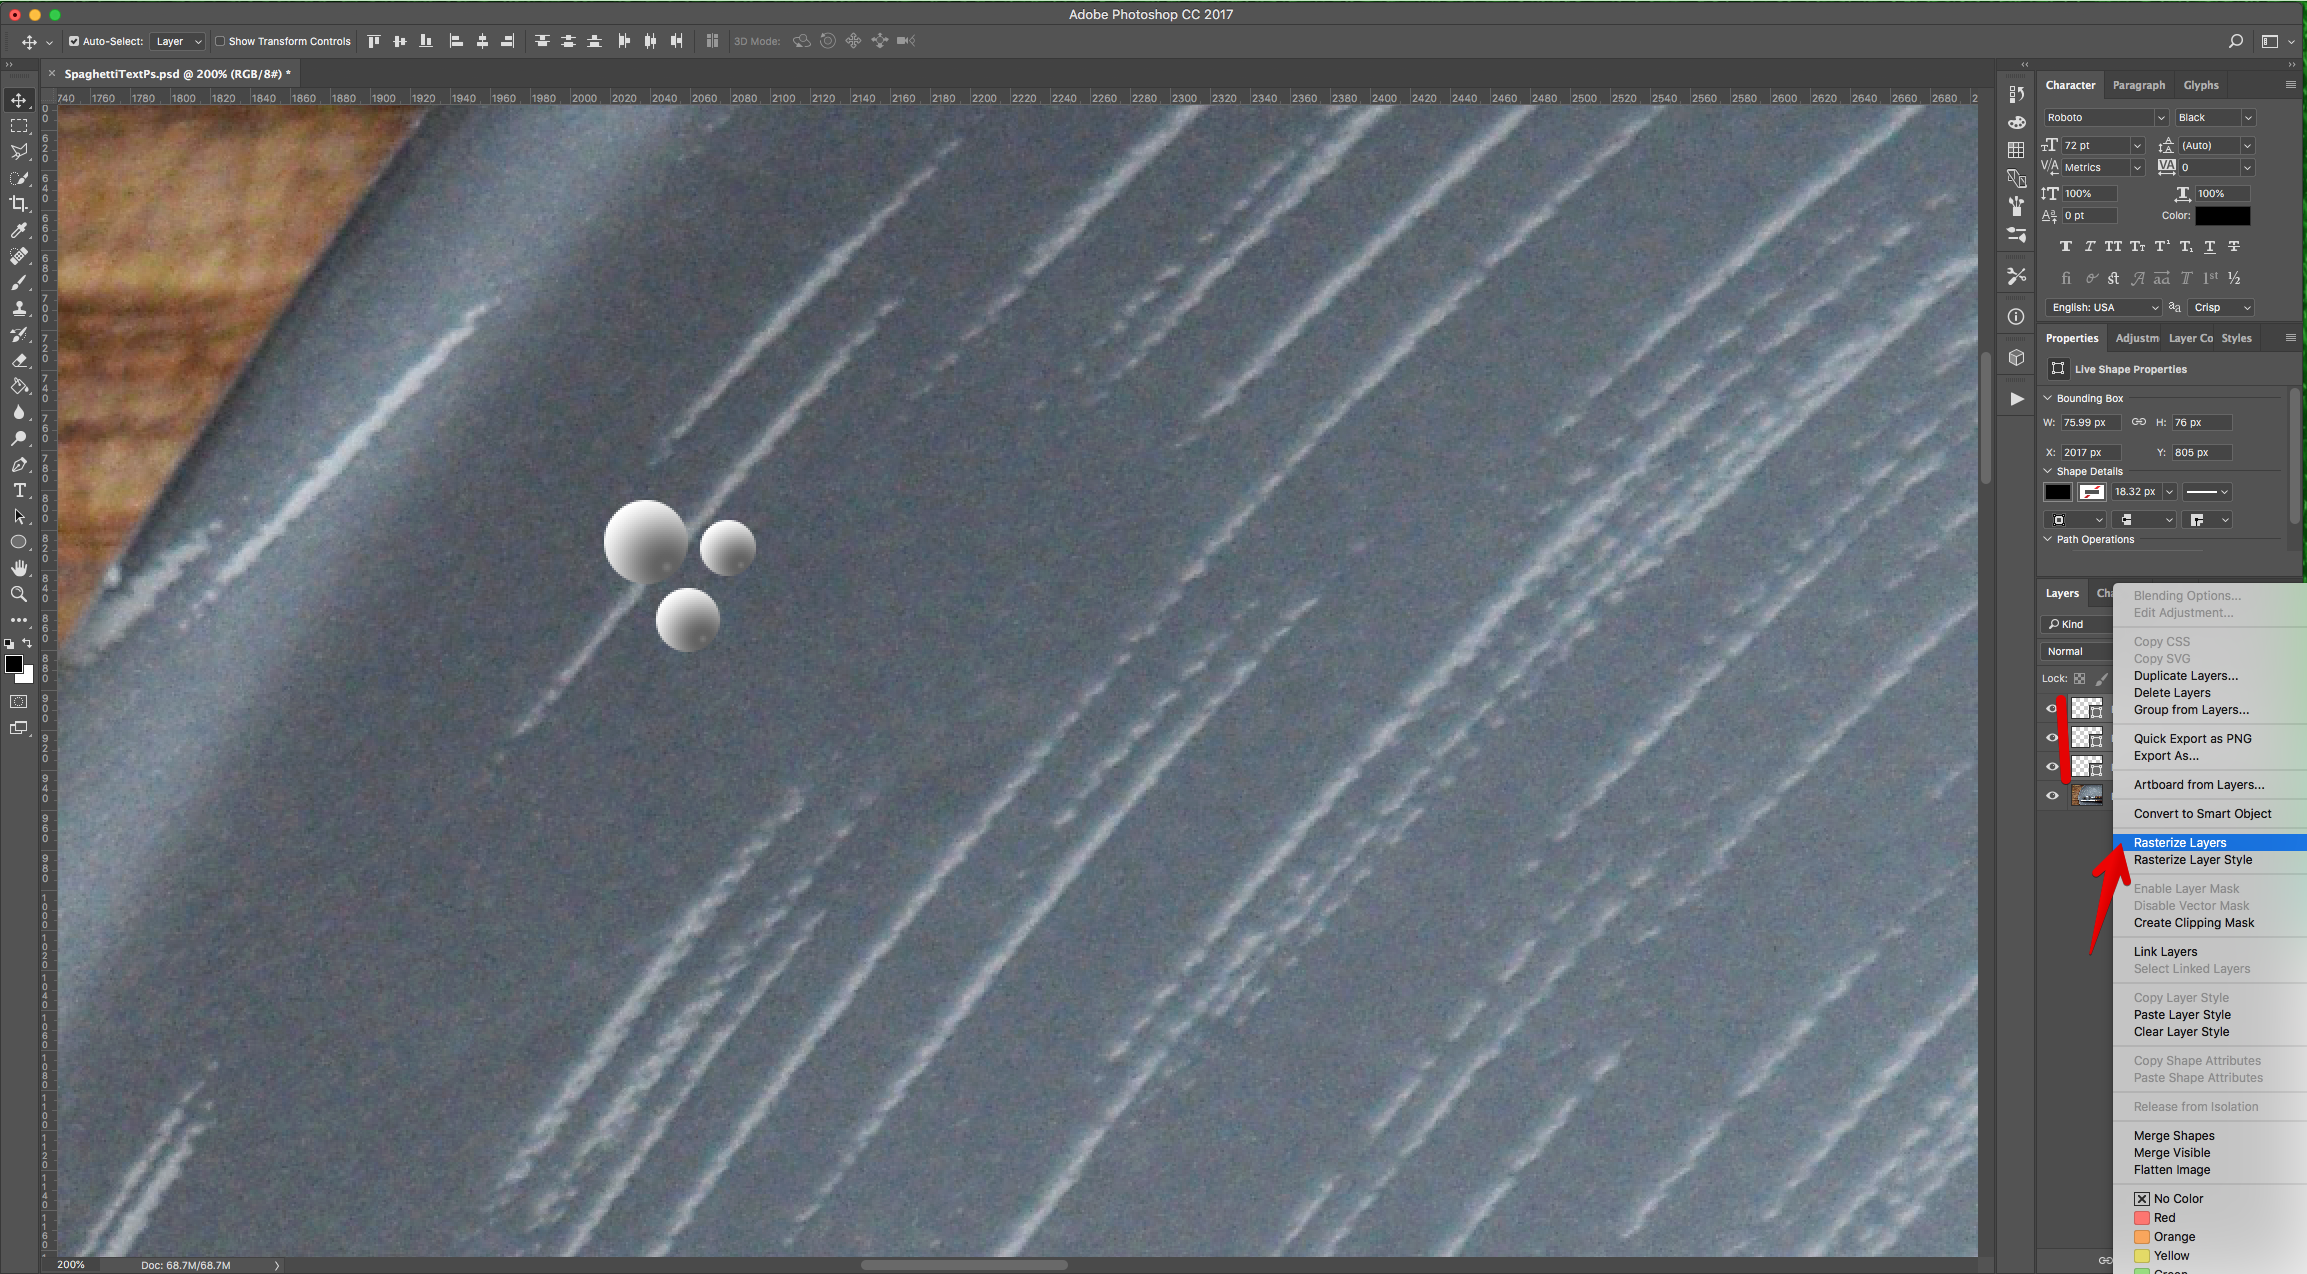
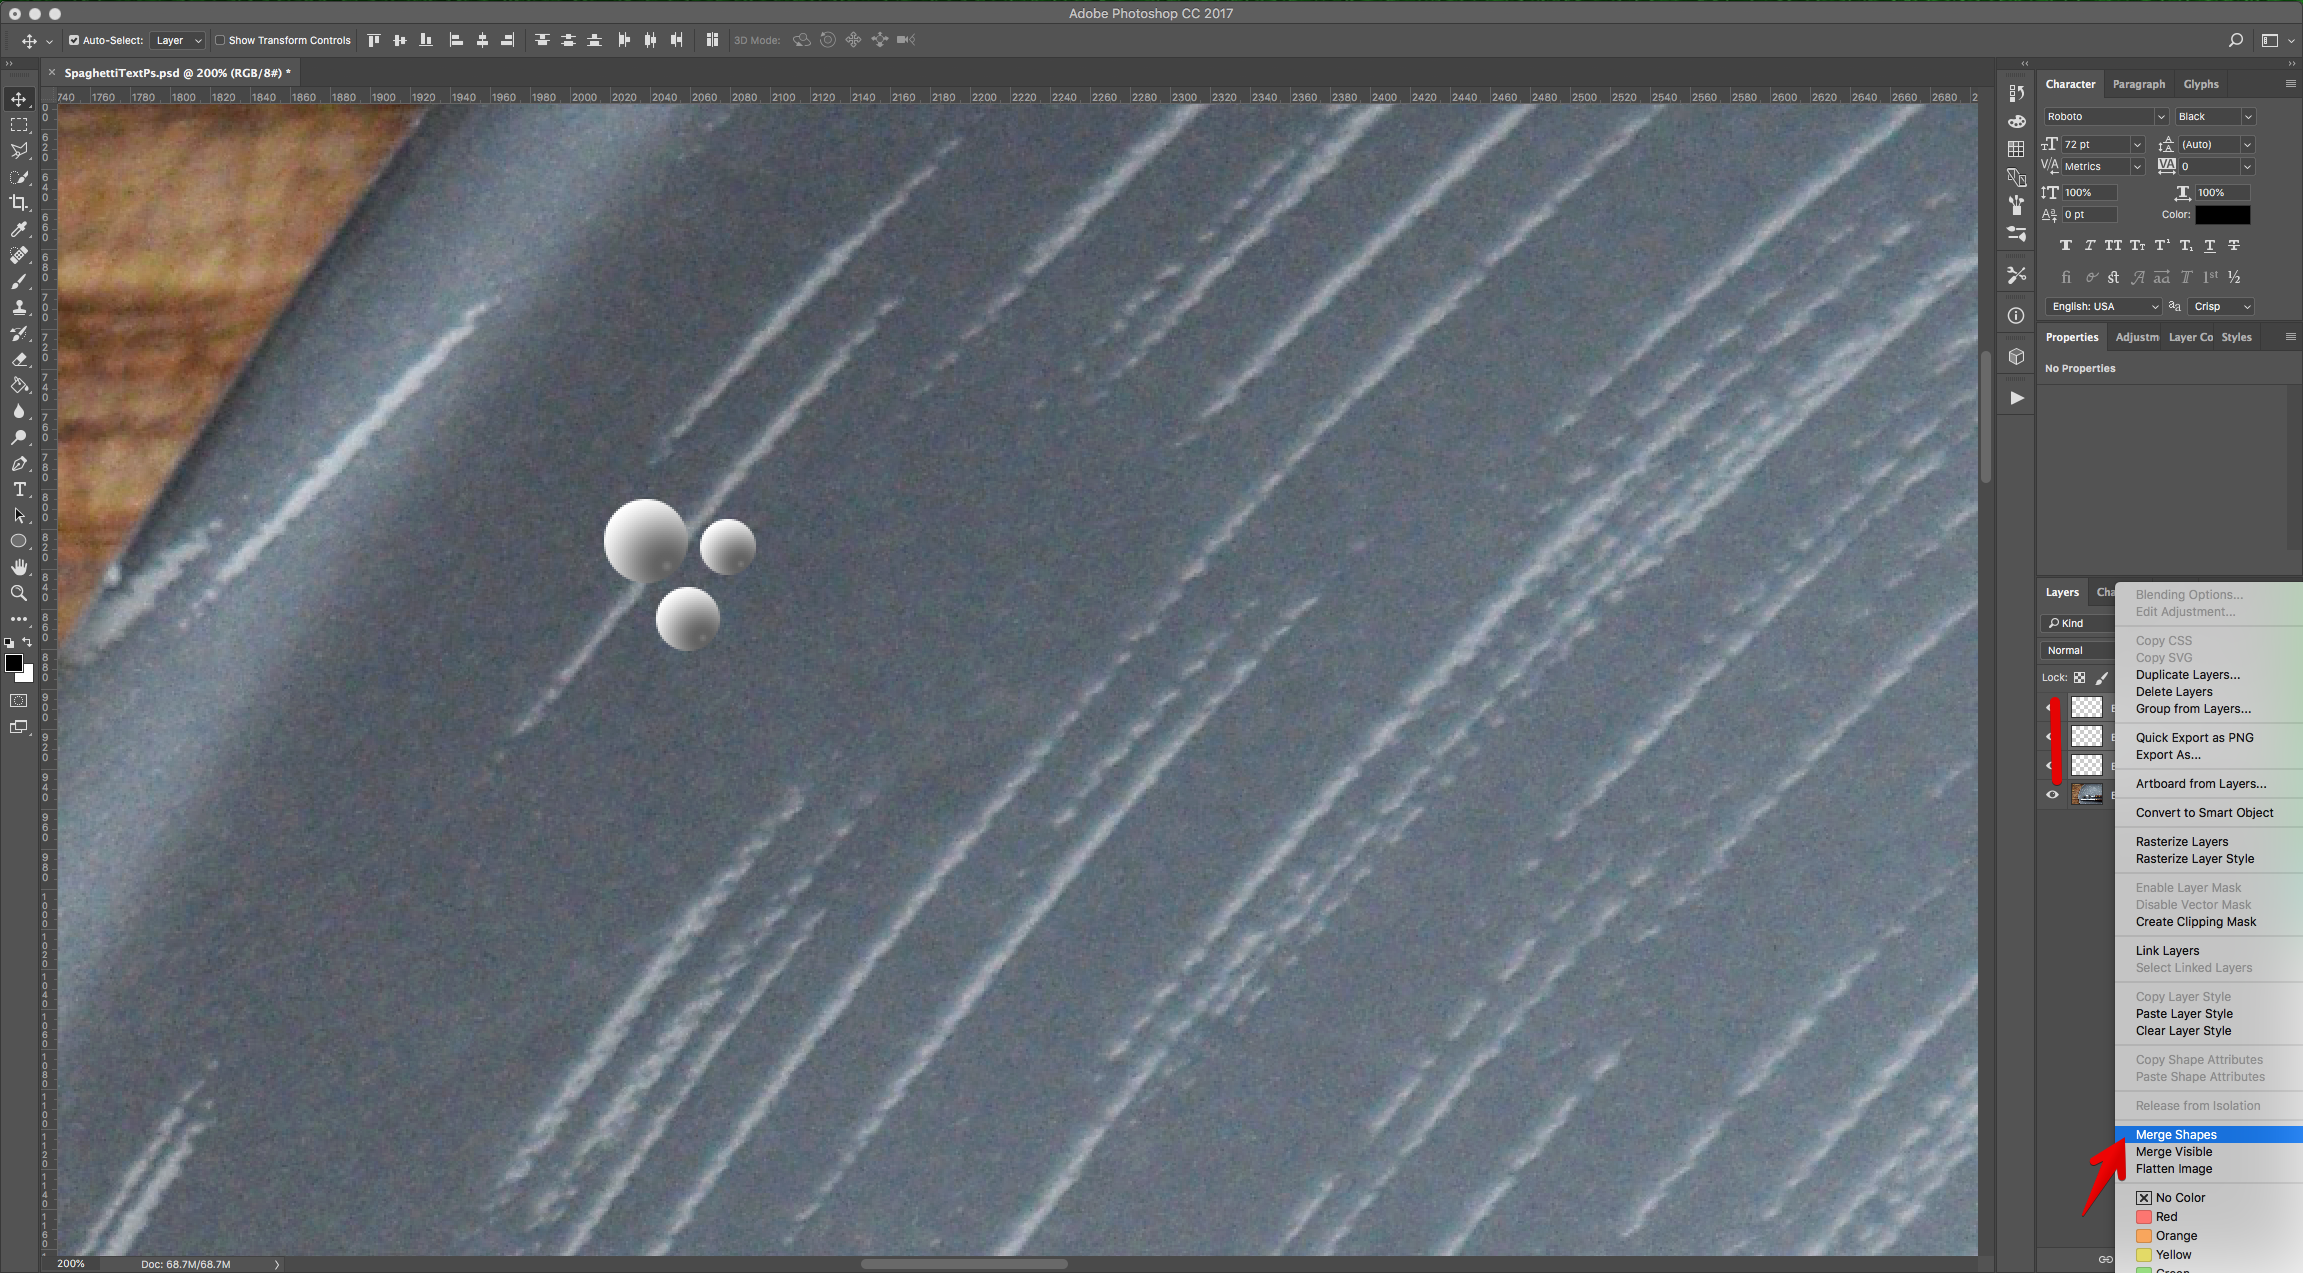
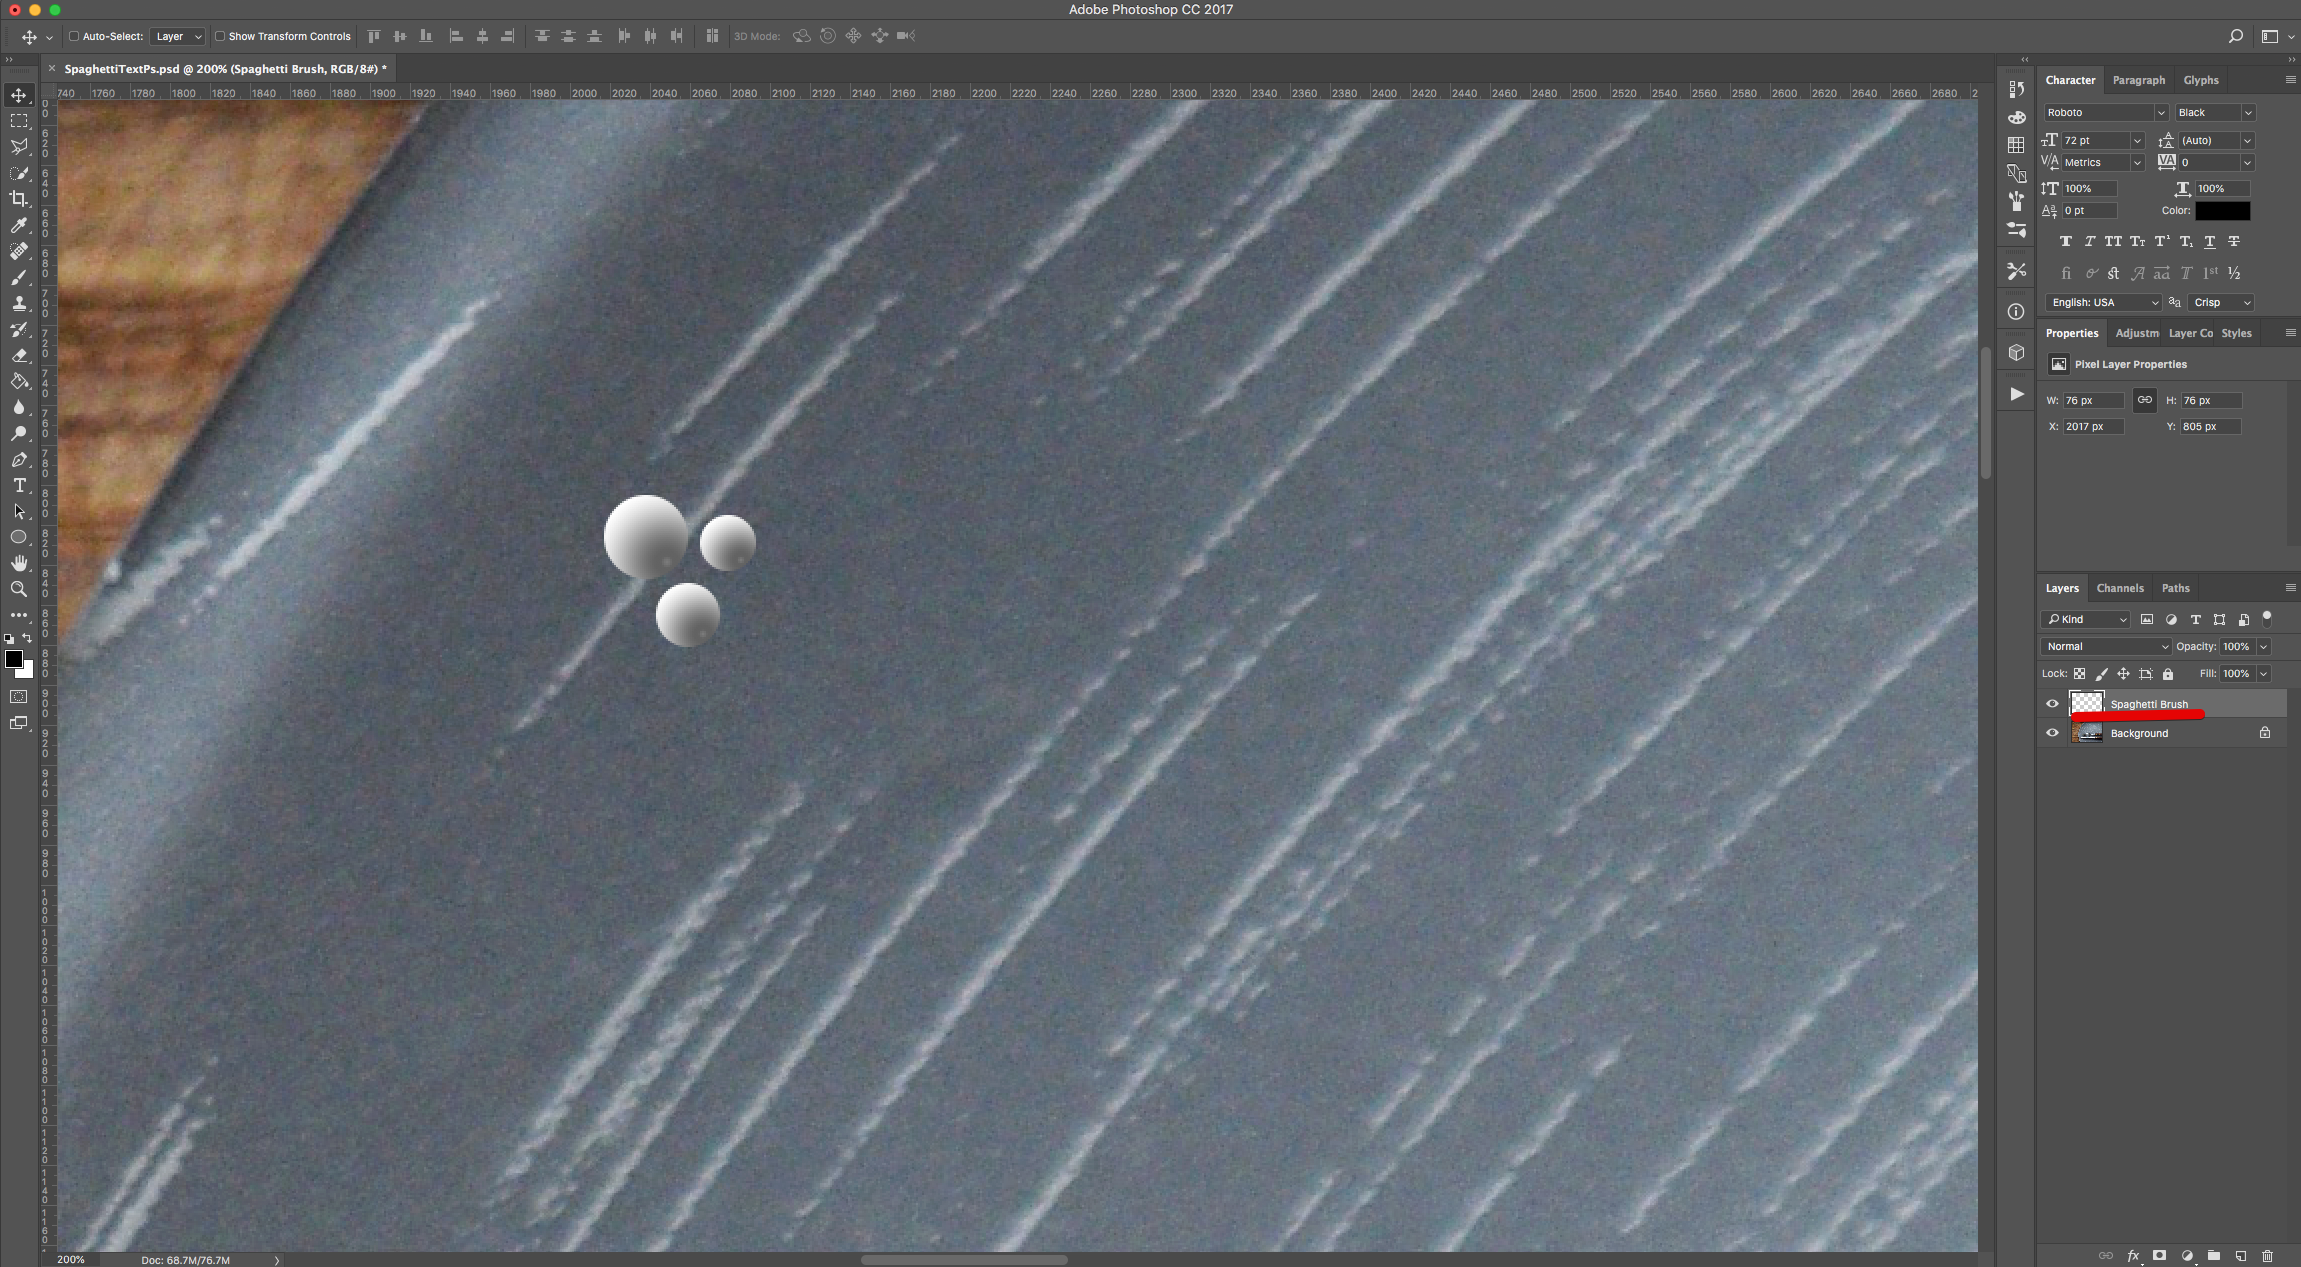
6 - Select the “Mixer Brush Tool” (U), choose a 100px, select “Load the brush after each stroke”, “Dry, Heavy Load”, 0% “Wet”, 100% “Load” and “Flow” and uncheck the “Sample All Layers” box.
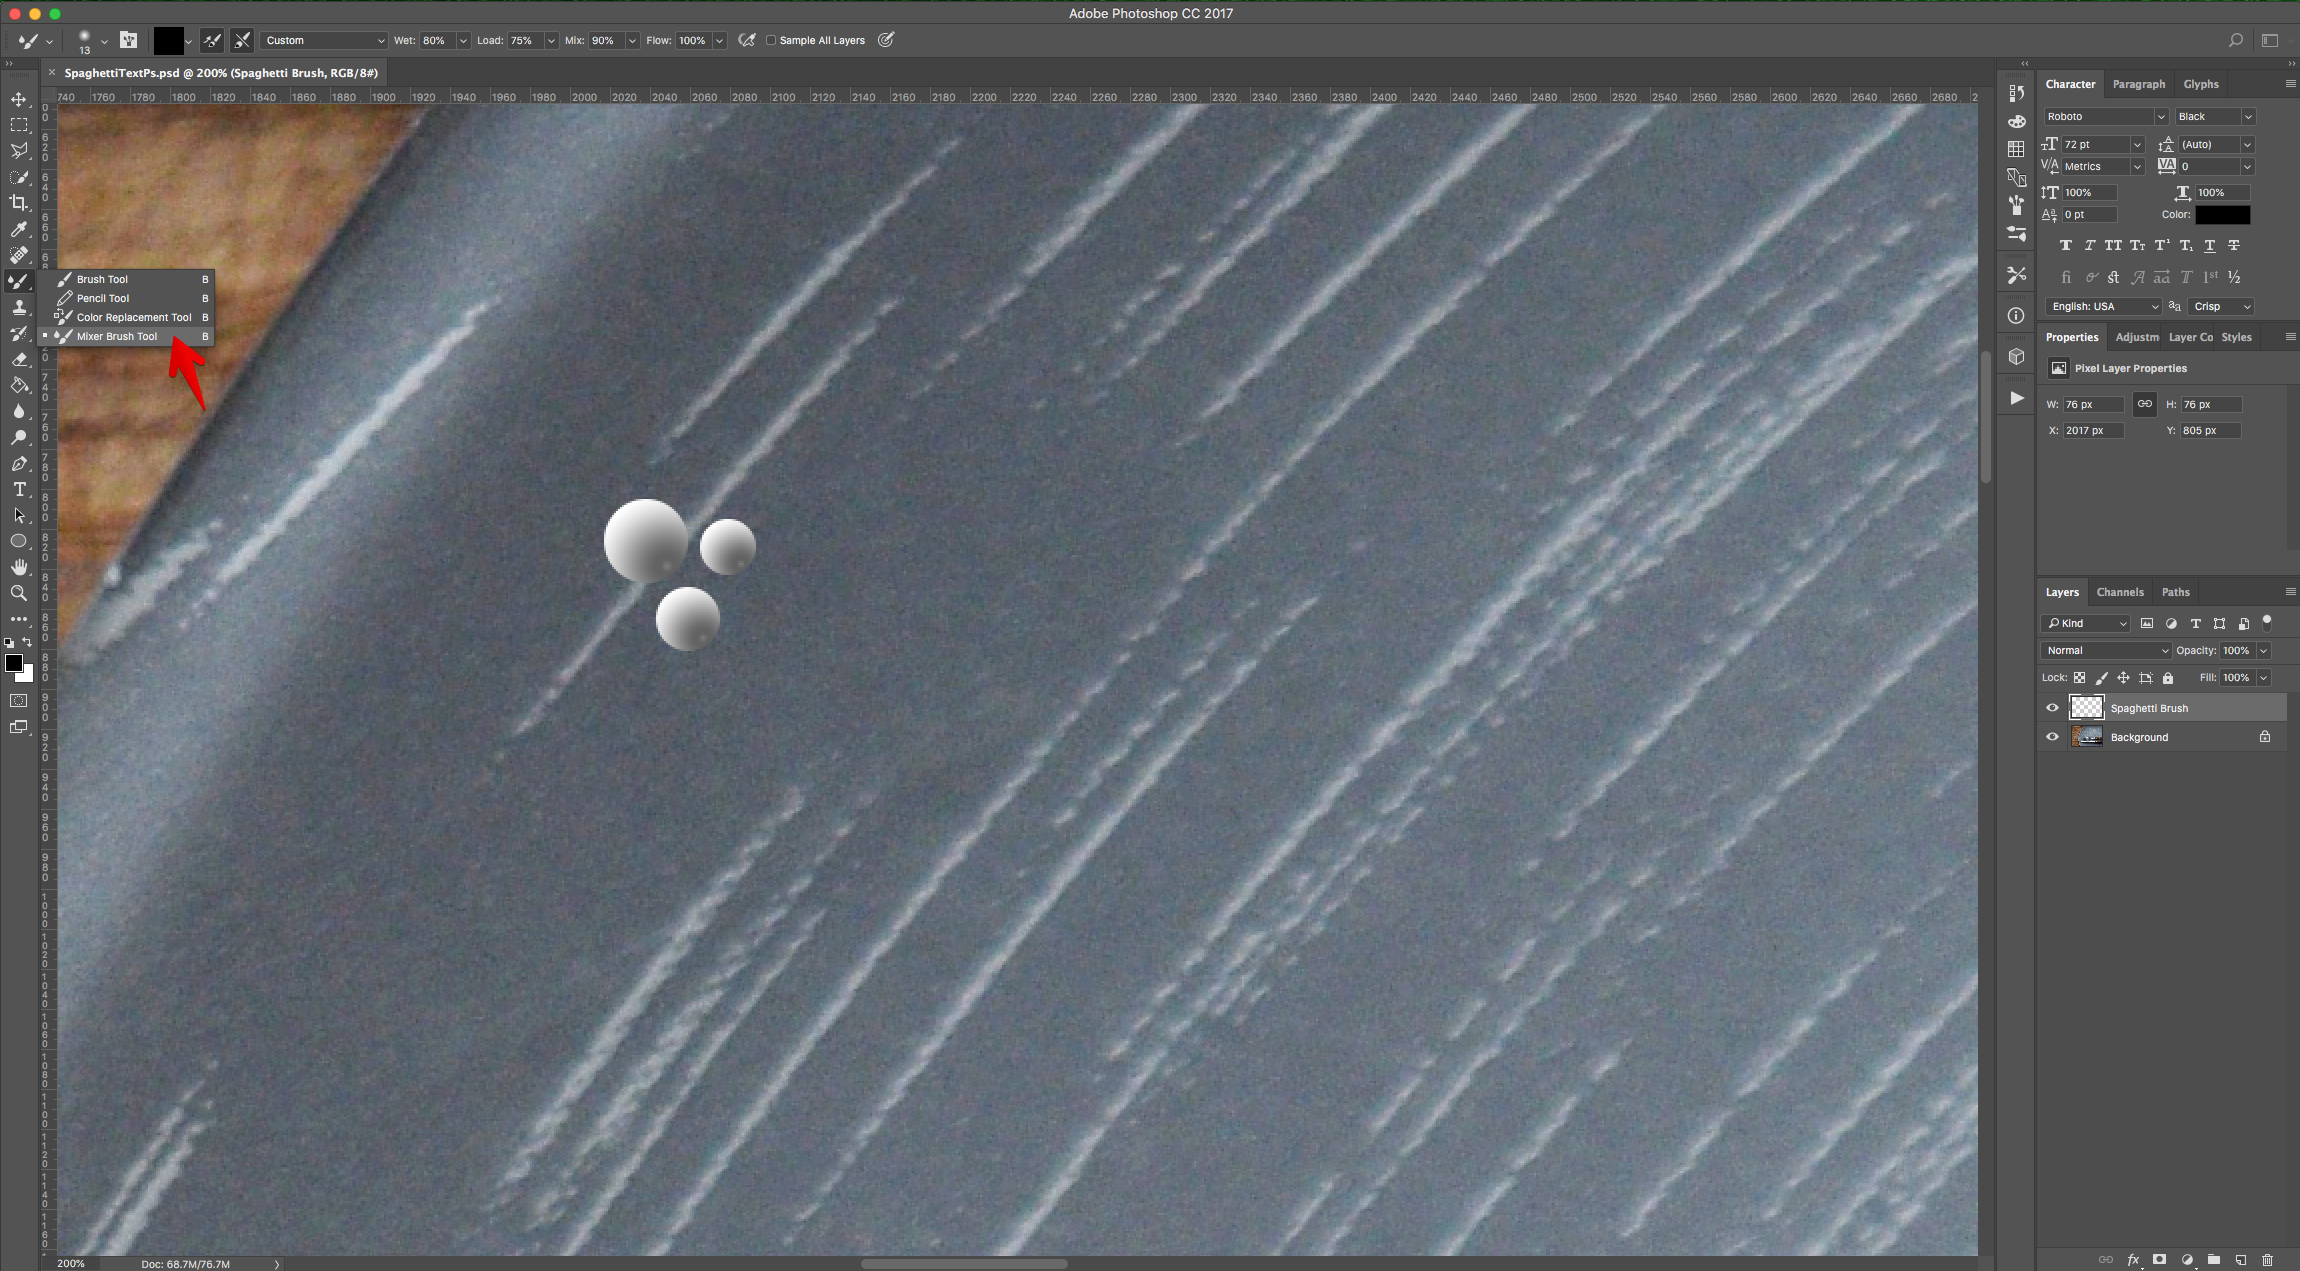
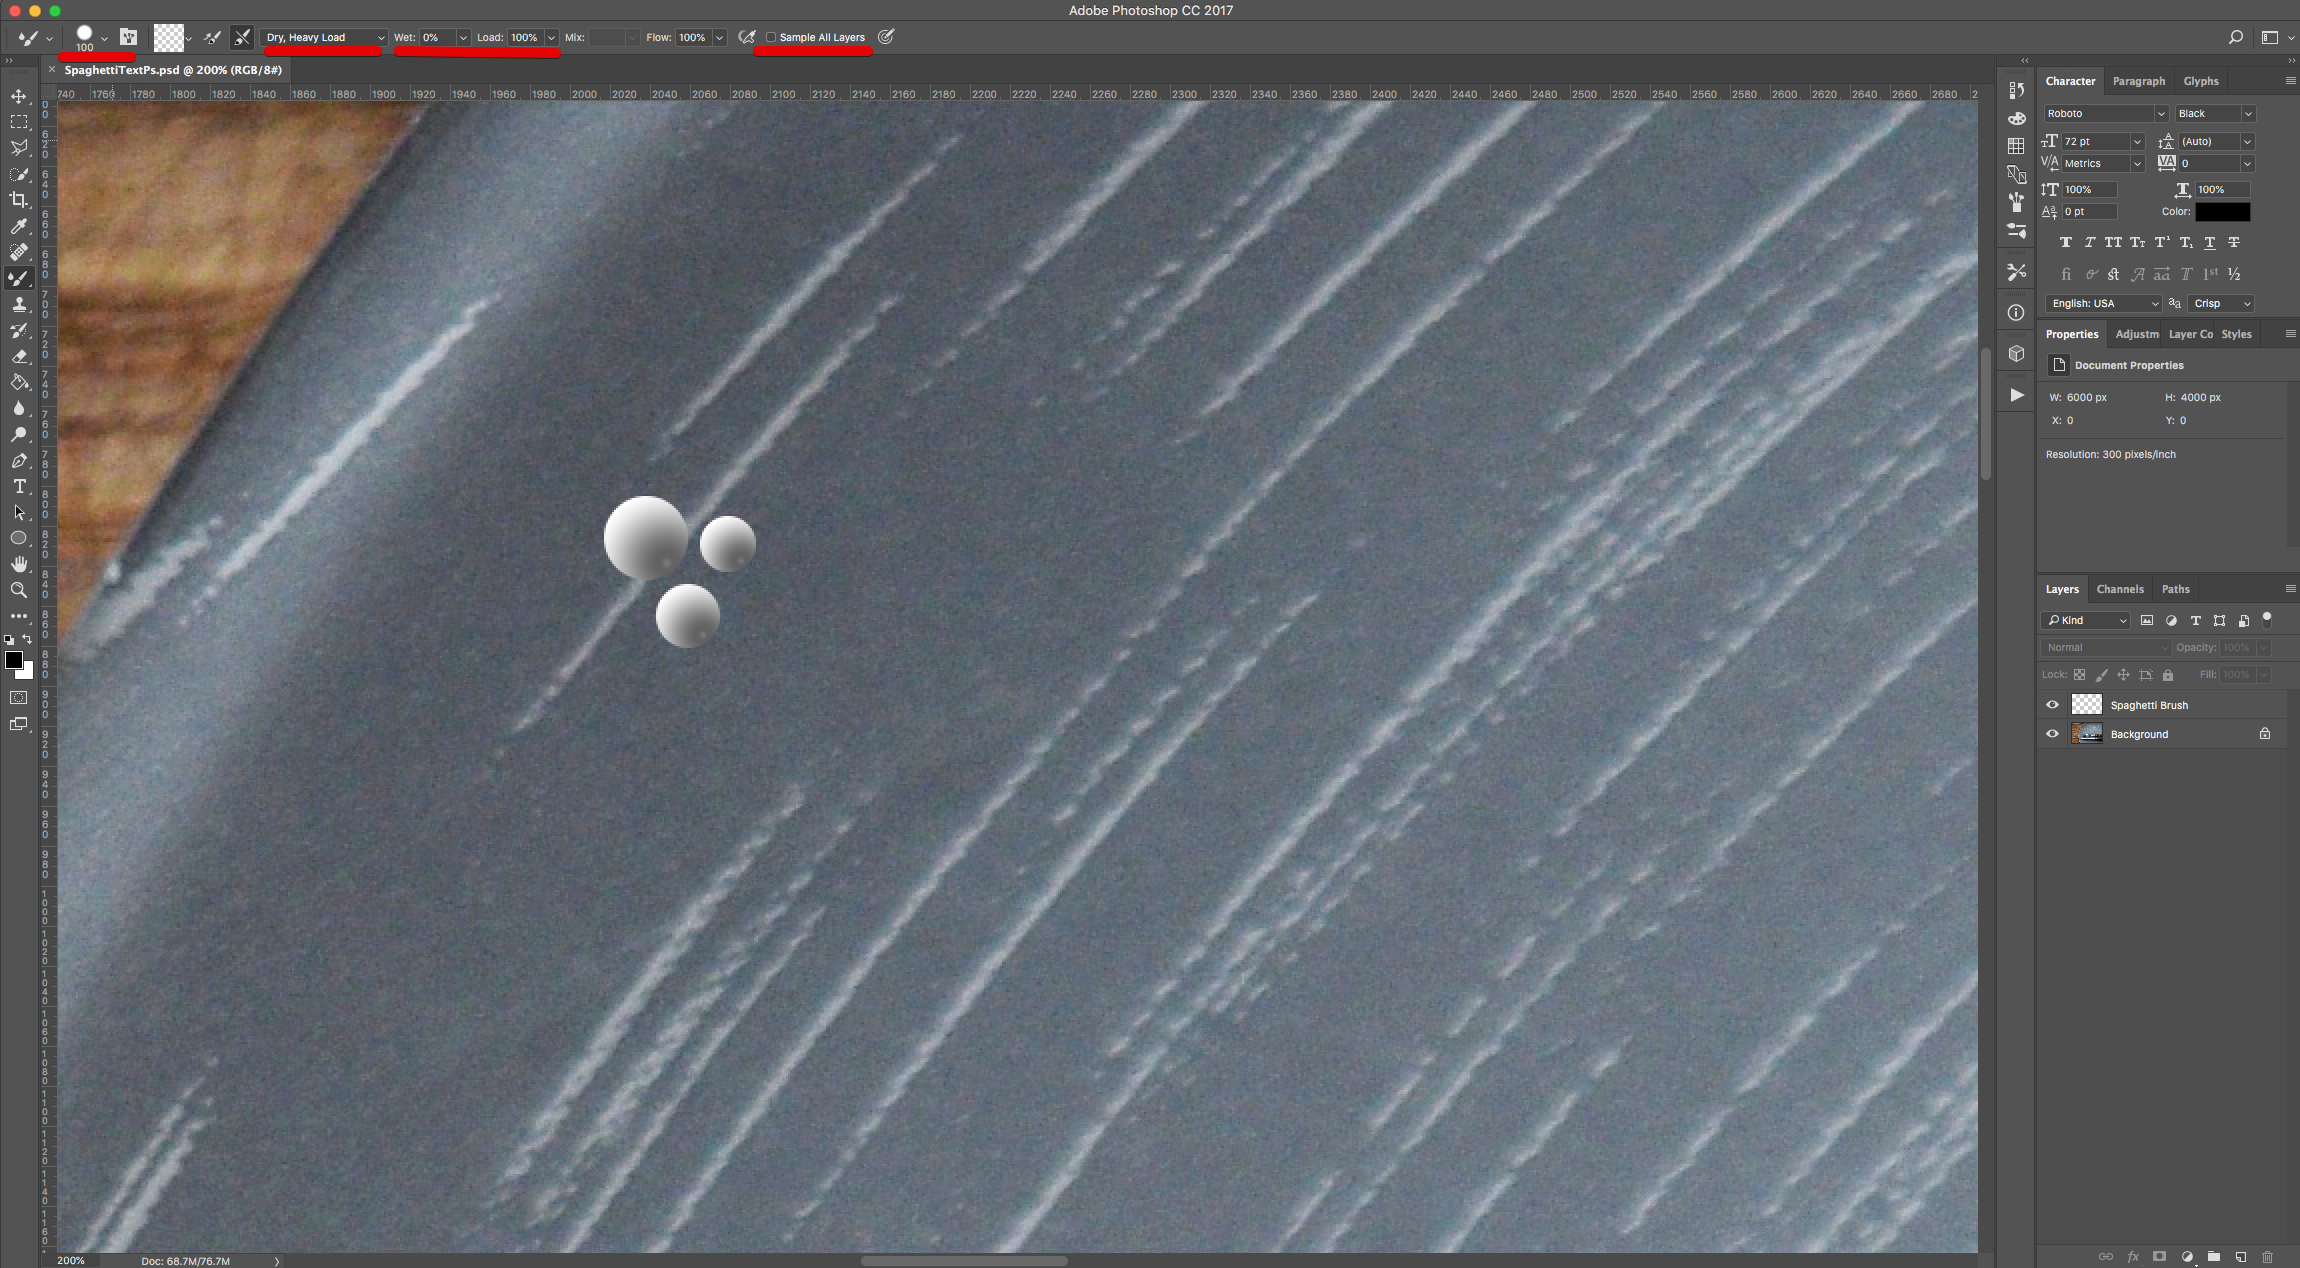
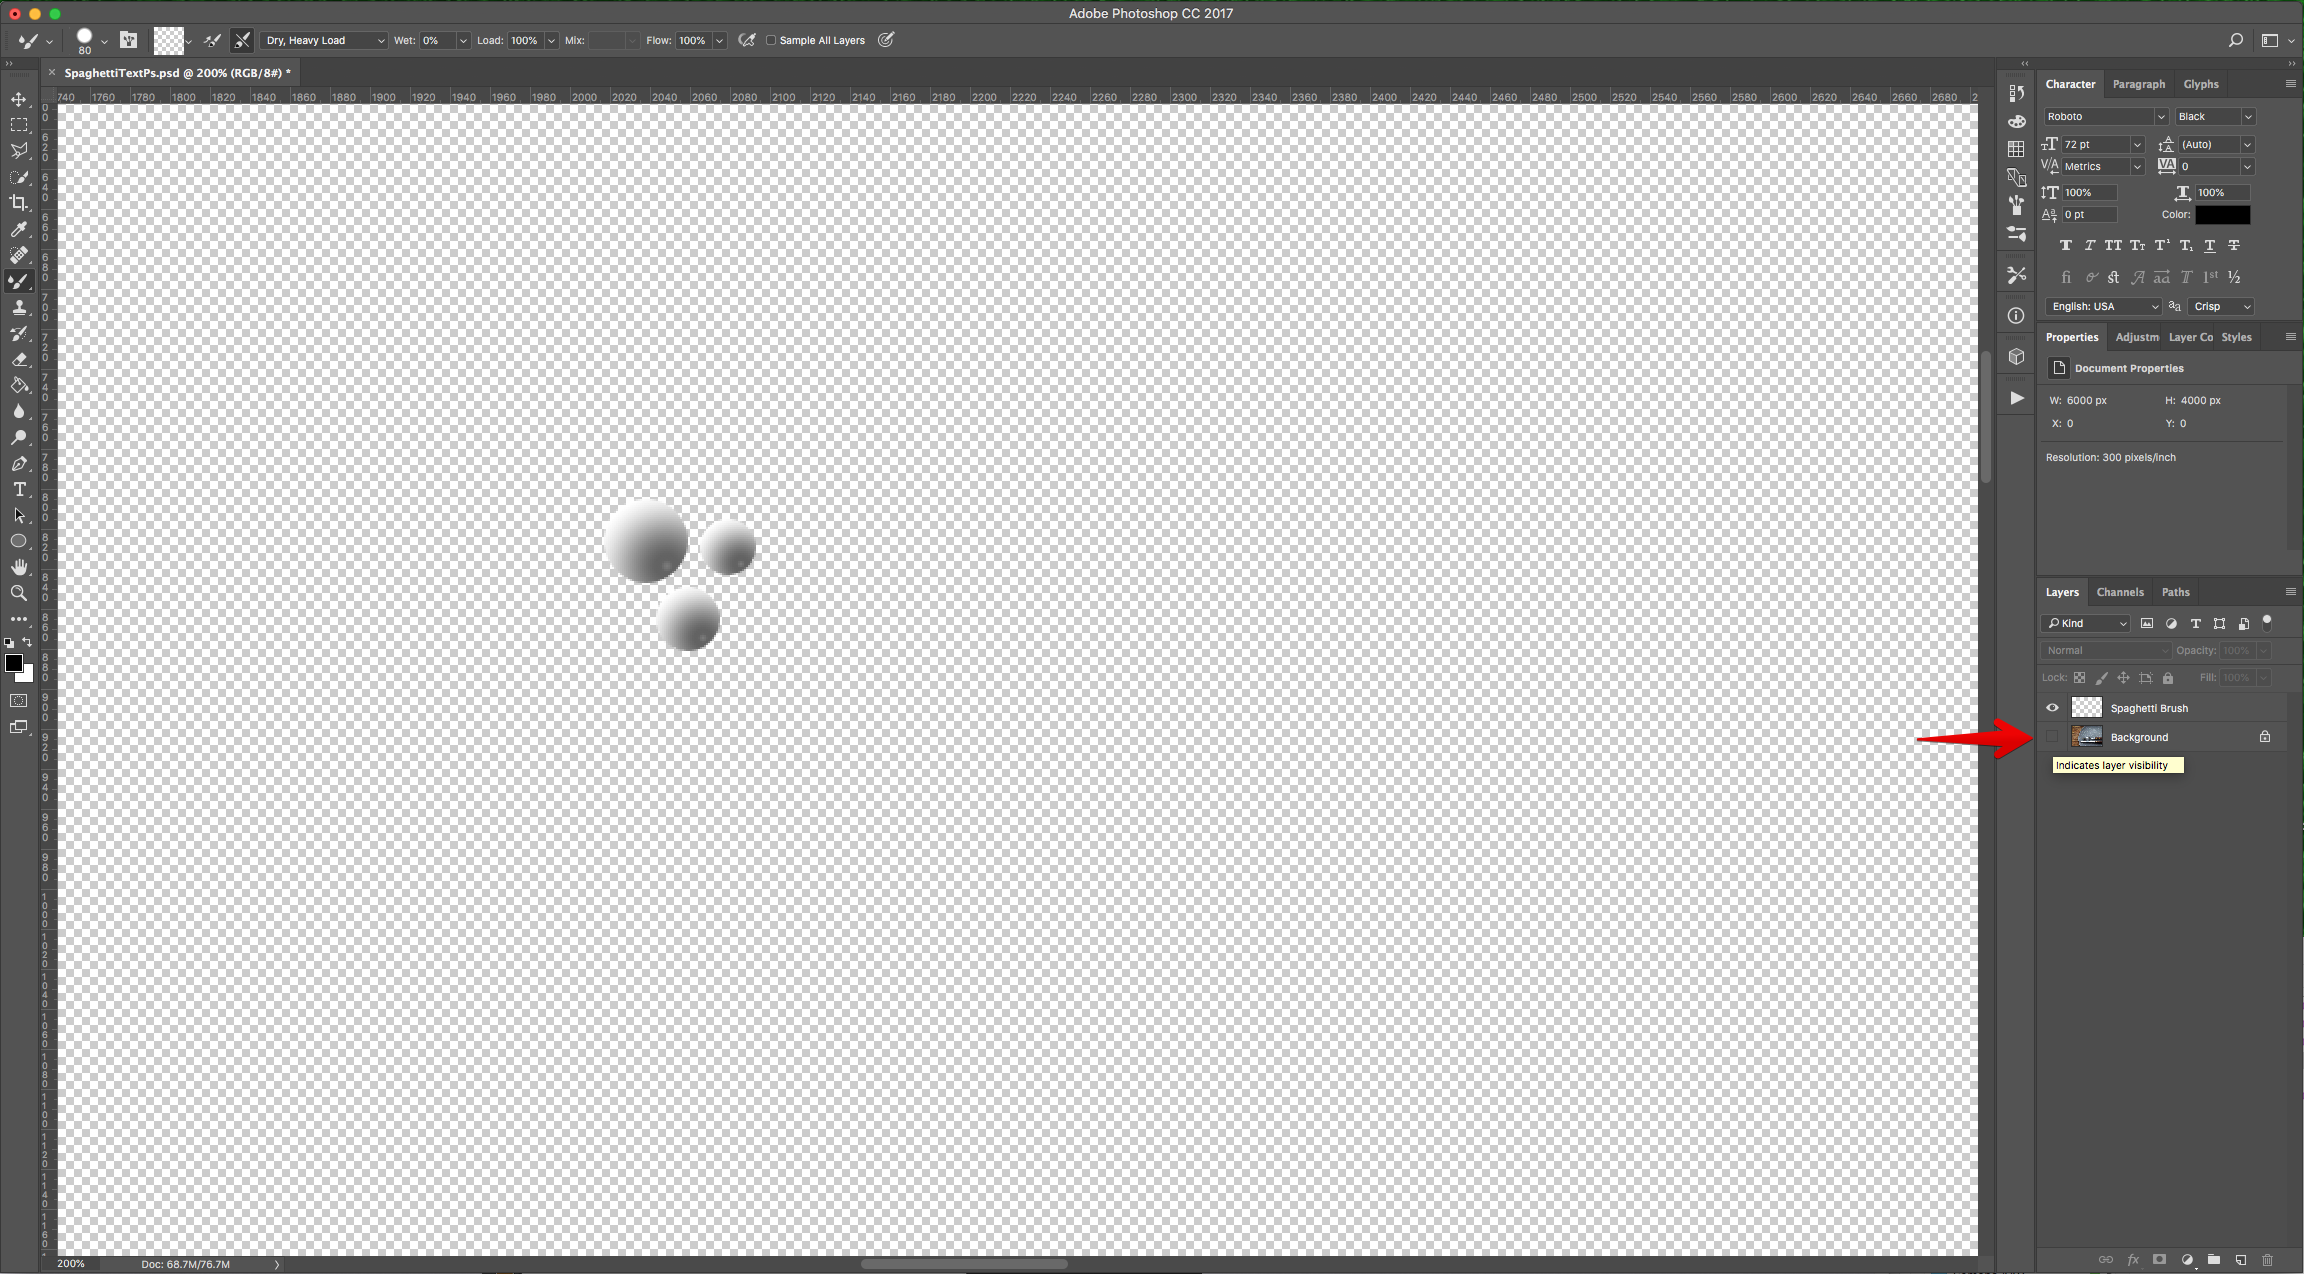
7 - “Hide” the “Background” Layer by clicking on the small eye on the left side of its Thumbnail and Option/Alt-click on top of the “Circles” to select them as your “Brush”. Make sure that you see the sample brush in the Top Menu.
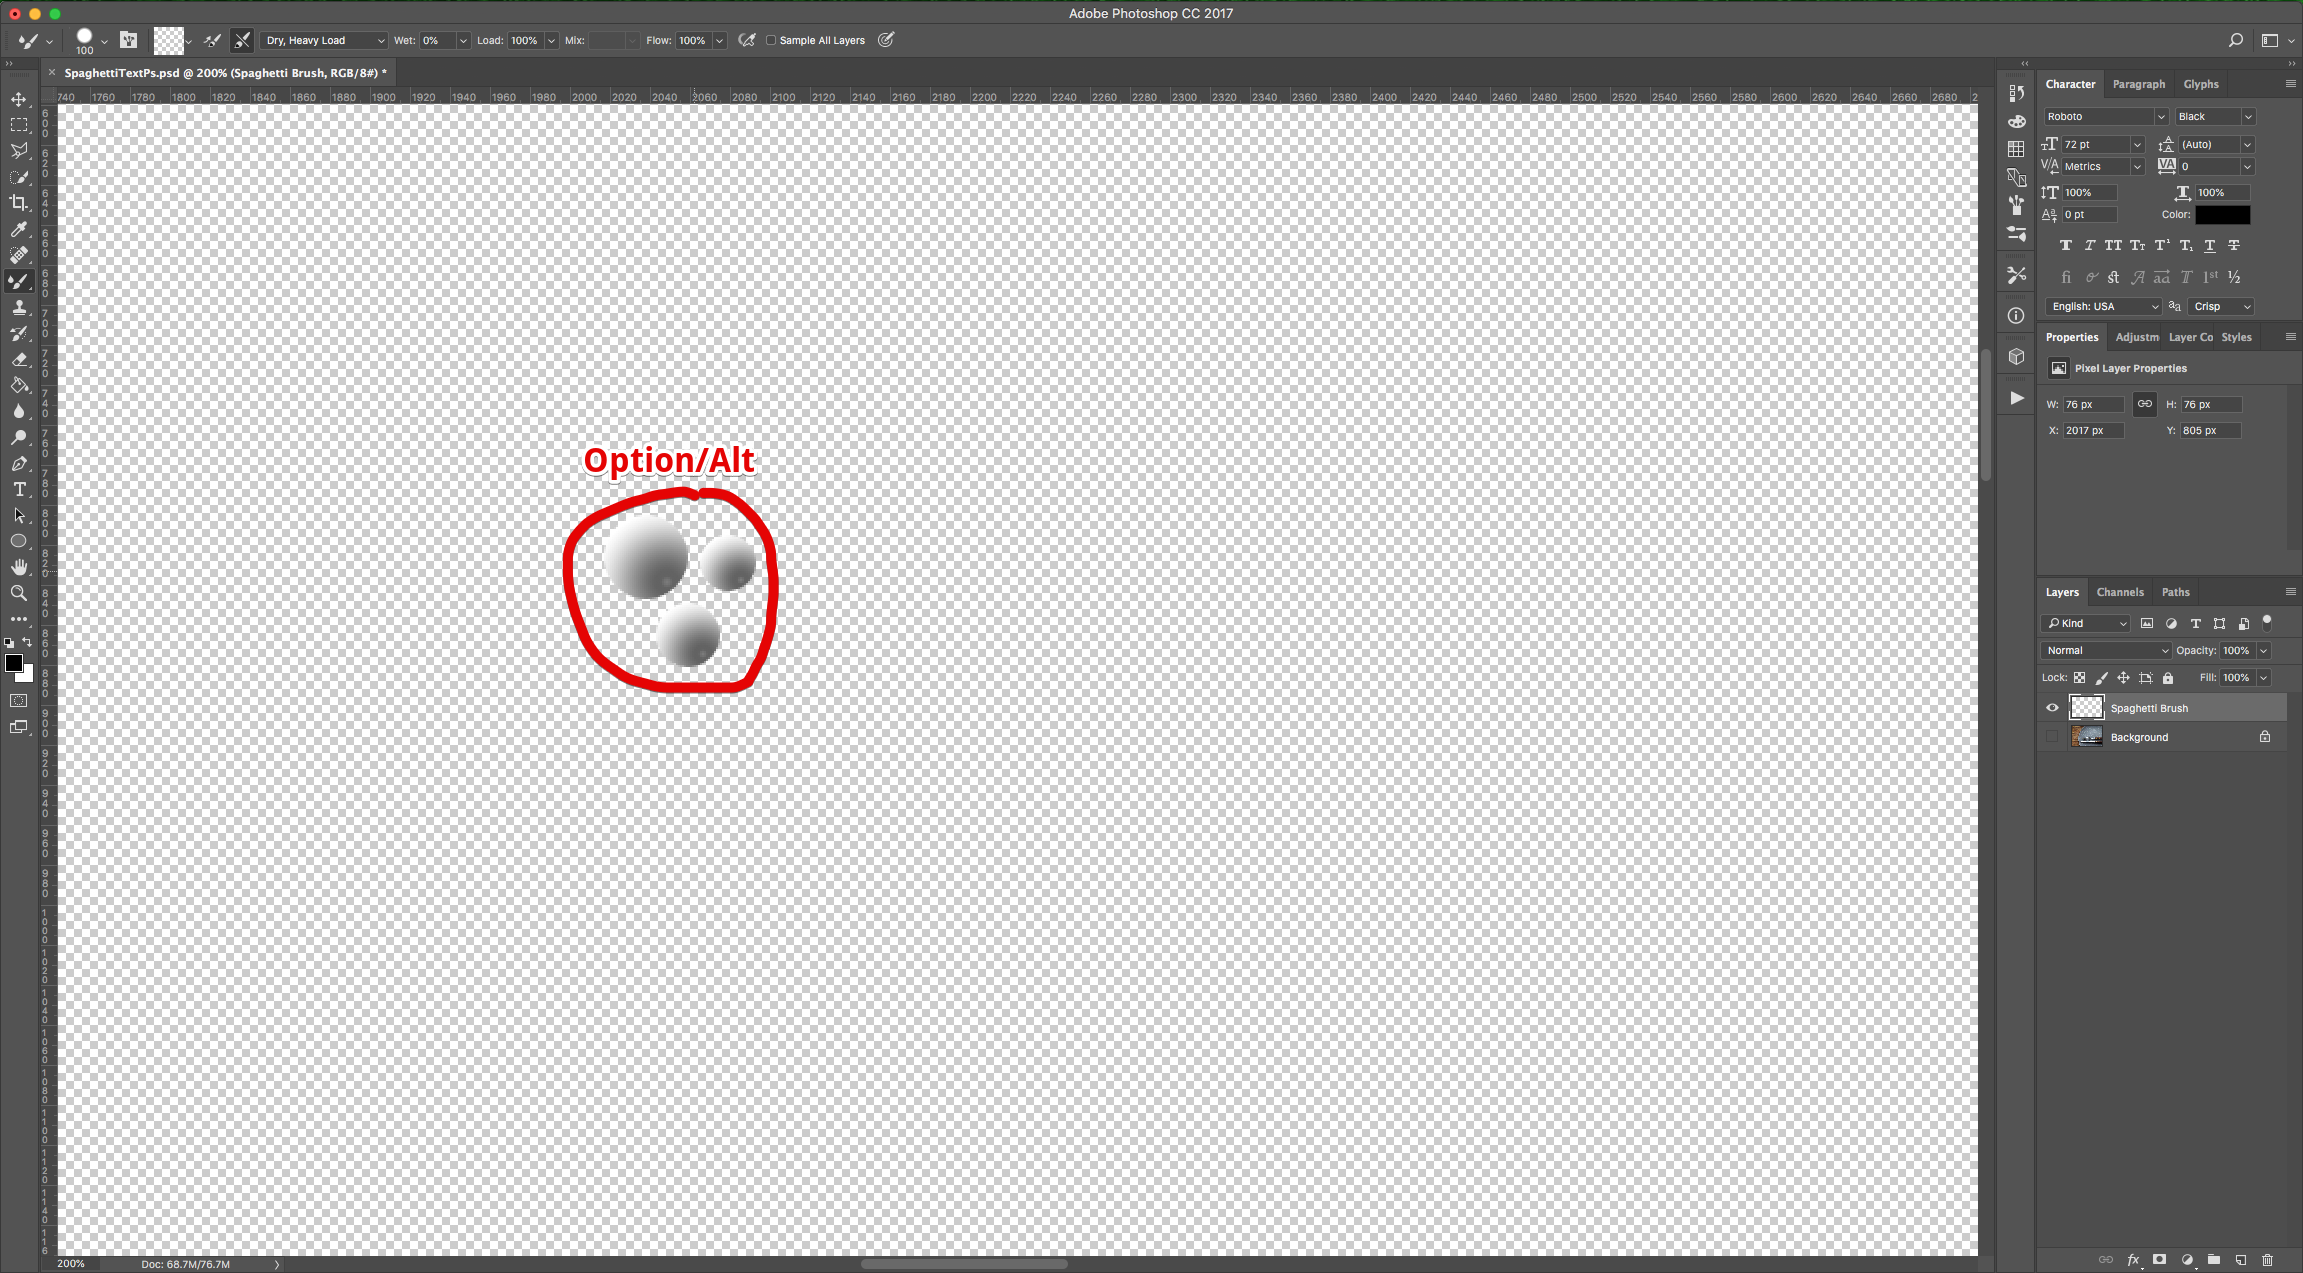
8 - Now, make the “Background” Layer visible again and “Hide” the “Brush” Layer.
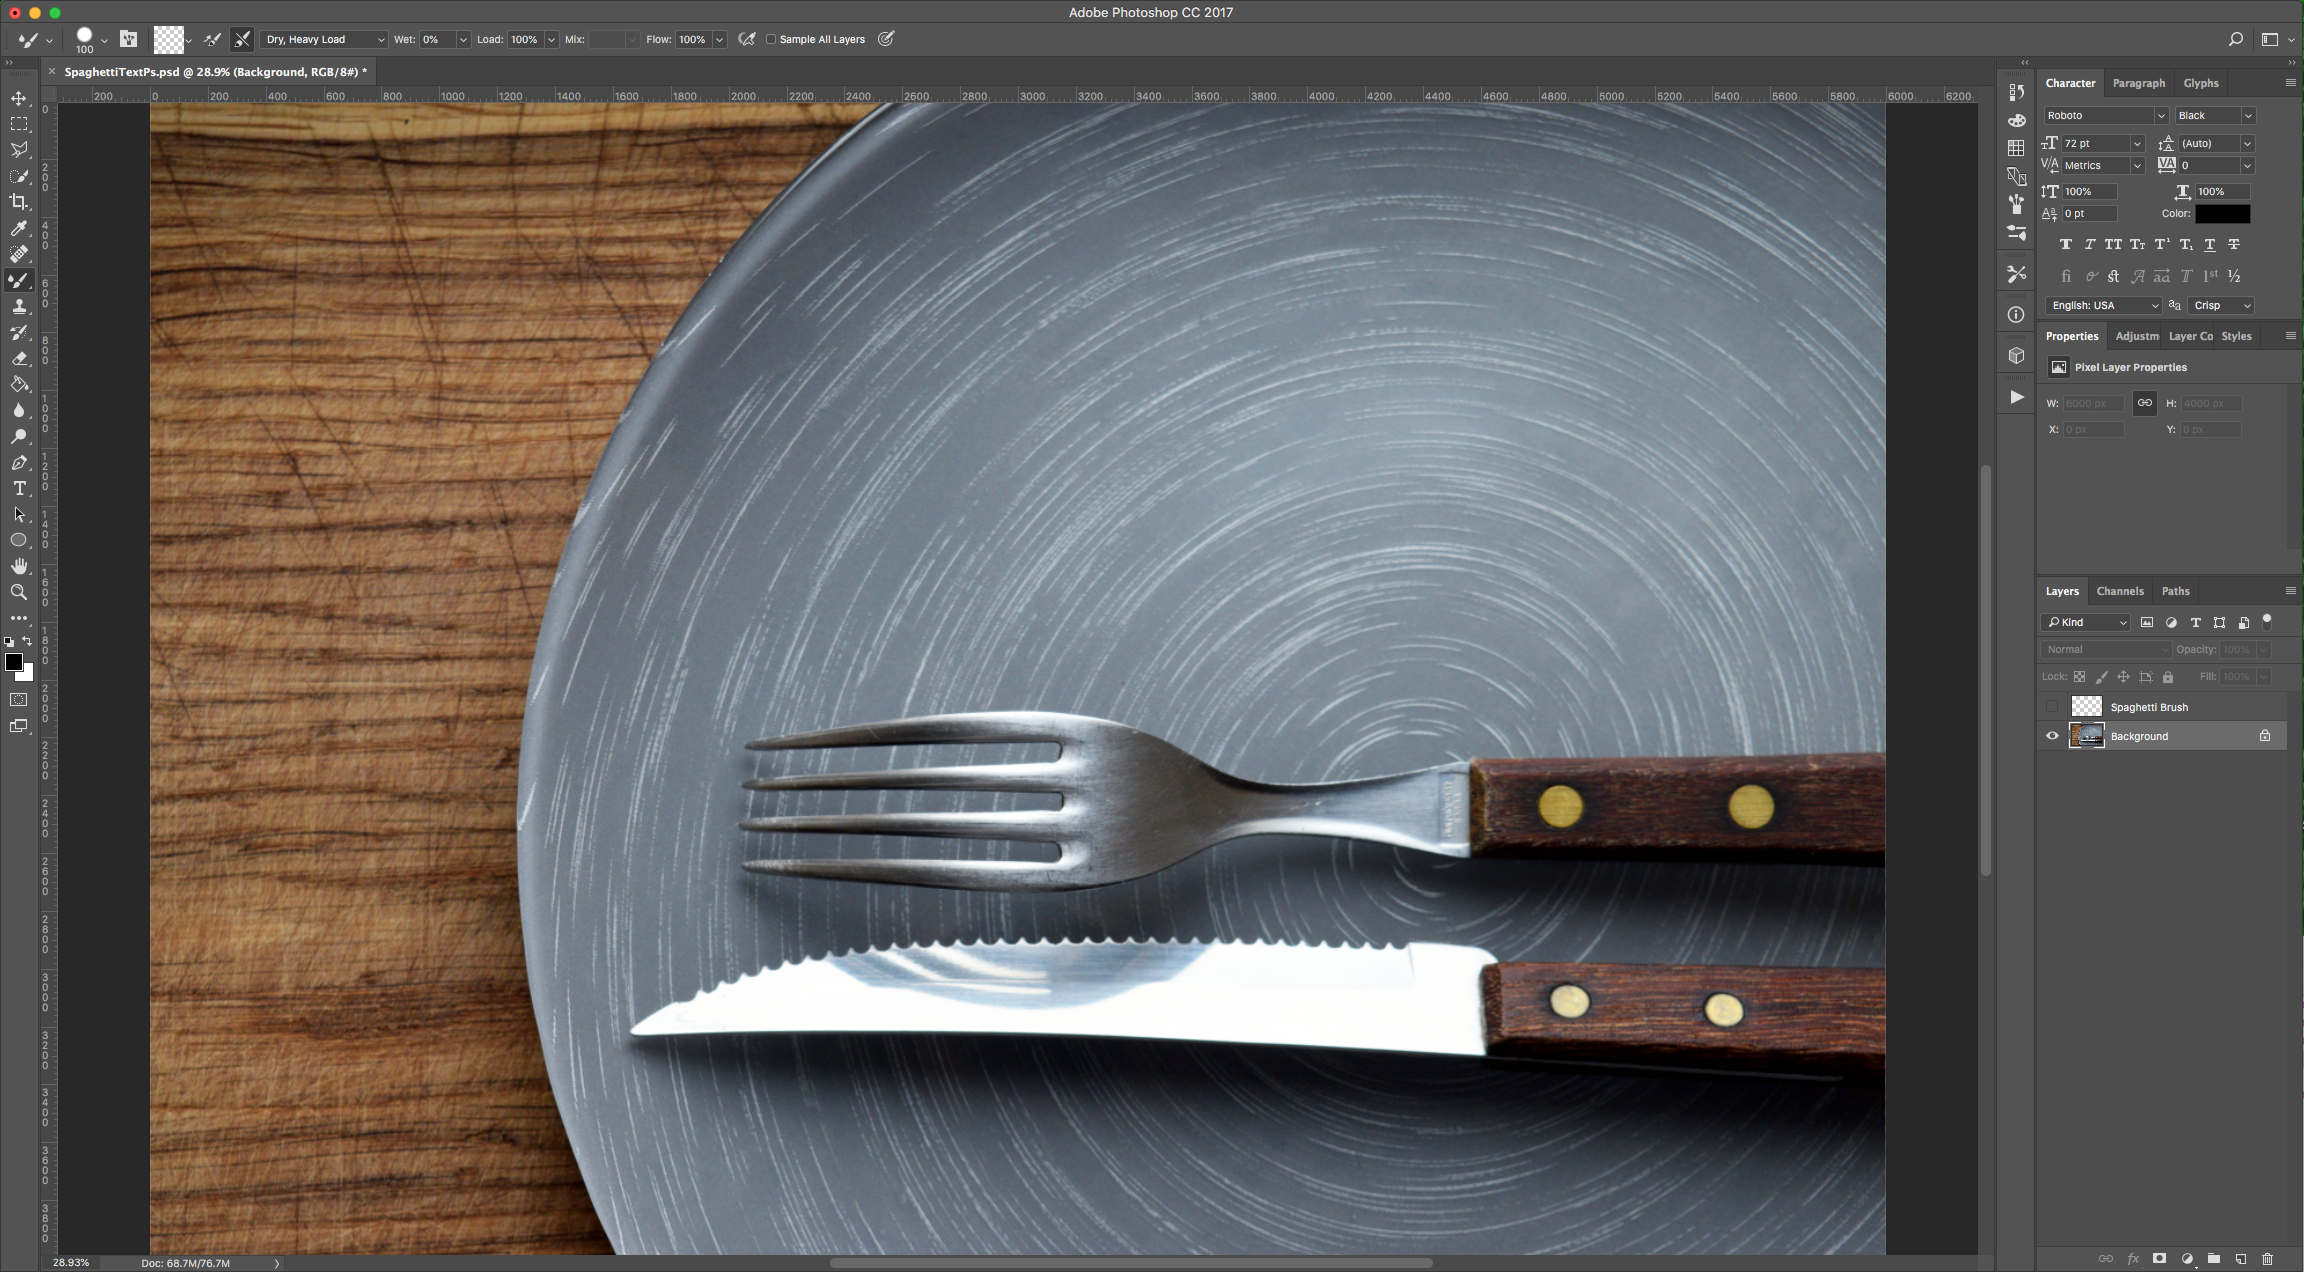
9 - Create a New Layer on top by clicking the “Create New Layer” button at the bottom of the “Layers” Panel and name it “Text”.
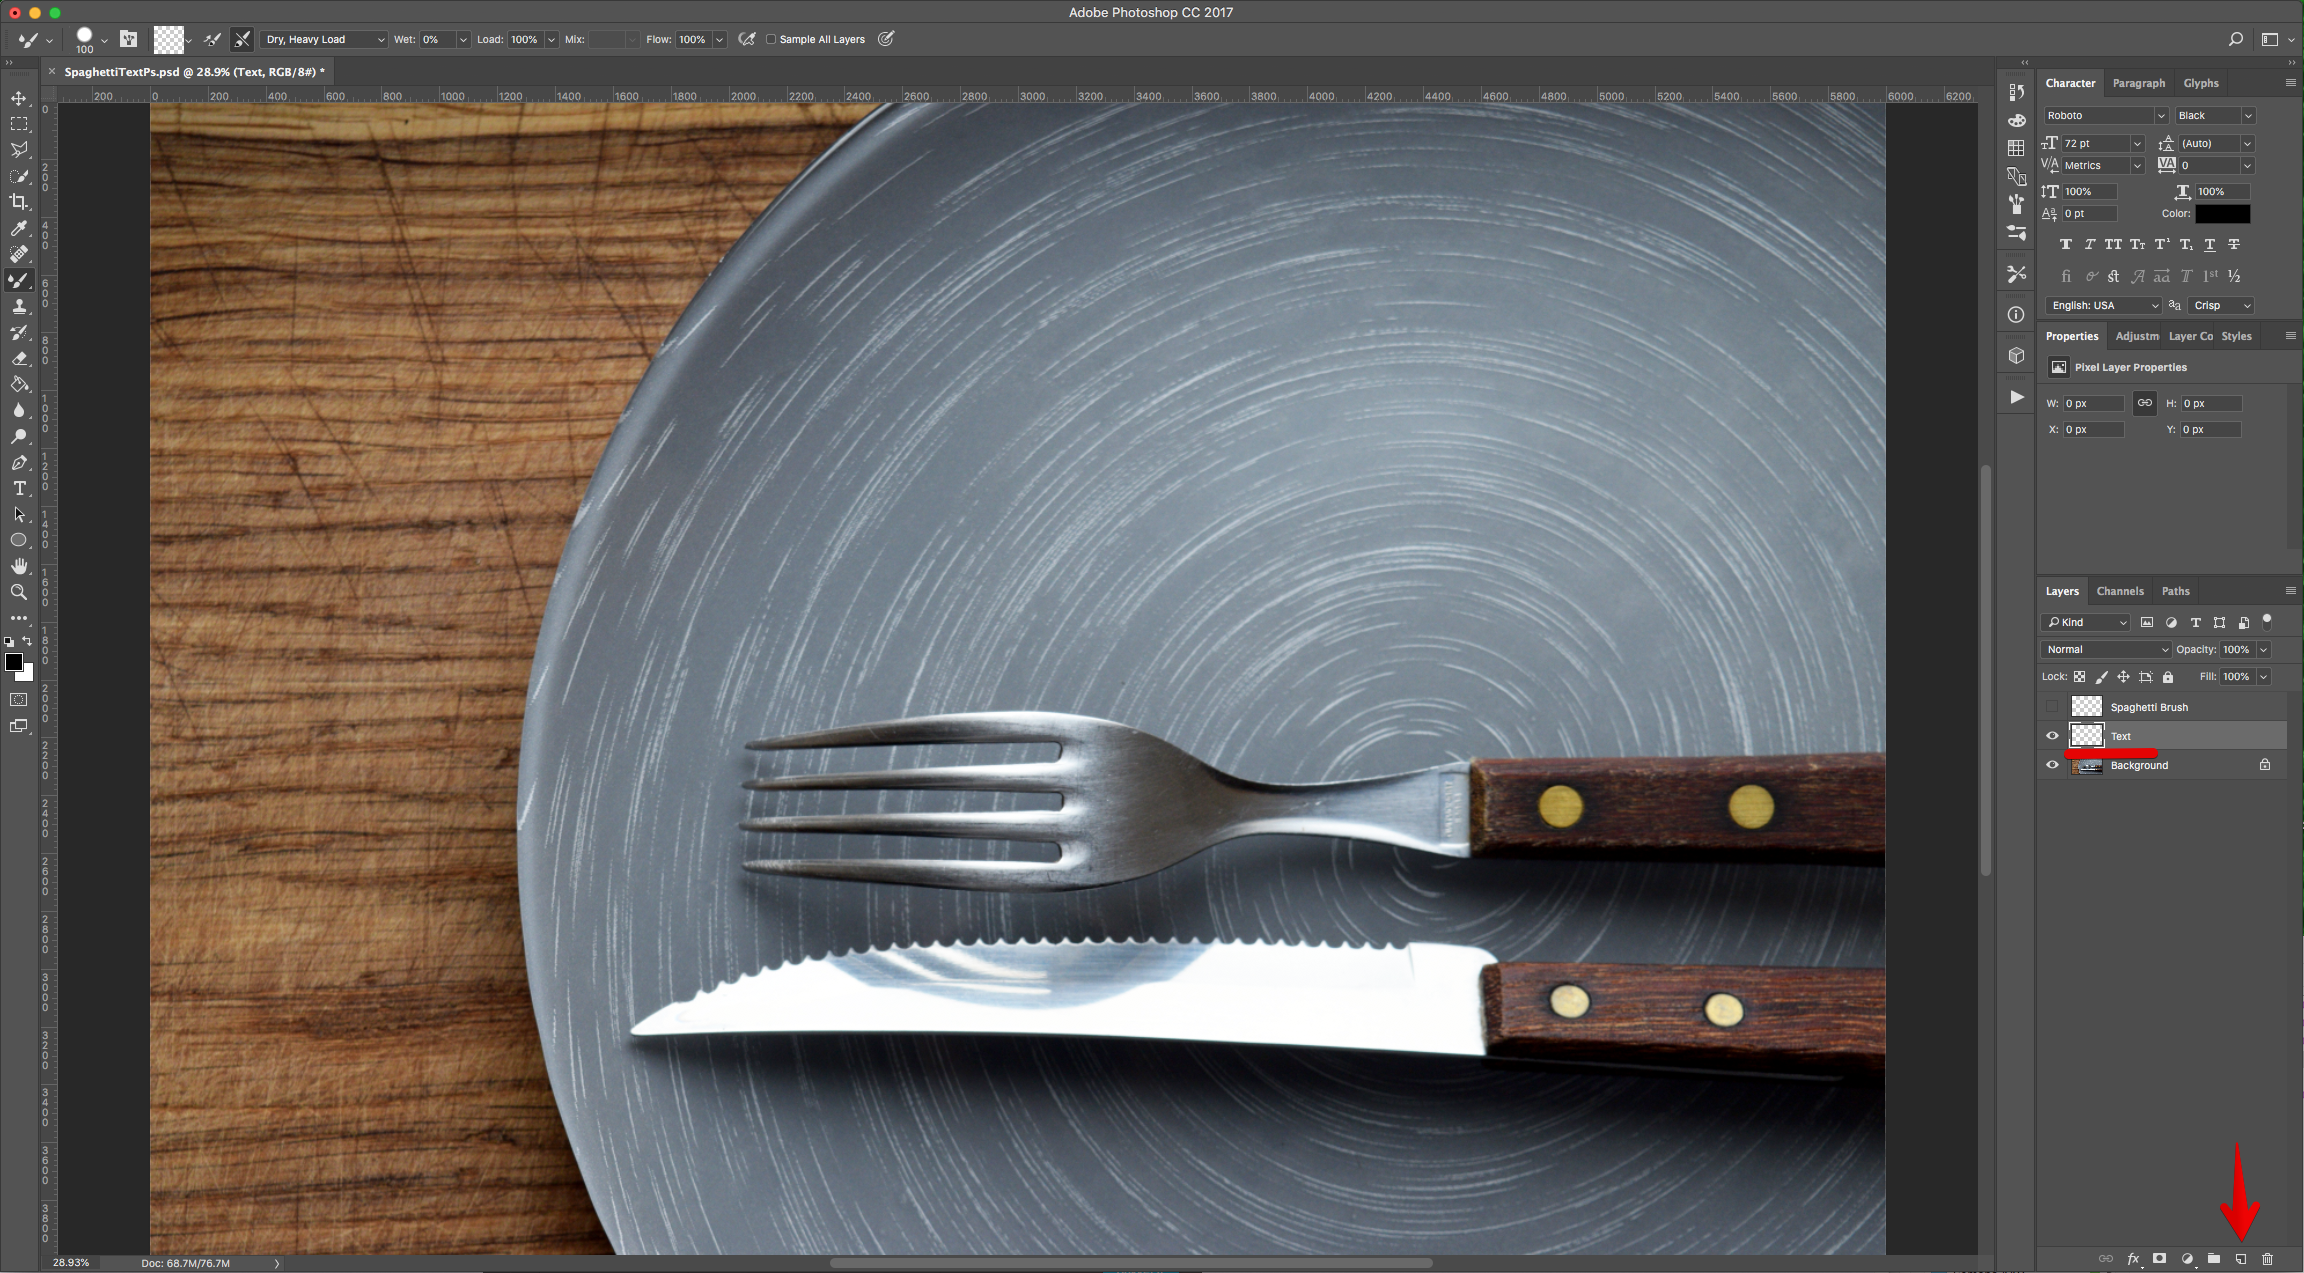
10 - Select the “Pen Tool” (P) and draw your “Text” or “Shape”.
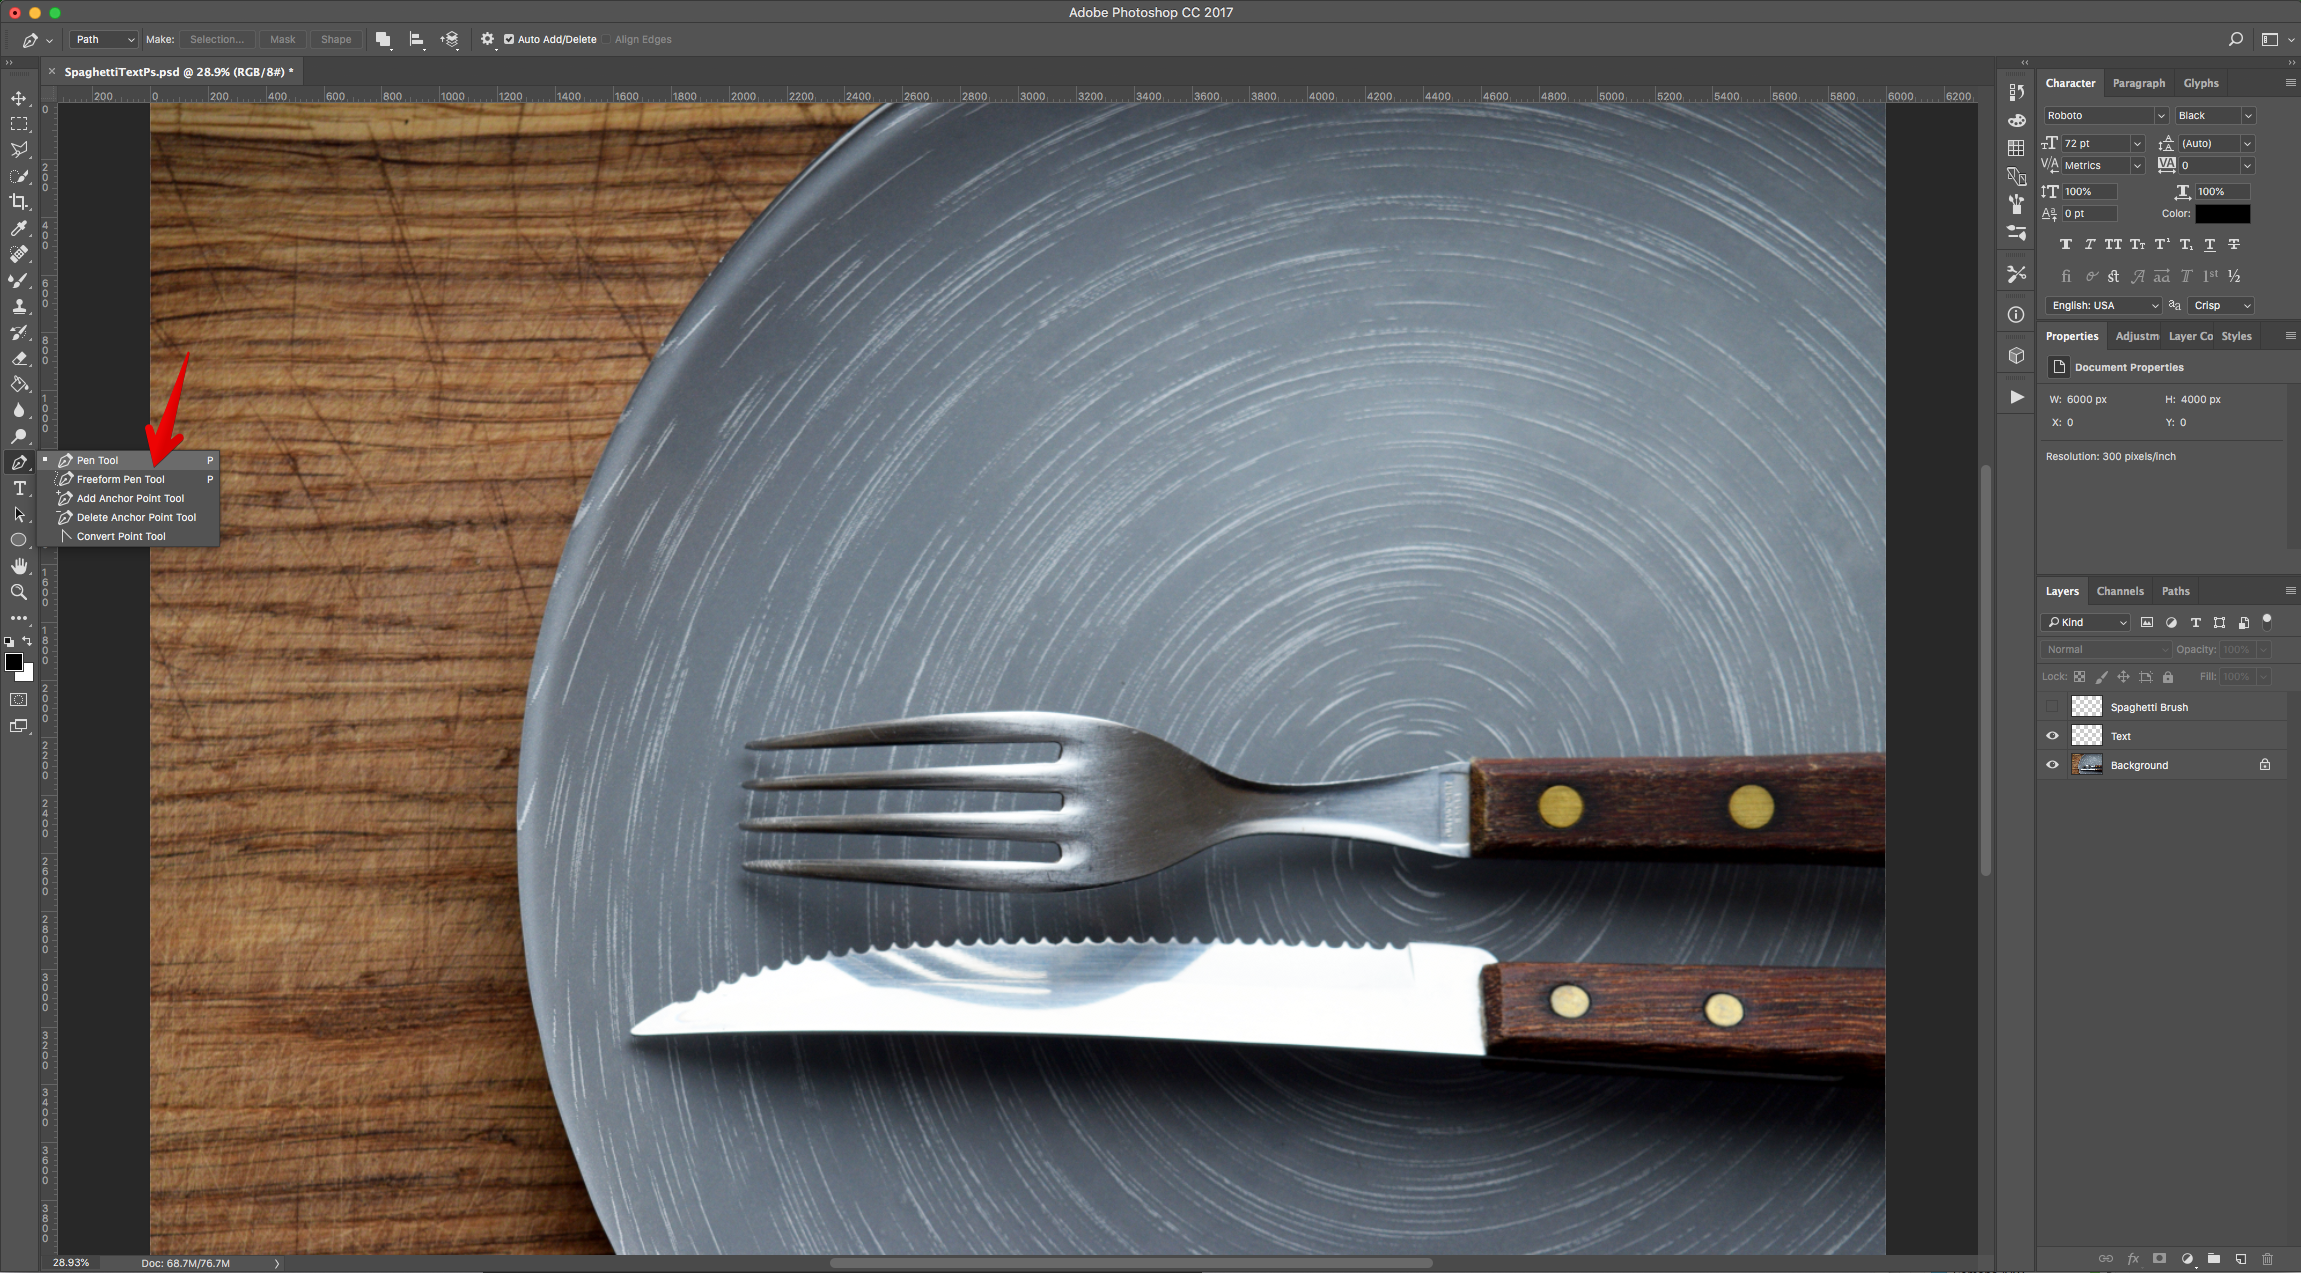
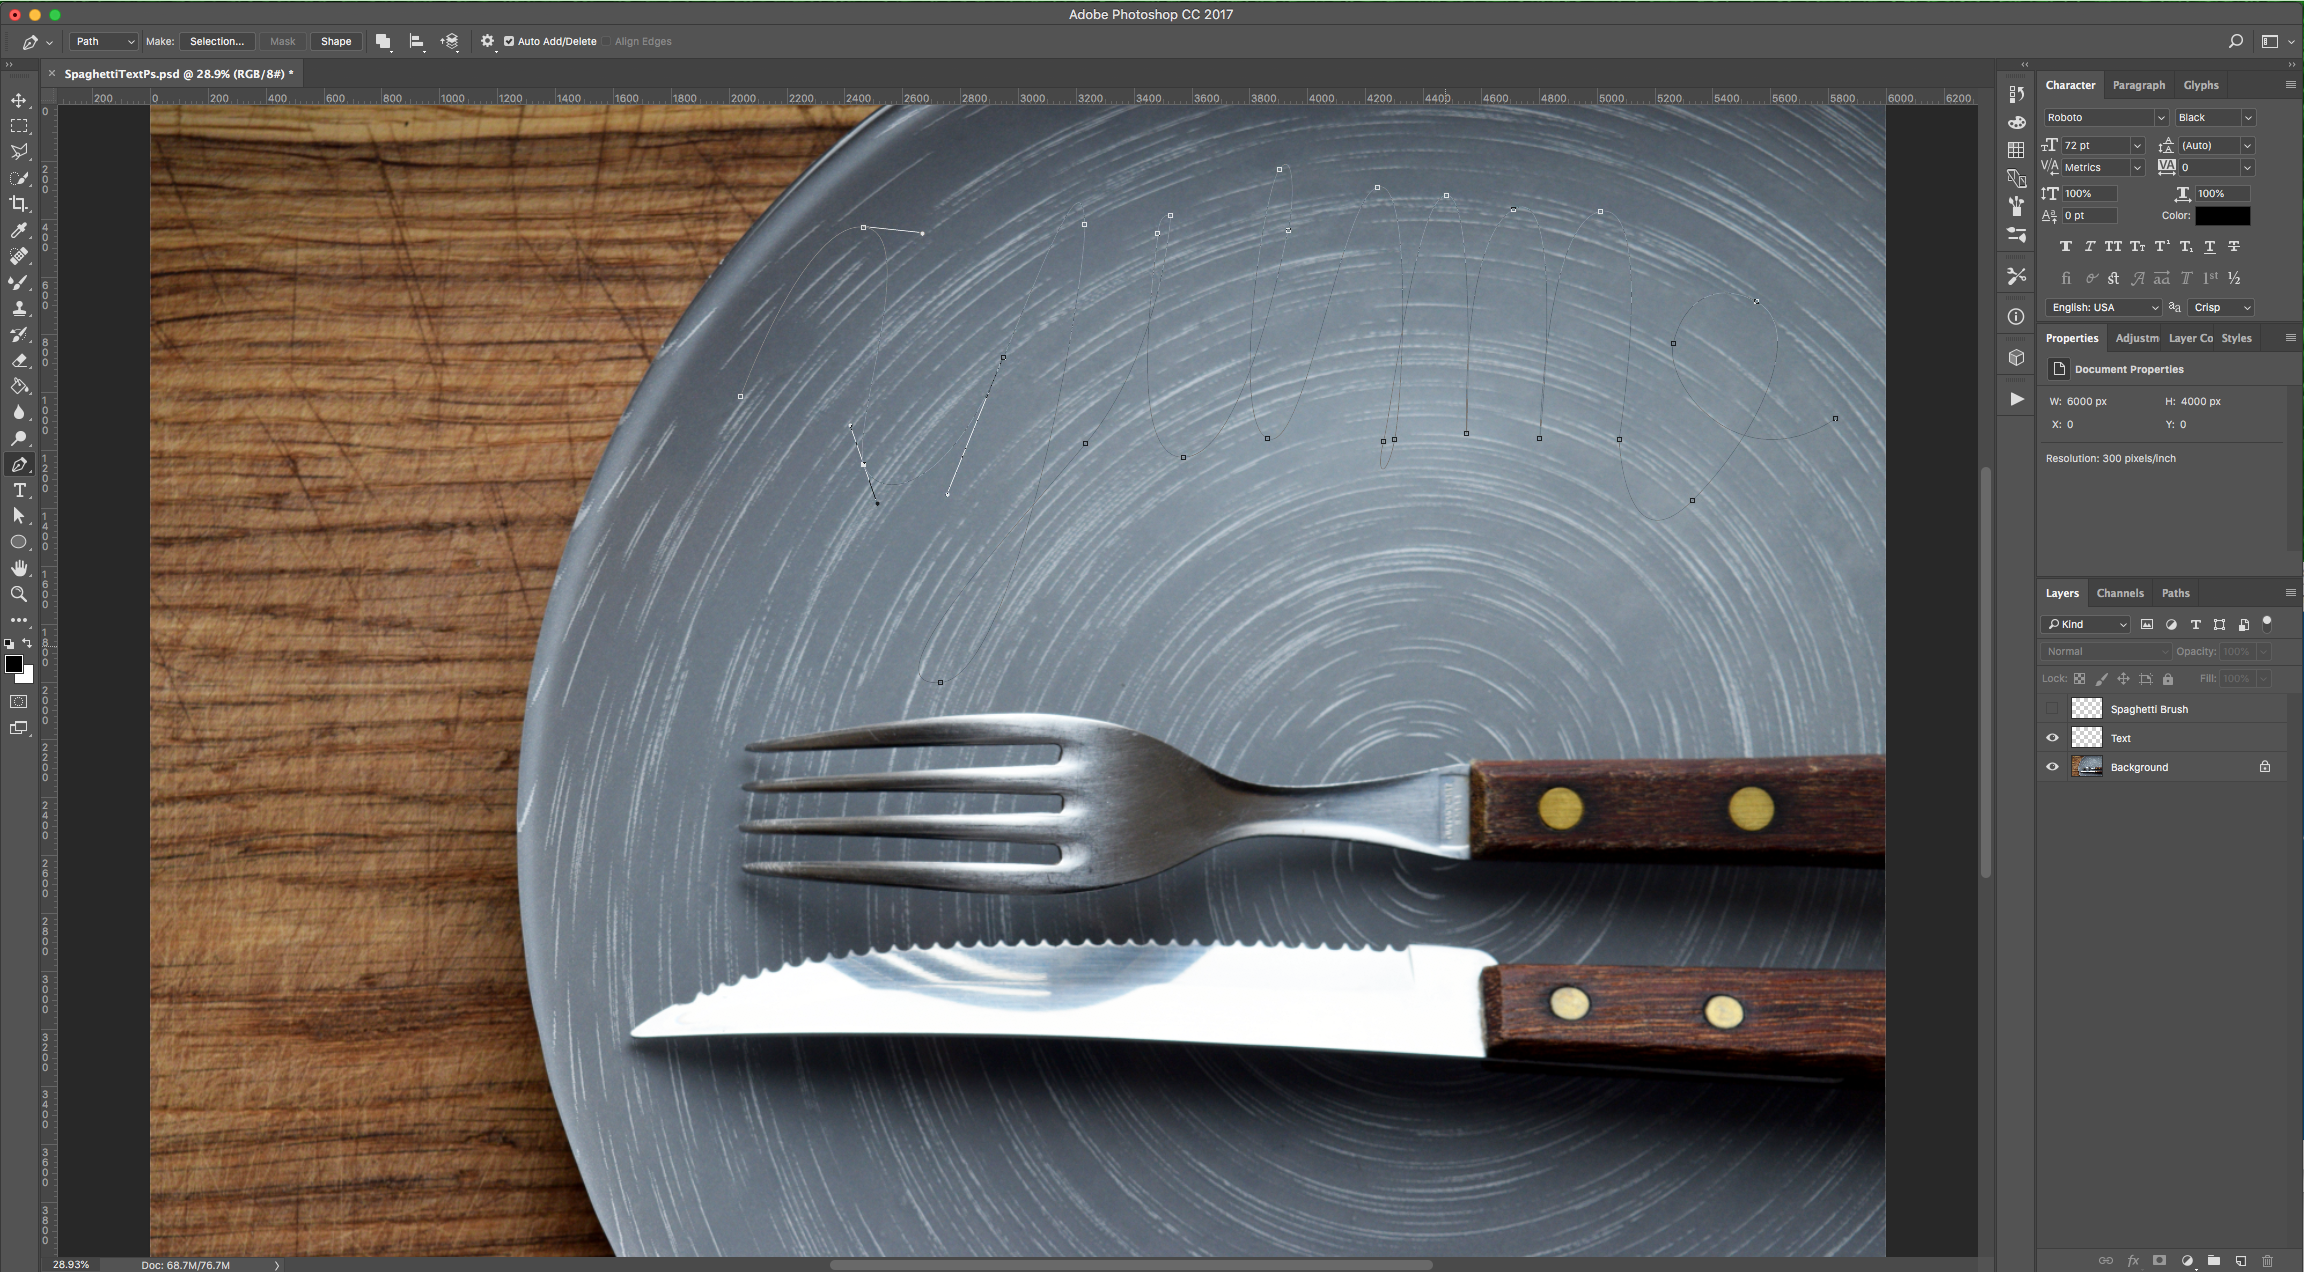
11 - Use the “Direct Selection Tool” (A) to click on an individual “Anchor Point” and fix the shape if needed.
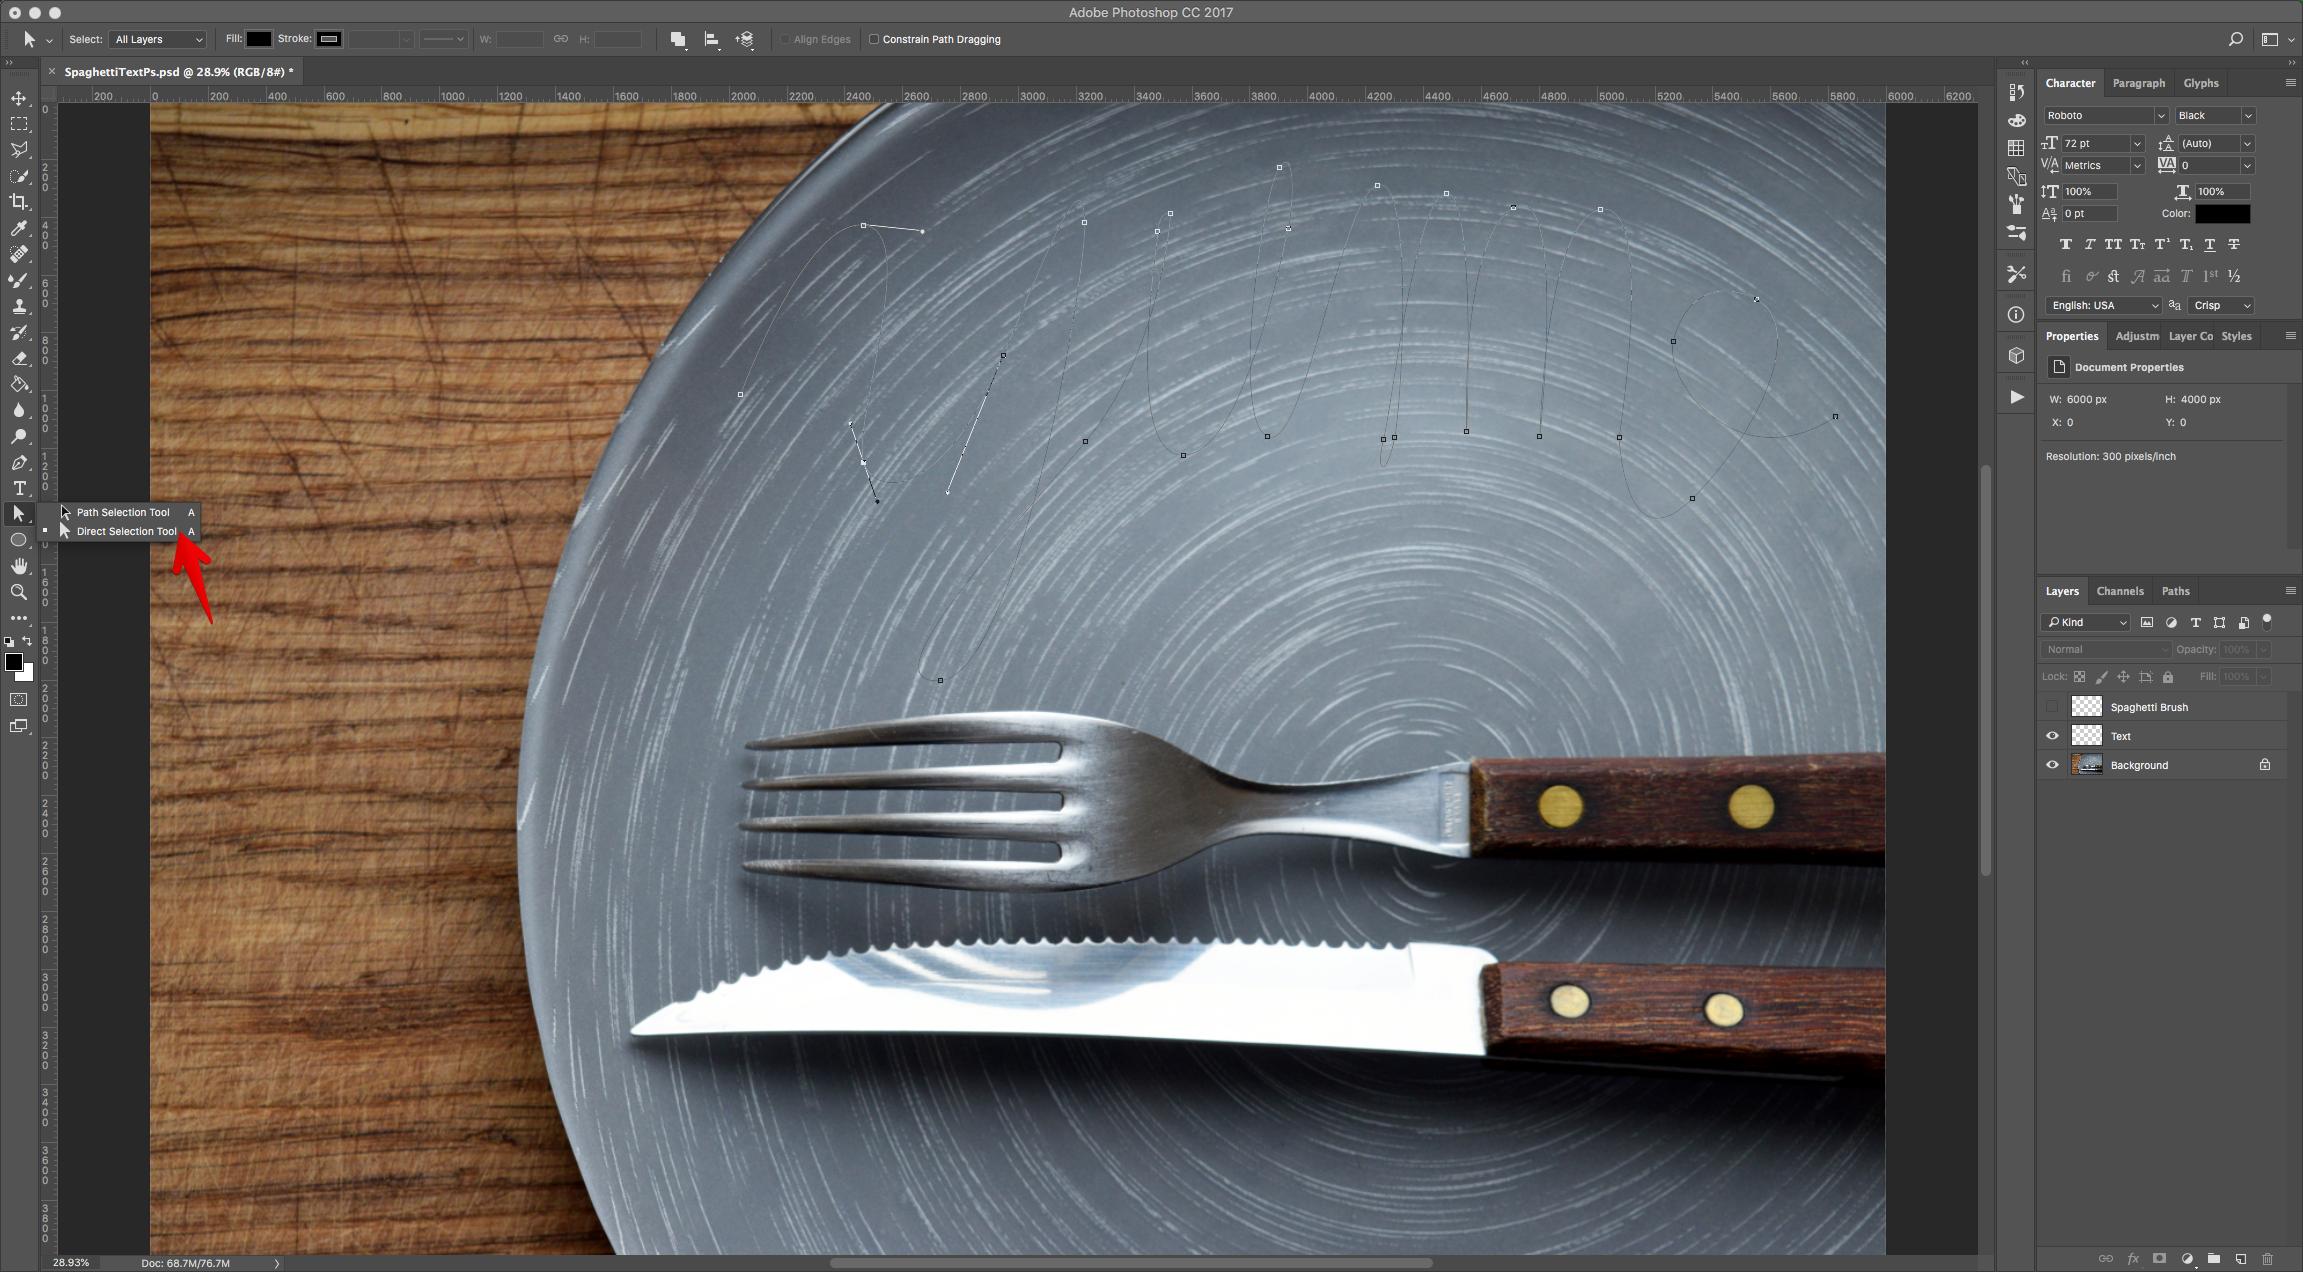
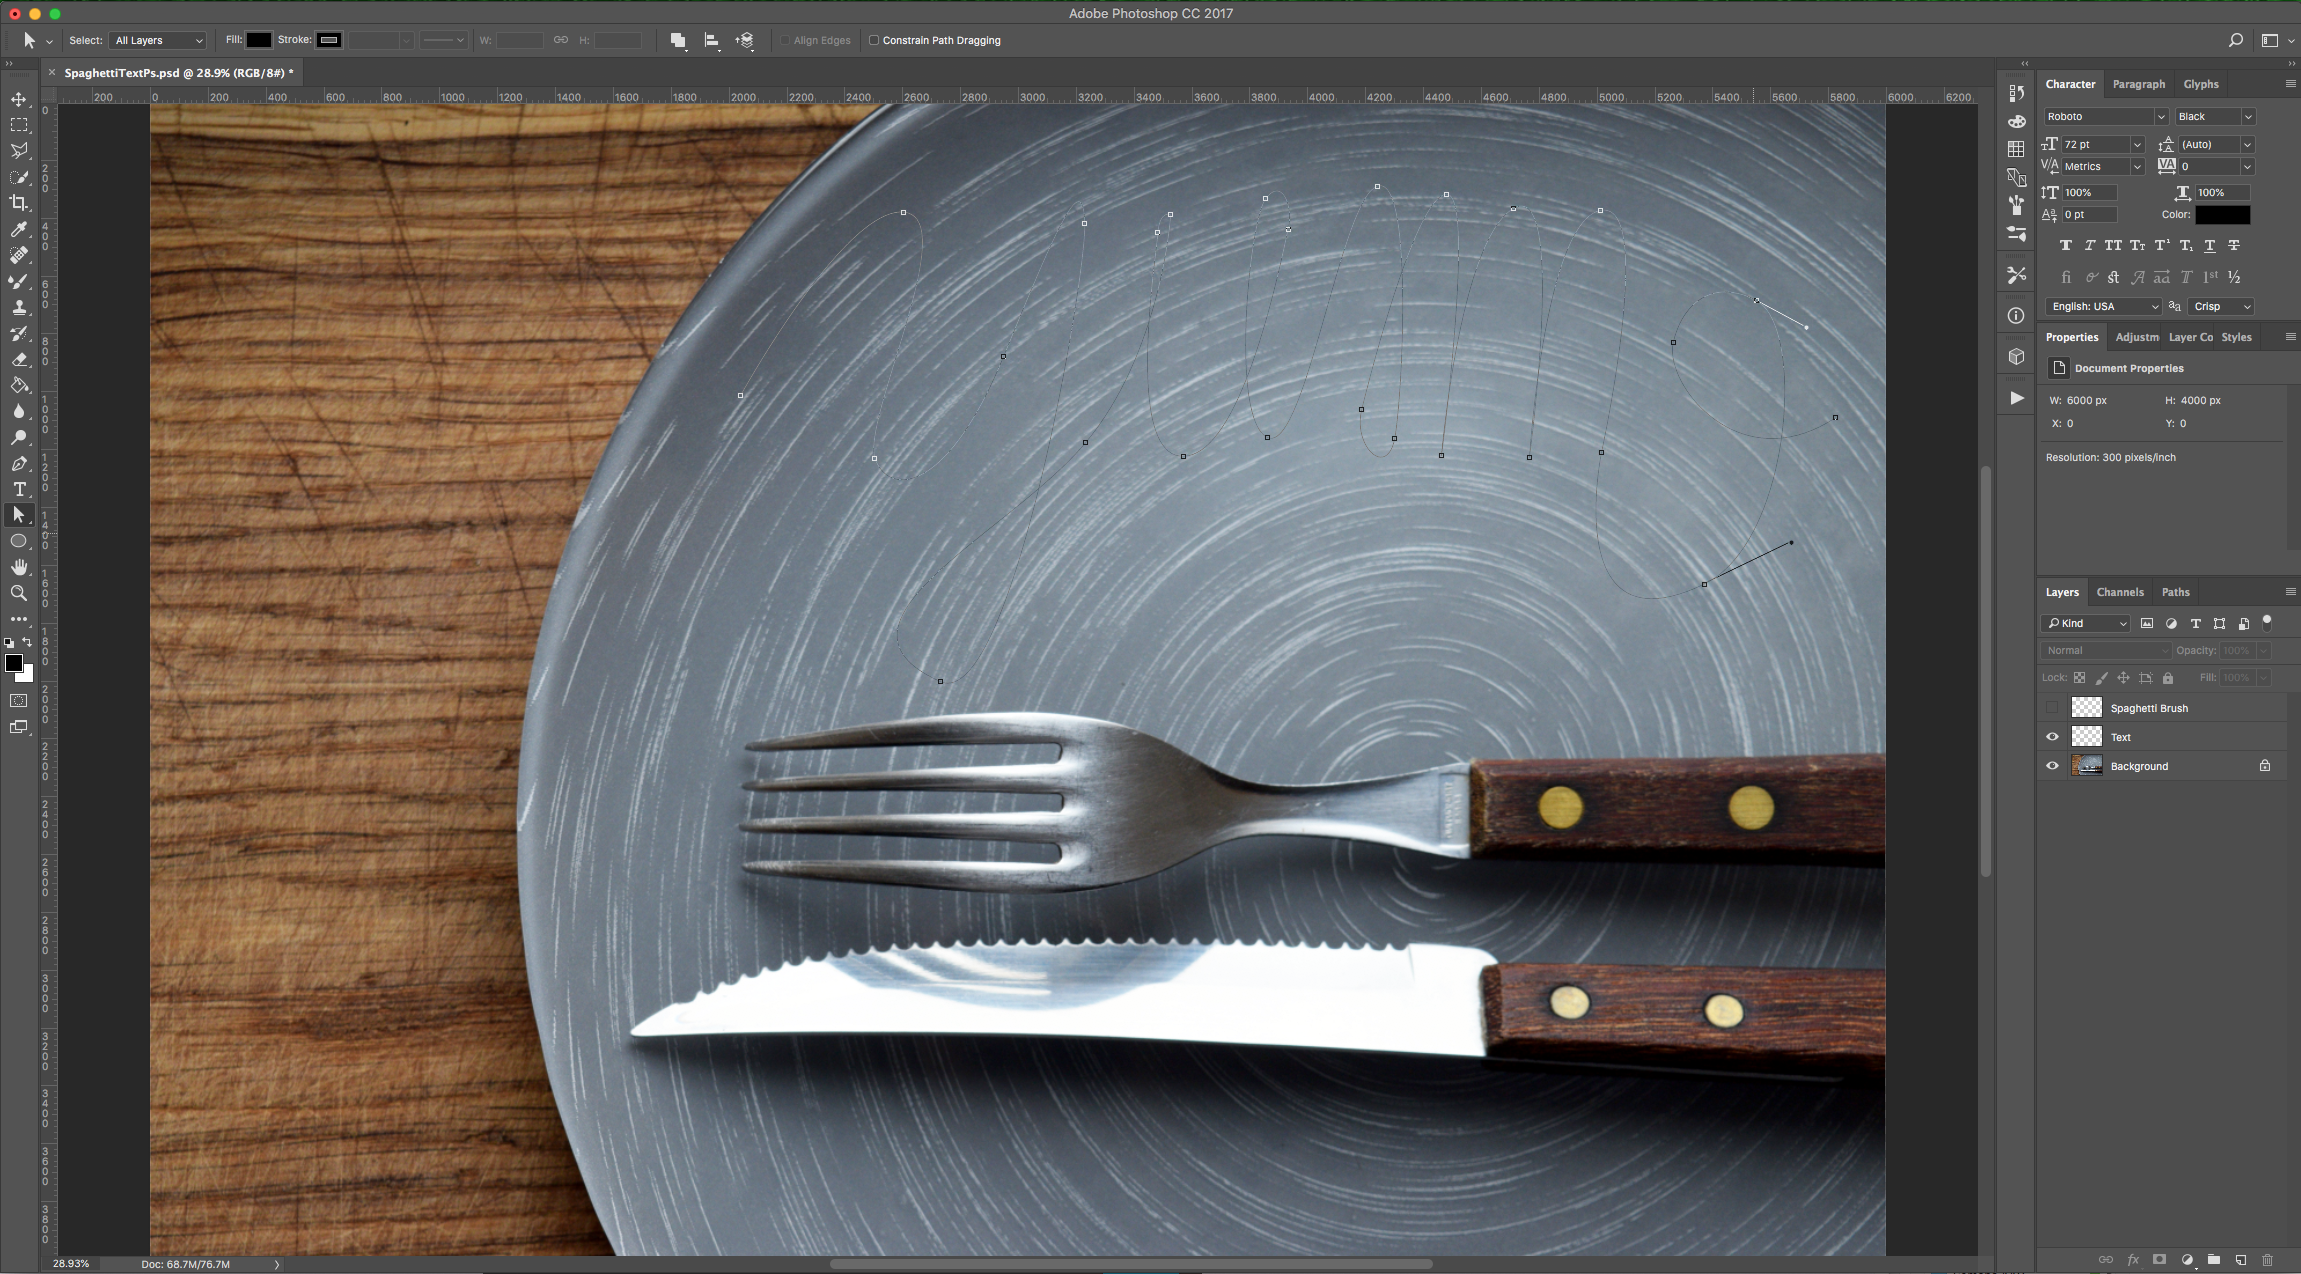
12 - Now, use the “Path Selection Tool” (A) to select the entire “Path”.
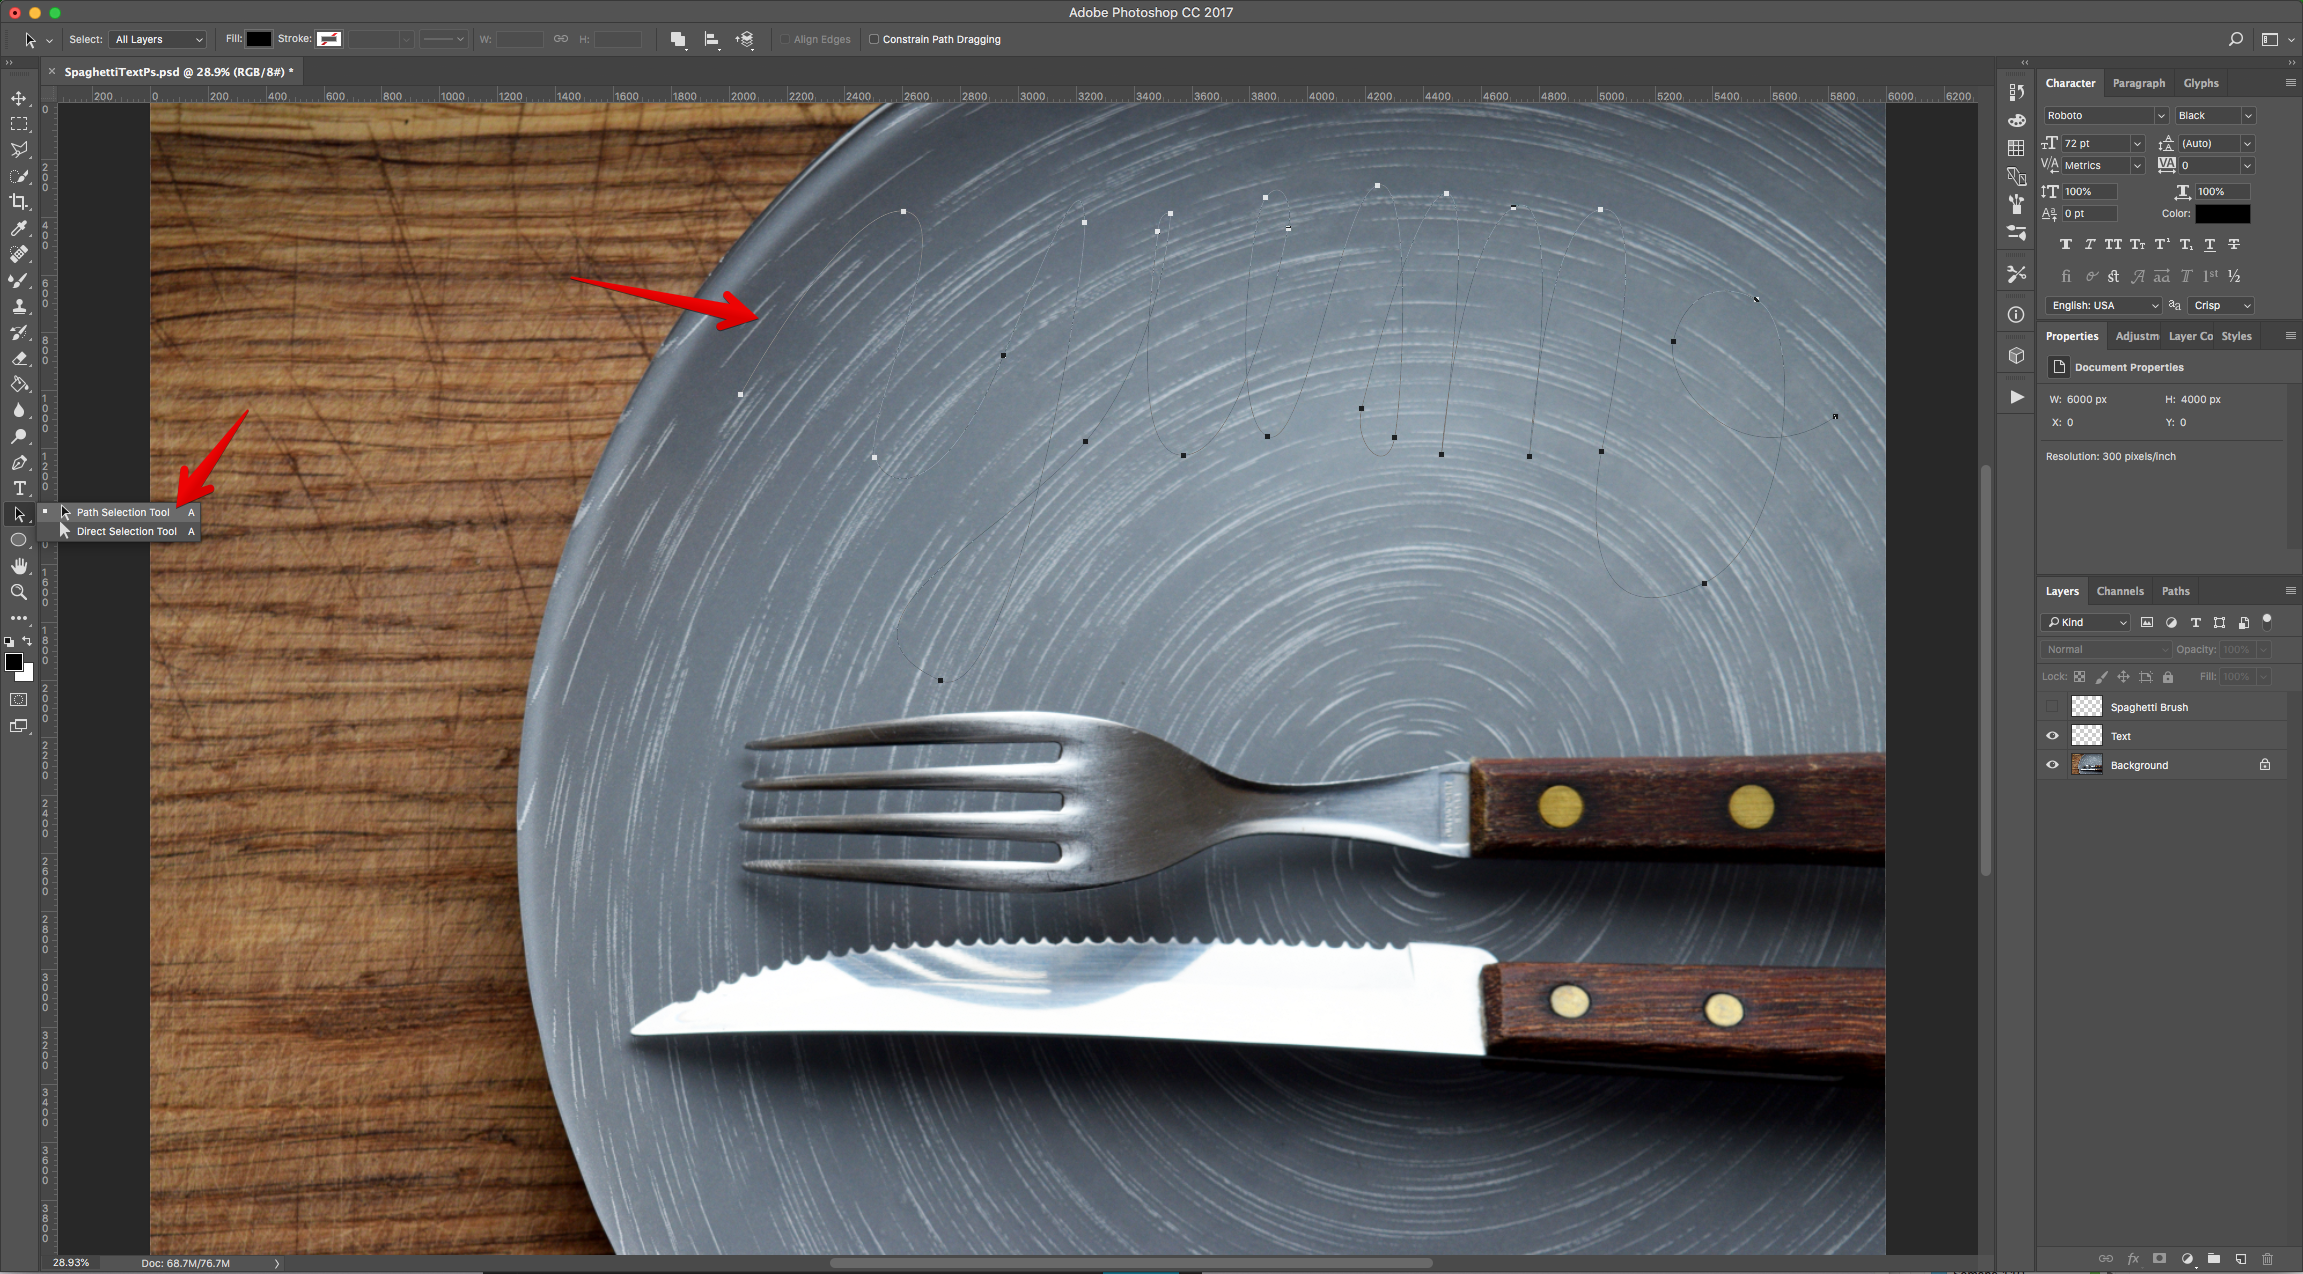
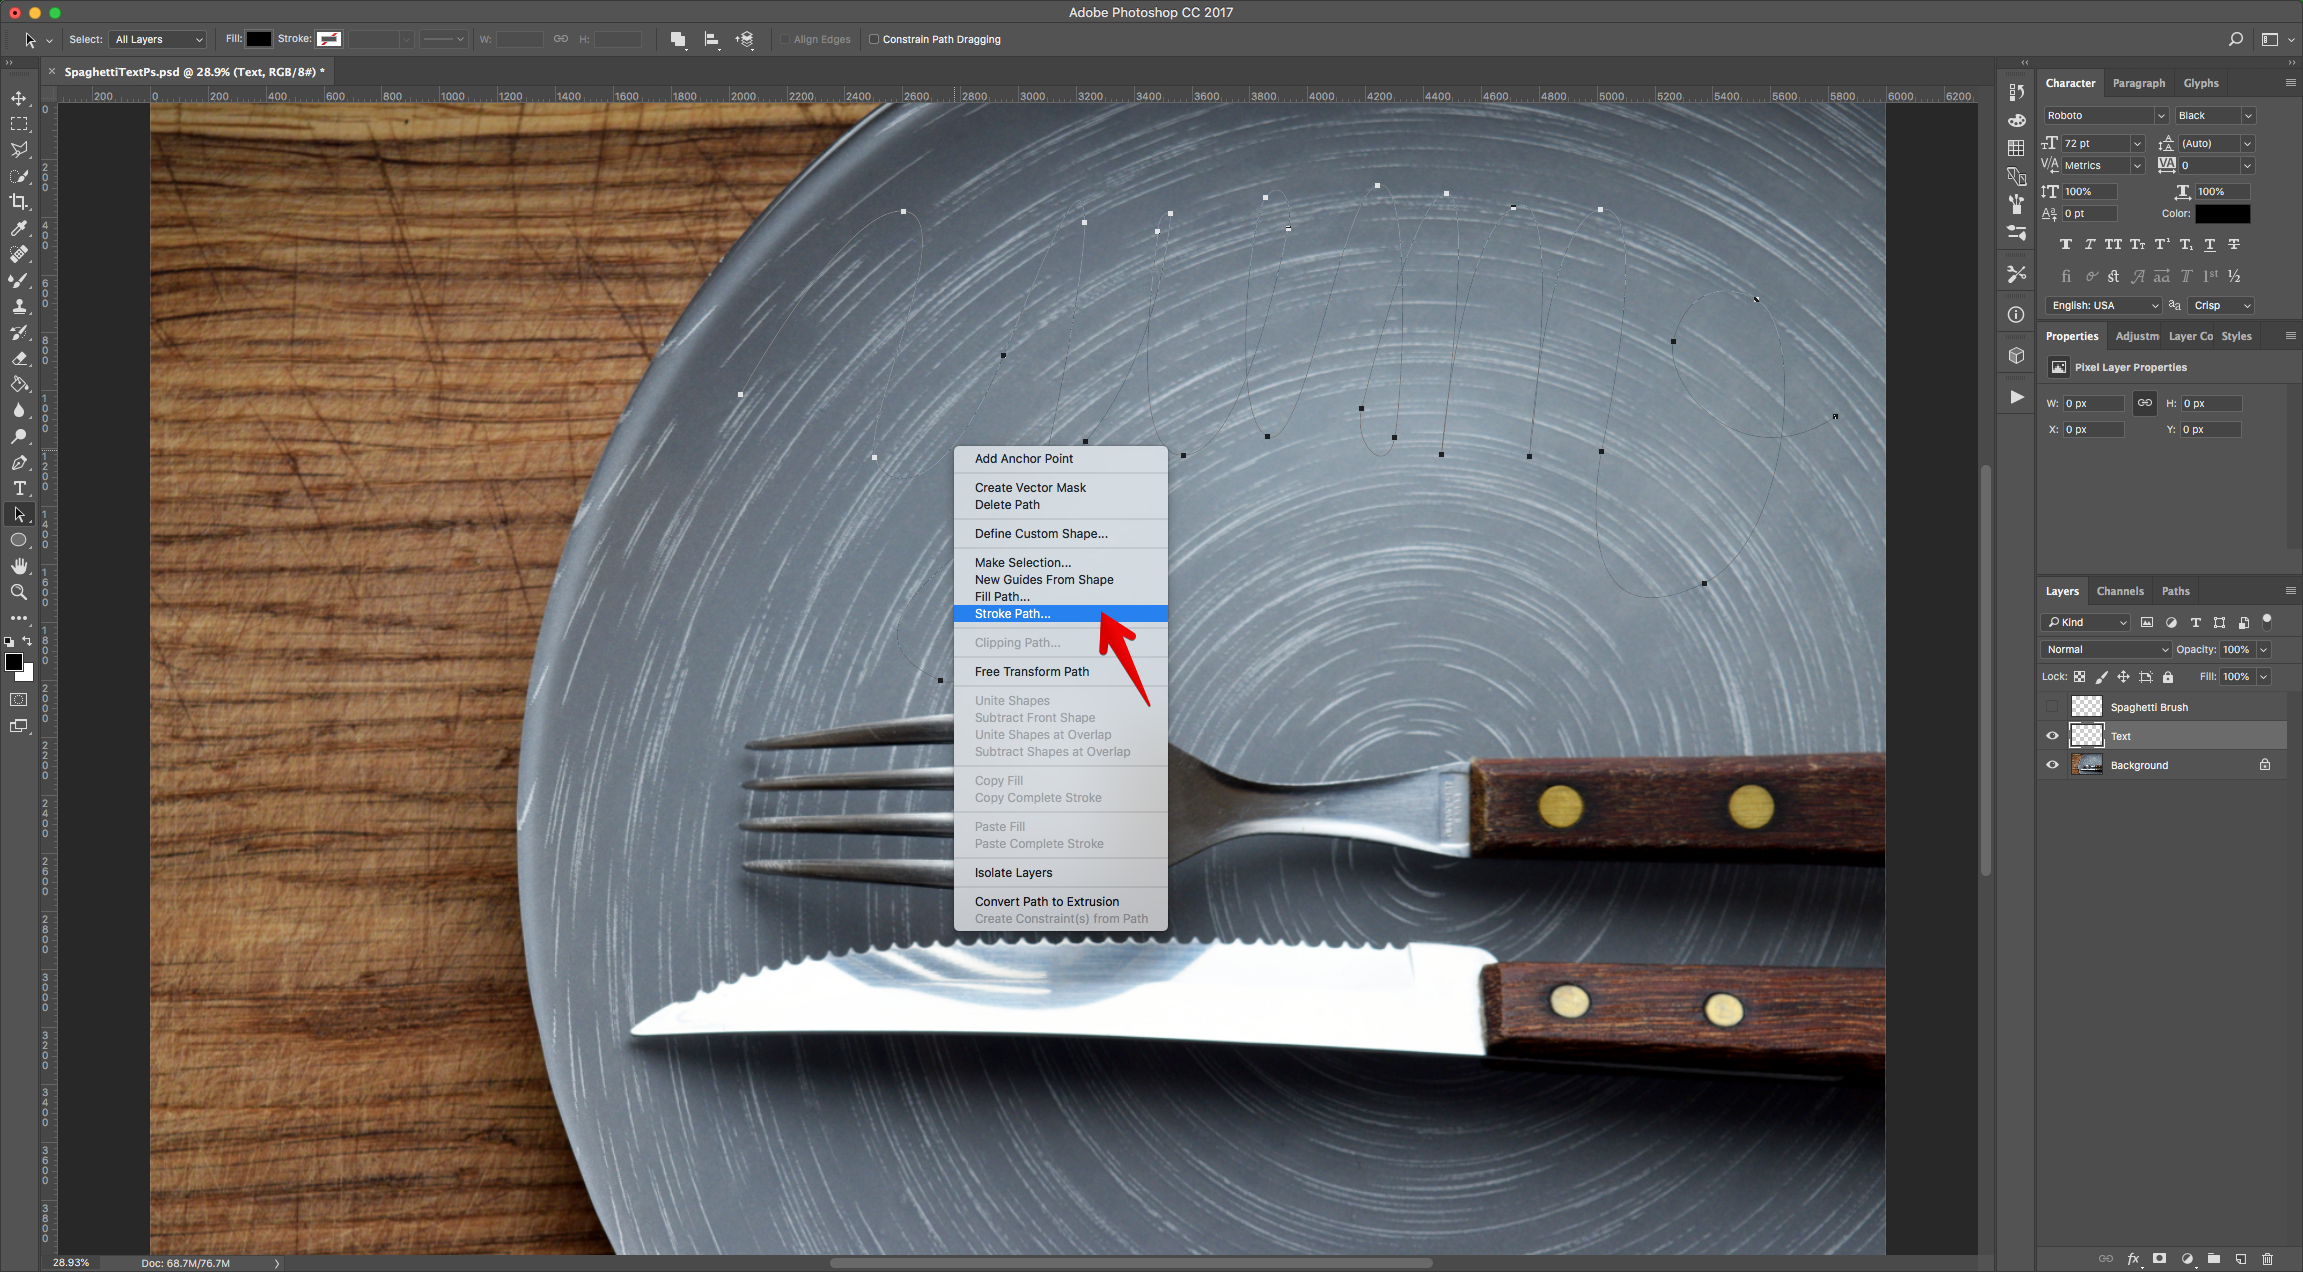
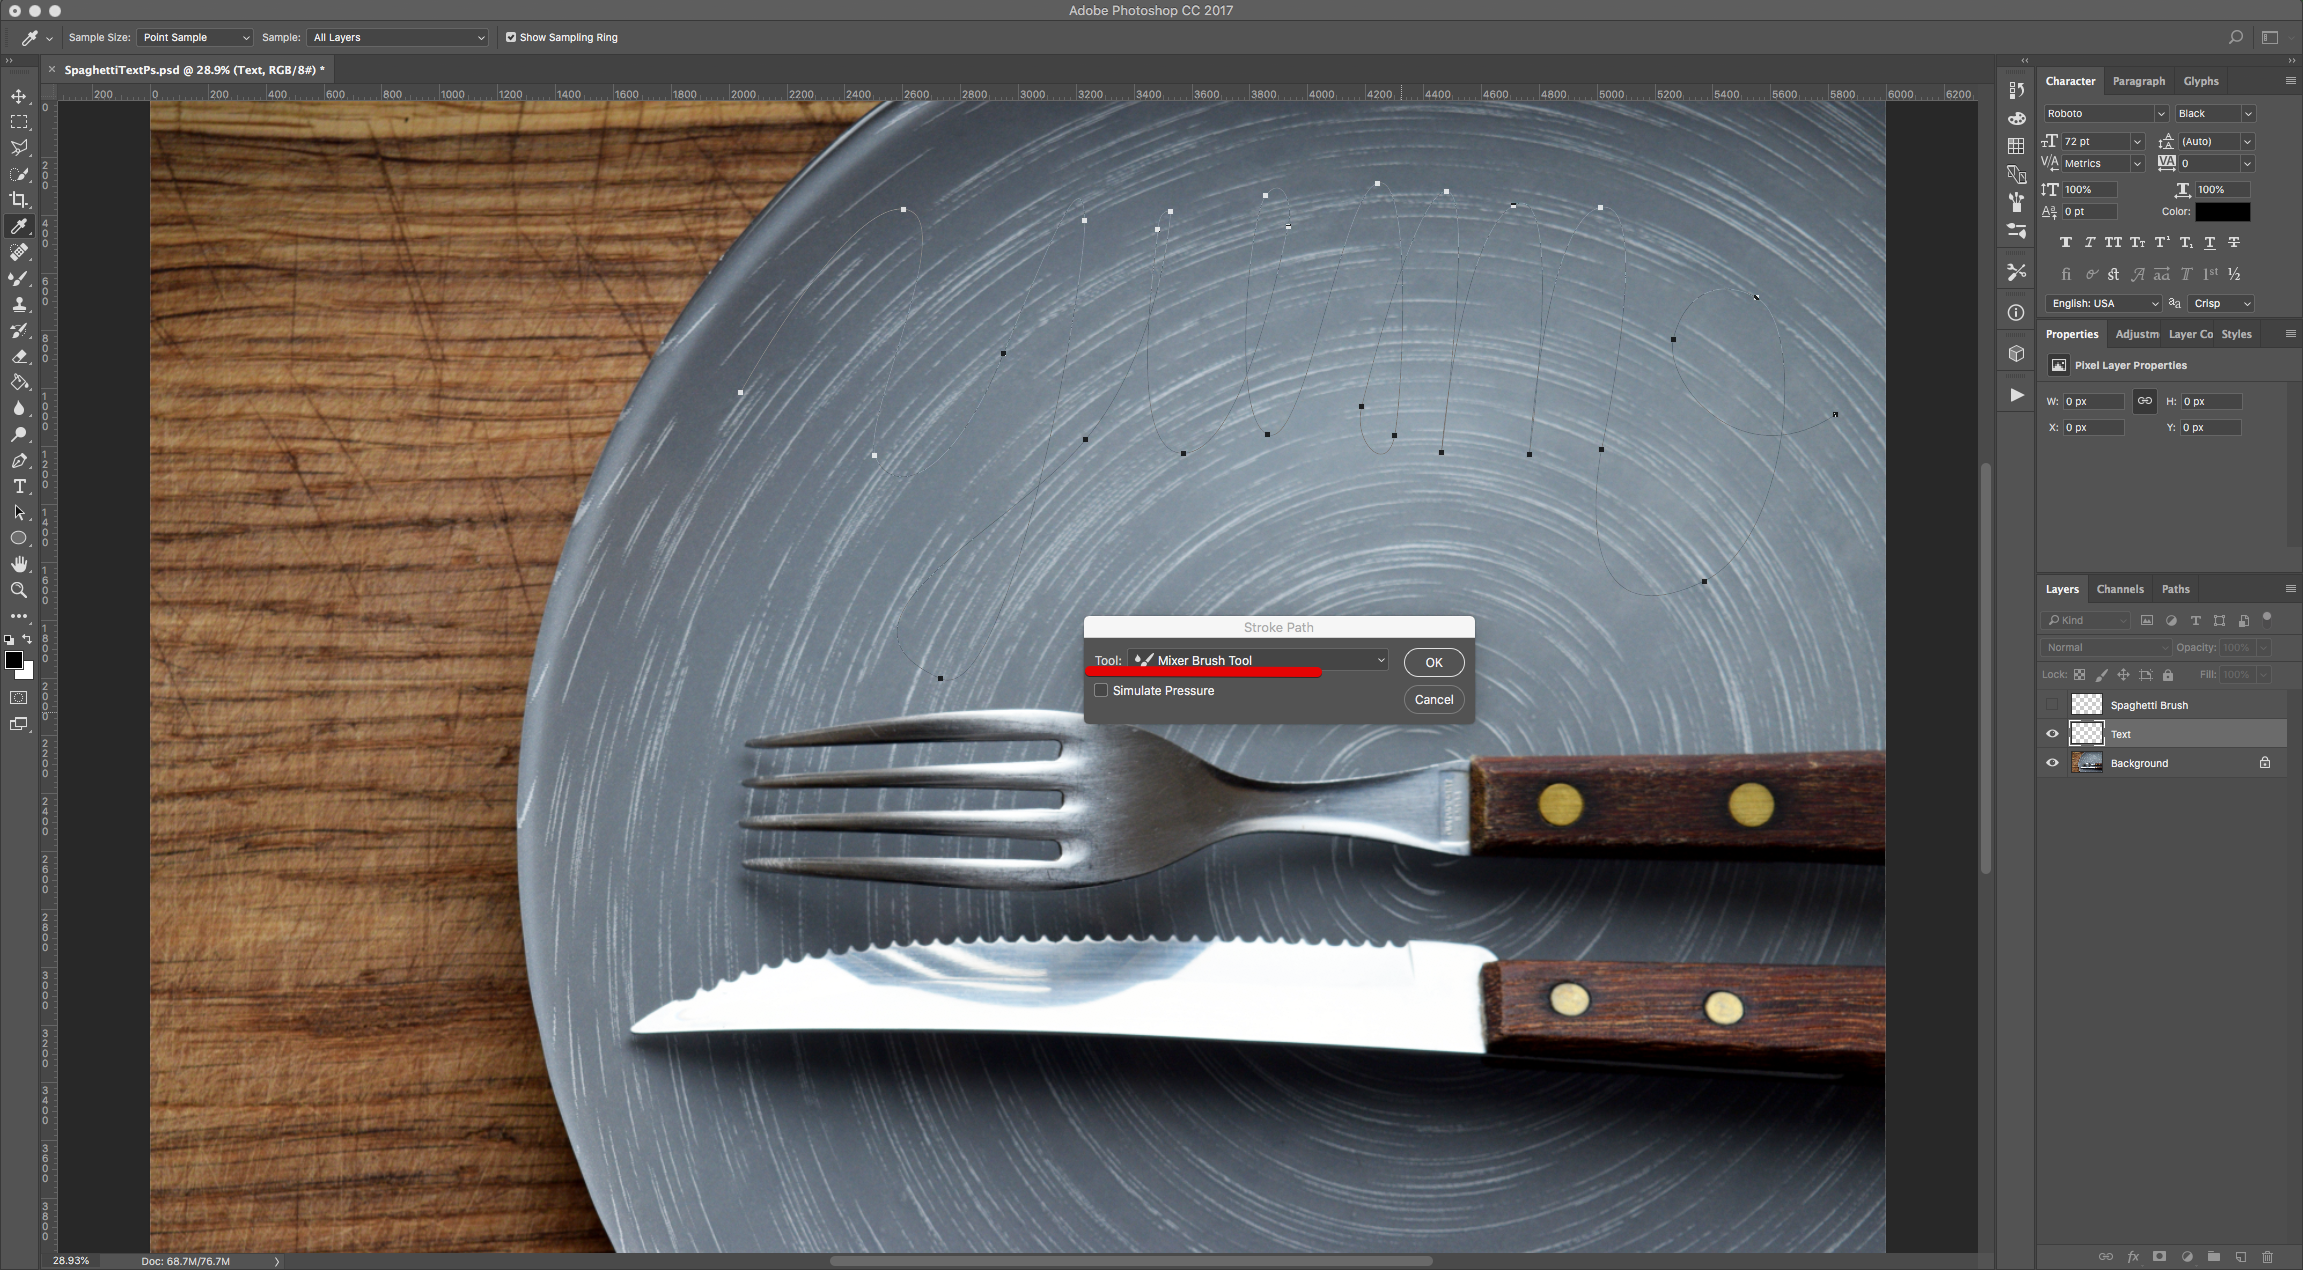
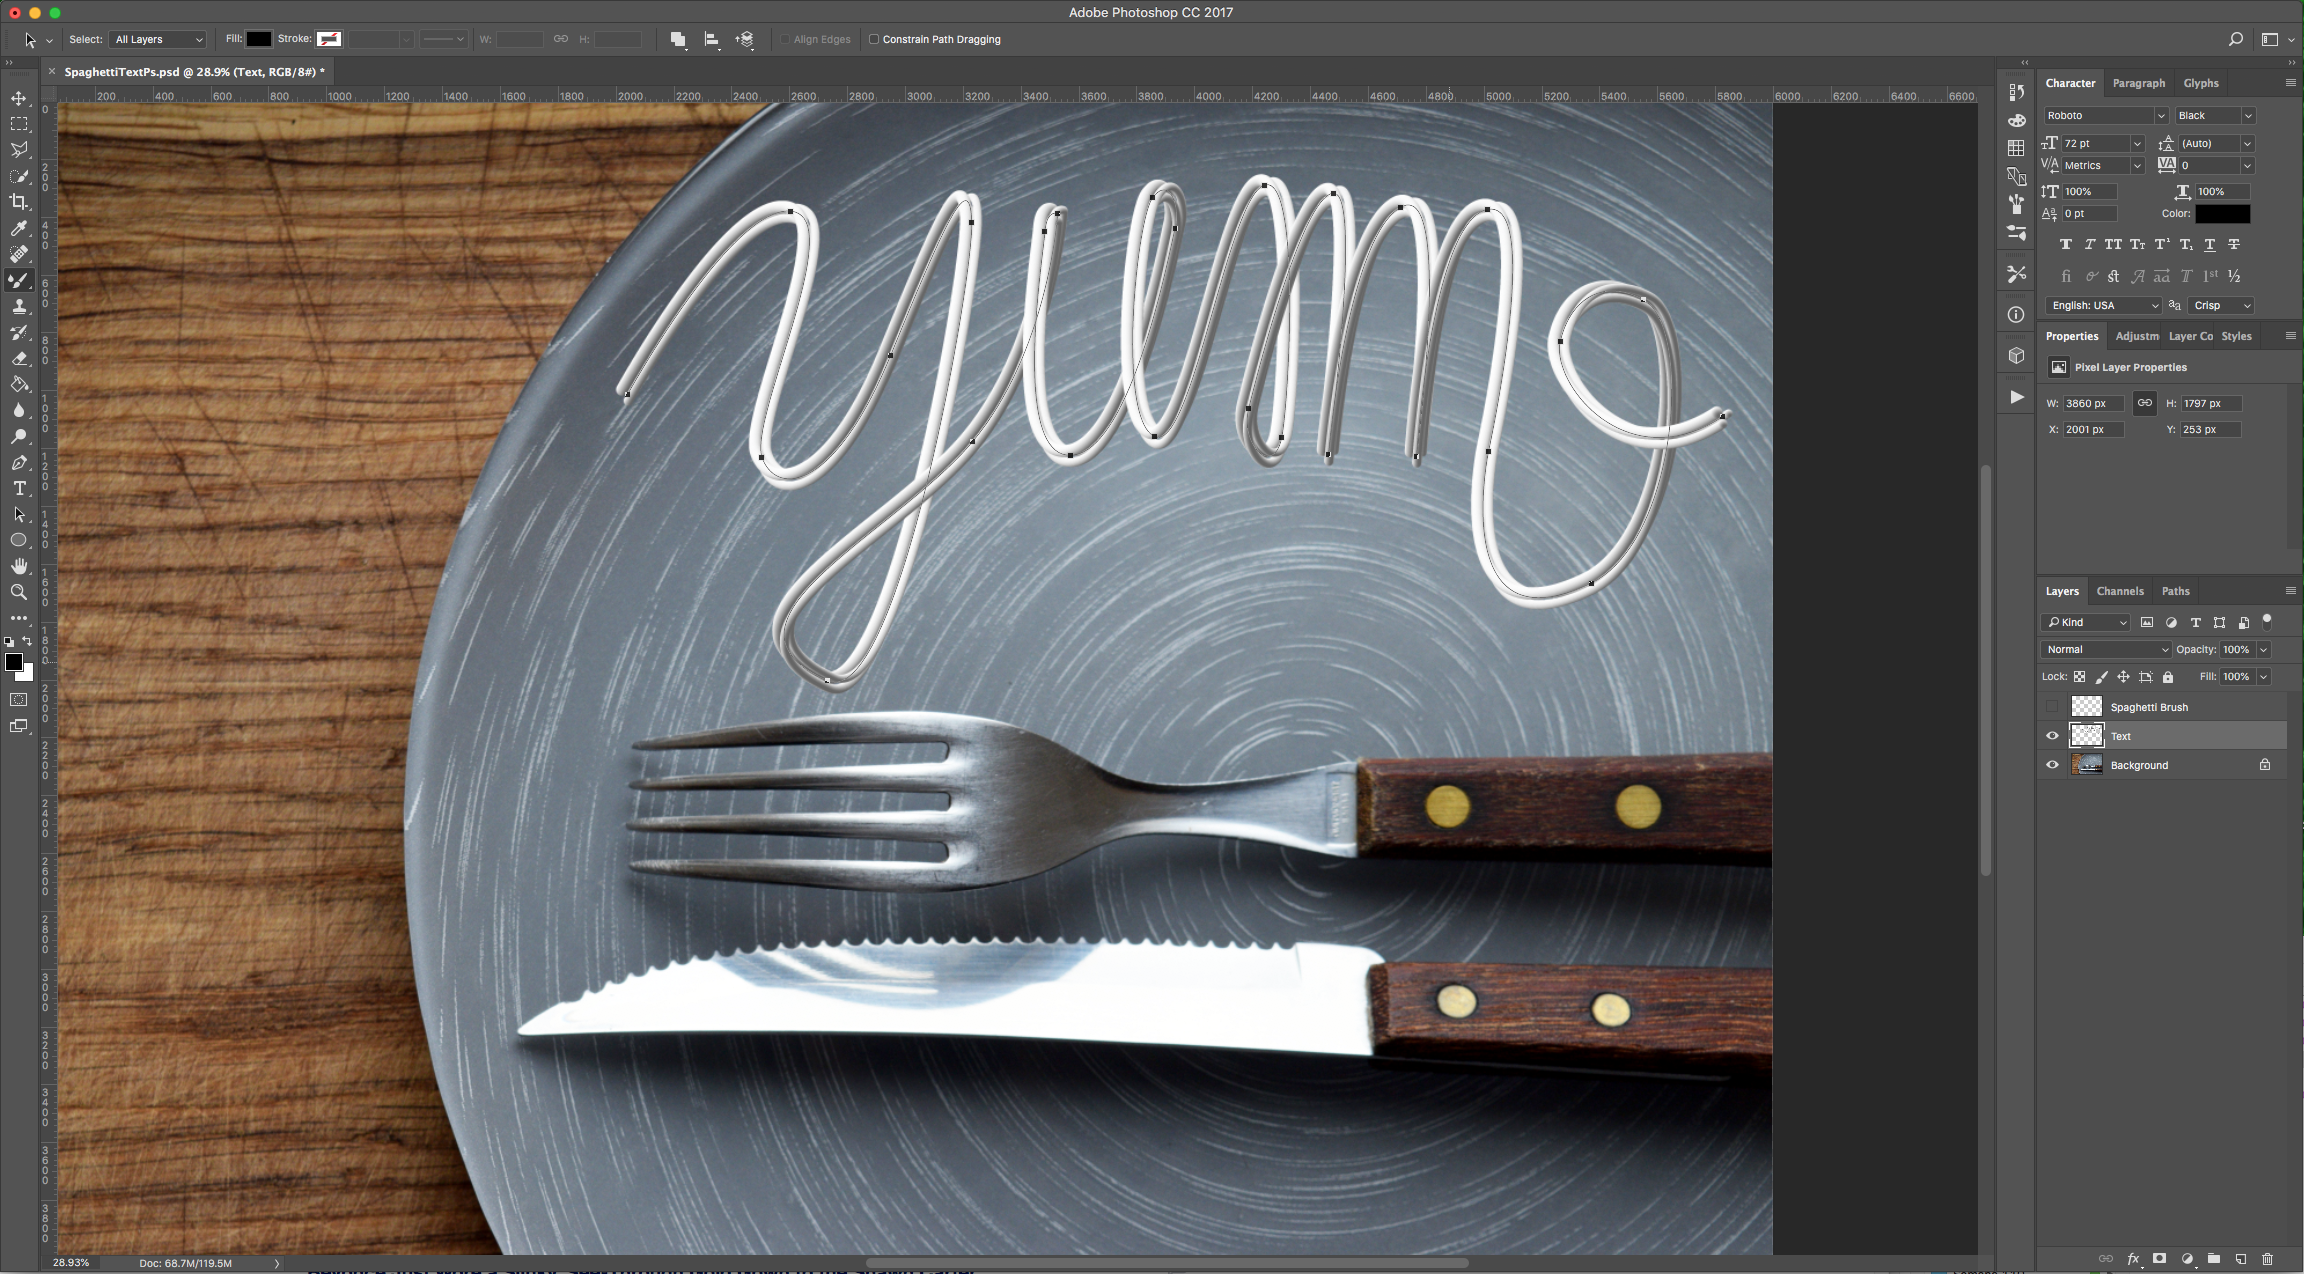
13 - Right-click on top, choose “Stroke Path” and then “Mixer Brush Tool” as “Tool”. Click “OK”.
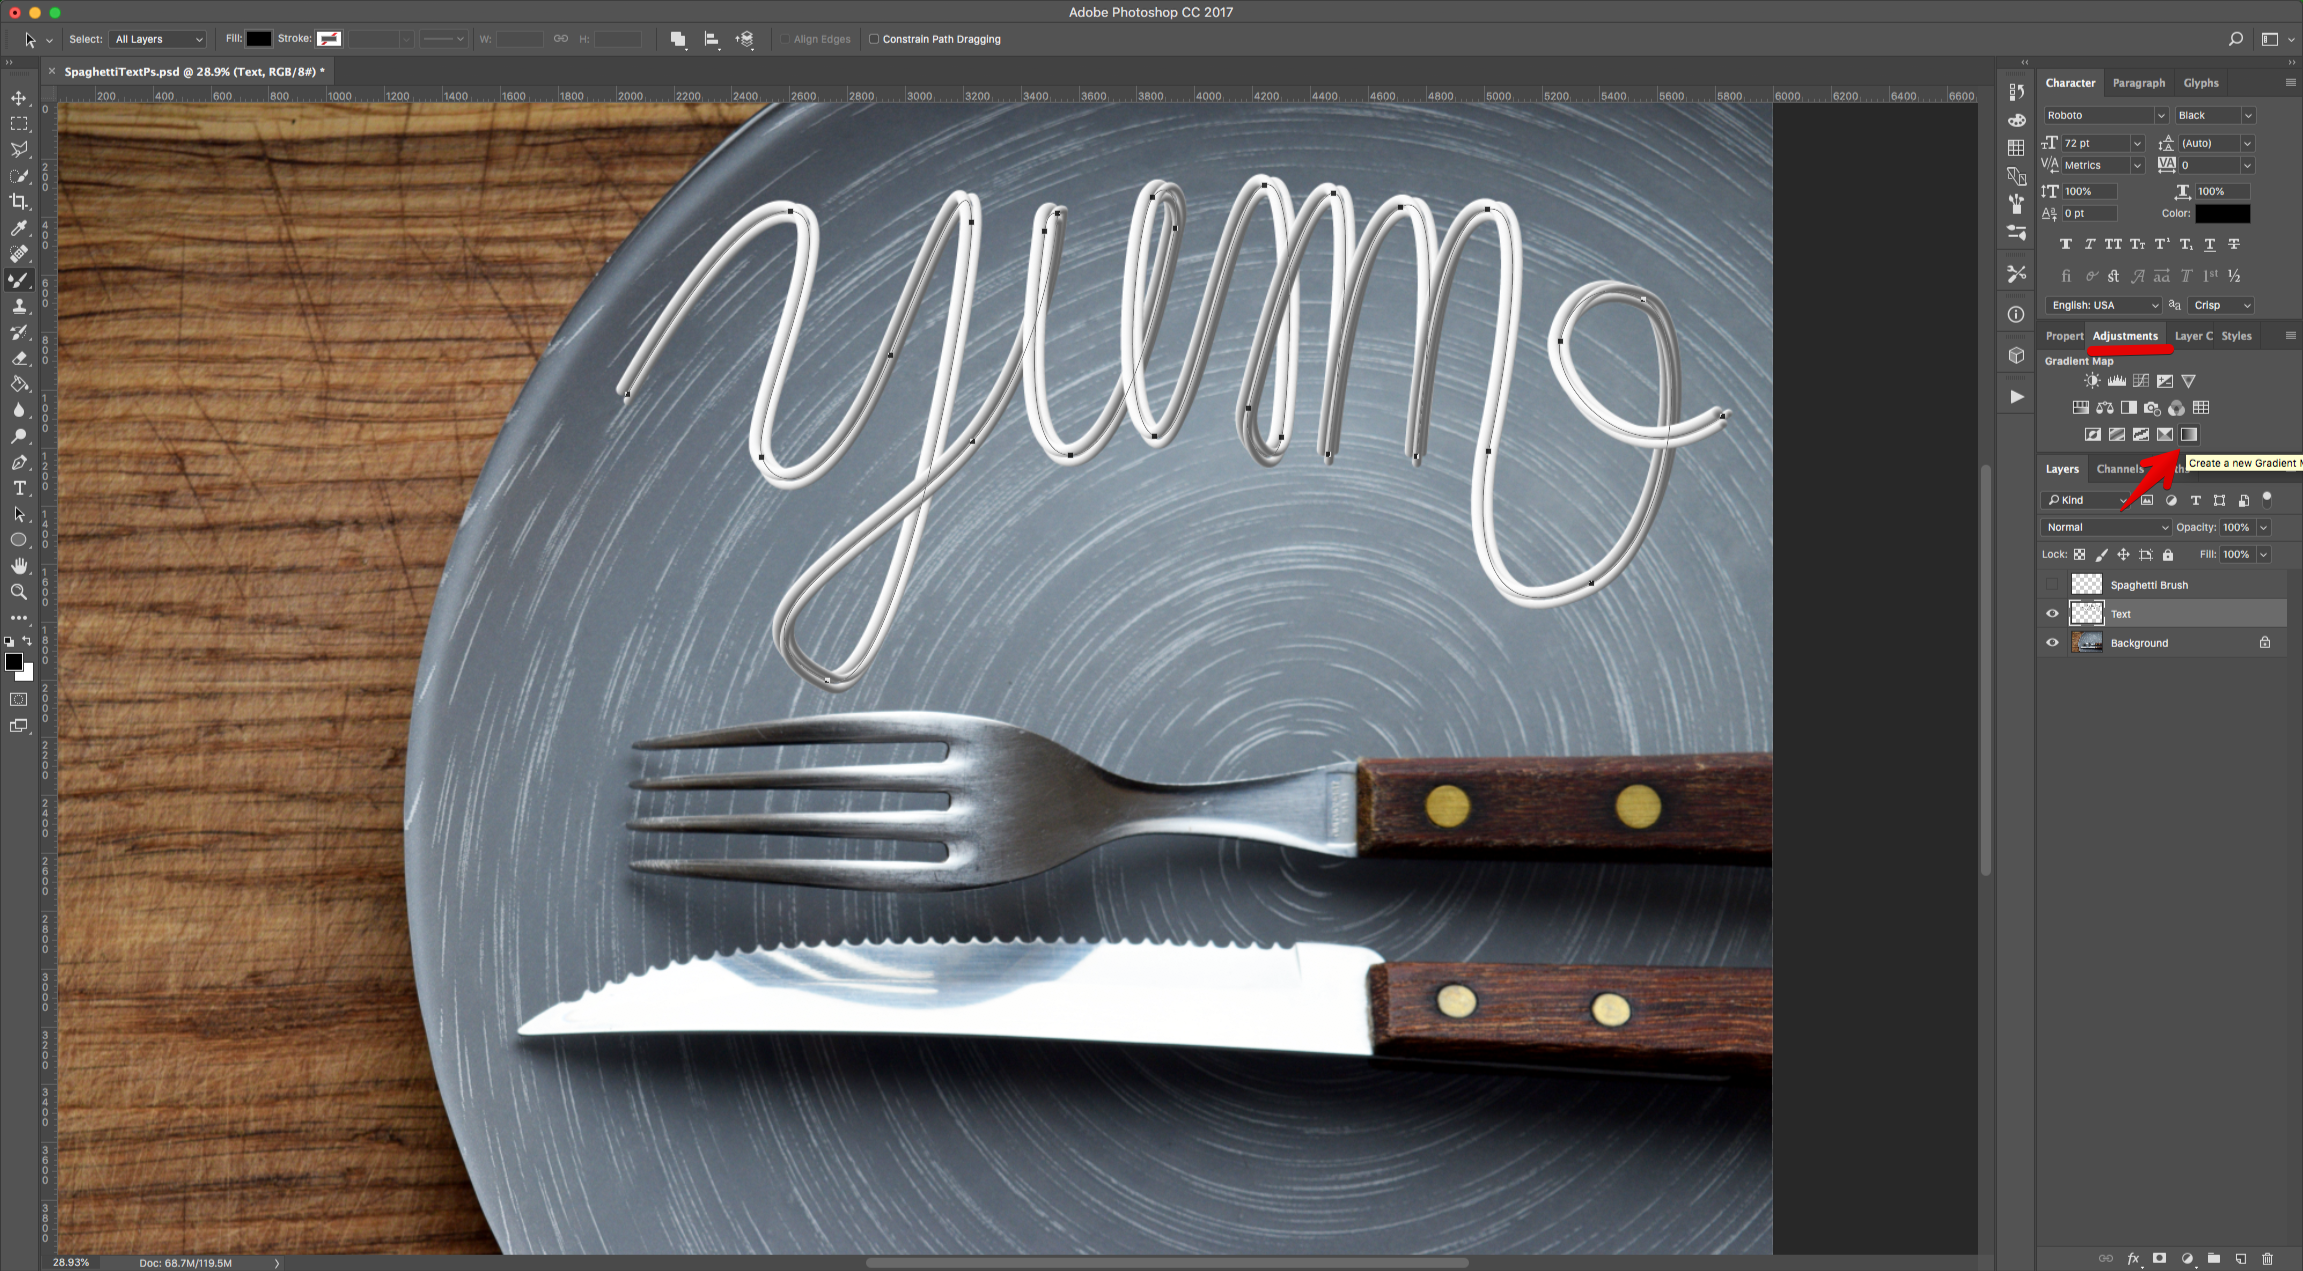
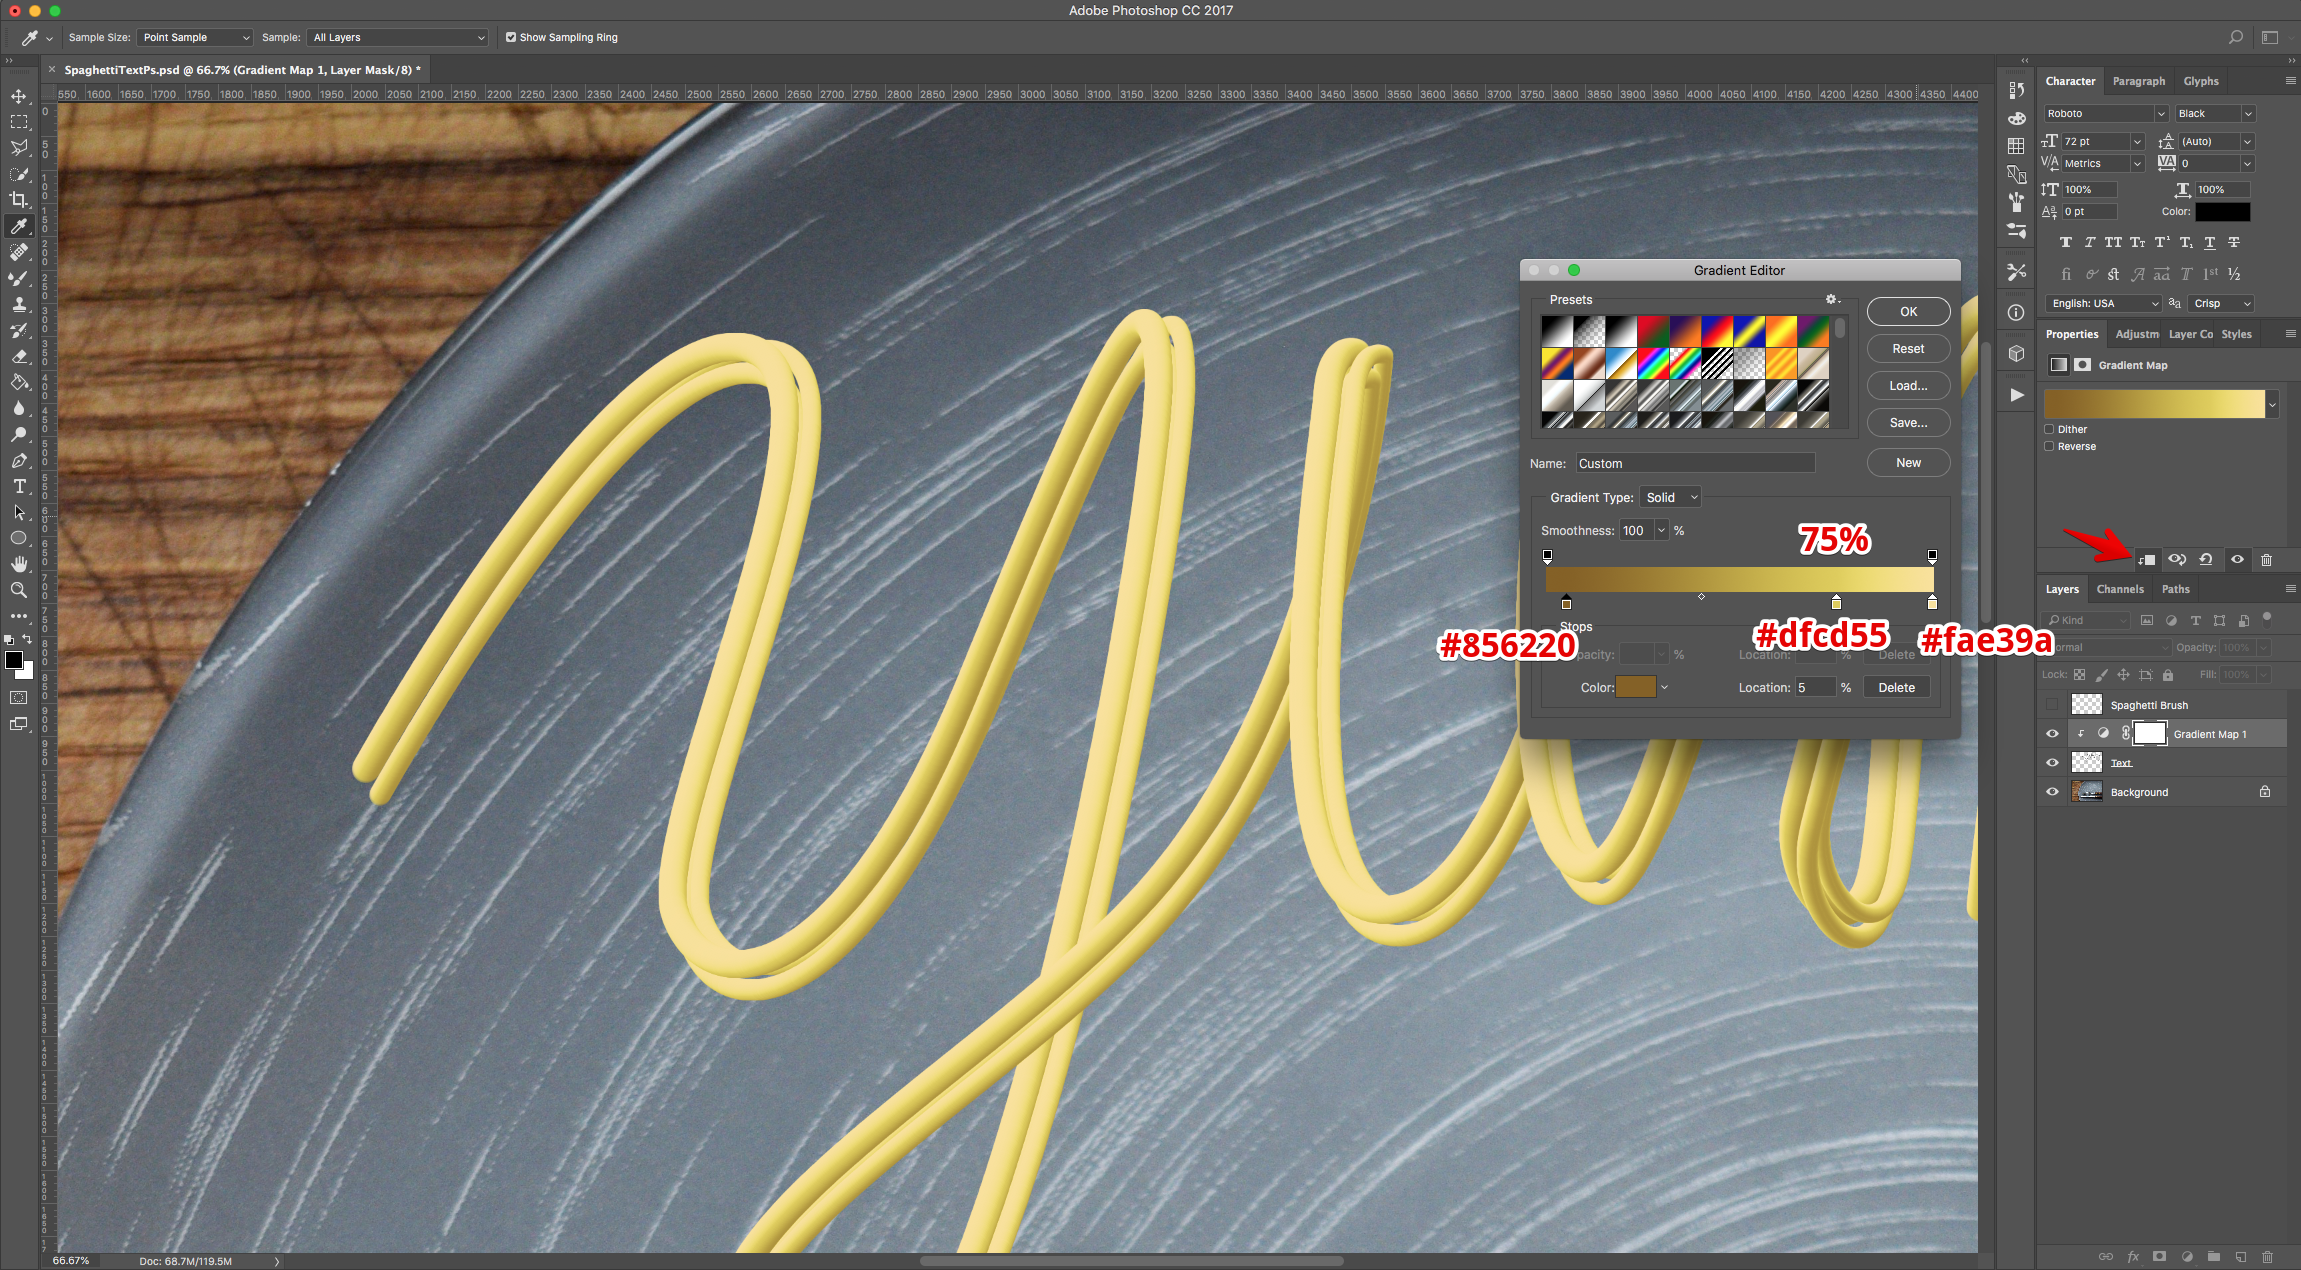
14 - Create a “New Gradient Map” Adjustment Layer on top of the “Text” Layer and clip it to it (click on the small icon at the bottom of the “Properties Panel”. Double-click on the Gradient and input the following (1: Location: 5%, #856220 - 2: Location: 75%, #dfcd55 - 3: Location: 100%, #fae39a)
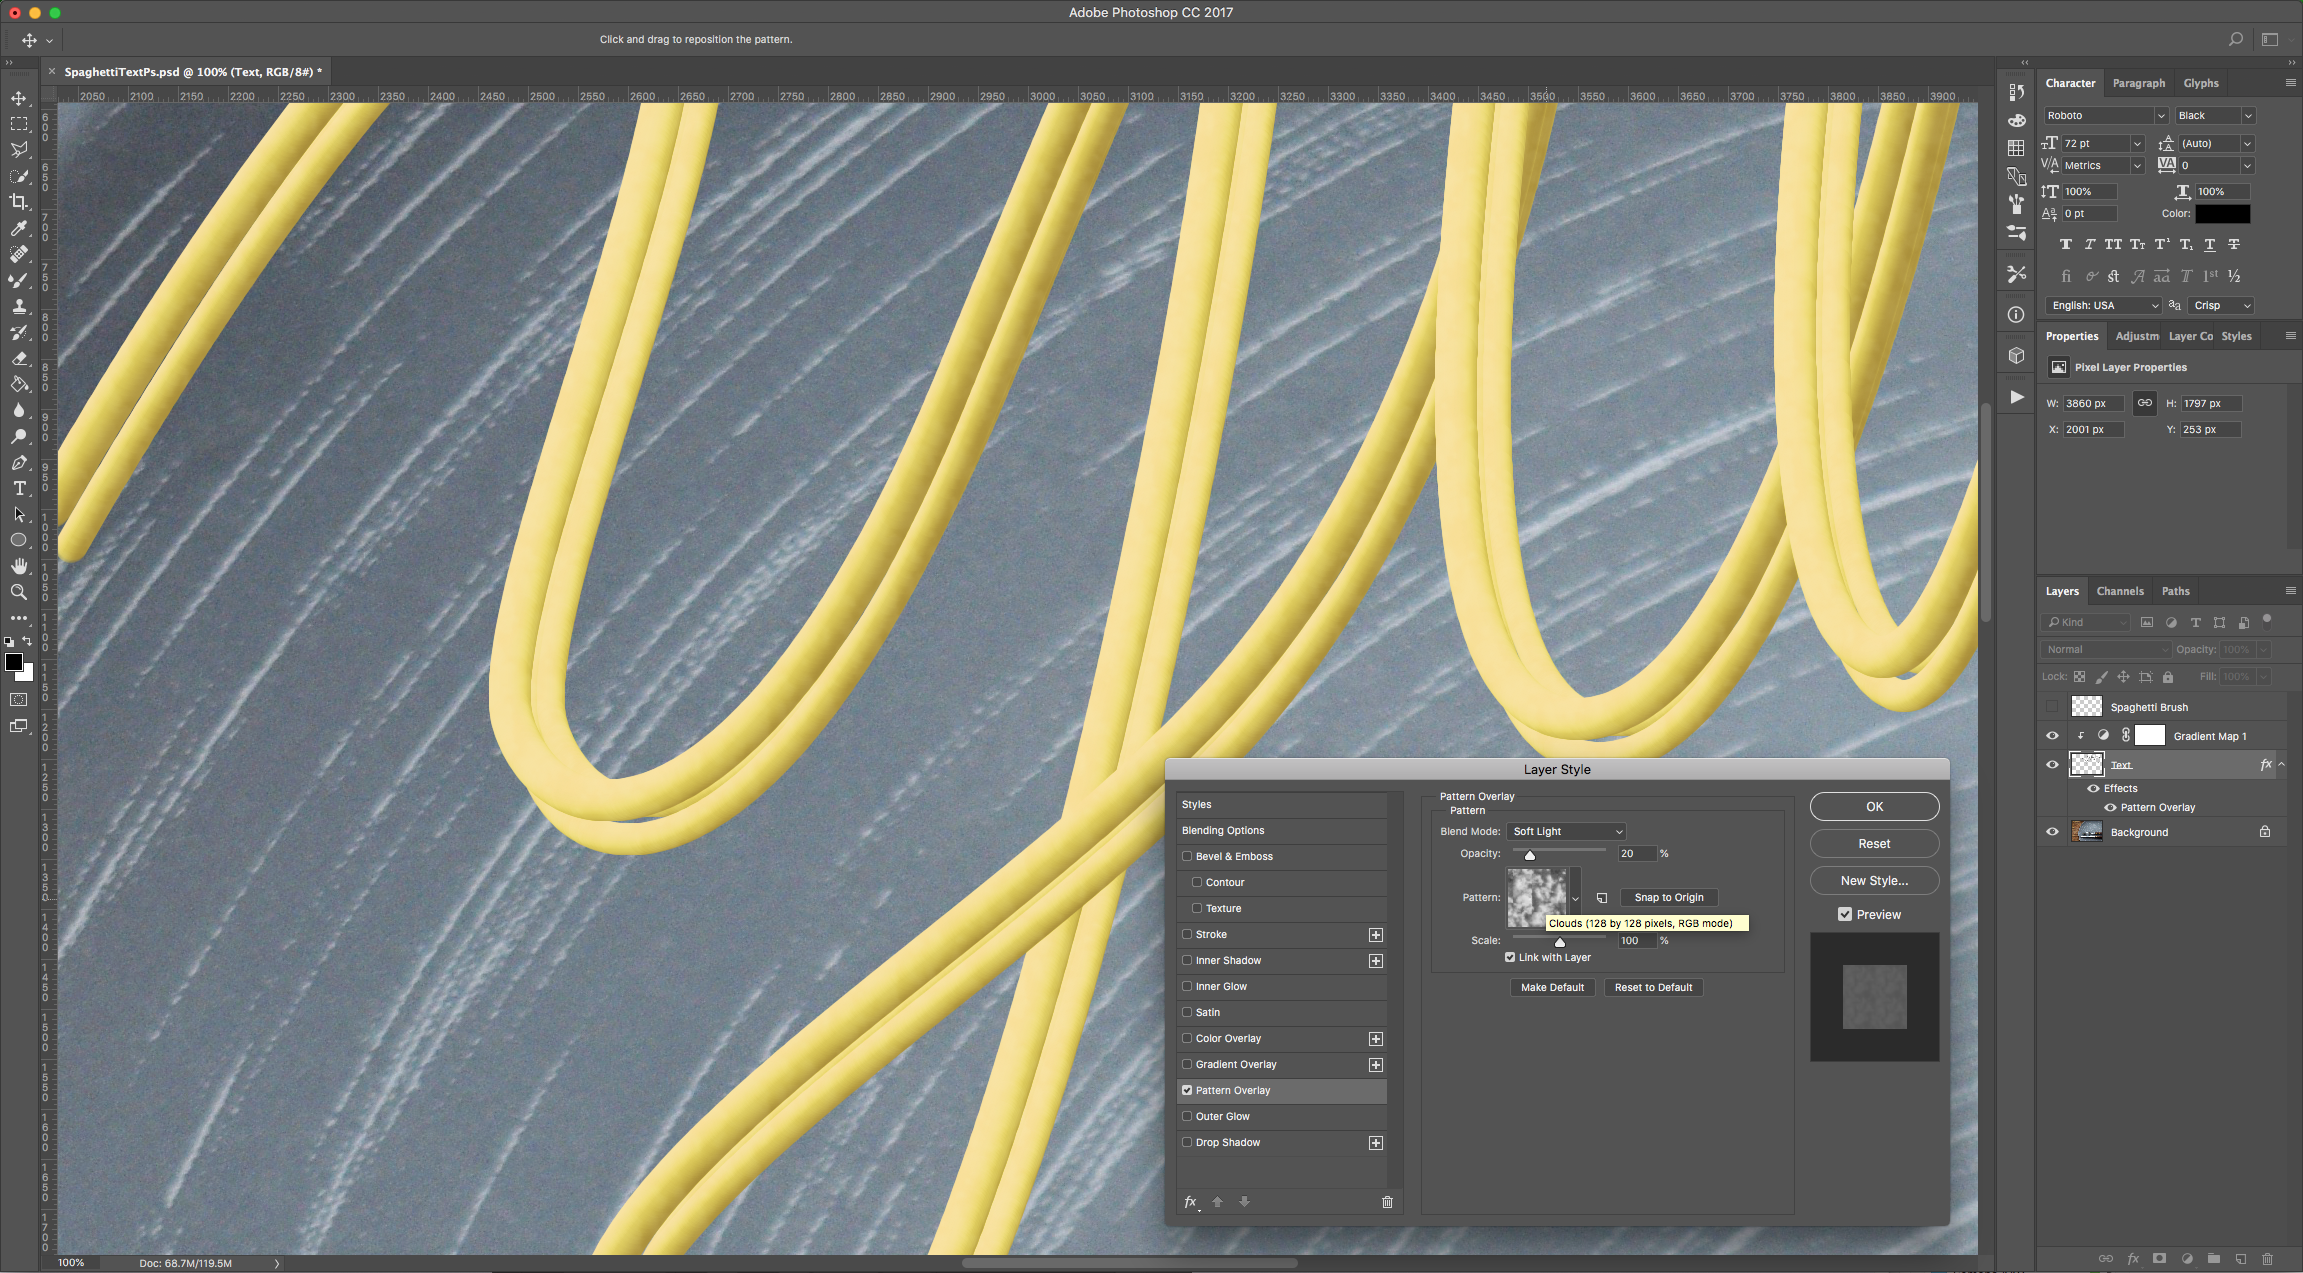
15 - Double-click on one of the “Text” Thumbnail and apply the following “Layer Styles”:
Pattern Overlay: (Clouds)
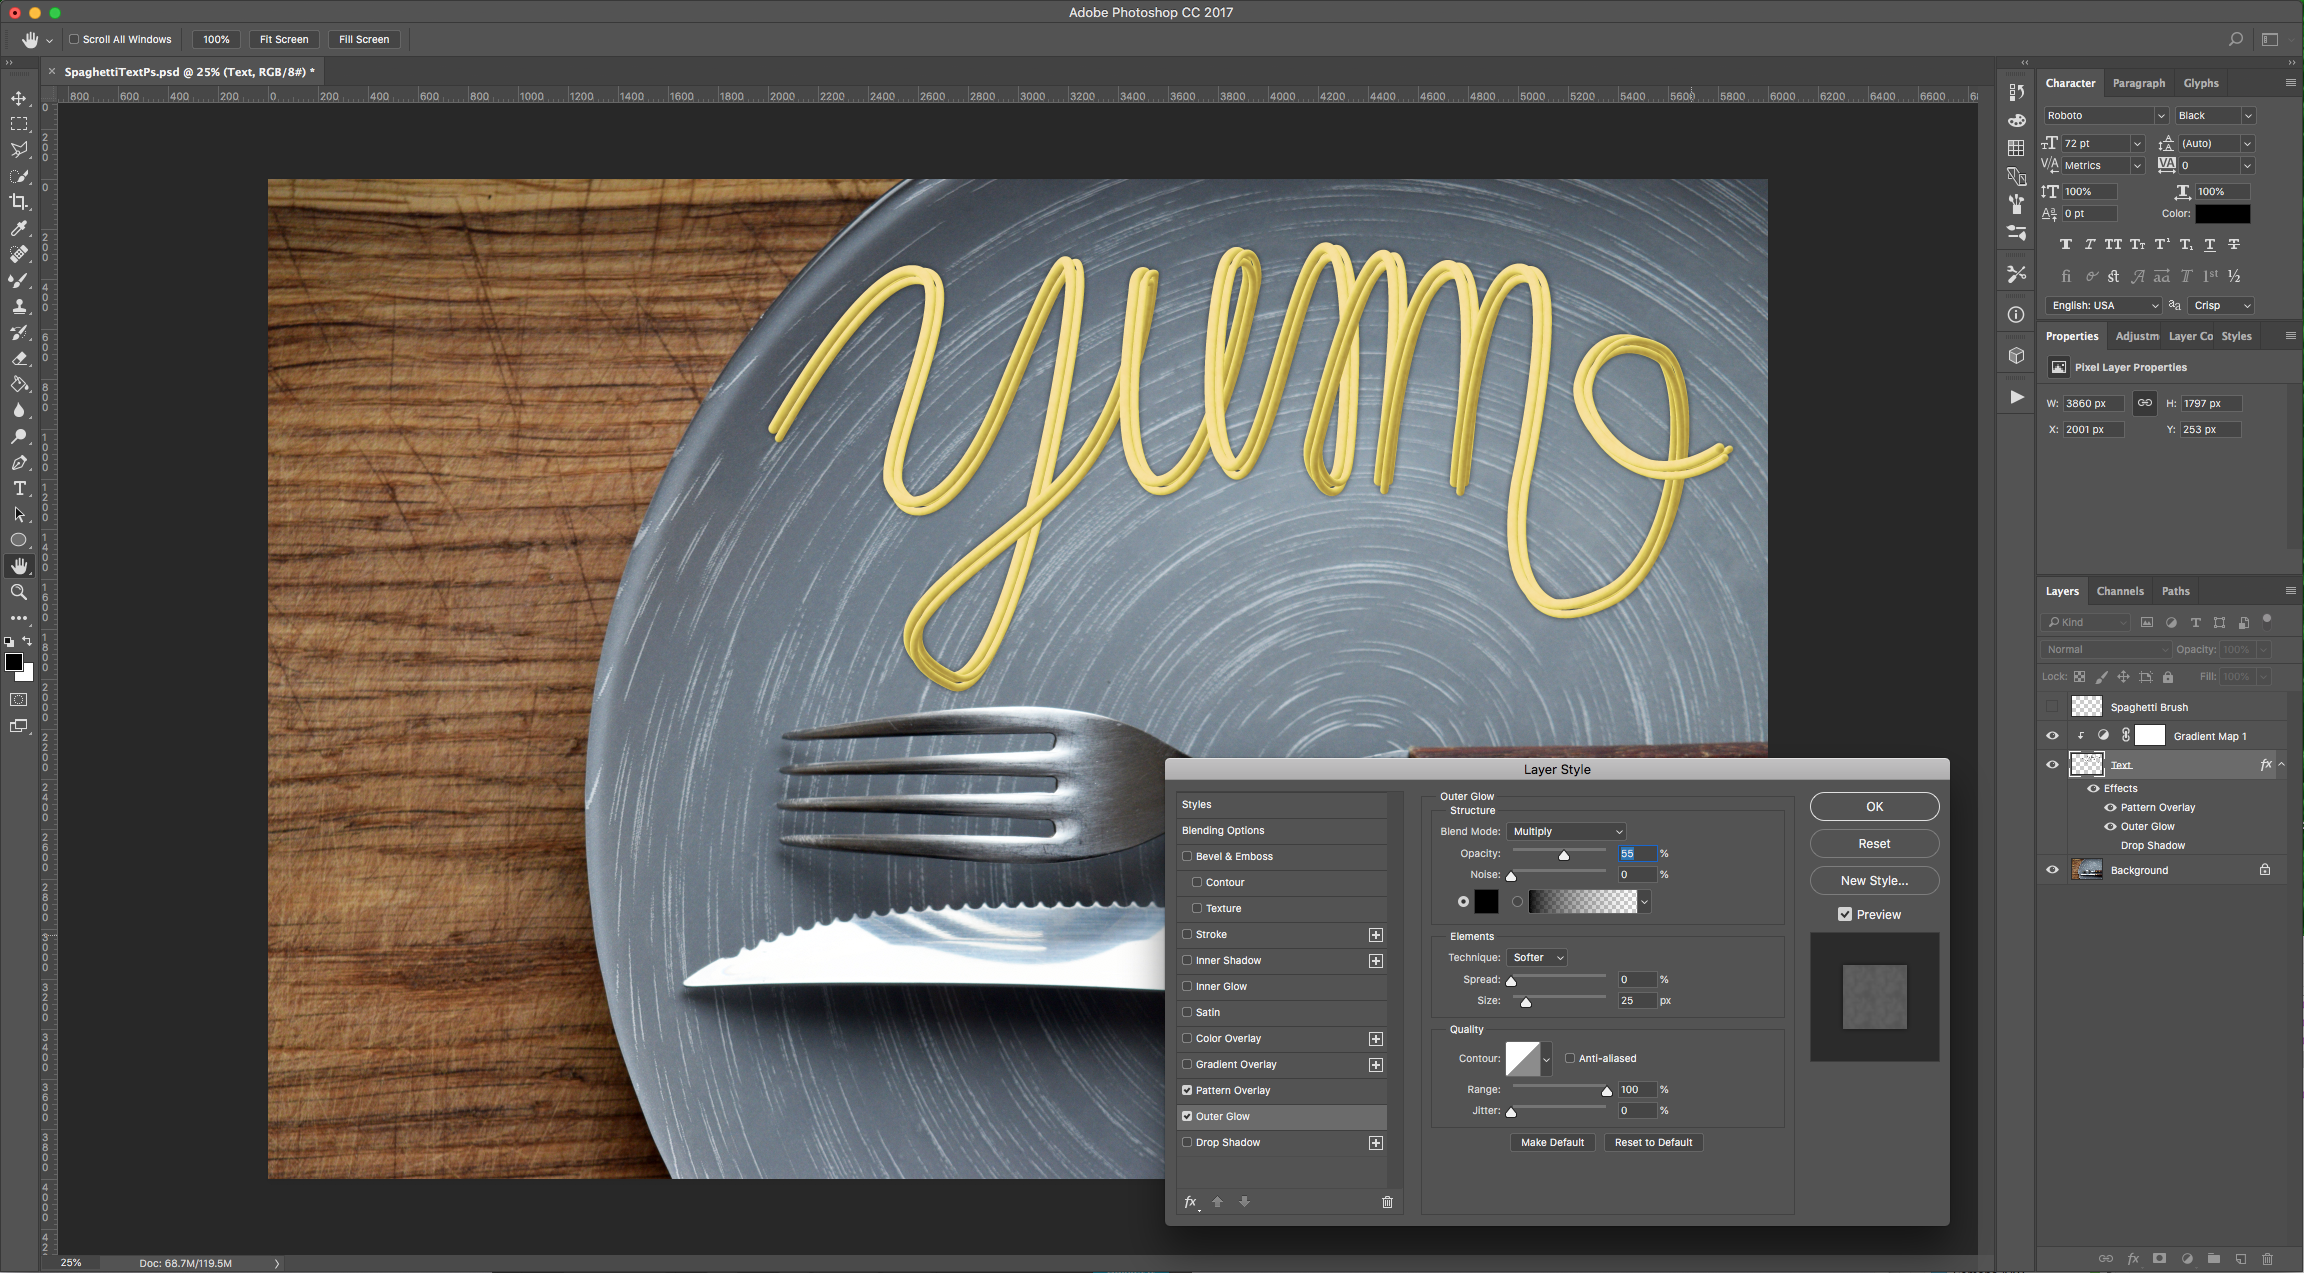
Outer Glow: (#000000)
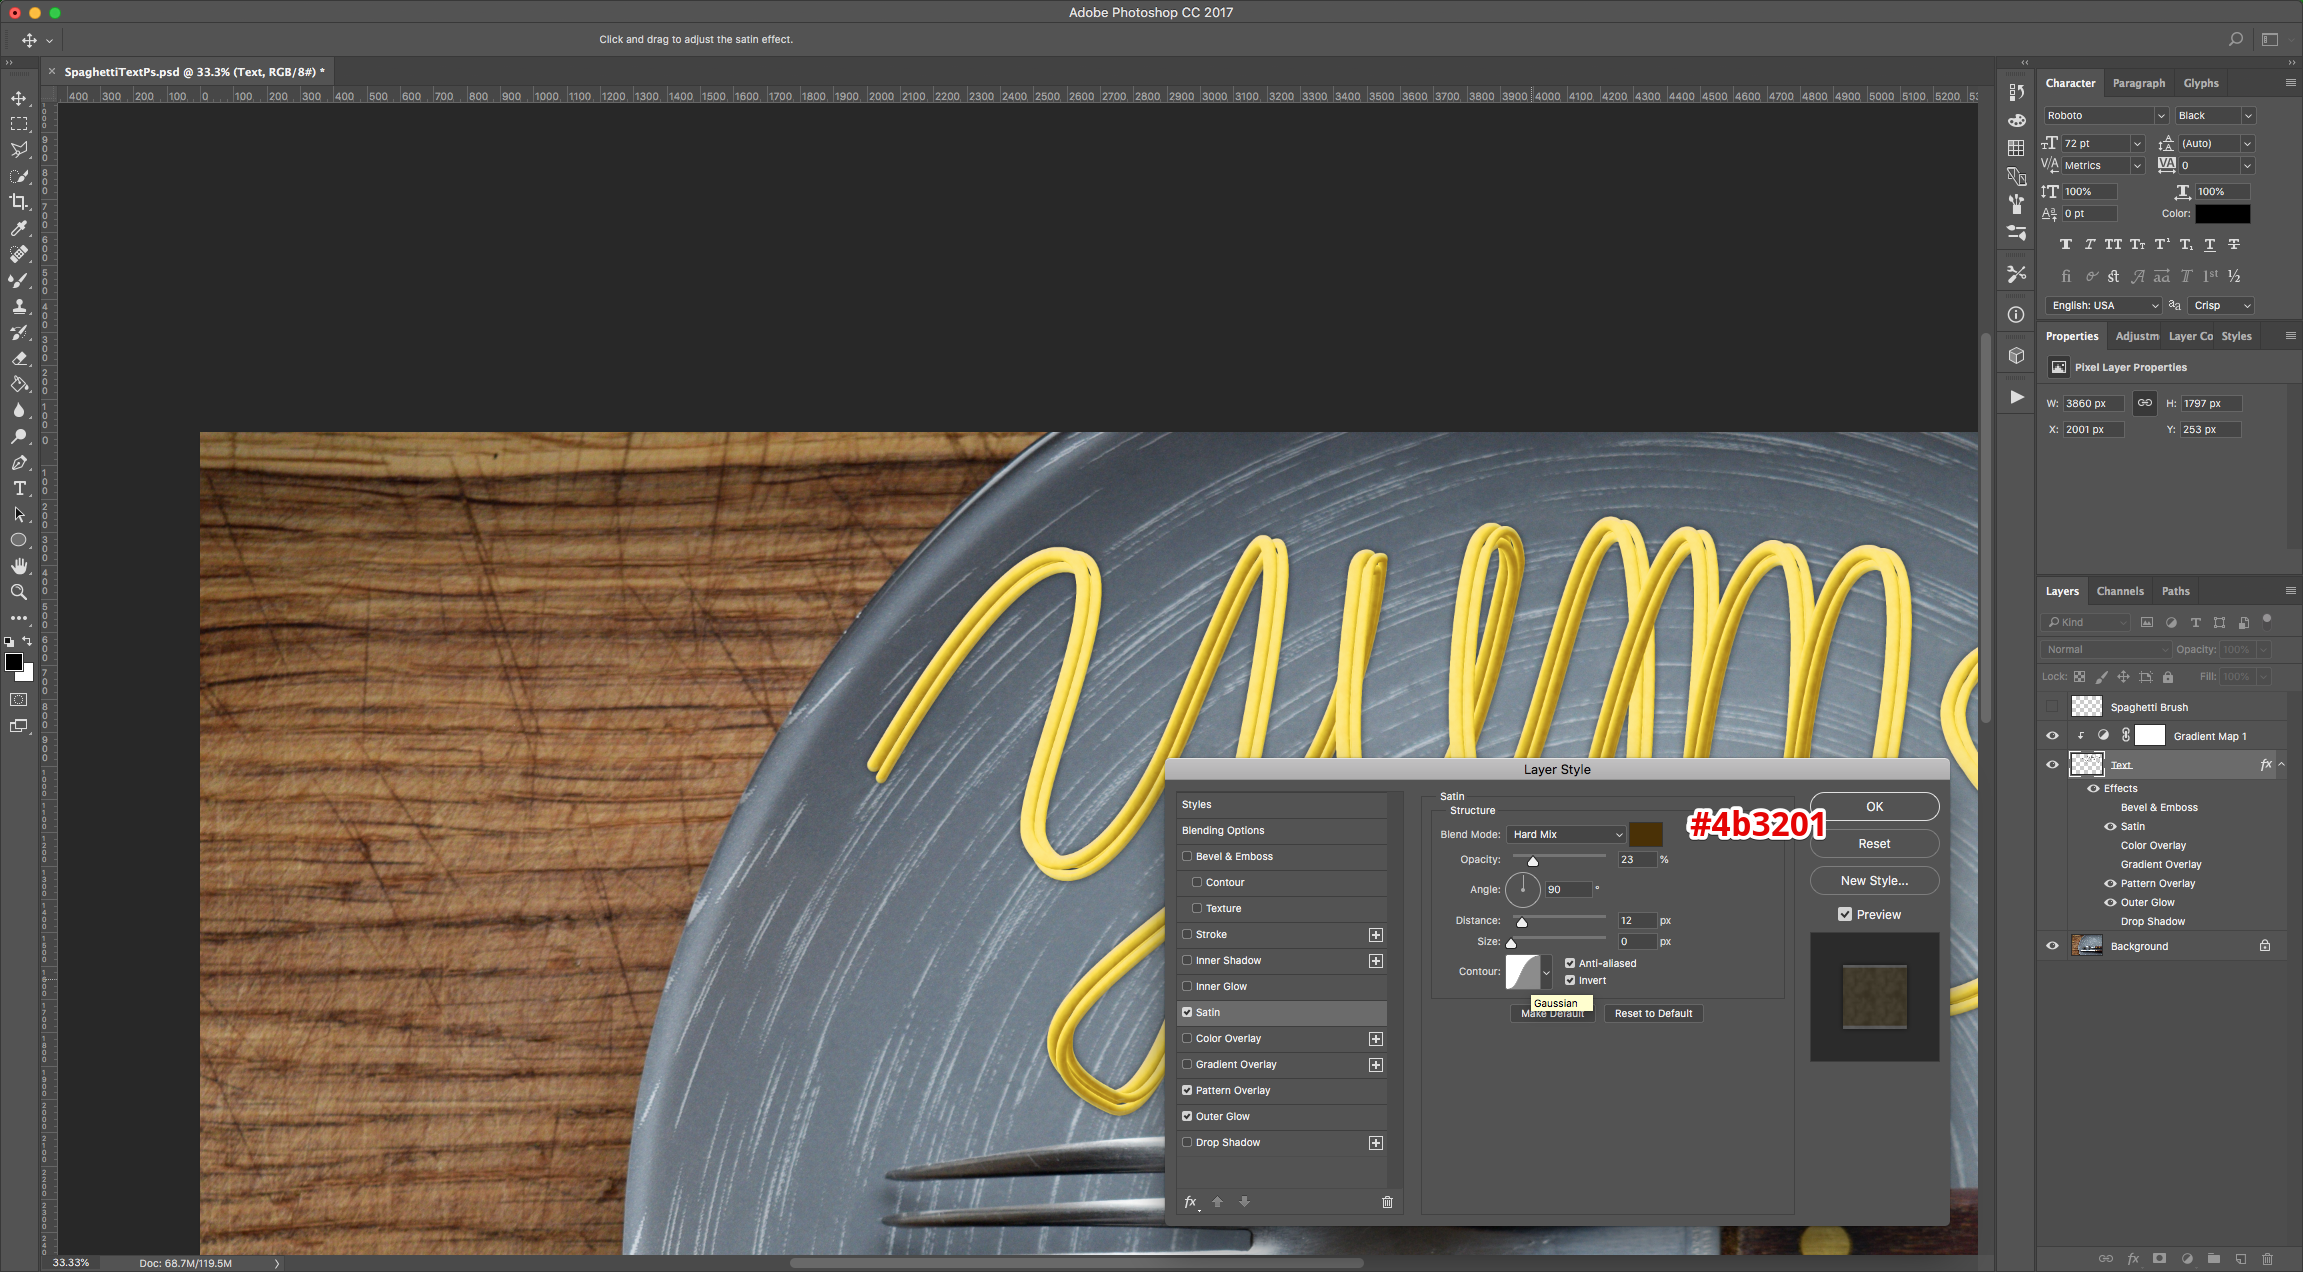
Satin: (#4b3201)
16 - Duplicate the “Text” Layer (Command/Control + J).
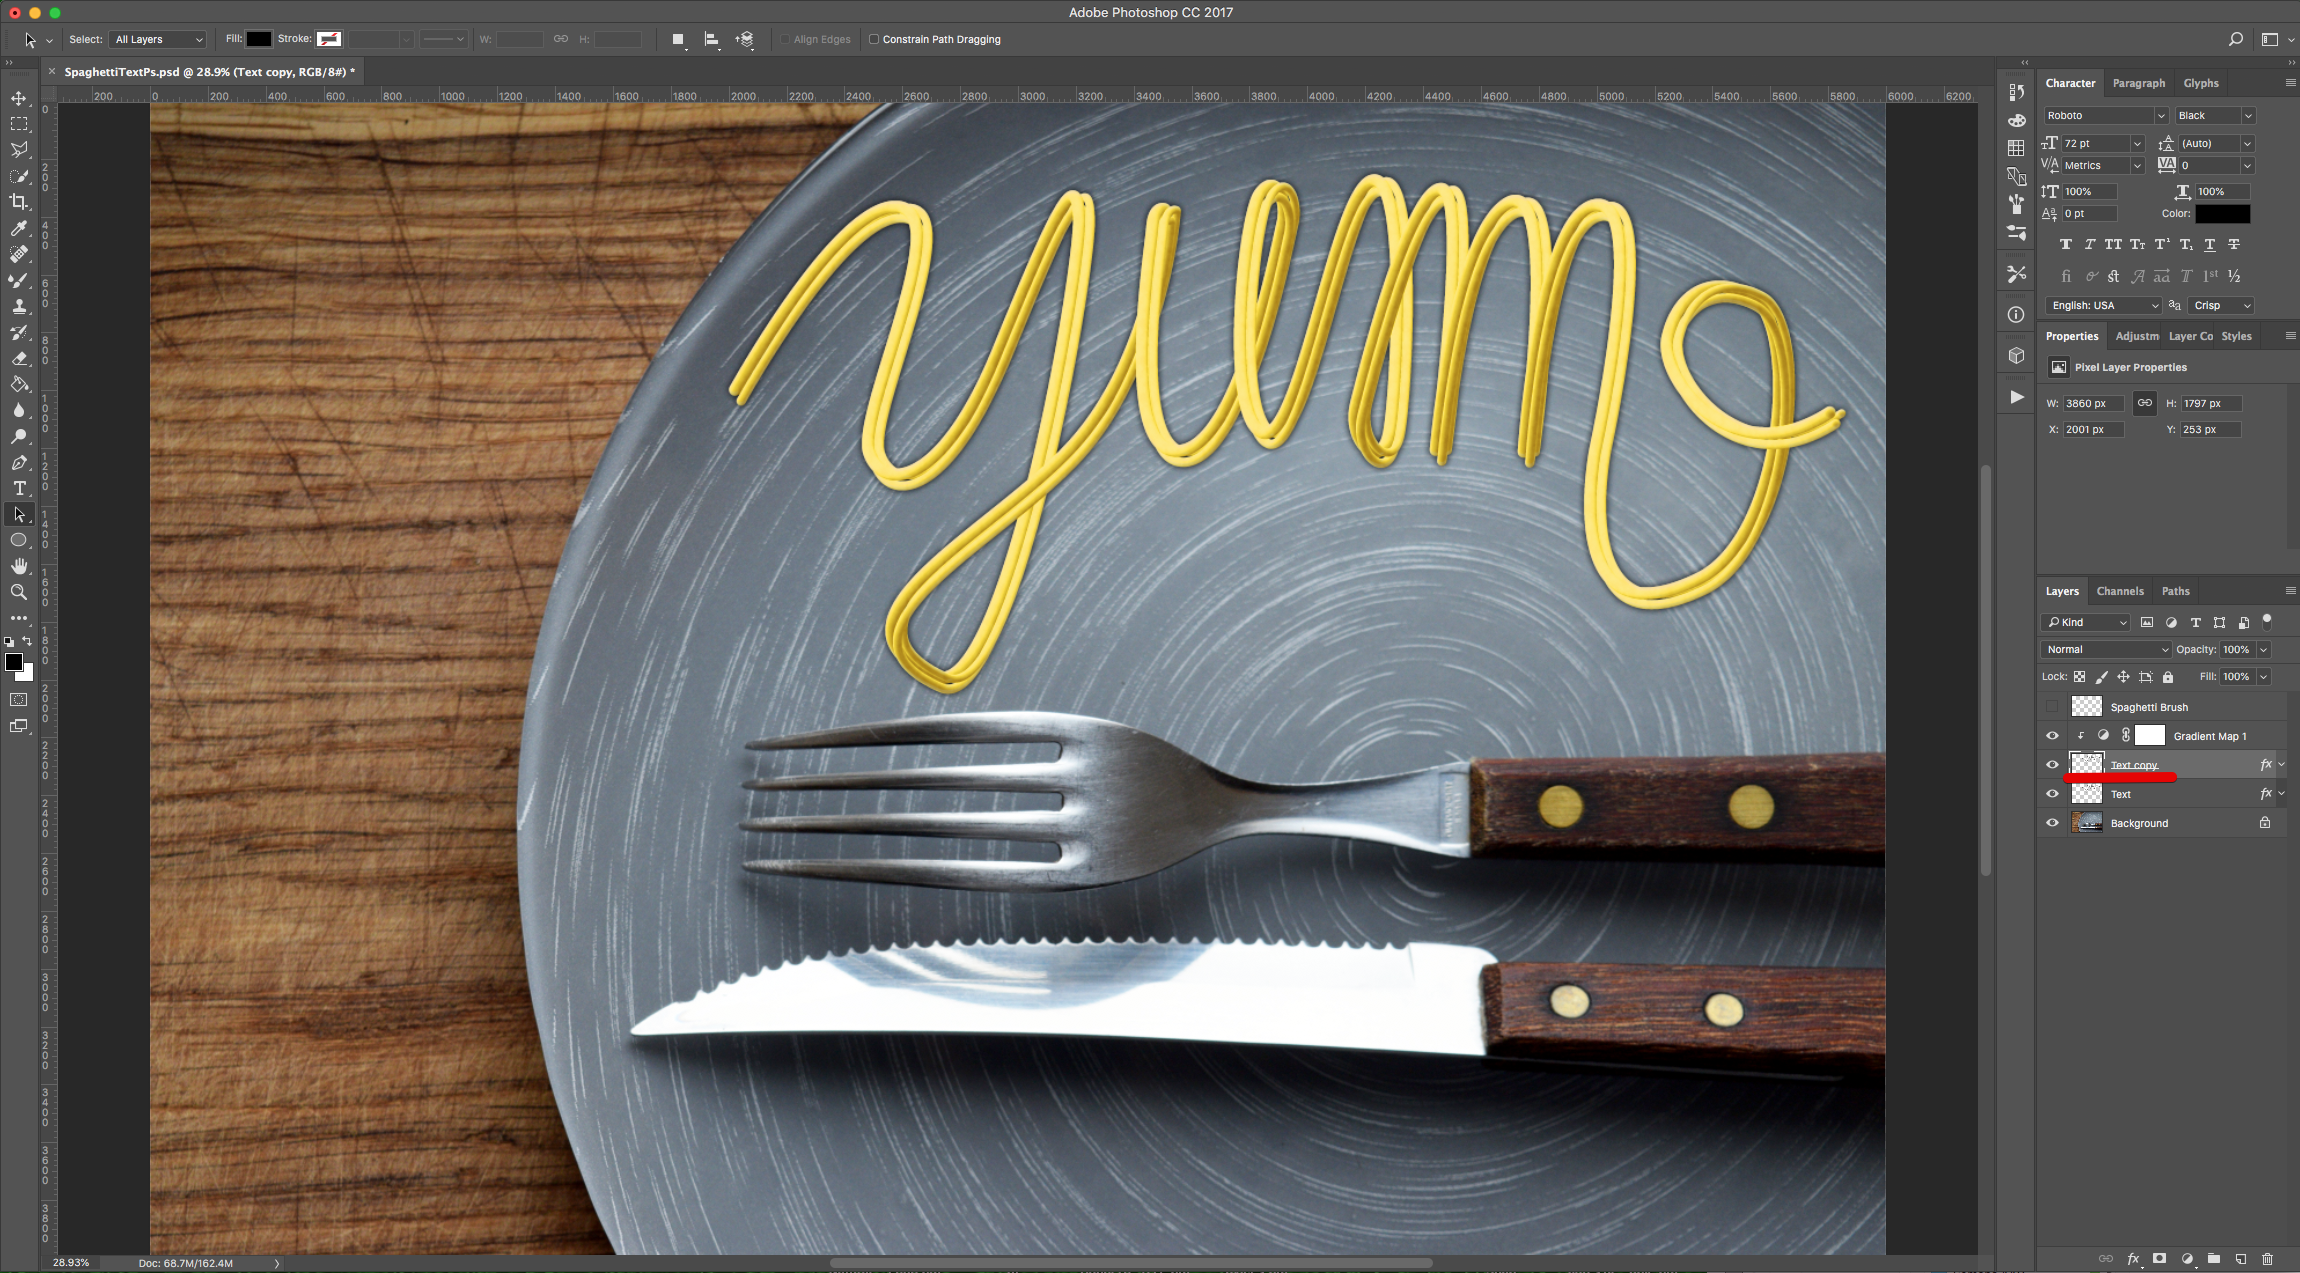
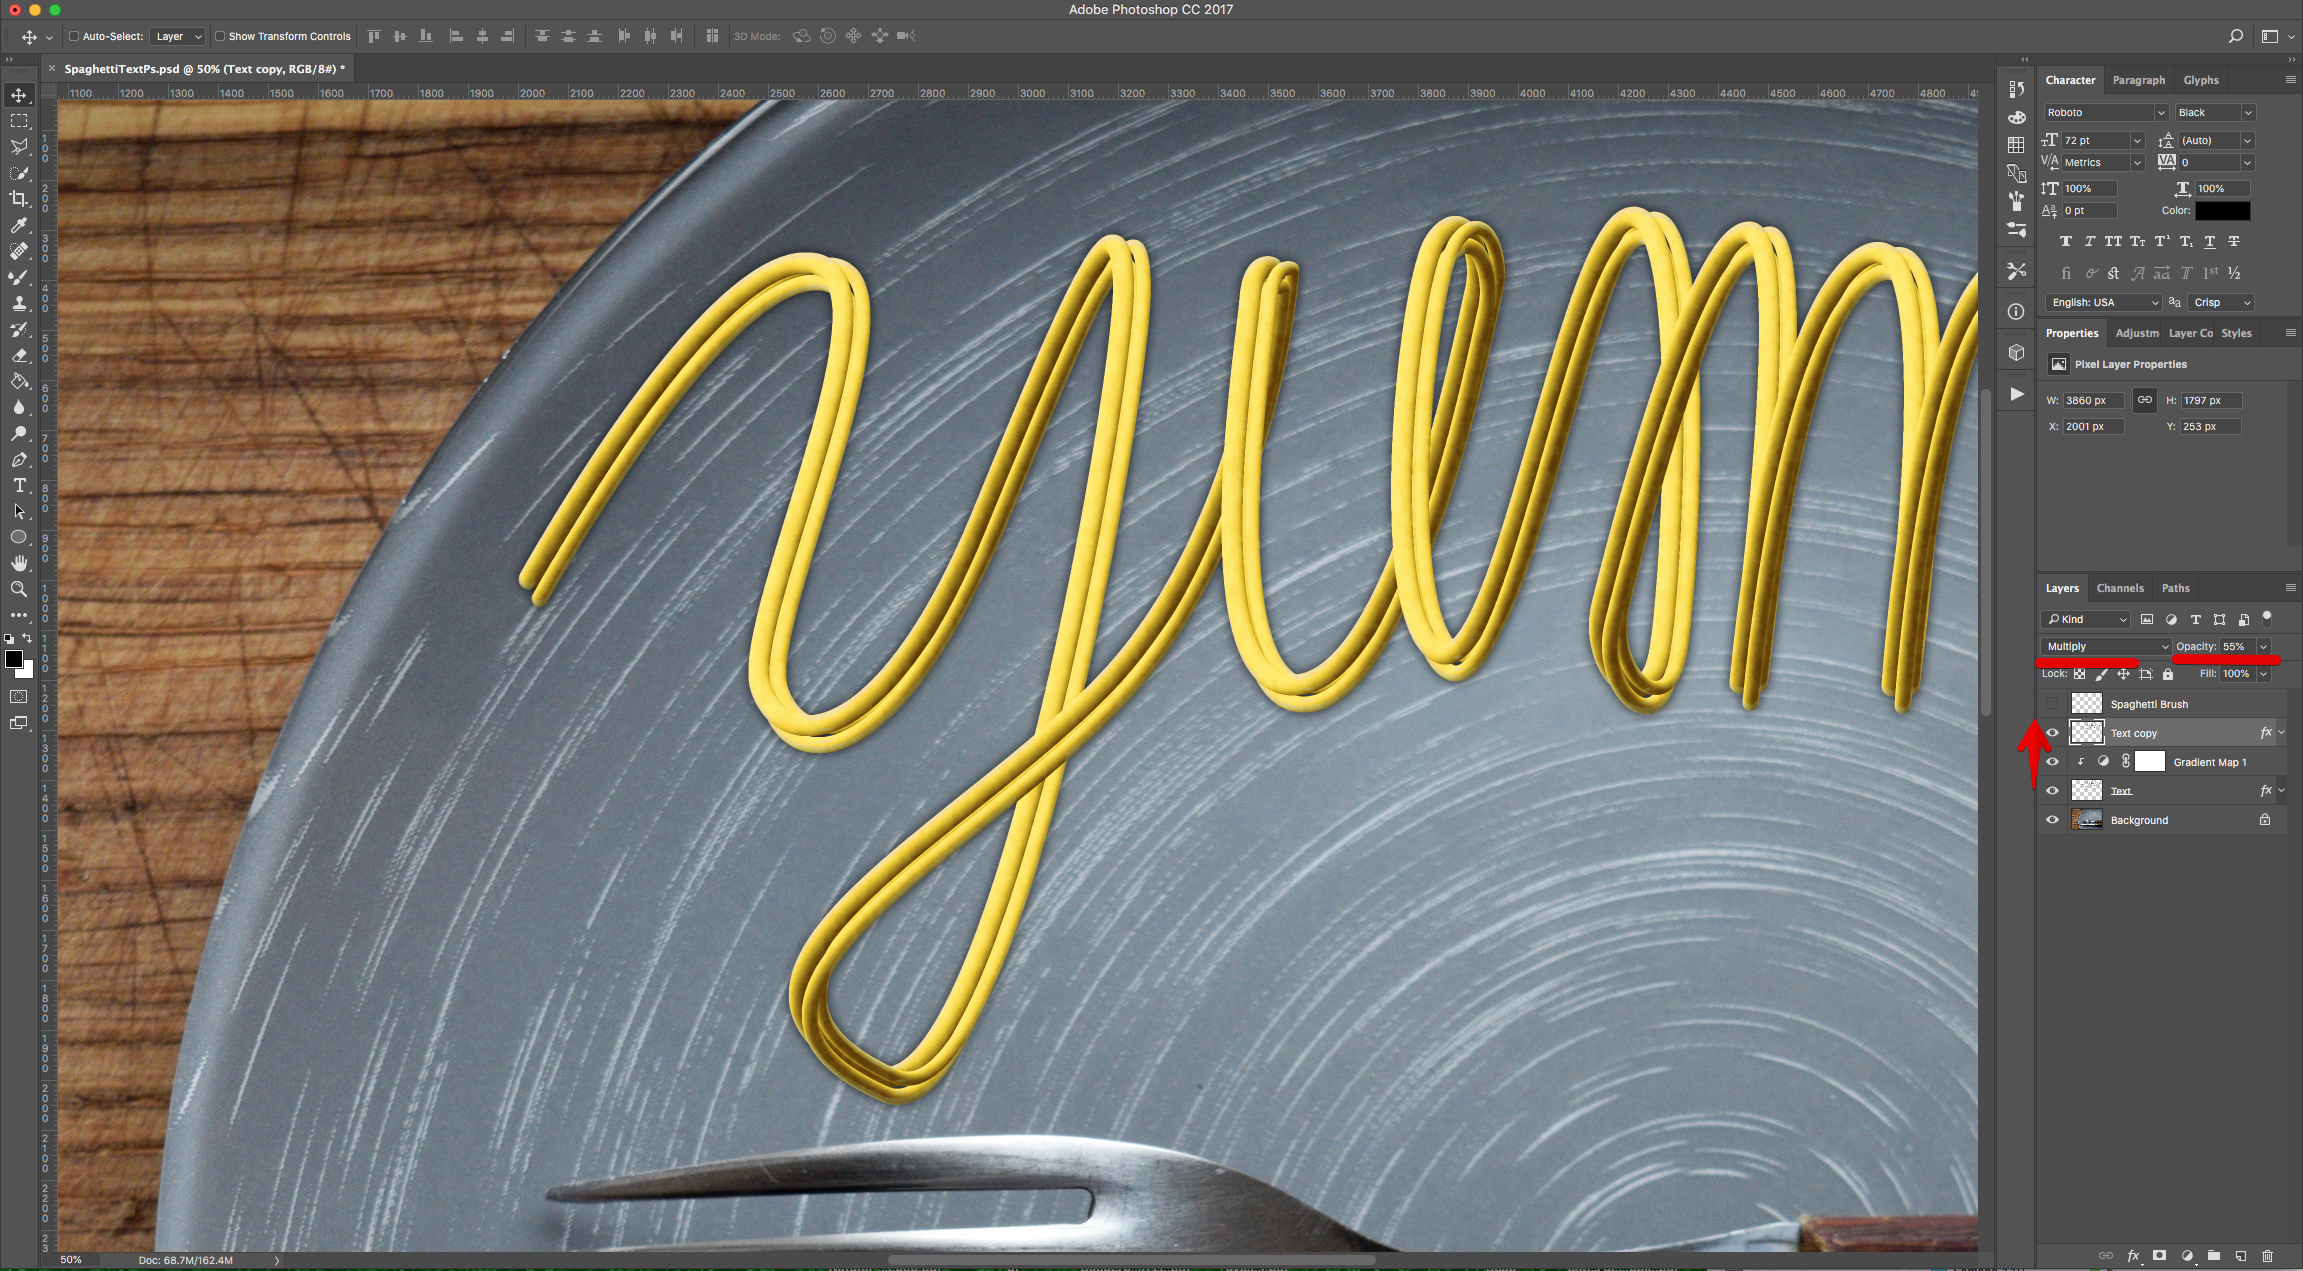
17 - Move the “Duplicate” on top of the “Gradient Map” Layer, change its “Blending Mode” to “Multiply” and “Opacity” to 55%.
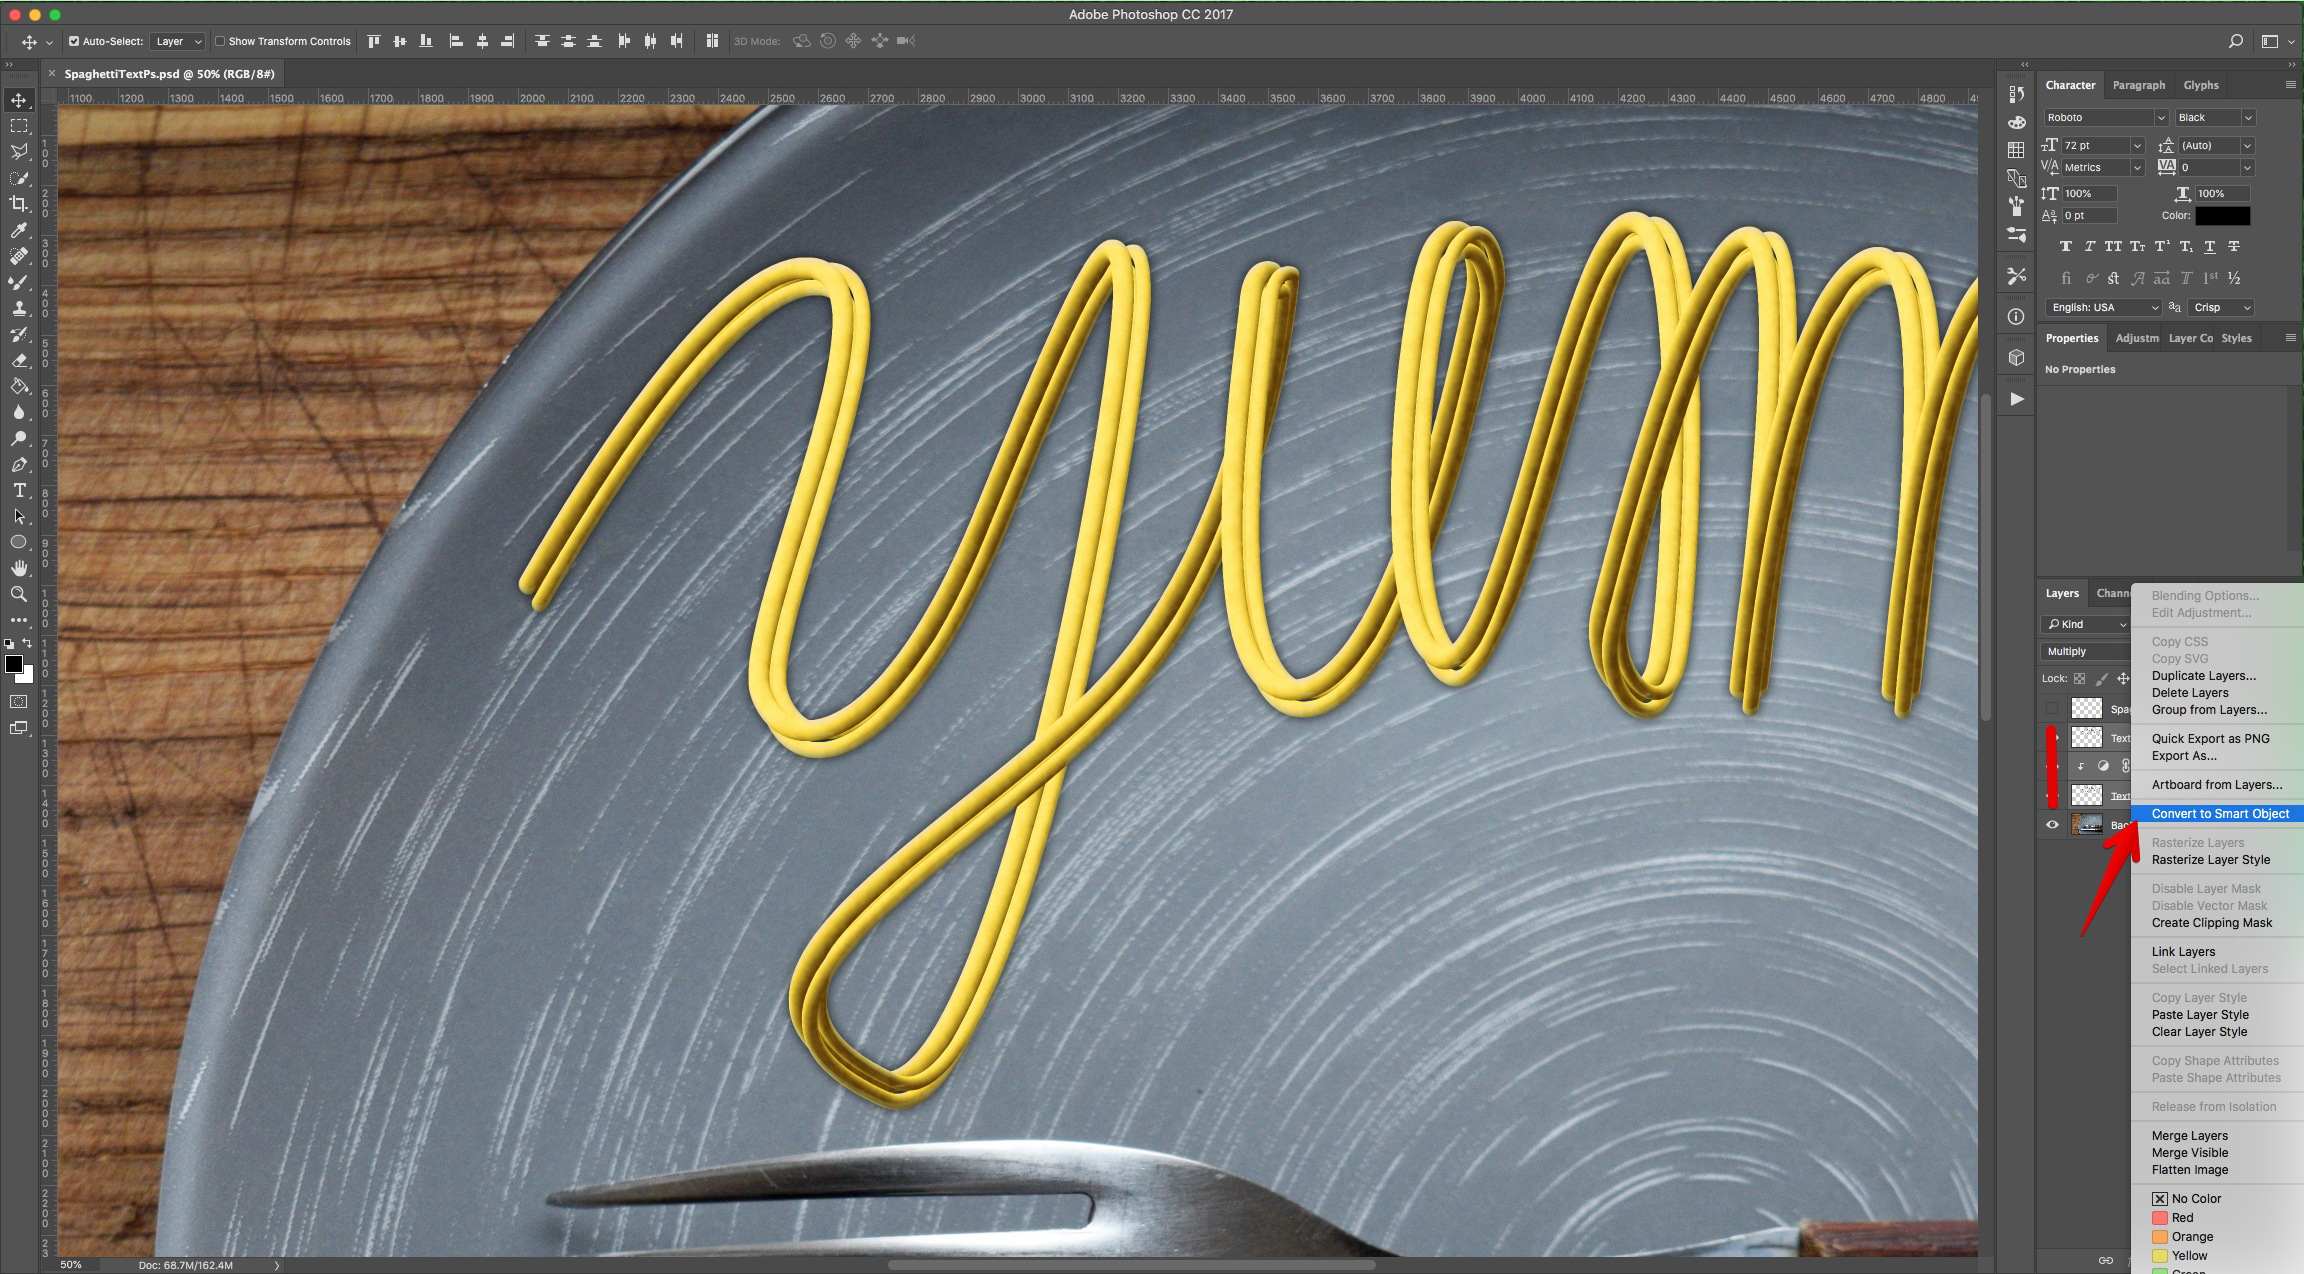
18 - Select the 3 Layers (“Shift” key), right-click on top and choose “Convert to Smart Object”.
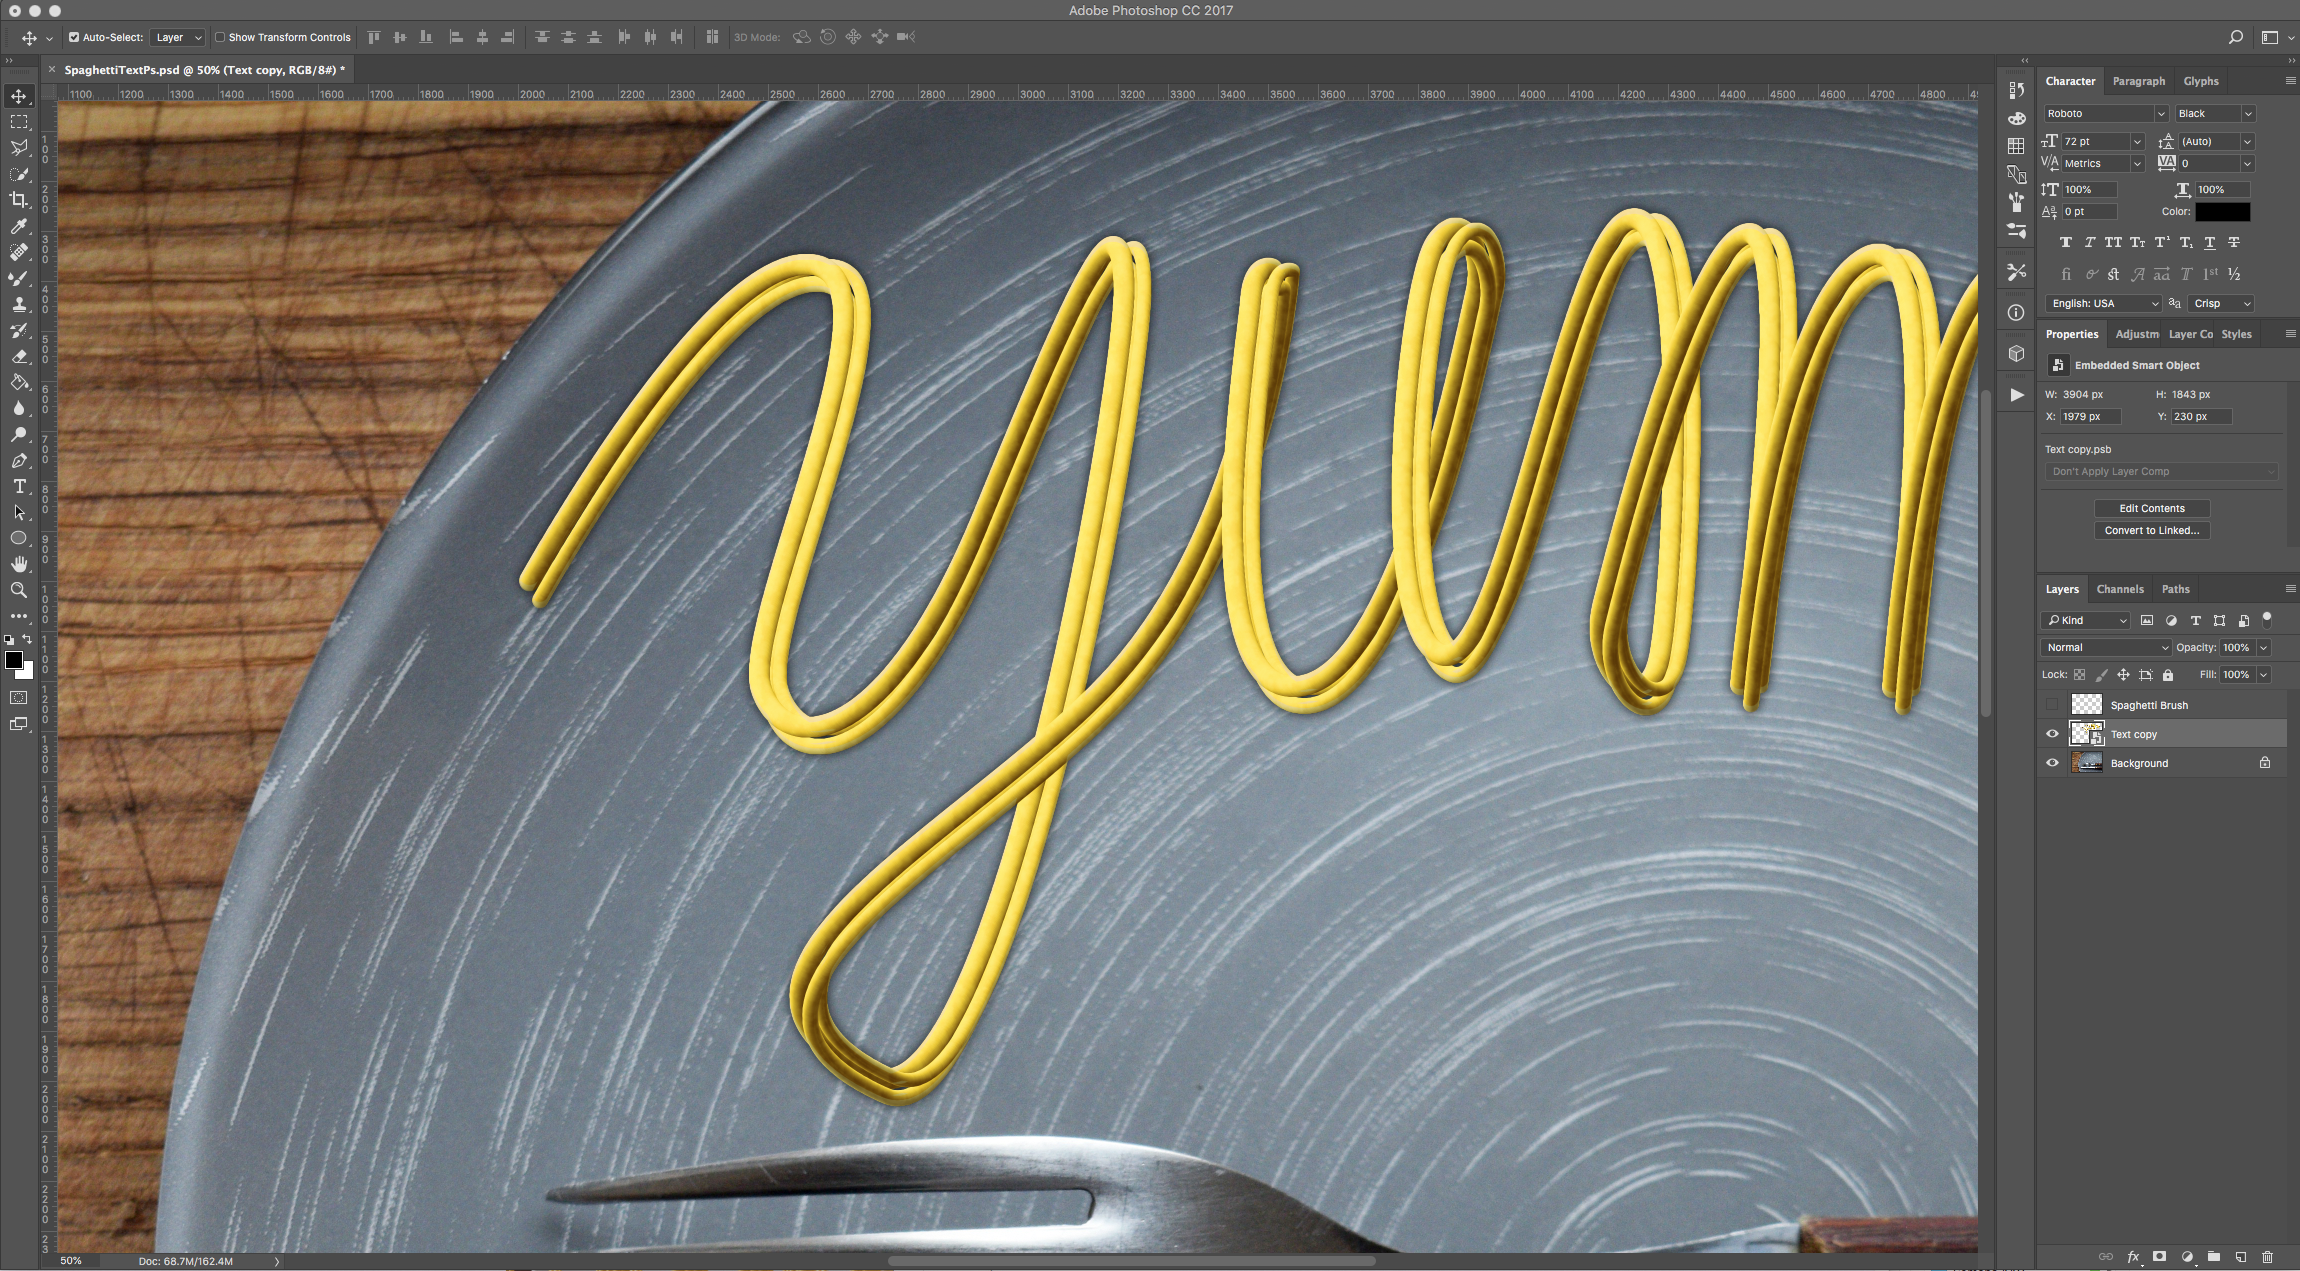
19 - Duplicate the “Smart Object” (Command/Control + J).
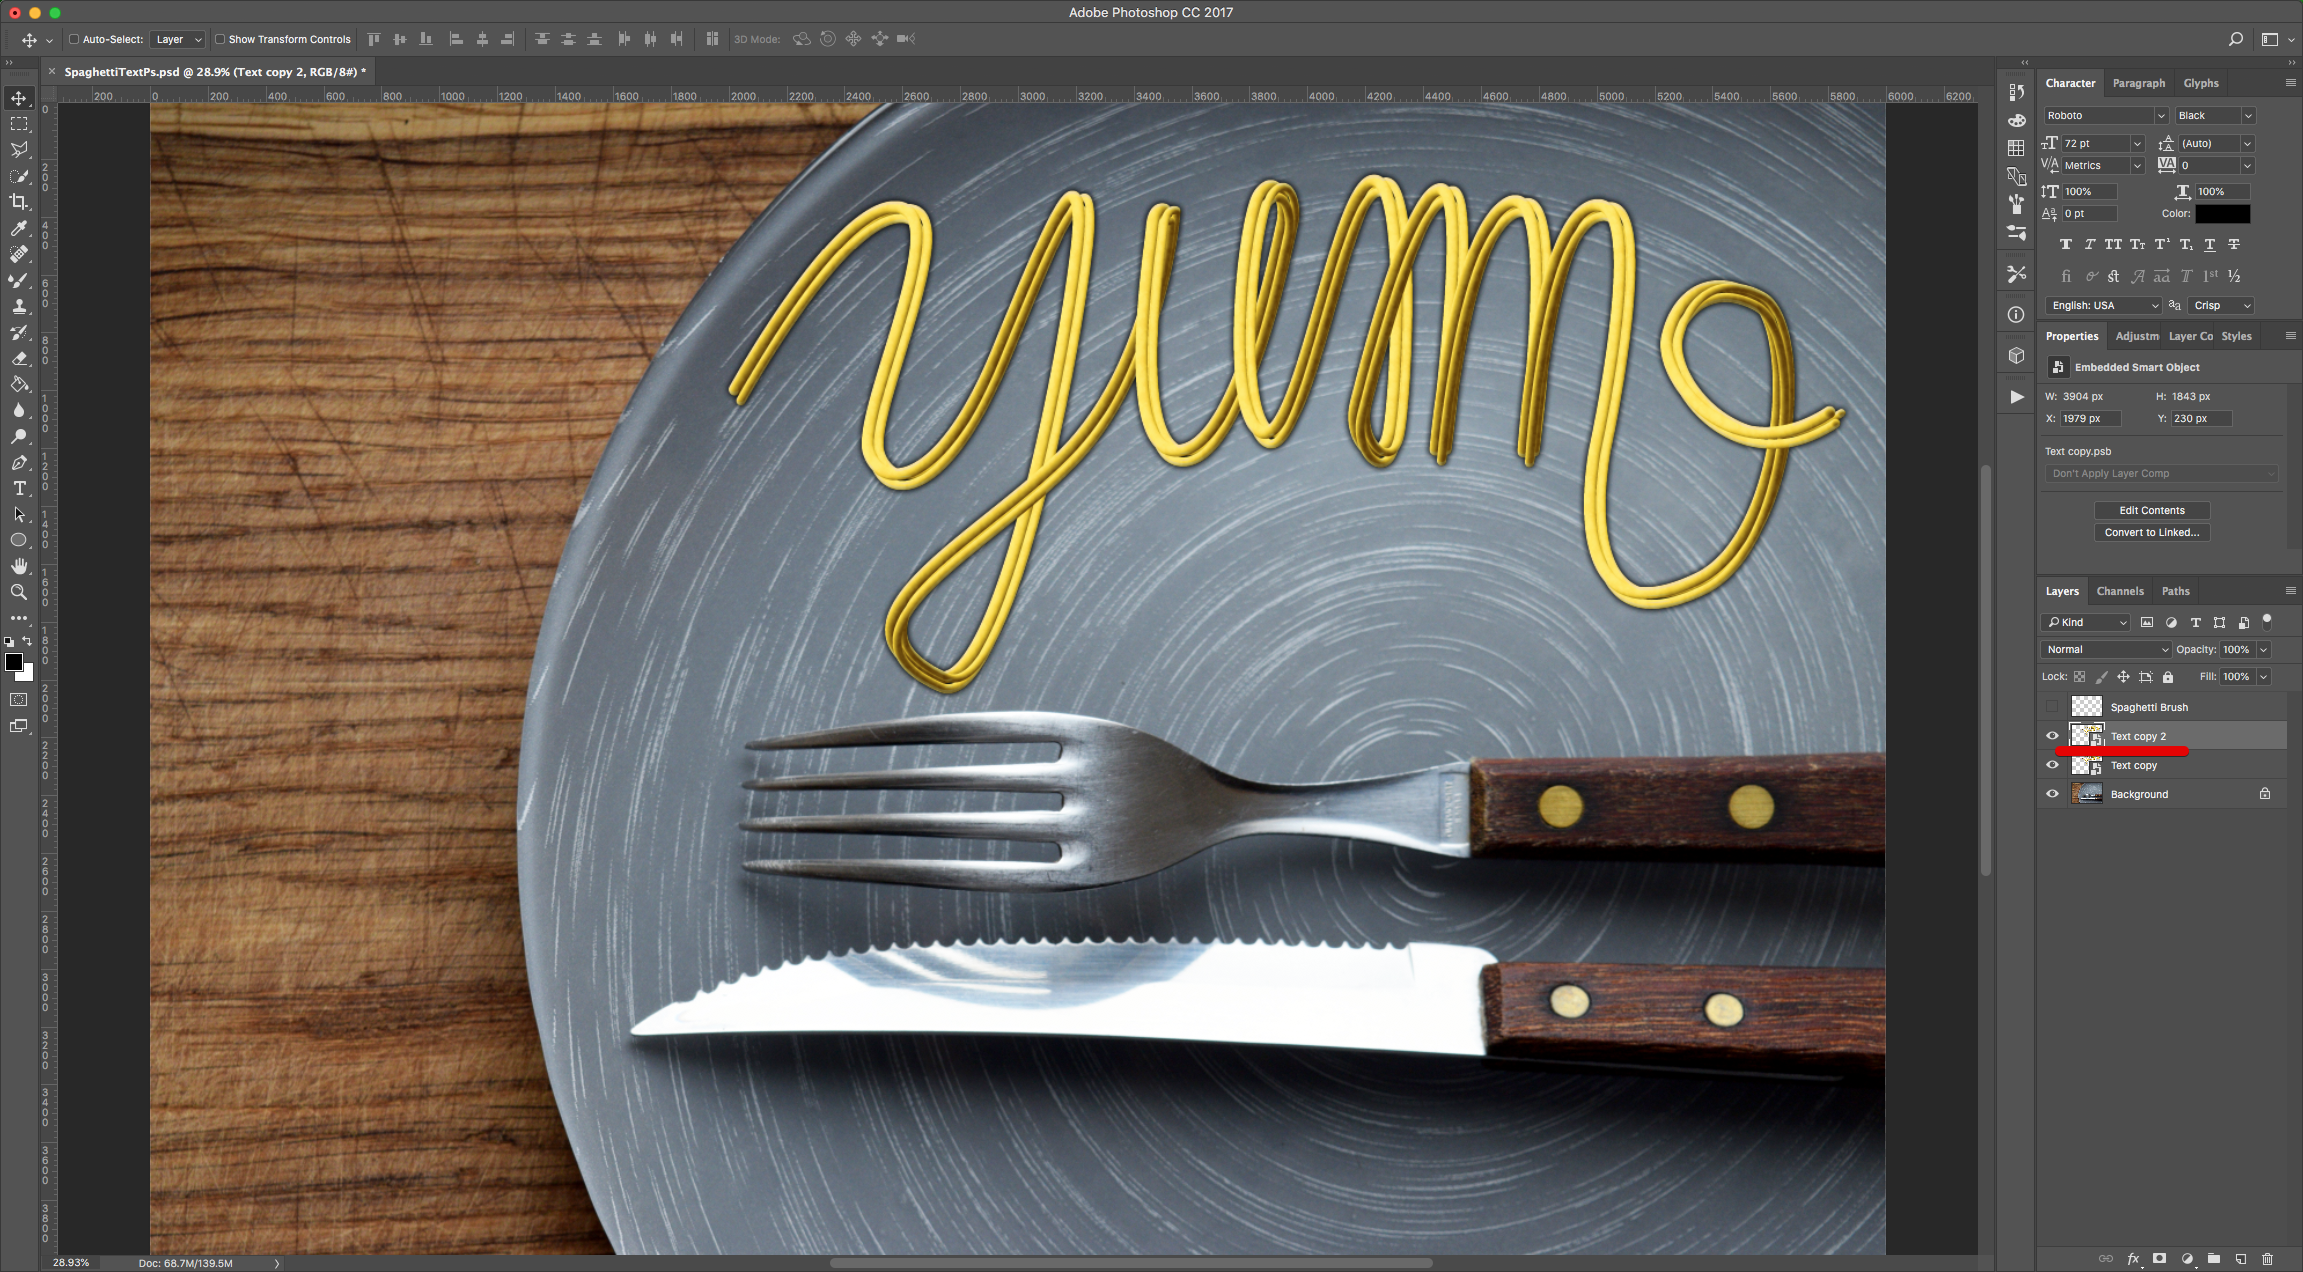
20 - Use “Free Transform” (Command/Control + T) to slightly distort and/or rotate the “Duplicate” to give the text a bit more depth. Once you are done, click “Enter” or the small “Check Mark” on the Top Menu to “Commit” the Transformation.
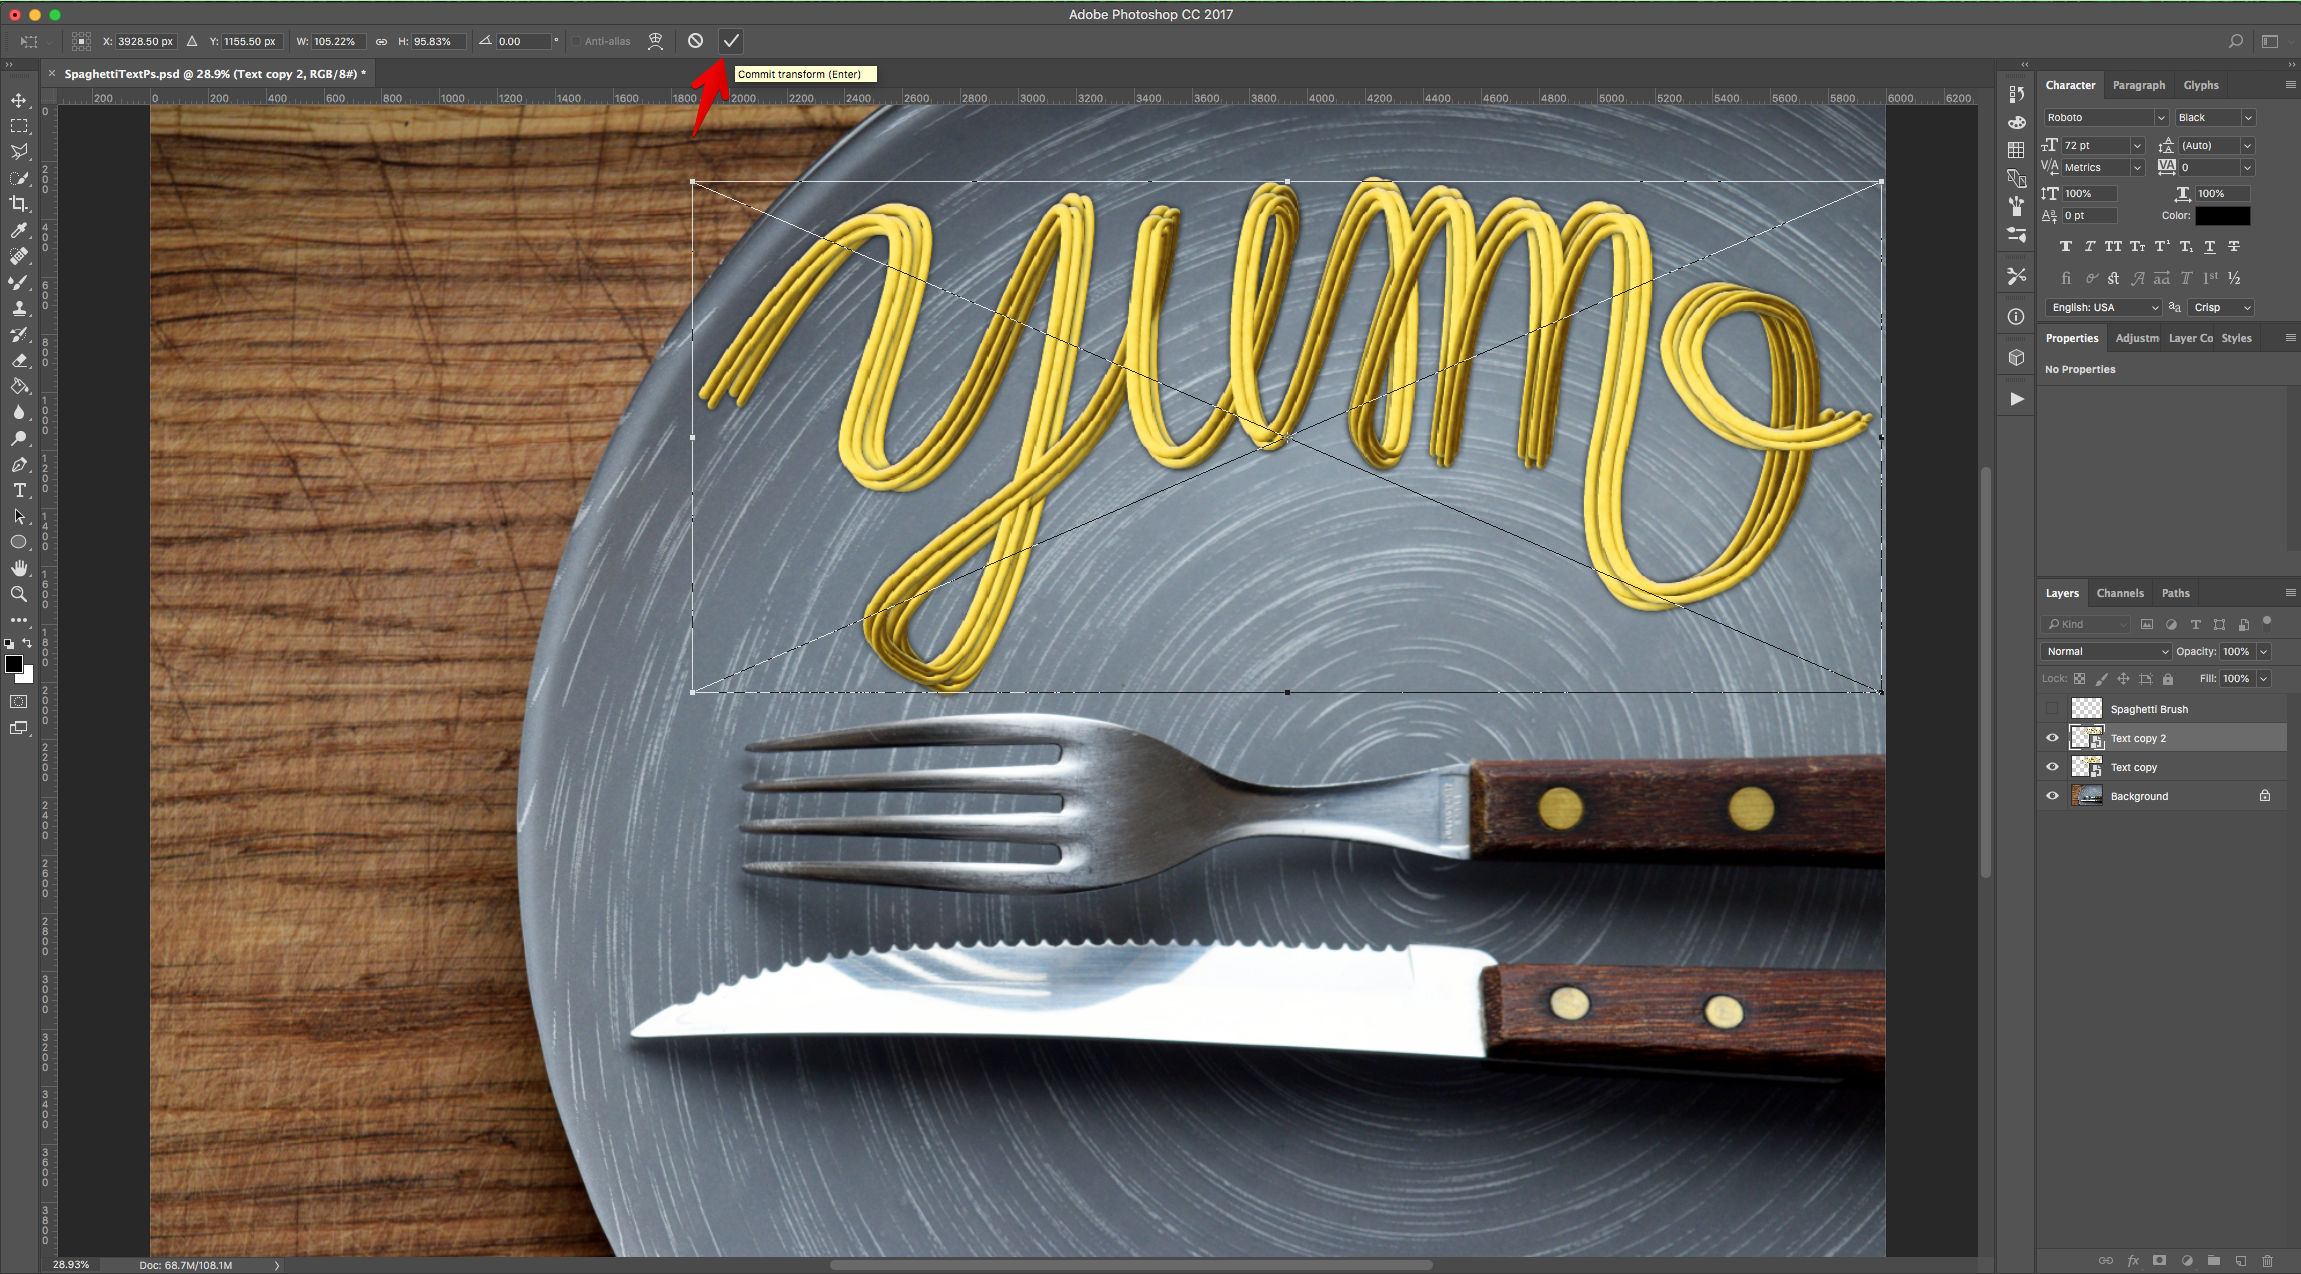
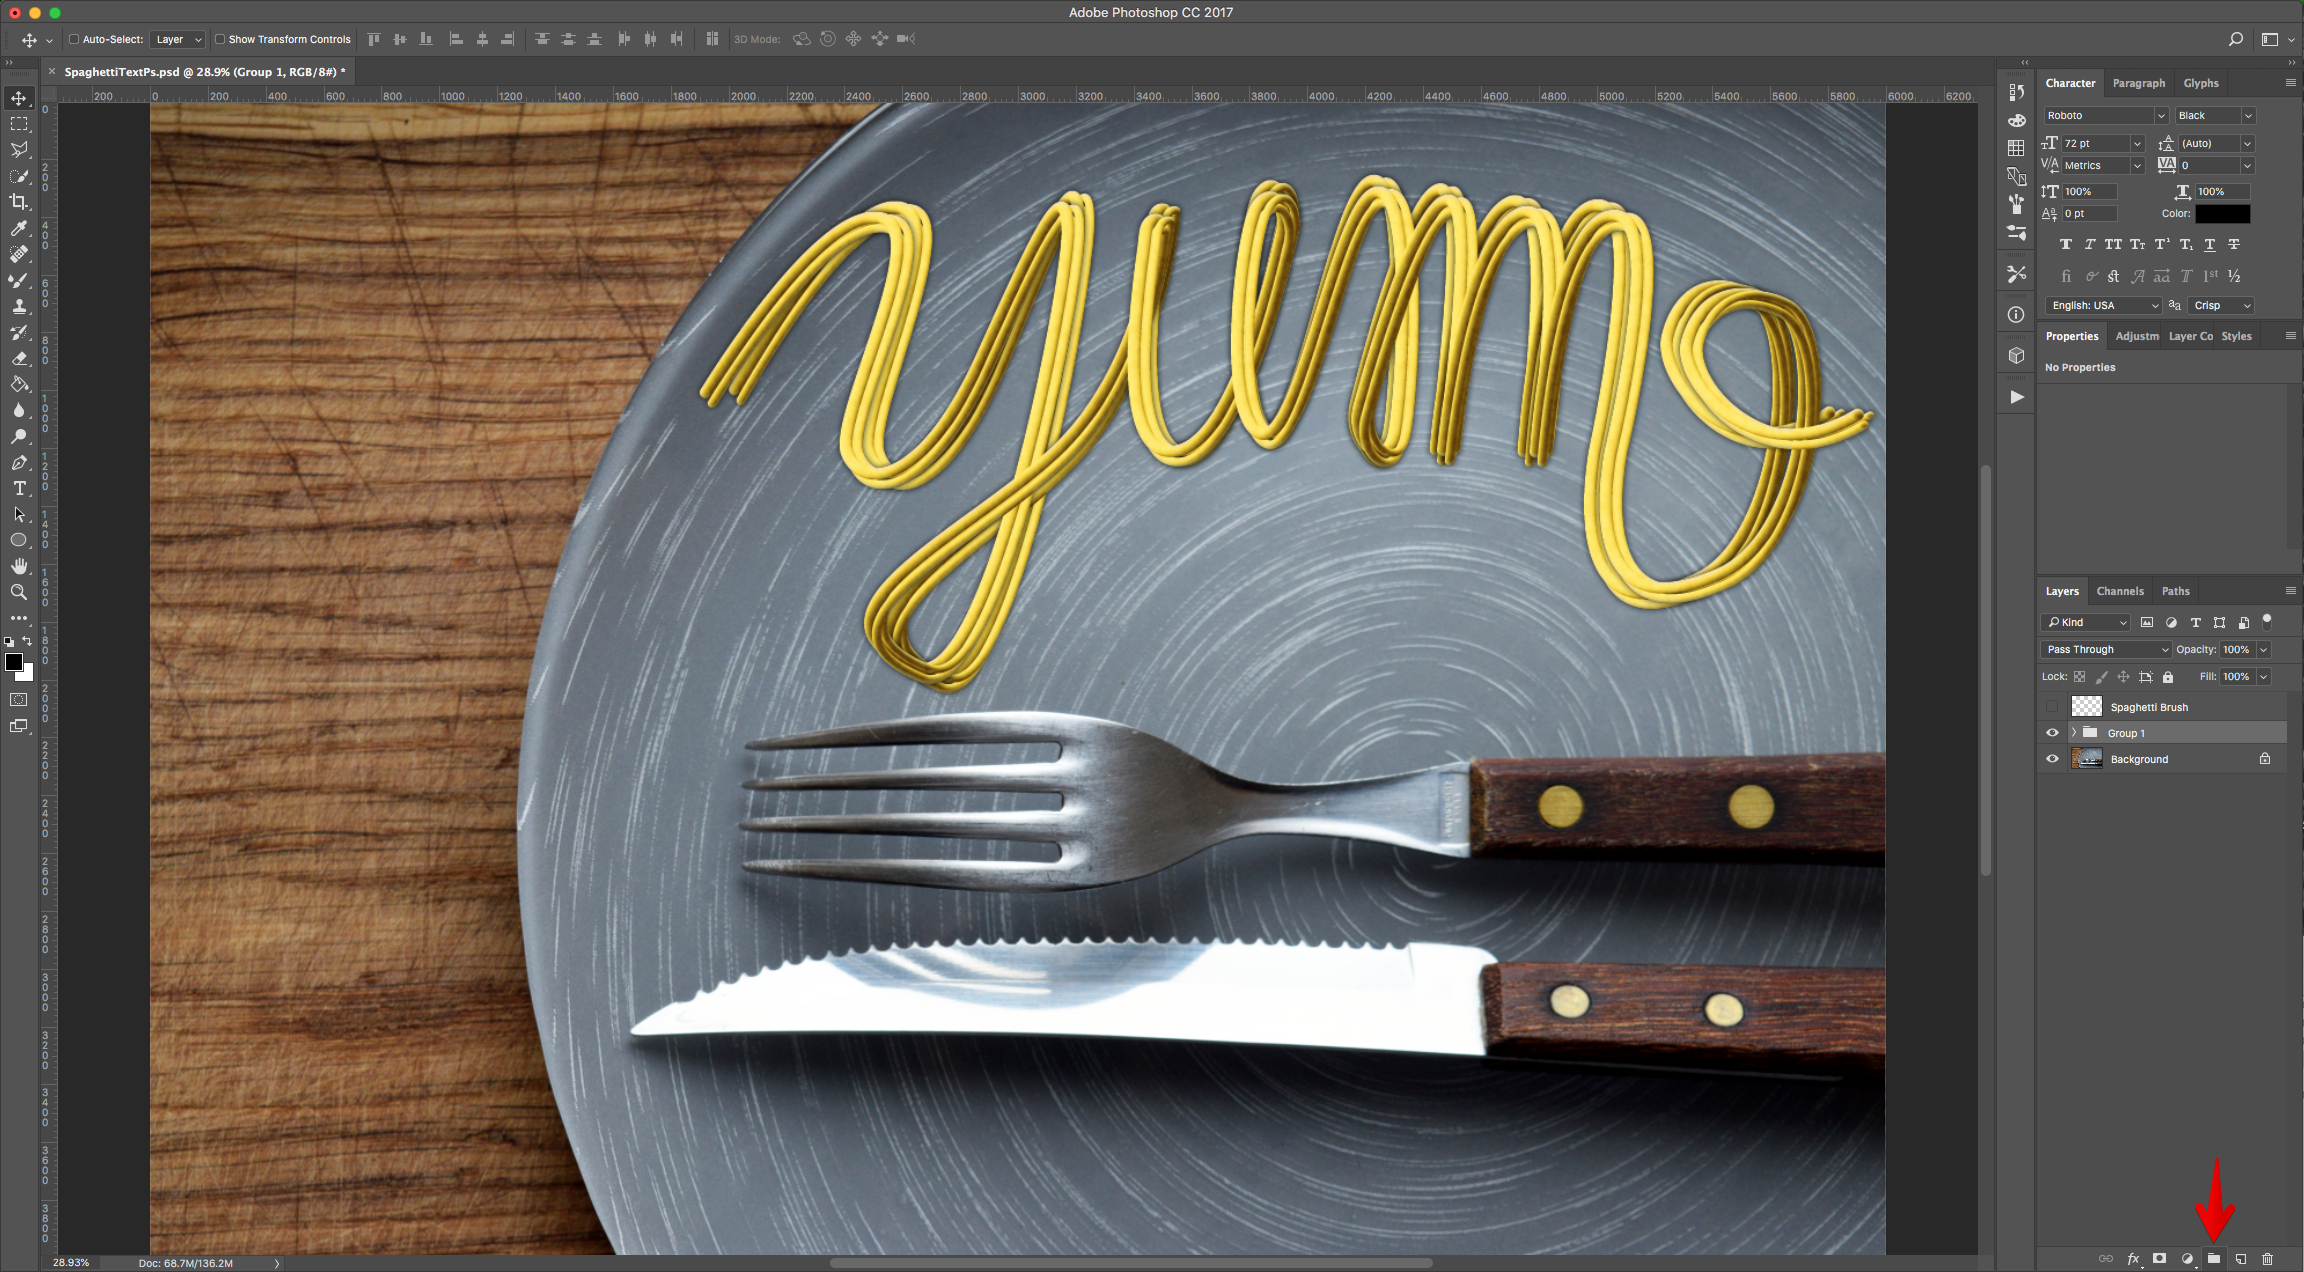
21 - Select both “Smart Objects” (“Shift” key) and “Group” them together by clicking on the small Folder icon at the bottom of the “Layers Panel”. Name the group “Pasta”.
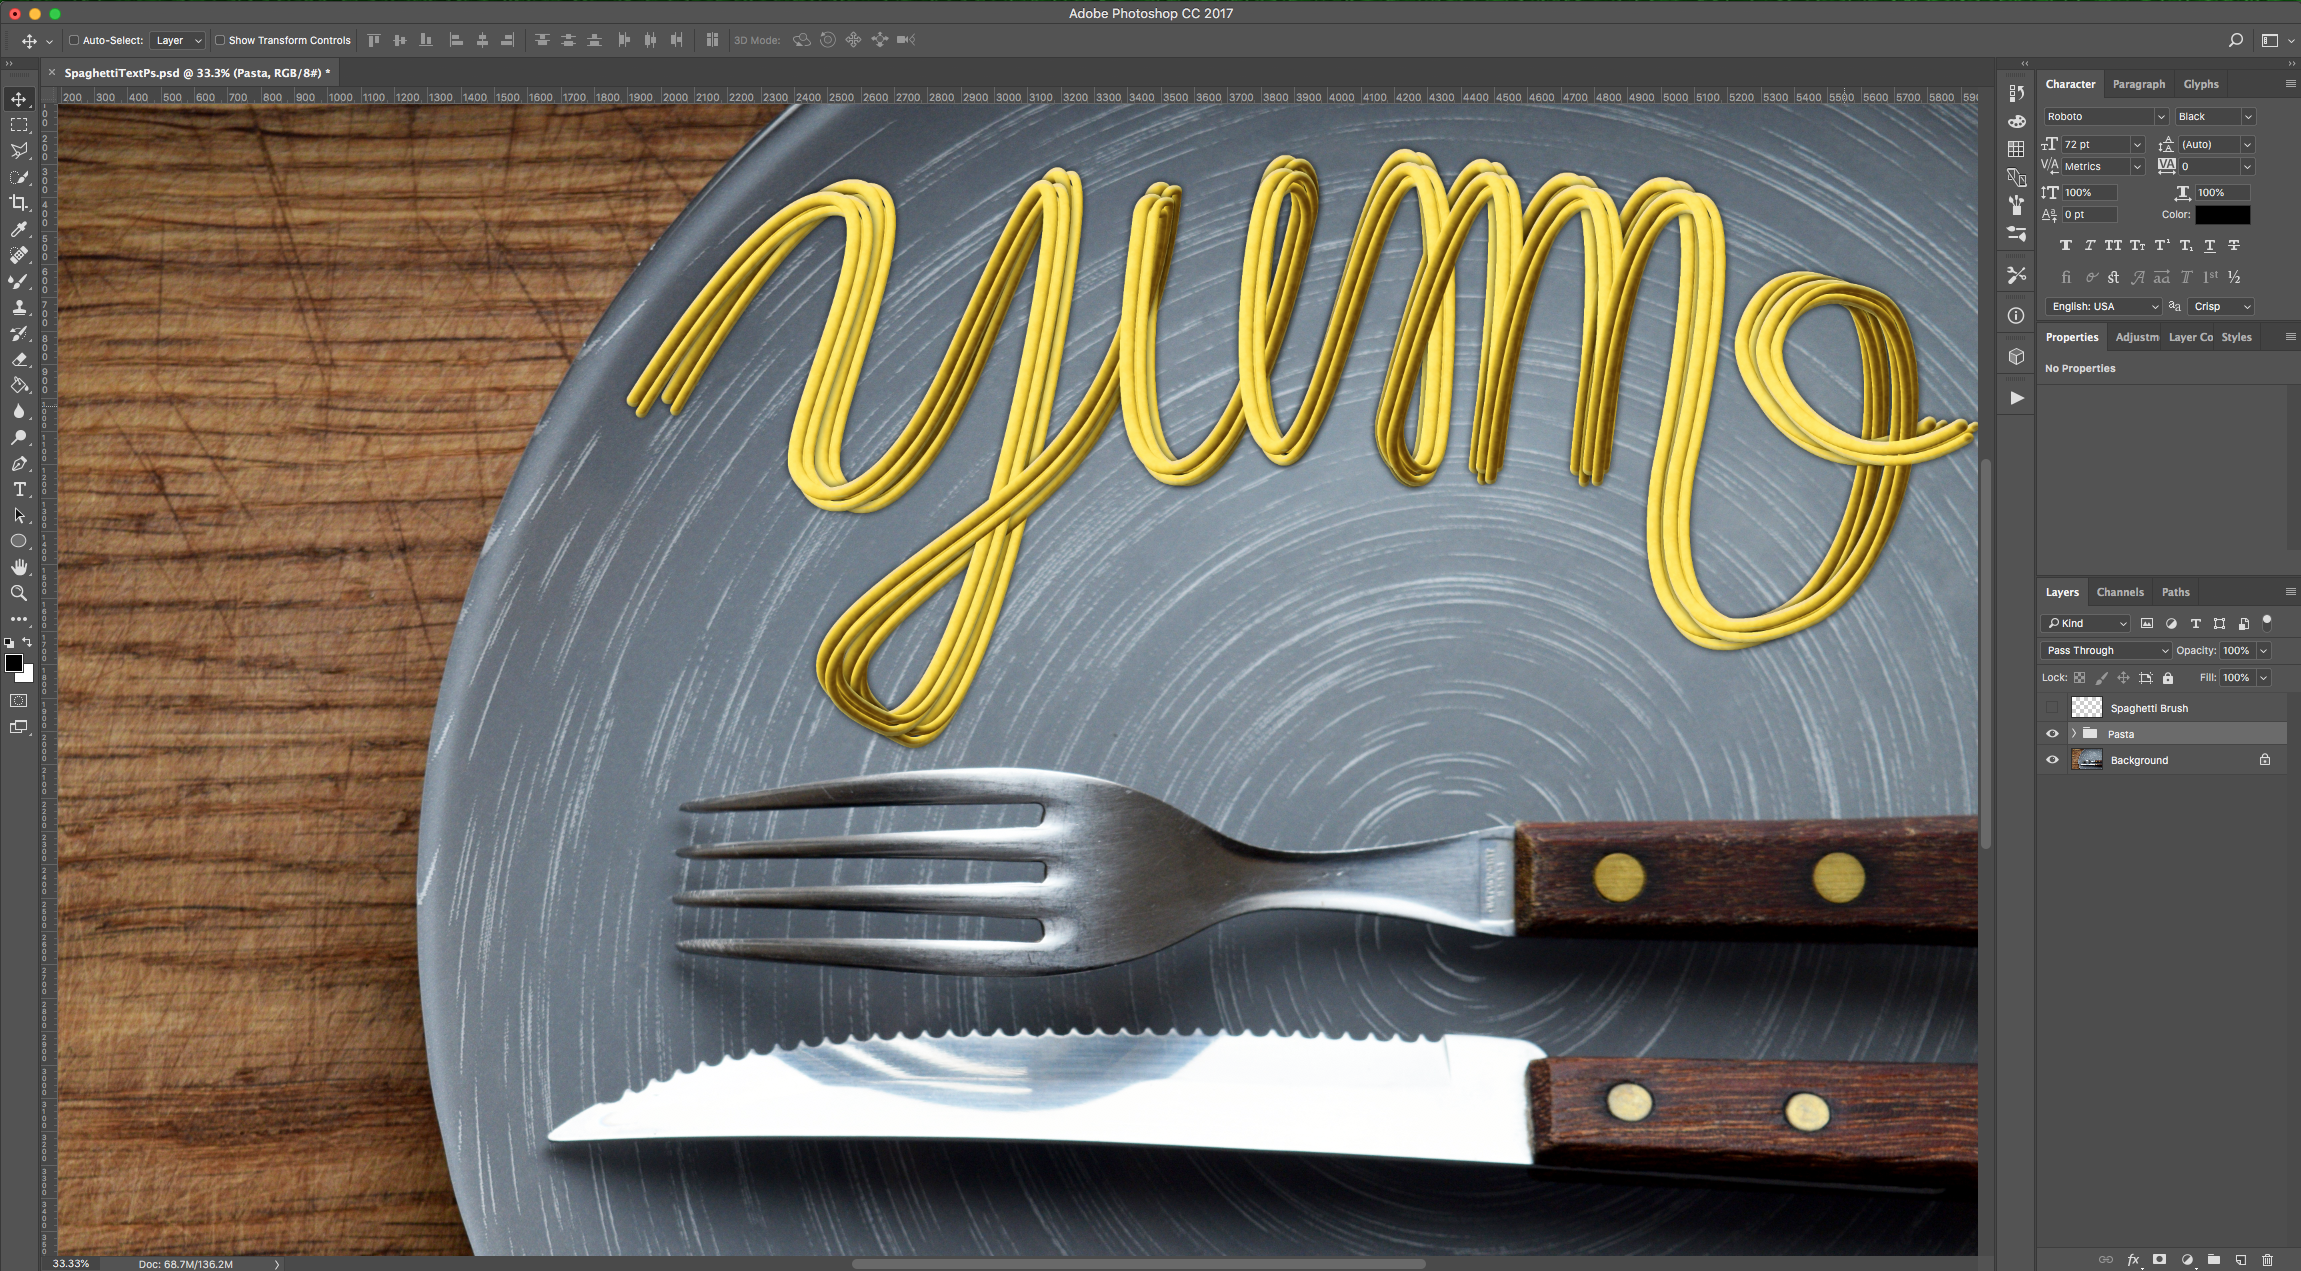
22 - Check out your Artwork!
1 - In Photoshop, open the image you wish to use as “Background” (we used the image of a plate).
2 - Choose the “Ellipse Tool” (U), use Black (Foreground) as “Fill” color and hold the “Shift” key while dragging diagonally inside your “Canvas” to create a “Circle”. Give it about 30 px in “Width” and “Height”. Create other “Circles” close to each other with a similar “Radius”.
3 - Double-click on one of the “Circles” Thumbnail and apply the following “Layer Styles”:
Gradient Overlay: (1: Location: 5%, #ffffff- 2: Location: 85%, #636363 - 3: Location: 100%, #7b7b7b)
4 - Right-click on top of its Thumbnail and choose “Copy Layer Style”. Then select the other “Circles” (“Shift” key) and choose “Paste Layer Style”.
5 - Select all the “Circles”, right-click on top of their Thumbnails and choose “Rasterize Layers”. Then, “Merge Shapes” and name the resulting Layer “Spaghetti Brush”.
6 - Select the “Mixer Brush Tool” (U), choose a 100px, select “Load the brush after each stroke”, “Dry, Heavy Load”, 0% “Wet”, 100% “Load” and “Flow” and uncheck the “Sample All Layers” box.
7 - “Hide” the “Background” Layer by clicking on the small eye on the left side of its Thumbnail and Option/Alt-click on top of the “Circles” to select them as your “Brush”. Make sure that you see the sample brush in the Top Menu.
8 - Now, make the “Background” Layer visible again and “Hide” the “Brush” Layer.
9 - Create a New Layer on top by clicking the “Create New Layer” button at the bottom of the “Layers” Panel and name it “Text”.
10 - Select the “Pen Tool” (P) and draw your “Text” or “Shape”.
11 - Use the “Direct Selection Tool” (A) to click on an individual “Anchor Point” and fix the shape if needed.
12 - Now, use the “Path Selection Tool” (A) to select the entire “Path”.
13 - Right-click on top, choose “Stroke Path” and then “Mixer Brush Tool” as “Tool”. Click “OK”.
14 - Create a “New Gradient Map” Adjustment Layer on top of the “Text” Layer and clip it to it (click on the small icon at the bottom of the “Properties Panel”. Double-click on the Gradient and input the following (1: Location: 5%, #856220 - 2: Location: 75%, #dfcd55 - 3: Location: 100%, #fae39a)
15 - Double-click on one of the “Text” Thumbnail and apply the following “Layer Styles”:
Pattern Overlay: (Clouds)
Outer Glow: (#000000)
Satin: (#4b3201)
16 - Duplicate the “Text” Layer (Command/Control + J).
17 - Move the “Duplicate” on top of the “Gradient Map” Layer, change its “Blending Mode” to “Multiply” and “Opacity” to 55%.
18 - Select the 3 Layers (“Shift” key), right-click on top and choose “Convert to Smart Object”.
19 - Duplicate the “Smart Object” (Command/Control + J).
20 - Use “Free Transform” (Command/Control + T) to slightly distort and/or rotate the “Duplicate” to give the text a bit more depth. Once you are done, click “Enter” or the small “Check Mark” on the Top Menu to “Commit” the Transformation.
21 - Select both “Smart Objects” (“Shift” key) and “Group” them together by clicking on the small Folder icon at the bottom of the “Layers Panel”. Name the group “Pasta”.
22 - Check out your Artwork!
by @lornacane
Related Tutorials
Photoshop Tutorials
How to Use Text Effects in Photoshop
With Photoshop Text Effects, you can create text with impact in just a few steps.
Photoshop Tutorials
Easy See through Cut Out Text in Photoshop
Create a see-through cut out text design in Photoshop with these easy to follow steps.
Photoshop Tutorials
How to Fill a Shape with Text in Photoshop
Learn how to fill a shape with text in Photoshop in seven quick steps.
Photoshop Tutorials
How to Make a Graffiti Text Effect in Photoshop
Learn how to create a realistic grafitti text effect in Photoshop.
Photoshop Tutorials
How to Create a Holographic Text Effect in Photoshop
Discover how to create a holographic text effect in Photoshop with this step by step tutorial.
Photoshop Tutorials
Chalk Text Effect in Photoshop
In this tutorial, learn how to turn any font into chalk text in Photoshop with the Brush tool.