By Lorna Cana
How to Make a QuickMenu in Procreate
Today we will learn how to make a Procreate QuickMenu. With QuickMenu, you can create, customize and easily access radial menus that will help you speed up your workflow. For example, you can create separate menus for calligraphy and drawing where each has a different function. So let us explore why a Procreate QuickMenu is a really helpful feature and how to take advantage of it.
Step 1 - Enable QuickMenu
To enable QuickMenu, you first need to assign a custom shortcut to activate it. So open the Actions menu by clicking on the wrench icon on the top left side of the menu bar. Click on the Preferences icon and then on the Gesture Controls tab to open the settings window.

Next, select QuickMenu to show the customized options. There, you can choose which gesture you want to use to invoke QuickMenu.

If you use the Apple Pencil (or some other stylus) to paint or draw, you can assign a finger gesture (like the one-finger Touch) as the shortcut. This leaves the stylus-related gestures free for other types of operations.

You can also use Modify Button + Apple Pencil if you find that option easier to manage.

Step 2 - Customize QuickMenu
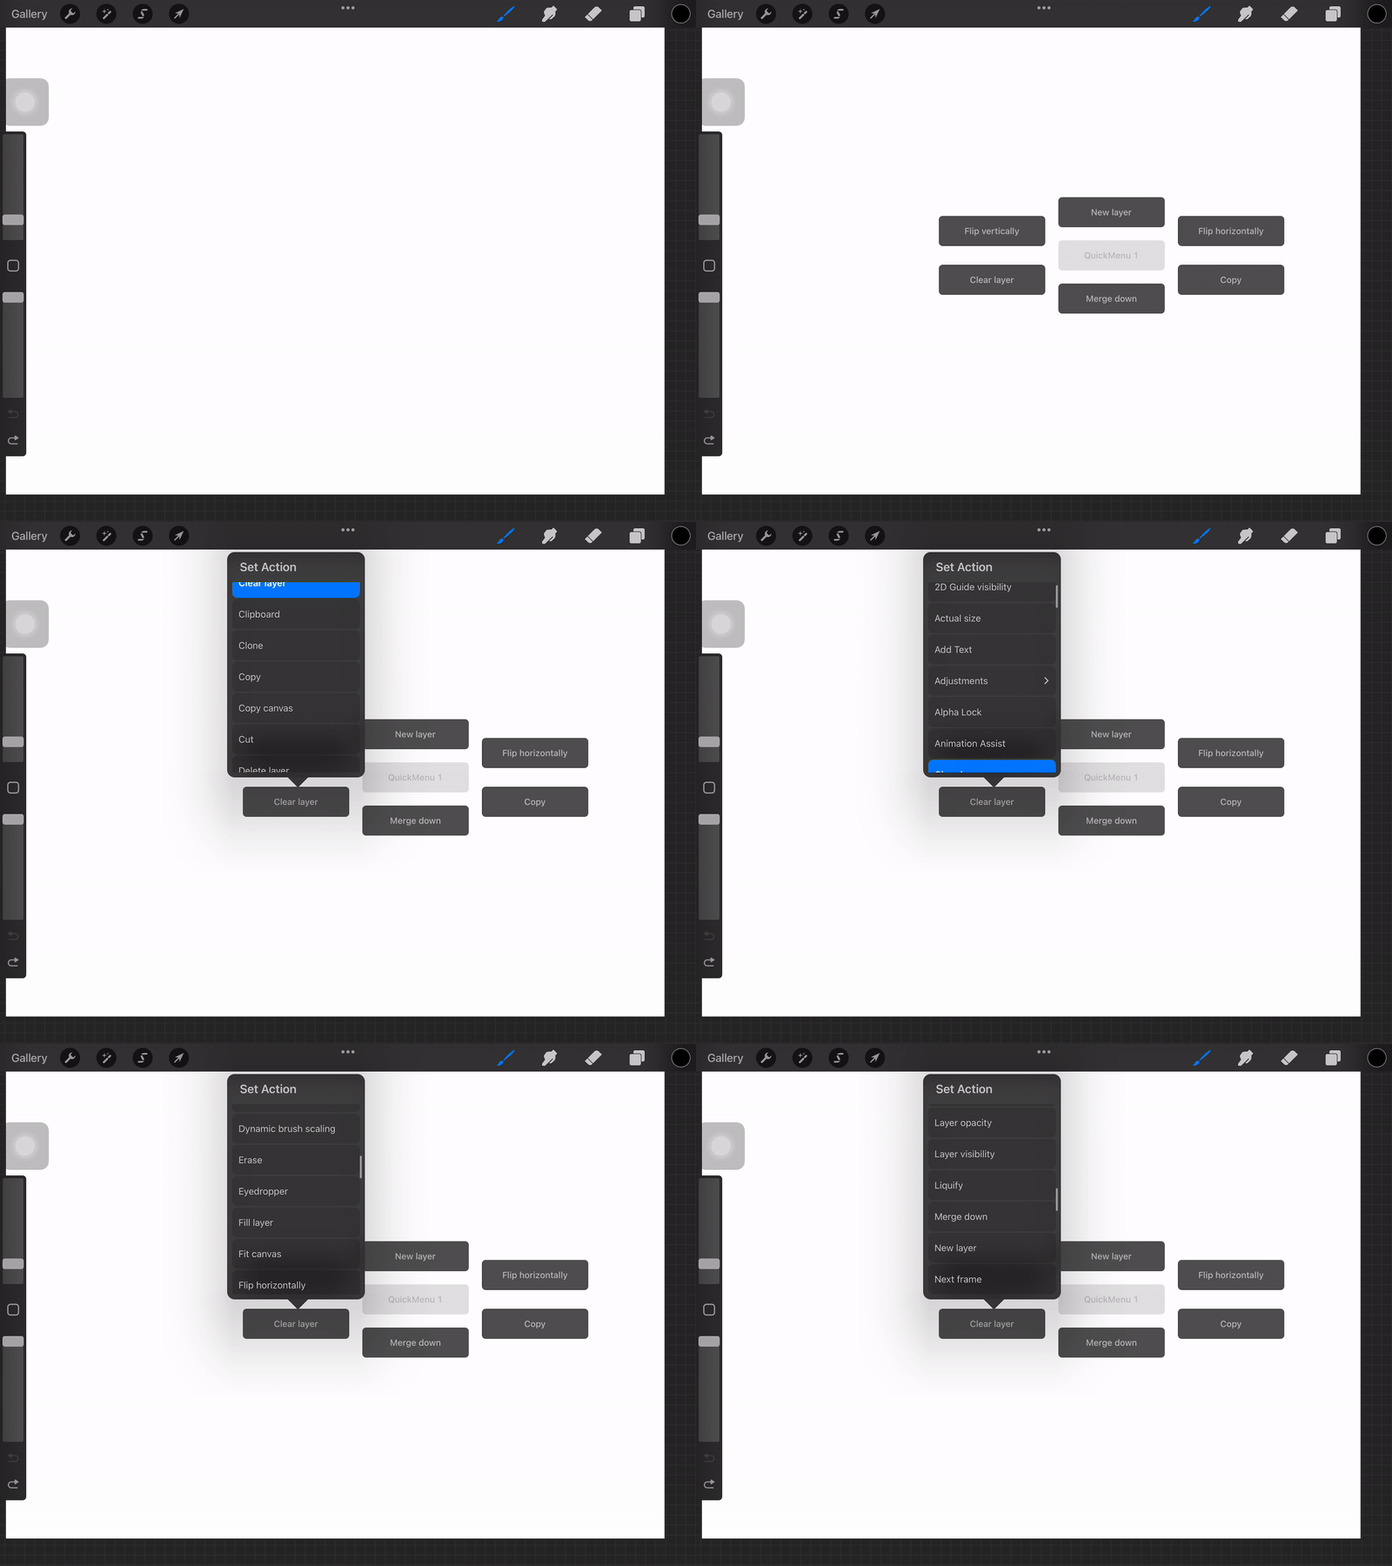
There are six buttons available inside QuickMenu. You can either use the default ones or change them to fit your needs.
To customize them, invokeQuickMenu using the gesture you set before. Then, click and hold the button you want to change to bring out the Set Action pop-up menu. You now need to scroll through the options provided and choose the one you want.
Step 3 - Create QuickMenu Profiles
You can create many QuickMenu profiles to use in different workflows. This will be really helpful if you want to use different sets of actions for different processes, like sketching, inking, calligraphy, etc.
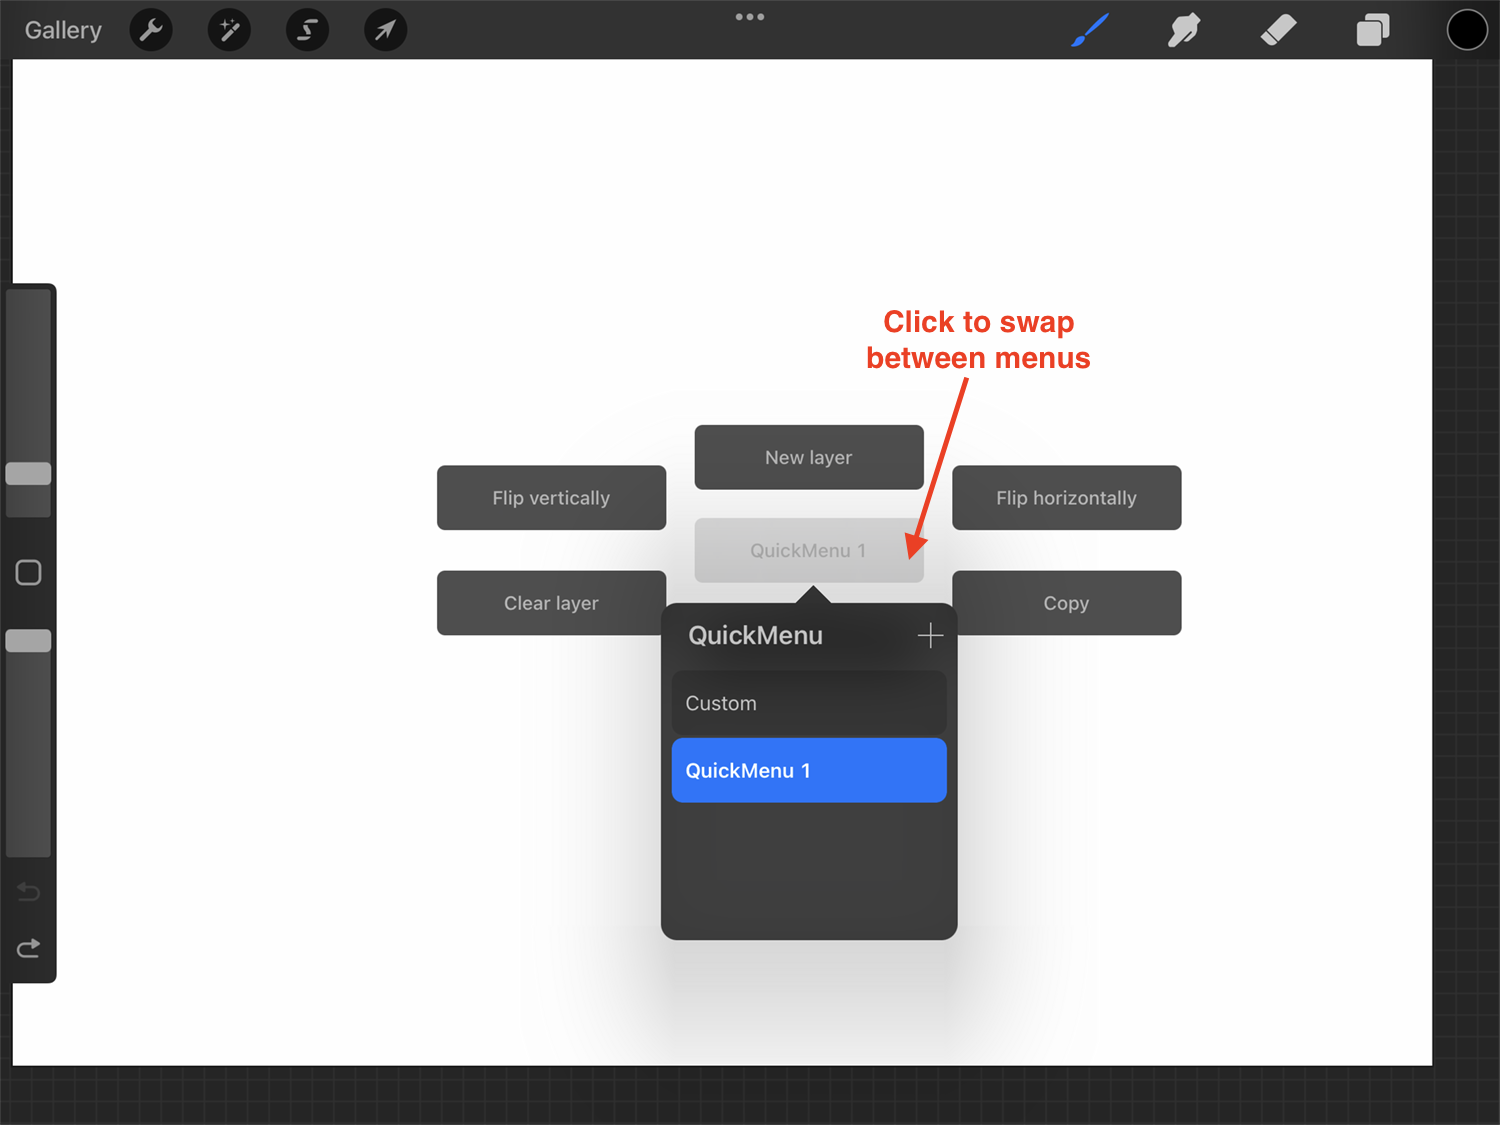
To create a new profile, just invokeQuickMenu and click on the central button (QuickMenu 1) to bring out the Profile pop-up menu.
Next, click the+ button in the top right corner to add a new profile. Since none of the buttons has an assigned action, you will need to customize each one to fit your needs.
If you want to rename your profiles, just double-click on top of them and type the name you want.
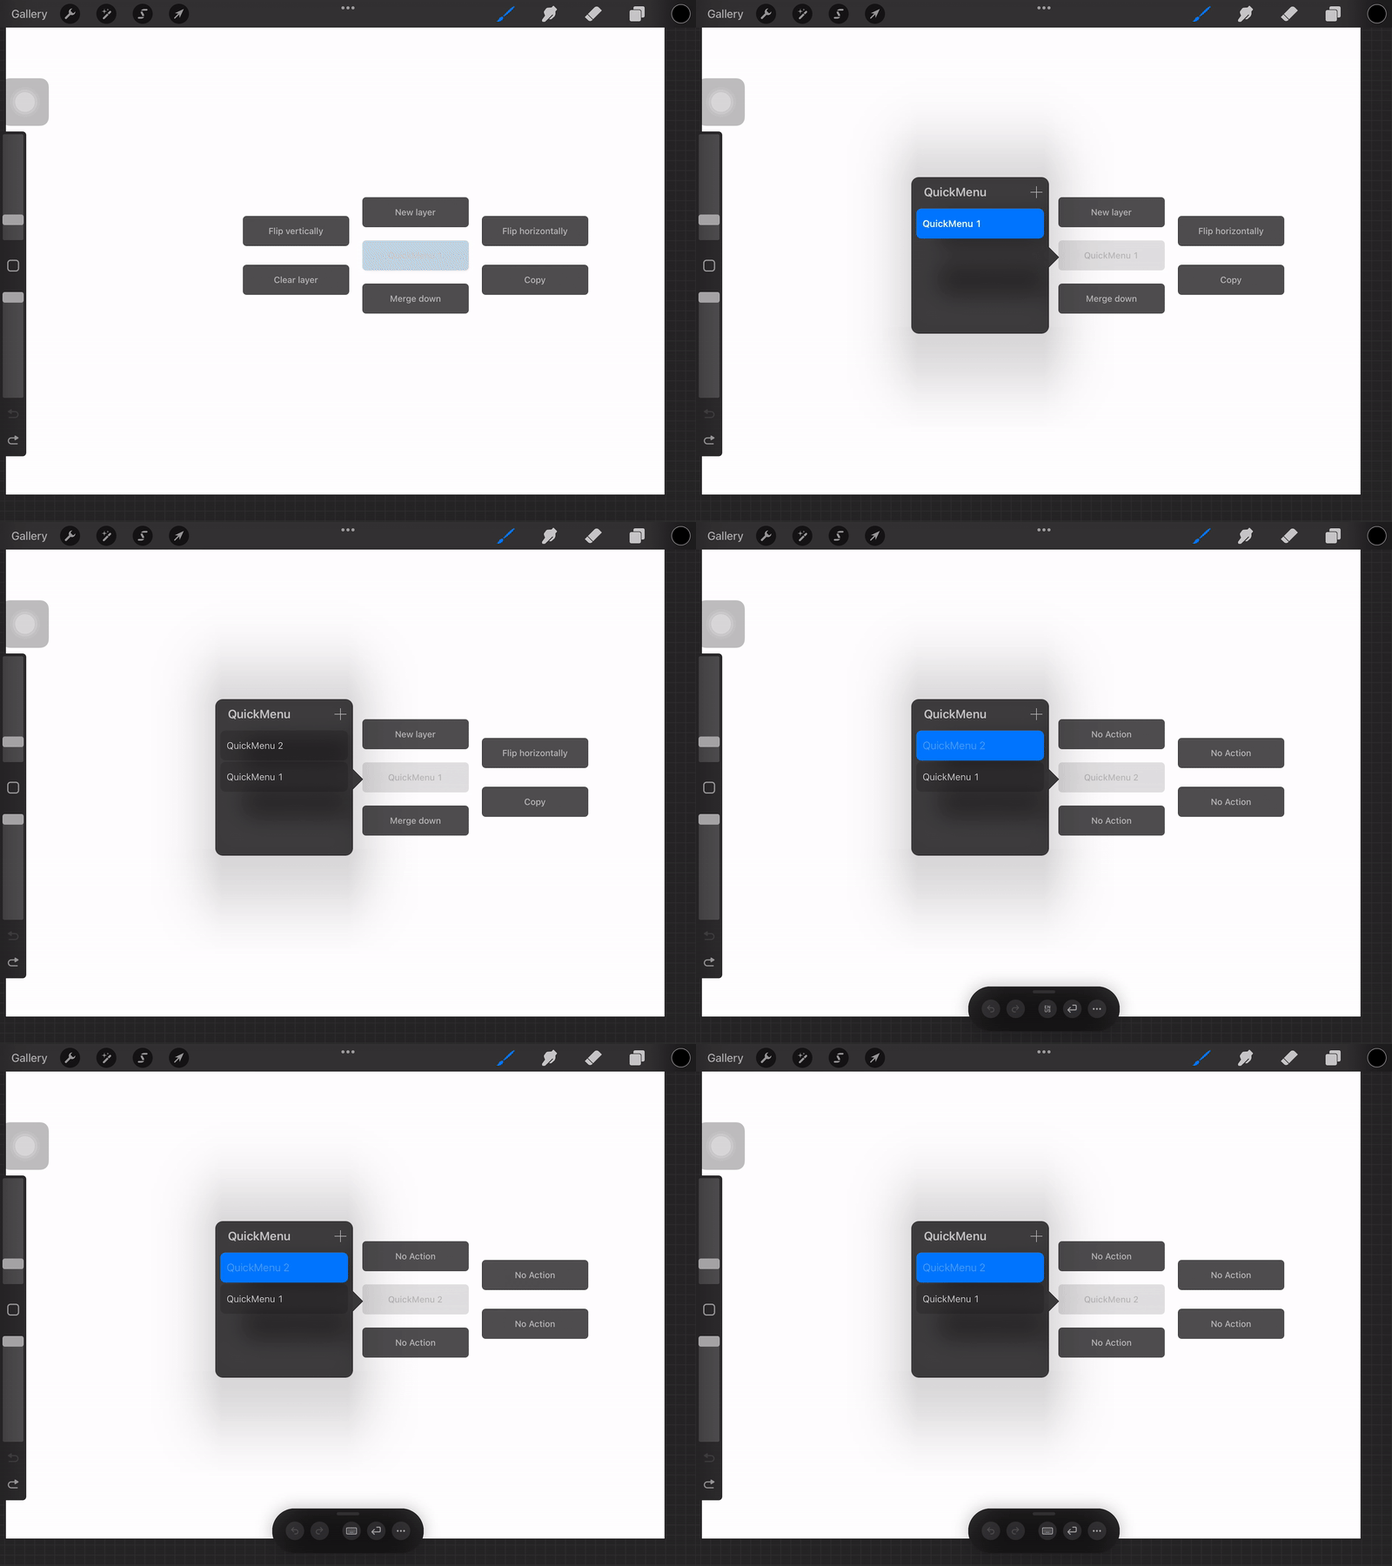
You can swap between profiles by clicking on the central button, then selecting the desired profile from the window.
Step 4 - Use QuickMenu
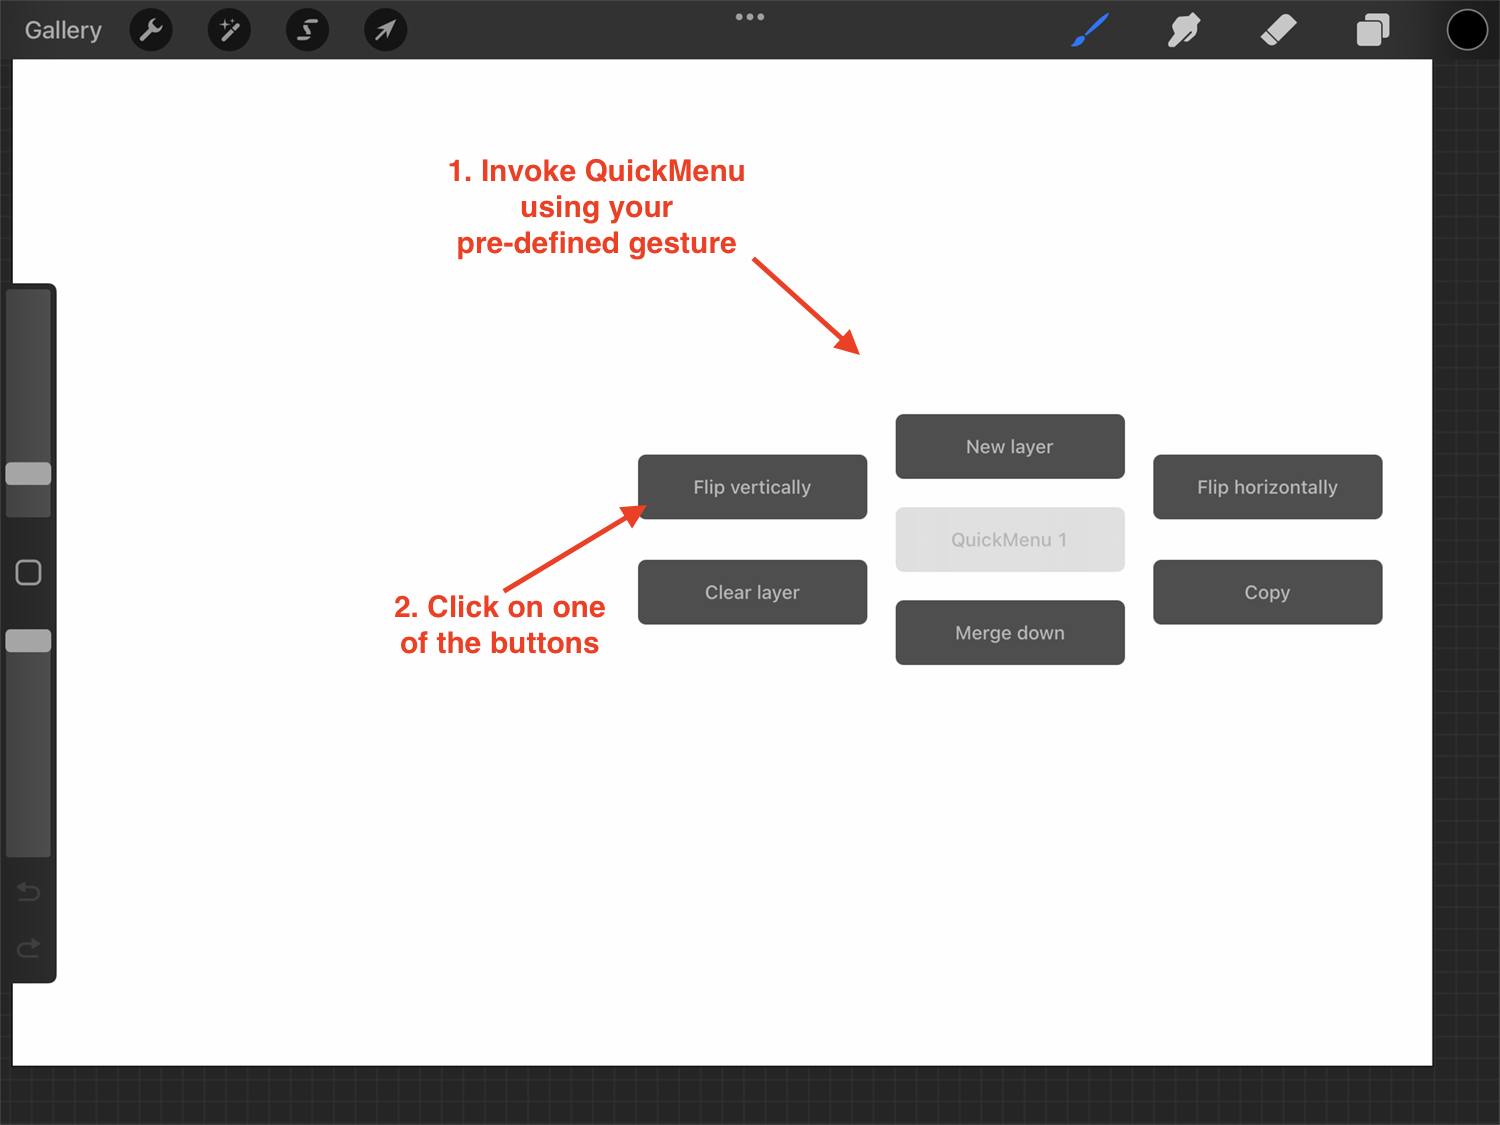
The next time you are working on Procreate, you just have to use your pre-set gesture to invoke QuickMenu. You will then be able to access one of your customized profiles and speed up your creative process.
It’s that easy to keep your most used tools or actions at hand. Being more efficient in your workflow is an essential part of creating. That is why a Procreate QuickMenu is a handy shortcut to have.
We have more excellent tutorials for you to follow such as how to use the Quickshape feature and how to align objects in Procreate.