By Design Bundles
SCAL Tutorials6 min
How to split an image when it is larger than your cutting mat in SCAL4
*Note SCAL4 Pro used.
1- Open SCAL4 software.
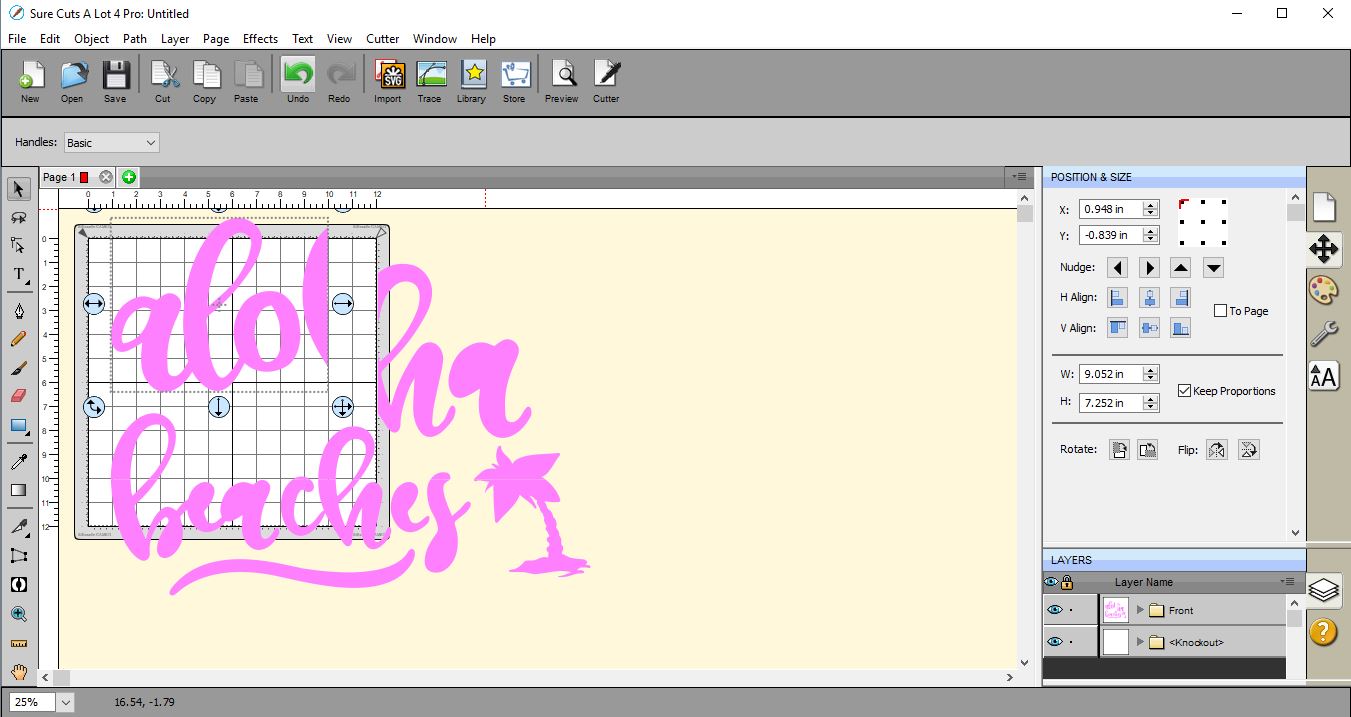
2- Import your image that you would like to cut. I am using this Free SVG bundle. As you can see the image I want to cut is larger than my cutting mat.
3- Create a rectangle/square.
4- Resize the rectangle to fit just over a 1/4 of your design, and at the same time making sure the rectangle is smaller than your cutting mat size. Go to Object > Duplicate.
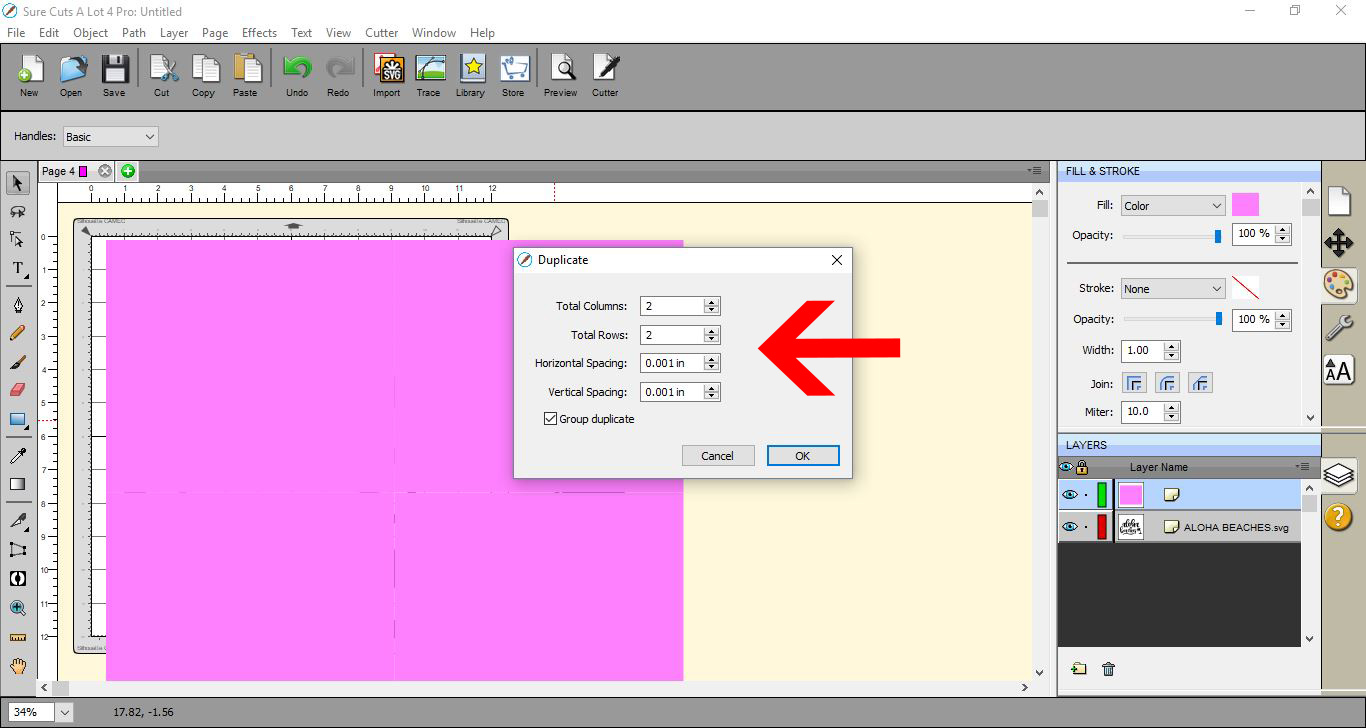
5- A new window will appear. adjust the number of columns and rows you want. I need 2 rows and 2 columns. We also need to close the gap between each rectangle. so with the H and V spacing change to 0.001 inch, so the gap is so small that it appears to be no gap. Check the group duplicate box also so the rectangles are grouped.
Click OK.
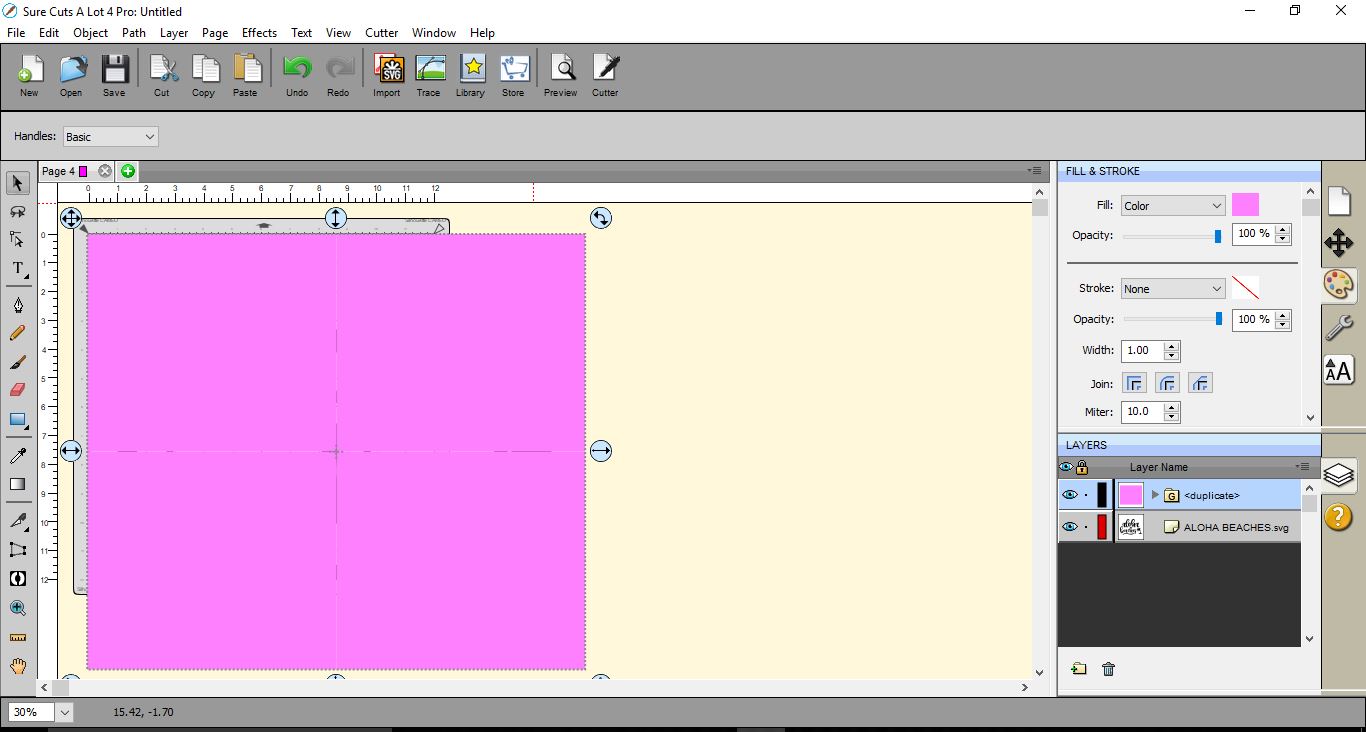
6- Make sure the rectangles are totally covering your design.
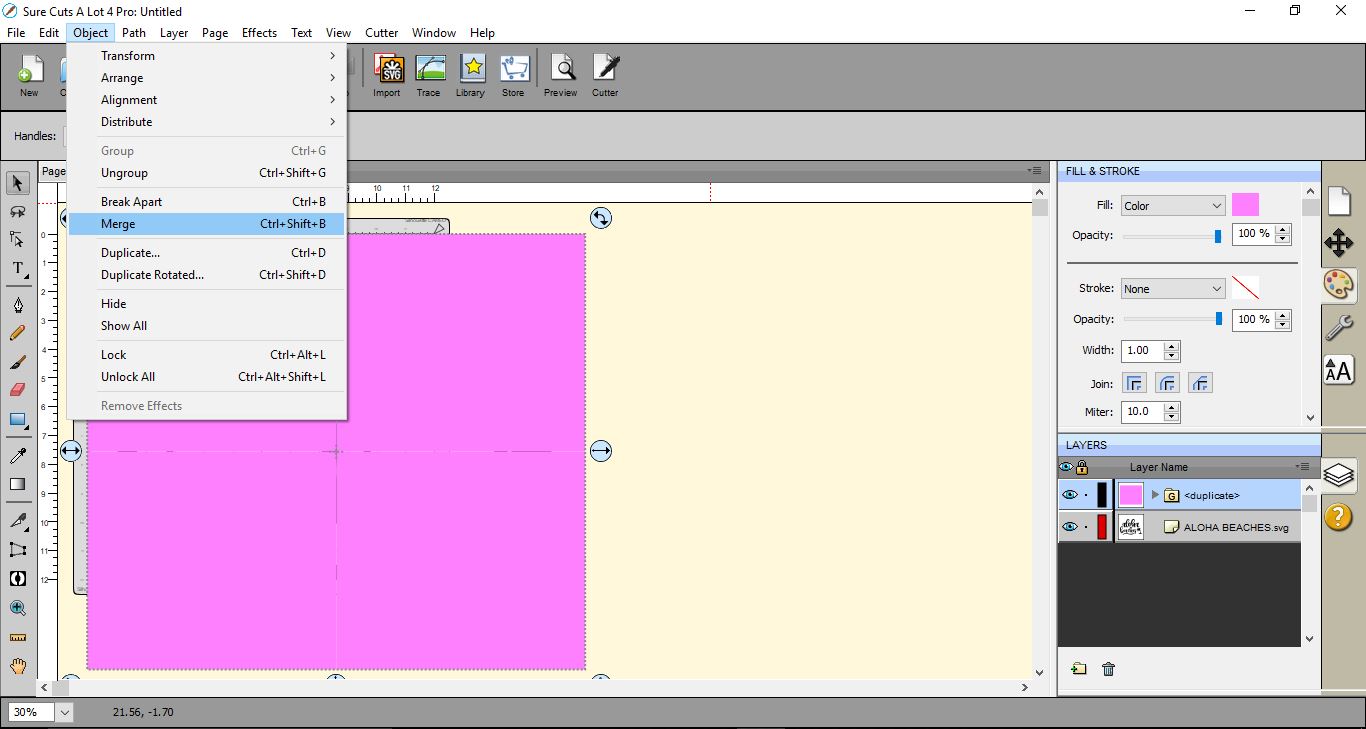
7- With the grouped rectangles selected go to Object > Merge.
8- Now select both the grouped rectangles and the design. you can ensure they are both selected by selecting them in the layers panel on the right.
9- go to Effects > Knockout.
10- A new window will appear. make sure there is 0.00 gap and click OK.
11- The image will just appear to have nothing changed. This is not the case. while still selected right click and select "break apart".
12- The sections will now be separated. But we need to ensure that the middles of letters are there to be cut. Select one 1/4 of the design. you will be able to find where it starts and stops by hovering your cursor over the image and it will highlight.
13- Once all of the section is highlighted go to Object > Merge.
14- The middles of the letters will re appear and the whole quarter will be grouped.
Repeat the above steps to the other 3 quarters.
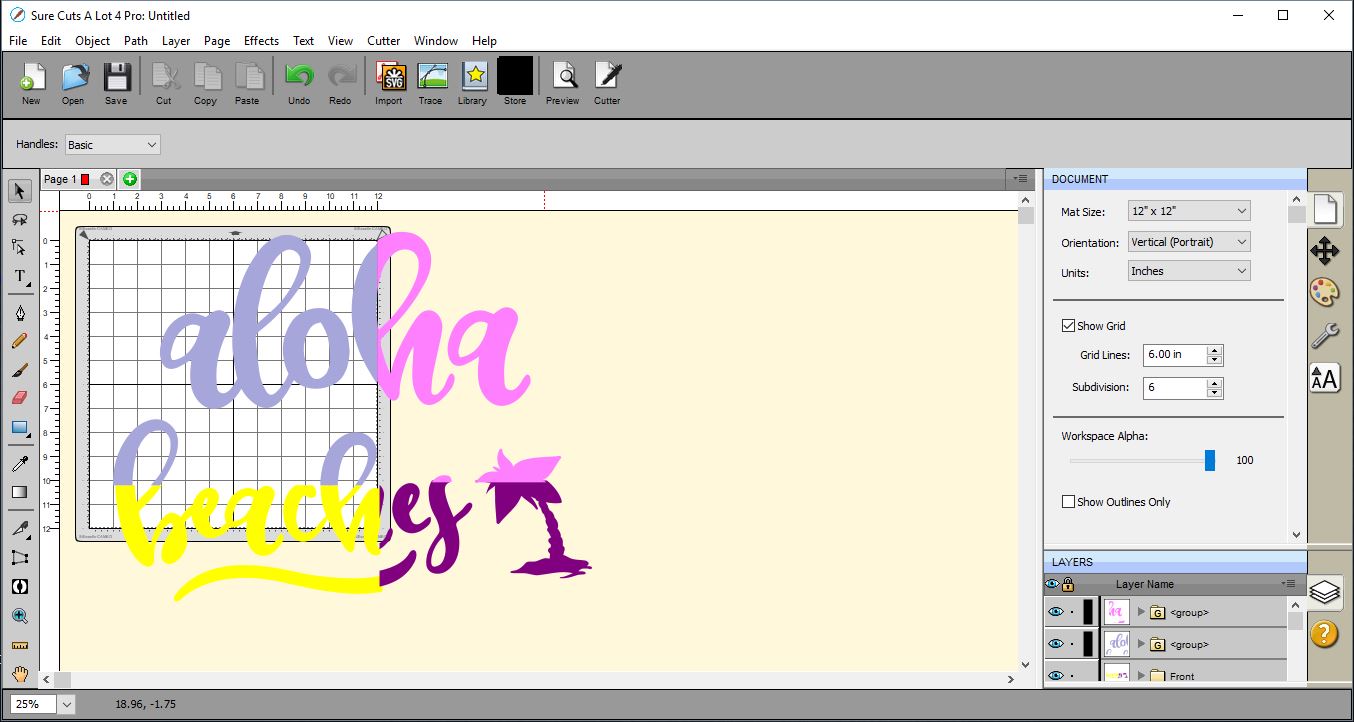
15- I change the color of each section to make it easier to cut each section. you can move to one side the parts you do not want to cut and then place the part you want on the mat to cut.
Once all sections are cut you can piece the project together.
1- Open SCAL4 software.
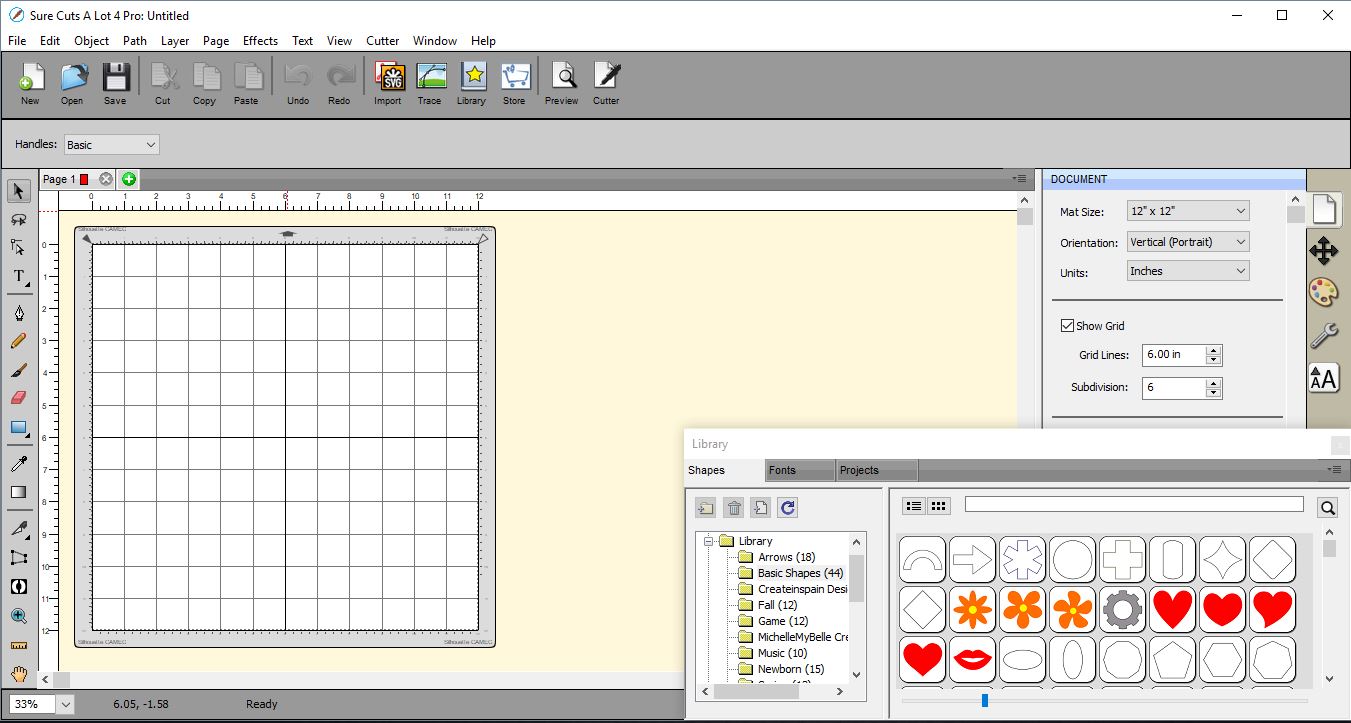
2- Import your image that you would like to cut. I am using this Free SVG bundle. As you can see the image I want to cut is larger than my cutting mat.
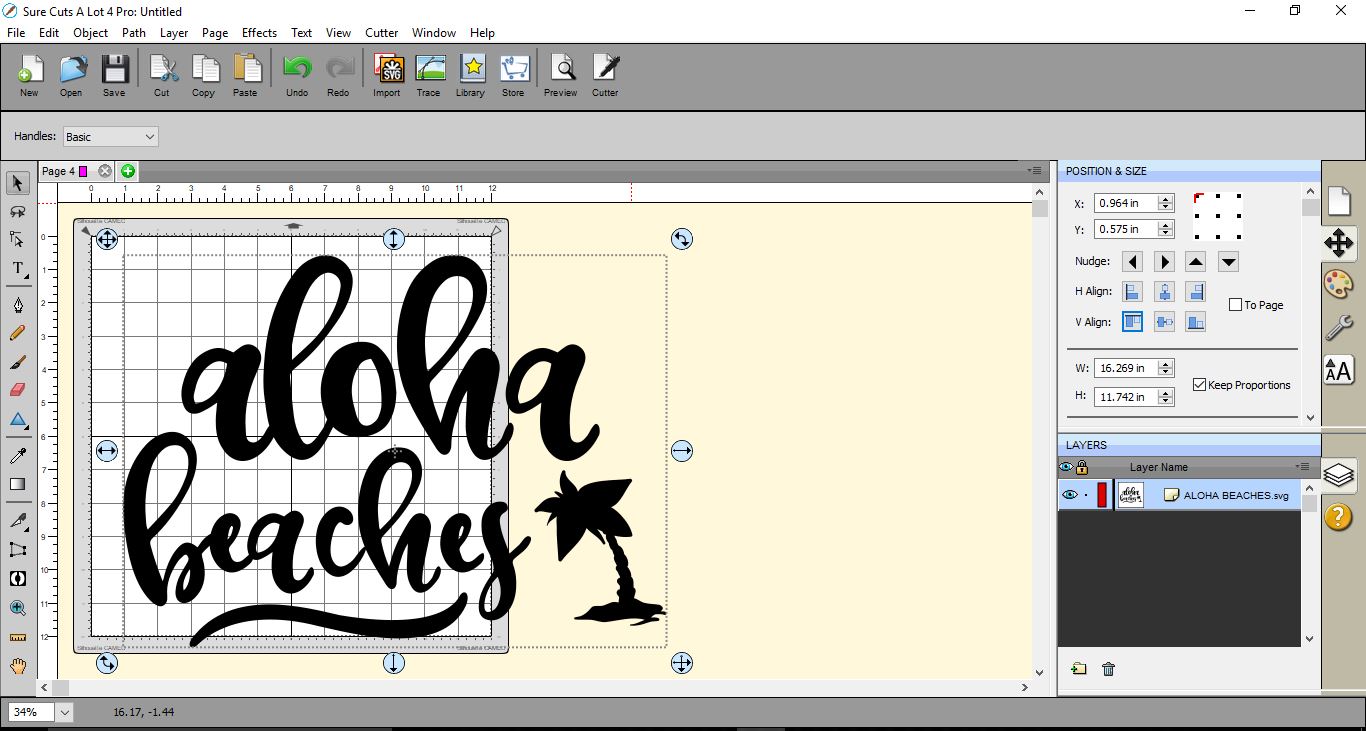
3- Create a rectangle/square.
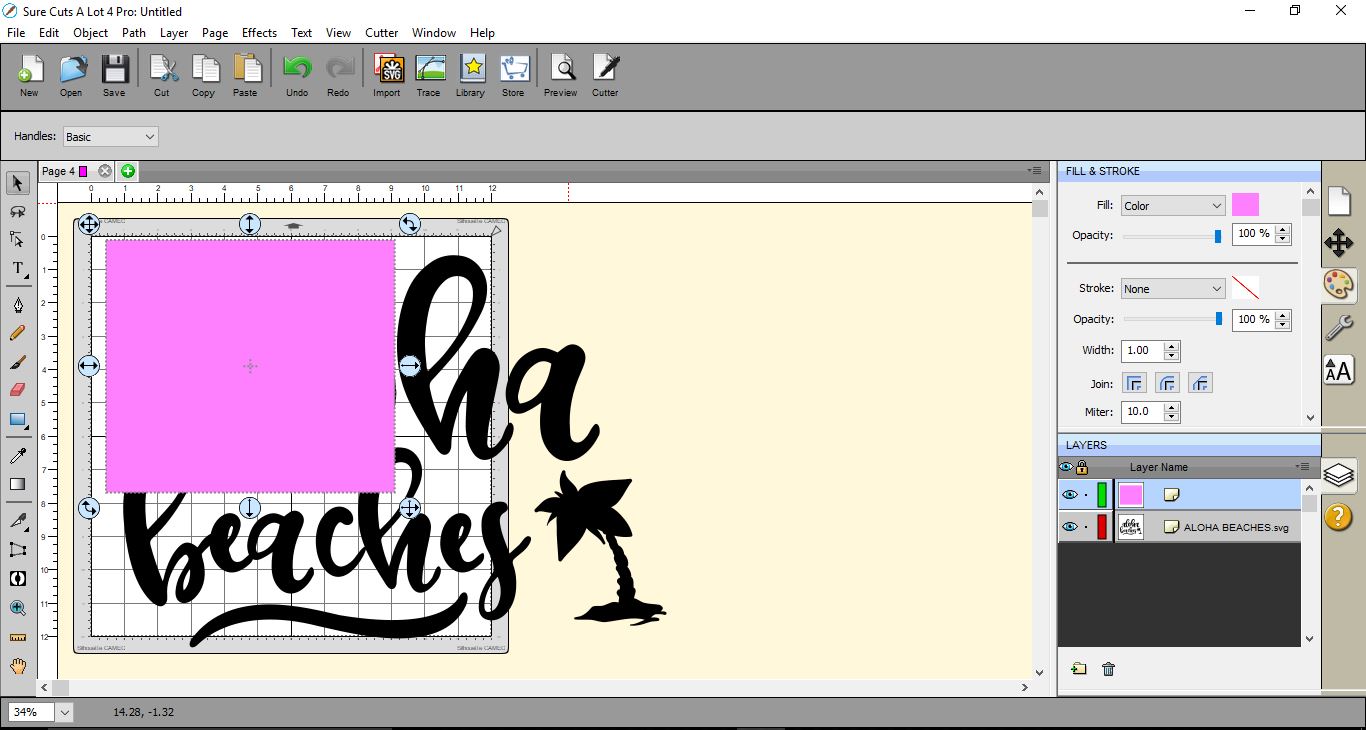
4- Resize the rectangle to fit just over a 1/4 of your design, and at the same time making sure the rectangle is smaller than your cutting mat size. Go to Object > Duplicate.
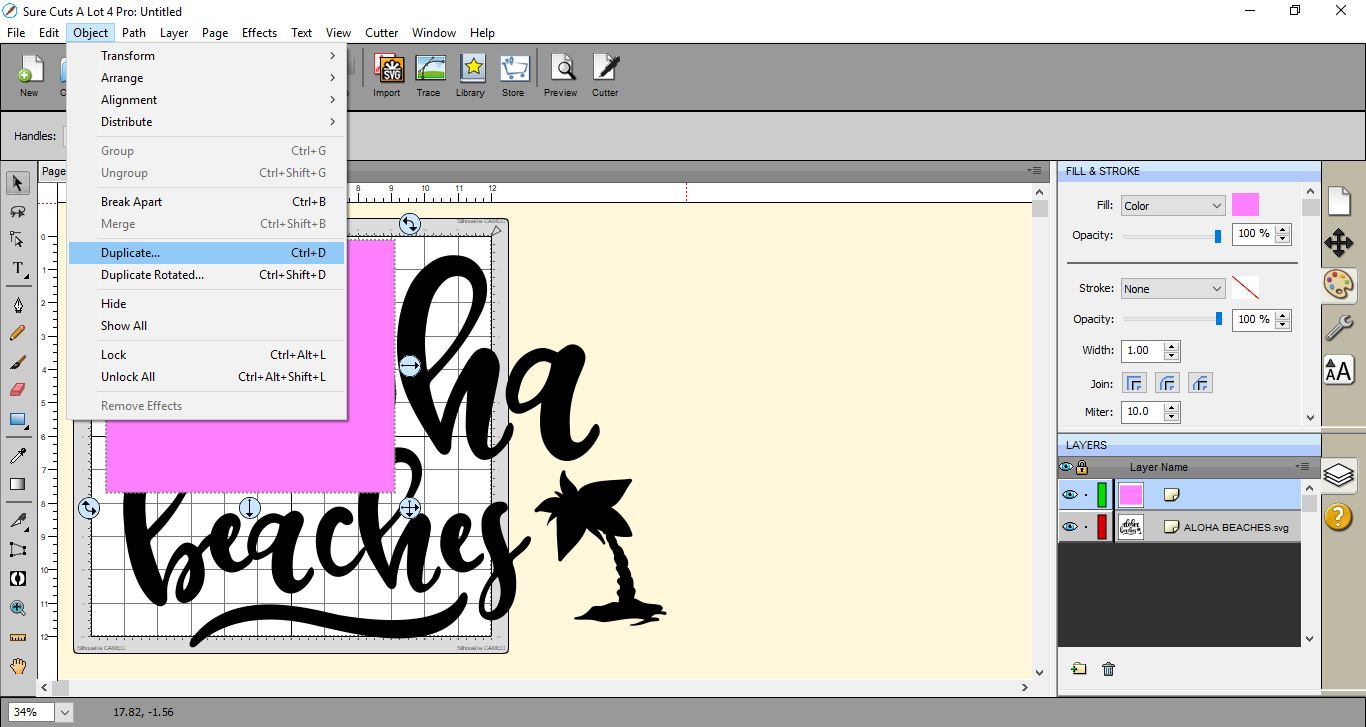
5- A new window will appear. adjust the number of columns and rows you want. I need 2 rows and 2 columns. We also need to close the gap between each rectangle. so with the H and V spacing change to 0.001 inch, so the gap is so small that it appears to be no gap. Check the group duplicate box also so the rectangles are grouped.
Click OK.
6- Make sure the rectangles are totally covering your design.
7- With the grouped rectangles selected go to Object > Merge.
8- Now select both the grouped rectangles and the design. you can ensure they are both selected by selecting them in the layers panel on the right.

9- go to Effects > Knockout.
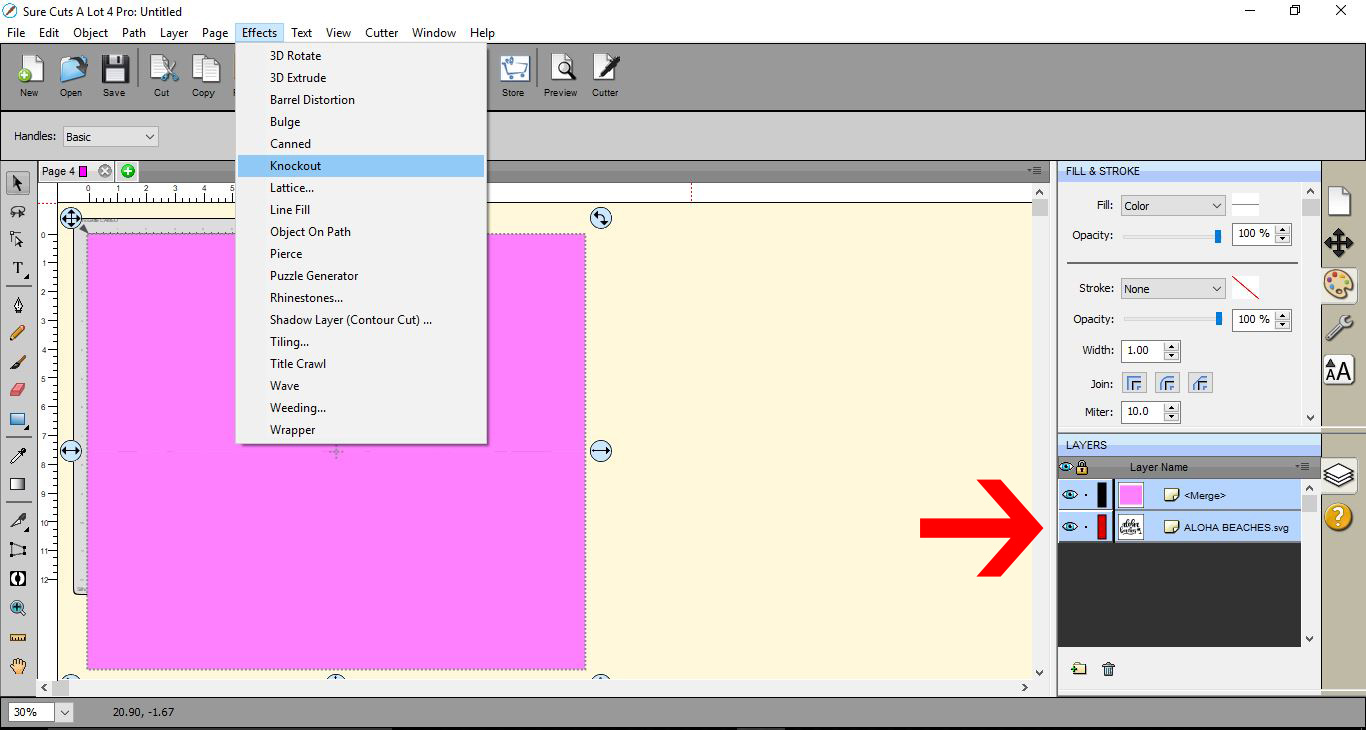
10- A new window will appear. make sure there is 0.00 gap and click OK.
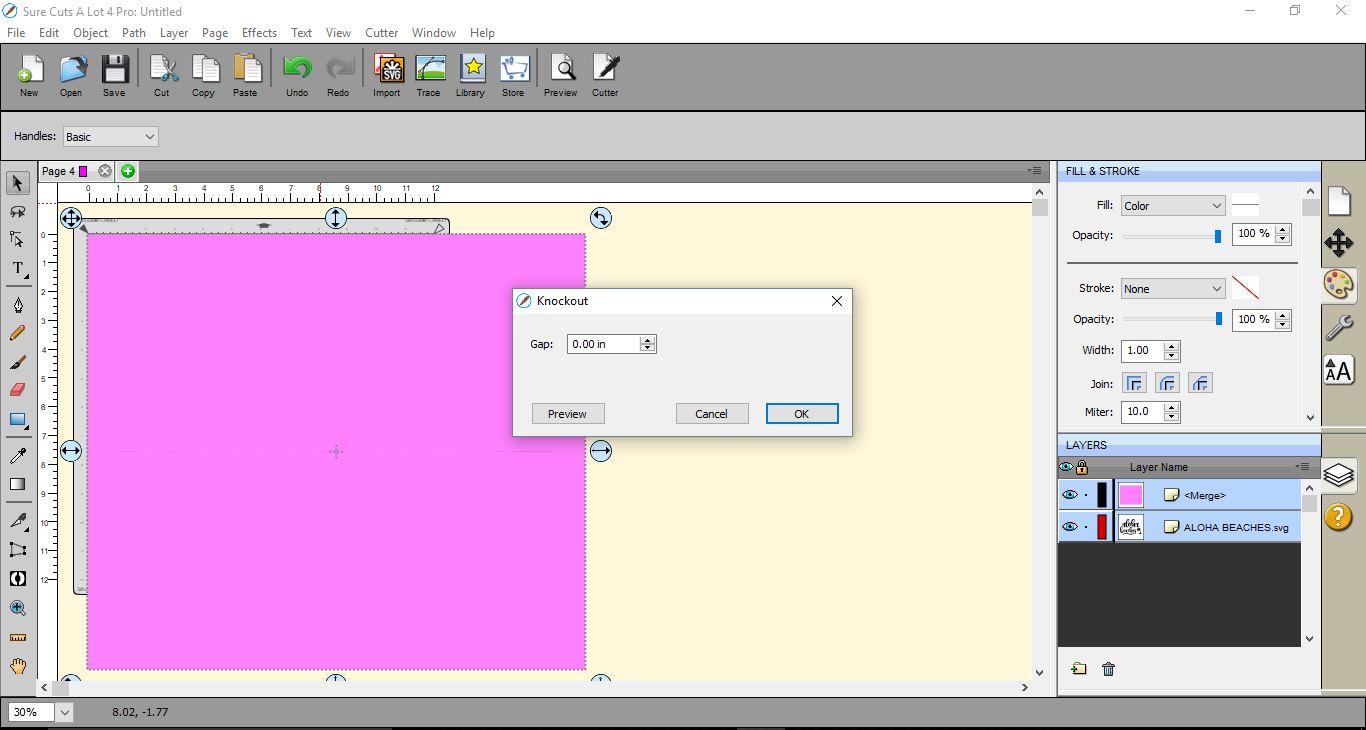
11- The image will just appear to have nothing changed. This is not the case. while still selected right click and select "break apart".
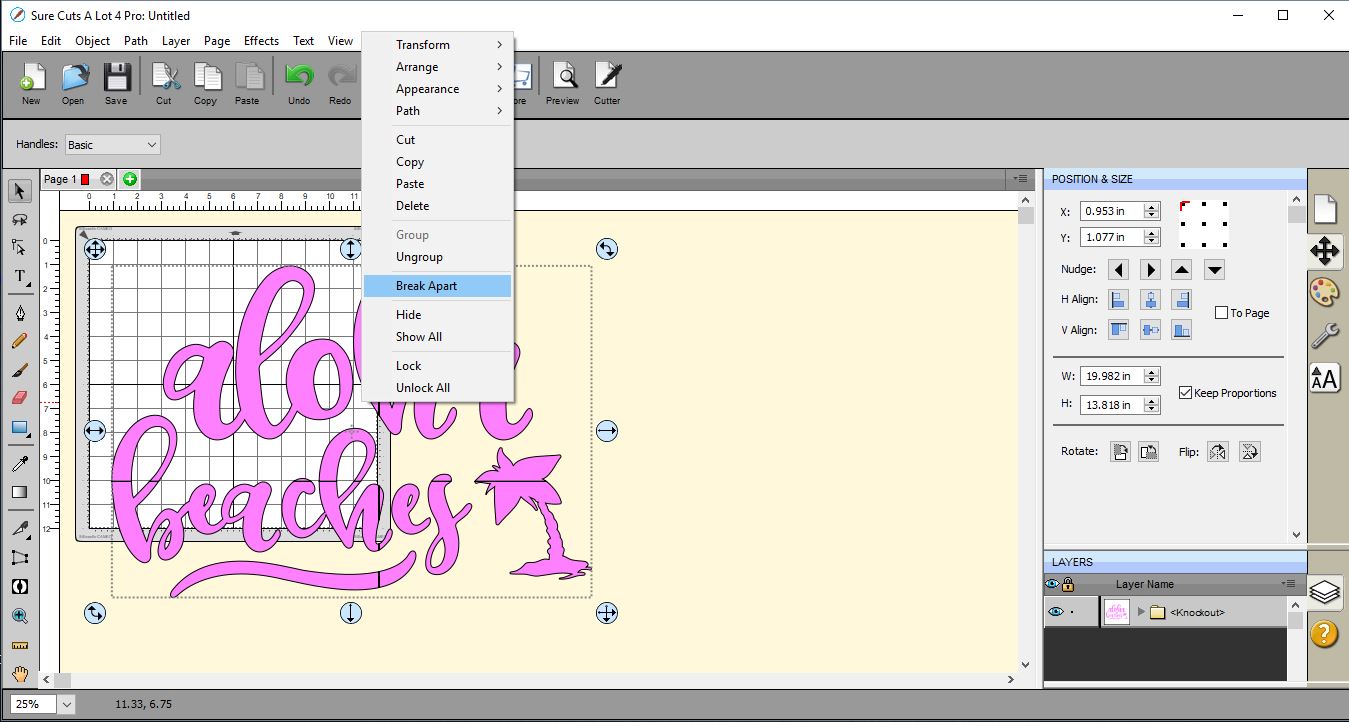
12- The sections will now be separated. But we need to ensure that the middles of letters are there to be cut. Select one 1/4 of the design. you will be able to find where it starts and stops by hovering your cursor over the image and it will highlight.

13- Once all of the section is highlighted go to Object > Merge.
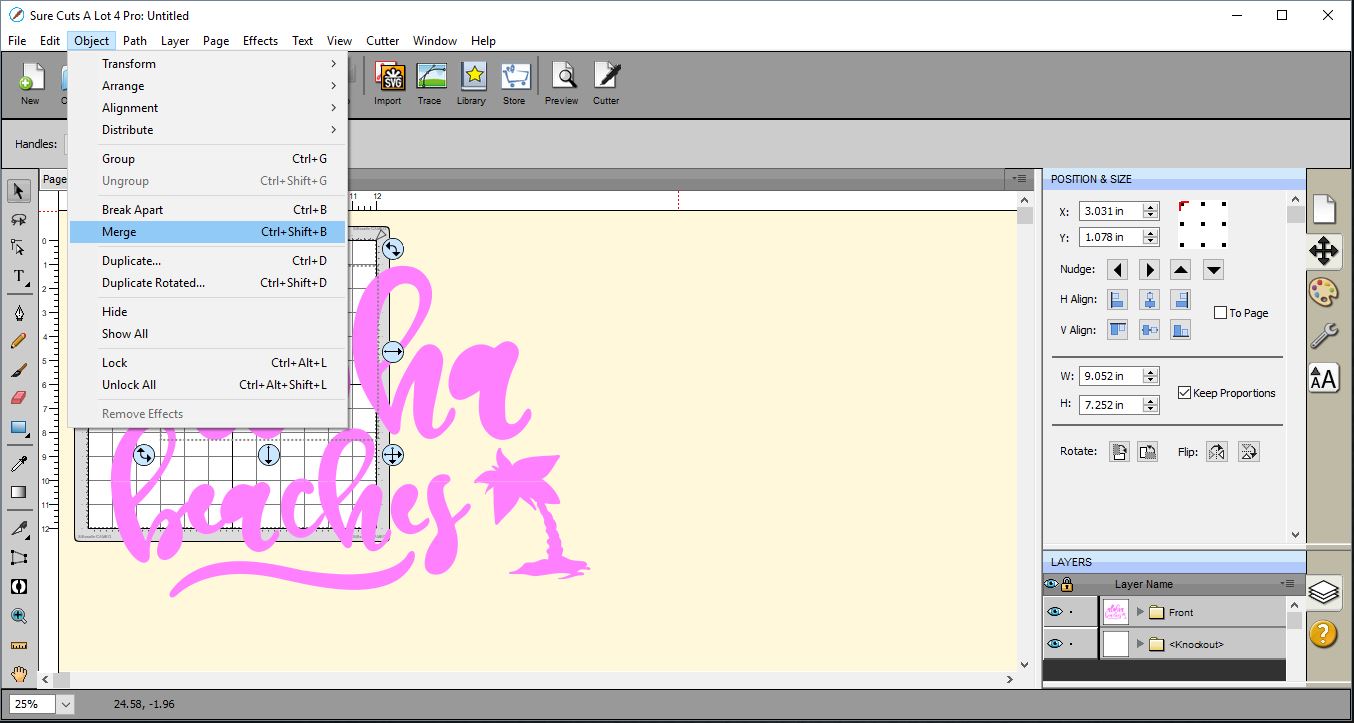
14- The middles of the letters will re appear and the whole quarter will be grouped.
Repeat the above steps to the other 3 quarters.
15- I change the color of each section to make it easier to cut each section. you can move to one side the parts you do not want to cut and then place the part you want on the mat to cut.
Once all sections are cut you can piece the project together.
Related Tutorials
Scan N Cut Tutorials
How to make a image larger than your cutting mat in Brother Scan N Cut canvas workspace
Learn how to cut designs larger than your cutting mat in Brother Scan N Cut canvas.
Cricut Tutorials
How to Cut Projects Larger Than Your Cutting Mat in Cricut Design Space
Learn how to cut projects larger than you cutting mat in Cricut Design Space.
Cricut Tutorials
How To Use The Slice Tool In Cricut Design Space To Split Images
Learn how easily to Split Images in Cricut Design Space using the Slice Tool.
Silhouette Tutorials
How to Cut Stamped Images Without a Picscan Mat in Silhouette Studio
Silhouette Tutorials
How to Add a New Cutting Material to Silhouette Studio
Cricut Tutorials
How to Create a Layered Image in Cricut Design Space
In this tutorial, you will learn how to create a layered image in Cricut Design Space.