By Design Bundles
Scan N Cut Tutorials2 min
Brother Scan N Cut Direct Cut Tutorial
*note CM900 used.
1- Turn on your machine.
2- Select the scan icon.

2- Click on direct cut.
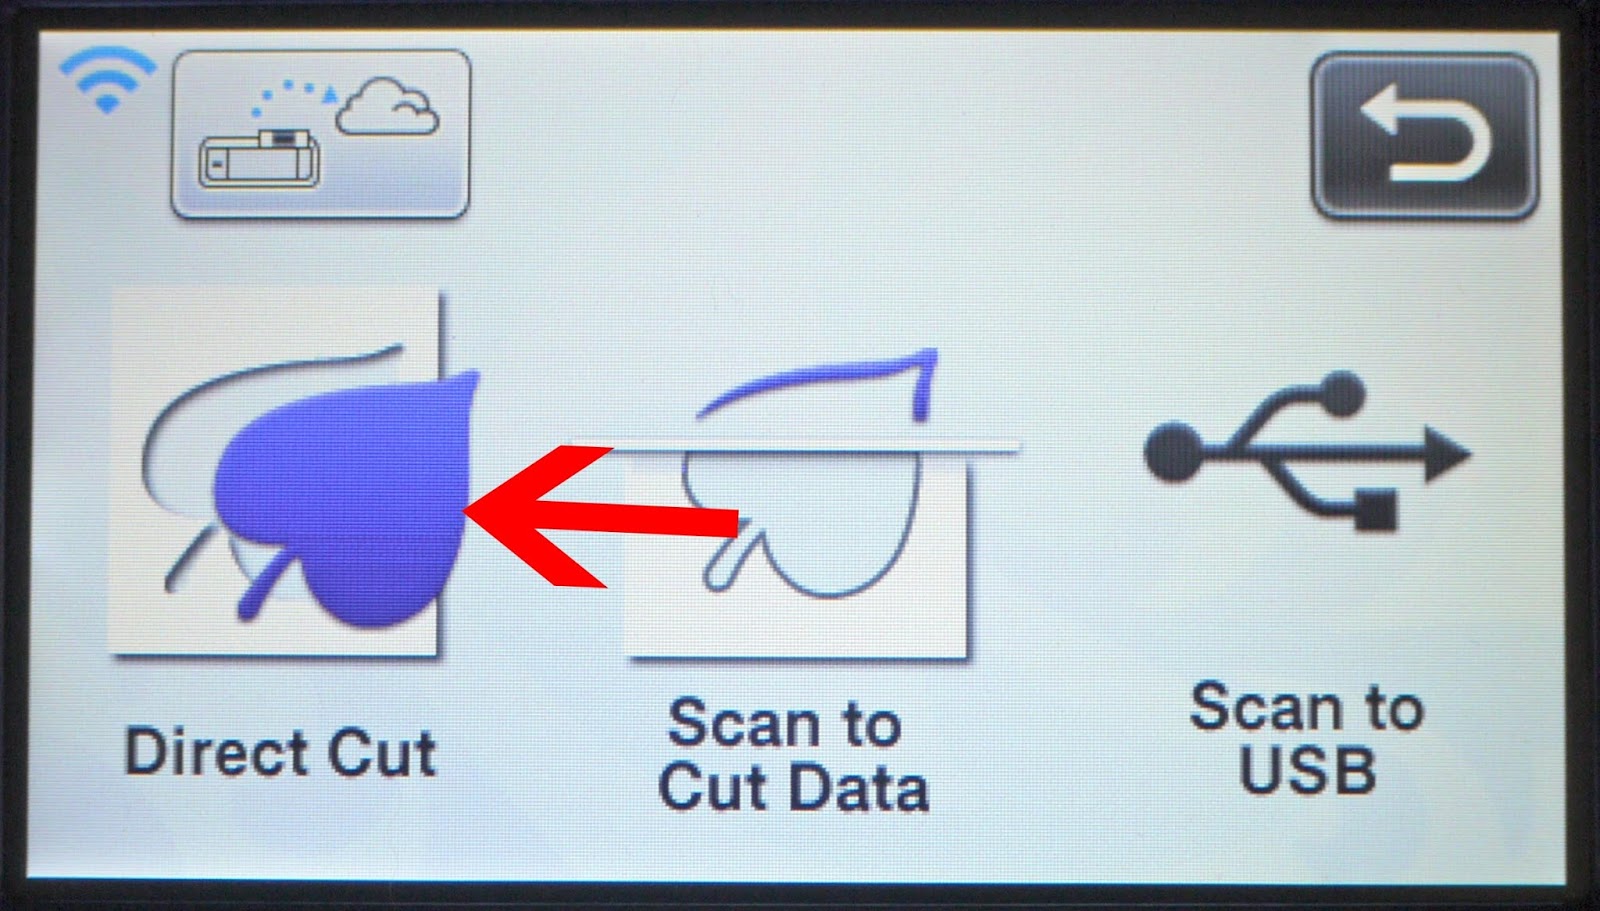
3-Select the scan and cut machine icon.

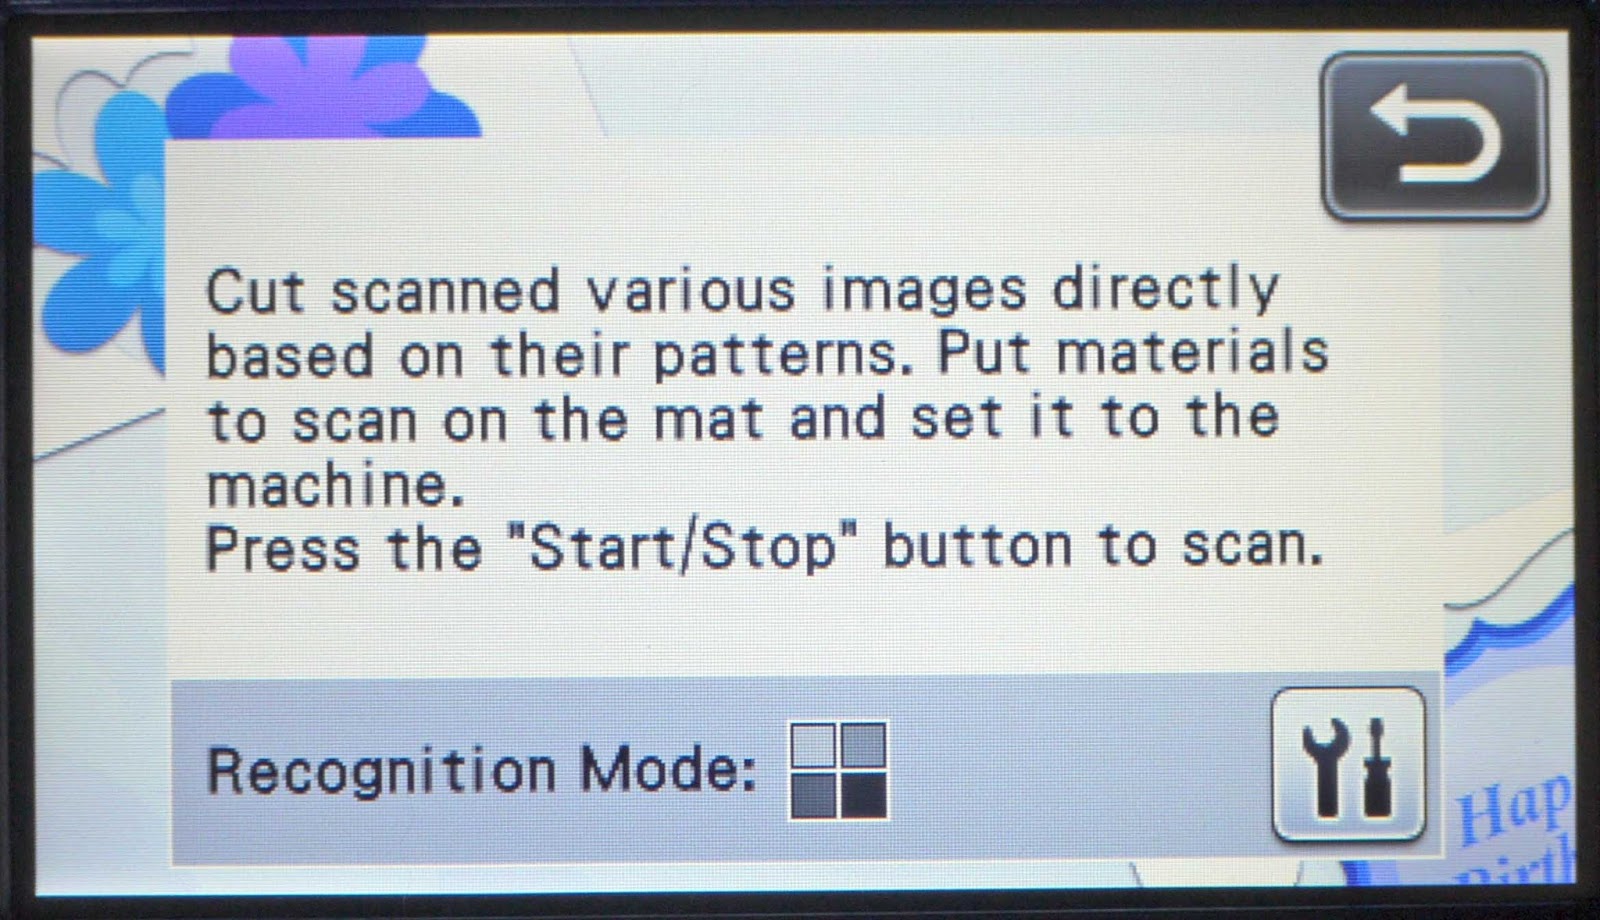
4-When this screen appears you can load your mat with the image you would like cut on it. Once loaded click on the start/stop button on your machine.
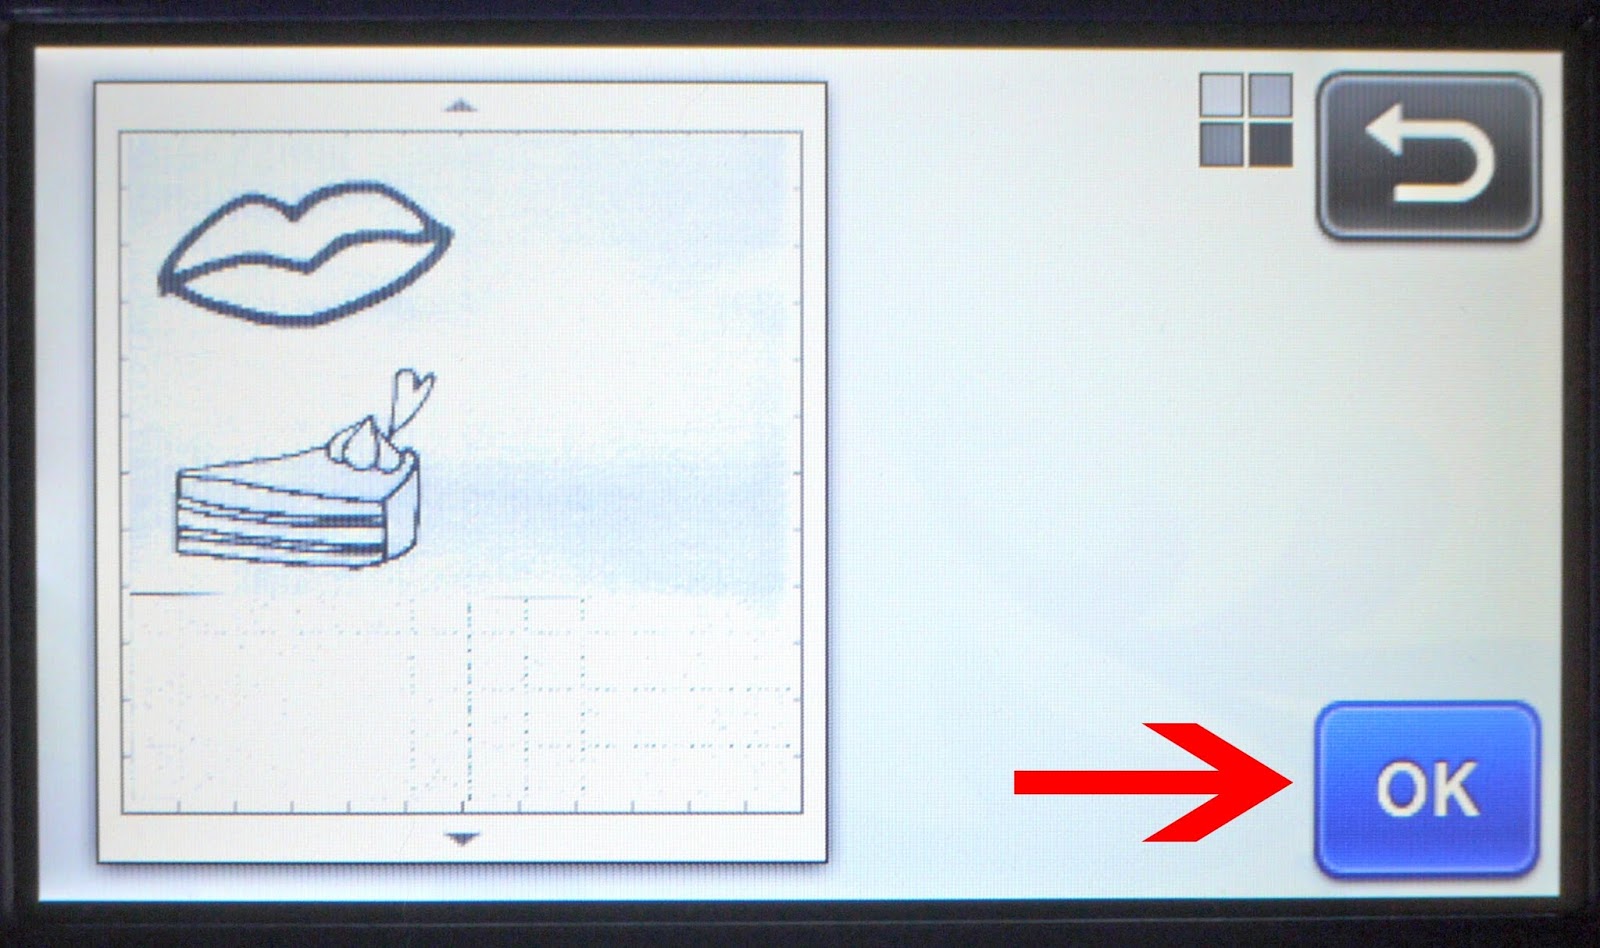
5- Then machine will scan the mat and images. They will appear on your screen. Click OK.
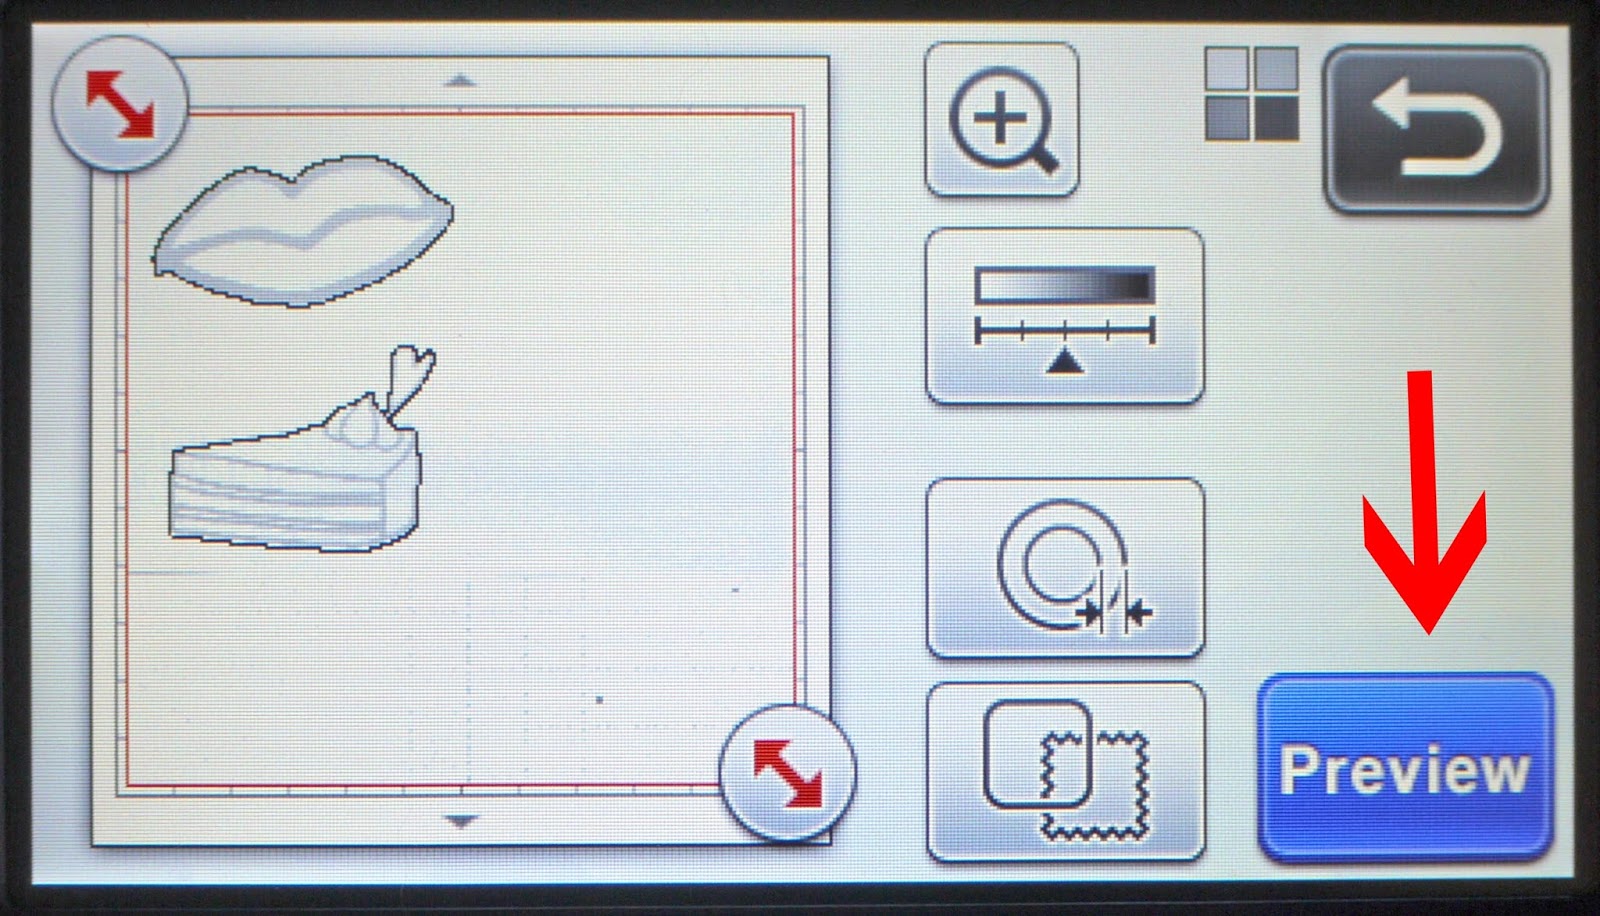
6- The cut lines will appear around your images on the screen. Select preview.
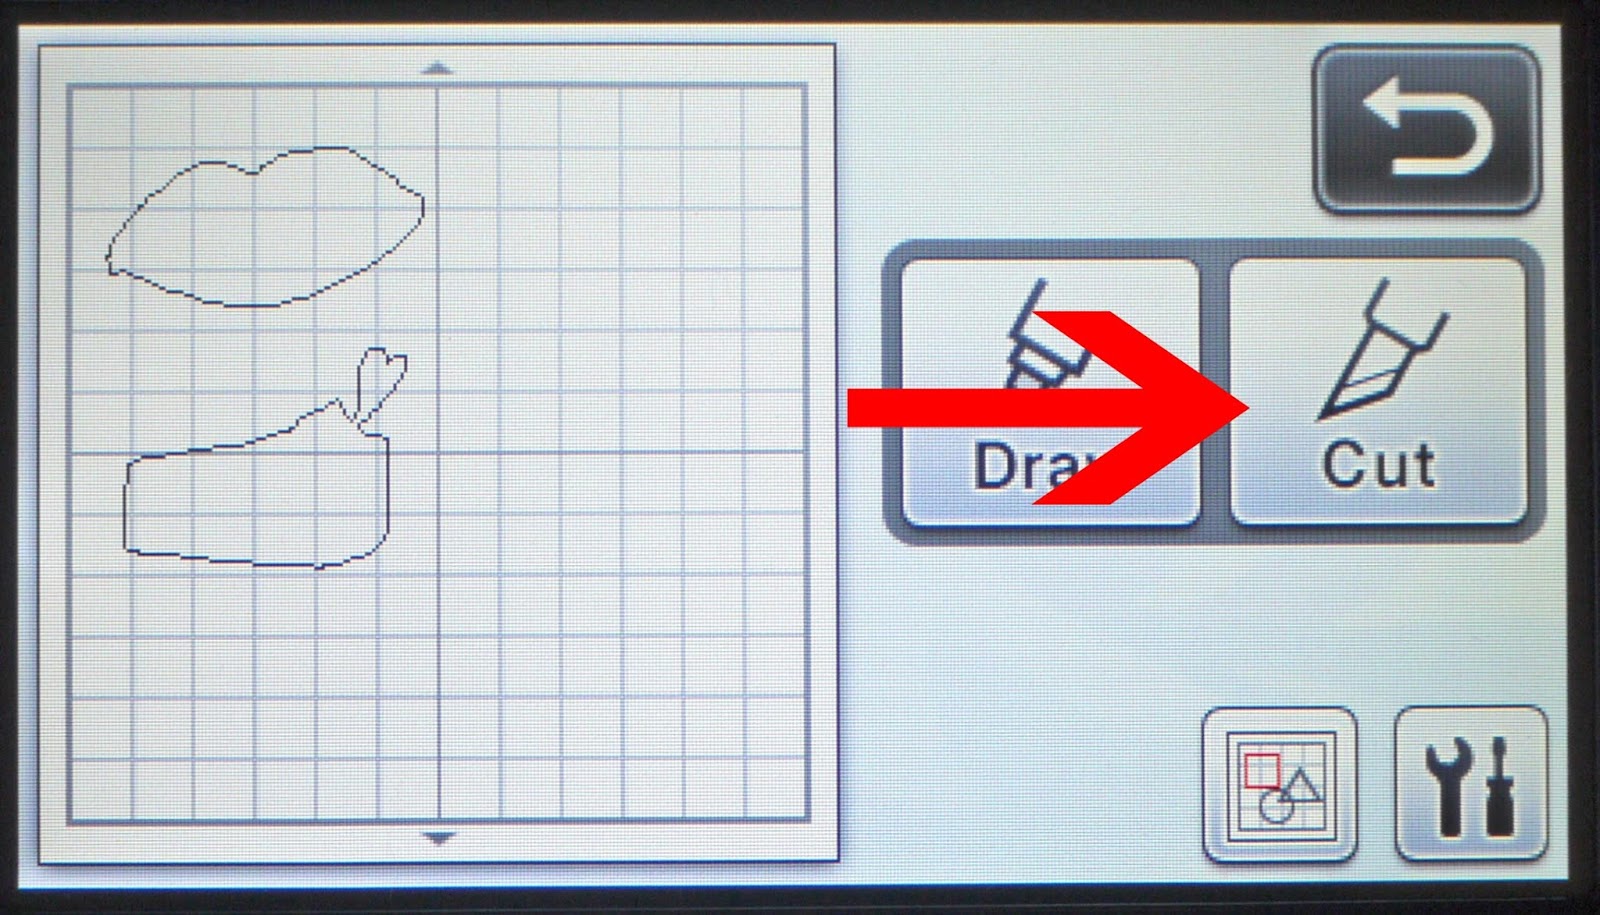
7- The scanned images will be removed only leaving the cut lines. If you are happy click on cut icon and then the start/stop button on your machine. The machine will cut out the images directly.
Related Tutorials
Scan N Cut Tutorials
Brother Scan N Cut- Welding in Brother Scan N Cut tutorial
Scan N Cut Tutorials
Brother Scan N Cut Character input function tutorial
Scan N Cut Tutorials
How to make a image larger than your cutting mat in Brother Scan N Cut canvas workspace
Learn how to cut designs larger than your cutting mat in Brother Scan N Cut canvas.
Scan N Cut Tutorials
Understanding the Setting Screens in Brother Scan N Cut
Scan N Cut Tutorials
How to Make a Dash Fold Line in Brother Scan N Cut
Scan N Cut Tutorials