
By Design Bundles
Auto Weed Function in Silhouette Studio V4.1
Today we are going to show you how to use the Auto Weed function in Silhouette Studio V4.1. Being able to weed effortlessly is a crafter’s dream. Silhouette Studio’s Auto Weed function adds borders to make weeding so much easier. It should be noted that this feature is only available in the Business Edition.
We also have a visual guide to help you get started.
If you have purchased an upgrade, check out this excellent tutorial on how to activate your Silhouette Studio upgrade.
Step 1 - Access the Weed Settings Panel
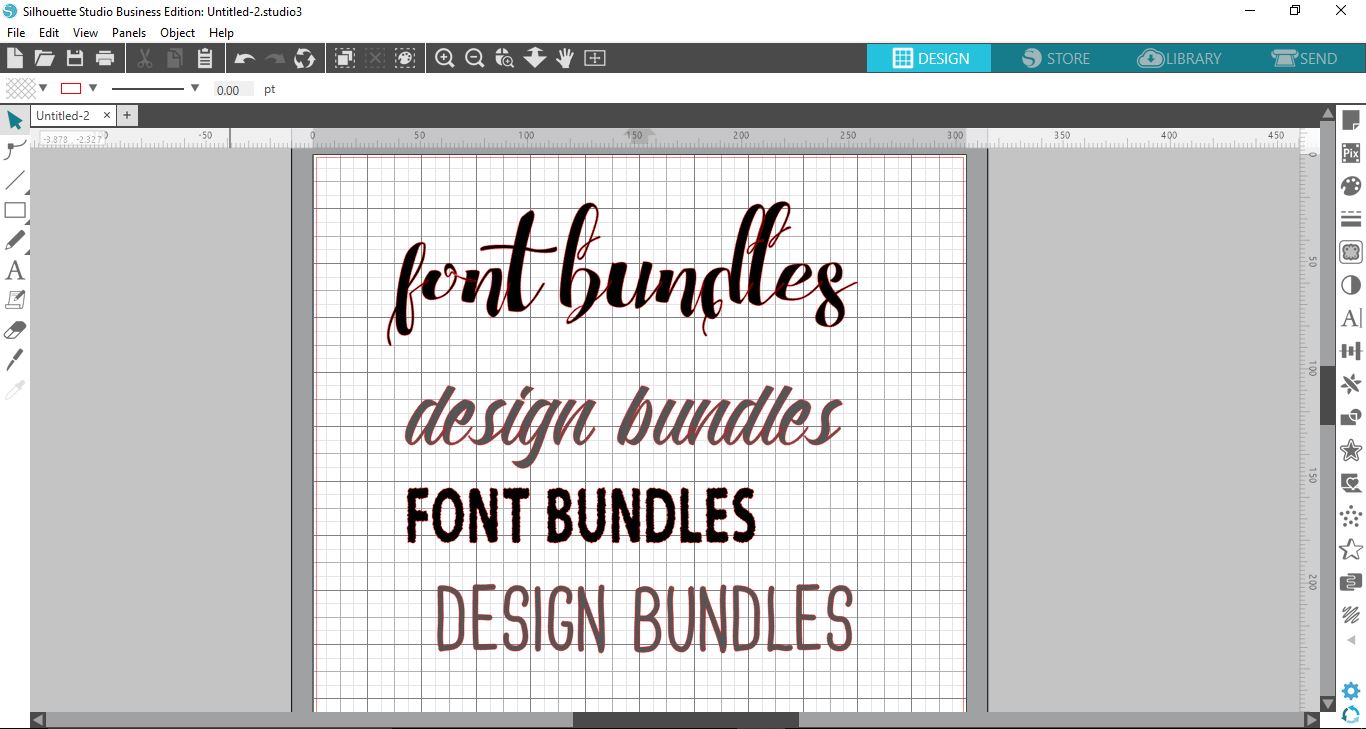
Open Silhouette Studio to get started. Now, add your text or design to the workspace. There are tons of fonts to choose from on Design Bundles including these Fun Fonts.
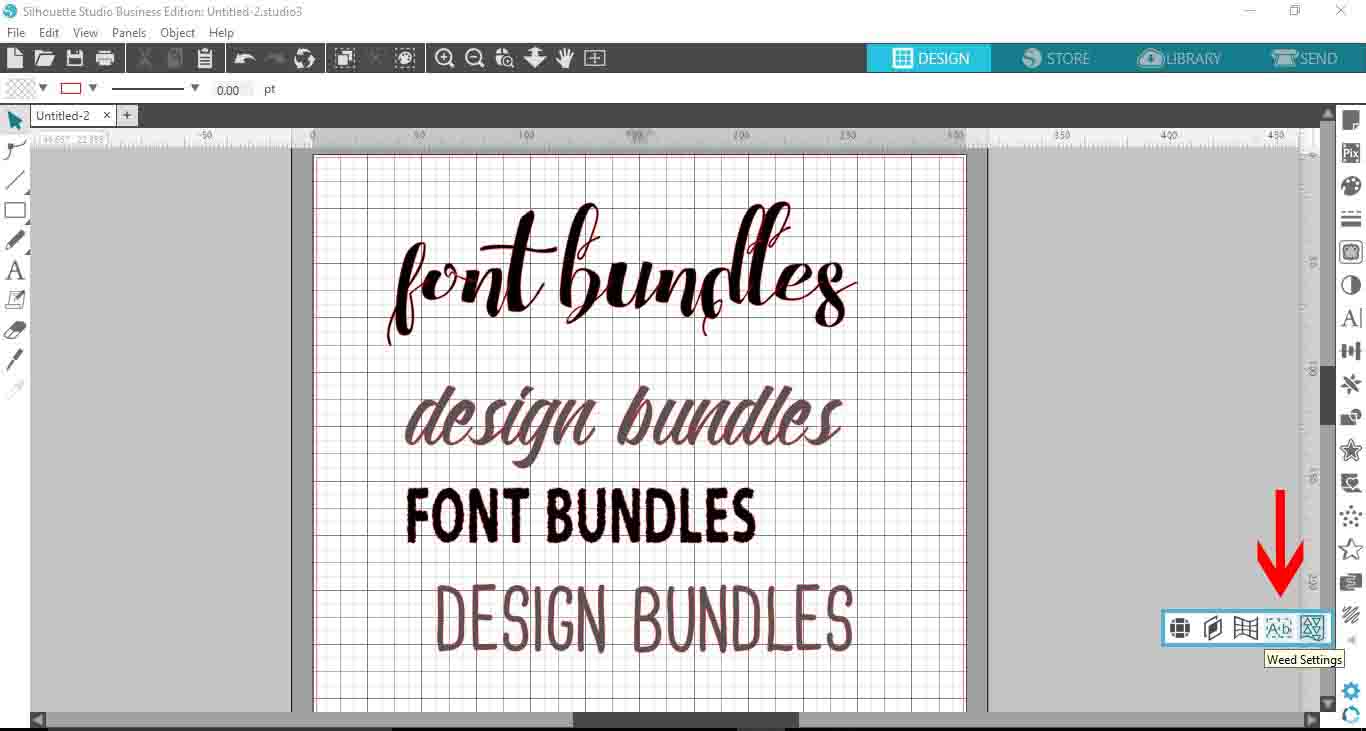
The Weed Settings are found on the bottom right side panel. If you don’t see the icon, click on the little arrow to show additional settings. Now click on Weed Settings.
Step 2 - Add Weeding Boxes
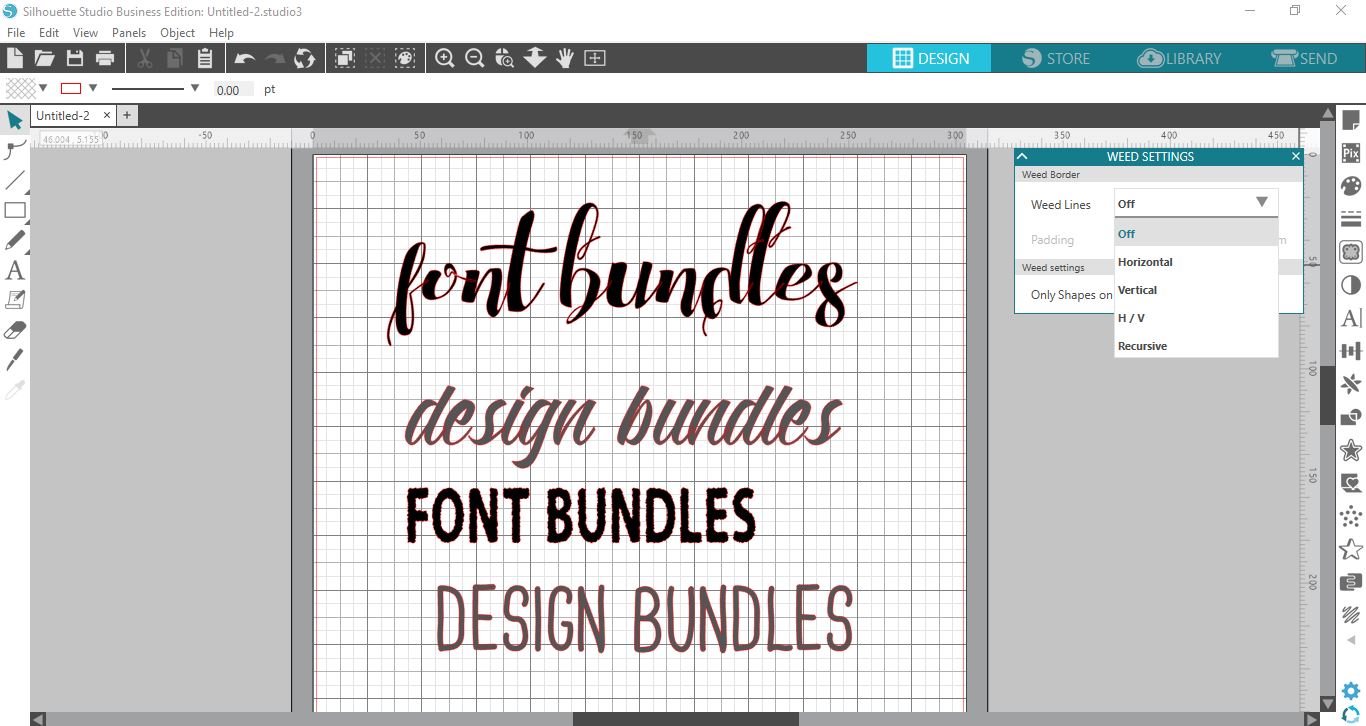
You don’t need to select the images or text when using the Weed Settings panel. In the panel, click on the drop down menu next to Weed Lines for the options available.
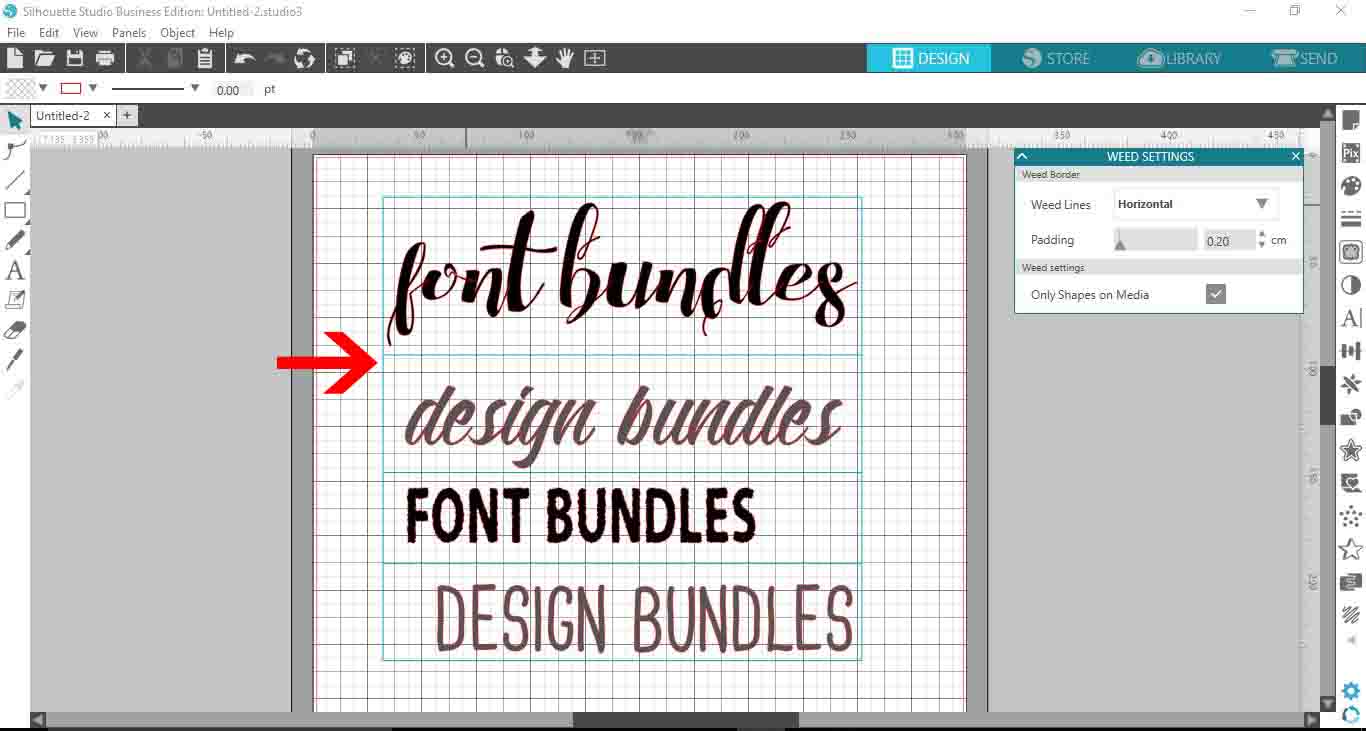
Silhouette Studio determines the space between objects. Then it applies the weeding lines according to the option selected.
Horizontal Weed Lines
Horizontal weed lines are for simpler designs or text. Generally the weeding lines will separate each line of text or image based on the amount of space.
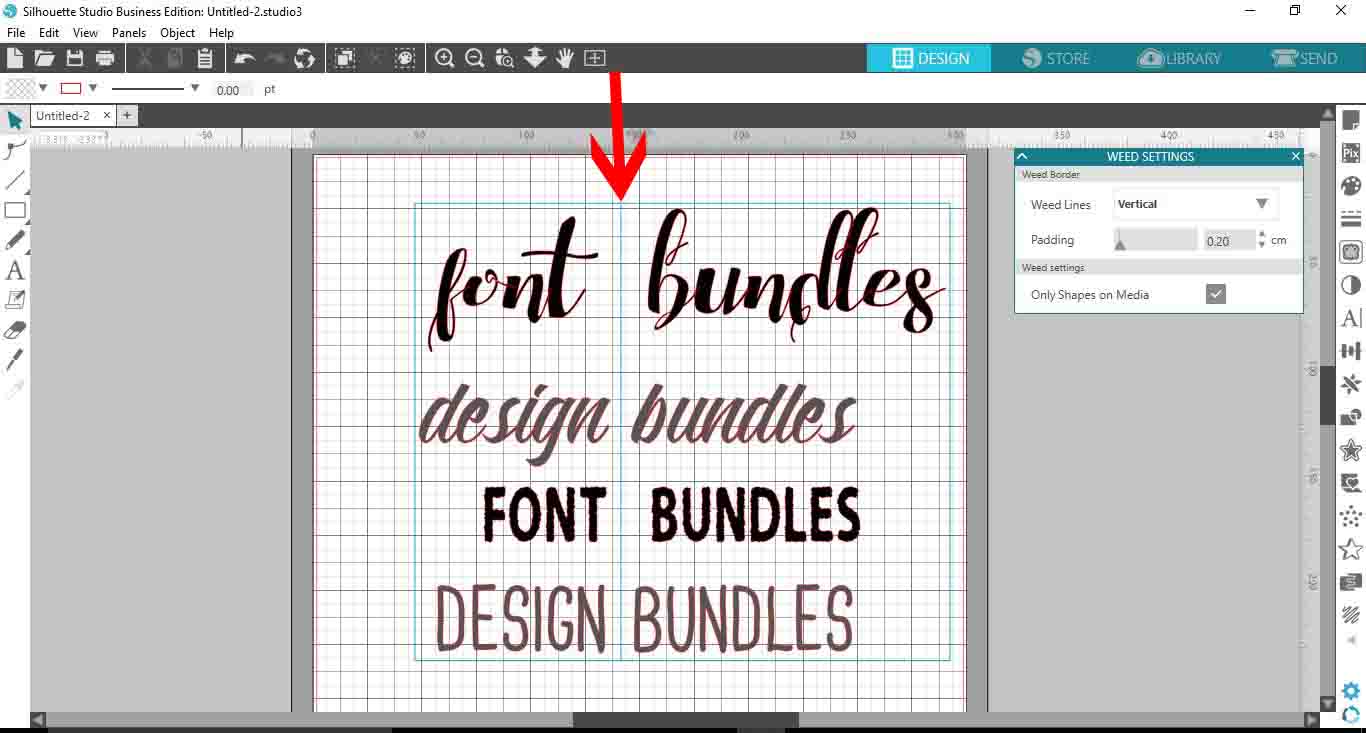
Vertical Weed Lines
These weed lines are placed vertically between any available gaps.
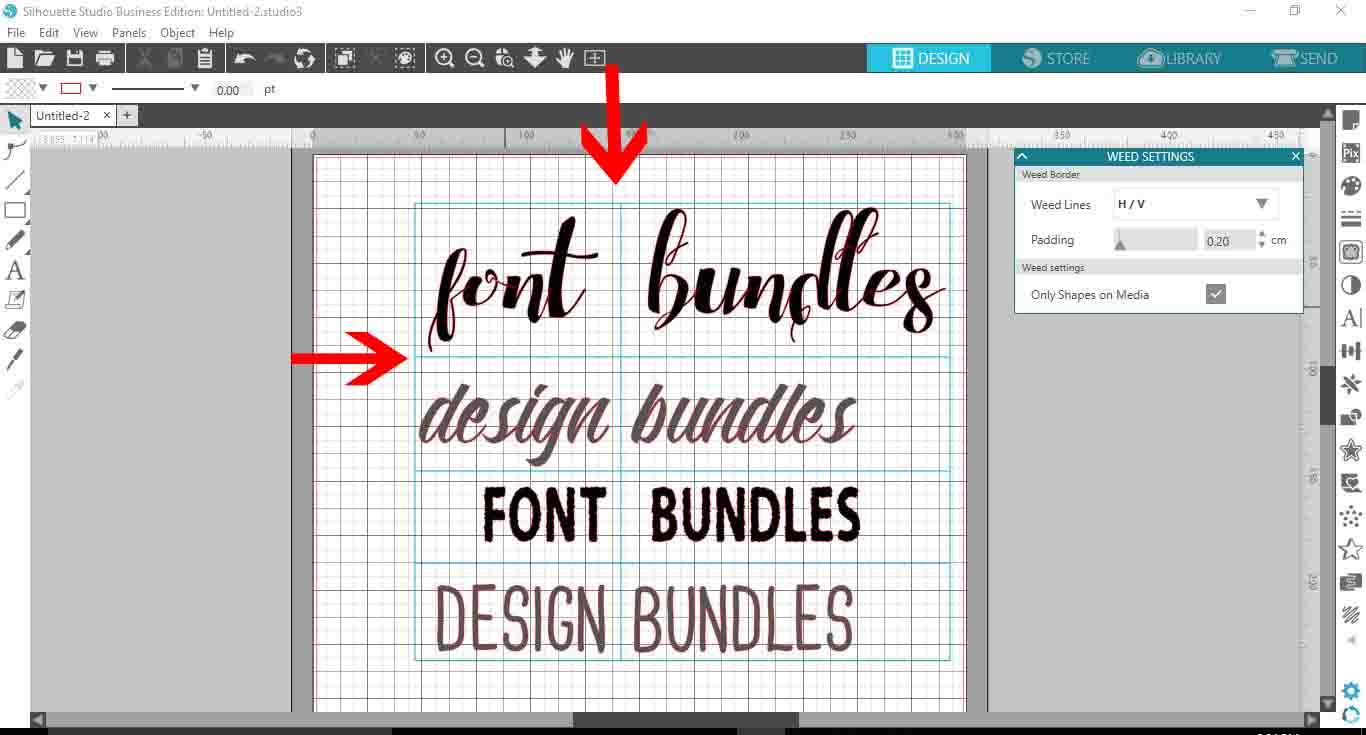
Horizontal and Vertical Weed Lines
The H/V option adds both horizontal and vertical weed lines. This is especially helpful for more intricate designs.
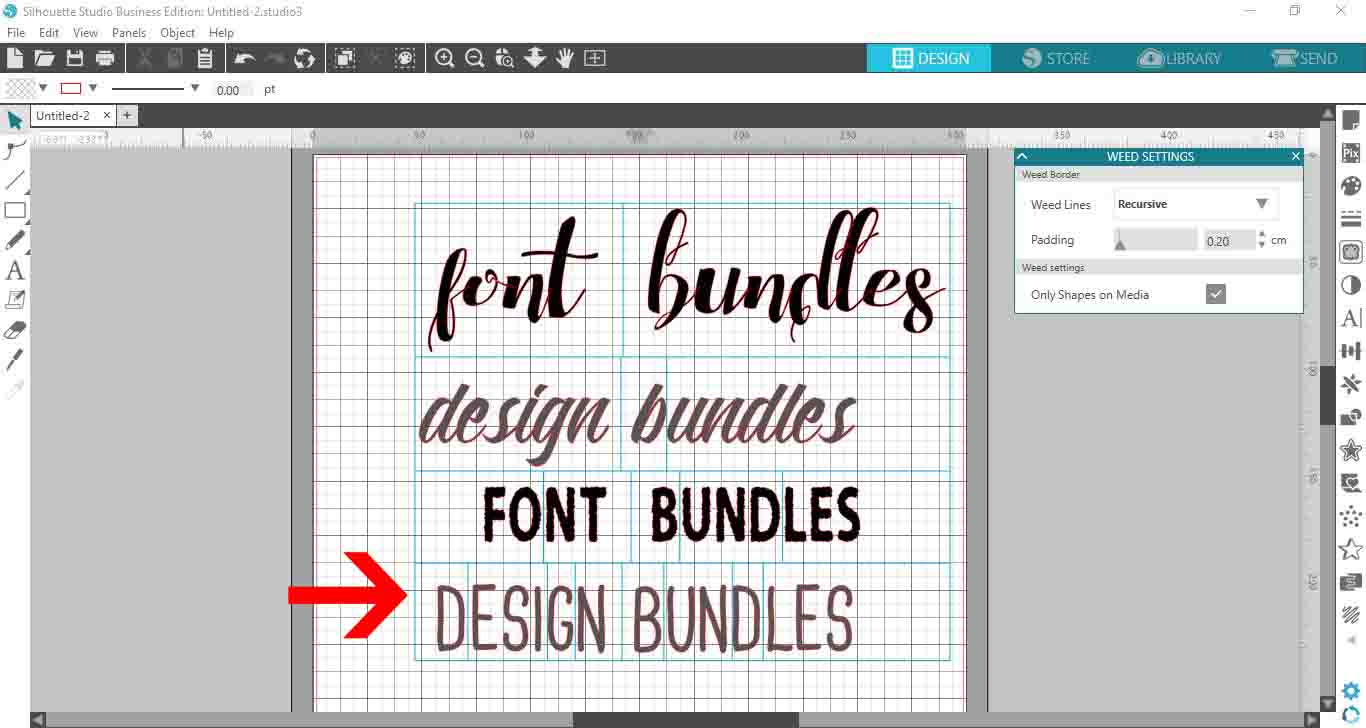
Recursive Weed Lines
Recursive weed lines are used to separate images and individual letters for easy weeding. This option will only work on text that is not welded as shown in the image below.
Step 3 - Edit the Weeding Boxes
In the Weed Settings panel you have the Padding option. This adjusts the spacing around the weed border. You can edit the weeding boxes so they are closer or further away from the text or design.
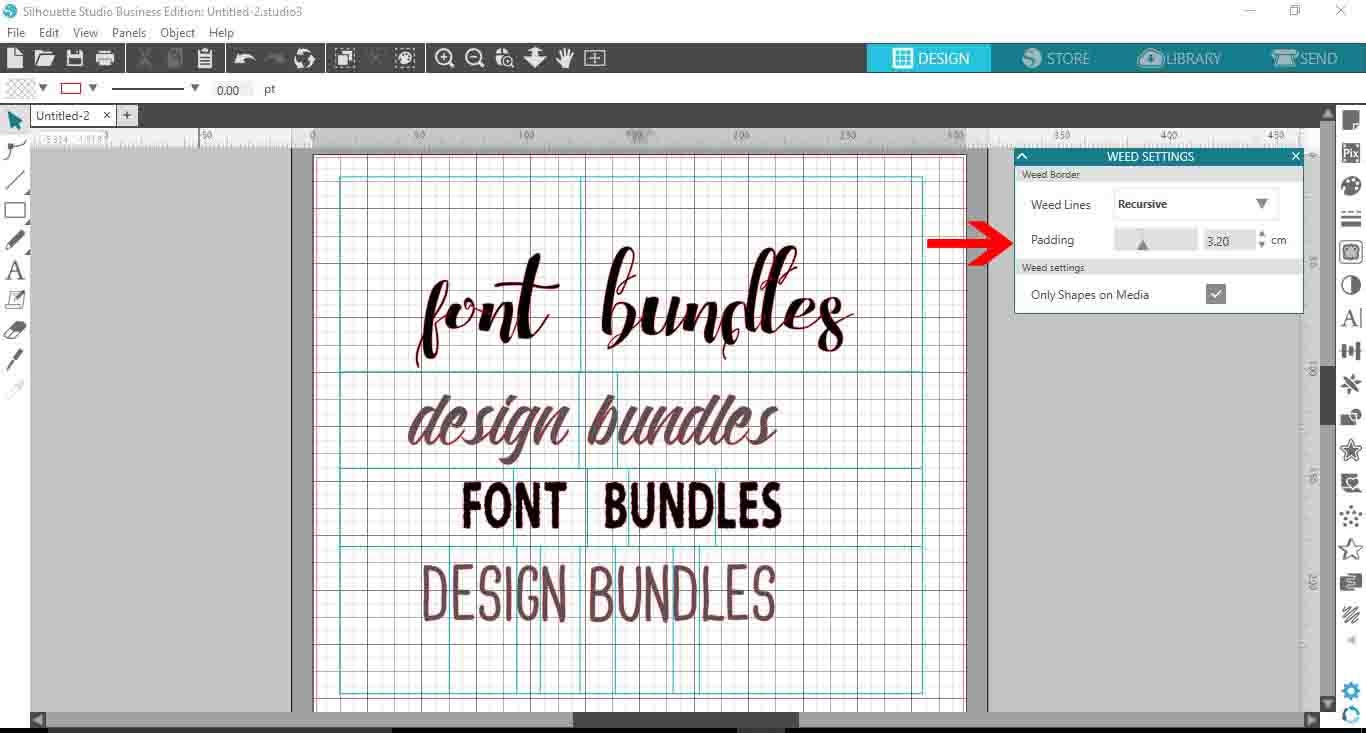
If you add another design or text, the weeding lines will adjust automatically to accommodate.
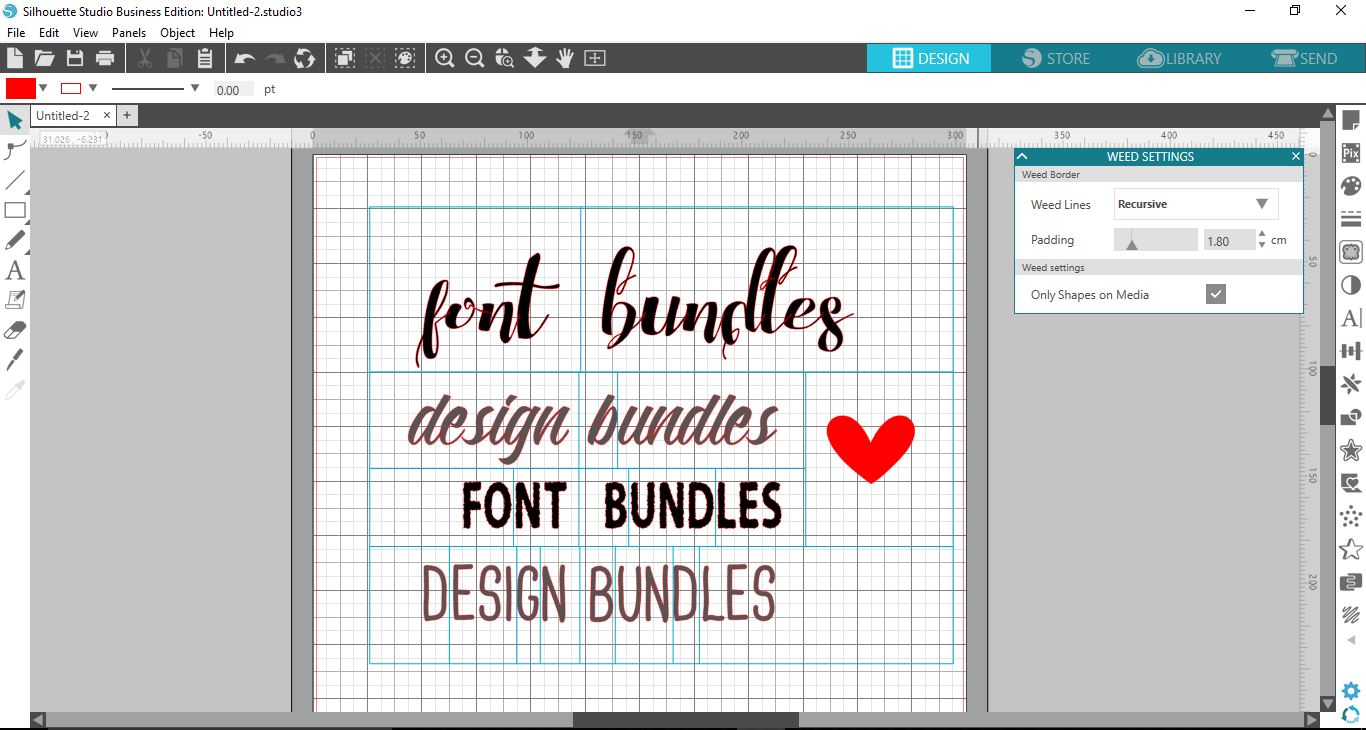
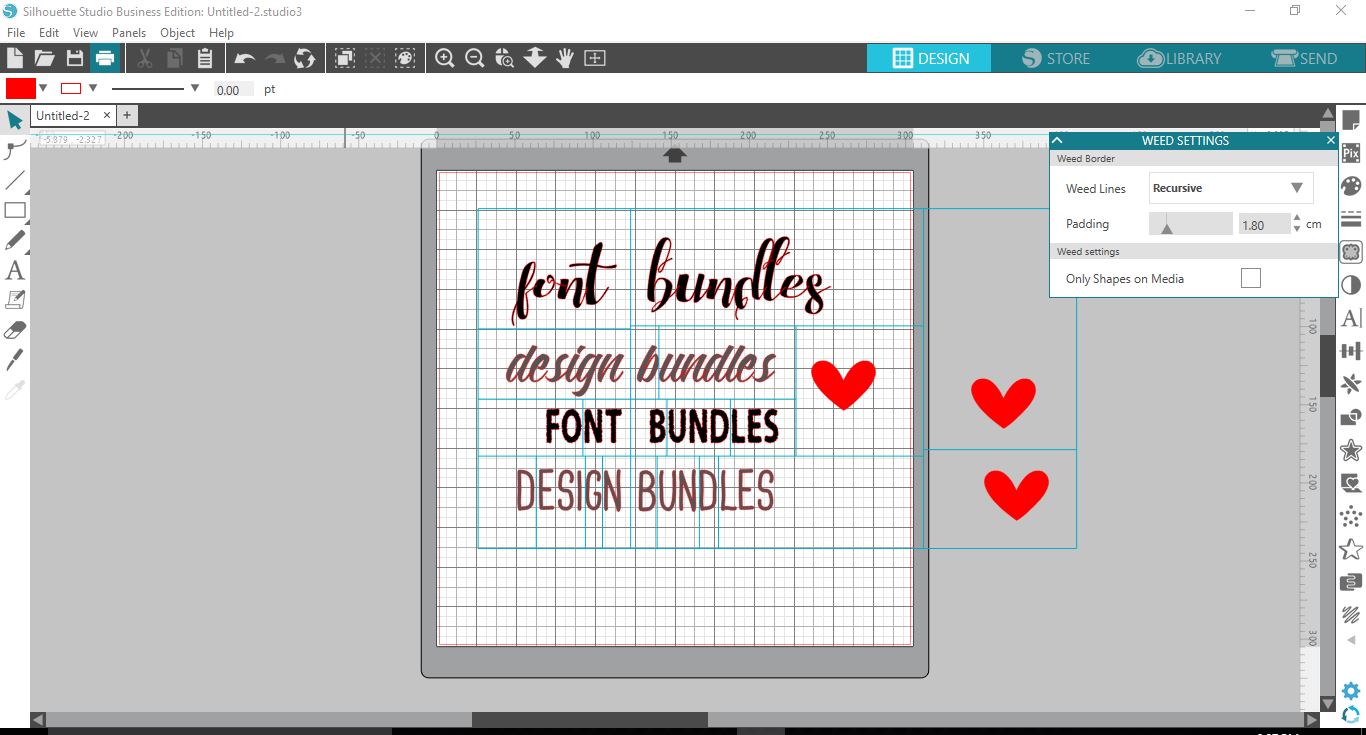
At the bottom of the Weed Settings panel is the box for Only Shapes on Media. When ticked, weeding lines will only be applied to designs or text on the mat. If unticked, weeding lines will extend to any media that is off the mat.
Send to Cut
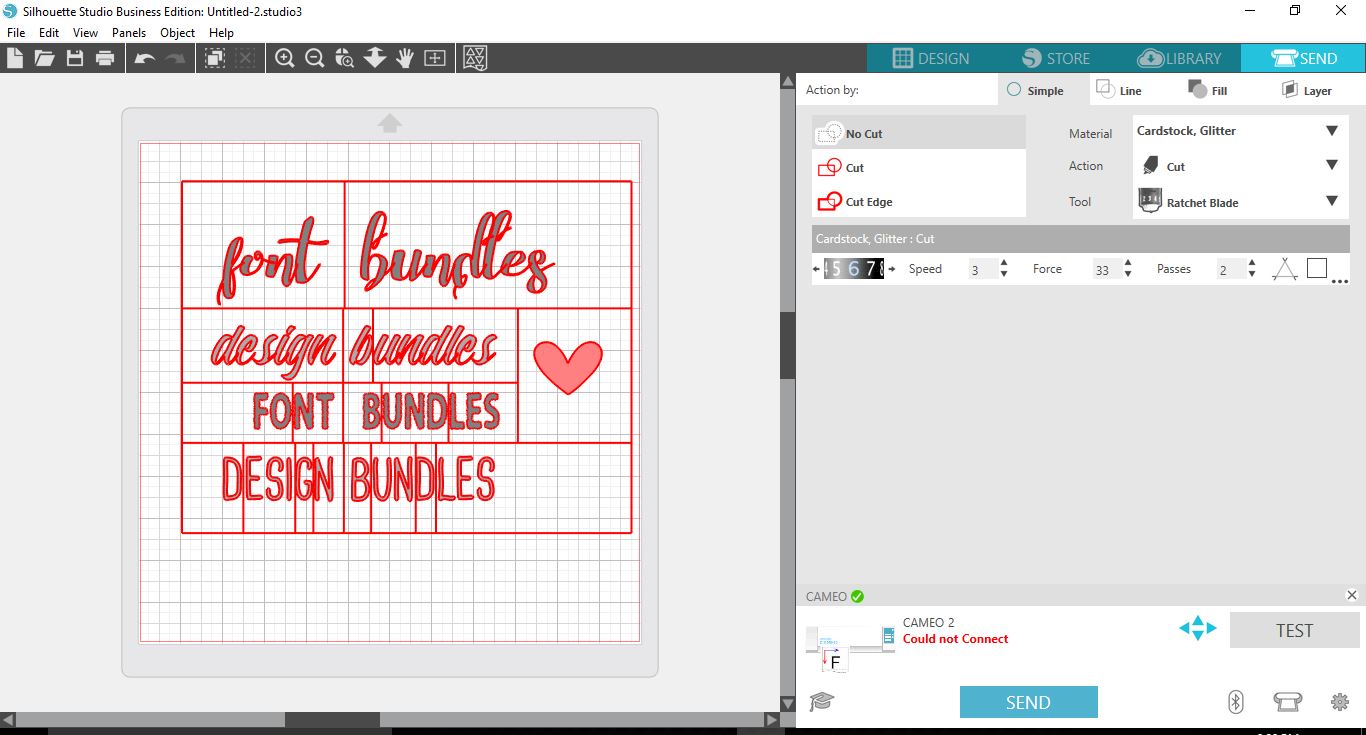
Click on the Send button top right to go to the cut settings. Here you can see that the designs, text and weeding lines are highlighted to be cut.
The Auto Weed function in Silhouette Studio will save you time and money. Projects become hassle free and more fun to make without worrying about losing small pieces. You can also create your own weeding lines for those projects that require a little more tweaking. We hope that this tutorial has been insightful and helped you learn to weed with confidence.