
By Design Bundles
How to Add an Outline Around Any Text in Silhouette Studio
In this tutorial you will learn how to add an outline around any text using Silhouette Studio. Adding an outline creates impact and makes the text stand out. It works especially well for t-shirts, decals, signage and much more.
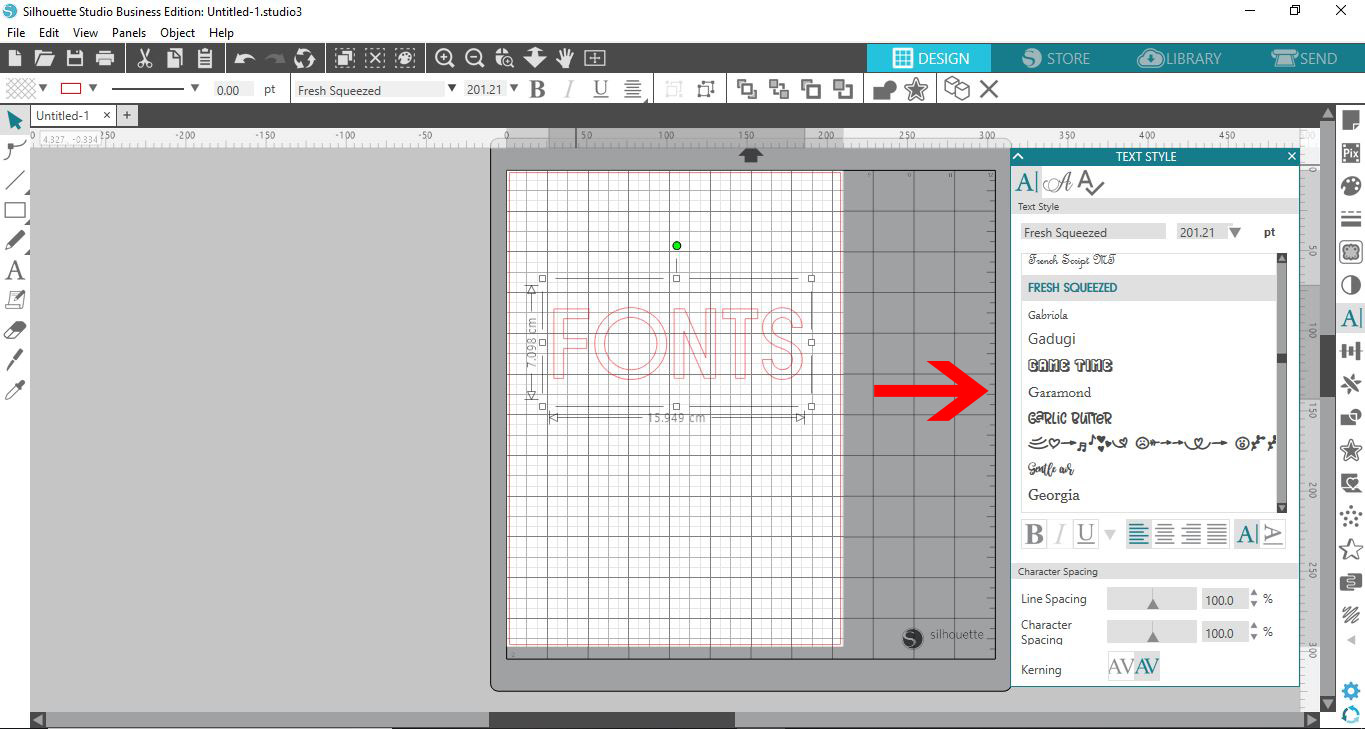
For this tutorial we are using this sans serif font duo called Fresh Squeezed.
Step 1 - Edit the Text Font
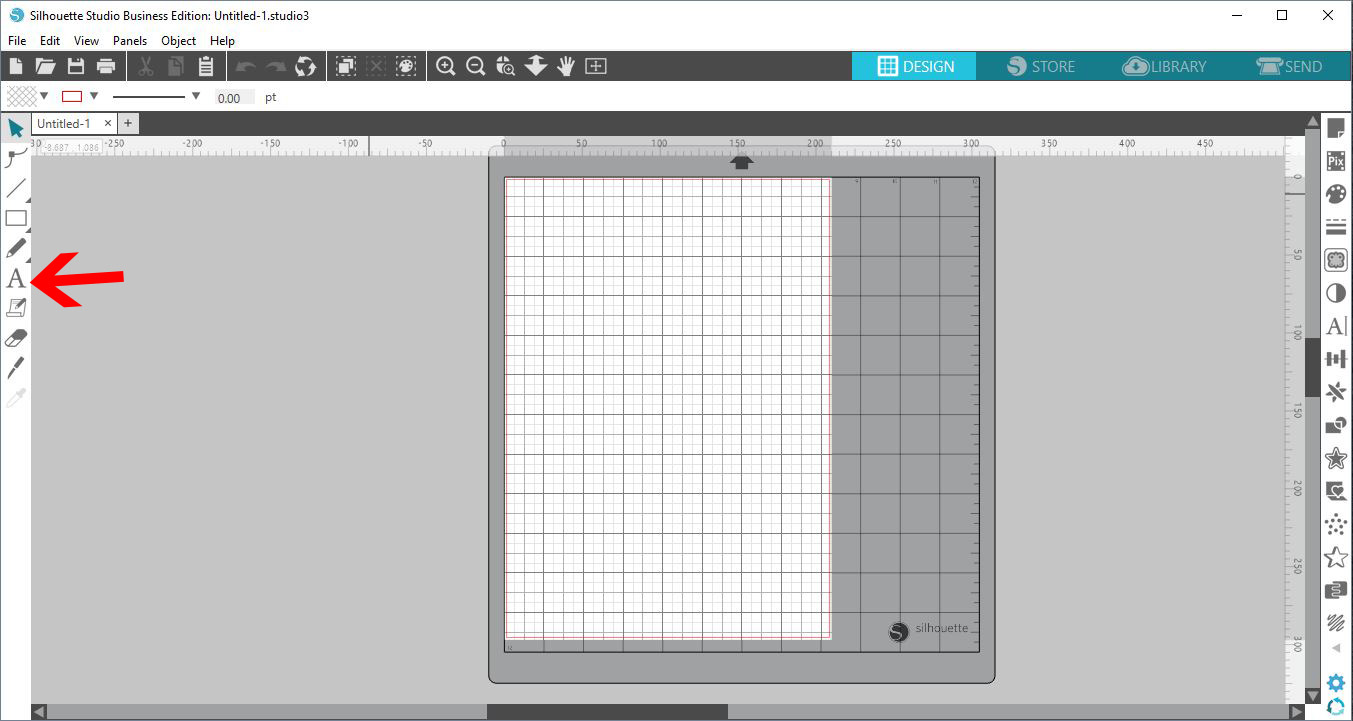
Once you have opened Silhouette Studio, click on the Text Tool on the left hand side.
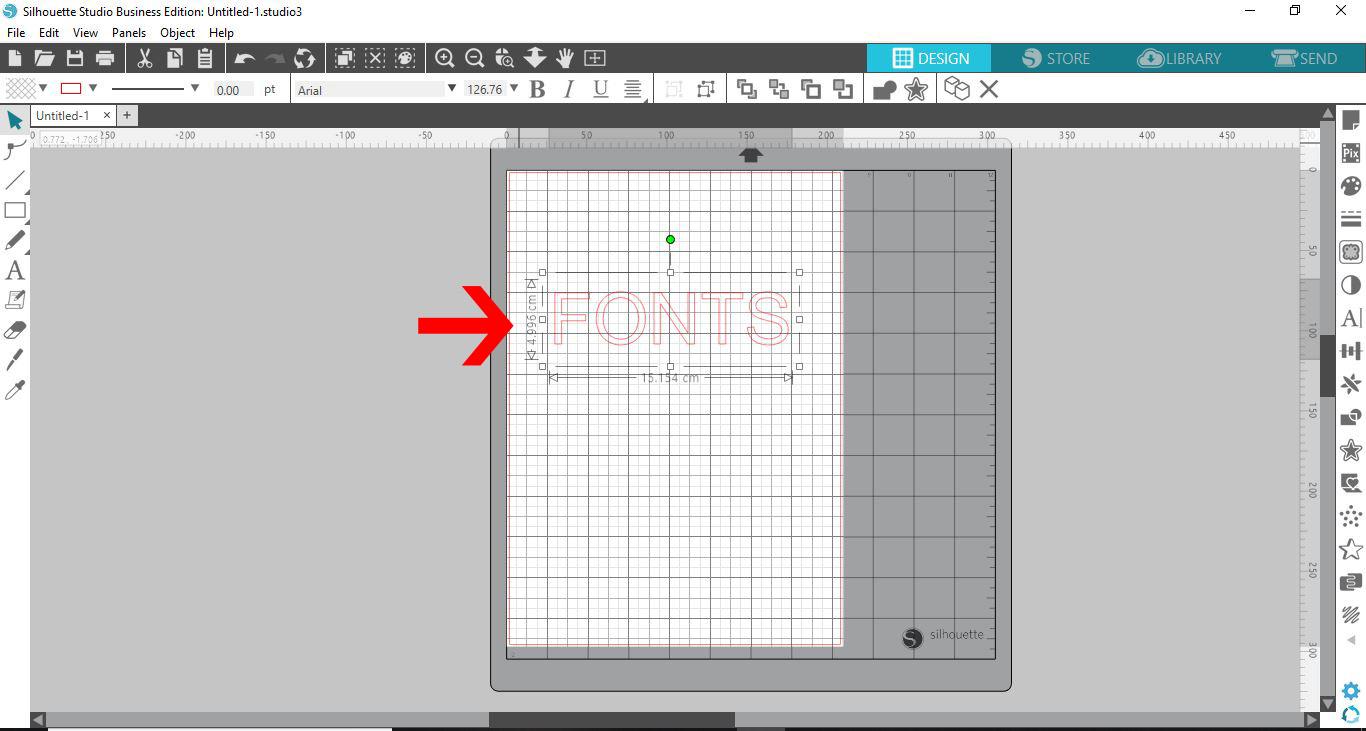
Click anywhere on the Silhouette mat and start typing your text. For more information, check out our tutorial on editing text in Silhouette Studio.
Change the font by selecting the Text Style panel on the right hand side. We have a great tutorial on how to use any font in Silhouette Studio if needed. You can even add glyphs to your text for a more interesting look.
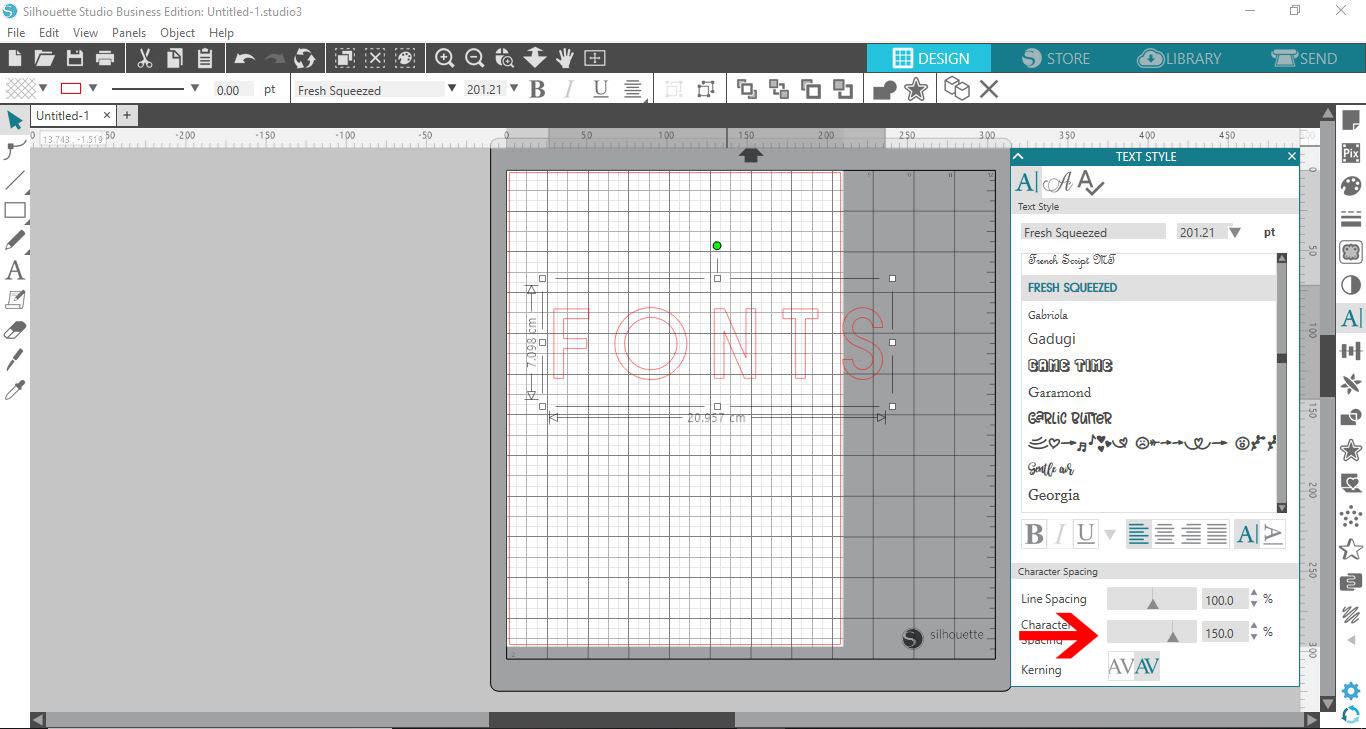
Once you have selected your font, you will need to adjust the character spacing. This is so you can add the outline without overlapping characters. Adjust the Character Spacing at the bottom of the panel.
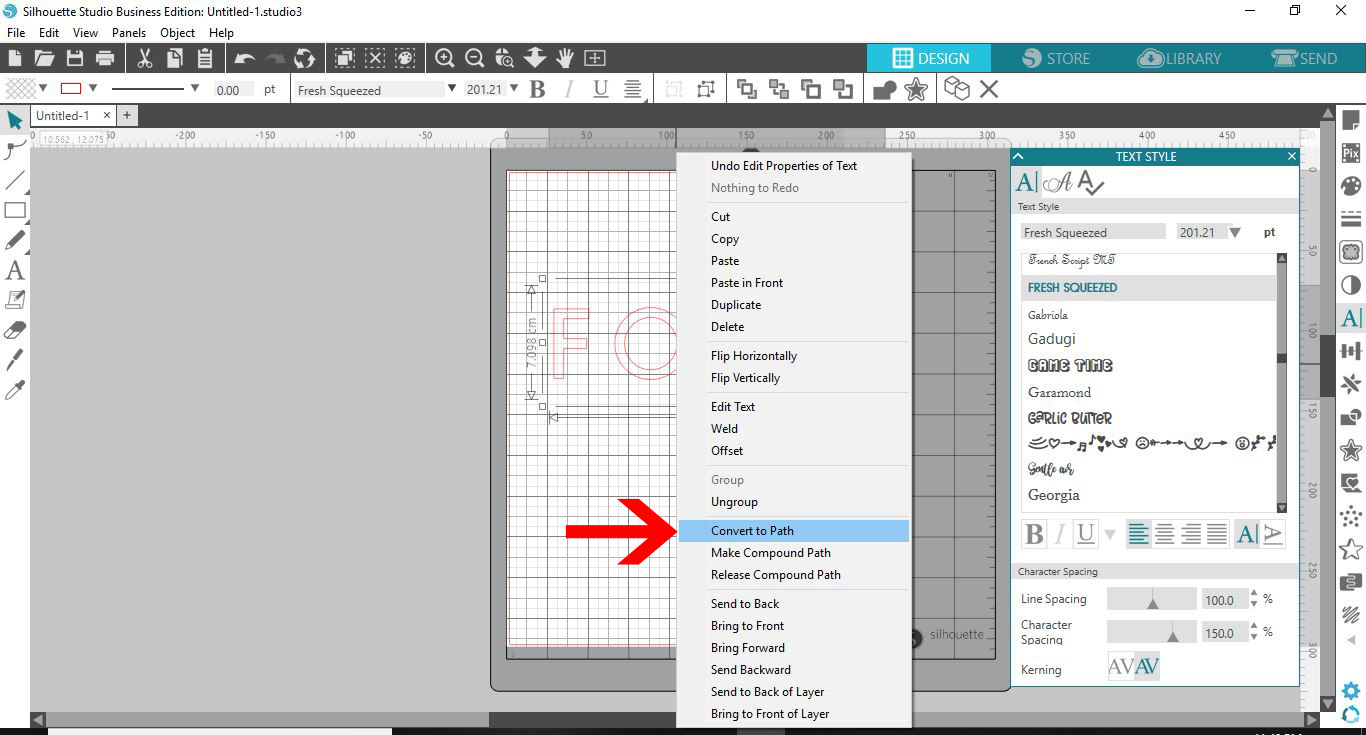
Once you are done editing your text, right click > Convert to Path. This will turn the text into an object.
Step 2 - Add an Offset to the Text
We are now going to add an offset to our text. On the right side panel, click on the icon Open Offset Panel.
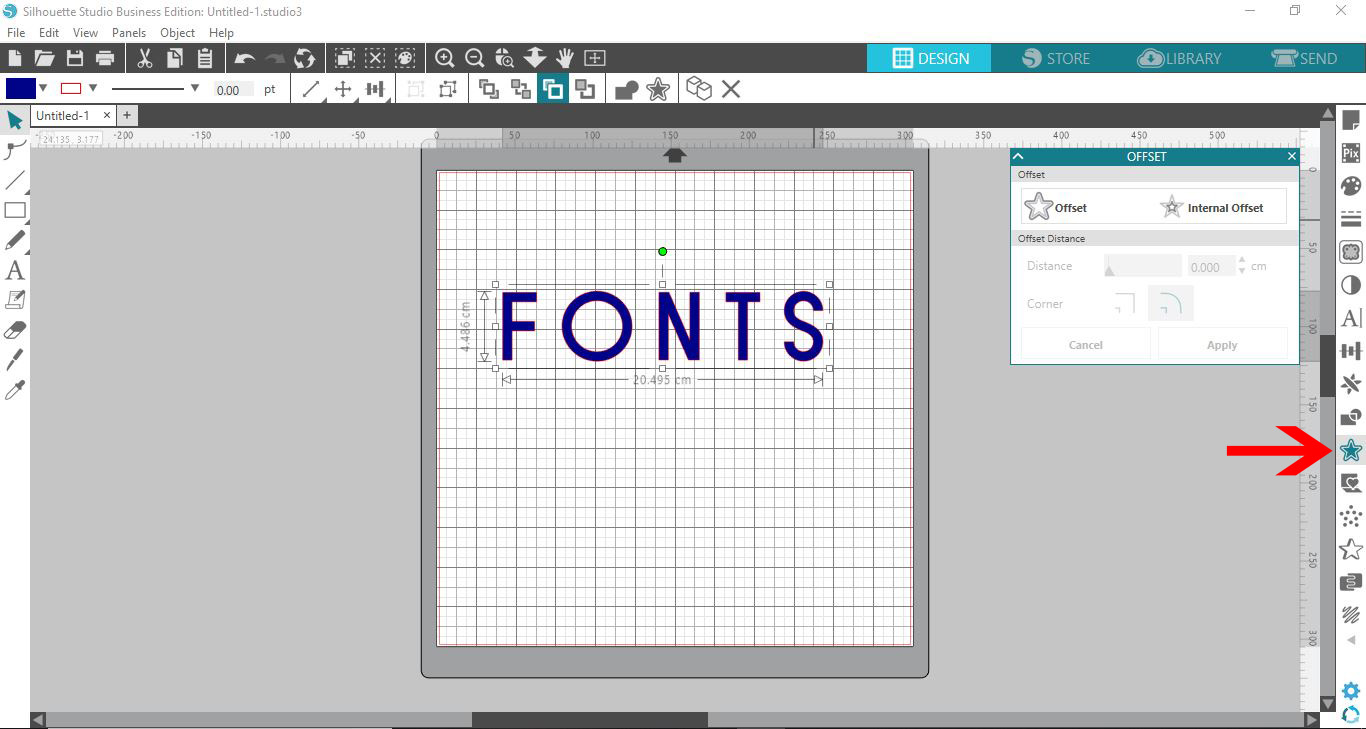
In the panel, click on Offset, then adjust the width according to your needs. This will create a gap between the text and the outline. When you are happy with the width, click on Apply to commit to the changes.

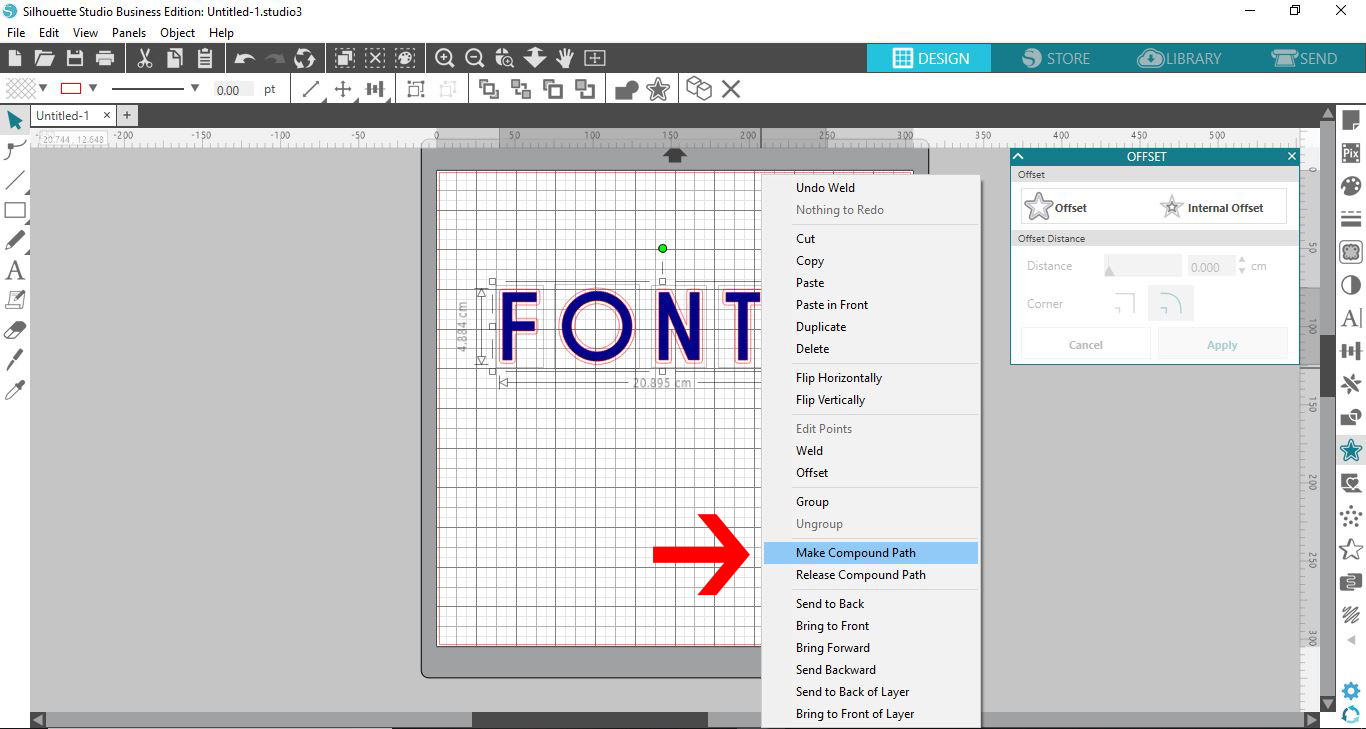
While the offset is still selected, right click > Make Compound Path. Then, right click > Group. We are grouping the offset as converting to a compound path turns each part into an individual object.
Now, we are going to add a second offset to the one we already created. Select the offset that is around the text.
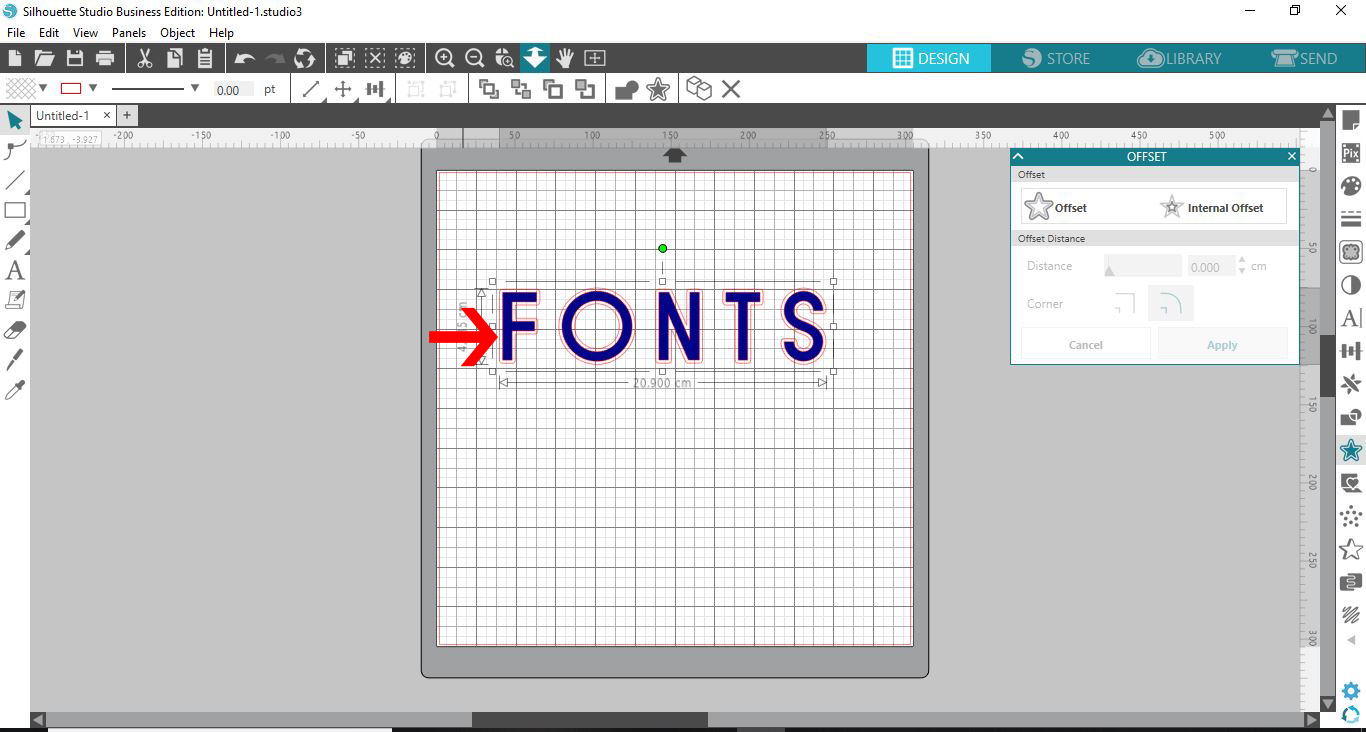
In the Offset Panel, click on Offset then adjust the width. Remember to click Apply. This will become the outline.
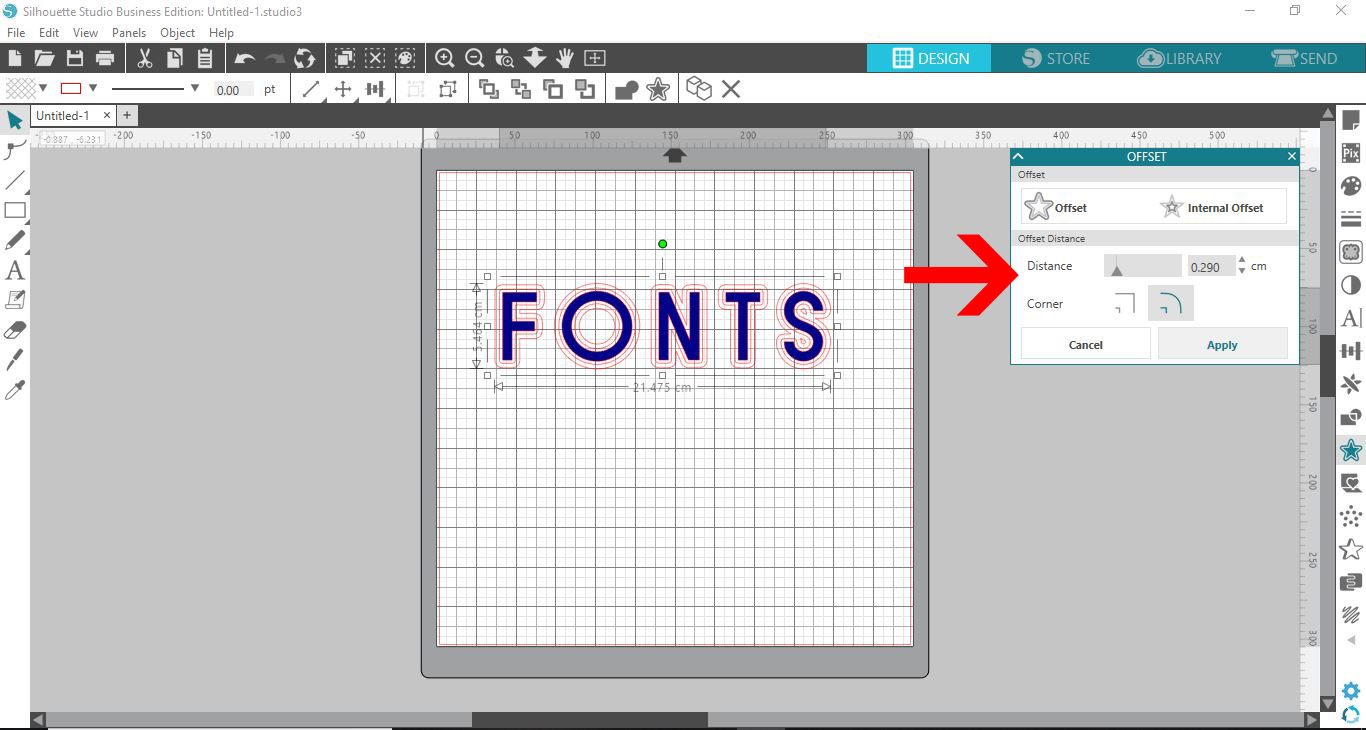
With the new offset still selected, again right click > Make Compound Path. Then right click > Group.
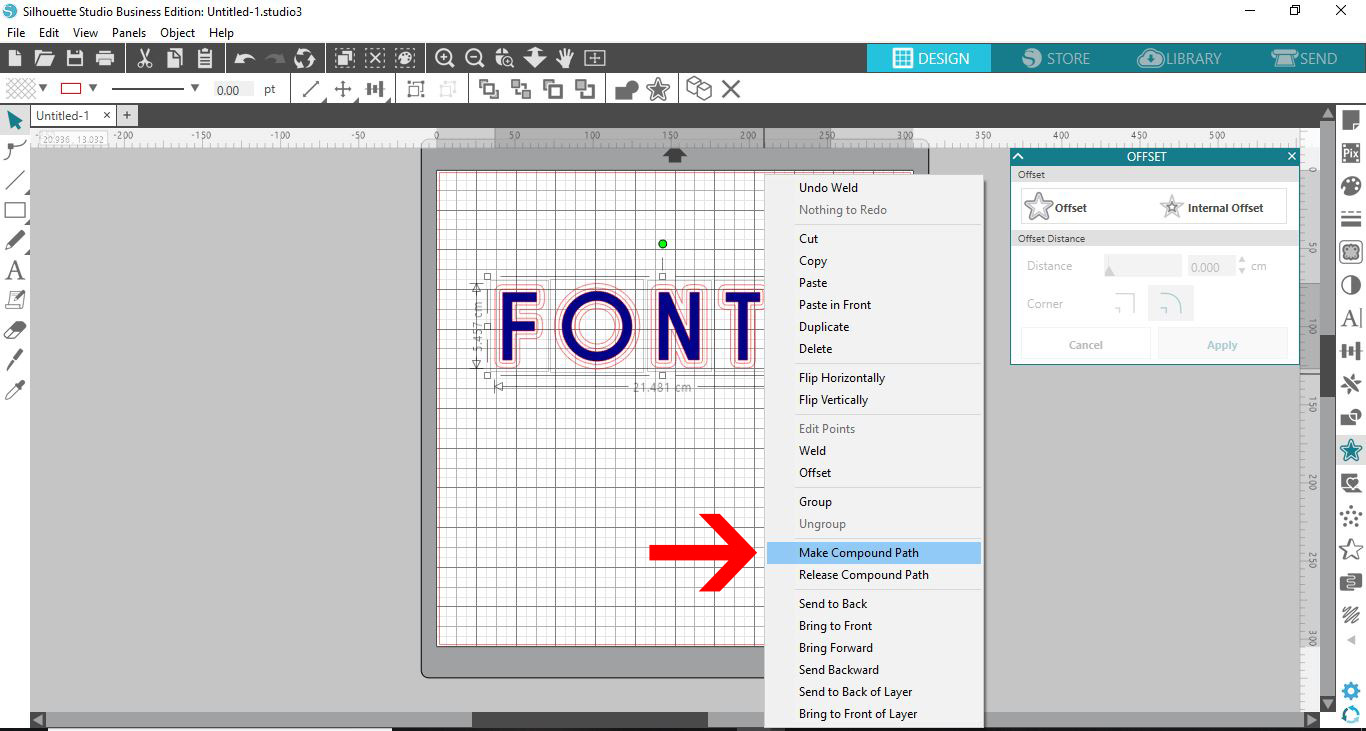
Step 3 - Create Outline Around Text
Add color to your offsets by using the Fill panel that looks like a paint palette on the right hand side. It’s not necessary to add a color to the first offset, but you may want a visual.

You now have two offsets on your text. The first offset you created, shown in Red below, is for the space between the outline and the text. The second offset, highlighted in Aqua, is the outline.
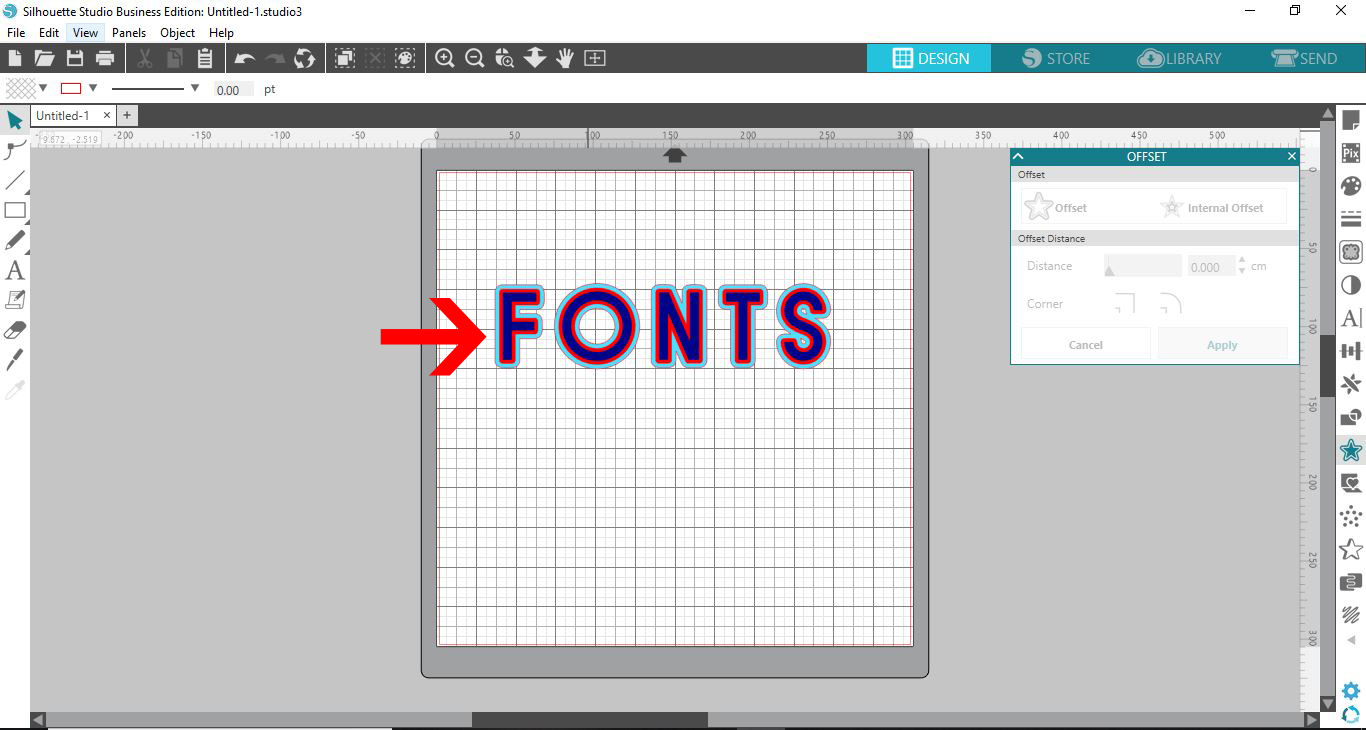
Zoom into the text so you can clearly see each offset.
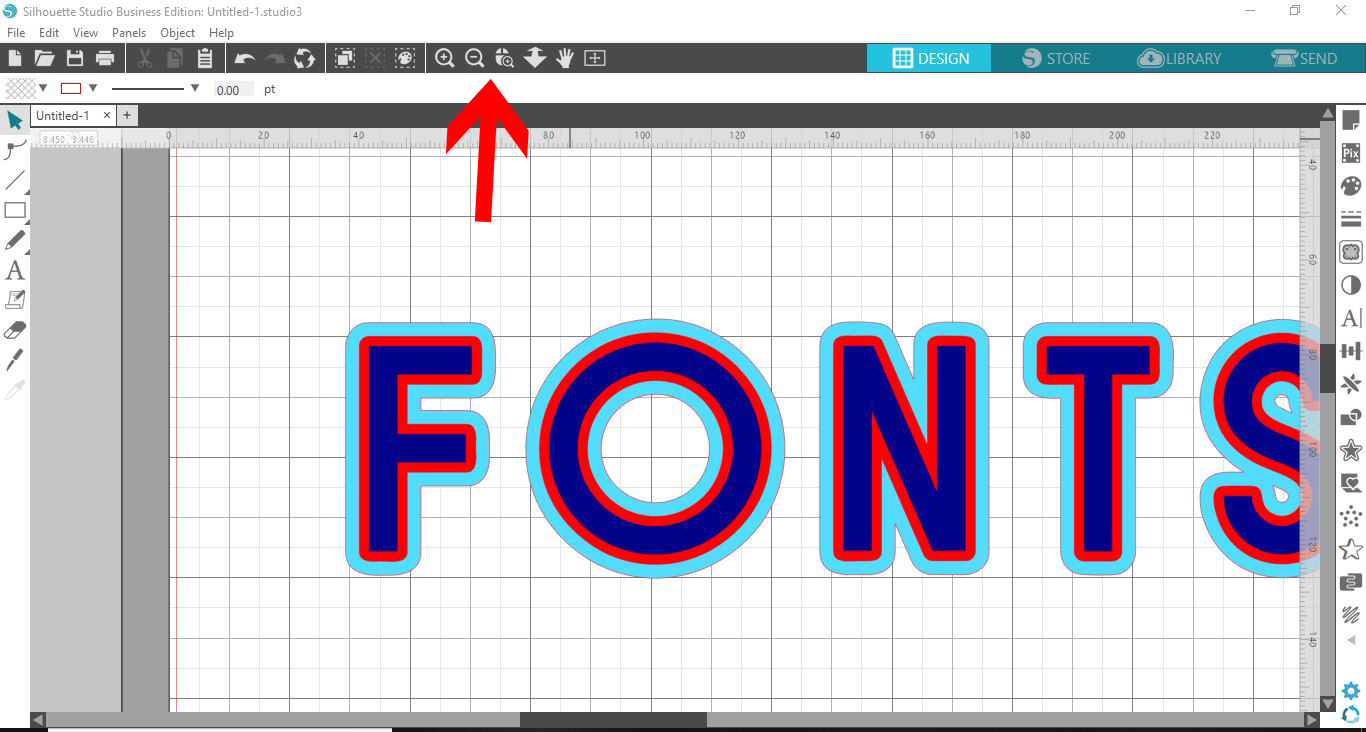
Select both of the offsets by clicking on one, then holding Shift, click on the second offset. Now both are selected.
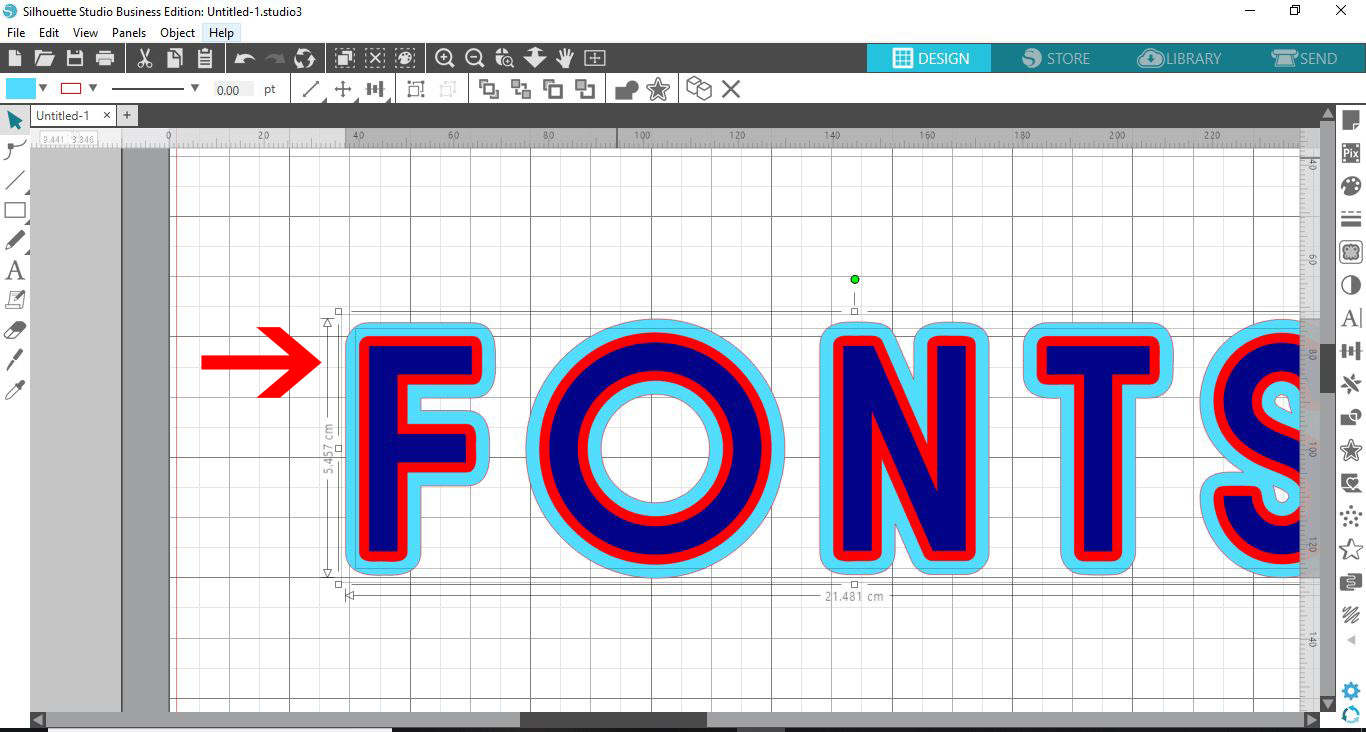
Next, right click > Make Compound Path.
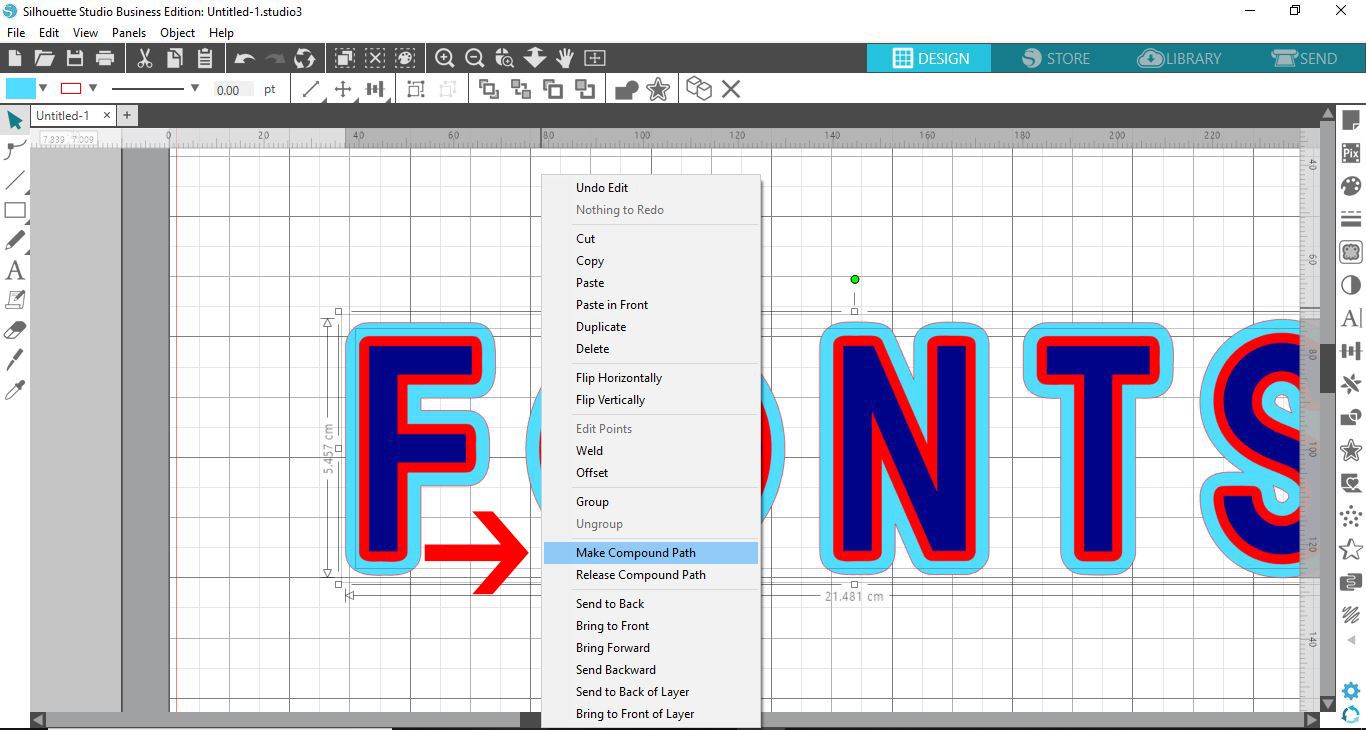
When converted to a compound path, the first offset will disappear and leave a space between the text and the outline.
You can now either Group or make a compound path, then click on the Send panel to cut.
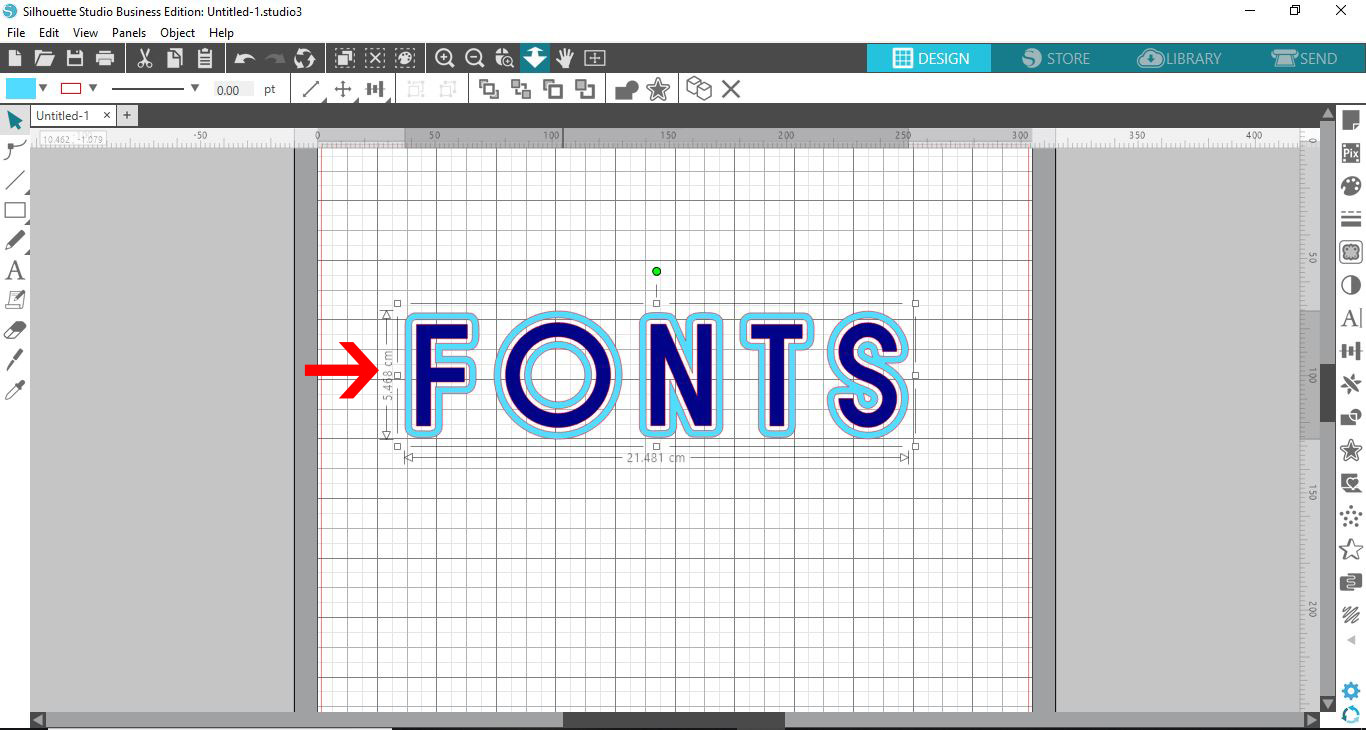
There you go, you have successfully added an outline around text using Silhouette Studio. You can now use your text creation in any of your future projects.