By Design Bundles
How to Calibrate with the Distance Adjustment Tool in Silhouette Studio
In this tutorial we will guide you on how to calibrate with the Distance Adjustment Tool in Silhouette Studio. The tool is used to correct any differences in your design measurement. You may find that your machine is cutting slightly off the design. It can be highly frustrating but with this tutorial we will help you to fix this issue.
An example of where you would use the Distance Adjustment Tool would be for a design like a 3cm square.
When cutting it may be off by 3.3cm, so you would need to correct this. Let’s get started by opening Silhouette Studio.
Step 1 - Print Distance Adjustment Test Page
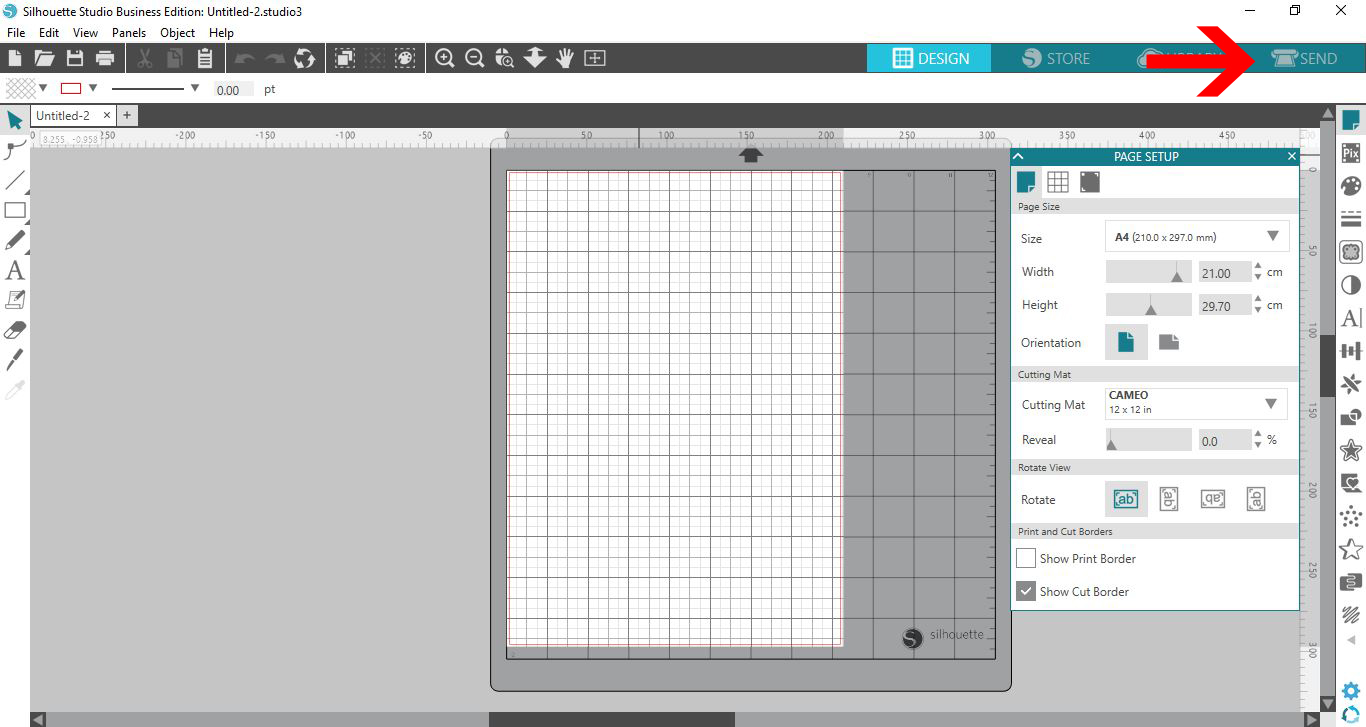
We will need to print out the Distance Adjustment test page in order to adjust. Once you have opened Silhouette Studio, click on the Send panel icon.
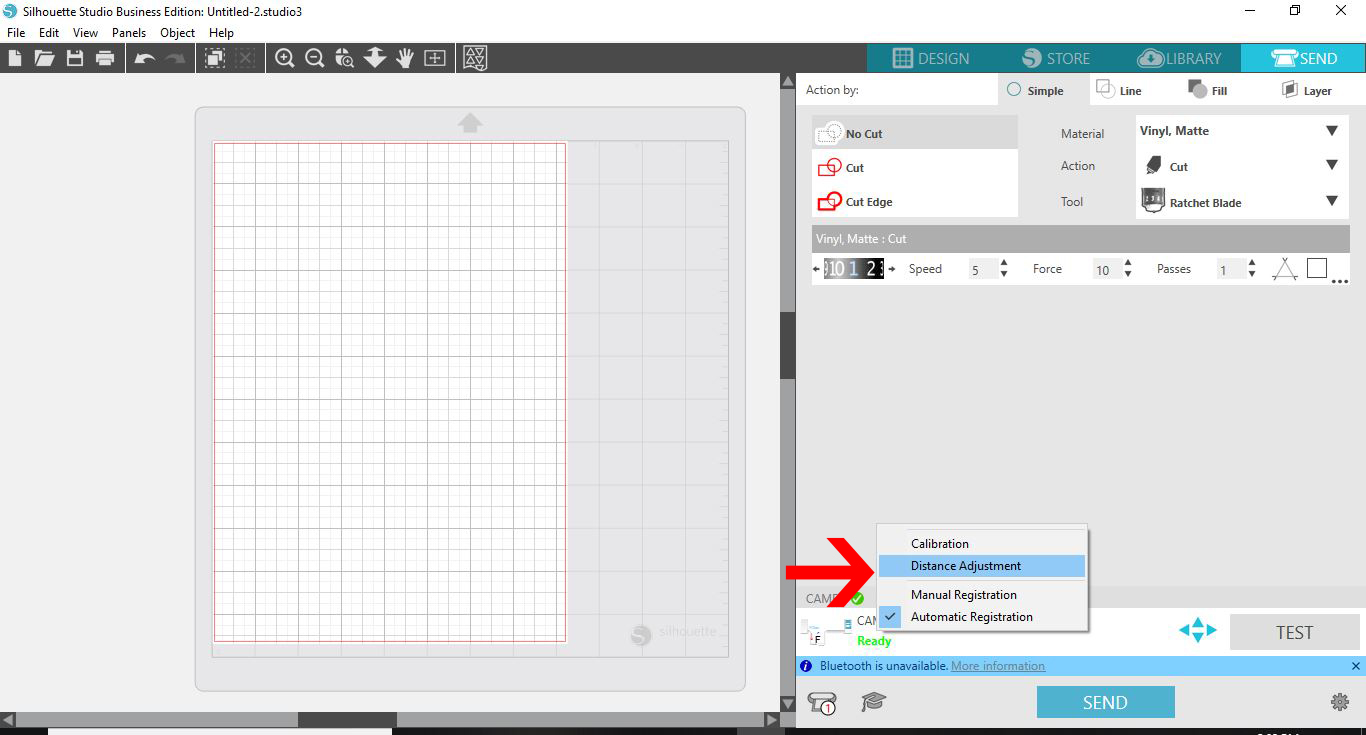
At the bottom of the screen, right click on the currently selected machine icon. In this case, the Cameo is selected. In the pop up window select the Distance Adjustment option.
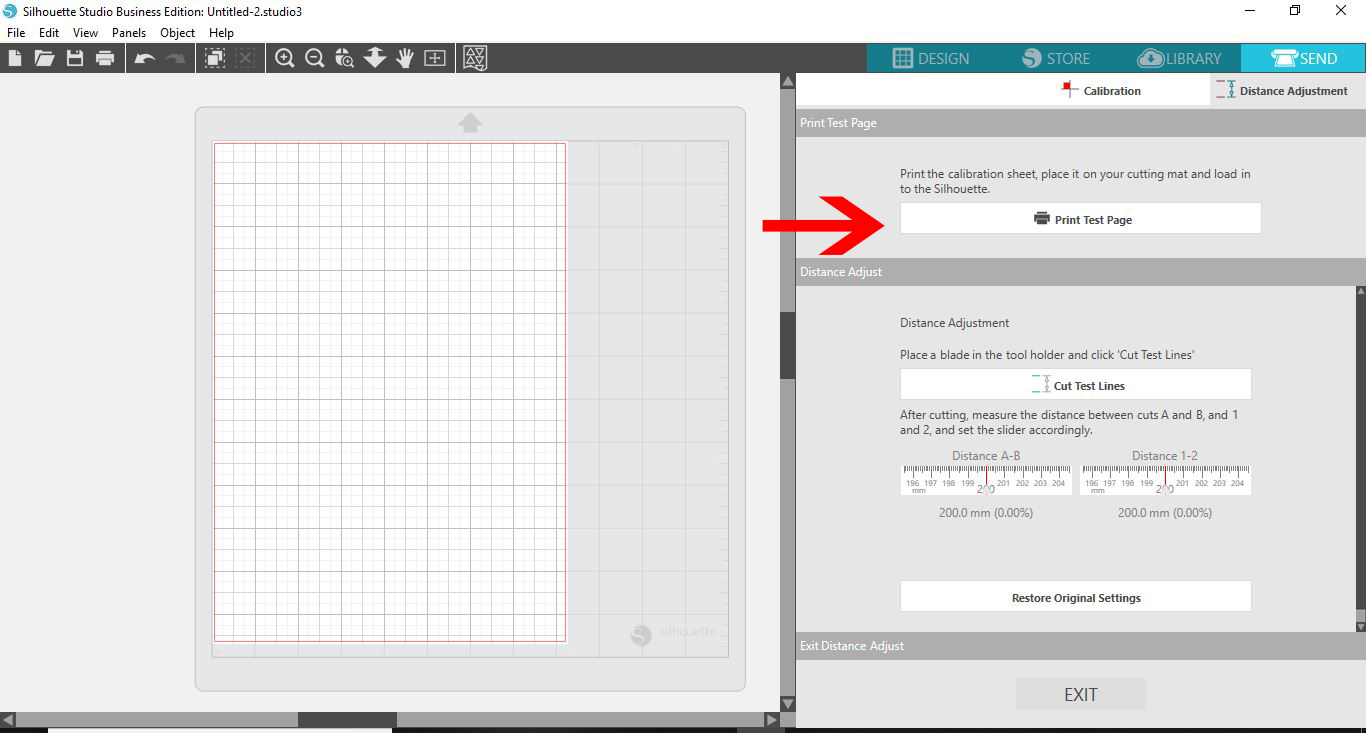
In the window on the right side, click on Print Test Page.
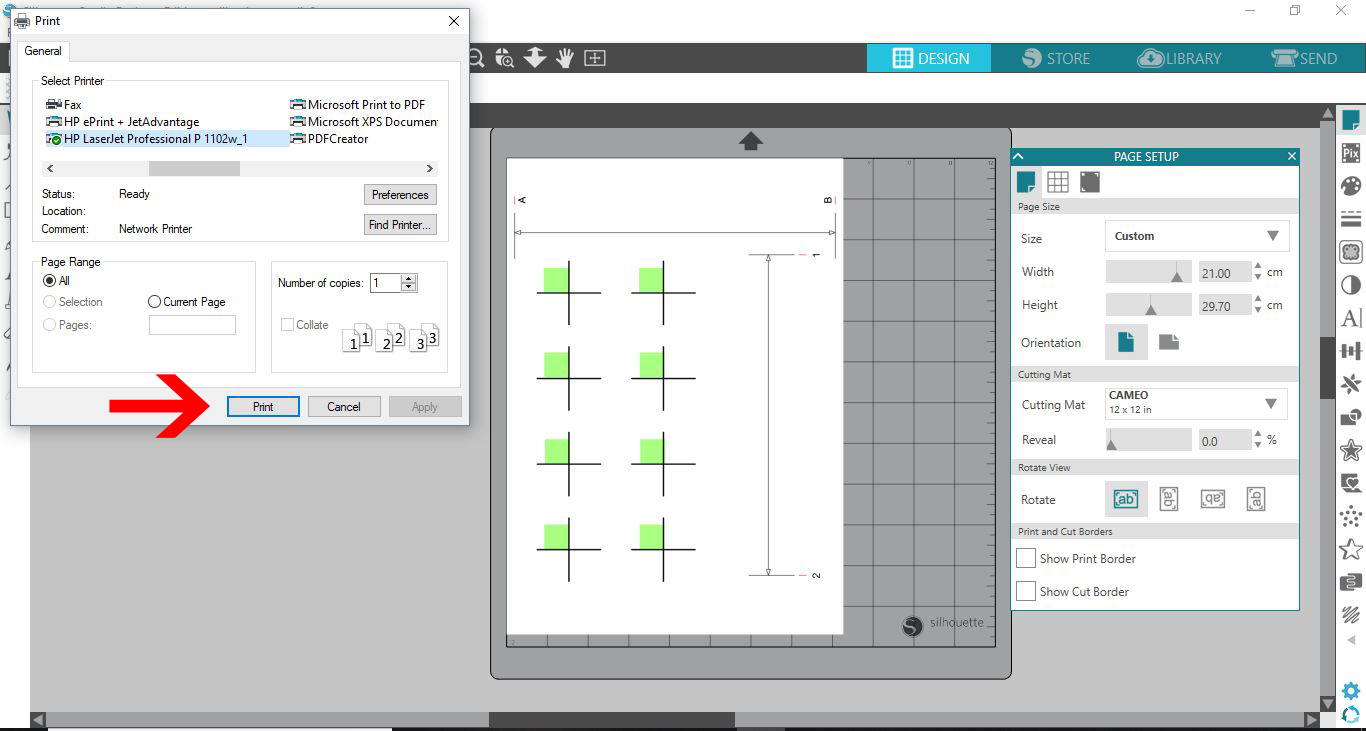
The test page will appear on the mat in the Design area. The print options menu will also open where you can select the printer. Choose a letter or A4 size for printing. Then, click on Print.
Step 2 - Send Test Sheet to Cut
Load the test sheet onto your mat. In the window on the right, click on Cut Test Lines. Your cutting machine will cut a small line just below A and B as well as 1 and 2.
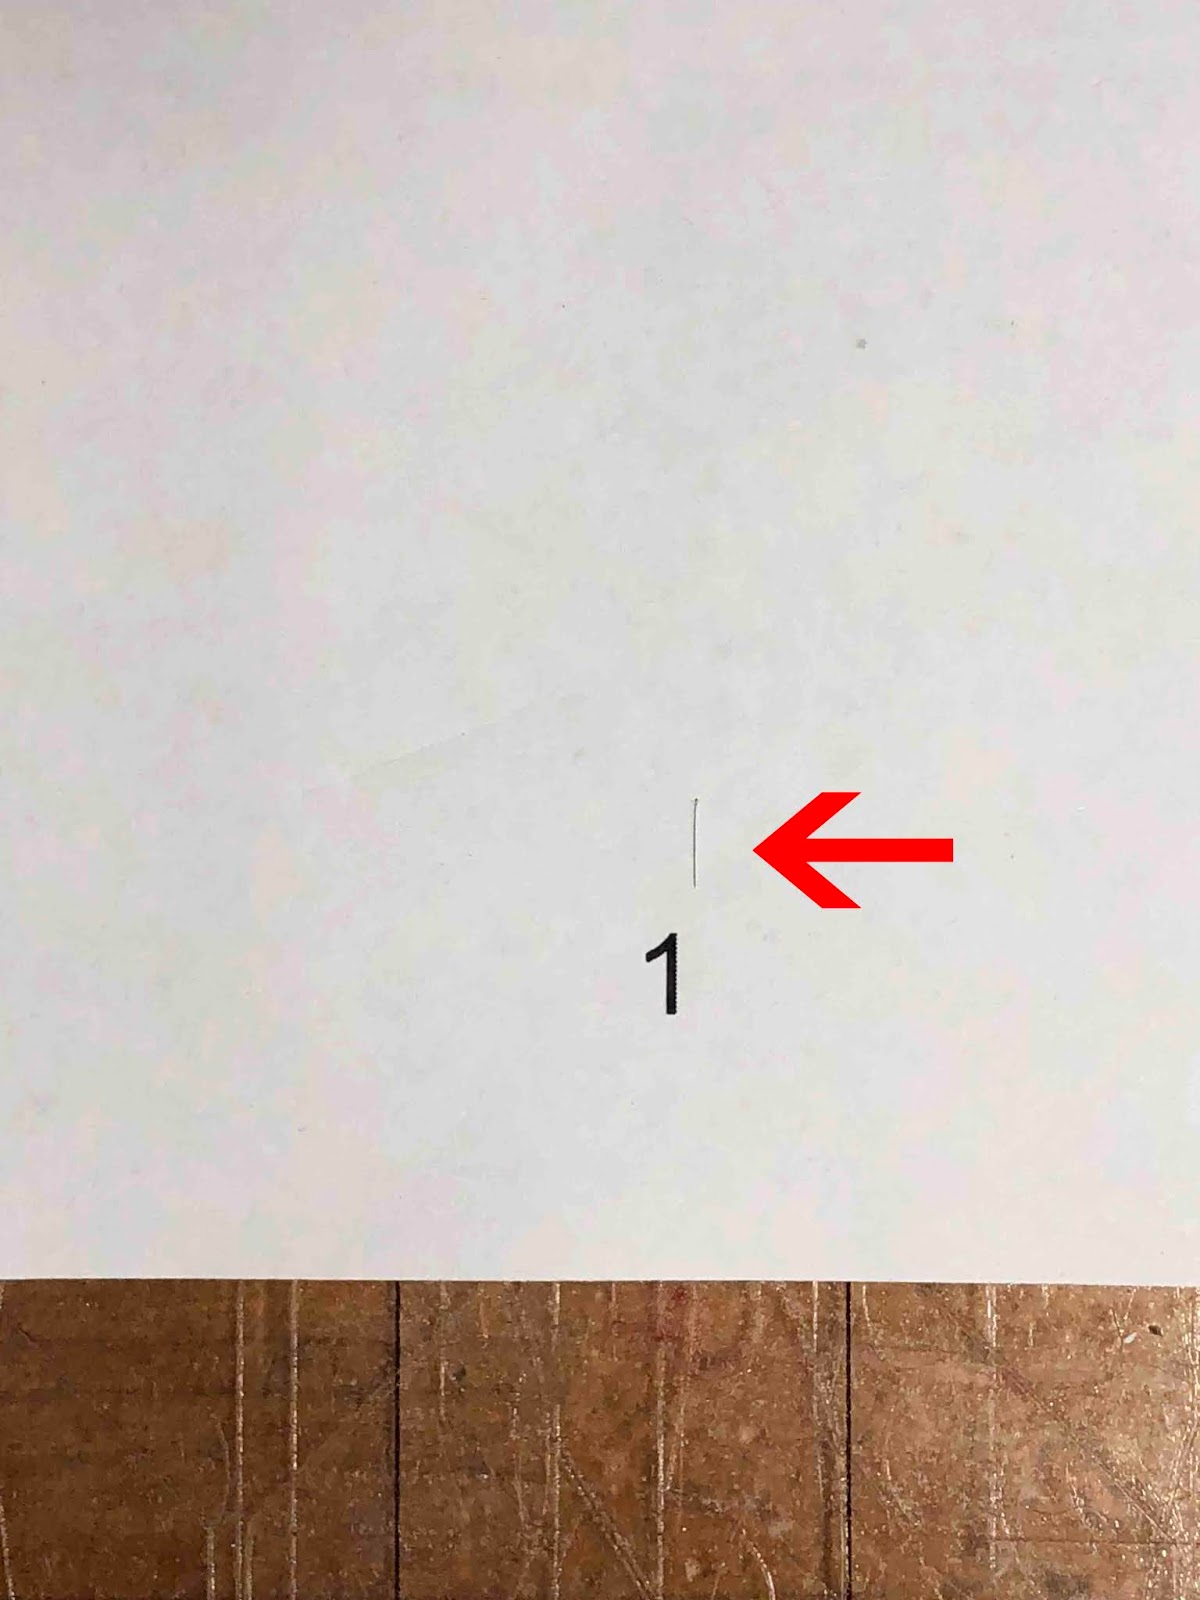
As you can see a small line was also cut above number 2.

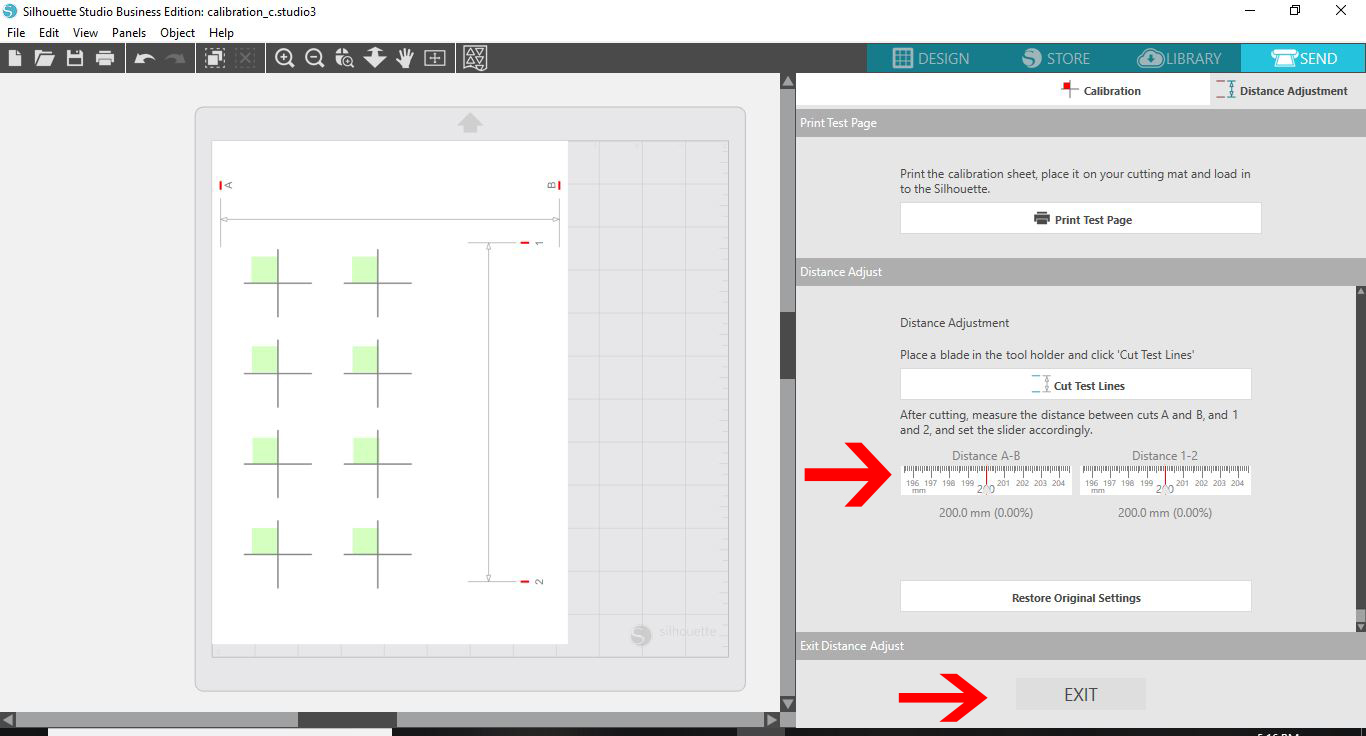
Now, take a ruler and measure, in mm, the distance between point 1 and 2. Then measure between A and B. If the distance is over 200mm, make a note of the number.
Go back to the screen. Then, under the Distance Adjustment option you will see two sets of measurements. If needed, change the measurements for the Distance A-B and Distance 1-2.
To check that the settings match, print a test sheet and cut again. If everything is correct, you can click on the Exit button to close out.
That’s it, your machine has been adjusted. We hope that you have enjoyed following this tutorial and found the information helpful.