By Design Bundles
Create a Stencil Edge Card in Silhouette Studio
Silhouette Studio, combined with your cutting machine, can help you to create some amazing projects. From card designs to decals, HTV and much more, there are endless crafting opportunities. Today, in this tutorial, we will show you how to create a stencil edge card in Silhouette Studio.
Step 1 - Create the card shape and score line
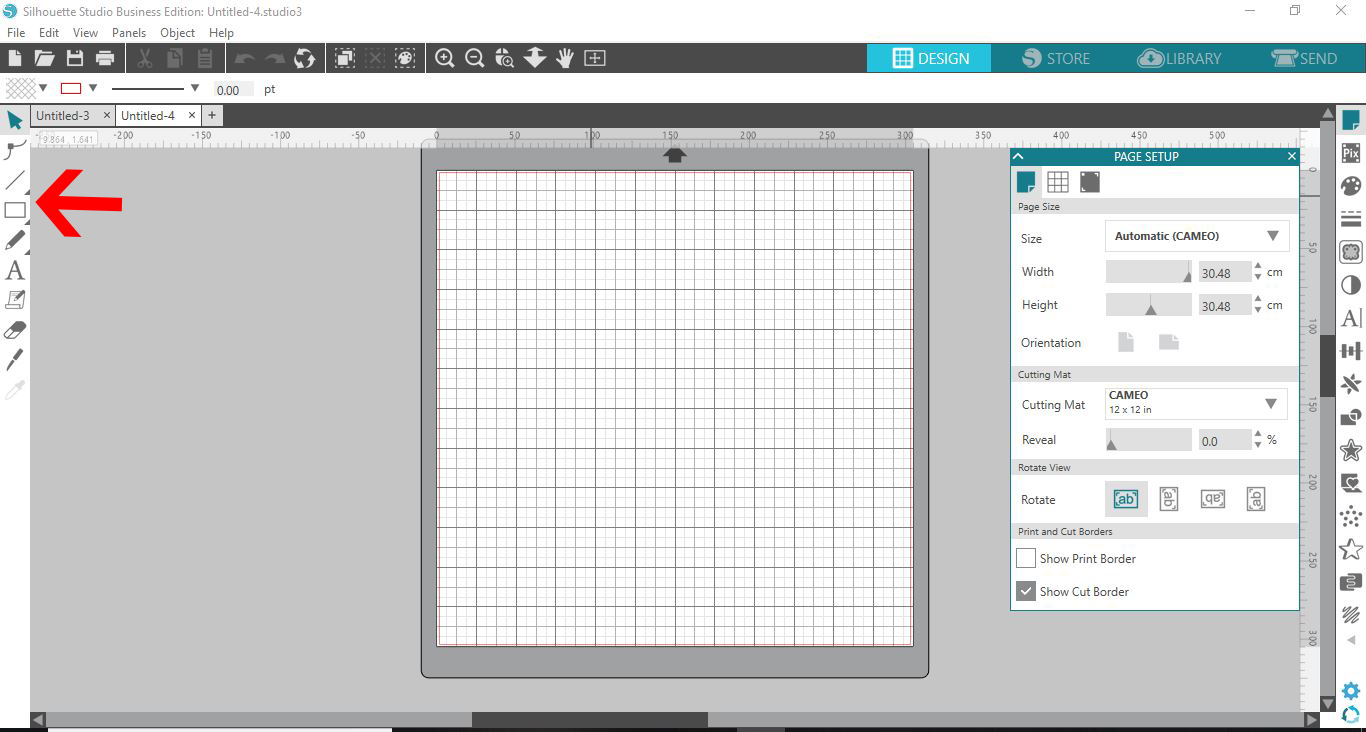
We need to set up our card shape before we can create a stencil edge. We will be using the Draw a Rectangle tool on the left hand side. If the tool is not visible, click on the small black arrow to open the selection. Then click on the rectangle tool.
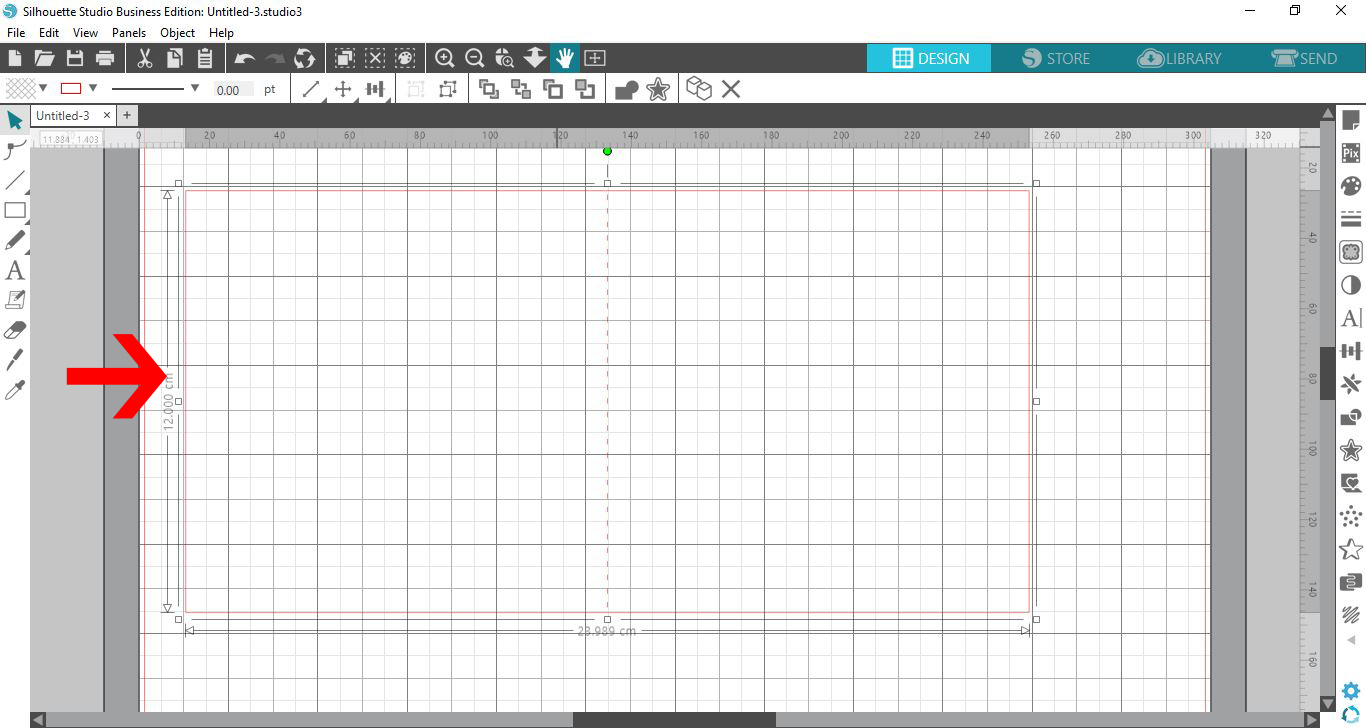
On your canvas, click + drag out a rectangle to the size that you want. Create a score line through the middle by clicking on the Line Tools (just above the rectangle tool) and Draw a Line. Hold Shift and click + drag a straight line down through the middle of the card. Go to the Line Style Panel on the right hand side. In the panel click on Style and choose a dashed line.
Step 2 - Add an Offset to the design
Import the design that you want to use as a stencil. You can do this by going to File > Open or drag and drop the design onto your canvas.
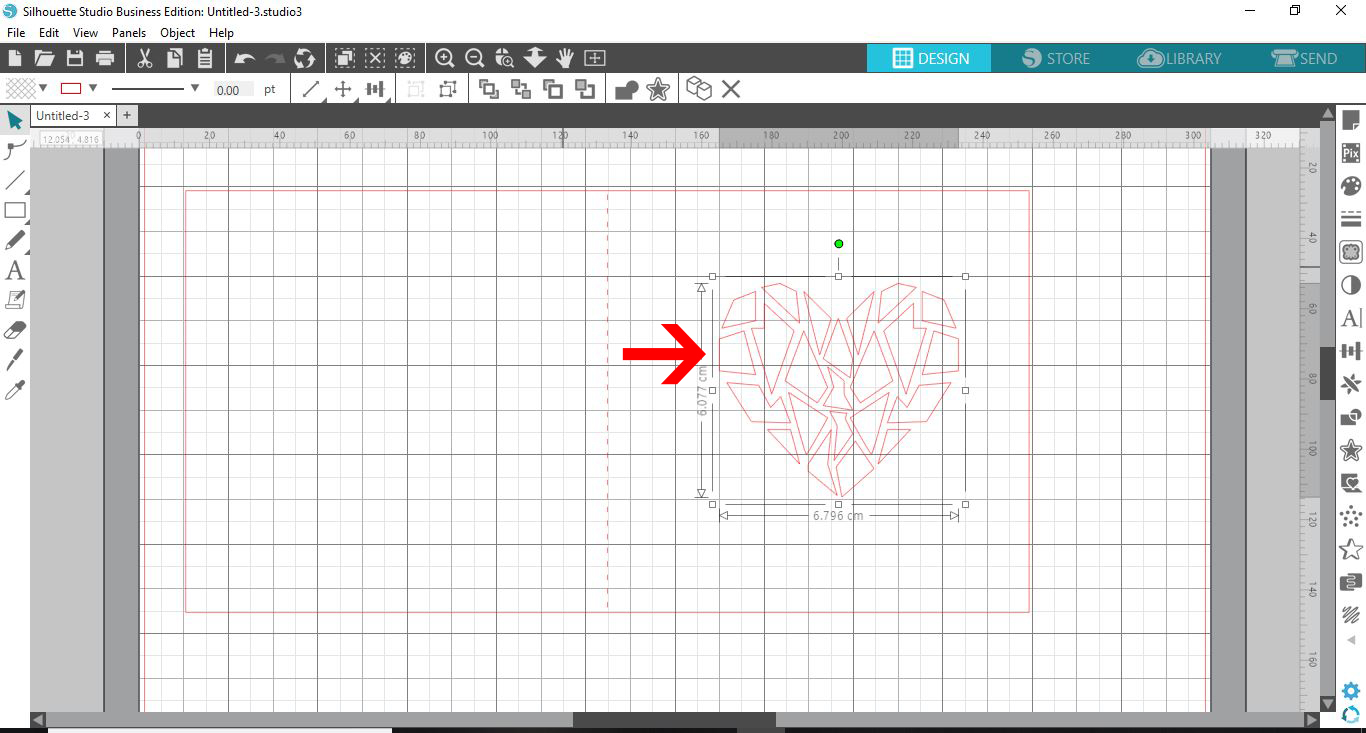
Click on the design to activate the sizing handles. Resize the design to fit the front of the card base.
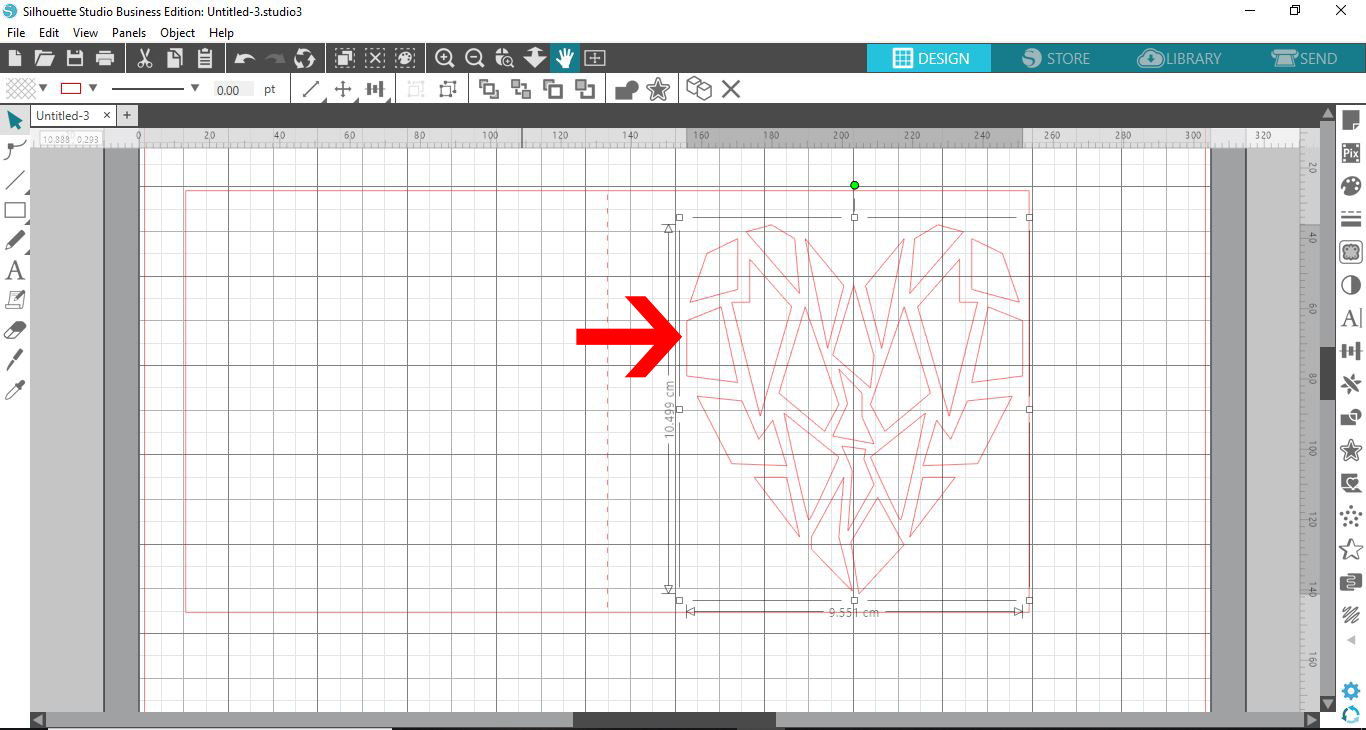
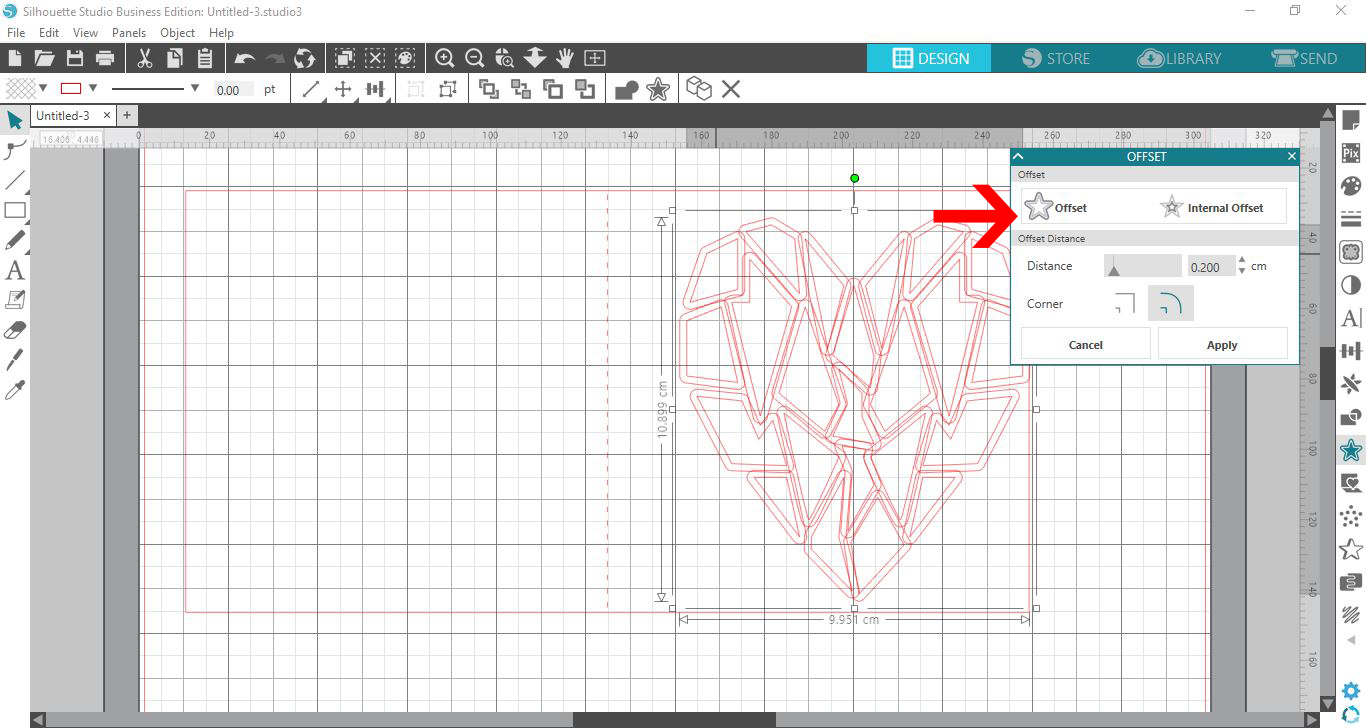
Now we want to add an offset, this will help with attaching to the card base. Click on the Offset panel on the right hand side. Once open, with the design selected, click on Offset. Any overlapping areas of the offset will combine.
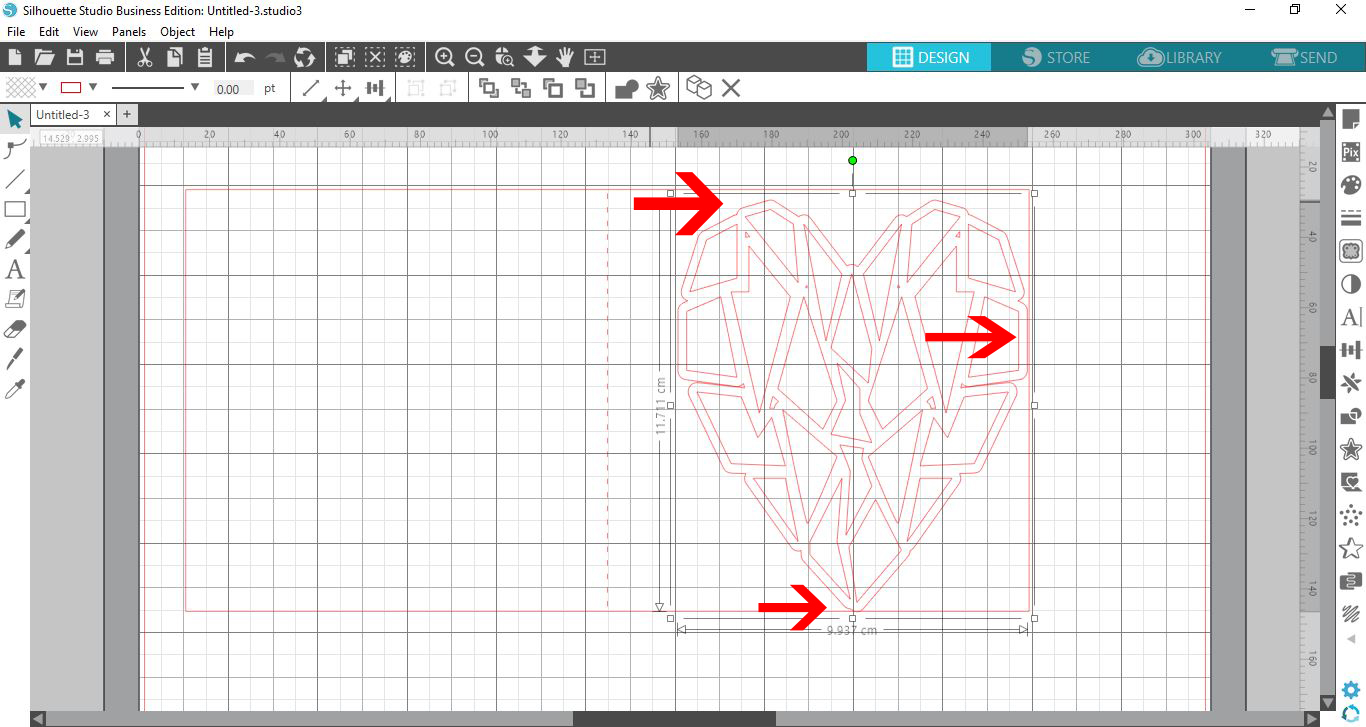
Now, select both the design and offset. Shift both over the to the right hand side. Adjust the size and positioning so that it has an edge touching the top, side and bottom of the card edge.
Step 3 - Edit the card base
We want edit the nodes of the card base to align everything up. Double click on the card rectangle to bring up the point editing tool. You will see little black dots or nodes appear. Each one can be edited individually.
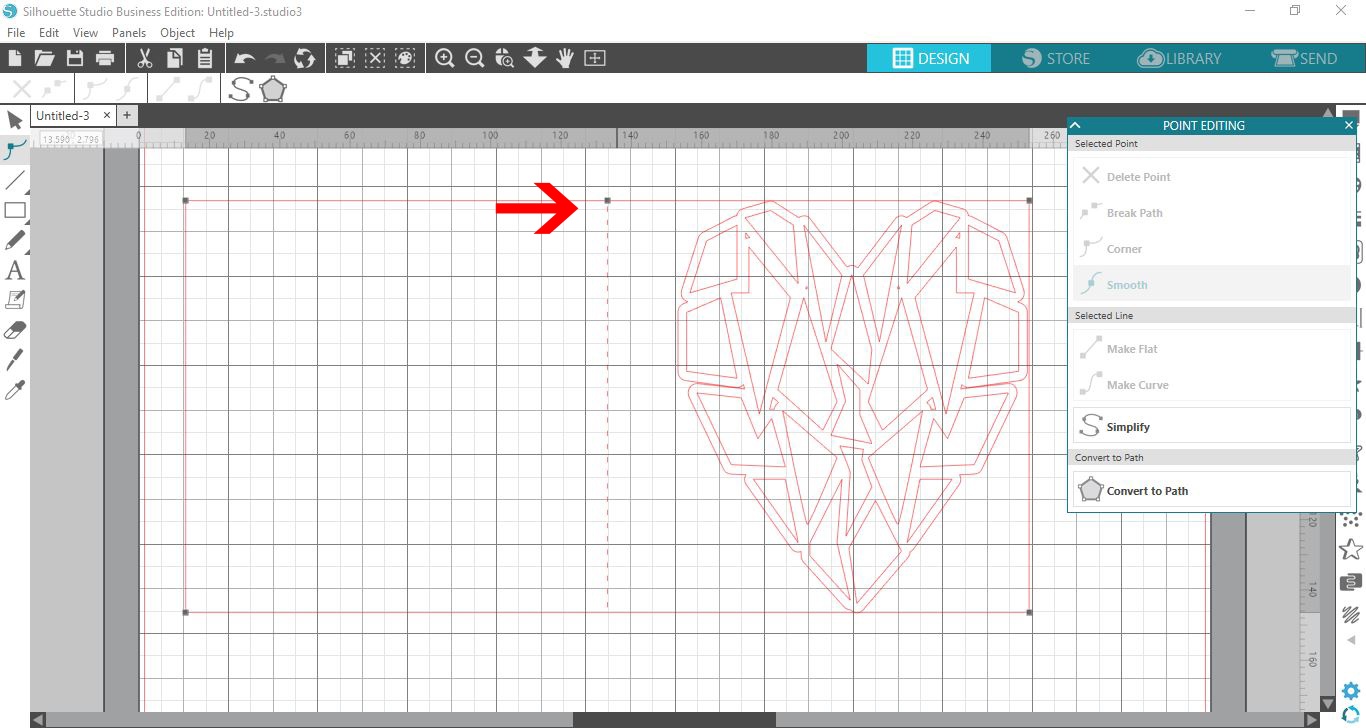
Where the design touches the card, we want to add additional points. As you move your mouse over a line, it will change into an arrow with a slanted line. This means that when you double click on that area, a new node will be placed. Add a node at each section where your design touches the edge of the rectangle.
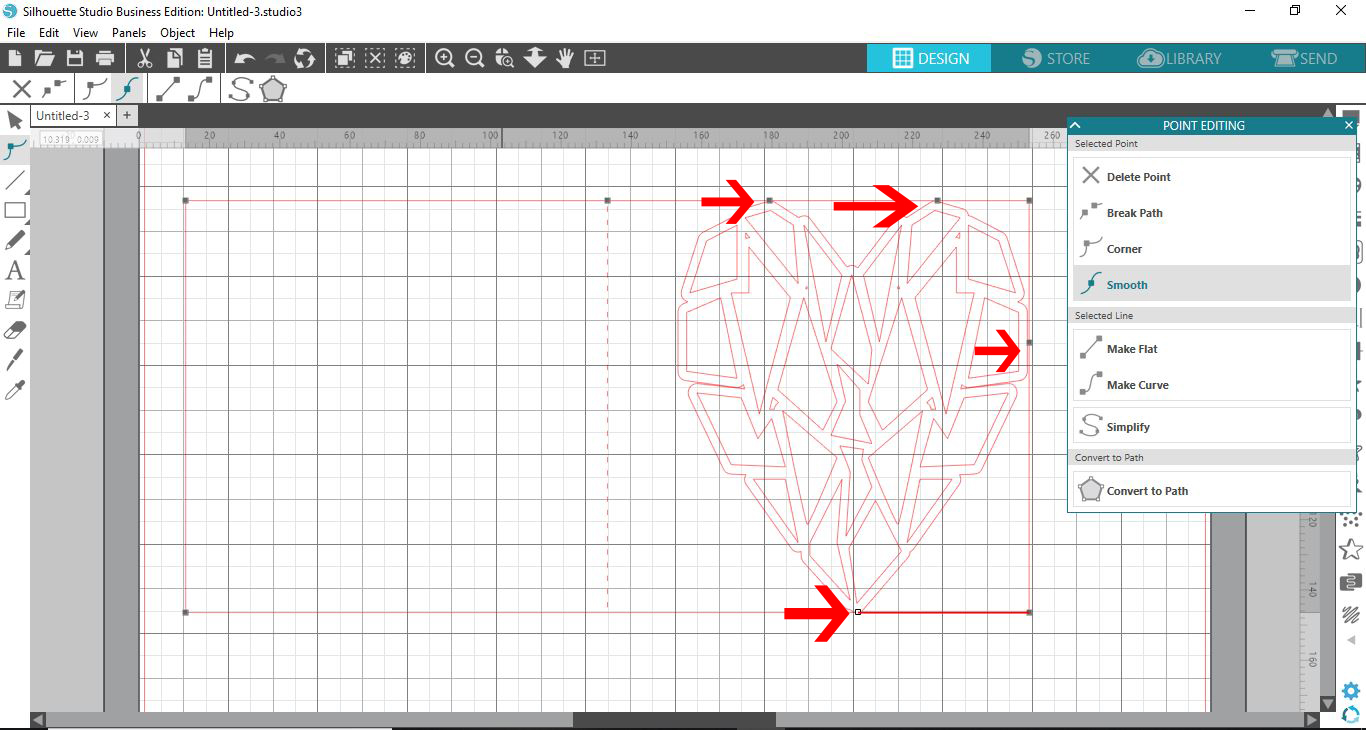
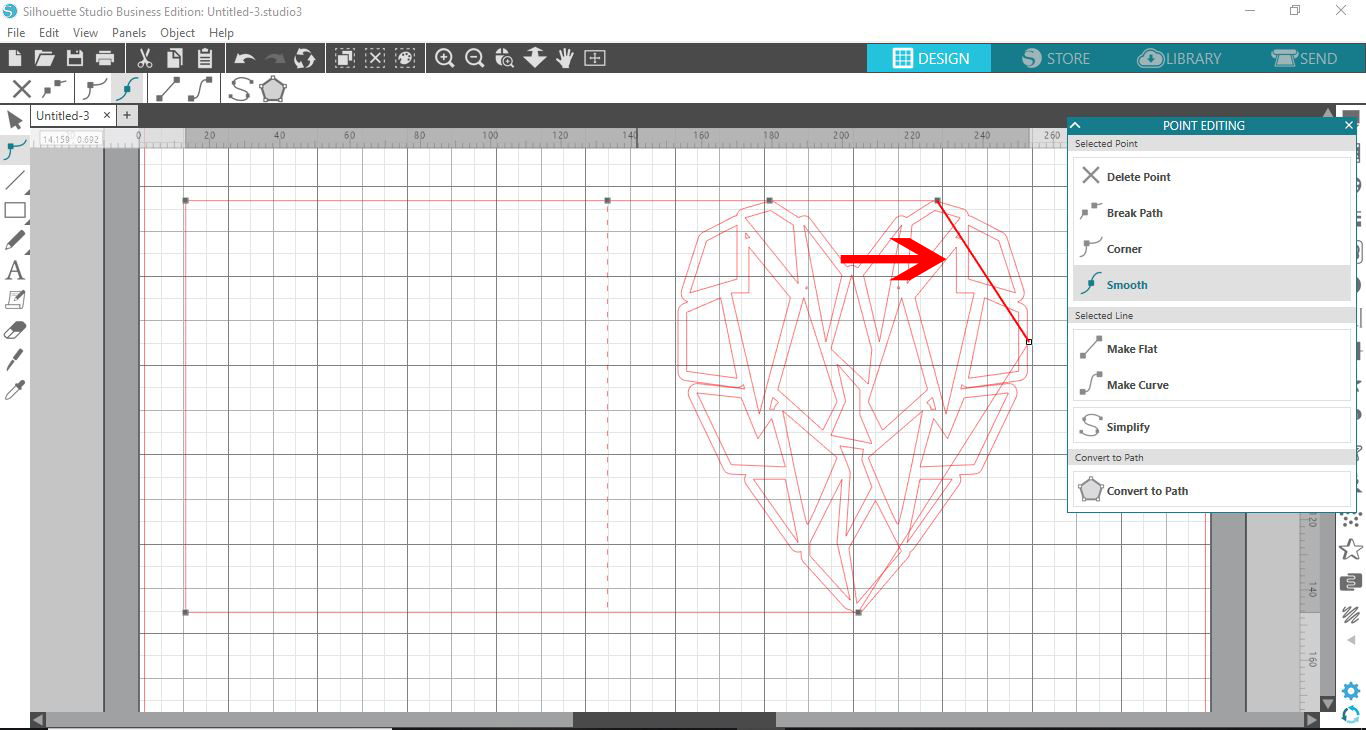
Now, we will delete the top corner and bottom corner nodes. To do this, click on the top corner node so that it is highlighted in white. Then, under the Point Editing panel click Delete Point. Do the same for the bottom corner node.
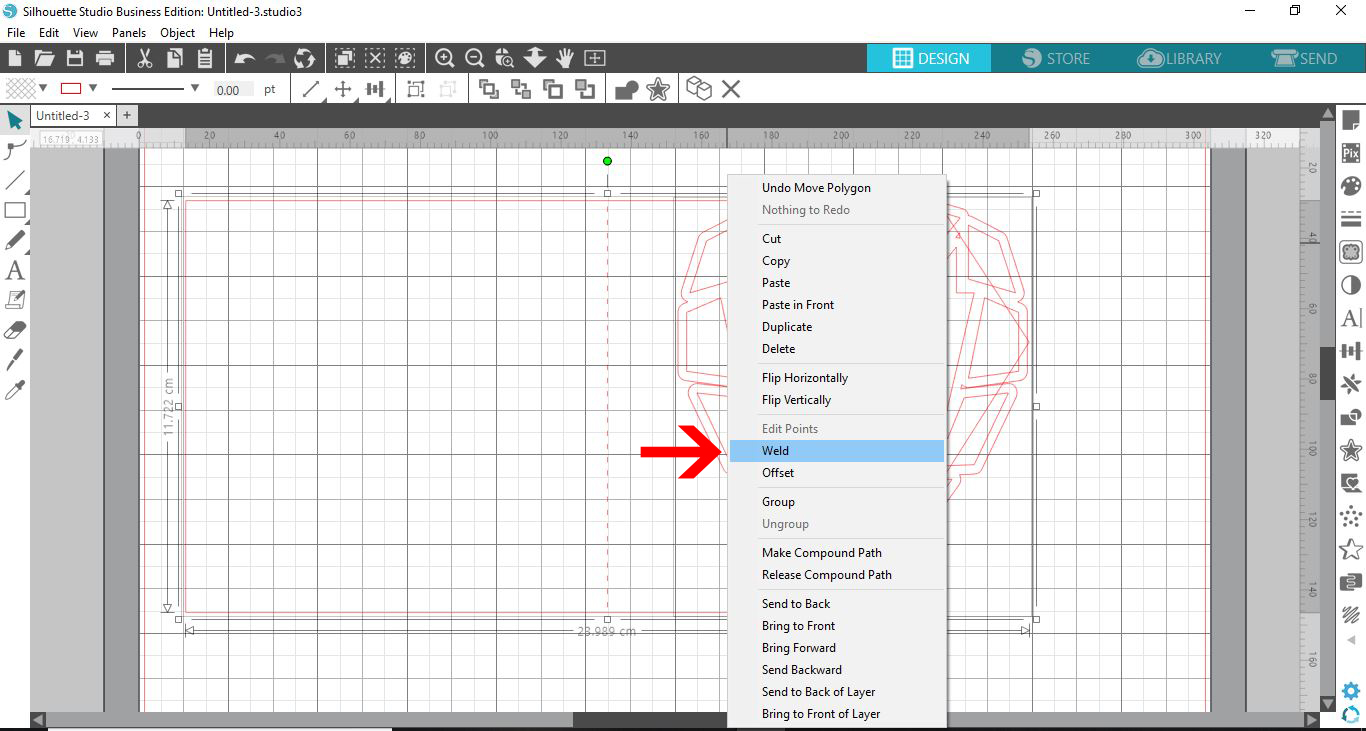
Select the card base and then hold Shift + click to select the offset. Do not select the design, just the card base and offset. Now right click > Weld.
Now, select the card base again and this time also select the design. On the right side, click on the Modify panel and then Subtract.
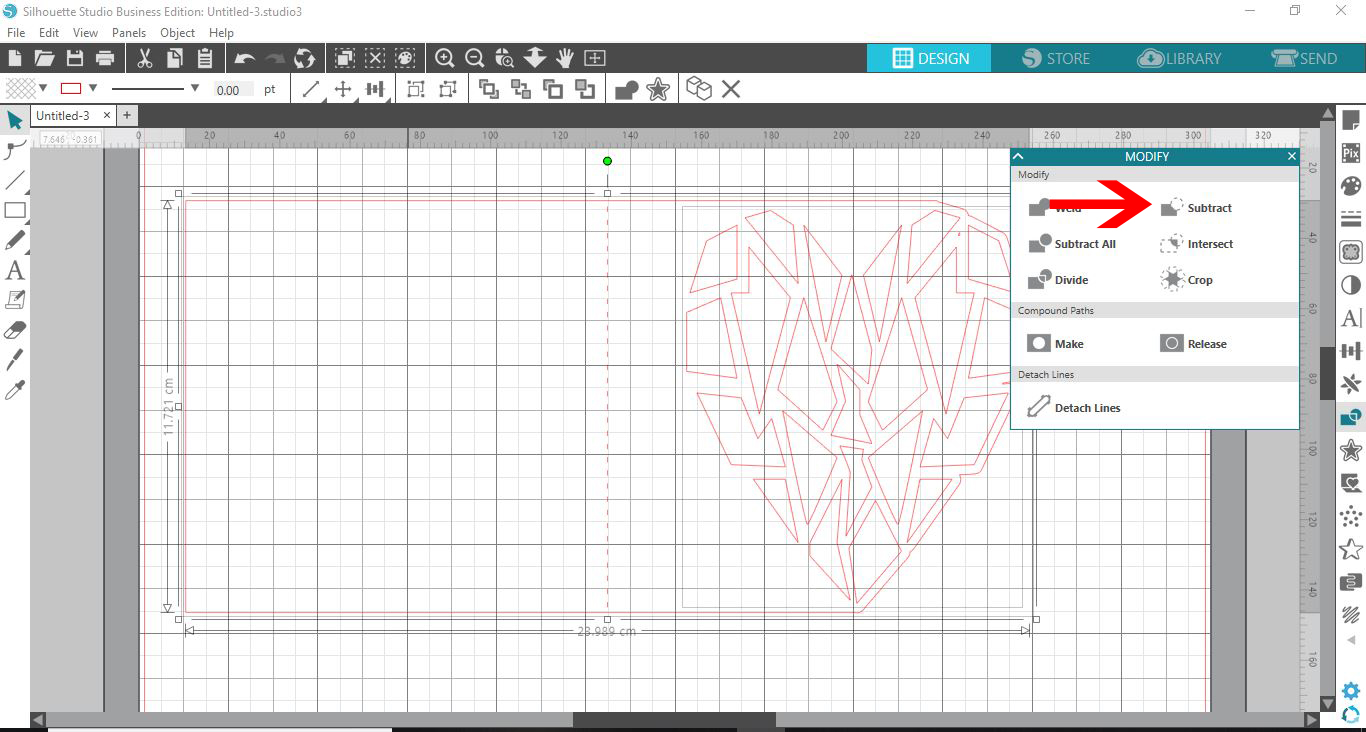
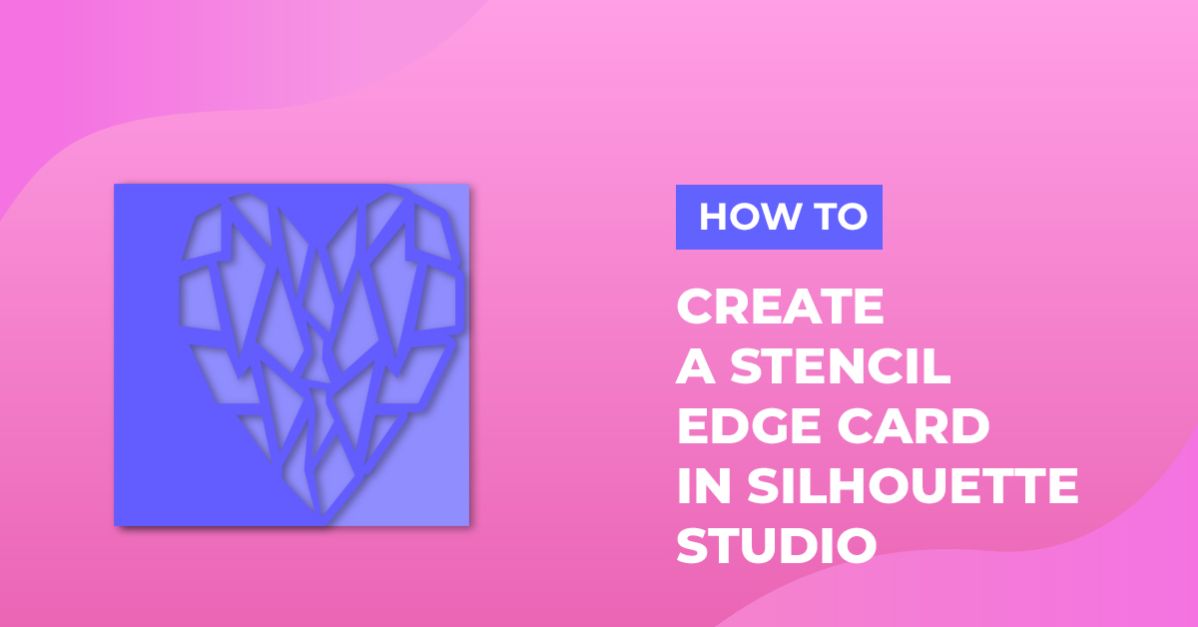
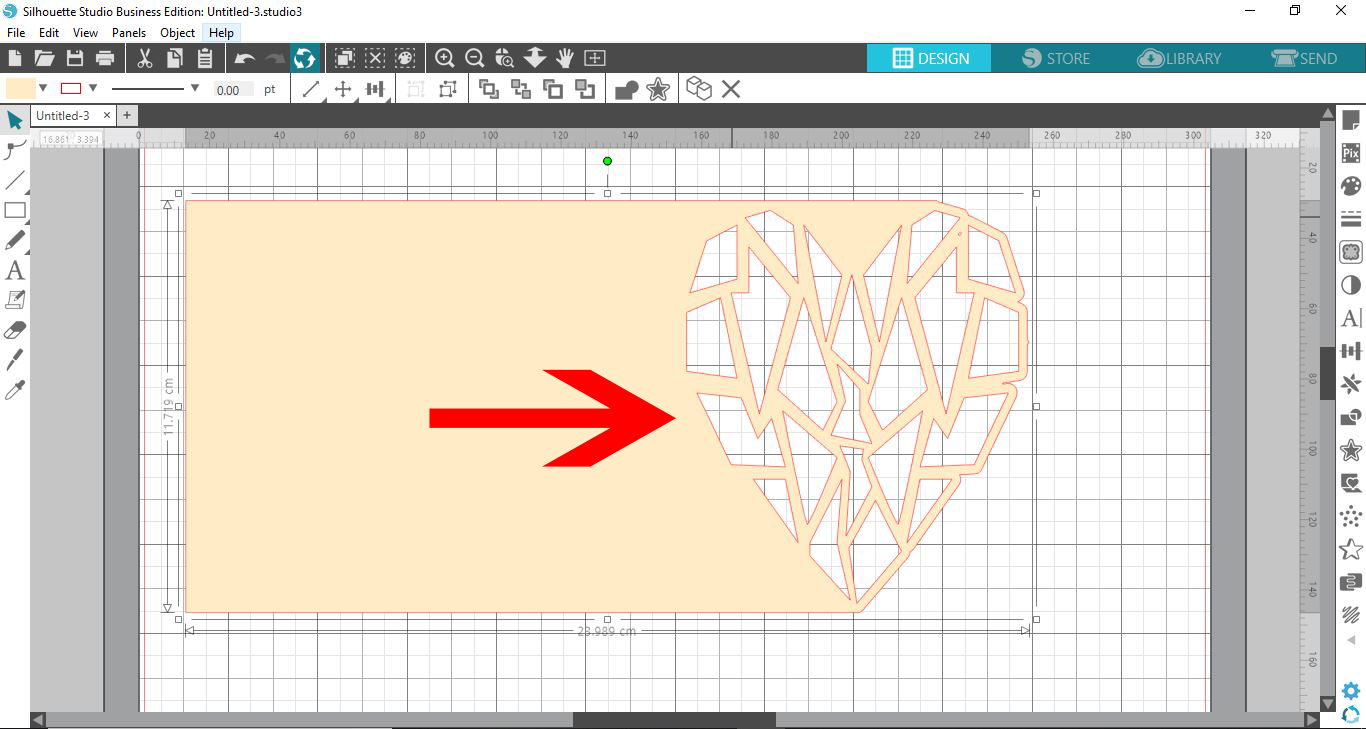
The design will be cut out of your card base. As you can see in the image below, the card has a stencil shaped edge.
We hope you enjoyed following this tutorial. If you did we have more fun tutorials to check out like how to make and edit shapes, use the font creator and how to remove unwanted cut lines in Silhouette Studio.