By Design Bundles
How to Use an AI File in Silhouette Alta 3D Software
1- Open Silhouette Studio Software (Business Edition).Click on the open folder.
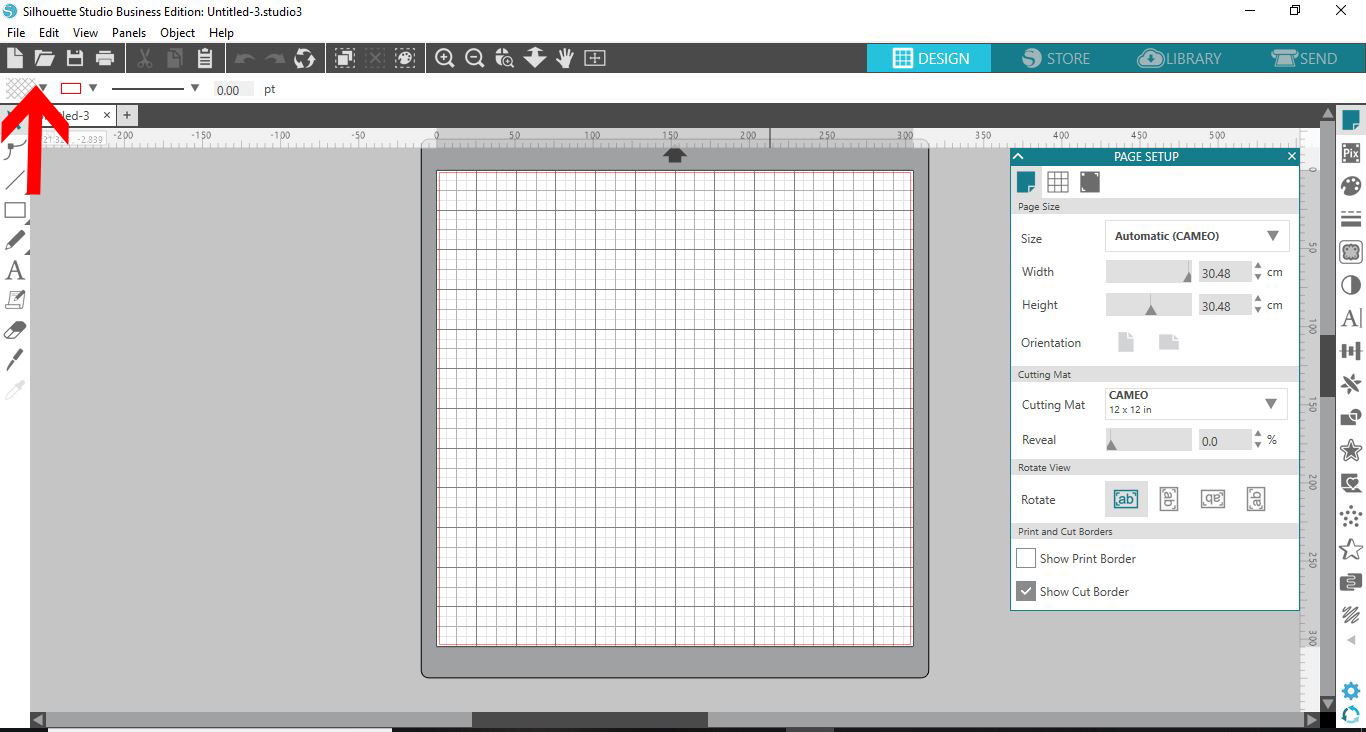
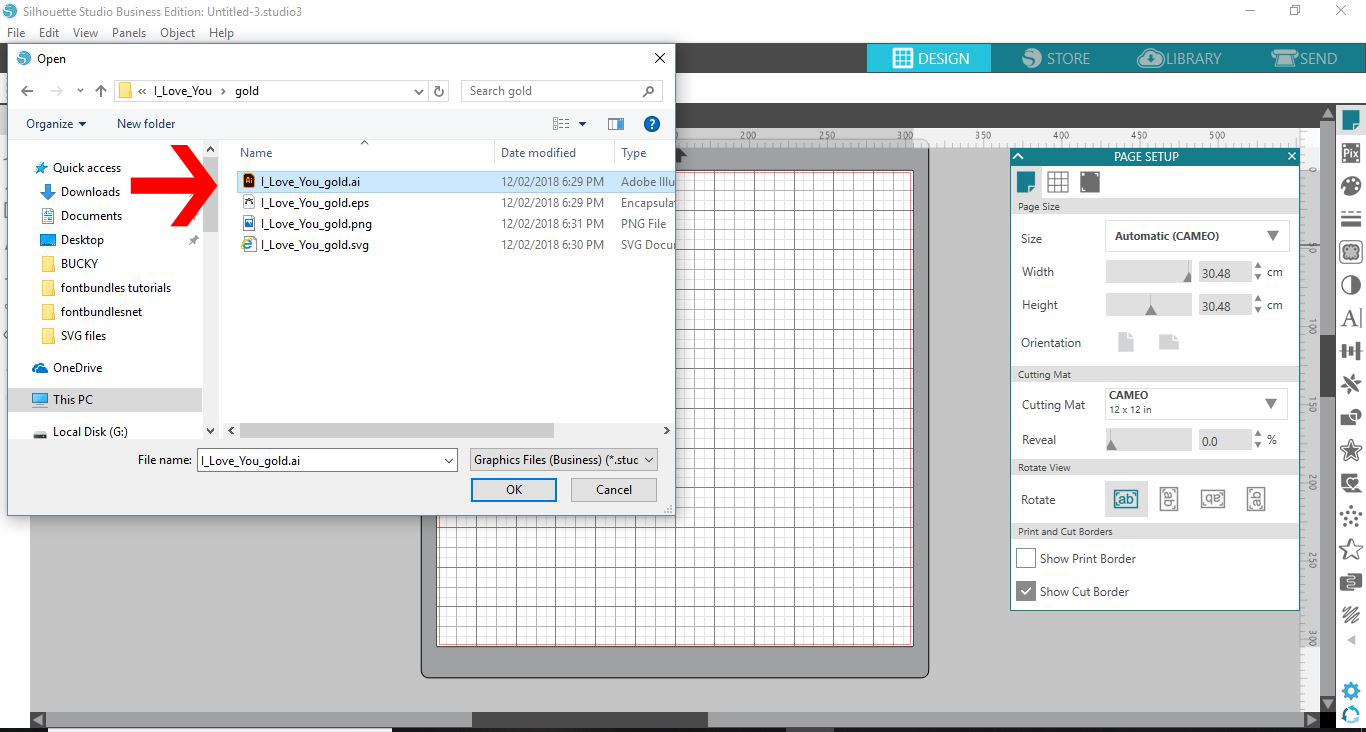
2- Find your Ai file and open. I am usingI love you svgfrom designbundles.net
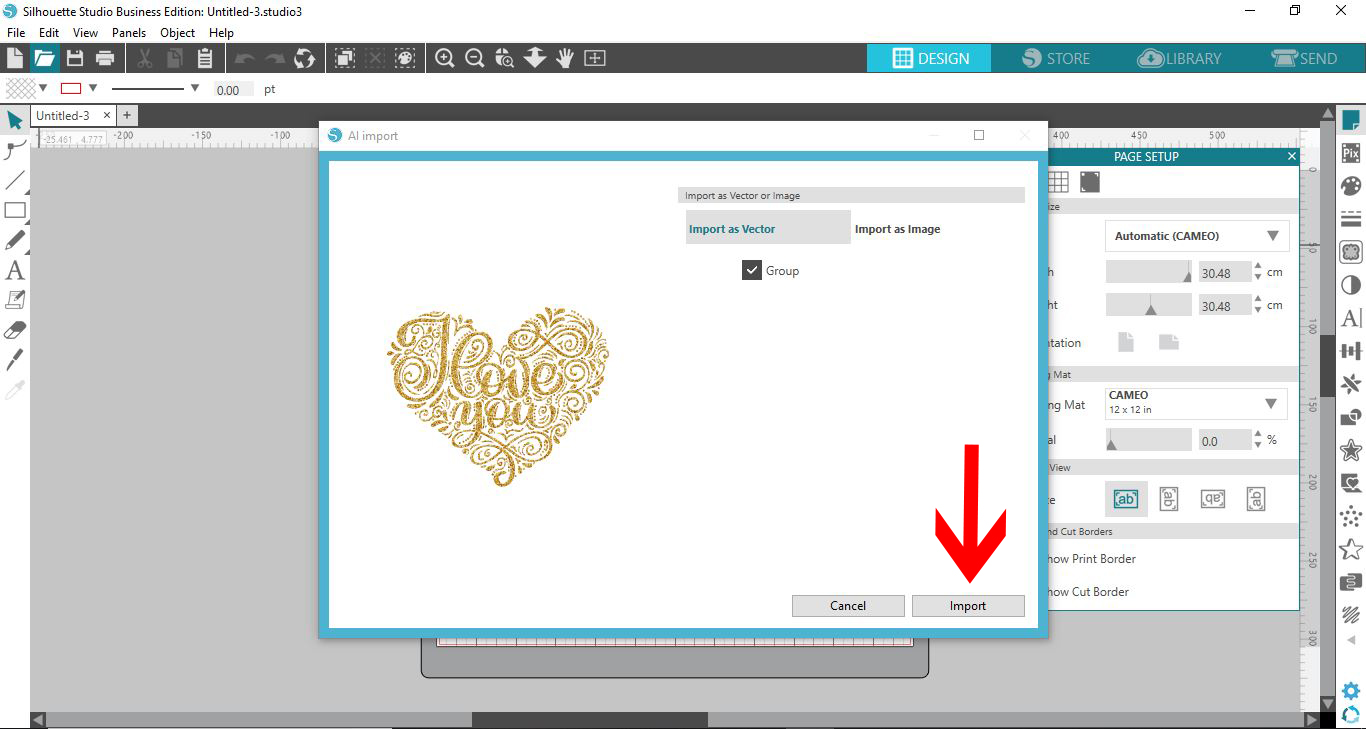
3-A new window will appear. This will let you import the design as a vector file. click on import.
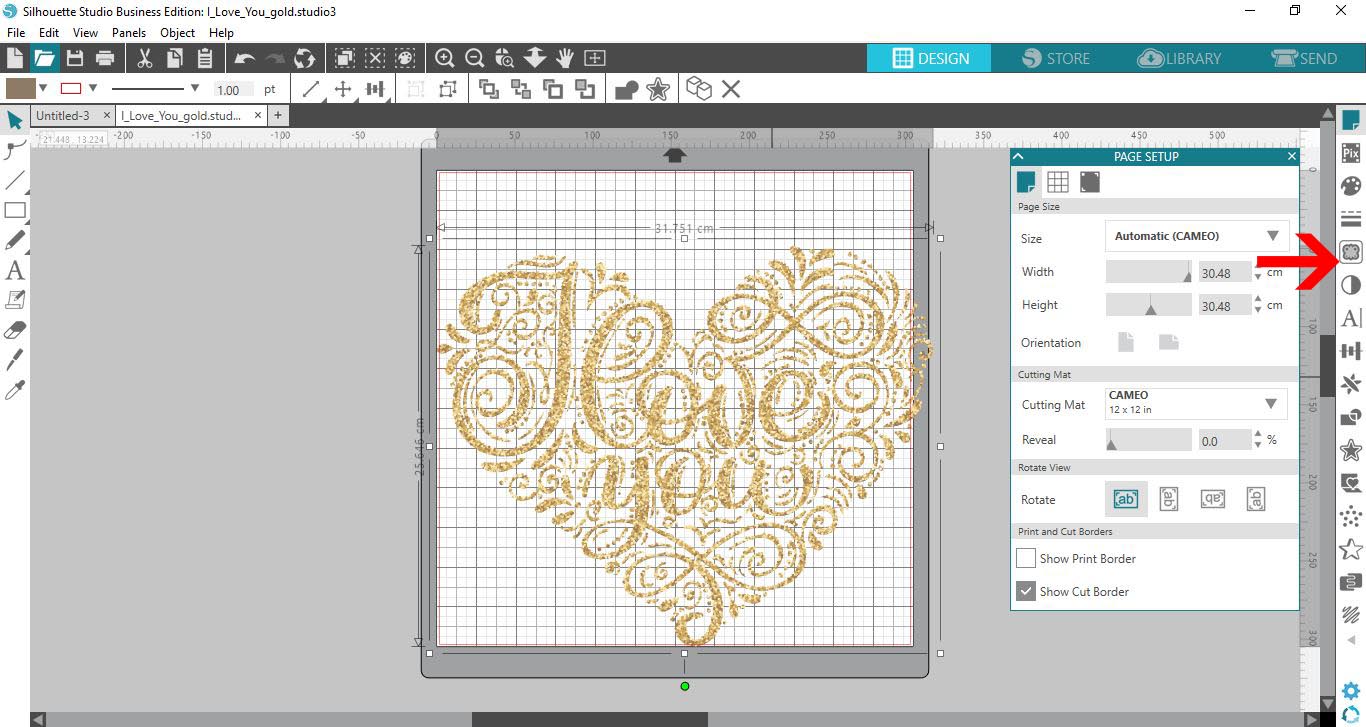
4- It will take a short while to import. Once imported click on the trace icon.
5- Trace your design.
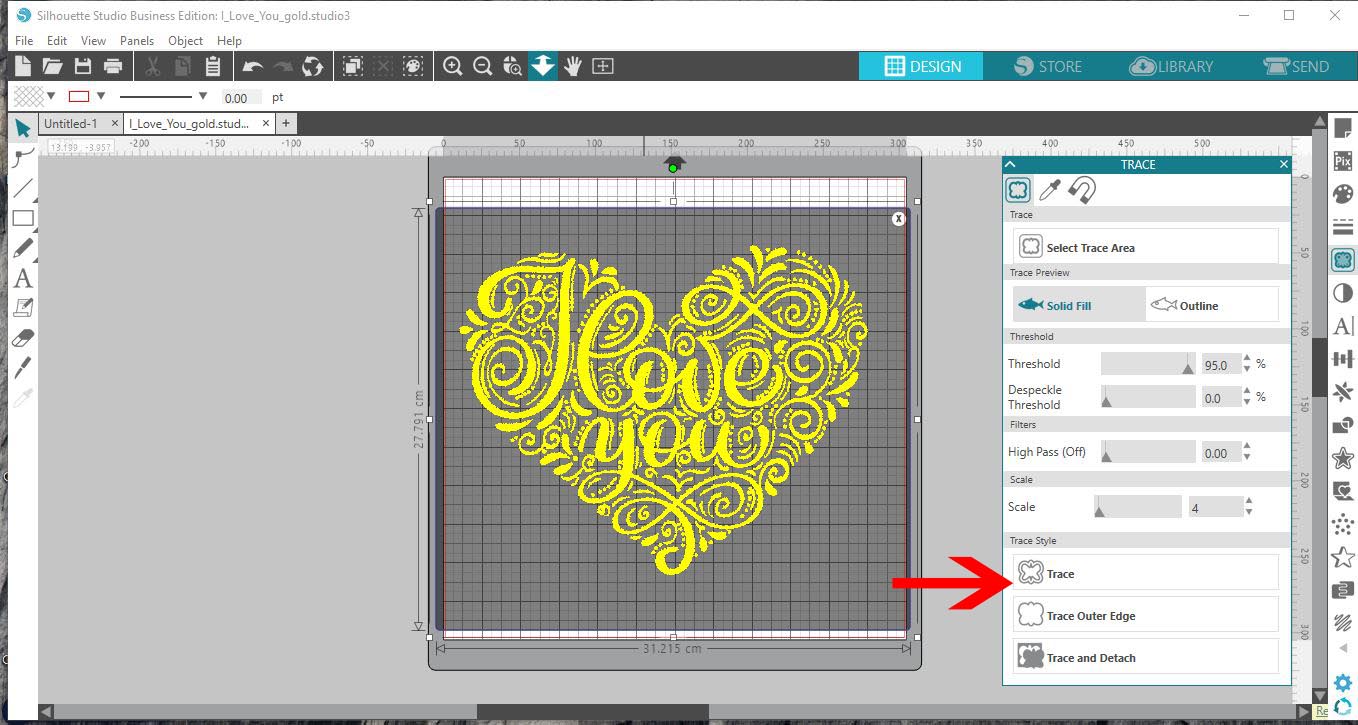
6- You now have an outline of the Ai image.
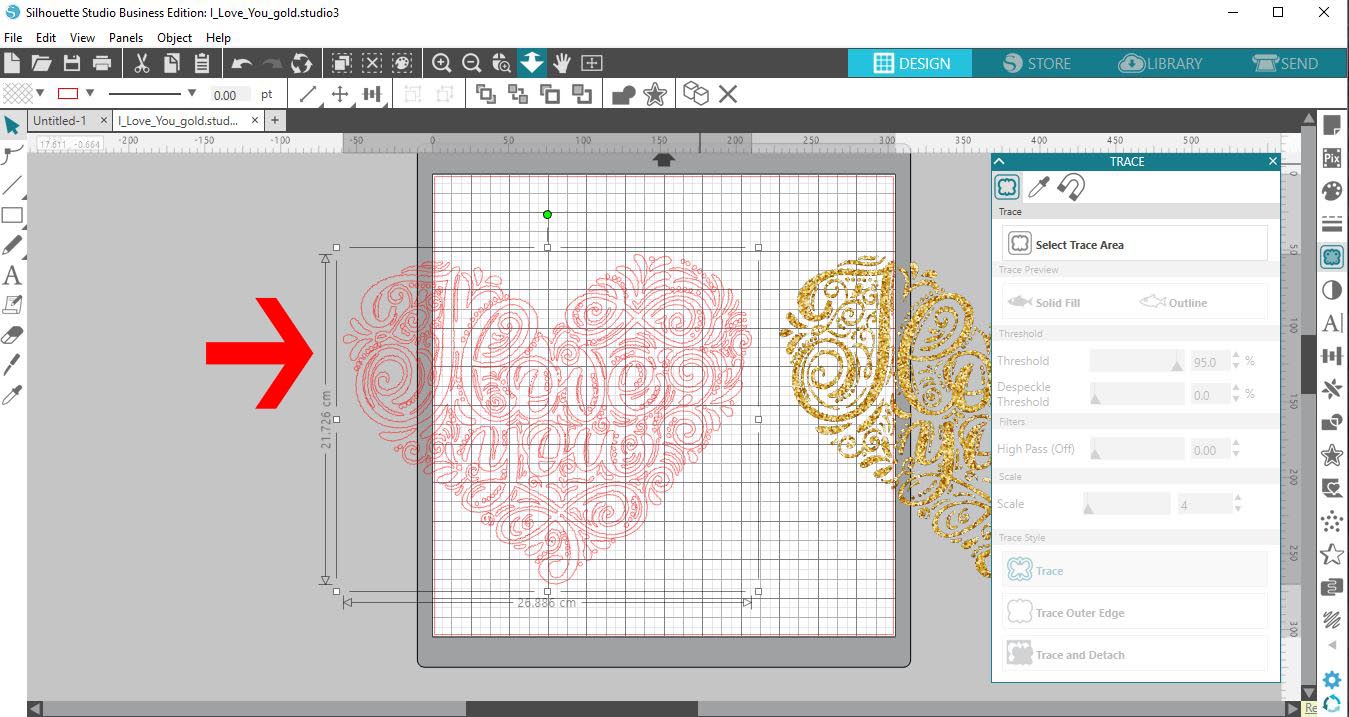
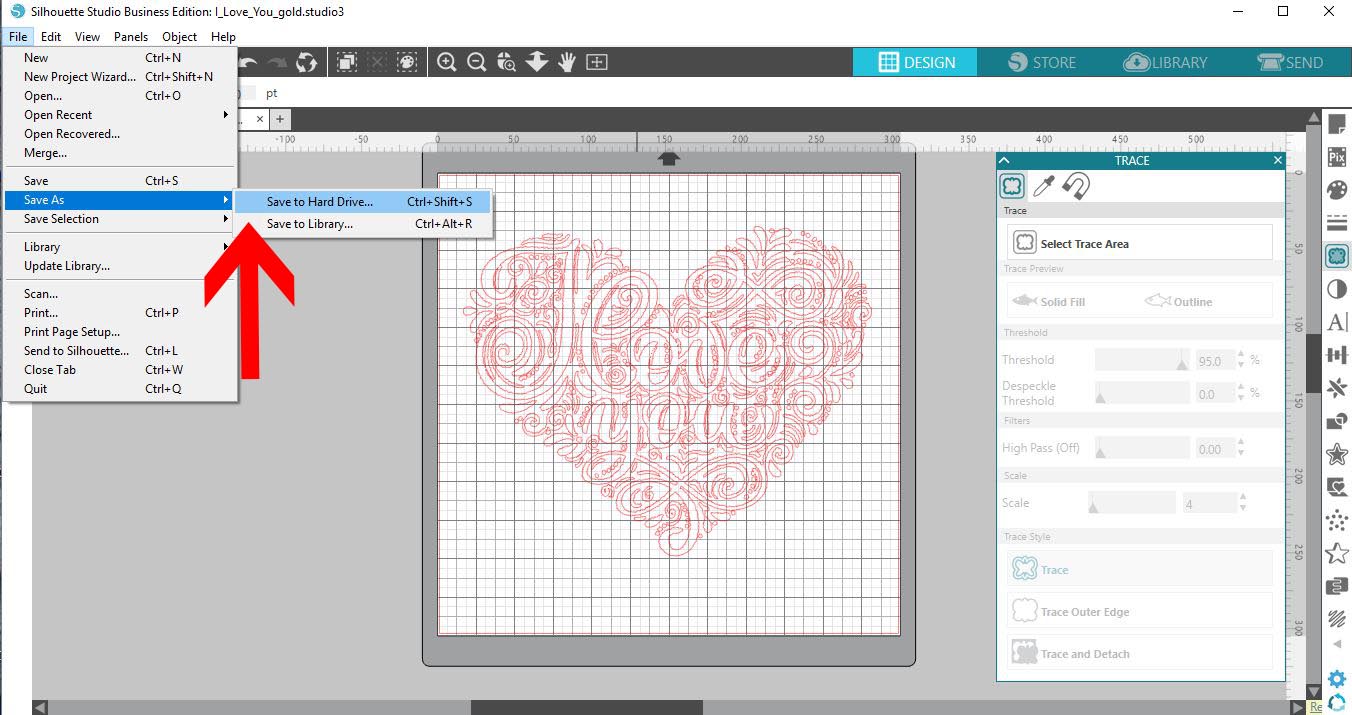
7- Delete the one you imported. with the trace file only, click on file - save as - save to hard drive.
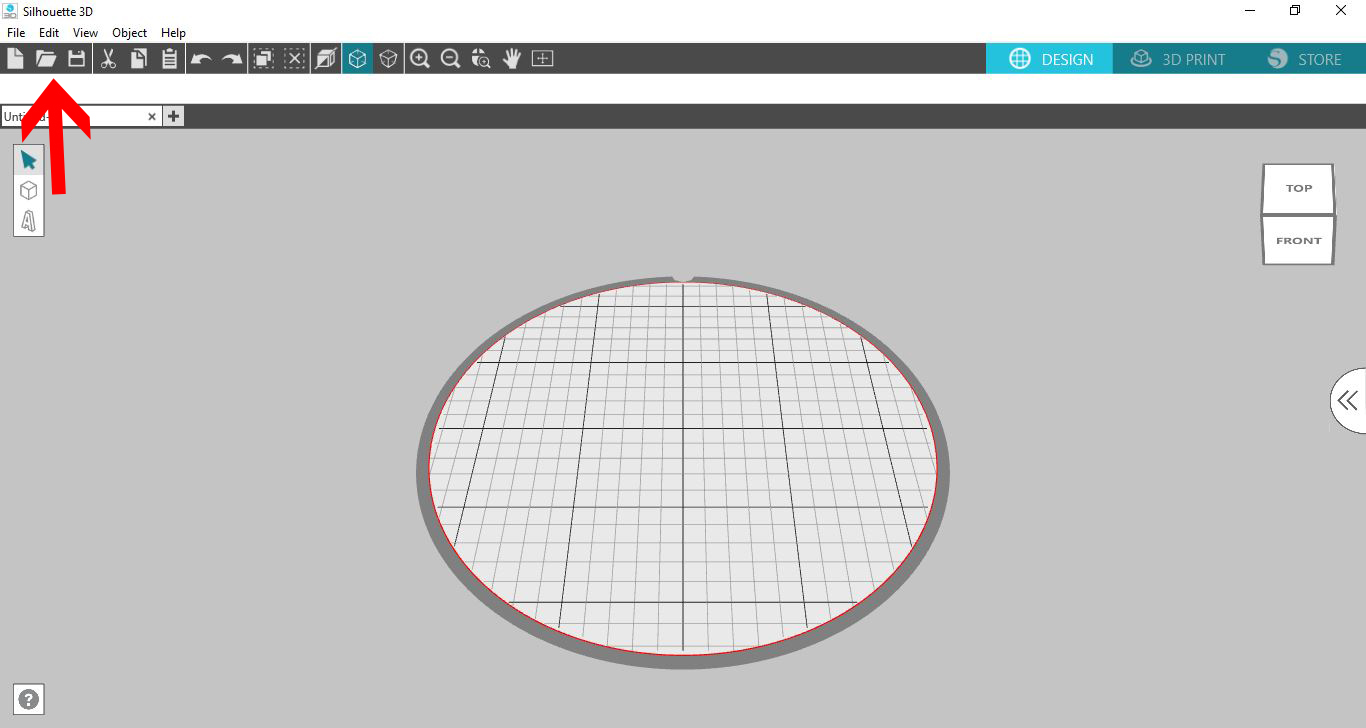
8- Open the Silhouette Alta software. Click on the open file folder.
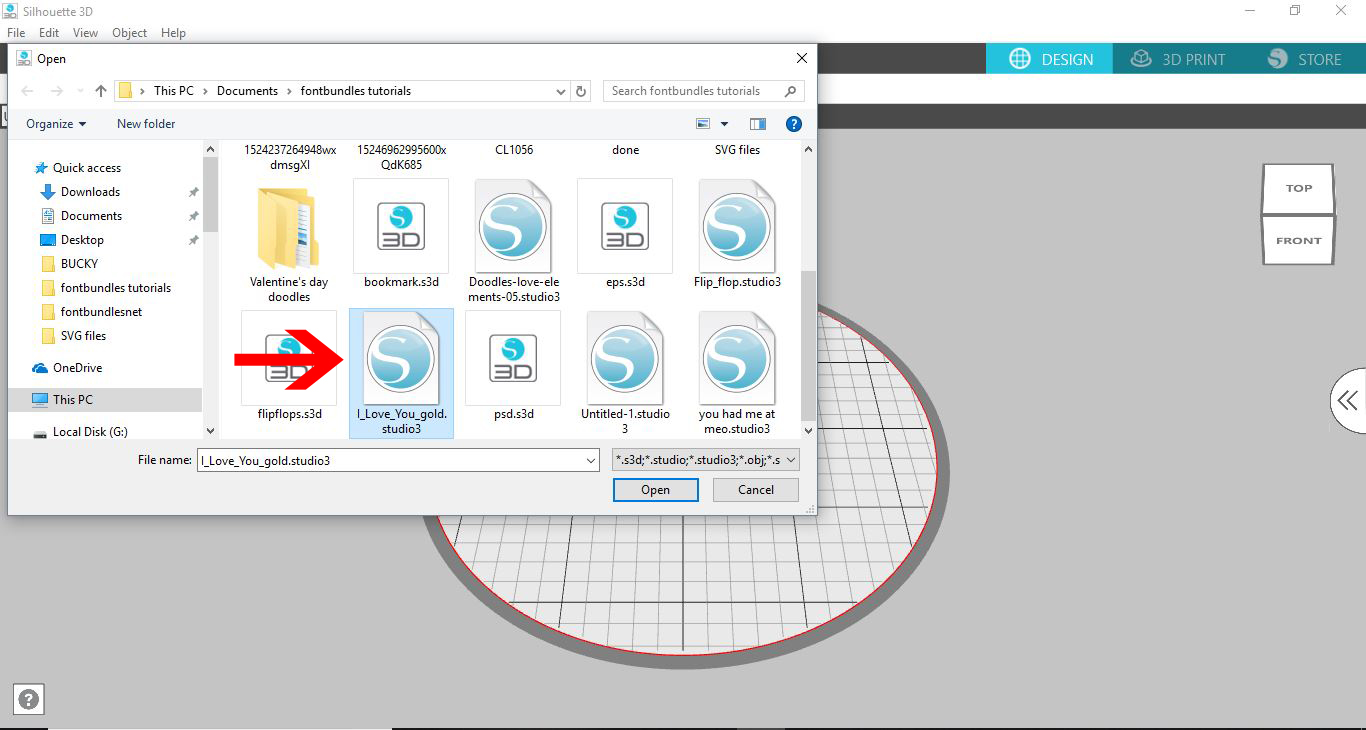
9- Select your silhouette studio file and open.
10- Depending on what you want to create, select the appropriate option to import your design as. I will be creating a stencil coaster, so i will import as a stencil.

11- Your design will be converted.
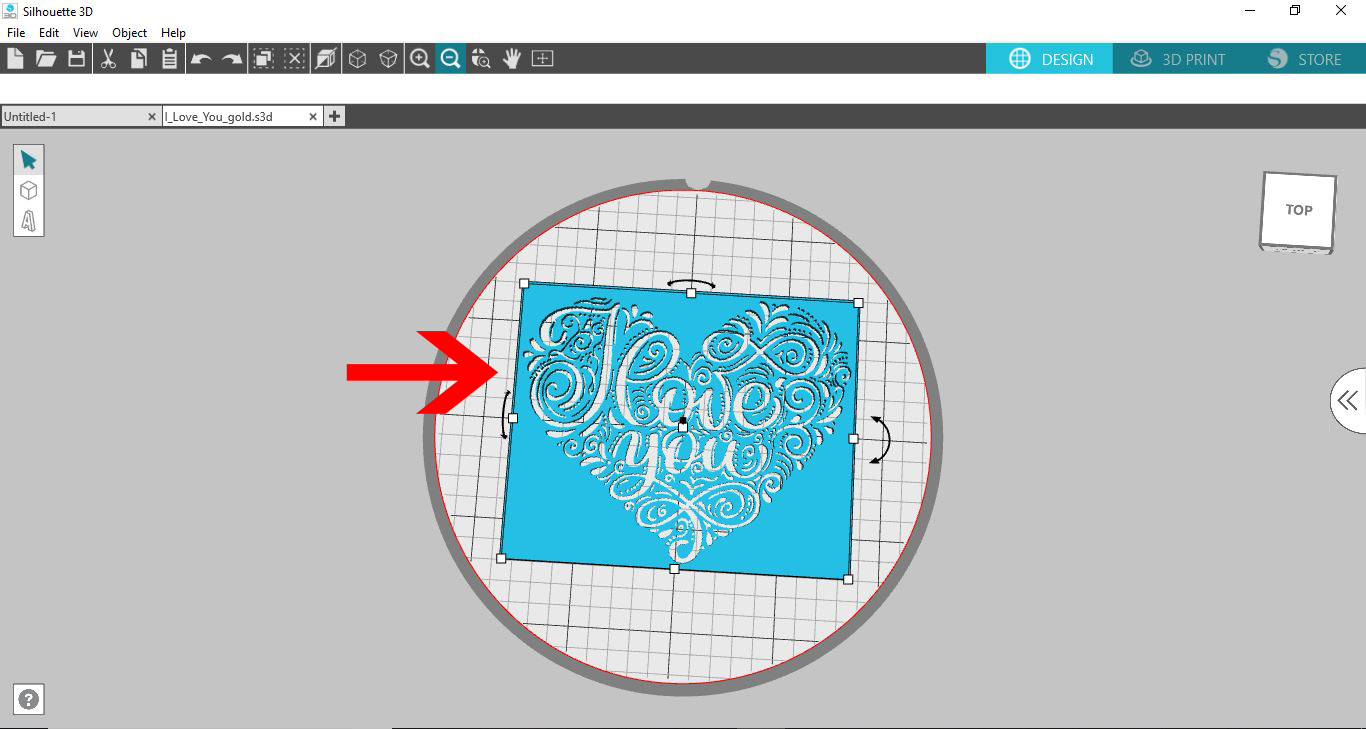
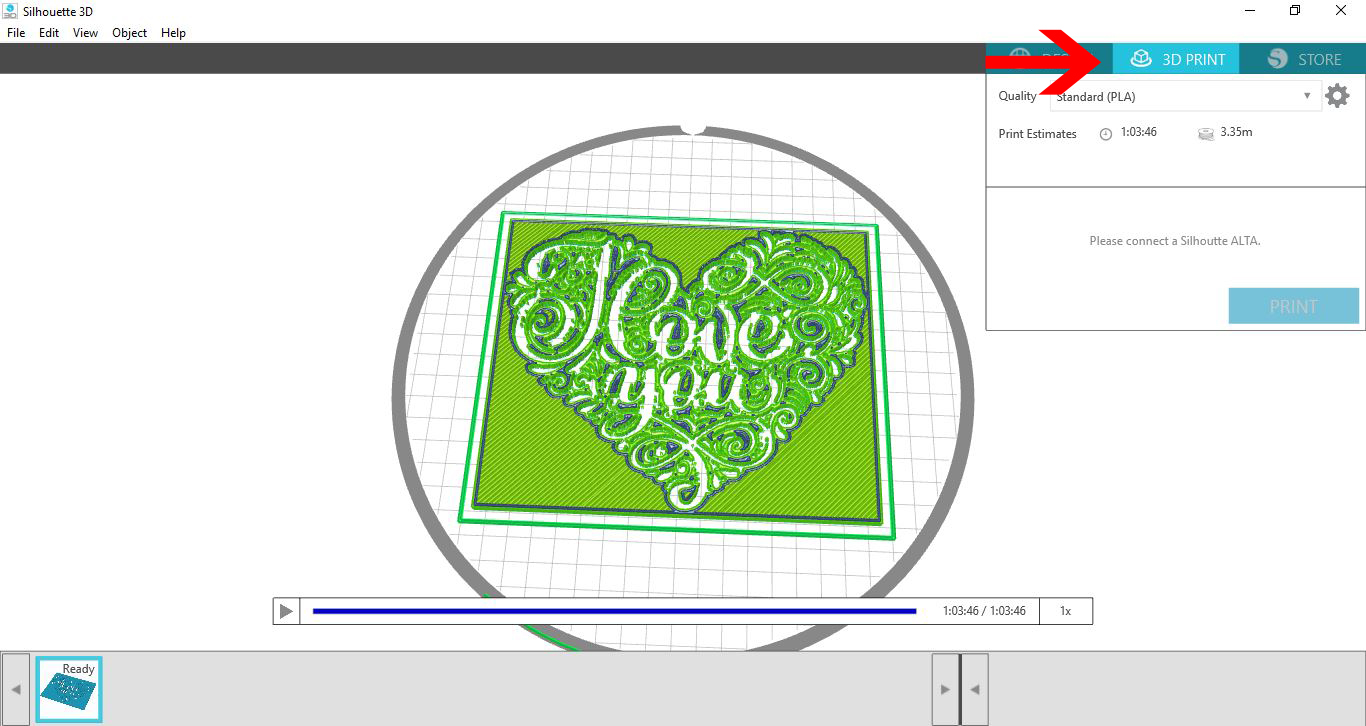
12- Click on 3D print. Select the quality you want to print, then click on the print icon.