
By Design Bundles
Tracing with the Stipple Tool in Silhouette Curio
Images such as JPEG and PNG can be used but you will need a high contrast image. For this tutorial we will use a SVG and JPEG file from a zodiac signs svg bundle by Digital Rainbow Shop. You can also use any Graphic Elements design if you want something a little different.
Step 1 - Adjust the Page Setup for Curio
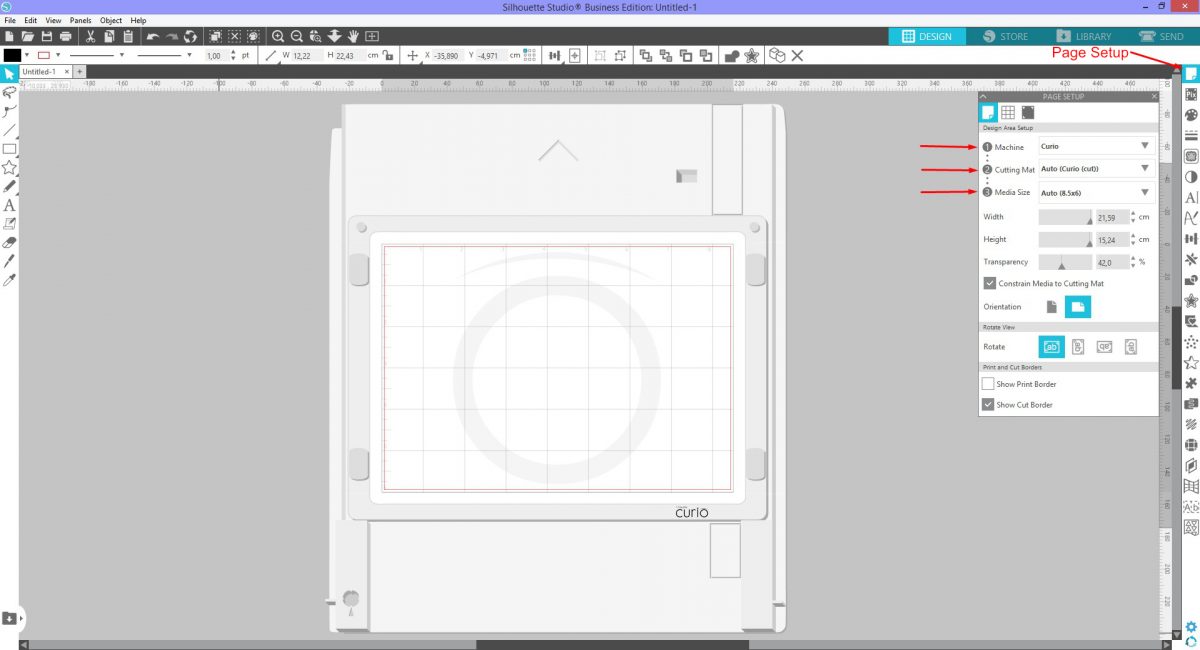
We need to first set up the page for the Curio machine. Click to Open Silhouette Studio and then select the Page Setup panel on the right hand side. Click on the Machine drop down menu and change to Curio. This will allow you to change the cutting mat and media size specific to the machine. We set our Cutting Mat to Auto Curio (cut) and Media to Auto (8.5 x 6).
When the settings have been changed the screen will show the Curio mat setup.
Step 2 - Add your design and use the Stipple Trace
You can add your design to the mat one of two ways. Go to File at the top and select Open then select your design. You can also locate the file where your design is stored and drag and drop it onto the mat. You may need to resize the design to fit onto your mat.
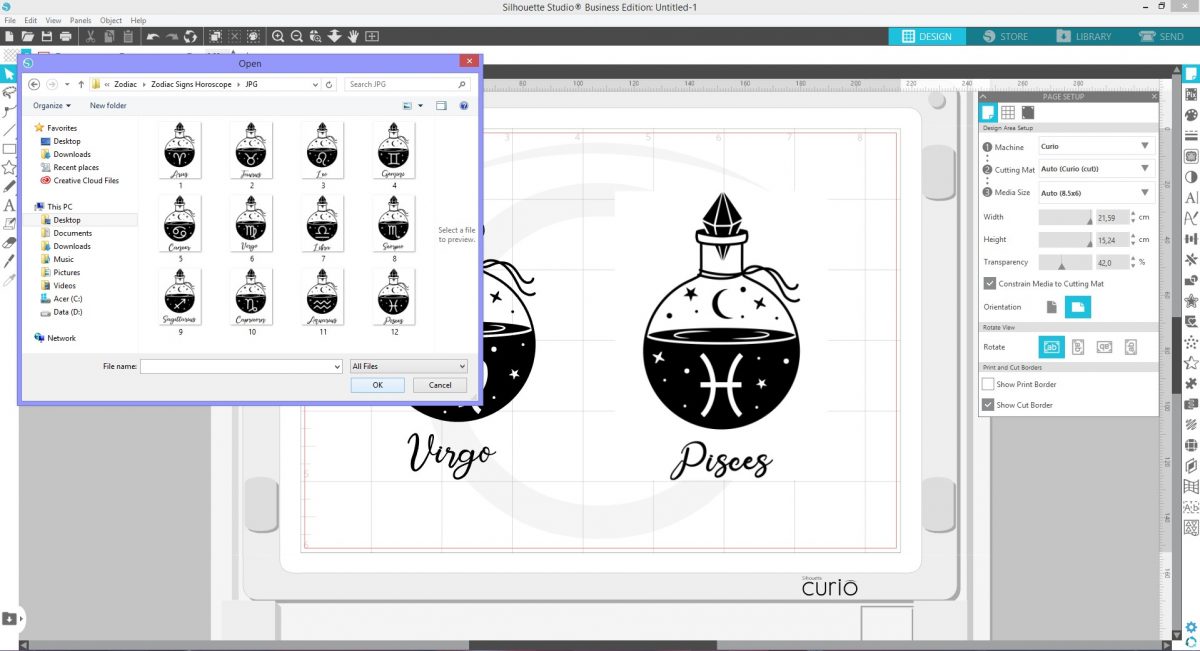
We chose to use the SVG for Virgo and JPEG for Pisces. Let us first begin with the SVG.
Use Stipple Trace with SVG
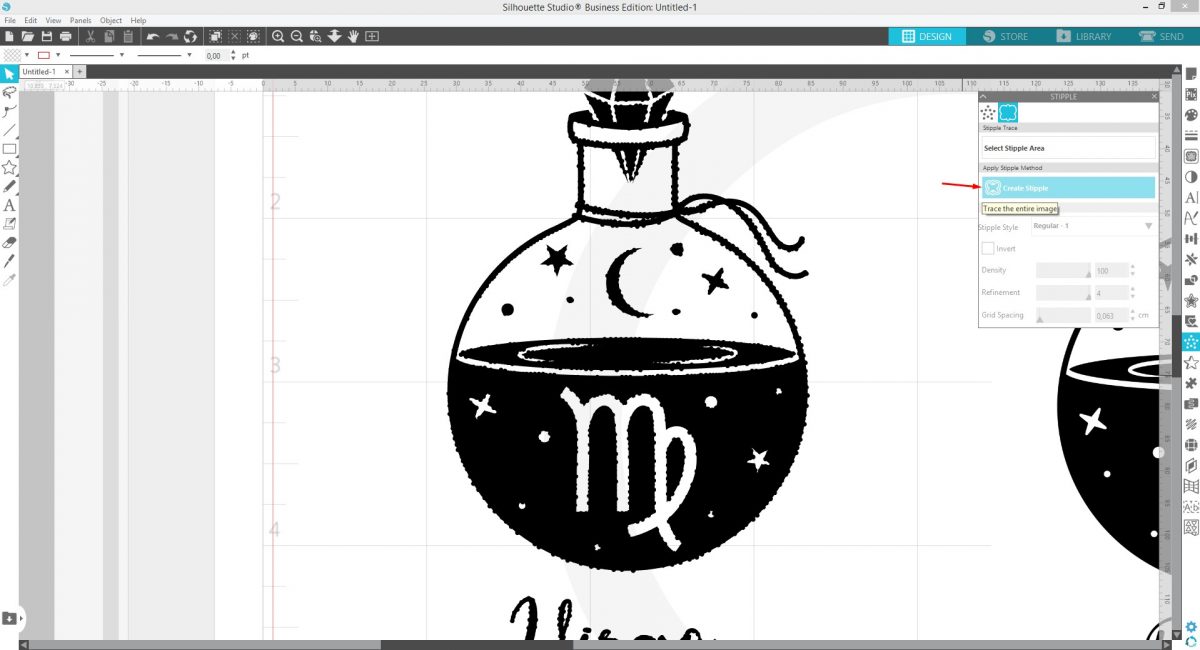
On the right hand side click on the dotted Star. This will open the Stipple Panel with two options at the top. Click on the second one called the Stipple Trace. Next, click on Select Stipple area then click + drag a trace box around the SVG design.

A basic Stipple fill will automatically be applied.

With the design still selected, adjust the Density to 100, Refinement to 4 and the Grid Spacing as low as possible. The Grid Spacing in our case went as as low as 0.063cm. You can experiment with the adjustments if needed to achieve the desired result.

We left the Stipple Style at Regular-1 but you can go through the settings to see what style you like. We found that Regular-1 gave us a cleaner stipple look. Now, click on Create Stipple. Your design may look blotchy but it will appear fine under the Send Panel.
Use Stipple Trace with JPEG
Using Stipple Trace with a JPEG follows the exact same steps as using it with a SVG. The reason we are showing a JPEG example is because sometimes the trace doesn't work so well from the beginning. A higher contrast image is best. But you may find that some areas are missing.
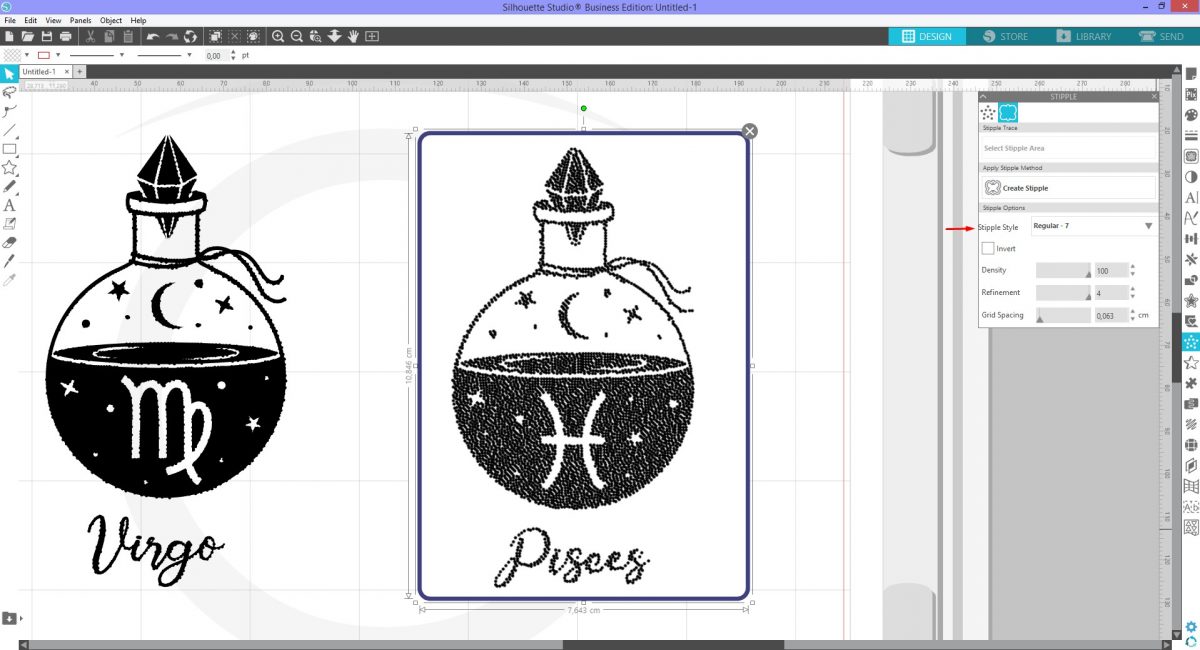
Follow the same steps as above to trace the area and make the same adjustments. As you can see from the image below, there are dots missing from the left top side of the bottle.
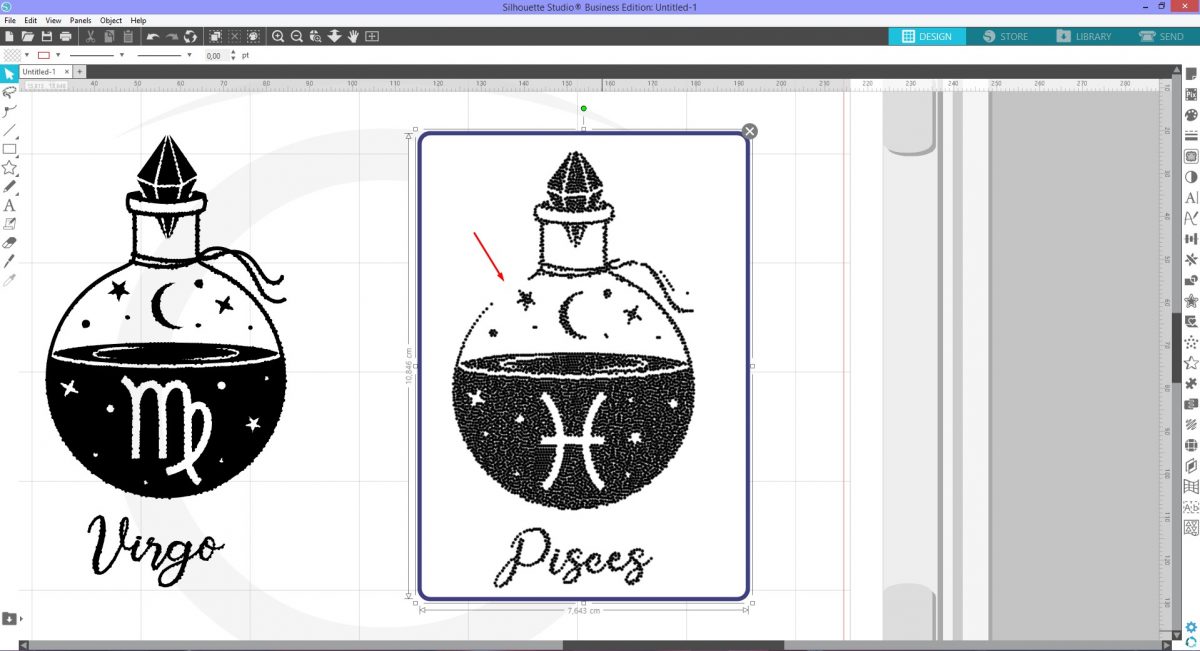
To fix this we adjusted the Stipple Style until we were happy with the result. For this design, Regular-7 worked best. Then we clicked Create Stipple.
Step 3 - Go to Send panel and adjust settings
We are now ready to go to the Send Panel. At the top right of the screen click on Send to open the panel options. At the bottom of the screen click the machine icon and select the Curio option.

Select your Material option, we chose Cardstock, Plain. Next, click on the Action drop down arrow and select Stipple. Then, for the Tool option click the arrow and select the Pen Tool. We selected the Pen tool to be used with a sketch pen. Be sure to select both designs and click on Sketch.

Place your material on your mat and the sketch pen in the carriage relating the one on your screen. Double check your settings then click Send. Now watch the magic happen. One thing to note is that Stippling can take quite a long time depending on the density of the design.
If you liked this tutorial and would like to learn more, have a look at our other tutorials such as using the sketch tool, sketching with multiple colors and editing text in Silhouette Studio.