By Design Bundles
Silhouette Tutorials3 min
Using the Polygon tool in Silhouette Studio
1- Open Silhouette Studio.
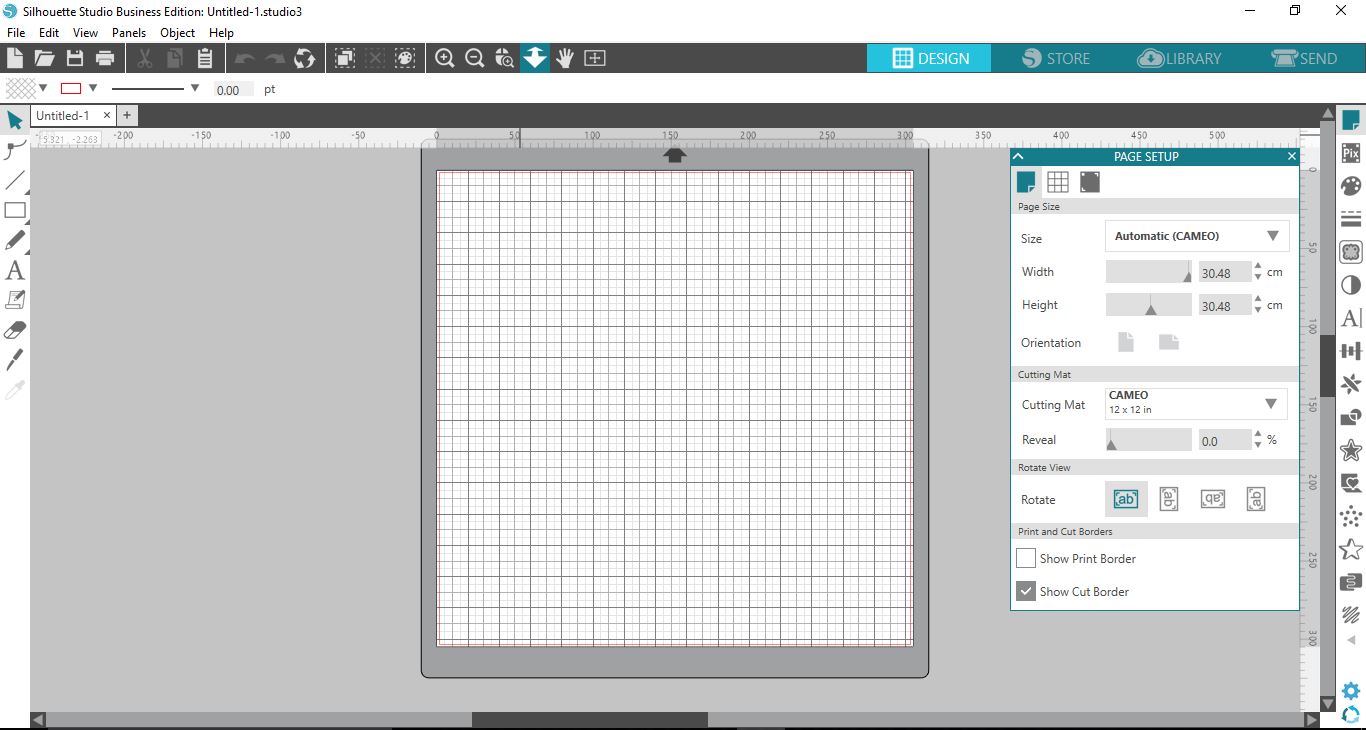
2- Click on the rectangle tool, a new pop out will appear. select the polygon icon.

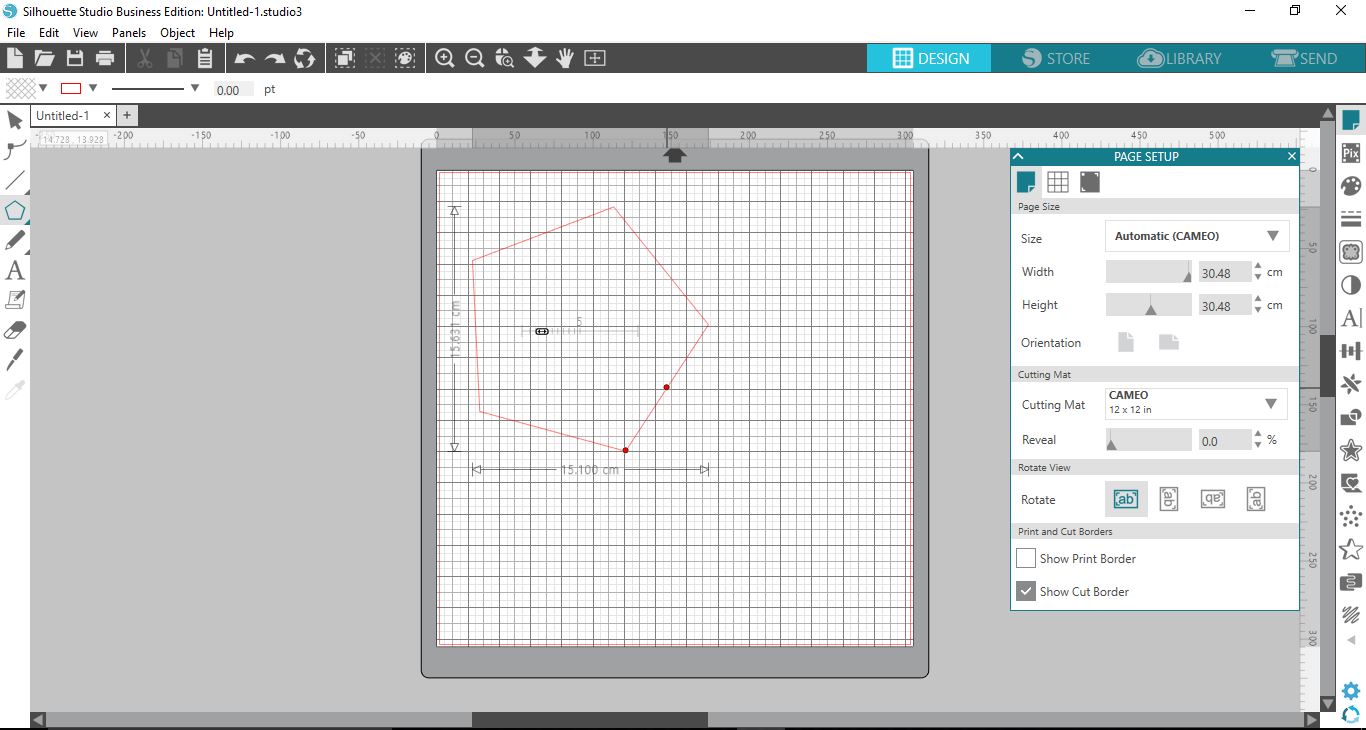
3- Click and drag on your work space.You will create a polygon.
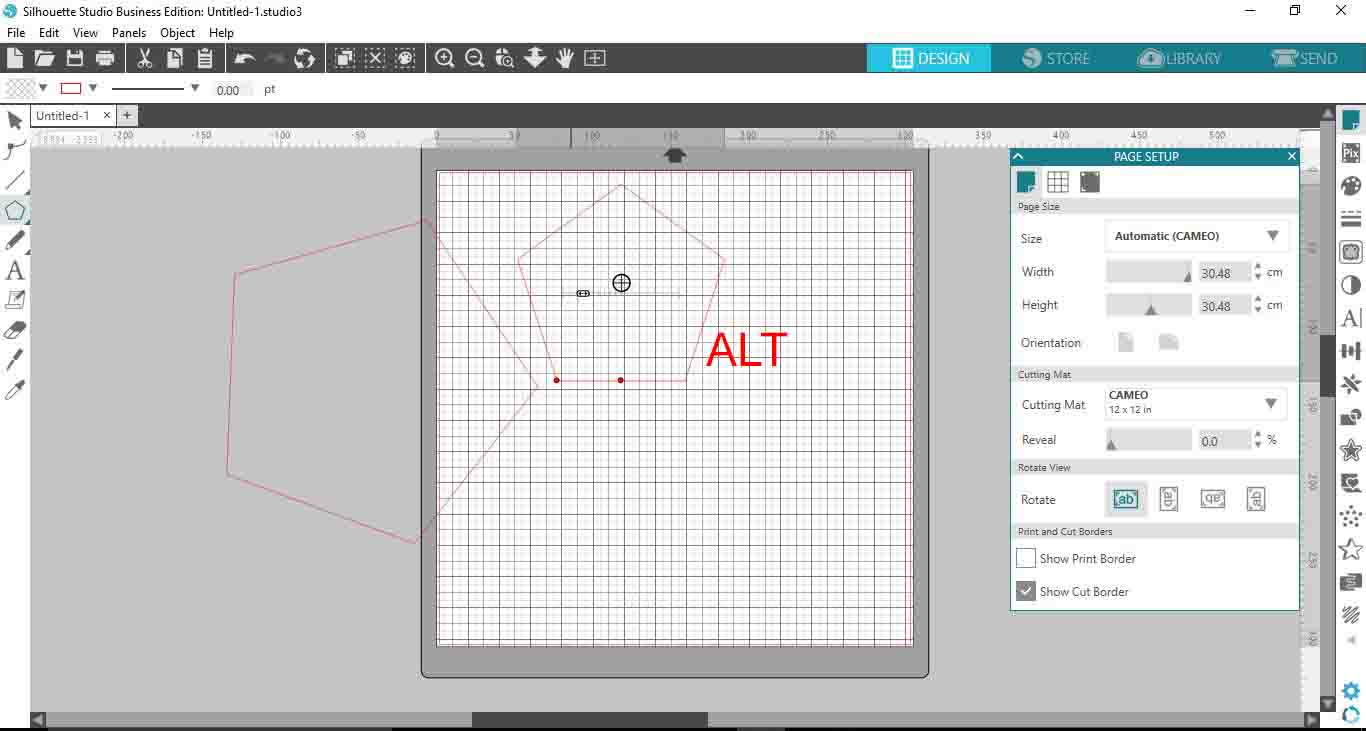
4- Hold the ALT key while creating your polygon to ensure the shape is created straight rather than is rotating as you create it.
5- To adjust the number of sides on your polygon, you can click on the slider in the middle of the polygon to increase and decrease the number of sides.
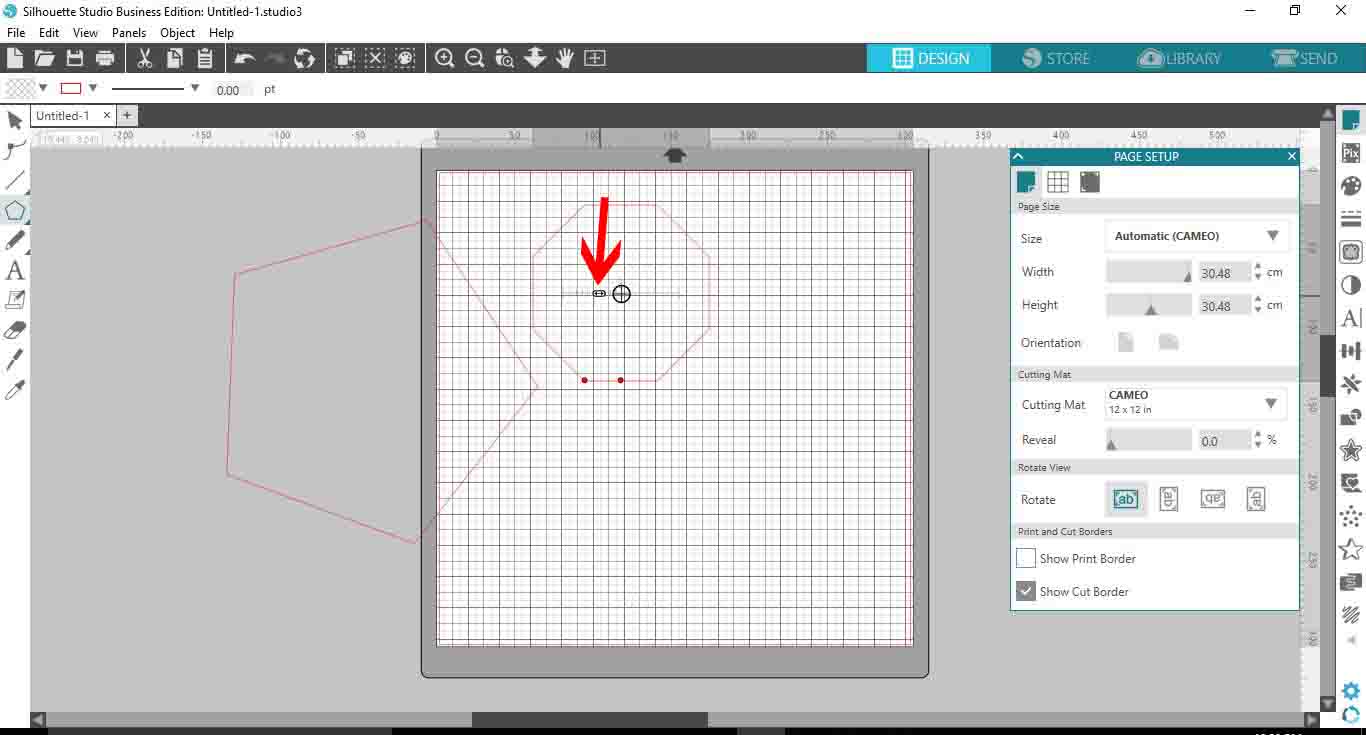
6- If you click on the red node in the middle of a side and hold shift, you can rotate the polygon so each side as you move is horizontal.
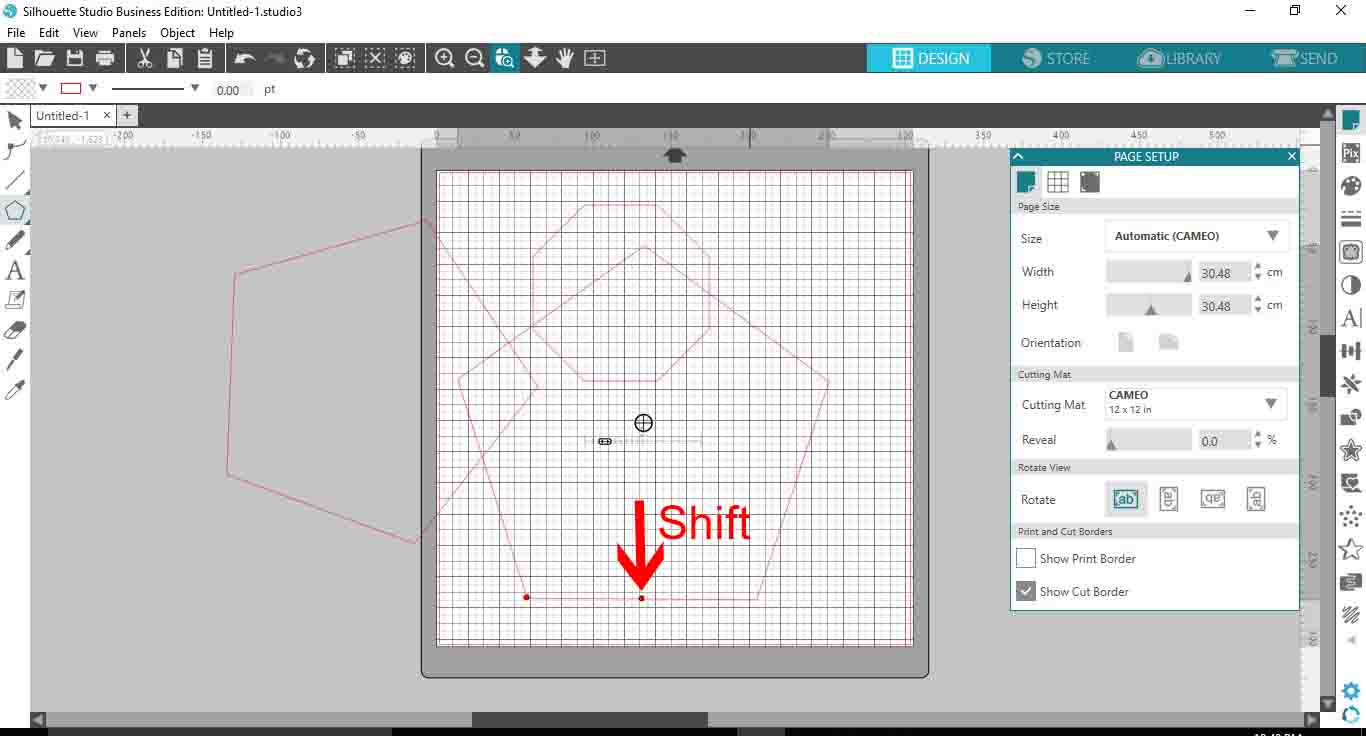
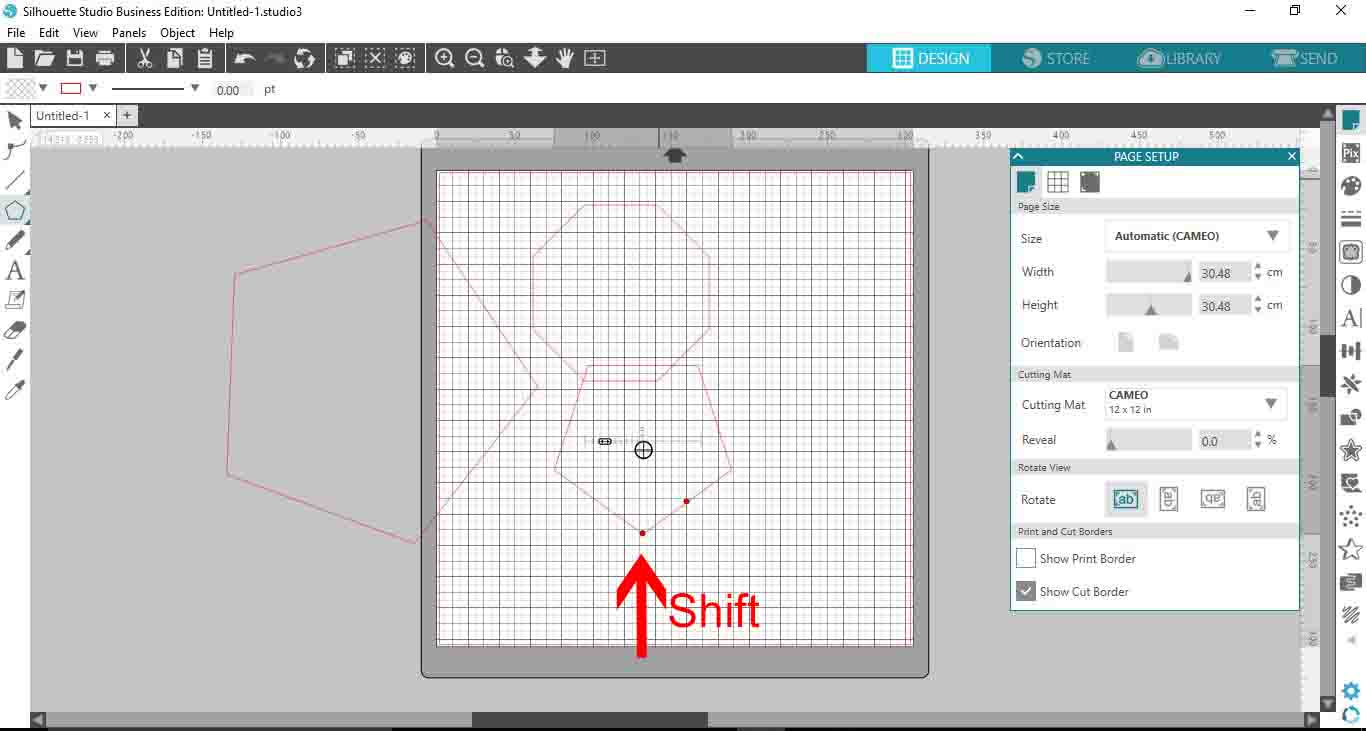
7- If you click on a corner node and hold shift while moving the polygon, the polygon will lock to each corner.
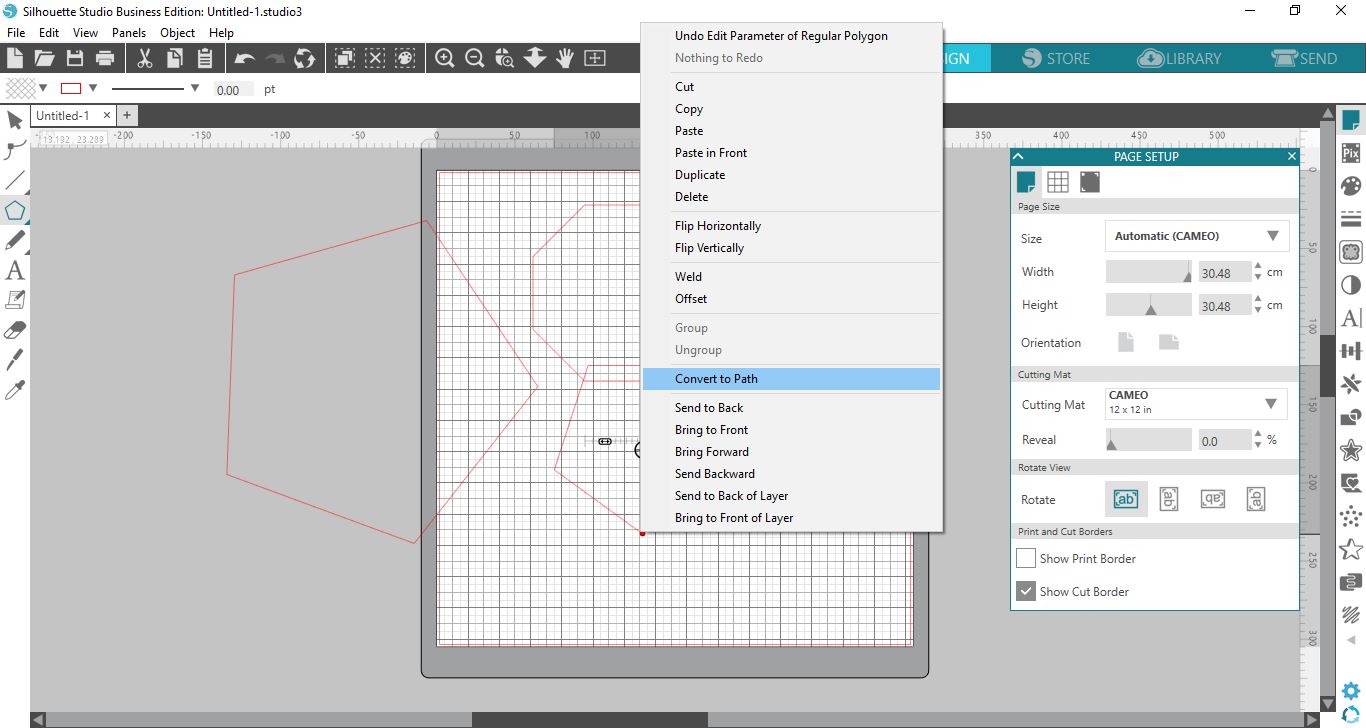
8- When you are happy with your polygon, right click and convert to path. This will remove the nodes and slider.
Related Tutorials
Silhouette Tutorials
Using the Lasso tool in Silhouette Studio
Learn how to use the Lasso Tool in Silhouette Studio with this beginner tutorial.
Silhouette Tutorials
Using the Align Tool in Silhouette Studio
Silhouette Tutorials
Using the Toggle Tool in Silhouette Studio
Silhouette Tutorials
Knife Tool Overview in Silhouette Studio
In this tutorial, discover how to use the Knife Tool in Silhouette Studio in more than one way.
Silhouette Tutorials
Silhouette Studio Lock Layer Tool
Learn how to lock layers using the lock layer tool in Silhouette Studio.
Silhouette Tutorials
How to Calibrate with the Distance Adjustment Tool in Silhouette Studio
Discover how to adjust your cut lines with the Distance Adjustment tool in Silhouette Studio.