By Design Bundles
Affinity Tutorials9 min
How to Make a Paper Cut Effect in Affinity Designer
In this tutorial, we will learn how to make a Paper Cut Effect in Affinity Designer. We are using a Forest Layered Paper Cut.
Create a New Document or Open the one/s you plan to use.
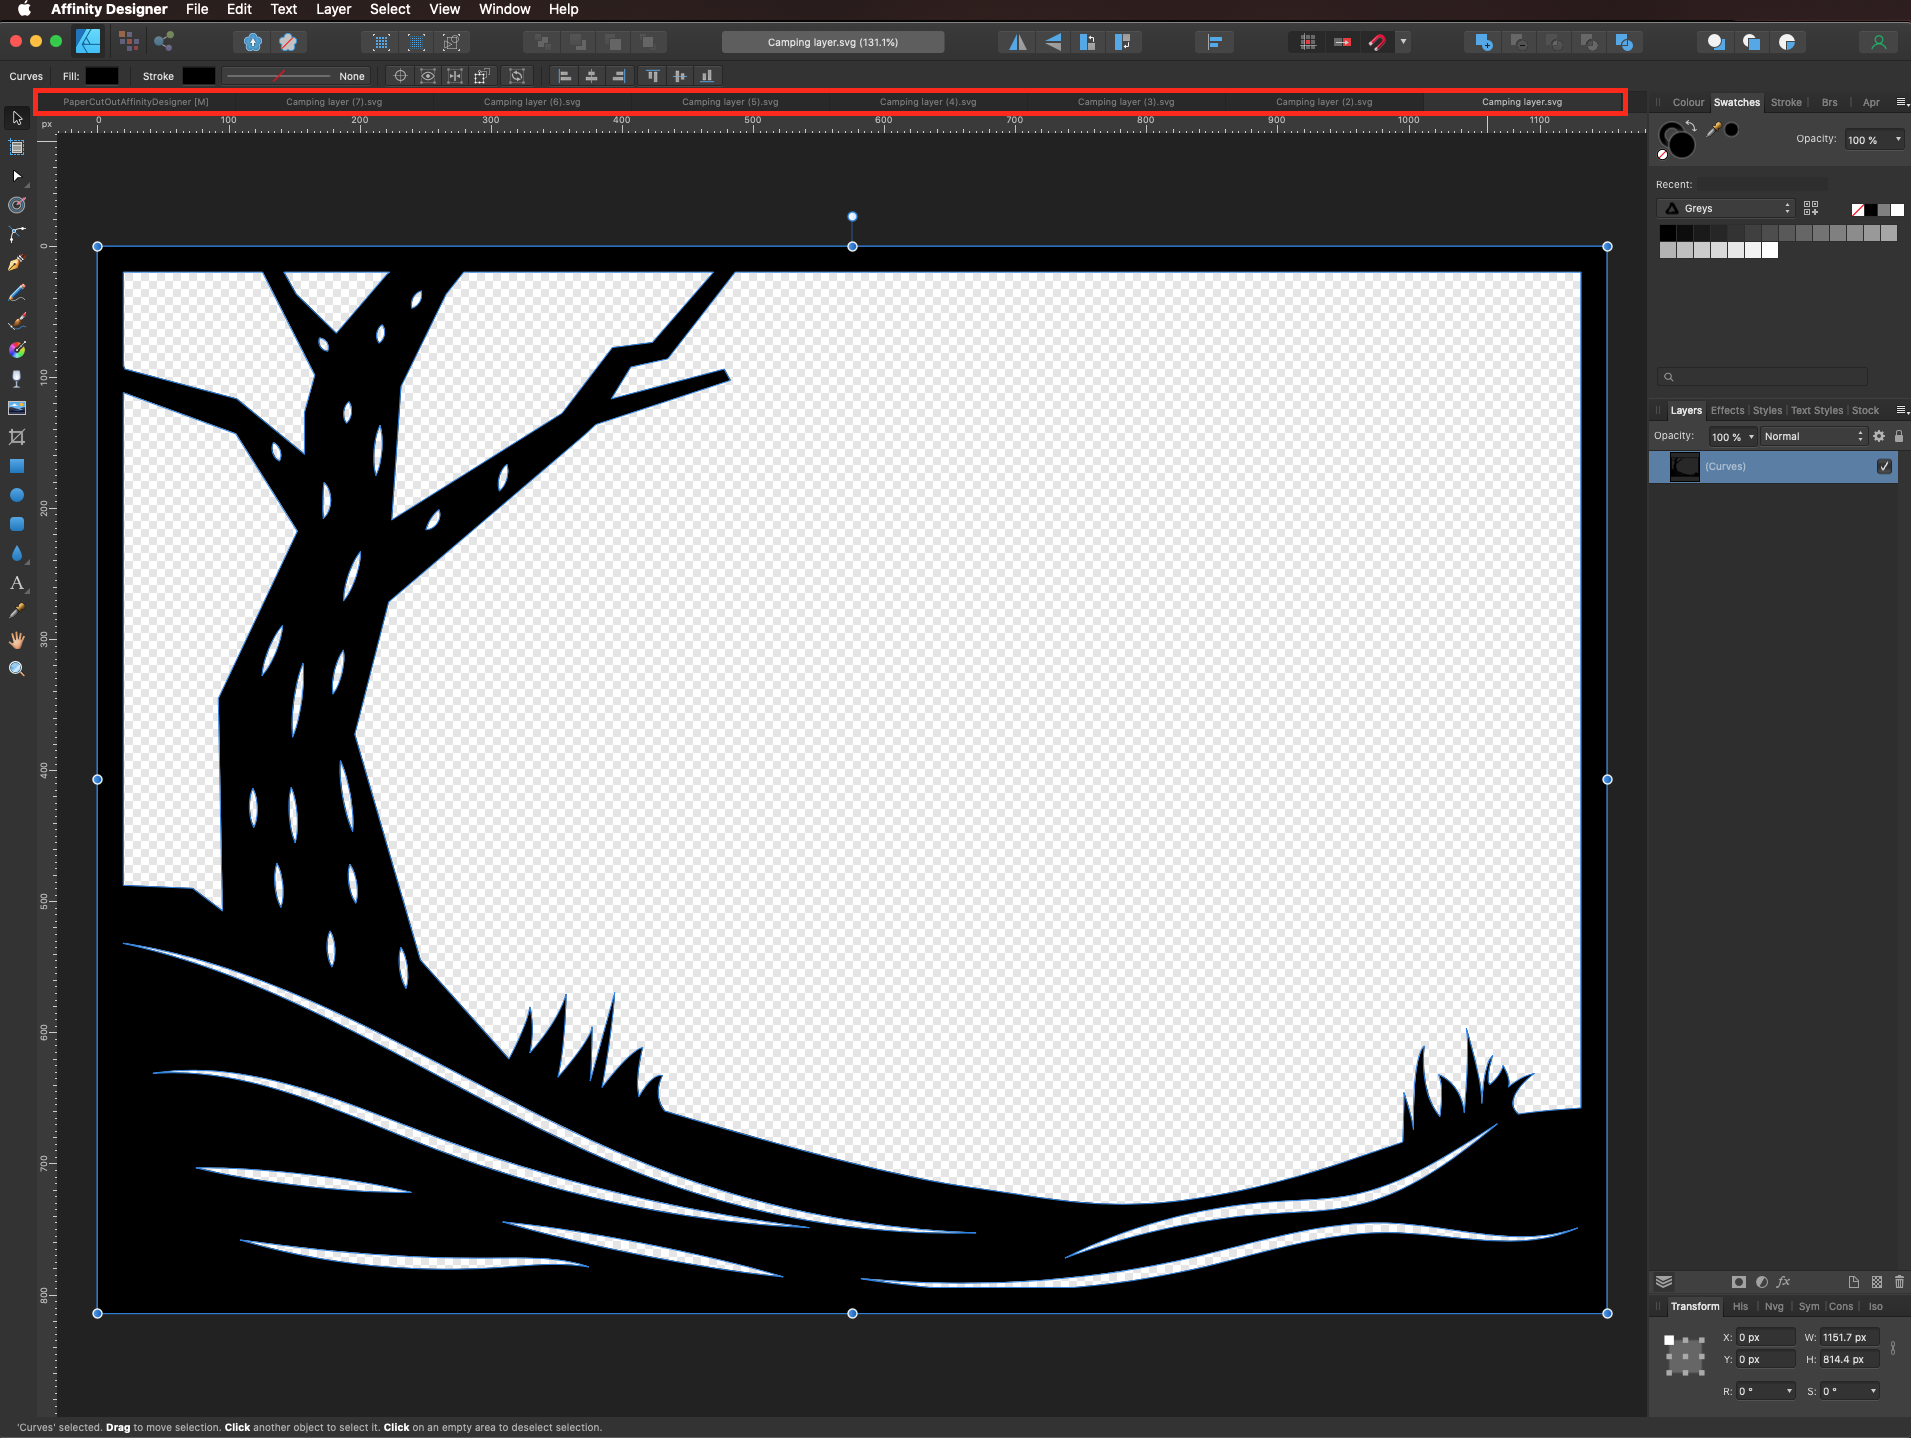
Copy (command/control + C) and Paste (command/control + V) the paths you want to use.
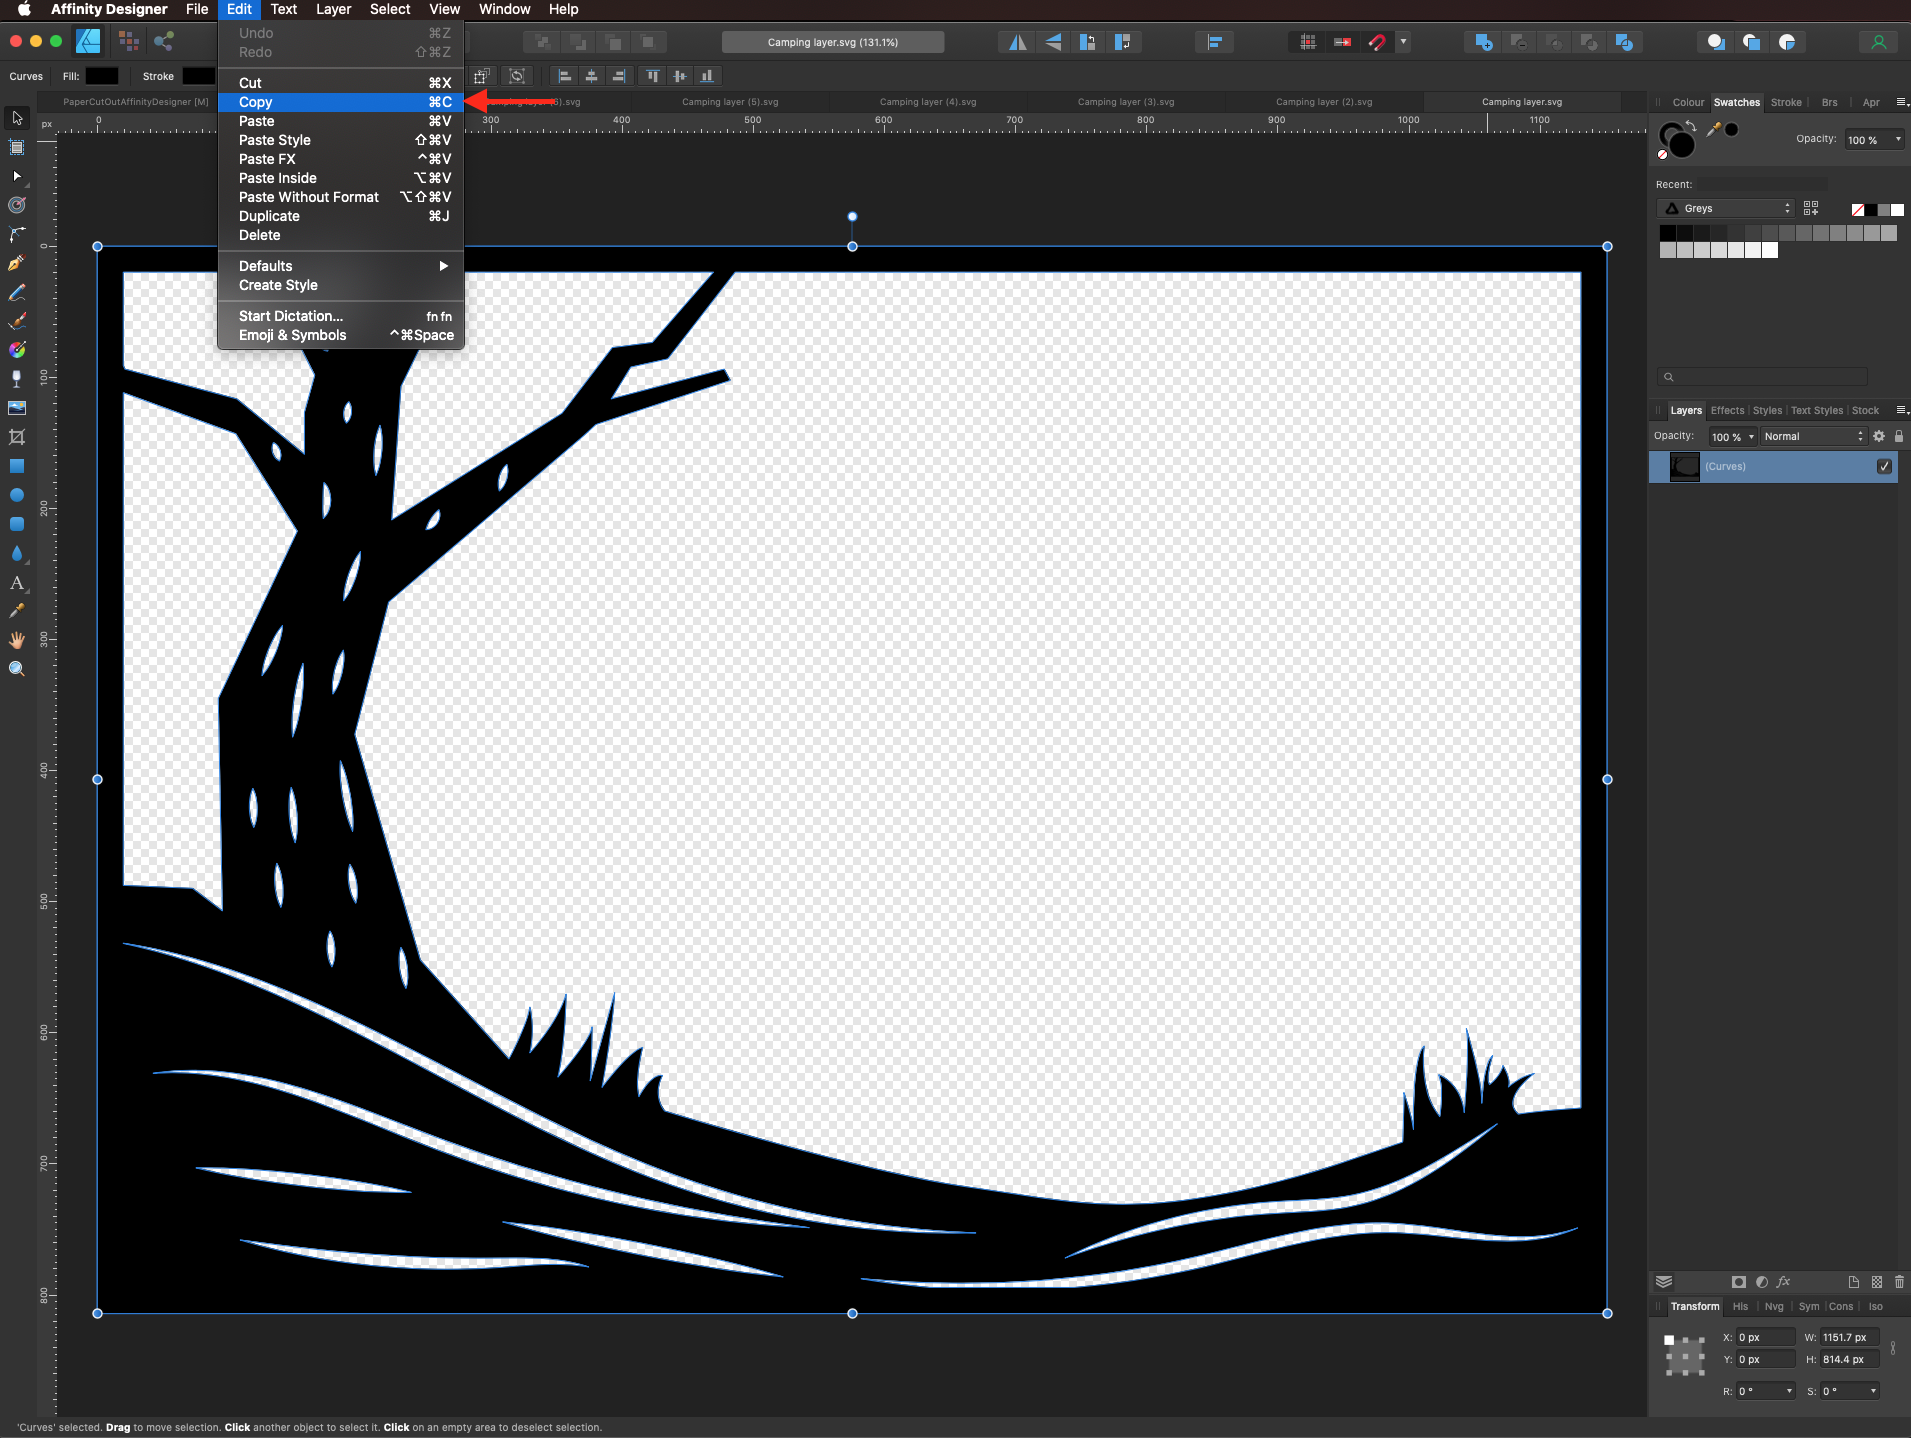
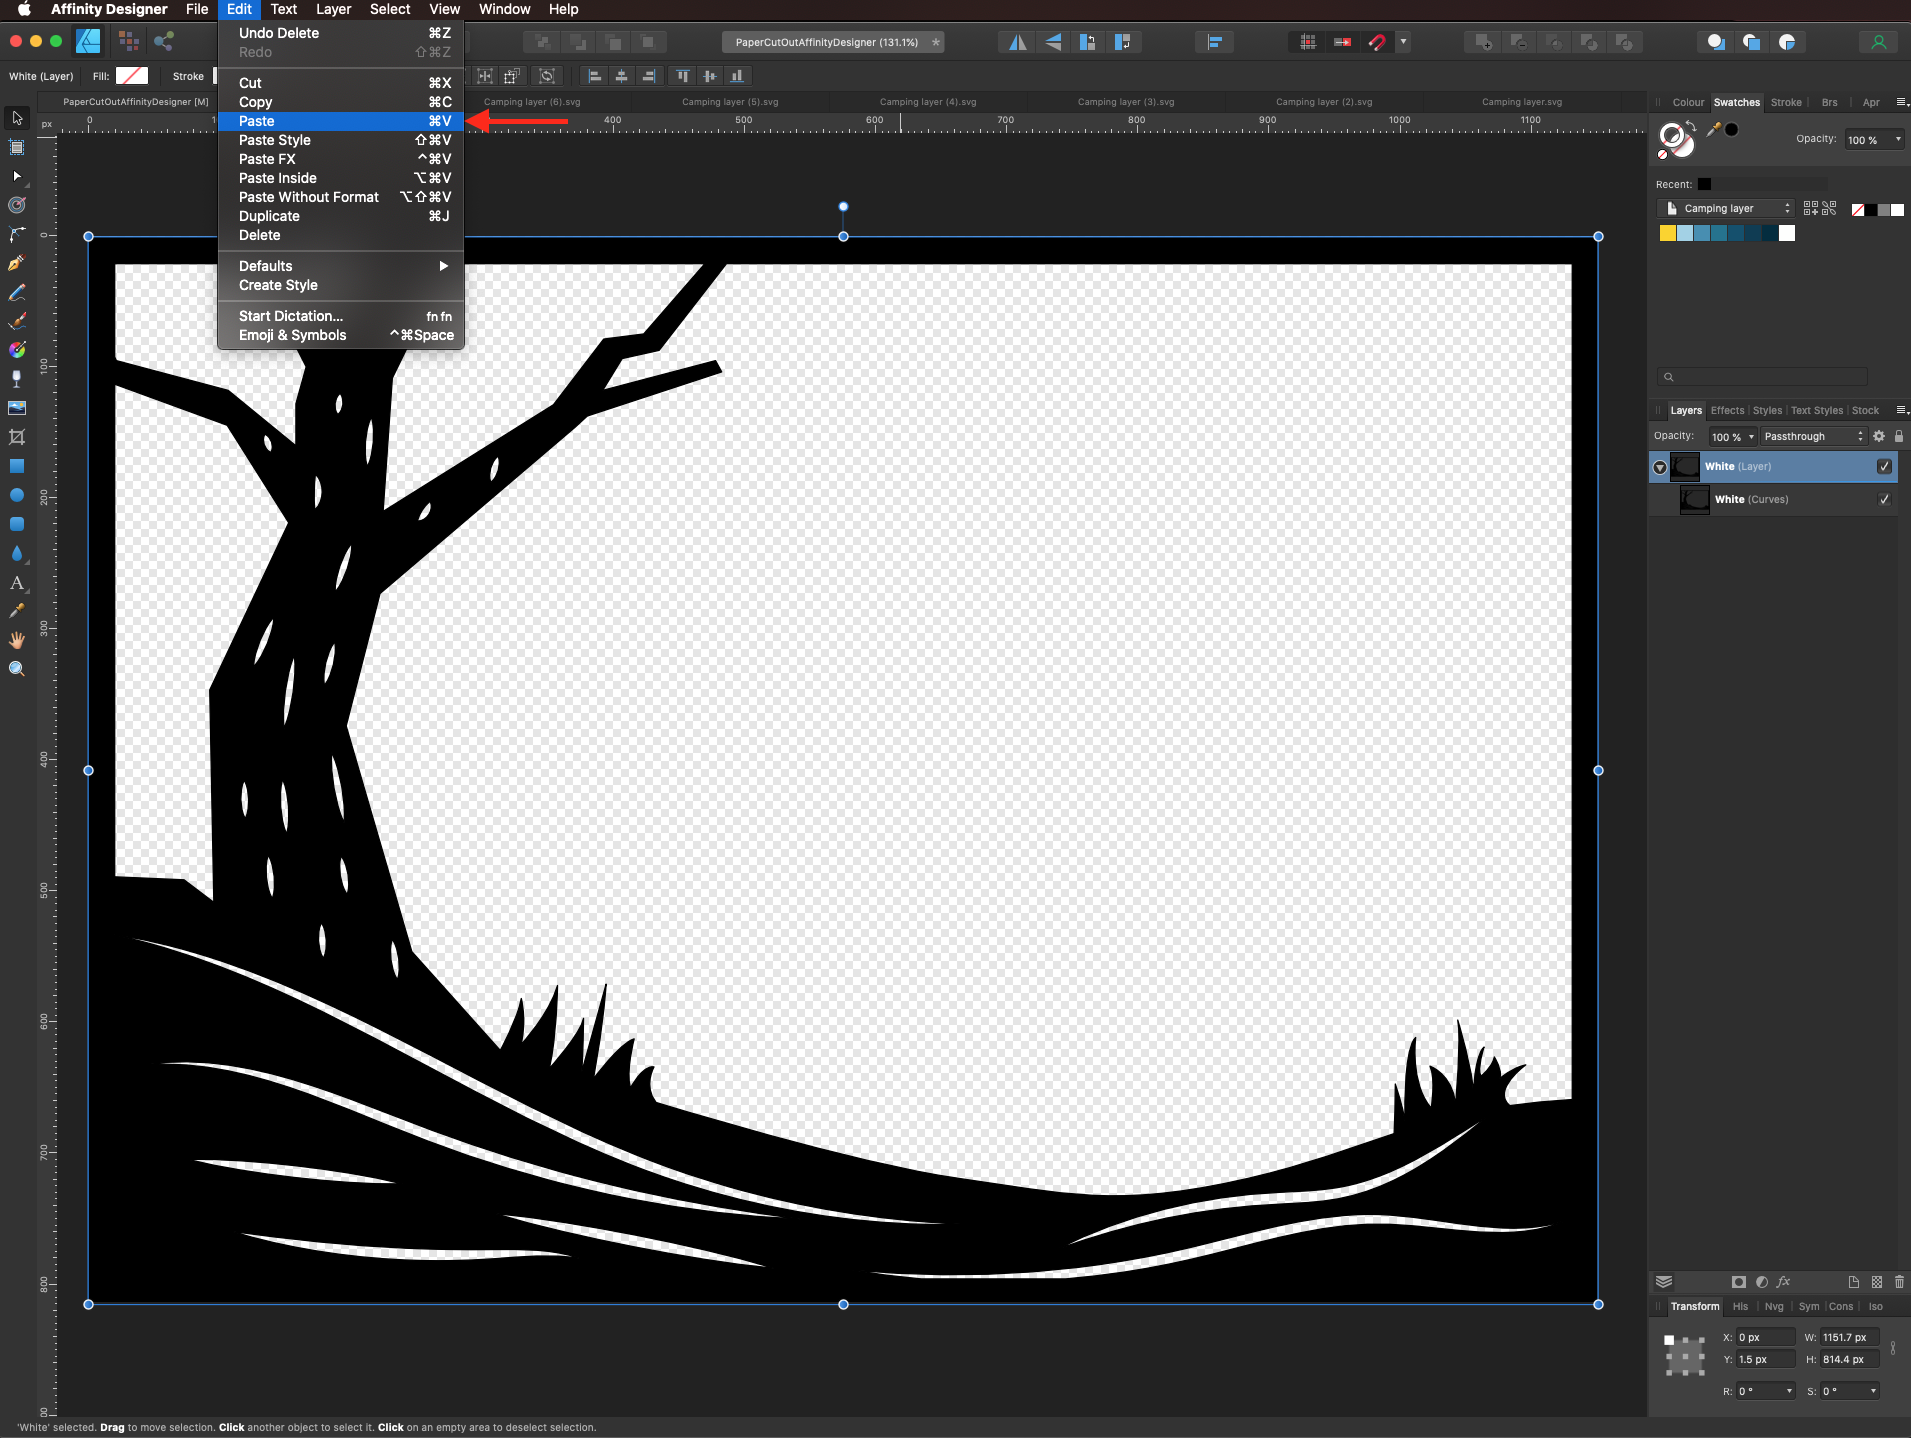
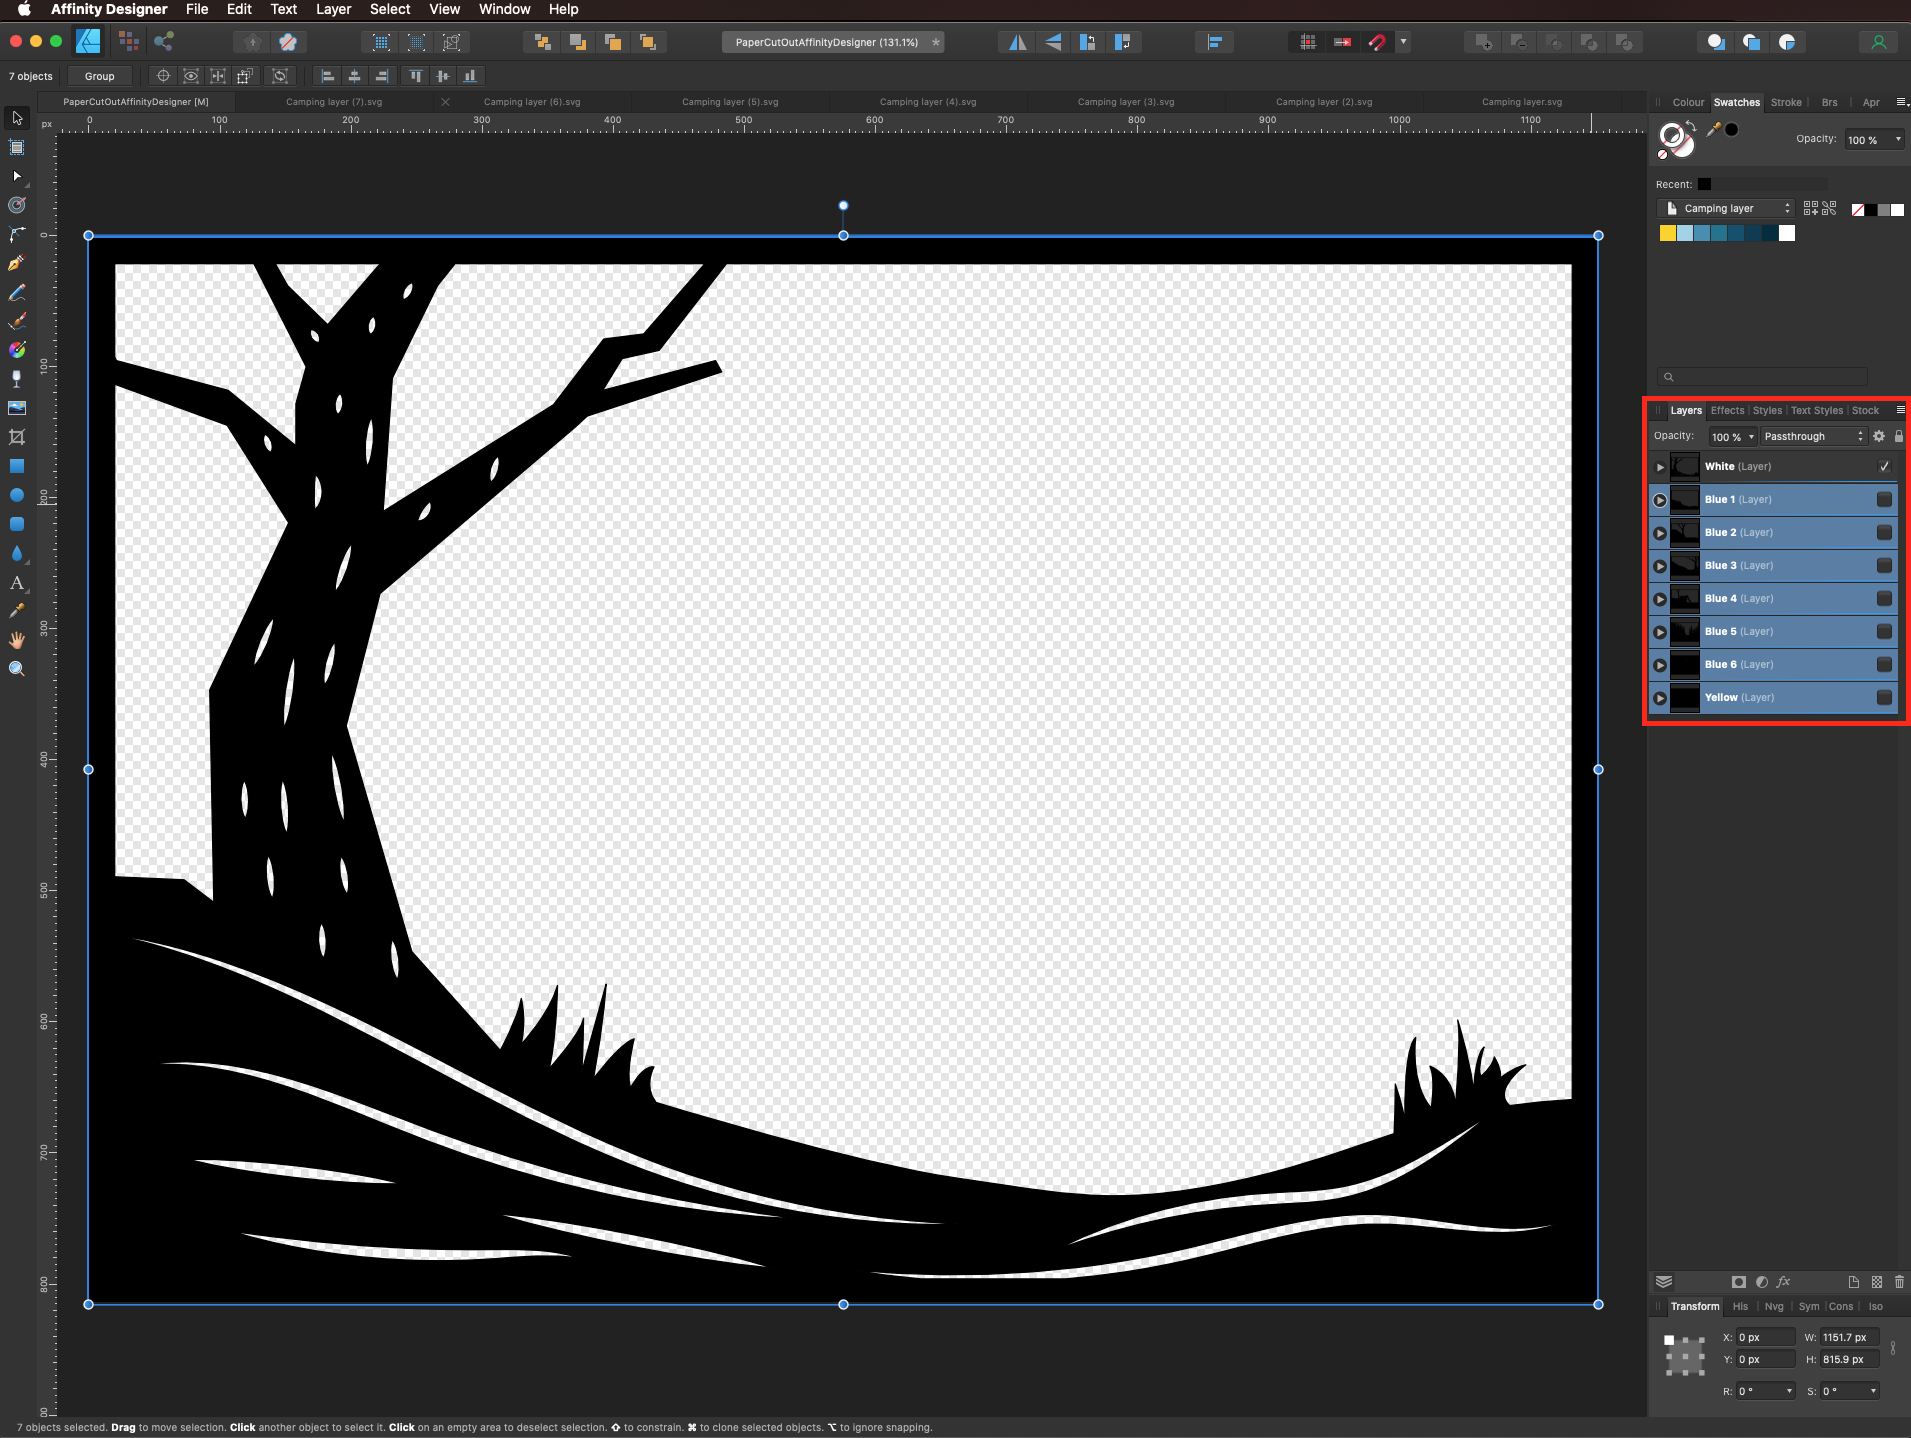
And place each one in a different Layer.
If your images are a Positive (a positive image is a normal image, and a negative image is a total inversion, in which light areas appear dark and vice versa), you can create a rectangular shape, place it under and use the Subtract feature from the Boolean Operations in the Geometry Studio Panel.
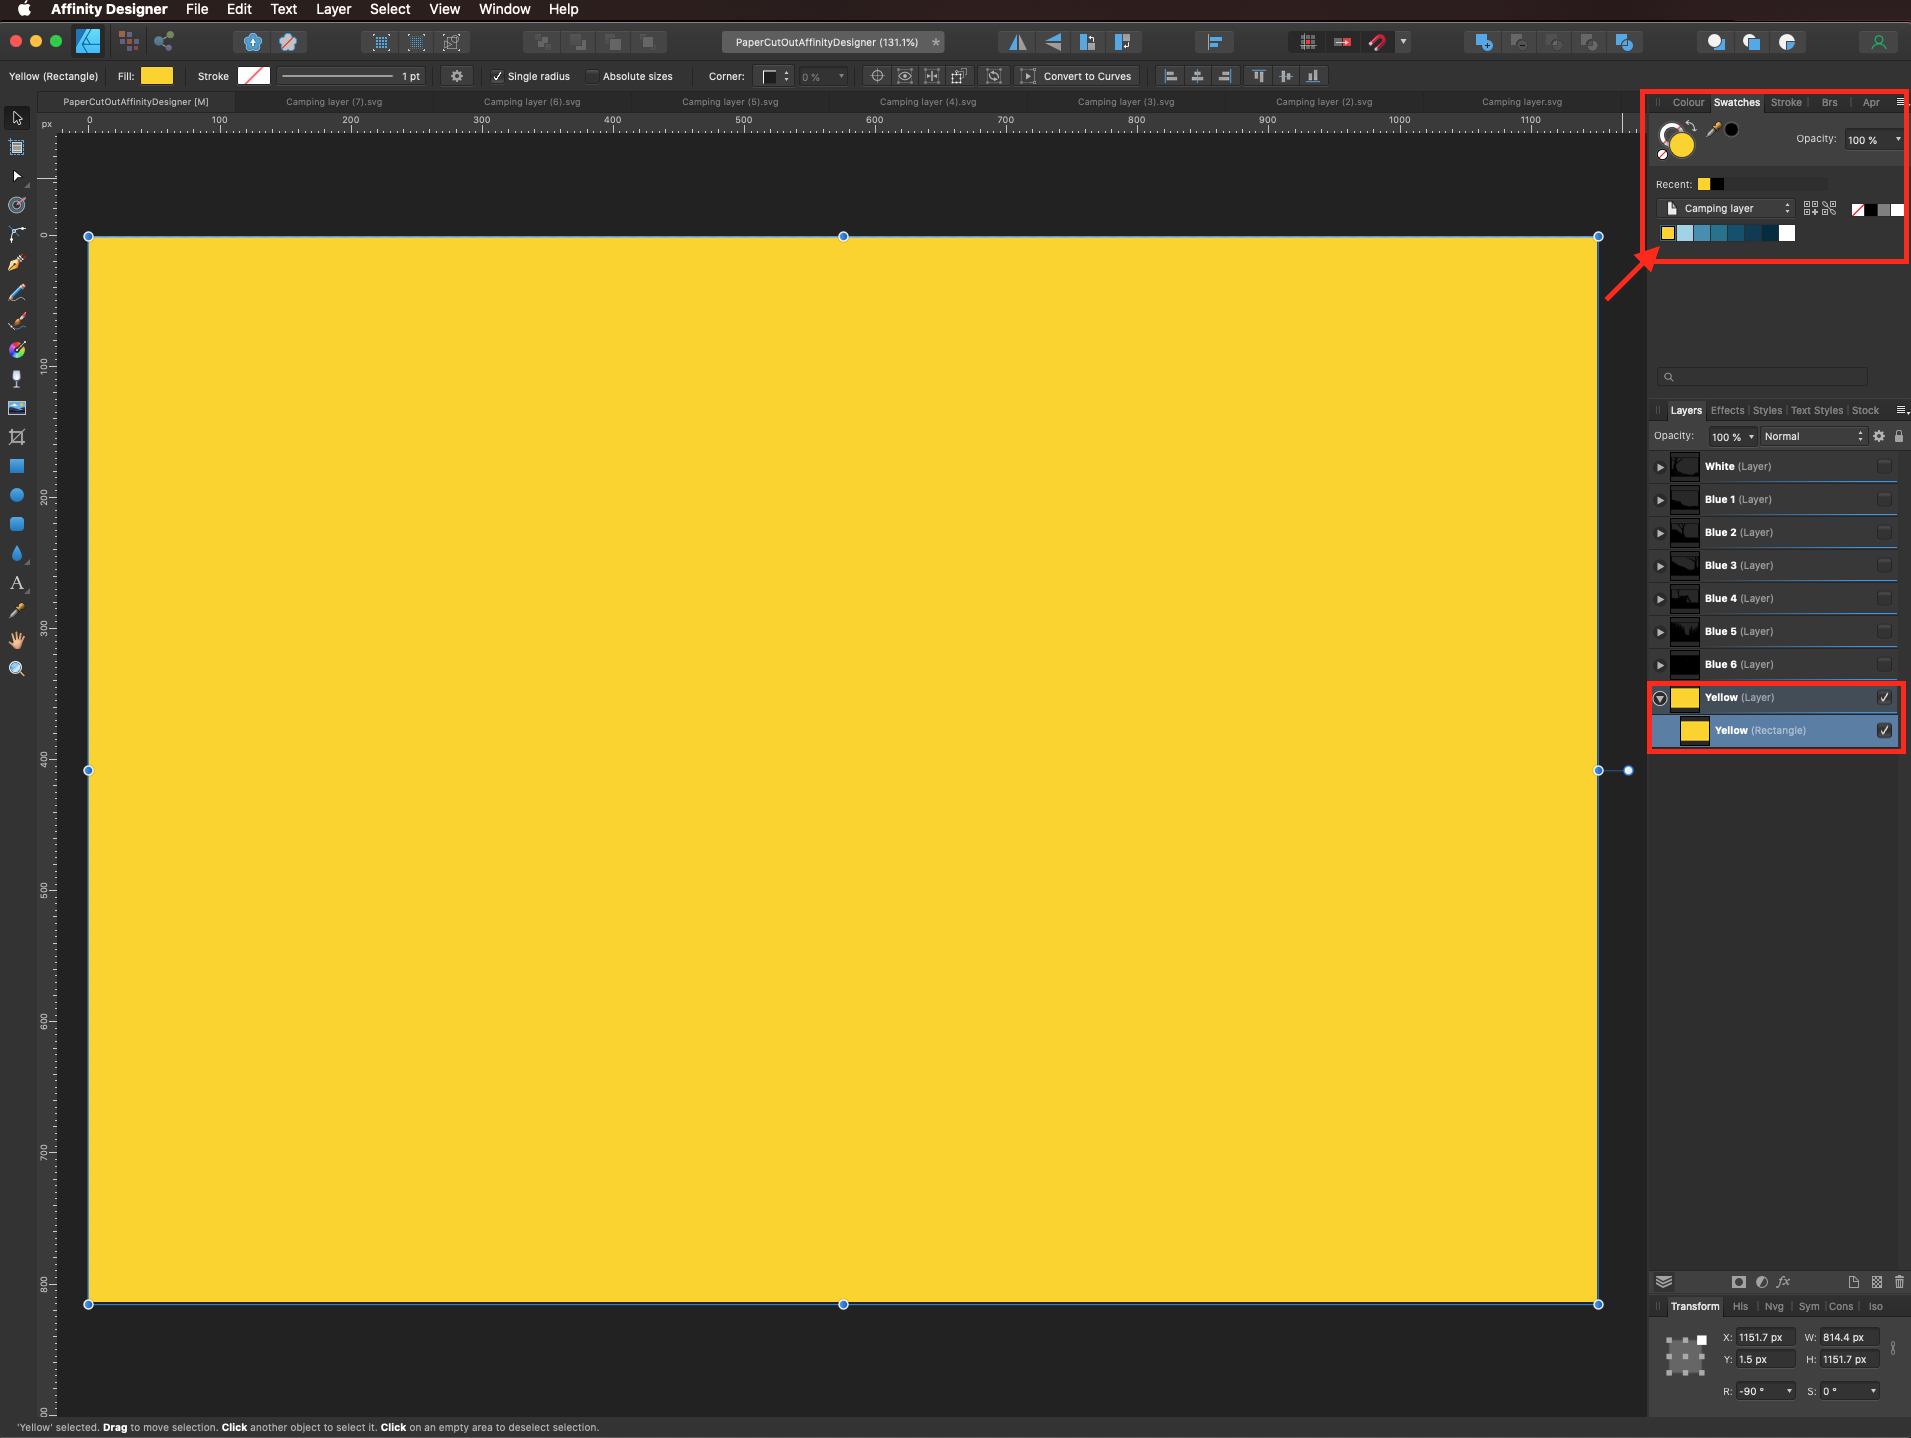
Select each layer and add the color you want to use. We are using a bright yellow for the background.
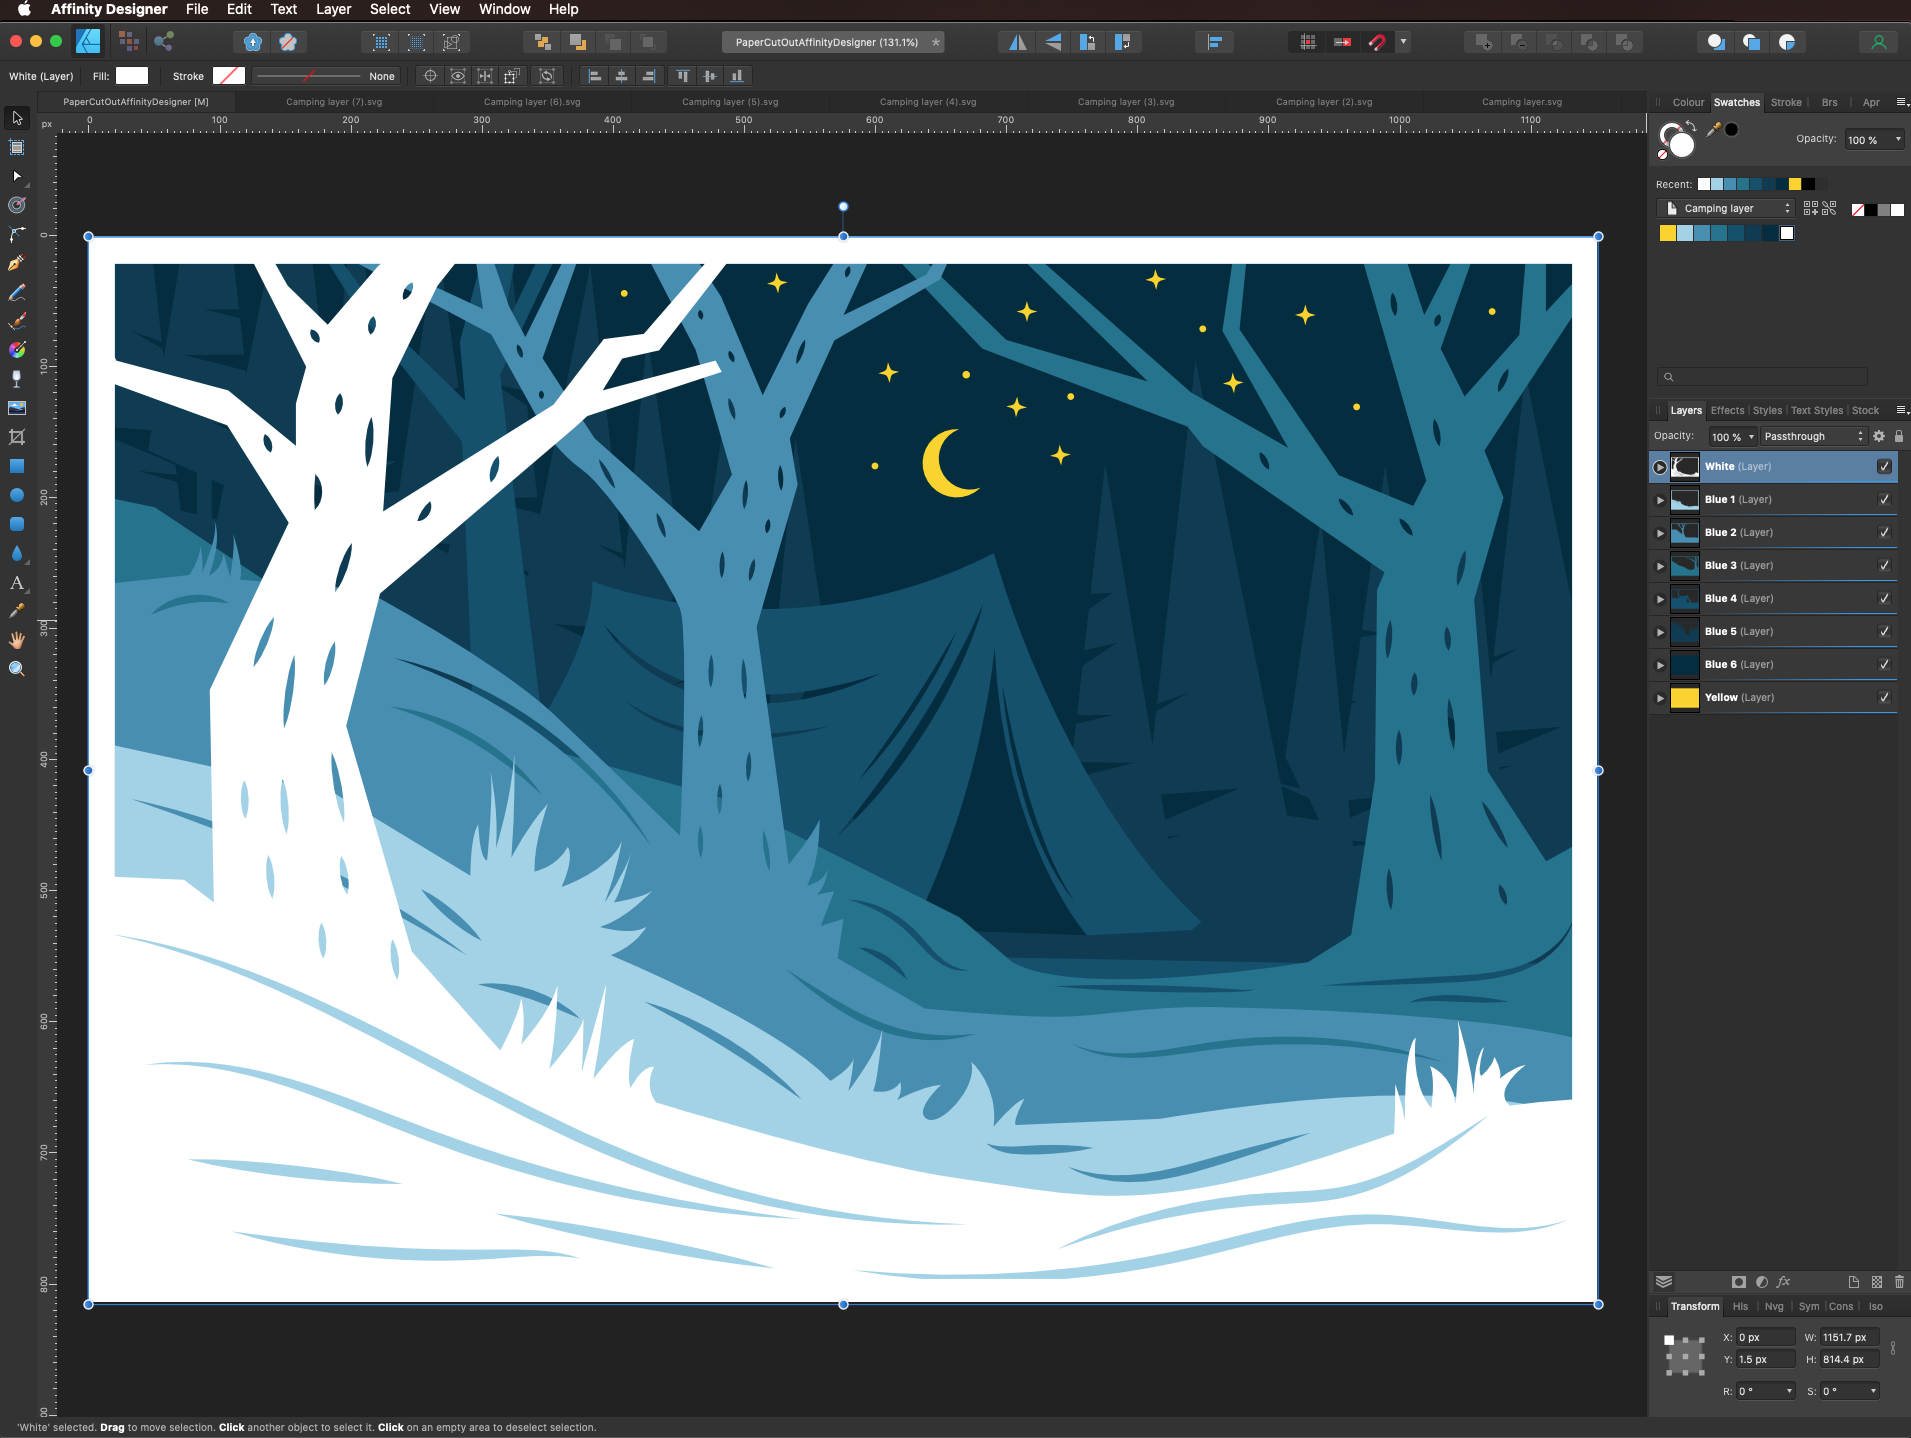
A progression of blue shades for the middle layers, and white for the one on top. Remember that normally the colors should go darker the further you get to the back of the image.
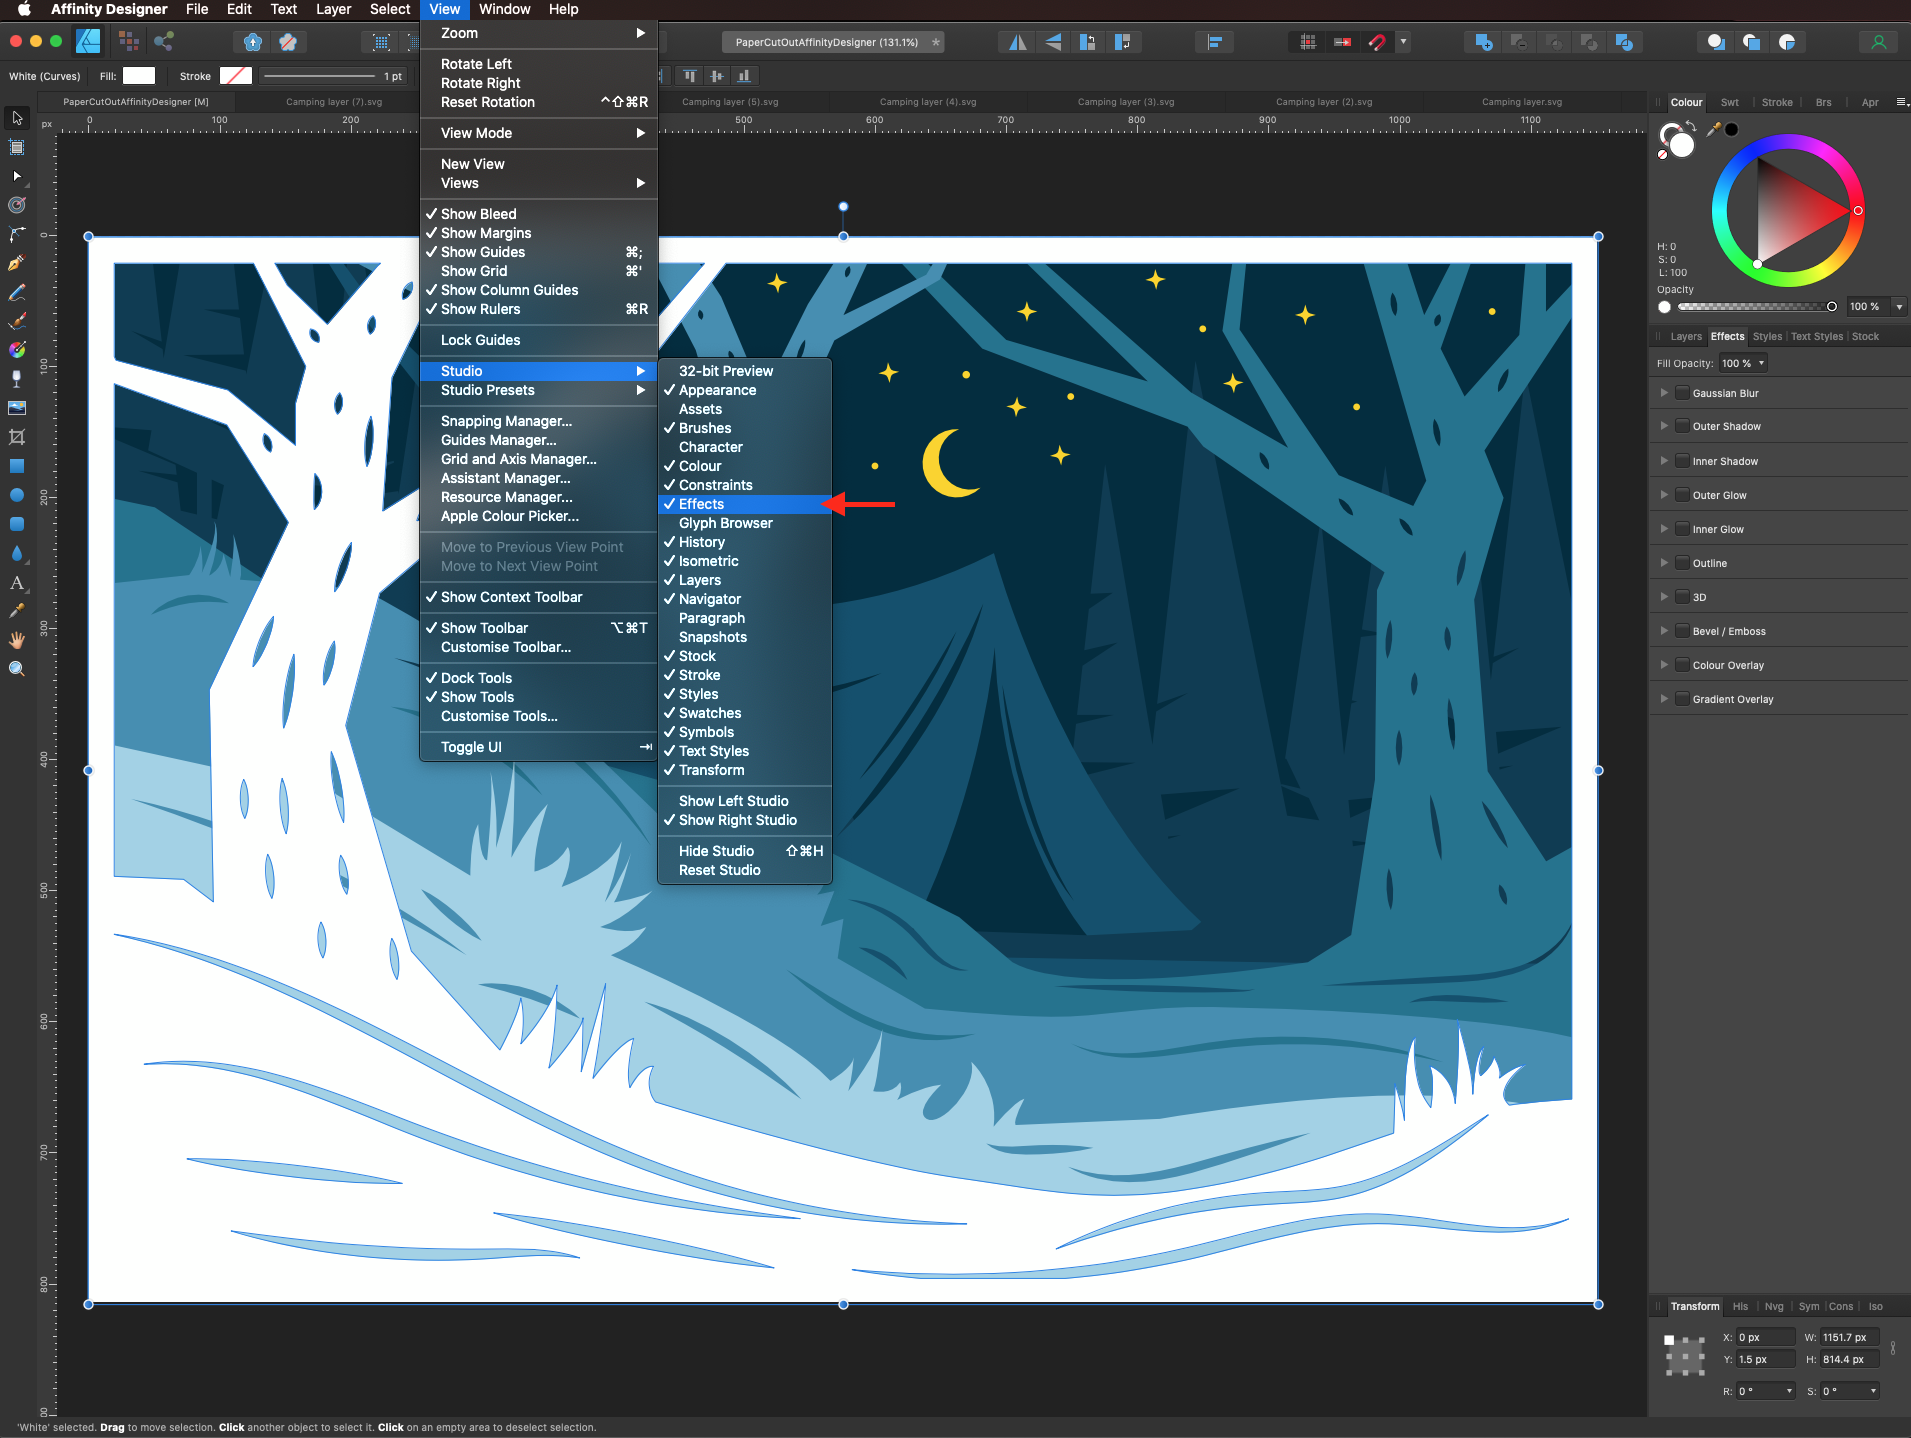
Select one of the layers and open the studio Effects Panel.
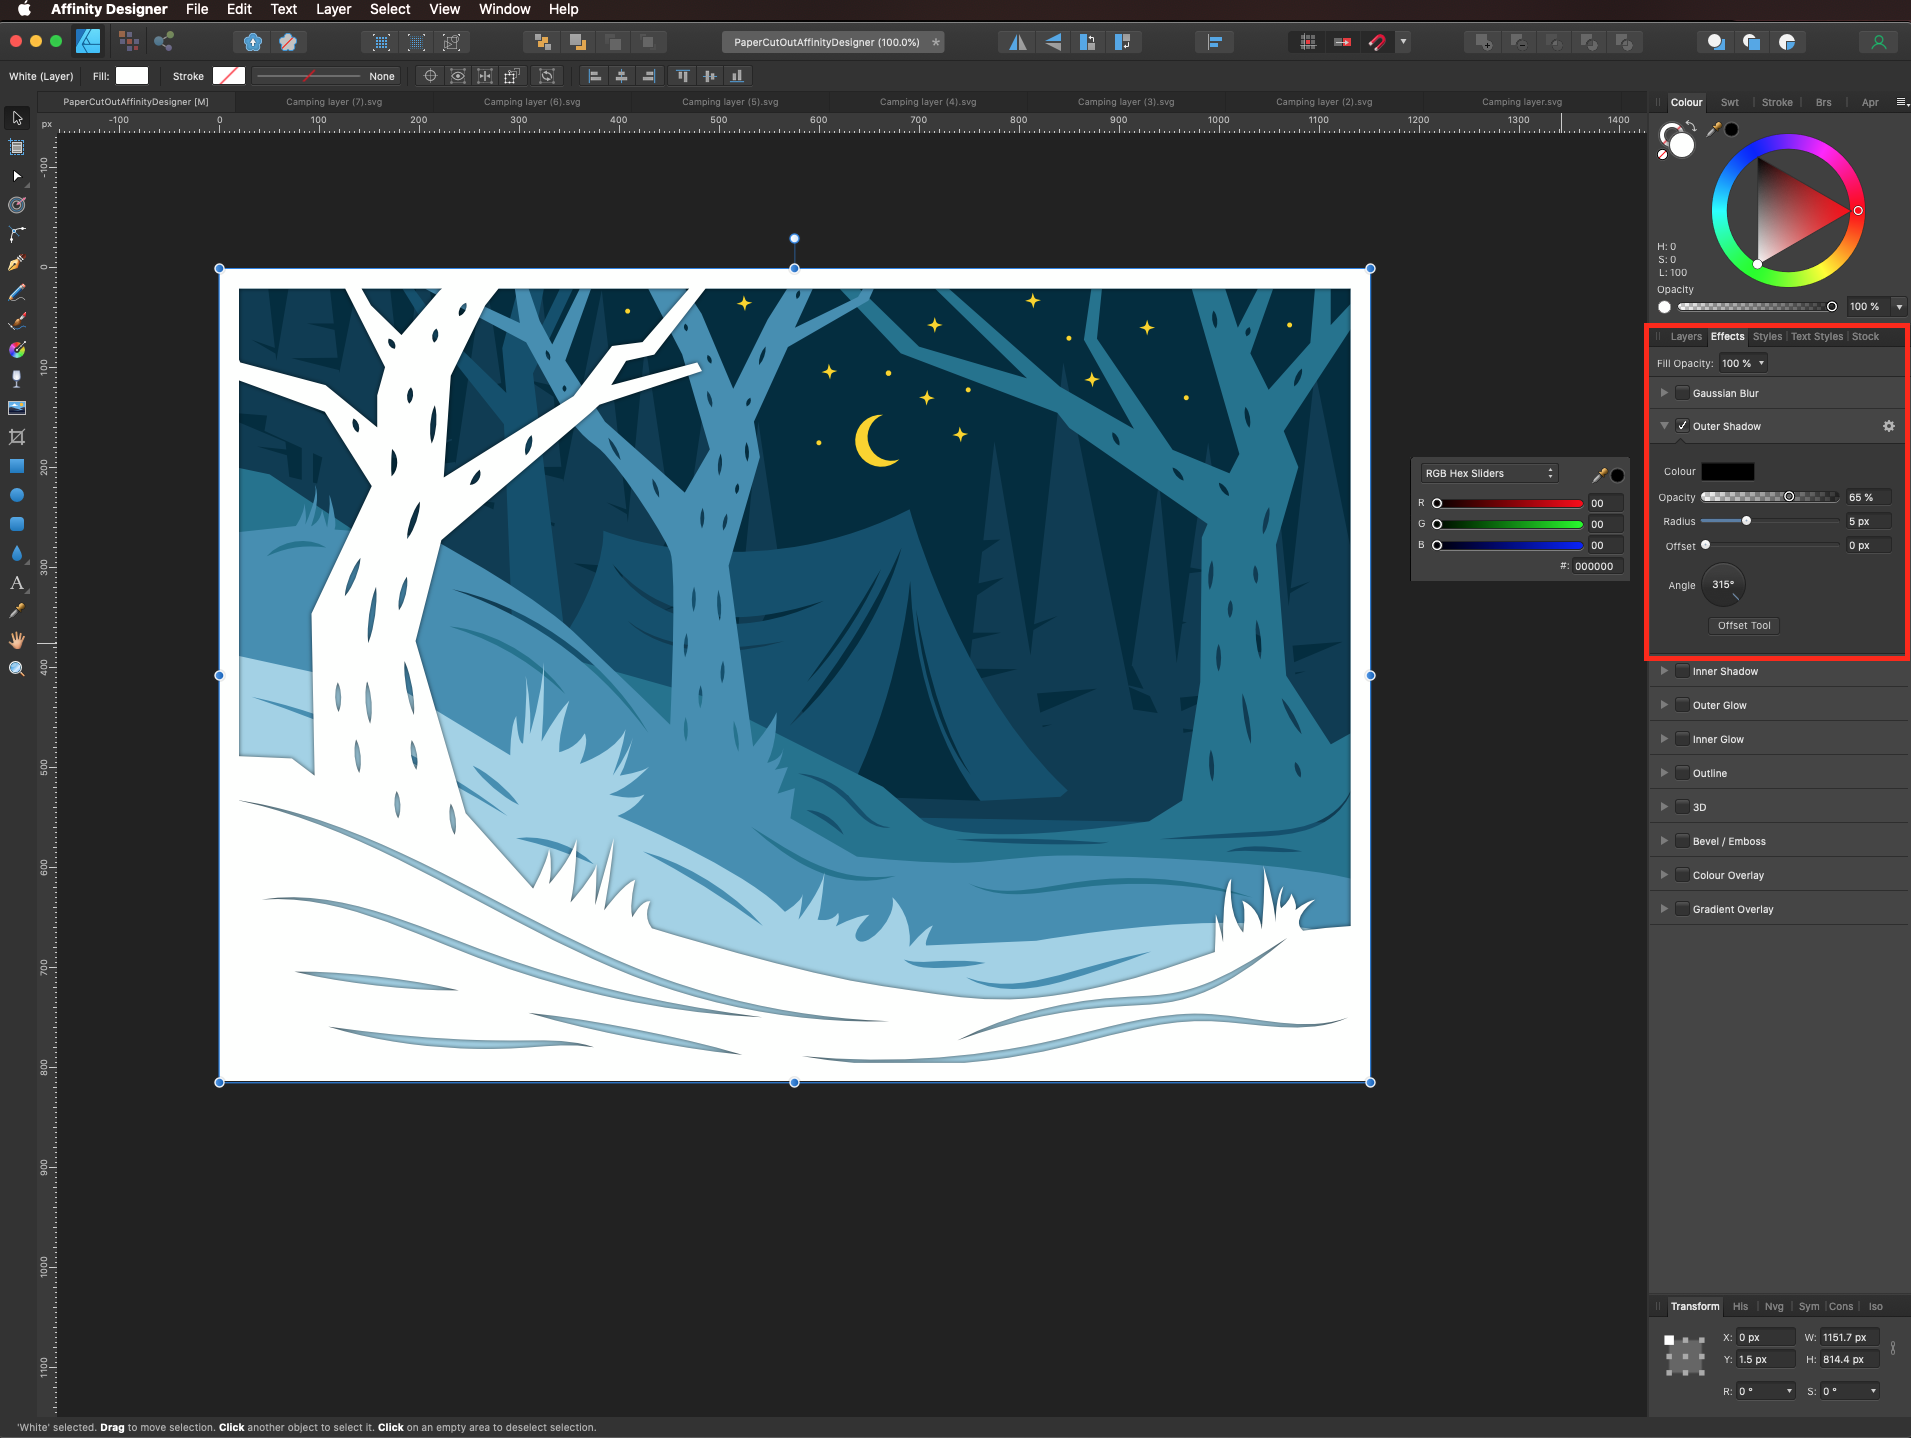
Apply an outer shadow with the values that work better for your artwork. We used #000000 (black) as Color, 65% Opacity, 5 px Radius, and a 315° Angle.
Repeat with the rest of the layers you want to apply the effect to.
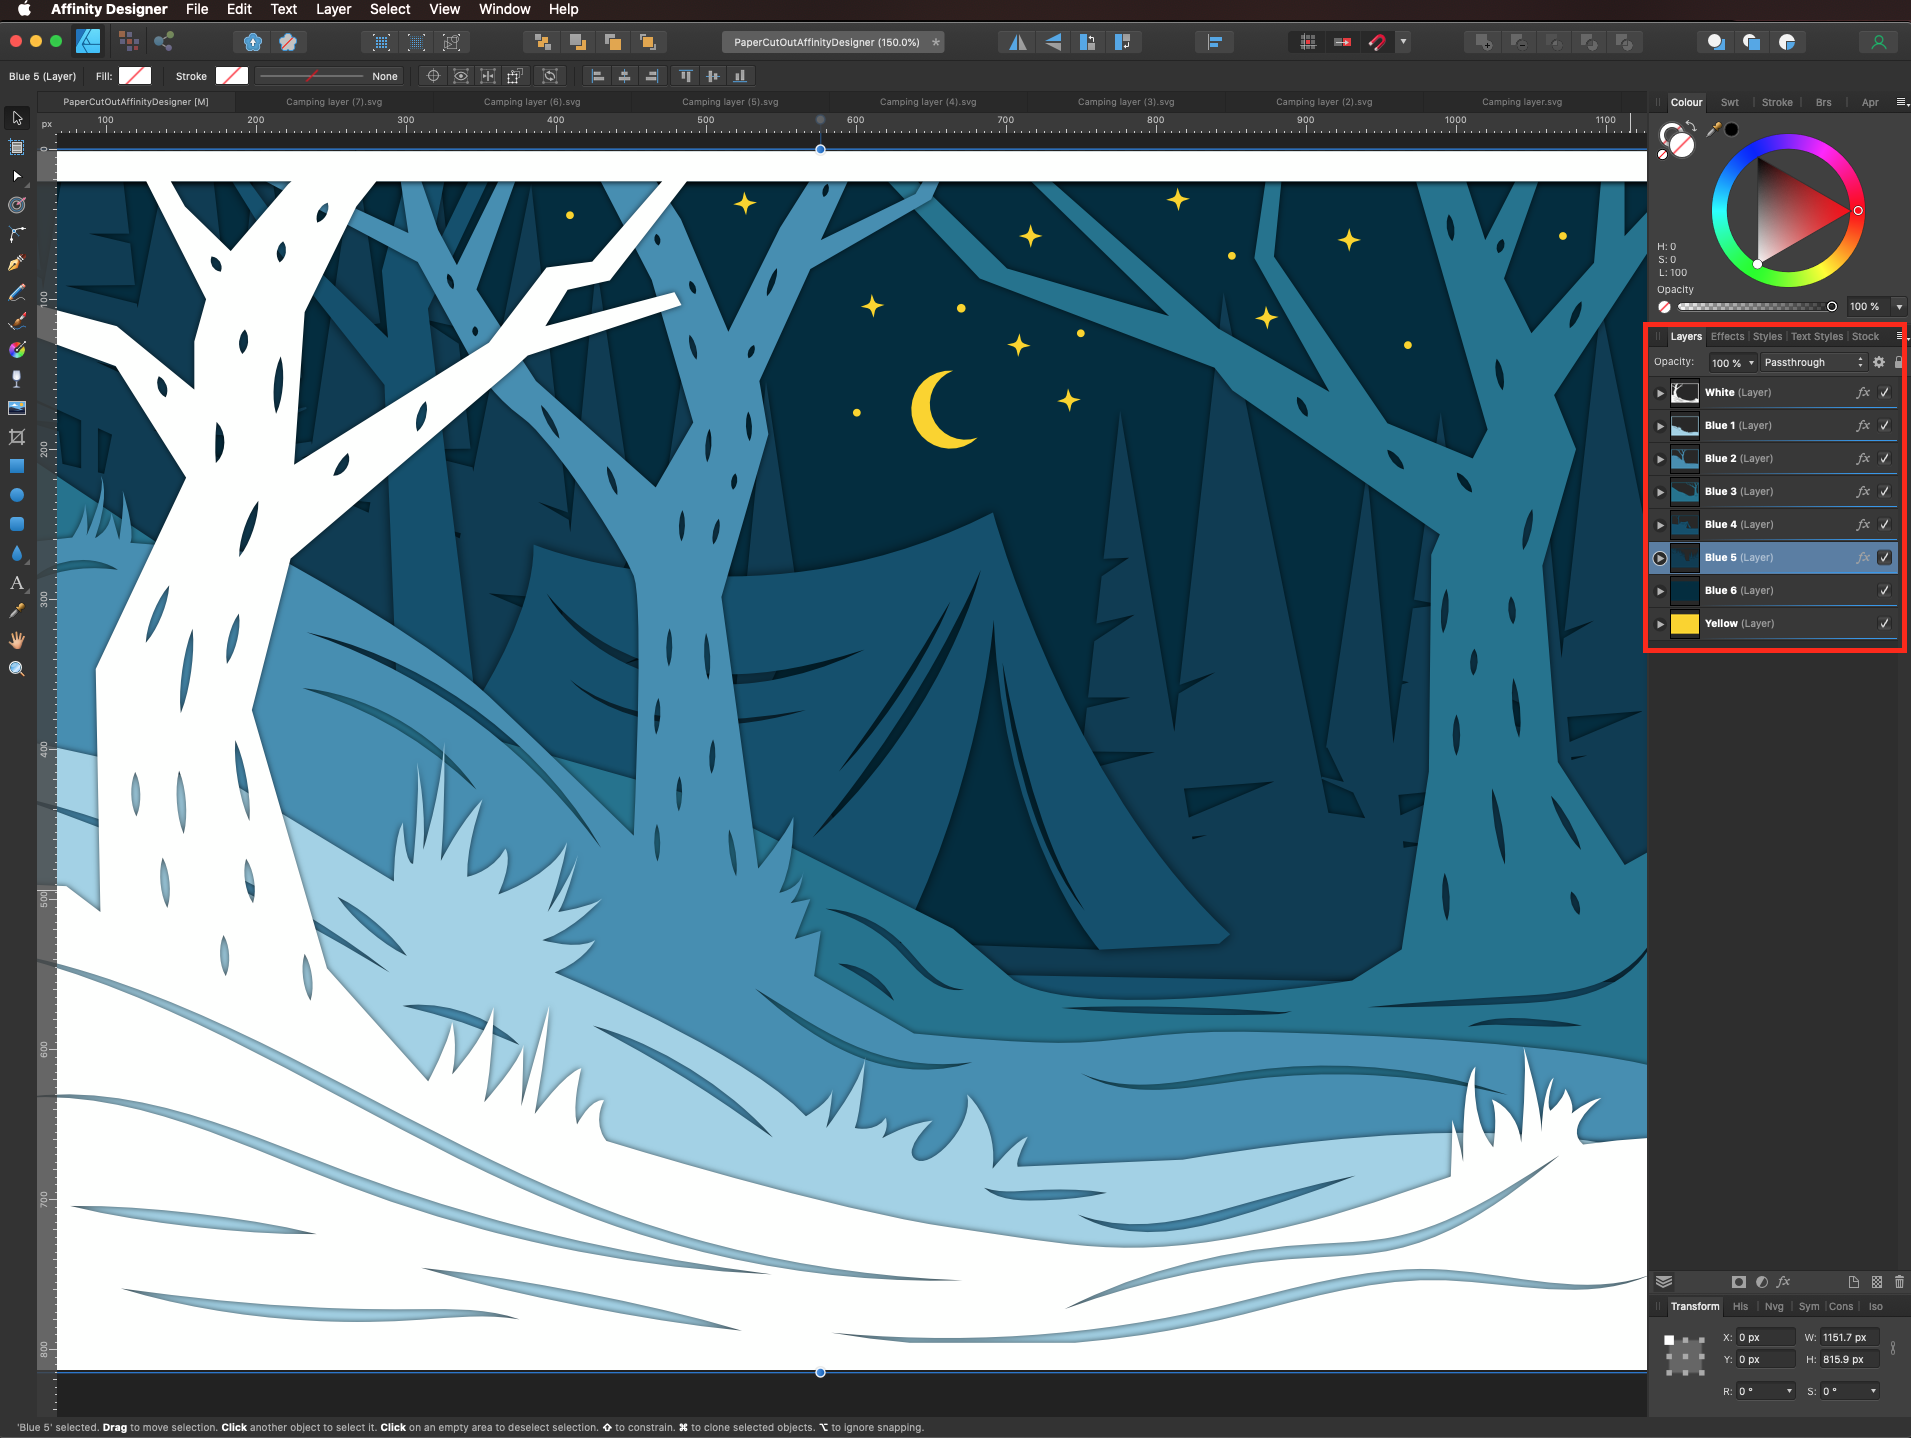
To adjust the effects settings, double-click the fx symbol in the layer thumbnail. Play with the angle, distance, and intensity settings to get the look you want. You can make the shadows stronger on the top right side by changing the angle closer to 225°.
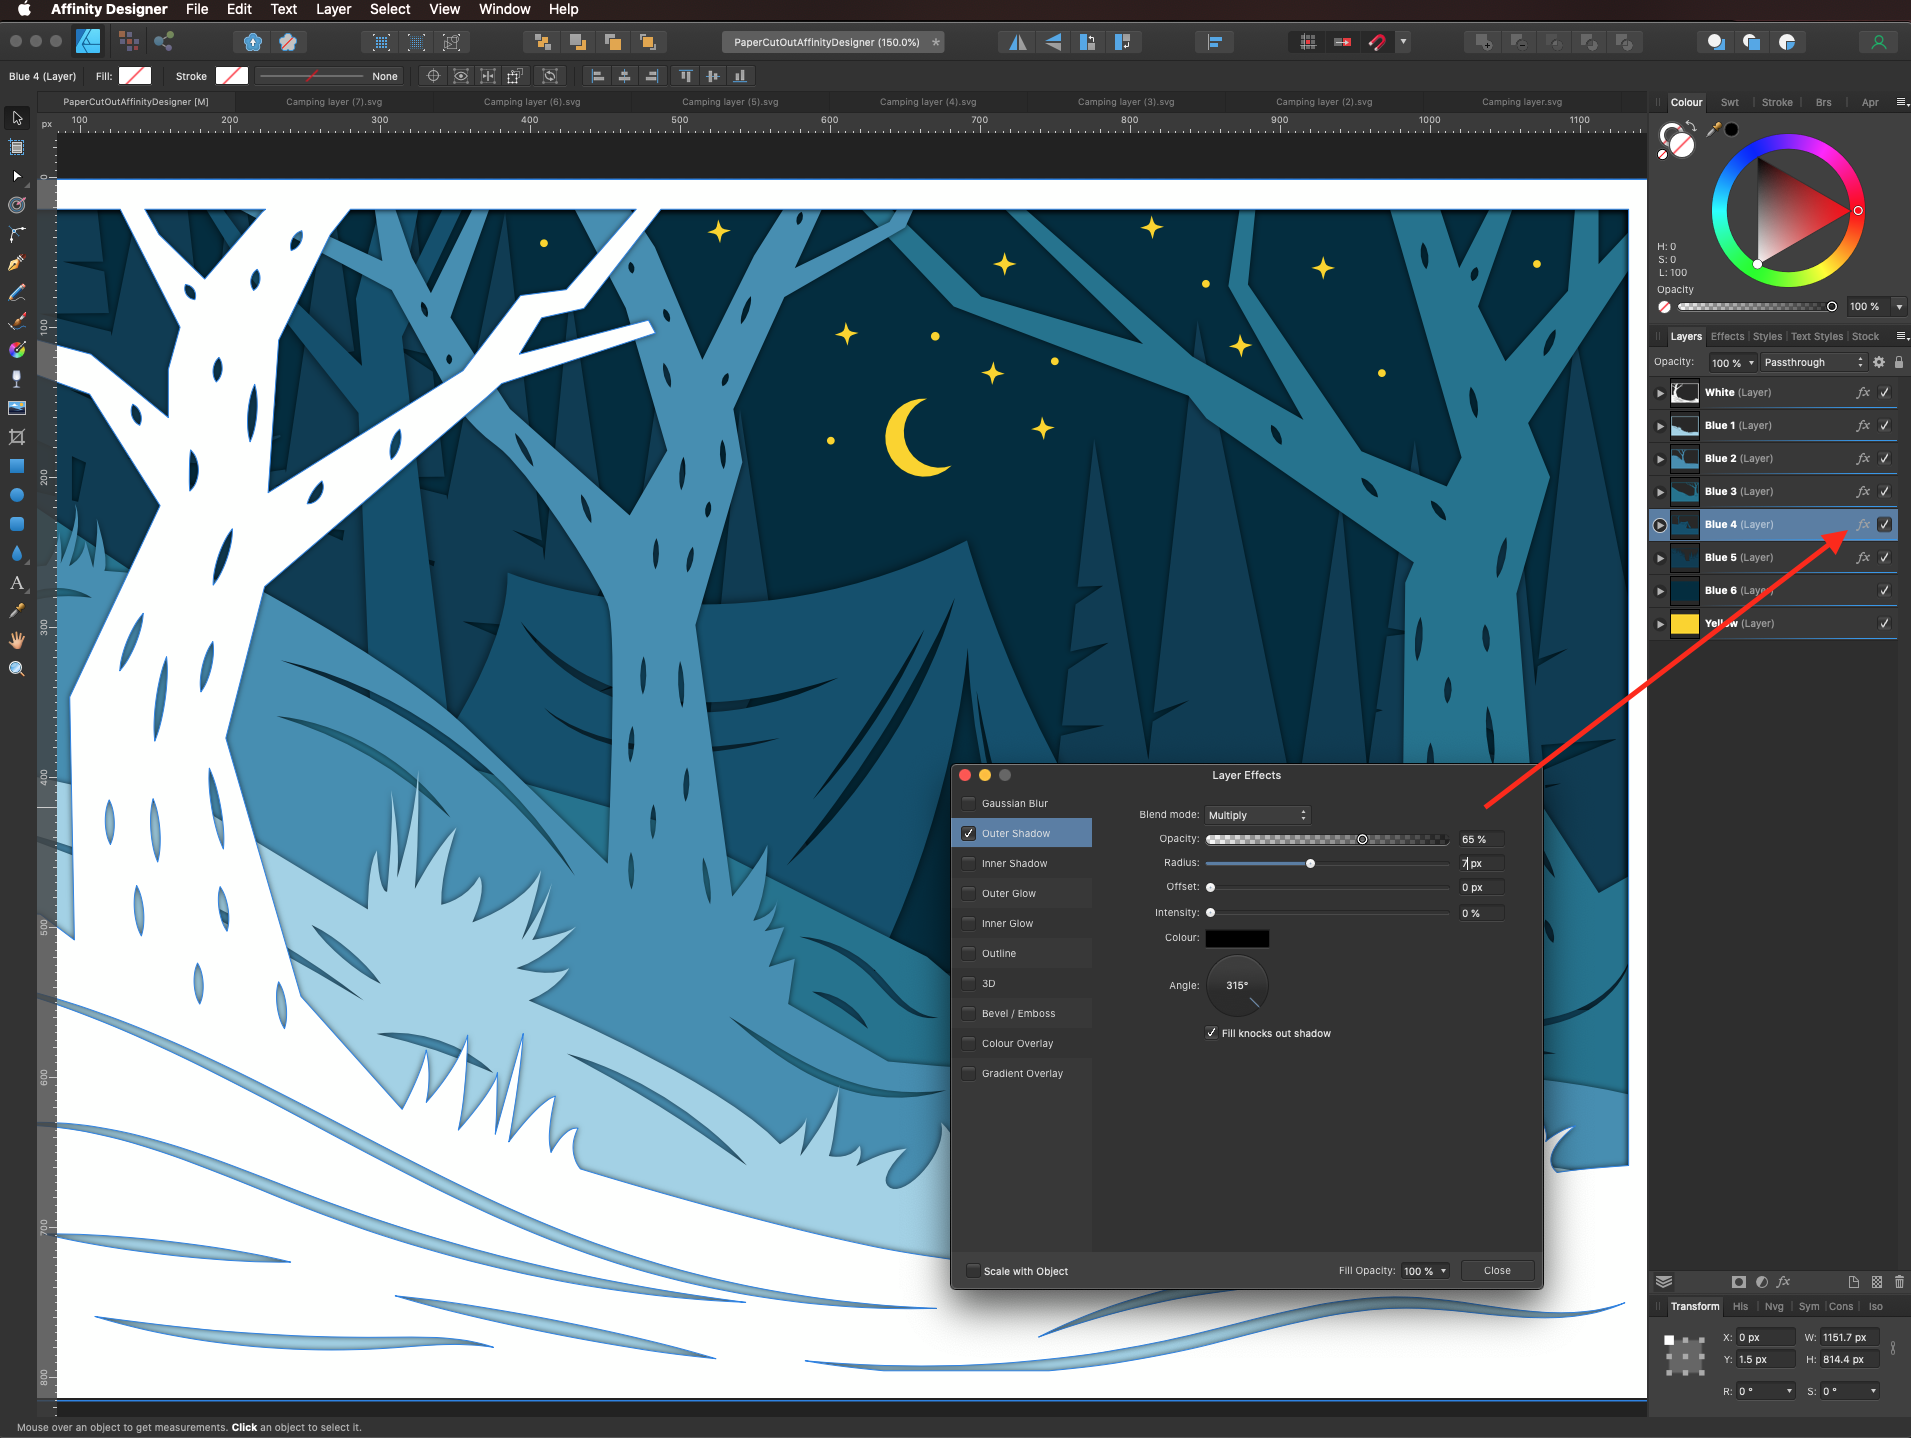
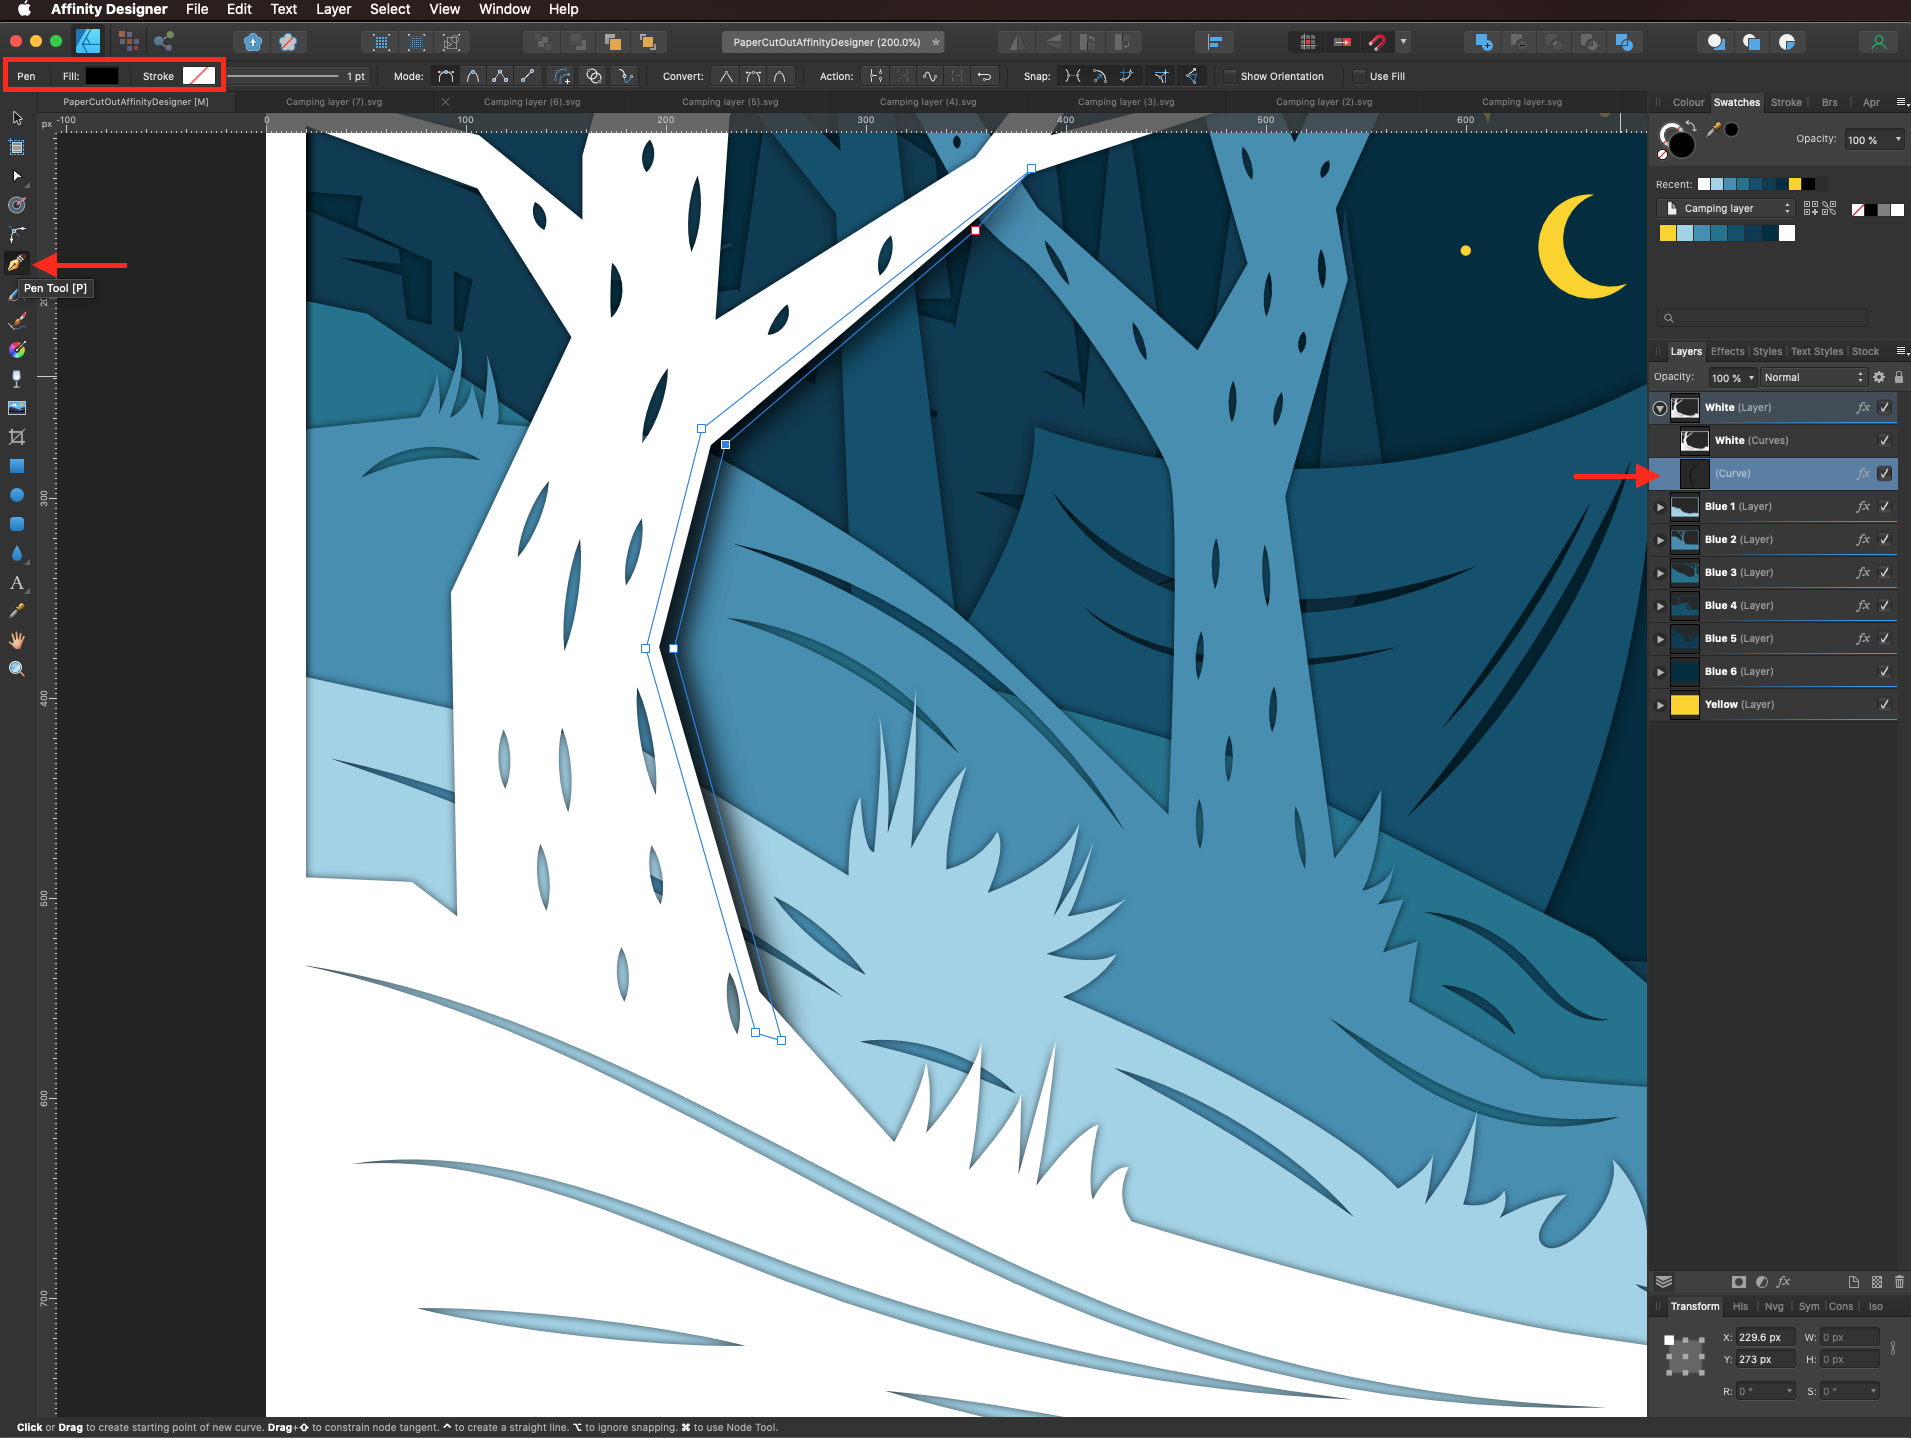
To add more shadows to particular portions of the image, make sure you are working on the layer you want and that the path will be placed under the image you want to add the shadow to. Then, use the Pen Tool (P) with black as fill color and add the shadow.
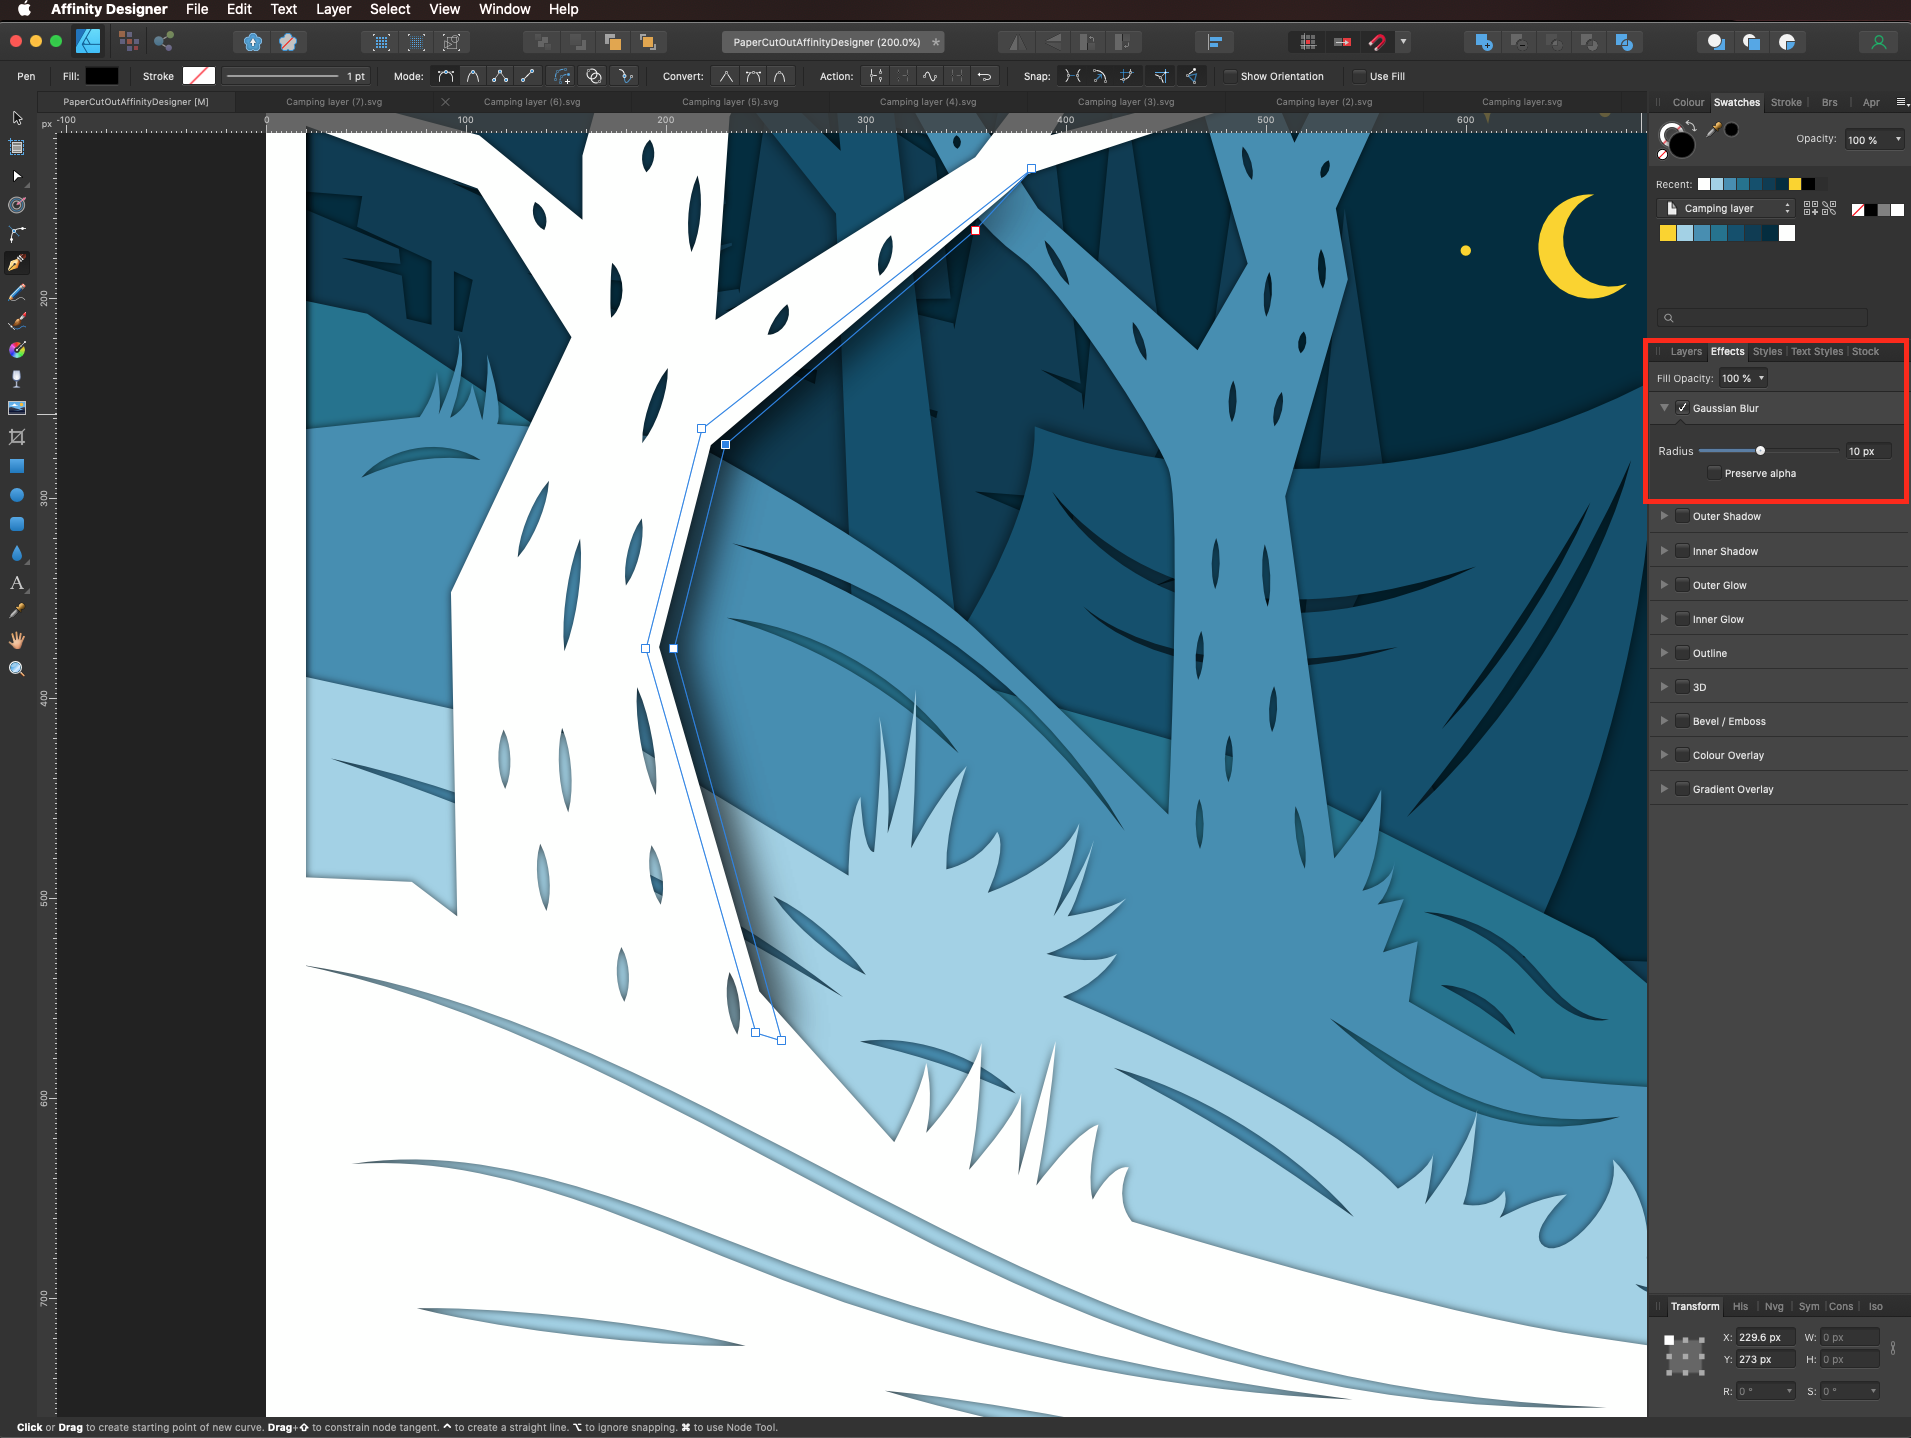
Go to the Effects Panel and add a Gaussian Blur. We used a 10 px Radius.
Lower the Opacity to about 75% (in the Layers Panel).
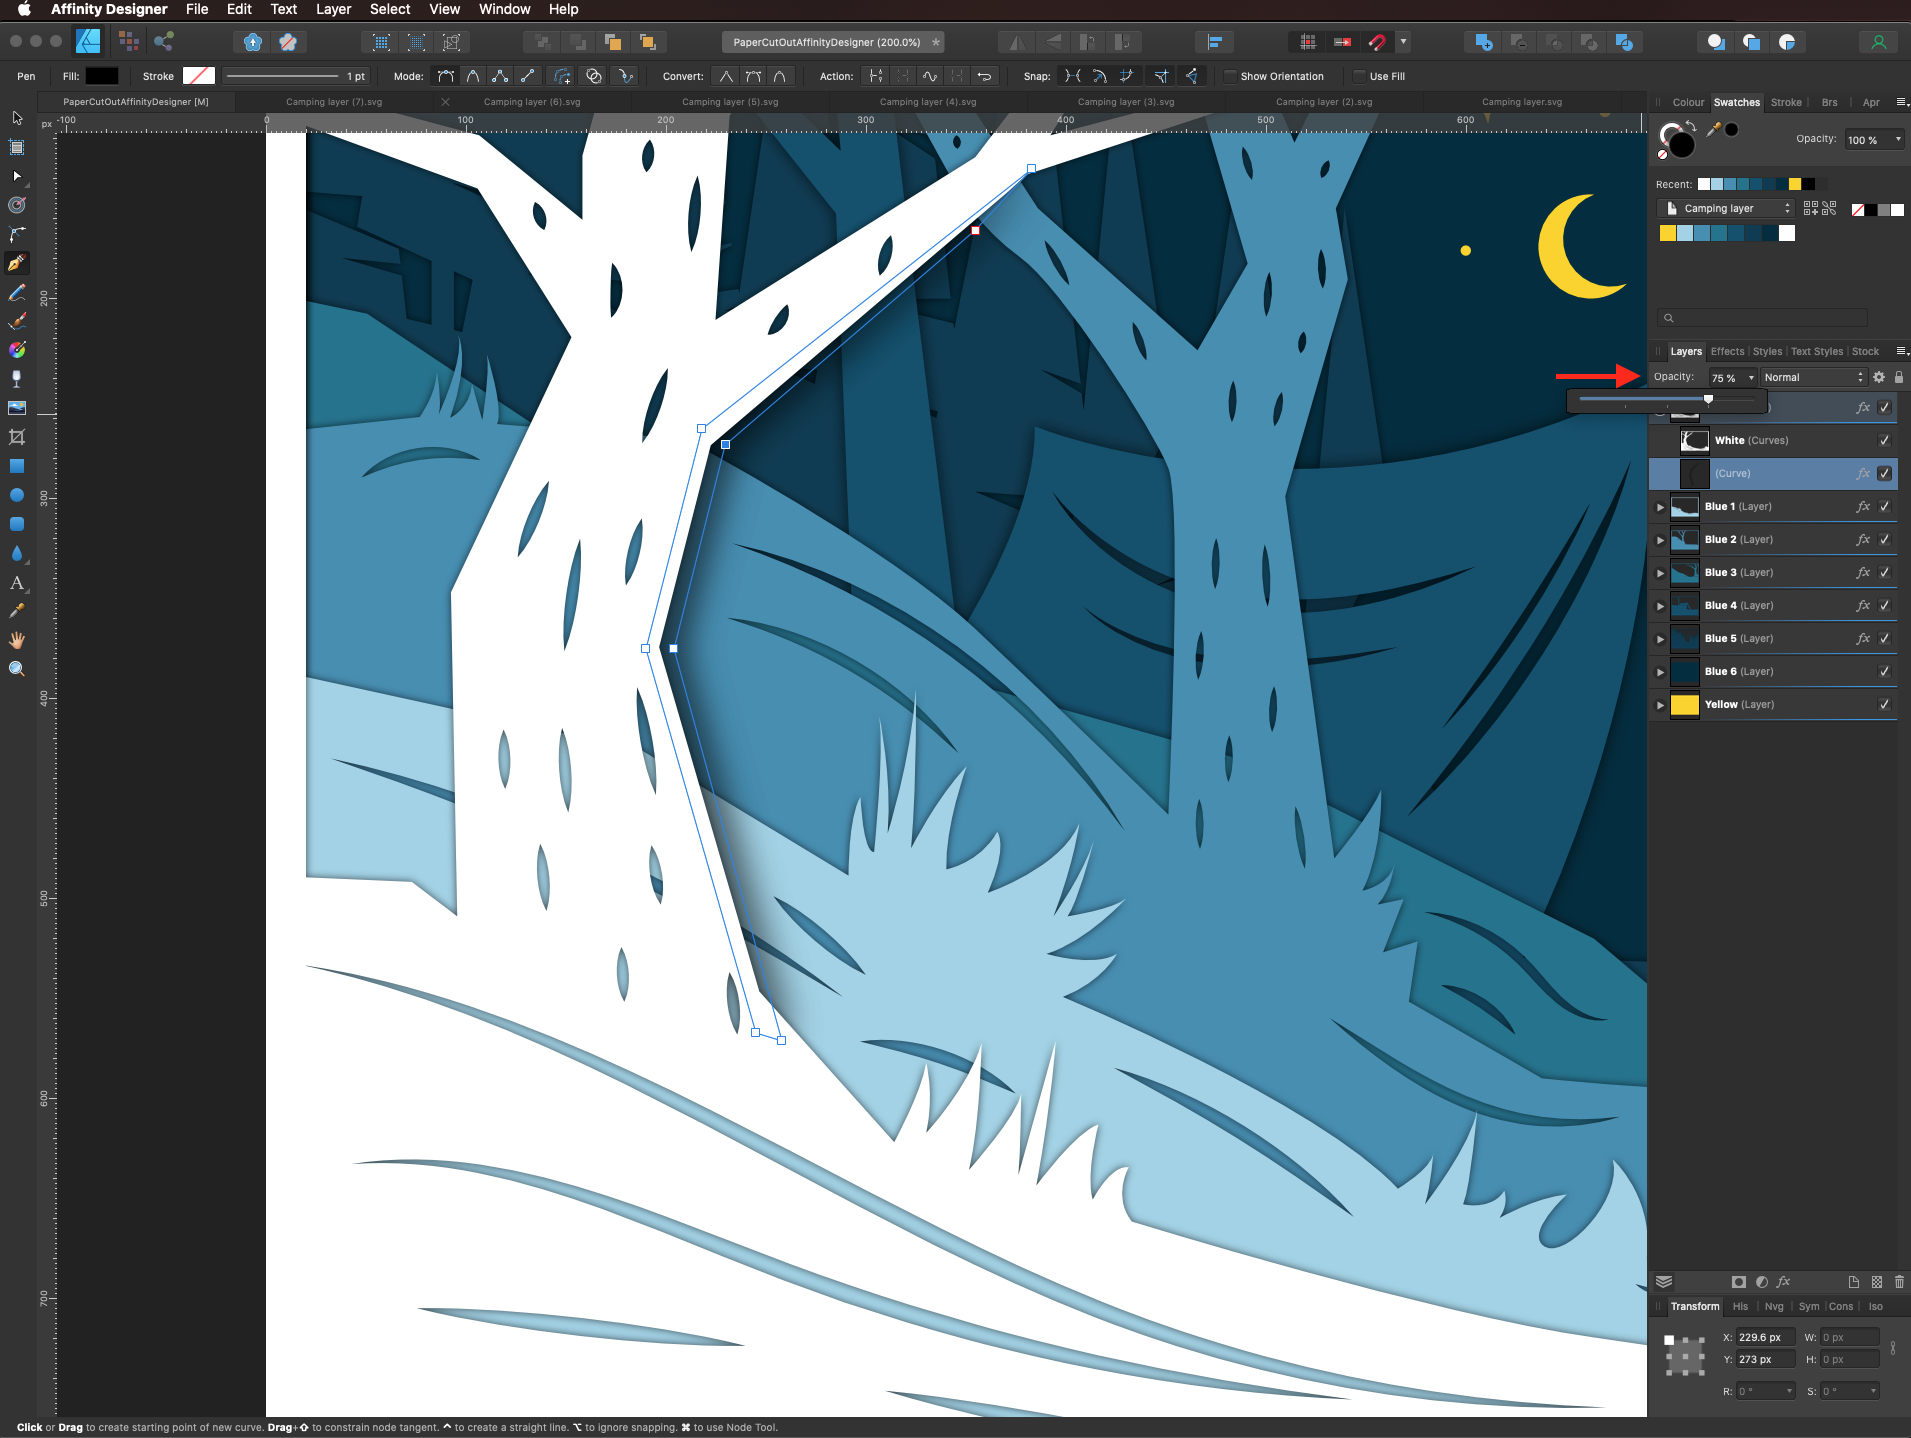
You can adjust your shape with the Node Tool (A).
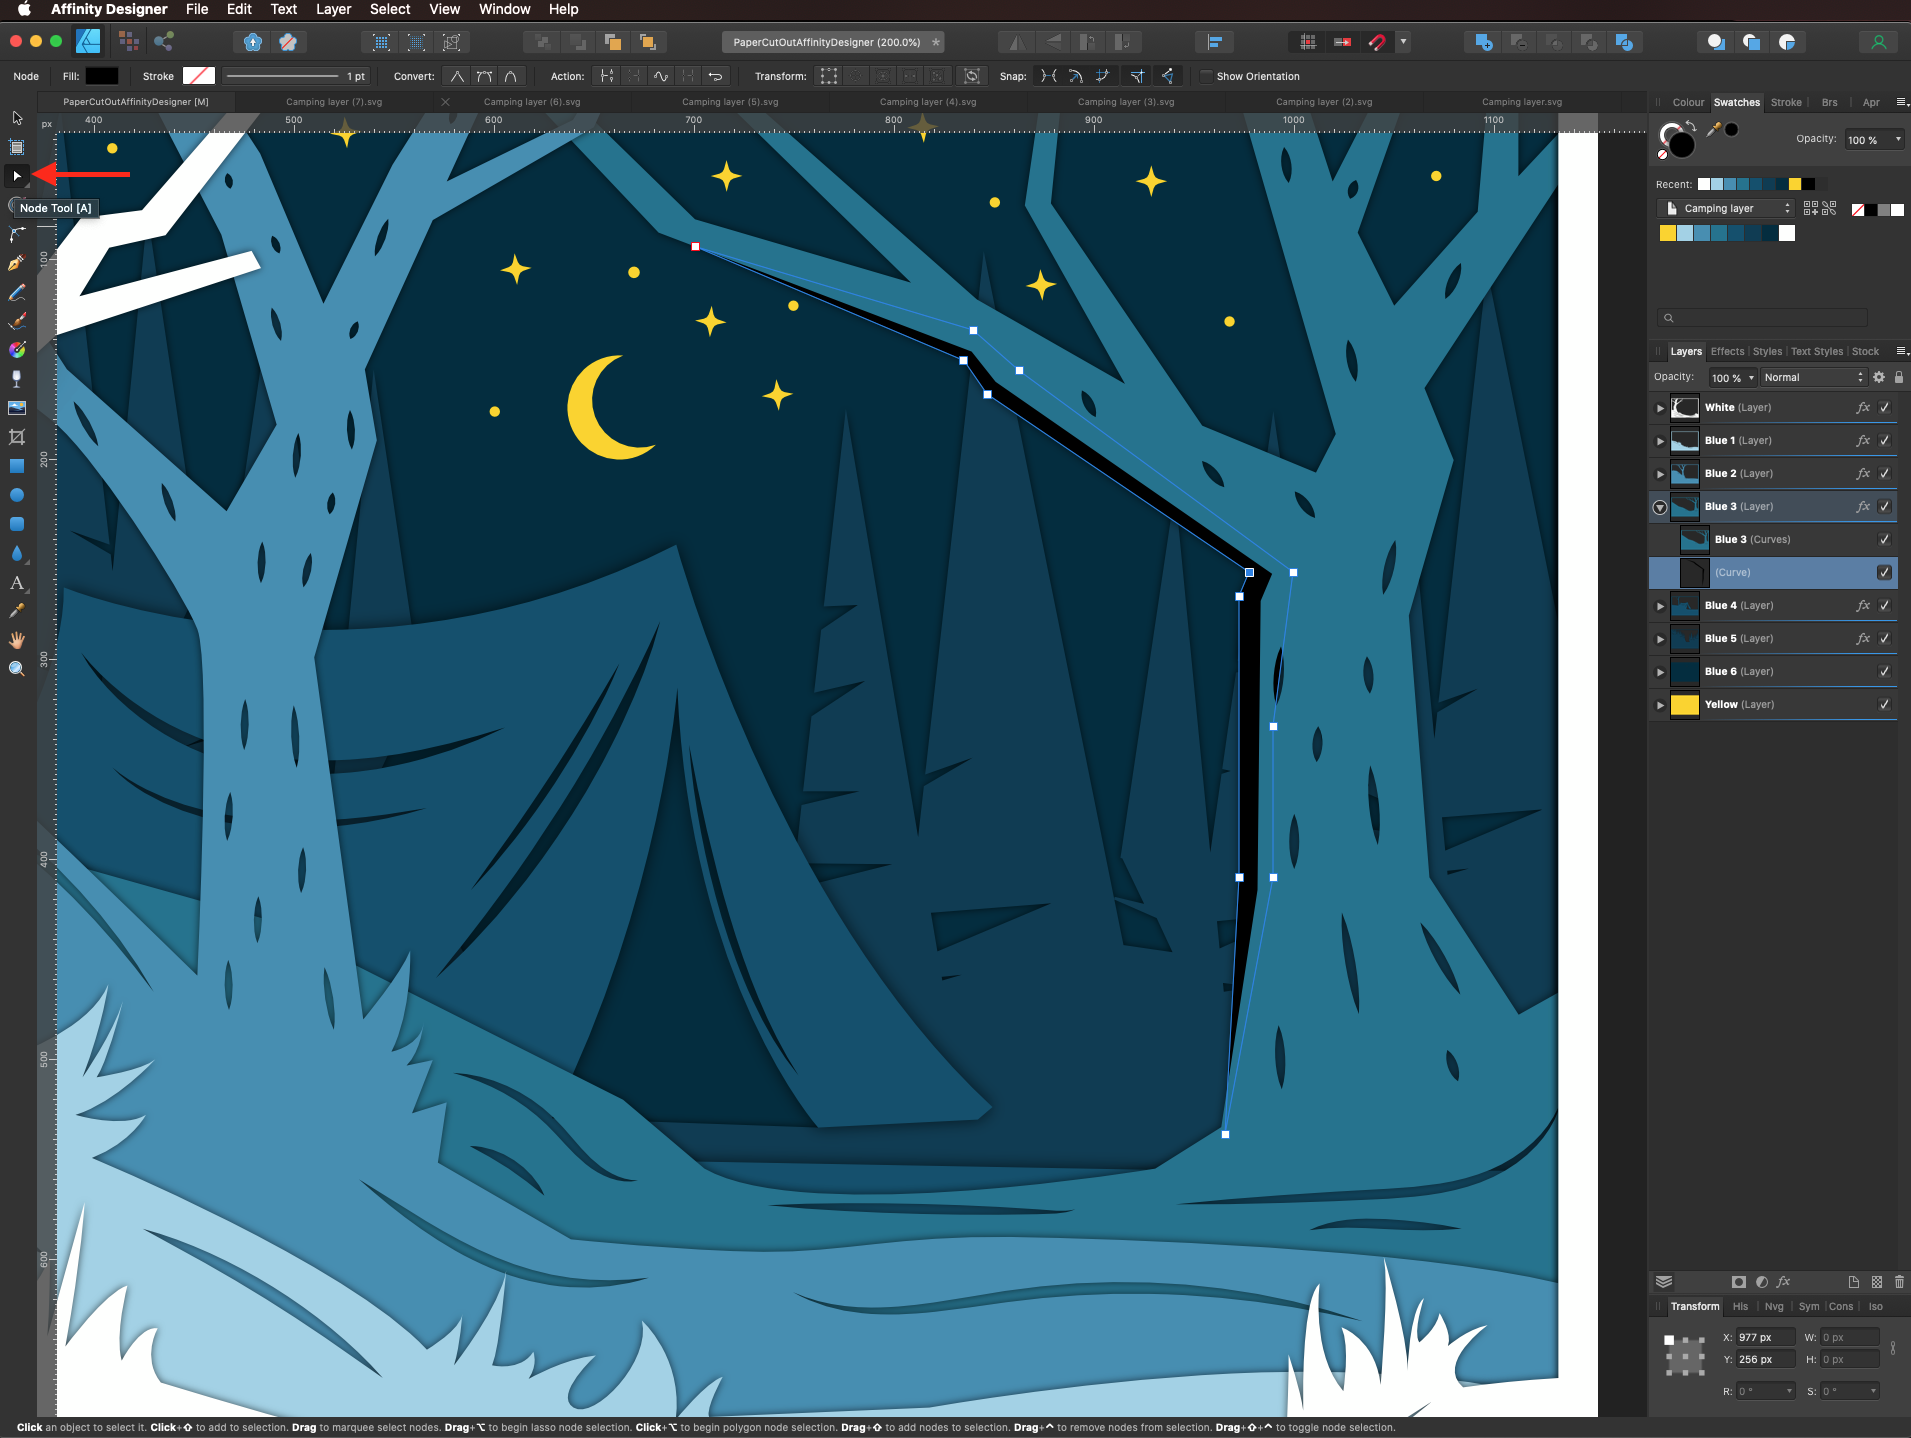
Repeat this with the other portions of the image you want to enhance.
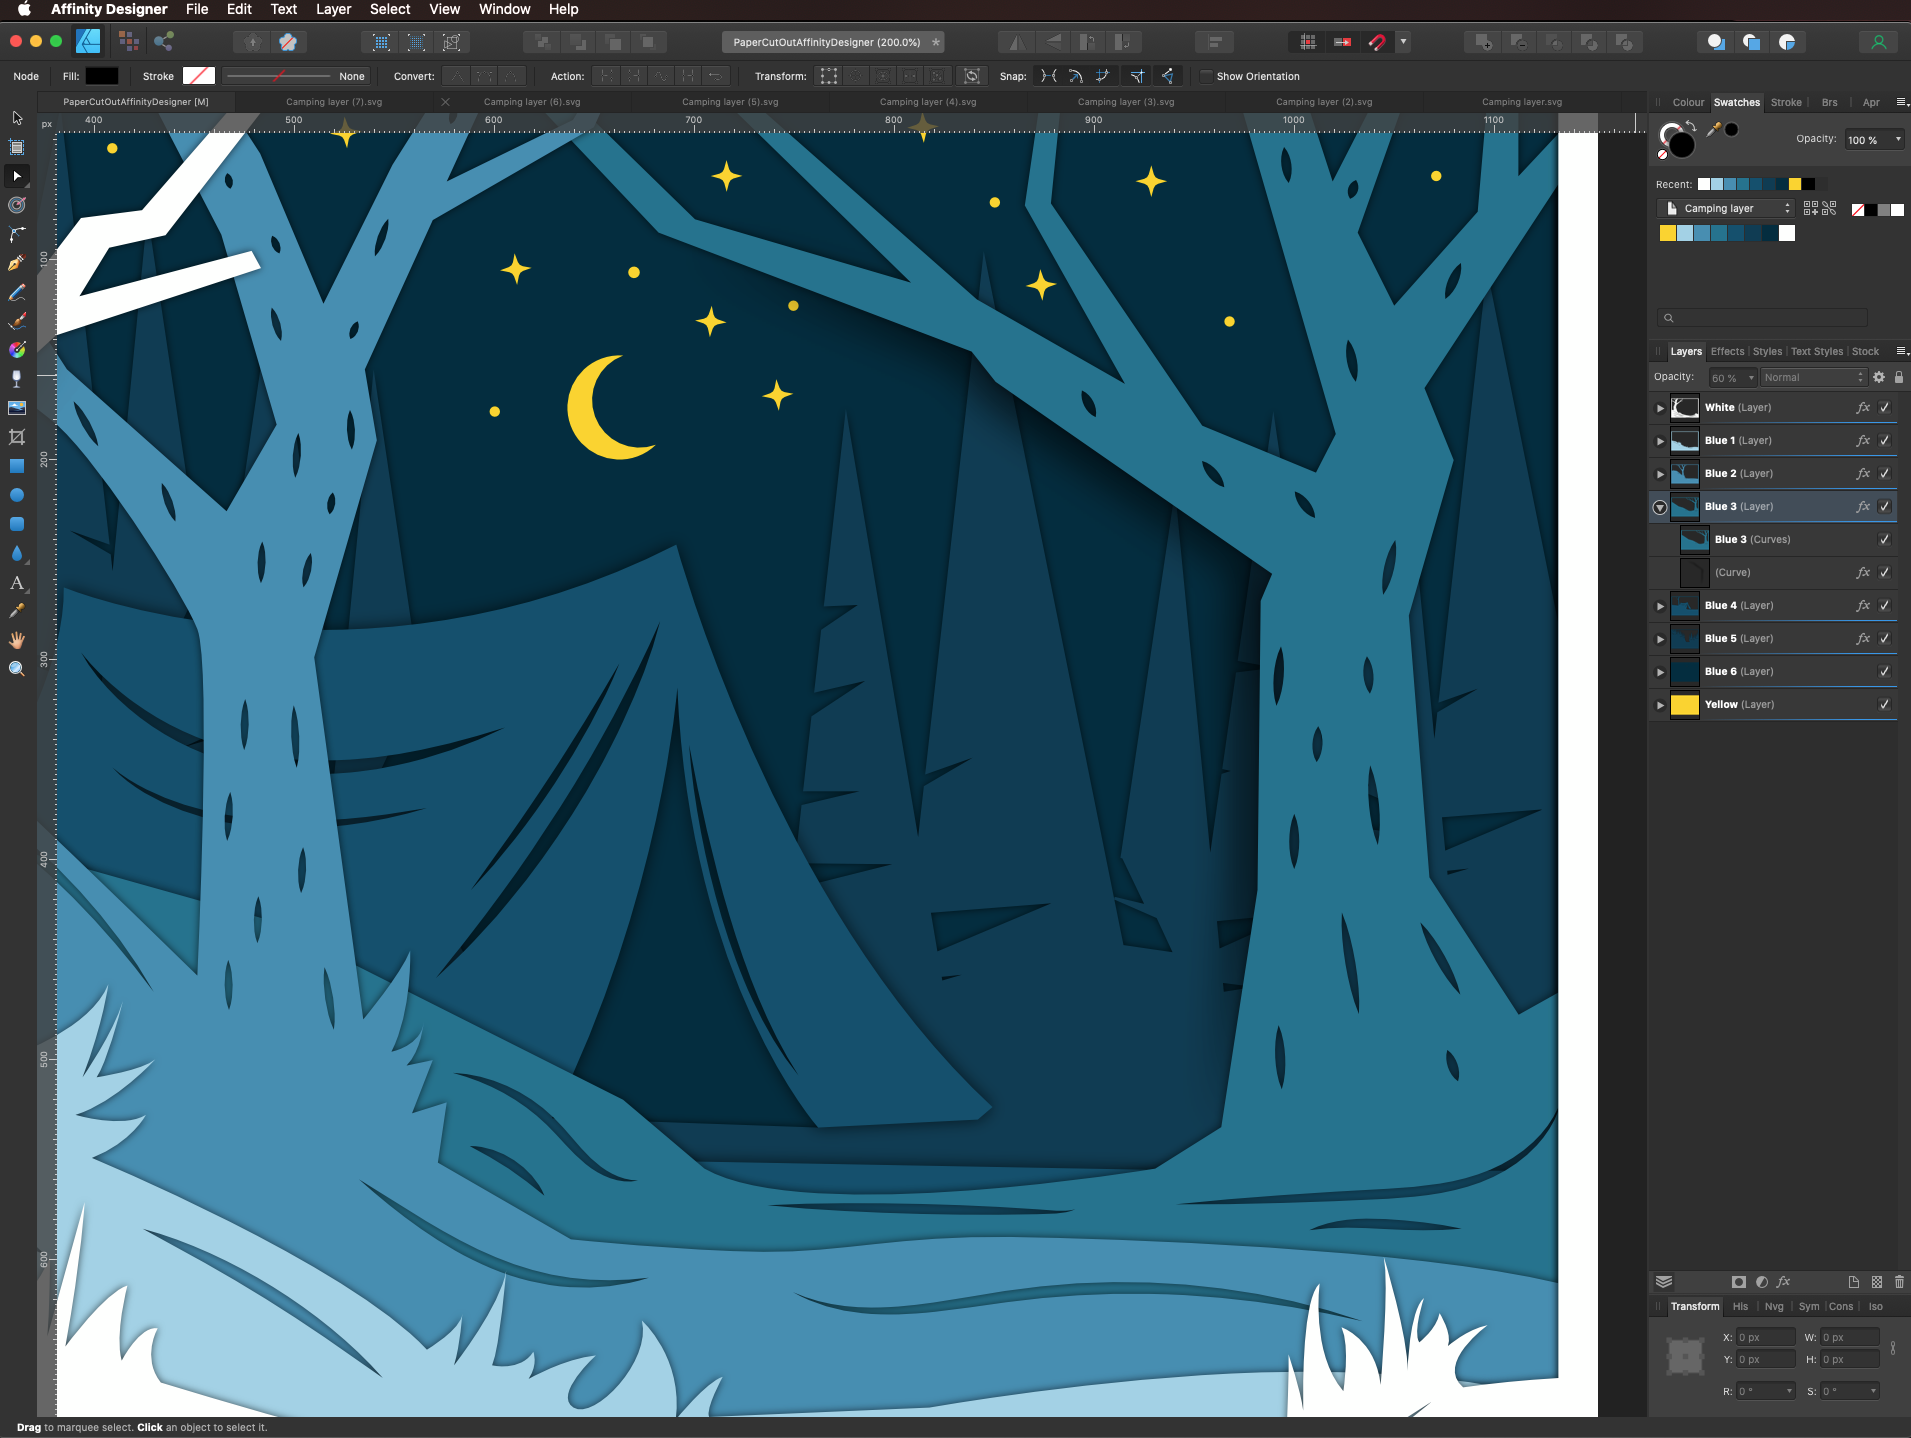
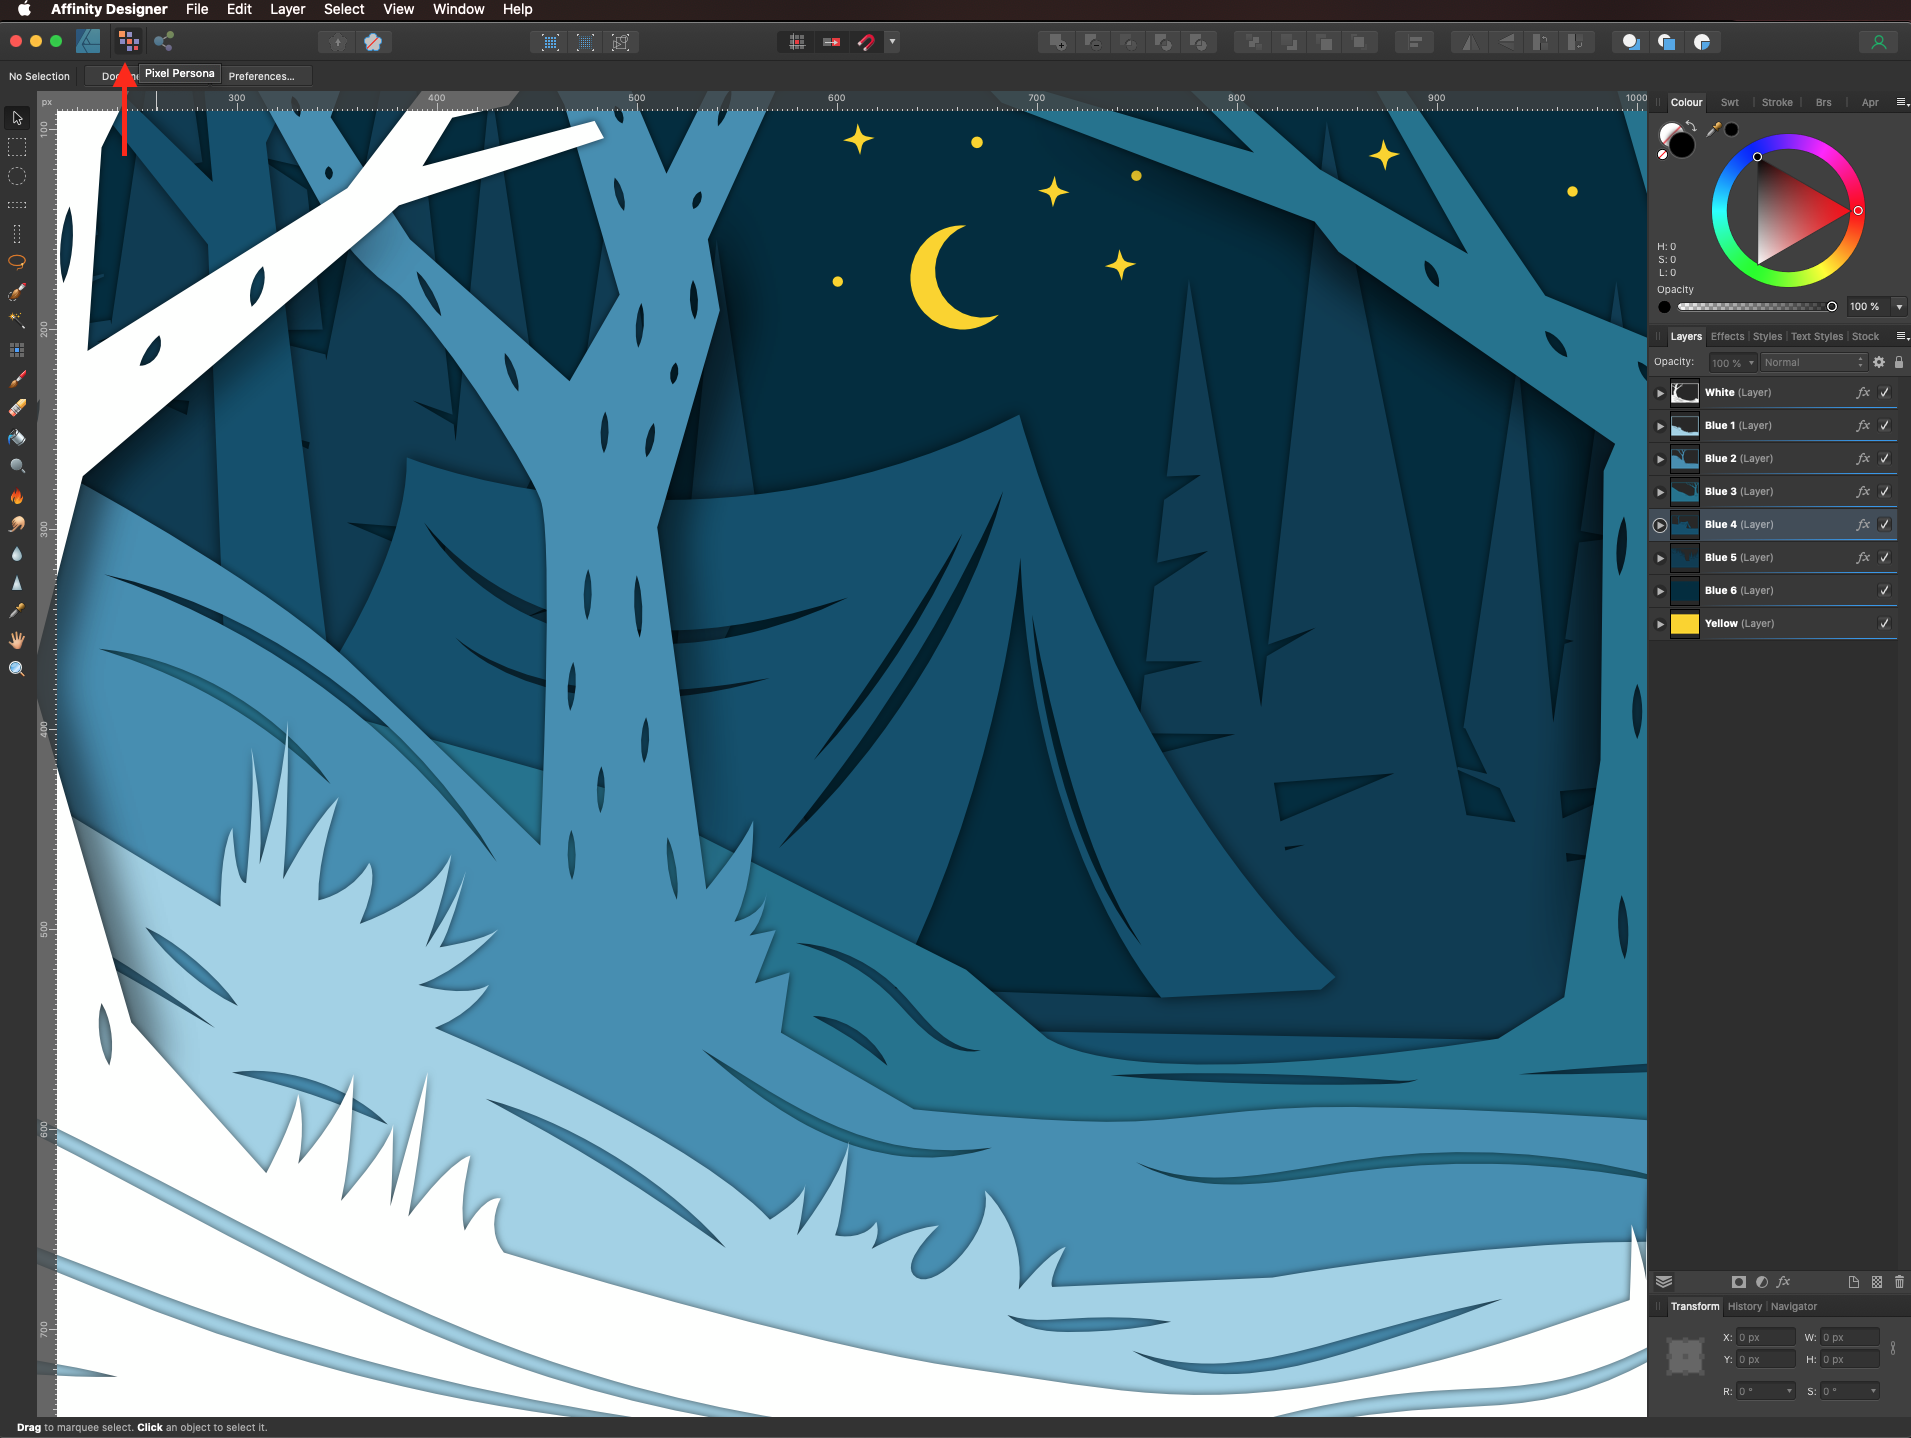
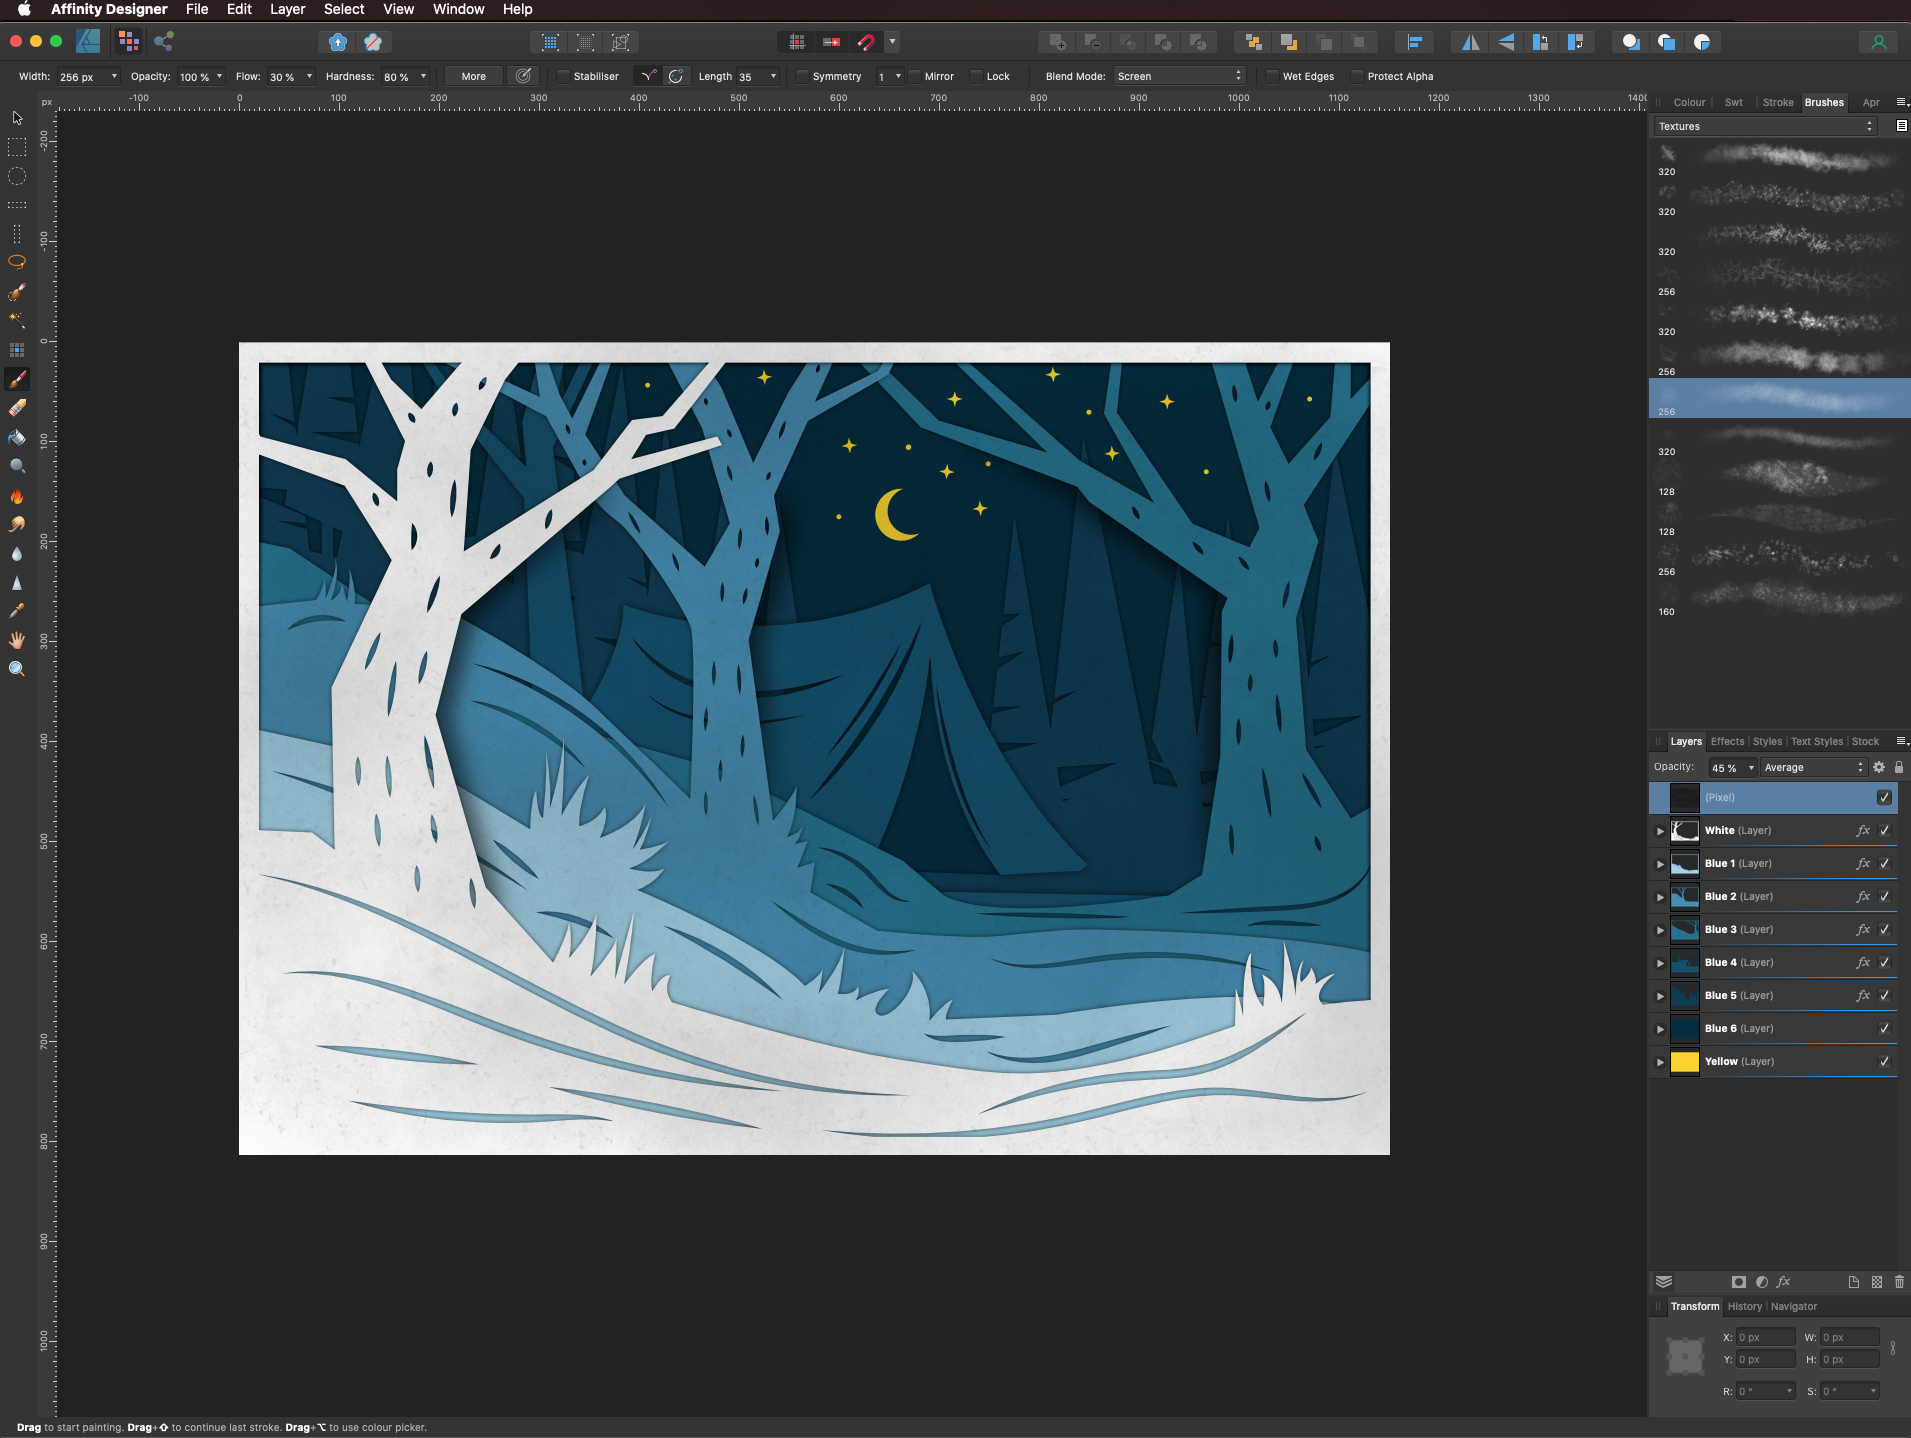
To further create the idea of layered paper, let’s add a texture to the artwork. Enter Pixel Persona by clicking on the icon on the top left side of the top menu.
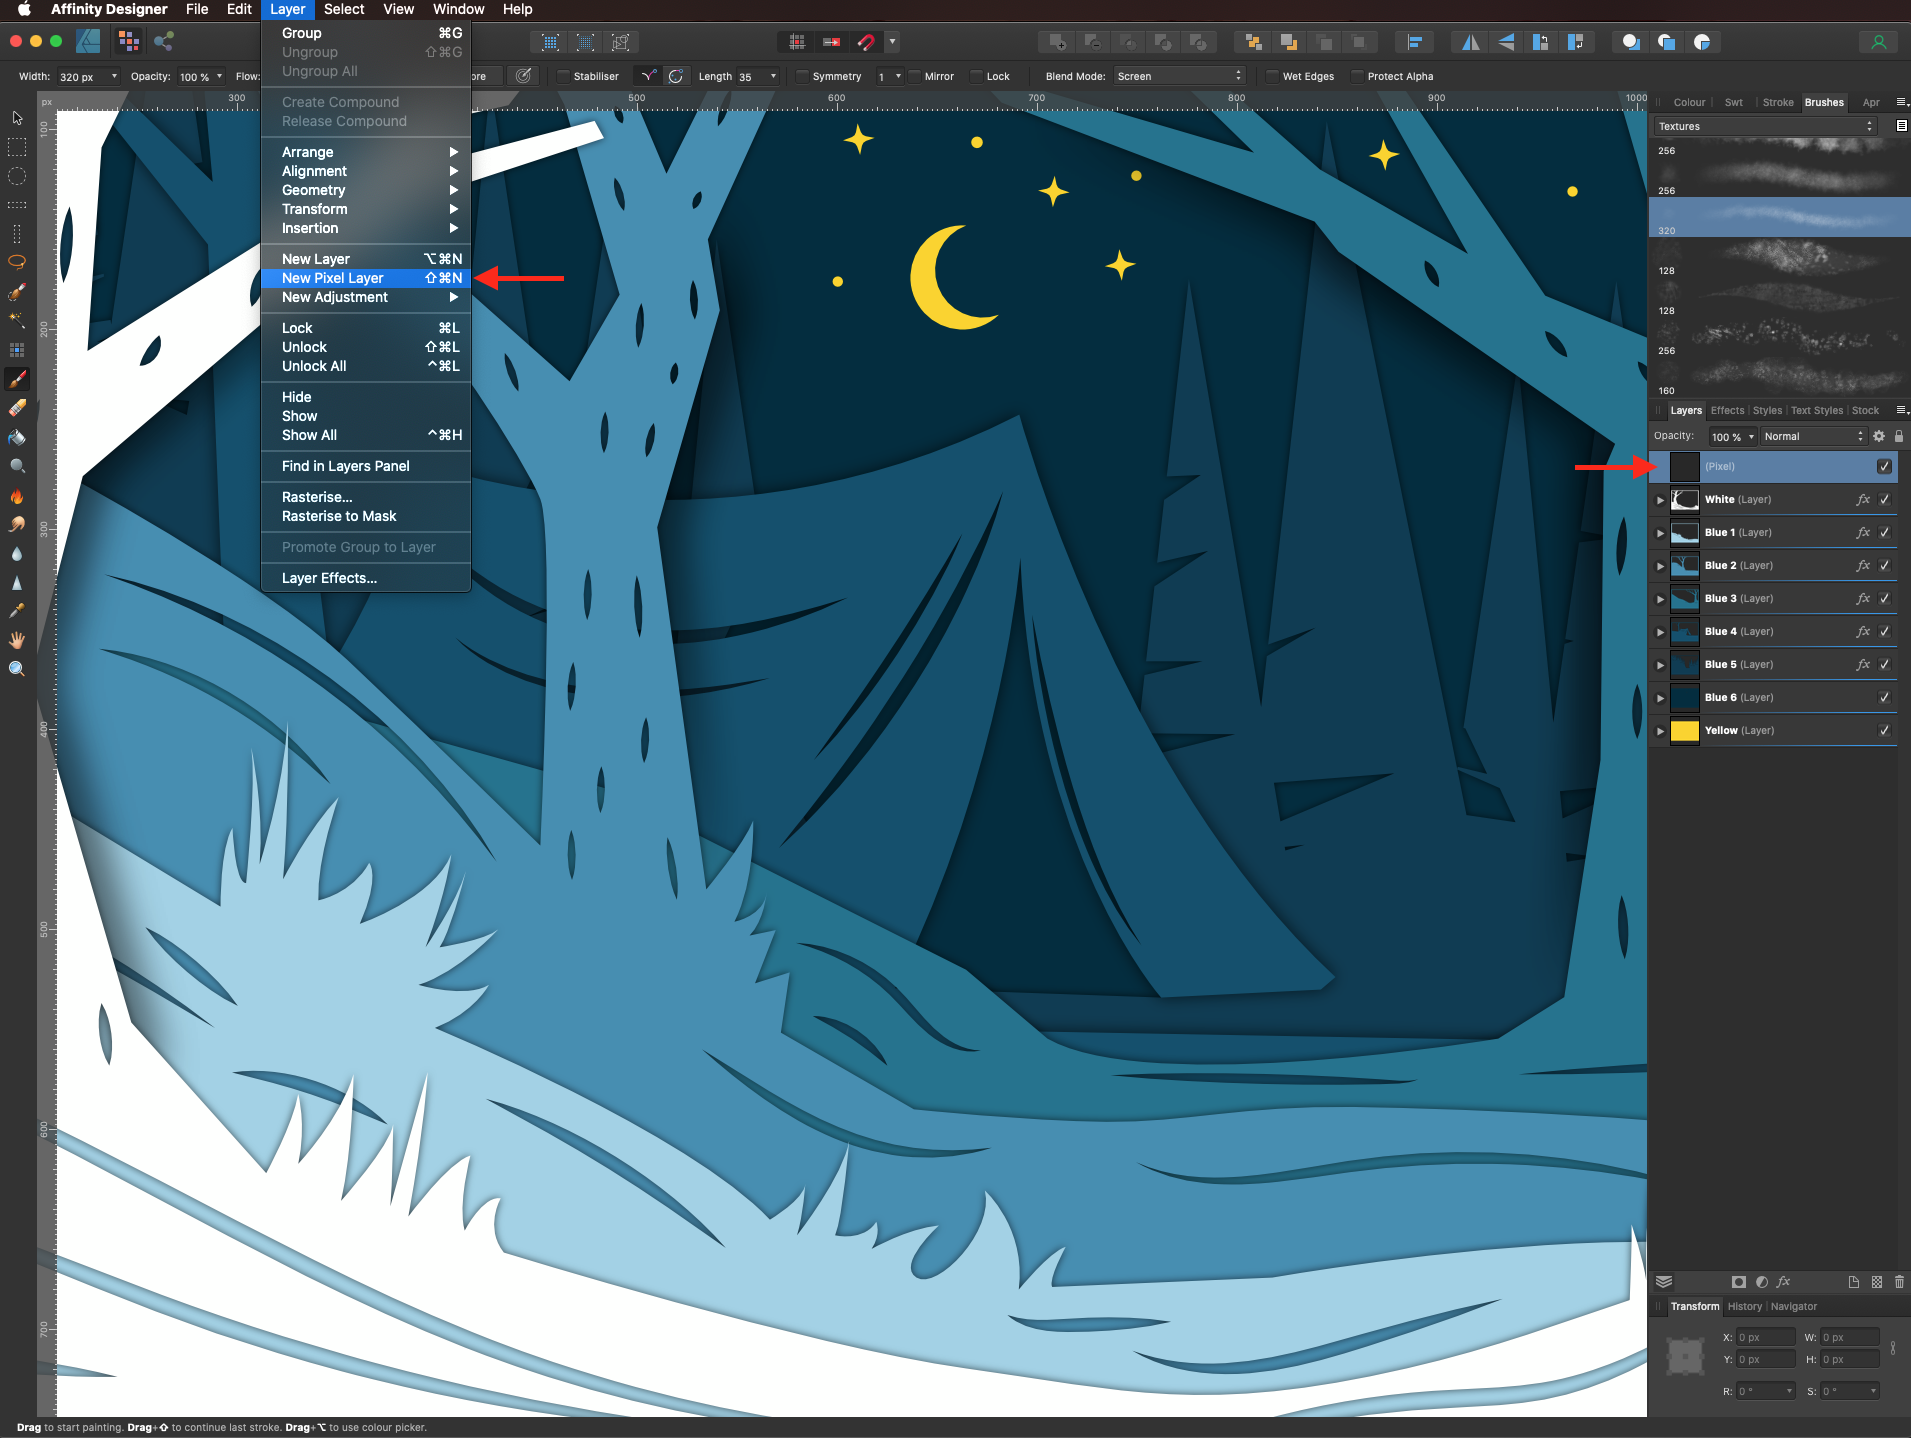
Create a new Pixel Layer on top of everything.
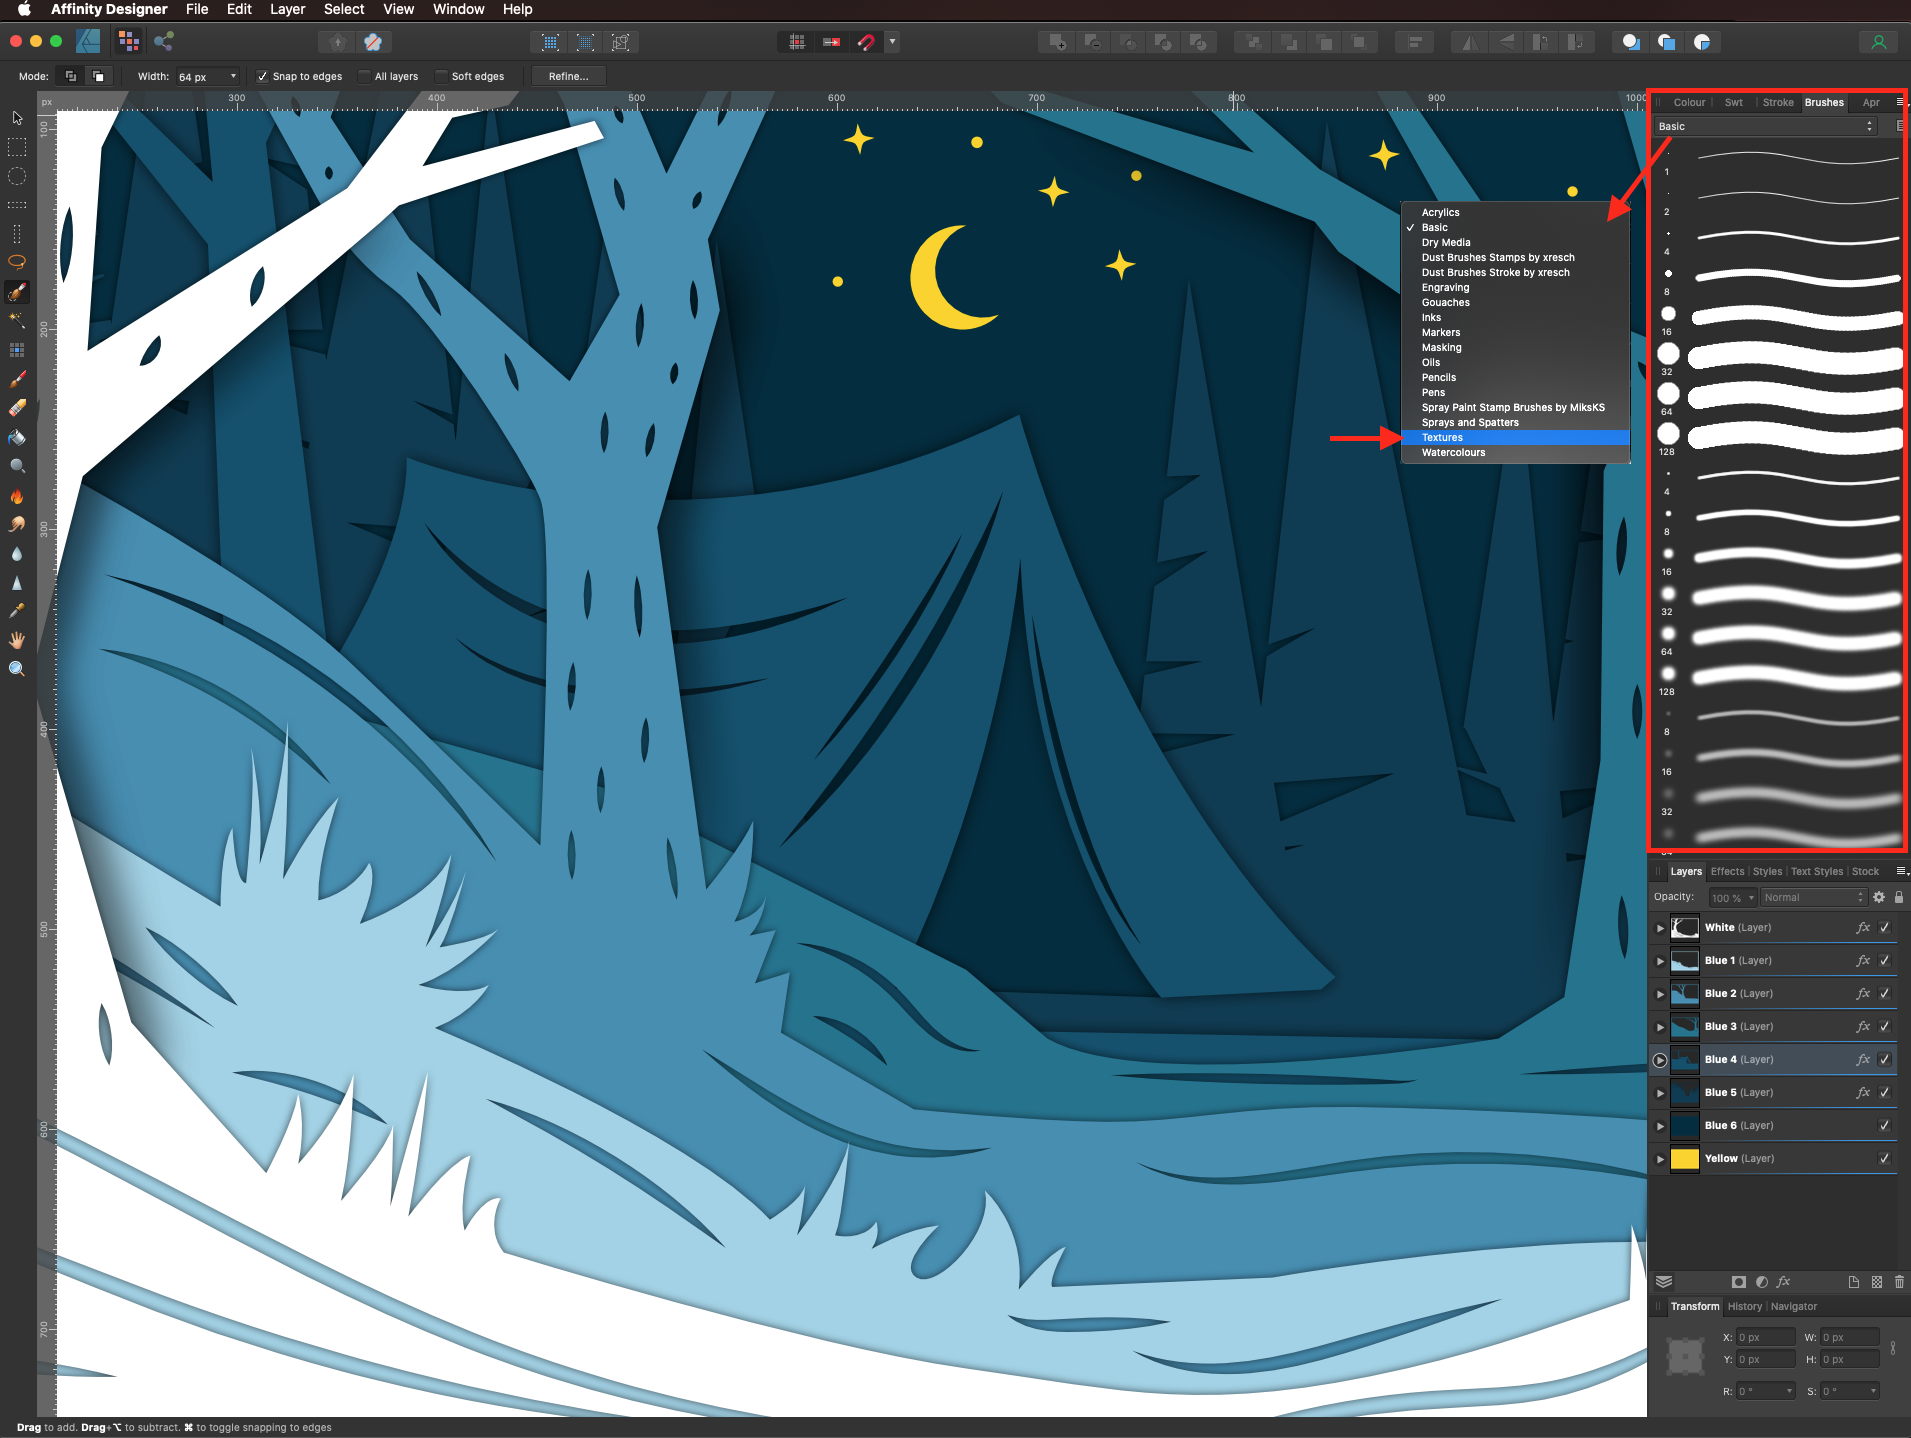
In the Brushes Panel, select Textures from the drop-down menu.
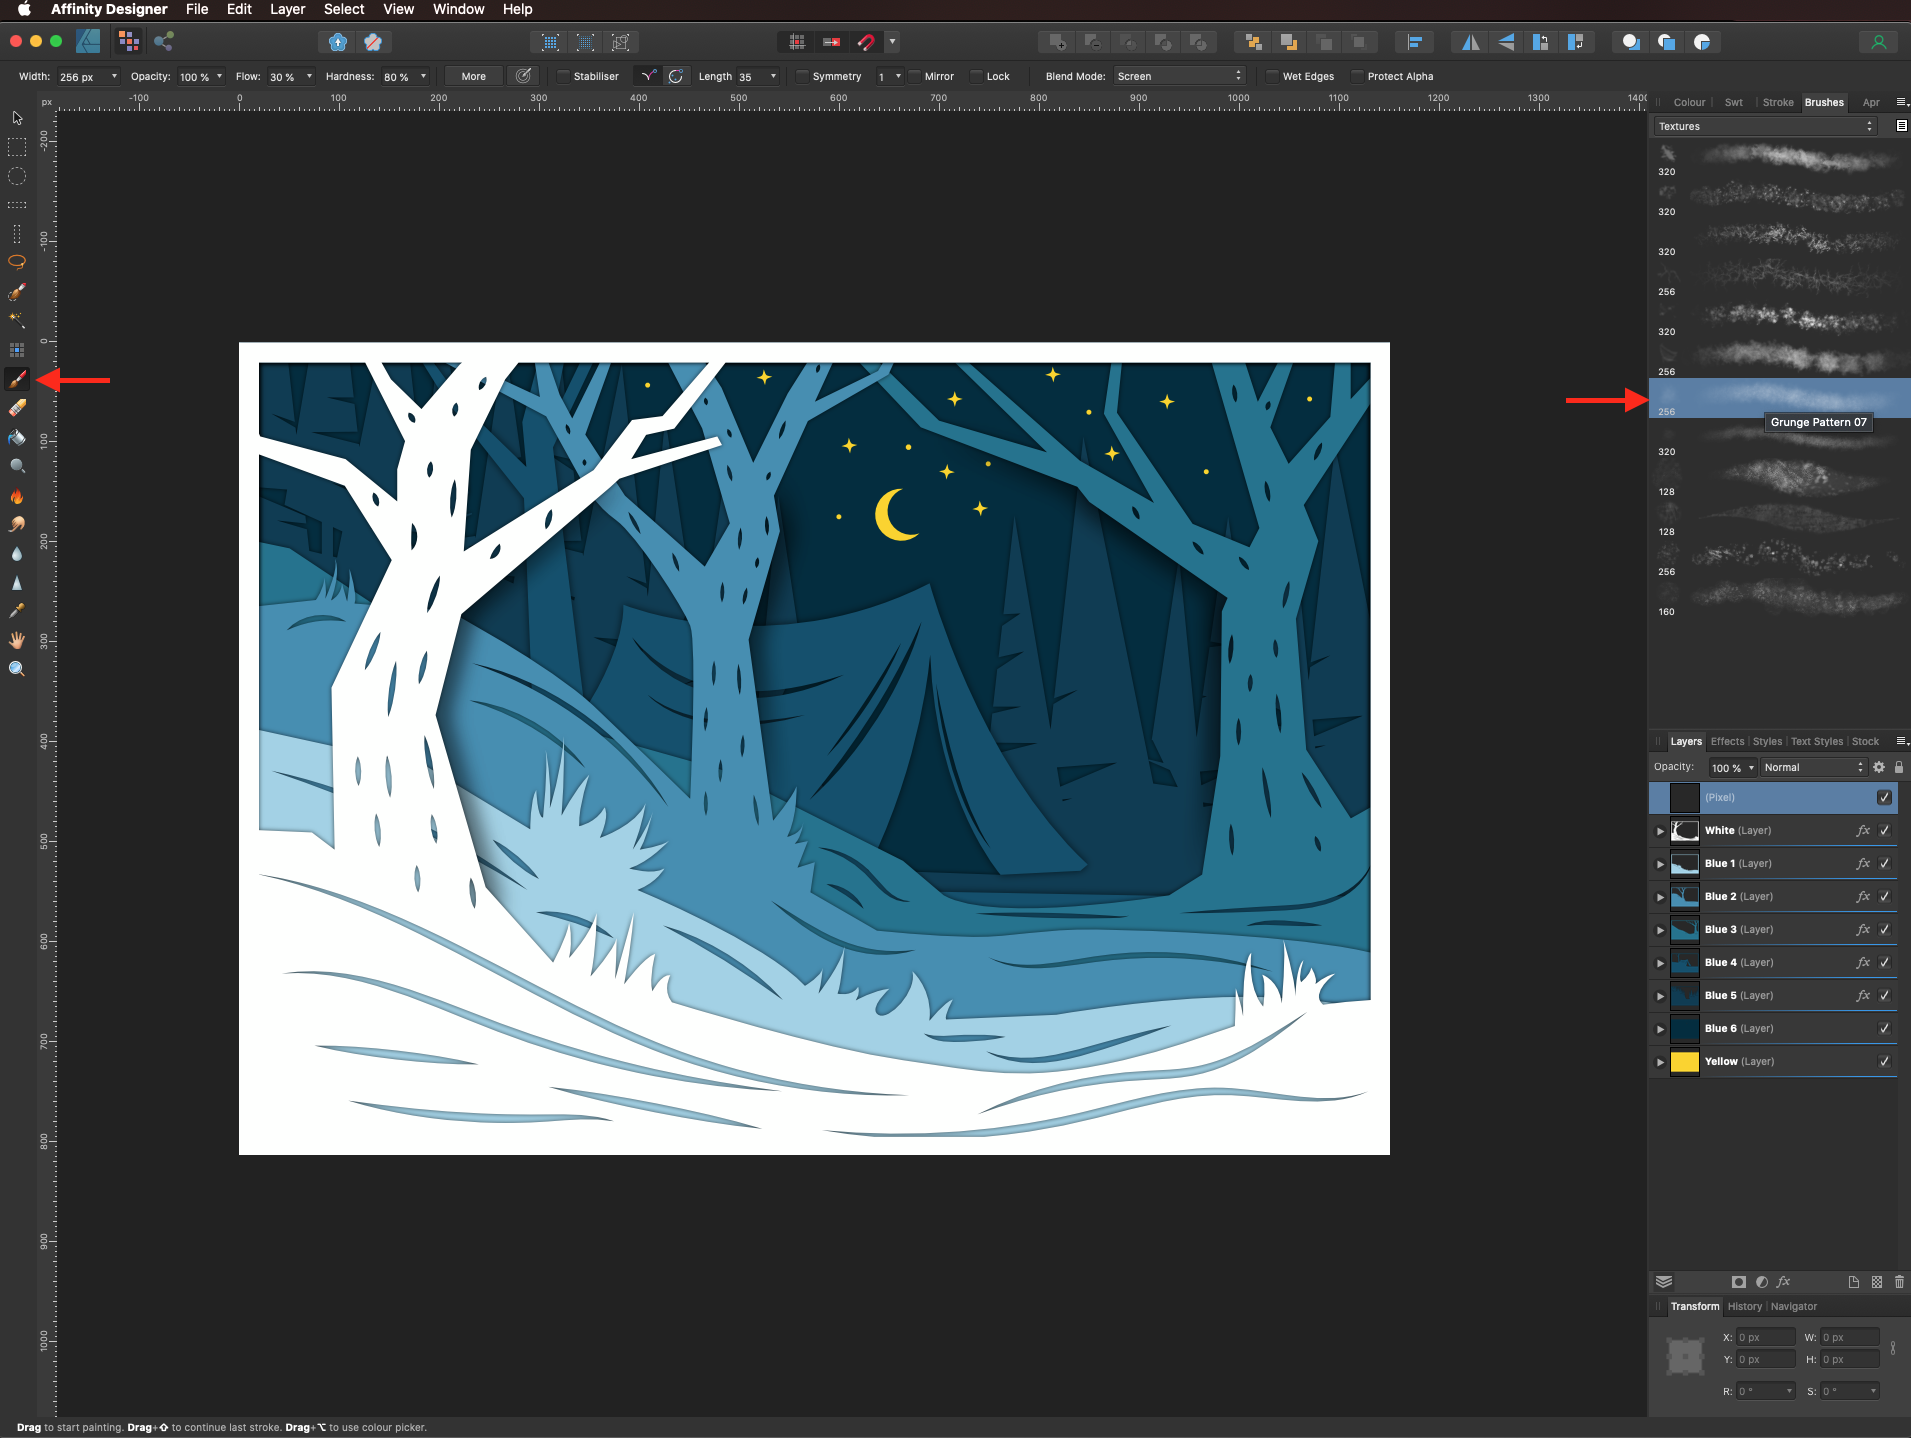
Pick a brush (we used grunge pattern 07) with black as the fill color and use the Brush Tool to paint some texture on the pixel layer.
Change the pixel layer Blending Mode to Average and reduce the Opacity to 45%.
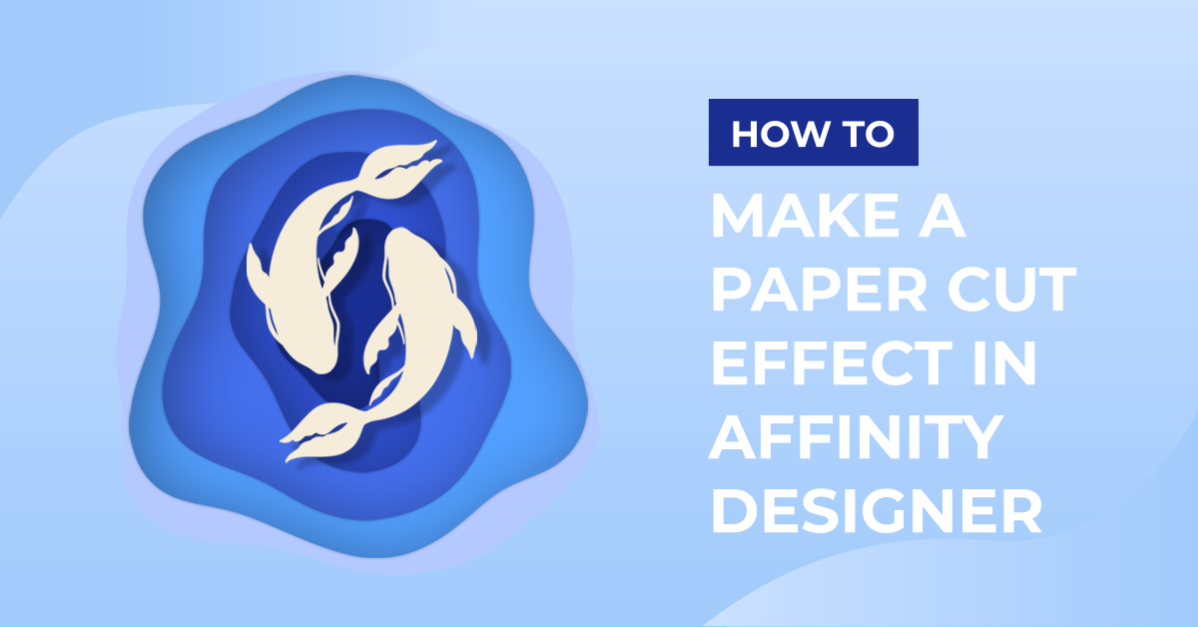
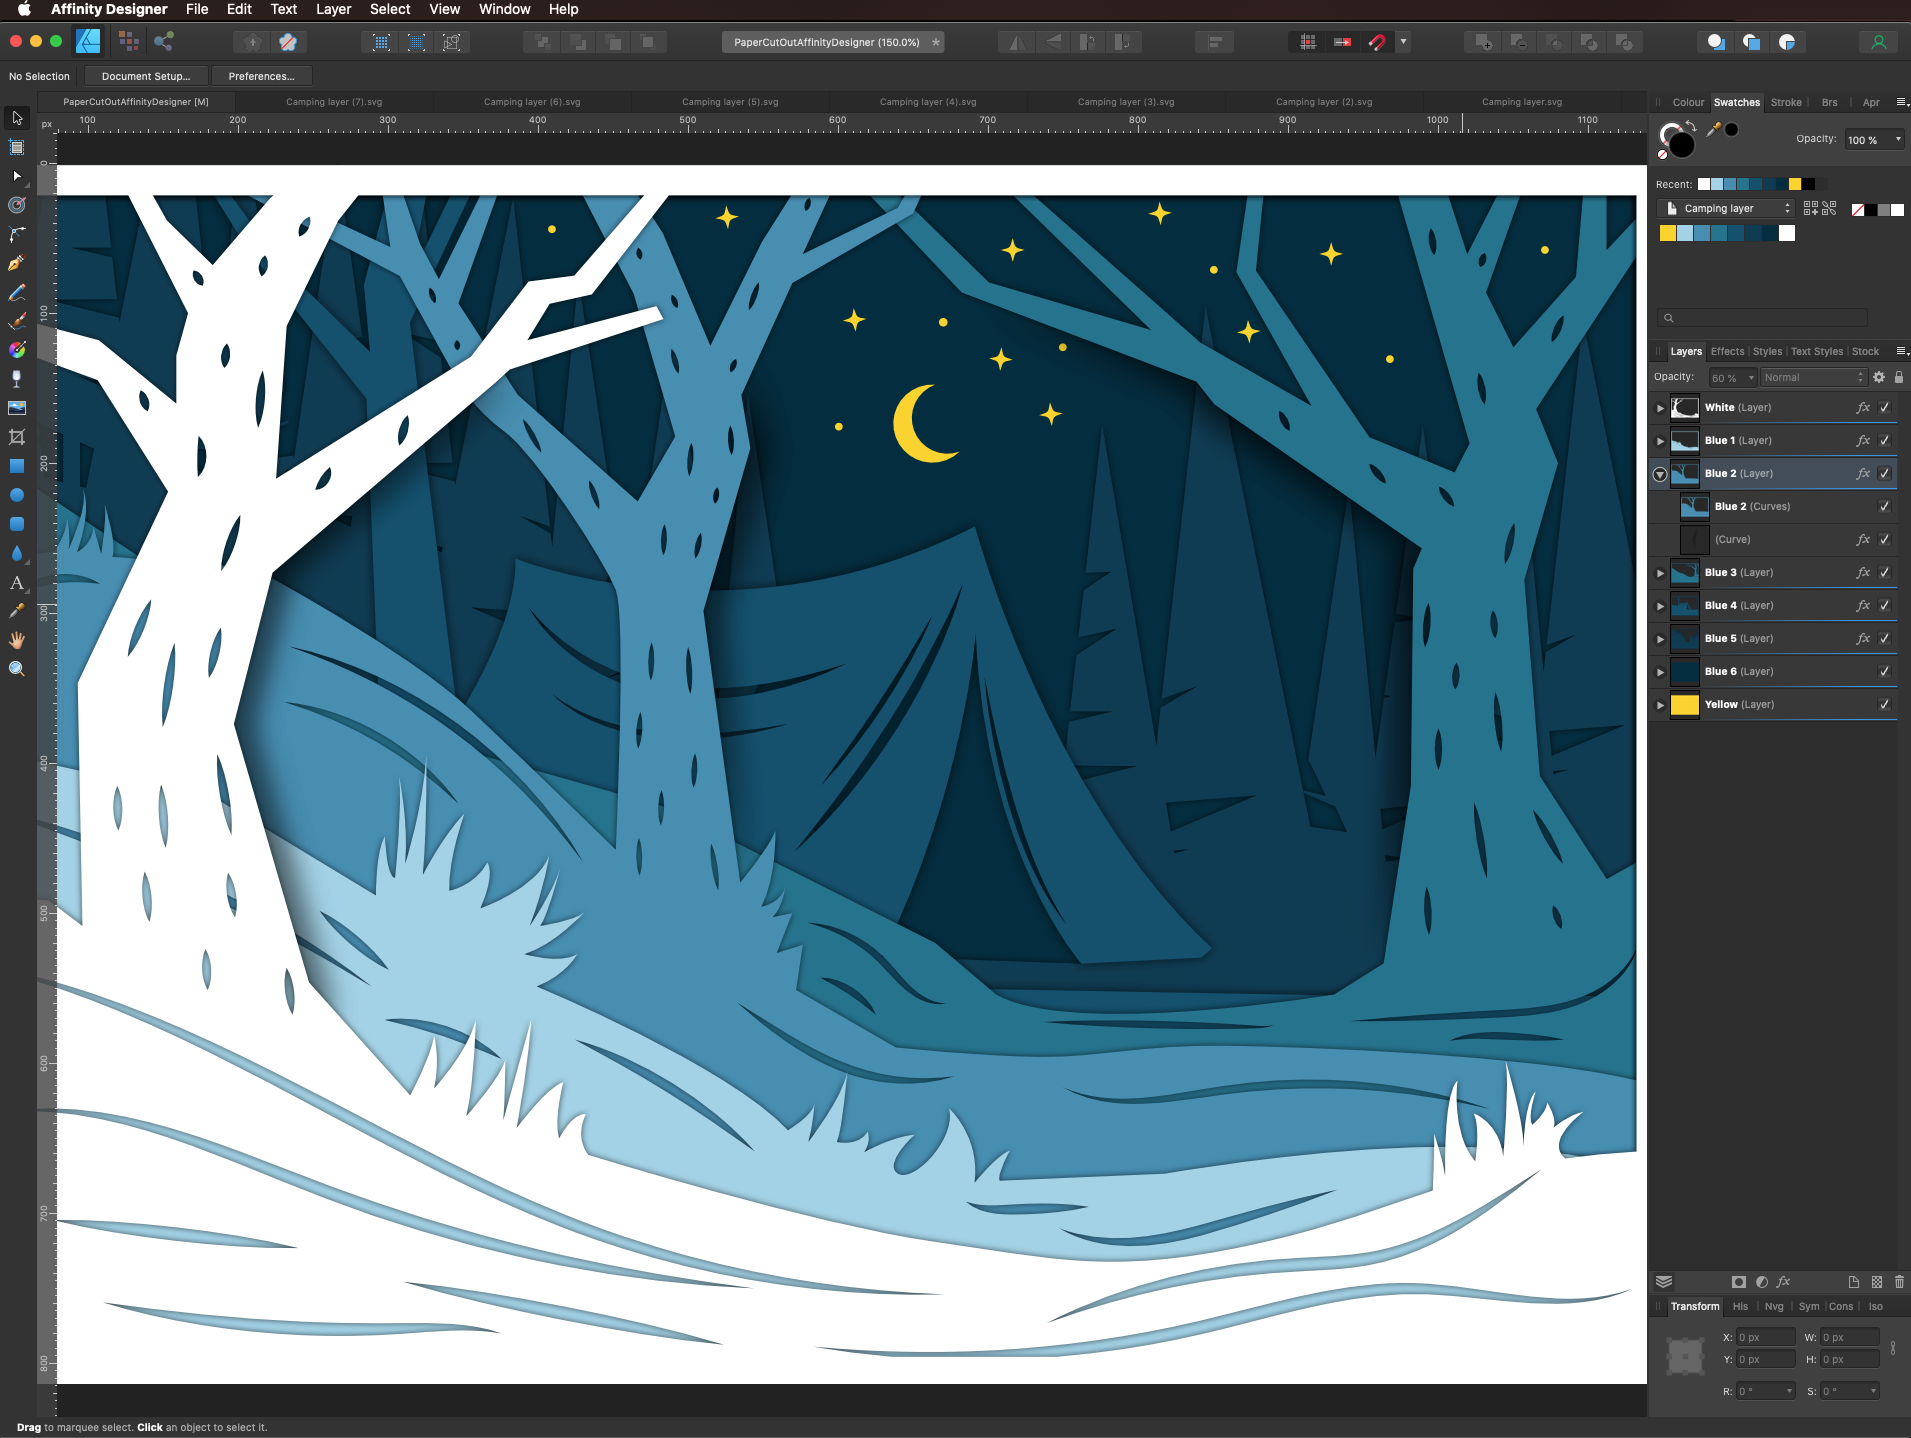
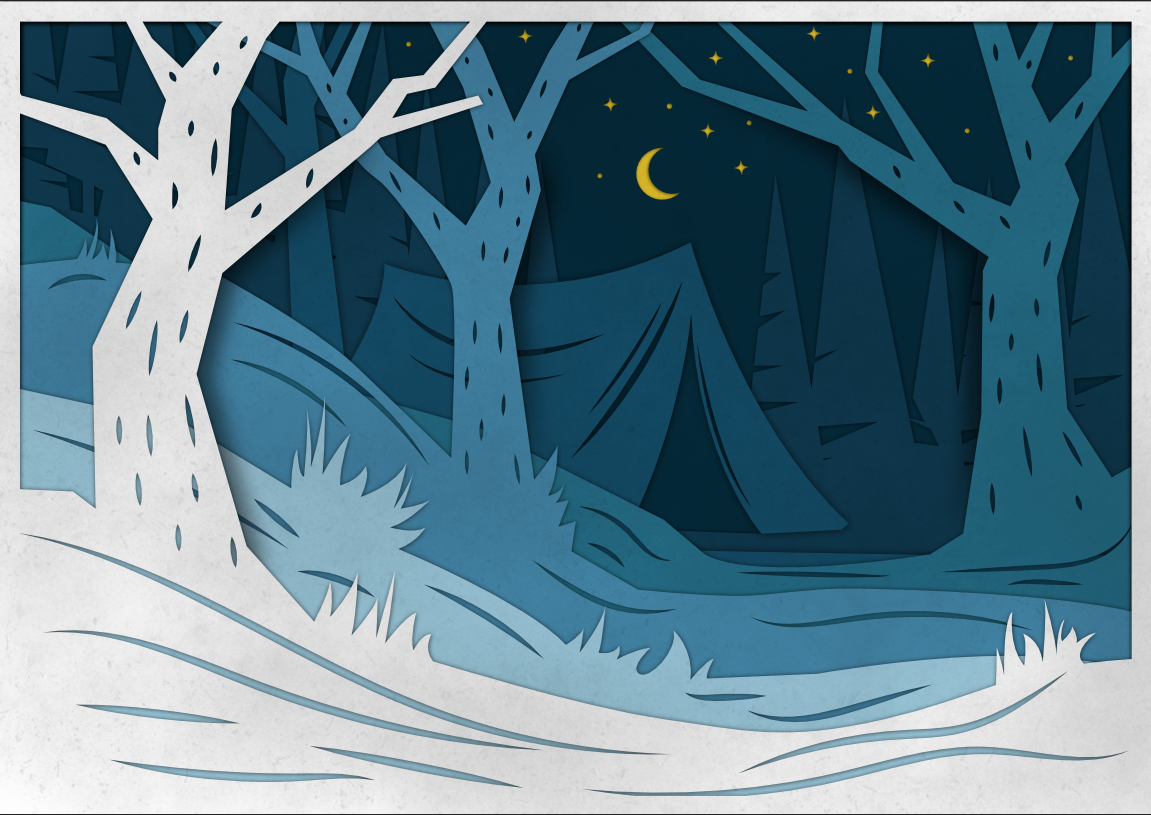
This is how our paper cut artwork looks like.
If you want, you can easily replicate this effect with other programs, check out similar tutorials like how to make a paper cut effect in Illustrator, paper cut out effect in photoshop, and paper cut out text effect in photoshop.
Step 1: Set Up Your Contour Shape Layers
Create a New Document or Open the one/s you plan to use.
Copy (command/control + C) and Paste (command/control + V) the paths you want to use.
And place each one in a different Layer.
If your images are a Positive (a positive image is a normal image, and a negative image is a total inversion, in which light areas appear dark and vice versa), you can create a rectangular shape, place it under and use the Subtract feature from the Boolean Operations in the Geometry Studio Panel.
Step 2: Add Color to the Layers
Select each layer and add the color you want to use. We are using a bright yellow for the background.
A progression of blue shades for the middle layers, and white for the one on top. Remember that normally the colors should go darker the further you get to the back of the image.
Step 3: Add a Layered Paper 3D Look with Layer Effects
Select one of the layers and open the studio Effects Panel.
Apply an outer shadow with the values that work better for your artwork. We used #000000 (black) as Color, 65% Opacity, 5 px Radius, and a 315° Angle.
Repeat with the rest of the layers you want to apply the effect to.
To adjust the effects settings, double-click the fx symbol in the layer thumbnail. Play with the angle, distance, and intensity settings to get the look you want. You can make the shadows stronger on the top right side by changing the angle closer to 225°.
Step 4: Add Extra Shadows
To add more shadows to particular portions of the image, make sure you are working on the layer you want and that the path will be placed under the image you want to add the shadow to. Then, use the Pen Tool (P) with black as fill color and add the shadow.
Go to the Effects Panel and add a Gaussian Blur. We used a 10 px Radius.
Lower the Opacity to about 75% (in the Layers Panel).
You can adjust your shape with the Node Tool (A).
Repeat this with the other portions of the image you want to enhance.
Step 5: Add a Paper-Like Texture to your Artwork
To further create the idea of layered paper, let’s add a texture to the artwork. Enter Pixel Persona by clicking on the icon on the top left side of the top menu.
Create a new Pixel Layer on top of everything.
In the Brushes Panel, select Textures from the drop-down menu.
Pick a brush (we used grunge pattern 07) with black as the fill color and use the Brush Tool to paint some texture on the pixel layer.
Change the pixel layer Blending Mode to Average and reduce the Opacity to 45%.
This is how our paper cut artwork looks like.
If you want, you can easily replicate this effect with other programs, check out similar tutorials like how to make a paper cut effect in Illustrator, paper cut out effect in photoshop, and paper cut out text effect in photoshop.
Related Tutorials
Illustrator Tutorials
How to Make a Paper Cut Effect in Illustrator
Procreate Tutorials
How to Make a Paper Cutout Effect in Procreate
In this tutorial you will discover how to create a Paper Cut Out Effect using Procreate.
Affinity Tutorials
How to Make an SVG in Affinity Designer
Learn how to create SVG files in Affinity Designer with this tutorial.
Affinity Tutorials
How to Make GIFs Using Affinity Designer
In just 3 easy steps you will learn how to create animated GIFs using Affinity Designer.
Affinity Tutorials
How to Make a Seamless Pattern in Affinity Designer
In this tutorial you will learn how create a Seamless Pattern in Affinity Designer.
Affinity Tutorials
How to Cut and Crop in Affinity Designer
Discover two methods for cutting and cropping images in Affinity Designer.