By Design Bundles
Cricut Tutorials6 min
How to Prepare an Embossing File for Cricut Design Space using SCAL4 Pro
* This is part 1 of 2 on how to use your Cricut Explore Air machine to emboss. You can find part 2 here
1- Open SCAL4 software. Click on the shape tool.
2- Create your shape and change the size to suit your needs. The size that you make will determine how large your embossed design will be. I am making a embossed design to fit on the front of an A2 card. ( 4 x 5.25 inches).
Next click on the strike and fill icon.
3- Select white to fill your shape.
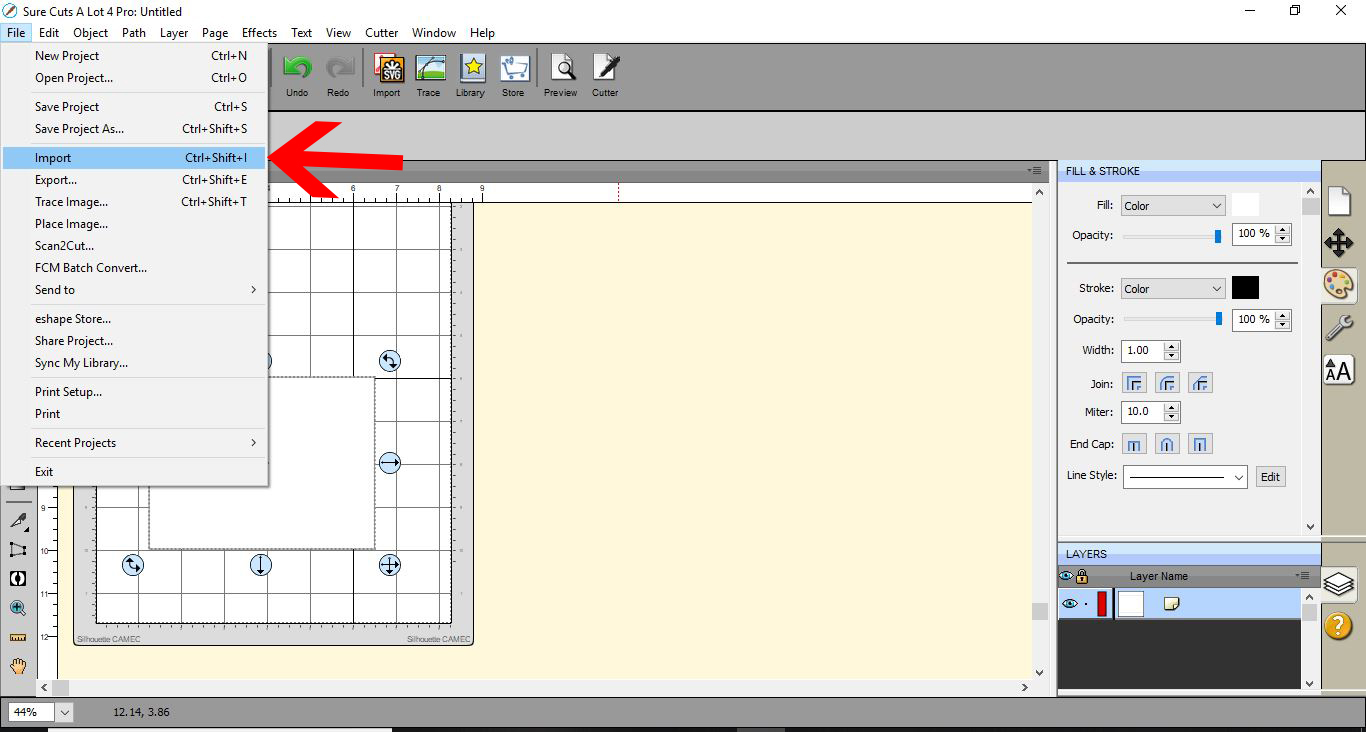
4- We now need to upload your design you need to emboss. Click on File - Import.
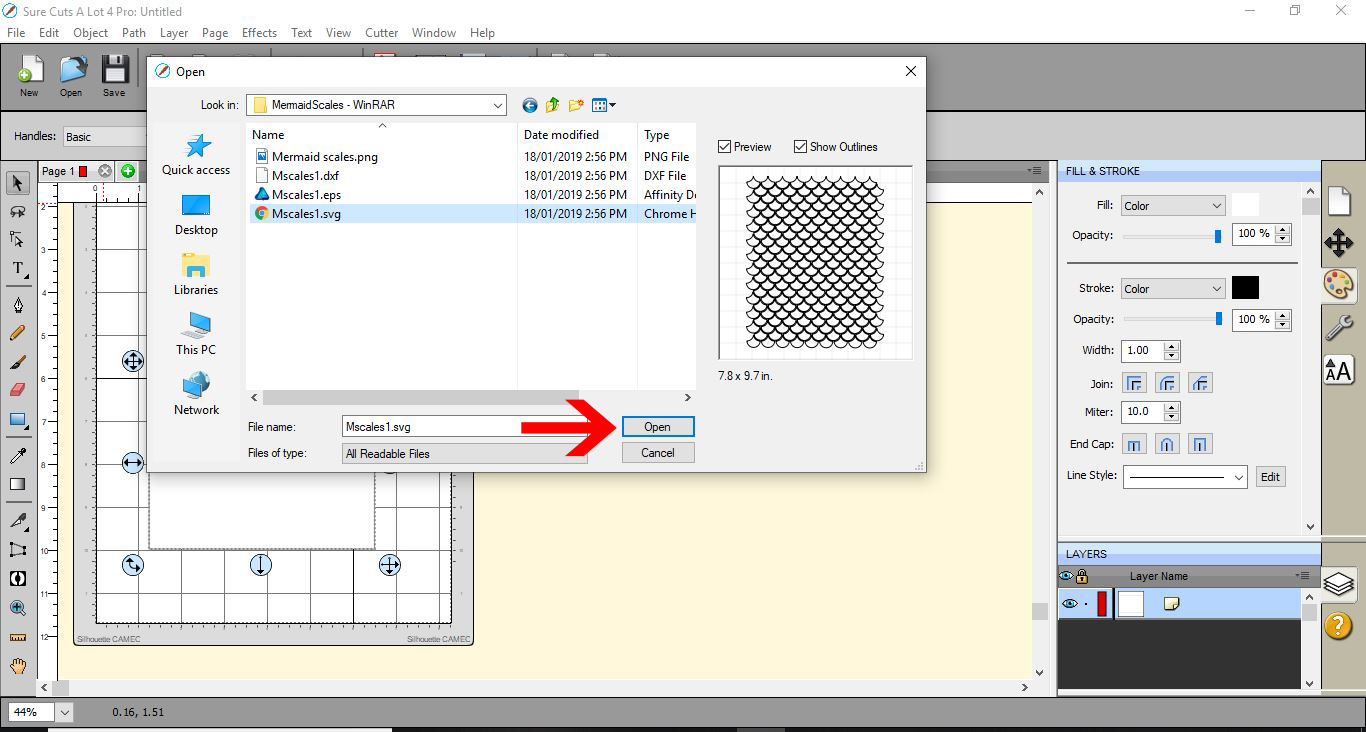
5- Select your file and click open. I am using Mermaid Scales from designbundles.net
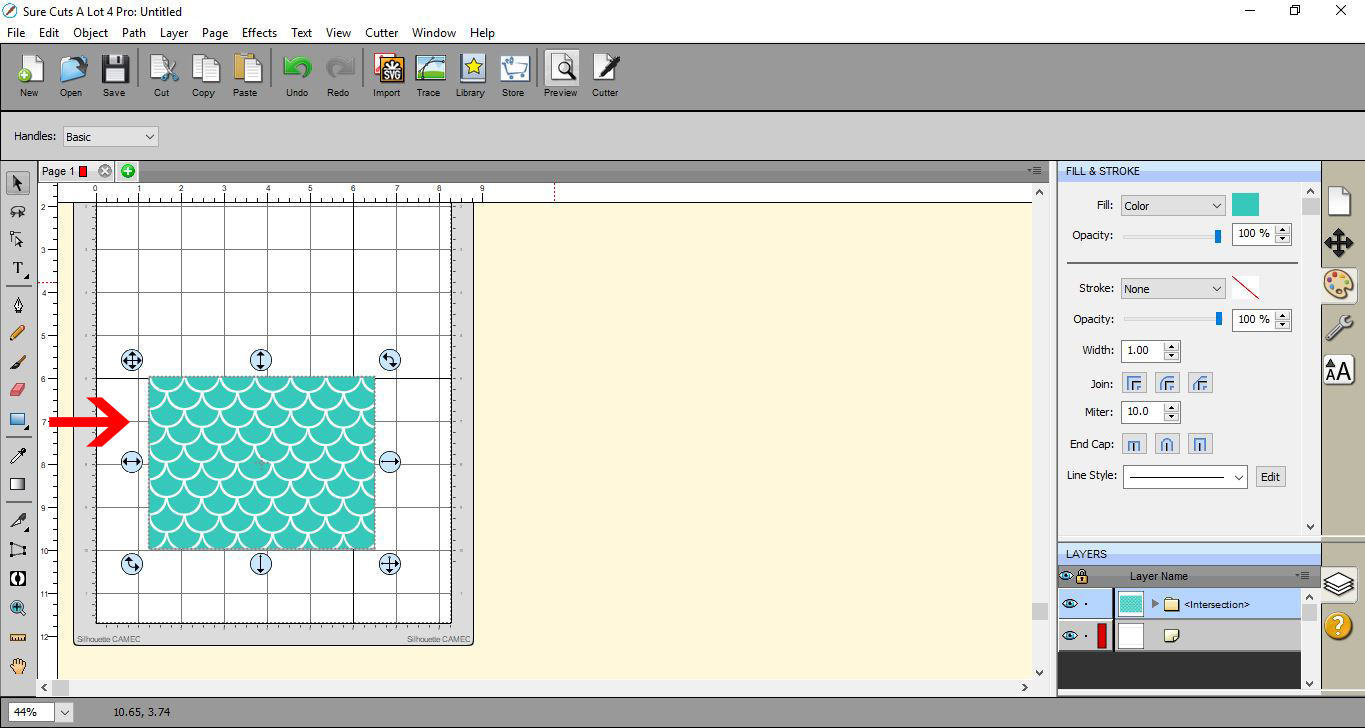
6- Your design will appear. We need it to fit inside your rectangle. If it fits, place inside the rectangle. If it does not like you can see here, you can resize to fit withing the white rectangle. Alternatively you can duplicate your rectangle, then with the rectangle placed over the design, select both and use Path - intersection.
7- Adjust your embossed image with in the white rectangle so there is a small amount of space on the edges.
8- Select the design.
9- Right click and copy.
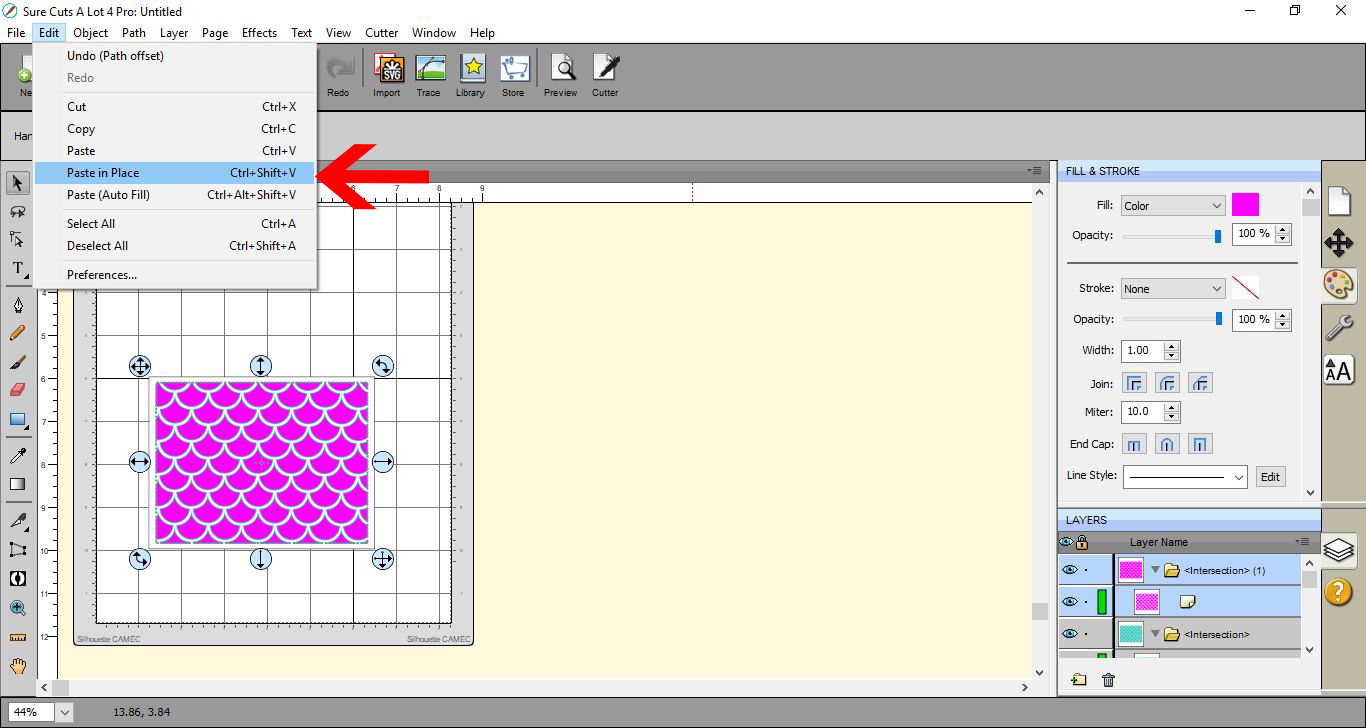
10- Go to edit - paste in place. This will paste the copy exactly over the top of the original.
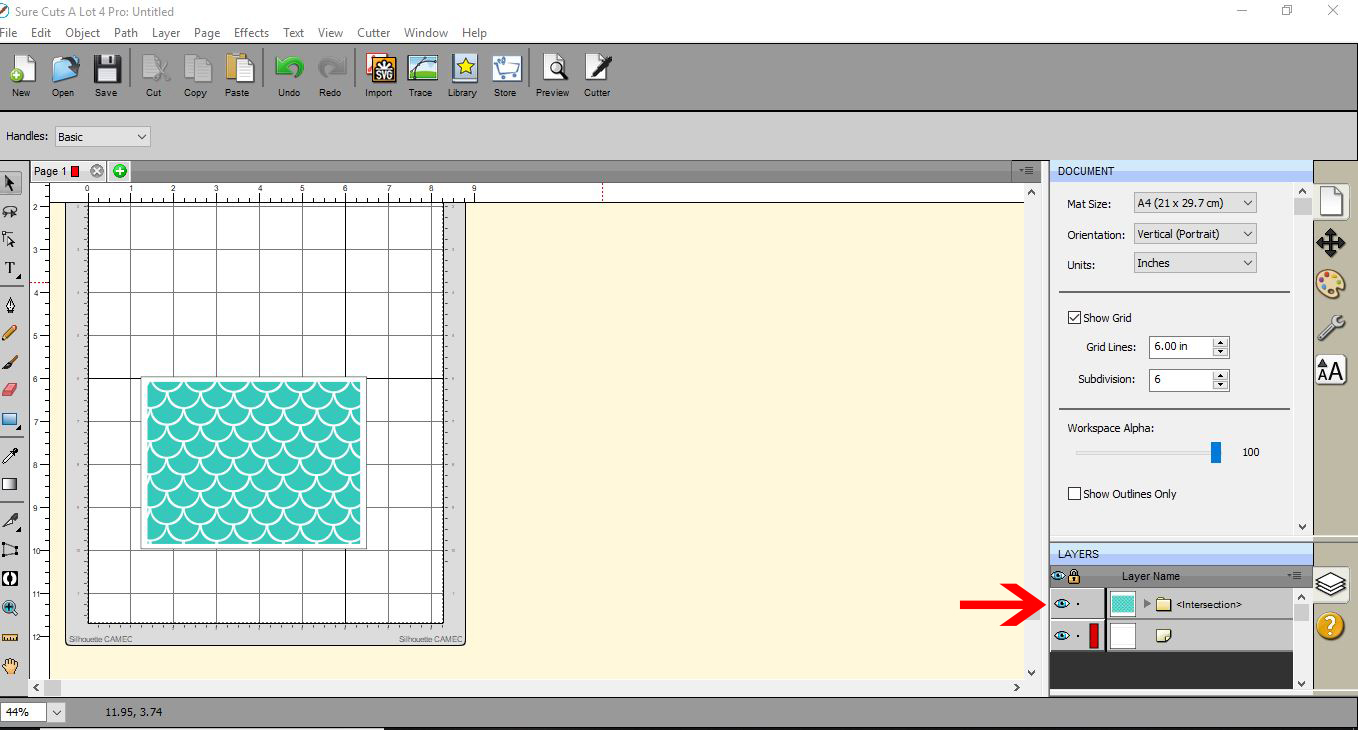
11- Make sure only the top duplicate is selected (you can select it in the layers panel). Go to the stroke and fill option.
12- Click on the fill option and select a new color.
13- the now pink duplicate still selected go to path.
14- Select path offset.
15- In the new window select the inset offset, and change the offset to 0.02 inches. Click on OK
16- You should be able to just see the green original design under the pink offset. Go to edit - copy.
17- Go to Edit - Paste in place.
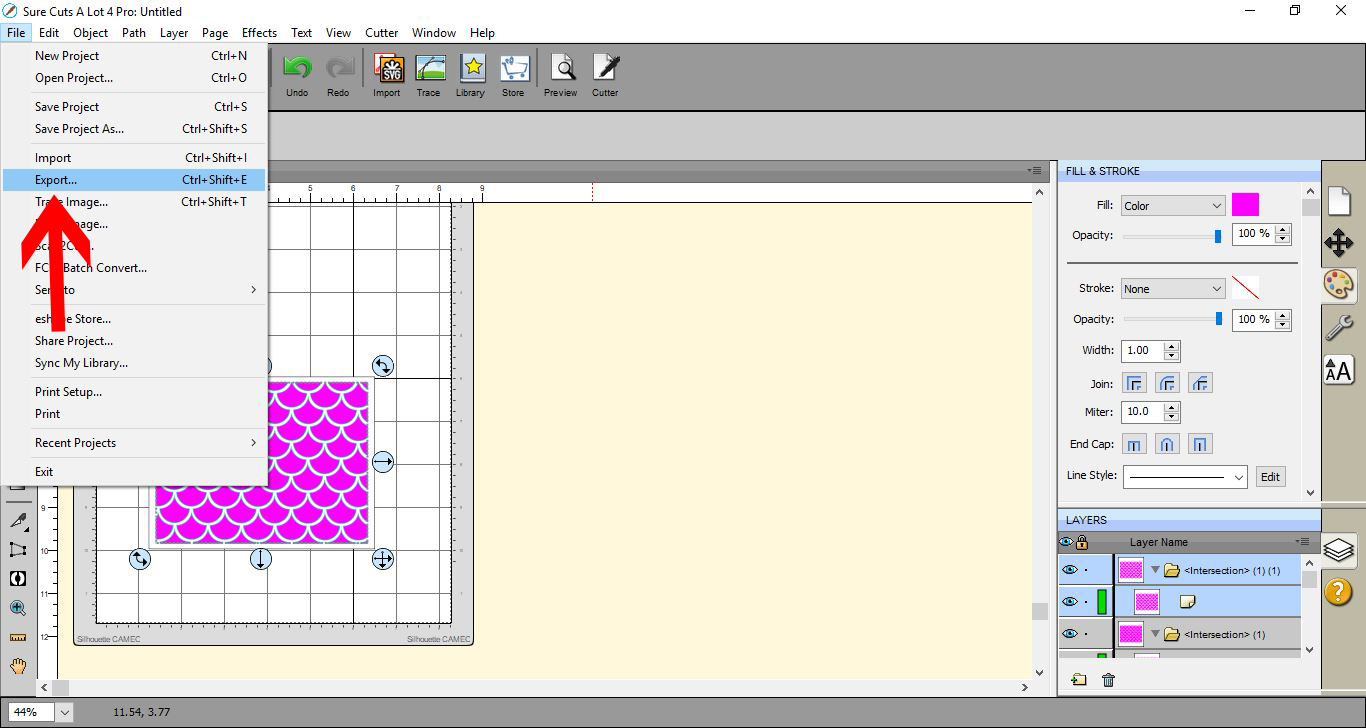
18- With everything now selected click on file - export.
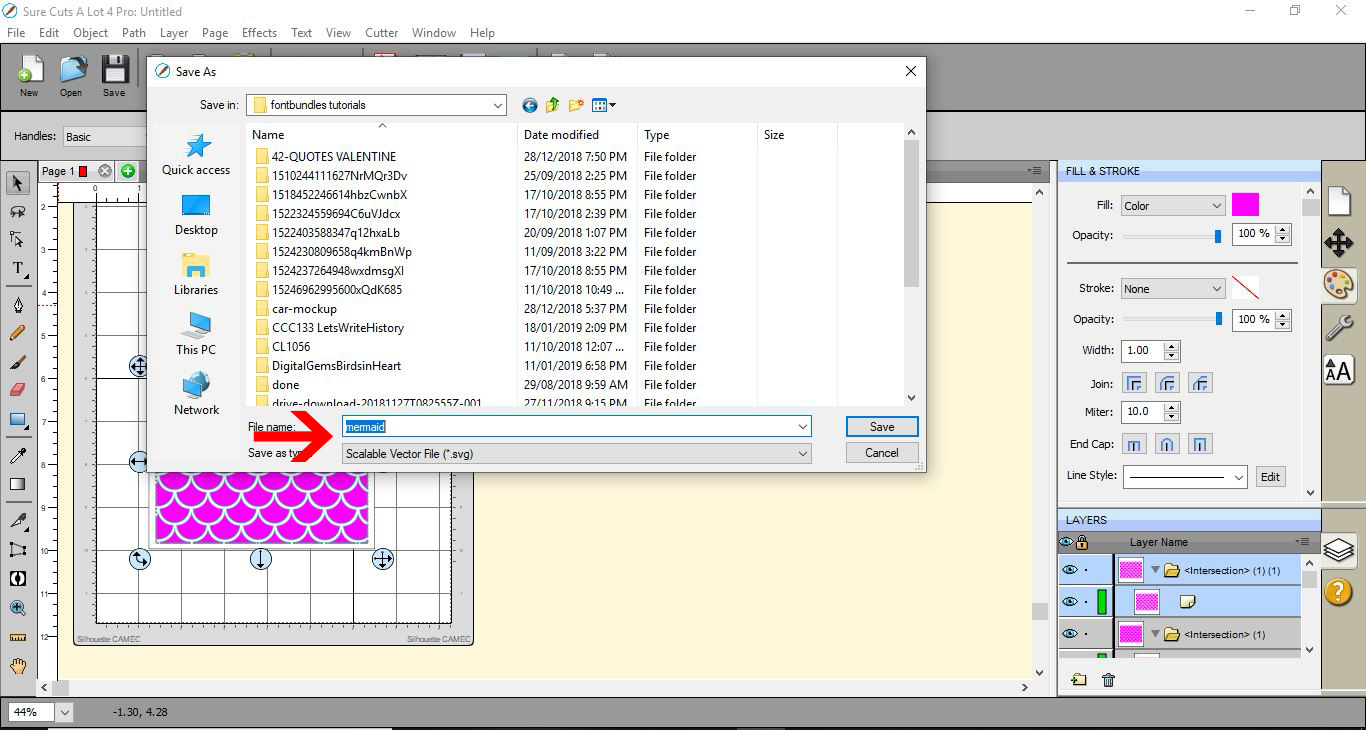
19- Save your file.

1- Open SCAL4 software. Click on the shape tool.
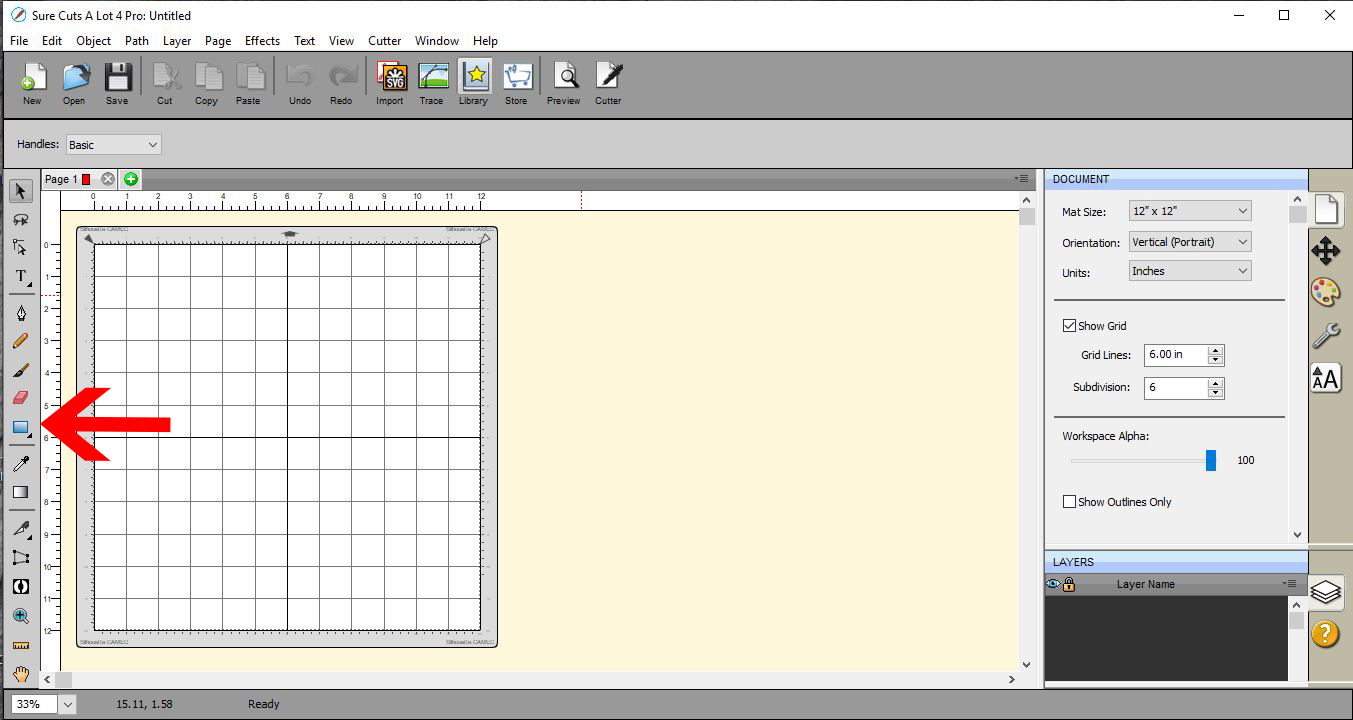
2- Create your shape and change the size to suit your needs. The size that you make will determine how large your embossed design will be. I am making a embossed design to fit on the front of an A2 card. ( 4 x 5.25 inches).
Next click on the strike and fill icon.
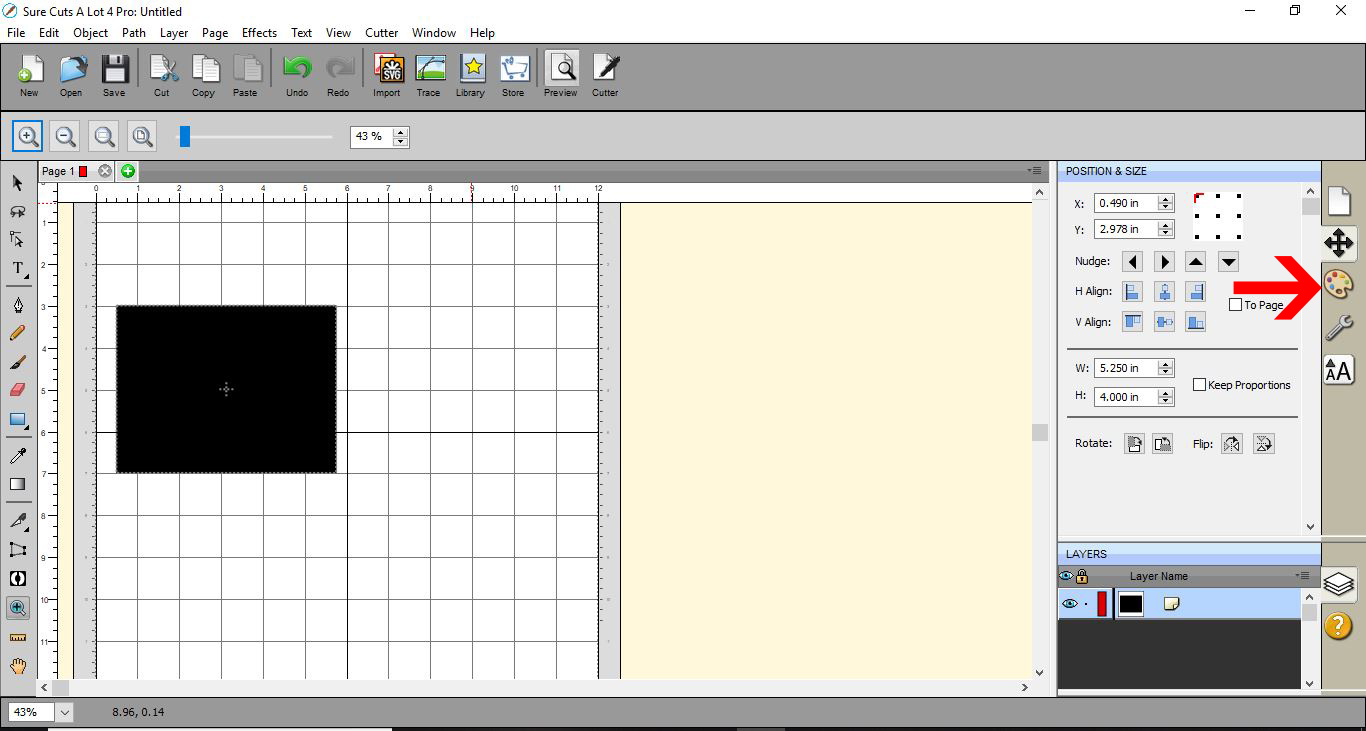
3- Select white to fill your shape.
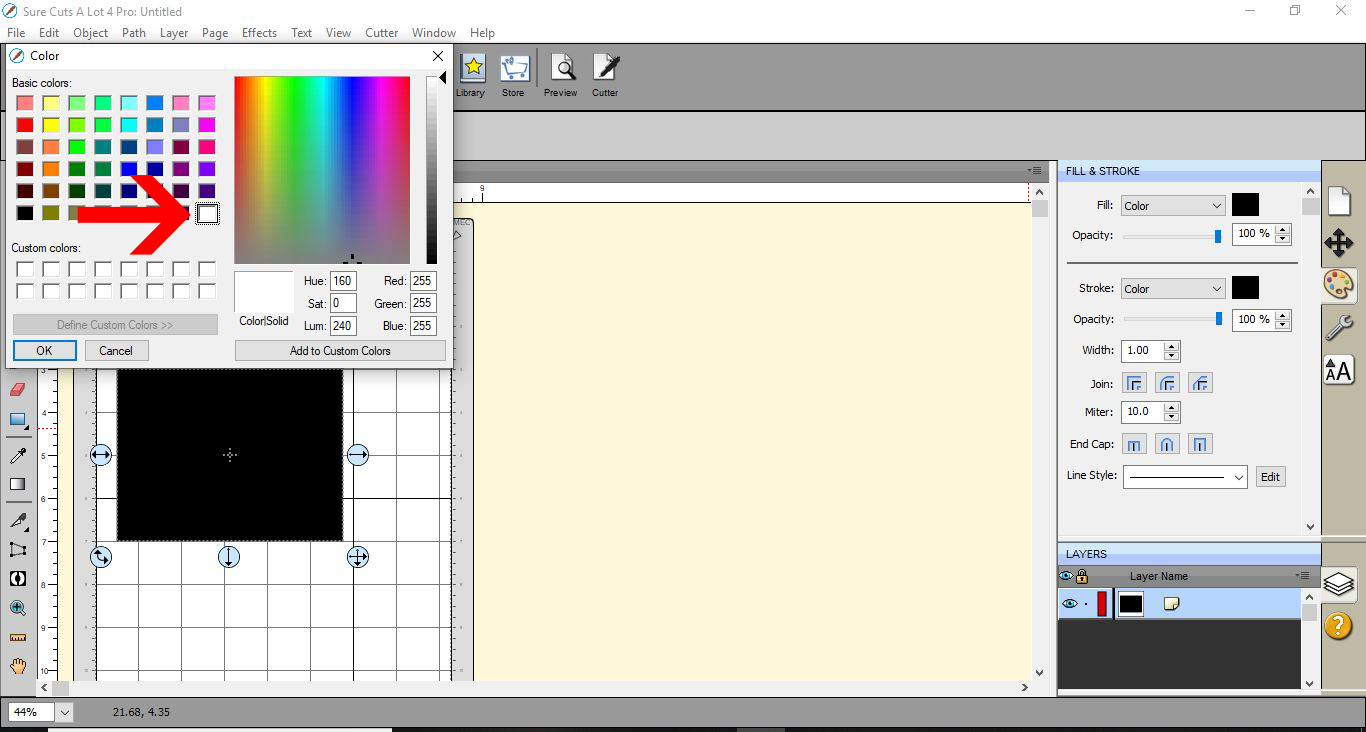
4- We now need to upload your design you need to emboss. Click on File - Import.
5- Select your file and click open. I am using Mermaid Scales from designbundles.net
6- Your design will appear. We need it to fit inside your rectangle. If it fits, place inside the rectangle. If it does not like you can see here, you can resize to fit withing the white rectangle. Alternatively you can duplicate your rectangle, then with the rectangle placed over the design, select both and use Path - intersection.

7- Adjust your embossed image with in the white rectangle so there is a small amount of space on the edges.
8- Select the design.
9- Right click and copy.
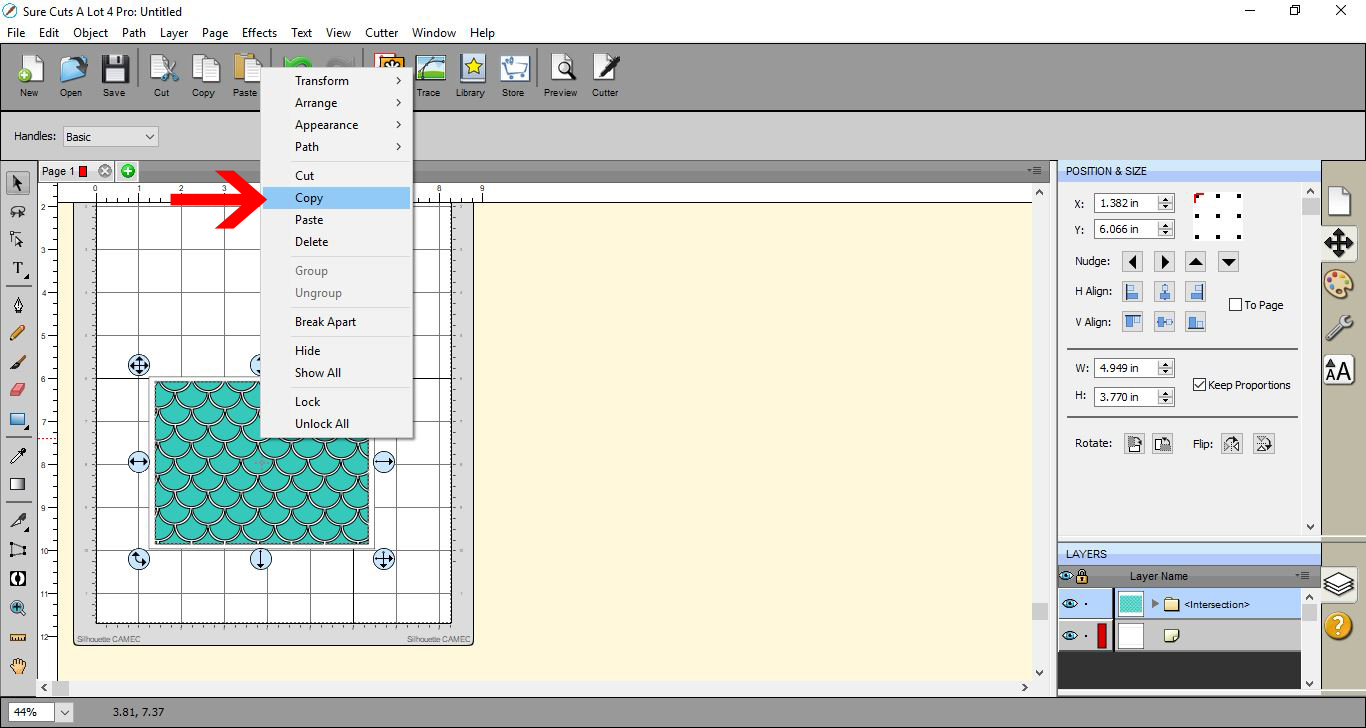
10- Go to edit - paste in place. This will paste the copy exactly over the top of the original.
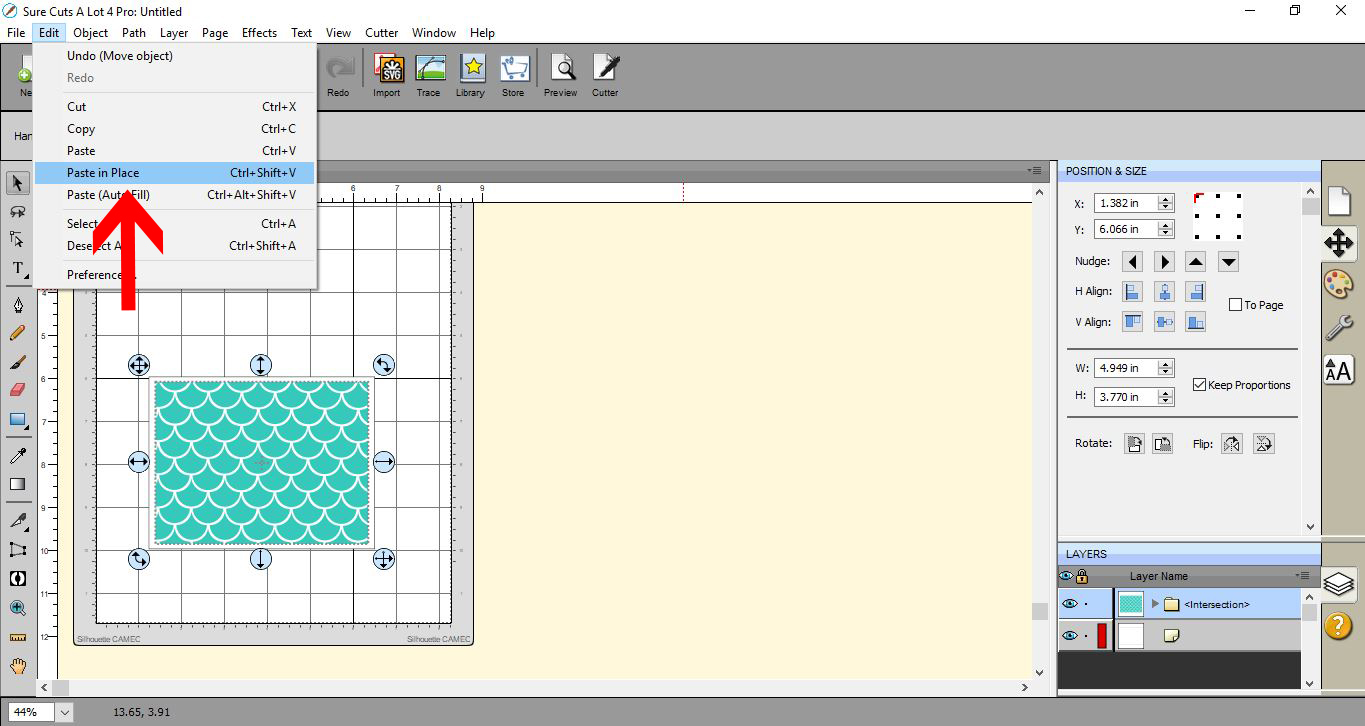
11- Make sure only the top duplicate is selected (you can select it in the layers panel). Go to the stroke and fill option.
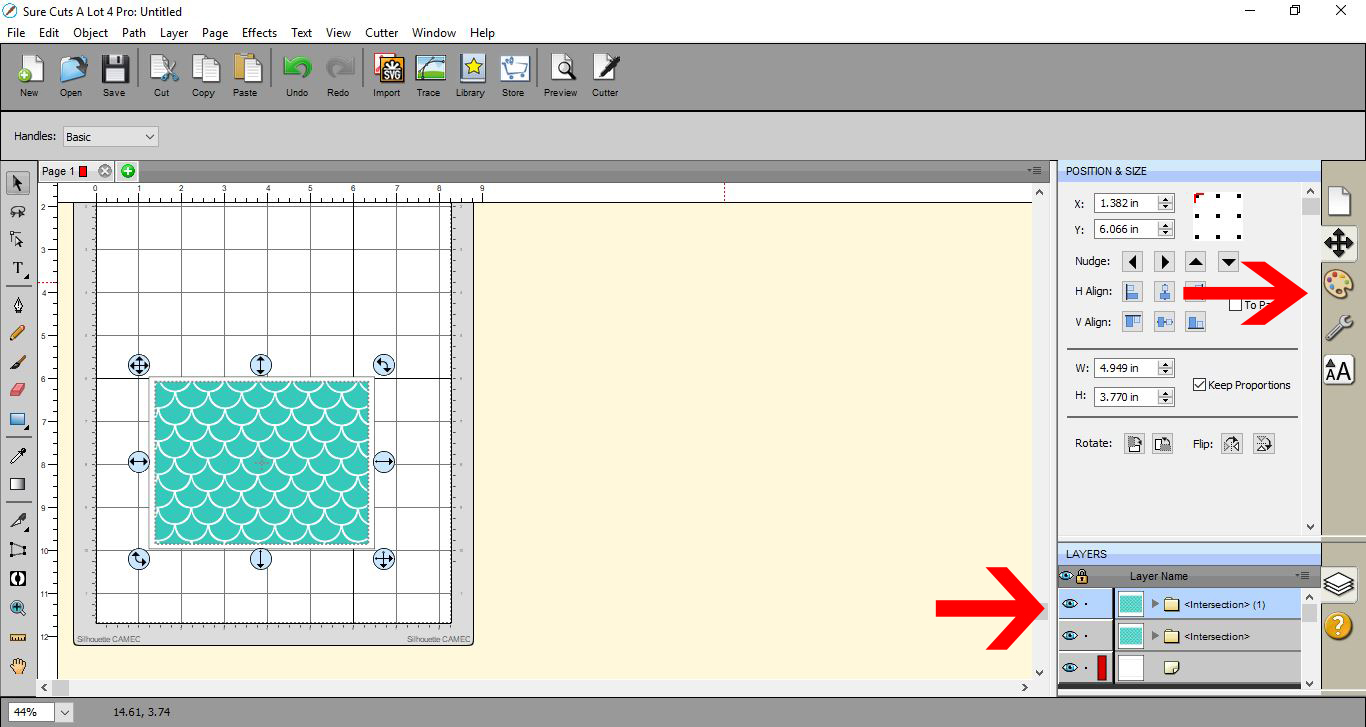
12- Click on the fill option and select a new color.
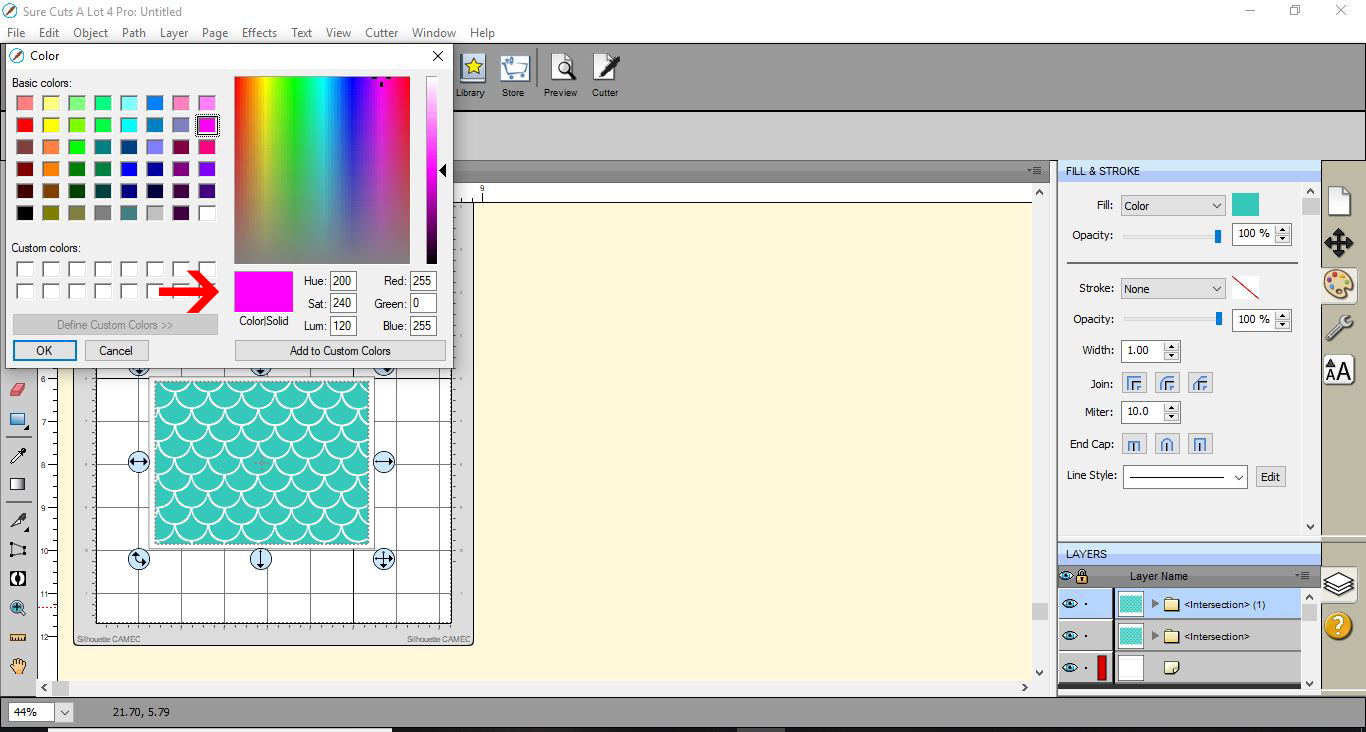
13- the now pink duplicate still selected go to path.
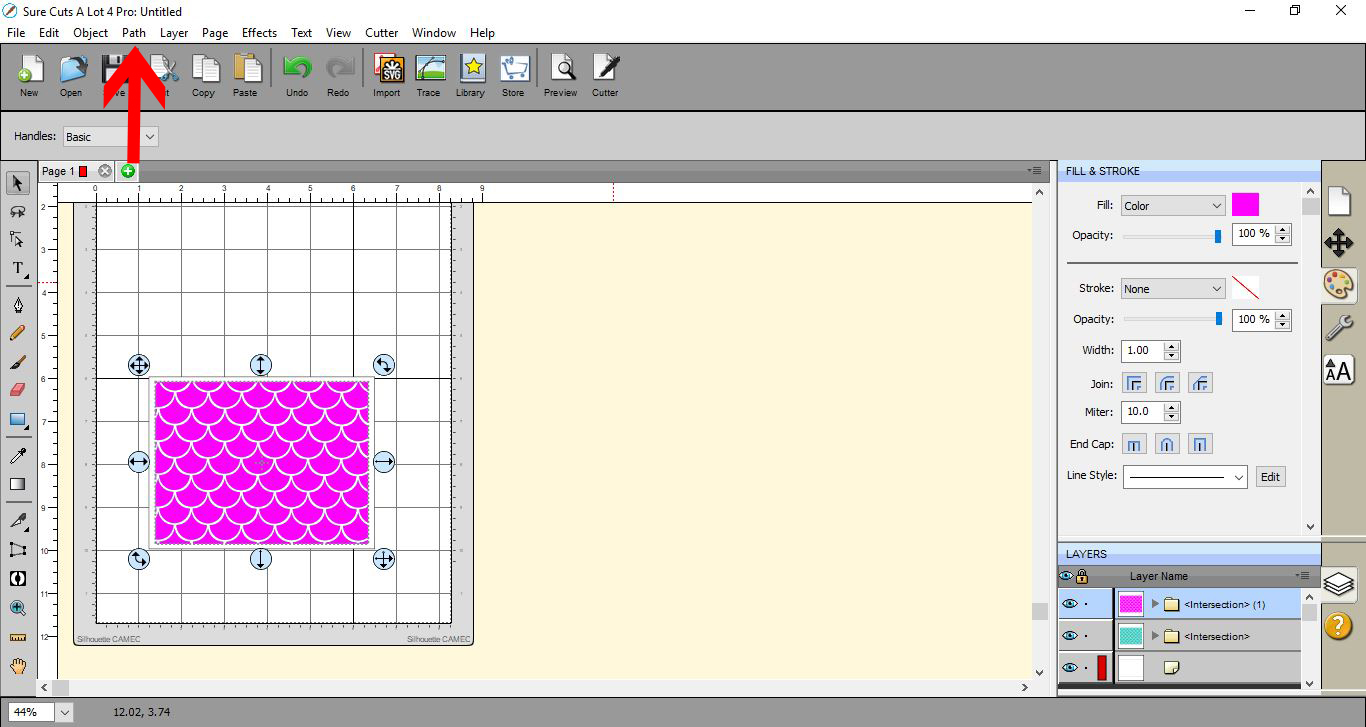
14- Select path offset.
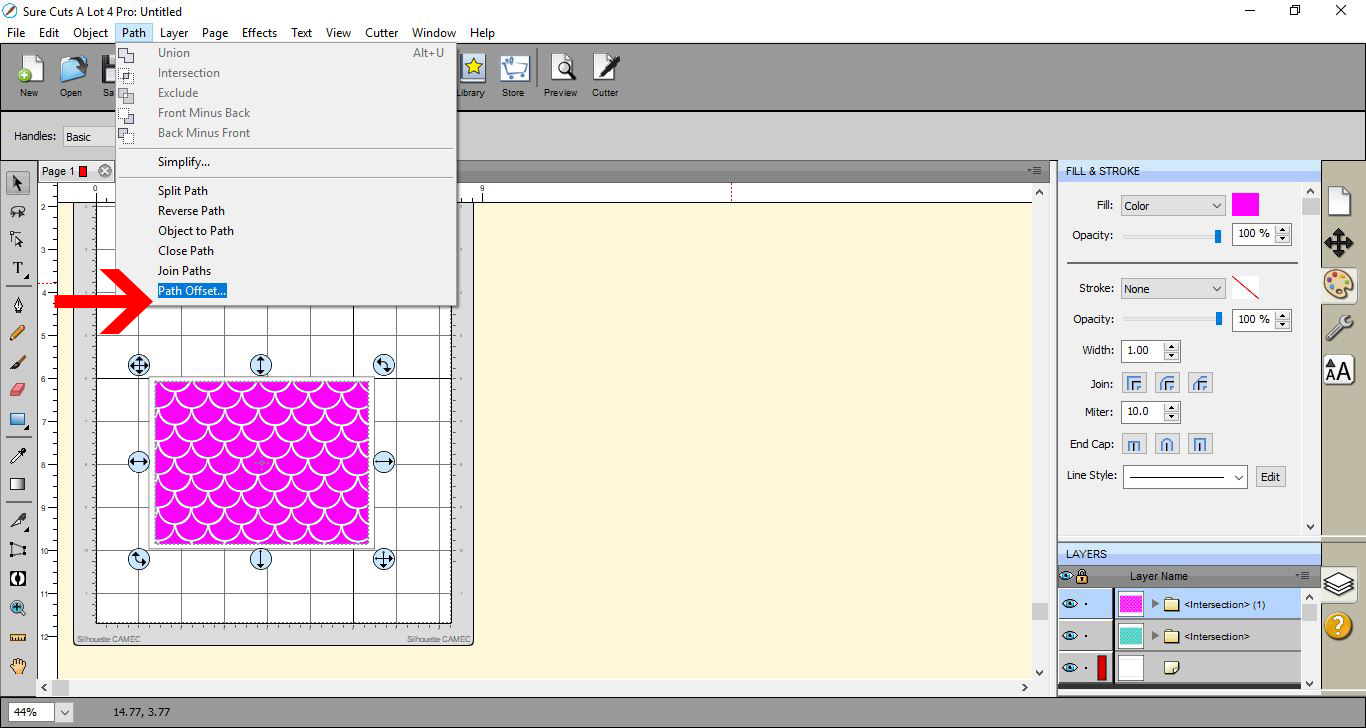
15- In the new window select the inset offset, and change the offset to 0.02 inches. Click on OK
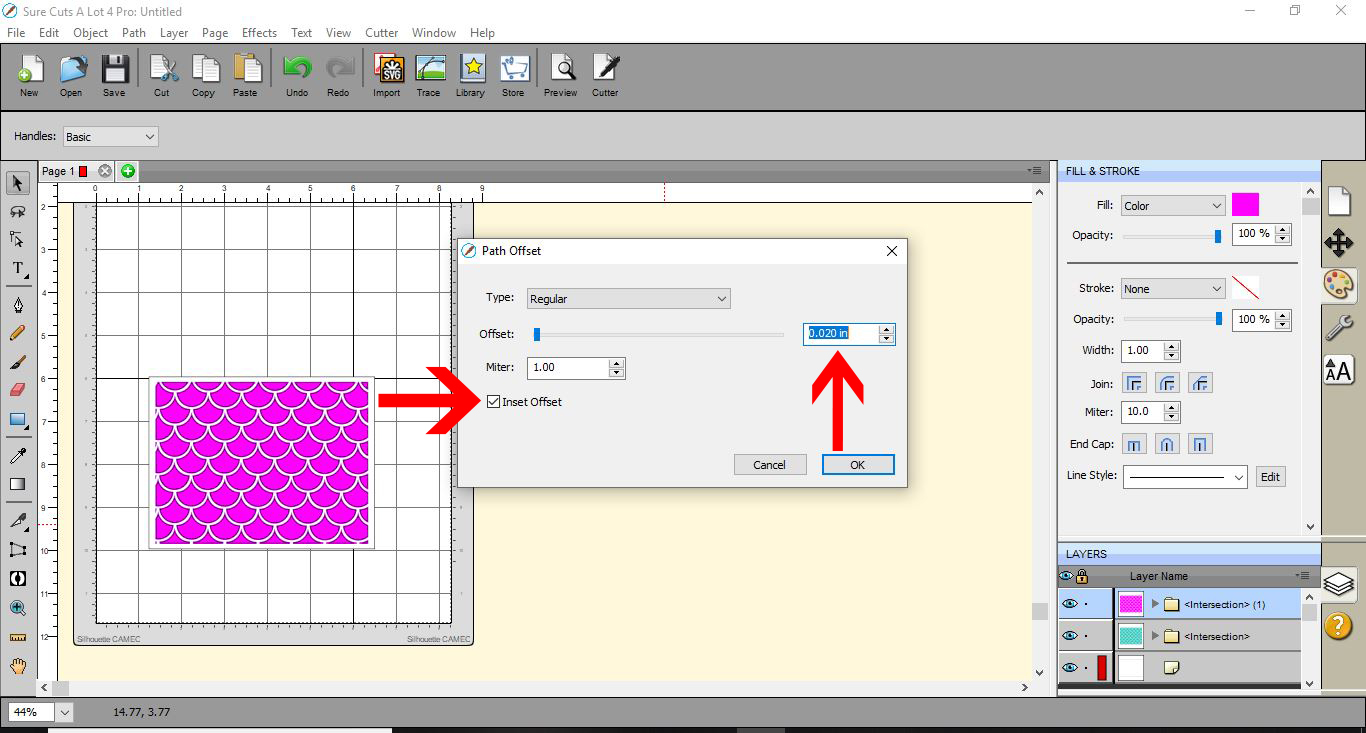
16- You should be able to just see the green original design under the pink offset. Go to edit - copy.
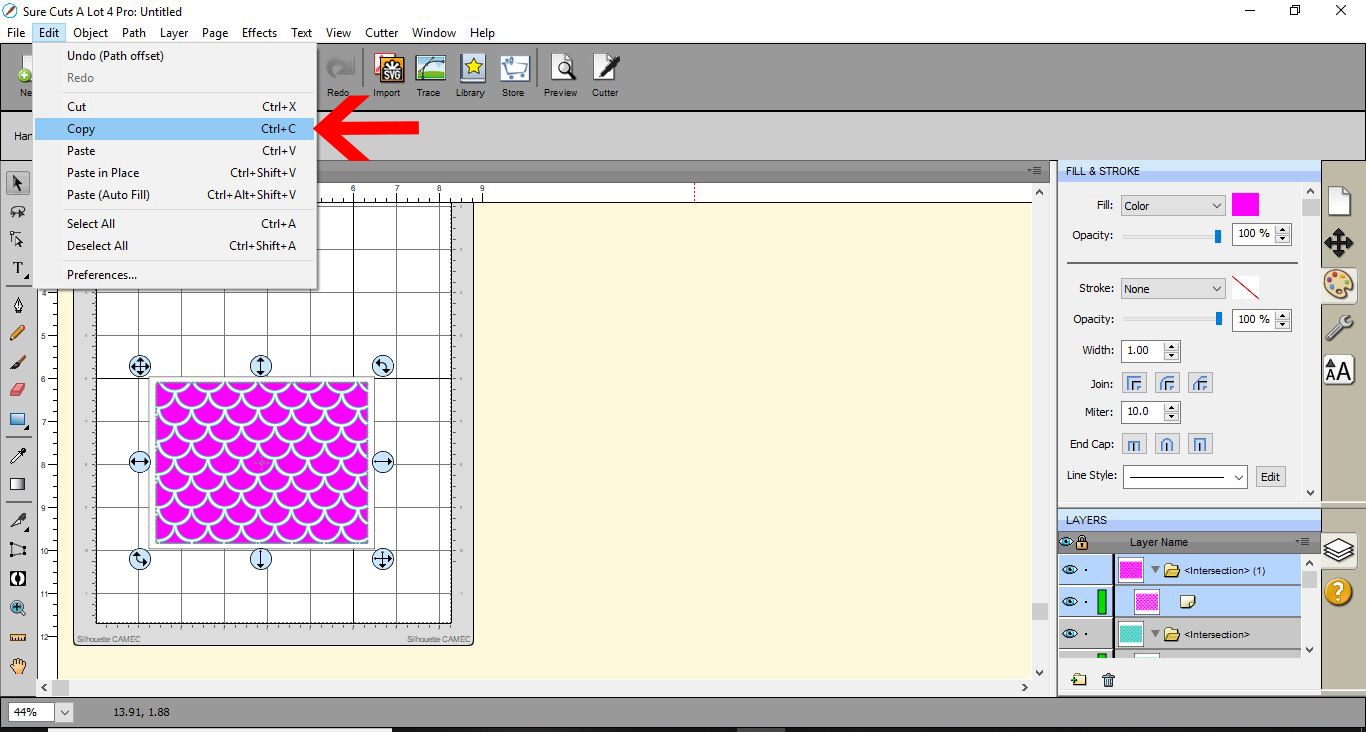
17- Go to Edit - Paste in place.
18- With everything now selected click on file - export.
19- Save your file.
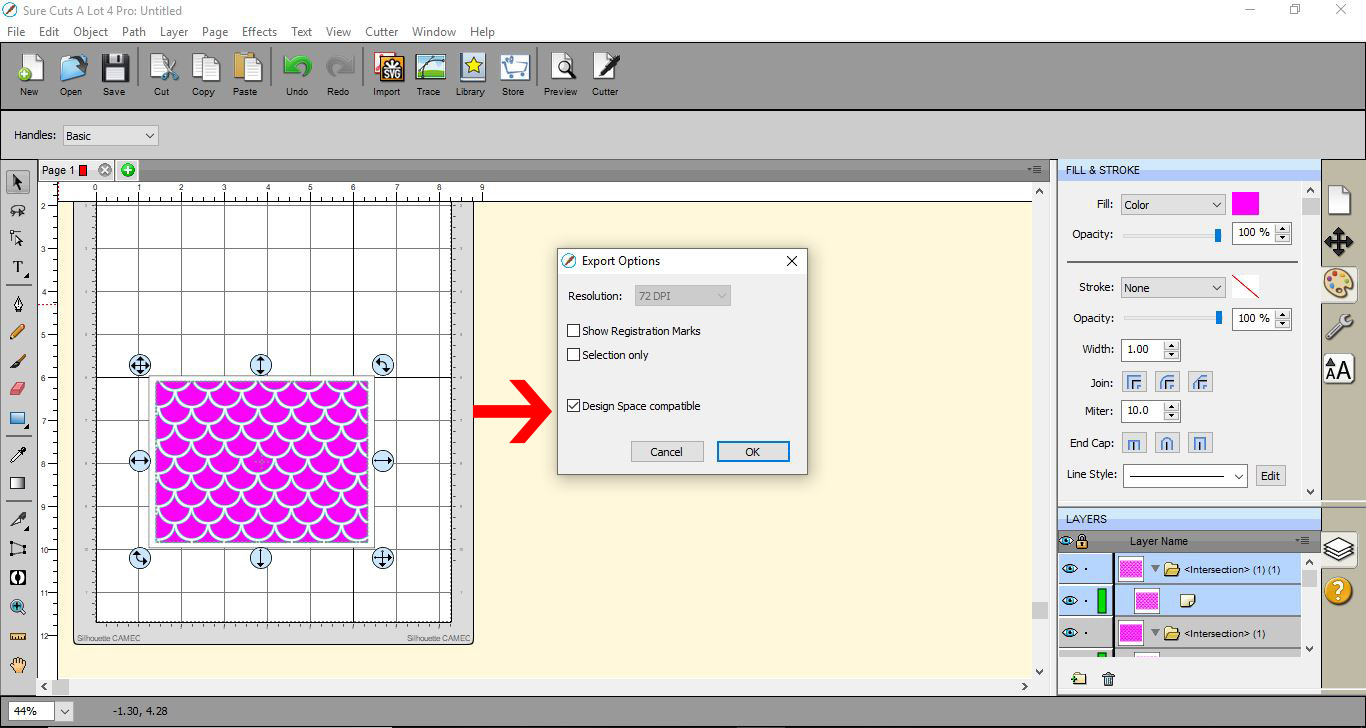
20- In the new window click on design space compatible and ensure the other boxes are unchecked. Click OK.
Related Tutorials
Cricut Tutorials
Foiling a SVG file in cricut design space using the foil quill
Cricut Tutorials
How to Use a PDF File in Cricut Design Space
In this tutorial we guide you through the steps on using a PDF file in Cricut Design Space.
Cricut Tutorials
How to thicken text for foiling using Inkscape and Cricut design space
Learn to thicken text for foiling using Inkscape and Cricut Design Space.
Cricut Tutorials
How to draw your first line in cricut design space using the foil quill
Learn to draw your first line in Cricut Design Space with this beginner step by step tutorial.