By Christine Hattingh
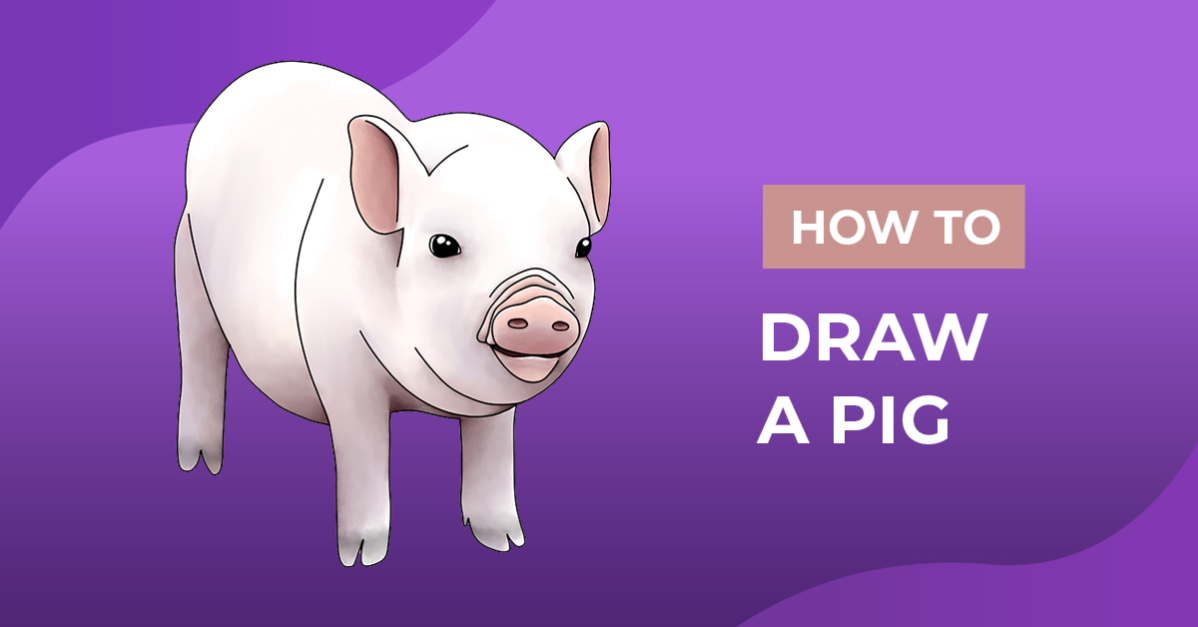
How to Draw a Pig
In Today’s drawing guide, we are showing you how to draw a pig. With their playful behavior and love for mud and puddles, we couldn’t resist drawing a pig with you today. Your illustration can be used for animal clipart, farmhouse designs, sublimated shopping bags, and as art for around your home.

Our drawing tutorials can be used with the supplies you already have on hand. This includes colored pencils and paints, or digital drawing programs such as Procreate. Create other cute farm animal drawings with our sketching guides such as drawing a cow or drawing a hedgehog.
Step 1 - Create the Body Shape of your Pig
For our first step, we will create rough sketches of our pig’s body. It is recommended to use a pencil that you can erase or a light color medium you can cover up.
Combine Shapes to Make the Body
Sketch two vertical ovals. Draw a small one for the head, as shown for number 1. Then, draw a bigger oval for the body, and place this on the left side of the head. You can see this shown in image number 2 below.

Draw a circle overlapping the top of the body for the back end of your pig sketch.

Add Definition to the Body Shape
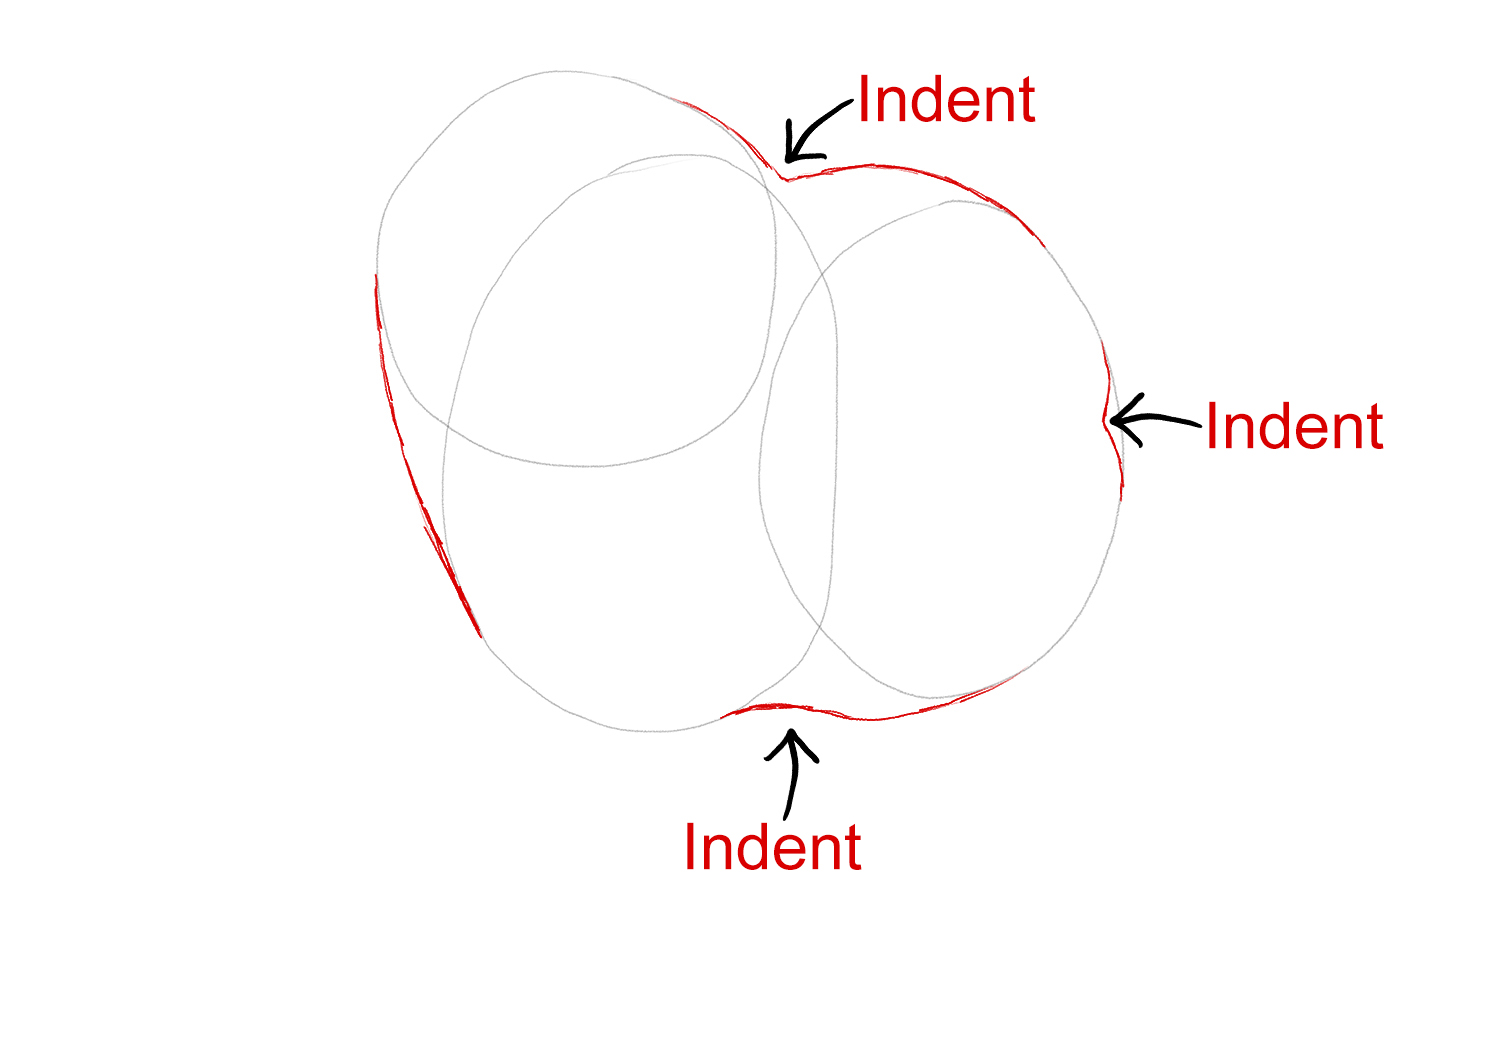
Join the head, body, and back end to create one defined body shape. Looking at our reference image below, we indicated where to add your sketch lines and indents.
Step 2 - Add Details to your Pig Head
Sketch an oval on the bottom right side of the head for the nose and mouth area. Then, inside the oval, add your pig's snout with two nostrils.

Above the mouth and nose area add the eye, with a big gap in between. The right eye should be placed where you created your indent on the side of the head. On both sides of the head, add pointy ears with rounded bottoms. Due to the viewing angle, our right pig ear will be partially visible.

Step 3 - Add the Legs and Body Lines
Our pig is at a slight side viewing angle, so we need to add the legs in specific places. Pay close attention to where we draw the legs to get the correct placement.
Sketch your Legs
Draw your legs as rectangles with rounded corners at the bottom. Add one back leg on the left edge of the body with the two front legs towards the right. You can follow our sketch below for guidance.

Draw your Lines
Inside the ears add dimension with curved lines (shown in pink). Then, add a curved line above the left front leg that goes towards the ear, with another curved line below the head to make a neck roll (shown in green and blue).
Lastly, draw upside-down “V” shapes at the bottom of the legs to create toes, as we did below (shown in red).

Step 4 - Outline your Pig Rough Sketch
With your rough sketches done, swap over to your outline medium. This can be any dark, black or permanent medium like a pen or marker.
Begin your outlines, going around the outer sketch lines of your whole pig illustration. Make sure to line around the right eye, and then create the toes.

Trace over the sketch lines around your pig’s head and face. We only lined parts of the head and created fold lines above the snout.

Complete your outlines by lining the back of the belly, leg line, neck roll, and inner lines of the ear. Once you are done tracing, tidy up your drawing by removing the rest of your sketches.

Step 5 - Add Color to your Pig
Your pig outline is ready for some color. Use any color you have on hand, such as different shades of brown, black, cream, or pink. Add highlights and shadows to your drawing to give it some dimension.
You can browse through our FREE drawing tutorials for coloring style inspiration, from basic solid colors to realistic shading.

Your little piggy looks fantastic! By changing how you color your drawing you can create different pig art styles for your projects.
Imagine how cute your pig clipart will look with a watercolor flower crown to make sublimated totes or nursery wall prints. Great work on following our drawing exercise and creating your pig drawing.