By Design Bundles
Illustrator Tutorials13 min
Gingerbread Cookies in Illustrator
For this tutorial, we will use some Vector Shapes for the “Cookies” and a “Checkered” Pattern to use as “Background”.
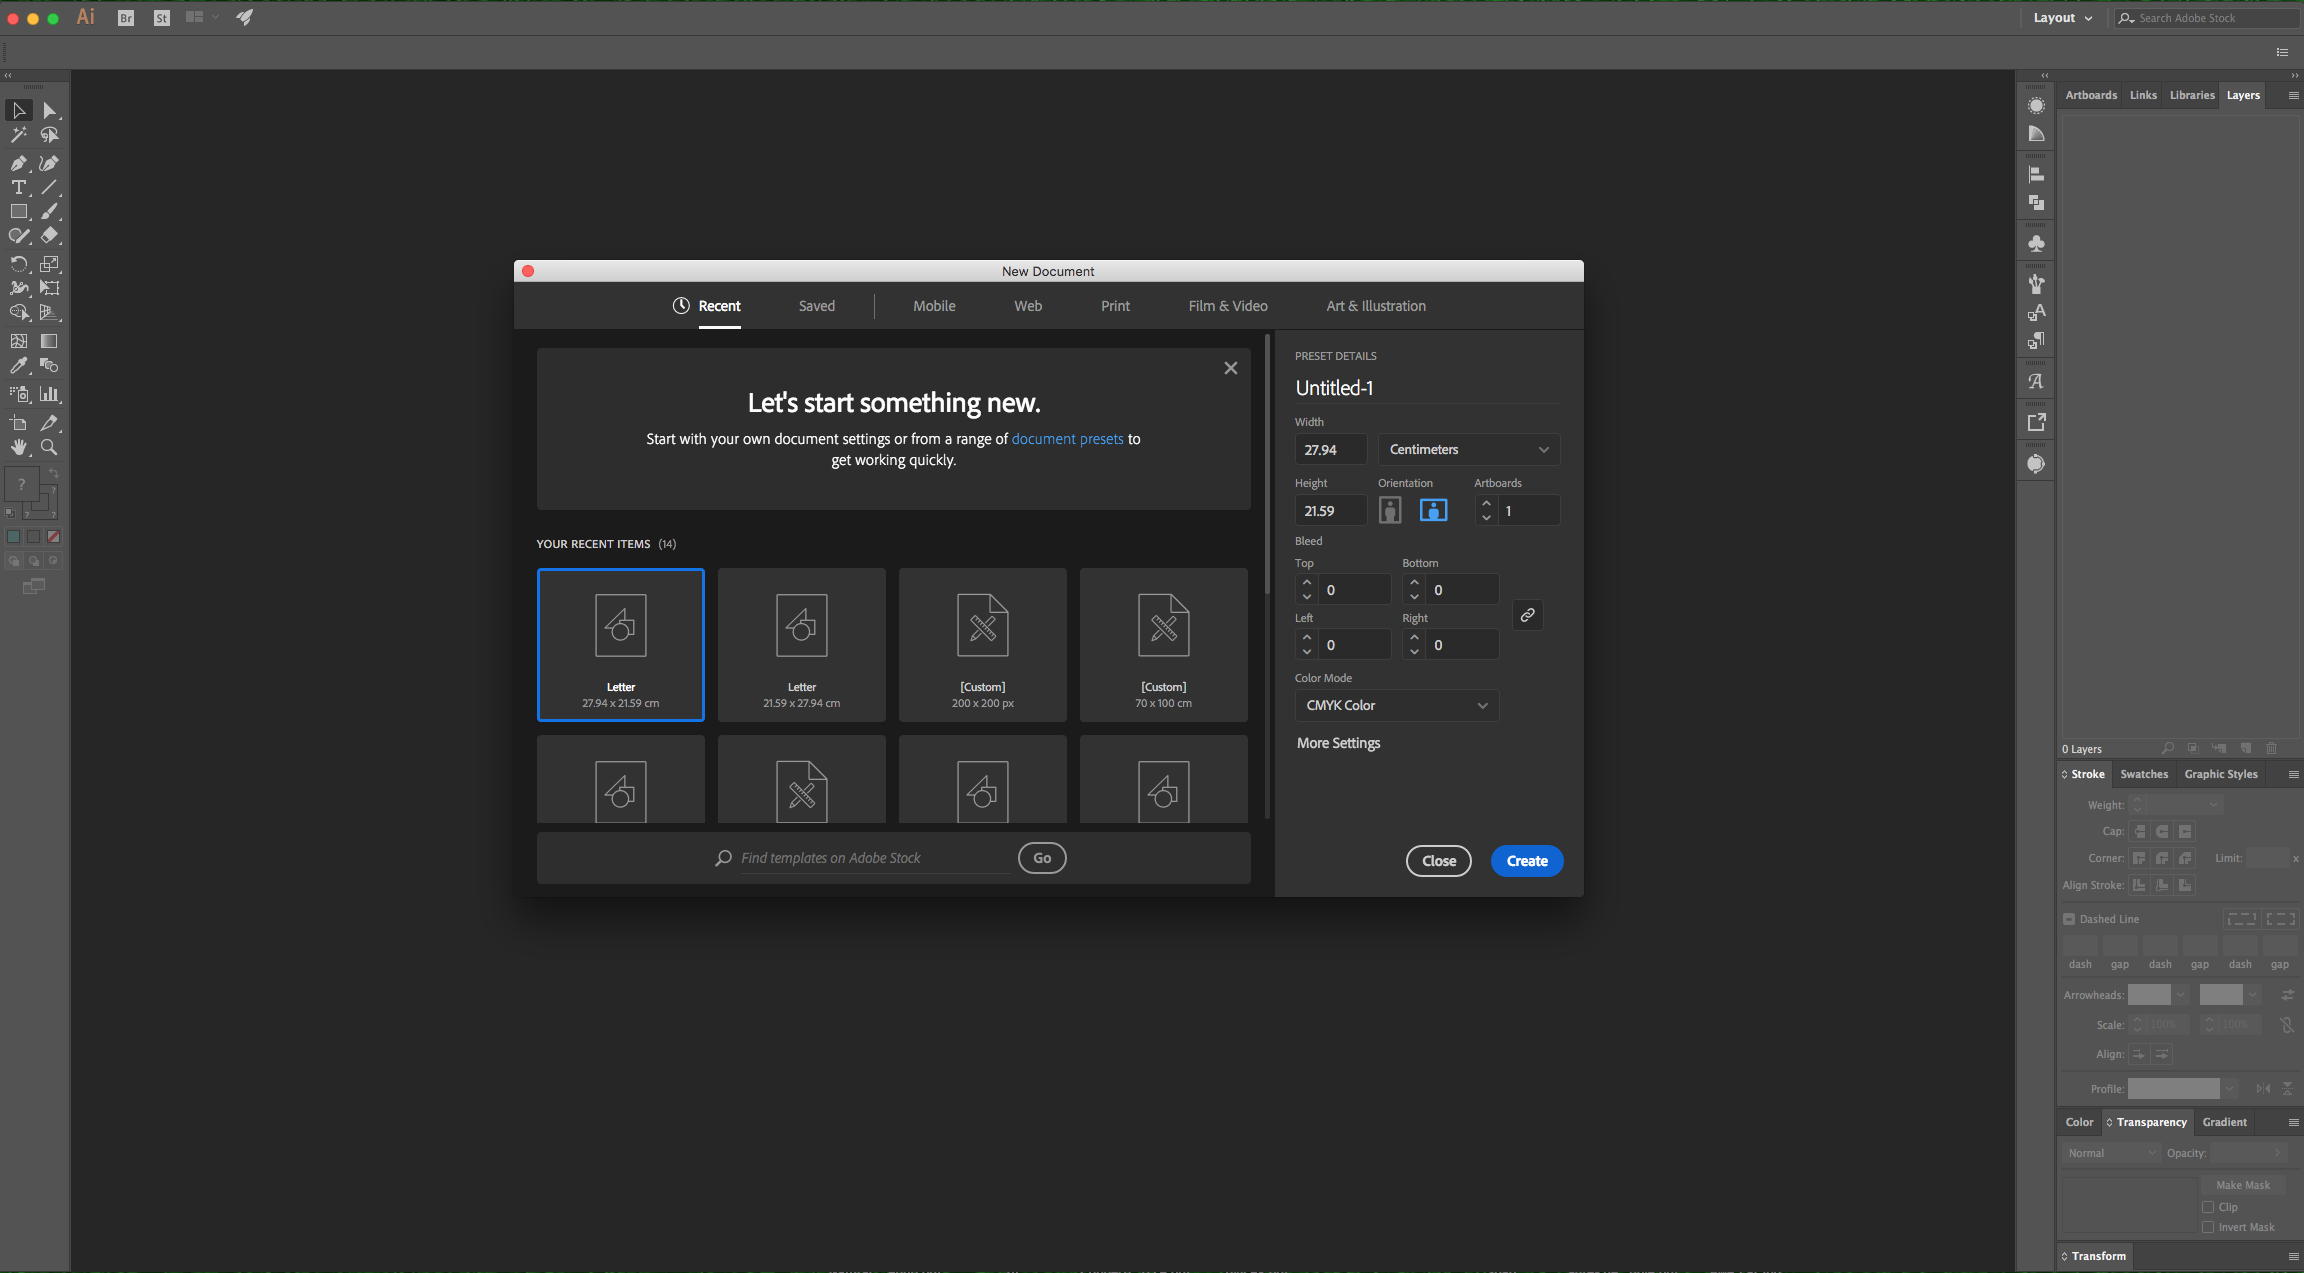
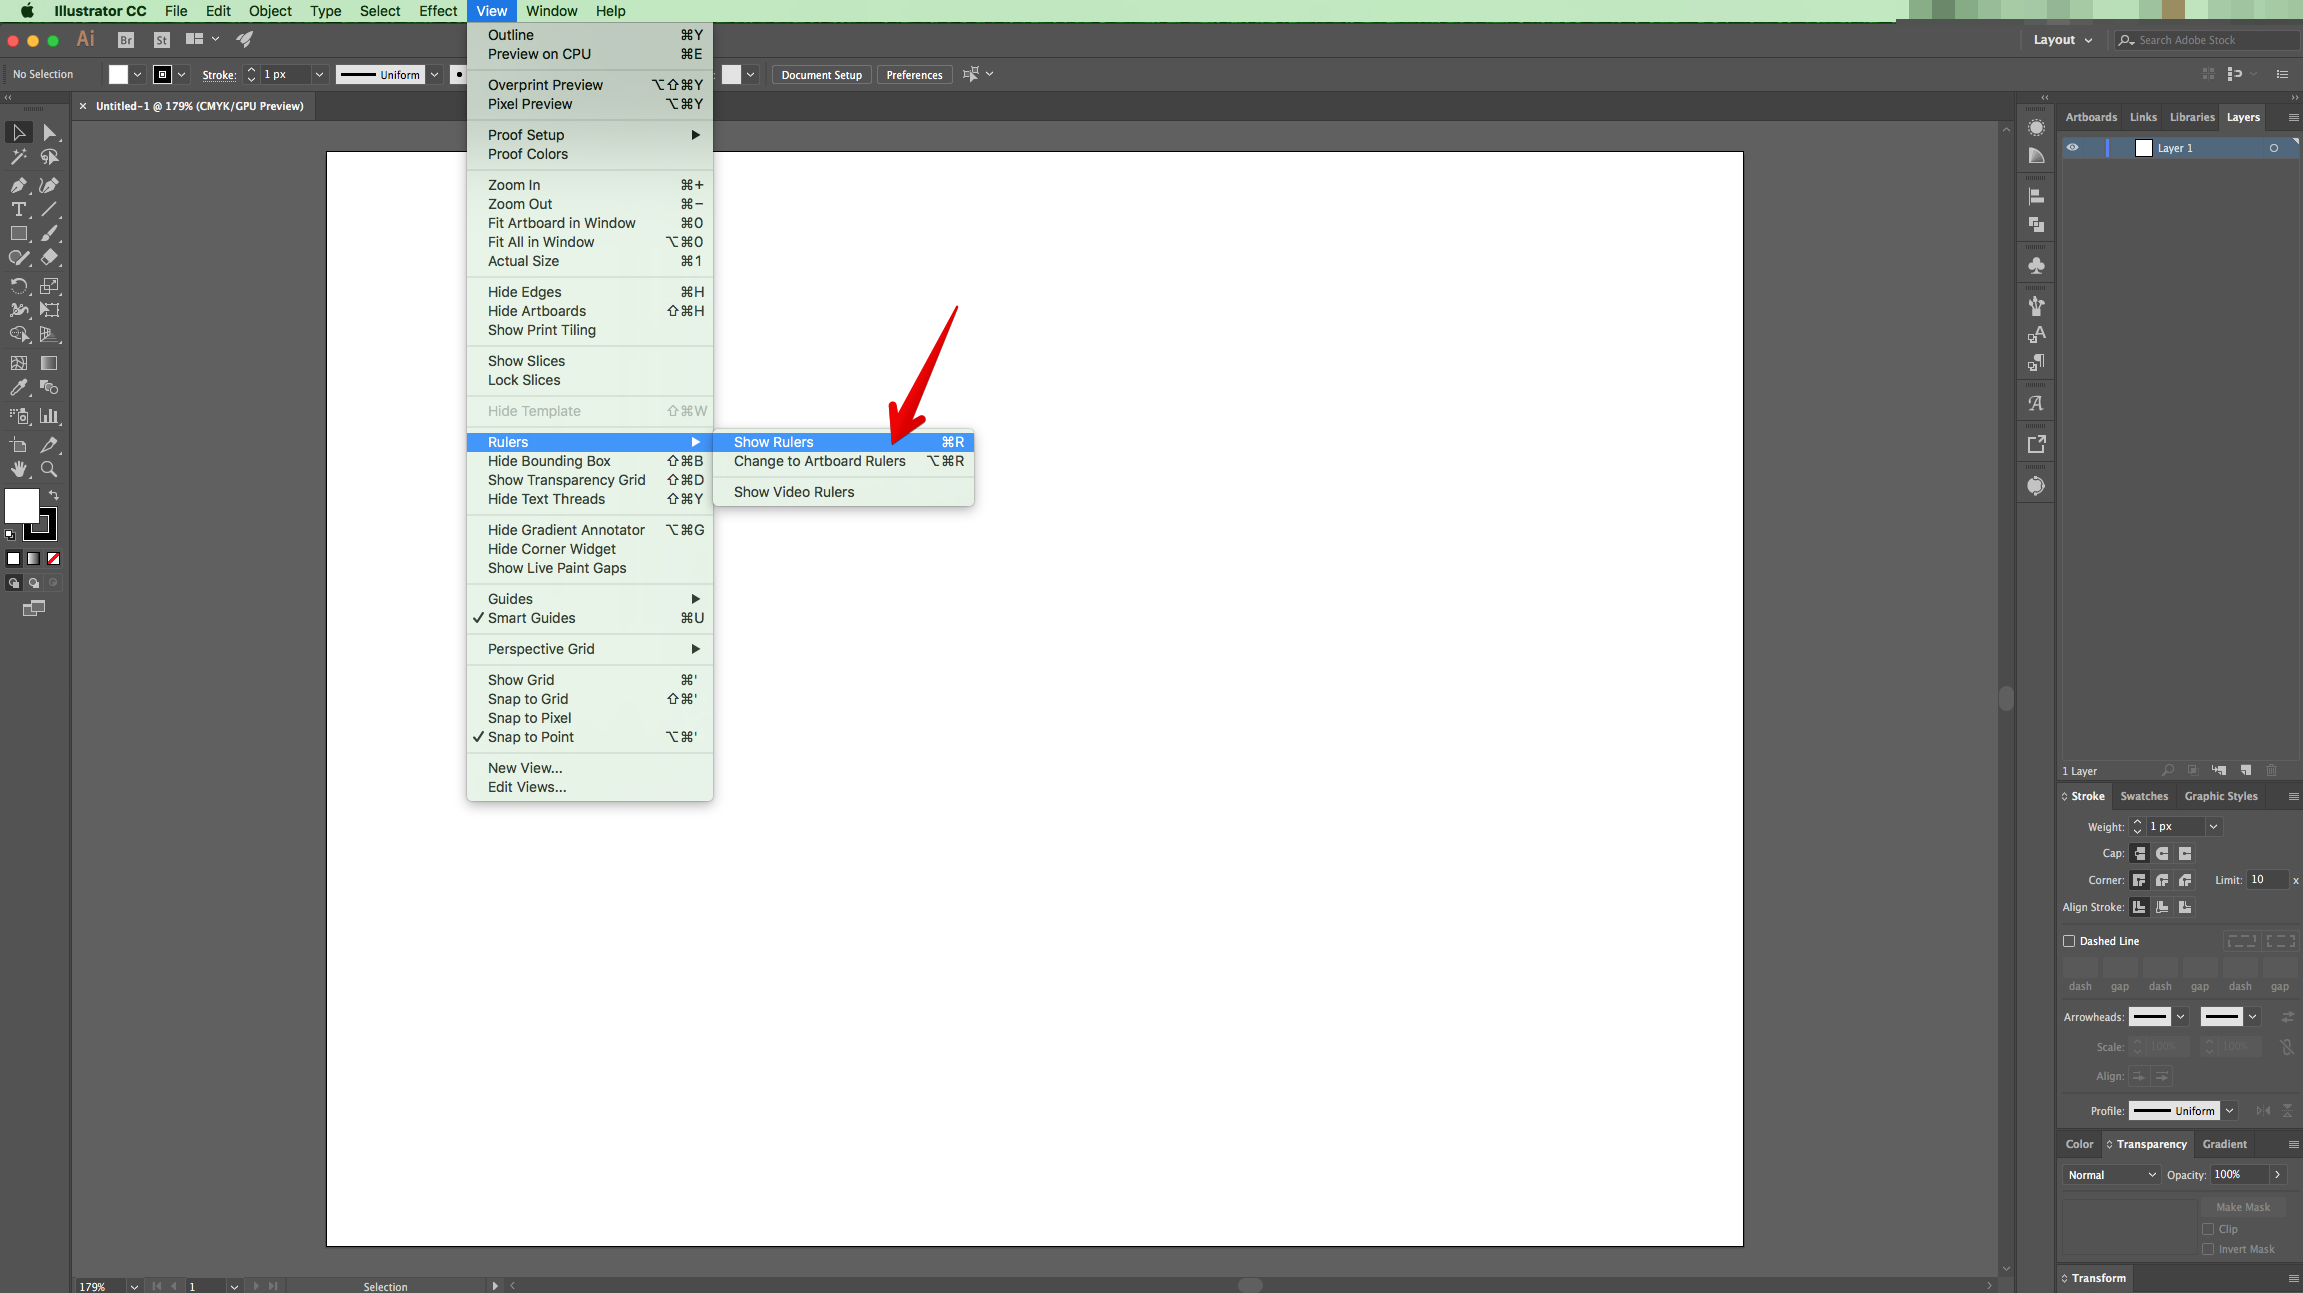
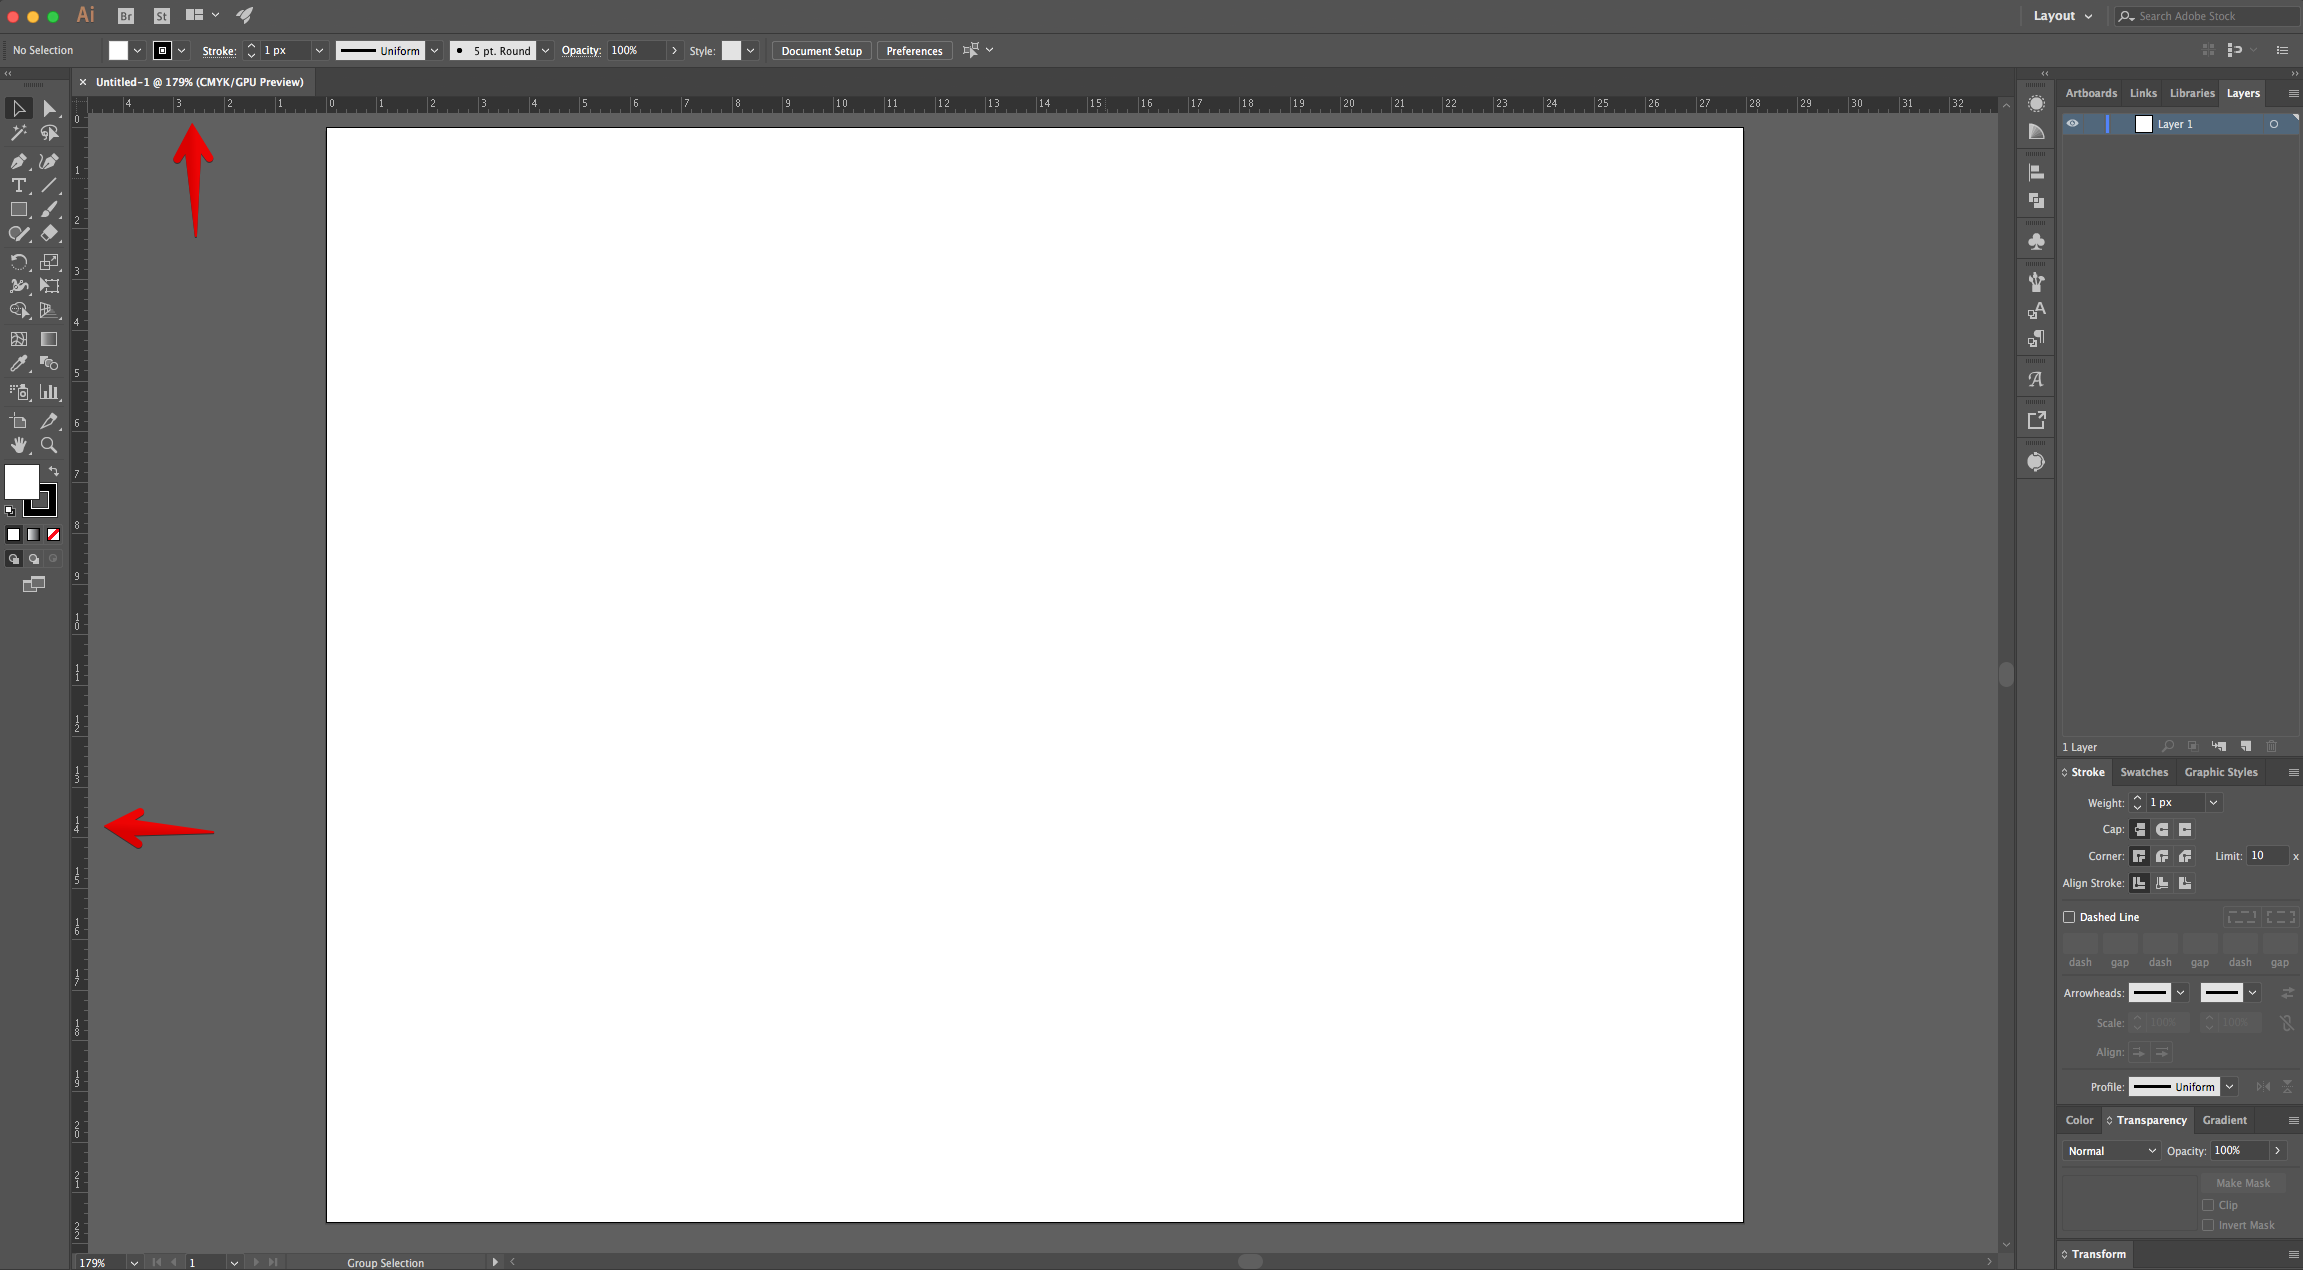
1 - In Illustrator, create a “New Document”. If the “Rulers” are not enabled, go to View > Rulers > Show Rulers (Command/Control + R) to turn them ON.
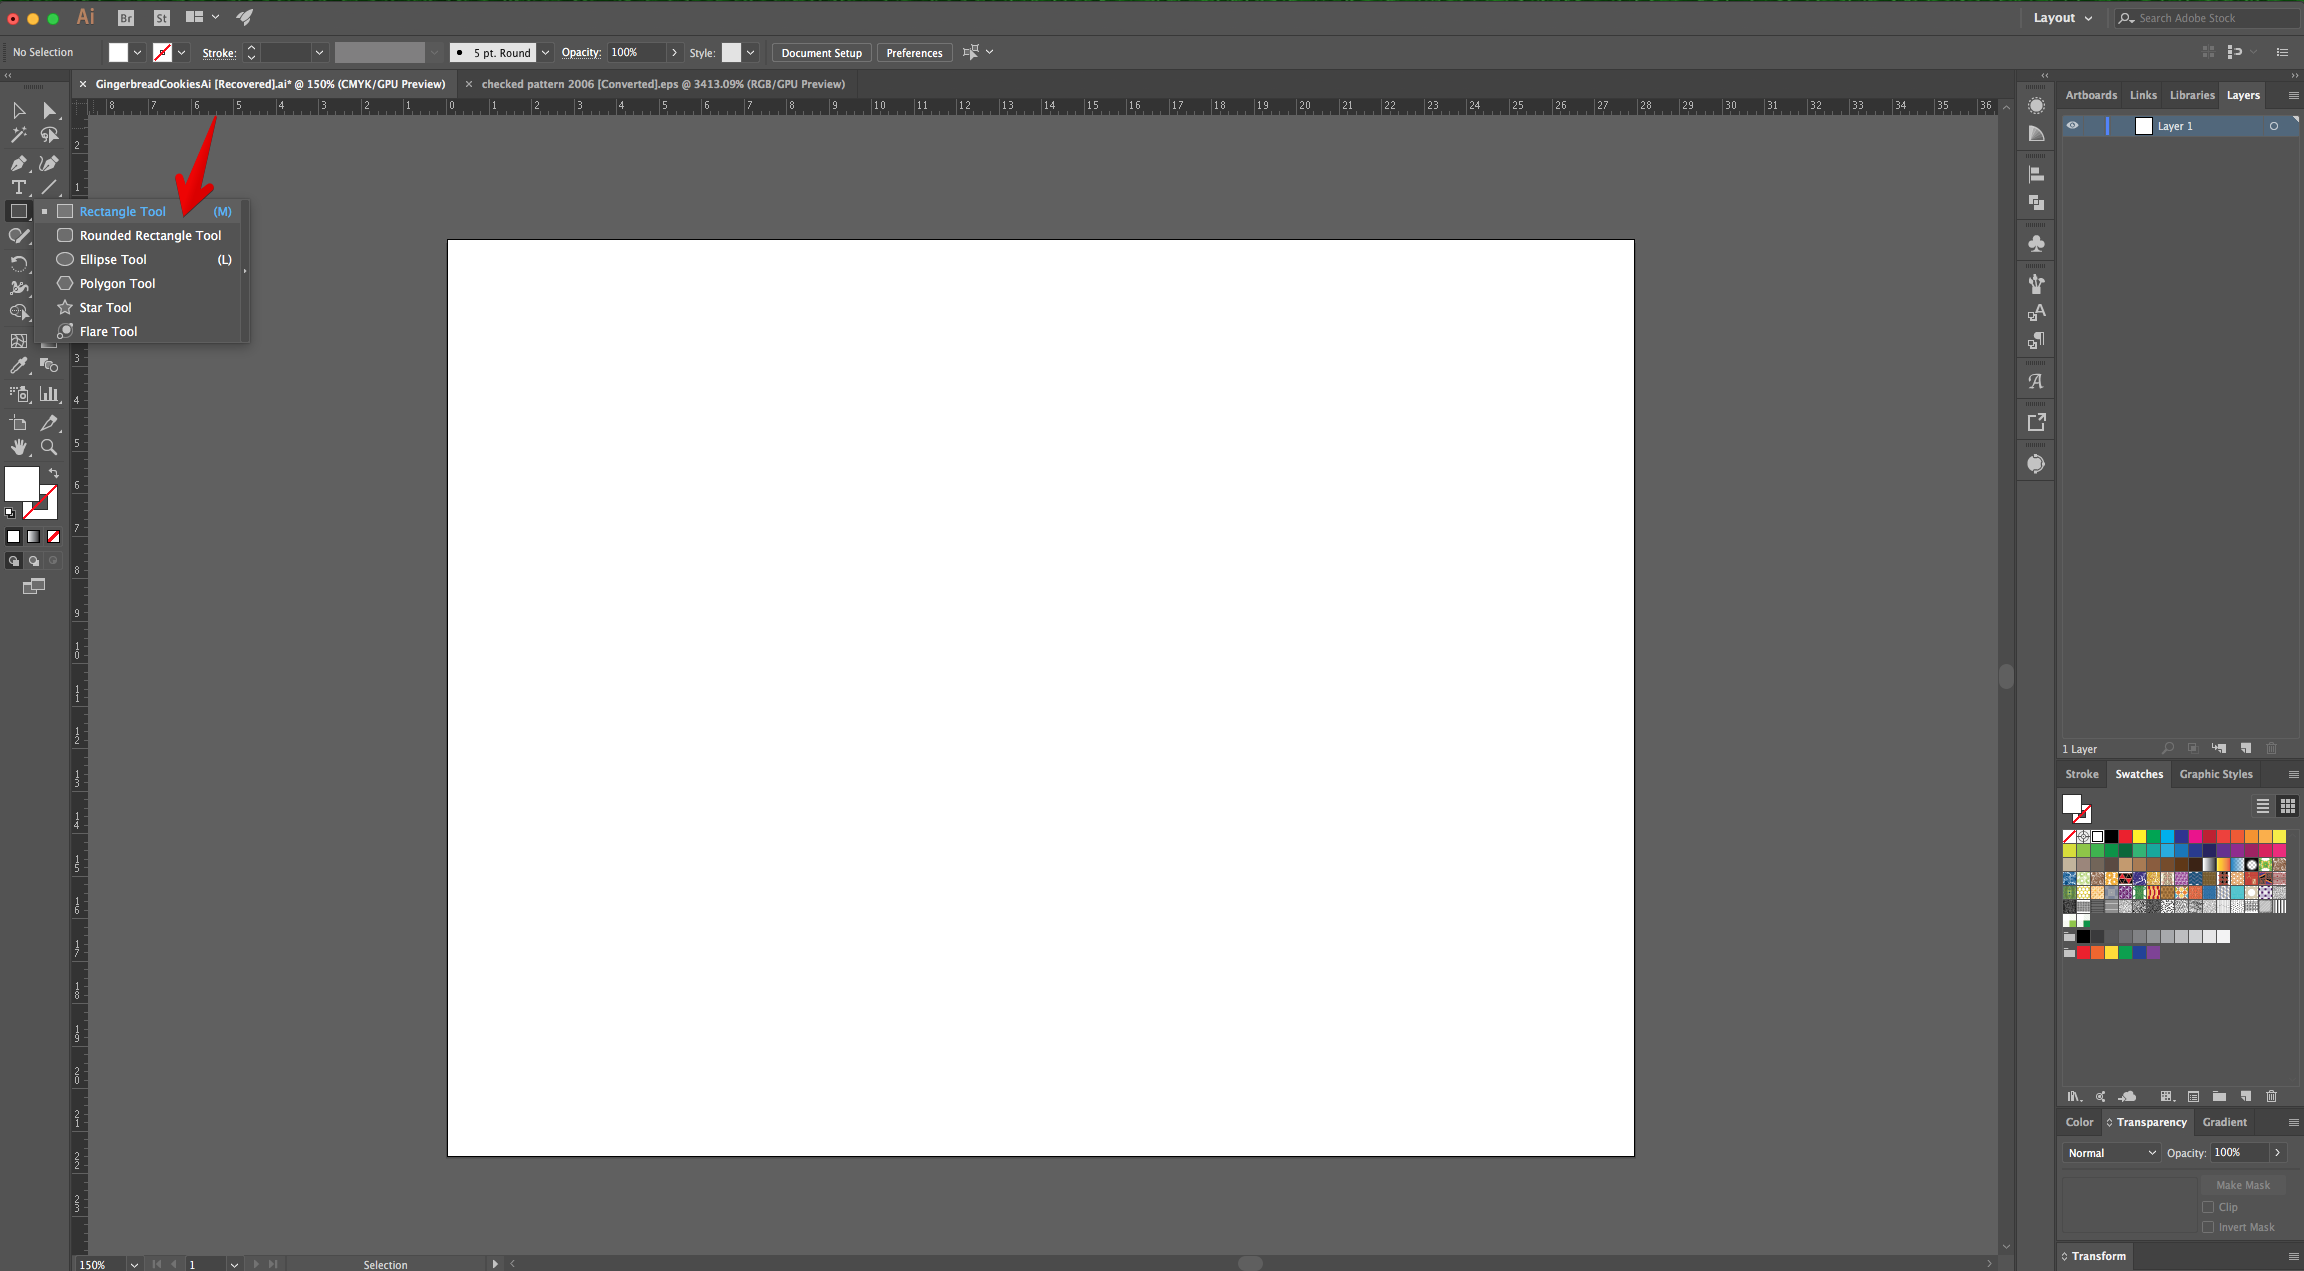
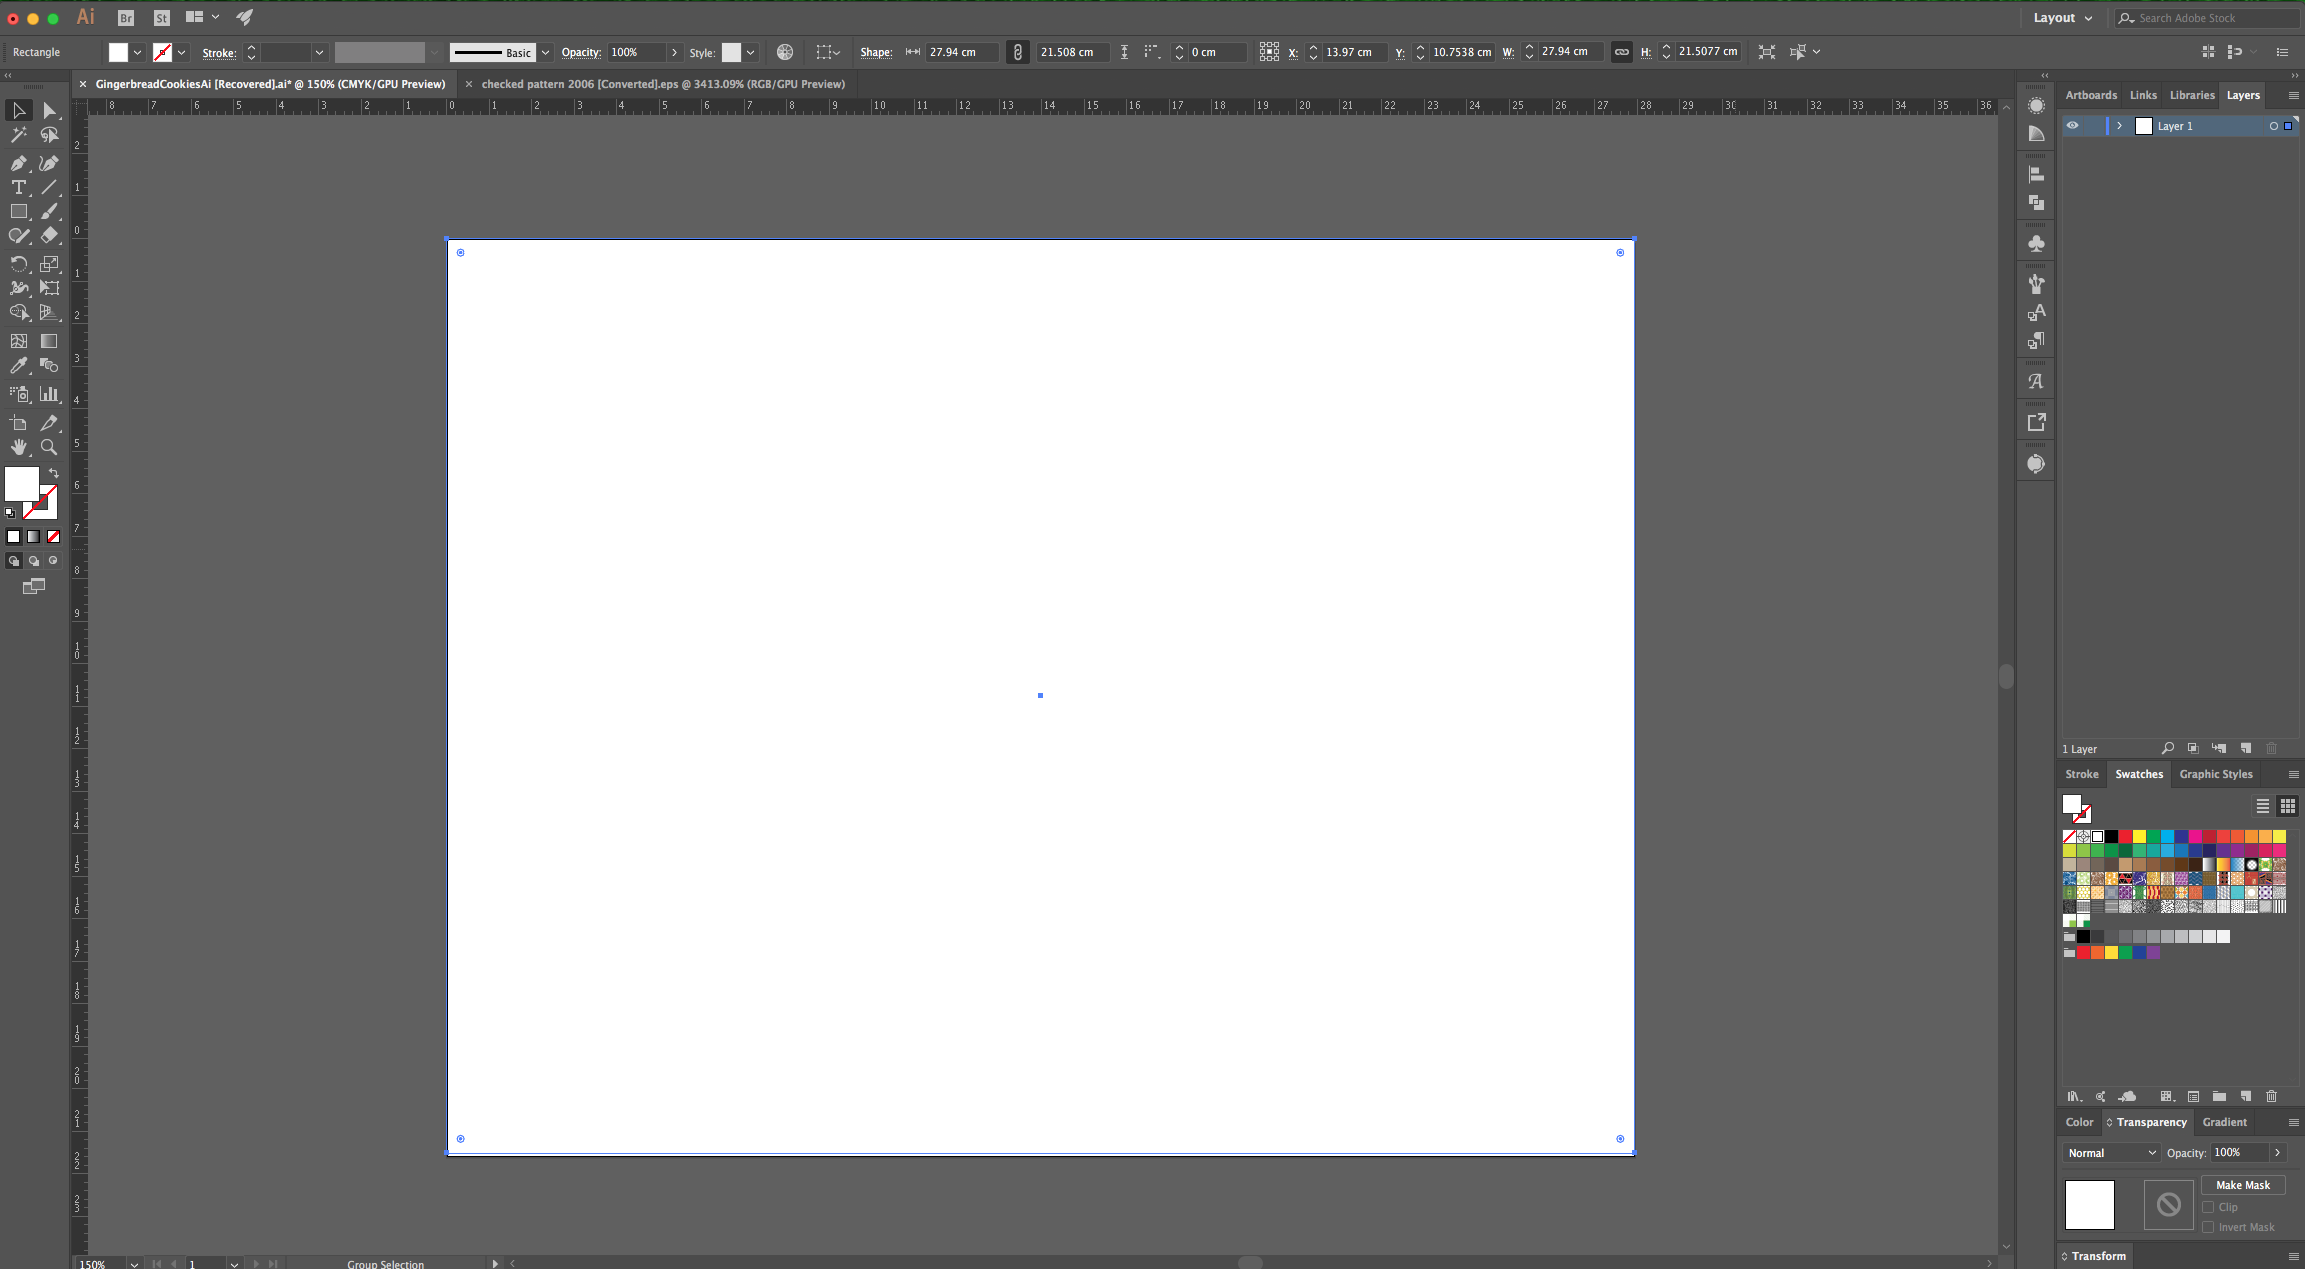
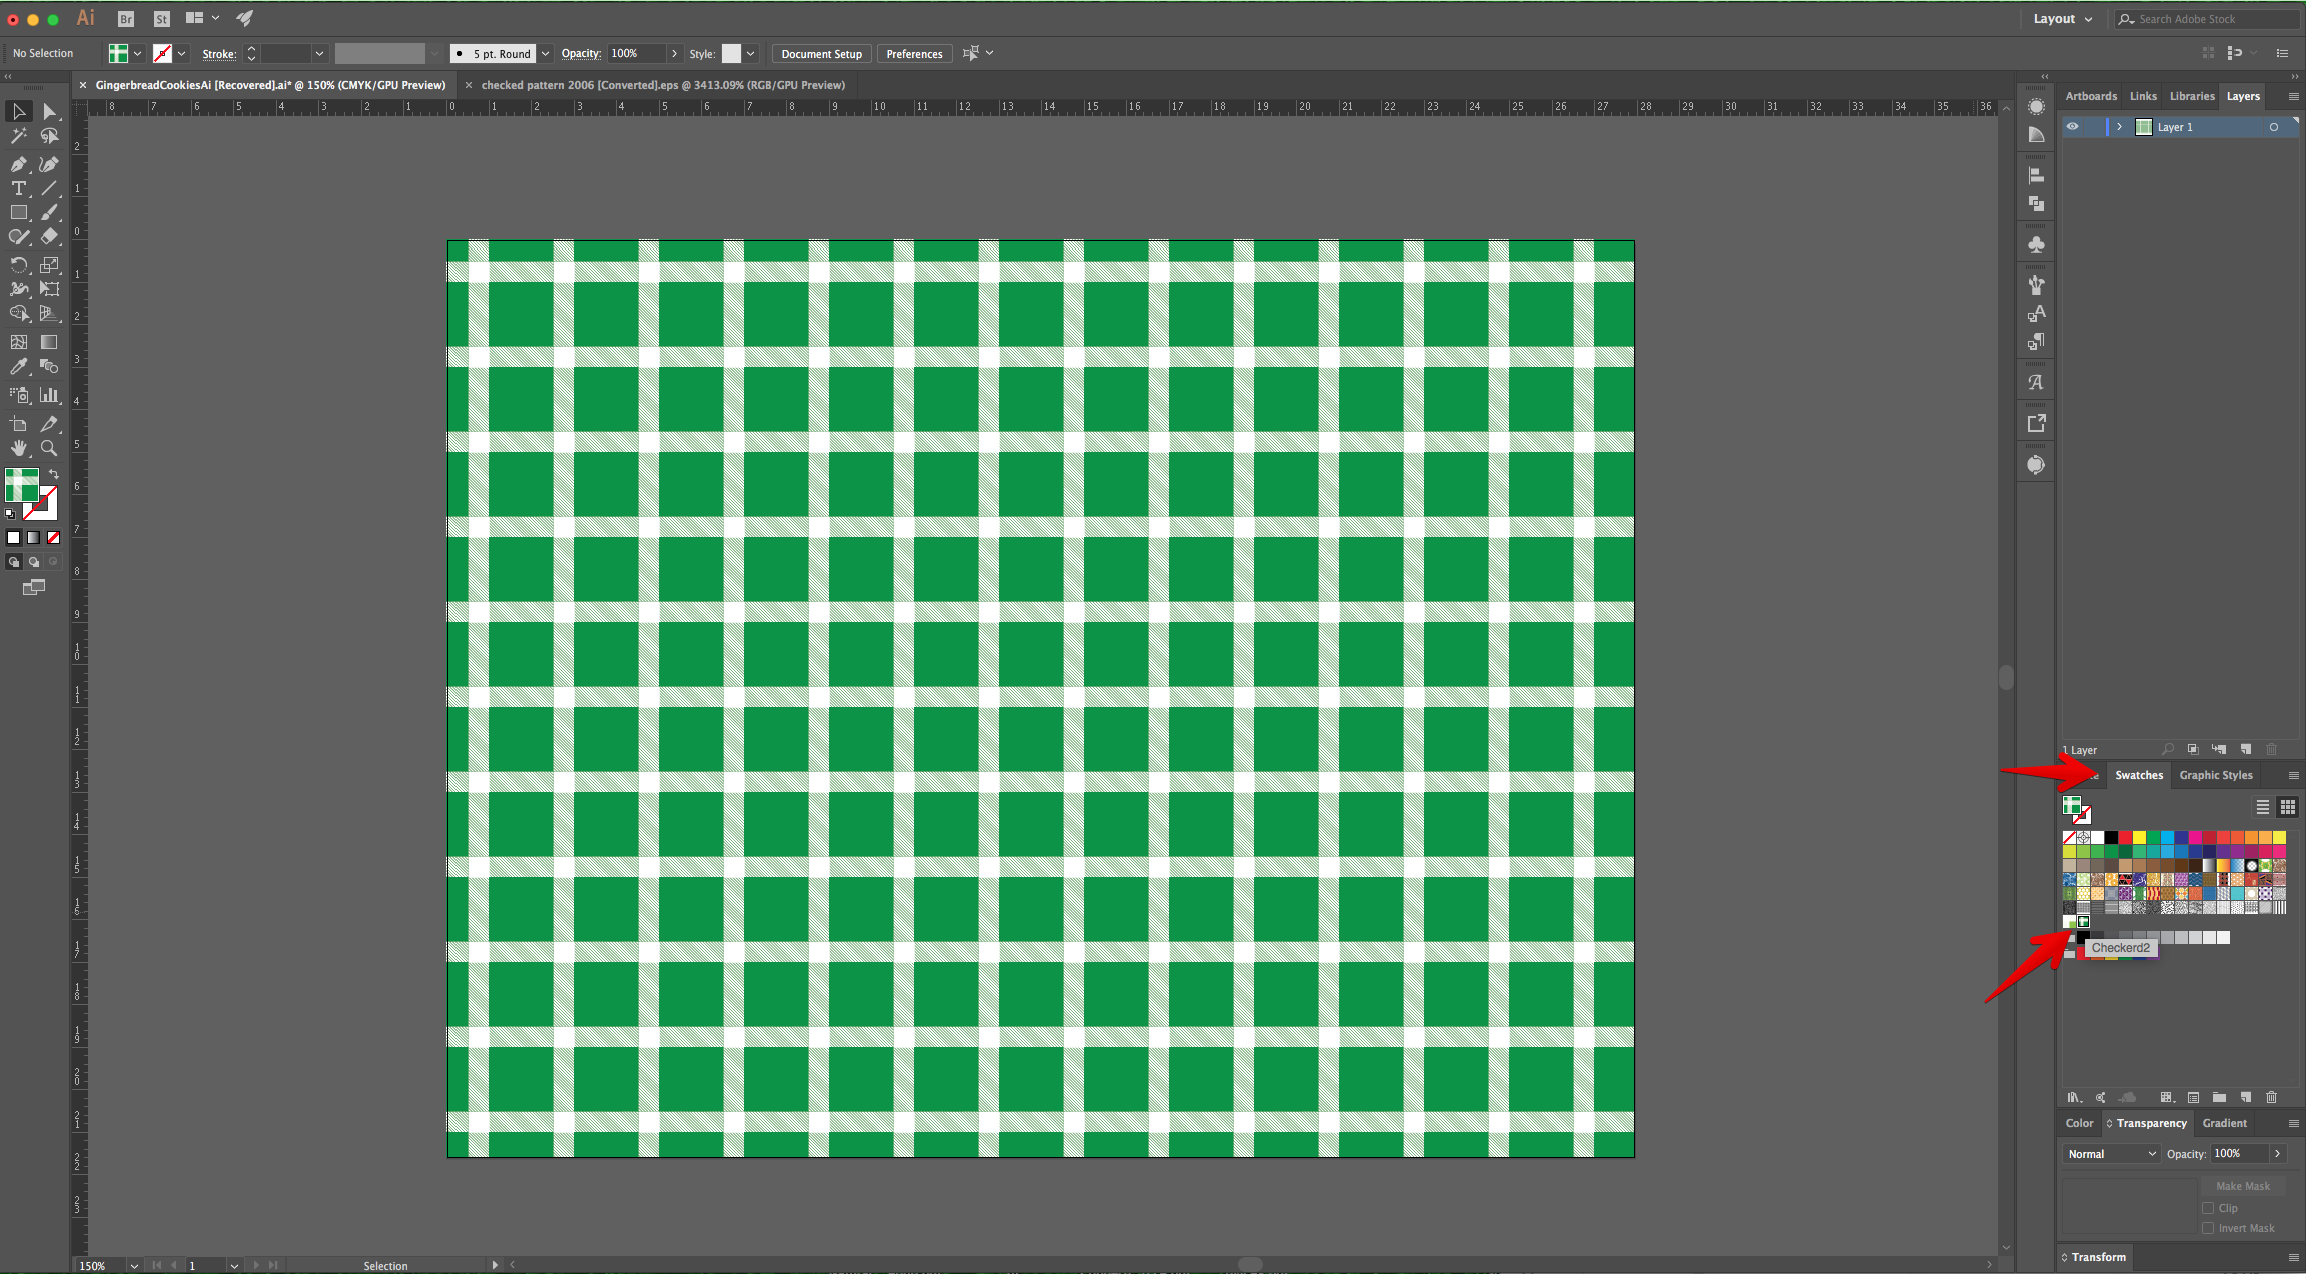
2 - Select the “Rectangle Tool” (M), and draw rectangle covering the entire “Document”. Fill it with the “Checkered” Pattern.
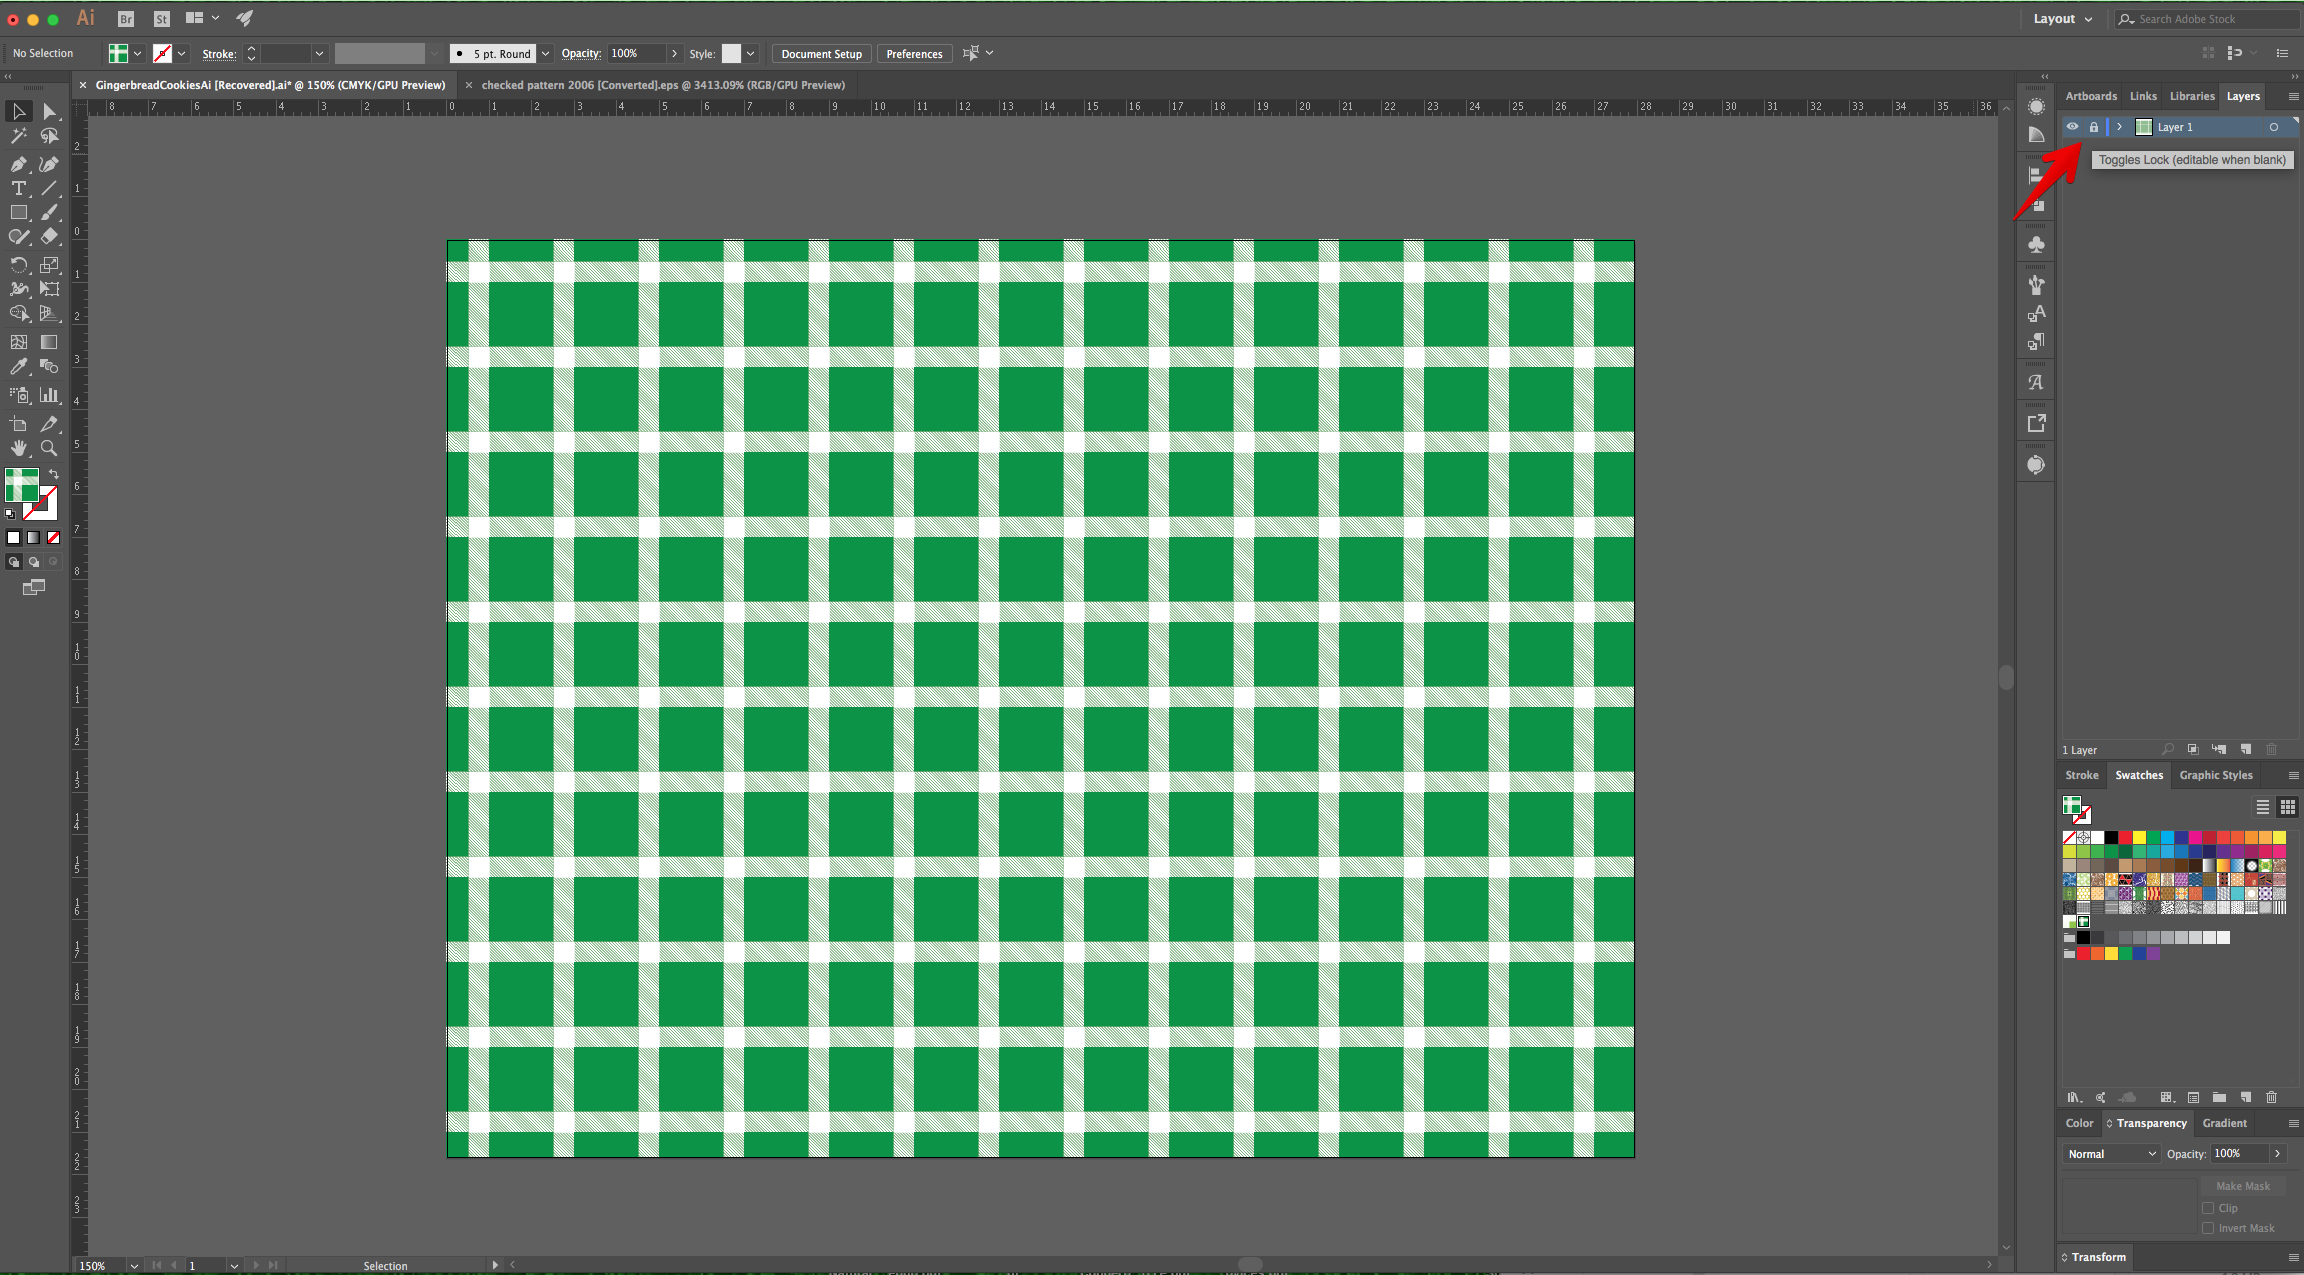
3 - Lock this Layer by clicking to the left of its thumbnail and bringing out the small Padlock icon or by going to Object > Lock > Selection (Command/Control + 2). “Create New Layer” by clicking on the button at the bottom of the “Layers Panel”.
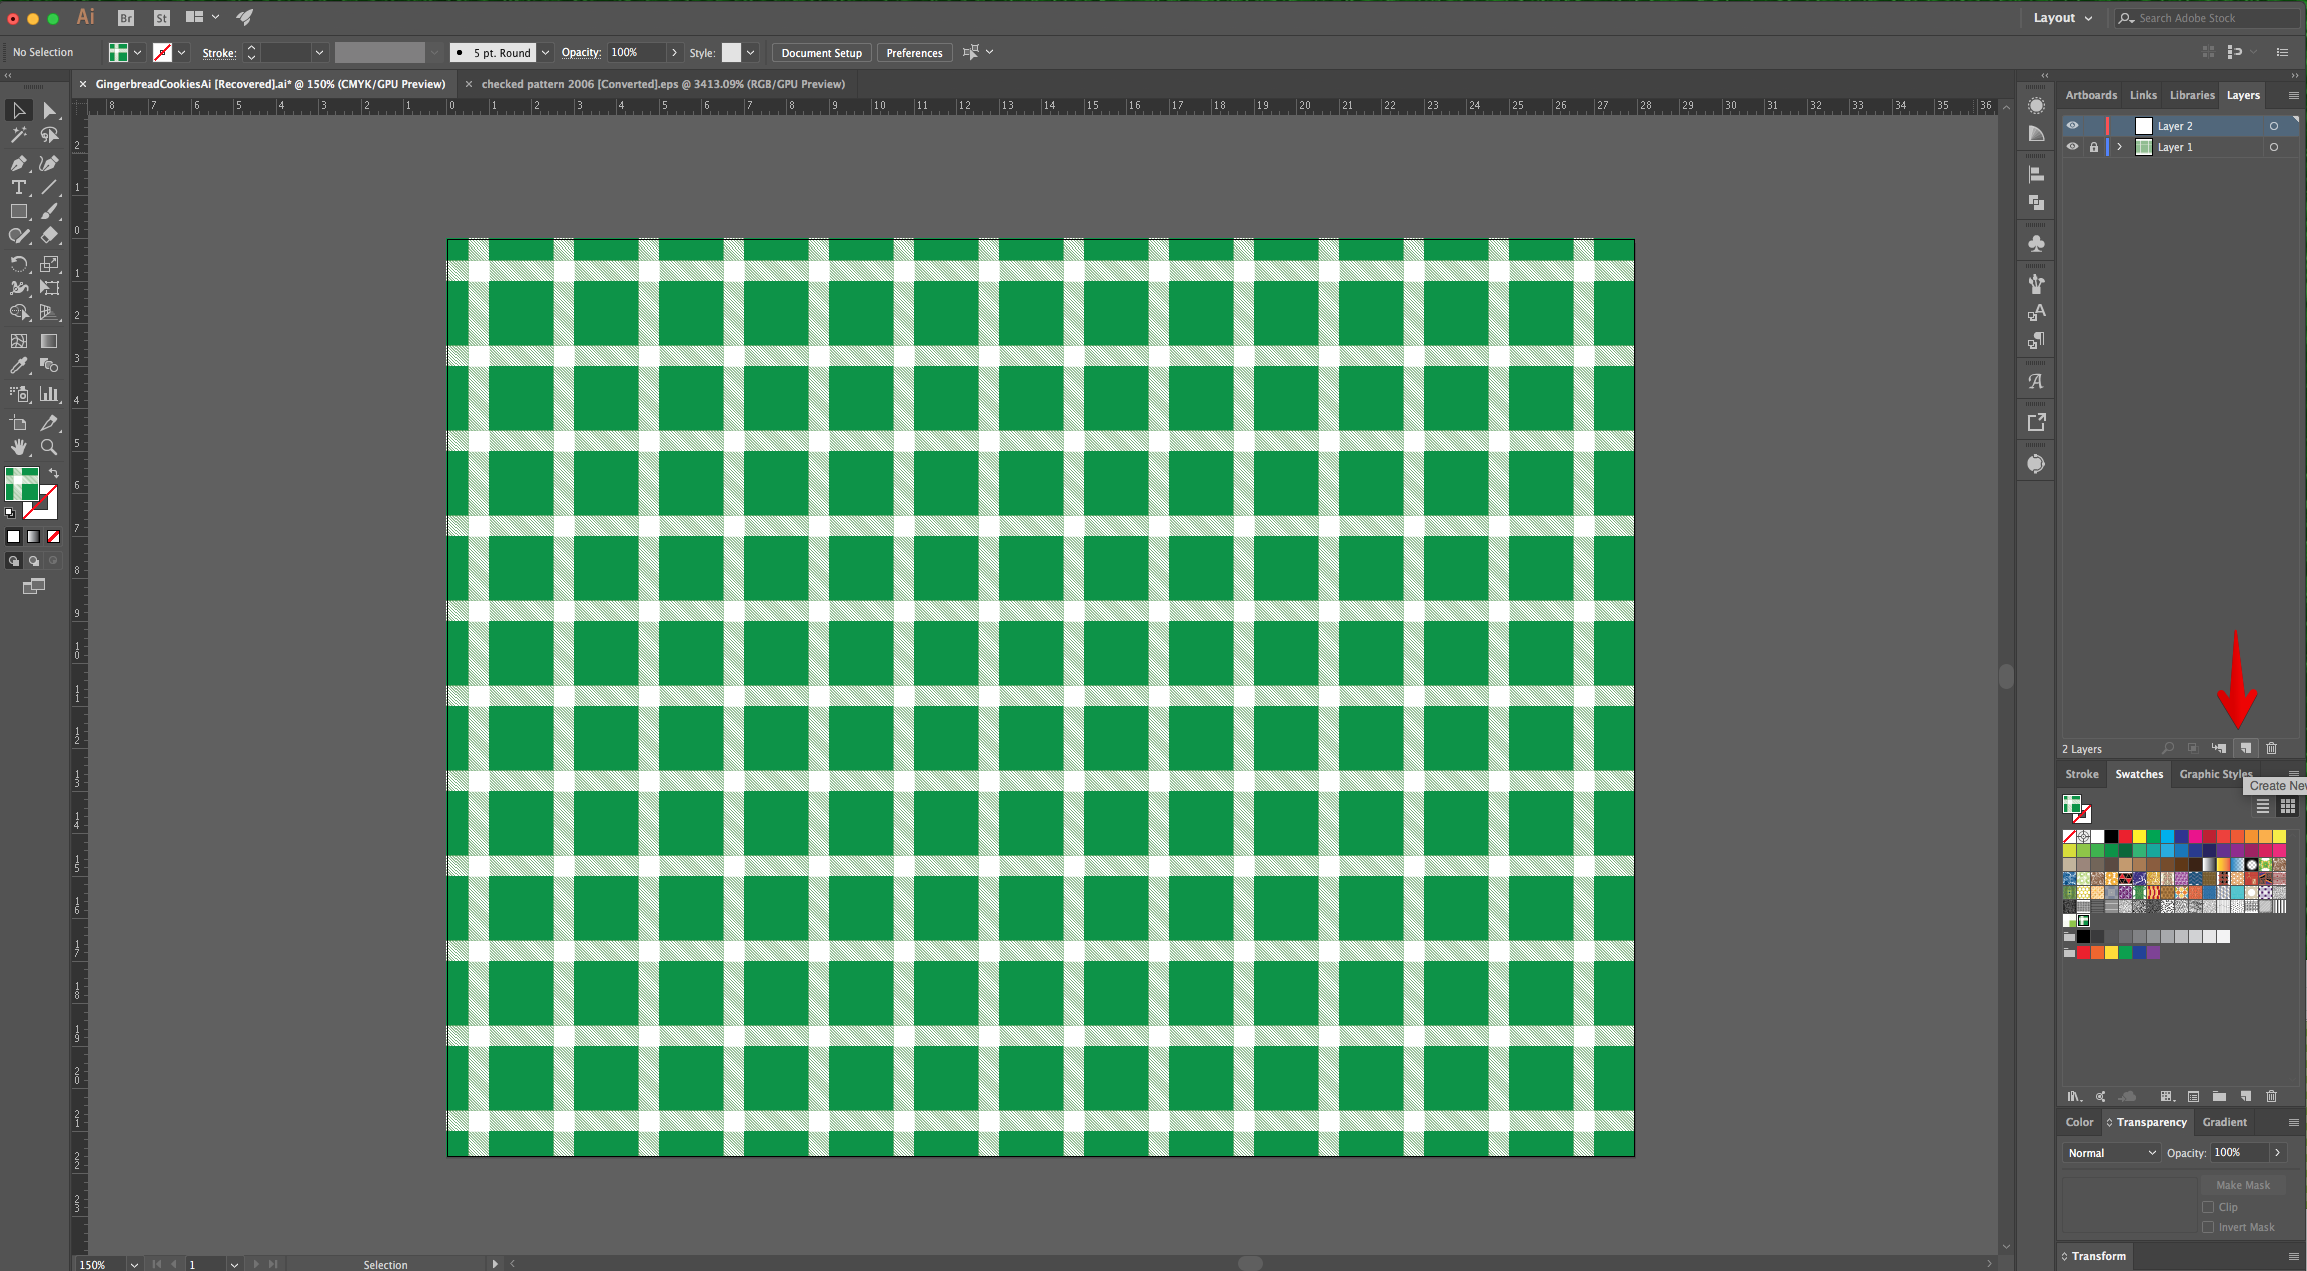
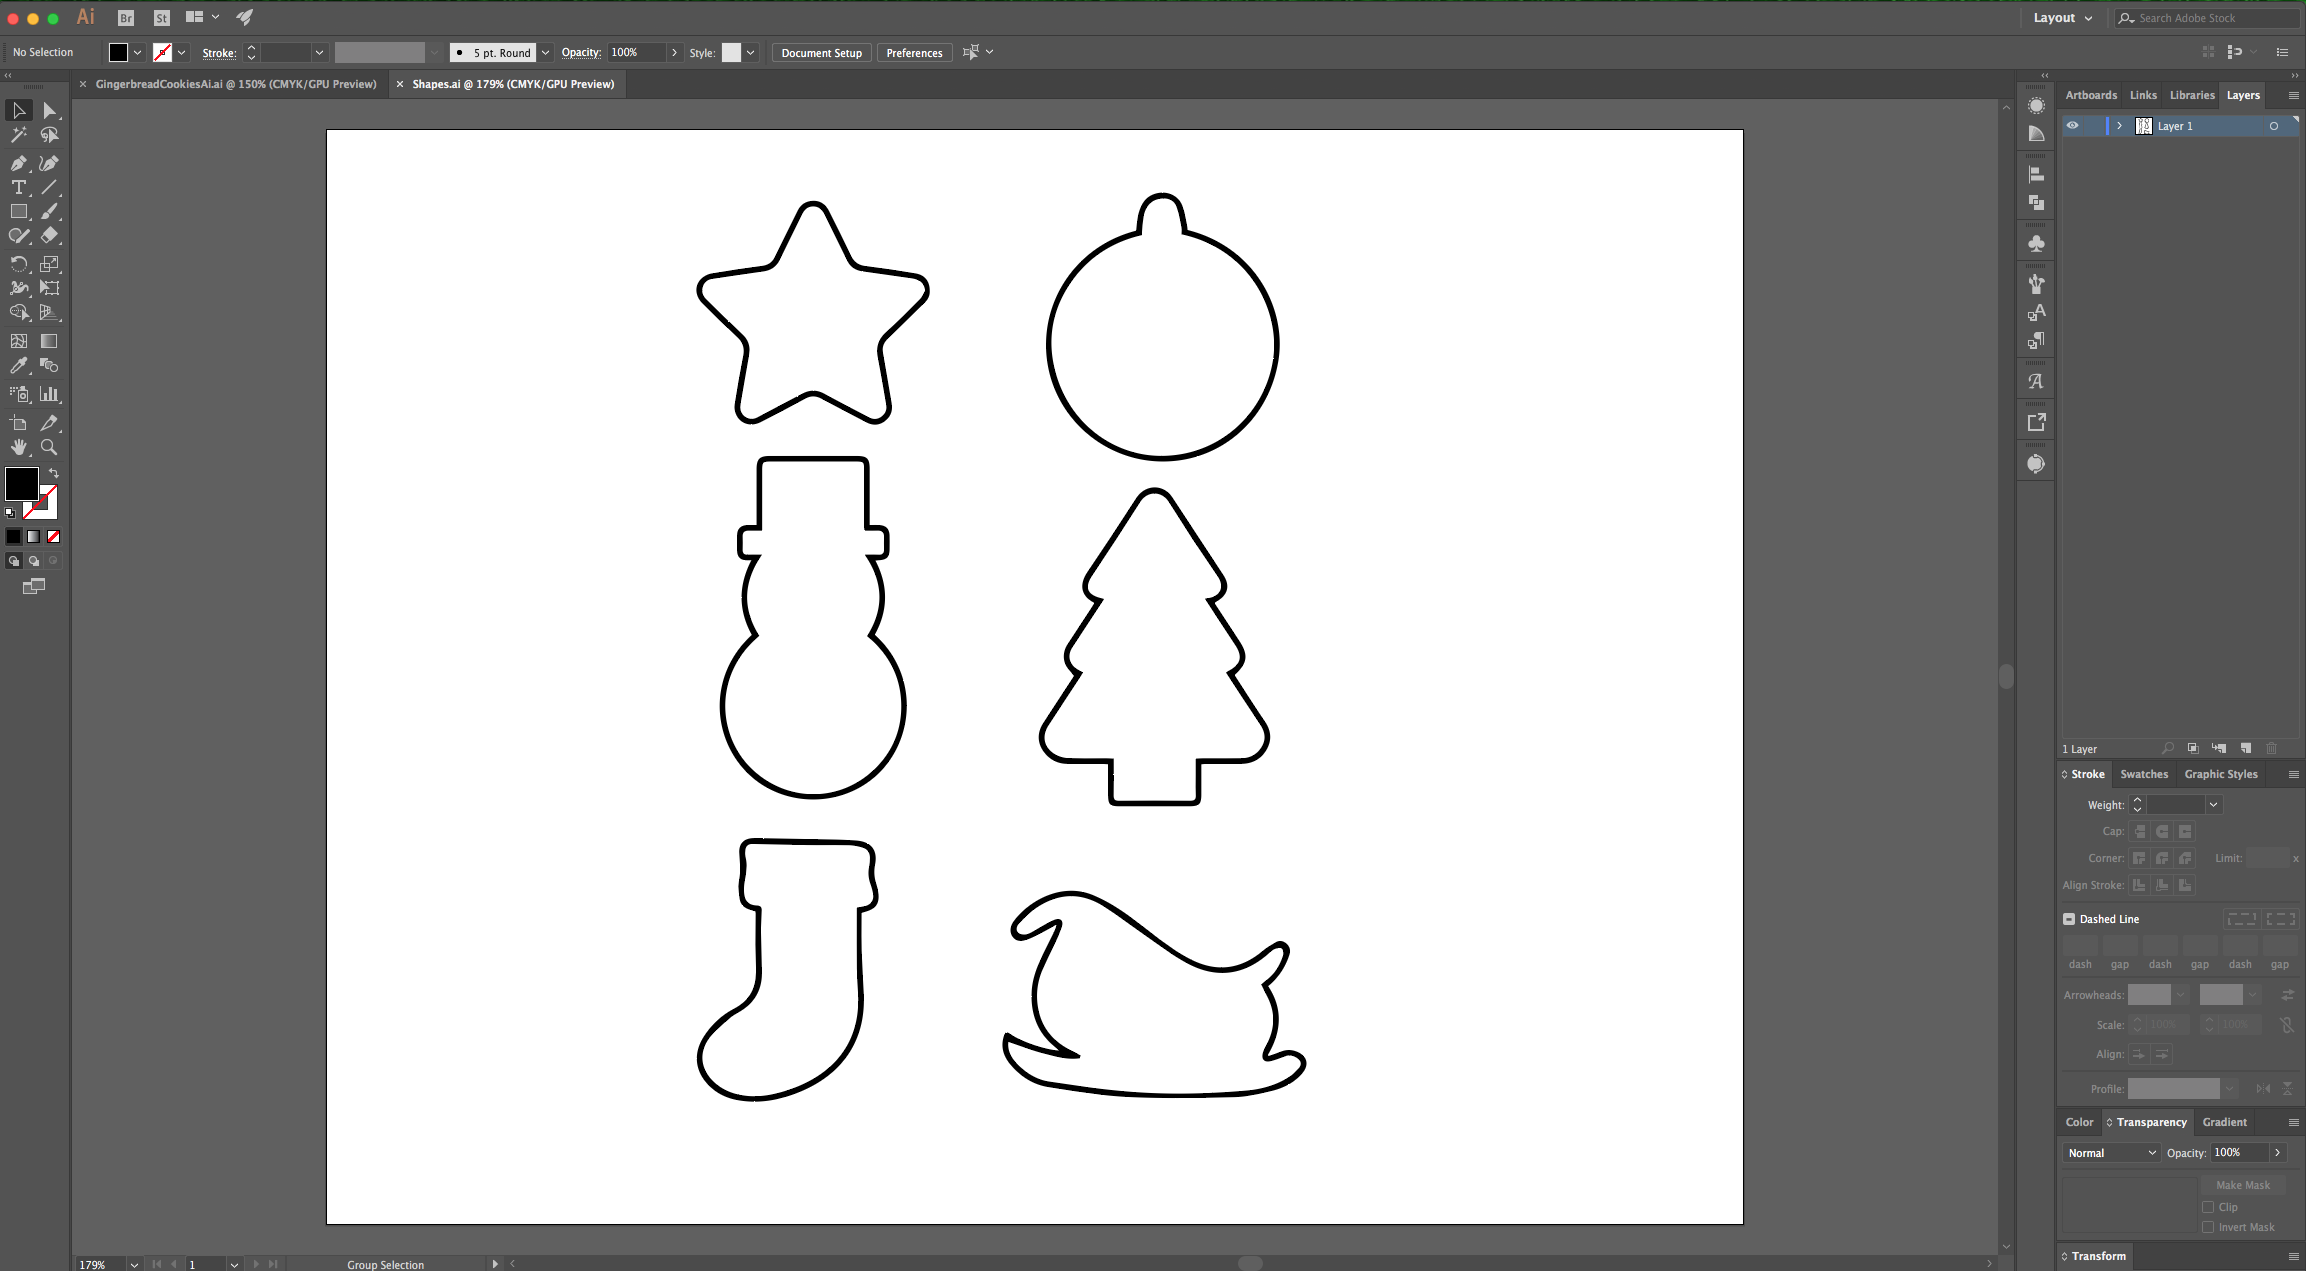
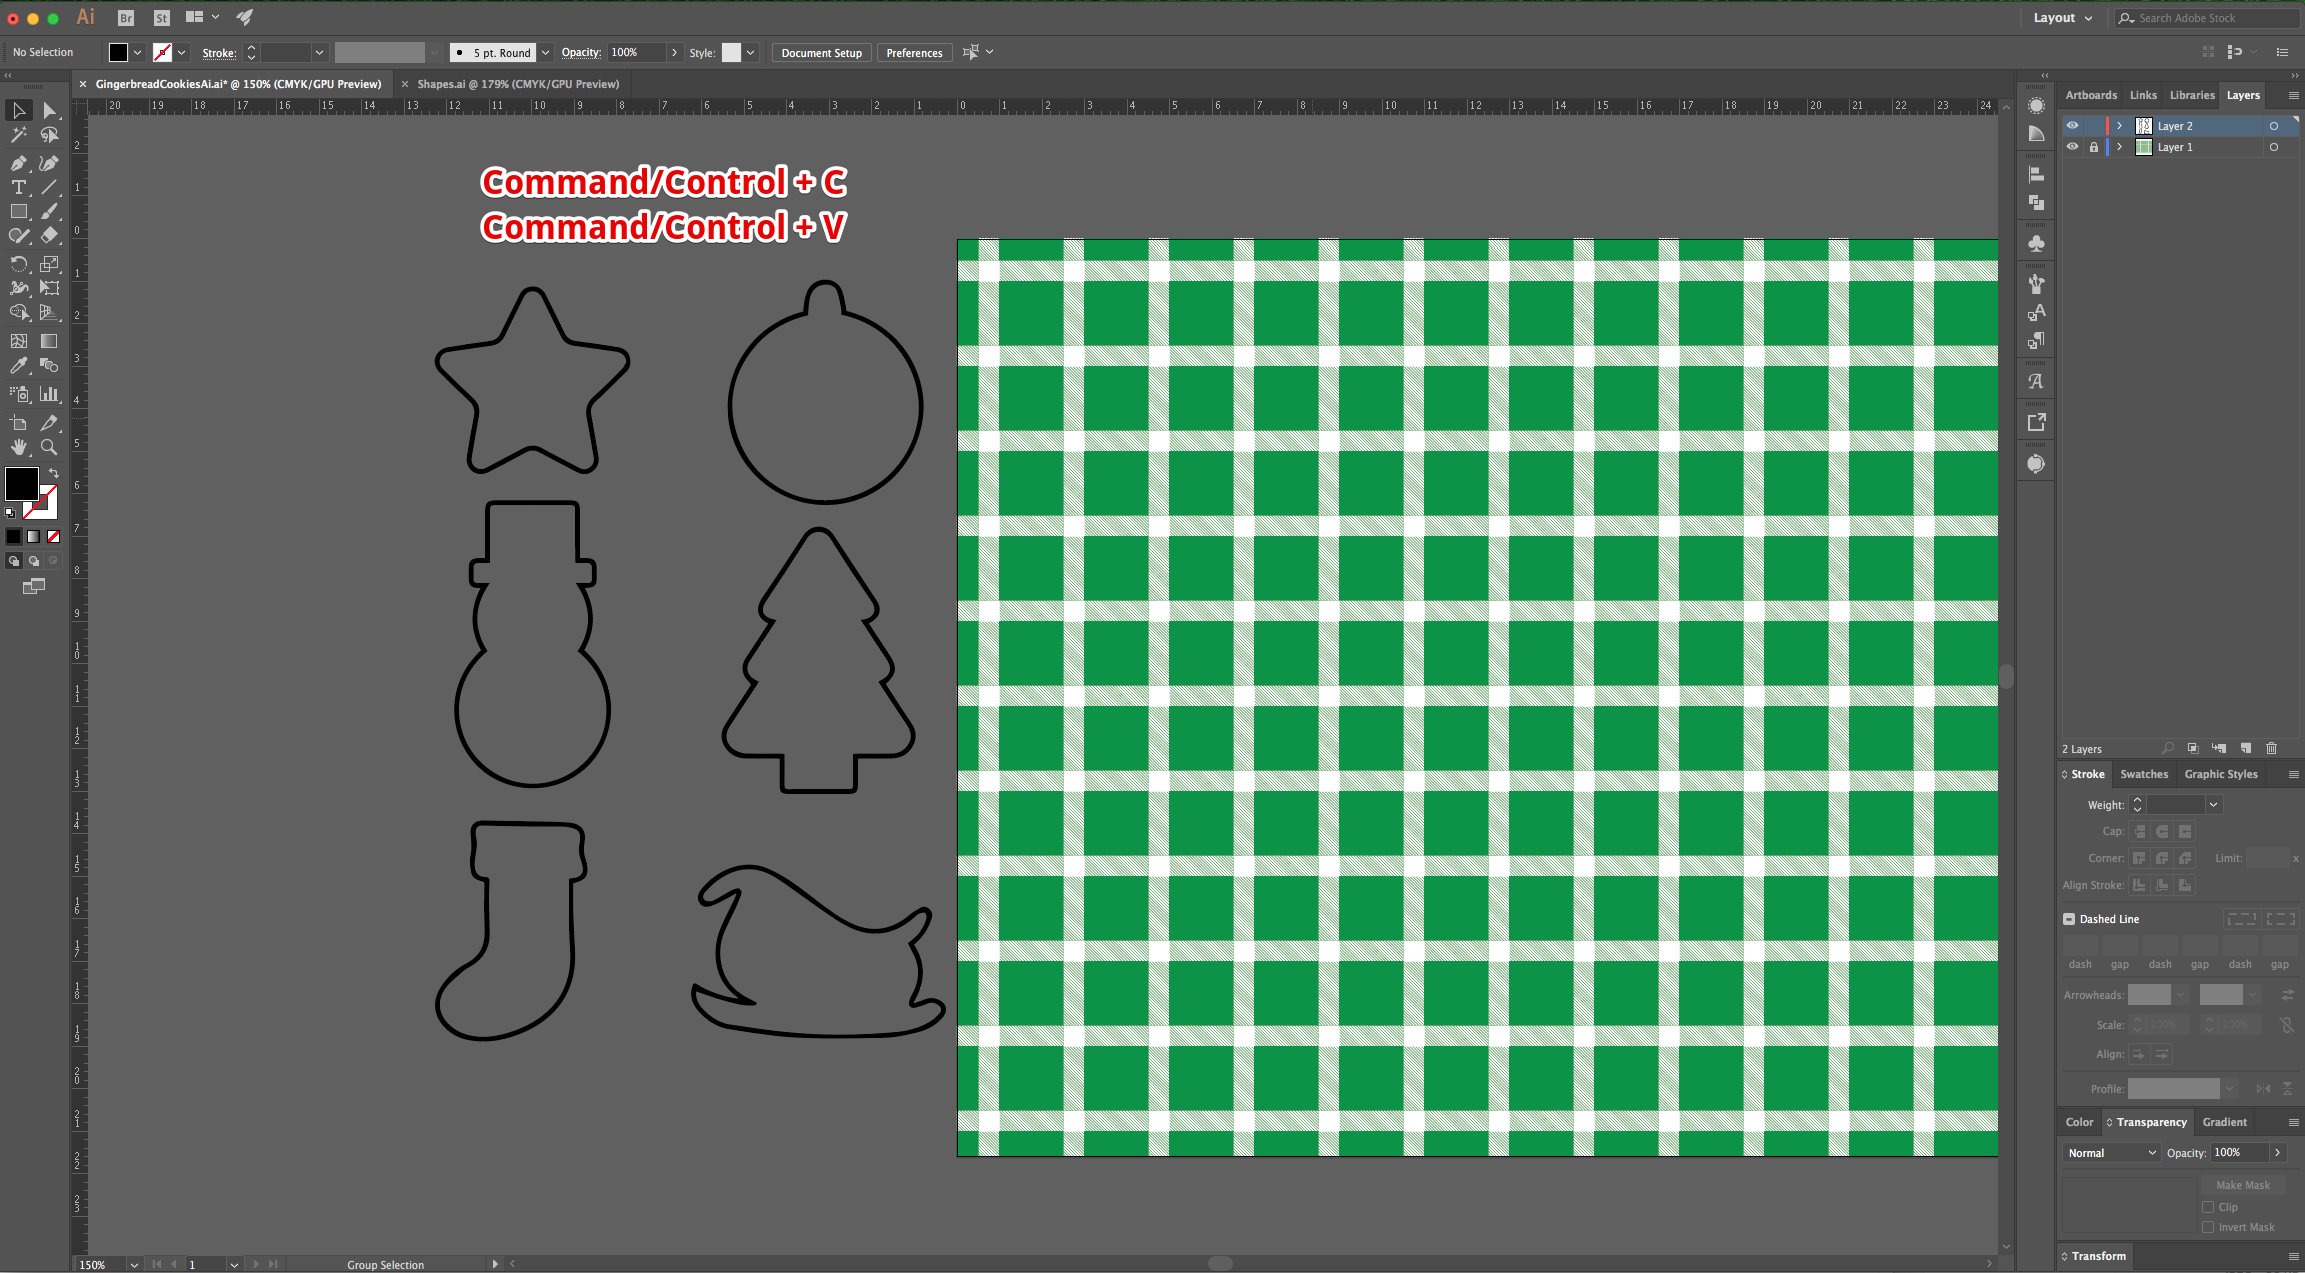
4 - Open the “Shapes” file, “Copy” (Command/Control + C) and “Paste” (Command/Control + V) them into your original “Document”.
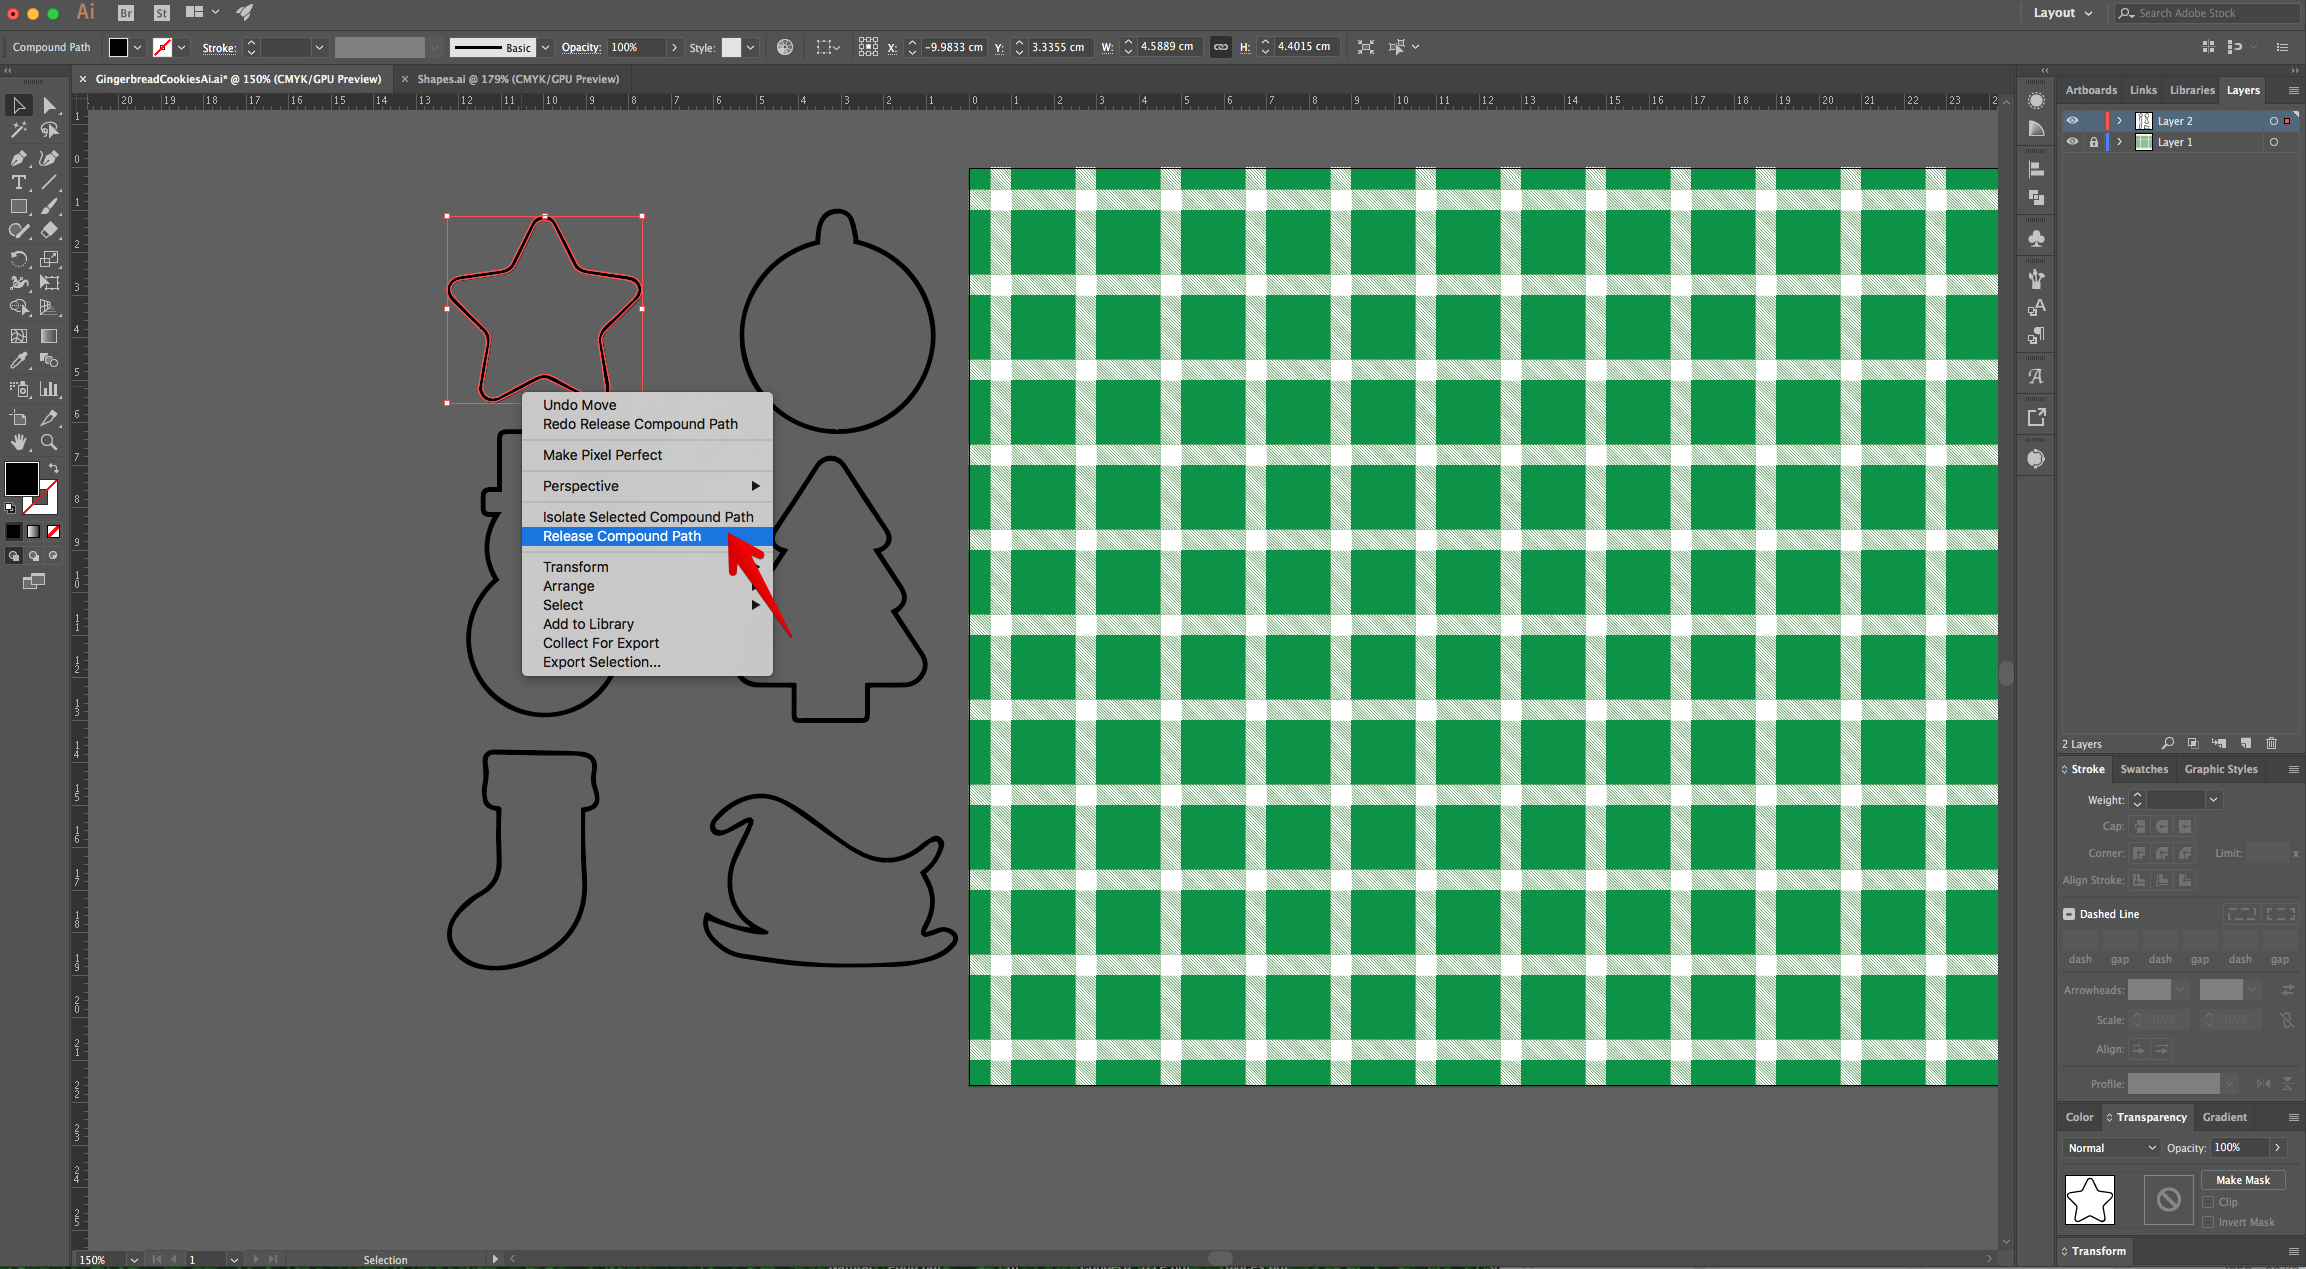
5 - Our shapes are in a “Compound Path” and we need to release them. Right-click on top and choose “Release Compound Path”. You should end with two shapes (one slightly smaller than the other). Repeat with all the shapes.
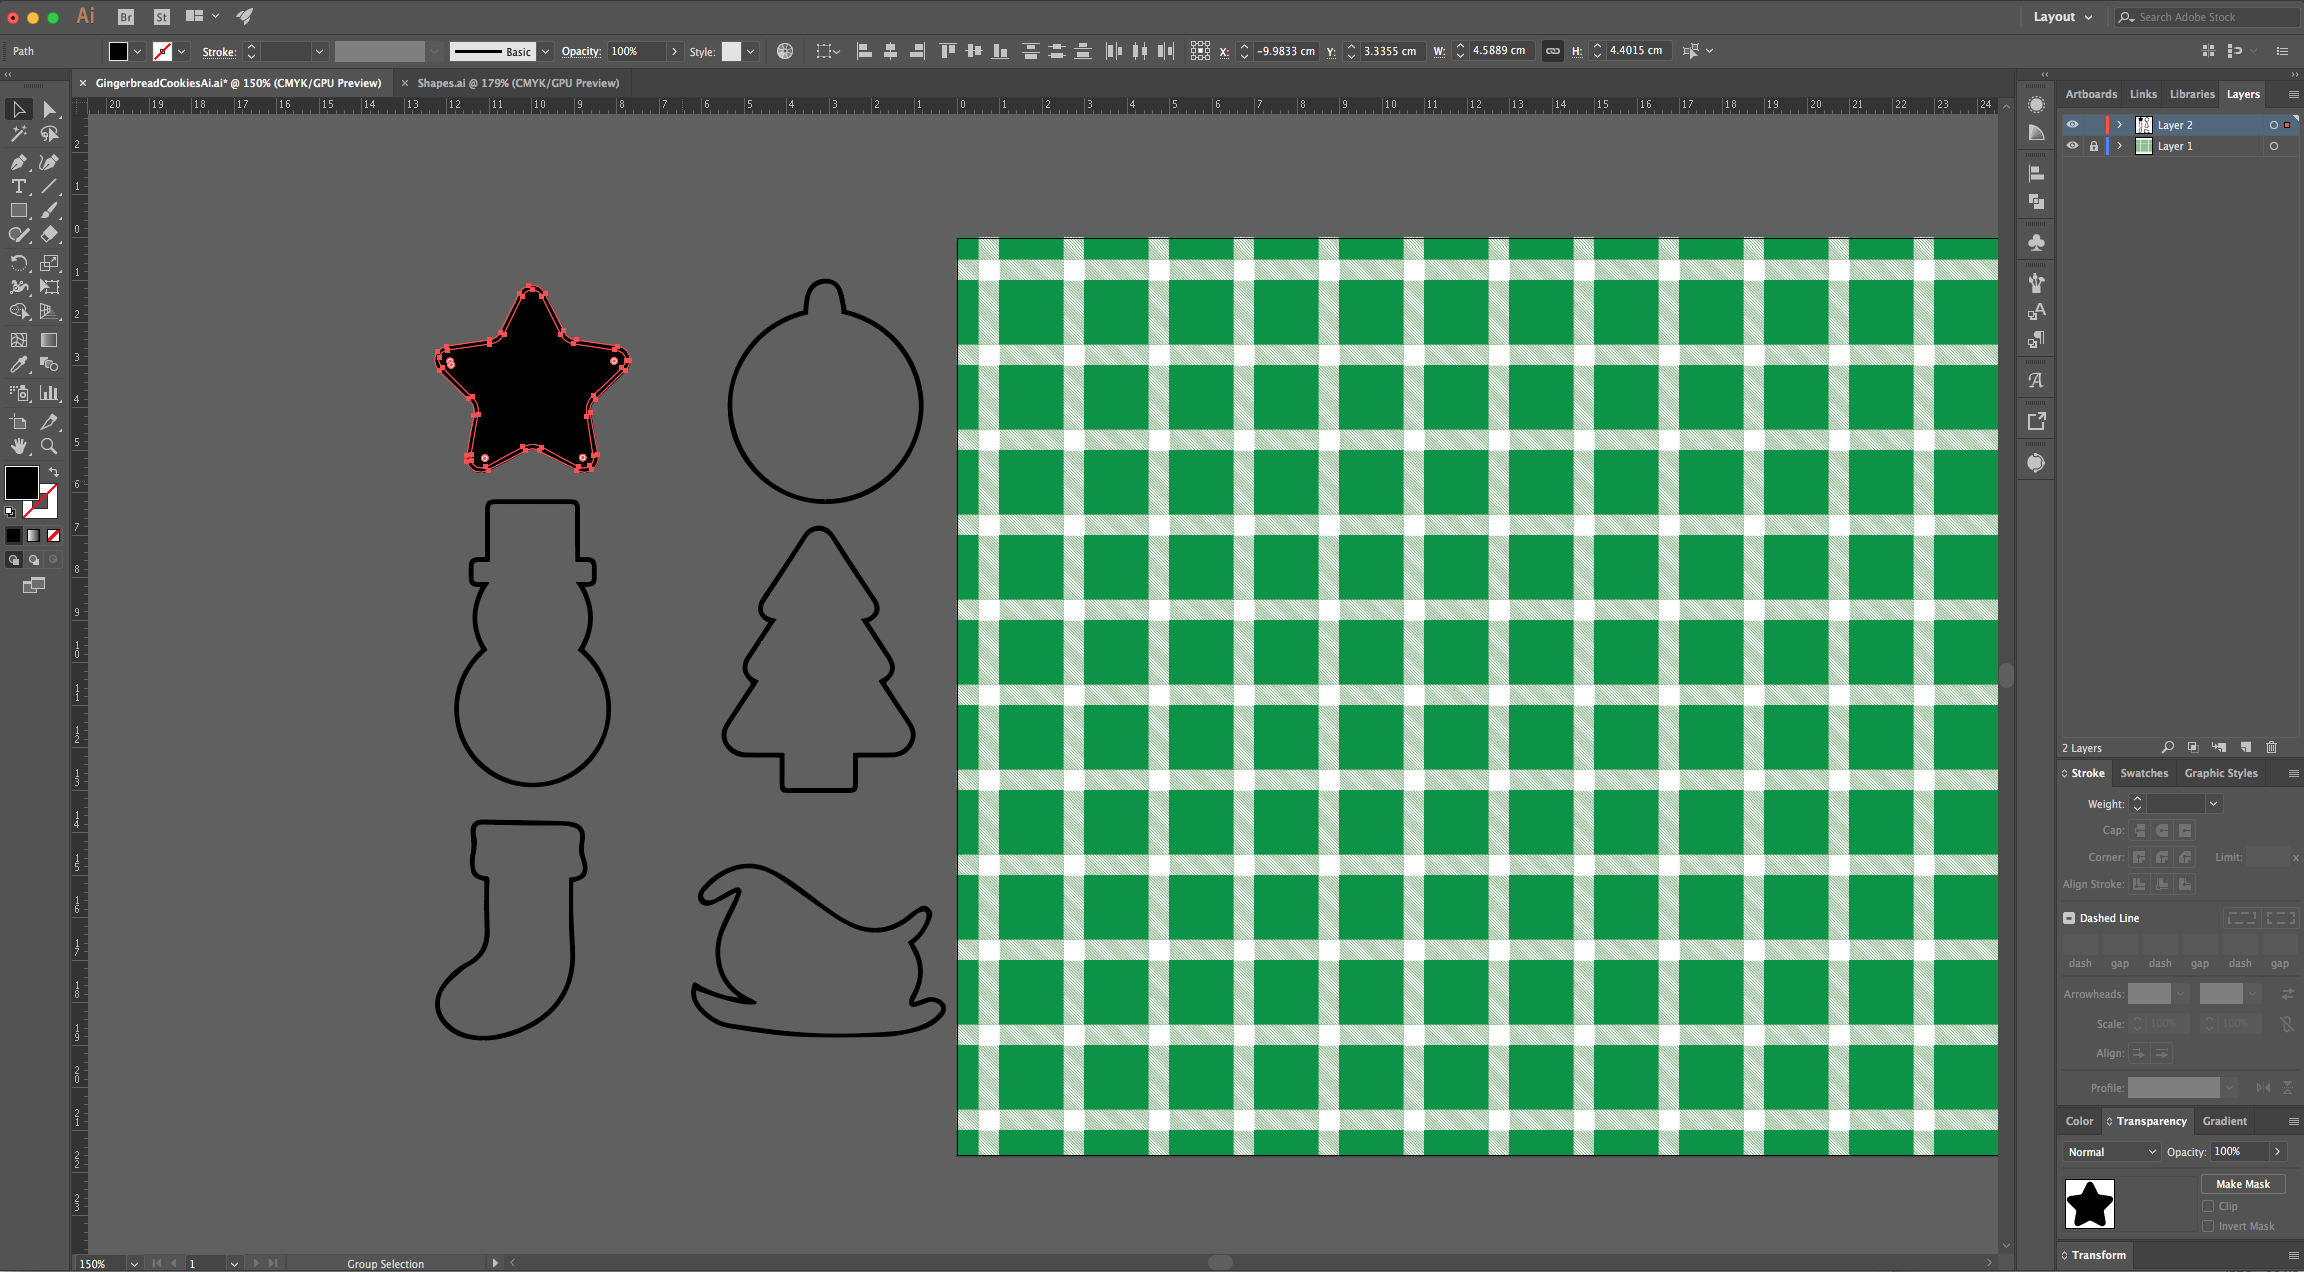
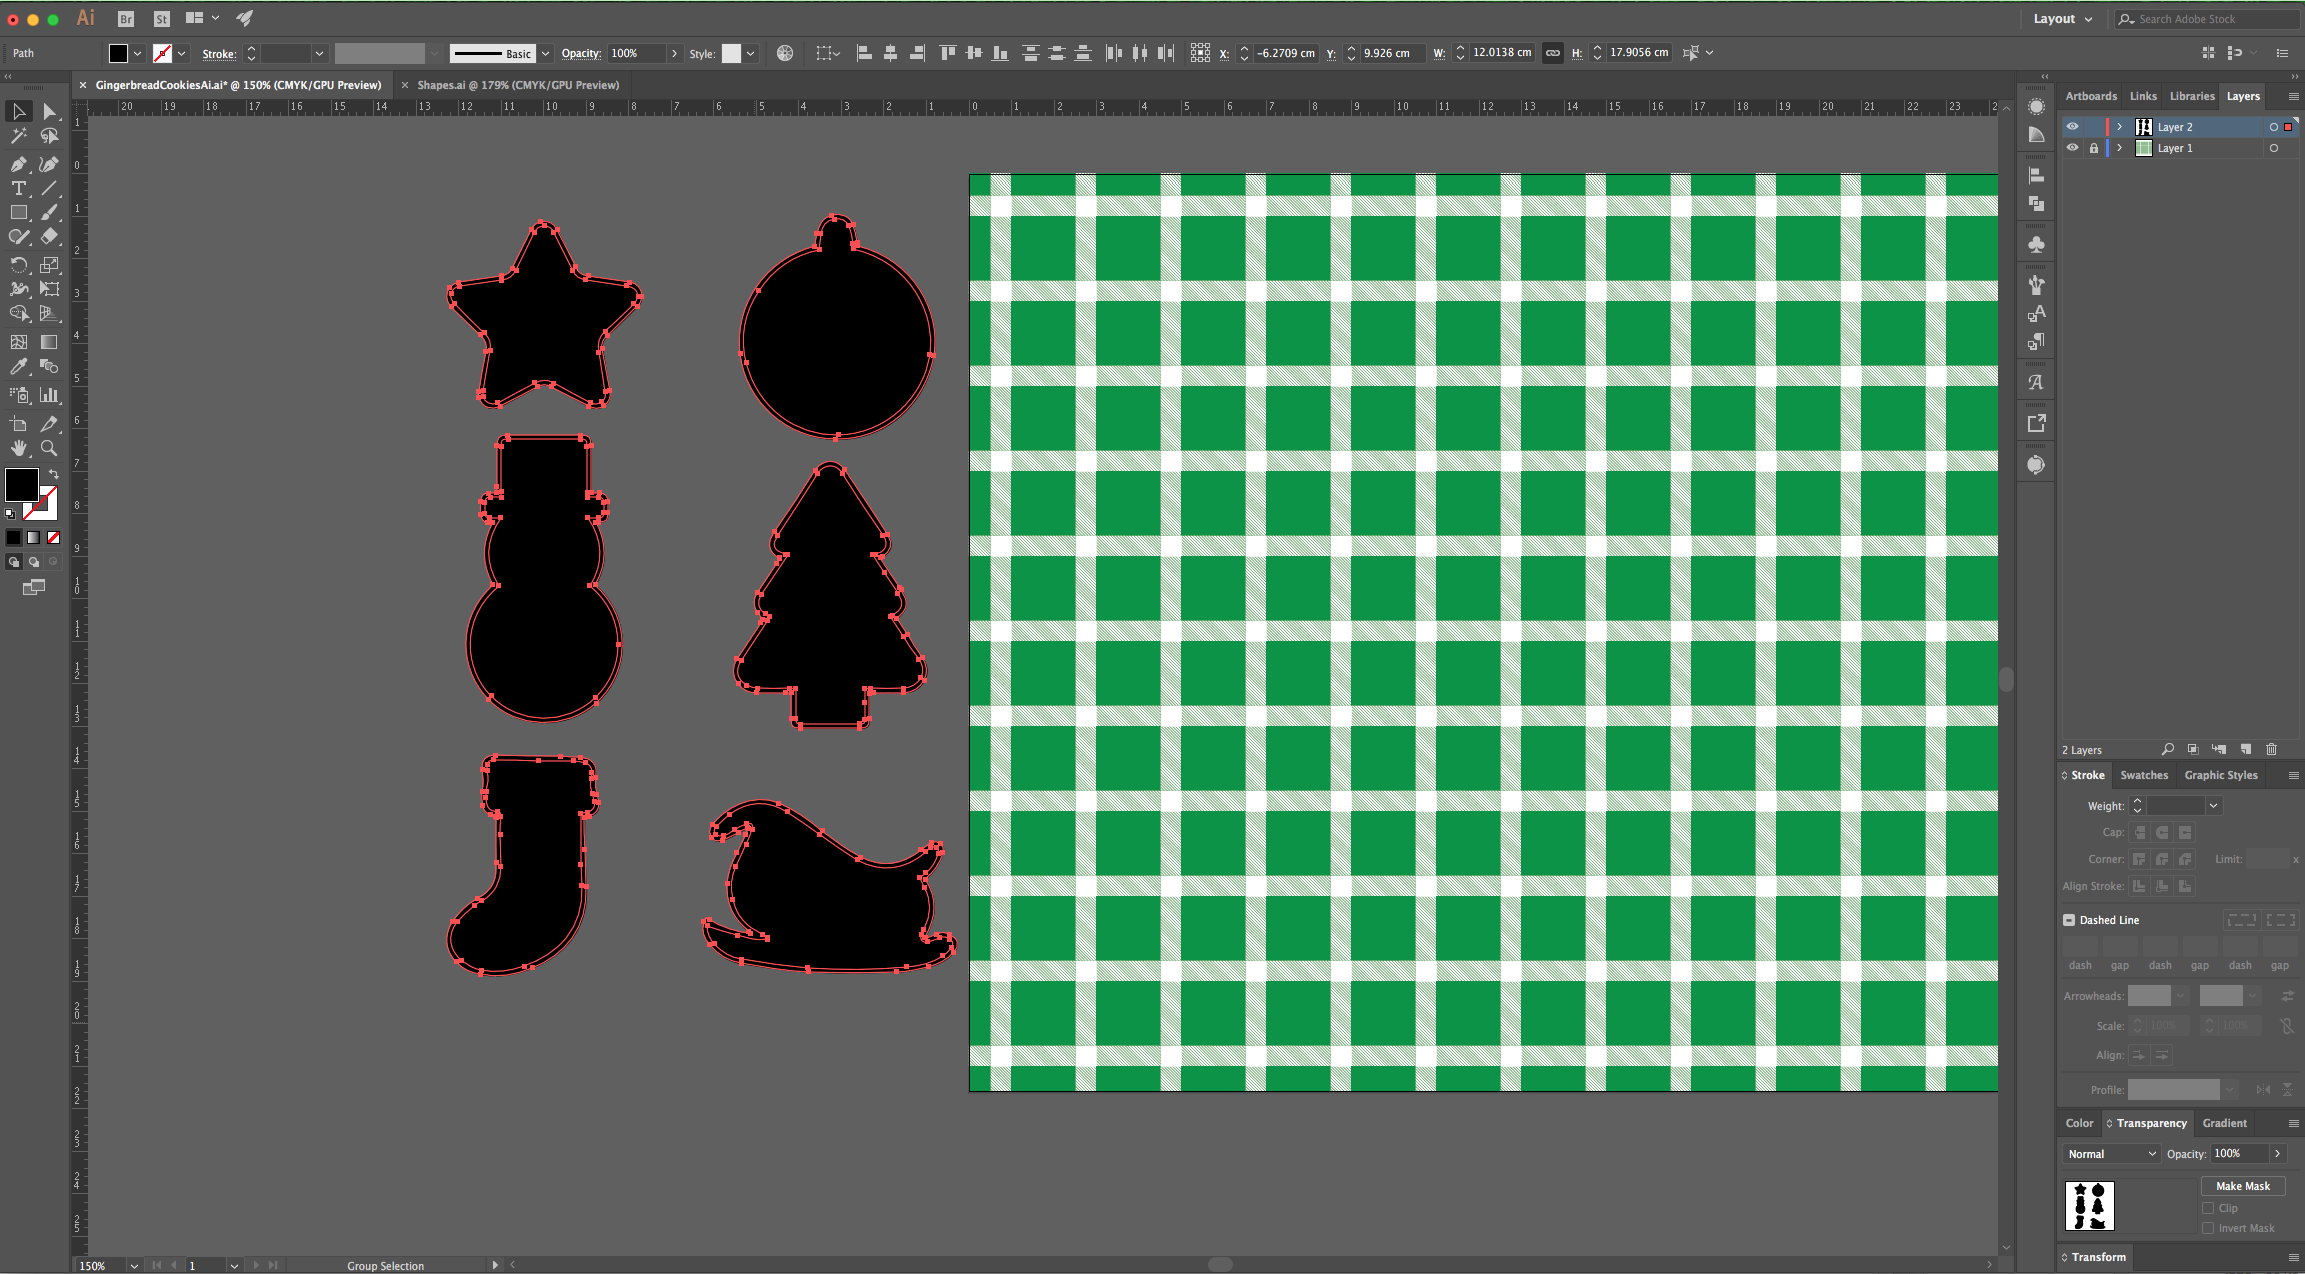
6 - Select the smaller ones (“Shift” key) and “Swap Fill and Stroke” (Shift + X). Select one of the larger Shapes and change the “Fill” color to a medium Brown from the “Swatches Panel”.
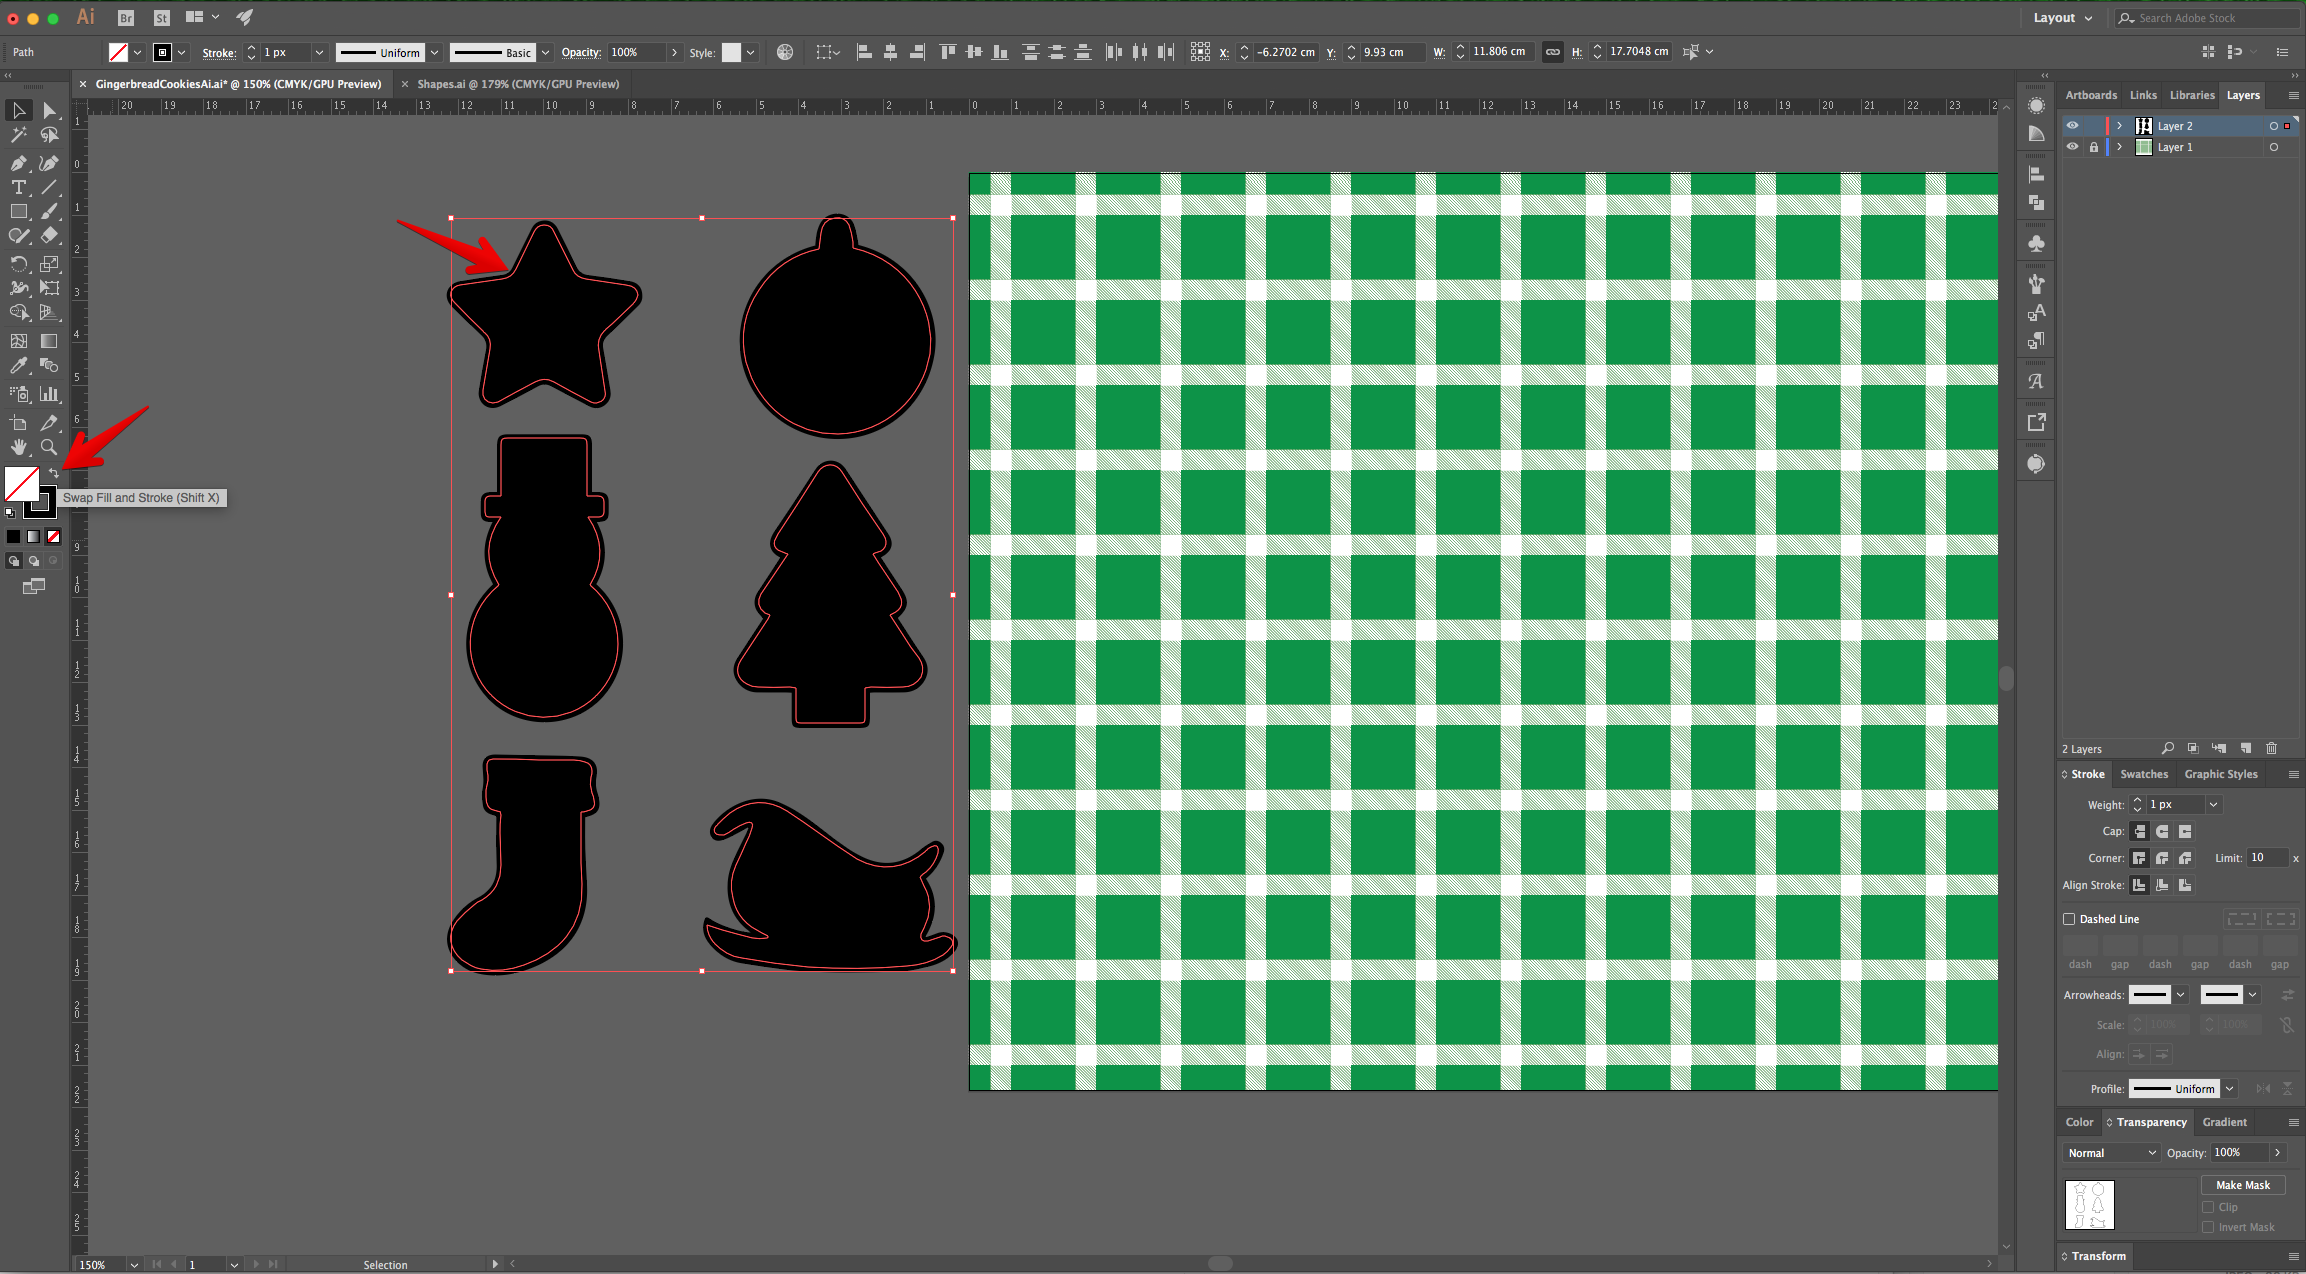
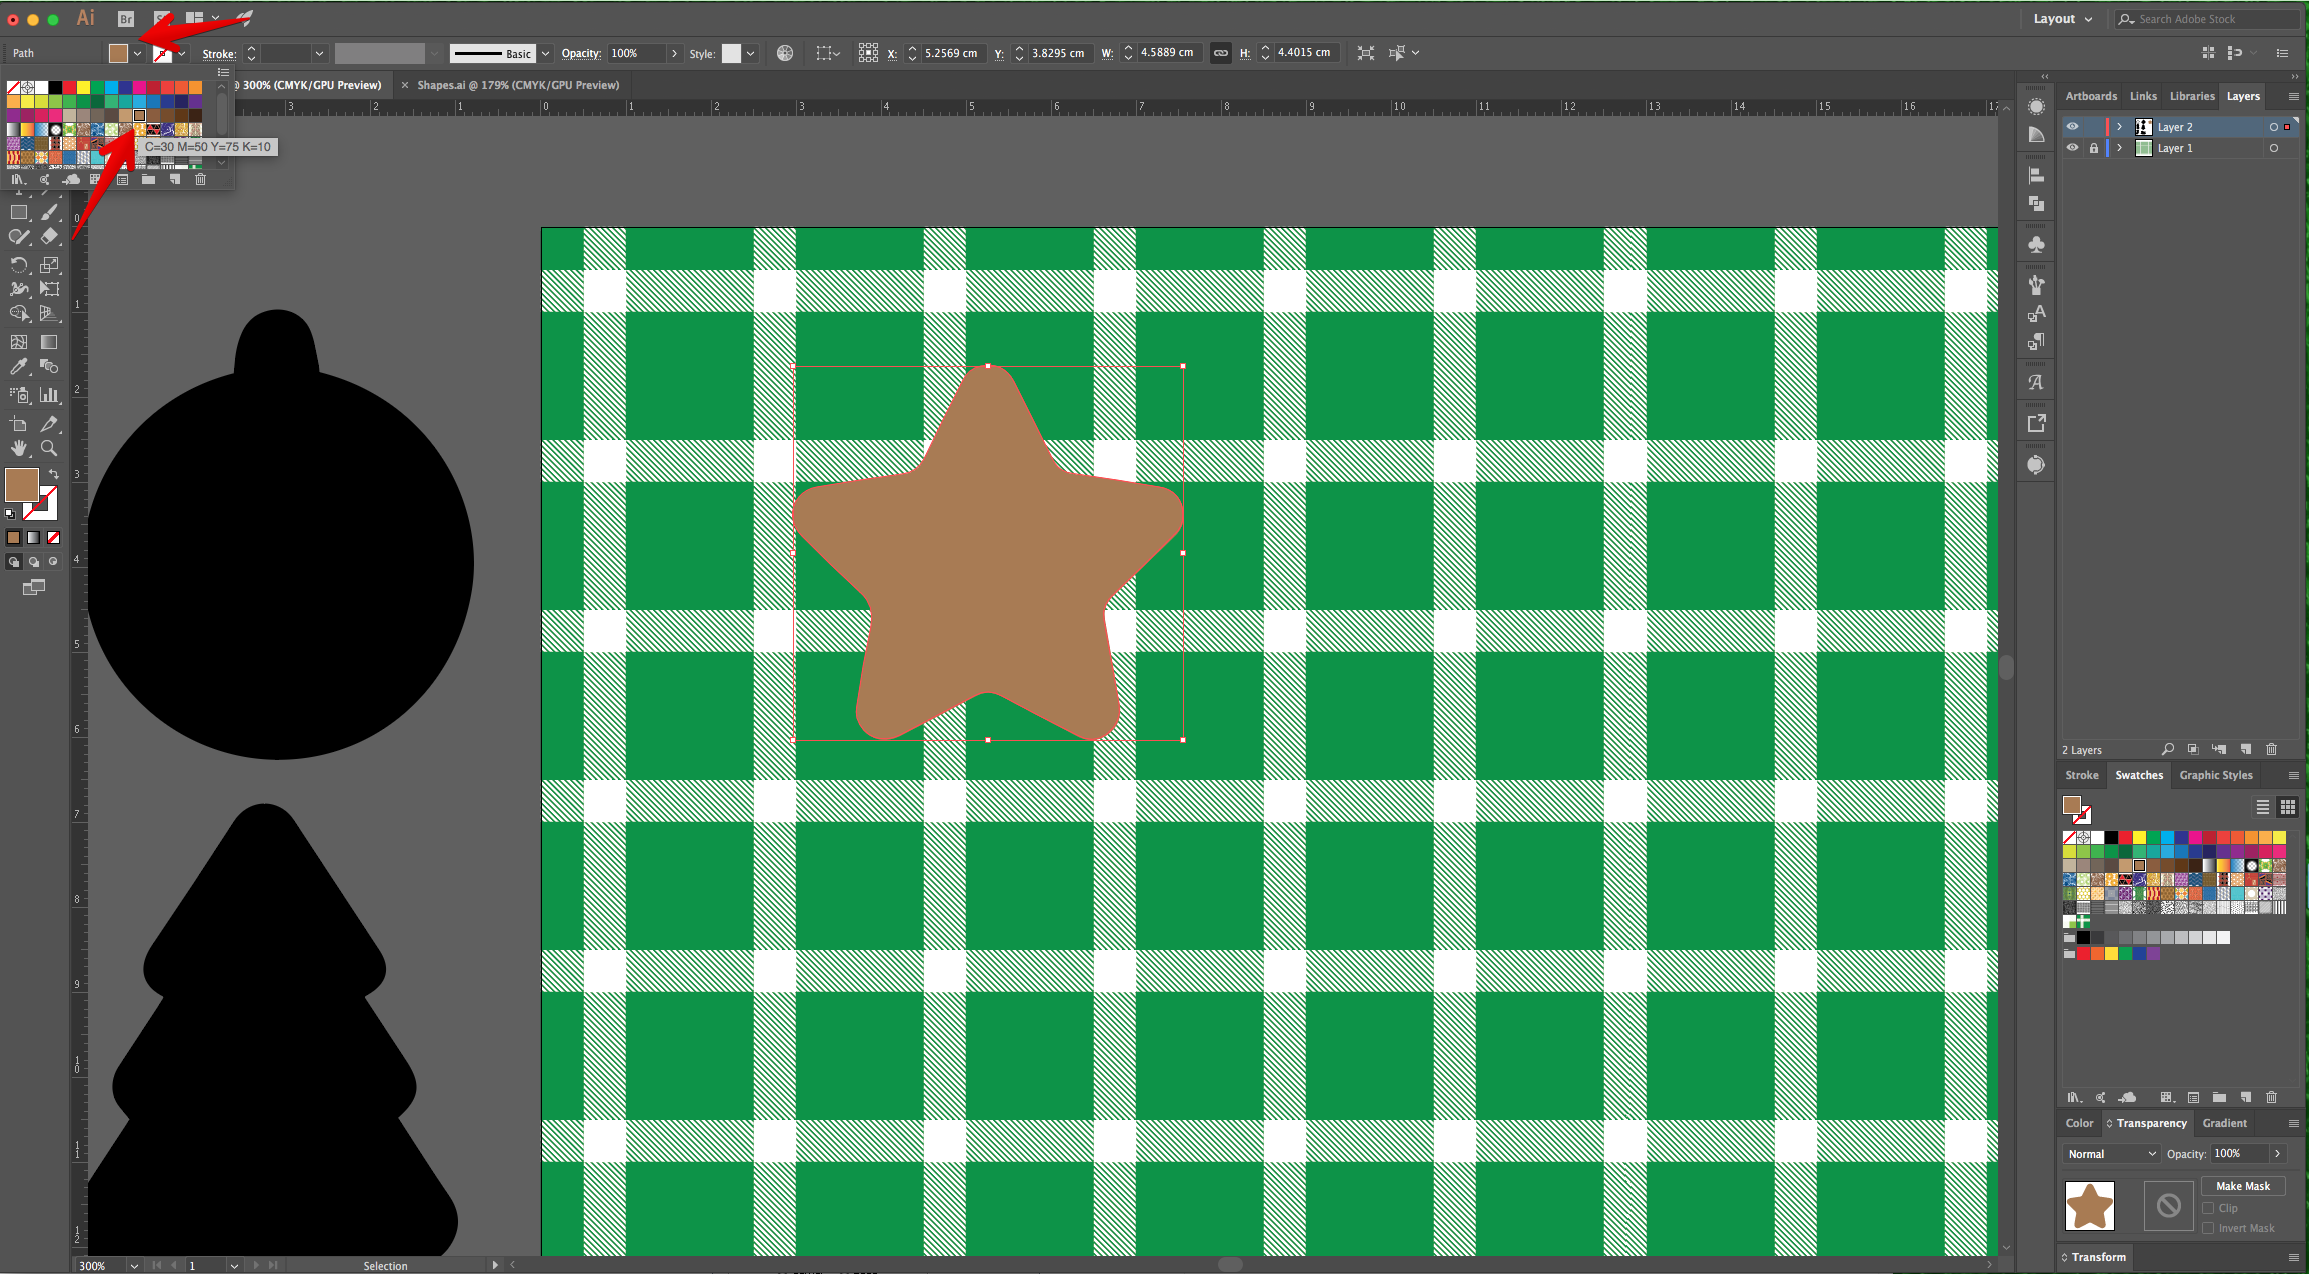
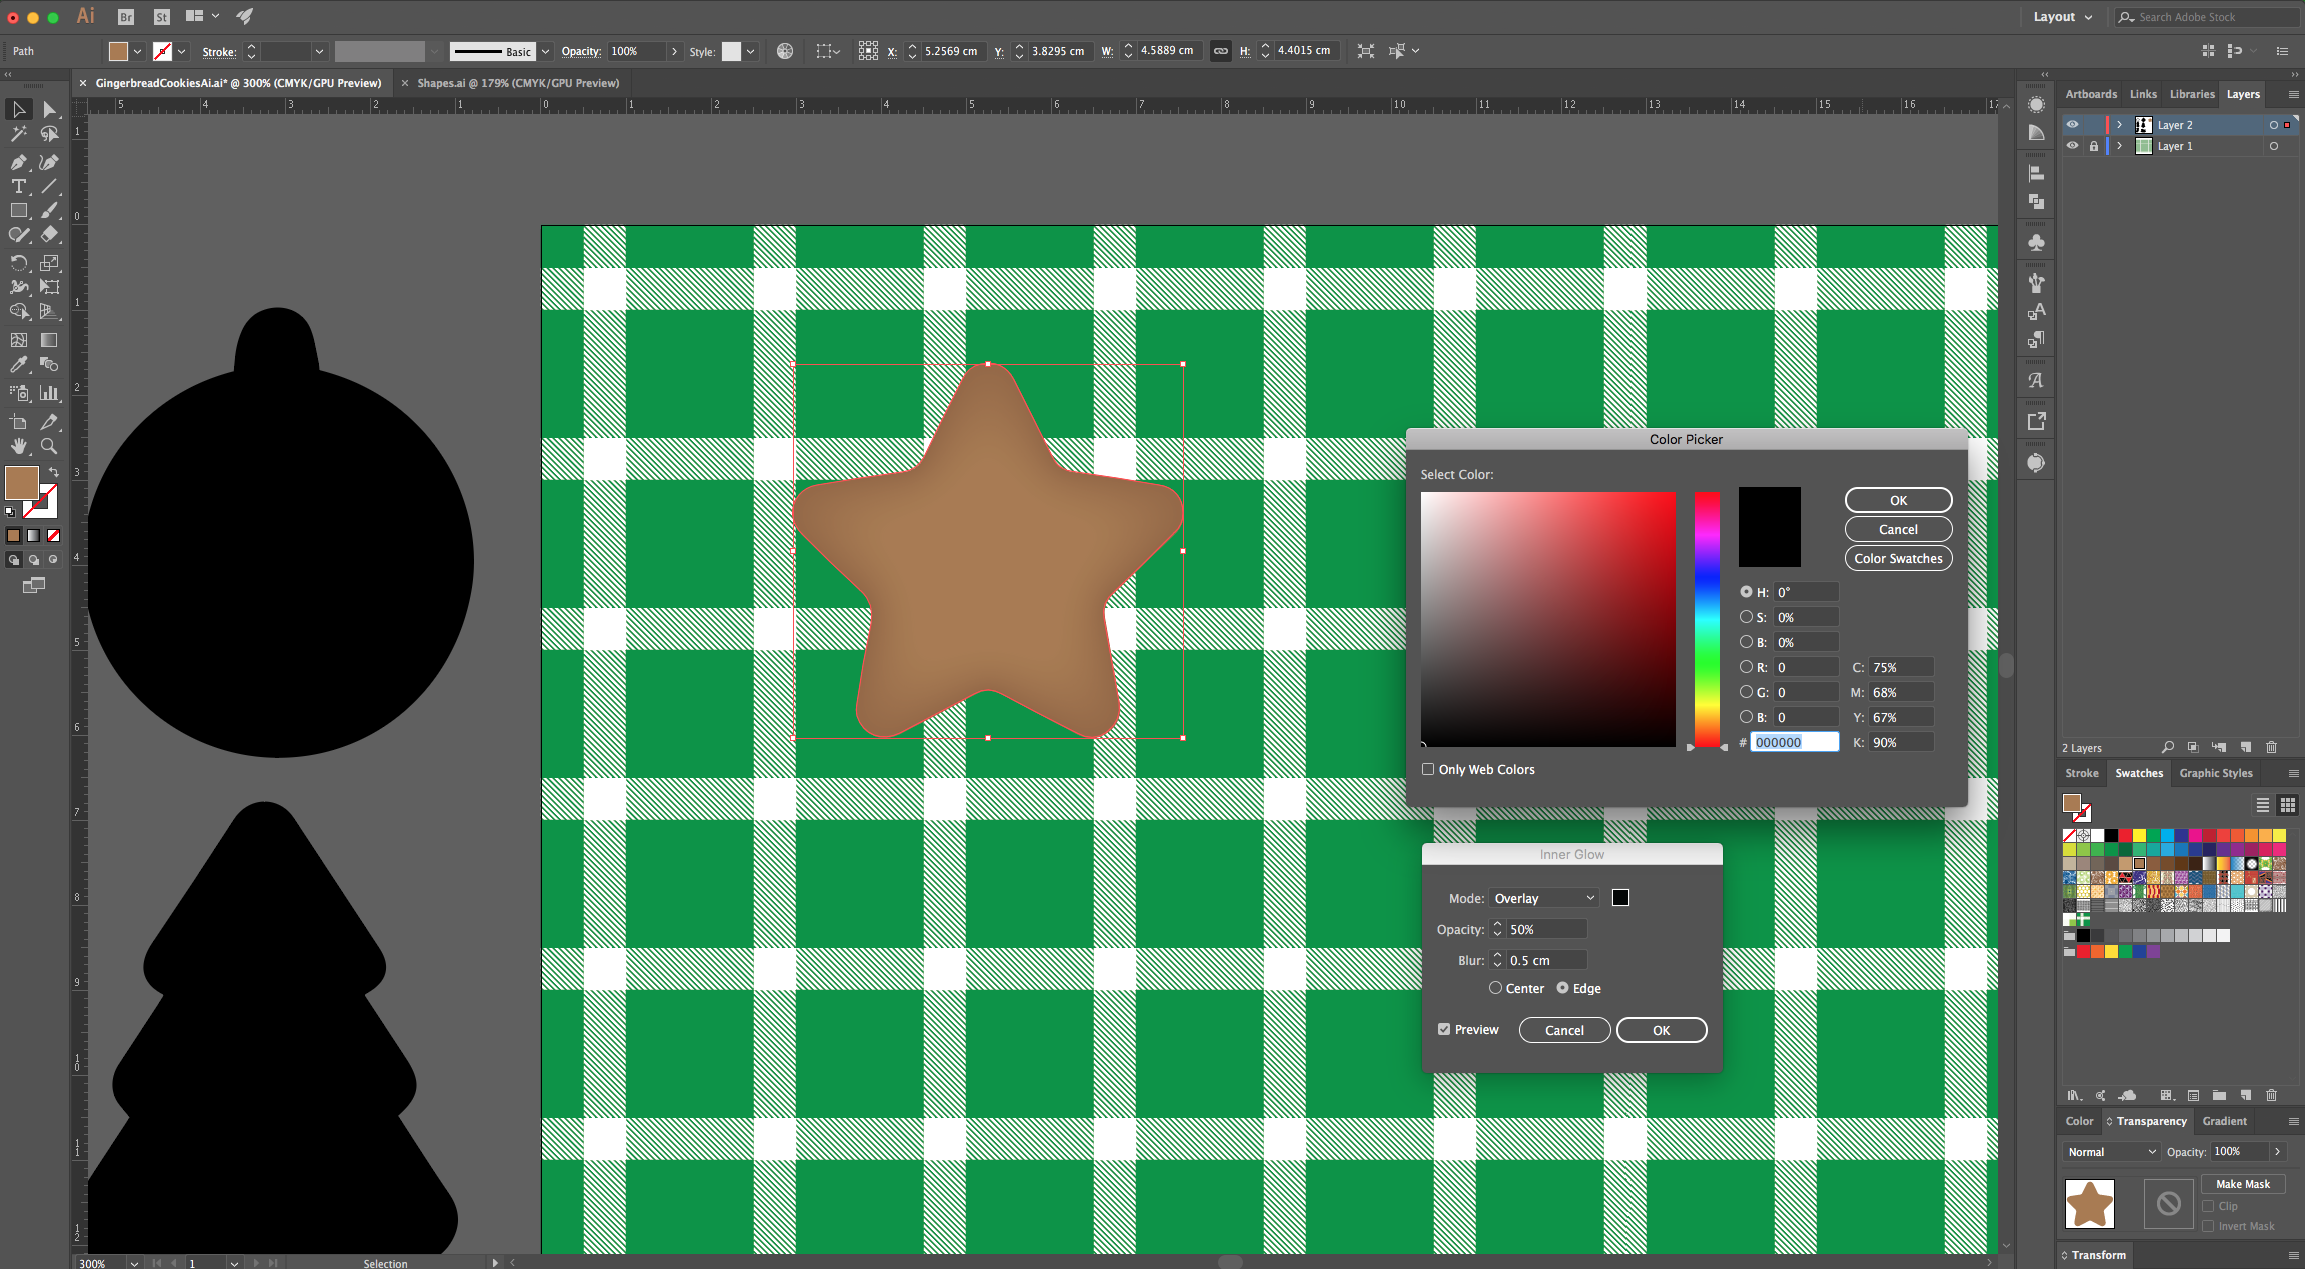
7 - Head to the “Appearance Panel”, click on the “Effects” Menu at the bottom and navigate to Stylize > Inner Glow, use “Overlay”, 50% for “Opacity”, 0.05 cm “Blur”, choose “Edge” and Black (#000000) as “Color”, click “OK.
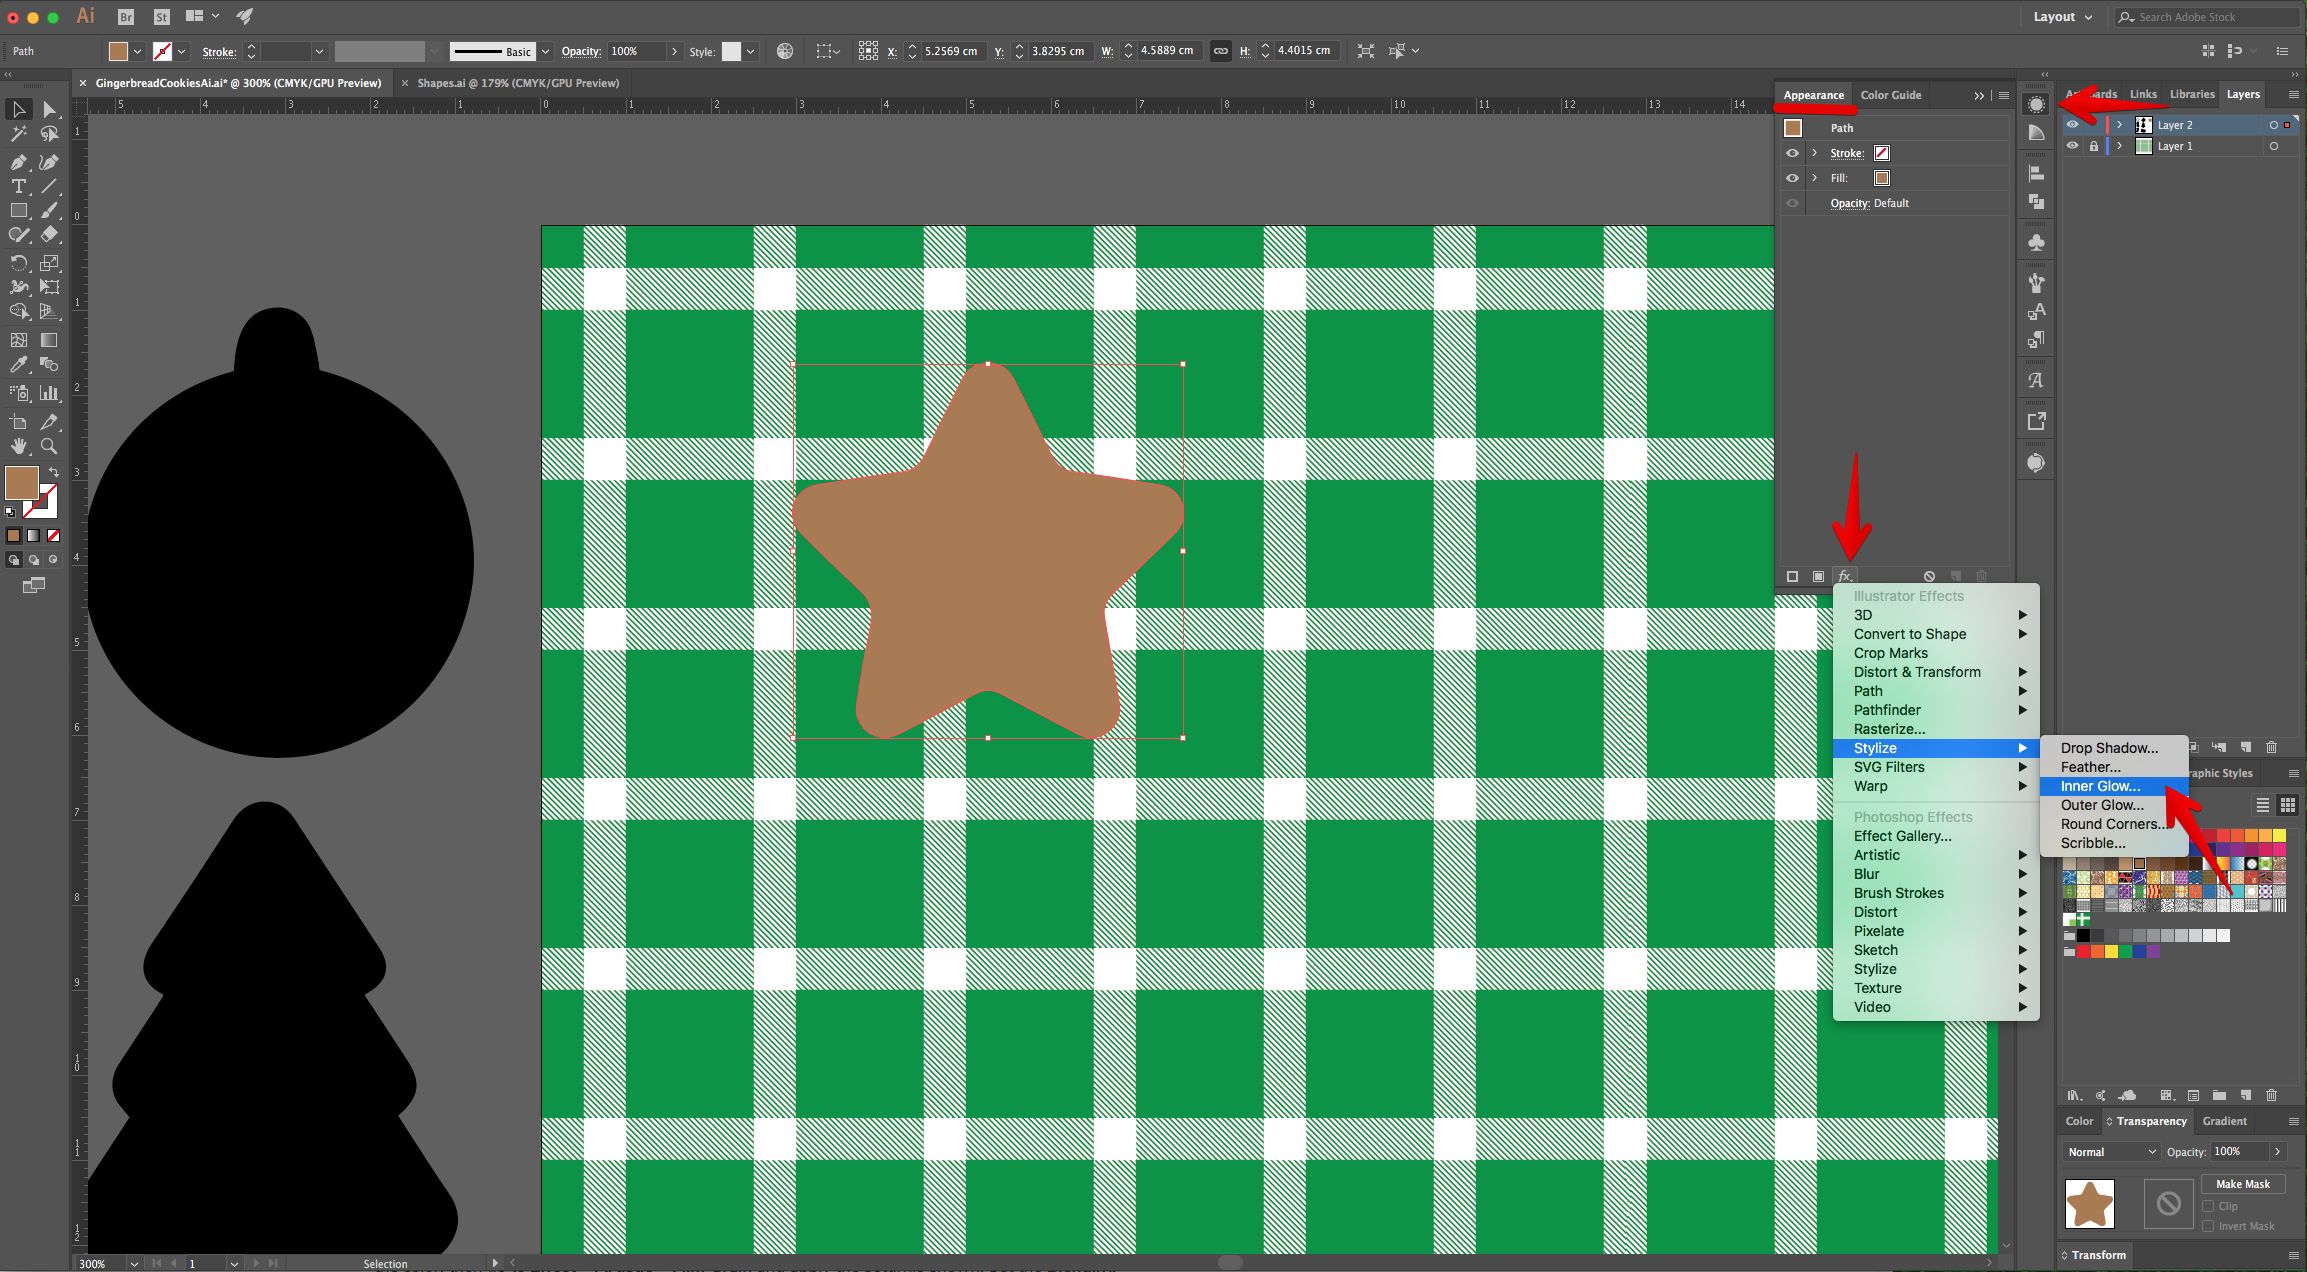
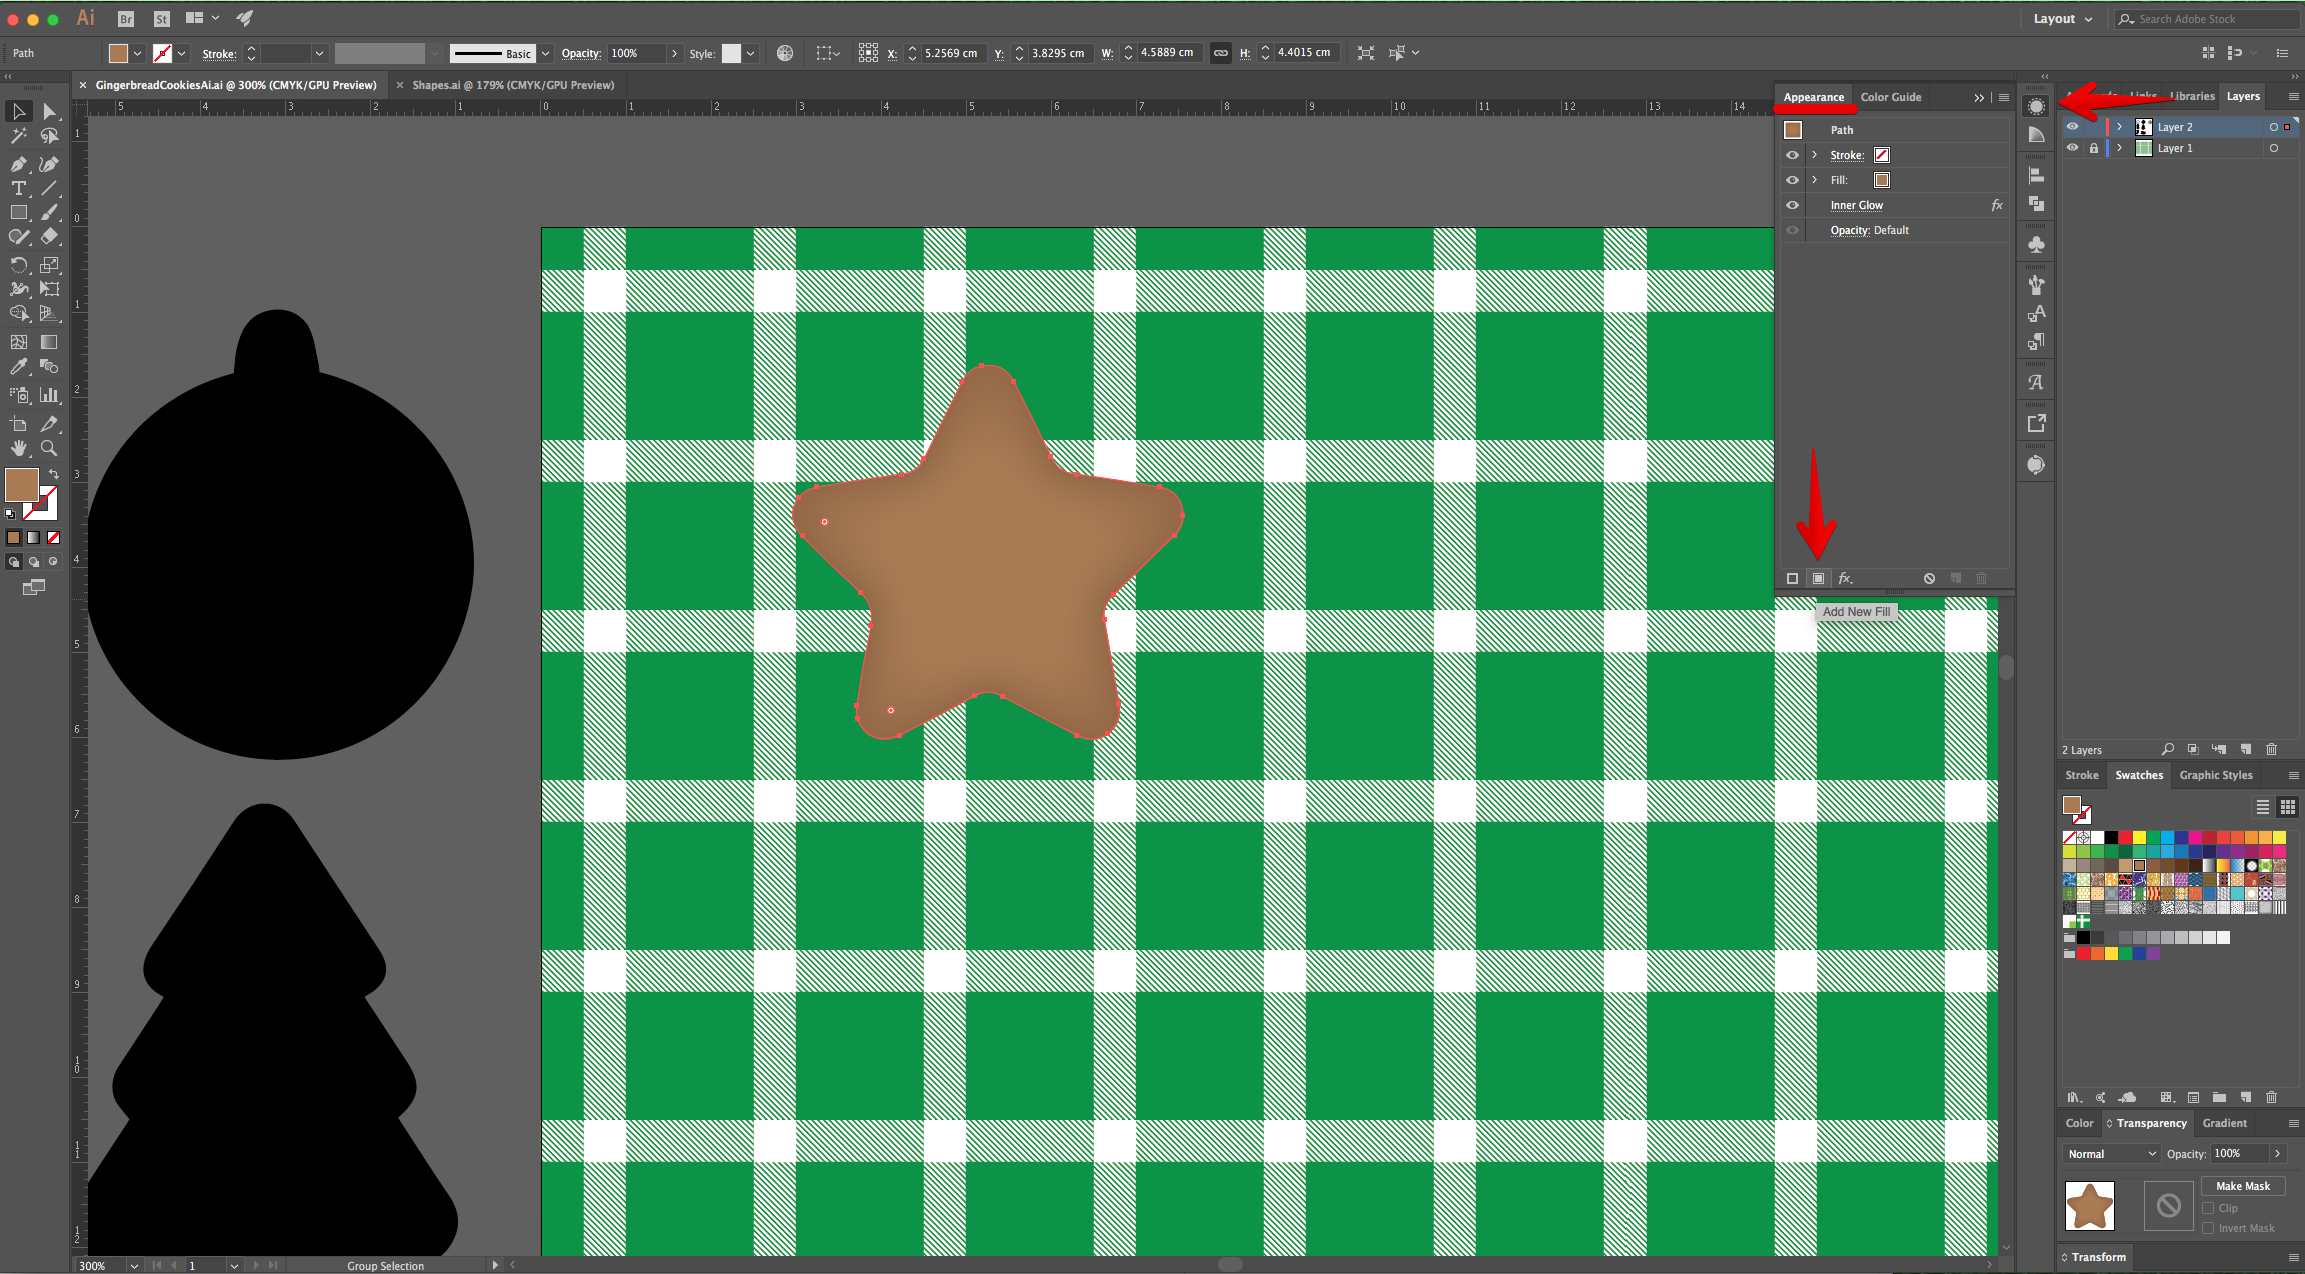
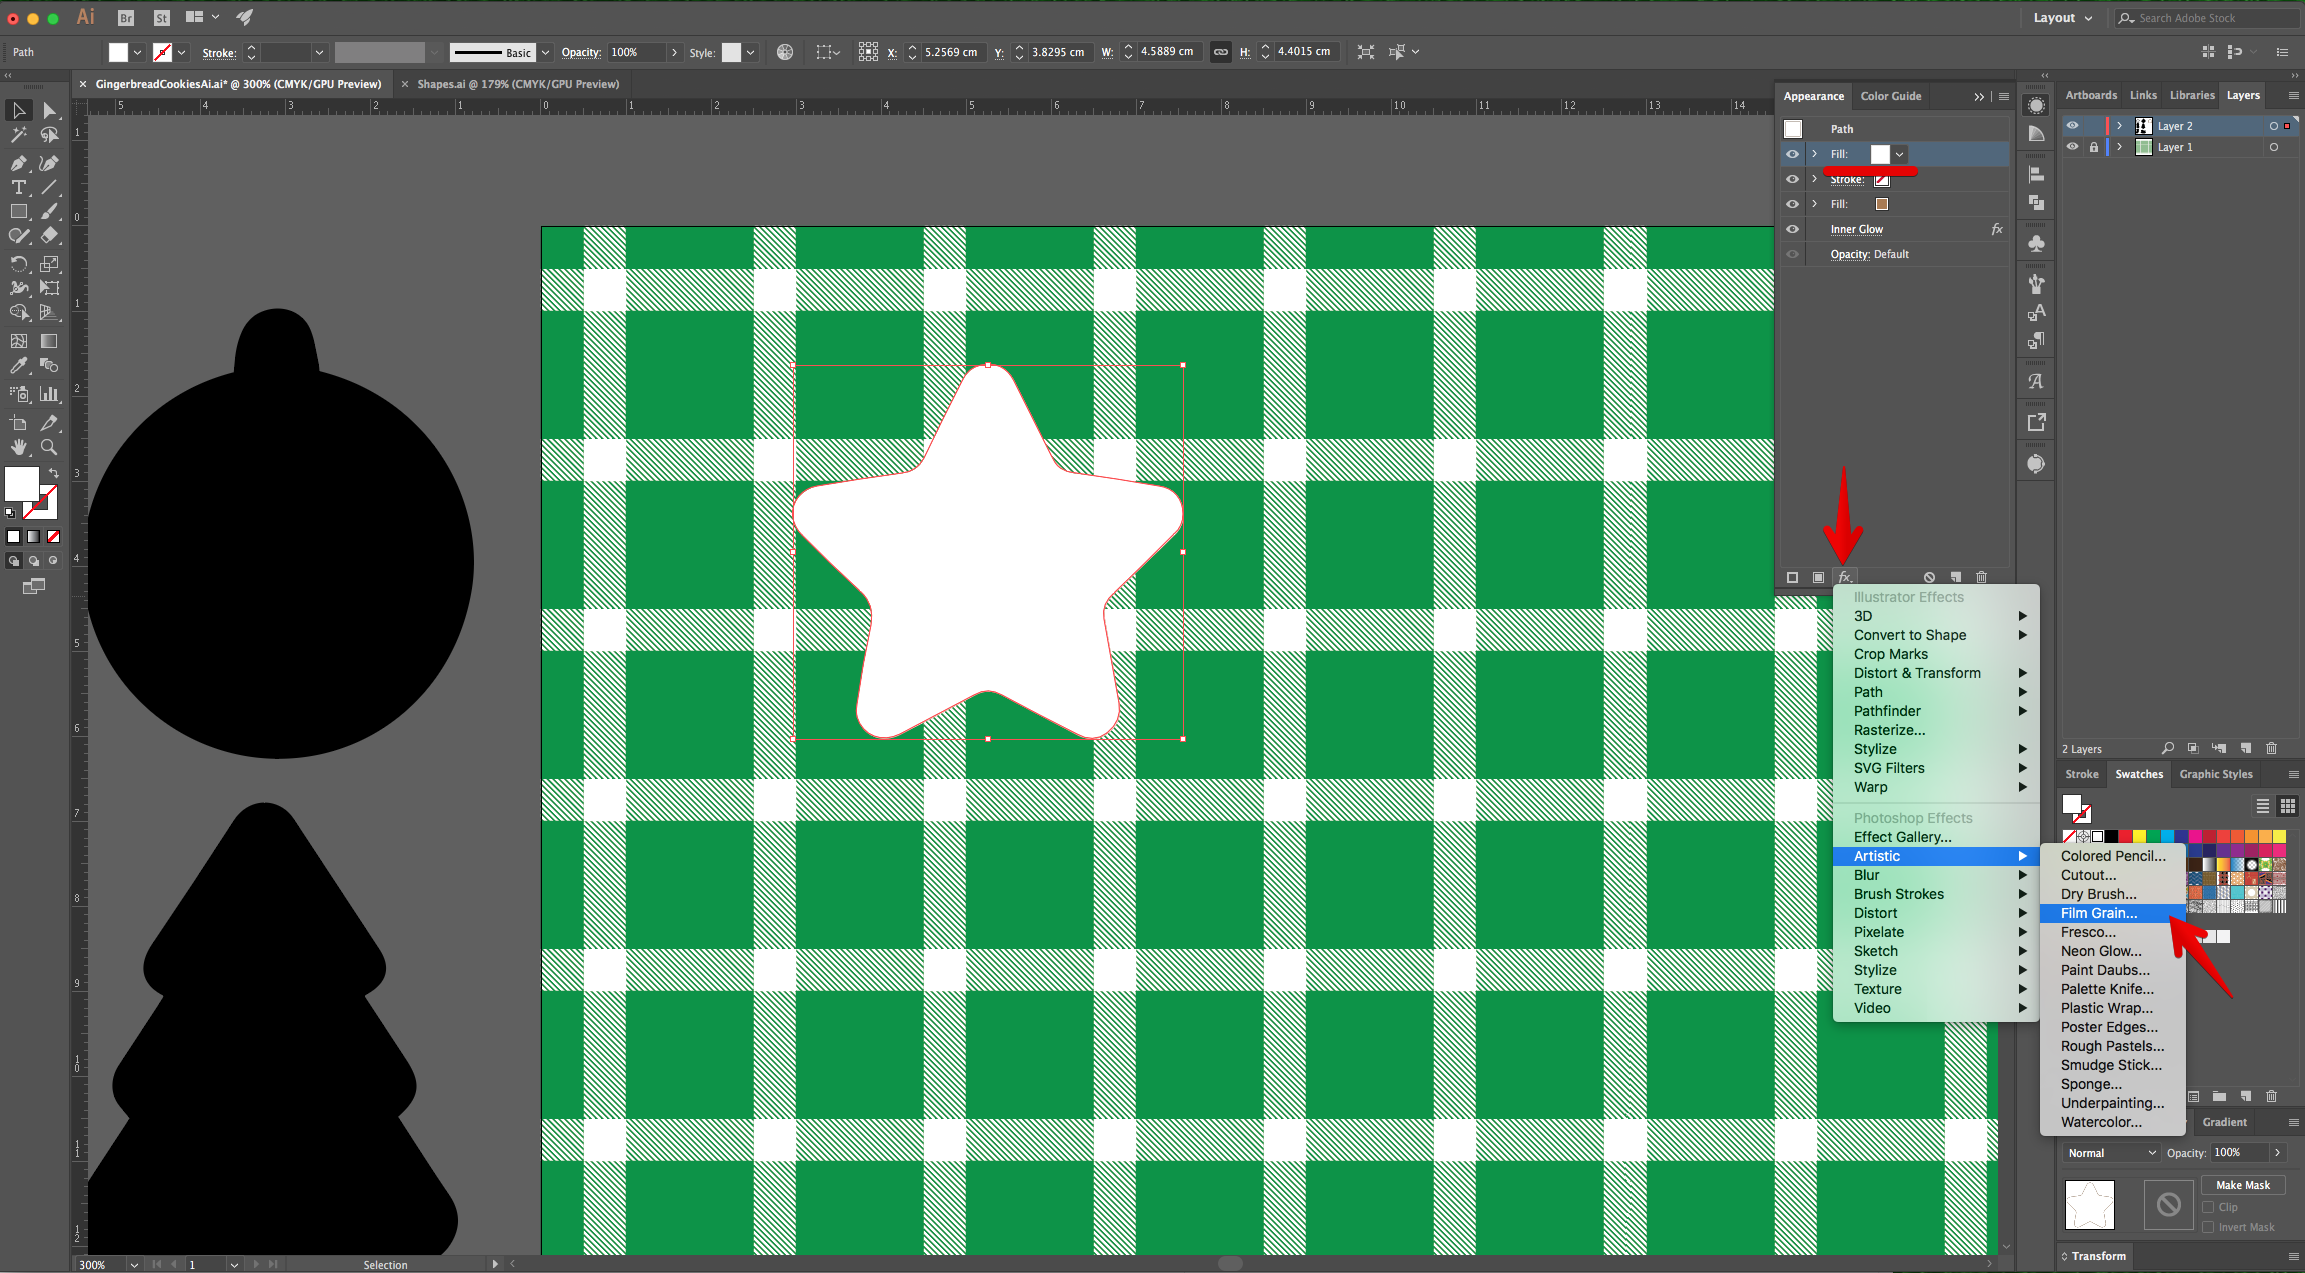
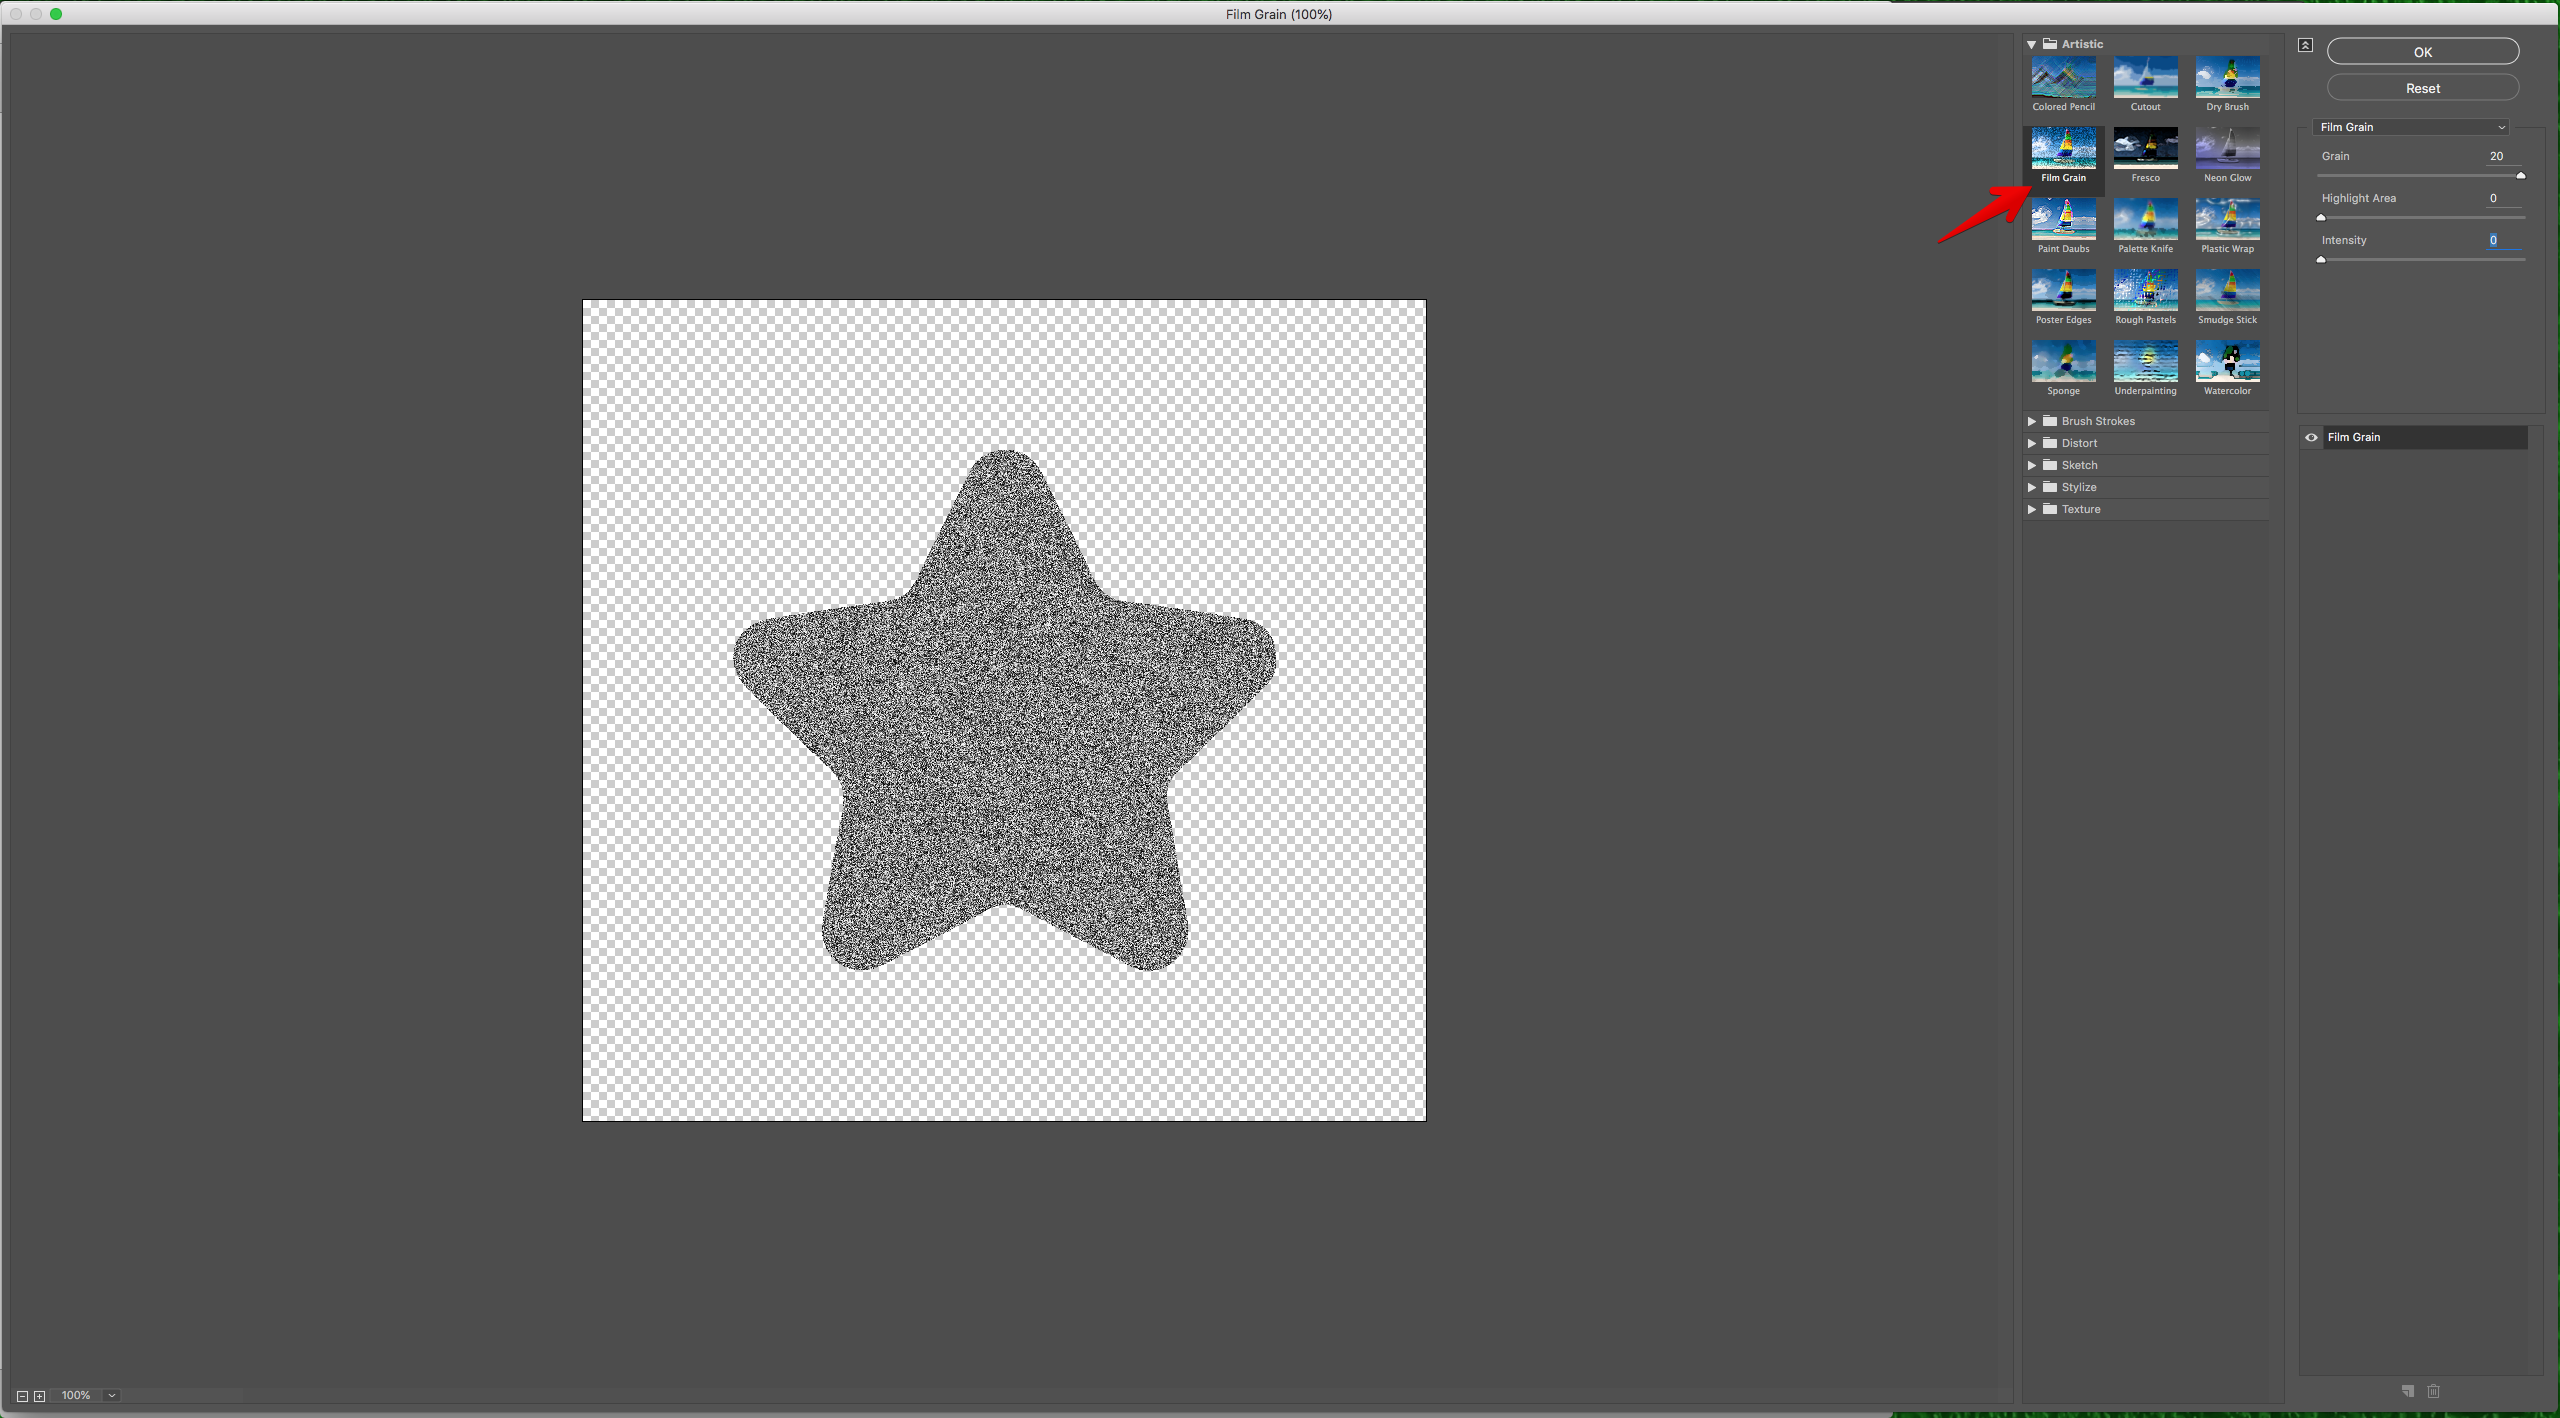
8 - With the vector still selected, head to the “Appearance Panel”, click on the “Add New Fill” button at the bottom, use White as “Fill” color. Click on the “Effects” Menu and navigate to Artistic > Film Grain, input the following values: 20,0 and 0, click “OK.
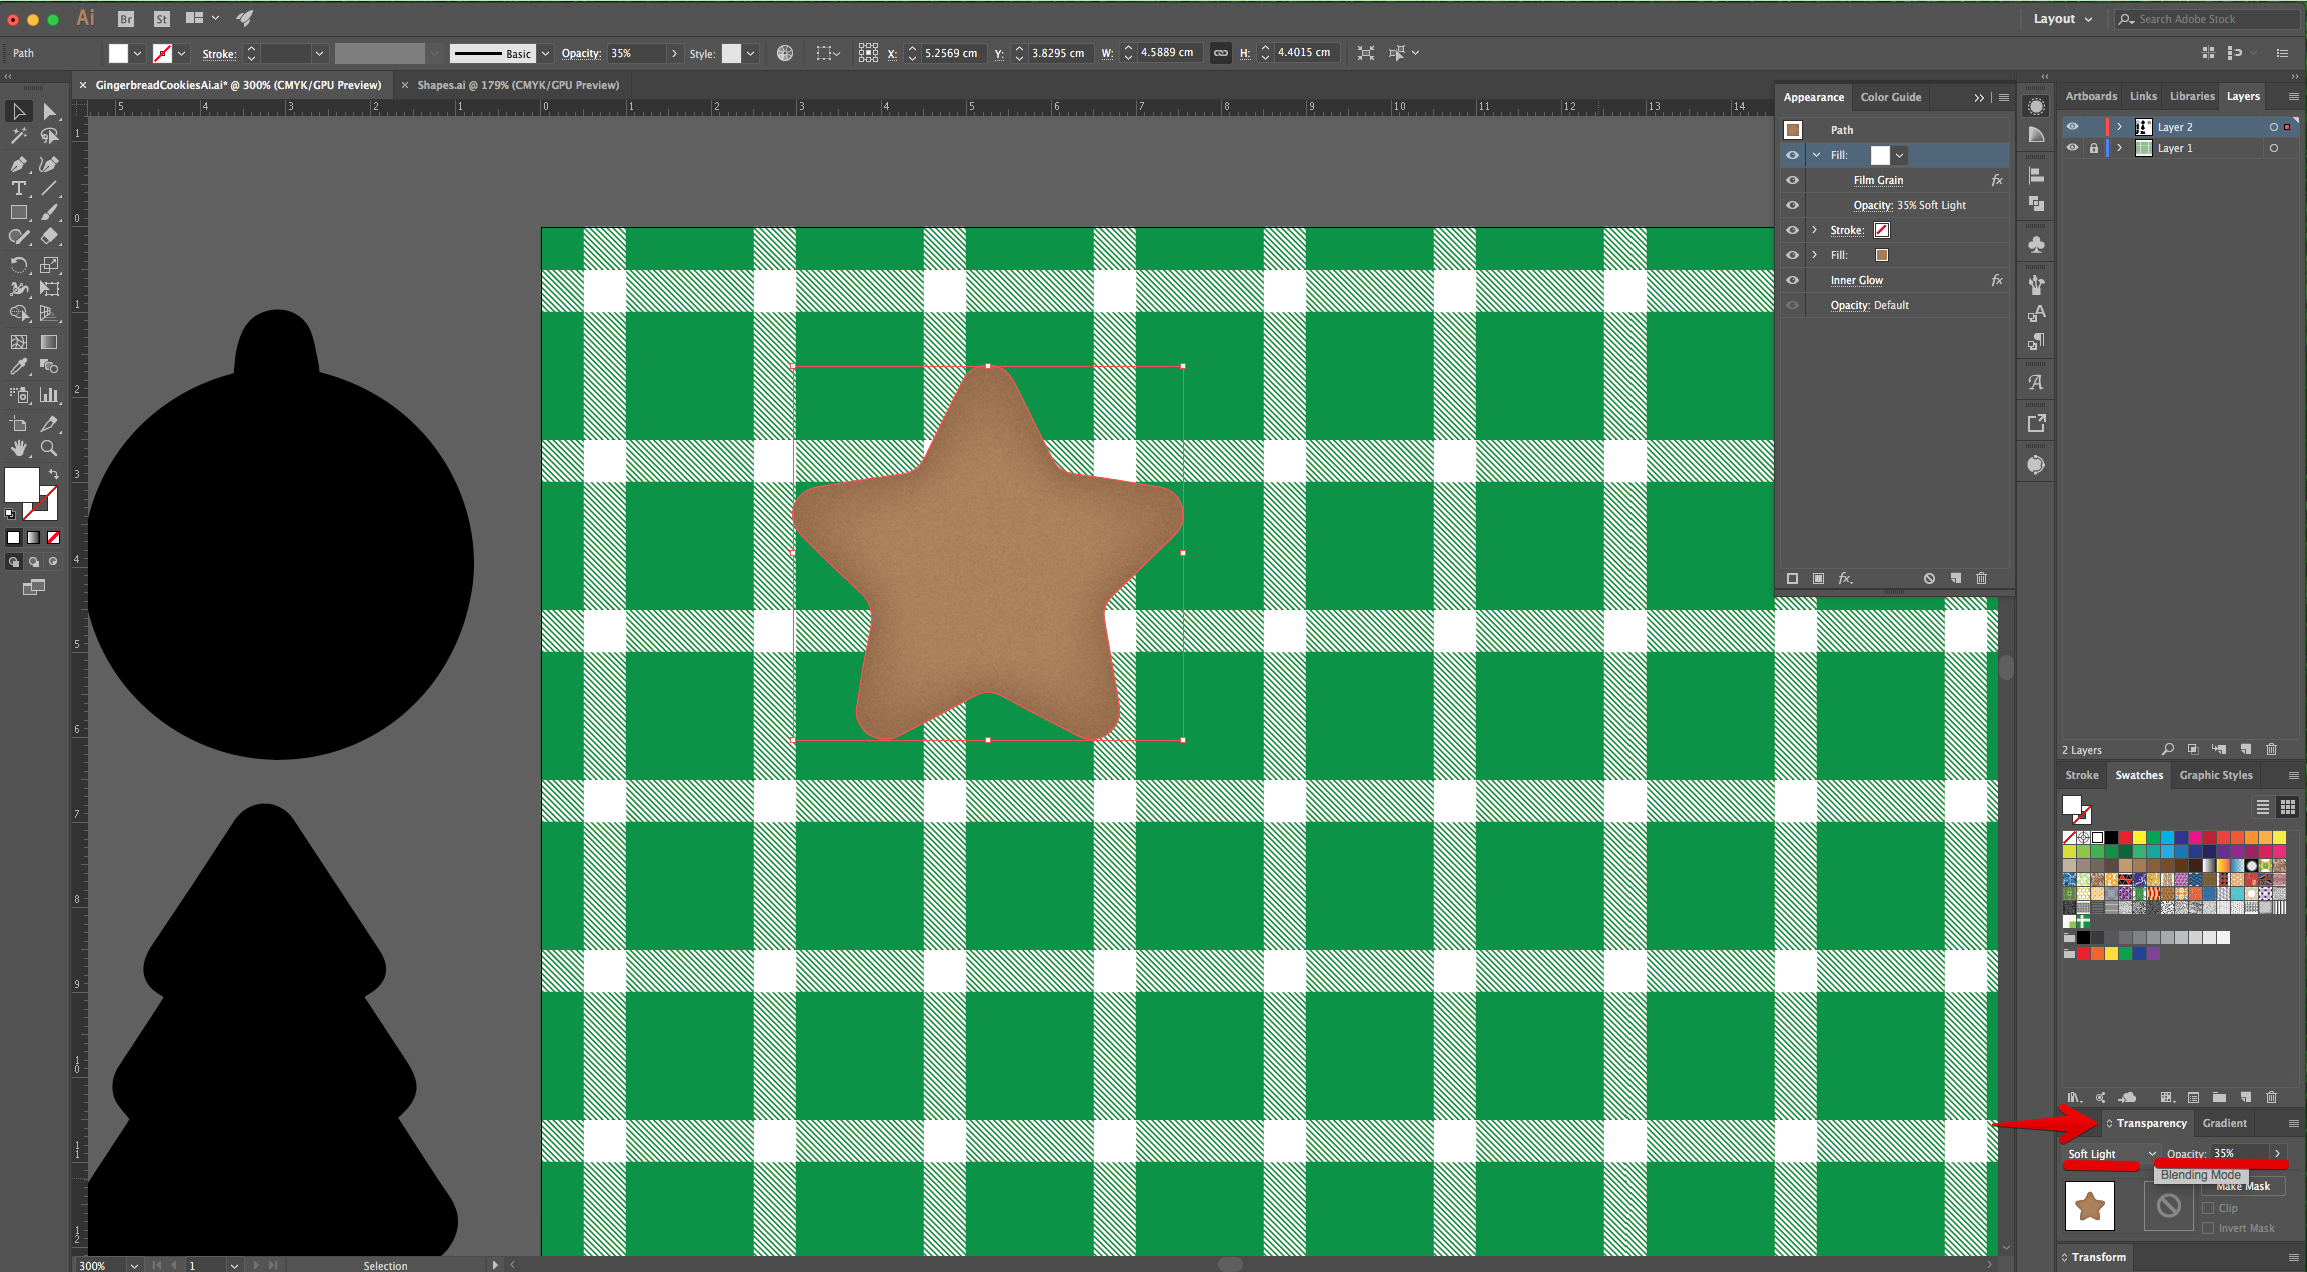
9 - In the “Transparency Panel” change the “Blending Mode” to “Soft Light” and the “Opacity” to 35%.
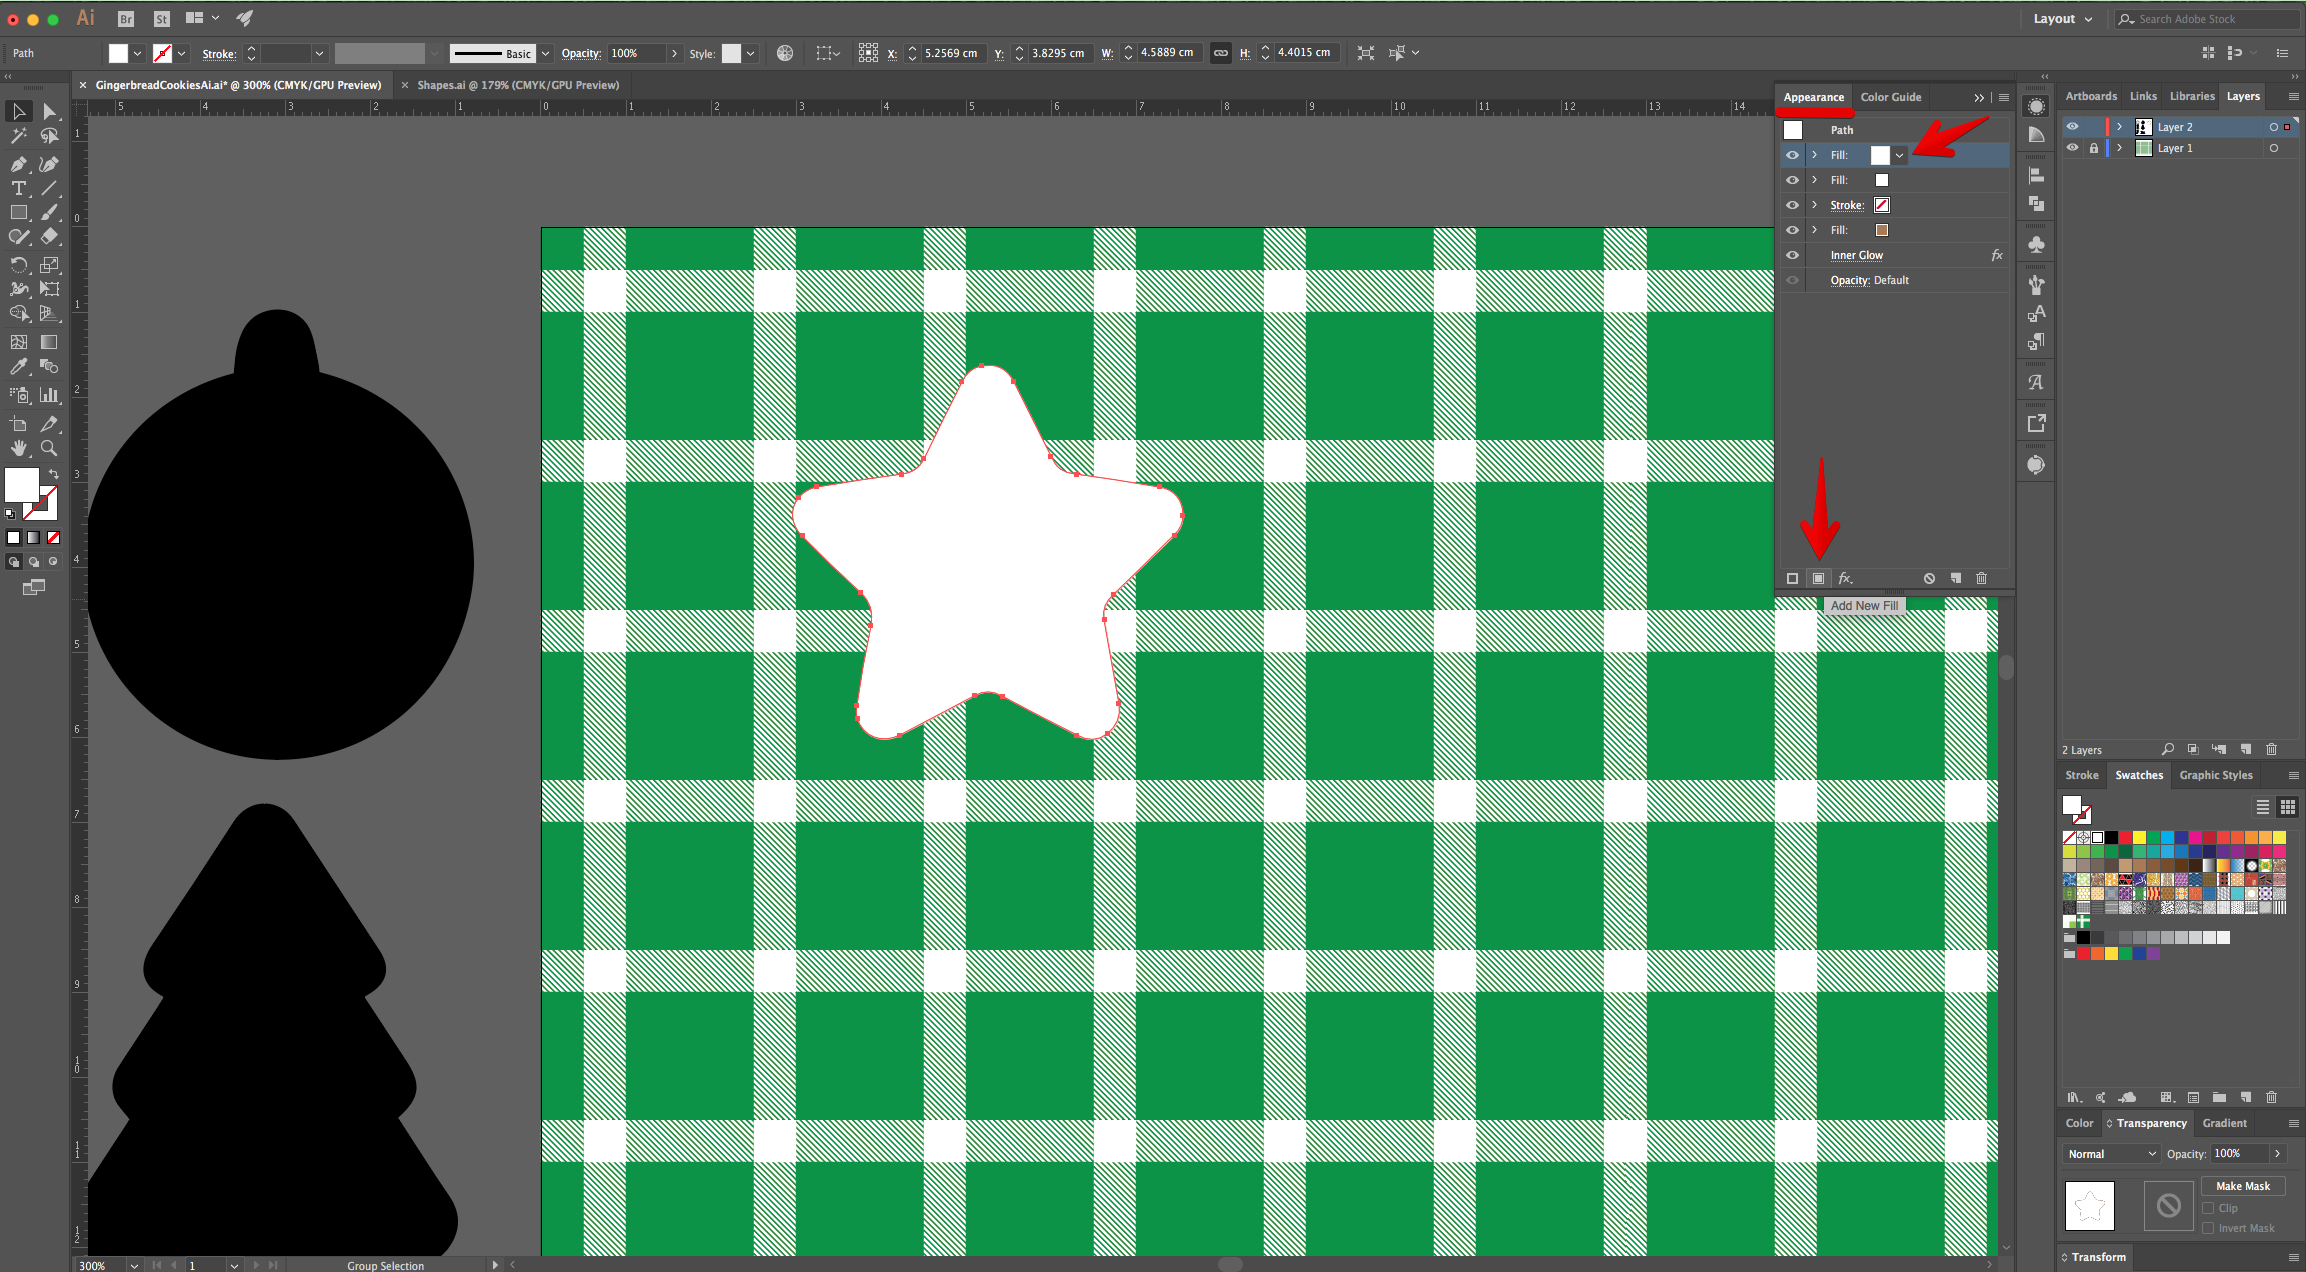
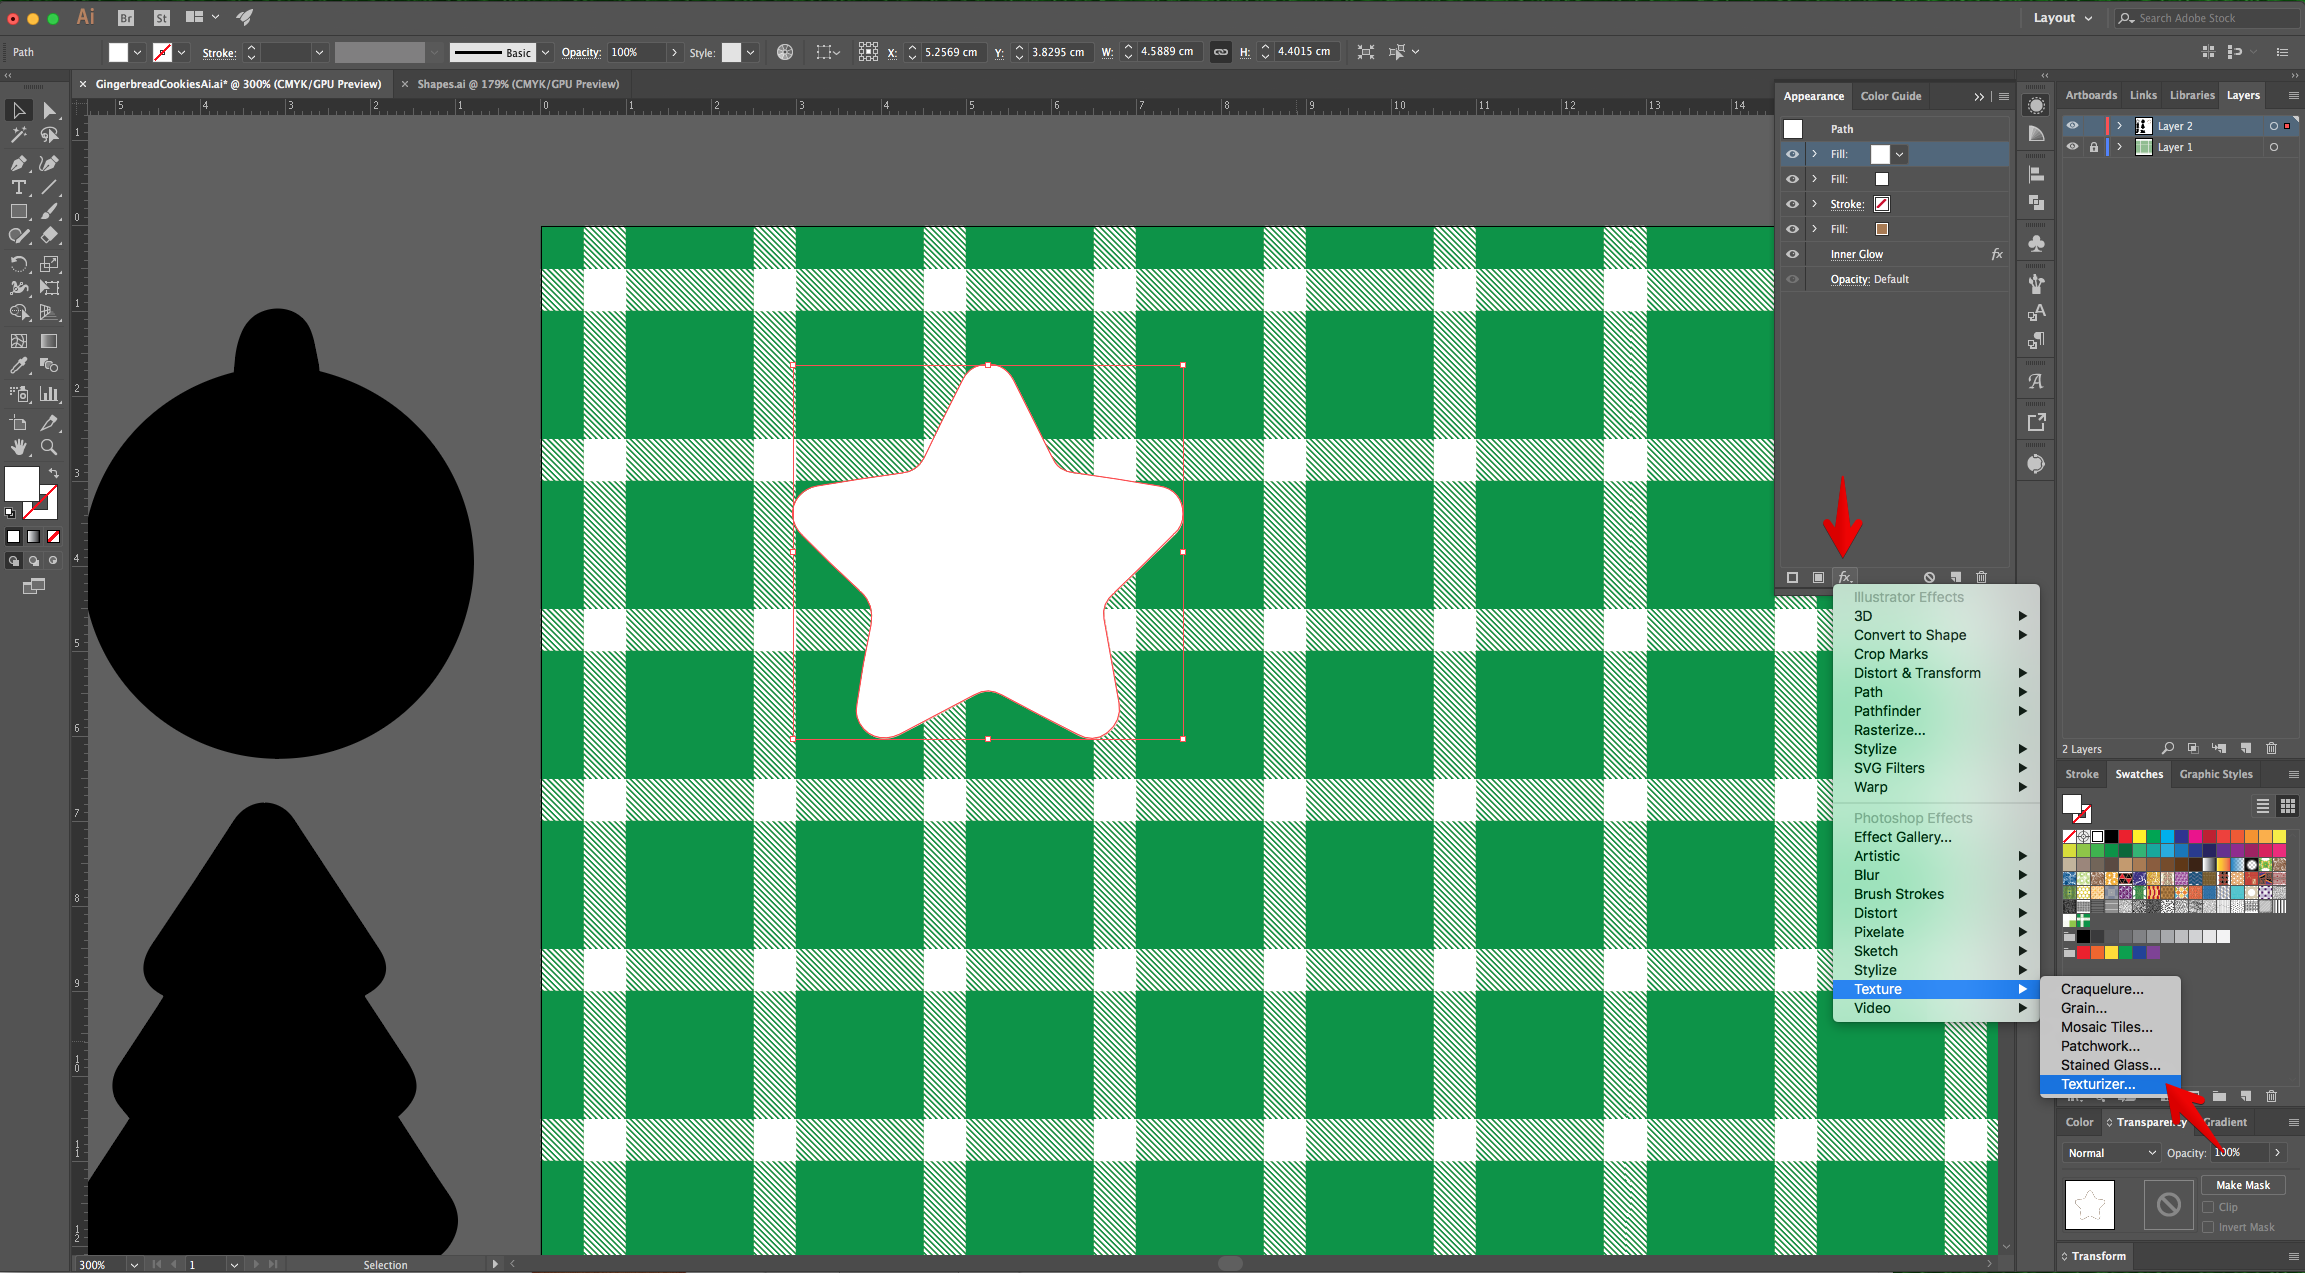
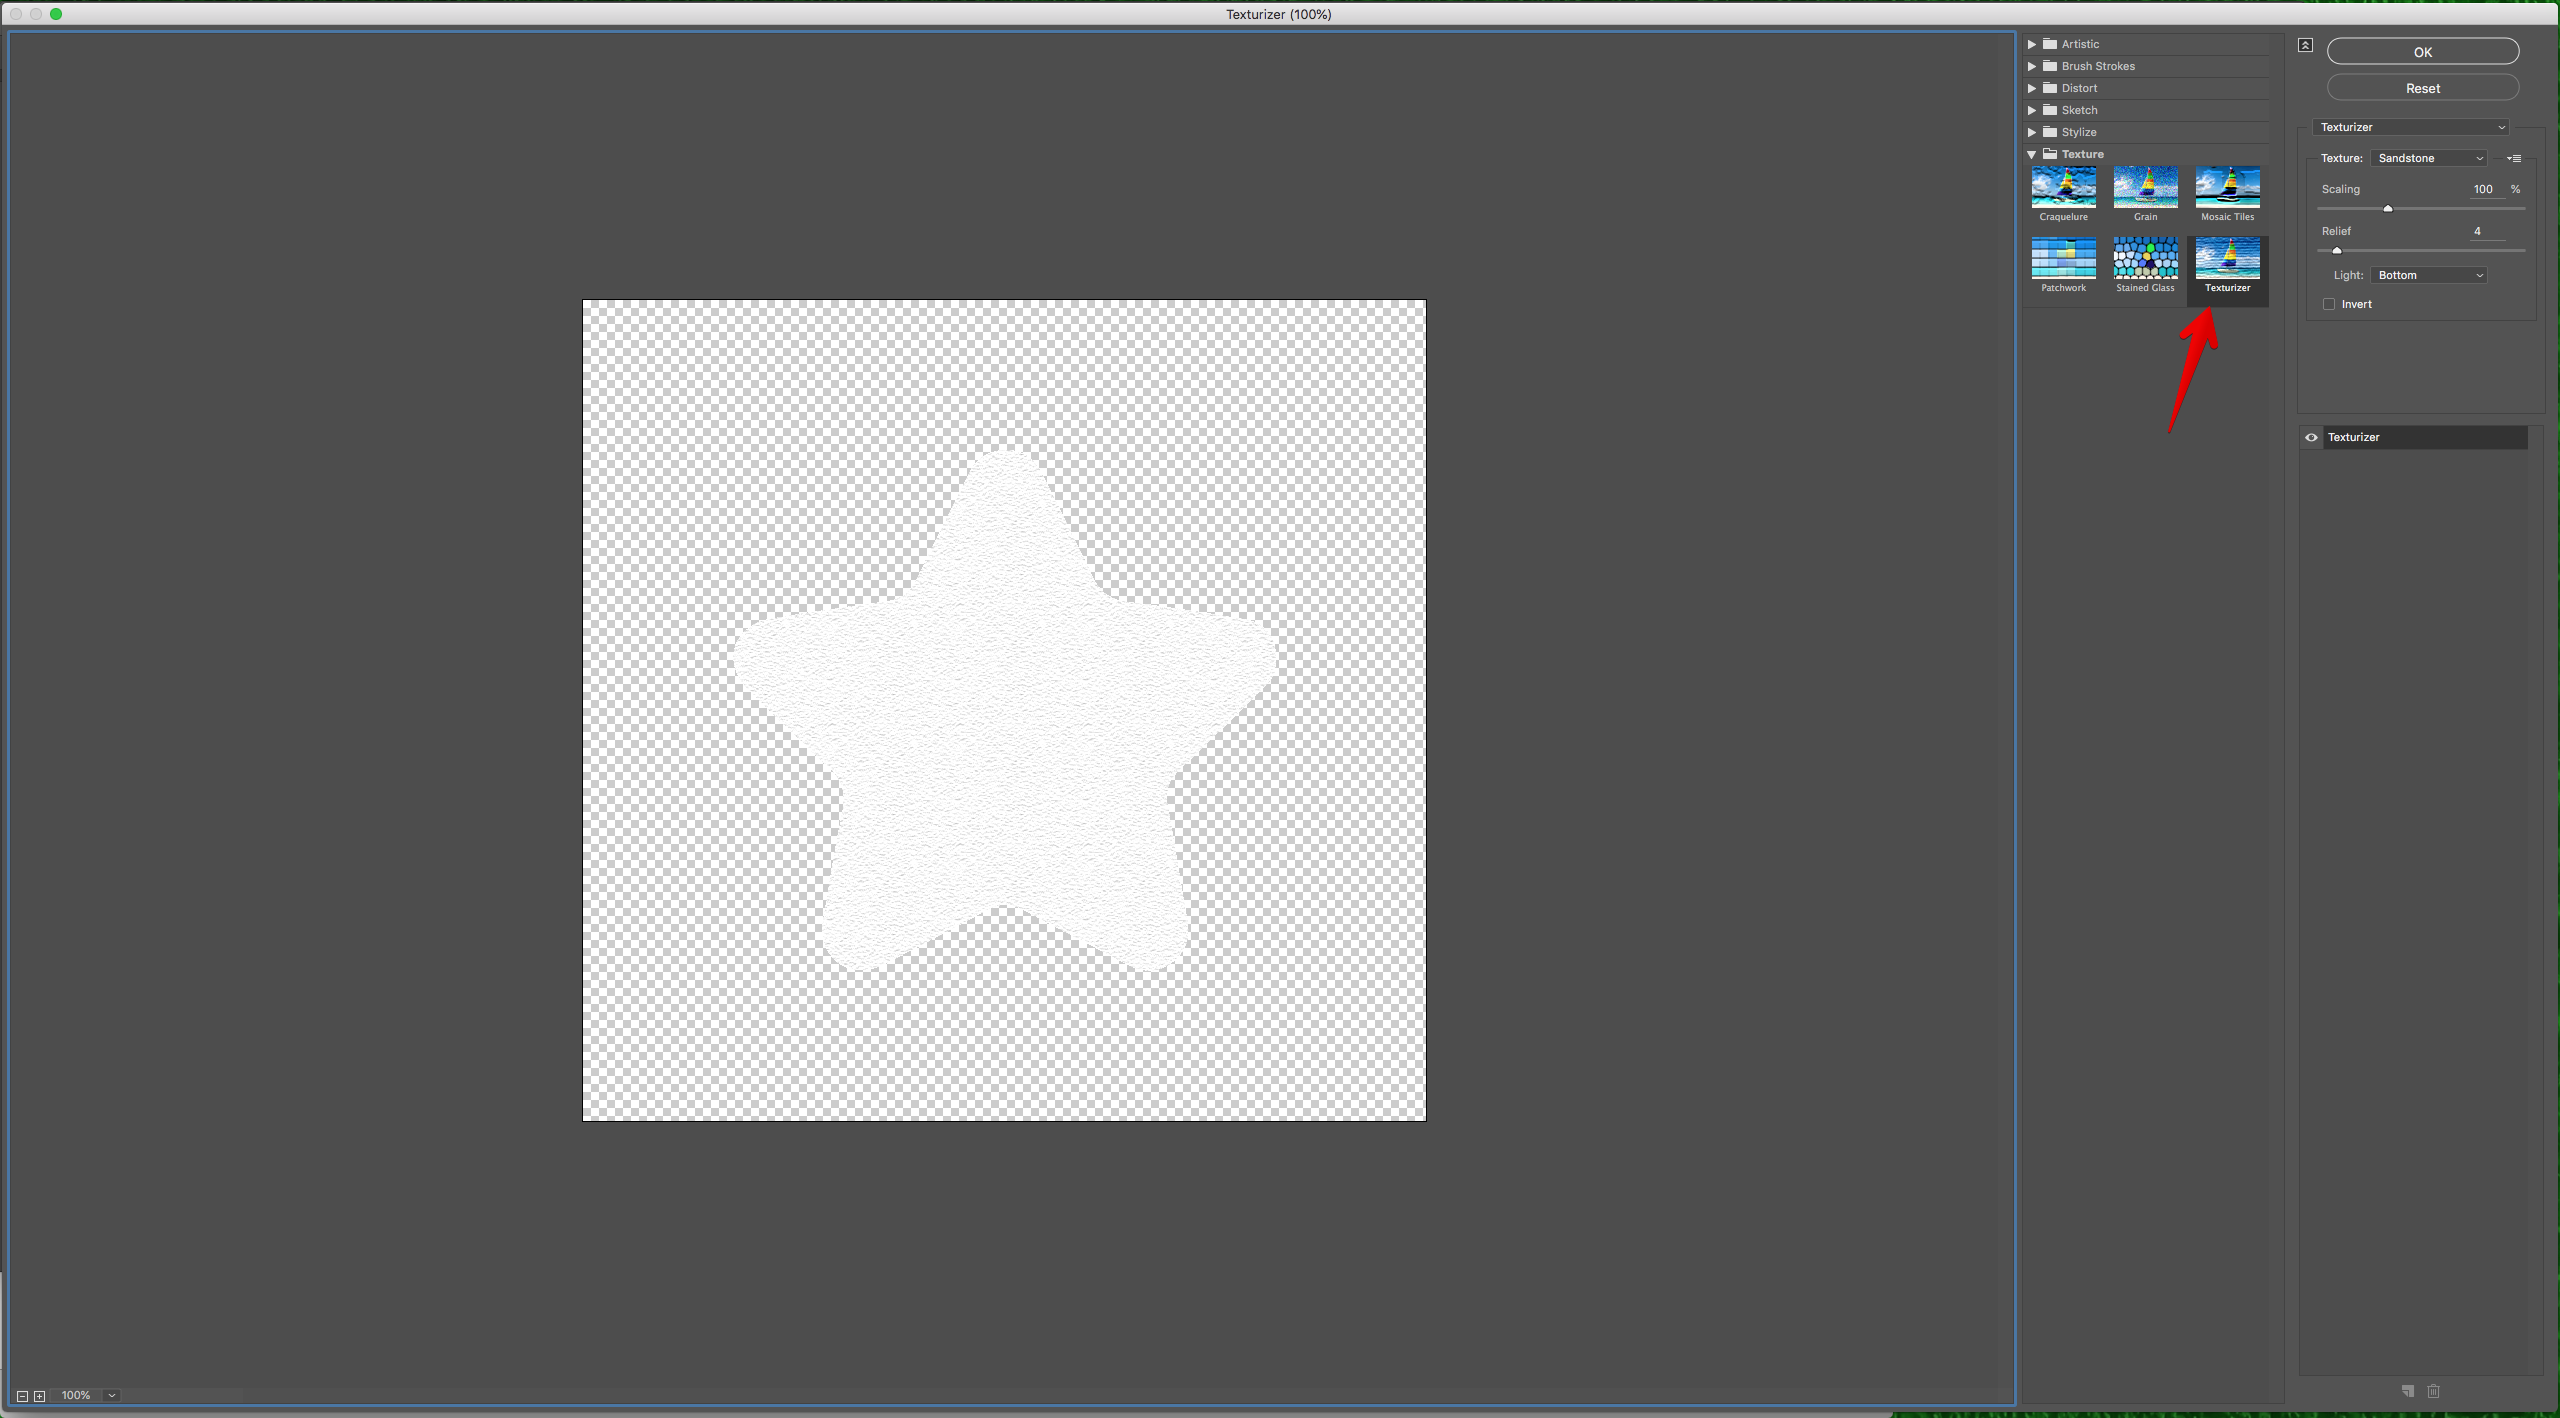
10 - With the vector still selected, head to the “Appearance Panel”, click on the “Add New Fill” button at the bottom, use White as “Fill” color. click on the “Effects” Menu and navigate to Texture > Texturizer, input the following values: “Sandstone”, 100%, 4, and “Bottom” click “OK.
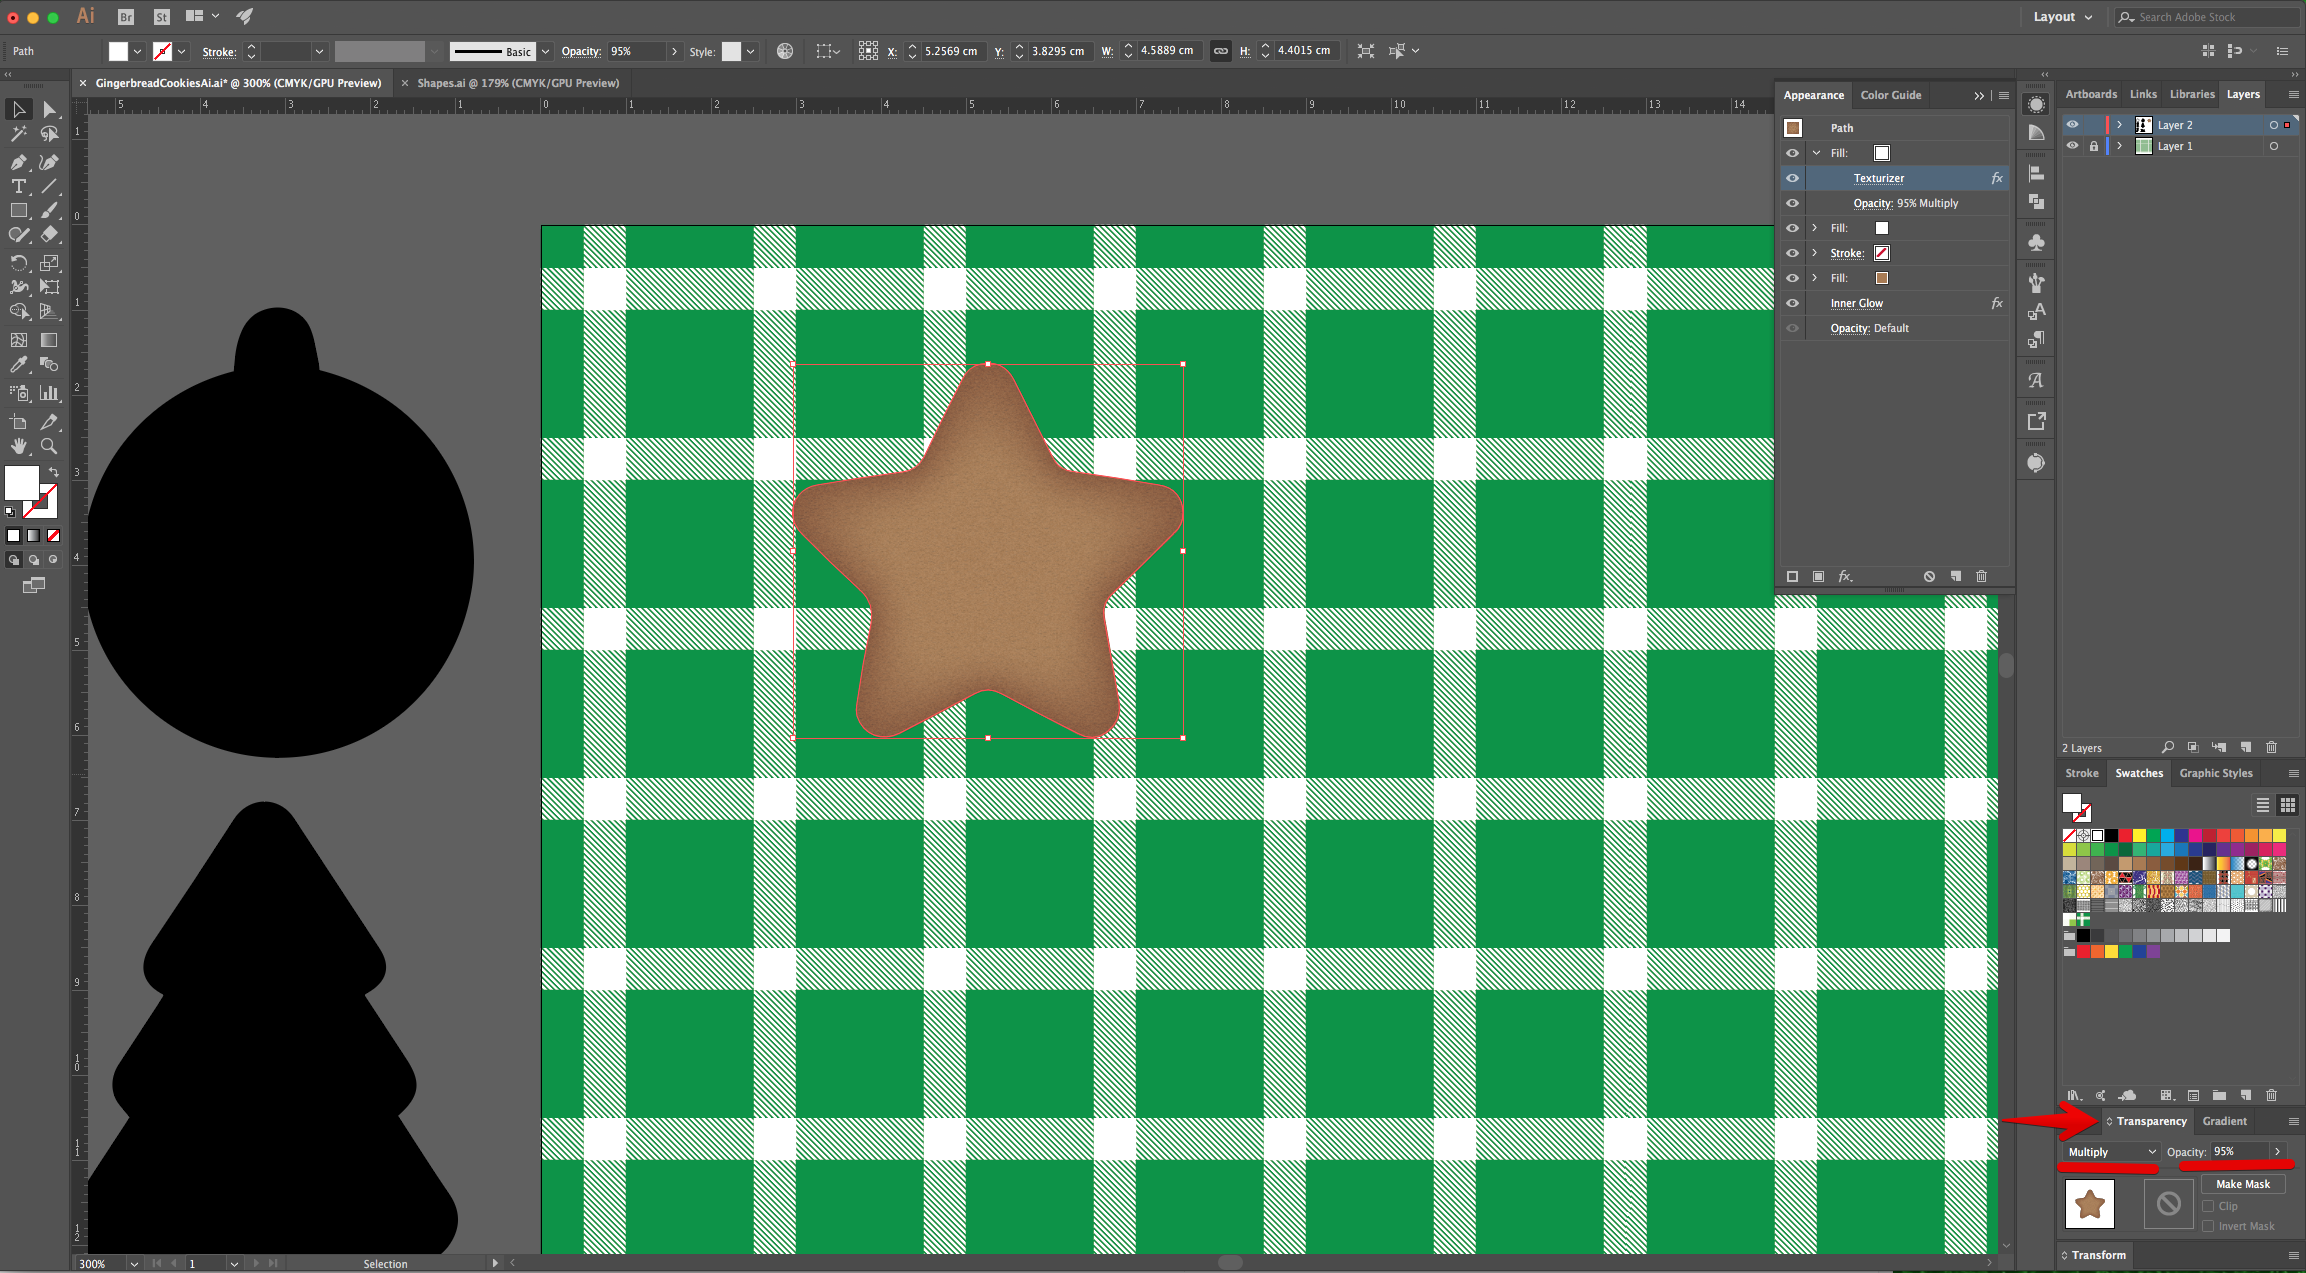
11 - In the “Transparency Panel” change the “Blending Mode” to “Multiply” and the “Opacity” to 95%.
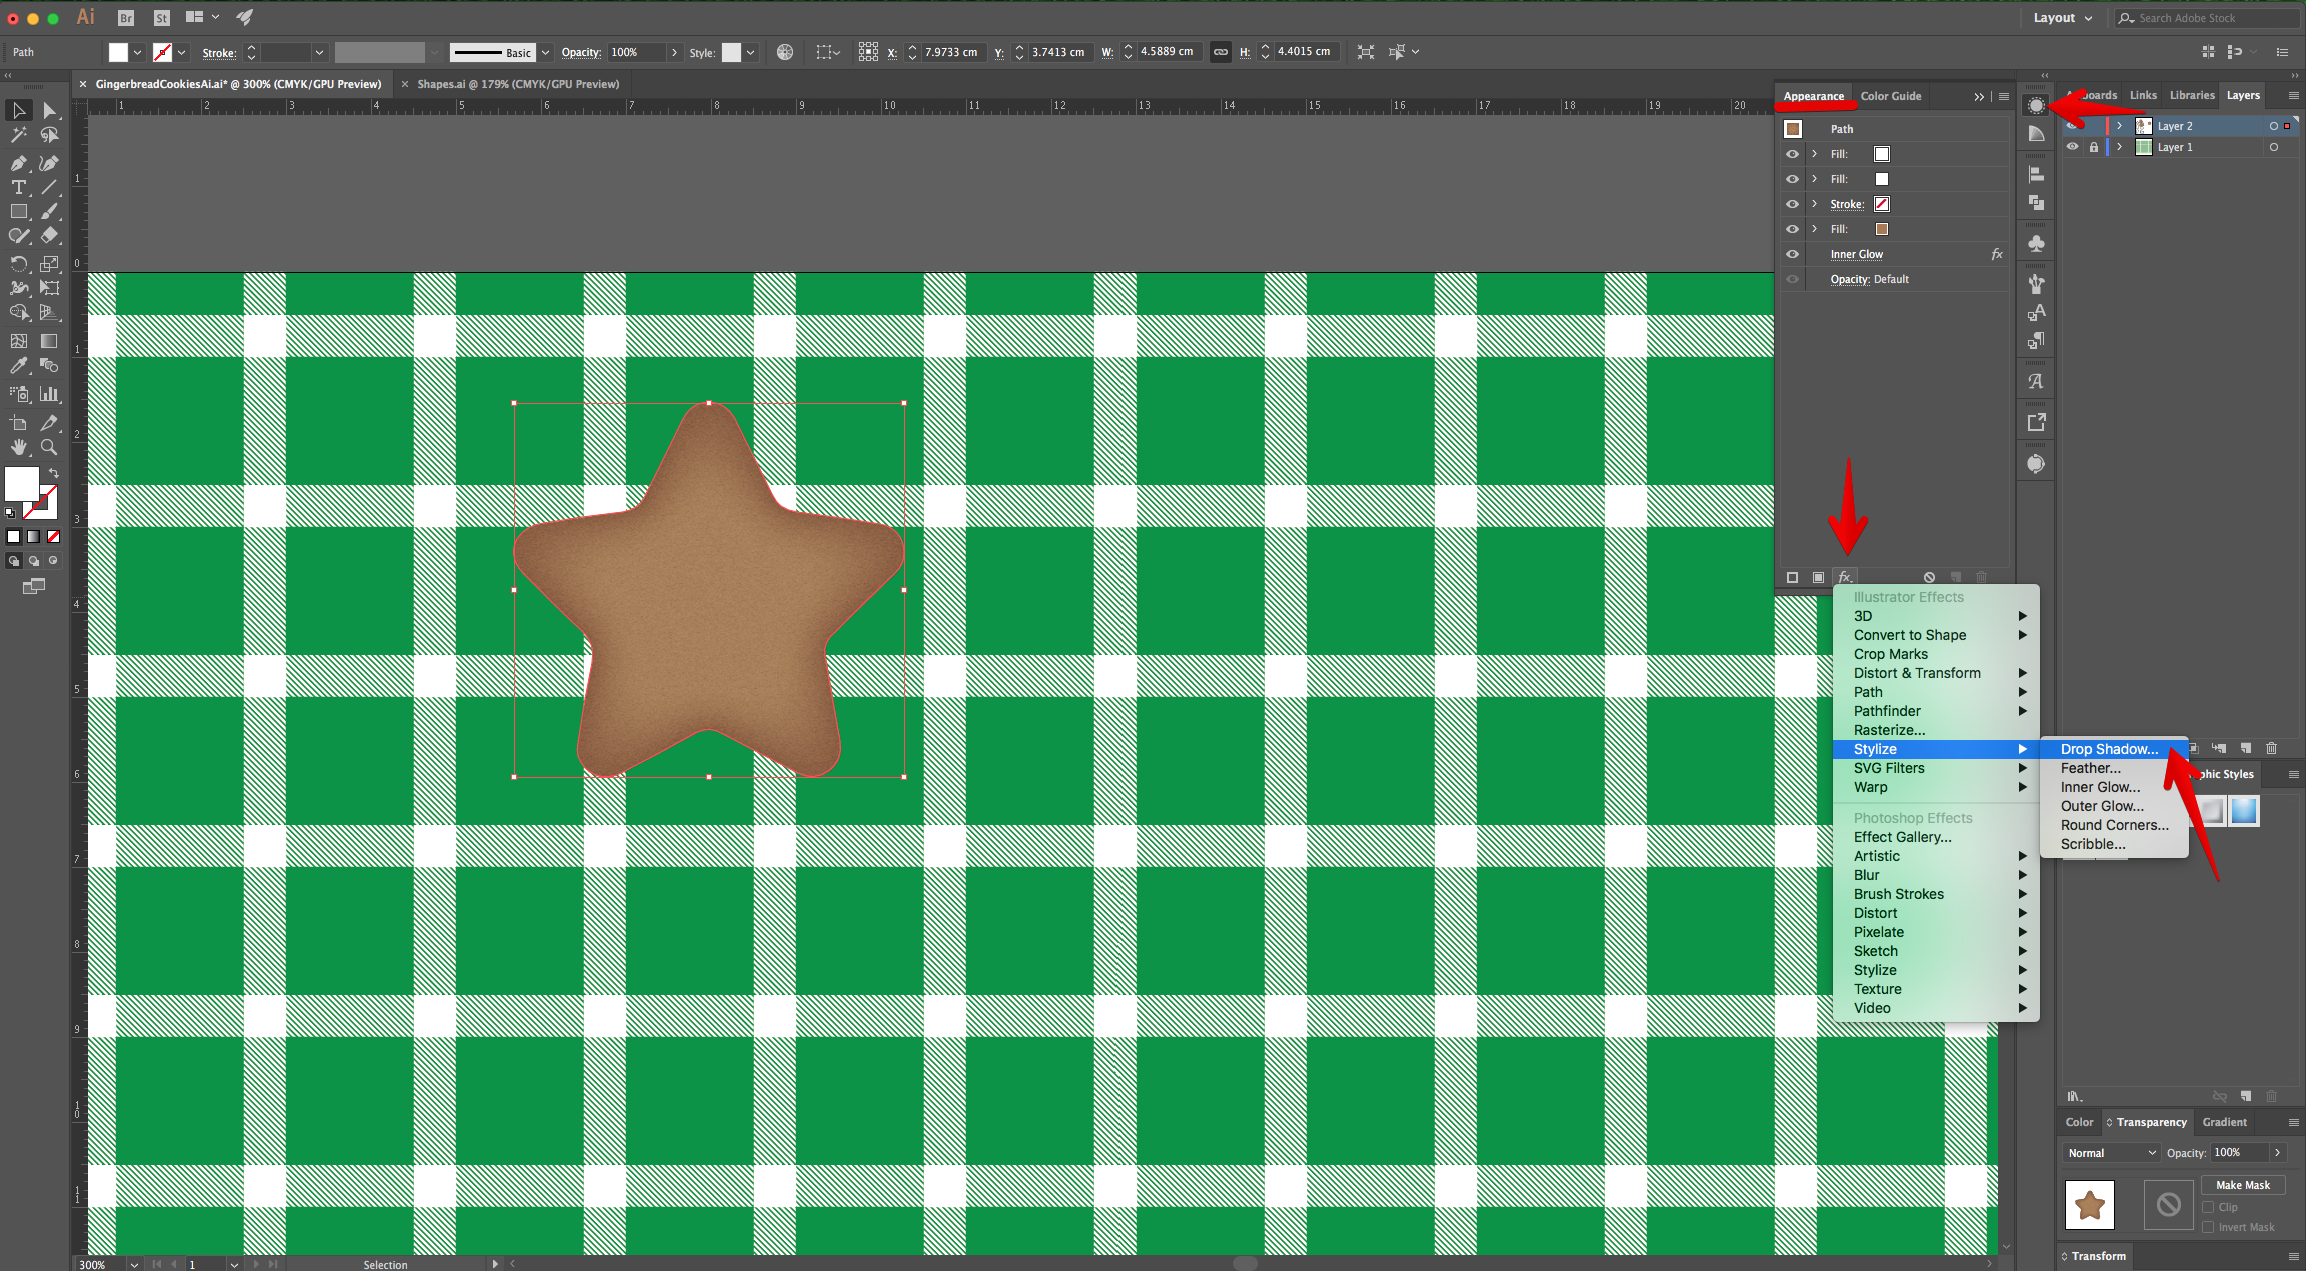
12 - Head to the “Appearance Panel”, click on the “Effects” Menu at the bottom and navigate to Stylize > Drop Shadow, use “Multiply”, 75% for “Opacity”, X-Offset: 0, Y-Offset: 0.05 cm, Blur: 0.1 cm and Black (#000000) as “Color”, click “OK.
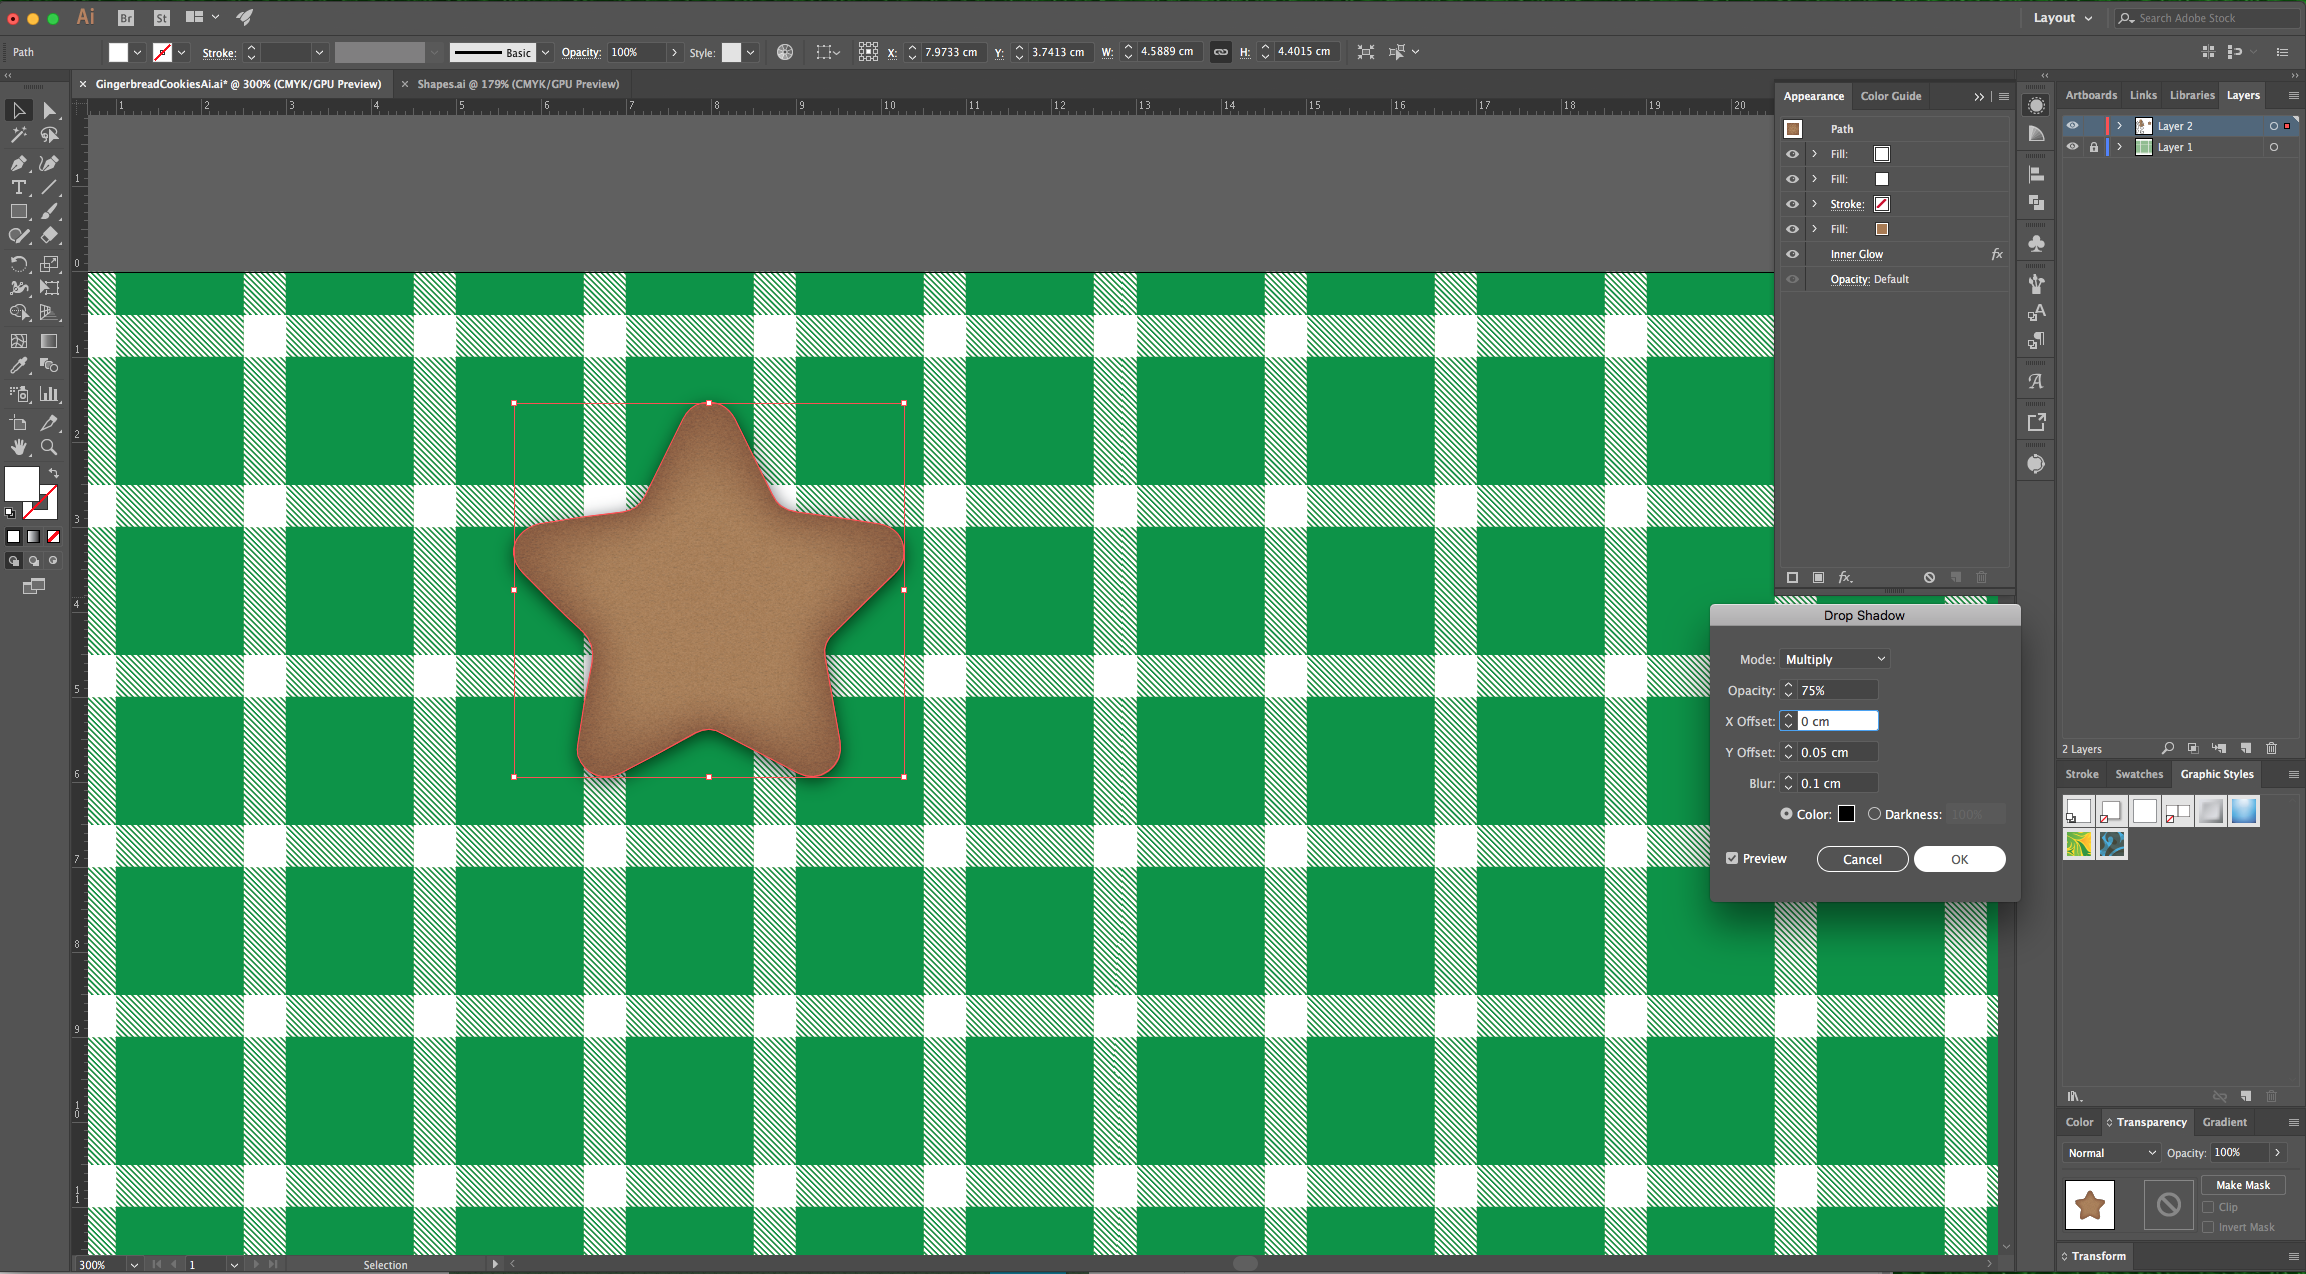
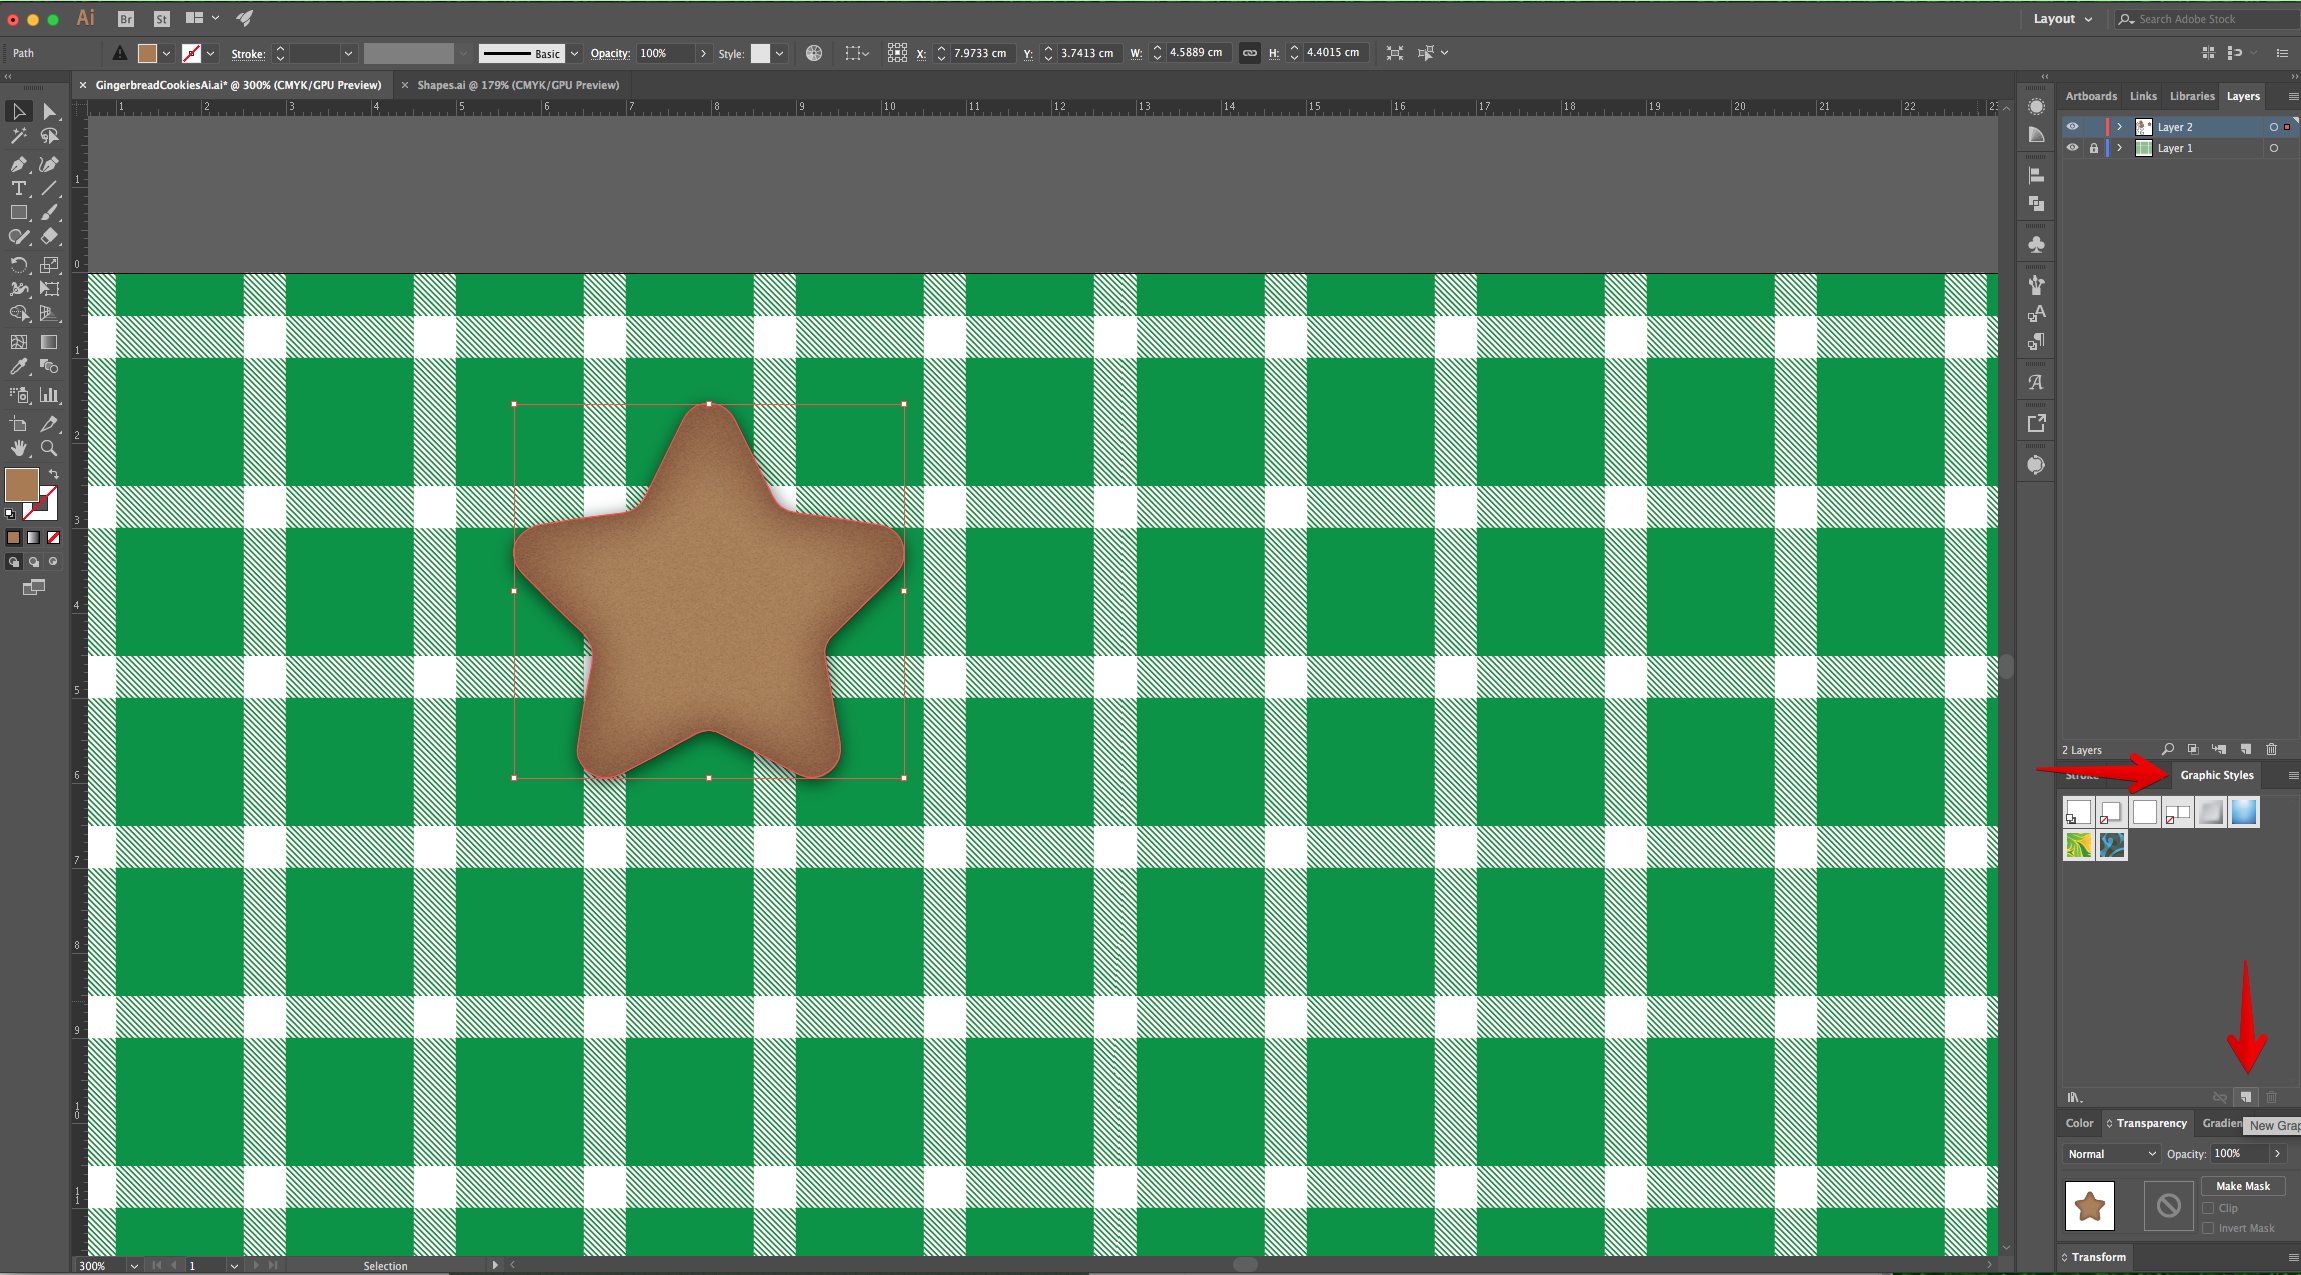
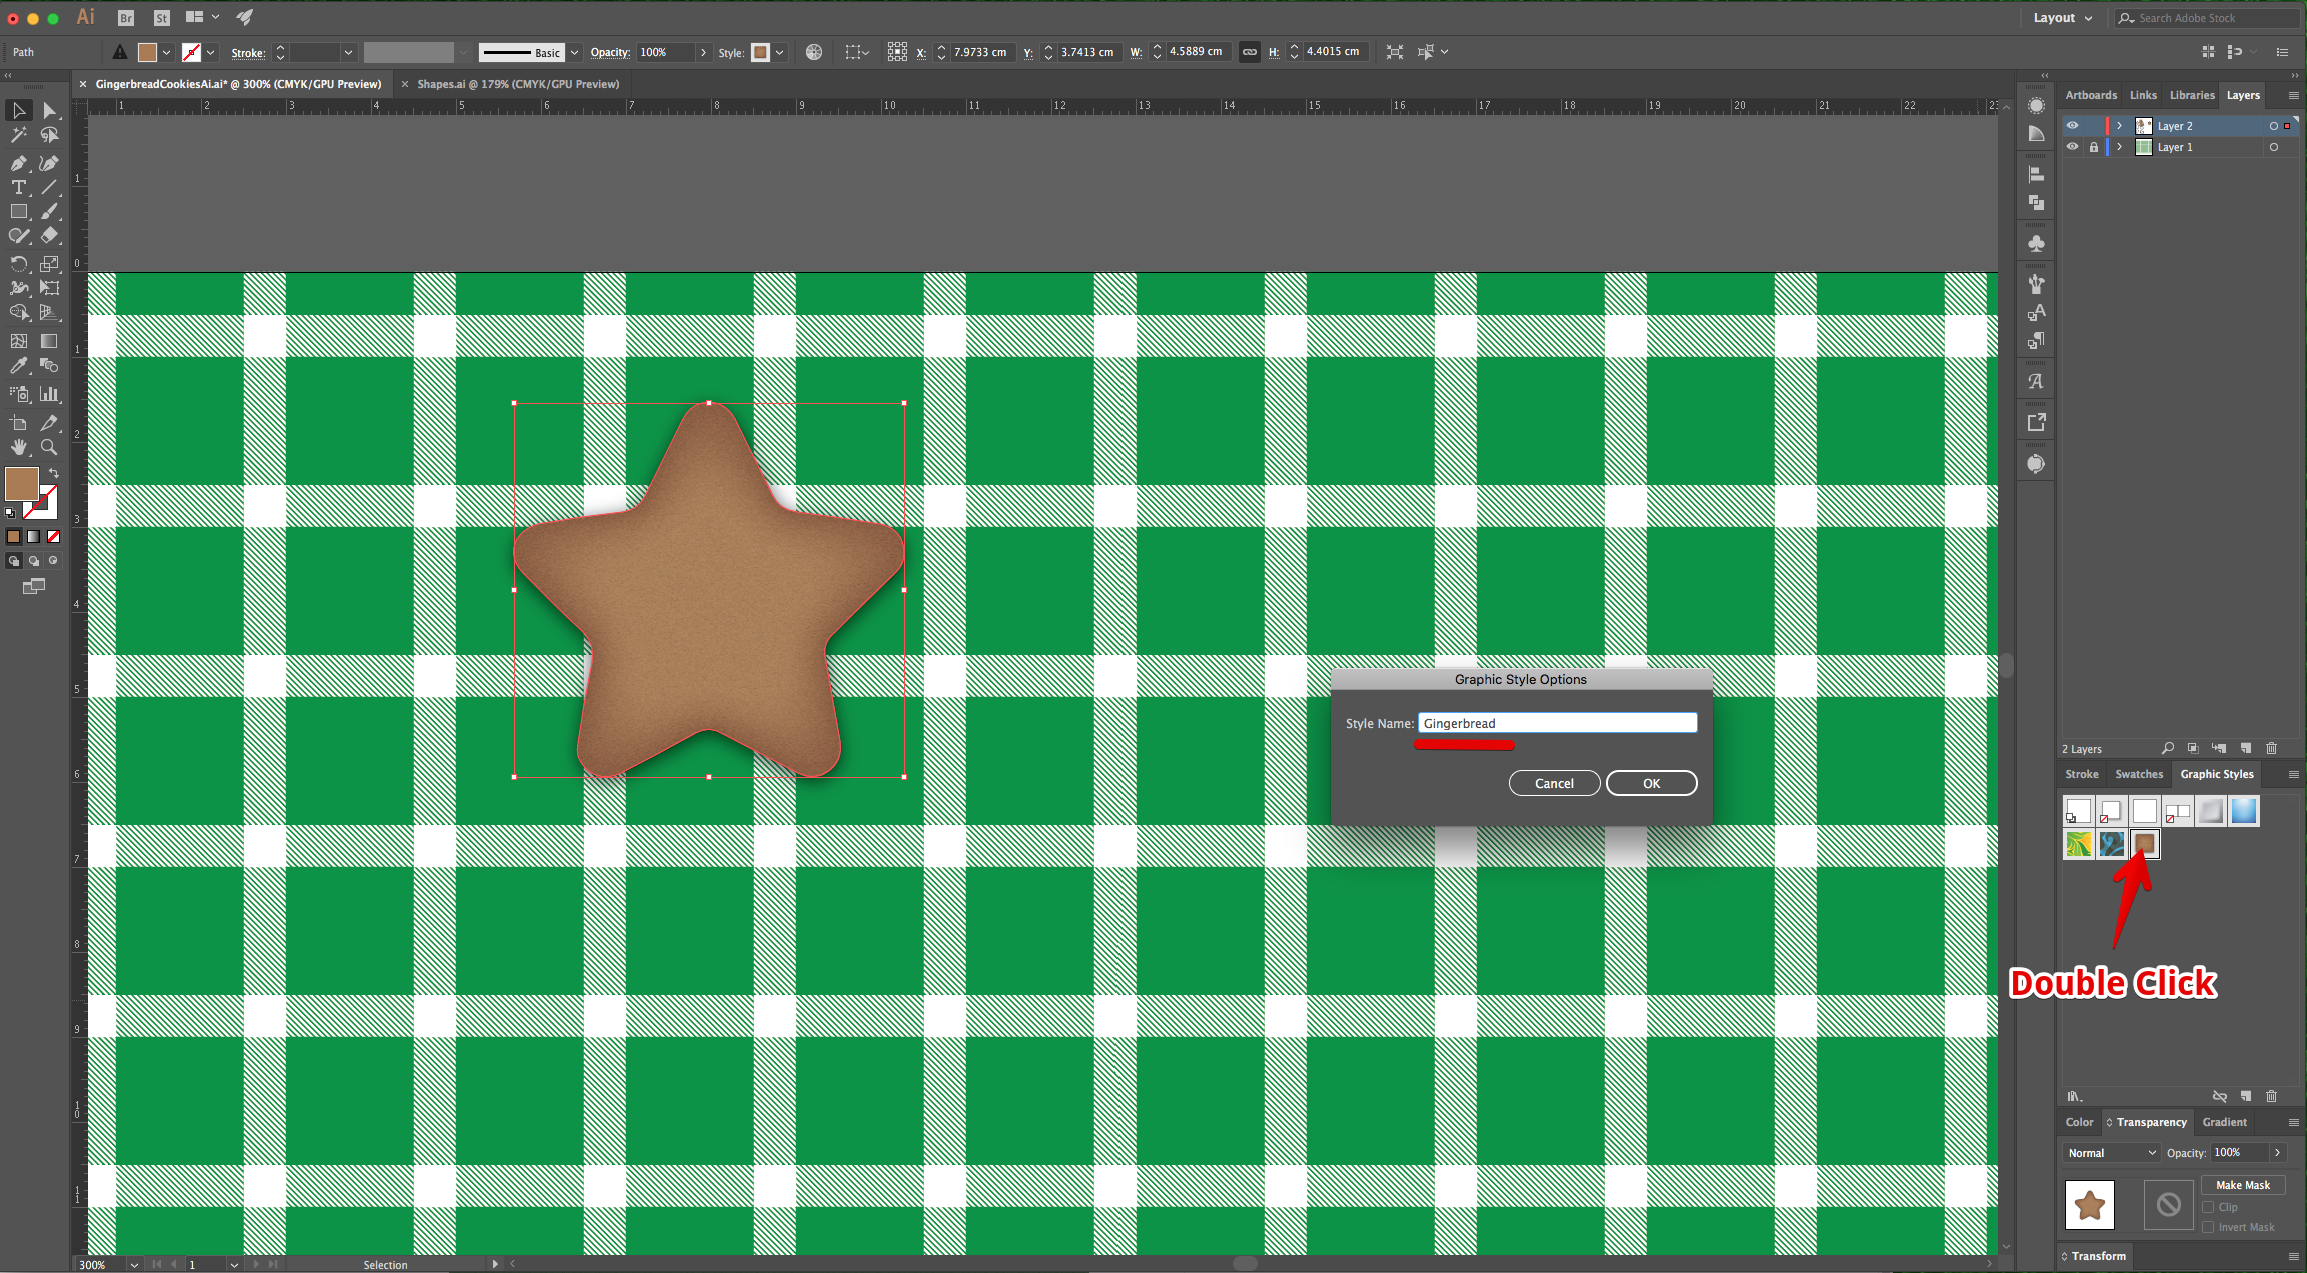
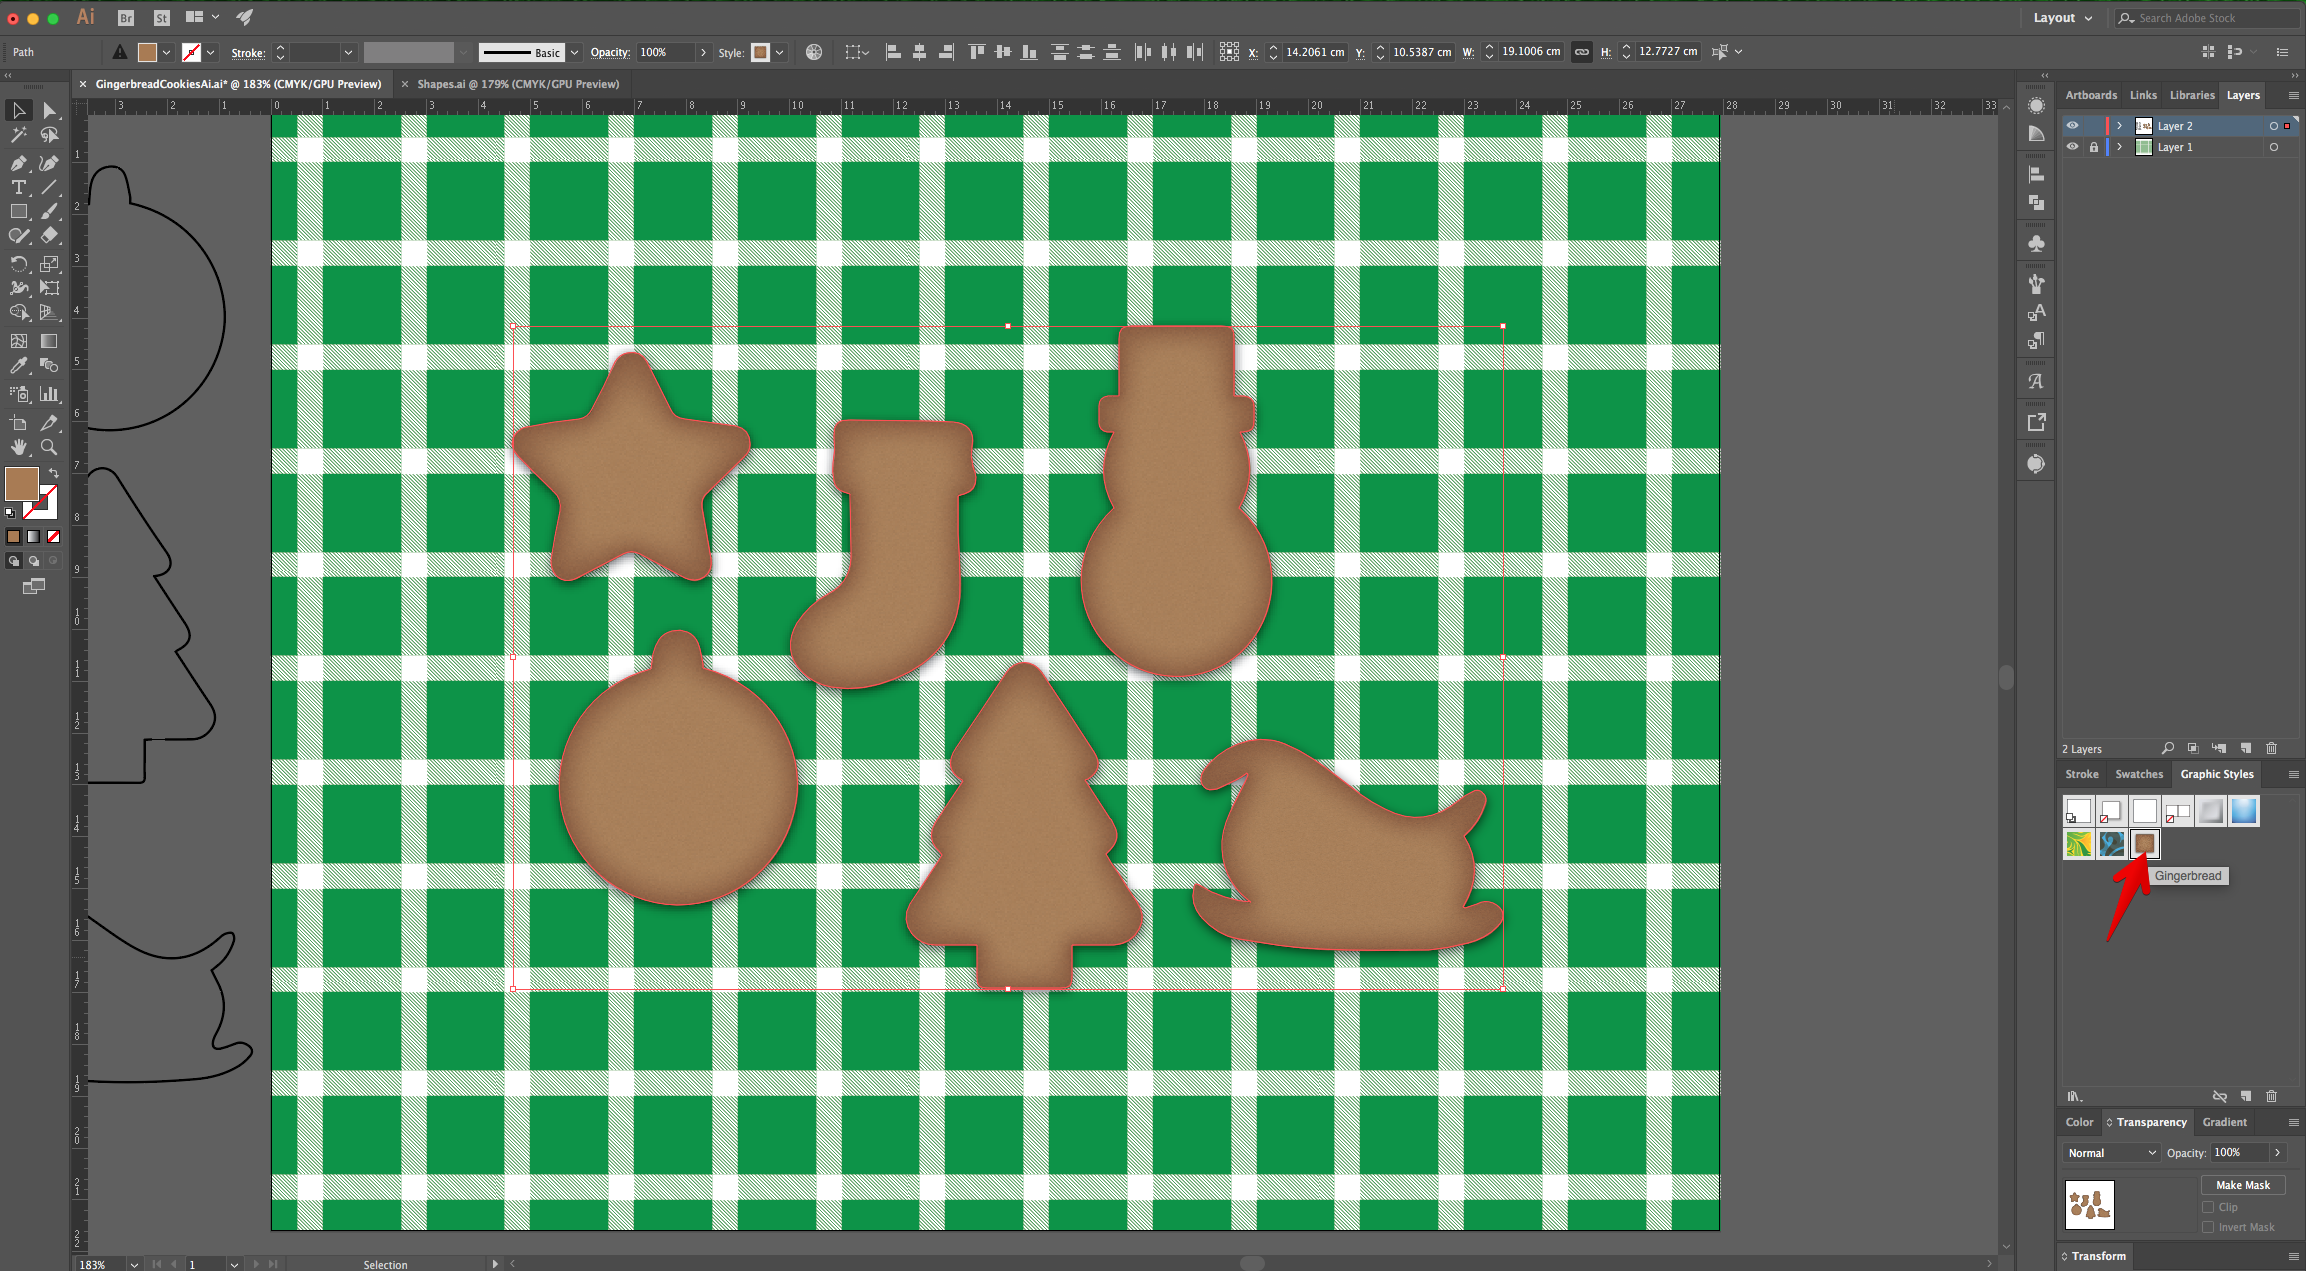
13 - With your “Cookie” still selected, head to the “Graphic Styles” Panel and click on the “New Graphic Style” button at the bottom of the Panel. Name the New Style “Gingerbread”. Select the rest of the larger Shapes and fill them with the new Style.
14 - Select the smaller Shapes and place them on top of the “Cookies”.
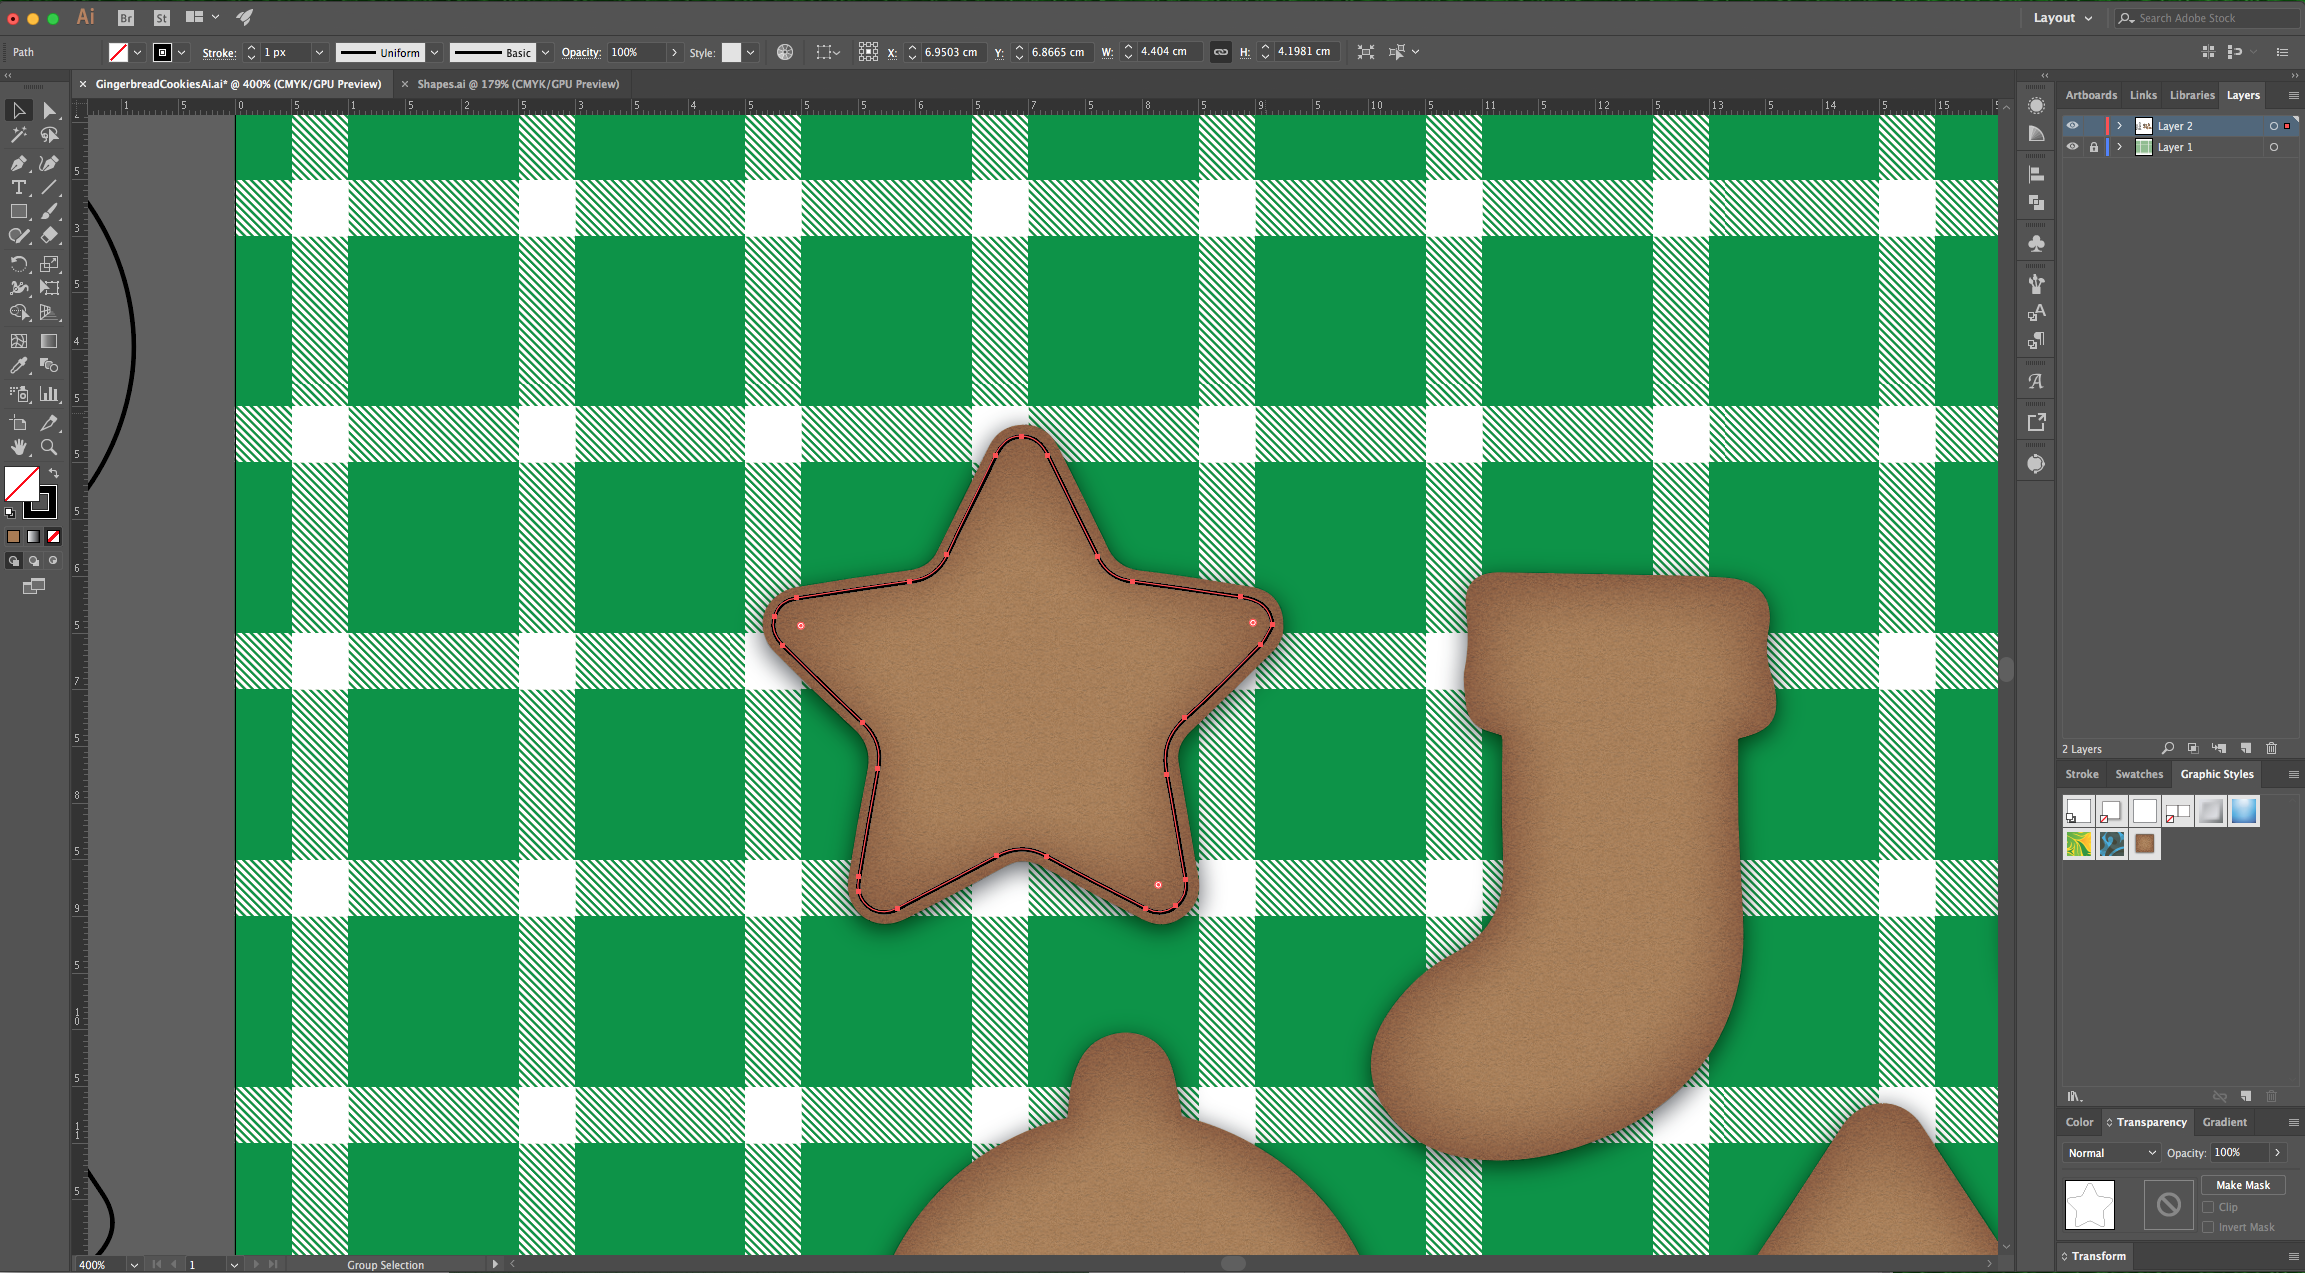
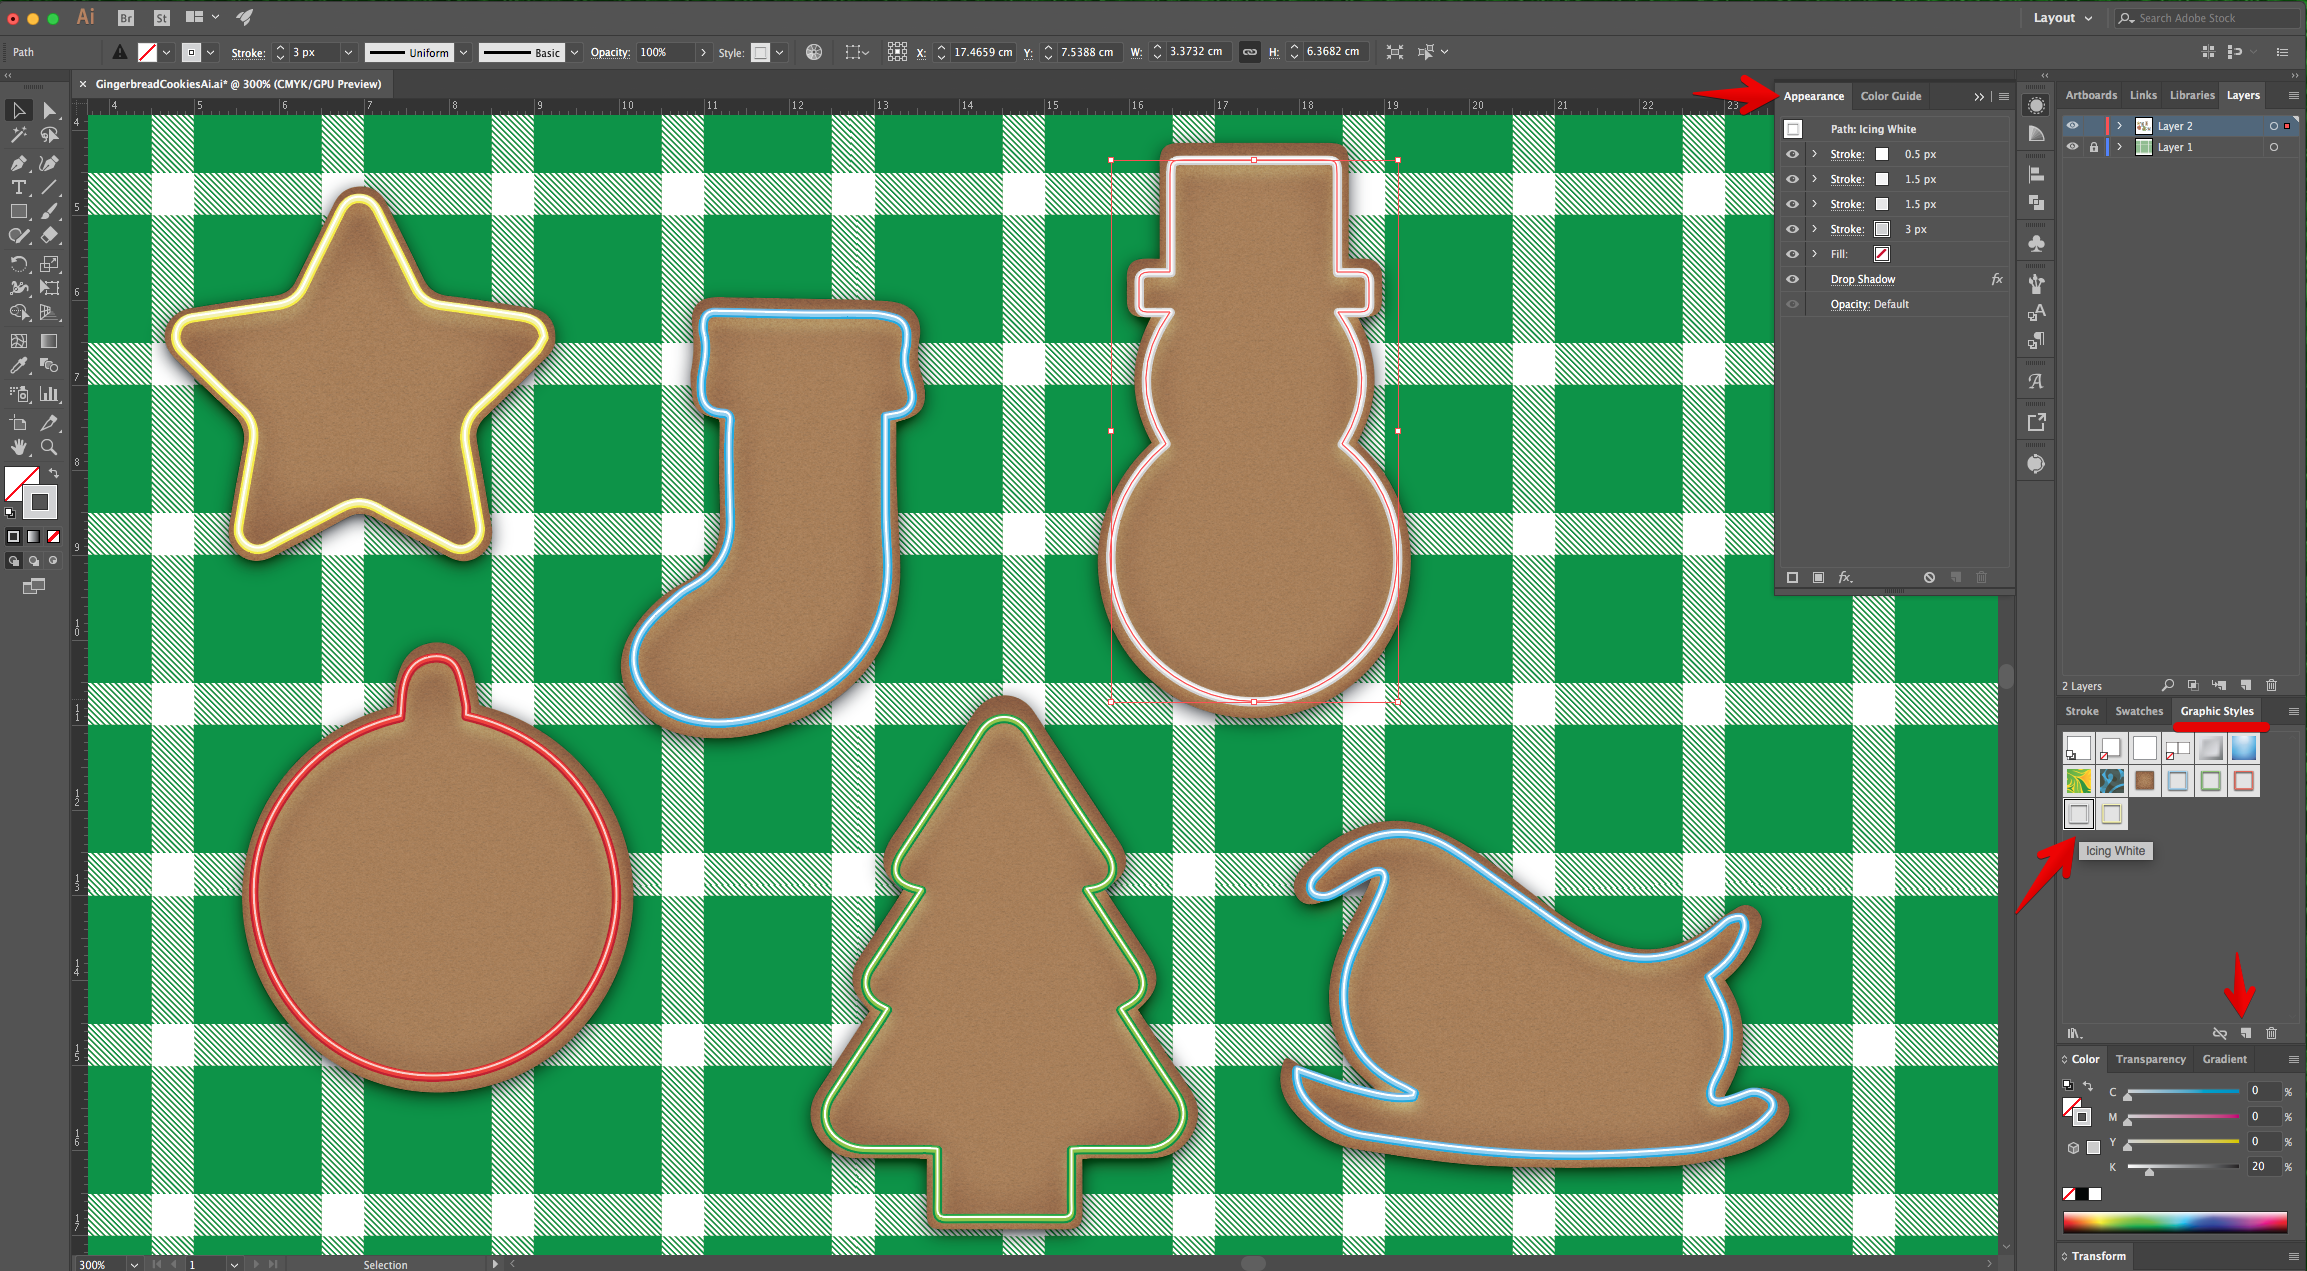
15 - Change the “Stroke” size to 3 pt with a “Round Cap and Corner” and change the “Stroke” color to a Medium Blue from the “Swatches Panel” .
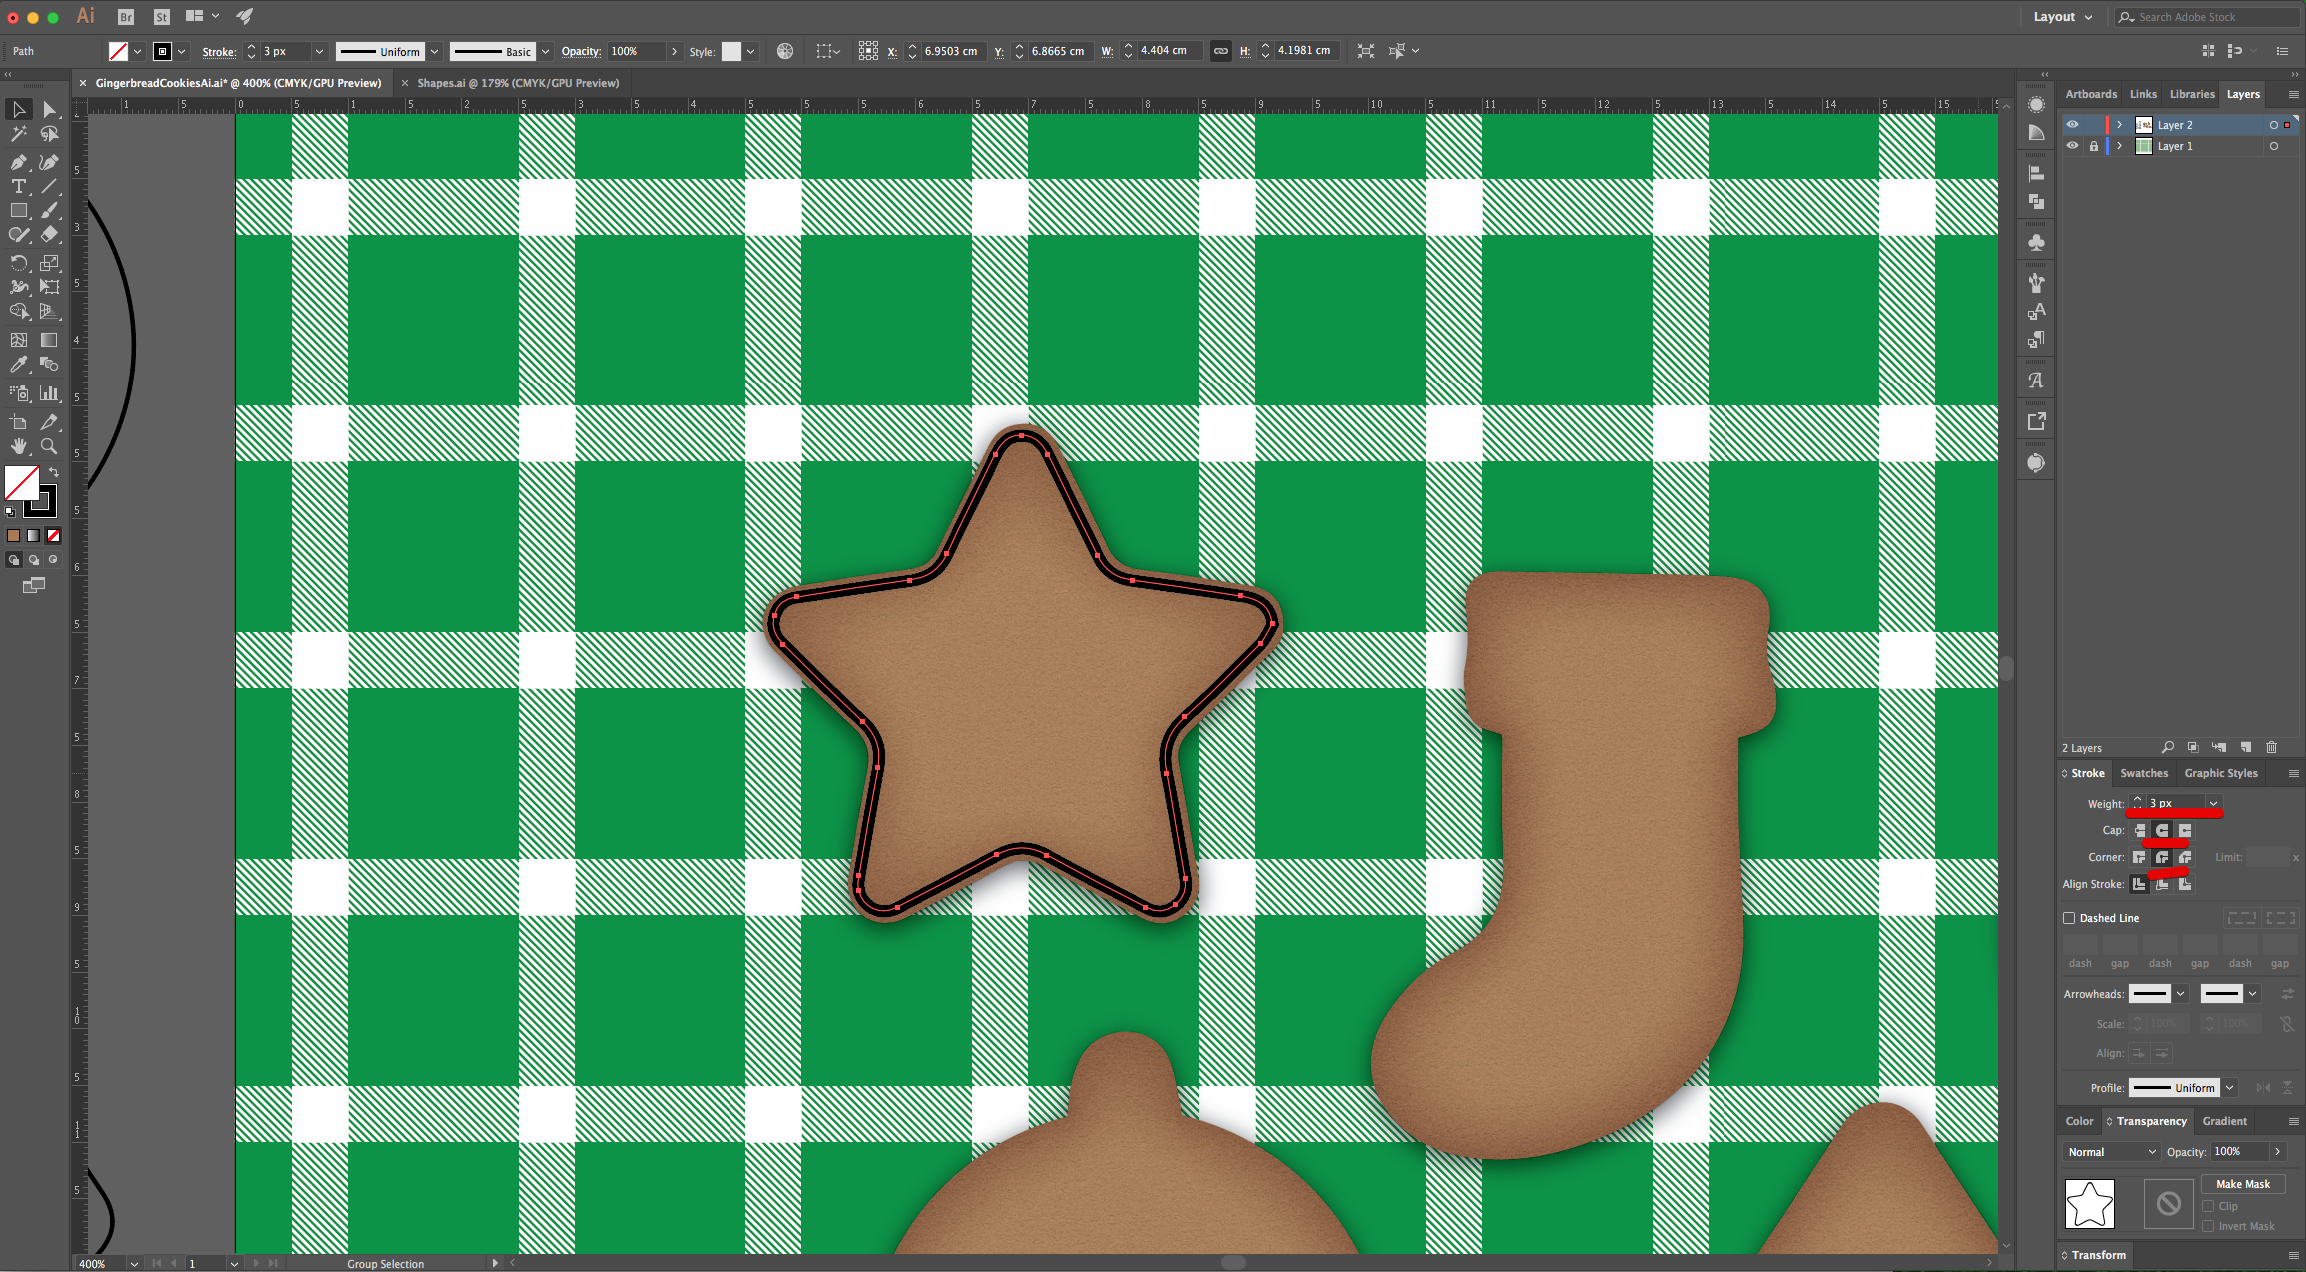
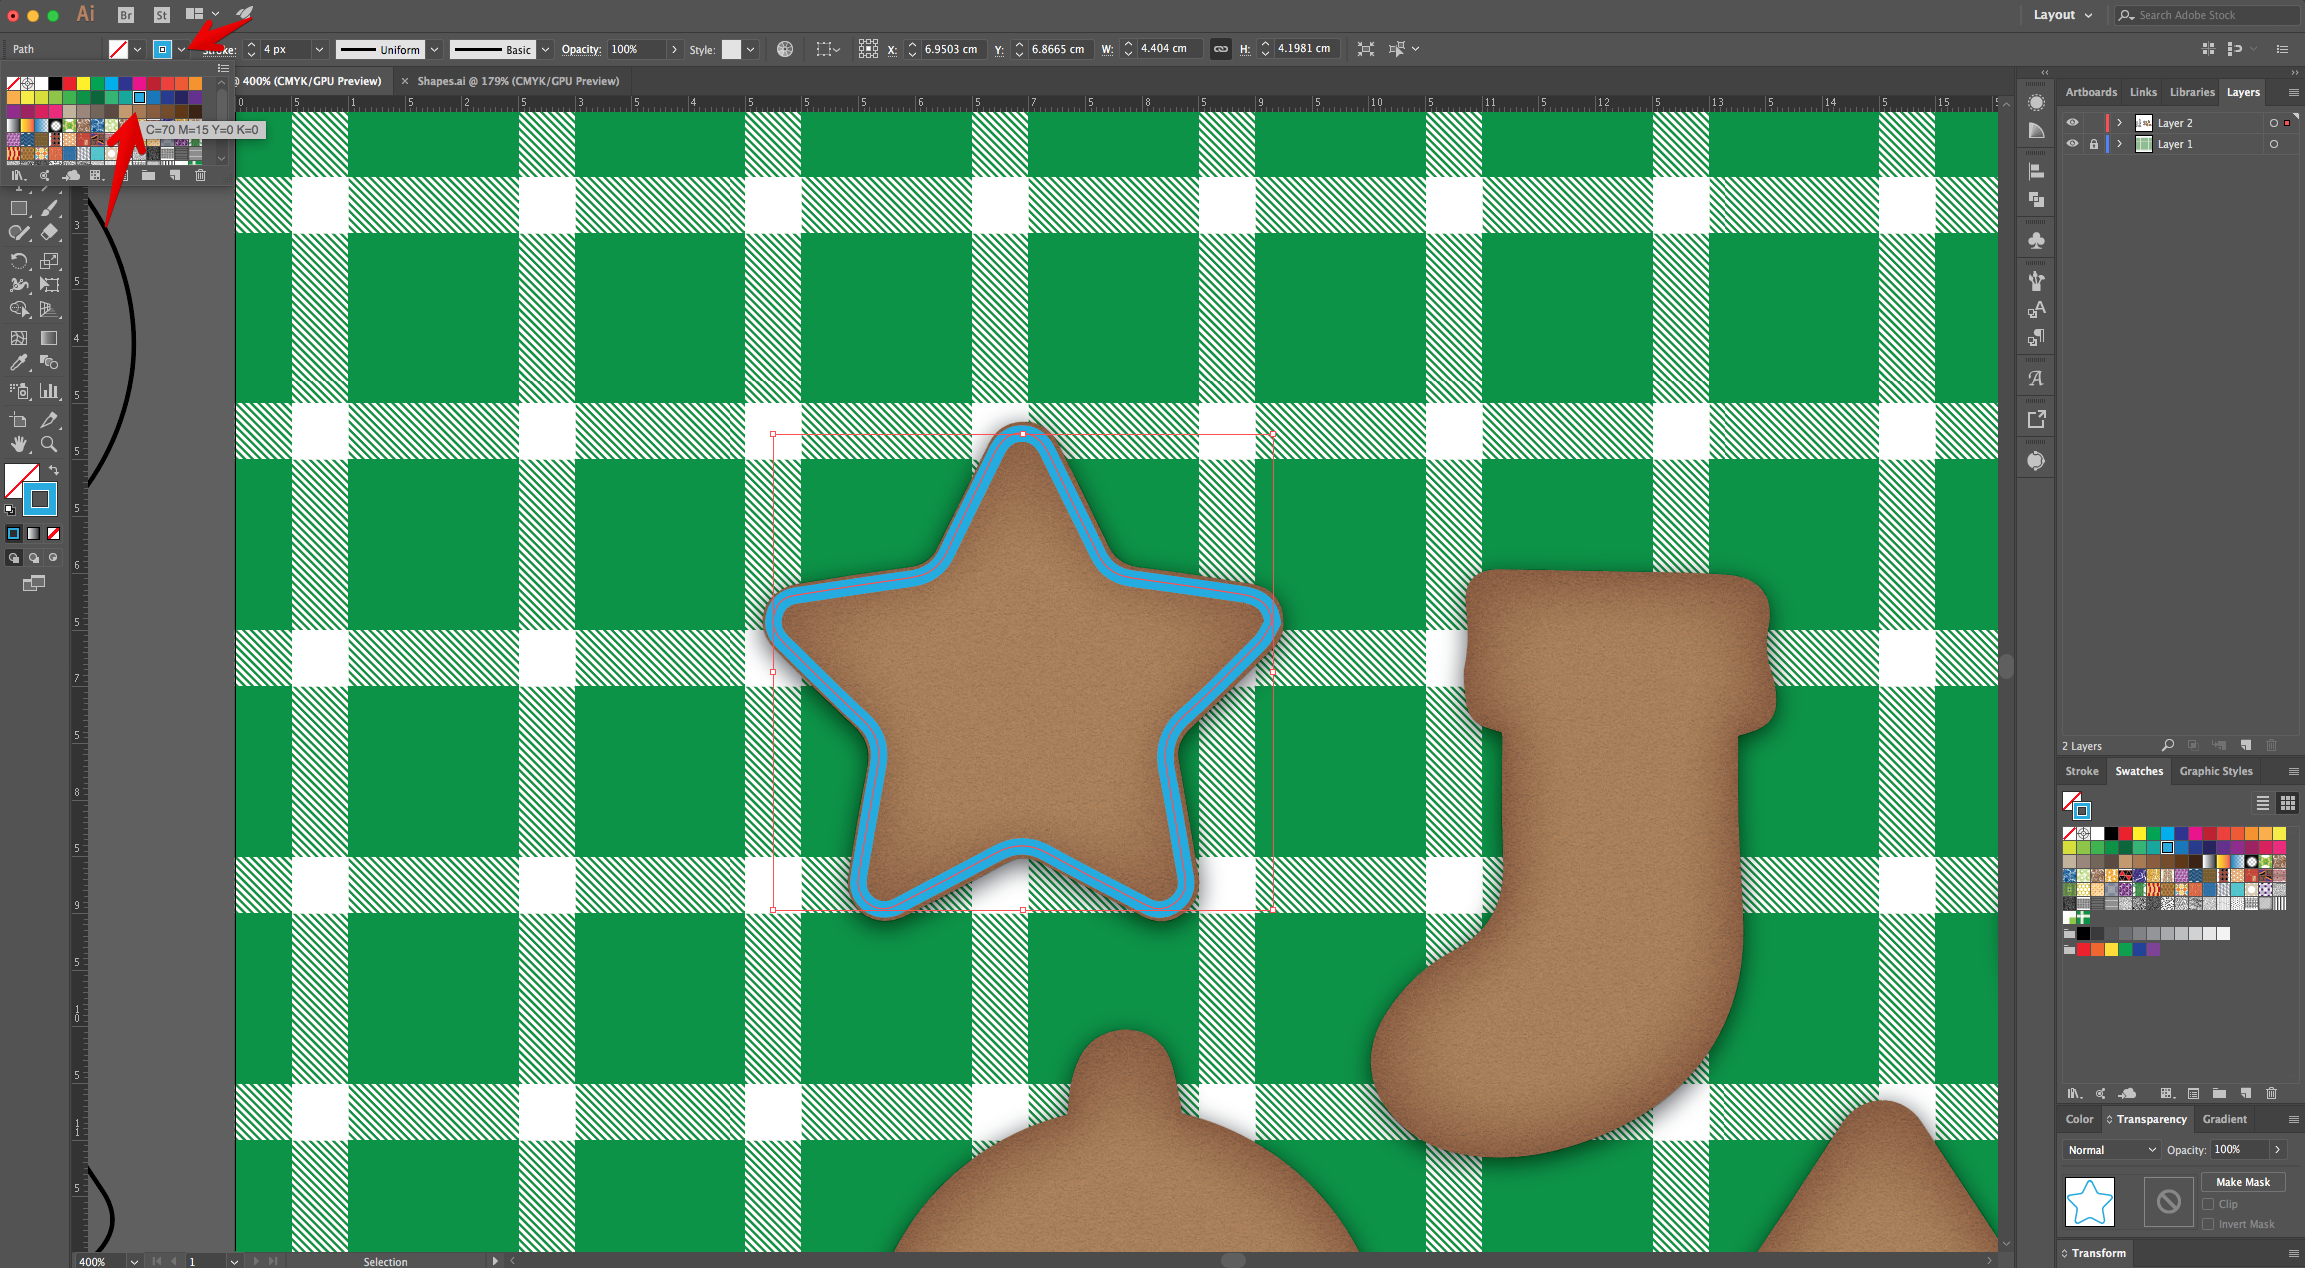
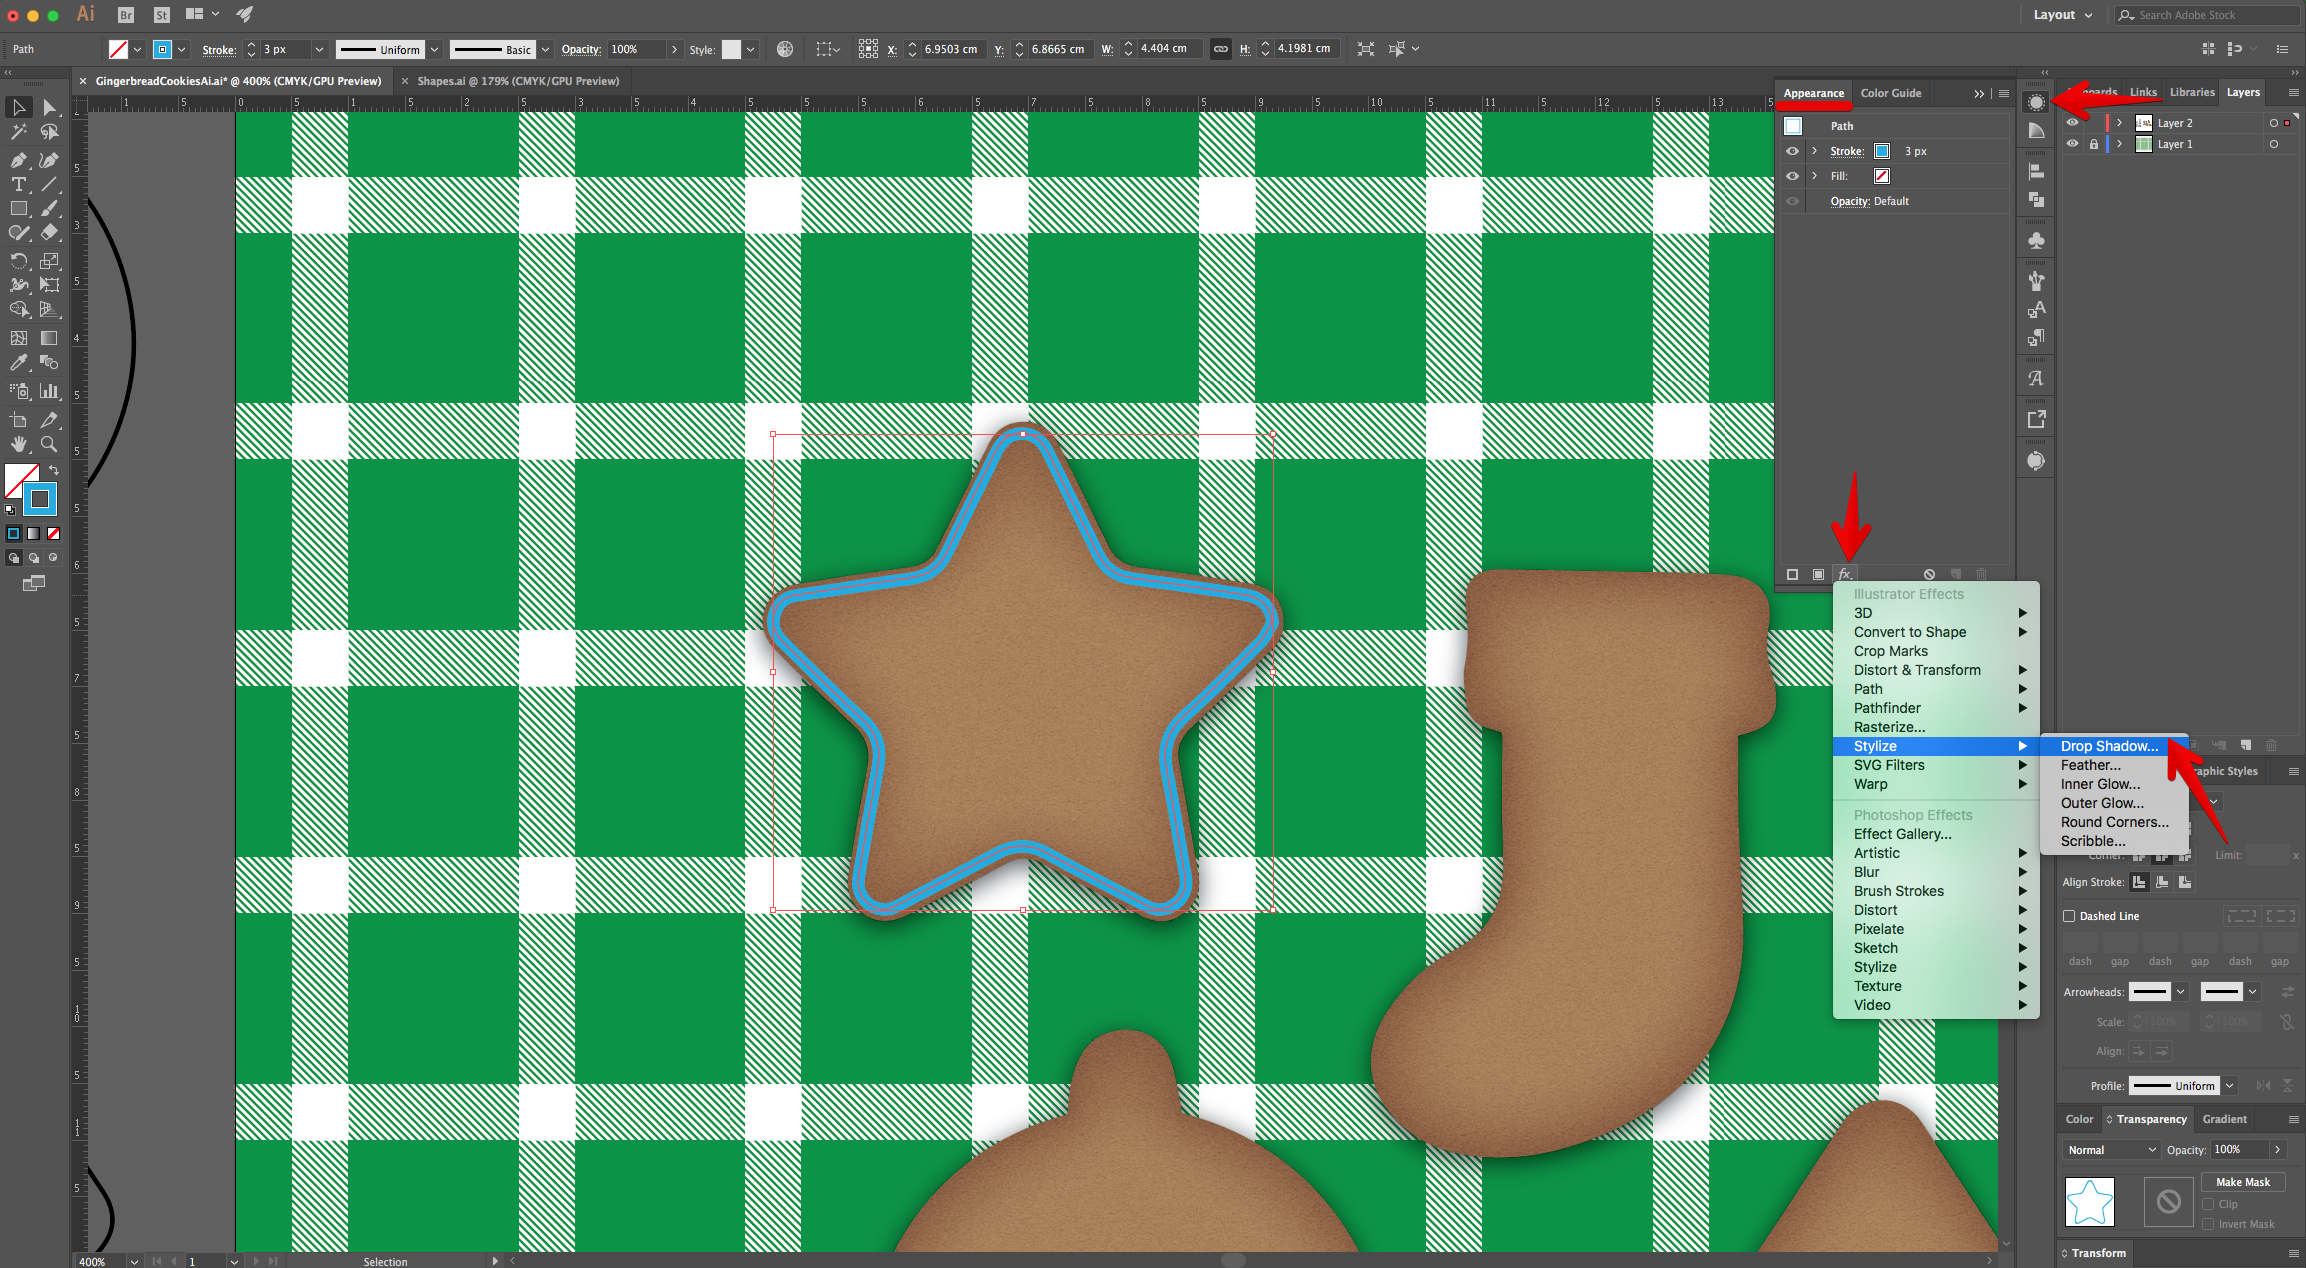
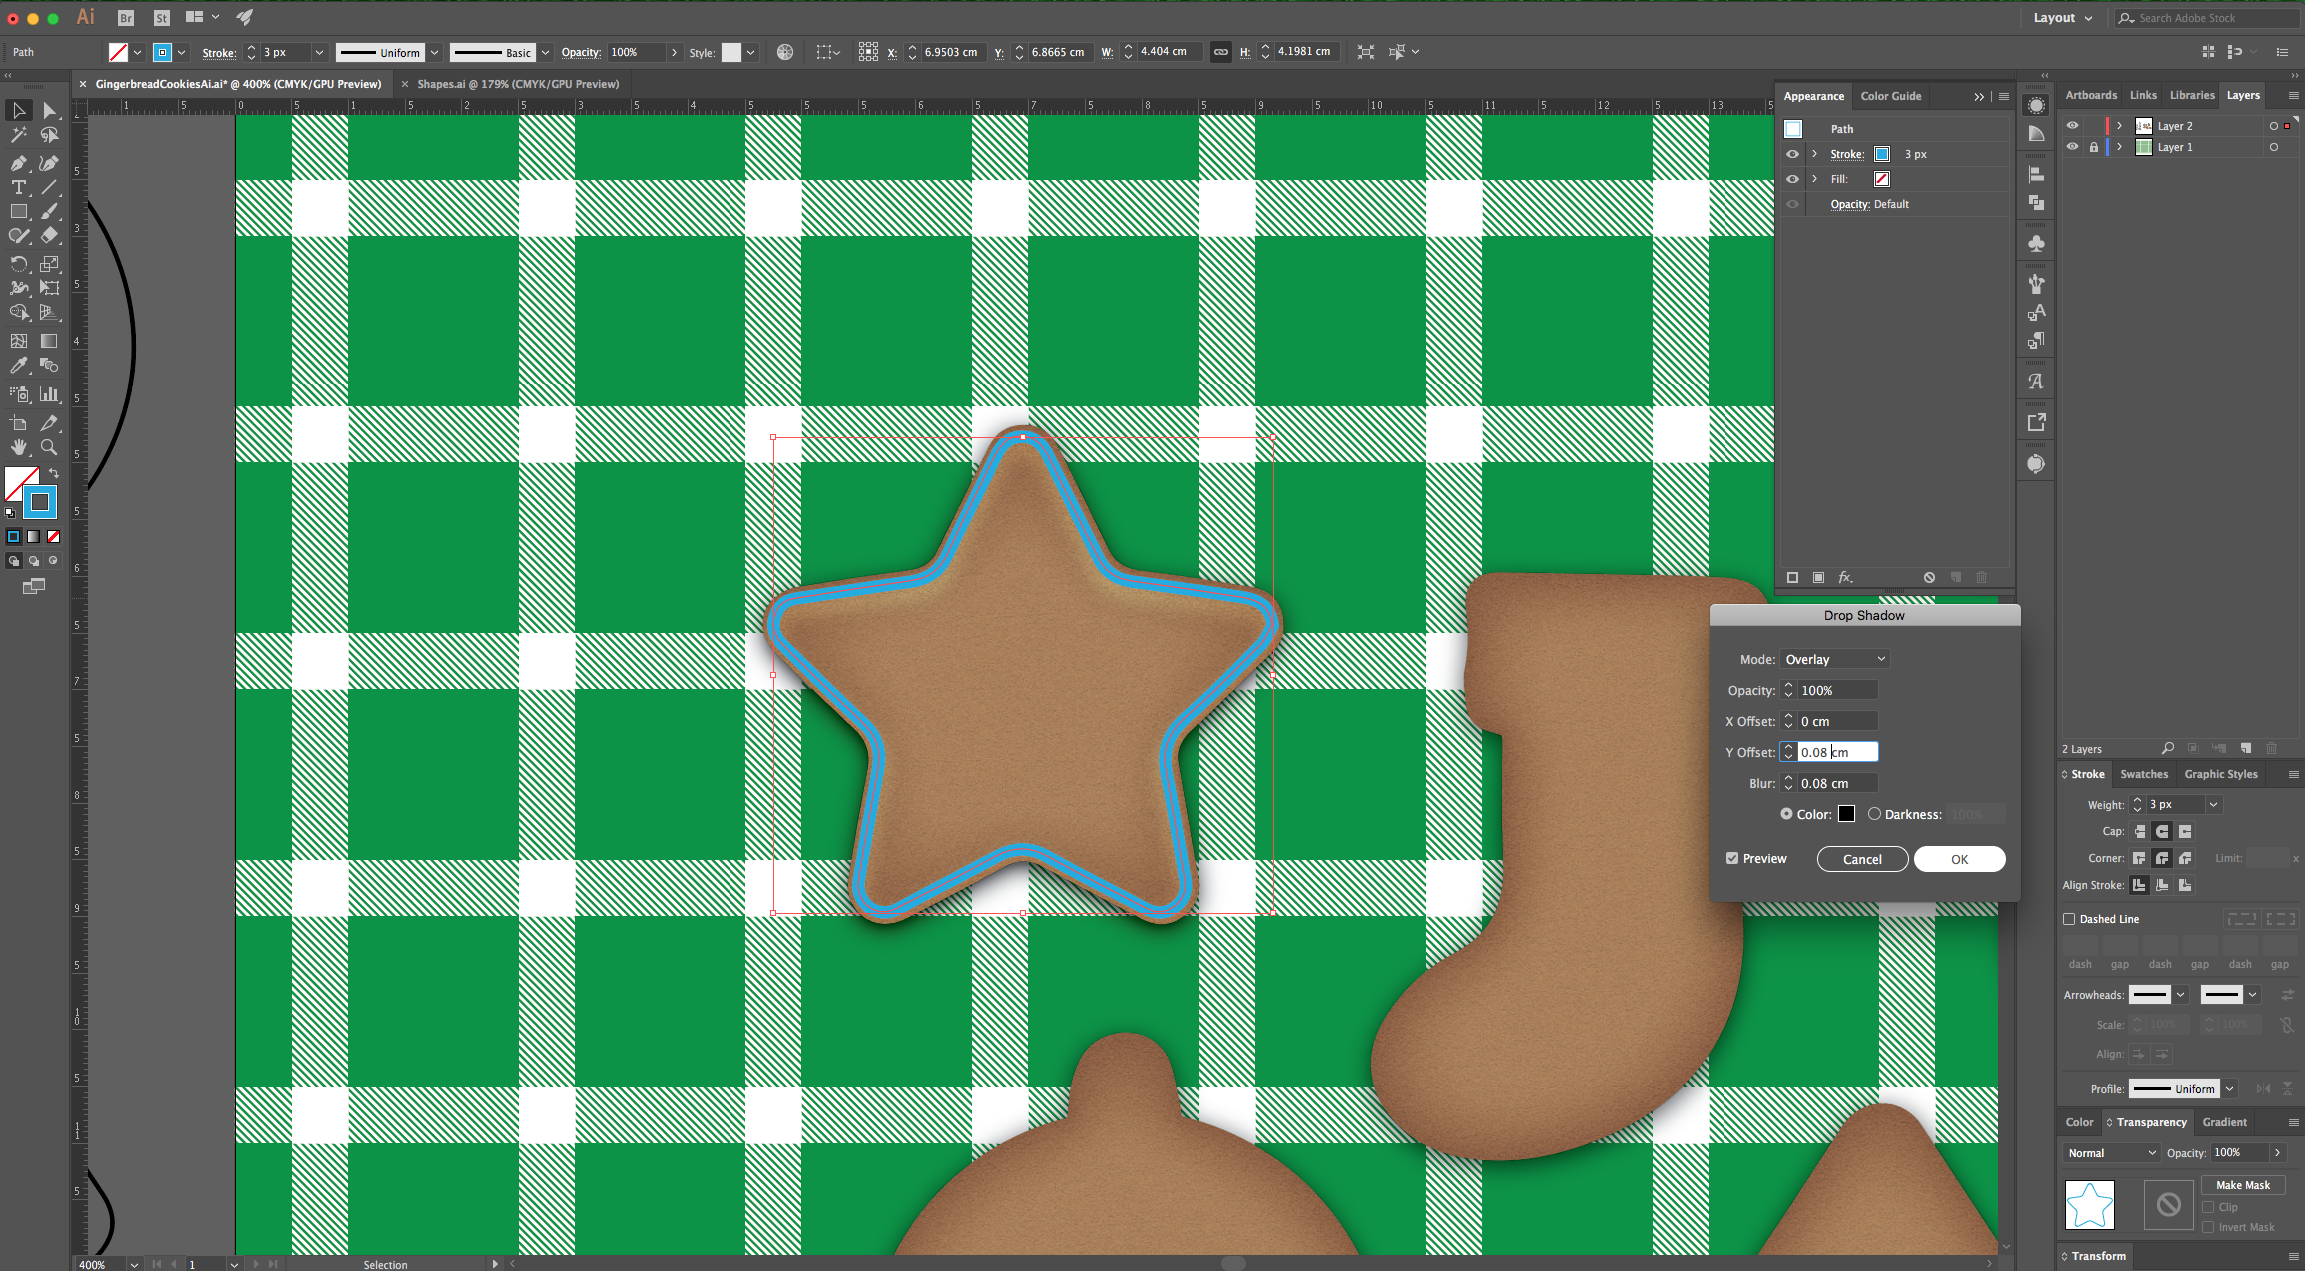
16 - With the “Stroke” selected, head to the “Appearance Panel”, click on the “Effects” Menu at the bottom and navigate to Stylize > Drop Shadow, use “Overlay”, 100% for “Opacity”, X-Offset: 0, Y-Offset: 0.08 cm, Blur: 0.08 cm and Black (#000000) as “Color”, click “OK.
17 - With the vector still selected, head to the “Appearance Panel”, click on the “Add New Stroke” button at the bottom, use a lighter shade of Blue as “Stroke” color. Change the “Stroke” size to 1.5 px.
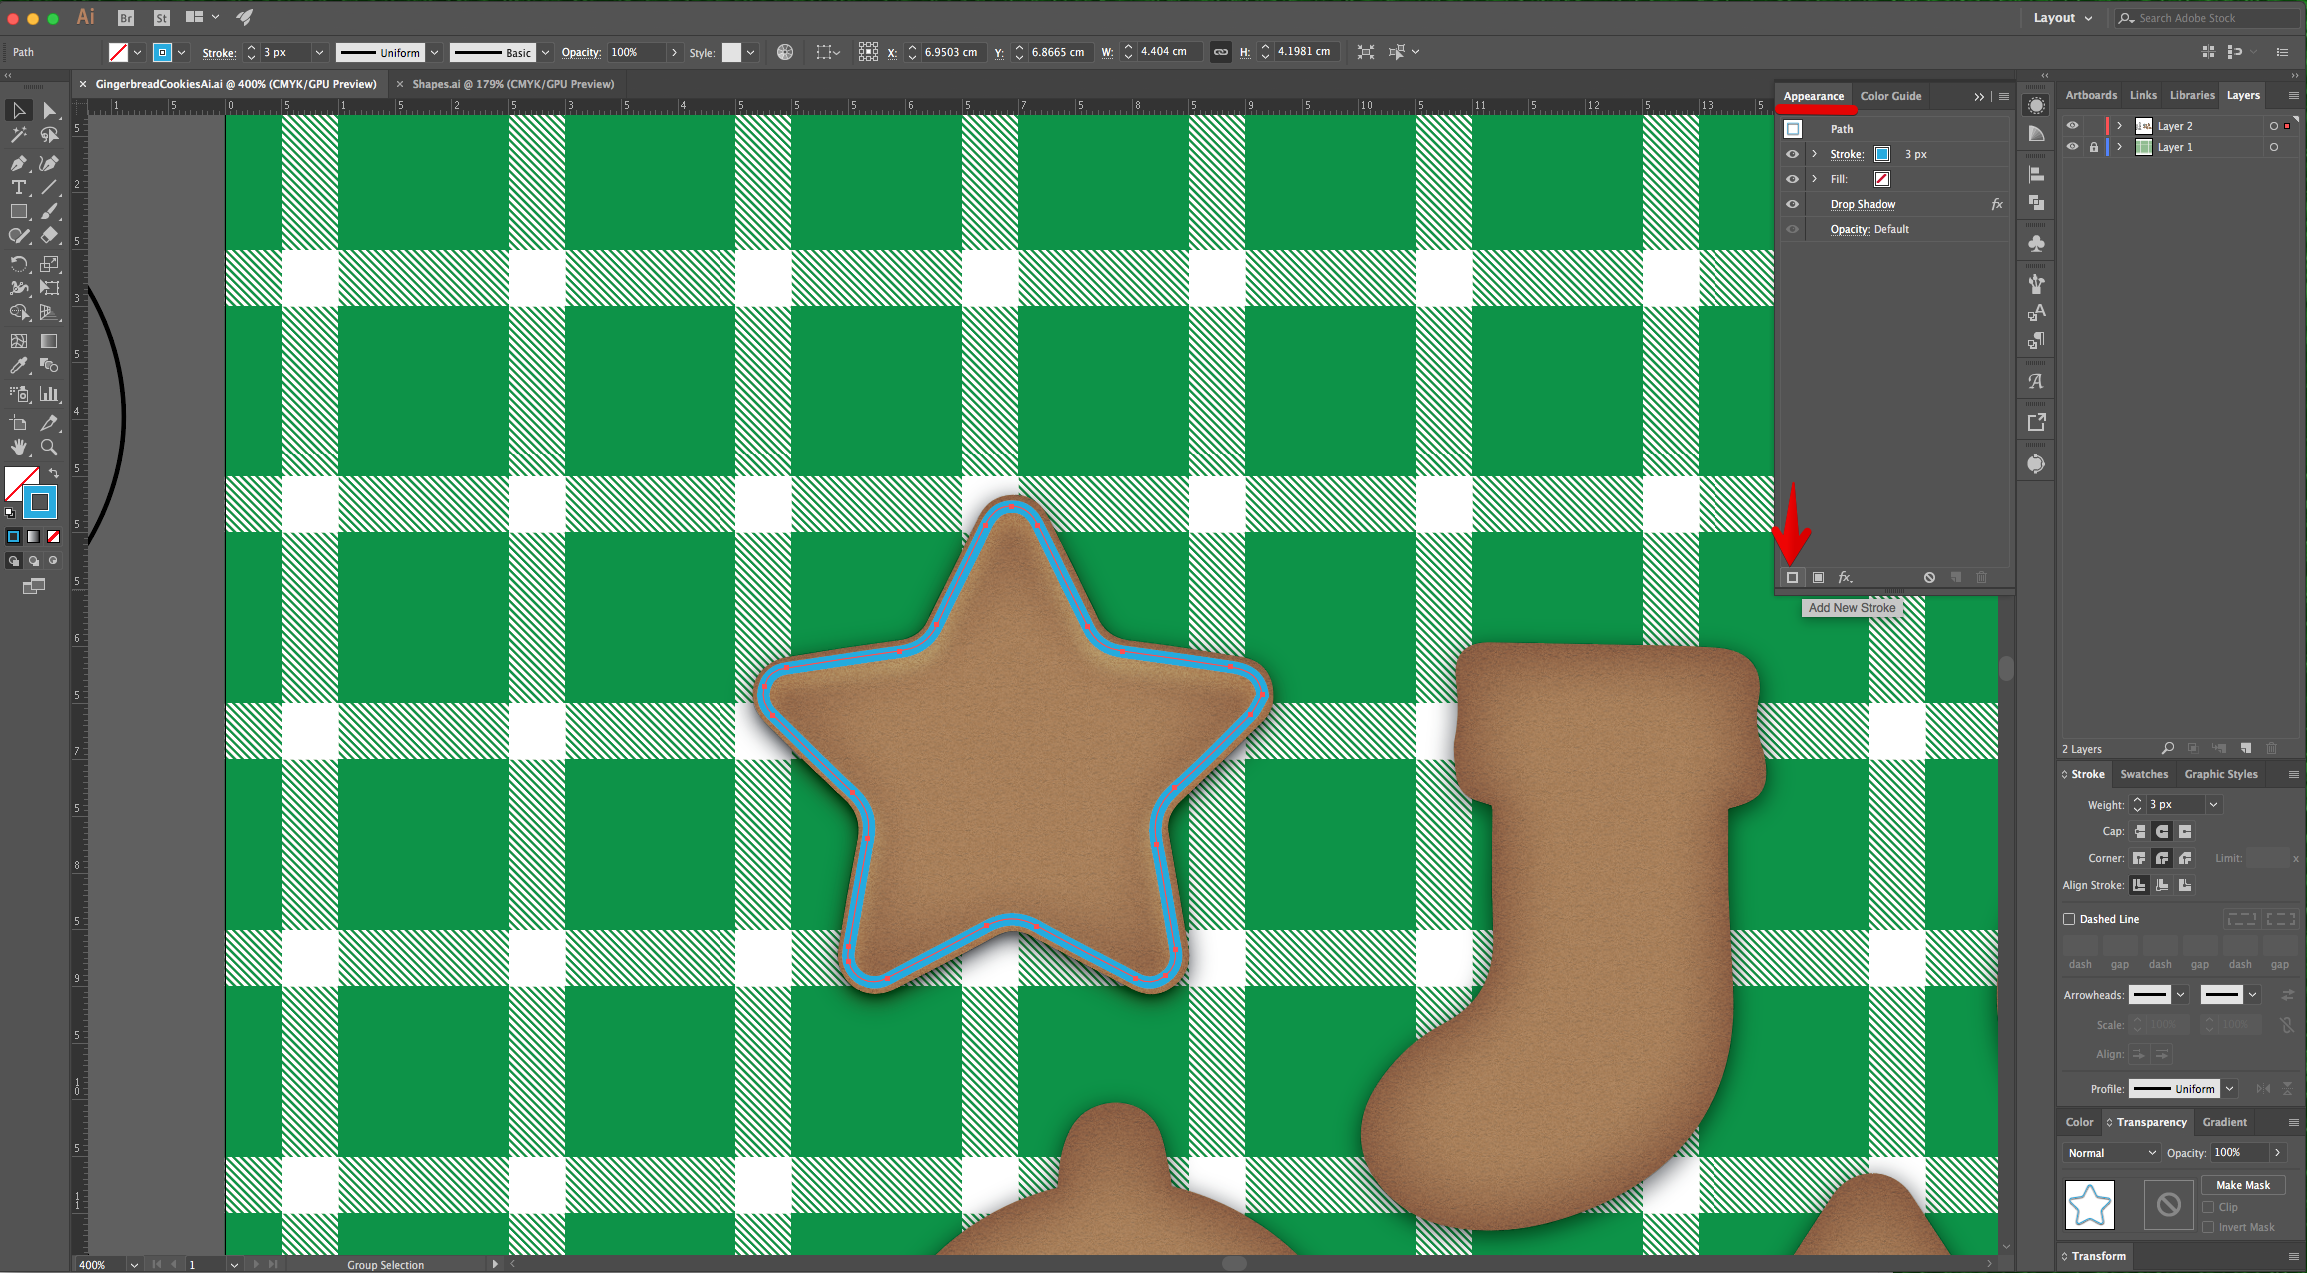
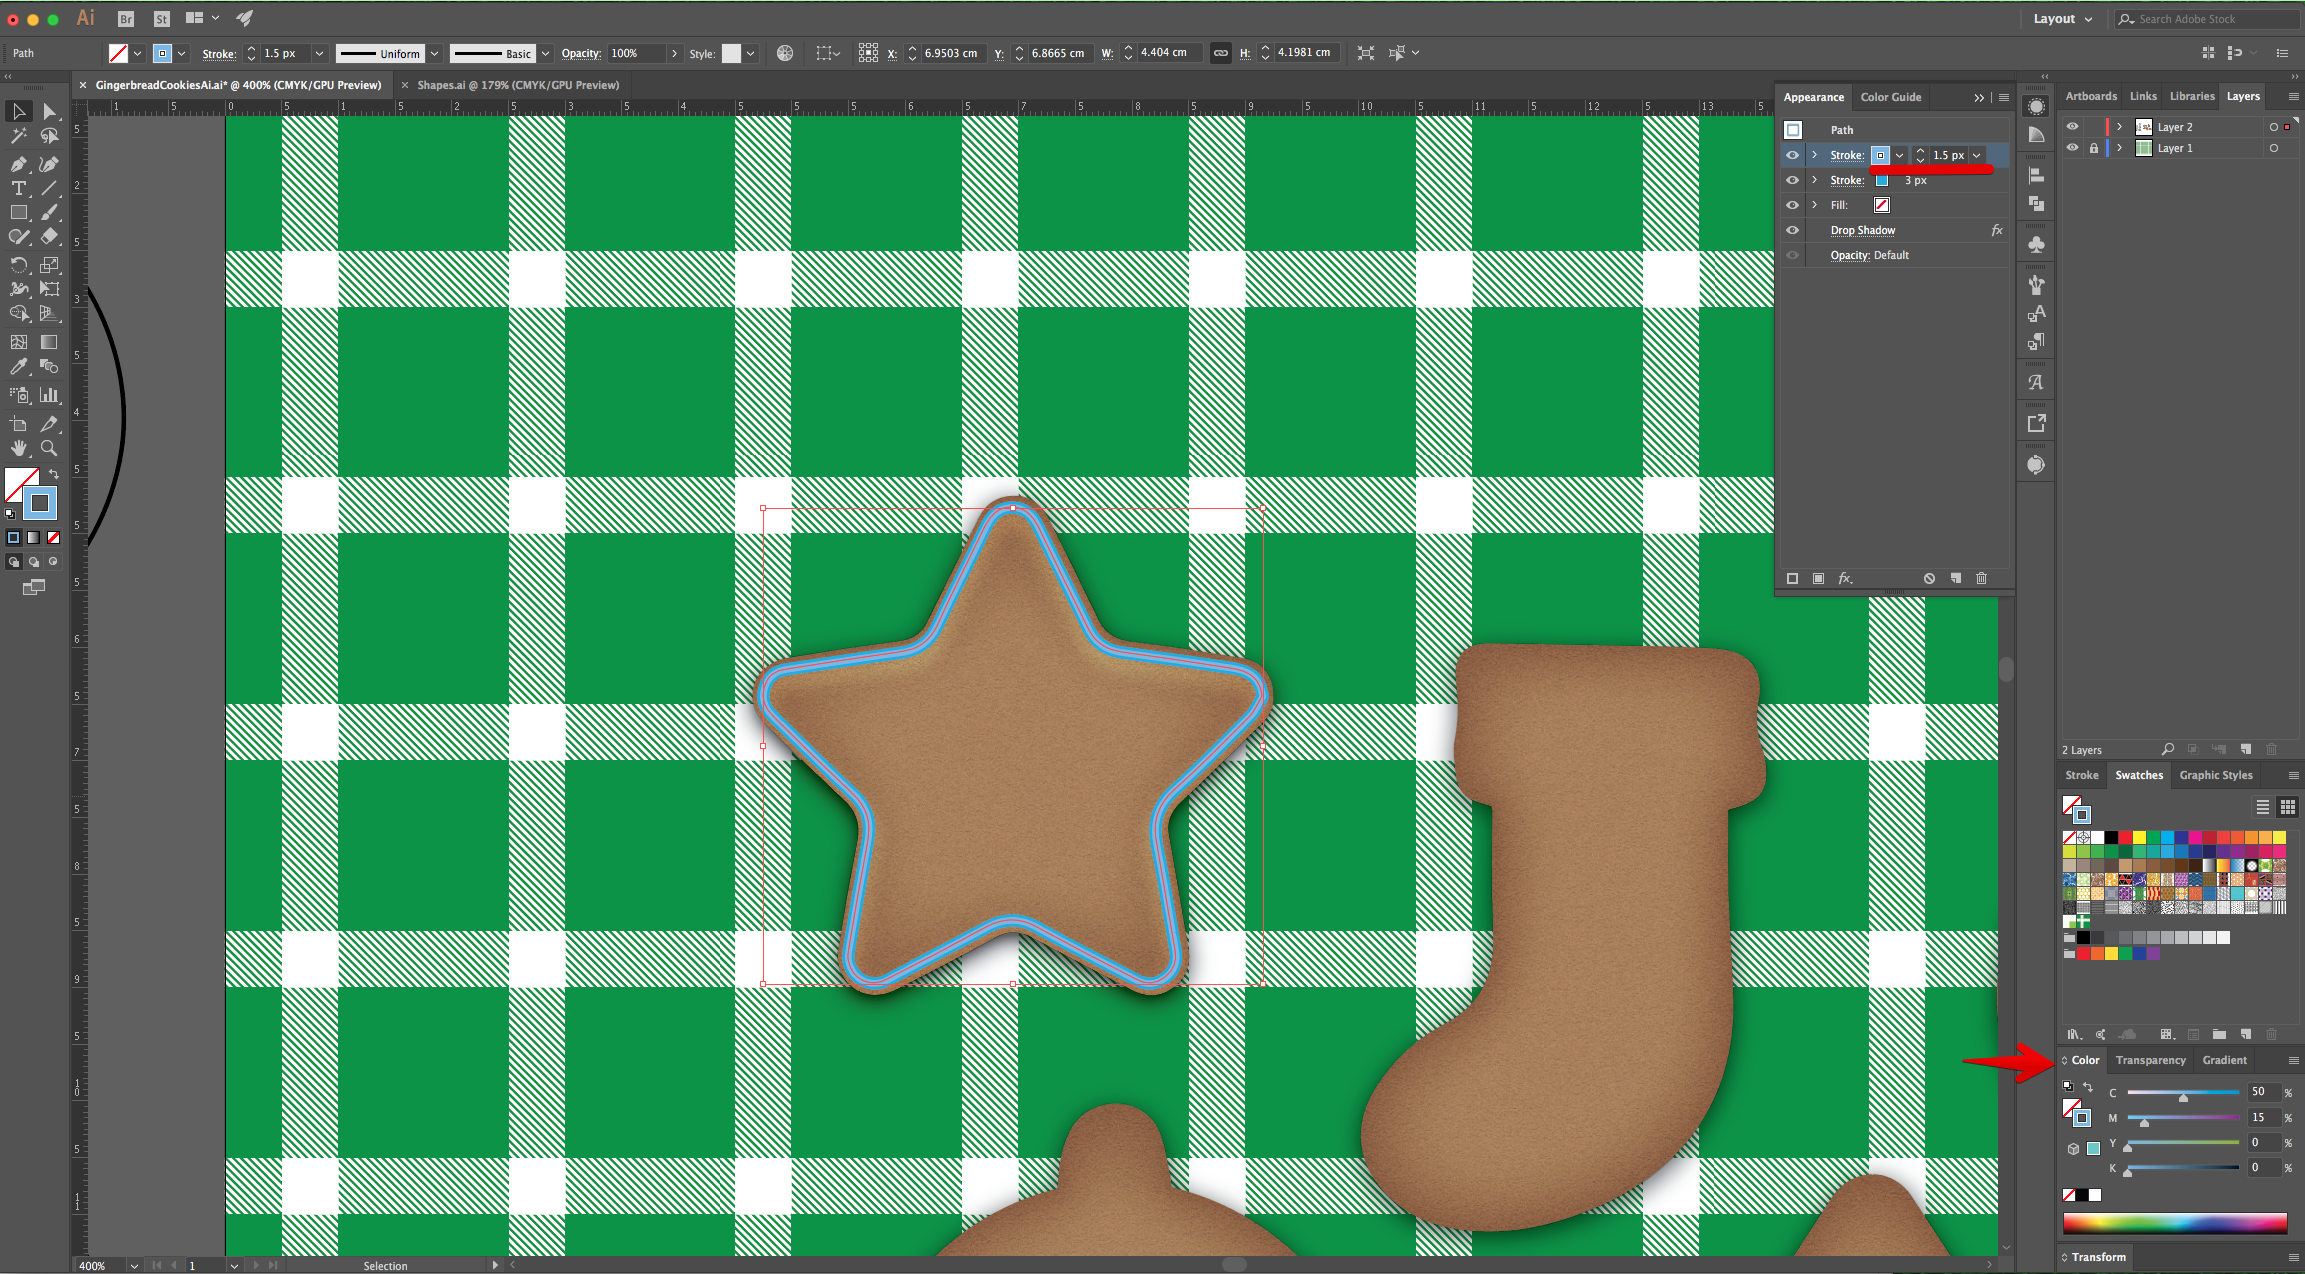
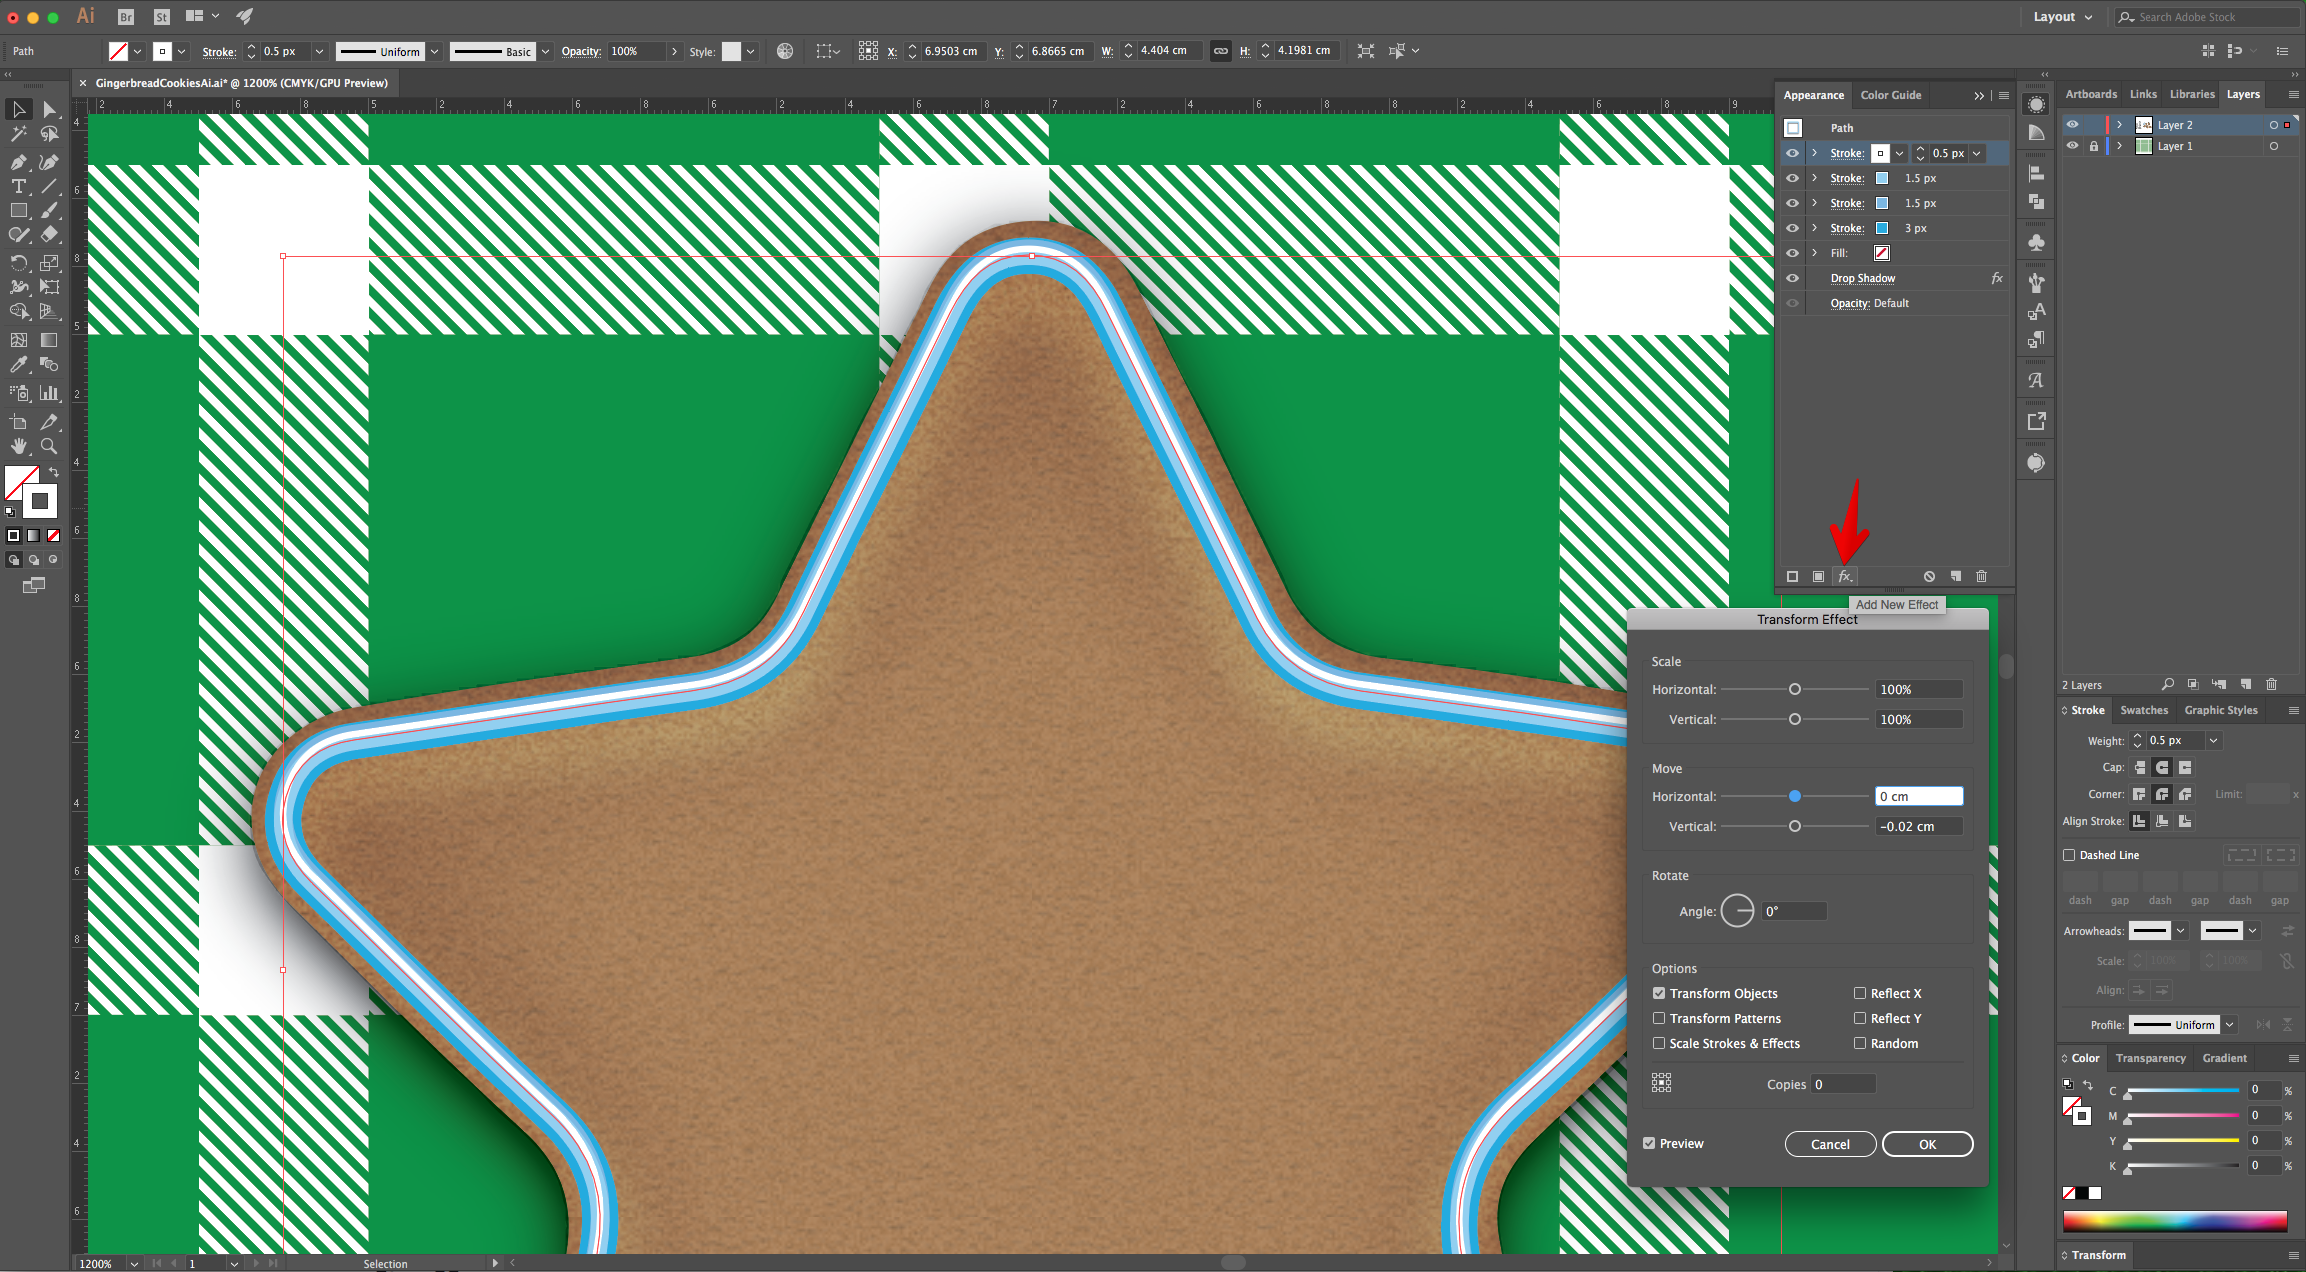
18 - Click on the “Effects” Menu and navigate to Distort & Transform > Transform and input a “Vertical Move” of -0.02 cm click “OK.
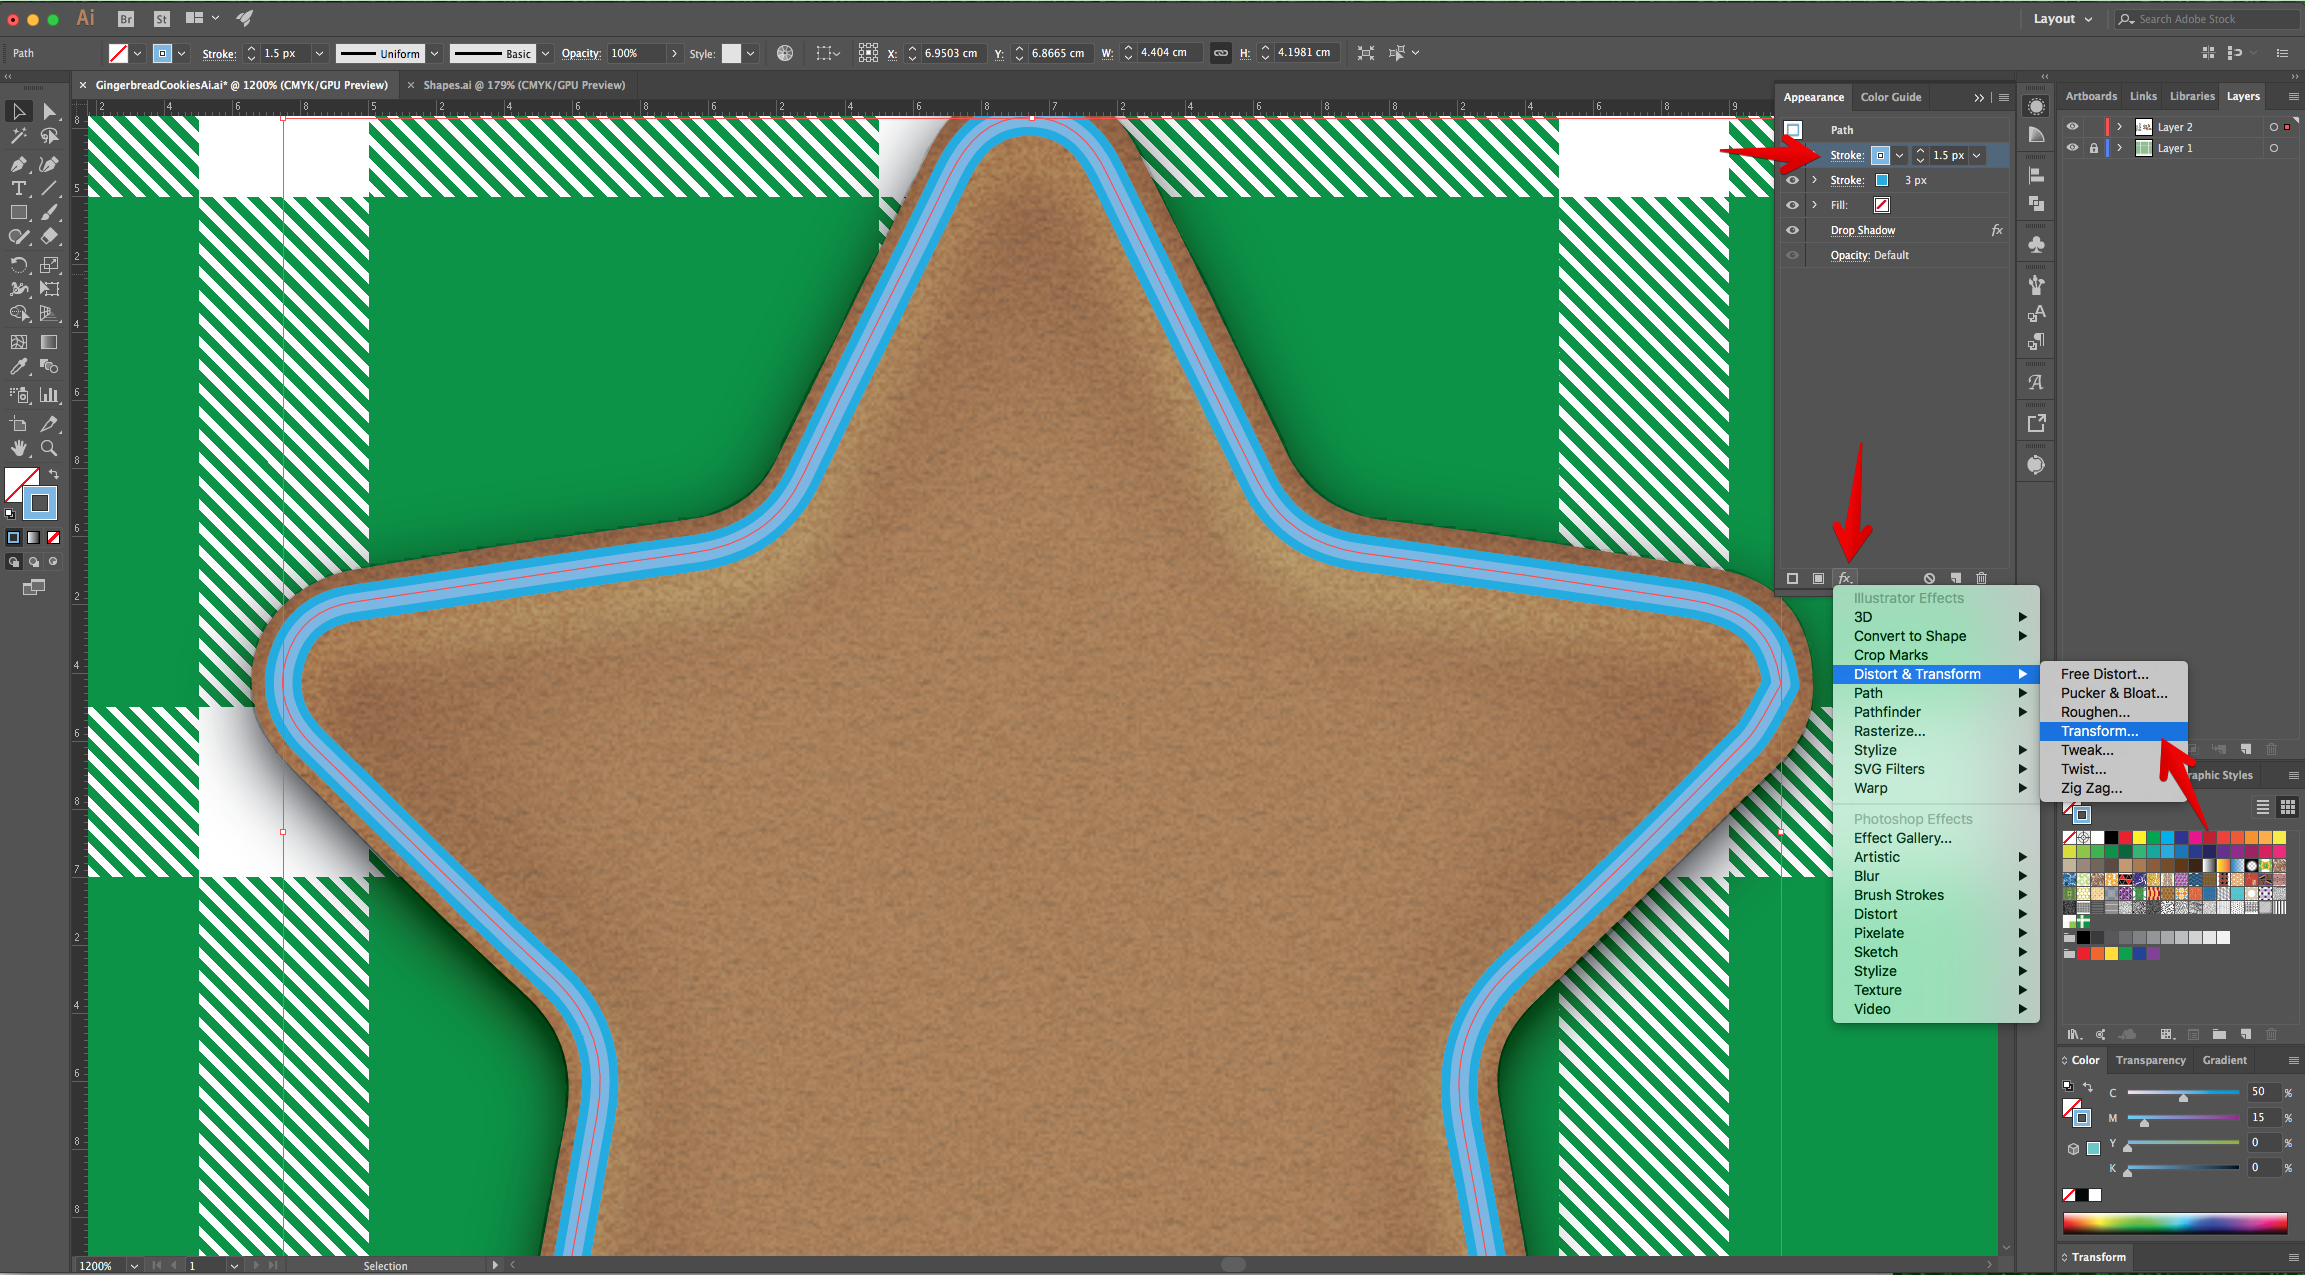
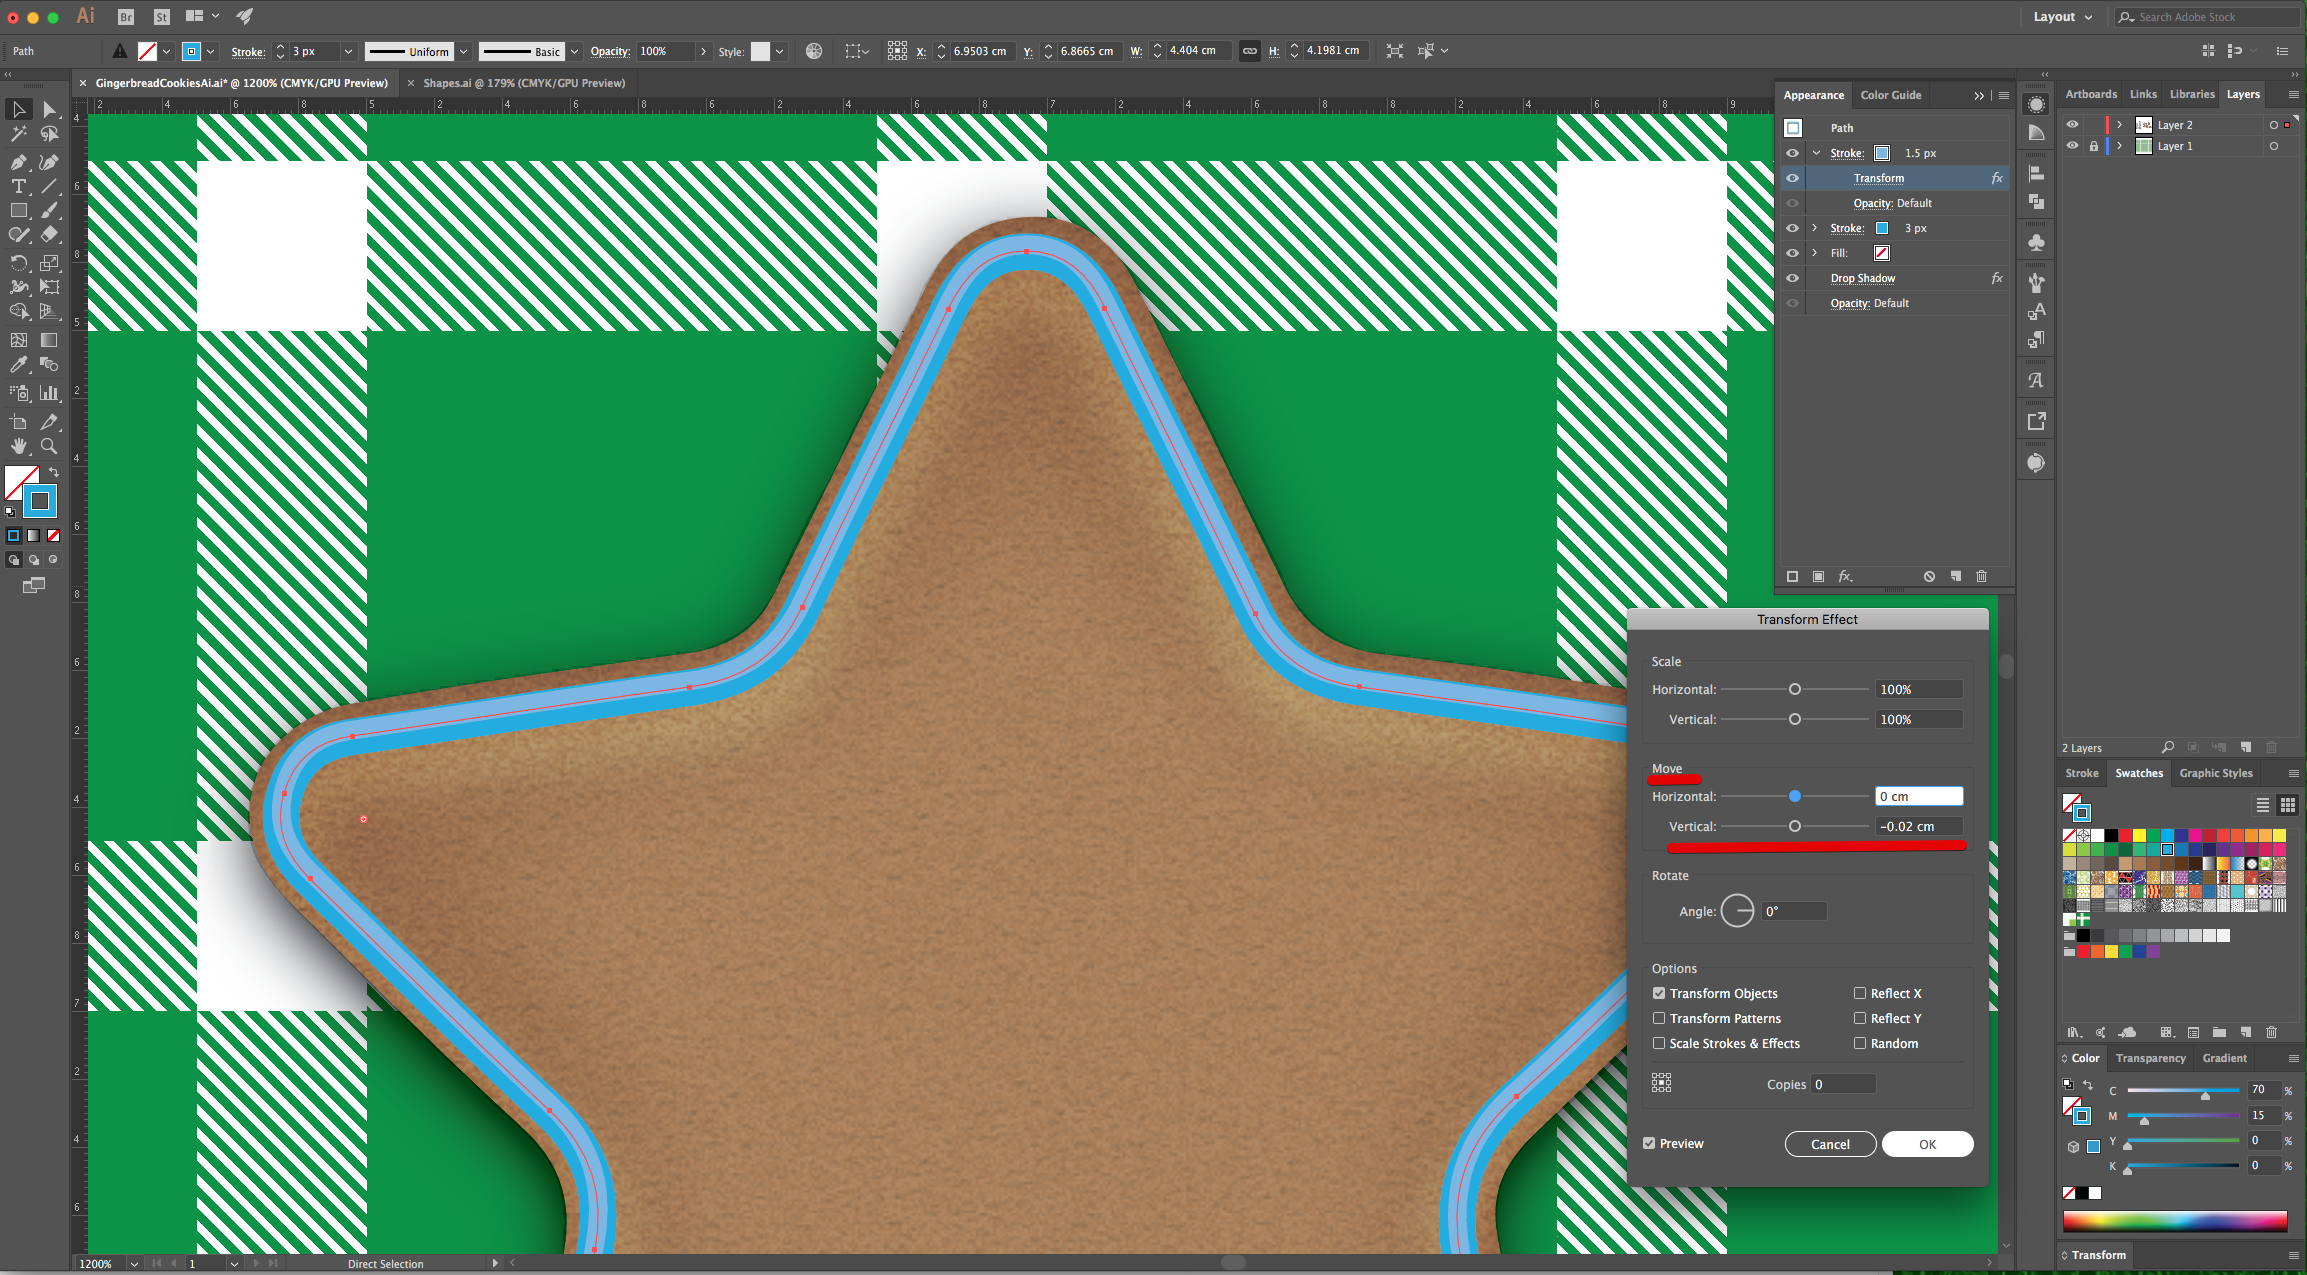
19 - Head to the “Appearance Panel”, click on the “Add New Stroke” button at the bottom, use a lighter shade of Blue as “Stroke” color. Make sure this stroke is on top of everything and its size is 1.5 px.
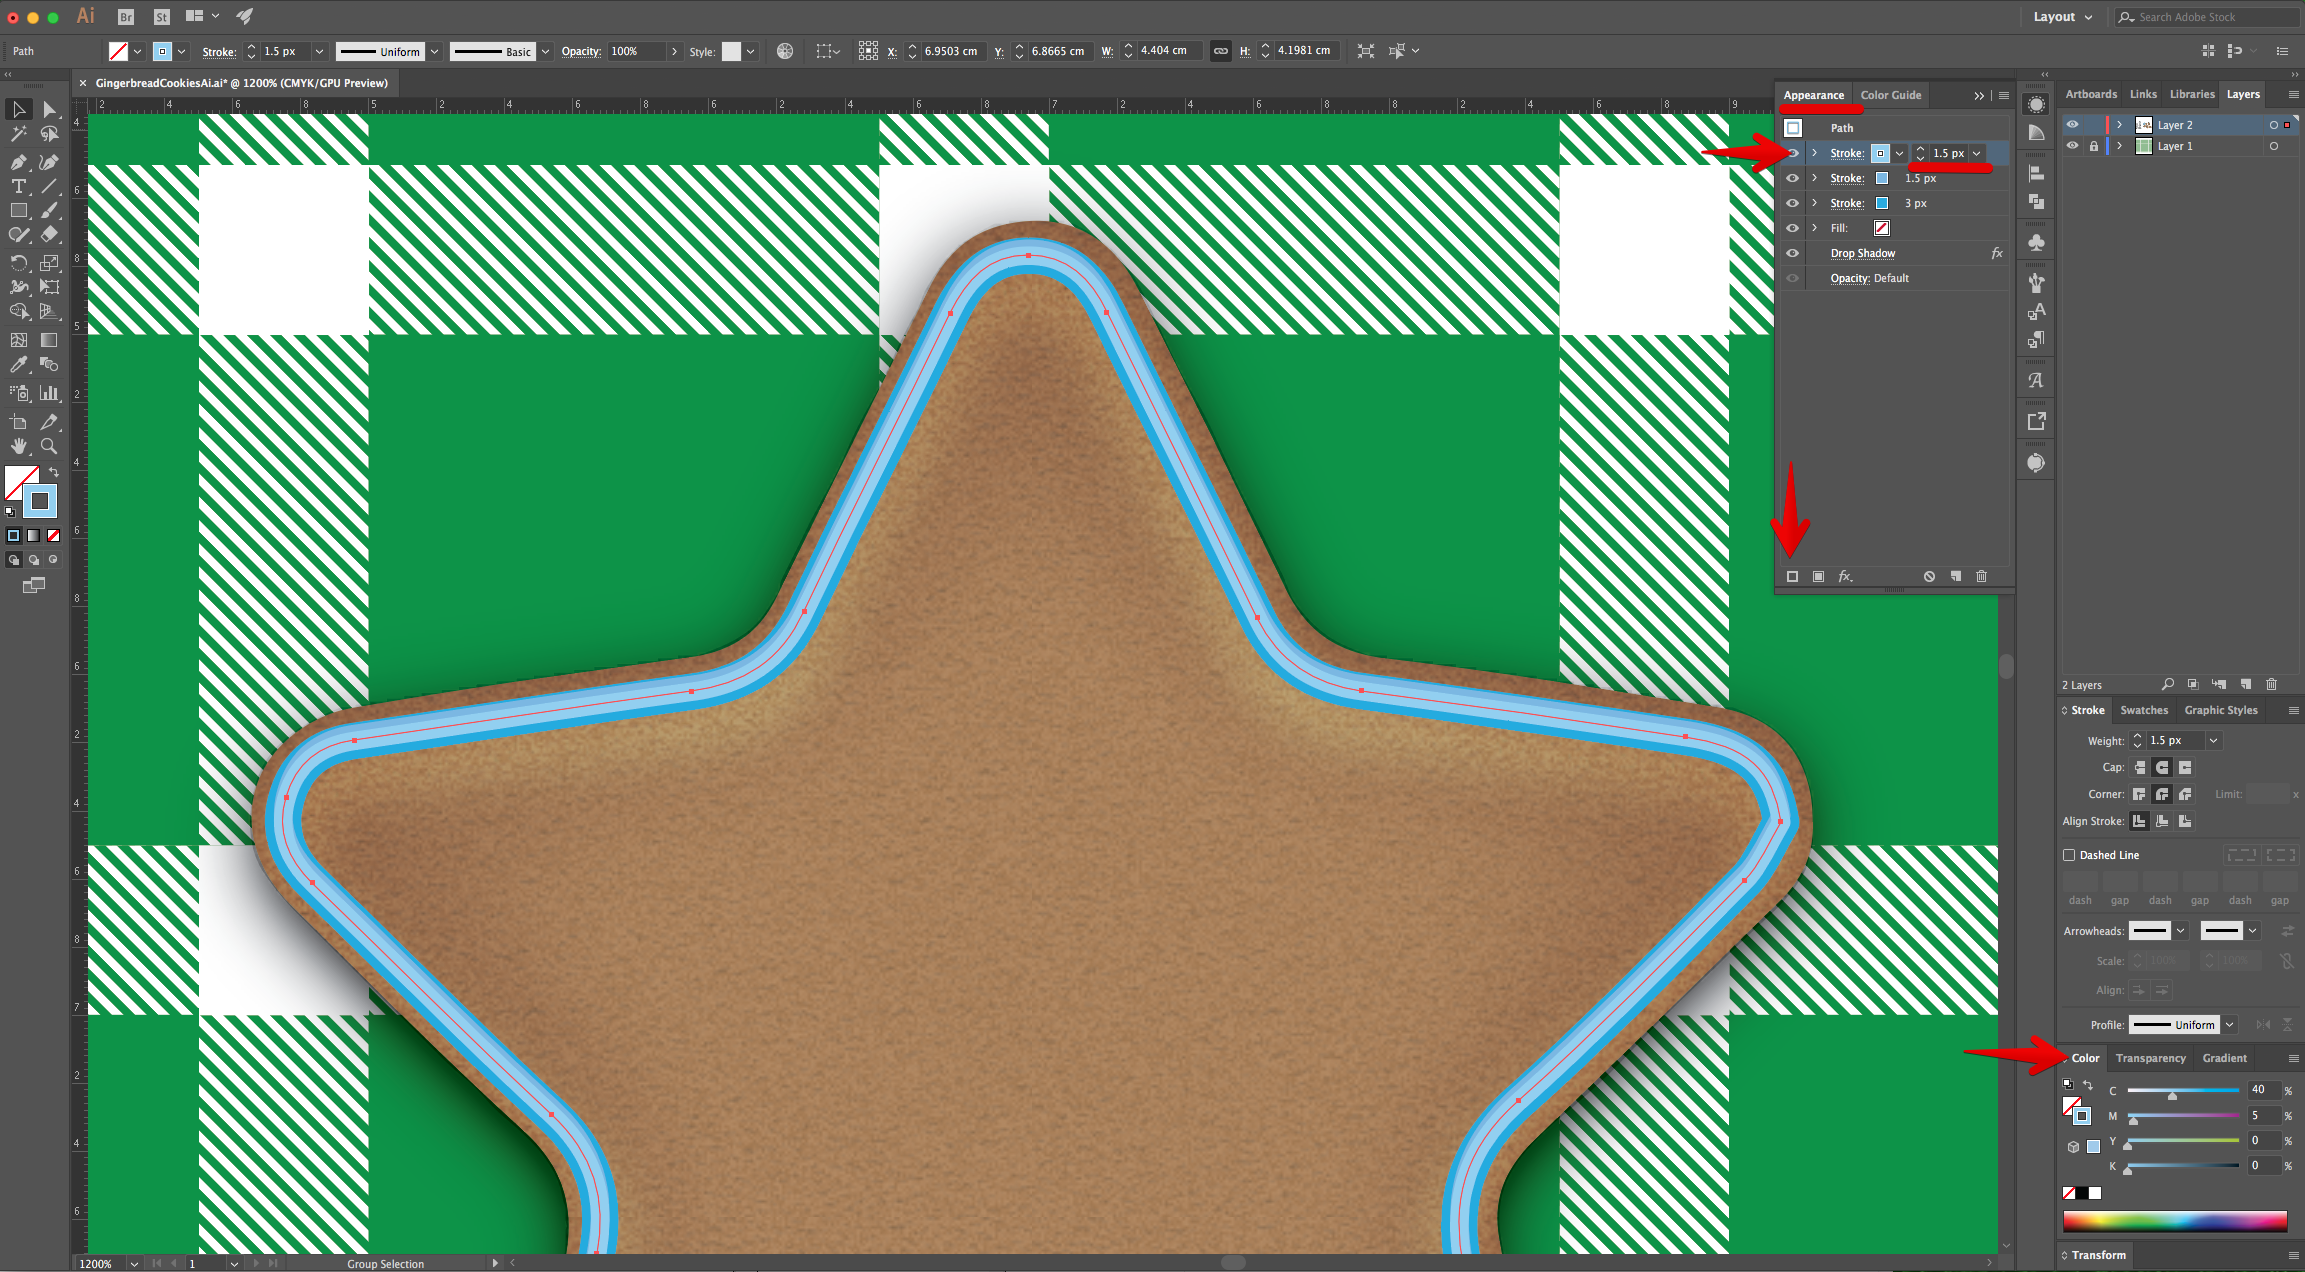
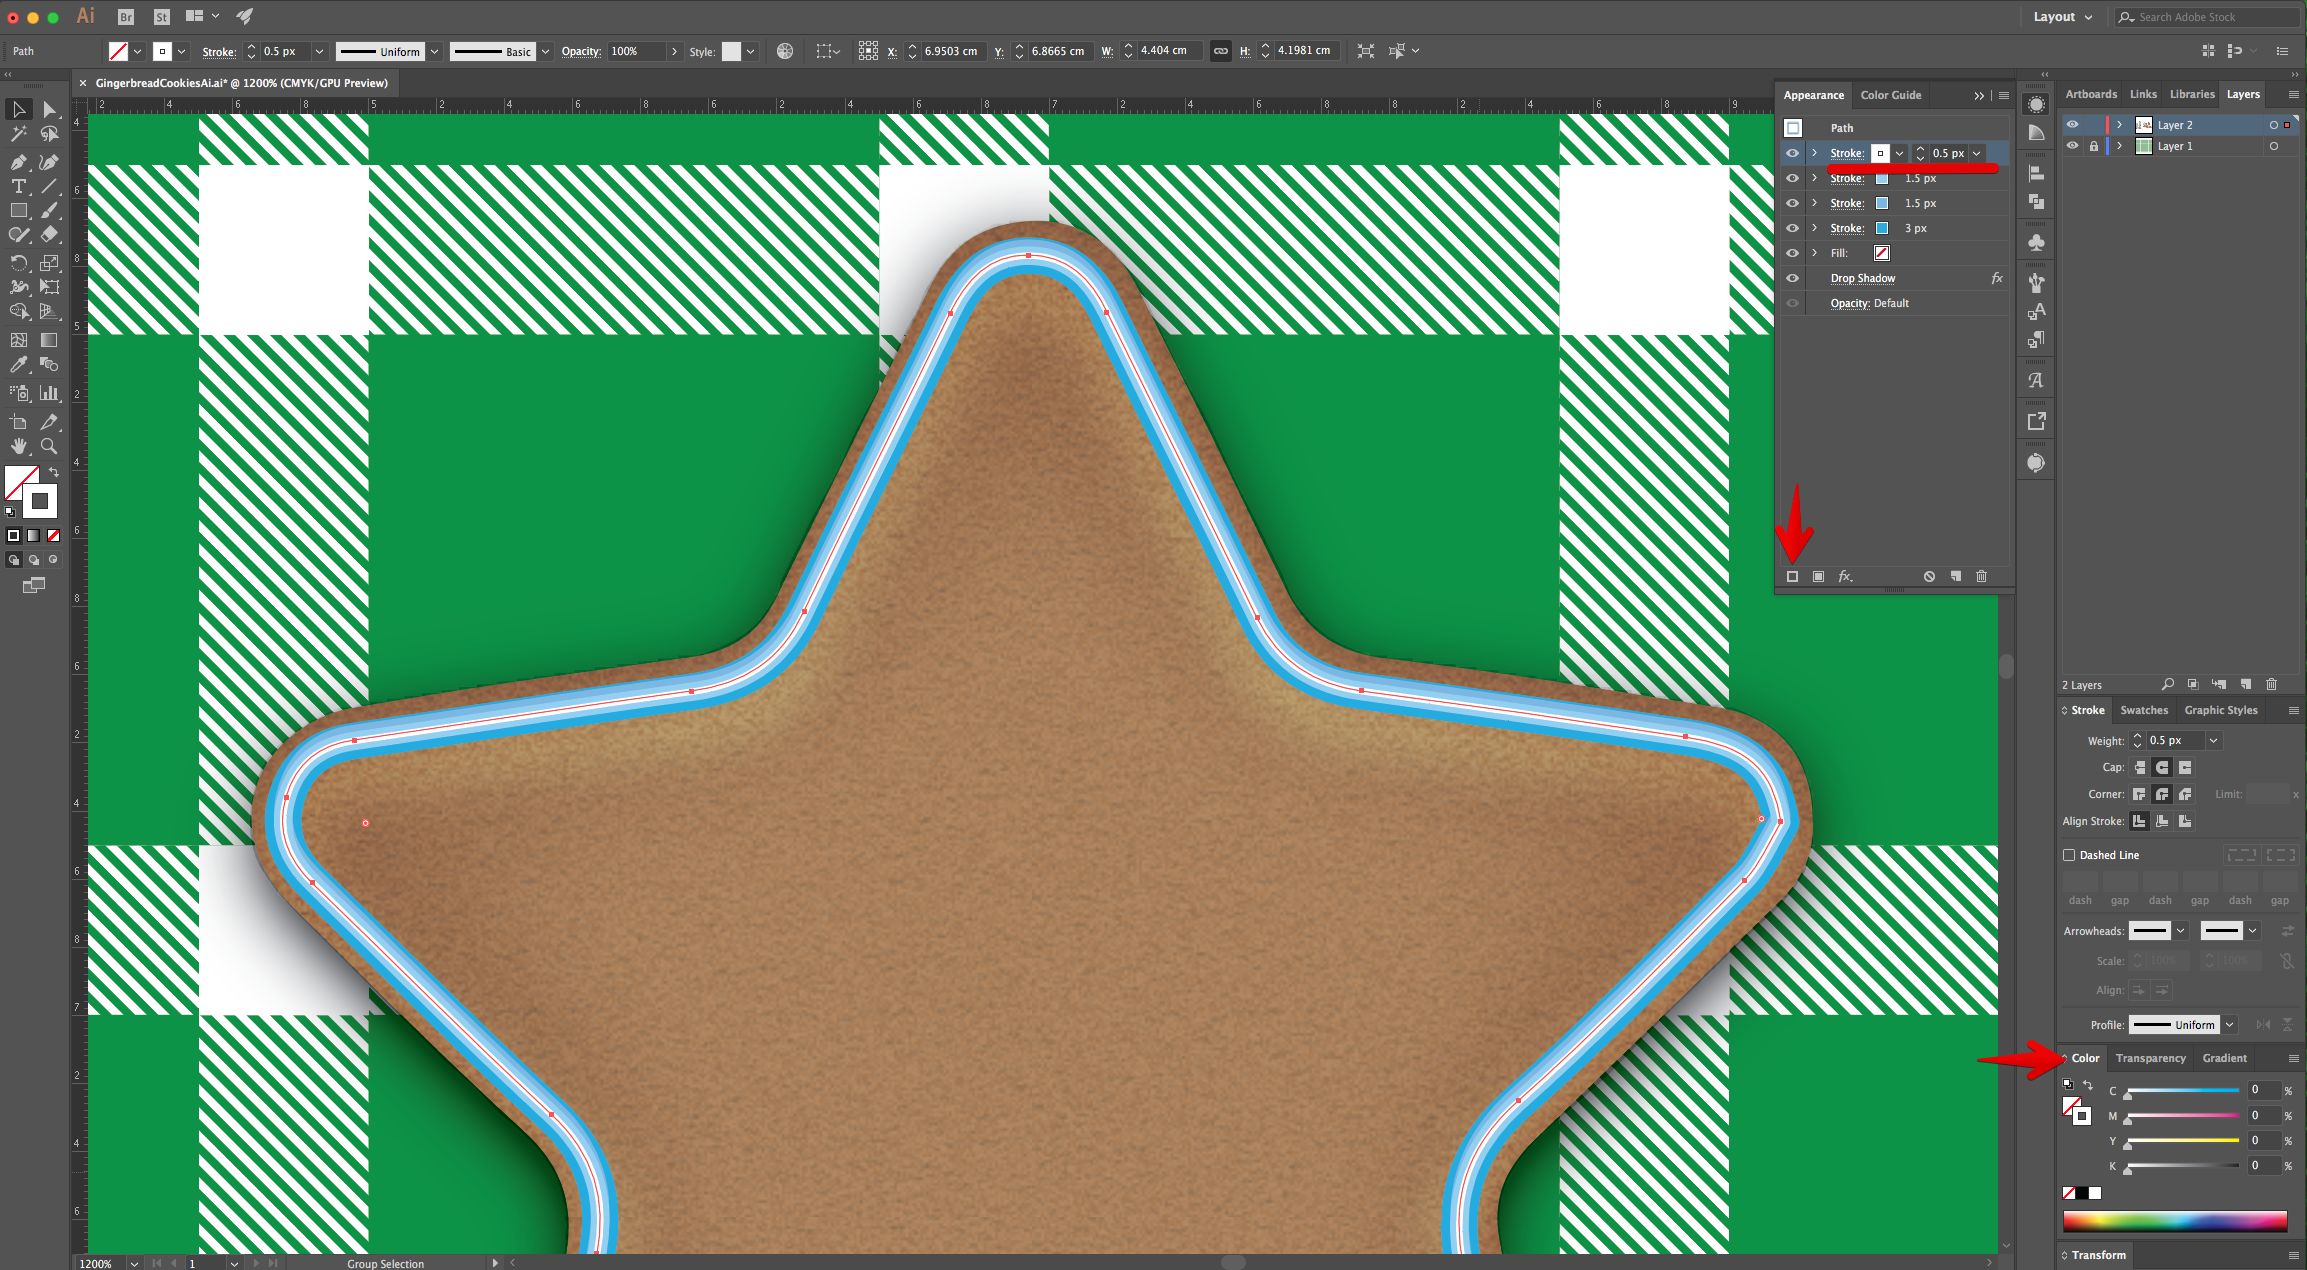
20 - Again, head to the “Appearance Panel”, click on the “Add New Stroke” button at the bottom, use White as “Stroke” color. Make sure this stroke is on top of everything and its size is 0.5 px. Click on the “Effects” Menu and navigate to Distort & Transform > Transform and input a “Vertical Move” of -0.02 cm click “OK.
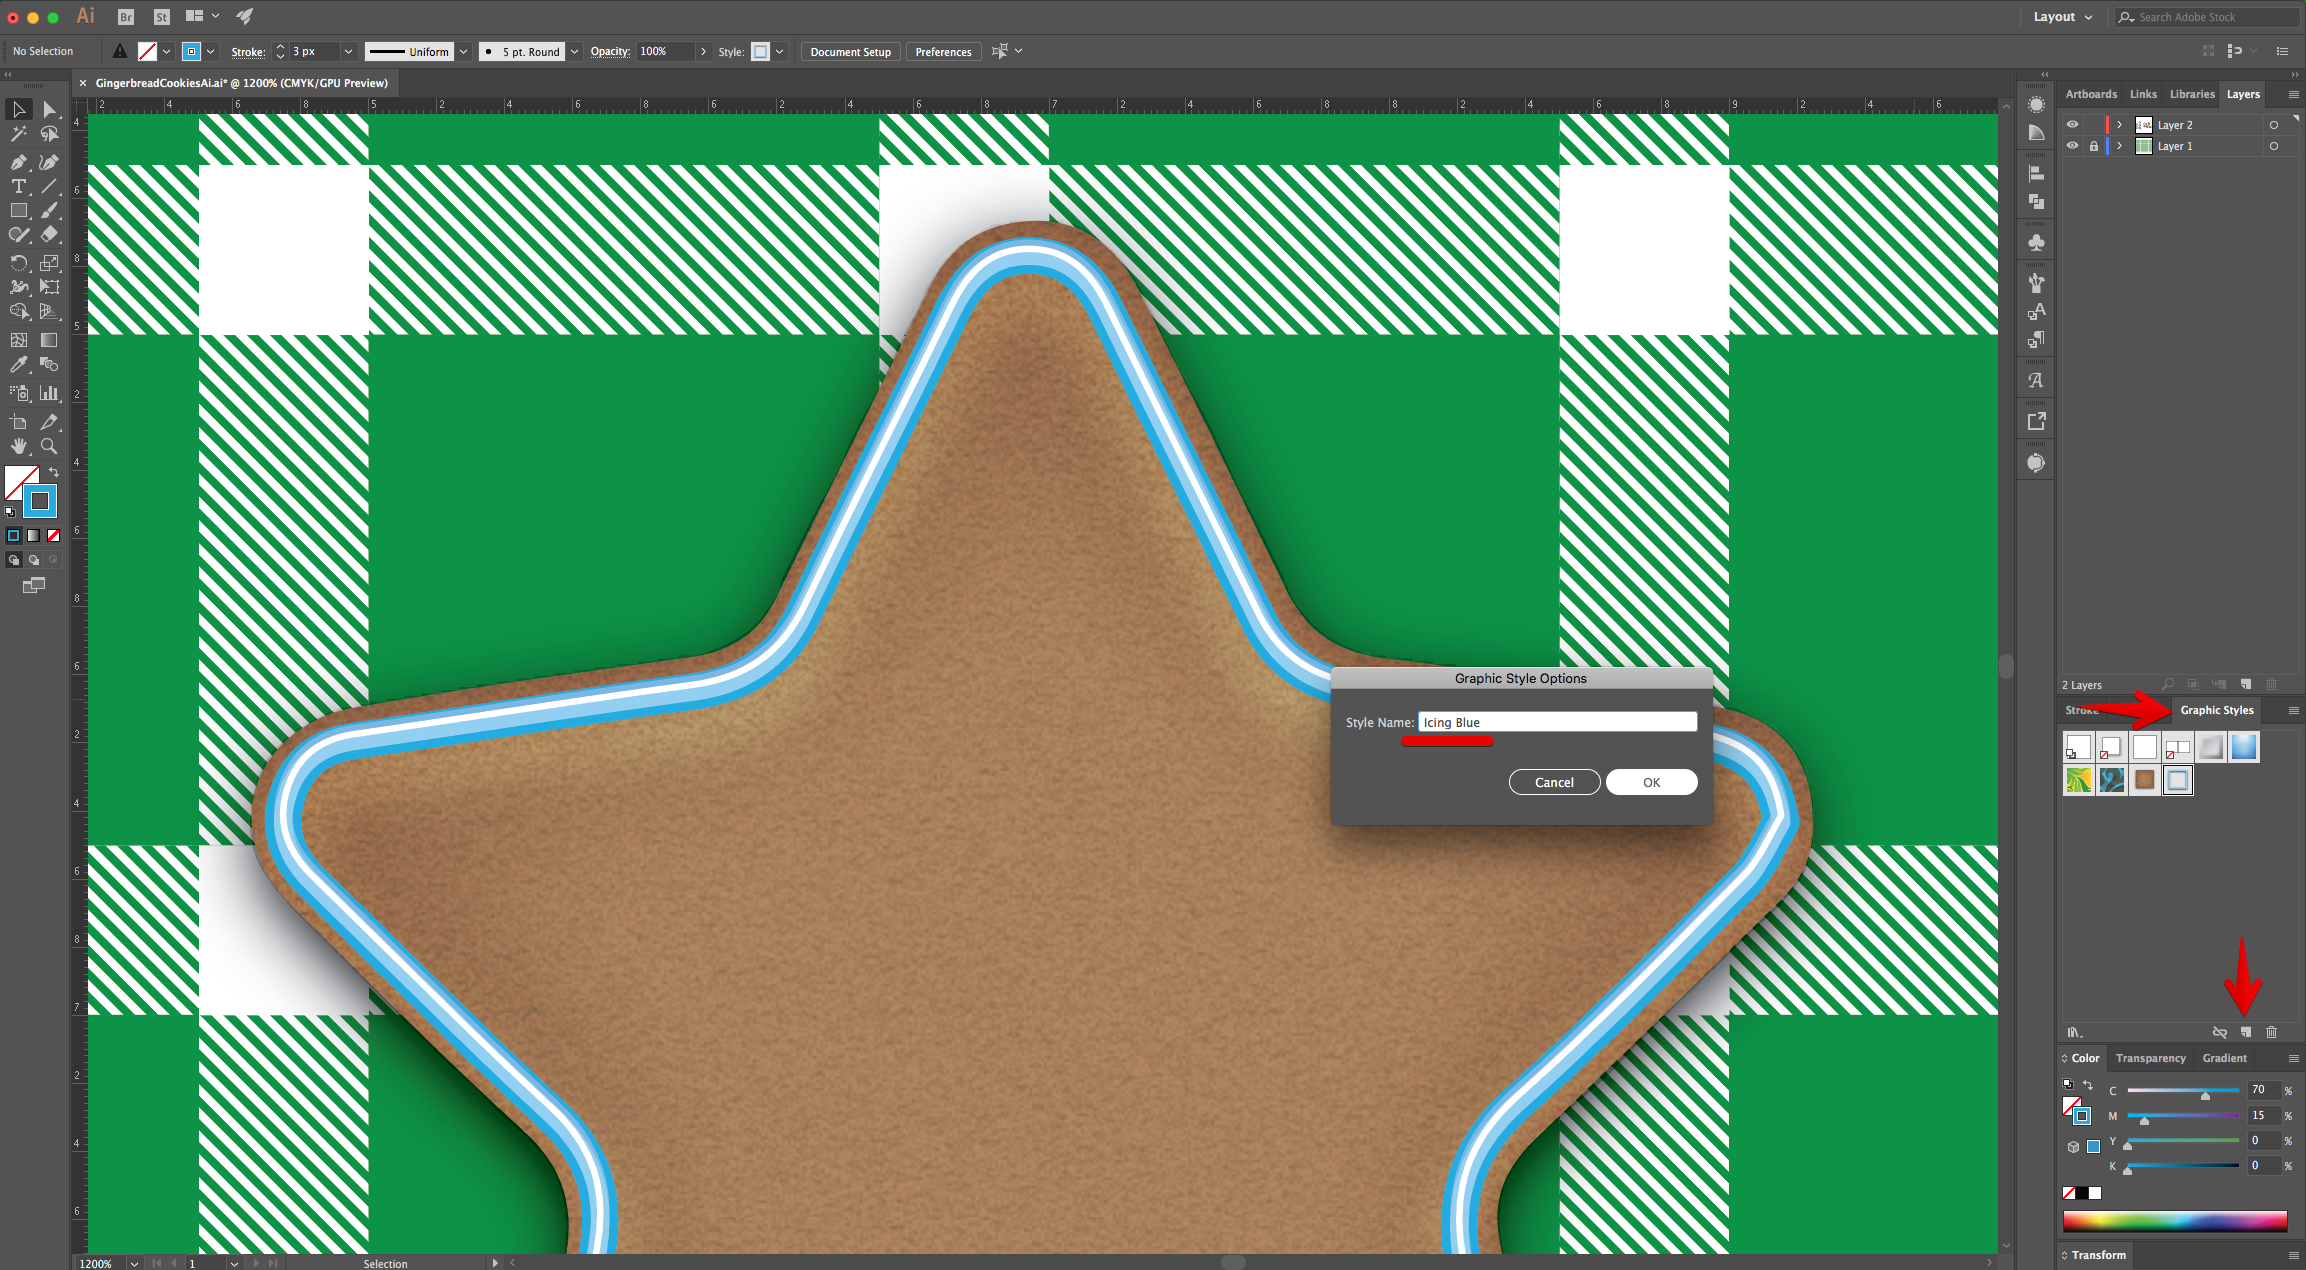
21 - With your “Shape” still selected, head to the “Graphic Styles” Panel and click on the “New Graphic Style” button at the bottom of the Panel. Name the New Style “Icing Blue”. Change the colors of the “Strokes” and create different “Icing” colors and save them as “Graphic Styles”. Apply to the rest of the “Cookies”.
22 - Check out your work!
1 - In Illustrator, create a “New Document”. If the “Rulers” are not enabled, go to View > Rulers > Show Rulers (Command/Control + R) to turn them ON.
2 - Select the “Rectangle Tool” (M), and draw rectangle covering the entire “Document”. Fill it with the “Checkered” Pattern.
3 - Lock this Layer by clicking to the left of its thumbnail and bringing out the small Padlock icon or by going to Object > Lock > Selection (Command/Control + 2). “Create New Layer” by clicking on the button at the bottom of the “Layers Panel”.
4 - Open the “Shapes” file, “Copy” (Command/Control + C) and “Paste” (Command/Control + V) them into your original “Document”.
5 - Our shapes are in a “Compound Path” and we need to release them. Right-click on top and choose “Release Compound Path”. You should end with two shapes (one slightly smaller than the other). Repeat with all the shapes.
6 - Select the smaller ones (“Shift” key) and “Swap Fill and Stroke” (Shift + X). Select one of the larger Shapes and change the “Fill” color to a medium Brown from the “Swatches Panel”.
7 - Head to the “Appearance Panel”, click on the “Effects” Menu at the bottom and navigate to Stylize > Inner Glow, use “Overlay”, 50% for “Opacity”, 0.05 cm “Blur”, choose “Edge” and Black (#000000) as “Color”, click “OK.
8 - With the vector still selected, head to the “Appearance Panel”, click on the “Add New Fill” button at the bottom, use White as “Fill” color. Click on the “Effects” Menu and navigate to Artistic > Film Grain, input the following values: 20,0 and 0, click “OK.
9 - In the “Transparency Panel” change the “Blending Mode” to “Soft Light” and the “Opacity” to 35%.
10 - With the vector still selected, head to the “Appearance Panel”, click on the “Add New Fill” button at the bottom, use White as “Fill” color. click on the “Effects” Menu and navigate to Texture > Texturizer, input the following values: “Sandstone”, 100%, 4, and “Bottom” click “OK.
11 - In the “Transparency Panel” change the “Blending Mode” to “Multiply” and the “Opacity” to 95%.
12 - Head to the “Appearance Panel”, click on the “Effects” Menu at the bottom and navigate to Stylize > Drop Shadow, use “Multiply”, 75% for “Opacity”, X-Offset: 0, Y-Offset: 0.05 cm, Blur: 0.1 cm and Black (#000000) as “Color”, click “OK.
13 - With your “Cookie” still selected, head to the “Graphic Styles” Panel and click on the “New Graphic Style” button at the bottom of the Panel. Name the New Style “Gingerbread”. Select the rest of the larger Shapes and fill them with the new Style.
14 - Select the smaller Shapes and place them on top of the “Cookies”.
15 - Change the “Stroke” size to 3 pt with a “Round Cap and Corner” and change the “Stroke” color to a Medium Blue from the “Swatches Panel” .
16 - With the “Stroke” selected, head to the “Appearance Panel”, click on the “Effects” Menu at the bottom and navigate to Stylize > Drop Shadow, use “Overlay”, 100% for “Opacity”, X-Offset: 0, Y-Offset: 0.08 cm, Blur: 0.08 cm and Black (#000000) as “Color”, click “OK.
17 - With the vector still selected, head to the “Appearance Panel”, click on the “Add New Stroke” button at the bottom, use a lighter shade of Blue as “Stroke” color. Change the “Stroke” size to 1.5 px.
18 - Click on the “Effects” Menu and navigate to Distort & Transform > Transform and input a “Vertical Move” of -0.02 cm click “OK.
19 - Head to the “Appearance Panel”, click on the “Add New Stroke” button at the bottom, use a lighter shade of Blue as “Stroke” color. Make sure this stroke is on top of everything and its size is 1.5 px.
20 - Again, head to the “Appearance Panel”, click on the “Add New Stroke” button at the bottom, use White as “Stroke” color. Make sure this stroke is on top of everything and its size is 0.5 px. Click on the “Effects” Menu and navigate to Distort & Transform > Transform and input a “Vertical Move” of -0.02 cm click “OK.
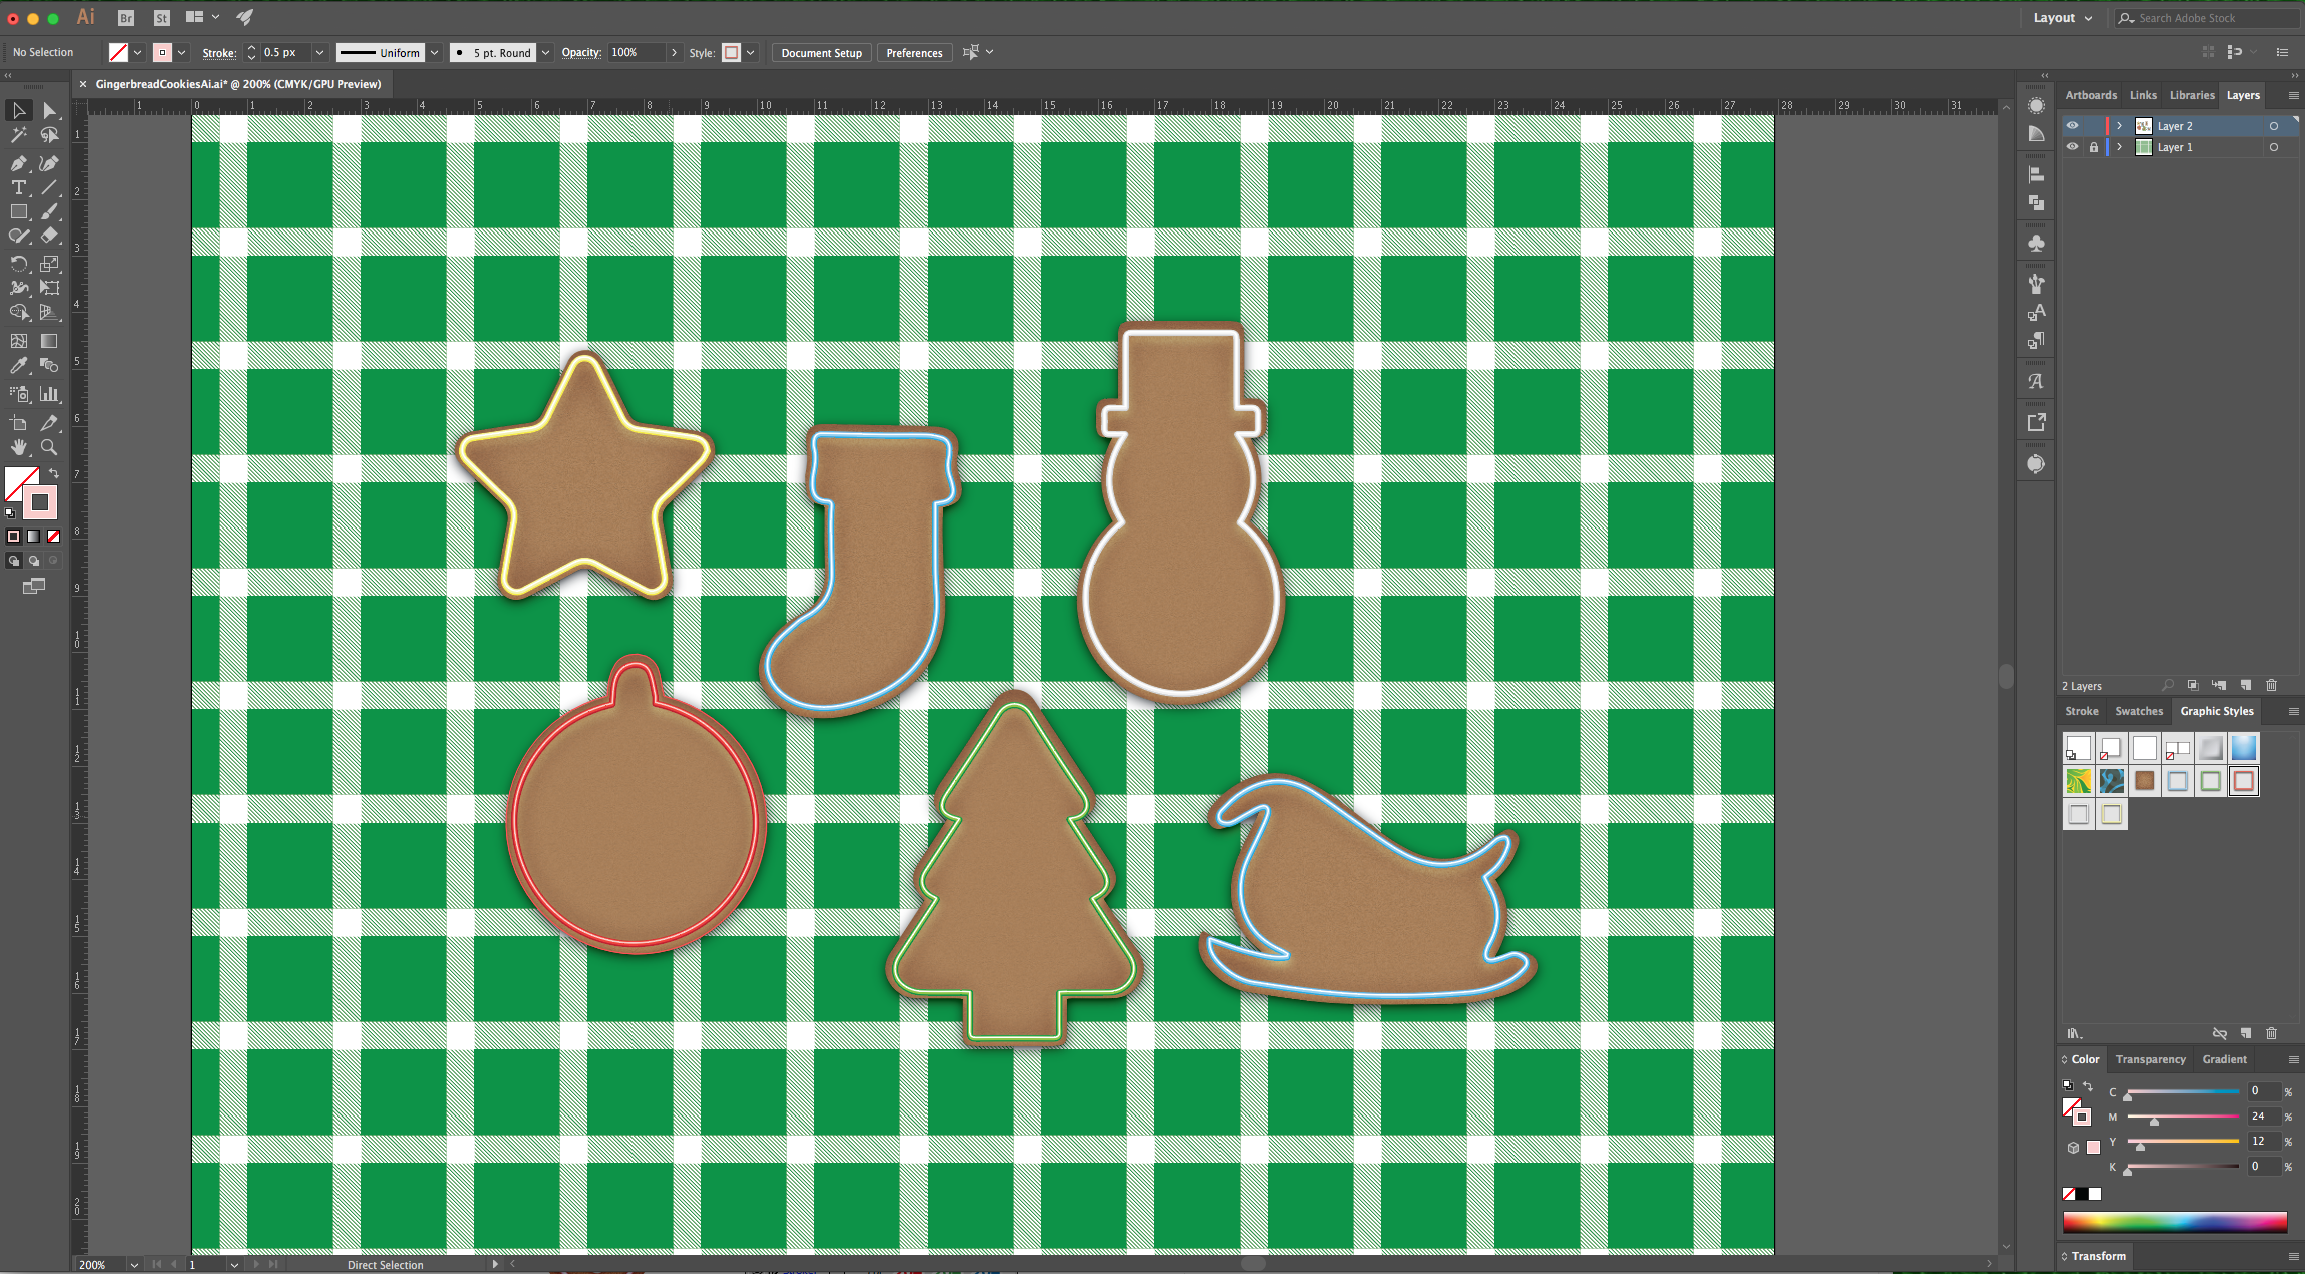
21 - With your “Shape” still selected, head to the “Graphic Styles” Panel and click on the “New Graphic Style” button at the bottom of the Panel. Name the New Style “Icing Blue”. Change the colors of the “Strokes” and create different “Icing” colors and save them as “Graphic Styles”. Apply to the rest of the “Cookies”.
22 - Check out your work!
by @lornacane
Related Tutorials
Illustrator Tutorials
How to Make a Wavy Line in Illustrator
In this tutorial learn a super quick and easy way to draw a wavy line in Adobe Illustrator.
Illustrator Tutorials
How to Create SVGs in Adobe Illustrator
In this tutorial, learn how to create and save a SVG in Adobe Illustrator.
Illustrator Tutorials
How to resize an image without losing quality in Adobe Illustrator
Learn how to resize an image without losing quality in Ai.
Illustrator Tutorials
How to Create a Transparent Gradient in Illustrator
Learn how to create a transparent gradient in Adobe Illustrator with this step by step tutorial.
Illustrator Tutorials
How to Add Texture in Illustrator
In this tutorial we will show you how to add texture in Adobe Illustrator by using layer masks.
Illustrator Tutorials
Wood Texture in Illustrator
Learn how to make a wood texture in Illustrator with this tutorial.